1
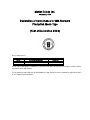
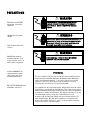
UC-ST
SmartTouch
Scale/Printer
®
User’s Guide
64056467.R03
©Mettler-Toledo, Inc. 2009
No part of this manual may be reproduced or transmitted in any form or by any means, electronic or
mechanical, including photocopying and recording, for any purpose without the express written
permission of Mettler-Toledo, Inc.
U.S. Government Restricted Rights: This documentation is furnished with Restricted Rights.
METTLER TOLEDO®
Attention: Retail Quality Manager - MTWR
Customer Feedback
If you have a problem with one of our products or publications, or just a
suggestion on how we can serve you better, please fill out this form and
send it to the address on the opposite side of this page (U.S. postage paid),
or fax it to us at (614) 438-4355. Your feedback will help us to improve
product performance, quality, and service.
Part / Product Name:
Part / Model Number:
Date:
Provided By:
Customer Name:
Address:
Phone Number:
Fax Number:
Your comments on product performance, quality, or service:
Do not write in space below. For METTLER TOLEDO use only.
Response (where appropriate). Include root cause analysis and corrective action taken.
METTLER TOLEDO Model UC-ST User's Guide 64056467
METTLER TOLEDO
1900 Polaris Parkway
Columbus, Ohio 43240
METTLER TOLEDO® is a registered trademark of Mettler-Toledo, Inc.
©2007 Mettler-Toledo, Inc.
Printed in USA
FOLD THIS FLAP FIRST
NO POSTAGE
NECESSARY IF
MAILED IN THE
UNITED STATES
BUSINESS REPLY MAIL
FIRST CLASS
PERMIT NO. 414
COLUMBUS, OH
POSTAGE WILL BE PAID BY ADDRESSEE
Mettler-Toledo, Inc.
Retail Quality Manager - MTWR
P.O. Box 1705
Columbus, OH 43216
USA
Please seal with tape.
Mettler-Toledo Inc.
Columbus, Ohio
Declaration of Conformance to SMA Standard
Production Meets Type
(Year of Declaration 2003)
We the manufacturer of
Model
Certificate and Number
Issued by
UC-ST
02-127A1
NCWM
declare in our responsibility the conformance of the above listed models and types to the mentioned certificates and the
requirements of the SMA standard.
This declaration becomes valid when the SMA Compliance Logo, having our name or trademark is applied to the device
or its accompanying documentation.
PRECAUTIONS
WARNING
READ this manual BEFORE
operating or servicing this
equipment.
FOLLOW these instructions
carefully.
SAVE this manual for future
reference.
FOR CONTINUED PROTECTION AGAINST SHOCK
HAZARD CONNECT TO PROPERLY GROUNDED
OUTLET ONLY. DO NOT REMOVE THE GROUND
PRONG.
WARNING
Power outlets must be easily accessible and located no
further than the length of the power cord supplied with
the product. Failure to do so could result in result in
personnel injury and/or property damage.
WARNING
DO NOT allow untrained
personnel to operate, clean,
inspect, maintain, service, or
tamper with this equipment.
ALWAYS DISCONNECT this
equipment from the power
source before cleaning or
performing maintenance.
CALL METTLER TOLEDO for parts,
information, and service.
DISCONNECT ALL POWER TO THIS UNIT BEFORE
REMOVING THE FUSE OR SERVICING.
FCC Notice
This device complies with Part 15 of the FCC Rules and the Radio Interference
Requirements of the Canadian Department of Communications. Operation is
subject to the following conditions: (1) this device may not cause harmful
interference, and (2) this device must accept any interference received,
including interference that may cause undesired operation.
This equipment has been tested and found to comply with the limits for a Class
A digital device, pursuant to Part 15 of FCC Rules. These limits are designed to
provide reasonable protection against harmful interference when the equipment
is operated in a commercial environment. This equipment generates, uses, and
can radiate radio frequency energy and, if not installed and used in
accordance with the instruction manual, may cause harmful interference to
radio communications. Operation of this equipment in a residential area is
likely to cause harmful interference in which case the user will be required to
correct the interference at his own expense.
Publication Revision
History
Part Number
Date
Revisions
64056467
Rev 01
5/06
System Management Setup, new Screens, DB Editor
changes
64056467
Rev 02
8/07
Labels Requirements chapter added, new Networking and
Dat/Time functions added
64056467
Rev 03
2/09
Adjustments and reconfiguration of menu cascades.
Disposal
In conformance with the European Directive 2002/96/EC on Waste Electrical and
Electronic Equipment (WEEE) this device may not be disposed of in domestic waste.
This also applies to countries outside the EU, per their specific requirements.
Please dispose of this product in accordance with local regulations at the collecting
point specified for electrical and electronic equipment.
If you have any questions, please contact the responsible authority or the distributor
from which you purchased this device.
Should this device be passed on to other parties (for private or professional use), the
content of this regulation must also be related.
Thank you for your contribution to environmental protection.
CONTENTS
CHAPTER 1
Loading Labels .................................................................... 1-1
CHAPTER 2
Operation ............................................................................ 2-1
Power Switch............................................................................................................ 2-1
Network Connection................................................................................................... 2-1
Leveling The Scale .................................................................................................... 2-2
Quick Start ............................................................................................................... 2-3
ENTER and ENTER/PRINT keys................................................................................................. 2-3
Main Numeric Entry Screen...................................................................................................... 2-4
Preset Mode Screen ................................................................................................................ 2-5
Print By-Weight PLU Service Mode ........................................................................................... 2-6
Print By-Weight PLU Prepack Mode .......................................................................................... 2-7
Print By-Count or Standard Pack Single Label............................................................................ 2-8
Print Multiple By-Count or Standard Pack Labels........................................................................ 2-8
Batch Queue Mode ................................................................................................................. 2-9
Zero the Scale ...................................................................................................................... 2-10
Label Feed........................................................................................................................... 2-10
Calling PLU Records ................................................................................................ 2-11
Numeric Entry Method........................................................................................................... 2-11
Preset Method...................................................................................................................... 2-11
PLU Edit Screen.................................................................................................................... 2-12
By-Weight PLU..................................................................................................................... 2-13
Standard Pack PLU .............................................................................................................. 2-14
By-Count PLU ...................................................................................................................... 2-14
Manual PLU ........................................................................................................................ 2-14
COOL – Country Of Origin Labeling ............................................................................ 2-15
Manual Overrides .................................................................................................... 2-18
Unit Price Overrides .............................................................................................................. 2-18
Count Overrides ................................................................................................................... 2-18
Total Price Overrides............................................................................................................. 2-18
Net Weight Overrides ............................................................................................................ 2-18
Tare Overrides...................................................................................................................... 2-18
Shelf Life and Use-By Date Overrides ...................................................................................... 2-19
Extra Text Overrides .............................................................................................................. 2-19
Operator Totals ....................................................................................................... 2-20
Memory Mode......................................................................................................... 2-21
Standalone Mode DB Editor ...................................................................................... 2-23
Edit .................................................................................................................................... 2-24
Quick.................................................................................................................................. 2-28
Report................................................................................................................................. 2-28
Clear .................................................................................................................................. 2-29
Config................................................................................................................................. 2-29
CHAPTER 3
Configuration Options............................................................ 3-1
Unit Setup ................................................................................................................ 3-1
Program Presets .................................................................................................................... 3-2
Set Preset Touch Reaction........................................................................................... 3-4
Setup Marquee.......................................................................................................... 3-5
Change Time and Date............................................................................................... 3-6
Network Setup .......................................................................................................... 3-7
CHAPTER 4
Maintenance ......................................................................... 4-1
Cleaning .................................................................................................................. 4-1
Printer ..................................................................................................................... 4-2
CHAPTER 5
Label Requirements ............................................................... 5-1
General Requirements ................................................................................................ 5-1
Label Paper ........................................................................................................................... 5-1
Adhesive ............................................................................................................................... 5-2
Release Liner ......................................................................................................................... 5-2
Total Thickness Label + Adhesive + Liner.................................................................................. 5-2
Light Transmission For Gap Sensor Operation............................................................................ 5-2
Label Stripping....................................................................................................................... 5-2
Finished Label Roll Requirements................................................................................. 5-3
Core and Method of Label Attachment....................................................................................... 5-3
Die Cutting ............................................................................................................................ 5-3
Slitting .................................................................................................................................. 5-3
Winding ................................................................................................................................ 5-4
Label Curl ............................................................................................................................. 5-4
Splicing ................................................................................................................................ 5-5
Finished Label and Roll Dimensional Requirements......................................................... 5-6
Preprinted Labels ...................................................................................................... 5-7
Special Shaped Labels ............................................................................................... 5-8
Definition Of Transmission Optical Density ..................................................................... 5-8
Label and Liner Optical Density ................................................................................... 5-9
Black Stripe Optical Density ........................................................................................ 5-9
For your notes
CHAPTER 1
LOADING LABELS
This chapter covers
•
Label Installation
A label loading diagram can be found on the inside of the printer door for quick
reference. Here are detailed instructions for loading your labels into the UC-ST
Scale.
Open the
printer door by
pressing down
on the release
tab.
Pull the printer
out using the
green pull-tab
on the printer.
Unlock and
raise the
printhead by
pulling up on
the latch (see
arrow).
UC-ST User Guide
1-1
Loading Labels
Install the label
roll on the
supply spool
and remove
about 6 inches
of labels from
the liner. Slide
the labels
under the
guides and
printhead as
shown in the
illustration.
Note: Do not use
excessive force to
pull out on the
green knob. The
knob does not
come out all the
way. Using
excessive force to
pull on the knob in
can result in a
broken locking
mechanism.
1-2
Pull the liner
back and route
it under the
bottom guide.
Gently pull out
on the green
knob on the
liner takeup
and then slide
the liner into
slot in the
roller. Note:
The Green
Knob does not
come all the
way out.
UC-ST User Guide
Loading Labels
Note: Do not use
excessive force to
push the green
knob in to lock the
liner. Always
remove all spent
liner from the
takeup roller
before pushing the
knob back in.
Using excessive
force to push the
knob in can result
in broken locking
tabs on the green
knob.
Gently push in
on the green
knob to lock
the liner into
place, and then
turn the roller
clockwise to
take up some
of the slack in
the liner.
Press down on
the printhead
latch until it
locks down.
Shown is the
printer with
properly
installed
labels.
Push the
printer back in
and close the
door.
UC-ST User Guide
1-3
Loading Labels
After installing the labels, select the label size as shown below. Refer to the UC-ST Service Manual
for detailed information on custom labels.
In Standalone mode “DB” is
displayed, not “Master Editor”.
OR
Note: If no password has
been configured, the ENTER
PASSWORD screen will be
bypassed.
The Unit Password has two
levels of access: Supervisor
or Operator. The supervisor
password allows entry into
all of the setup functions. The
Operator password allows
access only to functions that
the supervisor allows.
1-4
UC-ST User Guide
CHAPTER 2
OPERATION
This chapter covers
•
Power Switch
•
Scale Operation
•
DB Editor Operation
This chapter will explain the power switch, how to use the touchscreen, call up PLU
(Price Look Up) numbers, and how to print a label.
POWER SWITCH
The power switch and power cord jack are located under the touchscreen on the left front of the
scale. Press the (-) on the switch to turn the scale power to ON. To turn the scale power off, always
exit any editing screens before pressing the (o) on the switch to turn power OFF.
Always turn to power switch to off before cleaning the scale.
Power
Switch
Power Cord
Jack
NETWORK CONNECTION
The UC-ST can connect to your Ethernet network using a cable or using a wireless radio. If you use
a wired network connection and experience connection problems, make sure your Ethernet cable is
connected and seated securely in the jack, located under the touchscreen at the front of the scale. If
you are connected using a wireless radio, you will see a cover protruding from the left side of the
scale, indicating a wireless radio is installed.
RJ45
Ethernet Jack for
wired network
connections.
Cover for Wireless
Radio Ethernet
network connection.
UC-ST User’s Guide
2-1
Operation
LEVELING THE SCALE
The UC-ST scale must be level and installed on a stable counter. The level indicator is located
behind the customer display, as shown below.
Level
Indicator
Level Indicator Location
The bubble in the indicator must be centered inside the circle. If the bubble is outside of the circle on
the indicator, use the four leveling feet to level the scale.
Levelin
g Feet
Circle
Bubble
must be
inside
circle
Level Indicator shown with
bubble not centered.
2-2
Turn leveling feet in or out if
scale is not level.
UC-ST User’s Guide
Operation
QUICK START
The operator display and keyboard is a touchscreen. You simply press the keys
displayed on the screen. But, please only use your fingertip to press on the keys.
Do not use any sharp objects on the touchscreen. You may cause permanent
damage to the touchscreen.
The scale can be operated in Numeric or Preset modes. The following sections will
explain how to call up a PLU number and print a label.
ENTER and ENTER/PRINT keys
Below is the Main numeric screen keyboard has a standard ENTER key and an ENTER/PRINT key.
ENTER key
ENTER/PRINT key
When you key in a PLU number and press the ENTER key, the scale will next display the PLU Edit
screen. On this screen, you can select different options, or just print the label.
When you use the ENTER/PRINT key, a small window displays while the label prints. No overrides
or options are available when using this printing mode. If speed is the most important, the
ENTER/PRINT key will print the label the quickest.
UC-ST User’s Guide
2-3
Operation
Main Numeric Entry Screen
Will display “Off-Line” to indicate a
communication problem.
Indicates scale is Zero
Press far top corner
Current Department
to access Help
Name and Number.
Touch to zero the scale.
Gross indicates no
tare is taken.
Net indicates weight
is net (tare taken).
Time and Date
If BATCH QUEUE is enabled, the
LIST QUEUE will show the current
queue list. PRINT QUEUE will print
the batch.
Network IP
address
Numeric Entry
keys 0-9.
Accesses Unit
Setup Mode or
Master Editor.
CLEAR is used to:
• Erase an
incorrect entry.
• On some
menus, to
indicate you are
finished.
• Return to the
previous screen.
Deletes
accumulator
values from
totals for a
previous
transaction.
Lists up to 150
last used PLUs
for the current
department.
Then press the
PLU to select the
transaction.
Switches to
Preset Mode
2-4
Selects a Preset
Page for display
If memory is active, the SUBTOTAL
AND PRINT MEM keys will be
active. Press SUBTOTAL to display
totals. Press PRINT MEM to print a
receipt label and clear the memory.
ENTER/PRINT is used to call a PLU and
automatically print a label. When no PLU
number is entered, it will feed a blank label.
If Memory is active, the ENTER/PRINT key will
split into two keys. The new key adds a
transaction to memory.
ENTER/
PRINT
ENTER is used to
Enter a PLU and
advance to the PLU
Edit Screen. When
no PLU is entered, it
will feed a blank
label.
ENTER/
MEM
UC-ST User’s Guide
Operation
Preset Mode Screen
Preset Page Name
Accesses Unit
Setup Mode or the
Master Editor.
Selects Numeric
PLU Entry Screen
Clears a
previous
transaction.
Selects another
Preset Page.
Next
Preset
Page.
Previous
Preset
Page.
Preset Keys
used to call
PLUs
UC-ST User’s Guide
2-5
Operation
Print By-Weight PLU Service Mode
To weigh one transaction of a single item, use Service Mode. Service Mode is normally the default
on the PLU Edit screen. If Prepack is displayed (below Unit Price), touch the button to toggle to
Service Mode. When the product label is printed and the item is removed from the scale, the PLU will
clear and the scale will return to the home screen, ready for the next item.
2-6
UC-ST User’s Guide
Operation
Print By-Weight PLU Prepack Mode
When weighing more than one package of a single item, use the Prepack Mode (see below #2).
Prepack Mode retains the PLU information until the Clear button is pressed. When the item is placed
on the platter, the scale will automatically print a label. Removing the item and placing the next item
on the platter will cause the scale to print the next label. See below for details.
1
1
+2+3 +
TROUT
2
ENTER
Enter PLU Number or
Press the Preset Key for
desired item.
Total P rice
1.90 lb
0.02
PLU DESCRIPTION
7.89/lb
SERVIC E
Trout, Farm Raised
PACK DATE
SHELF LIFE
USE BY DATE
10/23/04
10/28/04
10/31/04
Easy to Grill
Marinade for four hours covered in the
refrigerator. Grill on both sides for 5
minutes each
.
GRAD E
COOL
$14.99
CLEA R
MEMO RY
LABEL FORM AT
AUT O
PRINT
Wild, Harvested in Thailand, Processed in Malaysia
Total P rice
1.90 lb
0.02
PLU DESCRIPTION
PREPAC K
Trout, Farm Raised
PACK DATE
10/23/04
SHELF LIFE
10/28/04
7.89/lb
$14.99
On the PLU Edit Screen,
If SERVICE is displayed,
press the button
to toggle to PREPACK.
With PREPACK displayed,
place the first item on the
scale platter.
CLEA R
USE BY DATE
10/31/04
Easy to Grill
Marinade for four hours covered in the
refrigerator. Grill on both sides for 5
minutes each
.
GRAD E
COOL
MEMO RY
LABEL FORM AT
AUT O
PRINT
Wild, Harvested in Thailand, Processed in Malaysia
3
TROUT, FARM RAISED
1.90 lb
$7.89/lb
$14.99
FISH
RT
MA
Place the item on the
scale. In Prepack Mode,
the label will print
automatically.
4
+
Take the label and
remove the item. Place
the next item to be weighed
on the platter. Continue until
all items have been weighed.
5
CLEAR
=
0.00 lb ENTER PLU: 0
Press Clear to end the run.
UC-ST User’s Guide
2-7
Operation
Print By-Count or Standard Pack Single Label
To print a single label for by-count or standard pack without changing the quantity, follow the
instructions below. If the count is different than what is programmed into the PLU record, press the
Contents/Qty box, change the quantity of the item and press Enter, and then press the Print key to
print the label.
PLU 345
ENTER PLU: 0
3
+
APPLES
ENTER
+4+5 +
+
PRINT
ENTER/
PRINT
PRINT
APPLES
=
6 / .99
0.17
$ .99
Print Multiple By-Count or Standard Pack Labels
PLU 67 8
ENTER PLU: 0
6
+7+8 +
ENTER
6
+
+
+
ENTER
WHOLE WHEAT BREAD
+
2-8
PRINT
=
$0.99
2
00015 02217
6
UC-ST User’s Guide
Operation
Batch Queue Mode
Batch Queue Mode is used to print batches of labels. To print Nutrition Facts or Extra Text Labels,
select the label format before pressing the QUEUE key.
UC-ST User’s Guide
2-9
Operation
Zero the Scale
If zero (0.00) is not displayed when the scale is at the Main Screen (without any items on the
platter) check for obstructions touching the platter, then touch the weight display.
Label Feed
2-10
UC-ST User’s Guide
Operation
CALLING PLU RECORDS
PLU (Price Look Up) records are called (retrieved from file) two ways: Numeric Entry (Enter the PLU
number on the keyboard), or Preset Entry (press one of the preset keys.)
Numeric Entry Method
If the Preset PLU entry screen is displayed, press the NUMERIC key. This will select the Numeric entry
screen for transactions. To call a PLU record, enter the PLU number on the numeric keypad, then
press the ENTER or ENTER/PRINT key.
1. Key in PLU number.
(Ex: 123)
2. Press ENTER or
ENTER/PRINT
Preset Method
When a preset key is pressed, the screen shown below will display. To call a preset PLU, press one
of the preprogrammed preset PLU keys.
Press a Preset
Key to call up
preset PLUs.
UC-ST User’s Guide
2-11
Operation
PLU Edit Screen
After a PLU is selected, the PLU Edit screen will display. This display will differ depending on the PLU
types used. If enabled in setup, certain items will be "double boxed" and can be manually
overwritten by pressing the appropriate box and following instructions. All changes made through
this screen will be for the current transaction only and the changes will not be saved to the PLU
record.
Tare weight displays on
random weight PLUs.
Unit Price for By-Weight
and By-Count PLUs, or
the Net Weight on
Standard Pack PLUs.
Net Weight (random
weight PLUs) or
Quantity (By-Count or
Standard Pack PLUs).
Service/Prepack (only on By-Weight PLUs) toggles
between the two modes. Service clears the PLU after the
transaction. Prepack retains the PLU information until
CLEAR is pressed.
No. Of Labels appears only on Std Pack/By-Count PLUs.
Total Price
Ends the transaction
and returns to the
home screen.
Displays the PLU
description.
MEMORY - enters the
transaction into
memory mode to print
a receipt type label.
TOTALS - In prepack
mode, allows printing
subtotal or grand total
labels.
QUEUE - Enters a ByCount or Std.Pack PLU
in a batch queue for
later printing of the
complete batch.
Displays
current date.
Displays the
current Shelf-Life. If
double boxed, the
Shelf-Life can be
changed by
pressing here.
Displays current Extra
Text information. If
pressed, used to select
an alternate ET record.
Displays current Use-By date. If
double boxed, the Use-By Date can
be changed by pressing here.
Selects a different label
format from a choice of 8
for the current transaction.
2-12
Used to select a
different Grade.
Prints a label.
Changes the
accumulator for the
current transaction.
UC-ST User’s Guide
Operation
By-Weight PLU
Service Mode
Call the PLU. If PREPACK is displayed on the EDIT screen, press that key to toggle to SERVICE. Place
the item on the platter and press PRINT to issue a label. When the item is removed from the platter,
the PLU will automatically clear.
Prepack Mode
Call the PLU. If SERVICE is displayed on the EDIT screen, press that key to toggle to PREPACK. Place
the item on the platter. A label will automatically issue. Take the label and remove the item from the
platter. The PLU will remain on the screen to weigh additional items. Press CLEAR when you are
finished weighing.
The By-Weight PLU Edit Screen is shown below. By-Weight PLUs can be priced in three ways:
*Note: most
locations, Price Per
Pound/KG is the only
acceptable method of
pricing. In this case,
the pricing is set when
the scale is calibrated
and sealed by a
Weights and
Measures certified
technician.
•
Priced "Per Pound" - Typically weighed items are priced per the pound. The weight
multiplied by the unit price equals the total price of the product to the customer.
•
Priced "Per Fraction of a Pound" (fractional) - The item may also be priced by the fraction
of the pound (where legal and desired). Pricing per 1/4 pound and per 1/2 pound is
available.*
•
"Pounds for" price - The PLU may be sold with a pounds-for price (rather than price per
pound). (e.g. 2 pounds for $1.00).*
Notes:
• Depending on the setting of the function “Print after Motion” and “Print Key Always Active” your
scale may function differently than described above. If the set up function “Print After Motion” is
set to NO, you will need to press the PRINT button to print a label for each item. When this is set
to YES (the factory default setting), the label prints automatically after you place the item on the
platter.
• If the function “Print Key Always Active” is set to YES, the PRINT key will issue a label when
pressed. If set to NO, the PRINT key will on print one label per item.
UC-ST User’s Guide
2-13
Operation
Standard Pack PLU
If the PLU is priced as a Standard Pack item, enter the quantity of labels desired (default is 1), then
press PRINT to print labels. Press the screen area to stop printing before the batch is finished.
The Standard Pack PLU allows the operator to use the scale for a labeling operation. Generally, the
labels indicate the net weight of the item and total price.
By-Count PLU
If the PLU is priced as a By-Count item, enter the quantity of labels desired (default is 1), then press
PRINT to print labels. Press the screen area to stop printing before the batch is finished.
Manual PLU
A manual PLU is a PLU that has been programmed at the master for the “Manual” pricing mode.
This allows a general PLU that can be used for incidental items that do not have a permanent PLU
record. If a manual PLU is selected, a screen will be displayed to select the Pricing Mode (byweight, by-count, standard pack). Select the pricing mode, then press ENTER. The corresponding
PLU Edit screen will be displayed, along with a numeric keyboard requesting essential data (such
as count, prices, etc.). Adjust the fields as necessary, then press PRINT to print a label.
2-14
UC-ST User’s Guide
Operation
COOL – COUNTRY OF ORIGIN LABELING
This section describes COOL operation if it is enabled set up properly on your scale. The COOL Text
is normally programmed into the PLU record and this pre-programmed COOL statement will be
called up with the PLU record.
However, if allowed, you can over-ride this setting, as described in the following sections.
When COOL Text is enabled, the PLU Edit screen will show the programmed default text in a small
box at the lower left of the screen. In addition, you may see a “LOT #” key shown next to the GRADE
key that is used for a tracking number.
PLU Edit Screen with COOL Text Enabled
If the COOL Text box has a double line around it (see above), the default COOL text can be overridden on the PLU Edit screen. If COOL Text is Forced, when you call up a PLU record, you will
immediately be shown the COOL Text selection screen as shown below. The second row titled
“LAST” shows the COOL text used with this PLU. If the text is ok, press the box to highlight the text,
or select another text and press the ENTER button to select it.
COOL Text Selection Screen (Standard Mode)
UC-ST User’s Guide
2-15
Operation
The screen below shows the “Restricted Mode” COOL text screen. In this mode, the default COOL text
assigned to the PLU will be highlighted. Press the ENTER button to accept the default, or press
another row to select and ENTER to accept the new text.
COOL Text Selection Screen (Restricted Mode)
You can build your own custom statements by using the Custom COOL function. Selections will
show up on the screen as they are selected. Press the UNDO button to erase the last entry. Press the
ENTER key to continue, the CANCEL key to quit, or the NO COOL Required key for no COOL text.
Custom COOL Screen
2-16
UC-ST User’s Guide
Operation
You may be required to select or add a Tracking Number. The tracking number select and edit
screens are shown below. The tracking number may be forced. In this case, the below screen will
automatically appear. If the tracking number is not forced, it can be accessed from the PLU Edit
screen by pressing the “Lot #” button. The tracking number is for internal use.
Select or Edit Tracking Number
Edit Tracking Number Screen
To Access the Tracking Number, press the “LOT #” Button from the PLU Edit Screen
UC-ST User’s Guide
2-17
Operation
MANUAL OVERRIDES
The operator can change PLU fields that are double-boxed in the PLU Edit screen. Instructions for
editing the fields follow.
Unit Price Overrides
The Unit Price applies only to By-Weight or By-Count PLUs. If allowed, touch the “Unit Price” area
and enter the new Unit Price through the numeric keyboard. The Total Price will be recalculated
using the new Unit Price and the current Weight (By-Weight PLUs) or Count (By-Count PLUs) to
adjust for the change in the Unit Price.
Count Overrides
The Count applies only to By Count or Standard Pack PLUs. If allowed, touch the “Contents/QTY”
area and enter the new Count through the numeric keyboard. For By-Count PLUs, the Total Price will
be recalculated based on the new Count and the current Unit Price. For Standard Pack PLUs, the Net
Weight and Total Price will be recalculated based on the new Count and the current values of the Net
Weight and Total Price.
Total Price Overrides
The Total Price can only be adjusted on By-Count or Standard Pack PLUs. If allowed, touch the
“Total Price” area and enter the new Total Price through the numeric keyboard. For By-Count PLUs,
the Unit Price will automatically be recalculated based on the new Total Price and the current Count.
For Standard Pack PLUs, changing the Total Price does not affect any other values.
Net Weight Overrides
The Net Weight can only be adjusted on Standard Pack PLUs. Changing the Net Weight will not
affect any other values.
Tare Overrides
The Tare Weight only applies to By-Weight PLUs. If “Modify Tare” is enabled and indicated by a
double line around the tare box, touch the “Tare Weight” area to enter a new value. Enter the new
tare using the Numeric Keyboard or place the empty container on the platter and press the PLATTER
TARE key. To clear a tare, press the CLEAR TARE key. The Weight (and, consequently, the Total
Price) will be adjusted based on the new Tare Weight. When a tare is changed an, a message
“New Tare Being Displayed to Customer” is displayed on the operator screen and the message “New
Tare XX.XX” displays on the customer display for 1.5 seconds.
2-18
UC-ST User’s Guide
Operation
Shelf Life and Use-By Date Overrides
The Numeric keyboard will appear. If allowed, touch the “Use By Date” area and enter the new
number of days from the current date or enter the exact date by typing the numeric month, numeric
day, and last two digits of the year separated by the "Slash (/)" key.
Extra Text Overrides
The numeric keyboard will appear with the current extra text number displayed. (Extra text is
programmed through the Master Editor, see Master Programming Manual.) If allowed, touch the
“Extra Text” area and enter the new extra text number.
UC-ST User’s Guide
2-19
Operation
OPERATOR TOTALS
Operator Totals allow totals to be recorded for up to 30 operators per department. Operators are
defined by number and name in the SmartTouch® Master or scale server. They must then be
enabled in Unit Setup -> PLU Options.
Once Operator Totals have been enabled, when in the PLU prior to printing a label you will be
prompted to enter your operator number.
Operator Number Entry
2-20
UC-ST User’s Guide
Operation
MEMORY MODE
When enabled, this feature allows the user to accumulate the items purchased by a customer. When
the sale is complete, an itemized receipt can be printed showing the grand total and department bar
code.
Main Screen
Key in the PLU number and press ENTER. When the PLU Edit screen displays, press the MEMORY
key to enter the transaction. You can continue to add new transaction to the memory.
Back on the Main screen, when finished with the customer, press the SUBTOTAL key.
A window will then appear that displays the number of pieces, total price, and four options. When
“Department” memory is active, you will be asked for an operator number when adding to the
memory.
UC-ST User’s Guide
2-21
Operation
SUBTOTAL Screen and Options
1. CONTINUE to call up another item for the same customer and enter it into memory.
2. REMOVE ITEM to delete an item from the transaction memory by choosing it from a list.
(See below)
3. CANCEL to delete the entire transaction and all items in memory (a confirmation prompt
will appear).
4. END/PRINT to end the transaction and print the receipt (a confirmation prompt will appear
after the receipt prints).
While in the memory mode, press MEMORY after each item is entered. If a separate label is also
desired for each item, press PRINT to receive a label and then press MEMORY to continue. To
prohibit the current item from being added to memory (before or after printing a label), press CLEAR.
The memory screen will appear with the normal choices, but the "cleared" item will not be in the
memory.
Notes:
• Press the ENTER/MEM key to do a quick transaction with a popup box that displays momentarily.
• When using die-cut labels, the number of items printed is limited to the label size in use.
Continuous strip labels will allow for a greater number of transaction items.
To remove an item from memory, touch the item to remove it from the transaction list. Then touch
YES to remove, or NO to cancel.
Remove Item Screen
2-22
UC-ST User’s Guide
Operation
STANDALONE MODE DB EDITOR
Your scale may be set up as a Standalone Scale that has an internal database of records. If you are
in Standalone Mode, when you press the Setup button on the home screen, a “DB EDITOR” button
will be shown as a selection.
Using the DB Editor in the standalone mode, you can add PLU’s, change prices, tare, Shelf Life, and
Use-By dates. To remove records, an external host program must be used.
The DB Editor may be protected by a password. To access the DB Editor, press SETUP then press
DB EDITOR (shown below). If a password has been programmed, enter the password.
The DB Editor screen is shown below.
UC-ST User’s Guide
2-23
Operation
Edit
The Edit functions allow editing the following records in the database:
•
•
•
•
•
PLU Records (see below for details)
Linked Records (see below for details)
Action code Record
Grade Record
PLU Accumulators
Edit Functions
PLU Records
Select PLU Records to Add, Delete, or Modify PLU record data. Each field is presented one screen at
a time. The following table lists the fields available in the PLU record.
2-24
PLU Number
The PLU number can be from one to six digits (1-999999). Entering a
new number allows entry of the field data. If the PLU currently exists, the
current field data is displayed and can be modified.
Item Number
This number is used in the bar code data. The Item number can be from
one to 10 digits depending on the barcode format.
Description
Up to four lines of description can be programmed for the PLU record, up
to 32 characters per line. To delete a character, press the Backspace
button. To delete the complete line, first press the Shift button, then press
Backspace.
PLU Type
The PLU Type determines the pricing mode that includes PRICE PER
POUND, POUNDS FOR, PRICE PER HALF POUND, PRICE PER QUARTER
POUND, BY COUNT, STANDARD PACK, and MANUAL. The choice of PLU
type affects some of the menu options for the PLU Edit screen. If a change
in PLU type is made, the default value for the new option is assigned.
UC-ST User’s Guide
Operation
Tare1/Ounces
This field changes depending on the PLU type. For Price Per Pound, Price
Per Half Pound, Price Per Quarter Pound, and Pounds For PLUs, this field
is titled TARE1 and when selected presents a numeric keyboard for the
entry of the tare weight (default = 0.00). For Std Pack PLUs, it is titled
OUNCES and when selected presents a numeric keyboard for the entry of
the number of ounces in a pack. For By Count or Manual PLUs, this field
is blank and disabled.
Tare2
This field changes depending on the PLU type. For Price Per Pound, Price
Per Half Pound, Price Per Quarter Pound, and Pounds For PLUs, this field
is titled TARE2 and when selected, a SELECT TARE2 TYPE screen is
presented. Tare2 can be a fixed weight or forced so that the operator must
enter the tare. A PERCENTAGE option is displayed but functions as the
FIXED WEIGHT tare. If FIXED WEIGHT or PERCENTAGE are selected, a
numeric keyboard prompts for the values of a tare weight (default=0.00).
If FORCED is selected, the word FORCED appears in that field. This tare is
available for the situation when 2 different tares are needed for the same
product (ex. - with meat products, one tare is for the back room, and one
tare is for the counter, after the meat has been re-packaged). For By
Count, Standard Pack, and Manual PLUs, this field is blank and disabled.
If Tare2 is not used, press the CANCEL button to bypass this entry.
Unit Price/Total
Price
This field changes depending on the PLU type. For Price per Pound, Price
Per Half Pound, Price Per Quarter Pound, and Pounds For PLUs, this field
is titled UNIT PRICE and when selected presents a numeric keyboard for
the entry of the unit price (default = $0.00). For By Count and Standard
Pack, it is titled TOTAL PRICE and when selected presents a numeric
keyboard for the entry of the total price (default = $0.00). For Manual
PLUs this field is blank and disabled.
Shelf Life
Enter the number of days from 0 to 999 (default = 0). This is added to
the current date when calculating the Shelf Life. Select Blank to blank the
date from the label or Force to require manual entry of this value by the
scale operator.
Use By Day
Enter the number of days from 0 to 999 (default = 0). Select Blank to
blank the date from the label or Force to require manual entry of this value
by the scale operator.
Group
Enter the group number between1-500, or press Enter to use no Group.
Grade
Enter the Grade number from 1-16, or press Enter to use no grade.
Extra Text
Number
Enter the Extra Text number you wish to use with this PLU from 1999999, or press Enter (with 0 showing) to not use any ET.
Nutrifacts No
Enter the Nutrition Facts number you wish to use with this PLU, or press
Enter (with 0 showing) to not use any NF.
Graphics No
Enter the number (1-999999) corresponding to a graphics image
resident in the database. Graphics images are created in a graphics
program that can create and edit raster images and save them as
monochrome (black and white) PCX files. The graphic images are
assigned a number and downloaded to the scale from an external host.
UC-ST User’s Guide
2-25
Operation
Action Code
Enter the Action Code (1-50). An Action Code will perform specific
functions when the PLU is called depending on the function selected when
downloaded from a host.
Barcode Type
Touch the desired bar code type to select.
0 Type 0 Prefix (No price is encoded)
1 Type 1 Prefix (No price is encoded)
2 Type 2 Random-Weight. Item number/total price encoded.
3 Type 3 Prefix (No price is encoded)
4 Type 4 Prefix (No price is encoded)
5 Type 0 Prefix (No price is encoded)
6 Type 6 Prefix (No price is encoded)
7 Type 7 Prefix (No price is encoded)
8 Type 8 Prefix (No price is encoded)
9 Type 9 Prefix (No price is encoded)
Use Scale Settings
Barcode Format
When a Type-2 UPC Bar Code is selected or if the Bar Code is configured
as EAN, the format of the symbol must be configured, as follows: (N=Item
Number, C=Price/Weight Check Digit, $=Total Price, X=Bar Code Check
Digit, #=Weight).
UPC
0 =
1 =
2 =
3 =
4 =
5 =
6 =
7 =
Formats
NNNNN C$$$$ X
NNNNN 0$$$$ X
NNNNN N$$$$ X
NNNNN $$$$$ X
NNNNN C#### X
NNNNN 0#### X
NNNNN N#### X
NNNNN ##### X
EAN Formats
0
1
2
3
4
5
6
2-26
=
=
=
=
=
=
=
NNNNN N$$$$ X
NNNNN $$$$$ X
NNNN$ $$$$$ X
NNNNN C$$$$ X
NNNNC $$$$$ X
NNNNN ##### X
NNNNC ##### X
Blank Outputs
The Pack Date, Weight, Unit Price, or Total Price can be blanked (not
printed) on the label. Touch the selection to toggle Blank or Normal.
Label Style
This field represents label styles 0-7 and will override the default label
style for this PLU. Style 0 is the default format. Styles 1-7 will override the
default style for a PLU.
Dayglo No.
Allows the user to select a Day-Glo graphic from a numbered list.
Security Lab
Select either YES or NO to print as a security label
UC-ST User’s Guide
Operation
Sp. Price Type
Select the type of discount, or press None for no Frequent Shopper Pricing.
List Price - (similar to a Mfg. Suggested List Price). The amount entered
is always higher than the PLU unit price.
Member Price - Discounted price for By-Weight, By-Count, or Std. Pack
PLUs.
Percent Discount - A percentage off the Total Price for By-Weight, ByCount, or Std. Pack PLUs.
Discount Per Pack - This is a specific amount off the Package Total Price
for By-Weight, By-Count, or Std. Pack PLUs.
Discount Per Unit - This is a specific amount off the Unit Price for ByWeight PLUs.
None - This disables Special Pricing. The value will default to zero and
editing is disabled.
Spec. Price
Set a special price for the chosen PLU
Portion
Number of portions per package
Force COOL
Enforces COOL representation within the selected PLU.
Tracking
YES to apply internal reference tracking information for a specific COOL.
Defaults to NO. Note: although internal, this tracking number can be
placed on labels.
COOL Text
Custom COOL text linked records may be entered here
Prod. Text No.
Selected product text linked record number
Country Text
Selected Country text linked record number
Pre Text
Selected Pre Text linked record number
TLU Text
Selected TLU text linked record number
LG One Type
Linked record options: Extra Text, Graphics Record, Large Graphic Tracked
LG One
Selected LG One linked record number
LG Two Type
Linked record options: Extra Text, Graphic Record, Large Graphic NonTracked
LG Two
Selected LG Two linked record number
UC-ST User’s Guide
2-27
Operation
Linked Records
Select Linked Records to edit various linked records.
Select the type of linked record, then enter the associated number on the keypad to bring up a
specific record. Edit accordingly and hit Quit and Save-YES.
Quick
The Quick menu allows changes to individual fields of the PLU record in the Standalone Database
without the need to step through the complete file for the following fields:
•
•
•
•
•
•
•
•
•
•
Price
Nutrifact Number
Tare
Shelf Life
Use By
Group
Action Number
Item Number
Extra Text Number
Grade
Report
The Report menu will allow viewing totals information in the Standalone Database on the screen for
the following totals.
•
•
•
•
•
2-28
PLU Totals
Group-Dept. Totals
Production Items
Hourly Production Items
Department Voids
UC-ST User’s Guide
Operation
Clear
The Clear menu allows clearing the following items in the Standalone Database.
•
•
•
•
•
•
All Accumulators by Department
PLU Accumulators
Hourly Accumulators by Department
Void Accumulators by Department
PLU Records
Linked Records
Config
To configure the standalone database, first press conFig to display the drop down menu.
The configuration options under the CONFIG key are as follows:
Passwords
The password can be up to four-digits numeric (1-9999). To
clear a password, press CLEAR or enter a zero.
Store/Department
Info
Configure the Store Name and Address, Department Name
and Address (used on labels), and Department UPC.
Department Number
Used to select the Current Department.
UC-ST User’s Guide
2-29
Operation
For your notes
2-30
UC-ST User’s Guide
CHAPTER 3
CONFIGURATION OPTIONS
This chapter covers
•
Setup
•
Configuration
This chapter covers setup and configuration of features such as network,
presets, etc.
UNIT SETUP
If no password has been configured, the ENTER PASSWORD screen will be bypassed. The Unit
Password has two levels of access: Supervisor or Operator. The supervisor password allows entry
into all of the setup functions. The operator password allows access only to functions that the
supervisor allows. Disabled functions are indicated by grayed key areas. Refer to the Program
Password section at the end of this chapter. For items not covered in the User’s Guide, refer to the
UC-ST Service Manual.
UC-ST User’s Guide
3-1
Configuration Options
Program Presets
Preset Keys allow calling a PLU record with one touch of a programmed key. From the Unit Setup
screen, touch PROGRAM PRESET KEYS to bring up the PRESET PAGES edit screen. Each of the 10
pages can contain up to 35 preset keys for a total of 350 presets.
To delete an entire Preset Page, touch the DELETE PAGE key, then touch the page you wish to
delete. Complete or cancel the deletion as prompted.
To swap preset page key positions, touch the SWAP PAGES key, and then touch the first page you
want to swap followed by the second page you want to swap.
To edit the page name, touch EDIT PAGE NAME, then touch the page you wish to edit. Type the
name you wish to appear on key. Use the BACKSPACE key to delete existing characters, or SHIFT
BACKSPACE to delete a complete line. One line of 7-8 large characters or two lines of 10 characters
can be displayed. To move to the second line, touch NEW LINE.
To program PLUs into a page, touch PROGRAM PRESETS, then touch one of the ten preset page
keys. The Preset Menu will then appear.
3-2
UC-ST User’s Guide
Configuration Options
Touch the
department box
to select a new
department.
Touch EDIT,
then the preset
key to add or
edit a preset.
To change the department that you are selecting PLUs from, touch the DEPARTMENT box (upper
left corner). A list of the departments with descriptions will display. Page through the list to find the
desired department and touch to select it.
To delete an existing preset key, touch DELETE (at the top of the screen) followed by the preset key
you wish to delete. Complete or cancel the deletion as prompted.
To swap the key locations of two preset keys on the preset page, touch SWAP (at the top of the
screen), then touch the first key you want to swap followed by the second key you want to swap.
To add a new preset key or edit an existing preset key, touch EDIT followed by the preset key you
wish to program. The numeric keyboard will display. Type in the PLU number or touch LOOK-UP to
generate a list of PLU numbers from the current department. Page through the list of PLUs to locate
the item and touch to select it.
The alphanumeric keyboard will display, and the preset key description for the item will show in the
upper left hand corner of the display. The second line of text in the left-hand corner is the description
editor. On new preset keys, the preset key description will default to the PLU description.
Use the keyboard to edit the preset key description. The BACKSPACE key erases one character at a
time, and SHIFT BACKSPACE erases the complete line. Up to three lines of 12 characters per line are
allowed. Touch the ENTER key when you are finished.
UC-ST User’s Guide
3-3
Configuration Options
SET PRESET TOUCH REACTION
PRESET TOUCH REACTION configures how the preset keys react when touched.
3-4
EDIT PLU
When a preset key is touched the PLU Edit screen displays, allowing
the user to make changes, then touch PRINT.
PRINT PLU
When a preset key is touched it will call the PLU and automatically
print a label. The PLU Edit screen is bypassed.
1 = EDIT
2 = PRINT
Touch the preset key once to call the PLU and display the PLU Edit
screen. Touch the preset key twice in rapid succession to bypass the
PLU Edit screen and print automatically.
CANCEL
Cancels operation and returns to the UNIT Setup screen.
UC-ST User’s Guide
Configuration Options
SETUP MARQUEE
From the Unit Setup screen, touch SETUP MARQUEE to display the Marquee Setup screen. The
messages shown on the Marquee list will scroll on the customer display when the marquee is
active. Any changes made at the unit will not affect the marquees stored in the master/server
database. The marquee starts automatically if there is no activity on the unit after approximately 10
seconds. When the Touchscreen is touched, or if weight is added to the platter, the marquee will be
suspended.
Line
Spacing
UC-ST User’s Guide
Retrieve
To retrieve a marquee from the master/server database, first touch
RETRIEVE, and then touch any of the 10 boxes to the left. Touch the
desired action code to select it. If no marquees (Type 3 Action codes)
were located at the master/server, a blank list is displayed.
Edit
To edit or create a message, touch the EDIT key and marquee box
you wish to edit.
Delete
To delete a message, touch the DELETE key followed by the marquee
message you wish to delete.
Swap
To swap the position of a marquee with another, touch SWAP, touch
the marquee to move, then touch the new location.
0-9
To adjust the marquee scrolling speed, change the number in the
FAST/SLOW column by touching the desired speed 0-9.
Start/Stop
Starts or stops the marquee for testing purposes.
Line Spacing
Change the number of blank spaces between the messages.
3-5
Configuration Options
CHANGE TIME AND DATE
From the Unit Setup screen, touch CHANGE TIME/DATE to bring up the Time and Date screen. To
make changes, touch the appropriate menu option window and follow the instructions indicated
below.
3-6
Month
Numeric month 1-12.
Day
Numeric day 1-31.
Year
Last two digits of the current year 00-99.
Date Format
Date format (MM/DD/YY, DD/MM/YY, YY/MM/DD, or YY/Mon/DD).
Date Separator
Select /, -, or .
Hour
Current hour (1-12) through the numeric keyboard.
Minute
Current minute (00 - 59) through the numeric keyboard.
PM/AM
Select AM or PM by touching the appropriate window.
Time Format
Select between12 or 24 hour formats.
NTP Server
Enter NTP Server IP
GMT Offset
± Hour offset from GMT
DST Offset
Number of minutes offest for the DST
Send Time &
Date To Master
(Touch DOWN to display)
Sends the time and date to a SmartTouch® master or STEM.
Sync From
Master
If set to YES, the time will be obtained from the master when the UCST is powered up. Setting to NO will disable this function.
Use 2007 DST
Rule:
YES/NO
UC-ST User’s Guide
Configuration Options
NETWORK SETUP
If the network is local, any number can be selected for the IP Address. An IP Address consists of a
group of four numbers from 0 to 255, separated by periods, for example: 207.142.140.101.
Do not duplicate numbers on the network. To enter the numbers, key in the numbers starting with
the MSD (left Most Significant Digit) number. The periods are not entered in this procedure. Enter
numbers lower than 100 with preceding zeros (Example: 10 is entered as 010). To exit without
saving, touch CLEAR. The scale will ping the network for the IP entered. If a duplicate IP is found on
the network, the message “DUPLICATE IP ADDR” will display. You must then change the IP address
to a unique address on the network before the client can access the master database. The UC-ST will
automatically reset on exit after changing the Network Configuration.
UC-ST User’s Guide
3-7
Configuration Options
You must first select the network boot type, Manual or Automatic. Automatic is the default. Automatic
will use DHCP to automatically obtain the network boot information from a DHCP server. Manual
uses a script to perform a boot from the network without changing the IP address. Details are
explained in the following table.
NETWORK
When Automatic is selected, the DHCP and BOOTP features will
be used. The “SERVER IP”, “SERVER MAC”, “SUBNET MASK”,
“ROUTER”, “DHCP SERVER”, and “DNS SERVER” fields will display
but cannot be changed. The administrator must make sure the
correct data is available on the network server and the DHCP
server points each client to the correct locations. With this setup,
administrators can abstract and group scales in logical groups.
Each group can have their own software and data settings,
eliminating the need to configure each scale individually.
If Manual is selected, then the DHCP feature is disabled and the
TCP/IP parameters and BOOTP parameters must be entered
manually. The “Server MAC” field will display but no changes are
allowed. The “DHCP Server” and “DNS Server” fields will display
but changes are not allowed to these fields.
SCALE IP
SCALE PORT
SCALE NAME
SCALE MAC
SERVER
3-8
If a scale is set to boot Manual, then there is no network query for
boot information when the scale powers up. Booting follows the
path of whatever data configured on the scale. The administrator
must access each scale with a manual setting on an individual
basis. This feature will allow the ease of administration that a
centralized, networked based boot system provides, but not
require DHCP services. The Boot sequence of a scale set to a
manual Boot Sequence will follow the boot sequence of the
Automatic setting excluding the DHCP portion. In addition, this
also allows a remote person (administrator, field support), to
update software and data on the scale through a ‘runonce’ boot
sequence change. This would allow them the ability, with the
coordination of scale network administrator, to change
configurations and software from a remote location.
This is the standalone IP address. If the “Network” is set to
“Automatic” this field cannot be changed. If the “Network” is set to
“Manual” then this field may be changed. The IP address is
entered as four sets of numbers called octets consisting of three
digits. The address is entered one octet at a time. A decimal point
will appear after every three numbers are entered. When there are
only 1 or 2 digits in an octet, fill in with zeros. For example, 1 is
entered as 001. The default value for this field is
255.255.255.000.
Used in the standalone mode. This is the TCP/IP Host Port
number used to communicate with the Standalone scale.
This is the local domain name to given to the standalone scale.
Devices on the network can reference the scale by using this
name.
Hardware Media Access Control (MAC) address. Each Ethernet
device has a unique 6-byte MAC address. This field is displayed
but cannot be changed.
Select Automatic or Manual. If you wish to set the Subnet Mask
and Router fields, set this function to Manual.
UC-ST User’s Guide
Configuration Options
SERVER IP
SERVER NAME
BACKUP IP
BACKUP NAME
SUBNET MASK
ROUTER
DHCP SERVER
DNS SERVER
MANUAL TFTP
SERVER
MANUAL TFTP
PORT
MANUAL
BOOTFILE
WARM UP
DELAY
STANDALONE
OPERATION
CLIENT PORT
UC-ST User’s Guide
This may be displayed, but is not used in the standalone mode.
This may be displayed, but is not used in the standalone mode.
If the database located at SERVER IP is un-available, the client
will attempt to locate the record at the Backup IP location. The IP
address is entered one octet at a time.
This is the name of the location entered as the Backup IP.
The mask that is used to identify the local network when
accessing an IP address on the Ethernet network. If the “Network”
is set to “Automatic” this field cannot be changed. If the “Network”
is set to “Manual” thee field may be changed. The mask is entered
one octet at a time. The default value is 255.255.255.000.
The router’s (default gateway) IP address. The router is used
when accessing devices outside of the local network. If the
“Network” is set to “Automatic” this field cannot be changed. If the
“Network” is set to “Manual” this field may be changed. The IP
address is entered one octet at a time. The default value is
255.255.255.000.
Display only. This is the current IP address of the local network’s
DHCP server. This field only displays when the “Network” is set to
“Automatic” and cannot be changed.
Display only. This is the current IP address of the local network’s
DNS server. This field only displays when the “Network” is set to
“Automatic” and cannot be changed.
The TFTP Server (Trivial File Transfer Protocol) is the location of
the network boot files for the scale that can include application
software and configuration data.
The default port is 69. This setting can be changed by the system
administrator if needed.
This is the file name of the application or configuration file that
will be downloaded to the scales.
0-250 second delay used to allow wireless radio to initialize prior
to scale network initialization.
YES/NO : Standalone mode Enable/Disable
FIXED/VARIABLE : Scale network TCP/IP Port Configuration
3-9
Configuration Options
For your notes
3-10
UC-ST User’s Guide
CHAPTER 4
MAINTENANCE
This chapter covers cleaning of the UC-ST.
CLEANING
•
Disconnect power.
WARNING
DISCONNECT ALL POWER TO THIS UNIT BEFORE INSTALLING, SERVICING,
CLEANING, OR REMOVING THE FUSE. FAILURE TO DO SO COULD RESULT
IN BODILY HARM AND/OR PROPERTY DAMAGE. DO NOT SPRAY OR WASH
DOWN. HAZARD OF ELECTRICAL SHOCK OR BURN.
•
Do not use solvents or commercial cleaners on the unit. They may harm the surfaces or
damage the touchscreen.
•
Do not spray directly on or at the unit
•
Touchscreen - Only use a soft clean cloth dampened with mild detergent and water to clean the
Touchscreen. Do not scrape with sharp objects.
•
Covers and Platter – Clean using a soft clean cloth dampened with a mild cleaner or detergent
and water.
UC-ST User’s Guide
4-1
Maintenance
PRINTER
Clean the printhead anytime you notice the print quality has degraded using a cleaning pen or
alcohol and a cotton swab to remove any label debris or glue.
Clean any glue or
debris from the
printhead.
Use the supplied
Cleaning Pen
Do not use any
metal or sharp
object to scrape the
printhead. This may
cause serious
damage.
4-2
UC-ST User’s Guide
CHAPTER 5
LABEL REQUIREMENTS
The purpose of this chapter is to specify the requirements of thermal labels to be used in Mettler
Toledo retail scale and pre-pack thermal printers. These requirements apply to your UC-ST printers.
This document includes dimensional requirements, for labels and label rolls, as well as general
requirements for label paper, thermal coatings, preprinting inks and adhesives. Use of label
materials and designs which meet with these requirements is necessary to ensure operation of the
printers in compliance with their respective functional specifications and satisfactory performance of
the label in the end use environment. Labels which do not comply with all of the requirements of
this document may function with limitations, but would need to be tested by the customer to insure
adequate performance in their application. Customer specified (COD) software is not covered under
this specification.
GENERAL REQUIREMENTS
Label Paper
DESCRIPTION, PRICE LABEL:
Premium white color, black imaging, with protective coating
DESCRIPTION, DAY-GLO LABEL:
Red orange fluorescent, black imaging, with protective coating
WEIGHT:
72 ± 7 grams/square meter
THICKNESS:
82 ± 14 µ meter (0.0032 inch)
ACTIVATION TEMPERATURE:
STANDARD:
Initial 74°C (165°F); Optimum 83°C (181°F)
HIGH SPEED:
Initial 66°C (151°F); Optimum 77°C (170°F) – for highest
speed printing
HOT BOX:
Initial 83°C (181°F); Optimum 91°C (195°F) - for use on
food items which are kept warm
SURFACE SMOOTHNESS:
The surface of the finished coated paper must be smooth to
prevent premature print head failure. Smoothness must be 40
Sheffield units or smoother.
ION CONTENT:
Ions such as sodium (Na) and chlorine (Cl) can cause
premature failure of the glass overcoat of a thermal print head.
Paper manufactured specifically for thermal printing with low
ion content must be used.
STORAGE LIFE:
18 months minimum when stored at less that 85% relative
humidity and less than 35°C (95°F)
UC-ST User’s Guide
5-1
Label Requirements
Adhesive
Permanent pressure sensitive – Nominal thickness 10 µ meter (0.0004 inch)
Label must adhere to product with a surface temperature of -15° C (5° F) minimum.
Bond strength must remain permanent over a temperature range of 2°C to 35°C (35°F to 95° F)
Release Liner
DESCRIPTION:
White semi-bleached supercalendered Kraft paper with silicone release coating.
BASIS WEIGHT: 68 ± 3 gram/square meter
THICKNESS:
67 ± 7 µ METER (0.0026 INCH)
Total Thickness Label + Adhesive + Liner
159 ± 17 µ METER (0.0056 to 0.0069 inch)
Light Transmission For Gap Sensor Operation
Light transmission at 800 to 900 NM wave length through the liner only must be at least 3 times the
transmission through the liner and label together. This means that the transmission optical density
of the liner must be at least 0.48 less than the that of the liner and label together.
Light transmission at 800 to 900 NM wave length through the liner and label together must be at
least 2% of incident light. This corresponds to an optical density of 1.7.
Also see OPTICAL DENSITY DEFINITION further in this chapter.
Label Stripping
Labels must strip from the liner over a temperature range of 2°C (26°F) at 50% RH
to 43°C (110°F) at 85% RH.
5-2
UC-ST User’s Guide
Label Requirements
FINISHED LABEL ROLL REQUIREMENTS
Core and Method of Label Attachment
The label stock must not be permanently attached to the cardboard core. The liner must separate
cleanly from the core with 1.0 pound pull tangent to the core as shown in the figure below. No core
material, tape, or adhesive is to remain on the label or liner after separation. Material, especially hot
melt adhesive, remaining on the label will damage the print head.
Die Cutting
Die cutting of the labels must not perforate the release liner.
Slitting
The release liner must be slit cleanly and be made free of edge slivers and dust by vacuuming or
some equally effective process.
UC-ST User’s Guide
5-3
Label Requirements
Winding
The labels must be wound face out as shown in the figure below. The finished roll must be made
free of paper dust and loose particles by vacuuming or some equally effective process.
Label Curl
Stripped labels must not curl more than 0.20 inch as specified in the figure below.
5-4
UC-ST User’s Guide
Label Requirements
Splicing
Each roll may contain one splice on non-label side of liner using 0.002 inch maximum thickness
tape as shown below.
UC-ST User’s Guide
5-5
Label Requirements
FINISHED LABEL AND ROLL DIMENSIONAL
REQUIREMENTS
CORE ID:
1.56 INCH (40 MM)
CORE WIDTH:
2.69 ± 0.03 (68.3 MM ± 0.8 MM)
MAXIMUM ROLL OD:
5.0 INCH (127MM)
LABEL AND LINER WIDTH:
• STANDARD PRICE LABEL = 2.625 ± 0.01 INCH (66.7 MM)
• STANDARD LINER WIDTH (PRICE LABEL) = 2.72 ± 0.01 INCH (69.1MM)
LINER WIDTH LIMITS: 1.575 INCH (40 MM) MINIMUM; 3.346 (85MM) MAXIMUM
LABEL LENGTH: 0.97 INCH (24.6 MM) MINIMUM; 7.0 INCH (177.8 MM) MAXIMUM
STANDARD GAP WIDTH:
• STANDARD PRICE LABEL GAP = 0.125 ± 0.01 INCH (3.18 MM)
GAP WIDTH LIMITS: 0.078 INCH (2 MM) MINIMUM; 0.236 INCH (6 MM) MAXIMUM
Finished Roll and Label
Detail – PRICE Label
5-6
UC-ST User’s Guide
Label Requirements
PREPRINTED LABELS
To ensure trouble free operation of the printer gap sensor, and to achieve normal print head life, no
pre printing should be placed on the label in the gap sensor path or in areas which will be printed
by the scale printer. However, since preprinting is commonly used by many customers the following
guidelines must be followed.
1. Inks used for preprinting must be specially formulated for use in thermal printers. If proper
inks are not used they can adhere to the print head. This ink build up on the print head will
interfere with heat transfer from the print head to the paper and cause printing elements to
burn out. Another problem with inks not formulated for thermal printing is that they can
contain chemicals which will cause the glass overcoat to chip off of the print head, causing
failure to print in the chipped areas.
2. If black ink is used in preprinting in the gap sensor path shown below, a dense black stripe
will have to be printed on the back of the liner, as shown below, to prevent the gap sensor
from being affected by the black preprinting. (Colors other than black might also be a
problem and should be tested by the customer) The black stripe must have gaps which
correspond to the label gaps. The black stripe on the liner must have a minimum
transmission optical density of 2.3 and must be uniform. In addition, the gap sensor circuit
will need to be adjusted for operation with the black stripe as explained in the product
service manual. This adjustment will need to be checked any time label paper is changed,
for example when labels are procured from a new supplier.
GAP SENSOR PATH
BLACK STRIPE
3. If an optical density of at least 2.3 cannot be achieved in the black stripe on the back of the
liner, the sensor path in the center of the label must be free of black preprinting.
UC-ST User’s Guide
5-7
Label Requirements
SPECIAL SHAPED LABELS
Labels with shapes other than rectangular will cause gap detection errors if the gap dimension in the
gap sensor path is outside the limits given in this document, or if the edge of the label shape
crosses into and out of the sensor path as shown below. For these cases the black stripe will have
to be printed on the back of the liner. Tests will be needed to determine if the stripe as shown earlier
will be adequate will be required (shown above).
The safe approach is to use the configuration shown increasing the width on all odd shaped labels.
Examples of ODD SHAPED LABELS which will cause
GAP Sensor problems
DEFINITION OF TRANSMISSION OPTICAL DENSITY
Transmission optical density is defined as:
Optical Density = log10 (incident light / transmitted light) = log10 (100 / % light transmission)
Transmission optical density can be measured with a transmission densitometer that meets ANSI
standards. Examples are the Macbeth model TD903 and TD932.
Optical density for 100% light transmission = log10 (100/100) = log10 (1) = 0
Optical density for 0.1% light transmission = log10 (100/0.1) = log10 (1000) = 3
5-8
UC-ST User’s Guide
Label Requirements
LABEL AND LINER OPTICAL DENSITY
If liner paper transmits 2% of the light which is incident on it, the optical density is
log10 (100/2) = 1.7
If the light transmitted through the liner is 3 times the light transmitted through the liner and label,
the relative optical densities are:
Optical Density of Liner + Label = log10 (100 / X)
Optical Density of Liner Only
=
log10 (100 / 3X)
=
log10 (0.3333X)
=
log10 0.3333 + log10 (X)
=
log10 (X) – 0.48
Therefore, if the liner must transmit 3 times the light that the liner and label transmits, the
transmission optical density of the liner must be 0.48 less than the transmission optical density of
the liner and label.
BLACK STRIPE OPTICAL DENSITY
If only 0.5 % of incident light is transmitted through the black stripe, the optical density is:
log10 (100 / 0.5) = log10 (200) = 2.3
The purpose of specifying a transmission optical density of at least 2.3 for the printed black stripe
on the back of the label is to minimize any variation in light transmission as a result of black preprinting on the front of the label. This variation due to black preprinting can cause the gap sensor to
give gap detection errors.
UC-ST User’s Guide
5-9
Label Requirements
For your notes
5-10
UC-ST User’s Guide
14001
Quality certification. Development,
production, and auditing in accordance
with ISO9001. Environmental management
system in accordance with ISO14001.
Worldwide service. Our dense service
network, among the best in the world,
ensures the maximum availability and
lifespan of your product.
Conformité Européene
This label is your guarantee that our
products conform to the latest guidelines.
On the Internet. You can find important
information about our products and
services, as well as our company, quickly
and easily at http://www.mt.com/support
METTLER TOLEDO
1900 Polaris Parkway
Columbus, Ohio 43240
www.mt.com
®
METTLER TOLEDO® and SmartTouch
are registered Trademarks of Mettler-Toledo, Inc.
©2009 Mettler-Toledo, Inc.
Printed in USA