1
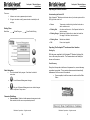
® Centipede 2 Module System Instructions Centipede 2® Module Temperature Control System With 4.3” Touchscreen Display (C2MOD-OI) Instruction Manual 1055 Gibbard Ave, Columbus, OH 43201 Toll Free: 800-848-7673 Phone: 614-294-3376 Fax: 614-294-3807 Email: [email protected] Read and understand this material before operating or servicing these heating tapes. Failure to understand how to safely operate these heaters could result in an accident causing serious injury or death. These heaters should only be operated by qualified personnel. BriskHeat® Corporation. All rights reserved 32 PN: 41295-02 Rev B ® ® Centipede 2 Module System Instructions Table of Contents Centipede 2 Module System Instructions Warranty Important Safety Instructions ................................................................ 3 Introduction ............................................................................................. 4 General Specifications ......................................................................... 4 Quick Start Guide ................................................................................... 5 Installation ............................................................................................... 6 Connecting C2MOD-C Modules to Heaters ......................................... 6 Understanding the Centipede 2® Touchscreen Interface (C2MOD-OI) ......................................................................... 7 Touchscreen Interface Mounting Instructions ...................................... 8 Operating the C2MOD-C Module ........................................................... 9 Understanding the Status LED ............................................................ 9 Operating The Centipede 2® Touchscreen User Interface ................... 9 Starting Up........................................................................................... 9 Zone Discovery.................................................................................... 9 Understanding the Operator Interface Status LED .............................. 10 Main Menu ............................................................................................... 10 View System ............................................................................................ 11 Multi-Zone View Navigation ................................................................. 11 Single-Zone View ................................................................................ 12 Understanding the Status Codes ......................................................... 13 Edit a Single Zone ............................................................................... 14 Global Programming .............................................................................. 15 Global Programming Parameters ........................................................ 16 Reset Default Settings ......................................................................... 18 Options / Setup ....................................................................................... 19 General Options .................................................................................. 20 Network Set-up .................................................................................... 23 Password Management ....................................................................... 24 Detect Zones ....................................................................................... 25 Alarm Setup ......................................................................................... 26 Alarm / Error Log ................................................................................. 27 Appendix 1: Fuse Replacement ............................................................. 28 Appendix 2: RS-232 Setup ..................................................................... 29 Hardware Requirements ...................................................................... 29 RS-232 Communication Set-Up .......................................................... 29 Appendix 3: Alarm Relay Installation .................................................... 29 Appendix 4: Troubleshooting Guide ..................................................... 30 Warranty .................................................................................................. 31 The BriskHeat Corporation (hereinafter referred as (“BriskHeat”) warrants to the original purchaser for the period of eighteen (18) months from date of shipment or twelve (12) months from date of installation, whichever comes first, that the products manufactured by BriskHeat: (A) conform to the description and specifications as set forth in BriskHeat’s current catalogue or in the quotation and drawings submitted by BriskHeat: and (B) are free from defects in materials and workmanship under prescribed use and service. Remedy. BriskHeat’s obligation and the exclusive remedy under this warranty shall be limited to the repair or replacement, at BriskHeat’s option, of any parts of the product which may prove defective under prescribed use and service within eighteen (18) months from date of shipment or twelve (12) months from date of installation, whichever comes first, and which, following BriskHeat’s examination, is determined by BriskHeats to be defective under conditions described herein: provided, BriskHeat has, at its option, a representative of BriskHeat present at start-up. BriskHeat shall not be liable for any incidental, consequential or special damages arising from any breach of warranty, breach of contract, negligence, or any other legal theory, including but not limited to, loss of use of parts or equipment or any associated equipment, cost of capital, cost of any substitute equipment, facilities or services, overhead, downtime costs, or claims of customer of purchaser for such damages. This remedy does not include labor costs for installation or removal of the equipment or parts covered by this warranty, and BriskHeat shall not be responsible for such labor costs. Limitation. This warranty shall not apply to any product or part thereof which has been subject to accident, negligence, alteration, damage during shipment, improper service, abuse, or misuse, including but not limited to use beyond rated capacity. BriskHeat makes no warranty whatsoever with respect to accessories or parts not supplied or manufactured by BriskHeat. BriskHeat’s obligation under this warranty shall be conditioned upon BriskHeat’s receiving written notice of any defect within fifteen (15) days after its discovery, and, at BriskHeat’s option, return of such equipment or parts prepaid to its factory at 1055 Gibbard Ave., Columbus, Ohio 43201. Disclaimer. BRISKHEAT MAKES NO WARRANTY WHATSOEVER, EXPRESS OR IMPLIED, EXCEPT AS IS EXPRESSLY SET FORTH ABOVE. NO AGENT, EMPLOYEE OR REPRESENTATIVE OF BRISKHEAT HAS ANY AUTHORITY TO BIND BRISKHEAT TO ANY AFFIRMATION, REPRESENTATION OR WARRANTY COVERING THE SALE OF ANY PRODUCT, AND UNLESS SUCH AFFIRMATION, REPRESENTATION OR WARRANTY MADE BY AN AGENT, EMPLOYEE OR REPRESENTATIVE IS SPECIFICALLY ENDORSED IN WRITING BY BRISKHEAT, IT SHALL NOT BE ENFORCEABLE BY ANY BUYER. BRISKHEAT MAKES NO EXPRESS OR IMPLIED WARRANTY OF MERCHANTABILITY AND NO EXPRESS OR IMPLIED WARRANTY OF FITNESS FOR PARTICULAR PURPOSE, EXCEPT AS IS EXPRESSLY SET FORTH ABOVE. BRISKHEAT SHALL NOT BE LIABLE FOR CONSEQUENTIAL, INCIDENTAL OR SPECIAL DAMAGES. This warranty allocates risk between the purchaser and BriskHeat as authorized by the Uniform Commercial Code and other applicable law. BriskHeat® Corporation. All rights reserved BriskHeat® Corporation. All rights reserved 2 31 ® ® Centipede 2 Module System Instructions Appendix 4: Troubleshooting Guide Please read this guide prior to contacting BriskHeat. This guide is designed to answer the most commonly asked questions. If you are unable to identify the problem or need additional assistance, please contact us at 1-800-848-7673 (U.S. / Canada), 1-614-294-3376 (worldwide), or [email protected]. PROBLEM SOLUTION(S) Heater does not warm up Verify heater is connected to proper voltage. No LED light displayed A person who has not read and understood all operating instructions is not qualified to operate this product. Check to see if there is a resistance reading (not an open If operator interface unit, verify that power is being supplied to unit. LED is blinking red See Understanding the Status LEDs (page 9 and 11) Operator interface does not detect all of the modules or ”No Zones Detected” Check to see the number of modules does not exceed 128. Check communication cable to make sure there is a connection. Check connection of wiring or replace RTD. Verify communication cable is properly connected to mod- Line Com Error SAFETY ALERT SYMBOL For Module unit, verify that the communication cable is Net Com Error IMPORTANT SAFETY INSTRUCTIONS Verify operation of Module. Make sure communication cable is secure. RTD Open or Shorted Centipede 2 Module System Instructions Verify heater has power applied and is properly connect- The symbol above is used to call your attention to instructions concerning your personal safety. It points out important safety precautions. It means “ATTENTION! Become Alert! Your Personal Safety is involved!” Read the message that follows and be alert to the possibility of personal injury or death Do not immerse or spray any component of the control system with liquid. Keep volatile or combustible material away from control and heating system when in use. Immediate hazards which WILL result in severe personal injury or death Keep sharp metal objects away from heater. Failure to observe these warnings may result in electric shock, risk of fire, and personal injury. Hazards or unsafe practices which COULD result in severe personal injury or death Hazards or unsafe practices which COULD result in minor personal injury or property damage End User Must Comply to the Following: Only qualified personnel are allowed to connect electrical wiring. Disconnect all supply power at the source before making any power connections. All electrical wiring must follow local electrical codes and highly recommend following NEC Article 427. Final installation / wiring is to be inspected by the authority who has jurisdiction in the area that the heating tape is installed. The end-user is responsible for providing Inspect all components before use. Do not use control and heating system if any component is damaged. Do not repair damaged or faulty control and heating systems. Do not crush or apply severe physical stress on any component of system, including cord assembly. Unplug control and heating system when not in use. a suitable disconnecting device. Power circuit breaker trips Validate that the circuit breaker is capable of handling the amperage requirement of heater. Examine system for any damage. The end-user is responsible for providing suitable electrical protection device. It is highly recommended that a ground fault circuit breaker is used. Failure to observe these warnings may result in personal injury or damage to the heater. Failure to observe these warnings may result in personal injury or damage to the heater. BriskHeat® Corporation. All rights reserved BriskHeat® Corporation. All rights reserved 30 3 ® ® Centipede 2 Module System Instructions INTRODUCTION Your Centipede 2® Temperature Control System supplies a complete network of temperature control by providing a controller and sensor to EACH heater in a system. A Centipede 2® Module Unit is a compact PID temperature controller with RTD feedback. Multiple modules can be networked together with CAT5 communication cables. The Centipede 2® Touchscreen Interface Unit acts as a Modbus master for up to 128 Centipede 2® Modules. This unit displays realtime data for all zones and allows a user to modify the major settings, such as set-point in the Centipede 2® Modules. For successful operation of this system, read these instructions prior to use. Centipede 2 Module System Instructions Appendix 2: RS-232 Setup Hardware Requirements Customer supplied communication cable is required to utilize the RS-232C communications mode. The Centipede 2® requires a straight-through communication cable to use the Male DB9 connector to mate to the Female DB9 installed in the C2MOD-OI. RS-232 Communication Set-up 1. General Specifications PID-auto-tuned control for each zone: Receives set-point through communication link and stored in nonvolatile memory (retains settings if power is interrupted) Quickly and easily program the following parameters (individually or globally across system): Temperature set-point, high-limit alarm temperature, and low-limit alarm temperature Operator interface displays actual temperature, power duty cycle of heater, and time / date stamped alarm messages in real-time. Ancillary Equipment Communication Parameters Slave mode running on an RS-232 physical layer Baudrate: 19.2k 8 bits, 1 stop bit, and no parity Appendix 3: Alarm Relay Installation 1. 2. 3. Strip wires of outer shell leaving 6mm (¼”) of bare wire. Insert wire into terminal and tighten. Repeat process for remaining wires. Automatically assigned zone addresses Up to 5 Amps @ 240VAC per control zone Temperature sensor: RTD Platinum 100 ohm, DIN 385 curve, class B Sensor accuracy: ±1.8°F (1.0°C) Temperature control range: 0 to 320°C (Displayed in °C) Maximum high-limit: 325°C Capable of communication with a PLC or external computer Ability for data streaming to a central monitoring system Alarm latch safety feature: Optional setting for heaters to power off in the event of an alarm condition. To reactivate, user unlatches heaters through operator interface or PLC Dry contact master alarm relay: NO or NC (Normally Open or Normally Closed) Environmental temperature: -13 to 131°F (-25 to 55°C) Storage temperature: -40 to 185°F (-40 to 85°C) Ambient humidity: 5 to 95% (non-condensing) SAVE THESE INSTRUCTIONS! Additional copies of this manual are available upon request Alarm Latch Feature: This feature is user configurable. The Factory default is ON. If set to ON, an alarm condition will require the user to reset the alarm to return the system to normal condition. Alarm latch is rated for 10 Amps @ 250 VAC. Alarm relay coil will energize with an alarm condition. Normally Open (NO): Will close contacts on alarm condition. Normally Closed (NC): Will open contacts on alarm condition. BriskHeat® Corporation. All rights reserved BriskHeat® Corporation. All rights reserved 4 29 ® ® Centipede 2 Module System Instructions Centipede 2 Module System Instructions QUICK START GUIDE Appendix 1: Fuse Replacement Fuse should be replaced with properly rated fuse: 2 AMP @ 240VAC max. Do not replace fuse with live power applied to Centipede 2®. Only authorized personnel should replace fuse. 1. Remove power from unit. 2. Replace the blown fuse with a new one of the specified amperage. 3. Apply power to unit. 4. If replacement fuse immediately fails, contact BriskHeat ® for more information concerning your issue. 1. Install all heaters and ensure that the RTD is making good contact with the object being heated. 2. Connect modules to heaters. Connect the heaters’ 6-pin power / RTD connector to each Centipede 2® module. 3. Connect each module in the string together using CAT5E communication cables. 4. Connect the first module to the operator interface using any of the available input strings (1 - 4). 5. Next, plug in the power to the heaters. Turn on operator interface. 6. In the Global Program menu, select “Global Prog/Select String”. Next, select the desired string to program. Set all values for low alarm, set-point, and high alarm. Individual module settings can be adjusted later. Monitor the Centipede 2® system to ensure that each heater achieves its desired set-point. The time to reach the set-point will vary for each heater. During this time, you may change individual module settings. 7. Refer to the rest of this manual for further details and troubleshooting. Fuse Location Left Side View BriskHeat® Corporation. All rights reserved BriskHeat® Corporation. All rights reserved 28 5 ® ® Centipede 2 Module System Instructions Centipede 2 Module System Instructions INSTALLATION Alarm Toggles Connecting C2MOD-C Modules to Heaters 1. Connect the 6-pin connector from the heating jacket to the C2MOD-C unit. This connector provides the control power and RTD temperature sensor input. Defines which errors are displayed on the operator interface. The only parameter that can be toggled OFF is the Lo Temp. 2. Plug in the CAT-5 connectors on each side of the module. These connections are bi-directional. This connection supplies the low voltage power and communications for the C2MOD-C. Alarm Log Reset Touch Alarm Log Reset icon to show ON status. Press to reset alarm log. Alarm / Error Log Getting There Main Menu Global Program Reset Default Setting Presents detailed records of the most recent errors. Do not mount C2MOD-C unit directly to the heater surface. Connect module to power connections between the heaters using plastic tie straps. BriskHeat® Corporation. All rights reserved BriskHeat® Corporation. All rights reserved 6 27 ® ® Centipede 2 Module System Instructions Alarm Setup Centipede 2 Module System Instructions Understanding the Centipede 2® Touchscreen Interface (C2MOD-OI) User can set-up alarm contacts to remain in alarm position and heaters powered off until the user manually clears the alarm. F Getting There A Main Menu Global Program Reset Default Setting B C D Alarm Latch Set-up Touch the Latch parameter to toggle ON/OFF. See page 14 for definitions. Hi Temperature Latch Lo-Temperature Latch Open RTD Latch Short RTD Latch Saves changes Exits out of Alarm setup menu without saving. Return to Options / Set-up menu. To Unlatch: Go to either the Alarm Setup screen or the Edit a Single Zone screen. Change Unlatch One-Shot toggle to ON and then touch unlatch. G E A. Touchscreen Display: Used for programming and viewing status of Centipede 2® modules (PN: C2MOD-C). B. Status LED: See page 11 for an explanation. C RJ45 Module Connections (Strings 1 through 4): Connect up to four separate strings of Centipede 2 modules (PN: C2MOD-C) utilizing CAT5 communication cables. Connect up to 64 modules per string (128 total modules). D. RS-232 External Communication Port: See page 30 for installation instructions. See page 24 for set-up instructions. E. Ethernet and USB Port: Currently inactive. F. Input Power Connector and Switch: Power cord connection point and main power switch for touchscreen operator interface. G. Dry Contact Alarm Relay Connection: NO or NC (Normally Open or Normally Closed). See page 31 for installation instructions. to BriskHeat® Corporation. All rights reserved BriskHeat® Corporation. All rights reserved 26 7 ® ® Centipede 2 Module System Instructions Centipede 2 Module System Instructions Touchscreen Interface Mounting Instructions C2MOD-OI comes equipped with four 4-40 mounting screws and nuts for easy installation. Cut out a panel using the illustrations below. Example of Screenshot when Password Mode is Enabled The user would need to enter a password to log-in to enter all edit menus. See Enter Password below to log-in. NOTE: A user will automatically be logged out if there is a period of 10 minutes of inactivity. Edit Mode: Indicates if the user is able to edit module settings. This mode is Enabled when Password Mode is Disabled or someone is logged in. The mode is Disabled when Password Mode is Enabled and someone is logged out. Enter Password: Place to enter password when password mode is enabled. Used to log-in. The default password is ‘briskheat’. Set New Password and Confirm New Password: Place to set a new password when user wants to permanently change the password. A keyboard screen appears. Detect Zones Getting There Main Menu à Options / Set-up à Detect Zones Check to make sure all connections are made prior to using this function. NOTE: When all zones have been found, the screen must be touched to complete zone identification. BriskHeat® Corporation. All rights reserved BriskHeat® Corporation. All rights reserved 8 25 ® ® Centipede 2 Module System Instructions Password Management Centipede 2 Module System Instructions Operating the C2MOD-C Module This menu: Understanding the Status LED 1. Allows a user to set-up password protect mode 2. Or log-in into admin mode (if password mode is enabled) to edit settings. Each Centipede 2® Module provides basic status of your heater system with its LED light found on the front. Green: Getting There Main Menu Global Program Reset Default Setting Temperature is within the high and low limits, and no alarm conditions exist. Blinking Red: An alarm condition exists. See Operator Interface for status message. Blinking Orange: Module/zone is latched due to alarm latch condition. See page 24 for Alarm Latch instructions. Blinking Green: Module/zone disabled. Off: Power is not supplied. Operating The Centipede 2® Touchscreen User Interface Starting Up With the power supplied to the Centipede 2® Operator Interface Unit, turn on the main power switch. The firmware version will initially be shown on the screen. Zone Discovery Basic Navigation Touch the desired field to program. See below for detailed instructions. Every time the operator interface unit is powered on, a zone discovery procedure is executed. This procedure discovers and automatically addresses all of the zones on the network. Once complete, touch the screen to continue to the Main Menu. Saves Password Management changes. Exits out of Password Management menu without changes. Returns to Options / Set-up menu. Parameter Definitions Password Mode: Enable or disable password management mode. When enabled, all edit menus are password protected. BriskHeat® Corporation. All rights reserved BriskHeat® Corporation. All rights reserved 24 9 ® ® Centipede 2 Module System Instructions Understanding the Operator Interface Status LED ® The Centipede 2 Operator Interface’s Status LED provides basic status of the entire Centipede 2® Module Network. Green: All the modules in the network are within their temperature limits and no errors exist. Blinking Red: One or more of the modules in the network have errors. Solid Red: No modules are connected to the operator interface. Off: This LED should never be off, unless no power is being supplied to the unit. Centipede 2 Module System Instructions Network Set-Up Getting There Main Menu Global Program Reset Default Setting MAIN MENU Parameter Definitions Address: Modbus address of the C2MOD-OI. Range: 0 to 255 Enable: Toggles between Modbus RTU and LUI (Local User Interface) protocol. ON = Modbus RTU OFF = LUI See page 30 for additional RS-232 hardware and communication set-up instructions. A. View System: See page 12. B. Global Program: See page 16. C. Options/ Setup: See page 20. BriskHeat® Corporation. All rights reserved BriskHeat® Corporation. All rights reserved 10 23 ® ® Centipede 2 Module System Instructions Centipede 2 Module System Instructions Change System Date and Time: VIEW SYSTEM NOTE: This function is used for time and date stamping of the error log. View performance and settings of each zone. 1. Touch the Date / Clock field. The below menu appears. Multi-Zone View Navigation B F A G E D 2. 3. Use the + and – buttons to change date and time. Touch the Exit icon when complete. Touch in General Options menu to save changes. Change Clock View: 1. Toggle between 24 HR and 12 HR clock by pressing button next to Time in General Options menu view. 2. Touch to save changes. Touchscreen Calibration: 1. Touch in General Options menu. 2. Touch Screen to continue to Calibration. 3. Touch Screen 3 times at each arrow (repeat for 3 arrows). 4. Touch screen to finalize calibration. A. C Multi-Zone Display (10 zones at one time) Str: String number Zone: Zone number Temp: Actual temperature in °C Green color: OK status mode Red color: Error status mode. Status message provided in SingleZone view. Touch any zone in the Multi-Zone View to go to the Single-Zone View. B. Changes Multi-Zone view by String number: ALL, 1, 2, 3, or 4. C. Home button: To Main Menu screen D. Left navigation: View last 10 zones E. Right navigation: View next 10 zones F. Quick navigation: Jump ahead 10, 20, or 30 zones at one time G. Scroll button: Activates automatic scroll of zones Pauses automatic scroll of zones See page 22 for how to adjust scroll rate BriskHeat® Corporation. All rights reserved BriskHeat® Corporation. All rights reserved 22 11 ® ® Centipede 2 Module System Instructions Centipede 2 Module System Instructions Change Operator Interface Name Single-Zone View Touch any zone in the Multi-Zone view to go to the detailed Single-Zone View C B 1. Touch the O/I Name field. A keyboard screen appears. 2. Input the desired Operator Interface name (maximum 12 character D E H A F G A. Current Performance of Zone Temperature: Actual temperature in °C Power Duty Cycle: In % Status Message: See page 14 for common list of status messages Green color: OK status mode Red color: Alarm/Error status mode. Orange Color: Alarm Latch Mode Displays zone parameters: Set-point, low-limit alarm, high-limit alarm, alarm latch on/off, zone on/off. C. Displays zone number D. Multi-zone view button: To Multi-zone view. See page 12. E. Edit zone button: Touch to edit the current zone. See Edit a Single Zone (page 15). F. Left navigation: View next zone G. Right navigation: View previous zone H. Scroll button: including spaces). Touch General Options screen. 3. Touch when complete. exits back to in General Options menu to save changes. Change Scroll Rate NOTE: The default Scroll Rate is set to 5 seconds 1. Touch the Scroll Rate field. A numeric keyboard screen appears. 2. Type the desired scrolling rate (1 to 99 seconds) B. Activates automatic scroll of zones Touch Pauses automatic scroll of zones 3. 4. See page 22 for how to adjust scroll rate when complete. exits back to General Options screen. Touch in General Options menu to save changes. Touch the Cancel icon to disregard any changes made to the Scroll Rate field. BriskHeat® Corporation. All rights reserved BriskHeat® Corporation. All rights reserved 12 21 ® ® Centipede 2 Module System Instructions General Options Centipede 2 Module System Instructions Understanding the Status Codes Getting There Main Menu Global Program Reset Default Setting Status Message Description OK No alarms present. Current actual temperature is above high alarm limit. Current temperature is below the low alarm limit. RTD is shorted. RTD is open. Internal module communication error. Communication between module and operator interface is lost. Zone is disabled (Turned Off). Hi Temp Lo Temp Short RTD Open RTD Line Com Net Com Err DISABLE Basic Navigation Touch the desired field to program. See pages 22 to 23 for detailed instructions. Saves General Option changes. Exits out of General Options menu without saving. Returns to Options / Set-up menu. BriskHeat® Corporation. All rights reserved BriskHeat® Corporation. All rights reserved 20 13 ® ® Centipede 2 Module System Instructions Edit a Single Zone OPTIONS / SETUP Basic Navigation Touch the desired field to program. See below for detailed instructions. Centipede 2 Module System Instructions Saves parameters to selected module. Exits out of Single Zone edit menu without saving. Returns to Single Zone view. A. General: General Options. Set O/I name, scroll rate, and date/time. See page 21. B. Network: Modbus settings. See page 24. C. Password Management: See page 25. D. Detect Zones: See page 26. E. Alarm Setup: See page 27. F. Alarm Log: Lists recent alarm logs. See page 28. Parameter Definitions Set Point: Target temperature. Range: 0 to 325°C. Low Alarm: Low-temperature limit. Module will go into alarm condition if sensor detects temperature below this temperature. High Alarm: High-temperature limit. Module will go into alarm condition if sensor detects temperature above this temperature. Unlatch One-Shot: Toggle to ON to unlatch a latched zone. See Alarm Latch Setup on page 27 for more details. Zone Enable: Toggle for turning on and off modules. Default is ON. BriskHeat® Corporation. All rights reserved BriskHeat® Corporation. All rights reserved 14 19 ® ® Centipede 2 Module System Instructions Reset Default Settings Centipede 2 Module System Instructions GLOBAL PROGRAMMING Getting There Main Menu Global Program Reset Default Setting Select one of the three choices: A. Global program ALL MODULES in a system B. Global program BY OUTPUT STRING (1 – 4) C. Reset to Default Settings NOTE: To determine which string you want to program, trace the CAT 5E communication cable to the Touchscreen Interface. They are numbered from string 1 to 4. to confirm. exits back to Global Programming menu. NOTE: Resetting to the default settings will erase all user data stored in the system. BriskHeat® Corporation. All rights reserved BriskHeat® Corporation. All rights reserved 18 15 ® ® Centipede 2 Module System Instructions Global Programming Parameters Centipede 2 Module System Instructions Programming Low Alarm, Set Point, and High Alarm: 1. Touch the desired field. A numeric keyboard screen appears. 2. Input the desired temperature (0 to 325°C). Touch Basic Navigation Touch the desired field to program. See below for detailed instructions. complete. Saves parameters to selected modules. Returns to Main when exits back to Global Programming menu. Menu. 3. Touch in Global Programming menu to save changes. Exits out of Global Programming menu without saving. Returns to Main Menu. Parameter Definitions Set Point: Target temperature. Range: 0 to 325°C. Low Alarm: Low-temperature limit. Module will go into alarm condition if sensor detects temperature below this temperature. High Alarm: High-temperature limit. Module will go into alarm condition if sensor detects temperature above this temperature. Program: Selected group of modules to globally program. Choose between All modules, String 1, String 2, String 3, or String 4. Alarm Unlatch: Toggles the alarm latch button to reset a latched alarm. See page 27 for more information. Zone On / Off: Toggle for globally turning on and off modules. Default is ON. BriskHeat® Corporation. All rights reserved BriskHeat® Corporation. All rights reserved 16 17