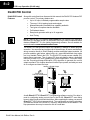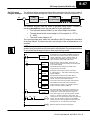
1
PID Loop Operation
(DL450 only)
In This Chapter. . . .
— DL450 PID Loop Features
— Introduction to PID Control
— Introducing DL450 PID Control
— PID Loop Operation
— Ten Steps to Successful Process Control
— PID Loop Setup
— PID Loop Tuning
— Using the Special PID Features
— Ramp/Soak Generator
— DirectSOFT Ramp/Soak Example
— Cascade Control
— Time Proportioning Control
— Feedforward Control
— PID Example Program
— Troubleshooting Tips
— Glossary of PID Loop Terminology
— Bibliography
18
8--2
PID Loop Operation (DL450 only)
DL450 PID Control
DL450 PID Control
Features
Along with control functions discussed in this manual, the DL450 CPU features PID
process control. The primary features are:
S Up to 16 loops, individual programmable sample rates
S The use of 16--bit analog inputs and outputs
S Manual/Automatic/Cascaded loop capability available
S Two types of bumpless transfer available
S Full-featured alarms
S Ramp/soak generator with up to 16 segments
S Auto Tuning
Maintenance
and Troubleshooting
PID Loop Operation
(DL450 Only)
NOTE : The D4--450 CPU requires at least DirectSOFT32, version 3.0c, build 58 or
later and CPU firmware version 1.9 (HB) and 2.446 (SH) or later to implement these
features. DirectSOFT 5 is the latest programming software. See our website for
more information www.automationdirect.com.
The DL450 CPU has process control loop capability in addition to ladder program
execution. You can select and configure up to sixteen loops. All sensor and actuator
wiring connects directly to DL405 analog modules and digital output modules. All
process variables, gain values, alarm levels, etc., associated with each loop reside
in a Loop Variable Table in the CPU. The DL450 CPU reads process variable (PV)
inputs during each scan. Then it makes PID loop calculations during a dedicated
time slice on each CPU scan, updating the control output value. The control loops
use the Proportional-Integral-Derivative (PID) algorithm to generate the control
output command. This chapter describes how the loops operate, and what you must
do to configure and tune the loops.
Analog or Digital Output
DL450 CPU
PID Loop Calculations
Manufacturing Process
Analog Input
As with DirectSOFT32, DirectSOFT 5 programming software, version 5.0 or later, is
used for configuring analog control loops in the DL450. DirectSOFT uses dialog
boxes to help you set up the individual loops. After completing the setup, you can use
DirectSOFT’s PID View to tune each loop. The configuration and tuning selections
you make are stored in the DL450’s V--memory, which can be set as retentive. The
loop parameters also may be saved to disk for recall later.
DL405 User Manual, 4th Edition, Rev. A
PID Loop Operation (DL450 only)
Number of loops
Selectable, 16 maximum
CPU V-memory needed
32 words (V locations) per loop selected, 64 words if using ramp/soak
PID algorithm
Position or Velocity form of the PID equation
Control Output polarity
Selectable direct-acting or reverse-acting
Error term curves
Selectable as linear, square root of error, and error squared
Loop update rate (time
between PID calculation)
0.05 to 99.99 seconds, user programmable
Minimum loop update rate
0.05 seconds for 1 to 4 loops, 0.1 seconds for 5 to 8 loops , and
0.2 seconds for 9 to 16 loops
Loop modes
Automatic, Manual (operator control), or Cascade control
Ramp/Soak Generator
Up to 8 ramp/soak steps (16 segments) per loop with indication of
ramp/soak step number
PV curves
Select standard linear, or square-root extract (for flow meter input)
Set Point Limits
Specify minimum and maximum setpoint values
Process Variable Limits
Specify minimum and maximum Process Variable values
Proportional Gain
Specify gains of 0.0 to 99.99
Integrator (Reset)
Specify reset time of 0.0 to 99.99 in units of seconds or minutes
Derivative (Rate)
Specify the derivative time from 0.00 to 99.99 seconds
Rate Limits
Specify derivative gain limiting from 1 to 20
Bumpless Transfer I
Automatically initialized bias and setpoint when control switches from
manual to automatic
Bumpless Transfer II
Automatically set the bias equal to the control output when control switches
from manual to automatic
Step Bias
Provides proportional bias adjustment for large setpoint changes
Anti-windup (Freeze Bias)
For position form of PID, this inhibits integrator action when the control
output reaches 0% or 100 % (speeds up loop recovery when output
recovers from saturation)
Error Deadband
Specify a tolerance (plus and minus) for the error term (SP--PV), so that no
change in control output value is made
Alarm Feature
Specifications
PV Alarm Hysteresis
Specify 1 to 200 (word/binary), does not affect all alarms, such as PV
Rate--of--Change Alarm
PV Alarm Points
Select PV alarm settings for Low--low, Low, High, and High-high conditions
PV Deviation
Specify alarms for two ranges of PV deviation from the setpoint value
Rate of Change
Detect when PV exceeds a rate of change limit you specify
DL405 User Manual, 4th Edition, Rev. A
Maintenance
Specifications
PID Loop Operation
(DL450 Only)
PID Loop Feature
8--3
8--4
PID Loop Operation (DL450 only)
Introduction to PID Control
Maintenance
and Troubleshooting
PID Loop Operation
(DL450 Only)
What is PID
Control?
In this discussion, we will explain why PID control is used in process control instead
of trying to provide control by simply using an analog input and a discrete output.
There are many types of analog controllers available, and the proper selection will
depend upon the particular application. There are two types of analog controllers
that are used throughout industry:
S 1. The ON--OFF controller, sometimes referred to as an open loop
controller.
S 2. The PID controller, sometimes called a closed loop controller.
Regardless of type, analog controllers require input signals from electronic sensors
such as pressure, differential pressure, level, flow meter or thermocouples. As an
example, one of the most common analog control applications is located in your
house for controlling either heat or air conditioning, the thermostat.
You wish for your house to be at a comfortable temperature so you set a thermostat
to a desired temperature (setpoint). You then select the “comfort“ mode, either heat
or A/C. A temperature sensing device, normally a thermistor, is located within the
thermostat. If the thermostat is set for heat and the setpoint is set for 69_, the furnace
will be turned on to provide heat at, normally, 2_ below the setpoint. In this case, it
would turn on at 67_. When the temperature reaches 71_, 2_ above setpoint, the
furnace will turn off. In the opposite example, if the thermostat is set for A/C (cooling),
the thermostat will turn the A/C unit on/off opposite the heat setting. For instance, if
the thermostat is set to cool at 76_, the A/C unit will turn on when the sensed
temperature reaches 2_ above the setpoint or 78_, and turn off when the
temperature reaches 74_. This would be considered to be an ON--OFF controller.
The waveform below shows the action of the heating cycle. Note that there is a slight
overshoot at the turn--off point, also a slight undershoot at the turn--on point.
71_
OFF
OFF
69_
67_
SETPOINT
ON
ON
ON
TIME
The ON--OFF controller is used in some industrial control applications, but is not
practical in the majority of industrial control processes.
The most common process controller that is used in industry is the PID controller.
DL405 User Manual, 4th Edition, Rev. A
PID Loop Operation (DL450 only)
8--5
Maintenance
DL405 User Manual, 4th Edition, Rev. A
PID Loop Operation
(DL450 Only)
The PID controller controls a continuous feedback loop that keeps the process
output (control variable) flowing normally by taking corrective action whenever there
is a deviation from the desired value (setpoint) of the process variable (PV) such as,
rate of flow, temperature, voltage, etc. An “error“ occurs when an operator manually
changes the setpoint or when an event (valve opened, closed, etc.) or a disturbance
(cold water, wind, etc.) changes the load, thus causing a change in the process
variable.
The PID controller receives signals from sensors and computes corrective action to
the actuator from a computation based on the error (Proportional), the sum of all
previous errors (Integral) and the rate of change of the error (Derivative).
We can look at the PID controller in more simple terms. Take the cruise control on an
automobile as an example. Let’s say that we are cruising on an interstate highway in
a car equipped with cruise control. The driver decides to engage the cruise control by
turning it ON, then he manually brings the car to the desired cruising speed, say 70
miles per hour. Once the cruise speed is reached, the SET button is pushed fixing
the speed at 70 mph, the setpoint. Now, the car is cruising at a steady 70 mph until it
comes to a hill to go up. As the car goes up the hill, it tends to slow down. The speed
sensor senses this and causes the throttle to increase the fuel to the engine. The
vehicle speeds up to maintain 70 mph without jerking the car and it reaches the top at
the set speed. When the car levels out after reaching the top of the hill it will speed up.
The speed sensor senses this and signals the throttle to provide less fuel to the
engine, thus, the engine slows down allowing the car to maintain the 70 mph speed.
How does this application apply to PID control? Lets look at the function of P, I and D
terms:
S Proportional -- is commonly referred to as Proportional Gain. The
proportional term is the corrective action which is proportional to the
error, that is, the change of the manipulated variable is equal to the
proportional gain multiplied by the error (the activating signal). In
mathematical terms:
Proportional action = proportional gain X error
Error = Setpoint (SP) -- Process Variable (PV)
Applying this to the cruise control, the speed was set at 70 mph which is
the Setpoint. The speed sensor senses the actual speed of the car and
sends this signal to the cruise controller as the Process Variable (PV).
When the car is on a level highway, the speed is maintained at 70 mph,
thus, no error since the error would be SP -- PV = 0. When the car goes
up the hill, the speed sensor detected a slow down of the car, SP--PV =
error. The proportional gain would cause the output of the speed
controller to bring the car back to the setpoint of 70 mph. This would be
the Controlled Output.
S Integral -- this term is often referred to as Reset action. It provides
additional compensation to the control output, which causes a change in
proportion to the value of the error over a period of time. In other words,
the reset term is the integral sum of the error values over a period of
time.
S Derivative -- this term is referred to as rate. The Rate action adds
compensation to the control output, which causes a change in
proportion to the rate of change of error. Its job is to anticipate the
probable growth of the error and generate a contribution to the output in
advance.
8--6
PID Loop Operation (DL450 only)
Maintenance
and Troubleshooting
PID Loop Operation
(DL450 Only)
Introducing DL450 PID Control
The DL450 is capable of controlling a process variable such as those already
mentioned. As previously mentioned, the control of a variable, such as temperature,
at a given level (setpoint) as long as there are no disturbances (cold water) in the
process.
The DL450 CPU has the ability to directly accept signals from electronic sensors,
such as thermocouples, pressure, VFDs, etc. These signals may be used in
mathematically derived control systems.
In addition, the DL450 has built--in PID control algorithms that can be implemented.
The basic function of PID closed loop process control is to maintain certain process
characteristics at desired setpoints. As a rule, the process deviates from the desired
setpoint reference as a result of load material changes and interaction with other
processes. During this control, the actual condition of the process characteristics
(liquid level, temperature, motor control, etc.) is measured as a process variable
(PV) and compared with the target setpoint (SP). When deviations occur, an error is
generated by the difference between the process variable (actual value) and the
setpoint (desired value). Once an error is detected, the function of the control loop is
to modify the control output in order to force the error to zero.
The DL450 PID control provides feedback loops using the PID algorithm. The
control output is computed from the measured process variable as follows:
Let:
Kc = proportional gain
Ti = Reset or integral time
Td = Derivative time or rate
SP = Setpoint
PV(t) = Process Variable at time “t”
e(t) = SP--PV(t) = PV deviation from setpoint at time “t” or PV error.
Then:
M(t) = Control output at time “t”
t
M(t) = Kc [ e(t) + 1/Ti ∫ 0 e(x) dx + Td d/dt e(t) ] + M0
The analog input module receives the process variable in analog form along with an
operator entered setpoint; the CPU computes the error. The error is used in the
algorithm computation to provide corrective action at the control output. The function
of the control action is based on an output control, which is proportional to the
instantaneous error value. The integral control action (reset action) provides
additional compensation to the control output, which causes a change in proportion
to the value of the change of error over a period of time. The derivative control action
(rate change) adds compensation to the control output, which causes a change in
proportion to the rate of change of error. These three modes are used to provide the
desired control action in Proportional (P), Proportional--Integral (PI), or
Proportional--Integral--Derivative (PID) control fashion.
DL405 User Manual, 4th Edition, Rev. A
PID Loop Operation (DL450 only)
8--7
Standard DL405 analog input modules are used to interface to field transmitters to
obtain the PV. These transmitters normally provide a 4--20mA current or an analog
voltage of various ranges for the control loop.
For temperature control, thermocouple or RTD can be connected directly to the
appropriate module. The PID control algorithm, residing in the CPU memory,
receives information from the user program, primarily control parameters and
setpoints. Once the CPU makes the PID calculation, the result may be used to
directly control an actuator connected to a 4--20mA current output module to control
a valve.
With DirectSOFT, additional ladder logic programming, both time proportioning (eg.
heaters for temperature control) and position actuator (eg. reversible motor on a
valve) type of control schemes can be easily implemented. This chapter will explain
how to set up the PID control loop, how to implement the software and how to tune
the loop.
The following block diagram shows the key parts of a PID control loop. The path from
the PLC to the manufacturing process and back to the PLC is the closed loop control.
Loop Configuring
and Monitoring
External
Disturbances
PLC System
+
Error Term
Σ
--
Loop
Calculation
Control Output
Manufacturing
Process
Process Variable
PID Loop Operation
(DL450 Only)
Setpoint Value
Maintenance
DL405 User Manual, 4th Edition, Rev. A
8--8
PID Loop Operation (DL450 only)
Maintenance
and Troubleshooting
PID Loop Operation
(DL450 Only)
Process Control
Definitions
Manufacturing Process -- the set of actions that adds value to raw materials. The
process can involve physical changes and/or chemical changes to the material. The
changes render the material more useful for a particular purpose, ultimately used in
a final product.
Process Variable -- a measurement of some physical property of the raw materials.
Measurements are made using some type of sensor. For example, if the
manufacturing process uses an oven, we will have a strong interest in controlling
temperature. Therefore, temperature is a process variable.
Setpoint Value -- the theoretically perfect quantity of the process variable, or the
desired amount which yields the best product. The machine operator knows this
value, and either sets it manually or programs it into the PLC for later automated use.
External Disturbances -- the unpredictable sources of error which the control
system attempts to cancel by offsetting their effects. For example, if the fuel input is
constant an oven will run hotter during warm weather than it does during cold
weather. An oven control system must counter-act this effect to maintain a constant
oven temperature during any season. Thus, the weather (which is not very
predictable), is one source of disturbance to this process.
Error Term -- the algebraic difference between the process variable and the
setpoint. This is the control loop error, and is equal to zero when the process variable
is equal to the setpoint (desired) value. A well-behaved control loop is able to
maintain a small error term magnitude.
Loop Calculation -- the real-time application of a mathematical algorithm to the
error term, generating a control output command appropriate for minimizing the
error magnitude. Various control algorithms are available, and the DL450 uses the
Proportional-Derivative-Integral (PID) algorithm (more on this later).
Control Output -- the result of the loop calculation, which becomes a command for
the process (such as the heater level in an oven).
Loop Configuring -- operator-initiated selections which set up and optimize the
performance of a control loop. The loop calculation function uses the configuration
parameters in real time to adjust gains, offsets, etc.
Loop Monitoring -- the function which allows an operator to observe the status and
performance of a control loop. This is used in conjunction with the loop configuring to
optimize the performance of a loop (minimize the error term).
DL405 User Manual, 4th Edition, Rev. A
PID Loop Operation (DL450 only)
8--9
PID Loop Operation
PID Position
Algorithm
PID Loop Operation
(DL450 Only)
The Proportional--Integral--Derivative (PID) algorithm is widely used in process
control. The PID method of control adapts well to electronic solutions, whether
implemented in analog or digital (CPU) components. The DL450 CPU implements
the PID equations digitally by solving the basic equations in software. I/O modules
serve only to convert electronic signals into digital form (or vice versa).
The DL450 uses two types of PID controls: “position“ and “velocity“. These terms
usually refer to motion control situations, but here we use them in a different sense:
S PID Position Algorithm -- The control output is calculated so it responds
to the displacement (position) of the PV from the SP (error term).
S PID Velocity Algorithm -- The control output is calculated to represent
the rate of change (velocity) for the PV to become equal to the SP.
Referring to the control output equation on page 8--6, the DL450 CPU approximates
the output M(t) using a discrete position form of the PID equation.
Let:
Ts = Sample rate
Kc = Proportional gain
Ki = Kc * (Ts/Ti) = Coefficient of integral term
Kr = Kc * (Td/Ts) = Coefficient of derivative term
Ti = Reset or integral time
Td = Derivative time or rate
SP = Setpoint
PVn = Process variable at nth sample
en = SP -- PVn = Error at nth sample
Mo = Value to which the controller output has been initialized
Then:
Mn = Control output at nth sample
n
Mn = Kc £ en + Ki Σ ei + Kr (en -- en--1) + Mo
This form of the PID equation is referred to as the position form since the actual
actuator position is computed. The velocity form of the PID equation computes the
change in actuator position. The CPU modifies the standard equation slightly to use
the derivative of the process variable instead of the error as follows:
Mn = Kc £ en + Ki
n
Σ ei + Kr (PVn -- PVn--1) + Mo
i=1
These two forms are equivalent unless the setpoint is changed. In the original
equation, a large step change in the setpoint will cause a correspondingly large
change in the error resulting in a bump to the process due to derivative action. This
bump is not present in the second form of the equation.
DL405 User Manual, 4th Edition, Rev. A
Maintenance
i=1
8--10
PID Loop Operation (DL450 only)
The DL450 also combines the integral sum and the initial output into a single term
called the bias (Mx). This results in the following set of equations:
Mxo = Mo
Mx = Ki * en + Mxn--1
Mn = Kc * en -- Kr(PVn -- PVn--1) + Mxn
The DL450 by default will keep the normalized output M in the range of 0.0 to 1.0.
This is done by clamping M to the nearer of 0.0 or 1.0 whenever the calculated output
falls outside this range. The DL450 also allows you to specify the minimum and
maximum output limit values (within the range 0 to 4095 in binary if using 12 bit
unipolar).
NOTE: The equations and algorithms, or parts of, in this chapter are only for
references. Analysis of these equations can be found in most good text books about
process control.
Maintenance
and Troubleshooting
PID Loop Operation
(DL450 Only)
Reset Windup
Protection
Reset windup can occur if reset action (integral term) is specified and the
computation of the bias term Mx is:
Mx = Ki * en + Mxn--1
For example, assume the output is controlling a valve and the PV remains at some
value greater than the setpoint. The negative error (en) will cause the bias term (Mx)
to constantly decrease until the output M goes to 0 closing the valve. However, since
the error term is still negative, the bias will continue to decrease becoming ever more
negative. When the PV finally does come back down below the SP, the valve will stay
closed until the error is positive for long enough to cause the bias to become positive
again. This will cause the process variable to undershoot.
One way to solve the problem is to simply clamp the normalized bias between 0.0
and 1.0. The DL450 CPU does this. However, if this is the only thing that is done, then
the output will not move off 0.0 (thus opening the valve) until the PV has become less
than the SP. This will also cause the process variable to undershoot.
The DL450 CPU is programmed to solve the overshoot problem by either freezing
the bias term, or by adjusting the bias term.
DL405 User Manual, 4th Edition, Rev. A
PID Loop Operation (DL450 only)
Freeze Bias
Adjusting the Bias
8--11
Maintenance
DL405 User Manual, 4th Edition, Rev. A
PID Loop Operation
(DL450 Only)
If the “Freeze Bias” option is selected when setting up the PID loop (discussed later)
then the CPU simply stops changing the bias (Mx) whenever the computed
normalized output (M) goes outside the interval 0.0 to 1.0.
Mx = Ki * en + Mxn--1
M = Kc * en -- Kr(PVn -- PVn--1) + Mx
Mn = 0
“if M < 0”
“if 0 < M > 1”
Mn = M
“if M > 1”
Mn = 1
Mxn = Mx
“if 0 < M > 1”
“otherwise”
Mxn = Mxn--1
Thus in this example, the bias will probably not go all the way to zero so that, when
the PV does begin to come down, the loop will begin to open the valve sooner than it
would have if the bias had been allowed to go all the way to zero. This action has the
effect of reducing the amount of overshoot.
The normal action of the CPU is to adjust the bias term when the output goes out of
range as shown below.
Mx = Ki * en + Mxn--1
M = Kc * en -- Kr(PVn -- PVn--1) + Mx
Mn = 0
“if M < 0”
“if 0 < M > 1”
Mn = M
“if M > 1”
Mn = 1
Mxn = Mx
“if 0 < M > 1”
Mxn = Mn -- Kc * en -- Kr(PVn -- PVn--1) “otherwise”
By adjusting the bias, the valve will begin to open as soon as the PV begins to come
down. If the loop is properly tuned, overshoot can be eliminated entirely. If the output
went out of range due to a setpoint change, then the loop probably will oscillate
because we must wait for the bias term to stabilize again.
The choice of whether to use the default loop action or to freeze the bias is
dependent on the application. If large step changes to the setpoint are
anticipated, then it is probably better to select the freeze bias option (see page
8--34).
8--12
PID Loop Operation (DL450 only)
Step Bias
Proportional to
Step Change SP
Maintenance
and Troubleshooting
PID Loop Operation
(DL450 Only)
Eliminating
Proportional,
Integral or
Derivative Action
Velocity Form of
the PID Equation
This feature reduces oscillation caused by a step change in setpoint when the
adjusting bias feature is used.
Mx = Mx * SPn / SPn--1 if the loop is direct acting
Mx = Mx * SPn--1 / SPn if the loop is reverse acting
Mxn = 0
“if Mx < 0”
Mxn = Mx “if 0 < Mx > 1”
“if M > 1”
Mxn = 1
It is not always necessary to run a full three mode PID control loop. Most loops
require only the PI terms or just the P term. Parts of the PID equation may be
eliminated by choosing appropriate values for the gain (Kc), reset (Ti) and rate (Td)
yielding a P, PI, PD, I and even an ID and a D loop.
Eliminating Integral Action
The effect of integral action on the output may be
eliminated by setting Ti = 9999 or 0000. When
this is done, the user may then manually control
the bias term (Mx) to eliminate any steady--state
offset.
Eliminating Derivative Action The effect of derivative action on the output may
be eliminated by setting Td = 0 (most loops do
not require a D parameter; it may make the loop
unstable).
Eliminating Proportional Action Although rarely done, the effect of proportional
term on the output may be eliminated by setting
Kc = 0. Since Kc is also normally a multiplier of
the integral coefficient (Ki) and the derivative
coefficient (Kr), the CPU makes the computation
of these values conditional on the value of \Kc as
follows:
Ki = Kc * (Ts / Ti)
“if Kc ¸ 0”
Ki = Ts / Ti
“if Kc = 0 (I or ID only)”
Kr = Kc * (Td / Ts)
“if Kc ¸ 0”
Kr = Td / Ts
“if Kc = 0 (ID or D only)”
The standard position form of the PID equation computes the actual actuator
position. An alternative form of the PID equation computes the change in actuator
position. This form of the equation is referred to as the velocity PID equation and is
obtained by subtracting the equation at time “n“ from the equation at time “n--1“.
The velocity equation is given by:
nMn = M -- Mn--1
DL405 User Manual, 4th Edition, Rev. A
PID Loop Operation (DL450 only)
8--13
Maintenance
DL405 User Manual, 4th Edition, Rev. A
PID Loop Operation
(DL450 Only)
Bumpless Transfer The DL450 loop controller provides for bumpless mode changes. A bumpless
transfer from manual mode to automatic mode is achieved by preventing the control
output from changing immediately after the mode change.
When a loop is switched from Manual mode to Automatic mode, the setpoint and
Bias are initialized as follows:
Position PID Algorithm
Velocity PID Algorithm
SP = PV
SP = PV
Mx = Control Ouput
The bumpless transfer feature of the DL450 is available in two types: Bumpless I and
Bumpless II (see page 8--27). The transfer type is selected when the loop is set up.
The DL450 allows the user to specify alarm conditions that are to be monitored for
Loop Alarms
each loop. Alarm conditions are reported to the CPU by setting up the alarms in
DirectSOFT using the PID setup alarm dialog when the loop is setup. The alarm
features for each loop are:
S PV Limit y Specify up to four PV alarm points.
High--High PV rises above the programmed High--High
Alarm Limit.
High
PV rises above the programmed High Alarm
Limit.
Low
PV fails below the Low Alarm Limit.
Low--Low PV fails below the Low--Low Limit.
S PV Deviation Alarm y Specify an alarm for High and Low PV deviation
from the setpoint (Yellow Deviation). An alarm for High High and Low
Low PV deviation from the setpoint (Orange Deviation) may also be
specified. When the PV is further from the setpoint than the
programmed Yellow or Orange Deviation Limit the corresponding alarm
bit is activated.
S Rate--of--Change y This alarm is set when the PV changes faster than
a specified rate--of--change limit.
S PV Alarm Hysteresis y The PV Limit Alarms and PV Deviation Alarms
are programmed using threshold values. When the absolute value or
deviation exceeds the threshold, the alarm status becomes true.
Real--world PV signals have some noise on them, which can cause
some fluctuation in the PV value in the CPU. As the PV value crosses
an alarm threshold, its fluctuations will cause the alarm to be intermittent
and annoy process operators. The solution is to use the PV Alarm
Hysteresis feature.
8--14
PID Loop Operation (DL450 only)
Loop Operating
Modes
Maintenance
and Troubleshooting
PID Loop Operation
(DL450 Only)
Special Loop
Calculations
The DL450 loop controller operates in one of two modes, either Manual or
Automatic.
Manual
In manual mode, the control output is determined by the operator, not the loop
controller. While in manual mode, the loop controller will still monitor all of the alarms
including High--High, High, Low, Low--Low, Yellow deviation, Orange deviation and
Rate--of--Change.
Automatic
In automatic mode, the loop controller computes the control output based on the
programmed parameters stored in V--memory. All alarms are monitored while in
automatic.
Cascade
Cascade mode is an option with the DL450 PLC and is used in special control
applications. If the cascade feature is used, the loop will operate as it would if in
automatic mode except for the fact that a cascaded loop has a setpoint which is the
control output from another loop.
Reverse Acting Loop
Although the PID algorithm is used in a direct, or forward, acting loop controller, there
are times when a reverse acting control output is needed. The DL450 loop controller
allows a loop to operate as reverse acting. With a reverse acting loop, the output is
driven in the opposite direction of the error. For example, if SP > PV, then a reverse
acting controller will decrease the output to increase the PV.
Mx = --Ki * en + Mxn--1
M = --Kc * en + Kr(PVn --PVn--1) + Mxn
Square Root of the Process Variable
Square root is selected whenever the PV is from a device such as an orifice meter
which requires this calculation.
Error Squared Control
Whenever error squared control is selected, the error is calculated as:
en = (SP -- PVn) * ABS(SP -- PVn)
A loop using the error squared is less responsive than a loop using just the error,
however, it will respond faster with a large error. The smaller the error, the less
responsive the loop. Error squared control would typically be used in a pH control
application.
DL405 User Manual, 4th Edition, Rev. A
PID Loop Operation (DL450 only)
8--15
Error Deadband Control
With error deadband control, no control action is taken if the PV is within the specified
deadband area around the setpoint. The error deadband is the same above and
below the setpoint.
Once the PV is outside of the error deadband around the setpoint, the entire error is
used in the loop calculation.
“SP -- Deadband__Below_SP < PV < SP -- Deadband_Above_SP”
en = 0
“otherwise”
en = P -- PVn
The error will be squared first if both Error Squared and Error Deadband is selected.
Derivative Gain Limiting
When the coefficient of the derivative term, Kr, is a large value, noise introduced into
the PV can result in erratic loop output. This problem is corrected by specifying a
derivative gain limiting coefficient, Kd. Derivative gain limiting is a first order filter
applied to the derivative term computation, Yn, as shown below.
Yn = Yn--1 +
__________
Ts
Ts + ( Td )
* (PVn
= Yn--1 )
Kd
nM = Kc * (en -- en--1) + Ki * en -- Kr * (Yn -- 2 * Yn--1 + Yn--2)
PID Loop Operation
(DL450 Only)
Position Algorithm
Mx = Ki * en + Mxn--1
M = Kc * en -- Kr * (Yn --Yn--1) + Mx
Velocity Algorithm
Maintenance
DL405 User Manual, 4th Edition, Rev. A
8--16
PID Loop Operation (DL450 only)
Maintenance
and Troubleshooting
PID Loop Operation
(DL450 Only)
Ten Steps to Successful Process Control
Modern electronic controllers such as the DL450 CPU provide sophisticated
process control features. Automated control systems can be very difficult to debug,
because a given symptom can have many possible causes. We recommend a
careful, step-by-step approach to bringing new control loops online:
The most important knowledge is -- how to produce your product. This knowledge is
Step 1:
the foundation for designing an effective control system. A good process recipe will
Know the Recipe
do the following:
S Identify all relevant Process Variables, such as temperature, pressure,
or flow rates, etc. which need precise control.
S Plot the desired Setpoint values for each of the process variables for the
duration of one process cycle.
Step 2:
This simply means choosing the method the machine will use to maintain control
over the Process Variables to follow their Setpoints. This involves many issues and
Plan Loop
trade-offs, such as, energy efficiency, equipment costs, ability to service the
Control Strategy
machine during production, and more. You must also determine how to generate the
Setpoint value during the process, and whether a machine operator can change the
SP.
Step 3:
Assuming the control strategy is sound, it is still crucial to properly size the actuators
and properly scale the sensors.
Size and Scale
Loop Components
S Choose an actuator (heater, pump. etc.) which matches the size of the
load. An oversized actuator will have an overwhelming effect on your
process after a SP change. However, an undersized actuator will allow
the PV to lag or drift away from the SP after a SP change or process
disturbance.
S Choose a PV sensor which matches the range of interest (and control)
for our process. Decide the resolution of control you need for the PV
(such as within 2°C), and make sure the sensor input value provides the
loop with at least 5 times that resolution (at LSB level). However, an
over-sensitive sensor can cause control oscillations, etc. The DL450
provides 12-bit and 15-bit, unipolar and bipolar data format options, and
a 16--bit unipolar option. This selection affects SP, PV, Control Output,
and Integrator sum.
Step 4:
After deciding the number of loops, PV variables to measure, and SP values, you
Select I/O Modules can choose the appropriate I/O modules. Refer to the figure on the next page. In
many cases, you will be able to share input or output modules among several control
loops. The example shown sends the PV and Control Output signals for two loops
through the same set of modules. Up to four loops could be handled by the modules
shown.
AutomationDirect offers DL405 analog modules with 4, 8, and 16 channels per
module in various signal types and ranges. Also available are thermocouple and
RTD modules which can be used to maintain temperatures to within a 10th of a
degree. Refer to our sales catalog for further information on these modules, or find
the modules on our website, www.automationdirect.com.
DL405 User Manual, 4th Edition, Rev. A
PID Loop Operation (DL450 only)
DL450 CPU
V-memory
Input
Module
Loop 1 Data
Channel 1
PV
Channel 2
PV
SP
OUT
Loop 2 Data
SP
OUT
8--17
Output
Module
Channel 1
Channel 2
Channel 3
Channel 3
Channel 4
Channel 4
Process 1
Process 2
After selection and procurement of all loop components and I/O modules, we can
perform the wiring and installation. Refer to the wiring guidelines in Chapter 2 of this
Manual, and to the DL405 Analog I/O Module manual as needed. The most
commonly overlooked wiring details when installing PID loop controls are:
S Reversing the polarity of sensor or actuator wiring connections.
S Incorrect signal ground connections between loop components.
Step 6:
Loop Parameters
After wiring and installation, choose the loop setup parameters. The easiest method
for programming the loop tables is by using DirectSOFT. This software provides PID
Setup using dialog boxes to simplify the task. Note: It is important to understand
the meaning of all loop parameters mentioned in this chapter before choosing
values to enter.
With the sensor and actuator wiring completed, and loop parameters entered, the
Manual mode must be used to manually and carefully check out the new control
system.
S Verify that the PV value from the sensor is correct.
S If it is safe to do so, gradually increase the control output up above 0%,
and see if the PV responds (and moves in the correct direction!).
Step 7:
Check Open Loop
Performance
If the open loop test (page 8--40) shows the PV reading is good and the control output
has the proper effect on the process; follow the closed--loop auto tuning procedure
(see page 8--45). In this step, the loop is tuned so the PV automatically follows the
SP.
Step 9:
If the closed loop test shows PV will follow small changes in the SP, consider running
Run Process Cycle an actual process cycle. The programming which will generate the desired SP in real
time must be completed. In this step, it may desirable to run a small test batch of
product through the machine, while watching the SP change according to the recipe.
WARNING: Be sure the Emergency Stop and power-down provision is readily
accessible, in case the process goes out of control. Damage to equipment
and/or serious injury to personnel can result from loss of control of some
processes.
Step 10:
Save Loop
Parameters
When the loop tests and tuning sessions are complete, be sure to save all loop setup
parameters to disk.
DL405 User Manual, 4th Edition, Rev. A
Maintenance
Step 8:
Loop Tuning
PID Loop Operation
(DL450 Only)
Step 5:
Wiring and
Installation
8--18
PID Loop Operation (DL450 only)
PID Loop Setup
Some Things to Do Have your analog module installed and operational before beginning the loop setup
(refer to the DL405 Analog I/O Modules Manual, D4--ANLG--M). The DL450 CPU
and Know Before
gets its PID loop processing instructions from V--memory tables. There isn’t a PID
Starting
instruction that can be used in RLL, such as a block, to setup the PID loop control.
Instead, the CPU reads the setup parameters from system V--memory locations.
These locations are shown in the table below for reference only; they can be used in
a RLL program if needed.
Address
Setup Parameter
Data type
Ranges
Read/Write
V7640
Loop Parameter
Table Pointer
Octal
V1400 -- V7340,
V10000 -- V37740
write
V7641
Number of Loops
BCD
0 -- 16
write
V7642
Loop Error Flags
Binary
0 or 1
read
Maintenance
and Troubleshooting
PID Loop Operation
(DL450 Only)
If the number of loops is “0”, the loop controller task is turned off during the ladder
program scan. The loop controller will allow use of loops in ascending order,
beginning with 1. For example, you cannot use loop 1 and 4 while skipping 2 and 3.
The loop controller attempts to control the full number of loops specified in V7641.
NOTE: The V--memory data is stored in RAM memory. If power is removed from the
CPU for an extended period of time, the PID Setup Parameters will be lost. It is
recommended to use the optional D3--D4--BAT for memory backup.
PID Error Flags
The CPU reports any programming errors of
the setup parameters in V7640 and V7641. It
does this by setting the appropriate bits in
V7642 on program-to-run mode transitions.
PID Error Flags, V7642
Bit 15 14 13 12 11 10 9 8 7 6 5 4 3 2 1 0
If you use the DirectSOFT loop setup dialog box, its automatic range checking
prohibits possible setup errors. However, the setup parameters may be written using
other methods such as RLL, so the error flag register may be helpful in those cases.
The following table lists the errors reported in V7642.
Bit
Error Description (0 = no error, 1 = error)
0
The starting address (in V7640) is out of the lower V-memory range.
1
The starting address (in V7640) is out of the upper V-memory range.
2
The number of loops selected (in V7641) is greater than 16.
3
The loop table extends past (straddles) the boundary at V7377. Use an
address closer to V1400.
4
The loop table extends past (straddles) the boundary at V37777. Use
an address closer to V10000.
As a quick check, if the CPU is in Run mode and V7642=0000, then we know there
are no programming errors.
DL405 User Manual, 4th Edition, Rev. A
PID Loop Operation (DL450 only)
Establishing the
Loop Table Size
and Location
8--19
On a PROGRAM-to-RUN mode transition, the CPU reads the loop setup
parameters as pictured below. At that moment, the CPU learns the location of the
loop table and the number of loops it configures. Then during the ladder program
scan, the PID Loop task uses the loop data to perform calculations, generate alarms,
and so on. There are some loop table parameters the CPU will read or write on every
loop calculation.
CPU Tasks
Ladder
Program
V--Memory Space
READ/
WRITE
User Data
LOOP
DATA
CONFIGURE/
MONITOR
PID Loop
Task
READ
(at powerup)
Setup Parameters
V7640, V7641
DirectSOFT 5 Programming Software
NOTE: Whether one or more loops are being setup, this block of V--memory will only
be used for the PID loop parameters, do not use this block of memory for
anything else in your program.
DL405 User Manual, 4th Edition, Rev. A
Maintenance
The Loop Table contains data for only the
V--Memory Space
number of loops selected. The address for
User Data
the table is stored in V7641. Each loop
V2000
LOOP #1
configuration occupies 32 words (0 to 37
V2037
32 words
octal) in the loop table.
LOOP #2
V2040
For example, consider an application with
32 words
V2077
4 loops, and V2000 has been chosen as
LOOP #3
the starting location. The Loop Parameter
32 words
will occupy V2000 -- V2037 for loop 1,
LOOP #4
V2040 -- V2077 for loop 2 and so on. Loop
32 words
4 occupies V2140 -- V2177.
Determine the block of V--memory to be used for each PID loop. Besides being the
beginning of the PID parameter memory block, the first address will be the start of
loop 1 parameters. Remember, there are 32 words (0 to 37 octal) needed for each
loop. Once you have determined the beginning V--memory address to be used, you
can setup and store the PID parameters either directly in your RLL program or by the
using PID Setup in DirectSOFT.
PID Loop Operation
(DL450 Only)
NOTE: The DL450 CPU’s PID algorithm requires at least DirectSOFT32, version
3.0c, Build 58 (or later) and CPU firmware version 1.9 (H8) and 2.446 (SH) (or later),
or DirectSOFT 5, version 5.0 (or later). See our website for more information:
www.automationdirect.com.
8--20
PID Loop Operation (DL450 only)
First type the beginning address in the PID Table Address dialog. After the address
has been entered, the memory range will appear. Also, entering the number of PID
loops (1 to 16) will set the total V--memory range for the number of loops entered.
After the V--memory address has been entered, the necessary PID parameters for a
basic loop operation for each loop can be setup with the dialogs made available.
Maintenance
and Troubleshooting
PID Loop Operation
(DL450 Only)
Using DirectSOFT is the simplest way to setup the parameters. The DL450 PID
parameters can be setup either offline or online while developing the user program.
The parameters will be loaded to V--memory as the program is loaded into the PLC.
If the PID parameters are setup or changed while the PLC is connected to the
programming computer, this can only be done in Program Mode.
To begin the PID setup, open an edited program with DirectSOFT, then click on PLC
> Setup > PID to access the Setup PID dialog which is pictured below.
DL405 User Manual, 4th Edition, Rev. A
8--21
PID Loop Operation (DL450 only)
Loop Table
Word Definitions
Word #
The parameters associated with each loop are listed in the following table. The
address offset is in octal, to help you locate specific parameters in a loop table. For
example, if a table begins at V2000, then the location of the reset (integral) term is
Addr+11, or V2011. Do not use the word# to calculate addresses.
Address+Offset Description
Format
Read onthe-fly***
PID Loop Mode Setting 1
bits
Yes
2
Addr + 1
PID Loop Mode Setting 2
bits
Yes
3
Addr + 2
Setpoint Value (SP)
word/binary
Yes
4
Addr + 3
Process Variable (PV)
word/binary
Yes
5
Addr + 4
Bias (Integrator) Value
word/binary
Yes
6
Addr + 5
Control Output Value
word/binary
Yes
7
Addr + 6
Loop Mode and Alarm Status
bits
--
8
Addr + 7
Sample Rate Setting
word/BCD
Yes
9
Addr + 10
Gain (Proportional) Setting
word/BCD
Yes
10
Addr + 11
Reset (Integral) Time Setting
word/BCD
Yes
11
Addr + 12
Rate (Derivative) Time Setting
word/BCD
Yes
12
Addr + 13
PV Value, Low-low Alarm
word/binary
No*
13
Addr + 14
PV Value, Low Alarm
word/binary
No*
14
Addr + 15
PV Value, High Alarm
word/binary
No*
15
Addr + 16
PV Value, High-high Alarm
word/binary
No*
16
Addr + 17
PV Value, deviation alarm (YELLOW)
word/binary
No*
17
Addr + 20
PV Value, deviation alarm (RED)
word/binary
No*
18
Addr + 21
PV Value, rate-of-change alarm
word/binary
No*
19
Addr + 22
PV Value, alarm hysteresis setting
word/binary
No*
20
Addr + 23
PV Value, error deadband setting
word/binary
Yes
21
Addr + 24
reserved for future use
--
--
22
Addr + 25
Loop derivative gain limiting factor setting
word/BCD
No**
23
Addr + 26
SP value lower limit setting
word/binary
Yes
24
Addr + 27
SP value upper limit setting
word/binary
Yes
25
Addr + 30
Control output value lower limit setting
word/binary
No**
26
Addr + 31
Control output value upper limit setting
word/binary
No**
27
Addr + 32
Remote SP Value V-Memory Address Pointer
word/hex
Yes
28
Addr + 33
Ramp/Soak Setting Flag
bit
Yes
29
Addr + 34
Ramp/Soak Programming Table Starting Address
word/hex
No**
30
Addr + 35
Ramp/Soak Programming Table Error Flags
bits
No**
31
Addr + 36
reserved for future use
--
--
32
Addr + 37
reserved for future use
--
--
* Read data only when alarm enable bit transitions 0 to1,
** Read data only on PLC Mode change,
*** Read on--the--fly means that the content of V--memory can be changed while the PID loop is in operation.
DL405 User Manual, 4th Edition, Rev. A
Maintenance
Addr + 0
PID Loop Operation
(DL450 Only)
1
8--22
PID Loop Operation (DL450 only)
PID Mode Setting 1 The individual bit definitions of PID Mode Setting 1 word (Addr+00) are listed in the
following table.
Bit Descriptions
(Addr + 00)
PID Mode Setting 1 Description
Read/Write
Bit=0
Bit=1
0
Manual Mode Loop Operation request
write
--
0¤1
request
1
Automatic Mode Loop Operation request
write
--
0¤1
request
2
Cascade Mode Loop Operation request
write
--
0¤1
request
3
Bumpless Transfer select
write
Mode I
Mode II
4
Direct or Reverse-Acting Loop select
write
Direct
Reverse
5
Position/Velocity Algorithm select
write
Position
Velocity
6
PV Linear/Square Root Extract select
write
Linear
Sq. root
7
Error Term Linear/Squared select
write
Linear
Squared
8
Error Deadband enable
write
Disable
Enable
9
Derivative Gain Limit select
write
Off
On
10
Bias (Integrator) Freeze select
write
Off
On
11
Ramp/Soak Operation select
write
Off
On
12
PV Alarm Monitor select
write
Off
On
13
PV Deviation alarm select
write
Off
On
14
PV rate-of-change alarm select
write
Off
On
15
reserved for future use
--
--
--
Maintenance
and Troubleshooting
PID Loop Operation
(DL450 Only)
Bit
DL405 User Manual, 4th Edition, Rev. A
8--23
PID Loop Operation (DL450 only)
PID Mode Setting 2 The bit definitions for PID Mode Setting 2 word (Addr+01) are listed in the following
table. More information about the use of this word is available later in this chapter.
Descriptions
(Addr + 01)
Bit
PID Mode Setting 2 Description
Read/Write
Bit=0
Bit=1
write
unipolar
bipolar
1
Input/Output Data Format select
(See Notes 1 and 2)
write
12 bit
15 bit
2
reserved for future use
--
--
--
3
SP Input limit enable
write
disable
enable
4
Integral Gain (Reset) units select
write
seconds
minutes
5
Select Autotune PID algorithm
write
closed loop
open loop
6
Autotune selection
write
PID
PI only
(rate = 0)
7
Autotune start (Note: Bit 7 can be used to
cancel Autotune mode by setting it to 0.)
read/write
autotune
done
force start
8
PID Scan Clock (internal use)
read
--
--
9
Input/Output Data Format 16-bit select
(See Notes 1 and 2)
write
not
16 bit
select
16 bit
10
Select separate data format for input and
output (See Notes 2 and 3)
write
same
format
separate
formats
11
Control Output Range
Unipolar/Bipolar select
(See Notes 2 and 3)
write
unipolar
bipolar
12
Output Data Format select
(See Notes 2 and 3)
write
12 bit
15 bit
13
Output data format 16-bit select
(See Notes 2 and 3)
write
not
16 bit
select
16 bit
--
--
--
14--15
Reserved for future use
NOTE 1: If the value in bit 9 is 0, then the values in bits 0 and 1 are read. If the value in
bit 9 is 1, then the values in bits 0 and 1 are not read, and bit 9 defines the data format
(the range is automatically unipolar).
NOTE 2: If the value in bit 10 is 0, then the values in bits 0, 1, and 9 define the input
and output ranges and data formats (the values in bits 11, 12, and 13 are not read). If
the value in bit 10 is 1, then the values in bits 0, 1, and 9 define only the input range
and data format, and bits 11, 12, and 13 are read and define the output range and
data format..
NOTE 3: If bit 10 has a value of 1 and bit 13 has a value of 0, then bits 11 and 12 are
read and define the output range and data format. If bit 10 and bit 13 each have a
value of 1, then bits 11 and 12 are not read, and bit 13 defines the data format, (the
output range is automatically unipolar).
DL405 User Manual, 4th Edition, Rev. A
Maintenance
Input (PV) and Control Output Range
Unipolar/Bipolar select
(See Notes 1 and 2)
PID Loop Operation
(DL450 Only)
0
8--24
PID Loop Operation (DL450 only)
Mode/Alarm
Monitoring Word
(Addr + 06)
The individual bit definitions of the Mode/Alarm monitoring word (Addr+06) are listed
in the following table.
Maintenance
and Troubleshooting
PID Loop Operation
(DL450 Only)
Bit
Read/Write
Bit=0
Bit=1
0
Manual Mode Indication
read
--
Manual
1
Automatic Mode Indication
read
--
Auto
2
Cascade Mode Indication
read
--
Cascade
3
PV Input LOW--LOW Alarm
read
Off
On
4
PV Input LOW Alarm
read
Off
On
5
PV Input HIGH Alarm
read
Off
On
6
PV Input HIGH--HIGH Alarm
read
Off
On
7
PV Input YELLOW Deviation Alarm
read
Off
On
8
PV Input RED Deviation Alarm
read
Off
On
9
PV Input Rate-of-Change Alarm
read
Off
On
10
Alarm Value Programming Error
read
--
Error
11
Loop Calculation Overflow/Underflow
read
--
Error
--
--
--
12--15
Ramp/Soak Table
Flags
(Addr + 33)
Mode / Alarm Bit Description
Reserved for Future Use
The individual bit definitions of the Ramp/Soak Table Flag word (Addr+33) are listed
in the following table.
Bit
Ramp/Soak Flag Bit Description
Read/Write
Bit=0
Bit=1
0
Start Ramp/Soak Profile
write
--
0¤1 Start
1
Hold Ramp/Soak Profile
write
--
0¤1 Hold
2
Resume Ramp/soak Profile
write
--
0¤1
Resume
3
Jog Ramp/Soak Profile
write
--
0¤1 Jog
4
Ramp/Soak Profile Complete
read
--
Complete
5
PV Input Ramp/Soak Deviation
read
Off
On
6
Ramp/Soak Profile in Hold
read
Off
On
7
Reserved
read
Off
On
Current Step in R/S Profile
read
8--15
decode as byte (hex)
Bits 8--15 must be read as a byte to indicate the current segment number of the
Ramp/Soak generator in the profile. This byte will have the values 1, 2, 3, 4, 5, 6, 7, 8,
9, A, B, C, D, E, F, and 10. which represent segments 1 to 16 respectively. If the
byte=0. then the Ramp/Soak table is not active.
DL405 User Manual, 4th Edition, Rev. A
8--25
PID Loop Operation (DL450 only)
Ramp/Soak
Table Location
(Addr + 34)
V2000
V2037
Each loop that you configure has the option of using a built-in Ramp/Soak generator
dedicated to that loop. This feature generates SP values in a continuous stream,
called a profile. To use the Ramp/Soak feature, you must program a separate table
of 32 words with appropriate values. A DirectSOFT dialog box makes this easy to
do.
In the basic loop table, the Ramp/Soak Table Pointer at Addr + 34 must point to the
start of the ramp/soak data for that loop. This may be anywhere in user memory, and
does not have to be adjoining to the Loop Parameter table, as shown to the left. Each
R/S table requires 32 words, regardless of the number of segments programmed.
The ramp/soak table parameters are defined in the table below. Further details are in
the section on Ramp/Soak Generator section in this chapter.
V--Memory Space
Addr
Offset
Step
User Data
+ 00
1
+ 01
32 words
LOOP #2
LOOP #1
32 words
Ramp/Soak #1
32 words
V2034 = 3000 octal
Pointer to R/S table
Step
Ramp End SP Value
+ 20
9
Ramp End SP Value
1
Ramp Slope
+ 21
9
Ramp Slope
+ 02
2
Soak Duration
+ 22
10
Soak Duration
+ 03
2
Soak PV Deviation
+ 23
10
Soak PV Deviation
+ 04
3
Ramp End SP Value
+ 24
11
Ramp End SP Value
+ 05
3
Ramp Slope
+ 25
11
Ramp Slope
+ 06
4
Soak Duration
+ 26
12
Soak Duration
+ 07
4
Soak PV Deviation
+ 27
12
Soak PV Deviation
+ 10
5
Ramp End SP Value
+ 30
13
Ramp End SP Value
+ 11
5
Ramp Slope
+ 31
13
Ramp Slope
+ 12
6
Soak Duration
+ 32
14
Soak Duration
+ 13
6
Soak PV Deviation
+ 33
14
Soak PV Deviation
+ 14
7
Ramp End SP Value
+ 34
15
Ramp End SP Value
+ 15
7
Ramp Slope
+ 35
15
Ramp Slope
+ 16
8
Soak Duration
+ 36
16
Soak Duration
+ 17
8
Soak PV Deviation
+ 37
16
Soak PV Deviation
Description
Write
0
Starting Addr out of lower V-memory range
read
--
Error
1
Starting Addr out of upper V-memory range
read
--
Error
--
--
--
2--3
4
5--15
Reserved for future Use
Starting Addr out of System Parameter
V-memory Range
Reserved for future Use
read
--
---
Error
--
DL405 User Manual, 4th Edition, Rev. A
Maintenance
Ramp/Soak Table
The individual bit definitions of the Ramp/Soak Table Programming Error Flags
Programming Error (Addr + 35) word are listed in the following table.
Flags
Read/
(Addr + 35)
Bit
R/S Error Flag Bit Description
Bit=0
Bit=1
PID Loop Operation
(DL450 Only)
V3000
Addr
Offset
Description
8--26
PID Loop Operation (DL450 only)
Maintenance
and Troubleshooting
PID Loop Operation
(DL450 Only)
Configure the PID
Loop
Once the PID table is established in V--memory, configuring the PID loop continues
with the DirectSOFT PID setup configuration dialog. You will need to check and fill in
the data required to control the PID loop. Select Configure and the following dialog
will appear for this process.
Select the Algorithm Type
Chose either Position or Velocity. The default algorithm is Position. This is the choice
for most applications which include heating and cooling loops as well as most
position and level control loops. A typical velocity control will consist of a process
variable such as a flow totalizer in a flow control loop.
Enter the Sample Rate
The main tasks of the CPU fall into
categories as shown to the right. The list
represents the tasks done when the CPU
is in Run Mode, on each PLC scan. Note
that PID loop calculations occur after the
ladder logic task.
The sample rate of a control loop is simply
the frequency of the PID calculation. Each
calculation generates a new control output
value. With the DL450 CPU, you can set
the sample rate of a loop from 50 mS to
99.99 seconds. Most loops do not require
a fresh PID calculation on every PLC
scan. Some loops may need calculating
only once in 1000 scans.
Enter 0.05 sec., or the sample rate of your
choice, for each loop, and the CPU
automatically schedules and executes
PID calculations on the appropriate scans.
Read
Inputs
Service
Peripherals
PLC
Scan
Ladder
Program
Calculate
PID Loops
Internal
Diagnostics
Write
Outputs
NOTE: If more than 4 loops are programmed, enter a minimum of 0.1 second.
DL405 User Manual, 4th Edition, Rev. A
PID Loop Operation (DL450 only)
8--27
Select Forward/Reverse
It is important to know which direction the control output will respond to the error
(SP--PV), either forward or reverse. A forward (direct) acting control loop means that
whenever the control output increases, the process variable will also increase. The
control output of most PID loops are forward acting, such as a heating control loop.
An increase in heat applied will increase the PV (temperature).
A reverse acting control loop is one where an increase in the control output results in
a decrease in the PV. A common example of this would be a refrigeration system,
where an increase in the cooling input causes a decrease in the PV (temperature).
The Transfer Mode
Choose either Bumpless I or Bumpless II to provide a smooth transition of the control
output from Manual Mode to Auto Mode. Choosing Bumpless I will set the SP equal
to the PV when the control output is switched from Manual to Auto. If this is not
desired, choose Bumpless II.
The characteristics of Bumpless I and II transfer types are listed in the chart below.
Note that their operation also depends on which PID algorithm you are using, the
position or velocity form of the PID equation. Note that you must use Bumpless
Transfer type I when using the velocity form of the PID algorithm.
Transfer
Select Bit
Bumpless
Transfer I
0
Bumpless
Transfer II
1
PID Algorithm
Manual-to-Auto
Transfer Action
Auto-to-Cascade
Transfer Action
Position
Forces Bias = Control Output
Forces SP = PV
Forces Major Loop Output =
Minor Loop PV
Velocity
Forces SP = PV
Forces Major Loop Output =
Minor Loop PV
Position
Forces Bias = Control Output
none
Velocity
none
none
PID Loop Operation
(DL450 Only)
Transfer
Type
The transfer type can also be selected in a RLL program by setting bit 3 of PID Mode
1, V+00 setting as shown.
Bumpless Transfer I / II select
Bit 15 14 13 12 11 10 9 8 7 6 5 4 3 2 1 0
SP/PV & Output Format
This block allows you to select either Common format or Independent format.
Common format is the default and is most commonly used. With this format both
SP/PV and Output will have the same data structure. Both will have the same
number of bits and either bipolar or unipolar. If Independent format is selected, the
data structure selections will be grayed out. The reason for this is that they become
independently selectable in the SP/PV and the Output dialogs.
Common Data Format
Select either Unipolar data format (which is positive data only) in 12 bit (0 to 4095),
15 bit (0 to 32767), or 16 bit (0 to 65535) format, or Bipolar data format, which ranges
from negative to positive (--4095 to 4095 or --32767 to 32767) and requires a sign bit.
Bipolar selection displays input/output as magnitude plus sign, not two’s
complement. The bipolar selection is not available when 16--bit data format is
selected.
DL405 User Manual, 4th Edition, Rev. A
Maintenance
PID Mode 1 Setting V+00
8--28
PID Loop Operation (DL450 only)
Setpoint V+02
+
Σ
--
Control Output V+05
Loop
Calculation
Process Variable V+03
PID Mode 2 Setting V+01
Bit 15 14 13 12 11 10 9 8 7 6 5 4 3 2 1 0
Data formats
00
Select data
format using
bits 0 and 1.
LSB
Bit 15 14 13 12 11 10 9 8 7 6 5 4 3 2 1 0
12 bit unipolar
0 to 0FFF (0 to 4095)
01
12 bit bipolar
0 to 0FFF, 8FFF to 8001
(0 to 4095, --4095 to --1)
10
15 bit unipolar
0 to 32767
11
15 bit bipolar
0 to 7FFF, FFF to 8001
(0 to 32767, --32767 to --1)
Maintenance
and Troubleshooting
PID Loop Operation
(DL450 Only)
= sign bit
The data format determines the numerical interface between the PID loop and the
PV sensor and the control output device. This selects the data format for both the SP
and the PV.
Loop Mode
The feature called Independent of CPU mode in the dialog is not available in the
DL450. However, the DL450 does provide the three standard control modes:
Manual, Automatic, and Cascade. The sources of the three basic variables SP, PV
and control output are different for each mode.
In Manual Mode, the loop is not executing PID calculations (however, loop alarms
are still active). With regard to the loop table, the CPU stops writing values to location
V+05 (control output) for that loop. It is expected that an operator or other intelligent
source is manually controlling the output by observing the PV and writing data to the
control output as necessary to keep the process under control. The drawing below
shows the equivalent schematic diagram of manual mode operation.
Input from Operator
Manual
Control Output V+05
Loop
Calculation
Auto
In Automatic Mode, the loop operates normally and generates new control output
values. It calculates the PID equation and writes the result in location V+05 every
sample period of that loop. The equivalent schematic diagram is shown below.
Input from Operator
Manual
Control Output V+05
Loop
Calculation
DL405 User Manual, 4th Edition, Rev. A
Auto
PID Loop Operation (DL450 only)
8--29
In Cascade Mode, the loop operates just as in Automatic Mode, with one important
change. The data source for the SP changes from its normal location at V+02, using
the control output value from another loop (the purpose of cascading loops is
covered later in this chapter). So in Auto or Manual modes, the loop calculation uses
the data at V+02. In Cascade Mode, the loop calculation reads the control output
from another loop’s parameter table.
Another loop
Cascaded loop
Control Output V+05
Loop
Calculation
Cascade
Setpoint
+
Normal SP V+02
Auto/Manual
Σ
--
Loop
Calculation
Control Output
Process Variable
As pictured below, a loop can change from one mode to another, but cannot go from
Manual Mode to Cascade. This mode change is prohibited because a loop would be
changing two data sources at the same time, and could cause a loss of control.
Manual
Automatic
Cascade
PID Loop Operation
(DL450 Only)
When the CPU is operating in the Run Mode, the normal operation of the PID loop
controller is to read the loop data and perform calculations on each scan of the RLL
program. When the CPU is placed in the Program Mode, the RLL program halts
operation and all PID loops are automatically put into the Manual Mode. The PID
parameters can then be changed if desired. Similarly, by placing the CPU in the Run
mode, the PID loops are returned to the operational mode which they were
previously in, i.e., Manual, Automatic and Cascade. With this selection you
automatically affect the modes by changing the CPU mode.
Maintenance
DL405 User Manual, 4th Edition, Rev. A
8--30
PID Loop Operation (DL450 only)
Maintenance
and Troubleshooting
PID Loop Operation
(DL450 Only)
SP/PV Addresses
An SP/PV dialog will be made available to setup how the setpoint (SP) and the
process variable (PV) will be used in the loop. If this loop is the minor loop of a
cascaded pair, enter that control output address in the Remote SP from Cascaded
Loop Output area. It is sometimes desirable to limit the range of setpoint values
allowed to be entered. To activate this feature, check the box next to Enable Limiting.
This will activate the Upper and Lower fields for the values to be entered. Set the
limits around the SP value to prevent an operator from entering a setpoint value
outside of a safe range. The Square root box is only checked for certain PID loops,
such as a flow control loop. The Auto Transfer From I/O module will be grayed out
and not available for use by the DL450.
NOTE: Auto Transfer From I/O module is not available in the DL450 PLC at this
time, but will be available in the future.
If the Auto Transfer From I/O module is selected, an error message (shown below)
will appear.
NOTE: The SP/PV dialog can be left as it first appears for basic PID operations.
DL405 User Manual, 4th Edition, Rev. A
PID Loop Operation (DL450 only)
8--31
Set Control Output Limits
Another dialog that will be available in the PID setup will be the Output dialog. The
control output address, V+05, (determined by the PID loop table beginning address)
will be in view. Enter the output range limits, Upper Limit and Lower Limit, that will
meet the requirement of the process and which will agree with the data format that
has been selected. For a basic PID operation using a 12 bit output module, set the
Upper Limit to 4095 and leave the Lower Limit set to 0. The Auto transfer to I/O
module is not available for use by the DL450.The Output Data format area is not
available and is grayed out if Common format has been chosen (see page 8--26).
PID Loop Operation
(DL450 Only)
WARNING: If the Upper Limit is set to zero, the output will never get above
zero. In effect, there will be no control output.
Maintenance
DL405 User Manual, 4th Edition, Rev. A
8--32
PID Loop Operation (DL450 only)
PID Loop Operation
(DL450 Only)
Enter PID Tuning Parameters
Another PID setup dialog, Tuning, is for entering the PID parameters shown as: Gain
(Proportional Gain), Reset (Integral Gain) and Rate (Derivative Gain)
Recall the position and velocity forms of the PID loop equations which were
introduced earlier. The equations basically show the three components of the PID
calculation: Proportional Gain (P), Integral Gain (I) and Derivative Gain (D). The
following diagram shows a form of the PID calculation in which the control output is
the sum of the proportional gain, integral gain and derivative gain. With each
calculation of the loop, each term receives the same error signal value.
Setpoint
+
Error Term
Σ
--
Maintenance
and Troubleshooting
Process Variable
Loop Calculation
P
I
D
+
+
Σ
Control Output
+
The P, I and D gains are 4--digit BCD numbers with values from 0000 to 9999. They
contain an implied decimal point in the middle, so the values are actually 00.00 to
99.99. Some gain values have units y Proportional gain has no unit, Integral gain
may be selected in seconds or in minutes, and Derivative gain is in seconds.
Gain (Proportional Gain) y This is the most basic gain of the three. Values range
from 0000 to 9999, but they are used internally as xx.xx. An entry of “0000“
effectively removes the proportional term from the PID equation. This
accommodates applications which need integral--only loops.
Reset (Integral Gain) y Values range from 0001 to 9998, but they are used
internally as xx.xx. An entry of “0000“ or “9999“ causes the integral gain to be “∞”,
effectively removing the integrator term from the PID equation. This accommodates
applications which need proportional--only loops. The units of integral gain may be
either seconds or minutes, as shown in the above dialog.
Rate (Derivative Gain) y Values which can be entered range from 0001 to 9999,
but they are used internally as xx.xx. An entry of “0000“ allows removal of the
derivative term from the PID equation (a common practice). This accommodates
applications which require only proportional and/or integral loops. Most control
loops will operate as a PI loop.
DL405 User Manual, 4th Edition, Rev. A
PID Loop Operation (DL450 only)
8--33
NOTE: You may elect to leave the tuning dialog blank and enter the tuning
parameters in the DirectSOFT PID View.
Derivative Gain Limiting
The derivative gain (rate) has an optional gain--limiting feature. This is provided
because the derivative gain reacts badly to PV signal noise or other causes of
sudden PV fluctuations. The function of the gain--limiting is shown in the diagram
below.
Loop Calculation
P
Setpoint
+
Σ
Error Term
--
D
Process Variable
Loop Table
00XX
Integral
+
+
Derivative
Σ
Control
Output
+
0
Derivative,
gain-limited
1
PID Mode 1 Setting V+00
Derivative Gain Limit
Bit 15 14 13 12 11 10 9 8 7 6 5 4 3 2 1 0
Derivative gain limit select
The gain limit can be particularly useful during loop tuning. Most loops can tolerate
only a little derivative gain without going into uncontrolled oscillations.
If Derivative Gain Limiting is selected, a unit of 0--20 for Limit must also be entered.
NOTE: When first configuring a loop, it’s best to use the standard error term until
after the loop is tuned. Once the loop is tuned, you will be able to tell if these functions
will enhance control. The Error Squared and/or Enable Deadband can be selected
later in the PID setup. Also, values are not required to be entered in the Tuning
dialog, but they can set later in the DirectSOFT PID View.
DL405 User Manual, 4th Edition, Rev. A
Maintenance
Error Term Selection
The error term is internal to the CPUs PID loop controller, and is generated again in
each PID calculation. Although its data is not directly accessible, you can easily
calculate it by subtracting: Error = (SP -- PV). The PID calculation operates on this
value linearly to give the result. However, a few applications can benefit from
non--linear control. The Error--squared method of non--linear control exaggerates
large errors and diminishes small error
Error Squared y When selected, the squared error function simply squares the
error term (but preserves the original algebraic sign), which is used in the
calculation. This affects the Control Output by diminishing its response to smaller
error values, but maintaining its response to larger errors. Some situations in which
the error squared term might be useful:
S Noisy PV signal -- using a squared error term can reduce the effect of
low--frequency electrical noise on the PV, which will make the control
system jittery. A squared error maintains the response to larger errors.
S Non--linear process -- some processes (such as chemical pH control)
require non--linear controllers for best results. Another application is
surge tank control, where the Control Output signal must be smooth.
PID Loop Operation
(DL450 Only)
V+25
I
Proportional
8--34
PID Loop Operation (DL450 only)
Enable Deadband y When selected, the enable deadband function takes a range
of small error values near zero, and simply substitutes zero as the value of the error.
If the error is larger than the deadband range, then the error value is used normally.
Freeze Bias
The term reset windup refers to an undesirable characteristic of integrator behavior
which occurs naturally under certain conditions. Refer to the figure below. Suppose
the PV signal becomes disconnected, and the PV value goes to zero. While this is a
serious loop fault, it is made worse by reset windup. Notice the bias (reset) term
keeps integrating normally during the PV disconnect, until its upper limit is reached.
When the PV signal returns, the bias value is saturated (windup) and takes a long
time to return to normal. The loop output consequently has an extended recovery
time. Until recovery, the output level is wrong and causes further problems.
PV
PV loss
0
Reset windup
PV loss
Freeze bias enabled
Maintenance
and Troubleshooting
PID Loop Operation
(DL450 Only)
Bias
Output
Recovery time
Recovery time
In the second PV signal loss episode in the figure, the freeze bias feature is enabled.
It causes the bias value to freeze when the control output goes to its range limits.
Much of the reset windup is thus avoided, and the output recovery time is much less.
For most applications, the freeze bias feature will work with the loop as described
above. It is suggested to enable this feature by selecting it in the dialog. Bit 10 of PID
Mode 1 Setting (V+00) word can also be set in RLL.
NOTE: The freeze bias feature stops the bias term from changing when the control
output reaches the end of the data range. If you have set limits on the control output
other than the range (i.e, 0--4095 for a unipolar/12 bit loop), the bias term still uses
the end of range for the stopping point and bias freeze will not work.
DL405 User Manual, 4th Edition, Rev. A
PID Loop Operation (DL450 only)
8--35
Setup the PID Alarms
Although the setup of the PID alarms is optional, you surely would not want to
operate a process without monitoring it. The performance of a process control loop
may generally be measured by how closely the process variable matches the
setpoint. Most process control loops in industry operate continuously, and will
eventually lose control of the PV due to an error condition. Process alarms are vital in
early discovery of a loop error condition and can alert plant personnel to manually
control a loop or take other measures until the error condition has been repaired.
The alarm thresholds are fully programmable, and each type of alarm may be
independently enabled and monitored. The following diagram shows the Alarm
dialog in the PID setup which simplifies the alarm setup.
High Alarm
PV
Low Alarm
Low--low Alarm
Loop Table
V+16
XXXX
High-high Alarm
V+15
XXXX
High Alarm
V+14
XXXX
Low Alarm
V+13
XXXX
Low-low Alarm
NOTE: The Alarm dialog can be left as it first appears, without alarm entries. The
alarms can then be setup in the DirectSOFT PID View.
DL405 User Manual, 4th Edition, Rev. A
Maintenance
High--high Alarm
PID Loop Operation
(DL450 Only)
Monitor Limit Alarms
Checking this box will allow all of the PV limit alarms to be monitored once the limits
are entered. The PV absolute value alarms are organized as two upper and two
lower alarms. The alarm status is false as long as the PV value remains in the region
between the upper and lower alarms, as shown below. The alarms nearest the safe
zone are named High Alarm and Low Alarm. If the loop loses control, the PV will
cross one of these thresholds first. Therefore, you can program the appropriate
alarm threshold values in the loop table locations shown below to the right. The data
format is the same as the PV and SP (12--bit or 15--bit). The threshold values for
these alarms should be set to give an operator an early warning if the process loses
control.
8--36
PID Loop Operation (DL450 only)
If the process remains out of control for some time, the PV will eventually cross one
of the outer alarm thresholds, named High-high alarm and Low-low alarm. Their
threshold values are programmed using the loop table registers listed above. A
High-high or Low-low alarm indicates a serious condition exists, and needs the
immediate attention of the operator.
The PV Absolute Value Alarms are
reported in the four bits in the PID Mode
and Alarm Status word in the loop table, as
shown to the right. We highly recommend
using ladder logic to monitor these bits.
The bit-of-word instructions make this
easy to do. Additionally, you can monitor
PID alarms using DirectSOFT.
Red Deviation Alarm
Yellow Deviation Alarm
Yellow Deviation Alarm
Maintenance
and Troubleshooting
PID Loop Operation
(DL450 Only)
Red Deviation Alarm
Bit 15 14 13 12 11 10 9 8 7 6 5 4 3 2 1 0
High-high Alarm
High Alarm
Low Alarm
Low-low Alarm
Red
Yellow
Green
SP
PID Mode and Alarm Status V+06
Yellow
Loop Table
V+17
XXXX
Yellow Deviation Alarm
V+20
XXXX
Red Deviation Alarm
Red
The thresholds define zones, which fluctuate with the SP value. The green zone
which surrounds the SP value represents a safe (no alarm) condition. The yellow
zones lie just outside the green zone, and the red zones are just beyond those.
The PV Deviation Alarms are reported in
the two bits in the PID Mode and Alarm
Status word in the loop table, as shown to
the right. We highly recommend using
ladder logic to monitor these bits. The
bit-of-word instructions make this easy to
do. Additionally, you can monitor PID
alarms using DirectSOFT.
PID Mode and Alarm Status V+06
Bit 15 14 13 12 11 10 9 8 7 6 5 4 3 2 1 0
Red Deviation
Yellow Deviation
The PV Deviation Alarm can be independently enabled and disabled from the other
PV alarms, using bit 13 of the PID Mode 1 Setting V+00 word.
Remember, the alarm hysteresis feature works in conjunction with both the deviation
and absolute value alarms, and is discussed at the end of this section.
DL405 User Manual, 4th Edition, Rev. A
PID Loop Operation (DL450 only)
8--37
PV Rate--of--Change Alarm
An excellent way to get an early warning of a process fault is to monitor the
rate-of-change of the PV. Most batch processes have large masses and
slowly-changing PV values. A relatively fast-changing PV will result from a broken
signal wire for either the PV or control output, a SP value error, or other causes. If the
operator responds to a PV Rate-of-Change Alarm quickly and effectively, the PV
absolute value will not reach the point where the material in process would be ruined.
The DL450 loop controller provides a programmable PV Rate-of-Change Alarm, as
shown below. The rate-of-change is specified in PV units change per loop sample
time. This value is programmed into the loop table location V+21.
Loop Table
PV slope OK
PV slope excessive
V+21
XXXX
PV Rate-of-Change Alarm
PV
PID Mode and Alarm Status V+06
rate-of-change alarm
Sample time
Bit 15 14 13 12 11 10 9 8 7 6 5 4 3 2 1 0
Sample time
As an example, suppose the PV is temperature for our process, and we want an
alarm when the temperature changes faster than 15 degrees/minute. We must know
PV counts per degree and the loop sample rate. Then, suppose the PV value (in
V+03 location) represents 10 counts per degree, and the loop sample rate is 2
seconds. We will use the formula below to convert our engineering units to
counts/sample period:
Alarm Rate-of-Change =
15 degrees
1 minute
X
10 counts / degree
30 loop samples / min.
=
150
30
=
PID Loop Operation
(DL450 Only)
PV Rate of
Change Alarm
5 counts / sample period
DL405 User Manual, 4th Edition, Rev. A
Maintenance
From the calculation result, we would program the value “5” in the loop table for the
rate-of-change. The PV Rate-of-Change Alarm can be independently enabled and
disabled from the other PV alarms, using bit 14 of the PID Mode 1 Setting V+00 word.
The alarm hysteresis feature (discussed next) does not affect the Rate-of-Change
Alarm.
8--38
PID Loop Operation (DL450 only)
PV Alarm Hysteresis
The PV Absolute Value Alarm and PV Deviation Alarm are programmed using
threshold values. When the absolute value or deviation exceeds the threshold, the
alarm status becomes true. Real-world PV signals have some noise on them, which
can cause some fluctuation in the PV value in the CPU. As the PV value crosses an
alarm threshold, its fluctuations cause the alarm to be intermittent and annoy
process operators. The solution is to use the PV Alarm Hysteresis feature.
The PV Alarm Hysteresis amount is programmable from 1 to 200 (binary/decimal).
When using the PV Deviation Alarm, the programmed hysteresis amount must be
less than the programmed deviation amount. The figure below shows how the
hysteresis is applied when the PV value goes past a threshold and descends back
through it.
Alarm threshold
Hysteresis
Loop Table
PV
V+22
XXXX
PV Alarm Hysteresis
Maintenance
and Troubleshooting
PID Loop Operation
(DL450 Only)
Alarm 1
0
The hysteresis amount is applied after the threshold is crossed, and toward the safe
zone. In this way, the alarm activates immediately above the programmed threshold
value. It delays turning off until the PV value has returned through the threshold by
the hysteresis amount.
Alarm Programming Error
The PV Alarm threshold values must have
certain mathematical relationships to be
valid. The requirements are listed below. If
not met, the Alarm Programming Error bit
will be set, as indicated to the right.
PID Mode and Alarm Status V+06
Bit 15 14 13 12 11 10 9 8 7 6 5 4 3 2 1 0
Alarm Programming Error
PV Absolute Alarm value requirements:
Low-low < Low < High < High-high
S PV Deviation Alarm requirements:
Yellow < Red
Loop Calculation Overflow/Underflow Error
S
This error occurs whenever the output
reaches it’s upper or lower limit and the PV
does not reach the setpoint. A typical
example might be when a valve is stuck,
the output is at it’s limit, but the PV has not
reached setpoint.
PID Mode and Alarm Status V+06
Bit 15 14 13 12 11 10 9 8 7 6 5 4 3 2 1 0
Loop Calculation
Overflow/Underflow Error
NOTE: Overflow/underflow can be alarmed in PID View. The optional C--more
operator interface panel (see the automationdirect.com website) can also be setup
to read these error bits using the PID Faceplate templates.
DL405 User Manual, 4th Edition, Rev. A
PID Loop Operation (DL450 only)
8--39
Ramp/Soak
R/S (Ramp/Soak) is the last dialog available in the PID setup. The basic PID does
not require any entries to be made in order to operate the PID loop. Ramp/Soak will
be discussed in another section in this chapter.
PID Loop Operation
(DL450 Only)
Complete the PID Setup
Once you have filled in the necessary information for the basic PID setup, the
configuration should be saved. The icons on the Setup PID dialog will allow you to
save the configuration to the PLC and to disk. The save to icons have the arrow
pointing to the PLC and disk. The read from icons have the arrows pointing away
from the PLC and disk.
An optional feature is available with the Doc tab in the Setup PID window. You enter a
name and description for the loop. This is useful if there are more than one PID loop
in your application.
Maintenance
NOTE: It is good practice to save your project after setting up the PID loop by
selecting File from the menu toolbar, then Save project > to disk. In addition to
saving your entire project, all the PID parameters are also saved.
DL405 User Manual, 4th Edition, Rev. A
8--40
PID Loop Operation (DL450 only)
PID Loop Tuning
Maintenance
and Troubleshooting
PID Loop Operation
(DL450 Only)
Once you have set up a PID loop, it must be tuned in order for it to work. The goal of
loop tuning is to adjust the loop gains so the loop has optimal performance in
dynamic conditions. The quality of a loop’s performance may generally be judged by
how well the PV follows the SP after a SP step change. It is important to keep in mind
that understanding the process is fundamental to getting a well designed control
loop. Sensors must be in appropriate locations and valves must be sized correctly
with appropriate trim. PID control does not have typical values. There isn’t one
control process that is identical to another.
Manual Tuning vs. Auto Tuning
You may enter the PID gain values to tune your loops (manual tuning), or you can
rely on the PID processing “engine“ in the CPU to automatically calculate the gain
values (auto tuning). Most experienced process engineers will have a favorite
method; the DL450 will accommodate either preference. The use of auto tuning can
eliminate much of the trial--and--error of the manual tuning approach, especially if
you do not have a lot of loop tuning experience. However, performing the auto tuning
procedure will get the gains close to optimal values, but additional manual tuning can
get the gain values to their optimal values.
WARNING: Only authorized personnel fully familiar with all aspects of the
process should make changes that affect the loop tuning constants. Using the
loop auto tune procedures will affect the process, including inducing large
changes in the control output value. Make sure you thoroughly consider the
impact of any changes to minimize the risk of injury to personnel or damage to
equipment. The auto tune in the DL450 is not intended to be used as a
replacement for your process knowledge.
Open--Loop Test
Whether you use manual or auto tuning, it is very important to verify basic
characteristics of a newly--installed process before attempting to tune it. With the
loop in Manual Mode, verify the following items for each new loop.
S Setpoint y verify that the SP source can generate a setpoint. Put the
PLC in Run Mode and leave the loop in Manual Mode, then monitor the
loop table location V+02 to see the SP value(s). (If you are using the
ramp/soak generator, test it now).
S Process Variable y verify that the PV value is an accurate
measurement, and the PV data arriving in the loop table location V+03
is correct. If the PV signal is very noisy, consider filtering the input either
through hardware (RC low--pass filter), or using the filter in this chapter.
S Control Output y if it is safe to do so, manually change the output a
small amount (perhaps 10%) and observe its affect on the process
variable. Verify the process is direct--acting or reverse acting, and check
the setting for the control output (inverted or non--inverted). Make sure
the control output upper and lower limits are not equal to each other.
S Sample Rate y while operating open--loop, this is a good time to find
the ideal sample rate (see Configure the PID Loop beginning on page
8--25). However, if you are going to use auto tuning, the auto tuning
procedure will automatically calculate the sample rate in addition to the
PID gains.
DL405 User Manual, 4th Edition, Rev. A
PID Loop Operation (DL450 only)
Manual Tuning
Procedure
8--41
It is not necessary to try to obtain the best values for the P, I and D parameters in the
PID loop by trial and error. Following is a typical procedure for tuning a temperature
control loop which you may use to tune your loop.
Monitor the values of SP, PV and CV with a loop trending instrument or use the PID
View feature in DirectSOFT (see page 8--49).
NOTE: We recommend using the PID View to select manual for the vertical scale
feature, for both SP/PV area and Bias/Control Output areas. The auto scaling
feature would otherwise change the vertical scale on the process parameters and
add confusion to the loop tuning process.
S
S
S
S
S
S
Increase the Proportional gain in small increments, such as 4, 6, 7, etc.
until the control output response begins to oscillate. This is the
Proportional gain that should be recorded.
DL405 User Manual, 4th Edition, Rev. A
Maintenance
The response may take awhile, but you will see that there isn’t any oscillation. This
response is not desirable since it takes a long time to correct the error; also, there is a
difference between the SP and the PV.
S Increase the Proportional gain, for example to 2.0. The control output
will be greater and the response time will be quicker. The trend should
resemble the figure below.
PID Loop Operation
(DL450 Only)
Adjust the gains so the Proportional Gain = 0.5 or 1.0 (1.0 is a good
value based on experience), Integral Gain = 9999 (this basically
eliminates reset) and Derivative Gain = 0000. This disables the
integrator and derivative terms, and provides some proportional gain.
Check the bias value in the PID View and set it to zero.
Set the SP to a value equal to 50% of the full range.
Now, select Auto Mode. If the loop will not stay in Auto Mode, check the
troubleshooting tips at the end of this chapter. Allow the PV to stabilize
around the 50% point of the range.
Change the SP to the 60% point of the range.
8--42
PID Loop Operation (DL450 only)
S
S
PID Loop Operation
(DL450 Only)
S
Maintenance
and Troubleshooting
S
S
Now, return the Proportional gain to the stable response, for example,
9.7. The error, SP--PV, should be small, but not at zero.
Next, add a small amount of Integral gain (reset) in order for the error to
reach zero. Begin by using 80 seconds (adjust in minutes if necessary).
The error should get smaller.
Set the Integral gain to a lower value, such as 50 for a different
response. If there is no response, continue to decrease the reset value
until the response becomes unstable. See the figure below.
For discussion, let us say that a reset value of 35 made the control
output unstable. Return the reset value to the stable value, such as 38.
Be careful with this adjustment since the oscillation can destroy the
process.
The control output response should be optimal now, without a Derivative
gain. The example recorded values are: Proportional gain = 9.7 and
Integral gain = 38 seconds. Note that the error has been minimized.
DL405 User Manual, 4th Edition, Rev. A
PID Loop Operation (DL450 only)
8--43
The foregone method is the most common method used to tune a PID loop.
Derivative gain is almost never used in a temperature control loop. This method can
also be used for other control loops, but other parameters may need to be added for
a stable control output.
Test your loop for a high PV of 80% and again for a low PV of 20%, and correct the
values if necessary. Small adjustments of the parameters can make the control
output more precise or more unstable. It is sometimes acceptable to have a small
overshoot to make the control output react quicker.
The derivative gain can be helpful for those control loops which are not controlling
temperature. For these loops, try adding a value of 0.5 for the derivative gain and see
if this improves the control output. If there is little or no response, increase the
derivative by increments of 0.5 until there is an improvement to the output trend.
Recall that the derivative gain reacts with a rate of change of the error.
PID Loop Operation
(DL450 Only)
Maintenance
DL405 User Manual, 4th Edition, Rev. A
8--44
PID Loop Operation (DL450 only)
Auto Tuning
Procedure
The auto tuning feature for the DL450 loop controller will only run once each time it is
enabled in the PID table. Therefore, auto tuning does not run continuously during
operation (this would be adaptive control). Whenever there is a substantial change
in loop dynamics, such as mass of process, size of actuator, etc., the tuning process
will need to be repeated in order to derive new gains required for optimal control.
Once the physical loop components are connected to the PLC, auto tuning can be
initiated within DirectSOFT (see the DirectSOFT Programming Software Manual),
and it can be used to establish initial PID parameter values. Auto tuning is the best
“guess“ the CPU can do after some trial tests.
The loop controller offers both closed--loop and open--loop methods. The following
sections describe how to use the auto tuning feature, and what occurs in open and
closed--loop auto tuning.
The controls for the auto tuning function use three bits in the PID Mode 2 word V+01,
as shown below. DirectSOFT will manipulate these bits automatically when you use
the auto tune feature within DirectSOFT. Or, you may have your ladder logic access
these bits directly for allowing control from another source such as a dedicated
operator interface. The individual control bits allow you to start the auto tune
procedure, select PID or PI tuning and select closed--loop or open--loop tuning. If
you select PI tuning, the auto tune procedure leaves the derivative gain at 0. The
Loop Mode and Alarm Status word V+06 reports the auto tune status as shown. Bit
12 will be on (1) during the auto tune cycle, automatically returning to off (0) when
done.
Maintenance
and Troubleshooting
PID Loop Operation
(DL450 Only)
WARNING: Only authorized personnel fully familiar with all aspects of the
process should make changes that affect the loop tuning constants. Using the
loop auto tuning procedures will affect the process, including inducing large
changes in the control output value. Make sure you thoroughly consider the
impact of any changes to minimize the risk of injury to personnel or damage to
equipment. The auto tune in the DL450 is not intended to be used as a
replacement for your process knowledge.
DL405 User Manual, 4th Edition, Rev. A
PID Loop Operation (DL450 only)
8--45
Open--Loop Auto Tuning
During an open--loop auto tuning cycle, the loop controller operates as shown in the
diagram below. Before starting this procedure, place the loop in Manual Mode and
ensure the PV and control output values are in the middle of their ranges (away from
the end points).
NOTE: In theory, the SP value does not matter in this case, because the loop is not
closed. However, the requirement of the firmware is that the SP value must be more
than 5% of the PV range from the actual PV before starting the auto tune cycle (for
the DL450, 12 bit PV should be 205 counts or more below the SP for forward--acting
loops, or 205 counts or more above the SP for reverse--acting loops).
Maintenance
DL405 User Manual, 4th Edition, Rev. A
PID Loop Operation
(DL450 Only)
When auto tuning, the loop controller induces a step change on the output and
simply observes the response of the PV. From the PV response, the auto tune
function calculates the gains and the sample time. It automatically places the results
in the corresponding registers in the loop table.
The following timing diagram shows the events which occur in the open--loop auto
tuning cycle. The auto tune function takes control of the control output and induces a
10%--of--span step change. If the PV change which the loop controller observes is
less than 2%, then the step change on the output is increased to 20%--of--span.
S
When Auto Tune starts, step change output m = 10%
S
During Auto Tune, the controller output reached the full scale positive
limit. Auto Tune stopped and the Auto Tune Error bit in the Alarm word
bit turned on.
S
When PV change is under 2%, output is changed at 20%. Open Loop
Auto Tune Cycle Wave: Step Response Method.
8--46
PID Loop Operation (DL450 only)
When the loop tuning observations are complete, the loop controller computes Rr
(maximum slope in %/sec.) and Lr (dead time in sec). The auto tune function
computes the gains according to the Zeigler--Nichols equations, shown below:
PID Tuning
SP Range
P = 1.2* nm/LrRr
P = 0.9* nm/LrRr
I = 2.0* Lr
I = 3.33* Lr
D = 0.5* Lr
D=0
Sample Rate = 0.056* Lr
Sample Rate = 0.12* Lr
Maintenance
and Troubleshooting
PID Loop Operation
(DL450 Only)
nm = Output step change (10% = 0.1, 20% = 0.2)
We highly recommend using DirectSOFT for the auto tuning interface. The duration
of each auto tuning cycle will depend on the mass of the process. A slowly--changing
PV will result in a longer auto tune cycle time. When the auto tuning is complete, the
proportional, integral, and derivative gain values are automatically updated in loop
table locations V+10, V+11, and V+12 respectively. The sample time in V+07 is also
updated automatically. You can test the validity of the values the auto tuning
procedure yields by measuring the closed--loop response of the PV to a step change
in the output. The instructions on how to do this are in the section on the manual
tuning procedure (located prior to this auto tuning section).
Closed--Loop Auto Tuning
During a closed--loop auto tuning cycle the loop controller operates as shown in the
diagram below.
When auto tuning, the loop controller imposes a square wave on the output. Each
transition of the output occurs when the PV value crosses over/under the SP value.
Therefore, the frequency of the limit cycle is roughly proportional to the mass of the
process. From the PV response, the auto tune function calculates the gains and the
sample time. It automatically places the results in the corresponding registers in the
loop table.
DL405 User Manual, 4th Edition, Rev. A
PID Loop Operation (DL450 only)
8--47
The following timing diagram shows the events which occur in the closed--loop auto
tuning cycle. The auto tune function examines the direction of the offset of the PV
from the SP. The auto tune function then takes control of the control output and
induces a full--span step change in the opposite direction. Each time the sign of the
error (SP y PV) changes, the output changes full--span in the opposite direction.
This proceeds through three full cycles.
Kpc = 4M / (π £ X0)
PID Loop Operation
(DL450 Only)
*Mmax = Output Value upper limit setting. Mmin = Output Value lower limit setting.
* This example is direct--acting.
When set to reverse--acting, the output will be inverted. When the loop tuning
observations are complete, the loop controller computes To (bump period) and Xo
(amplitude of the PV). Then it uses these values to compute Kpc (sensitive limit) and
Tpc (period limit). From these values, the loop controller auto tune function
computes the PID gains and the sample rate according to the Zeigler--Nichols
equations shown below:
Tpc = 0
M = Amplitude of output
PI Tuning
P = 0.45 £ Kpc
P = 0.30 £ Kpc
I = 0.60 £ Tpc
I = 1.00 £ Tpc
D = 0.10 £ Tpc
D=0
Sample Rate = 0.014 £ Tpc
Sample Rate = 0.03 £ Tpc
Auto Tuning Error
In open--loop tuning, if the auto tune error bit (bit 13 of loop Mode/Alarm status word
V+06) is on, please verify the PV and SP values are at least 5% of full scale
difference, as required by the auto tune function.
NOTE: If your PV fluctuates rapidly, you probably need to create a filter in ladder
logic (see example on page 8--54).
DL405 User Manual, 4th Edition, Rev. A
Maintenance
PID Tuning
8--48
PID Loop Operation (DL450 only)
Maintenance
and Troubleshooting
PID Loop Operation
(DL450 Only)
Use DirectSOFT 5
Data View with PID
View
Open a New Data
View Window
Open PID View
The Data View window is a very useful tool which can be used to help tune your PID
loop. You can compare the variables in the PID View with the actual values in the
V--memory location with Data View.
A new Data View window can be opened in any one of three ways; the menu bar
Debug > Data View > New, the keyboard shortcut Ctrl + Shift + F3 or the Data
button on the Status toolbar. By default, the Data View window is assigned Data1 as
the default name. This name can be changed for the current view using the Options
dialog. The following diagram is an example of a newly opened Data View. The
window will open next to the Ladder View by default.
The Data View window can be used just as it is shown above for troubleshooting your
PID logic, and it can be most useful when tuning the PID loop.
The PID View can only be opened after a loop has been setup in your ladder program
and the programming computer is connected to the PLC (online). PID View is
opened by selecting it from the View submenu on the Menu bar, View > PID View.
The PID View can also be opened by clicking on the PID View button from the PLC
Setup toolbar if it is in view.
DL405 User Manual, 4th Edition, Rev. A
PID Loop Operation (DL450 only)
8--49
The PID View will open and appear over the Ladder View which can be brought into
view by clicking on it’s tab. When using the Data View and the PID View together,
each view can be sized for better use as shown on the facing page.
PID Loop Operation
(DL450 Only)
The two views are now ready to be used to tune your loop. You will be able to see
where the PID values have been set and see the process that it is controlling.
Maintenance
DL405 User Manual, 4th Edition, Rev. A
8--50
PID Loop Operation (DL450 only)
The diagram below illustrates how the to use the views to see the current SP, PV and
Output values, along with the other PID addresses. Refer to the Loop Table
Definitions page 8--21 for details of each word in the table. This is also a good data
type reference for each word in the table.
Scale the time axis of the viewing
The trend can be cleared and
window by using this input box.
restarted from the left at anytime.
Process Variable and
Setpoint trends are
color coded.
The loop name area
turns red whenever there is an
P
I
D
With both windows positioned in this manner, you are able to see where the PID
values have been set and see the process that it is controlling.
Maintenance
and Troubleshooting
PID Loop Operation
(DL450 Only)
overflow error.
DL405 User Manual, 4th Edition, Rev. A
PID Loop Operation (DL450 only)
8--51
Using Other PID Features
How to Change
Loop Modes
The first three bits of the PID Mode 1 word
V+00 requests the operating mode of the
corresponding loop. Note: These bits are
mode change requests, not commands
(certain conditions can prohibit a
particular mode change -- see next page).
PID Mode 1 Setting V+00
Bit 15 14 13 12 11 10 9 8 7 6 5 4 3 2 1 0
Manual
Cascade
Automatic
The normal state of these mode request bits is “000”. To request a mode change, you
must SET the corresponding bit to a “1”, for one scan. The PID loop controller
automatically resets the bits back to “000” after it reads the mode change request.
Methods of requesting mode changes are:
S DirectSOFT’s PID View -- this is the easiest method. Use the drop--down
menu, or click on one of the radio buttons if using older DirectSOFT versions,
and the appropriate bit will be set.
S
Ladder program-- ladder logic can request any loop mode when the PLC is in
Run Mode. This will be necessary after application startup.
S
X0
Go to Auto Mode
B2000.1
SET
Operator panel -- interface the operator’s panel to ladder logic using standard
methods, then use the technique above to set the mode bit.
Since we can only request mode changes, the PID loop controller decides when to
permit mode changes and provides the loop mode status. It reports the current mode
on bits 0, 1, and 2 of the Loop Mode and Alarm Status word, location V+06 in the loop
table. The parallel request / monitoring functions are shown in the figure below. The
figure also shows the mode-dependent two possible SP sources, and the two
possible Control Output sources.
Input from Operator
Manual
Cascade
Control Output
Setpoint
+
Normal Source
Auto/Manual
Error Term
Σ
--
Loop
Calculation
Auto/Cascade
Process Variable
Mode Select
PID Mode
Control
PID Mode 1 Setting V+00
Bit 15 14 13 12 11 10 9 8 7 6 5 4 3 2 1 0
Mode Request
Cascade
Manual
Automatic
Loop Mode and Alarm Status V+06
Bit 15 14 13 12 11 10 9 8 7 6 5 4 3 2 1 0
Mode Monitoring
Cascade
Manual
Automatic
DL405 User Manual, 4th Edition, Rev. A
Maintenance
Control Output
from another loop
PID Loop Operation
(DL450 Only)
Use the rung shown to the right to SET the
mode bit on (do not use an out coil). On a
0--1 transition of X0, the rung sets the Auto
bit = 1. The loop controller resets it.
8--52
PID Loop Operation (DL450 only)
Operator Panel
Control of
PID Modes
Since the modes Manual, Auto, and Cascade are the most fundamental and
important PID loop controls, you may want to “hard-wire” mode control switches to
an operator’s panel. Most applications will need only Manual and Auto selections
(Cascade is used in a few advanced applications). Remember that mode controls
are really mode request bits, and the actual loop mode is indicated elsewhere.
The following figure shows an operator’s panel using momentary push-buttons to
request PID mode changes. The panel’s mode indicators do not connect to the
switches, but interface to the corresponding data locations.
Operator’s Panel
Manual
Auto
Mode Request
PID Mode 1 Setting V+00
Maintenance
and Troubleshooting
PID Loop Operation
(DL450 Only)
Bit 15 14 13 12 11 10 9 8 7 6 5 4 3 2 1 0
Cascade
Mode Monitoring
Loop Mode and Alarm Status V+06
Bit 15 14 13 12 11 10 9 8 7 6 5 4 3 2 1 0
PLC Modes’ Effect
on Loop Modes
The modes of the PLC (Program, Run) interact with the loops as a group. The
following summarizes this interaction:
S When the PLC is in Program Mode, all loops are placed in Manual Mode
and no loop calculations occur. However, note that output modules
(including analog outputs) turn off in PLC Program Mode. So, actual
manual control is not possible when the PLC is in Program Mode.
S The only time the CPU will allow a loop mode change is during PLC run
Mode operation. As such, the CPU records the modes of all 16 loops as
the desired mode of operation. If power failure and restoration occurs
during PLC run Mode, the CPU returns all loops to their prior mode
(which could be Manual, Auto, or Cascade).
S On a Program-to-Run mode transition, the CPU forces each loop to
return to its prior mode recorded during the last PLC Run Mode.
S You can add and configure new loops only when the PLC is in Program
Mode. New loops automatically begin in Manual Mode.
Loop Mode
Override
In normal conditions and during PLC Run Mode operation, the mode of a loop is
determined by the request to V+00, bits 0, 1, and 2. However, a condition exists
which will prevent a requested mode change from occurring:
S A major loop of a cascaded pair of loops cannot go from Manual to Auto
until its minor loop is in Cascade mode.
In other situations, the PID loop controller will automatically change the mode of the
loop to ensure safe operation:
S A loop which develops an error condition automatically goes to Manual.
S If the minor loop of a cascaded pair of loops leaves Cascade Mode for
any reason, its major loop automatically goes to Manual Mode.
DL405 User Manual, 4th Edition, Rev. A
PID Loop Operation (DL450 only)
8--53
Creating an Analog The DL450 does not support a built in filter, however, your analog inputs can be
filtered effectively using the following RLL program example. Be sure to change the
Filter in Ladder
example memory locations to those that fit your application.
Logic
Filtering can induce a 1 part in 1000 error in your output because of “rounding”.
Because of the rounding error, you should not use zero or full scale as alarm points.
Additionally, the smaller the filter constant the greater the smoothing effect, but the
slower the response time. Be certain that a slower response is acceptable in
controlling your process.
SP1
LD
V2000
BIN
BTOR
SUBR
V1400
Loads the analog signal, which is a BCD value
and has been loaded from V-memory location
V2000, into the accumulator. Contact SP1 is
always on.
Converts the BCD value in the accumulator
to binary. This instruction is not needed if the
analog value is originally brought in as a
binary number.
Converts the binary value in the accumulator
to a real number.
MULR
R0.2
Multiplies the real number in the
accumulator by 0.2 (the filter factor),
and stores the result in the
accumulator. This is the filtered value.
ADDR
V1400
Adds the real number stored in
location V1400 to the real number
filtered value in the accumulator, and
stores the result in the accumulator.
OUTD
V1400
BCD
OUT
V1402
Copies the value in the accumulator
to location V1400.
Converts the real number in the
accumulator to a binary value, and
stores the result in the accumulator.
Converts the binary value in the accumulator
to a BCD number. Note: the BCD instruction
is not needed for PID loop PV (loop PV is a
binary number).
Loads the BCD number filtered value from
the accumulator into location V1402 to use
in your application or PID loop.
DL405 User Manual, 4th Edition, Rev. A
Maintenance
RTOB
PID Loop Operation
(DL450 Only)
Subtracts the real number stored in location
V1400 from the real number in the
accumulator, and stores the result in the
accumulator. V1400 is the designated
workspace in this example.
8--54
PID Loop Operation (DL450 only)
Use the
DirectSOFT 5 Filter
Intelligent Box
Instruction
For those who are using DirectSOFT 5, you have the opportunity to use the Analog
Helper Intelligent Boxes (IBox) instructions. Following is one example which is
available. IBox instruction IB--402, Filter Over Time in Binary (decimal) will perform a
first--order filter on the Raw Data on a defined time interval. The equation is,
Maintenance
and Troubleshooting
PID Loop Operation
(DL450 Only)
New = Old + [(Raw -- Old)/FDC] where,
New = New Filtered Value
Old = Old Filtered Value
FDC = Filter Divisor Constant
Raw = Raw Data
The Filter Divisor Constant is an integer in the range K1 to K100, such that
if it equaled K1, then no filtering is performed.
FilterB Example
The rate at which the calculation is performed is specified by time in hundredths of a
second (0.01 seconds) as the Filter Freq Time parameter. Note that this Timer
instruction is embedded in the IBox and must NOT be used any other place in your
program. Power flow controls whether the calculation is enabled. If it is disabled, the
Filter Value is not updated. On the first scan from Program to Run mode, the Filter
Value is initialized to 0 to give the calculation a consistent starting point.
Since the following binary filter example does not write directly to the PID PV
location, the BCD filter could be used with BCD values and then converted to BIN.
Following is an example of how the FilterB IBox is used in a ladder program. The
instruction is used to filter a binary value that is in V2000. Timer (T1) is set to 0.5
seconds, the rate at which the filter calculation will be performed. The filter constant
is set to 3.0. A larger value will increase the smoothing effect of the filter. A value of 1
results with no filtering. The filtered value will be placed in V2100.
See DL405 IBox Instructions PLC User Manual Supplement for more detailed
information.
NOTE: In order to use the IBox instructions found in DirectSOFT 5, the D4--450
CPU must have firmware version 3.30 or higher installed.
DL405 User Manual, 4th Edition, Rev. A
PID Loop Operation (DL450 only)
8--55
Ramp/Soak Generator
Introduction
Our discussion of basic loop operation noted the setpoint for a loop will be generated
in various ways, depending on the loop operating mode and programming
preferences. In the figure below, the ramp/soak generator is one of the ways the SP
may be generated. It is the responsibility of your ladder program to ensure only one
source attempts to write the SP value at V+02 at any particular time.
If the SP for your process rarely changes or can tolerate step changes, you probably
will not need to use the ramp/soak generator. However, some processes require
precisely--controlled SP value changes. The ramp/soak generator can greatly
reduce the amount of programming required for these applications.
Maintenance
DL405 User Manual, 4th Edition, Rev. A
PID Loop Operation
(DL450 Only)
The terms “ramp” and “soak” have special
meanings in the process control industry,
and refer to desired setpoint (SP) values in
temperature control applications. In the figure to the right, the setpoint increases during
the ramp segment. It remains steady at one
value during the soak segment.
Complex SP profiles can be generated by specifying a series of ramp/soak
segments. The ramp segments are specified in SP units per second. The soak time
is also programmable in minutes.
It is instructive to view the ramp/soak generator as a dedicated function to generate
SP values, as shown below. It has two categories of inputs which determine the SP
values generated. The ramp/soak table must be programmed in advance,
containing the values that will define the ramp/soak profile. The loop reads from the
table during each PID calculation as necessary. The ramp/soak controls are bits in a
special loop table word that control the real--time start/stop functionality of the
ramp/soak generator. The ladder program can monitor the status of the ramp soak
profile (current ramp/segment number).
8--56
PID Loop Operation (DL450 only)
Maintenance
and Troubleshooting
PID Loop Operation
(DL450 Only)
Now that we have described the general ramp/soak generator operation, we list its
specific features:
S
Each loop has its own ramp/soak generator (use is optional).
S
You may specify up to eight ramp/soak steps (16 segments).
S
The ramp soak generator can run anytime the PLC is in Run mode. Its
operation is independent of the loop mode (Manual or Auto).
S
Ramp/soak real--time controls include Start, Hold, Resume, and Jog.
S
Ramp/soak monitoring includes Profile Complete, Soak Deviation (SP
minus PV), and current ramp/soak step number.
The following figure shows a SP profile consisting of ramp/soak segment pairs. The
segments are individually numbered as steps from 1 to 16. The slope of each of the
ramp may be either increasing or decreasing. The ramp/soak generator
automatically knows whether to increase or decrease the SP based on the relative
values of a ramp’s end points. These values come from the ramp/soak table.
Ramp/Soak Table
The parameters which define the ramp/soak
profile for a loop are in a ramp/soak table.
Each loop may have its own ramp/soak table,
but it is optional. Recall the Loop Parameter
table consists a 32--word block of memory for
each loop, and together they occupy one contiguous memory area. However, the ramp/soak
table for a loop is individually located, because
it is optional for each loop. An address pointer
in location V+34 in loop table specifies the
starting location of the ramp/soak table.
In the example to the right, the loop parameter
tables for Loop #1 and #2 occupy contiguous
32--word blocks as shown. Each has a pointer
to its ramp/soak table, independently located
elsewhere in user V--memory. Of course, you
may locate all the tables in one group, as long
as they do not overlap.
DL405 User Manual, 4th Edition, Rev. A
PID Loop Operation (DL450 only)
8--57
The parameters in the ramp/soak table must be user--defined. the most convenient
way is to use DirectSOFT, which features a special editor for this table. Four
parameters are required to define a ramp and soak segment pair, as pictured below.
S Ramp End Value y specifies the destination SP value for the end of
the ramp. Use the same data format for this number as you use for the
SP. It may be above or below the beginning SP value, so the slope
could be up or down (we don’t have to know the starting SP value for
ramp #1).
S Ramp Slope y specifies the SP increase in counts (units) per second.
It is a BCD number from 00.00 to 99.99 (uses implied decimal point).
S Soak Duration y specifies the time for the soak segment in minutes,
ranging from 000.1 to 999.9 minutes in BCD (implied decimal point).
S Soak PV Deviation y (optional) specifies an allowable PV deviation
above and below the SP value during the soak period. A PV deviation
alarm status bit is generated by the ramp/soak generator.
Ramp End
SP Value
Soak
duration
segment becomes active
Ramp/Soak Table
V+00
XXXX
Ramp End SP Value
V+01
XXXX
Ramp Slope
V+02
XXXX
Soak Duration
V+03
XXXX
Soak PV Deviation
The ramp segment becomes active when the previous soak segment ends. If the
ramp is the first segment, it becomes active when the ramp/soak generator is
started, and automatically assumes the present SP as the starting SP.
Step
Addr
Offset
Step
+ 00
+ 01
1
1
Ramp End SP Value
Ramp Slope
+ 20
+ 21
9
9
Ramp End SP Value
Ramp Slope
+ 02
2
Soak Duration
+ 22
10
Soak Duration
+ 03
2
Soak PV Deviation
+ 23
10
Soak PV Deviation
+ 04
3
Ramp End SP Value
+ 24
11
Ramp End SP Value
+ 05
3
Ramp Slope
+ 25
11
Ramp Slope
+ 06
4
Soak Duration
+ 26
12
Soak Duration
+ 07
4
Soak PV Deviation
+ 27
12
Soak PV Deviation
+ 10
5
Ramp End SP Value
+ 30
13
Ramp End SP Value
+ 11
5
Ramp Slope
+ 31
13
Ramp Slope
+ 12
6
Soak Duration
+ 32
14
Soak Duration
+ 13
6
Soak PV Deviation
+ 33
14
Soak PV Deviation
+ 14
7
Ramp End SP Value
+ 34
15
Ramp End SP Value
+ 15
7
Ramp Slope
+ 35
15
Ramp Slope
+ 16
8
Soak Duration
+ 36
16
Soak Duration
+ 17
8
Soak PV Deviation
+ 37
16
Soak PV Deviation
Description
Description
DL405 User Manual, 4th Edition, Rev. A
Maintenance
Addr
Offset
PID Loop Operation
(DL450 Only)
SP
Slope
Soak PV
deviation
8--58
PID Loop Operation (DL450 only)
Ramp/Soak Table
Flags
Many applications do not require all 16 R/S steps. Use all zeros in the table for
unused steps. The R/S generator ends the profile when it finds ramp slope = 0.
The individual bit definitions of the Ramp/Soak Table Flag (Addr+33) word is listed in
the following table.
Bit
PID Loop Operation
(DL450 Only)
Maintenance
and Troubleshooting
Ramp/Soak
Controls
Read/Write
Bit=0
Bit=1
0
1
Start Ramp/Soak Profile
Hold Ramp/Soak Profile
write
write
---
0¤1 Start
0¤1 Hold
2
Resume Ramp/soak Profile
write
--
3
Jog Ramp/Soak Profile
write
--
0¤1
Resume
0¤1 Jog
4
Ramp/Soak Profile Complete
read
--
Complete
5
PV Input Ramp/Soak Deviation
read
Off
On
6
Ramp/Soak Profile in Hold
read
Off
On
7
Reserved
read
Off
On
Current Step in R/S Profile
read
8--15
Ramp/Soak
Generator Enable
Ramp/Soak Flag Bit Description
decode as byte (hex)
The main enable control to permit ramp/soak
generation of the SP value is accomplished with
bits 11 in the PID Mode 1 Setting V+00 word, as
shown to the right. The other ramp/soak controls
in V+33 shown in the table above will not operate unless this bit=1 during the entire ramp/soak
process.
The four main controls for the ramp/soak generator
are in bits 0 to 3 of the ramp/soak settings word in
the loop parameter table. DirectSOFT controls
these bits directly from the ramp/soak settings dialog. However, you must use ladder logic to control
these bits during program execution. We recommend using the bit--of--word instructions.
Ladder logic must set a control bit to a “1“ to command the corresponding function.
When the loop controller reads the ramp/soak value, it automatically turns off the bit
for you. Therefore, a reset of the bit is not required when the CPU is in Run Mode.
The example program rung to the right shows
how an external switch X0 can turn on and the
PD contact uses the leading edge to set the
proper control bit to start the ramp soak profile.
This uses the Set Bit--of--Word instruction.
DL405 User Manual, 4th Edition, Rev. A
PID Loop Operation (DL450 only)
8--59
The normal state for the ramp/soak control bits is all zeros. Ladder logic must set
only one control bit at a time.
S Start y a 0 to 1 transition will start the ramp soak profile. The CPU
must be in Run Mode, and the loop can be in Manual or Auto Mode. If
the profile is not interrupted by a Hold or Jog command, it finishes
normally.
S Hold y a 0 to 1 transition will stop the ramp/soak profile in its current
state, and the SP value will be frozen.
S Resume y a 0 to 1 transition cause the ramp/soak generator to resume
operation if it is in the hold state. The SP values will resume from their
previous value.
S Jog y a 0 to 1 transition will cause the ramp/soak generator to truncate
the current segment (step), and go to the next segment.
Ramp/Soak Profile
Monitoring
You can monitor the Ramp/Soak profile status
using other bits in the Ramp/Soak Settings
V+33 word, shown to the right.
R/S Profile Complete y =1 when the
last programmed step is done.
S Soak PV Deviation y =1 when the error
(SP--PV) exceeds the specified deviation
in the R/S table.
S R/S Profile in Hold y =1 when the pro
file was active but is now in hold. Ramp/
Soak Settings V+33.
S
The starting address for the ramp/soak table
must be a valid location. If the address points
outside the range of user V--memory, one of
the bits to the right will turn on when the
ramp/soak generator is started. We recommend using DirectSOFT to configure the
ramp/soak table. It automatically range
checks the addresses for you.
Testing Your
It’s a good idea to test your ramp/soak profile before using it to control the process.
Ramp/Soak Profile This is easy to do, because the ramp/soak generator will run even when the loop is in
Manual Mode. Using DirectSOFT’s PID View will be a real time--saver, because it
will draw the profile on--screen for you. Be sure to set the trending timebase slow
enough to display completed ramp--soak segment pairs in the waveform window.
DL405 User Manual, 4th Edition, Rev. A
Maintenance
Ramp/Soak
Programming
Errors
PID Loop Operation
(DL450 Only)
The number of the current step is available in
the upper 8 bits of the Ramp/Soak Settings
V+33 word. The bits represent a 2--digit hex
number, ranging from 1 to 10. Ladder logic
can monitor these to synchronize other parts
of the program with the ramp/soak profile.
Load this word to the accumulator and shift
right 8 bits, and you have the step number.
8--60
PID Loop Operation (DL450 only)
DirectSOFT Ramp/Soak Example
The following example will step you through the Ramp/Soak setup.
Maintenance
and Troubleshooting
PID Loop Operation
(DL450 Only)
Setup the Profile in The first step is to use Setup in DirectSOFT PID to set the profile of your process.
Open the Setup PID window and select the R/S tab, and then enter the Ramp/Soak
PID Setup
data. Note the V--memory location for the beginning of this profile is V5000, and
V5037 is the end of the range of the profile.
DL405 User Manual, 4th Edition, Rev. A
PID Loop Operation (DL450 only)
8--61
Program the
Refer to the Ramp/Soak Flag Bit Description table on page 8--59 when adding the
Ramp/Soak Control control rungs to your program similar to the ladder rungs below. For the example
below, the PID parameters begin at V7000. The Ramp/Soak bit flags are located at
in Relay Ladder
V7033.
PID Loop Operation
(DL450 Only)
Maintenance
DL405 User Manual, 4th Edition, Rev. A
8--62
PID Loop Operation (DL450 only)
After the Ramp/Soak program has been developed in RLL, test the program. Check
your profile by using PID View. If there are any changes to be made in the profile,
they are made in the PID Setup R/S profile. Make the changes in Program mode
then start the Ramp/Soak process again.
Maintenance
and Troubleshooting
PID Loop Operation
(DL450 Only)
Test the Profile
DL405 User Manual, 4th Edition, Rev. A
PID Loop Operation (DL450 only)
8--63
Cascade Control
Introduction
Cascaded loops are an advanced control technique that is superior to individual loop
control in certain situations. As the name implies, cascade means that one loop is
connected to another loop. In addition to Manual (open loop) and Auto (closed loop)
Modes, the DL450 also provides Cascaded Mode.
NOTE: Cascaded loops are an advanced process control technique. Therefore, we
recommend their use only for experienced process control engineers.
When a manufacturing process is complex and contains a lag time from control input
to process variable output, even the most perfectly tuned single loop around the
process may yield slow and inaccurate control. It may be that the actuator operates
on one physical property, which eventually affects the process variable, measured
by a different physical property. Identifying the intermediate variable allows us to
divide the process into two parts as shown in the following figure.
PROCESS
Control input
Process A
Intermediate
Variable
Process B
Process
Variable (PV)
Setpoint
+
Loop B
Calculation
Σ
--
Major
Loop
Output B/
Setpoint A
+
Loop A
Calculation
Σ
Output A
Process A
(secondary)
External
Disturbances
Process B
(primary)
-Minor
Loop
PV, Process A
PV, Process B
One of the benefits to cascade control can be seen by examining its response to
external disturbances. Remember that the minor loop is faster acting than the major
loop. Therefore, if a disturbance affects process A in the minor loop, the Loop A PID
calculation can correct the resulting error before the major loop sees the effect.
DL405 User Manual, 4th Edition, Rev. A
Maintenance
External
Disturbances
PID Loop Operation
(DL450 Only)
The principle of cascaded loops is simply that we add another process loop to more
precisely control the intermediate variable! This separates the source of the control
lag into two parts, as well.
The diagram below shows a cascade control system, showing that it is simply one
loop nested inside another. The inside loop is called the minor loop, and the outside
loop is called the major loop. For overall stability, the minor loop must be the fastest
responding loop of the two. We do have to add the additional sensor to measure the
intermediate variable (PV for process A). Notice that the setpoint for the minor loop is
automatically generated for us, by using the output of the major loop. Once the
cascaded control is programmed and debugged, we only need to deal with the
original setpoint and process variable at the system level. The cascaded loops
behave as one loop, but with improved performance over the previous single-loop
solution.
8--64
PID Loop Operation (DL450 only)
Cascaded Loops in In the use of the term “cascaded loops”, we must make an important distinction. Only
the minor loop will actually be in the Cascade Mode. In normal operation, the major
the DL450 CPU
loop must be in Auto Mode. If you have more than two loops cascaded together, the
outer-most (major) loop must be in Auto Mode during normal operation, and all inner
loops in Cascade Mode.
NOTE: Technically, both major and minor loops are “cascaded” in strict process
control terminology. Unfortunately, we are unable to retain this convention when
controlling loop modes. Just remember that all minor loops will be in Cascade Mode,
and only the outer-most (major) loop will be in Auto Mode.
You can cascade together as many loops as necessary on the DL450, and you may
have multiple groups of cascaded loops. For proper operation on cascaded loops
you must use the same data range (12/15 bit) and polar/bipolar settings on the major
and minor loop.
To prepare a loop for Cascade Mode operation as a minor loop, you must program its
remote Setpoint Pointer in its loop parameter table location V+32, as shown below.
The pointer must be the address of the V+05 location (control output) of the major
loop. In Cascade Mode, the minor loop will ignore the its local SP register (V+02),
and read the major loop’s control output as its SP instead.
Major Loop (Auto mode)
Loop Table
PID Loop Operation
(DL450 Only)
Maintenance
and Troubleshooting
Minor Loop (Cascade Mode)
Loop Table
V+02
XXXX
SP
V+02
XXXX
SP
V+03
XXXX
PV
V+03
XXXX
PV
V+05
XXXX
Control Output
V+05
XXXX
Control Output
V+32
XXXX
Remote SP Pointer
When using DirectSOFT’s PID View to watch the SP value of the minor loop,
DirectSOFT automatically reads the major loop’s control output and displays it for
the minor loop’s SP. The minor loop’s normal SP location, V+02, remains
unchanged.
Now, we use the loop parameter arrangement above and draw its equivalent loop
schematic, shown below.
Major loop
Minor Cascaded loop
Cascade
Control Output V+05
Loop
Calculation
Remote SP
Setpoint
+
Local SP
V+02
Auto/Manual
Σ
--
Loop
Calculation
Control
Output
Process Variable
Remember that a major loop goes to Manual Mode automatically if its minor loop is
taken out of Cascade Mode.
DL405 User Manual, 4th Edition, Rev. A
PID Loop Operation (DL450 only)
Tuning Cascaded
Loops
8--65
When tuning cascaded loops, you will need to de--couple the cascade relationship
and tune the minor loop, using one of the loop tuning procedures previously covered.
Once this has been done, have the minor loop in cascade mode and auto tune the
major loop (see Step 4).
1. If you are not using auto tuning, then find the loop sample rate for the minor
loop, using the method discussed earlier in this chapter. Then set the sample
rate of the major loop slower than the minor loop by a factor of 10. Use this as a
starting point.
2. Tune the minor loop first. Leave the major loop in Manual Mode, and you will
need to generate SP changes for the minor loop manually as described in the
loop tuning procedure.
3. Verify the minor loop gives a critically--damped response to a 10% SP change
while in Auto Mode. Then we are finished tuning the minor loop.
4. In this step, you will need to get the minor loop in Cascade Mode, and then the
Major loop in Auto Mode. We will be tuning the major loop with the minor loop
treated as a series component its overall process. Therefore, do not go back and
tune the minor loop again while tuning the major loop.
5. Tune the major loop, following the standard loop tuning procedure in this
section. The response of the major loop PV is actually the overall response of the
cascaded loops together.
PID Loop Operation
(DL450 Only)
Maintenance
DL405 User Manual, 4th Edition, Rev. A
8--66
PID Loop Operation (DL450 only)
Time-Proportioning Control
Maintenance
and Troubleshooting
PID Loop Operation
(DL450 Only)
The PID loop controller in the DL450 CPU generates a smooth control output signal
across a numerical range. The control output value is suitable to drive an analog
output module, which connects to the process. In the process control field, this is
called continuous control, because the output is on (at some level) continuously.
While continuous control can be smooth and robust, the cost of the loop components
(such as actuators, heater amplifiers) can be expensive. A simpler form of control is
called time-proportioning control. This method uses actuators which are either on or
off (no in-between). Loop components for on/off-based control systems are lower
cost than their continuous control counterparts.
In this section, we will show you how to convert the control output of a loop to
time-proportioning control for the applications that need it. Let’s take a moment to
review how alternately turning a load on and off can control a process. The diagram
below shows a hot-air balloon following a path across some mountains. The desired
path is the setpoint. The balloon pilot turns the burner on and off alternately, which is
his control output. The large mass of air in the balloon effectively averages the effect
of the burner, converting the bursts of heat into a continuous effect, slowly changing
balloon temperature and ultimately the altitude, which is the process variable.
Time-proportioning control approximates continuous control by virtue of its
duty-cycle -- the ratio of ON time to OFF time. The following figure shows an example
of how duty cycle approximates a continuous level when it is averaged by a large
process mass.
period
Desired
Effect
On/Off
Control
On
Off
If we were to plot the on/off times of the burner in the hot-air balloon, we would
probably see a very similar relationship to its effect on balloon temperature and
altitude.
DL405 User Manual, 4th Edition, Rev. A
PID Loop Operation (DL450 only)
8--67
The following ladder segment provides a time proportioned on/off control output. It
converts the continuous output in V2005 to on/off control, using the ouptut coil, Y0.
On/Off Control
Program Example
SP
+
Loop
Calculation
Σ
--
Time
Proportioning
V2005
continuous
PV
Y0
Process
P
V
on/off
The example program uses two timers to generate on/off control. It makes the
following assumptions, which you can alter to fit your application:
S The loop table starts at V2000, so the control output is at V2005.
S The data format of the control output is 12-bit, unipolar (0 -- FFF or
0 -- 4095).
S The on/off control output is Y0.
The control program must “match” the resolution of the PID output to the resolution
of the time interval. The time interval for one full cycle of the on/off waveform is 10
seconds.
NOTE: Some processes change too fast for time proportioning control. Consider the
speed of your process when you choose this control method. Use continuous control
for processes that change too fast for time proportioning control.
TMRF
T0
K1000
T0
At the end of the 10 second period, T0 turns on, and
loads the control output value (binary) from the loop table
V+05 location (V2005).
BTOR
The BTOR instruction changes the number in the
accumulator to a real number.
DIVR
R4.095
Dividing the control output by 4.095, converts the
0 -- 4095 range to 0 -- 1000, which “matchs” the preset
time for TMRF T0.
RTOB
This instruction converts the real number back to
binary. This step prepares the number for conversion
to BCD. There is no real-to-BCD instruction.
BCD
Convert the number in the accumulator to BCD format.
This satisfies the timer preset format requirement.
T1
TMRF
T1
V1400
TA1
K0
Output the result to V1400. In our example, this is the
location of the timer preset for TMRF T1.
The second fast timer also counts in increments of .01
seconds, so its range is variable from 0 to a maximum
of 1000 ticks, or 10 seconds. This timer’s output, T1,
turns off the output coil, Y0, when the preset is reached.
Y0
OUT
The N.C. T1 contact, inverts the T1 timer output. The
control output is on at the beginning of the 10-second time
interval. Y0 turns off when T1 times out. The STRNE
contact prevents Y0 from energizing during the one scan
when T0 resets T1. Y0 is the actual control output.
END
END coil marks the end of the main program.
DL405 User Manual, 4th Edition, Rev. A
Maintenance
LD
V2005
OUT
V1400
T0
A fast timer (0.01 sec. timebase) establishes the primary
time interval. The constant, K1000, sets the preset at 10
seconds (1,000 ticks). The N.C. enabling contact, T0,
makes the timer self-resetting. T0 is on for one scan
each 10 seconds, when it resets itself and T1.
PID Loop Operation
(DL450 Only)
T0
8--68
PID Loop Operation (DL450 only)
Feedforward Control
Feedforward control is an enhancement to standard closed-loop control. It is most
useful for diminishing the effects of a quantifiable and predictable loop disturbance
or sudden change in setpoint. Use of this feature is an option available to you on the
DL450. However, it’s best to implement and tune a loop without feedforward, and
adding it only if better loop performance is still needed. The term “feed-forward”
refers to the control technique involved, shown in the diagram below. The incoming
setpoint value is fed forward around the PID equation, and summed with the output.
Feedforward path
Setpoint
+
kf
Loop
Calculation
Σ
--
+
+
Σ
Control Output
Process Variable
Maintenance
and Troubleshooting
PID Loop Operation
(DL450 Only)
In the previous section on the bias term, we said that “the bias term value establishes
a “working region” or operating point for the control output. When the error fluctuates
around its zero point, the output fluctuates around the bias value.” Now, when there
is a change in setpoint, an error is generated and the output must change to a new
operating point. This also happens if a disturbance introduces a new offset in the
loop. The loop does not really “know its way” to the new operating point... the
integrator (bias) must increment/decrement until the error disappears, and then the
bias has found the new operating point.
Suppose that we are able to know a sudden setpoint change is about to occur
(common in some applications). We can avoid much of the resulting error in the first
place, if we can quickly change the output to the new operating point. If we know
(from previous testing) what the operating point (bias value) will be after the setpoint
change, we can artificially change the output directly (which is feedforward). The
benefits from using feedforward are:
S The SP--PV error is reduced during predictable setpoint changes or loop
offset disturbances.
S Proper use of feedforward will allow us to reduce the integrator gain.
Reducing integrator gain gives us an even more stable control system.
Feedforward is very easy to use in the DL450 loop controller, as shown below. The
bias term has been made available to the user in a special read/write location, at PID
Parameter Table location V+04.
kp
Setpoint
+
Error Term
Σ
ki
Loop Calculation
P
I
--
Process Variable
DL405 User Manual, 4th Edition, Rev. A
kd
D
V+04
XXXX Bias Term
+
+
Σ
+
Control Output
PID Loop Operation (DL450 only)
8--69
To change the bias (operating point), ladder logic only has to write the desired value
to V+04. The PID loop calculation first reads the bias value from V+04 and modifies
the value based on the current integrator calculation. Then it writes the result back to
location V+04. This arrangement creates a sort of “transparent” bias term. All you
have to do to implement feed forward control is write the correct value to the bias
term at the right time (the example below shows you how).
NOTE: When writing the bias term, one must be careful to design ladder logic to
write the value just once, at the moment when the new bias operating point is to
occur. If ladder logic writes the bias value on every scan, the loop’s integrator is
effectively disabled.
Feedforward
Example
How do we know when to write to the bias term, and what value to write? Suppose we
have an oven temperature control loop, and we have already tuned the loop for
optimal performance. Refer to the figure below. We notice that when the operator
opens the oven door, the temperature sags a bit while the loop bias adjusts to the
heat loss. Then when the door closes, the temperature rises above the SP until the
loop adjusts again. Feedforward control can help diminish this effect.
Open
PV
PV sags
Closed
PV excess
Bias
Oven Closed
door
Open
Closed
PV
Feed-forward
Feed-forward
Bias
The step changes in the bias are the result of our two feed-forward writes to the bias
term. We can see that the PV variations are greatly reduced. The same technique
may be applied for changes in setpoint.
DL405 User Manual, 4th Edition, Rev. A
Maintenance
First, we record the amount of bias change the loop controller generates when the
door opens or closes. Then, we write a ladder program to monitor the position of an
oven door limit switch. When the door opens, our ladder program reads the current
bias value from V+04, adds the desired change amount, and writes it back to V+04.
When the door closes, we duplicate the procedure, but subtracting desired change
amount instead. The following figure shows the results.
PID Loop Operation
(DL450 Only)
Oven Closed
door
8--70
PID Loop Operation (DL450 only)
PID Example Program
After the PID loop(s) has been setup with DirectSOFT, you will need to edit your RLL
program to include the rungs needed to setup the analog I/O module to be used by
the PID loop(s).
Maintenance
and Troubleshooting
PID Loop Operation
(DL450 Only)
Program Setup for
the PID Loop
DL405 User Manual, 4th Edition, Rev. A
PID Loop Operation (DL450 only)
8--71
The example program shows how an analog input module, F4--08AD is used to
setup a PID loop. This example assumes that the PID table for loop 1 has a
beginning address of V3000.
All of the analog I/O modules used with the DL450 is setup in a similar manner. Refer
to the DL405 Analog I/O Manual for the setup information for the particular module
that you will be using.
Note that the modules used in the PID loop example program were set up for binary
format. They could have been set up for BCD format. In the later case, the BCD data
would have to be converted to binary format before being stored to the setpoint and
process variable, and the control output would have to be converted from binary to
BCD before being stored to the analog output.
By following the steps outlined in this chapter, you should be able to setup workable
PID control loops. The DirectSOFT Programming Software Manual provides more
information for the use of PID View.
PID Loop Operation
(DL450 Only)
Maintenance
DL405 User Manual, 4th Edition, Rev. A
8--72
PID Loop Operation (DL450 only)
Troubleshooting Tips
Q. The loop will not go into Automatic Mode.
A. Check the following for possible causes:
S The PLC is in Program Mode. It must be in Run Mode for loops to run.
S A PV alarm exists, or a PV alarm programming error exists.
S The loop is the major loop of a cascaded pair, and the minor loop is not
in Cascade Mode.
Maintenance
and Troubleshooting
PID Loop Operation
(DL450 Only)
Q. The Control Output just stays at zero constantly when the loop is in Automatic Mode.
A. Check the following for possible causes:
S The Control Output upper limit in loop table location V+31 is zero.
S The loop is driven into saturation, because the error never goes to zero
value and changes (algebraic) sign.
Q. The Control Output value is not zero, but it is incorrect.
A. Check the following for possible cause:
S The gain values are entered improperly. Remember, gains are entered
in the loop table in BCD, while the SP and PV are in binary. If you are
using DirectSOFT 5, PID View displays the SP, PV, Bias and Control
output in decimal, converting it to binary before updating the loop table.
Q. The Ramp/Soak Generator does not operate when I activate the Start bit.
A. Check the following for possible causes:
S The Ramp/Soak enable bit is off. Check the status of bit 11 of loop
parameter table location V+00. It must be set =1.
S The hold bit or other bits in the Ramp/Soak control are on.
S The beginning SP value and the first ramp ending SP value are the
same, so first ramp segment has no slope and consequently has no
duration. The ramp/soak generator moves quickly to the soak segment,
giving the illusion that the first ramp is not working.
S The loop is in Cascade Mode, and is trying to get the SP remotely.
S The SP upper limit value in the loop table location V+27 is too low.
S Check your ladder program to verify it is not writing to the SP location
(V+02 in the loop table). A quick way to do this is to temporarily place an
end coil at the beginning of your program, then go to PLC Run Mode,
and manually start the ramp/soak generator.
Q. The PV value in the table is constant, even though the analog module receives the PV signal.
A. Your ladder program must read the analog value from the module successfully
and write it into the loop table V+03 location. Verify that the analog module is
generating the value, and that the ladder is working.
Q. The Derivative gain doesn’t seem to have any affect on the output.
A. The derivative limit is probably enabled (see section on derivative gain limiting).
DL405 User Manual, 4th Edition, Rev. A
PID Loop Operation (DL450 only)
8--73
Maintenance
DL405 User Manual, 4th Edition, Rev. A
PID Loop Operation
(DL450 Only)
Q. The loop Setpoint appears to be changing by itself.
A. Check the following for possible causes:
S The Ramp/Soak generator is enabled, and is generating setpoints.
S If this symptom occurs on loop Manual-to-Auto Mode changes, the loop
is in Bumpless Transfer Mode 1.
S Check your ladder program to verify it is not writing to the SP location
(V+02 in the loop table). A quick way to do this is to temporarily place an
end coil at the beginning of your program, then go to PLC Run Mode.
Q. The SP and PV values I enter with DirectSOFT work okay, but these values do not work
properly when the ladder program writes the data.
A. The PID View in DirectSOFT lets you enter SP, PV, and Bias values in decimal,
and displays them in decimal for your convenience. For example, when the data
format is 12 bit unipolar, the values range from 0 to 4095. However, the loop table
actually requires these in hex, so DirectSOFT converts them for you. The values in
the table range from 0 to FFF, for 12-bit unipolar format. Your ladder program must
convert constant values from their BCD format (when entered as Kxxxx) to binary
with the BIN instruction or you must enter them in the constant field (Kxxxx) as the
hex equivalent of the decimal value.
Q. The loop seems unstable and impossible to tune, no matter what gains I use.
A. Check the following for possible causes:
S The loop sample time is set too long. Refer to the section near the front
of this chapter on selecting the loop update time.
S The gains are too high. Start out by reducing the derivative gain to zero.
Then reduce the integral gain by increasing the integral time value, and
the proportional gain if necessary.
S There is too much transfer lag in your process. This means the PV
reacts sluggishly to control output changes. There may be too much
“distance” between actuator and PV sensor, or the actuator may be
weak in its ability to transfer energy into the process.
S There may be a process disturbance that is over-powering the loop.
Make sure the PV is relatively steady when the SP is not changing.
8--74
PID Loop Operation (DL450 only)
Maintenance
and Troubleshooting
PID Loop Operation
(DL450 Only)
Glossary of PID Loop Terminology
Automatic Mode
An operational mode of a loop, in which it makes PID calculations and updates the
loop’s control output.
Bias Freeze
A method of preserving the bias value (operating point) for a control output, by inhibiting
the integrator when the output goes out-of-range. The benefit is a faster loop recovery.
Bias Term
In the position form of the PID equation, it is the sum of the integrator and the initial
control output value.
Bumpless Transfer
A method of changing the operation mode of a loop while avoiding the usual sudden
change in control output level. This consequence is avoided by artificially making the SP
and PV equal, or the bias term and control output equal at the moment of mode change.
Cascaded Loops
A cascaded loop receives its setpoint from the output of another loop. Cascaded loops
have a major/minor relationship, and work together to ultimately control one PV.
Cascade Mode
An operational mode of a loop, in which it receives its SP from another loop’s output.
Continuous Control
Control of a process done by delivering a smooth (analog) signal as the control output.
Direct-Acting Loop
A loop in which the PV increases in response to a control output increase. In other
words, the process has a positive gain.
Error
The difference in value between the SP and PV,
Error Deadband
An optional feature which makes the loop insensitive to errors when they are small. You
can specify the size of the deadband.
Error Squared
An optional feature which multiplies the error by itself, but retains the original algebraic
sign. It reduces the effect of small errors, while magnifying the effect of large errors.
Feedforward
A method of optimizing the control response of a loop when a change in setpoint or
disturbance offset is known and has a quantifiable effect on the bias term.
Control Output
The numerical result of a PID equation which is sent by the loop with the intention of
nulling out the current error.
Derivative Gain
A constant that determines the magnitude of the PID derivative term in response to the
current error.
Integral Gain
A constant that determines the magnitude of the PID integral term in response to the
current error.
Major Loop
In cascade control, it is the loop that generates a setpoint for the cascaded loop.
Manual Mode
An operational mode of a loop, in which the PID calculations are stopped. The operator
must manually control the loop by writing to the control output value directly.
Minor Loop
In cascade control, the minor loop is the subordinate loop that receives its SP from the
major loop.
On / Off Control
A simple method of controlling a process, through on/off application of energy into the
system. The mass of the process averages the on/off effect for a relatively smooth PV. A
simple ladder program can convert the DL450’s continuous loop output to on/off control.
PID Loop
A mathematical method of closed-loop control involving the sum of three terms based
on proportional, integral, and derivative error values. The three terms have independent
gain constants, allowing one to optimize (tune) the loop for a particular physical system.
Position Algorithm
The control output is calculated so it responds to the displacement (position) of the PV
from the SP (error term)
Process
A manufacturing procedure which adds value to raw materials. Process control
particularly refers to inducing chemical changes to the material in process.
Process Variable (PV)
A quantitative measurement of a physical property of the material in process, which
affects final product quality and is important to monitor and control.
DL405 User Manual, 4th Edition, Rev. A
Error=SP -- PV
PID Loop Operation (DL450 only)
8--75
PV Absolute Alarm
A programmable alarm that compares the PV value to alarm threshold values.
PV Deviation Alarm
A programmable alarm that compares the difference between the SP and PV values to
a deviation threshold value.
Ramp / Soak Profile
A set of SP values called a profile, which is generated in real time upon each loop
calculation. The profile consists of a series of ramp and soak segment pairs, greatly
simplifying the task of programming the PLC to generate such SP sequences.
Rate
Also called differentiator, the rate term responds to the changes in the error term.
Remote Setpoint
The location where a loop reads its setpoint when it is configured as the minor loop in a
cascaded loop topology.
Reset
Also called integrator, the reset term adds each sampled error to the previous,
maintaining a running total called the bias.
Reset Windup
A condition created when the loop is unable to find equilibrium, and the persistent error
causes the integrator (reset) sum to grow excessively (windup). Reset windup causes
an extra recovery delay when the original loop fault is remedied.
Reverse-Acting Loop
A loop in which the PV increases in response to a control output decrease. In other
words, the process has a negative gain.
Sampling time
The time between PID calculations. The CPU method of process control is called a
sampling controller, because it samples the SP and PV only periodically.
Setpoint (SP)
The desired value for the process variable. The setpoint (SP) is the input command to
the loop controller during closed loop operation.
Soak Deviation
The soak deviation is a measure of the difference between the SP and PV during a soak
segment of the Ramp/Soak profile, when the Ramp / Soak generator is active.
Step Response
The behavior of the process variable in response to a step change in the SP (in closed
loop operation), or a step change in the control output (in open loop operation)
Transfer
To change from one loop operational mode to another ( between Manual, Auto, or
Cascade). The word “transfer” probably refers to the transfer of control of the control
output or the SP, depending on the particular mode change.
Velocity Algorithm
The control output is calculated to represent the rate of change (velocity) for the PV to
become equal to the SP.
DL405 User Manual, 4th Edition, Rev. A
Maintenance
A constant that determines the magnitude of the PID proportional term in response to
the current error.
PID Loop Operation
(DL450 Only)
Proportional Gain
8--76
PID Loop Operation (DL450 only)
Fundamentals of Process Control Theory, Second Edition
Author: Paul W. Murrill
Publisher: Instrument Society of America
ISBN 1--55617--297--4
Application Concepts of Process Control
Author: Paul W. Murrill
Publisher: Instrument Society of America
ISBN 1--55617--080--7
PID Controllers: Theory, Design, and Tuning, 2nd Edition
Author: K. Astrom and T Hagglund
Publisher: Instrument Society of America
ISBN 1--55617--516--7
Fundamentals of Temperature, Pressure, and Flow
Measurements, Third edition
Author: Robert P. Benedict
Publisher: John Wiley and Sons
ISBN 0--471--89383--8
Process / Industrial Instruments & Controls Handbook,
Fourth Edition
Author (Editor-in-Chief): Douglas M. Considine
Publisher: McGraw-Hill, Inc.
ISBN 0--07--012445--0
pH Measurement and Control, Second Edition
Author: Gregory K. McMillan
Publisher: Instrument Society of America
ISBN 1--55617--483--7
Programmable Controllers Concepts and Applications,
First Edition,
Authors: C.T. Jones and L.A. Bryant
Publisher: International Programmable Controls
ISBN 0--915425--00--9
Fundamentals of Programmable Logic Controllers, Sensors, and Communications
Author: Jon Stenerson
Publisher: Prentice Hall
ISBN 0--13--726860--2
Process Control, Third Edition
Instrument Engineer’s Handbook
Author (Editor-in-Chief): Bela G. Liptak
Publisher: Chilton
ISBN 0--8019--8242--1
Process Measurement and Analysis, Third Edition
Instrument Engineer’s Handbook
Author (Editor-in-Chief): Bela G. Liptak
Publisher: Chilton
ISBN 0--8019--8197--2
Maintenance
and Troubleshooting
PID Loop Operation
(DL450 Only)
Bibliography
DL405 User Manual, 4th Edition, Rev. A