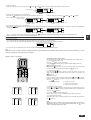
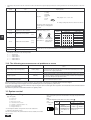
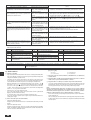
1
Air-Conditioners
INDOOR UNIT
D
PER L’INSTALLATORE
VOOR DE INSTALLATEUR
FÖR INSTALLATÖREN
PARA O INSTALADOR
E
F
FOR INSTALLER
FÜR INSTALLATEURE
POUR L’INSTALLATEUR
PARA EL INSTALADOR
GB
PEH-P400, 500MYA
INSTALLATION MANUAL
INSTALLATIONSHANDBUCH
I
For safe and correct use, please read this operation manual thoroughly before operating the air-conditioner unit.
Zum sicheren und ordnungsgemäßen Gebrauch der Klimageräte das Installationshandbuch gründlich durchlesen.
MANUEL D’INSTALLATION
MANUAL DE INSTALACIÓN
NL
Veuillez lire le manuel d’installation en entier avant d’installer ce climatiseur pour éviter tout accident et vous assurer d’une utilisation correcte.
Para un uso seguro y correcto, lea detalladamente este manual de instalación antes de montar la unidad de aire acondicionado.
INSTALLATIEHANDLEIDING
SW
MANUALE DI INSTALLAZIONE
Per un uso sicuro e corretto, leggere attentamente questo manuale di installazione prima di installare il condizionatore d’aria.
Voor een veilig en juist gebruik moet u deze installatiehandleiding grondig doorlezen voordat u de airconditioner installeert.
MANUAL DE INSTALAÇÃO
Para segurança e utilização correctas, leia atentamente este manual de instalação antes de instalar a unidade de ar condicionado.
P
INSTALLATIONSMANUAL
Läs denna installationsmanual noga för säkert och korrekt bruk innan luftkonditioneringen installeras.
2
[Fig. 2.0.1]
A
B
A Air outlet
B
B Remote controller
3
3.2
[Fig. 3.2.1]
PEH-P500:1940
PEH-P400:1637
620
63
B
400
PEH-P500:1890
PEH-P400:1587
D
200
PEH-P500:2490
PEH-P400:2187
25 75
GB
*1
C
A
700
746
946
200
B
500
When installing the suspension fixtures prior to installation of the
indoor unit without inlet duct
A
Service space
B
Suspension bolt pitch
C
Air inlet
D
Air outlet
*1 When there is no 500mm of service space on top of the unit, there must be
700mm of service space at the air outlet side.
A
F
PEH-P20:2043
PEH-P16:1740
PEH-P20:1940
PEH-P16:1637
25
C
620
F
E
H
E
Top of the unit
F
4-ø12 suspension bolt holes
G Control box
B
H Main body
63
G
746
D
1206
706
3
B
NL
When connecting air inlet
2
3 When hanging the indoor unit directly without inlet duct
1
2
[Fig. 3.2.2]
SW
1
4
4.1
[Fig. 4.1.1]
[Fig. 4.1.2]
E
I
H
E
C
A
Ceiling board
B
Edge beam
C
Tie beam
F
Insert: 100 to 150 kg (1 piece) (field supply)
D
Square timber for hanging the air conditioner
G
M10 hanging bolt (field supply)
E
Pitch
H
Reinforcement
F
G
E
B
D
A
5
5.1
[Fig. 5.1.1]
100
over
P
[Fig. 5.1.2]
A
A
B
B
2
A
Unit body
B
Lifting machine
A
30
A
B
A
Ceiling
A
Nut
B
Washer
5
5.2
[Fig. 5.2.1]
A
A
6
Level check
6.2
[Fig. 6.2.1]
* In case of PEH-P500
100
50
100
91
54
A
B
A
B
7
39
Refrigerant pipe (liquid pipe)
B
Refrigerant pipe (gas pipe)
C
Drain pipe
D
C
81
24
39
24
C
81
A
190
211
90
74
A
B
251
256
90
74
A
B
GB
* In case of PEH-P400
F
7.1
[Fig. 7.1.1]
[Fig. 7.1.2]
A
C
B
A
NL
A
Remove the cap
D
E
[Fig.7.1.3]
E
Thermal insulation
B
Pull out insulation
C
Wrap with damp cloth
D
Return to original position
E
Ensure that there is no gap here
F
Wrap with insulating tape
G
A
A
A Brazing
A
B
C
A
E
(No.1)
G
A
D
B
E
Flare joint
C
Gas pipe
D
Liquid pipe
I
F
F
(No.2)
A
SW
A
E Service port
F Indoor unit
G Outdoor unit
E
E
B
7.2
C
E
F
G
D
B
A
H
I
J
A
Insulator
B
Drain pipe R1
C
Drain pan
D
>
= 70 mm
>
= 2×F>
= 70 mm
E
P
[Fig.7.2.1]
F
>
= 35 mm
G
Downward slope 20mm/m or more
H
Drain trap
I
The drain pipe should extend below this level.
J Open drain
3
8
[Fig.8.0.1]
[Fig.8.0.2]
G
D
A
G
10 mm
E
E
F D
B
C
B
A
C
2-
12.5
20
A Air inlet
25~100 mm
B Air outlet
A Inlet duct flange
C Access door
D Ceiling surface
B
Inlet temperature sensor
E Canvas duct
C
Sensor protection plate
F
Keep duct-work length 850 or more
G Connect common reference potential wire between duct-work to air conditioner
D
Sensor fixture
E
Inlet duct
GB
[Fig.8.0.3]
A
PEH-P500:1648
PEH-P400:1388
49
A
19
B
44
600
H
23
D
C
G
D
A
Inlet duct flange
B
PEH-P400: 10 × 130 pitch = 1300
PEH-P500: 12 × 130 pitch = 1560
C
PEH-P400: 34-ø3 holes (Inlet duct mount holes)
PEH-P500: 38-ø3 holes (Inlet duct mount holes)
D
Top of the unit
E
Outlet duct flange
F
F PEH-P400, 500: 8 × 130 pitch = 1040
F
NL
E
29.5
PEH-P500:323
PEH-P400:208
1099
I
36
9
37
462
G
PEH-P400, 500: 26-ø3 holes (Outlet duct mount holes)
H
PEH-P400, 500: 5 × 110 pitch = 550
I
PEH-P400, 500: 3 × 130 pitch = 390
9.1
[Fig.9.1.1]
(1)
(2)
B
<A> For installation in the switch box:
C
30
SW
A
D
B-1.
E
30
I
D
46
120
83.5
30
C
A
Remote controller profile
B
Required clearances
surrounding the remote controller
C
Temperature sensor
D
Installation pitch
F
E
C
For installation in the switch box
B-2.
<B> For direct installation on the wall
D
D
E
P
H
G
C Switch box for two pieces
D
Remote controller cord
E Cross-recessed, pan-head screw
G Seal the remote controller cord service entrance with putty
H Wood screw
4
I
G
H
(3)
<A>
I
<B> For direct installation on the wall
select one of the following:
C
Wall
D Conduit
E
Lock nut
F Bushing
G
Switch box
H Remote controller cord
I Seal with putty.
I
9
9.2
[Fig.9.2.1]
A
AB
A
To TB5 on the indoor unit
B
Terminal block TB6 in remote controller
No polarity
B
TB6
9.3
[Fig.9.3.1]
[Fig.9.3.2]
(2)
GB
(1)
10
A
A
B
B
L
L
L
C
K
E
(NO.1)
I
F
Power supply wiring for outdoor unit
Outdoor unit
F
Indoor unit
G
Connection wiring for indoor/outdoor units (polarity)
H
Remote controller
I Connection wiring for indoor/remote controller (no polarity)
(NO.2)
K
G
J
Earth leakage breaker
C
E
G
E
Power supply
B
D Power supply wiring for indoor unit
D
C
A
F
A
B
D
[Fig.10.0.1]
J
J
H
J
Grounding
K Signal wiring for alternate defrost
NL
L Wiring circuit breaker or isolating switch
[Fig.10.0.2]
B
A
(TB4-1) (TB4-2)
, , ,
L1 L2 L3 N S1 S2 S3 S1 S2 S3
F
3ø4W
E
F
D
L1 L2 L3 N S1 S2 S3
G
OUT OUT IN IN
J
H
(NO.1 Outdoor)
3ø4W
D
E
F
A
Indoor unit
B
Power cable wiring
C
Control cable wiring
D
Outdoor unit
E
Earth leakage breaker
F
Wiring circuit breaker or isolating switch
G
Power cable terminal bed
I
E
SW
C
3ø4W
H Control cable terminal bed
, , ,
L1 L2 L3 N S1 S2 S3
G
H
OUT OUT IN IN
I
I
Defrost signal cable terminal bed
J
Defrost signal cable wiring
A
For remote controller cables
E
(NO.2 Outdoor)
P
[Fig.10.0.3]
CB A
B
For outdoor unit connection cables
C
For power supply cables
5
11
11.2
[Fig.11.2.1]
<SW4>
A
OFF ON
A
B
1
2
14
C
D
Stop
B
Cooling
C
Operation
D
Heating
14.1
[Fig.14.1.1]
E SW 1 - 3 ~ 6
GB
A E
TB1
TB1
TB4
TB4
TB4
E
I
SW
NL
F
D
TB5
P
A G
TB1
B
6
A F
B
2
1
C
TB5
2
B
TB5
ON
OFF
3 4 5 6
A
Outdoor unit
B
Indoor unit
C
Main remote controller
D Subordinate remote controller
D1
E Standard 1:1 (Refrigerant address = 00))
F
Refrigerant address = 01
G
Refrigerant address = 02
1. Safety precautions ...................................................................................... 7
1.1. Before installation and electric work .......................................... 7
1.2. Precautions for devices that use R407C refrigerant .................. 7
1.3. Before getting installed .............................................................. 8
1.4. Before getting installed (moved) - electrical work ...................... 8
1.5. Before starting the test run ........................................................ 8
2. Indoor unit accessories ............................................................................... 8
3. Selecting an installation site ....................................................................... 8
3.1. Install the indoor unit on a ceiling strong enough to sustain
its weight ................................................................................... 9
3.2. Securing installation and service space .................................... 9
3.3. Combining indoor units with outdoor units ................................ 9
4. Fixing hanging bolts .................................................................................... 9
4.1. Fixing hanging bolts .................................................................. 9
5. Installing the unit ......................................................................................... 9
5.1. Hanging the unit body ............................................................... 9
5.2. Confirming the unit’s position and fixing hanging bolts ............. 9
6. Refrigerant pipe and drain pipe specifications .......................................... 10
6.1. Refrigerant pipe and drain pipe specifications ........................ 10
6.2. Refrigerant pipe, drain pipe and filling port ............................. 10
7. Connecting refrigerant pipes and drain pipes ........................................... 10
7.1. Refrigerant piping work ........................................................... 10
7.2. Drain piping work ..................................................................... 10
8. Duct work ..................................................................................................
9. Remote controller .....................................................................................
9.1. Installing procedures ...............................................................
9.2. Connecting procedures ...........................................................
9.3. Fitting the upper case ..............................................................
9.4. Function selection ...................................................................
10. Electrical wiring .........................................................................................
11. Test run ......................................................................................................
11.1. Before test run .........................................................................
11.2. Test run procedures .................................................................
11.3. Self-check ................................................................................
11.4. Remote controller check ..........................................................
12. Test run [for wireless remote controller] ....................................................
12.1. Before test run .........................................................................
12.2. Self-check ................................................................................
12.3. Test run method .......................................................................
13. Troubleshooting .........................................................................................
13.1. How to handle problems with the test run ...............................
13.2. The following occurrences are not problems or errors ............
14. System control ..........................................................................................
14.1 System settings .......................................................................
14.2 Examples of refrigerant system address setting .....................
14.3 Capacity control setting method (PEH-P400, 500MYA only) ...
11
11
11
12
12
12
16
16
16
17
18
19
19
19
19
20
21
21
22
22
22
23
23
GB
Contents
Symbols used in the text
•
Warning:
Describes precautions that should be observed to prevent danger of injury
or death to the user.
Caution:
Describes precautions that should be observed to prevent damage to the
unit.
•
•
Symbols put on the unit
: Indicates an action that must be avoided.
: Indicates that important instructions must be followed.
•
: Indicates a part which must be grounded.
: Indicates that caution should be taken with rotating parts. (This symbol is
displayed on the main unit label.) <Color: yellow>
: Beware of electric shock. (This symbol is displayed on the main unit label.)
<Color: yellow>
•
Warning:
Carefully read the labels affixed to the main unit.
•
Warning:
•
•
•
•
•
•
•
Ask the dealer or an authorized technician to install the air conditioner.
- Improper installation by the user may result in water leakage, electric shock,
or fire.
Install the unit at a place that can withstand its weight.
- Inadequate strength may cause the unit to fall down, resulting in injuries.
Use the specified cables for wiring. Make the connections securely so
that the outside force of the cable is not applied to the terminals.
- Inadequate connection and fastening may generate heat and cause a fire.
Prepare for strong winds and earthquakes and install the unit at the specified place.
- Improper installation may cause the unit to topple and result in injury.
Always use an filter and other accessories specified by Mitsubishi Electric.
- Ask an authorized technician to install the accessories. Improper installation
by the user may result in water leakage, electric shock, or fire.
Never repair the unit. If the air conditioner must be repaired, consult the
dealer.
- If the unit is repaired improperly, water leakage, electric shock, or fire may
result.
Do not touch the heat exchanger fins.
- Improper handling may result in injury.
•
•
•
•
1.2. Precautions for devices that use R407C
refrigerant
Caution:
•
Do not use the existing refrigerant piping.
- The old refrigerant and refrigerator oil in the existing piping contains a large
amount of chlorine which may cause the refrigerator oil of the new unit to
deteriorate.
7
F
•
NL
s The “Safety precautions” provide very important points regarding safety. Make sure you follow them.
SW
•
I
s Before installing the unit, make sure you read all the “Safety
precautions”.
When handling this product, always wear protective equipment.
EG: Gloves, full arm protection namely boiler suit, and safety glasses.
- Improper handling may result in injury.
If refrigerant gas leaks during installation work, ventilate the room.
- If the refrigerant gas comes into contact with a flame, poisonous gases will
be released.
Install the air conditioner according to this Installation Manual.
- If the unit is installed improperly, water leakage, electric shock, or fire may
result.
Have all electric work done by a licensed electrician according to “Electric Facility Engineering Standard” and “Interior Wire Regulations” and
the instructions given in this manual and always use a special circuit.
- If the power source capacity is inadequate or electric work is performed improperly, electric shock and fire may result.
Securely install the outdoor unit terminal cover (panel).
- If the terminal cover (panel) is not installed properly, dust or water may enter
the outdoor unit and fire or electric shock may result.
When installing and moving the air conditioner to another site, do not
charge it with a refrigerant different from the refrigerant (R407C) specified on the unit.
- If a different refrigerant or air is mixed with the original refrigerant, the refrigerant cycle may malfunction and the unit may be damaged.
If the air conditioner is installed in a small room, measures must be taken
to prevent the refrigerant concentration from exceeding the safety limit
even if the refrigerant leaks.
- Consult the dealer regarding the appropriate measures to prevent the safety
limit from being exceeded. If the refrigerant leak and cause the safety limit to
be exceeded, hazards due to lack of oxygen in the room could result.
When moving and reinstalling the air conditioner, consult the dealer or
an authorized technician.
- If the air conditioner is installed improperly, water leakage, electric shock, or
fire may result.
After completing installation work, make sure that refrigerant gas is not
leaking.
- If the refrigerant gas leaks and is exposed to a fan heater, stove, oven, or
other heat source, it may generate noxious gases.
Do not reconstruct or change the settings of the protection devices.
- If the pressure switch, thermal switch, or other protection device is shorted
and operated forcibly, or parts other than those specified by Mitsubishi Electric are used, fire or explosion may result.
To dispose of this product, consult your dealer.
The installer and system specialist shall secure safety against leakage
according to local regulation or standards.
- Following standards may be applicable if local regulation are not available.
Pay a special attention to the place, such as a basement, etc. where refrigeration gas can stay, since refrigeration is heavier than the air.
E
•
P
1.1. Before installation and electric work
D
1. Safety precautions
•
•
•
•
•
•
D
GB
•
•
F
•
Use refrigerant piping made of phosphorus deoxidized copper. In addition, be sure that the inner and outer surfaces of the pipes are clean and
free of hazardous sulphur, oxides, dust/dirt, shaving particles, oils, moisture, or any other contaminant.
- Contaminants on the inside of the refrigerant piping may cause the refrigerant residual oil to deteriorate.
Store the piping to be used during installation indoors and keep both
ends of the piping sealed until just before brazing. (Store elbows and
other joints in a plastic bag.)
- If dust, dirt, or water enters the refrigerant cycle, deterioration of the oil and
compressor trouble may result.
Use ester oil, ether oil or alkylbenzene (small amount) as the refrigerator
oil to coat flares and flange connections.
- The refrigerator oil will degrade if it is mixed with a large amount of mineral
oil.
Use liquid refrigerant to fill the system.
- If gas refrigerant is used to seal the system, the composition of the refrigerant in the cylinder will change and performance may drop.
Do not use a refrigerant other than R407C.
- If another refrigerant (R22, etc.) is used, the chlorine in the refrigerant may
cause the refrigerator oil to deteriorate.
Use a vacuum pump with a reverse flow check valve.
- The vacuum pump oil may flow back into the refrigerant cycle and cause the
refrigerator oil to deteriorate.
Do not use the following tools that are used with conventional refrigerants.
(Gauge manifold, charge hose, gas leak detector, reverse flow check valve,
refrigerant charge base, refrigerant recovery equipment)
- If the conventional refrigerant and refrigerator oil are mixed in the R407C,
the refrigerant may deteriorated.
- If water is mixed in the R407C, the refrigerator oil may deteriorate.
- Since R407C does not contain any chlorine, gas leak detectors for conventional refrigerants will not react to it.
Do not use a charging cylinder.
- Using a charging cylinder may cause the refrigerant to deteriorate.
Be especially careful when managing the tools.
- If dust, dirt, or water gets in the refrigerant cycle, the refrigerant may deteriorate.
Caution:
•
•
•
•
•
•
•
•
•
•
1.3. Before getting installed
Caution:
•
•
NL
1.4. Before getting installed (moved) - electrical work
•
SW
•
I
•
Do not install the unit where combustible gas may leak.
- If the gas leaks and accumulates around the unit, an explosion may result.
Do not use the air conditioner where food, pets, plants, precision instruments, or artwork are kept.
- The quality of the food, etc. may deteriorate.
Do not use the air conditioner in special environments.
- Oil, steam, sulfuric smoke, etc. can significantly reduce the performance of
the air conditioner or damage its parts.
When installing the unit in a hospital, communication station, or similar
place, provide sufficient protection against noise.
- The inverter equipment, private power generator, high-frequency medical
equipment, or radio communication equipment may cause the air conditioner
to operate erroneously, or fail to operate. On the other hand, the air conditioner may affect such equipment by creating noise that disturbs medical
treatment or image broadcasting.
Do not install the unit on a structure that may cause leakage.
- When the room humidity exceeds 80 % or when the drain pipe is clogged,
condensation may drip from the indoor unit. Perform collective drainage work
together with the outdoor unit, as required.
Ground the unit.
- Do not connect the ground wire to gas or water pipes, lightning rods, or
telephone ground lines. Improper grounding may result in electric shock.
Install the power cable so that tension is not applied to the cable.
- Tension may cause the cable to break and generate heat and cause a fire.
Install an earth leakage circuit breaker, as required.
- If an earth leakage circuit breaker is not installed, electric shock may result.
Use power line cables of sufficient current carrying capacity and rating.
- Cables that are too small may leak, generate heat, and cause a fire.
Use only a circuit breaker and fuse of the specified capacity.
- A fuse or circuit breaker of a larger capacity or a steel or copper wire may
result in a general unit failure or fire.
Do not wash the air conditioner units.
- Washing them may cause an electric shock.
Be careful that the installation base is not damaged by long use.
- If the damage is left uncorrected, the unit may fall and cause personal injury
or property damage.
Install the drain piping according to this Installation Manual to ensure
proper drainage. Wrap thermal insulation around the pipes to prevent
condensation.
- Improper drain piping may cause water leakage and damage to furniture
and other possessions.
Be very careful about product transportation.
- Only one person should not carry the product if it weighs more than 20 kg.
- Some products use PP bands for packaging. Do not use any PP bands for a
means of transportation. It is dangerous.
- Do not touch the heat exchanger fins. Doing so may cut your fingers.
- When transporting the outdoor unit, suspend it at the specified positions on
the unit base. Also support the outdoor unit at four points so that it cannot
slip sideways.
Safely dispose of the packing materials.
- Packing materials, such as nails and other metal or wooden parts, may cause
stabs or other injuries.
- Tear apart and throw away plastic packaging bags so that children will not
play with them. If children play with a plastic bag which was not torn apart,
they face the risk of suffocation.
1.5. Before starting the test run
Caution:
•
•
•
•
•
Turn on the power at least 12 hours before starting operation.
- Starting operation immediately after turning on the main power switch can
result in severe damage to internal parts. Keep the power switch turned on
during the operational season.
Do not touch the switches with wet fingers.
- Touching a switch with wet fingers can cause electric shock.
Do not touch the refrigerant pipes during and immediately after operation.
- During and immediately after operation, the refrigerant pipes are may be hot
and may be cold, depending on the condition of the refrigerant flowing through
the refrigerant piping, compressor, and other refrigerant cycle parts. Your
hands may suffer burns or frostbite if you touch the refrigerant pipes.
Do not operate the air conditioner with the panels and guards removed.
- Rotating, hot, or high-voltage parts can cause injuries.
Do not turn off the power immediately after stopping operation.
- Always wait at least five minutes before turning off the power. Otherwise,
water leakage and trouble may occur.
E
2. Indoor unit accessories
The unit is provided with the following accessories:
<Accessory part position>
A
[Fig. 2.0.1] (P.2)
Air outlet
B Remote controller
3. Selecting an installation site
Select a site with sturdy fixed surface sufficiently durable against the weight of
unit.
•
Do not install unit at a site where combustible gas may generate, flow in, stagnate or leak.
•
Before installing unit, the routing to carry in unit to the installation site should
be determined.
•
Do not install unit at a site where equipment generating high frequency waves
(a high frequency wave welder for example) is provided.
•
Do not install unit at a site where fire detecter is located at the supply air side.
(Fire detector may operate erroneously due to the heated air supplied during
heating operation.)
•
When special chemical product may scatter around such as site chemical plants
and hospitals, full investigation is required before installing unit. (The plastic
components may be damaged depending on the chemical product applied.)
P
•
•
Select a site where the unit is not affected by entering air.
•
Select a site where the flow of supply and return air is not blocked.
•
Select a site where refrigerant piping can easily be led to the outside.
•
Select a site which allows the supply air to be distributed fully in room.
•
Do not install unit at a site with oil splashing or steam in much quantity.
8
3.1. Install the indoor unit on a ceiling strong
enough to sustain its weight
Service space
[Fig. 3.2.1] (P.2)
Warning:
The unit must be securely installed on a structure that can sustain its weight.
If the unit is mounted on an unstable structure, it may fall down causing
injuries.
1
When connecting air inlet
2
When installing the suspension fixtures prior to installation of the indoor unit without inlet duct
3
When hanging the indoor unit directly without inlet duct
A
Service space
B
Suspension bolt pitch
C
Air inlet
D
Air outlet
3.2. Securing installation and service space
*1 When there is no 500 mm of service space on top of the unit, there must be 700 mm of
service space at the air outlet side.
•
Select the optimum direction of supply airflow according to the configuration of
the room and the installation position.
Suspension bolt pitch
•
As the piping and wiring are connected at the bottom and side surfaces, and
the maintenance is made at the same surfaces, allow a proper space properly.
For the efficient suspension work and safety, provide a space as much as
possible.
[Fig. 3.2.2] (P.2)
E
Top of the unit
G Control box
F
4-ø12 suspension bolt holes
H
Main body
3.3. Combining indoor units with outdoor
units
4. Fixing hanging bolts
•
(Use M10 hanging bolts. The bolts should be supplied in the field.)
(Give site of suspension strong structure.)
[Fig. 4.1.1] (P.2)
Ceiling: The ceiling structure varies from building to one another. For detailed
information, consult your construction company.
1 Reinforcing the ceiling with additional members (edge beam, etc) must be required to keep the ceiling at level and to prevent the ceiling from vibrations.
2 Cut and remove the ceiling members.
3 Reinforce the ceiling members, and add other members for fixing the ceiling
boards.
Ceiling board
D
Square timber for hanging the air conditioner
B
Edge beam
C Tie beam
E Pitch
For reinforced concrete construction
•
As shown in the figure below, fix the hanging bolts, or use square timbers to fix
the hanging bolts.
[Fig. 4.1.2] (P.2)
F
Insert: 100 to 150 kg (1 piece) (field supply)
G
M10 hanging bolt (field supply)
H Reinforcement
Product Weight (kg)
For wooden construction
Use the tie beam (for one story building) or second-floor beam (for two story
building) as strength members.
PEH-P400MYA
PEH-P500MYA
180 kg
212 kg
NL
•
A
D
Hanging structure
•
To hang the air-conditioner, use a hard square timber of more than 6 cm if the
distance between beams is less than 90 cm and a hard square timber of more
than 9 cm if the distance between beams is less than 180 cm.
F
4.1. Fixing hanging bolts
GB
For combining indoor units with outdoor units, refer to the outdoor unit installation
manual.
s To hang the indoor unit, use a lifting machine to lift and pass through the
hanging bolts.
s Install the indoor unit before ceiling work.
[Fig. 5.1.1] (P.2)
B Lifting machine
<Hanging the indoor unit directly>
1. Attach a washer and nut(s) to each suspension bolt. (The washers and nuts
are to be supplied locally.)
2. Fit the indoor unit to each suspension bolt.
3. Make sure that the unit is positioned level, then tighten each nut.
[Fig. 5.1.2] (P.2)
A
Nut
A
Level check
s Use the gage supplied with the panel to confirm that the unit body and
hanging bolts are positioned in place. If they are not positioned in place,
it may result in dew drops due to wind leak. Be sure to check the positional
relationship.
s Use a level to check that the surface indicated by A is at level. Ensure
that the hanging bolt nuts are tightened to fix the hanging bolts.
s To ensure that drain is discharged, be sure to hang the unit at level using
a level.
Caution:
Be sure to install the unit body at level.
B
Washer
P
A Unit body
[Fig. 5.2.1] (P.3)
I
s Bring the indoor unit to an installation site as it is packed.
5.2. Confirming the unit’s position and fixing hanging bolts
E
5.1. Hanging the unit body
SW
5. Installing the unit
9
6. Refrigerant pipe and drain pipe specifications
To avoid dew drops, provide sufficient antisweating and insulating work to the refrigerant and drain pipes.
When using commercially available refrigerant pipes, be sure to wind commercially available insulating material (with a heat-resisting temperature of more than
100 °C and thickness given below) onto both liquid and gas pipes.
Be also sure to wind commercially available insulating material (with a form
polyethylene’s specific gravity of 0.03 and thickness given below) onto all pipes
which pass through rooms.
6.1. Refrigerant pipe and drain pipe specifications
Model
Item
1 Select the thickness of insulating material by pipe size.
Pipe size
6.4 mm to 25.4 mm
28.6 mm to 38.1 mm
Insulating material’s thickness
More than 10 mm
More than 15 mm
PEH-P400MYA
Liquid pipe
Refrigerant pipe
Gas pipe
Drain pipe
PEH-P500MYA
ø12.7
ø25.4
ø28.58
R1 (Male screw)
6.2. Refrigerant pipe, drain pipe and filling
port
2 If the unit is used on the highest story of a building and under conditions of
high temperature and humidity, it is necessary to use pipe size and insulating
material’s thickness more than those given in the table above.
[Fig. 6.2.1] (P.3)
A
Refrigerant pipe (liquid pipe)
C
Drain pipe
B Refrigerant pipe (gas pipe)
3 If there are customer’s specifications, simply follow them.
D
GB
7. Connecting refrigerant pipes and drain pipes
7.1. Refrigerant piping work
This piping work must be done in accordance with the installation manuals for
outdoor unit.
•
•
For constraints on pipe length and allowable difference of elevation, refer to
the outdoor unit manual.
Additional refrigerant charge
•
The method of pipe connection is brazing connection.
•
Take care not to allow dirt or cutting chips to enter the refrigerant pipes.
•
The refrigerant pipes must be kept warm, so take particular care to insulate
between refrigerant pipes and the gas pipe located inside the indoor unit, since
the gas pipe causes condensation during cooling operation.
•
When connecting the refrigerant pipes, make sure that the stop valve of the
outdoor unit is fully closed (as it was when shipped from the factory). After
connecting all the refrigerant pipes between the indoor and outdoor units, purge
air from the stop valve service port of the outdoor unit and service port of each
connecting pipe. Check that there is no air leakage from any pipe connection,
then fully open the stop valve of the outdoor unit. This will connect the refrigerant circuit between the indoor and outdoor units.
•
The refrigerant pipes must be as short as possible.
•
Flare and flange connections must be used for connection of the refrigerant
pipes.
•
The indoor and outdoor units must be connected with the refrigerant pipes.
Cautions on refrigerant piping
F
s Be sure to use non-oxidative brazing for brazing to ensure that no foreign matter or moisture enter into the pipe.
s Provide a metal brace to support the refrigerant pipe so that no load is
imparted to the indoor unit end pipe. This metal brace should be provided 50 cm away from the indoor unit’s brazing connection.
Warning:
NL
Do not mix anything other than the specified refrigerant (R407C) into the
refrigerating cycle. Mixing air may cause the refrigerating cycle to get abnormally high temperature, resulting in a burst.
Caution:
•
Install the refrigerant piping for the indoor unit in accordance with the
following.
1. Remove the cap.
[Fig. 7.1.1] (P.3)
SW
- The refrigerant used in the unit is highly hygroscopic and mixes with water
and will degrade the refrigerator oil.
Do not use a leak detection additive.
A Remove the cap
2. Pull out the thermal insulation on the site refrigerant piping, braze the unit
piping, and replace the insulation in its original position.
Wrap the piping with insulating tape.
I
[Fig. 7.1.2] (P.3)
A Thermal insulation
B
C
D Return to original position
Wrap with damp cloth
E Ensure that there is no gap here
F Wrap with insulating tape
E
Before brazing the refrigerant piping, always wrap the piping on the main
body, and the thermal insulation piping, with damp cloths to prevent heat
shrinkage and burning the thermal insulation tubing. Take care to ensure
that the flame does not come into contact with the main body itself.
Caution:
P
•
•
•
•
Use refrigerant piping made of C1220 (CU-DHP) phosphorus deoxidized
copper as specified in the JIS H3300 “Copper and copper alloy seamless
pipes and tubes”. In addition, be sure that the inner and outer surfaces of
the pipes are clean and free of hazardous sulphur, oxides, dust/dirt, shaving particles, oils, moisture, or any other contaminant.
Never use existing refrigerant piping.
- The large amount of chlorine in conventional refrigerant and refrigerator oil
in the existing piping will cause the new refrigerant to deteriorate.
Store the piping to be used during installation indoors and keep both
ends of the piping sealed until just before brazing.
- If dust, dirt, or water gets into the refrigerant cycle, the oil will deteriorate and
the compressor may fail.
Use ester oil, ether oil or alkylbenzene (small amount) as the refrigerator
oil to coat flares and flange connections.
10
A
Brazing
B Flare joint
C
Gas pipe
D
Liquid pipe
E
F
Indoor unit
G
Outdoor unit
Service port
Warning:
During installation and re-installation, take care not to allow any gas or materials other than the specified refrigerant (R407C) to enter the refrigerant
cycle. Entry of air will cause extremely high pressure inside the refrigerant
cycle, possibly resulting in breakage of pipes.
Pull out insulation
Note:
• Pay strict attention when wrapping the copper piping since wrapping the
piping may cause condensation instead of preventing it.
*
[Fig. 7.1.3] (P.3)
Piping Method
Height Difference
between Indoor and
Outdoor Units
Number of bends
(right angles)
Total Piping Length
Refrigerant Liquid Pipe
Pipe Size
Gas Pipe
(mm)
PEH-P400MYA
Brazing
PEH-P500MYA
Brazing
40 m or less
40 m or less
15 or less
15 or less
50 m or less
50 m or less
ø12.7 × 2
ø12.7 × 2
ø25.4 × 2
ø28.58 × 2
s Refer to the installation manual for details of the additional amount of
refrigerant for the outdoor unit.
7.2. Drain piping work
[Fig. 7.2.1] (P.3)
A
Insulator
C Drain pan
E
>
= 2×F>
= 70 mm
B Drain pipe R1
D
F
>
= 70 mm
>
= 35 mm
G Downward slope 20 mm/m or more H Drain trap
I The drain pipe should extend below this level.
J Open drain
1. Ensure that the drain piping is downward (pitch of more than 20 mm/m) to the
outdoor (discharge) side.
2. Ensure that any cross-wise drain piping is less than 20 m (excluding the difference of elevation). If the drain piping is long, provide metal braces to prevent it
from waving. Never provide any air vent pipe. Otherwise drain may be ejected.
4. Ensure that collected pipes are 10 cm lower than the unit body’s drain port .
5. Put the end of the drain piping in a position where no odor is generated.
6. Do not put the end of the drain piping in any drain where ionic gases are
generated.
3. Use a hard vinyl chloride pipe VP-25 (with an external diameter of 32 mm) for
drain piping.
8. Duct work
2 Connect the inlet duct.
•
In connecting duct, insert canvas duct between unit and duct.
•
Use incombustible material for duct parts.
3 Drill a sensor hole (ø12.5 dia.) on the side on the duct.
•
Provide full insulation to inlet duct flange, outlet duct flange and outlet duct to
prevent condensation.
4 Assemble the sensor and fixture.
•
Be sure to apply the air filter near the air inlet grille.
•
When pulling out the sensor, do not pull it by the lead wire. Doing so may result
in wire breakage.
Before connecting an inlet duct, remove the air filter (supplied with the unit),
then install that filter in the inlet grille.
•
Before connecting the inlet duct, make sure that the sensor, its fixture and
protection plate are removed.
[Fig. 8.0.1] (P.4)
•
The sensor removed in step 1 must be re-installed in the position specified in
the drawing. Installation of the sensor in an incorrect position may result in
malfunction.
•
Mount holes for outlet duct flange and inlet duct.
A Air inlet
B
Air outlet
C Access door
D Ceiling surface
E
F
Canvas duct
Keep duct-work length 850 mm or more
G Connect common reference potential wire between duct-work to air conditioner
GB
•
[Fig. 8.0.3] (P.4)
Caution:
A
Inlet duct flange
B
PEH-P400: 10 × 130 pitch = 1300
PEH-P500: 12 × 130 pitch = 1560
•
•
Outlet duct is 850 mm or more necessary to construct.
To connect the air conditioner main body and the duct for potential equalization.
•
Inlet temperature sensor when an inlet duct is installed.
An inlet temperature sensor is installed on the inlet duct flange. Before connecting an inlet duct, this sensor must be removed and installed in the specified position.
G
PEH-P400, 500: 26-ø3 holes (Outlet duct mount holes)
[Fig. 8.0.2] (P.4)
H
PEH-P400, 500: 5 × 110 pitch = 550
I
PEH-P400, 500: 3 × 130 pitch = 390
B
Inlet temperature sensor
C Sensor protection plate
D
Sensor fixture
D
D Top of the unit
E
Outlet duct flange
F
PEH-P400, 500: 8 × 130 pitch = 1040
F
A Inlet duct flange
C PEH-P400: 34-ø3 holes (Inlet duct mount holes)
PEH-P500: 38-ø3 holes (Inlet duct mount holes)
E Inlet duct
1 Pull out the sensor, and remove the sensor fixture and protection plate. (The
protection plate must be discarded.)
9.1. Installing procedures
NL
9. Remote controller
<B> For direct installation on the wall select one of the following:
B-1. To lead the remote controller cord from the back of the controller:
B-2. To run the remote controller cord through the upper portion:
1 The temperature sensors are located on both remote controller and indoor
unit. To use the temperature sensor on the remote controller, mainly use the
remote controller for temperature setting or room temperature detection. Install the remote controller in such an area that can detect average room temperatures, free of direct sunlight, airflow from the air conditioner, and other
such heating source.
2 In either case when the remote controller is installed in the switch box or on the
wall, provide the clearances indicated in the diagram.
Note:
Check that there is no electric wire left close to the remote controller sensor.
If any electric wire is near the sensor, the remote controller may fail to detect
a correct room temperature.
3 Procure the following parts locally:
Switch box for two pieces
Thin copper conduit tube
Lock nuts and bushings
(2) Seal the service entrance for the remote controller cord with putty to
prevent possible invasion of dew drops, water, cockroaches or worms.
<A> For installation in the switch box:
•
•
Run the remote controller cord through the cut-out upper case, then seal the
cut-out notch with putty similarly as above.
[Fig. 9.1.1] (P.4)
C Wall
D
Conduit
F
Bushing
G
Switch box
E Lock nut
H
Remote controller cord
I Seal with putty
I
D Installation pitch
(3) Install the lower case in the switch box or on the wall.
[Fig. 9.1.1] (P.4)
<A> For installation in the switch box
C
Switch box for two pieces
E
Cross-recessed, pan-head screw
D Remote controller cord
G
Seal the remote controller cord service entrance with putty
E
A Remote controller profile
B Required clearances surrounding the remote controller
C Temperature sensor
Prepare a hole through the wall to pass the remote controller cord (in order to
run the remote controller cord from the back), then seal the hole with putty.
SW
[Fig. 9.1.1] (P.4)
•
<B> For direct installation on the wall
H
Wood screw
Caution:
Do not over-tighten the screws to possible deformed or broken lower case.
Note:
• Select a flat place for installation.
• Be sure to use two or more locations for securing of the remote controller in the switch box or on the wall.
When the remote controller is installed in the switch box, seal the junction
between the switch box and the conduit tube with putty.
11
P
(1) Select an installing position for the remote controller (switch box).
Be sure to observe the following precautions.
9.3. Fitting the upper case
9.2. Connecting procedures
•
The remote controller cord can be extended up to a maximum of 200 m. Use
electric wires or (two-core) cables of 0.3 mm2 to 1.25 mm2 for making connection of remote controller. Do not use multi-conductor cables to prevent possible malfunction of the unit.
[Fig. 9.3.1] (P.5)
(1) To remove the upper case, put a slotted screwdriver tip in the latches as
shown in the diagram then move the screwdriver in the direction of arrow.
(1) Connect the remote controller cord to the terminal block at the lower
case.
(2) To install the upper case, put the upper latches (at two locations) first,
then fit the upper case into the lower case as illustrated.
[Fig. 9.2.1] (P.5)
[Fig. 9.3.2] (P.5)
A To TB5 on the indoor unit
Note:
Wiring hole for installing directly on the wall (or open wiring)
• Cut off the shaded area from the upper case using a knife, nippers, etc.
• Take out the remote control cord connected to the terminal block via this
portion.
B Terminal block TB6 in remote controller
No polarity
Caution:
•
•
Do not use crimp-style terminals for connection to the remote controller
terminal block to eliminate contact with the boards and resultant trouble.
Prevent remote cord chips from getting into the remote controller. Electric shock or malfunction may result.
Caution:
•
GB
•
Do not move the screwdriver while inserting the tip far into the latches to
prevent broken latches.
Be sure to put the upper case securely in the latches by pressing it until
a snap sounds. Loosely inserted, the upper case may fall down.
Note:
The operating section is covered with a protective sheet. Before using the
unit, remember to remove the protective sheet.
9.4. Function selection
Item 1
1. Change Language
(“CHANGE LANGUAGE”)
2. Function limit
(“FUNCTION
SELECTION”)
3. Mode selection
(“MODE SELECTION”)
Item 2
Item 3 (Setting content)
• Display in multiple languages is possible.
Language setting to display
(1)
(2)
(3)
(1)
Operation function limit setting (operation lock) (“LOCKING FUNCTION”)
Use of automatic mode setting (“SELECT AUTO MODE”)
Temperature range limit setting (“LIMIT TEMP FUNCTION”)
Remote controller main/sub setting (“CONTROLLER MAIN/SUB”)
(2) Use of clock setting (“CLOCK”)
(3) Timer function setting (“WEEKLY TIMER”)
(4) Contact number setting for error situation (“CALL.”)
F
D
<Wired remote controller type>
(1) Function selection of remote controller
The setting of the following remote controller functions can be changed using the remote controller function selection mode. Change the setting when needed.
NL
4. Display change
(“DISP MODE SETTING”)
(1) Temperature display °C/°F setting (“TEMP MODE °C/°F”)
(2) Suction air temperature display setting (“ROOM TEMP DISP SELECT”)
(3) Automatic cooling/heating display setting (“AUTO MODE DISP C/H”)
• Setting the range of operation limit (operation lock)
• Setting the use or non-use of “automatic” operation mode
• Setting the temperature adjustable range (maximum, minimum)
• Selecting main or sub remote controller
* When two remote controllers are connected to one group, one controller must be set to sub.
• Setting the use or non-use of clock function
• Setting the timer type
• Contact number display in case of error
• Setting the telephone number
• Setting the temperature unit (°C or °F) to display
• Setting the use or non-use of the display of indoor (suction) air temperature
• Setting the use or non-use of the display of “Cooling” or “Heating” display during
operation with automatic mode
[Function selection flowchart]
[1] Stop the air conditioner to start remote controller function selection mode. → [2] Select from item1. → [3] Select from item2. → [4] Make the setting. (Details
are specified in item3) → [5] Setting completed. → [6] Change the display to the normal one. (End)
SW
Normal display (Display when the
air condition is not running)
I
Press the G button.
Change Language
(“CHANGE LANGUAGE”)
Press the
E button.
Press the
E button.
→ Operation function limit setting (“LOCKING FUNCTION”)
→ →
Function limit
(“FUNCTION
SELECTION”) Press the
G button.
Press the G button.
Use of automatic mode setting (“SELECT AUTO MODE”)
→ Remote controller main/sub setting (“CONTROLLER MAIN/SUB”)
P
12
See [4]-2. (2)
See [4]-3. (1)
F
See [4]-3. (2)
Use of clock setting (“CLOCK”)
See [4]-3. (3)
Timer function setting (“WEEKLY TIMER”)
See [4]-3. (4)
Contact number setting for error situation (“CALL.”)
→ →
Press the
Display change G button.
(“DISP MODE
SETTING”)
See [4]-2. (1)
Press the G button.
→ Temperature display °C/°F setting (“TEMP MODE °C/°F”)
The language that is selected in
CHANGE LANGUAGE mode
appears on this display. English is set
in this manual.
See [4]-2. (3)
Press the D
button.
→ →
Press the
E button.
Press the D
button.
Temperature range limit setting (“LIMIT TEMP FUNCTION”)
→
Press the
Mode selection G button.
(“MODE
SELECTION”)
Dot display
See [4]-1
Item 3
(Setting content)
Item 2
Press the E
button.
NOTE
Timer operation stops when the display for
remote controller function selection is changed
to the normal one.
Remote Controller Function
Selection Mode
Item 1
E
(Hold down the E button and press
the D button for two seconds.)
* The remote controller records the
setting that is made in this way.
(Hold down the E button and press the D button for two
seconds.)
* The display cannot be changed during the unit function
selection, the test run and the self diagnosis.
Press the D
button.
TEMP.
E
MENU
BACK
PAR-21MAA
MONITOR/SET
ON/OFF
ON/OFF
FILTER
DAY
CLOCK
I
A
CHECK TEST
OPERATION
CLEAR
B
G
H
See [4]-4. (1)
Press the G button.
Suction air temperature display setting (“ROOM TEMP DISP SELECT”)
See [4]-4. (2)
Automatic cooling/heating display setting (“AUTO MODE DISP C/H”)
See [4]-4. (3)
C
D
* The settable range varies depending on the unit to connect (Mr. Slim units, Freeplan units, and intermediate temperature units)
[Detailed setting]
[4] -1. CHANGE LANGUAGE setting
The language that appears on the dot display can be selected.
• Press the [ MENU] button to change the language.
1 Japanese (JP), 2 English (GB), 3 German (D), 4 Spanish (E), 5 Russian
(RU), 6 Italian (I), 7 Chinese (CH), 8 French (F)
[4] -3. Mode selection setting
(1) Remote controller main/sub setting
• To switch the setting, press the [ ON/OFF] button.
1 Main: The controller will be the main controller.
2 Sub: The controller will be the sub controller.
[4] -2. Function limit
(1) Operation function limit setting (operation lock)
• To switch the setting, press the [ ON/OFF] button.
1 no1: Operation lock setting is made on all buttons other than the [ ON/OFF]
button.
2 no2: Operation lock setting is made on all buttons.
3 OFF (Initial setting value):
Operation lock setting is not made.
* To make the operation lock setting valid on the normal screen, it is necessary to
press buttons (Press and hold down the [FILTER] and [ ON/OFF] buttons at
the same time for two seconds.) on the normal screen after the above setting is
made.
(2) Use of clock setting
• To switch the setting, press the [ ON/OFF] button.
1 ON: The clock function can be used.
2 OFF: The clock function cannot be used.
(3) Temperature range limit setting
After this setting is made, the temperature can be changed within the set range.
• To switch the setting, press the [ ON/OFF] button.
1 LIMIT TEMP COOL MODE:
The temperature range can be changed on cooling/dry mode.
2 LIMIT TEMP HEAT MODE:
The temperature range can be changed on heating mode.
3 LIMIT TEMP AUTO MODE:
The temperature range can be changed on automatic mode.
4 OFF (initial setting): The temperature range limit is not active.
* When the setting, other than OFF, is made, the temperature range limit setting
on cooling, heating and automatic mode is made at the same time. However, the
range cannot be limited when the set temperature range has not changed.
TEMP ( ) or ( )]
• To increase or decrease the temperature, press the [
button.
• To switch the upper limit setting and the lower limit setting, press the [
]
button. The selected setting will flash and the temperature can be set.
• Settable range
Cooling/Dry mode: Lower limit: 19°C ~ 30°C
Upper limit: 30°C ~ 19°C
Heating mode:
Lower limit: 17°C ~ 28°C
Upper limit: 28°C ~ 17°C
Automatic mode: Lower limit: 19°C ~ 28°C
Upper limit: 28°C ~ 19°C
[4] -4. Display change setting
(1) Temperature display °C/°F setting
ON/OFF] button.
• To switch the setting, press the [
1 °C: The temperature unit °C is used.
2 °F: The temperature unit °F is used.
F
(2) Suction air temperature display setting
• To switch the setting, press the [ ON/OFF] button.
1 ON: The suction air temperature is displayed.
2 OFF: The suction air temperature is not displayed.
D
(4) Contact number setting for error situation
• To switch the setting, press the [ ON/OFF] button.
1 CALL OFF:
The set contact numbers are not displayed in case of error.
2 CALL **** *** ****: The set contact numbers are displayed in case of error.
CALL_:
The contact number can be set when the display is as shown
on the left.
• Setting the contact numbers
To set the contact numbers, follow the following procedures.
TEMP. ( ) and ( )]
Move the flashing cursor to set numbers. Press the [
button to move the cursor to the right (left). Press the [ CLOCK ( ) and ( )]
button to set the numbers.
(3) Automatic cooling/heating display setting
• To switch the setting, press the [ ON/OFF] button.
1 ON: One of “Automatic cooling” and “Automatic heating” is displayed under the
automatic mode is running.
2 OFF: Only “Automatic” is displayed under the automatic mode.
NL
(2) Use of automatic mode setting
When the remote controller is connected to the unit that has automatic operation
mode, the following settings can be made.
• To switch the setting, press the [ ON/OFF] button.
1 ON (Initial setting value):
The automatic mode is displayed when the operation mode is selected.
2 OFF:
The automatic mode is not displayed when the operation mode is selected.
GB
(3) Timer function setting
• To switch the setting, press the [ ON/OFF] button (Choose one of the
followings.).
1 WEEKLY TIMER (Initial setting value):
The weekly timer can be used.
2 AUTO OFF TIMER: The auto off timer can be used.
3 SIMPLE TIMER:
The simple timer can be used.
4 TIMER MODE OFF: The timer mode cannot be used.
* When the use of clock setting is OFF, the “WEEKLY TIMER” cannot be used.
(2) Unit Function Selection
Set the functions of each indoor unit from the remote controller, as required. The functions of each indoor unit can be selected only from the remote controller.
Set the functions by selecting the necessary items from Table 1 and Table 2. (Default settings are also shown below)
Indoor temperature
detection
LOSSNAY
connectivity
Unit operating average
Set by unit’s remote controller
Remote controller’s internal sensor
Not Supported
Supported (unit is not equipped with outdoor-air intake)
Supported (unit is equipped with outdoor-air intake)
240 V
220 V, 230 V
Mode no.
01
02
03
04
Setting no.
1
Check
Default settings
Remarks
Approx. 4-minute wait-period
after power is restored.
2
1
2
3
1
2
3
1
2
E
Power voltage
Settings
Not available
Available
I
Function
Power failure
automatic recovery
SW
Table 1. Itemized functions of the entire refrigerant system (select unit number 00 to 15)
Fan operation
during thermo off
in heating
operation
Fan operation
during thermo off
in cooling
operation
Operation
Stop
3
25
2
Operation
Stop
Setting no.
1
2
3
1
27
2
Check
Default settings
Remarks
When selecting fan operation
“Stop”, set setting no. of Mode
no. “02” in Table 1 to “3”. Be sure
to place the remote controller
inside the room to be air-conditioned so that it can monitor the
room temperature.
Note:
When the indoor unit functions were changed using the function selection after installation is complete, always indicate the set contents by entering or other
mark in the appropriate check field of Table 1 and Table 2.
13
P
Table 2. Itemized functions of the indoor unit (select unit numbers 01 to 04 or AL)
Settings
Mode no.
Function
100 Hr
Filter sign
2500 Hr
07
No filter sign indicator
[Function selection flow]
First grasp the function selection flow. The following describes setting of “Power voltage” of Table 1 as an example.
(For the actual setting procedure, see [Setting procedure] 1 to 0.)
1 Check the function selection set contents.
2 Switch to the FUNCTION SELECTION mode.
(Press A and B simultaneously in the remote controller OFF state.)
F
3 Refrigerant address specification → 00 (Outdoor unit specification)
(Unnecessary for single refrigerant system.)
4 Unit address No. specification
→ 00 (Indoor unit specification)
(Buttons C and D operation)
5 Registration (Press button E.)
(Specified indoor unit →
Fan operation)
NO
6 Mode No. Selection → 04 (Power voltage)
7 Setting No. selection → 2 (220 V, 230 V)
(Buttons F and G operation)
YES
E
BACK
MONITOR/SET
PAR-21MAA
ON/OFF
ON/OFF
FILTER
DAY
CLOCK
I
A
CHECK TEST
OPERATION
CLEAR
B
G
Change
refrigerant
address and unit
address No.?
H
C
8 Register (Press button E.)
End?
TEMP.
MENU
D
9
NO
GB
YES
0 Ending function display (Press buttons A and B simultaneously.)
D
[Procedure] (Set only when change is necessary.)
1 Check the set contents of each mode. When the set contents of a mode were changed by function selection, the functions of that mode also change.
Check the set contents as described in steps 2 to 7 and change the setting based on the entries in the Table 1 and Table 2. (Refer default settings, when change the
setting)
2 Set the remote controller to Off.
Press and hold down the A [FILTER] and B [TEST] buttons at the same time
for two seconds or longer.
“FUNCTION SELECTION” blinks for a while, then the remote controller display
changes to the display shown below.
3 Set the outdoor unit refrigerant address No.
When the C [ CLOCK ( ) and ( )] buttons are pressed, the refrigerant
address No. decreases and increases between 00 and 15. Set it to the refrigerant address No. whose function you want to select.
(This step is unnecessary for single refrigerant system.)
F
Refrigerant address display
* If the remote controller enters the OFF state after the “FUNCTION SELECTION” and room temperature displays “
probably abnormal. Make sure there are no noise sources near the transmission line.
” have flashes for two seconds, communication is
NL
Note:
If you make a mistake during operation, end function selection by step ? and repeat selection from step 2.
4 Set the indoor unit address No.
Press the D [ ON/OFF] button. The unit address No. display “– –” flashes.
When the C [ CLOCK ( ) and ( )] buttons are pressed, the unit address
No. changes in 00 → 01 → 02 → 03 → 04 → AL order. Set it to the unit address
No. of the indoor unit whose functions you want to set.
SW
Unit address No. display
I
* When setting mode 01 to 04, set the unit address No. to “00”.
* When setting modes 07, 25, 27:
• When setting for each indoor unit, set the unit address No. to “01-04”.
• When batch setting for all indoor units, set the unit address No. to “AL”.
5 Refrigerant address and unit address No. registration
] button. The refrigerant address and unit address No.
Press the E [
are registered.
After a while, the mode No. display “– –” flashes.
Mode No. display
When registered using the E [
] button, the registered indoor unit
begins fan operation. When you want to know the location of the indoor units of
the unit address No. whose functions were selected, check here. When the unit
address No. is 00 or AL, all the indoor units of the selected refrigerant address
perform the fan operation.
Ex) When refrigerant address 00, unit address No. = 01 registered
E
Refrigerant address 00
P
Outdoor unit
* When “
” flashes at the room temperature display, the selected refrigerant
address is not in the system.
When “F” is displayed at the unit address No. display, and when it flashes together with the refrigerant address display, the selected unit address No. does
not exist. Correctly set the refrigerant address and unit address No. by repeating steps 2 and 3.
Indoor unit
Unit address
No. 01
Fan operation
Registration
Remote Controller
* When grouping by different refrigerant systems and an indoor unit other than
the specified refrigerant address performs the fan operation, the refrigerant
address set here is probably duplicated.
Recheck the refrigerant address at the outdoor unit DIP switches.
14
6 Mode No. selection
Select the mode No. you want to set with the F [
TEMP. (
) and (
)] buttons. (Only the settable mode numbers can be selected.)
Mode No. display
Mode No. 04 = Power voltage
7 Select the setting contents of the selected mode.
When the G [ MENU] button is pressed, the current setting No. flashes. Use
this to check the currently set contents.
Select the setting No. using the F [
TEMP. (
) and (
)] buttons.
Setting No. display
Setting No. 2 = 220 V, 230 V
Setting No. 1 = 240 V
8 The contents set at steps 3 to 7 are registered.
When the E [
] button is pressed, the mode No. and setting No. flash and registration begins. The flashing mode No. and setting No. change to a steady light and
setting ends.
” flashes at the room temperature display, communication is probably abnormal.
GB
* When “– –” appears at the mode No. and setting No. displays and “
Make sure there are no noise sources near the transmission line.
9 To select more functions, repeat steps 3 to 8.
D
0 End function selection.
Press and hold down the A [FILTER] and B [TEST] buttons at the same time for two seconds or longer.
After a while, the function selection display disappears and the remote controller returns to the air conditioner off display.
* Do not operate the air conditioner from the remote controller for 30 seconds after the end of function selection.
F
Note:
When the functions of an indoor unit were changed by function selection after the end of installation, always indicate the set contents by entering a or other
mark in the appropriate check field of Table 1 and Table 2.
<Wireless remote controller type>
Changing the power voltage setting
Be sure to change the power voltage setting depending on the voltage used.
1 Go to the function select mode
CHECK
toward the receiver of the indoor unit and press the
C,D
F
AUTO STOP
VANE
AUTO START
CHECK LOUVER
TEST RUN
SET
h
RESET
min
A
min
B
button B.
3 Selecting a mode
C and
D buttons.
Enter 04 to change the power voltage setting using the
Direct the wireless remote controller toward the receiver of the indoor unit and
CLOCK
press the
h
button A.
Current setting number:
1
2
CHECK
CHECK
button A.
2 Setting the unit number
button C and D to set the unit number “00”. Direct the
Press the temp
wireless remote controller toward the receiver of the indoor unit and press the
1 = 1 beep (one second)
2 = 2 beeps (one second each)
3 = 3 beeps (one second each)
I
MODE
FAN
h
SW
TEMP
4 Selecting the setting number
Use the
C and
D buttons to change the power voltage setting to 02 (220
V, 230 V). Direct the wireless remote controller toward the sensor of the indoor unit
and press the
h
button A.
E
ON/OFF
E
NL
CHECK
button F twice continuously.
Press the
(Start this operation from the status of remote controller display turned off.)
CHECK is lighted and “00” blinks.
Press the temp
button C once to set “50”. Direct the wireless remote controller
5 To select multiple functions continuously
Repeat steps 3 and 4 to change multiple function settings continuously.
4
CHECK
CHECK
the
button E.
Note:
Whenever changes are made to the function settings after construction or
maintenance, be sure to record the added functions with an “ ”, in the
“Check” column provided on the chart.
15
P
3
6 Complete function selection
Direct the wireless remote controller toward the sensor of the indoor unit and press
10. Electrical wiring
Precautions on electrical wiring
1. Be sure to take power from the special branch circuit.
2. Be sure to install an earth leakage breaker to the power.
[Wiring example] (For metal piping)
Warning:
Electrical work should be done by qualified electrical engineers in accordance with “Engineering Standards For Electrical Installation” and supplied
installation manuals. Special circuits should also be used. If the power circuit lacks capacity or has an installation failure, it may cause a risk of electric shock or fire.
3. Install the unit to prevent that any of the control circuit cables (remote controller, transmission cables) is brought in direct contact with the power cable outside the unit.
4. Ensure that there is no slack on all wire connections.
5. Some cables (power, remote controller, transmission cables) above the ceiling
may be bitten by mouses. Use as many metal pipes as possible to insert the
cables into them for protection.
6. Never connect the power cable to leads for the transmission cables. Otherwise
the cables would be broken.
GB
Caution:
Make sure that refrigerant pipe and wiring unit must be connected from Outdoor unit No.1 to Indoor unit No.1 and Outdoor unit No.2 to Indoor unit No.2
respectively.
Wiring from Outdoor unit No.1 must be connected to terminal bed TB4-1 in
control box of Indoor unit No.1 while wiring from Outdoor unit No.2 must be
connected to terminal bed TB4-2 in control box of Indoor unit No.2.
Any mistakes on those connections may cause an abnormal refrigerant pipe
temperature and etc.
7. Be sure to connect control cables to the indoor unit, remote controller, and the
outdoor unit.
PEH-P400MYA
PUH-P200MYA
PEH-P500MYA
PUH-P250MYA
*
D
In the case of Class B fuse
•
Fuse (class B)
Earth leakage
breaker ELB
(with over-load protection)
9. Be sure to connect between the control cable terminal block of the outdoor unit
and that of the indoor unit. (Cables have polarity, so make sure that they are
connected according to the terminal numbers.)
F
The grounding wire must be of the same diameter as the power cable wires.
[Selecting earth leakage breaker (NV)]
To select NF or NV instead of a combination of Class B fuse with switch, use the
following:
8. Put the unit to the ground on the outdoor unit side.
10. Fix power source wiring to control box by using buffer bushing for tensible force
(PG connection or the like). Connect control wiring to control terminal bed
throngh the knockout hole of control box using ordinary bushing.
In case of A-control wiring there is high voltage potential on the S3 terminal
caused by electrical circuit design that has no electrical insulation between
power line and communication signal line. Therefore, please turn off the main
power supply when servicing. And do not touch the S1, S2, S3 terminals
when the power is energized. If isolator should be used between indoor unit
and outdoor unit, please use 3-potes type.
NL
40 A
NV100-SW
40 A
100 mA 0.1s or less
50 A
NV100-SW
50 A
100 mA 0.1s or less
•
Power supply cords of appliances shall not be lighter than design 245 IEC 53
or 227 IEC 53.
•
Indoor unit/outdoor unit connecting cords shall not be lighter than design 245
IEC 57.
•
A switch with at least 3 mm contact separation in each pole shall be provided
by the Air conditioner installation.
•
The connection wiring between the outdoor and indoor units can be extended
up to a maximum of 80 m.
If 4 mm2 used and S3 separated, Max. 50 m.
If 6 mm2 used and S3 separated, Max. 80 m.
Be sure to put the unit to the ground on the outdoor unit side. Do not connect the earth cable to any gas pipe, water pipe, lightening rod, or telephone
earth cable. Incomplete grounding may cause a risk of electric shock.
A Power supply
15 A
NV100-SW
15 A
30 mA 0.1s or less
NV is a product name of MITSUBISHI.
Caution:
[Fig. 10.0.1] (P.5)
Remote
Breaker
Defrost signal
Capacity Fuse controller
Cable
cable
1.5 mm2 or thicker 15 A
15 A Cable or
–
4 mm2 or thicker
30 A
32 A wire of 0.32 0.5 mm2 or thicker
~ 1.25 mm
1.5 mm2 or thicker 15 A
15 A (max. DC
–
2
6 mm or thicker
40 A
40 A 12 V)
0.5 mm2 or thicker
Power Cable
Caution:
B Earth leakage breaker
Do not use anything other than the correct capacity breaker and fuse. Using
fuse, wire or copper wire with too large capacity may cause a risk of malfunction or fire.
F
Location of cable holes
C Power supply wiring for outdoor unit
D Power supply wiring for indoor unit
E Outdoor unit
Indoor unit
SW
G Connection wiring for indoor/outdoor units (polarity)
[Fig. 10.0.3] (P.5)
H Remote controller
A
For remote controller cables
I Connection wiring for indoor/remote controller (no polarity)
B
For outdoor unit connection cables
C
For power supply cables
J Grounding
K Signal wiring for alternate defrost
L Wiring circuit breaker or isolating switch
P
E
I
[Fig. 10.0.2] (P.5)
A Indoor unit
B Power cable wiring
C Control cable wiring
D Outdoor unit
E Earth leakage breaker
F Wiring circuit breaker or isolating switch
G Power cable terminal bed
H Control cable terminal bed
I
J Defrost signal cable wiring
Defrost signal cable terminal bed
11. Test run
11.1. Before test run
•
Check that the ball valve is fully open on both the liquid and gas ends.
The test run can be carried out either from the outdoor unit or the indoor unit.
•
Check the electrical power phase. If the phase is reversed, the fan may rotate
in the wrong direction or stop, or unusual sounds may be produced.
1. Checklist
•
•
After the installation, piping setup, and wiring of the indoor and outdoor units is
complete, check that refrigerant is not leaking, the power and control wires are
not loose, and the poles are not reversed.
Starting at least 12 hours before the test run, send current through the
crankcase heater. (If the current is running for a shorter period of time,
damage to the compressor could result.)
•
•
Use a 500 V insulation resistance tester to make sure that the resistance between the power terminal and the ground is 1.0 MΩ or more. If it is less than
1.0 MΩ, do not operate the unit. * Absolutely do not touch the tester to indoor/
outdoor connection terminals S1, S2, and S3. An accident could occur.
For specific models requiring changing of settings for higher ceilings or selection of power supply ON/OFF capability, make proper changes referring to the
description for Selection of Functions through Remote Controller.
After the above checks are complete, carry out the test run as indicated in the
following outline.
•
Make sure there is no malfunction in the outdoor unit. (If there is a malfunction,
you can diagnose it using LED1 on the board.)
16
11.2. Test run procedures
•
In the case of the test run, the OFF timer will activate, and the test run will
automatically stop after two hours.
1) Indoor unit
•
The room temperature display section shows the control temperature for the
indoor units during the test run.
Operating procedures
•
Check that all the indoor units are running properly for simultaneous twin and
triple operation.
Malfunctions may not be displayed even if the wiring is incorrect.
1 Turn on the main power supply
While the display on the remote controller indicates “ ”, the remote controller
is disabled. Turn off the “ ” indicator before using the remote controller.
“CENTRALLY CONTROLLED”
indicator
˚C
˚C
TEMP.
6 Register a telephone number
The telephone number of the repair shop, sales office, etc., to contact if an
error occurs can be registered in the remote controller. The telephone number
will be displayed when an error occurs.
For registration procedures, refer to 9.4 Function selection of remote controller.
ON/OFF
Operation mode display
“TEST RUN” and “OPERATION MODE” are
displayed alternately.
2 Press the [TEST] button twice successively within three seconds. Test
run starts.
“TEST RUN” and “OPERATION MODE” are displayed alternately.
3 Press [
Timer stops test run after two hours.
] button
˚C
Cooling/drying mode: Cool air should start to blow.
Piping temperature display
TEMP.
ON/OFF
Stop test run by pressing the [
Heating mode: Warm air should start to blow (after a while).
PAR-21MAA
The outdoor unit features automatic capacity control to provide optimum fan
speeds. The fan keeps running at a low speed to meet the current outside air
condition unless it exceeds its available maximum power. Then, in actuality,
the fan may stop or run in the reverse direction depending on the outside air,
which does not mean malfunction.
5 Press the [
ON/OFF] button to reset the test run in progress
The test run will be automatically shut down after two hours in response to the
AUTO STOP setting of two hours on the timer.
•
During the test run, the room temperature display shows the indoor unit tubing
temperatures.
ON/OFF
CLOCK
ON/OFF] button.
FILTER
DAY
During test run, the RUN lamp remains on.
[TEST] button
CHECK TEST
OPERATION
CLEAR
[
] button
(*1)
After turning ON the power, the system will go into startup mode, and the remote
controller operation lamp (green) and the display section’s “PLEASE WAIT” will
flash. Also, in the case of the indoor substrate LEDs, LED 1 and LED 2 light up
(when address is 0) or become dim (when address is not 0), and LED 3 flashes. In
the case of the outdoor substrate LED display,
and
are displayed
alternatively at 1-second intervals.
•
If one of the above operations does not function correctly, the following causes
should be considered, and if applicable, dealt with. (The following symptoms
have been determined under test run mode. Note that “startup” in the chart
means the *1 display above.)
F
•
MONITOR/SET
GB
BACK
D
MENU
4 Check the outdoor unit fan for correct running
Display messages do not appear even when remote
controller operation switch is turned ON (operation
lamp does not light up).
Operation display appears but soon disappears even
when remote controller operations are executed.
• Wiring for the indoor and outdoor unit is not connected correctly. (Polarity
is wrong for S1, S2, S3)
• Remote controller transmission wire short
• There is no outdoor unit for address 0 (address is something other than
0).
• Remote controller transmission wire burnout
NL
• After cancellation of function selection, operation is not possible for about
30 secs. (correct operation).
Nonconformity Content
LCD
Nonconformity Content
LCD
Nonconformity Content
P1
P2
P4
P5
P6
Suction sensor error
Tubing (liquid) sensor error
Drain sensor error
Drain overflow safeguard operation
Freezing/overheating safeguard operation
P8
P9
U0 ~ UP
F1 ~ FA
E0 ~ E5
Tube temperature error
Tube (2-phase tube) sensor error
Outdoor unit nonconformity
Outdoor unit nonconformity
Signal error between remote controller and
indoor unit
E6 ~ EF
Signal error between indoor and outdoor
units
No error history
No relevant unit
---FFFF
See the chart below for details of the LED displays (LED 1, 2, 3) on the indoor substrate.
LED 1 (microcomputer power supply)
LED 2 (remote controller feed)
LED 3 (indoor and outdoor signals)
E
Press the remote controller’s “CHECK” button twice consecutively to be able to run a self-check. See the chart below for content of error code displays.
LCD
P
*
After “startup” display, “F1” (negative
phase) is displayed.
After “startup” display, “00” or “EE” is
displayed (“EE” is displayed when a
test run is made).
After “startup” display, “EA” (error for
number of units) or “Eb” (unit number
error) is displayed.
After “startup” display, “00” is displayed (correct operation).
After “startup” display, “00” is displayed (correct operation).
After “startup” display, “00” is displayed (correct operation).
Cause
• After power is turned ON, system startup lasts for about 2 mins., and
“PLEASE WAIT” is displayed (correct operation).
• Outdoor unit’s safeguard installation connector is open.
• Negative phase and open phase of outdoor unit’s power terminal board
/triple phase: L1, L2, L3, N,
)
(Single phase: L, N,
/
• Incorrect connection of outdoor terminal board (Single phase: L, N,
triple phase: L1, L2, L3, N,
grounding and S1, S2, S3)
• Outdoor unit and indoor unit construction differ
SW
Power is turned ON, and “EE” or “EF” are displayed
after “PLEASE WAIT” is displayed.
Outdoor Substrate LED Display
After “startup” display, “00” is displayed (correct operation).
After “startup” display, error code is
displayed.
I
Symptoms
Remote Controller Display
Remote controller is displaying “PLEASE WAIT”, and
operation is not possible.
After power is turned ON, “PLEASE WAIT” is displayed for 3 mins., then error code is displayed.
Displays the ON/OFF of power for control. Check that this is lit during normal use.
Displays the ON/OFF of feed to wired remote controller. Is only lit for indoor unit linked to outdoor unit with address “00”.
Displays signal between indoor and outdoor units. Check that this is flashing during normal use.
17
2) Outdoor unit
•
1) Check Items
•
•
•
After installation of indoor and outdoor units, and piping and electric wiring
work, check that the unit is free from leaks of refrigerant, loosened connections, and incorrect polarity.
Check that there is no negative phase and open phase. (The F1 message for
negative phase and the F2 message for open phase will flash at LED 1 on the
outdoor substrate. If this happens, rewire correctly.)
Measure the impedance between power terminals (Single phase: L, N,
/
triple phase: L1, L2, L3, N,
) and the ground with a 500 V Megger and check
that it is 1.0 MΩ or more. Do not operate the equipment if measurement is less
than 1.0 MΩ. * Never conduct this operation on the outdoor connection wiring
terminals (S1, S2, S3) as this causes damage.
•
When there is no error at the outdoor unit.
(If there is an error at the outdoor unit, it can be evaluated at LED 1 [digital
display] of the outdoor substrate.)
•
The stop valves are open both the liquid and gas sides.
After checking the above, execute the test run in accordance with the following.
GB
2) Test run start and finish
•
Operation from the outdoor unit
Execute settings for test run start, finish and operation mode (cooling, heating)
using the DIP switch SW 4 on the outdoor substrate.
[Fig. 11.2.1] (P.6)
A Stop
B
Cooling
C
D
Heating
Operation
1 Set the operation mode (cooling, heating) using SW 4-2
2 Turn ON SW 4-1, The operation mode for SW 4-2 will be adhered to, and
the test run will commence
3 Turn OFF SW 4-1 to finish the test run
There may be a faint knocking noise emitted from the proximity of the fan
during the test run. This is torque fluctuation occurring due to control of fan
revolutions. There is no problem with the product.
Note:
The SW 4-2 operation mode cannot be changed during the test run. (To change
test run mode, stop the equipment with SW 4-1, change the operation mode,
then restart test run with SW 4-1.)
•
•
If the 2-hour timer is set, the test run will stop automatically after 2 hours.
•
During the test run, the room temperature display on the indoor unit will indicate the temperature of the indoor unit piping.
Operation from the indoor unit
Execute the test run using the installation manual for the indoor unit.
11.3. Self-check
D
Retrieve the error history of each unit using the remote controller.
1 Switch to the self check mode.
When the H [CHECK] button is pressed twice successively within three seconds, the display shown below appears.
F
Self check address or self check refrigerant address
2 Set the address or refrigerant address No. you want to self check.
When the F [
TEMP. ( ) and ( )] buttons are pressed, the address decreases and increases between 01 and 50 or 00 and 15. Set it to the address
No. or refrigerant address No. you want to self check.
Approximately three seconds after the change operation, the self check refrigerant address changes from flashing to a steady light and self check begins.
3 Self check result display <Error history> (For the contents of the error code, refer to 13. Troubleshooting, error code list.)
ERROR CODE
NL
Error code 4 digits or error code 2 digits
<When there is no error history>
SW
ERROR CODE
Address 3 digits or unit address No. 2 digits
<When opposite side does not exist>
ERROR CODE
4 Error history reset
The error history is displayed in 3 Self check results display.
ERROR CODE
When the error history was reset, the display shown below appears.
When error history reset failed, the error contents are displayed again.
I
When the D [ MENU] button is pressed twice successively within three seconds, the self check address or refrigerant address flashes.
ERROR CODE
5 Self check reset
There are the following two ways of resetting self check.
Press the H [CHECK] button twice successively within three seconds → Resets self check and returns to the state before self check.
Press the I [ ON/OFF] button → Self check resets and indoor units stop.
(When operation is prohibited, this operation is ineffective.)
P
E
ERROR CODE
18
11.4. Remote controller check
If operation cannot be carried out from the remote controller, use this function to diagnose the remote controller.
1 First check the power mark.
When normal voltage (DC12V) is not applied to the remote controller, the power
mark goes off.
When the power mark is off, check the remote controller wiring and the indoor
unit.
2 Switch to the remote controller check mode.
When the H [CHECK] button is held down for five seconds or longer, the display shown below appears.
Power mark
When the A [FILTER] button is pressed, remote controller check begins.
3 Remote controller check result
When remote controller is normal
When remote controller is faulty
(Error display 1) “NG” flashes → Remote controller send/receive circuit abnormal
Remote controller switching is necessary.
When the problem is other than the checked remote controller
(Error code 2) “E3” “6833” “6832” flash → Cannot send
(Error display 3) “ERC” and data error count are displayed → Data error generation
GB
Since there is no problem at the remote controller, check for other causes.
There is noise on the transmission line, or the indoor unit or another remote controller is faulty. Check the transmission line and the other remote controllers.
“Data error count” is the difference between the number of bits of remote controller
send data and the number of bits actually sent to the transmission line. In this case,
the send data was disturbed by the noise, etc. Check the transmission line.
D
ERROR CODE
When data error count is 02
F
Remote controller send data
Send data on transmission line
NL
4 Remote controller check reset
When the H [CHECK] button is held down for five seconds or longer, remote controller check resets and the “PLEASE WAIT” and RUN lamp flash. Approximately 30
seconds later, the remote controller returns to the state before remote controller check.
12. Test run [for wireless remote controller]
12.2. Self-check
s After completing installation and the wiring and piping of the indoor and
outdoor units, check for refrigerant leakage, looseness in the power supply or control wiring, and wrong polarity.
1 Turn on the power.
A
CHECK begins to light.
B
“00” begins to blink.
CHECK
ON/OFF
Do not use the air conditioner if the insulation resistance is less than
1.0 M Ω.
Caution:
The compressor will not operate unless the power supply phase connection
is correct.
the unit’s receiver, press the
button.
The check code will be indicated by the
number of times that the buzzer sounds
from the receiver section and the number
of blinks of the operation lamp.
MODE
2
FAN
AUTO STOP
VANE
AUTO START
CHECK LOUVER
TEST RUN
SET
h
I
3 While pointing the remote controller toward
h
Warning:
TEMP
4
3
min
RESET
CLOCK
4 Press the ON/OFF button to stop the selfcheck.
E
s Do not carry out this test on the control wiring (low voltage circuit) terminals.
CHECK
button twice.
2 Press the
(Start this operation from the status of remote controller display turned off.)
B
P
s Use a 500-volt megohmmeter to check that the resistance between the
power supply terminals and ground is at least 1.0 MΩ .
A
SW
12.1. Before test run
19
•
For description of each check code, refer to the following table.
1 Check code
P1
P2
P4
P5
P6
P8
P9
U0–UP
F1–FA
E0–E5
E6–EF
––
FFFF
•
2 Buzzer sound
Single beep × 1
Single beep × 2
Single beep × 4
Single beep × 5
Single beep × 6
Single beep × 8
Single beep × 2
Double beep × 1
Double beep × 1
Sounds other than above
Sounds other than above
No sound
Triple beep
Symptom
Intake sensor error
Pipe sensor error
Drain sensor error
Drain pump error
Freezing / Overheating safeguard operation
Pipe temperature error
TH5 sensor error
Outdoor unit error
Outdoor unit error
Signal error between remote controller and indoor units
Communication error between indoor and outdoor units
No alarm history
No unit
3 OPE LED
Lit for 1 sec. × 1
Lit for 1 sec. × 2
Lit for 1 sec. × 4
Lit for 1 sec. × 5
Lit for 1 sec. × 6
Lit for 1 sec. × 8
Lit for 1 sec. × 2
Lit for 0.4 sec. + 0.4 sec. × 1
Lit for 0.4 sec. + 0.4 sec. × 1
Lights other than above
Lights other than above
Not lit
Not lit
On wireless remote controller
2 The continuous buzzer sounds from receiving section of indoor unit.
3 Blink of operation lamp
GB
•
On wired remote controller
1 Check code displayed in the LCD.
•
If the unit cannot be operated properly after the above test run has been performed, refer to the following table to remove the cause.
Symptom
Wired remote controller
For about 2
minutes following
power-on
D
PLEASE WAIT
PLEASE WAIT → Error code
F
Display messages do not apper even
when operation switch is turned ON
(operation lamp does not light up).
Cause
LED 1, 2 (PCB in outdoor unit)
After about 2
minutes has
expired following
power-on
After LED 1, 2 are lighted, LED 2 is turned off,
then only LED 1 is lighted. (Correct operation)
• For about 2 minutes following power-on, operation of the
remote controller is not possible due to system start-up.
(Correct operation)
Only LED 1 is lighted. → LED 1, 2 blink.
• Connector for the outdoor unit’s protection device is not
connected.
• Reverse or open phase wiring for the outdoor unit’s power
terminal block (L1, L2, L3)
Only LED 1 is lighted. → LED 1 blinks twice,
LED 2 blinks once.
• Incorrect wiring between indoor and outdoor units (incorrect polarity of S1, S2, S3)
• Remote controller wire short
NL
On the wireless remote controller with condition above, following phenomena takes place.
•
No signals from the remote controller are accepted.
•
OPE lamp is blinking.
•
The buzzer makes a short pipng sound.
Note:
Operation is not possible for about 30 seconds after cancellation of function selection. (Correct operation)
I
SW
For description of each LED (LED1, 2, 3) provided on the indoor controller, refer to the following table.
LED1 (power for microcomputer)
Indicates whether control power is supplied. Make sure that this LED is always lit.
LED2 (power for remote controller)
Indicates whether power is supplied to the remote controller. This LED lights only in the case of the
indoor unit which is connected to the outdoor unit refrigerant address “0”.
LED3 (communication between indoor and outdoor units)
Indicates state of communication between the indoor and outdoor units. Make sure that this LED is
always blinking.
Note:
• Point the remote controller towards the indoor unit receiver while following steps 2 to 6.
• It is not possible to run in FAN, DRY or AUTO mode.
12.3. Test run method
A
1 Turn on the power to the unit at least 12
hours before the test run.
E
TEST RUN
button twice continuously.
2 Press the
(Start this operation from the status of remote controller display turned off.)
A
TEST RUN and current operation mode are displayed.
TEST RUN
ON/OFF
TEMP
7
MODE
P
3 Press the
button to activate COOL mode, then check whether cool
air is blown out from the unit.
MODE
button to ac4 Press the
tivate HEAT mode, then check whether warm
air is blown out from the unit.
FAN
button and check whether
5 Press the
fan speed changes.
6 Press the ON/OFF button to stop the test
run.
20
FAN
AUTO STOP
VANE
AUTO START
5
MODE
6
3,4
CHECK LOUVER
TEST RUN
min
2
SET
h
RESET
CLOCK
13. Troubleshooting
13.1. How to handle problems with the test run
Error code list: details
Problem location
NL
F
D
GB
Remote Controller
Remote Controller
Remote Controller
Indoor unit
Indoor unit
Indoor unit
Indoor unit
Outdoor unit
Outdoor unit
Outdoor unit
Outdoor unit
Outdoor unit
Outdoor unit
M-NET board
Outdoor unit
Outdoor unit
M-NET board
M-NET board
M-NET board
M-NET board
M-NET board
M-NET board
–
Outdoor unit
Outdoor unit
Outdoor unit
Outdoor unit
Outdoor unit
Outdoor unit
Outdoor unit
Outdoor unit
Indoor unit
Indoor unit
Indoor unit
Indoor unit
Indoor unit
Indoor unit
Indoor unit
Indoor unit
SW
Error details
Remote controller communication – reception error
Remote controller board error
Remote controller communication – transmission error
Remote controller communication – reception error
Remote controller communication – transmission error
Communication between indoor and outdoor units – reception error
Communication between indoor and outdoor units – transmission error
Communication between indoor and outdoor units – reception error
Communication between indoor and outdoor units – transmission error
Indoor/outdoor connection wiring error, indoor unit overload (5 units or more)
Indoor/outdoor connection wiring error (interference, loose)
Excessive time in use
Serial communication error
Serial communication error
Reverse phase, out of phase verification
Faulty input circuit
Duplicated M-NET address setting
M-NET error in PH/W transmission
M-NET bus busy
M-NET communication error with P transmission
M-NET error – no ACK
M-NET error- no response
Undefined error code
Outlet temperature error
CN23 Short-circuit Connector Unplugged
Open/short in discharge temp thermistor
Open/short in liquid temp or condenser/evaporater temp thermistor
Compressor overcurrent interruption (51C operation)
High pressure error (63H1 operation)
Low pressure error (63L operation)
Power synchronous idle circuit error
Inlet sensor error
Piping sensor error
Drain sensor error
Drain overflow protector operation
Water leak error (PDH only)
Freeze prevention operation
Surge prevention operation
Piping temperature error
I
6831, 6834
6201, 6202
6832, 6833
6831, 6834
6832, 6833
6740, 6843
6841, 6842
6840, 6843
6841, 6842
6844
6845
6846
0403
0403
4103
4115
6600
6602
6603
6606
6607
6608
undefined
1102
1108
5104
5105
4101
1302
1300
4115
5101
5102
2503
2502
2500
1503
1504
1110
E
MELANS display
P
Remote controller
display
E0
E1, E2
E3
E4
E5
E6
E7
E8
E9
EA
EB
EC
ED
EE
F1
F8
A0
A2
A3
A6
A7
A8
EF
U2
U2
U3
U4
U6
UE
UL
F8
P1
P2
P4
P5
P5
P6
P6
P8
21
•
Depending on the position of the SW2 switch on the outdoor unit board, the segments light up to indicate the running condition of the unit and the particulars of the check
code.
SW2 setting
123456
000000
Item
Display contents
Operation mode/relay output
tens place
units place
O: stop
C: cooling
H: heating
d: defrosting
1: SV1
2: 21S4
4: 52C
Relay output = SV1 + 21S4 + 52C
Ex. During cooling mode, when 52C and SV1 are ON: C5
When an error occurs, the error code
and error signal (*1) are displayed in
alternation.
Outdoor unit control condition
011110
Control mode display system
Display
010110
(IC1)
(IC2)
GB
Indoor unit control condition
110110
(IC3)
(IC4)
Indoor unit No.1
Indoor unit No.3
Outdoor unit
NL
F
D
Indoor unit control condition
Indoor unit No.2
Indoor unit No.4
011100
Error code history 1
111100
Error code history 2
SW
Ordinary
←
1
Hot adjustment
←
2
Defrosting
←
3
—
←
4
Heater ON
←
5
Freeze prevention
←
6
Surge prevention
←
7
Compressor OFF
←
The error code (ex. U8, UA) and error indicator (*1) are displayed in alternation.
13.2. The following occurrences are not problems or errors
The fan setting changes during heating.
I
0
*1 Display system for error indicator
The indicator corresponds to the following numbers
0 ............. Outdoor unit
1 ............. Indoor unit No.1
2 ............. Indoor unit No.2
3 ............. Indoor unit No.3
4 ............. Indoor unit No.4
Problem
E
Control mode
Indoor unit
Outdoor unit
The fan stops during heating.
Remote controller display
Ordinary display
Defrosting display
When the switch is turned ON, the fan does
not begin to operate.
Heating preparations
underway
The outdoor unit fan turns in reverse or stops,
and an unusual sound is heard.
Ordinary display
Cause
During thermostat OFF mode, light air or low air operation will take place.
During thermostat ON mode, light air or low air will switch automatically to set notch on
the basis of time or piping temperature.
During defrosting, the fan will stop.
After the switch is turned to ON or until the piping temperature reaches 35°C, there will
be 5 minutes of light air operation. After that there will be 2 minutes of low air operation,
then set notch will begin (hot adjustment control).
There is a risk of the power to the outdoor unit being connected in reverse phase. Be
sure to check that the phase is correct.
Note:
If the fan in the indoor unit does not operate, check the over-current relay on the fan motor to determine whether it has been tripped.
If the over-current relay has been tripped, reset it after eliminating the cause of the problem (e.g. motor lock).
To reset the over-current relay, open the control box and press the green claw on bottom-right of the relay until a click is heard. Release the claw and check that
it returns to its original position.
Note that if it is pressed too hard it will not return to its original position.
14. System control
14.1 System settings
[Fig. 14.1.1] (P.6)
A Outdoor unit
P
B Indoor unit
C Main remote controller
D Subordinate remote controller
E Standard 1:1 (Refrigerant address = 00)
F Refrigerant address = 01
G Refrigerant address = 02
* Set the refrigerant address using the DIP switch of the outdoor unit.
1 Wiring from the Remote Control
This wire is connected to TB5 (terminal board for remote controller) of the indoor
unit (non-polar).
22
2 When a Different Refrigerant System Grouping is Used
Up to 16 refrigerant systems can be controlled as one group using the MA remote
controller.
Note:
In single refrigerant system, there is no need of wiring 2.
SW1
Function table
<SW1>
ON
OFF
1 2 3 4 5 6
SW1
function
settings
Function
Operation according to switch setting
ON
OFF
1 Compulsory defrosting
2 Error history clear
3 Refrigerant sys4 tem address set5 ting
6
Clear
Normal
Settings for outdoor unit addresses 0 to 15
Start
Normal
14.2 Examples of refrigerant system address
setting
Ex.
Indoor unit
Outdoor unit
1
PEH-P400,
500MYA
No.1
No.2
Outdoor unit refrigerant Remote controller
system address
power supply unit
00
01~15
* Set the refrigerant system address of one outdoor unit to 00 for the power supply
to the remote controller.
(The refrigerant system address is set to 00 when shipped from the factory.)
Do not duplicate the refrigerant system address settings within the same system.
14.3 Capacity control setting method (PEHP400, 500MYA only)
With the PEH-P400·500MYA which has two outdoor units, the capacity can be
controlled to 0%, 50% or 100%.
This is set by setting the outdoor unit side dip switches as shown in the table below
before turning the power on.
E
I
SW
NL
F
D
GB
No.1 side outdoor unit No.2 side outdoor unit
OFF
ON
P
DipSW5-1
23
Air-Conditioners
INDOOR UNIT
D
PER L’INSTALLATORE
VOOR DE INSTALLATEUR
FÖR INSTALLATÖREN
PARA O INSTALADOR
E
F
FOR INSTALLER
FÜR INSTALLATEURE
POUR L’INSTALLATEUR
PARA EL INSTALADOR
GB
PEH-P400, 500MYA
INSTALLATION MANUAL
INSTALLATIONSHANDBUCH
I
For safe and correct use, please read this operation manual thoroughly before operating the air-conditioner unit.
Zum sicheren und ordnungsgemäßen Gebrauch der Klimageräte das Installationshandbuch gründlich durchlesen.
MANUEL D’INSTALLATION
MANUAL DE INSTALACIÓN
NL
Veuillez lire le manuel d’installation en entier avant d’installer ce climatiseur pour éviter tout accident et vous assurer d’une utilisation correcte.
Para un uso seguro y correcto, lea detalladamente este manual de instalación antes de montar la unidad de aire acondicionado.
INSTALLATIEHANDLEIDING
SW
MANUALE DI INSTALLAZIONE
Per un uso sicuro e corretto, leggere attentamente questo manuale di installazione prima di installare il condizionatore d’aria.
Voor een veilig en juist gebruik moet u deze installatiehandleiding grondig doorlezen voordat u de airconditioner installeert.
MANUAL DE INSTALAÇÃO
Para segurança e utilização correctas, leia atentamente este manual de instalação antes de instalar a unidade de ar condicionado.
P
INSTALLATIONSMANUAL
Läs denna installationsmanual noga för säkert och korrekt bruk innan luftkonditioneringen installeras.
2
[Fig. 2.0.1]
A
B
A Air outlet
B
B Remote controller
3
3.2
[Fig. 3.2.1]
PEH-P500:1940
PEH-P400:1637
620
63
B
400
PEH-P500:1890
PEH-P400:1587
D
200
PEH-P500:2490
PEH-P400:2187
25 75
GB
*1
C
A
700
746
946
200
B
500
When installing the suspension fixtures prior to installation of the
indoor unit without inlet duct
A
Service space
B
Suspension bolt pitch
C
Air inlet
D
Air outlet
*1 When there is no 500mm of service space on top of the unit, there must be
700mm of service space at the air outlet side.
A
F
PEH-P20:2043
PEH-P16:1740
PEH-P20:1940
PEH-P16:1637
25
C
620
F
E
H
E
Top of the unit
F
4-ø12 suspension bolt holes
G Control box
B
H Main body
63
G
746
D
1206
706
3
B
NL
When connecting air inlet
2
3 When hanging the indoor unit directly without inlet duct
1
2
[Fig. 3.2.2]
SW
1
4
4.1
[Fig. 4.1.1]
[Fig. 4.1.2]
E
I
H
E
C
A
Ceiling board
B
Edge beam
C
Tie beam
F
Insert: 100 to 150 kg (1 piece) (field supply)
D
Square timber for hanging the air conditioner
G
M10 hanging bolt (field supply)
E
Pitch
H
Reinforcement
F
G
E
B
D
A
5
5.1
[Fig. 5.1.1]
100
over
P
[Fig. 5.1.2]
A
A
B
B
2
A
Unit body
B
Lifting machine
A
30
A
B
A
Ceiling
A
Nut
B
Washer
5
5.2
[Fig. 5.2.1]
A
A
6
Level check
6.2
[Fig. 6.2.1]
* In case of PEH-P500
100
50
100
91
54
A
B
A
B
7
39
Refrigerant pipe (liquid pipe)
B
Refrigerant pipe (gas pipe)
C
Drain pipe
D
C
81
24
39
24
C
81
A
190
211
90
74
A
B
251
256
90
74
A
B
GB
* In case of PEH-P400
F
7.1
[Fig. 7.1.1]
[Fig. 7.1.2]
A
C
B
A
NL
A
Remove the cap
D
E
[Fig.7.1.3]
E
Thermal insulation
B
Pull out insulation
C
Wrap with damp cloth
D
Return to original position
E
Ensure that there is no gap here
F
Wrap with insulating tape
G
A
A
A Brazing
A
B
C
A
E
(No.1)
G
A
D
B
E
Flare joint
C
Gas pipe
D
Liquid pipe
I
F
F
(No.2)
A
SW
A
E Service port
F Indoor unit
G Outdoor unit
E
E
B
7.2
C
E
F
G
D
B
A
H
I
J
A
Insulator
B
Drain pipe R1
C
Drain pan
D
>
= 70 mm
>
= 2×F>
= 70 mm
E
P
[Fig.7.2.1]
F
>
= 35 mm
G
Downward slope 20mm/m or more
H
Drain trap
I
The drain pipe should extend below this level.
J Open drain
3
8
[Fig.8.0.1]
[Fig.8.0.2]
G
D
A
G
10 mm
E
E
F D
B
C
B
A
C
2-
12.5
20
A Air inlet
25~100 mm
B Air outlet
A Inlet duct flange
C Access door
D Ceiling surface
B
Inlet temperature sensor
E Canvas duct
C
Sensor protection plate
F
Keep duct-work length 850 or more
G Connect common reference potential wire between duct-work to air conditioner
D
Sensor fixture
E
Inlet duct
GB
[Fig.8.0.3]
A
PEH-P500:1648
PEH-P400:1388
49
A
19
B
44
600
H
23
D
C
G
D
A
Inlet duct flange
B
PEH-P400: 10 × 130 pitch = 1300
PEH-P500: 12 × 130 pitch = 1560
C
PEH-P400: 34-ø3 holes (Inlet duct mount holes)
PEH-P500: 38-ø3 holes (Inlet duct mount holes)
D
Top of the unit
E
Outlet duct flange
F
F PEH-P400, 500: 8 × 130 pitch = 1040
F
NL
E
29.5
PEH-P500:323
PEH-P400:208
1099
I
36
9
37
462
G
PEH-P400, 500: 26-ø3 holes (Outlet duct mount holes)
H
PEH-P400, 500: 5 × 110 pitch = 550
I
PEH-P400, 500: 3 × 130 pitch = 390
9.1
[Fig.9.1.1]
(1)
(2)
B
<A> For installation in the switch box:
C
30
SW
A
D
B-1.
E
30
I
D
46
120
83.5
30
C
A
Remote controller profile
B
Required clearances
surrounding the remote controller
C
Temperature sensor
D
Installation pitch
F
E
C
For installation in the switch box
B-2.
<B> For direct installation on the wall
D
D
E
P
H
G
C Switch box for two pieces
D
Remote controller cord
E Cross-recessed, pan-head screw
G Seal the remote controller cord service entrance with putty
H Wood screw
4
I
G
H
(3)
<A>
I
<B> For direct installation on the wall
select one of the following:
C
Wall
D Conduit
E
Lock nut
F Bushing
G
Switch box
H Remote controller cord
I Seal with putty.
I
9
9.2
[Fig.9.2.1]
A
AB
A
To TB5 on the indoor unit
B
Terminal block TB6 in remote controller
No polarity
B
TB6
9.3
[Fig.9.3.1]
[Fig.9.3.2]
(2)
GB
(1)
10
A
A
B
B
L
L
L
C
K
E
(NO.1)
I
F
Power supply wiring for outdoor unit
Outdoor unit
F
Indoor unit
G
Connection wiring for indoor/outdoor units (polarity)
H
Remote controller
I Connection wiring for indoor/remote controller (no polarity)
(NO.2)
K
G
J
Earth leakage breaker
C
E
G
E
Power supply
B
D Power supply wiring for indoor unit
D
C
A
F
A
B
D
[Fig.10.0.1]
J
J
H
J
Grounding
K Signal wiring for alternate defrost
NL
L Wiring circuit breaker or isolating switch
[Fig.10.0.2]
B
A
(TB4-1) (TB4-2)
, , ,
L1 L2 L3 N S1 S2 S3 S1 S2 S3
F
3ø4W
E
F
D
L1 L2 L3 N S1 S2 S3
G
OUT OUT IN IN
J
H
(NO.1 Outdoor)
3ø4W
D
E
F
A
Indoor unit
B
Power cable wiring
C
Control cable wiring
D
Outdoor unit
E
Earth leakage breaker
F
Wiring circuit breaker or isolating switch
G
Power cable terminal bed
I
E
SW
C
3ø4W
H Control cable terminal bed
, , ,
L1 L2 L3 N S1 S2 S3
G
H
OUT OUT IN IN
I
I
Defrost signal cable terminal bed
J
Defrost signal cable wiring
A
For remote controller cables
E
(NO.2 Outdoor)
P
[Fig.10.0.3]
CB A
B
For outdoor unit connection cables
C
For power supply cables
5
11
11.2
[Fig.11.2.1]
<SW4>
A
OFF ON
A
B
1
2
14
C
D
Stop
B
Cooling
C
Operation
D
Heating
14.1
[Fig.14.1.1]
E SW 1 - 3 ~ 6
GB
A E
TB1
TB1
TB4
TB4
TB4
E
I
SW
NL
F
D
TB5
P
A G
TB1
B
6
A F
B
2
1
C
TB5
2
B
TB5
ON
OFF
3 4 5 6
A
Outdoor unit
B
Indoor unit
C
Main remote controller
D Subordinate remote controller
D1
E Standard 1:1 (Refrigerant address = 00))
F
Refrigerant address = 01
G
Refrigerant address = 02
GB
Indice
1. Misure di sicurezza ...................................................................................
1.1. Prima dell’installazione e dell’esecuzione dei collegamenti
elettrici .....................................................................................
1.2. Precauzioni per le unità che usano il refrigerante R407C .......
1.3. Prima di installare l’unità .........................................................
1.4. Prima dell’installazione (trasporto) - collegamenti elettrici ......
1.5. Prima di iniziare la prova di funzionamento .............................
2. Accessori della sezione interna ................................................................
3. Selezione del luogo d’installazione ...........................................................
3.1. Installare la sezione interna su un soffitto sufficientemente
solido da poterne sopportare il peso .......................................
3.2. Sicurezza dell’installazione e spazio di servizio ......................
3.3. Combinazione delle sezioni interne con le sezioni esterne .....
4. Fissaggio dei bulloni di sospensione ........................................................
4.1. Fissaggio dei bulloni di sospensione .......................................
5. Installazione dell’unità ...............................................................................
5.1. Sospensione dell’unità ............................................................
5.2. Conferma della posizione dell’unità e fissaggio dei bulloni di
sospensione ............................................................................
6. Specifiche delle tubazioni del refrigerante e di drenaggio ........................
6.1. Specifiche delle tubazioni del refrigerante e di drenaggio .......
6.2. Tubo del refrigerante, tubo di drenaggio e apertura di
introduzione .............................................................................
7. Collegamento delle tubazioni del refrigerante e di drenaggio ...................
7.1. Collegamento della tubazione del refrigerante ........................
78
78
79
79
79
79
80
80
80
80
80
80
80
81
81
81
81
81
81
81
81
7.2. Collegamento della tubazione di drenaggio ............................
8. Sistemazione dei condotti .........................................................................
9. Comando a distanza .................................................................................
9.1. Procedure di installazione .......................................................
9.2. Procedure di collegamento ......................................................
9.3. Montaggio della scatola superiore ..........................................
9.4. Selezione delle funzioni ...........................................................
10. Cablaggi elettrici .......................................................................................
11. Prova di funzionamento ............................................................................
11.1. Operazioni preliminari alla prova di funzionamento ................
11.2. Procedure per la prova di funzionamento ...............................
11.3. Autocontrollo ...........................................................................
11.4. Controllare del comando a distanza ........................................
12. Prova di funzionamento [Per telecomando senza fili] ...............................
12.1. Prima della prova di funzionamento ........................................
12.2. Autocontrollo ...........................................................................
12.3. Metodo per eseguire la prova di funzionamento .....................
13. Ricerca dei guasti .....................................................................................
13.1. Come risolvere i problemi della prova di funzionamento .........
13.2. Le situazioni seguenti non costituiscono né problemi né errori ..
14. Controllo del sistema ................................................................................
14.1. Impostazioni del sistema .........................................................
14.2. Esempi di impostazioni dell’indirizzo sistema refrigerante ......
14.3. Metodo di impostazione controllo capacità
(solo PEH-P400, 500MYA) ......................................................
82
82
83
83
83
83
84
88
89
89
89
91
91
92
92
92
93
93
93
94
94
94
95
95
1.1. Prima dell’installazione e dell’esecuzione dei collegamenti elettrici
•
s Leggere attentamente la sezione “Misure di sicurezza” prima di far funzionare l’unità.
•
F
D
1. Misure di sicurezza
s La sezione “Misure di sicurezza” contiene informazioni importanti sulla sicurezza di funzionamento dell’unità. Accertarsi che vengano seguite perfettamente.
•
•
NL
Simboli utilizzati nel testo
Avvertenza:
Descrive le precauzioni da prendere per evitare il rischio di lesioni, anche
mortali, per l’utente.
Cautela:
I
Descrive le precauzioni da prendere per evitare il danneggiamento dell’unità.
•
•
Simboli utilizzati sull’unità
•
: Indica un’azione da evitare.
: Indica la necessità di rispettare un’istruzione importante.
: Indica la necessità di collegare un componente a massa.
: Indica che occorre operare con grande cautela con le parti rotanti. (Questo
simbolo è visualizzato sull’etichetta dell’unità principale.) <Colore: giallo>
•
: Attenzione alle scosse elettriche. (Questo simbolo è visualizzato sull’etichetta dell’unità principale.) <Colore: giallo>
Avvertenza:
•
E
Leggere attentamente le etichette attaccate all’unità principale.
Avvertenza:
•
P
•
•
•
Chiedere al distributore o ad una società autorizzata di installare l’unità.
- Se l’unità non è installata correttamente, vi è il rischio di perdite d’acqua, di
scosse elettriche o di incendio.
Installare l’unità in un punto in grado di reggerne il peso.
- Se l’unità è montata su una struttura non adatta, vi è il rischio che cada con
conseguenze anche gravi.
Utilizzare solo cavi specifici per i cablaggi. I collegamenti devono essere
eseguiti in modo sicuro ed occorre evitare che i cavi siano troppo tesi
rispetto ai raccordi terminali.
- Collegamenti non corretti ed un’installazione impropria possono creare un
surriscaldamento con rischio di incendio.
Predisporre l’unità sul punto indicato in modo tale da minimizzare il rischio di venti forti e terremoti.
- Un’installazione eseguita in modo non corretto rischia di cadere e di causare
danni o lesioni.
78
•
•
Utilizzare soltanto filtri e accessori indicati da Mitsubishi Electric.
- Chiedere al proprio distributore o ad una società autorizzata di installarli. Se
questi non sono installati correttamente, vi è il rischio di perdite d’acqua, di
scosse elettriche o di incendio.
Non riparare mai l’unità. Qualora debba essere riparata, consultare il proprio distributore.
- In caso di riparazione non effettuata correttamente, vi è il rischio di perdite
d’acqua, di scosse elettriche o di incendio.
Non toccare le alette dello scambiatore di calore.
- Una manipolazione non corretta può essere alla base di lesioni.
Per maneggiare questo prodotto indossare sempre abiti protettivi, ad
esempio, guanti, protezioni complete per le braccia (abiti da lavoro specifici per caldaie) e occhiali protettivi.
- Una manipolazione non corretta può essere alla base di lesioni.
Ventilare la stanza se si verificano delle perdite di refrigerante durante
l’installazione dell’unità.
- In caso di contatto del refrigerante con una fiamma, vi sarà il rilascio di gas
velenosi.
Installare l’unità conformemente a quanto indicato nel manuale di installazione.
- In caso di installazione non effettuata correttamente, vi è il rischio di perdite
d’acqua, di scosse elettriche o di incendio.
Tutti i lavori elettrici devono essere eseguiti da un elettricista esperto,
nel pieno rispetto degli standard normativi locali sulle installazioni elettriche e suoi circuiti interni, oltre che delle istruzioni contenute nel presente manuale. Le unità devono essere alimentate da una linea specifica.
- Linee di alimentazione con una capacità insufficiente o raccordate in modo
inadatto possono causare scosse elettriche o un incendio.
Fissare saldamente il coperchio del blocco terminale della sezione esterna (pannello).
- Se il coperchio del blocco terminale (pannello) non è installato correttamente, può consentire l’entrata di polvere o acqua, con un conseguente rischio
di scosse elettriche o incendio.
In caso di installazione o di spostamento del condizionatore in un altro
luogo, non utilizzare un refrigerante diverso da quello (R407C) specificato per l’unità.
- Qualora venisse mischiato un refrigerante diverso a quello originale, vi è il
rischio di un cattivo funzionamento del circuito, con conseguenti danni all’unità.
Se il condizionatore d’aria viene installato in una stanza di piccole dimensioni, occorre adottare le misure necessarie per evitare la concentrazione di refrigerante al di là dei limiti di sicurezza anche in caso di
perdite.
- Per quanto riguarda queste misure, rivolgersi al proprio distributore. Nel caso
in cui si verifichino perdite di refrigerante e vengano oltrepassati i limiti di
sicurezza, potrebbero verificarsi degli incidenti seri a causa della mancanza
di ossigeno nella stanza.
In caso di spostamento o di reinstallazione del condizionatore d’aria, consultare il proprio distributore od una società specializzata.
- In caso di installazione non effettuata correttamente, vi è il rischio di perdite
d’acqua, di scosse elettriche o di incendio.
•
•
•
•
•
•
•
•
•
1.3. Prima di installare l’unità
•
•
•
•
•
•
•
•
•
1.5. Prima di iniziare la prova di funzionamento
Cautela:
Cautela:
•
•
Non installare l’unità in un luogo in cui potrebbero esservi perdite di gas.
- In caso di perdite di gas, questo potrebbe accumularsi all’attorno all’unità ed
esplodere.
Non tenere generi alimentari, animali domestici, piante, strumenti di precisione od opere d’arte nella zona della portata d’aria del condizionatore.
- La qualità dei generi alimentari, ecc... potrebbe deteriorarsi.
Messa a terra dell’unità.
- Non collegare mai il filo di massa ad un tubo del gas, ad un tubo dell’acqua,
ad un conduttore di illuminazione o ad un filo di messa a terra del telefono.
Ciò può infatti creare scosse elettriche.
Installare le linee di alimentazione in modo che i cavi non siano in tensione.
- La tensione potrebbe causare una rottura dei cavi, con la generazione di
calore e il rischio di incendio.
Installare un interruttore del circuito per dispersione verso terra, se necessario.
- In mancanza di un interruttore del circuito per dispersione verso terra, vi è il
rischio di scosse elettriche.
Utilizzare, per le linee di alimentazione, cavi standard con una capacità
sufficiente.
- In caso contrario, vi è il rischio di perdite, di generazione di calore o di incendio.
Usare soltanto un interruttore del circuito e fusibili della capacità specificata.
- In presenza di un interruttore del circuito o di fusibili di capacità superiore, un
cavo di acciaio o di rame può causare un guasto generale o un incendio.
Non lavare un condizionatore d’aria.
- Ciò potrebbe causare una scossa elettrica.
Accertarsi che la base di installazione non sia danneggiata dal lungo
uso.
- Qualora non si provveda a rimediare a tale inconveniente, l’unità rischia di
cadere e di causare danni o lesioni.
Installare la tubazione di drenaggio rispettando quanto raccomandato
nel presente manuale di installazione, in modo da assicurare un corretto
drenaggio. Avvolgere nastro isolante termico attorno ai tubi per evitare
la formazione di condensa.
- Una tubazione di drenaggio non conforme può causare perdite d’acqua e
danni ai mobili ed agli altri beni.
Stare molto attenti durante il trasporto dell’unità.
- Se il suo peso supera i 20 kg, essa non deve essere trasportata da una
persona sola.
- Alcune unità sono imballate con nastri PP. Evitare di usare tali nastri come
mezzo di trasporto. Ciò può essere pericoloso.
- Non toccare le alette degli scambiatori di calore a mani nude, per evitare di
tagliarsi le mani.
- Durante il trasporto della sezione esterna, sospenderla nei punti specificati
sulla base dell’unità. Sostenere inoltre la sezione esterna nei quattro punti in
modo da non farla scivolare sui lati.
Accertarsi di eliminare in modo sicuro i materiali di imballaggio.
- I materiali di imballaggio, come ganci e parti metalliche o di legno, possono
provocare ferite.
- Rimuovere ed eliminare tutti i sacchetti di plastica in modo che i bambini non
li usino per giocare. I giochi con i sacchetti di plastica sono molto pericolosi
in quanto i bambini corrono il rischio di soffocamento.
•
•
Accendere l’interruttore di alimentazione principale almeno dodici ore
prima dell’avvio dell’unità.
- Un immediato avvio dell’unità dopo l’accensione di questo interruttore può
danneggiare le parti interne della stessa. Tenere acceso l’interruttore di alimentazione principale durante la stagione di funzionamento.
Non toccare alcun interruttore con le dita bagnate.
- Questo potrebbe causare una scossa elettrica.
79
GB
Non usare l’esistente tubazione del refrigerante.
- Il vecchio liquido refrigerante e l’olio refrigerante presenti nella tubazione
esistente contengono un’elevata quantità di cloro che può causare un deterioramento dell’olio della nuova unità.
Utilizzare tubazioni di refrigerante a base di rame disossidato con fosforo. Oltre a ciò, accertarsi che le superfici interne dei tubi siano perfettamente pulite e prive di tracce di zolfo, ossidi, polvere/sporcizia, trucioli,
oli, umidità e qualsiasi altro agente contaminante.
- Gli agenti contaminanti all’interno della tubazione del refrigerante possono
causare un deterioramento dell’olio refrigerante residuo.
Conservare la tubazione da usare per l’installazione all’interno e sigillare
entrambe le estremità della tubazione sino al momento della saldatura.
(Conservare i gomiti e gli altri giunti in un sacco di plastica.)
- In caso di ingresso di polvere, sporcizia o acqua nel circuito refrigerante, vi è
il rischio di un deterioramento dell’olio e di un cattivo funzionamento del compressore.
Usare olio a base di esteri, olio a base di etere o alchilbenzene (in piccole
quantità) per lubrificare i collegamenti a cartella ed a flangia.
- L’olio refrigerante subirà un deterioramento se mescolato con una grande
quantità di olio minerale.
Riempire il sistema di liquido refrigerante.
- In caso di uso di gas refrigerante per sigillare il sistema, la composizione del
refrigerante nel cilindro subirà una modifica ed il rendimento può diminuire
notevolmente.
Utilizzare esclusivamente refrigerante di tipo R407C.
- In caso d’uso di un refrigerante di altro tipo (R22, ecc...), il cloro presente nel
refrigerante può causare un deterioramento dell’olio.
Usare una pompa a vuoto con una valvola di controllo dell’inversione di
flusso.
- L’olio della pompa a vuoto può fluire nel circuito refrigerante e causare un
deterioramento dell’olio.
Non usare i seguenti attrezzi, utilizzati di solito con i refrigeranti convenzionali.
(Raccordo del manometro, tubo flessibile di carica, rivelatore di perdite
di gas, valvola di controllo del flusso invertito, base di carica del refrigerante, equipaggiamento di recupero di refrigerante.)
- Qualora il liquido refrigerante e l’olio refrigerante di tipo convenzionale venissero mischiati con l’R407C, l’olio refrigerante potrebbe deteriorasi.
- Qualora venisse mischiata dell’acqua all’R407C, l’olio refrigerante potrebbe
deteriorarsi.
- Poiché l’R407C non contiene cloro, i rivelatori di perdite di gas per refrigeranti convenzionali non saranno di alcuna utilità.
Non utilizzare una bombola di carica.
- L’uso di una bombola di carica può causare un deterioramento dell’olio refrigerante.
Usare gli attrezzi con grande precauzione.
- In caso di ingresso di polvere, sporcizia o acqua nel circuito refrigerante, il
refrigerante rischia di deteriorarsi.
Cautela:
•
D
Cautela:
•
1.4. Prima dell’installazione (trasporto) collegamenti elettrici
F
1.2. Precauzioni per le unità che usano il
refrigerante R407C
•
NL
•
•
Non usare il condizionatore in ambienti speciali.
- Gli oli, i vapori, i fumi solforici, ecc.., possono ridurre in modo significativo il
rendimento dell’unità e danneggiare le sue parti interne.
Durante l’installazione dell’unità in un ospedale, in un centro di trasmissione o luogo simile, occorre prevedere una sufficiente protezione acustica.
- Il condizionatore d’aria può funzionare in modo errato o non funzionare del
tutto se disturbato da un’apparecchiatura inverter, da un generatore elettrico
ad uso privato, da un’apparecchiatura medica ad alta frequenza o da un
equipaggiamento di comunicazione radio. Per converso, il condizionatore
d’aria può influenzare negativamente il funzionamento di tali equipaggiamenti
creando rumori in grado di disturbare il trattamento medico o la trasmissione
di immagini.
Non installare l’unità su una struttura che potrebbe causare una perdita.
- Se l’umidità della stanza supera l’80 % o se il tubo di drenaggio è intasato,
l’acqua può gocciolare dalla sezione interna. Effettuare quindi un drenaggio
sia di questa che della sezione esterna se necessario.
I
•
•
•
E
•
Una volta completata l’installazione, accertarsi che non vi siano perdite
di refrigerante.
- In caso di perdite di gas e di contatto di queste con un riscaldatore, uno
scaldino, un forno od un’altra sorgente elettrica, vi è il rischio di generazione
di gas nocivi.
Non rimodellare o modificare le caratteristiche dei dispositivi di protezione.
- Se il pressostato, l’interruttore termico od un altro dispositivo di protezione
viene messo in corto e fatto funzionare in modo non opportuno, o se vengono utilizzate parti diverse da quelle specificate dalla Mitsubishi Electric, vi è
il rischio di incendio o esplosione.
Per eliminare questo prodotto, consultare il proprio concessionario.
L’installatore e lo specialista del sistema adotteranno le misure di sicurezza destinate ad evitare le perdite conformemente ai regolamenti ed
agli standard locali.
- In mancanza di regolamenti locali, saranno applicabili i seguenti standard.
Dedicare un’attenzione particolare al luogo di installazione, come la base
di appoggio, ecc.., in cui potrebbe esservi un accumulo di gas refrigerante, dato che questo è più pesante dell’aria.
P
•
•
•
Non toccare i tubi del refrigerante con le mani nude durante ed immediatamente dopo il funzionamento.
- Talvolta, questi tubi sono roventi o ghiacciati, in funzione delle condizioni del
refrigerante, del compressore e degli altri componenti del circuito refrigerante. I tubi potrebbero in questo caso causare scottature o congelamento.
Prima di iniziare il funzionamento dell’unità, controllare che tutti i pannelli, e le protezioni siano installate correttamente.
- Le parti rotanti, roventi o ad alta tensione possono produrre conseguenze
gravi.
•
Dopo aver arrestato l’unità, non spegnere immediatamente l’interruttore
di alimentazione principale.
- Attendere almeno cinque minuti prima di spegnere l’interruttore, per evitare
perdite d’acqua o il rischio di un guasto.
2. Accessori della sezione interna
L’unità viene fornita con i seguenti accessori:
<Ubicazione>
A
[Fig. 2.0.1] (P.2)
B
Ingresso dell’aria
Comando a distanza
•
Selezionare un luogo provvisto di una superficie sufficientemente resistente
per sopportare il peso dell’unità.
•
Prima di installare l’unità, definire con precisione il cammino da percorrere con
la stessa fino al luogo d’installazione.
•
Selezionare un luogo in cui l’unità non si trovi esposta all’ingresso d’aria.
•
Selezionare un luogo in cui l’ingresso e l’uscita dell’aria non siano bloccati.
•
Selezionare un luogo in cui la tubazione del refrigerante possa essere condotta facilmente all’esterno.
•
Selezionare un luogo che consenta la completa distribuzione dell’aria all’interno del locale.
•
Non installare l’unità in un luogo caratterizzato dalla presenza di spruzzi d’olio
o di vapori in grandi quantità.
•
Non installare l’unità in luoghi caratterizzati dalla generazione, dalla permanenza o dalla fuoriuscita di gas combustibili.
•
Non installare l’unità nei pressi di macchine generatrici di onde ad alta frequenza (come una saldatrice ad alta frequenza, per esempio).
•
Non installare l’unità in un luogo in cui un rilevatore d’incendio verrebbe a
trovarsi nei pressi dell’uscita dell’aria. (Il rilevatore d’incendio potrebbe infatti
funzionare in modo non corretto a seguito dell’aria calda soffiata durante l’attivazione della fase di riscaldamento.)
NL
•
Qualora dei prodotti chimici siano stati sparsi sul luogo dell’installazione, come
all’interno di stabilimenti chimici o ospedali, occorre procedere ad un’attenta
valutazione della situazione prima di installare l’unità. (I componenti di plastica
potrebbero infatti essere danneggiati dai prodotti chimici presenti.)
I
F
D
GB
3. Selezione del luogo d’installazione
3.1. Installare la sezione interna su un soffitto sufficientemente solido da poterne sopportare il peso
3.2. Sicurezza dell’installazione e spazio di
servizio
•
Selezionare la direzione ottimale della portata d’aria in funzione della configurazione del locale e della posizione d’installazione.
•
Poiché le tubazioni e i cablaggi elettrici sono collegati alle superfici inferiore e
laterali dell’unità, e la manutenzione deve essere effettuate sulle stesse superfici, è opportuno lasciare il maggior spazio possibile.
Spazio di servizio
[Fig. 3.2.1] (P.2)
1
Quando viene collegato l’ingresso dell’aria
2
Quando vengono installati i supporti di sospensione prima di installare la sezione
interna senza il condotto di ingresso
3 Quando la sezione interna viene sospesa direttamente senza condotto di ingresso
A Spazio di servizio
B
C
D Uscita dell’aria
Ingresso dell’aria
Passo del bullone di sospensione
*1 Quando non c’è uno spazio di servizio di 500 mm sulla parte superiore dell’unità, ci deve
essere uno spazio di servizio di 700 mm sul lato dell’uscita dell’aria.
Passo del bullone di sospensione
[Fig. 3.2.2] (P.2)
E
Parte superiore dell’unità
F
G
Scatola di comando
H Corpo principale
Fori dei bulloni di sospensione 4-ø12
3.3. Combinazione delle sezioni interne con
le sezioni esterne
Per effettuare la corretta combinazione delle sezioni interne con le sezioni esterne, fare riferimento al manuale d’installazione delle sezioni esterne.
Avvertenza:
L’unità deve essere fissata saldamente ad una struttura in grado di sostenere il suo peso. Se l’unità è montata su una struttura non adatta, vi è il rischio
che cada con conseguenze anche gravi.
4. Fissaggio dei bulloni di sospensione
[Fig. 4.1.1] (P.2)
4.1. Fissaggio dei bulloni di sospensione
A
(Utilizzare bulloni di sospensione M10, da procurarsi localmente.)
(Procurarsi i dati relativi alla solidità della struttura di sospensione.)
•
Soffitto: La struttura del soffitto varia da un edificio all’altro. Per le informazioni
dettagliate, consultare il costruttore dell’edificio.
P
1 Per rispettare l’orizzontalità del soffitto e impedire la presenza di vibrazioni,
può essere necessario rinforzarlo (travi, ecc...).
Costruzioni di legno
•
Utilizzare come rinforzi dei tiranti (per le abitazioni ad un solo piano) o delle
travi su due piani (per le abitazioni a due piani).
•
Per poter sospendere il condizionatore d’aria, utilizzare travi di legno resistenti
aventi una sezione trasversale di almeno 6 cm se le travi sono disposte ad
intervalli massimi di 90 cm, e di almeno 9 cm se la distanza fra le travi è inferiore a 180 cm.
80
C
Tirante
Per abitazioni in cemento armato
•
Come indicato nella figura sottostante, fissare i bulloni di sospensione, utilizzando eventualmente travi a sezione quadrata.
[Fig. 4.1.2] (P.2)
F
Inserto: in grado di sopportare un peso da 100 a 150 kg (1) (di fornitura locale).
G
Bullone di sospensione (di fornitura locale).
2 Sezionare le parti eccedenti delle travi e rimuoverle.
3 Rinforzare gli elementi del soffitto ed aggiungerne altri per fissare i pannelli.
B Trave
E Distanza
E
Struttura di sospensione
Pannello del soffitto
D Trave a sezione quadrata per sospendere il condizionatore
Peso dell’unità (kg)
PEH-P400MYA
PEH-P500MYA
180 kg
212 kg
H
Rinforzo
5. Installazione dell’unità
5.1. Sospensione dell’unità
s Trasportare la sezione interna sul luogo dell’installazione senza toglierla
dall’imballaggio.
s Per sospendere la sezione interna, utilizzare un apposito dispositivo di
sollevamento e farla passare attraverso i bulloni di sospensione.
s Installare la sezione interna prima di effettuare i lavori sul soffitto.
[Fig. 5.1.1] (P.2)
A Unità
B Dispositivo di sollevamento
<Sospensione dell’unità interna direttamente>
1. Attaccare una rondella e il(i) dado(i) a ciascun bullone di sospensione. (Le
rondelle e i dadi sono di fornitura locale.)
2. Fissare la sezione interna a ciascun bullone di sospensione.
3. Accertarsi che l’unità sia perfettamente orizzontale e serrare poi ciascun dado.
[Fig. 5.1.2] (P.2)
A Dado
B Rondella
5.2. Conferma della posizione dell’unità e
fissaggio dei bulloni di sospensione
[Fig. 5.2.1] (P.3)
A
Controllo del livello
s Utilizzare la dima fornita con il pannello per essere certi del corretto
posizionamento dell’unità e dei bulloni di sospensione. Qualora il
posizionamento non fosse corretto, può esservi la formazione di gocce
di condensa a seguito di fuoriuscite dell’aria. Accertarsi quindi del corretto posizionamento.
s Utilizzare una livella per accertarsi della perfetta orizzontalità della superficie indicata con A. Accertarsi inoltre che i dadi dei bulloni di sospensione siano correttamente serrati per bloccare i bulloni di sospensione.
s Utilizzare una livella per accertarsi che l’unità sospesa sia a livello in
modo da scaricare correttamente il drenaggio.ng the unit at level using a
level.
Cautela:
GB
Accertarsi di installare l’unità perfettamente orizzontale.
Diametro dei tubi
da 6,4 mm a 25,4 mm
da 28,6 a 38,1 mm
Spessore del materiale isolante
Più di 10 mm
Più di 15 mm
Modello
Componente
PEH-P400MYA
Tubo del liquido
Tubo del refrigerante
Tubo del gas
Tubo di drenaggio
PEH-P500MYA
ø12,7
ø25,4
ø28,58
R1 (vite maschio)
6.2. Tubo del refrigerante, tubo di drenaggio e apertura di introduzione
F
1 Selezionare lo spessore del materiale isolante in funzione del diametro dei
tubi.
6.1. Specifiche delle tubazioni del refrigerante e di drenaggio
[Fig. 6.2.1] (P.3)
2 Qualora l’unità venga utilizzata al piano più elevato di un edificio e in condizioni di temperatura e umidità elevate, è necessario utilizzare tubi di diametro
superiore e materiale isolante di spessore più elevato rispetto ai valori indicati
nella tabella di cui sopra.
A
Tubo del refrigerante (tubo del liquido)
B
Tubo del refrigerante (tubo del gas)
C
Tubo di drenaggio
NL
Allo scopo di evitare la caduta di gocce di condensa, effettuare un corretto lavoro
di isolamento e contro il trasudamento dei tubi del refrigerante e di drenaggio.
Se vengono usati tubi del refrigerante disponibili in commercio, accertarsi di avvolgere del materiale isolante acquistato localmente (resistente ad una temperatura
superiore a 100°C e avente lo spessore indicato qui sotto) attorno ai tubi del liquido e del gas.
Accertarsi inoltre di avvolgere del materiale isolante disponibile in commercio (con
gravità specifica di 0,03 per schiuma di polietilene e spessore indicato qui sotto)
su tutti i tubi che si trovano nella stanza.
D
6. Specifiche delle tubazioni del refrigerante e di drenaggio
I
3 Se il cliente fornisce delle specifiche particolari alle sue applicazioni, occorre
seguirle.
7. Collegamento delle tubazioni del refrigerante e di drenaggio
7.1. Collegamento della tubazione del refrigerante
1. Rimuovere il coperchio.
Il collegamento della tubazione deve essere eseguito conformemente al contenuto del manuale di installazione della sezione esterna.
2. Estrarre l’isolamento termico che copre le tubazioni del locale, saldarvi per
brasatura la tubazione dell’unità e sostituire l’isolante nella posizione originale.
Avvolgere del nastro isolante attorno alla tubazione.
•
La connessione della tubazione avviene mediante saldatura.
[Fig. 7.1.2] (P.3)
Precauzioni da adottare con la tubazione del refrigerante
Avvertenza:
Utilizzare esclusivamente il liquido refrigerante specificato (R407C) nel circuito refrigerante. L’ingresso d’aria nel circuito può alterare il corretto funzionamento del circuito con l’aumento anormale delle temperature dell’unità
e il rischio di bruciature.
A
Isolamento termico
B Estrazione
C
Avvolgere con panno umido
D Ritorno alla posizione originale
E Accertarsi di non lasciare spazi in questo punto
s Accertarsi di usare un metodo di brasatura non ossidante, per evitare
l’ingresso nella tubazione di materiale estraneo o umidità.
s Fornire un rinforzo metallico atto a supportare la tubazione del refrigerante in modo tale da non appesantire la tubazione terminale della sezione interna. Tale rinforzo andrà posizionato a 50 cm dalla connessione a
saldatura della sezione interna.
Rimuovere il coperchio
F
Avvolgere con nastro isolante
Nota:
• Fare molta attenzione durante l’avvolgimento del nastro attorno alla tubazione, in quanto è possibile che questa operazione provochi la formazione di condensa invece che impedirla.
*
Prima di procedere alla brasatura, avvolgere sempre con panni umidi la
tubazione del corpo principale ed i tubi isolanti, in modo da evitare contrazioni e bruciature dei tubi stessi. Fare in modo che la fiamma non entri in
contatto con il corpo principale.
Cautela:
•
E
Per le specifiche relative alla lunghezza della tubazione ad al massimo dislivello
consentito, fare riferimento al manuale della sezione esterna.
A
Installare la tubazione del refrigerante della sezione interna conformemente a quanto segue.
81
P
•
[Fig. 7.1.1] (P.3)
Cautela:
•
•
•
•
•
Avvertenza:
Utilizzare tubazioni del refrigerante fatte in rame fosforoso disossidato C1220
(CU-DHP), come specificato in JIS H3300 “Tubazioni e tubi senza saldature
in rame e leghe di rame”. Oltre a ciò, accertarsi che le superfici interne dei
tubi siano perfettamente pulite e prive di tracce di zolfo, ossidi, polvere/
sporcizia, trucioli, oli, umidità e qualsiasi altro agente contaminante.
Non usare l’esistente tubazione del refrigerante.
- L’elevata quantità di cloro presente nel refrigerante convenzionale e nell’olio
refrigerante causerà un deterioramento del nuovo refrigerante.
Conservare la tubazione da usare per l’installazione all’interno e sigillare
entrambe le estremità della tubazione sino al momento della saldatura.
- In caso di ingresso di polvere, sporcizia o acqua nel circuito refrigerante, vi è
il rischio di un deterioramento dell’olio e di un cattivo funzionamento del compressore.
Usare olio a base di estere, olio a base di etere o alchilbenzene (in quantità ridotta) come olio refrigerante per lubrificare le connessioni a cartella ed a flangia. (Per i modelli che usano R407C)
- Il refrigerante usato nel condizionatore è altamente igroscopico. Durante l’uso,
è possibile che si mescoli con l’acqua,causando un deterioramento dell’olio
refrigerante.
Non utilizzare additivi rivelatori di perdite.
Durante l’installazione o lo spostamento dell’unità in un altro luogo, evitare
di far entrare un gas o materiali diversi dal refrigerante raccomandato (R407C)
nel sistema. In caso di ingresso d’aria nel sistema, la pressione interna si
alzerà in modo anormale, causando danni ai tubi.
GB
Accertarsi di non far entrare sporcizia o materiale estraneo nei tubi del refrigerante.
•
I tubi del refrigerante devono essere mantenuti caldi, cosicché occorre effettuare un isolamento accurato fra gli stessi e il tubo del gas situato all’interno
della sezione interna, in quanto questo tubo causa la formazione di condensa
durante l’attivazione della fase di raffreddamento.
F
D
•
Durante il collegamento dei tubi del refrigerante, accertarsi che la valvola di
arresto della sezione esterna sia completamente chiusa (come è stata spedita
dalla fabbrica). Dopo aver isolato tutti i tubi del refrigerante fra le sezioni interna ed esterna, spurgare l’aria dall’apertura di servizio della valvola di arresto
della sezione esterna e dall’apertura di servizio di ciascun tubo di collegamento. Controllare l’assenza di perdite d’aria da una qualsiasi connessione dei
tubi, aprire quindi completamente la valvola di arresto della sezione esterna.
Questo collegherà il circuito del refrigerante fra le sezioni interna ed esterna.
•
I tubi del refrigerante devono essere i più corti possibili
•
Il collegamento dei tubi del refrigerante deve essere effettuato con collegamenti a cartella ed a flangia.
•
Le sezioni interna ed esterna devono essere collegate ai tubi del refrigerante.
NL
[Fig. 7.1.3] (P.3)
A Saldatura
B
Giunto a flangia
C
Tubo del gas
D Tubo del liquido
E
Apertura di servizio
F
Sezione interna
PEH-P500MYA
Saldatura
max 40 m
max 15
max 50 m
ø12,7 × 2
ø28,58 × 2
s Vedi la guida all'installazione per informazioni sulla quantità aggiuntiva
di refrigerante per la sezione esterna.
7.2. Collegamento della tubazione di drenaggio
[Fig. 7.2.1] (P.3)
Carica di refrigerante addizionale
•
PEH-P400MYA
Saldatura
max 40 m
max 15
max 50 m
ø12,7 × 2
ø25,4 × 2
Metodo di collegamento
Dislivello fra sezioni interna ed esterna
Numero di pieghe (angoli retti)
Lunghezza totale della tubazione
Diametro tubo del
Tubo del liquido
refrigerante (mm)
Tubo del gas
A
Isolatore
B
Tubo di drenaggio R1
C
Vaschetta di drenaggio
D
E
>
= 2×F>
= 70 mm
F
>
= 70 mm
>
= 35 mm
G Inclinazione verso il basso di almeno 20 mm/m
H Sifone di drenaggio
I Il tubo di drenaggio dovrebbe estendersi al di sotto di questo livello
J Apertura di drenaggio
1. Accertarsi che la tubazione di drenaggio sia inclinata verso il basso (gradiente
di almeno 20 mm/m) rispetto alla sezione esterna (lato di drenaggio).
2. Mantenere la lunghezza orizzontale della tubazione di drenaggio sotto i 20 m
(non incluso il dislivello). Per le tubazioni di drenaggio particolarmente lunghe,
prevedere un supporto di metallo disposto in modo tale da evitare le ondulazioni della tubazione. Non installare mai un tubo di sfiato per non alterare il
corretto funzionamento del drenaggio.
3. Per la tubazione di drenaggio, usare tubi in cloruro di vinile (PVC) VP-25 (diametro esterno 32 mm).
4. Accertarsi che i tubi riuniti siano situati 10 cm sotto l’apertura di drenaggio
dell’unità.
5. Posizionare l’uscita della tubazione di drenaggio in modo da evitare la generazione di cattivi odori.
6. Evitare di collegare direttamente la tubazione di drenaggio alle fogne per non
generare gas ionici.
G Sezione esterna
I
8. Sistemazione dei condotti
•
•
Per collegare i condotti, inserire un condotto in tela fra l’unità e i condotti da
collegare.
A
Flangia del condotto di ingresso
B
Sensore della temperatura di ingresso
Utilizzare materiale incombustibile durante queste operazioni di raccordo dei
condotti.
C
Piastra di protezione del sensore
D
Supporto del sensore
E
Condotto di ingresso
•
Isolare completamente la flangia dei condotti di entrata e di uscita per evitare
la formazione di condensa.
1 Tirare via il sensore, rimuovere il supporto del sensore e la piastra di protezione (la piastra può essere eliminata).
•
Accertarsi di installare il filtro dell’aria nei pressi della griglia di ingresso dell’aria.
2 Collegare il condotto di ingresso.
•
Prima di collegare il condotto di ingresso, rimuovere il filtro dell’aria (fornito con
l’unità), ed installare poi il filtro nella griglia di ingresso.
3 Praticare un foro del sensore (diam. di ø12,5) sul lato del condotto.
[Fig. 8.0.1] (P.4)
A
Ingresso dell’aria
B
Uscita dell’aria
C Sportello di accesso
D
Superficie del soffitto
E
E Condotto in tela
F
4 Montare il sensore e il supporto.
•
Durante la rimozione del sensore, non tirare via il terminale per evitare di rompere il filo.
•
Prima di collegare il condotto di ingresso, accertarsi che il sensore, il suo supporto e la piastra di protezione siano stati rimossi.
•
Il sensore rimosso conformemente alla fase 1, deve essere reinstallato nella
posizione specificata nel diagramma. L’installazione non corretta del sensore
può provocare un funzionamento anormale del sistema.
Il condotto di uscita deve essere lungo almeno 850 mm
G I potenziali elettrici dell’unità principale e del condotto devono essere gli stessi
Cautela:
Il condotto di uscita deve essere lungo almeno 850 mm.
I potenziali elettrici dell’unità principale e del condotto devono essere gli
stessi.
•
Sensore della temperature di entrata quando viene installato un condotto d'ingresso.
Installazione di un sensore di entrata della temperatura sulla flangia del condotto d'ingresso. Prima di collegare un condotto d’ingresso, rimuovere il sensore
e installarlo nella posizione indicata.
P
•
•
[Fig. 8.0.2] (P.4)
•
Fori di montaggio della flangia del condotto di uscita e del condotto di ingresso.
[Fig. 8.0.3] (P.4)
A
Flangia del condotto di ingresso
B
PEH-P400: 10 × 130 = 1300
PEH-P500: 12 × 130 = 1560
C
PEH-P400: fori 34-ø3 (fori di montaggio del condotto di ingresso)
PEH-P500: fori 38-ø3 (fori di montaggio del condotto di ingresso)
D
Parte superiore dell’unità
G PEH-P400, 500: fori 26-ø3 (fori di montaggio del condotto di uscita)
H PEH-P400, 500: 5 × 110 = 550
I PEH-P400, 500: 3 × 130 = 390
82
E Flangia del condotto di uscita
F PEH-P400, 500: 8 × 130 = 1040
9. Comando a distanza
Cautela:
[Fig. 9.1.1] (P.4)
A Sagoma del comando a distanza
B Spazi necessari attorno al comando a distanza
D Distanza di installazione
1 I sensori della temperatura sono situati sia sul comando a distanza che sulla
sezione interna. Il sensore di temperatura del comando a distanza è particolarmente utile quando questo componente viene utilizzato per impostare la
temperatura o rilevare la temperatura della stanza. Installare il comando a distanza in un punto tale che consenta la rilevazione delle temperature medie
della stanza, lontano dalla luce diretta del sole, dalla portata d’aria del condizionatore e da altre fonti di calore.
2 Sia che il comando a distanza sia installato nella scatola degli interruttori che
sulla parete, è importante lasciare gli spazi liberi indicati nello schema.
9.2. Procedure di collegamento
•
[Fig. 9.2.1] (P.5)
(1) Collegare il cavo del comando a distanza al blocco terminale della scatola inferiore.
A Verso TB5 della sezione interna
Nota:
Controllare che non vi siano fili elettrici nei presi del sensore del comando a
distanza, in quanto ciò potrebbe influenzare negativamente il corretto rilevamento della temperatura della stanza.
B Blocco terminale TB6 nel comando a distanza
Assenza di polarità
Cautela:
•
3 Procurarsi i seguenti componenti localmente:
Scatola degli interruttori
Tubo conduttore in rame sottile
Controdadi e boccole
•
(2) Sigillare l’apertura di servizio del cavo del comando a distanza con mastice, per evitare la possibile entrata di condensa, acqua, scarafaggi o
vermi.
[Fig. 9.3.1] (P.5)
Praticare un foro sulla parete per poter far passare il cavo del comando a
distanza (per far scorrere il cavo dalla parte posteriore) e sigillare poi il foro
con mastice.
B-2. Per far passare il cavo del comando a distanza attraverso la sezione
superiore:
•
Far passare il cavo del comando a distanza attraverso la scatola superiore e
sigillare poi la scanalatura con mastice, come indicato al punto precedente.
[Fig. 9.1.1] (P.4)
C Parete
D
Condotto
F Boccola
G
Scatola degli interruttori
E
H Cavo del comando a distanza
I
Cautela:
•
Sigillare con mastice
[Fig. 9.1.1] (P.4)
<A> In caso di installazione nella scatola degli interruttori
D
[Fig. 9.3.2] (P.5)
Nota:
Foro per il cablaggio per l’installazione direttamente sulla parete (o cablaggio
aperto)
• Rimuovere la parte ombreggiata dalla scatola superiore mediante un
coltellino, una pinzetta o un altro attrezzo adatto.
• Estrarre, attraverso questa parte, il cavo del comando a distanza collegato al blocco terminale.
Controdado
(3) Installare la scatola inferiore nella scatola degli interruttori o sulla parete.
C Scatola degli interruttori
(2) Per installare la scatola superiore, montare in primo luogo le chiusure
superiori (in due punti), quindi inserire la scatola superiore nella scatola
inferiore, come mostrato.
Cavo del comando a distanza
E Incassato a croce, vite della vaschetta
F
<B> Per un’installazione diretta sul muro, selezionare uno dei seguenti metodi:
(1) Per rimuovere la scatola superiore, inserire la punta di un cacciavite
scanalato nelle chiusure, come mostrato nello schema, e spingere poi il
cacciavite in direzione della freccia.
NL
Quando il comando a distanza è installato in questa scatola, occorre sigillare
con mastice l’attacco fra la scatola ed il tubo del conduttore.
B-1. Per far scorrere il cavo del comando a distanza dalla parte posteriore
dell’unità di comando:
•
Evitare di usare morsetti del tipo a grinze per effettuare i collegamenti
con il blocco terminale del comando a distanza, per eliminare qualsiasi
contatto con i bordi dell’unità ed i disturbi che ne derivano.
Impedire l’ingresso di pezzettini di cavo nel comando a distanza. Ciò
potrebbe causare scosse elettriche o malfunzionamenti.
9.3. Montaggio della scatola superiore
<A> Per installazione nella scatola degli interruttori:
•
Il cavo del comando a distanza può essere prolungato fino a 200 m. Per il
collegamento del comando a distanza, usare dei fili elettrici o cavi a doppio
conduttore che presentino una sezione compresa fra 0,3 mm2 e 1,25 mm2.
Evitare di usare cavi a conduttori multipli per impedire il funzionamento non
corretto dell’unità.
•
Evitare di muovere il cacciavite mentre si inserisce la sua punta nelle
chiusure, per evitare di romperle.
Accertarsi di inserire saldamente la scatola superiore nelle chiusure,
premendo fino ad avvertire uno scatto. Se inserita in modo non corretto,
la scatola superiore rischia di cadere.
I
C Sensore di temperatura
Nota:
• Selezionare un punto perfettamente piatto per l’installazione.
• Fissare in almeno due punti il comando a distanza nella scatola degli
interruttori o sulla parete.
GB
(1) Selezionare un luogo adatto per l’installazione del comando a distanza
(scatola degli interruttori).
Accertarsi di osservare le seguenti precauzioni.
Evitare di serrare eccessivamente le viti per non deformare o rompere la
scatola inferiore.
D
9.1. Procedure di installazione
Nota:
La sezione operativa è coperta da un foglio di protezione.
Prima di usare l’unità, ricordarsi di rimuovere il foglio di protezione.
G Sigillare l’apertura di servizio del cavo del comando a distanza con mastice.
<B> In caso di installazione sulla parete
P
E
H Vite per legno
83
9.4. Selezione delle funzioni
<Tipo di comando a distanza con filo>
(1) Selezione delle funzioni del comando a distanza
L’impostazione delle funzioni del comando a distanza elencate di seguito può essere modificata mediante la modalità di selezione delle funzioni del comando a distanza.
Modificare l’impostazione se necessario.
Elemento 1
1. Modifica lingua
(“CHANGE LANGUAGE”)
2. Limite funzioni
(“SELEZIONE FUNZIONI”)
3. Selezione modalità
(“SELEZIONE MODO”)
Elemento 2
Impostazione lingua visualizzata sul display
Elemento 3 (descrizione dell’impostazione)
• La visualizzazione in più lingue è possibile.
(1) Impostazione limite funzioni di funzionamento (blocco funzionamento) (“BLOCCO FUNZIONI”)
(2) Uso impostazione modalità automatica (“SELEZIONE MODO AUTO”)
(3) Impostazione limite intervallo temperatura (“LIMITAZIONE TEMPAERATURA”)
(1) Impostazione comando a distanza principale/asservito (“CONTROLLO MAIN/SUB”)
• Impostazione dell’intervallo del limite di funzionamento (blocco funzionamento)
• Impostazione dell’uso o meno della modalità di funzionamento “automatica”
• Impostazione dell’intervallo regolabile della temperatura (massima, minima)
• Selezione del comando a distanza principale o asservito
* Se due comandi a distanza sono collegati a un unico gruppo, un comando a
distanza deve essere impostato come asservito.
• Impostazione dell’uso o meno della funzione orologio
• Impostazione del tipo di timer
• Visualizzazione del numero da chiamare in caso di errore
• Impostazione del numero di telefono
• Impostazione dell’unità di temperatura (°C o °F) visualizzata
• Impostazione dell’uso o meno del display della temperatura dell’aria interna (aspirata)
• Impostazione dell’uso o meno del display “Cooling” (Raffreddamento) o “Heating”
(Riscaldamento) durante il funzionamento nella modalità automatica
(2) Uso impostazione orologio (“OROLOGIO”)
(3) Impostazione funzione timer (“TIMER SETTIMANALE”)
(4) Impostazione numero da chiamare in caso di errore (“CALL.”)
(1) Impostazione display temperatura °C/°F (“TEMPERATURA °C/°F”)
(2) Impostazione display temperatura aria aspirata (“TEMPERATURA AMBIENTE”)
(3) Impostazione display raffreddamento/riscaldamento automatico
(“AUTO C/H”)
GB
4. Modifica display
( “ I M P O S TA Z I O N E
MODO DISPLAY”)
[Flusso di selezione delle funzioni]
[1] Arrestare il climatizzatore per avviare la modalità di selezione delle funzioni del comando a distanza. → [2] Selezionare una voce dell’elenco Elemento 1. →
[3] Selezionare una voce dell’elenco Elemento 2. → [4] Eseguire l’impostazione. (I dettagli sono specificati nell’elenco Elemento 3.) → [5] Impostazione
completata. → [6] Reimpostare il display normale. (Fine)
Display normale (quando il
climatizzatore non è in funzione)
D
(Tenere premuto il pulsante E, quindi premere il pulsante D per
due secondi.)
* Non è possibile modificare il display durante la selezione delle
funzioni dell’unità, la prova di funzionamento e l’autodiagnosi.
Premere il pulsante G.
Premere il pulsante G.
Uso impostazione modalità automatica (“SELEZIONE MODO AUTO”)
→ Impostazione comando a distanza principale/asservito (“CONTROLLO MAIN/SUB”)
F
Premere il
pulsante E.
I
E
Vedere [4]-3. (1)
Vedere [4]-3. (3)
Impostazione funzione timer (“TIMER SETTIMANALE”)
Vedere [4]-3. (4)
Premere il
pulsante D.
E
BACK
MONITOR/SET
ON/OFF
ON/OFF
FILTER
DAY
CLOCK
I
A
CHECK TEST
OPERATION
CLEAR
B
G
H
Vedere [4]-4. (1)
Premere il pulsante G.
Impostazione display temperatura aria aspirata (“TEMPERATURA AMBIENTE”)
Vedere [4]-4. (2)
Impostazione display raffreddamento/riscaldamento automatico (“AUTO C/H”)
Vedere [4]-4. (3)
(2) Uso impostazione modalità automatica
Quando il comando a distanza è collegato a un’unità che funziona in modalità
automatica, è possibile eseguire le impostazioni seguenti.
• Per attivare o disattivare l’impostazione, premere il pulsante [ ON/OFF].
1 ON (Impostazione iniziale):
Quando viene selezionata la modalità di funzionamento, la modalità automatica viene visualizzata.
TEMP.
MENU
PAR-21MAA
Impostazione numero da chiamare in caso di errore (“CALL.”)
[4] -2. Limite funzioni
(1) Impostazione limite funzioni di funzionamento (blocco funzionamento)
• Per attivare o disattivare l’impostazione, premere il pulsante [ ON/OFF].
1 no1: L’impostazione di blocco del funzionamento viene eseguita per tutti i pulsanti, tranne il pulsante [ ON/OFF].
2 no2: L’impostazione di blocco del funzionamento viene eseguita per tutti i pulsanti.
3 OFF (Impostazione iniziale):
L’impostazione di blocco del funzionamento non viene eseguita.
* Per rendere effettiva l’impostazione di blocco del funzionamento nel display normale, è necessario premere e tenere premuti contemporaneamente per due
secondi i pulsanti [FILTER] e [ ON/OFF] sul display normale dopo avere eseguito la suddetta impostazione.
F
Vedere [4]-3. (2)
→ →
P
Premere il
pulsante D.
Uso impostazione orologio (“OROLOGIO”)
[Impostazione dettagliata]
[4] -1. Impostazione CHANGE LANGUAGE (Cambia lingua)
La lingua visualizzata nel display a matrice di punti può essere selezionata.
• Per cambiare lingua, premere il pulsante [ MENU].
1 Giapponese (JP), 2 Inglese (GB), 3 Tedesco (D), 4 Spagnolo (E),
5 Russo (RU), 6 Italiano (I), 7 Cinese (CH), 8 Francese (F)
84
Vedere [4]-2. (2)
Premere il pulsante G.
→ Impostazione display temperatura °C/°F (“TEMPERATURA °C/°F”)
Premere il
Modifica display pulsante G.
(“IMPOSTAZIONE
MODO DISPLAY”)
Vedere [4]-2. (1)
Vedere [4]-2. (3)
→ →
Selezione
modalità
(“SELEZIONE MODO”)
Premere il
pulsante G.
Premere il
pulsante D.
Impostazione limite intervallo temperatura (“LIMITAZIONE TEMPAERATURA”)
→
NL
Premere il Premere il
pulsante E. pulsante E.
→ Impostazione limite funzioni di funzionamento (“BLOCCO FUNZIONI”)
→ →
Limite funzioni
(“SELEZIONE
FUNZIONI”) Premere il
pulsante G.
Display a matrice di punti
La lingua selezionata mediante la funzione
CHANGE LANGUAGE (Cambia lingua) viene
visualizzata in questo display. Nel presente
manuale è impostata la lingua inglese.
Vedere [4]-1
Elemento 3 (descrizione
dell’impostazione)
Elemento 2
Premere il
pulsante E.
NOTA
Il funzionamento del timer si arresta quando il
display di selezione delle funzioni del comando a
distanza viene sostituito con il display normale.
Modalità di selezione delle funzioni
del comando a distanza
Elemento 1
Modifica lingua
(“CHANGE LANGUAGE”)
(Tenere premuto il pulsante E, quindi premere il pulsante D per due secondi.)
* In questo modo il comando a distanza
registra l’impostazione eseguita.
C
D
2 OFF:
Quando viene selezionata la modalità di funzionamento, la modalità automatica non viene visualizzata.
(3) Impostazione limite intervallo temperatura
Una volta eseguita questa impostazione, è possibile modificare la temperatura
entro l’intervallo impostato.
• Per attivare o disattivare l’impostazione, premere il pulsante [ ON/OFF].
1 LIMITAZIONE MODO COOL:
L’intervallo di temperatura può essere modificato nella modalità di raffreddamento/deumidificazione.
2 LIMITAZIONE MODO HEAT:
L’intervallo di temperatura può essere modificato nella modalità di riscaldamento.
3 LIMITAZIONE MODO AUTO:
L’intervallo di temperatura può essere modificato nella modalità automatica.
4 OFF (impostazione iniziale): Il limite dell’intervallo di temperatura non è attivo.
* Quando viene eseguita un’impostazione diversa da OFF, contemporaneamente
viene impostato il limite dell’intervallo di temperatura nelle modalità di raffreddamento, riscaldamento e automatica. Tuttavia, tale intervallo non può essere limitato se l’intervallo di temperatura impostato non è stato modificato.
TEMP ( ) o
• Per aumentare o ridurre la temperatura, premere il pulsante [
( )].
• Per impostare il limite superiore e il limite inferiore, premere il pulsante [
]
L’impostazione selezionata lampeggia ed è possibile impostare la temperatura.
• Intervallo impostabile
Modalità di raffreddamento/deumidificazione :
Limite inferiore: 19°C a 30°C Limite superiore: 30°C a 19°C
Modalità di riscaldamento :
Limite inferiore: 17°C a 28°C Limite superiore: 28°C a 17°C
Modalità automatica :
Limite inferiore: 19°C a 28°C Limite superiore: 28°C a 19°C
* L’intervallo impostabile varia a seconda dell’unità da collegare (unità Mr. Slim,
unità Free Plan o unità a temperatura intermedia).
[4] -4. Impostazione del display
(1) Impostazione display temperatura °C/°F
• Per attivare o disattivare l’impostazione, premere il pulsante [
1 °C: Viene utilizzata l’unità di temperatura °C.
2 °F: Viene utilizzata l’unità di temperatura °F.
ON/OFF].
(2) Impostazione display temperatura aria aspirata
• Per attivare o disattivare l’impostazione, premere il pulsante [
1 ON: La temperatura dell’aria aspirata viene visualizzata.
2 OFF: La temperatura dell’aria aspirata non viene visualizzata.
(3) Impostazione funzione timer
• Per attivare o disattivare l’impostazione, premere il pulsante [ ON/OFF] (Scegliere una delle impostazioni seguenti.)
1 TIMER SETTIMANALE (Impostazione iniziale) :
È possibile utilizzare il timer settimanale.
2 AUTO OFF TIMER: È possibile utilizzare il timer a disattivazione automatica.
3 TIMER SEMPLIFICATO:
È possibile utilizzare il timer semplice.
4 TIMER OFF:
Non è possibile utilizzare la modalità timer.
* Se l’orologio è impostato in modo da non essere usato (OFF), non è possibile
utilizzare il “TIMER SETTIMANALE”.
ON/OFF].
ON/OFF].
(3) Impostazione display raffreddamento/riscaldamento automatico
• Per attivare o disattivare l’impostazione, premere il pulsante [ ON/OFF].
1 ON: Nella modalità automatica vengono visualizzati “Automatic cooling” (Raffreddamento automatico) e “Automatic heating” (Riscaldamento automatico).
2 OFF: Nella modalità automatica viene visualizzato solo “Automatic” (Automatica).
(2) Selezione delle funzioni dell’unità
Impostare le funzioni di ciascuna sezione interna a partire dal comando a distanza, come richiesto. Le funzioni di ciascuna sezione interna possono essere selezionate solo
dal comando a distanza.
Impostare le funzioni selezionando le voci appropriate nella Tabella 1 e nella Tabella 2. (Le impostazioni predefinite sono indicate di seguito.)
GB
(2) Uso impostazione orologio
• Per attivare o disattivare l’impostazione, premere il pulsante [
1 ON: La funzione orologio può essere utilizzata.
2 OFF: La funzione orologio non può essere utilizzata.
ON/OFF].
D
[4] -3. Selezione della modalità
(1) Impostazione comando a distanza principale/asservito
• Per attivare o disattivare l’impostazione, premere il pulsante [
1 Main: Il comando a distanza viene impostato come principale.
2 Sub: Il comando a distanza viene impostato come asservito.
(4) Impostazione numero da chiamare in caso di errore
• Per attivare o disattivare l’impostazione, premere il pulsante [ ON/OFF].
1 CALL OFF:
I numeri da chiamare impostati non vengono visualizzati in
caso di errore.
2 CALL **** *** ****: I numeri da chiamare impostati vengono visualizzati in caso
di errore.
CALL_:
Quando il display è come quello mostrato a sinistra, è possibile impostare i numeri da chiamare.
• Impostazione dei numeri da chiamare
Per impostare i numeri da chiamare, attenersi alla procedura seguente.
Spostare il cursore lampeggiante per impostare i numeri. Premere i pulsanti
[
TEMP. ( ) e ( )] per spostare il cursore verso destra e verso sinistra. Premere i pulsanti [ CLOCK ( ) e ( )] per impostare i numeri.
Tabella 1. Funzioni specifiche dell’intero sistema refrigerante (selezionare i numeri di unità da 00 a 15)
Tensione
02
03
04
Funzionamento
Arresto
3
25
2
Funzionamento
Arresto
Circa 4 minuti di attesa dopo il
ripristino dell’alimentazione.
1
27
2
F
Notas
1
2
3
1
2
3
1
2
Tabella 2. Funzioni specifiche dell’unità interna (selezionare i numeri di unità da 01 a 04 o AL)
Impostazioni
Numero di modo Numero di impostazione Controllo
Funzione
100 ore
1
Simbolo filtro
2500 ore
07
2
Nessuna indicazione di simbolo filtro
3
Azionamento della
ventola a termostato
spento durante il
riscaldamento
Funzionamento della
ventola in modalità di
raffreddamento con il
termostato disattivato
Impostazioni predefinite
NL
Media di funzionamento unità
Impostato dal comando a distanza dell’unità
Sensore interno del comando a distanza
Non supportata
Supportata (unità priva di presa di ingresso aria esterna)
Supportata (unità dotata di presa di ingresso aria esterna)
240 V
220 V, 230 V
Numero di modo Numero di impostazione Controllo
1
01
2
Impostazioni predefinite
Notas
I
Collegabilità
LOSSNAY
Impostazioni
Non disponibile
Disponibile
Quando si seleziona la funzione di arresto della ventola, impostare il numero di impostazione del numero di modo
“02” nella tabella 1 su “3”. Accertarsi che
il comando a distanza si trovi nella stanza in cui deve essere attivata l’aria condizionata, in modo da poter monitorare
la temperatura della stanza.
P
Nota:
Ogni volta che vengono modificate le impostazioni di funzione dell’unità interna al termine dell’installazione, accertarsi di registrare le funzioni impostate
immettendo un o un altro simbolo nel campo appropriato della Tabella 1 e della Tabella 2.
E
Funzione
Recupero automatico
da interruzioni di
corrente
Rilevamento temperatura in interni
85
[Flusso di selezione delle funzioni]
Comprendere innanzitutto il flusso di selezione delle funzioni. Di seguito, viene descritta a titolo di esempio l’impostazione della “Tensione” della Tabella 1. (Per la procedura
d’impostazione effettiva, vedi [Procedura d’impostazione] da 1 a 0.)
1 Controllare il contenuto della selezione delle funzioni.
2 Commutare sulla modalità Selezione delle funzioni.
(Premere simultaneamente A e B nello stato OFF del comando a distanza.)
F
3 Specifica indirizzo refrigerante
4 Specifica N° indirizzo unità
(Funzionamento pulsanti C e D)
→ 00 (specifica sezione esterna)
(Non è necessario per un sistema con un solo refrigerante.)
→ 00 (specifica sezione interna)
TEMP.
JA
5 Registrazione (Premere il pulsante E.) (Funzionamento ventilatore →
Sezione interna specificata)
NO
6 Selezione N° modalità → 04 (Tensione)
7 Selezione N° impostazione → 2 (220 V, 230 V)
(Funzionamento pulsanti F e G)
MENU
E
BACK
MONITOR/SET
PAR-21MAA
ON/OFF
ON/OFF
DAY
CLOCK
I
A
CHECK TEST
OPERATION
CLEAR
B
G
Modificare indirizzo
refrigerante e
indirizzo unità. N°?
H
C
8 Registrare (Premere pulsante E.)
FILTER
D
9
NO
Fine?
GB
JA
0 Display funzione di fine (Premere simultaneamente i pulsanti A e B.)
D
[Procedura d’impostazione][Impostare solo quando è necessario.]
1 Controllare il contenuto delle impostazioni di ogni modalità. Se il contenuto di una modalità è stato cambiato con la selezione delle funzioni, anche le funzioni di quel modo cambiano.
Verificare le funzioni impostate come descritto nei punti da 2 a 7, quindi modificare l’impostazione in base alle funzioni riportate nella Tabella 1 e nella Tabella 2.
(Quando si modifica l’impostazione, fare riferimento alle impostazioni predefinite.)
2 Impostare il comando a distanza su OFF.
Tenere premuti contemporaneamente i pulsanti [FILTER] A e [TEST] B per
almeno due secondi.
“SELEZIONE FUNZIONI” lampeggia per un po, quindi il display del comando a
distanza cambia nel display mostrato sotto.
3 Impostare il N° dell’indirizzo del refrigerante della sezione esterna.
Quando vengono premuti i pulsanti [ CLOCK ( ) e ( )] C , il N° dell’indirizzo del refrigerante diminuisce e aumenta fra 00 e 15. Impostarlo sul N° dell’indirizzo del refrigerante di cui si vuole selezionare la funzione.
(Questo punto non è necessario per un sistema con un unico refrigerante.)
F
Display indirizzo refrigerante
* Se il comando a distanza entra nello stato OFF dopo che i display “SELEZIONE FUNZIONI” e della temperatura ambiente “
problema di comunicazione. Accertarsi che non vi siano sorgenti di rumore vicino alla linea di trasmissione.
” lampeggiano per due secondi, vi è un
NL
Nota:
Se si commette un errore durante il funzionamento, terminare la selezione delle funzioni con il punto ? e ripetere la selezione dal punto 2.
4 Impostare il N° dell’indirizzo della sezione interna.
Premere il pulsante [ ON/OFF] D Il display del N° dell’indirizzo dell’unità
“– –” lampeggia.
Quando vengono premuti i pulsanti [ CLOCK ( ) e ( )] C, il N° dell’indirizzo dell’unità cambia nell’ordine 00 → 01 → 02 → 03 → 04 → AL. Impostarlo sul
N° dell’indirizzo dell’unità della sezione interna di cui si vuole impostare la funzione.
I
Display N° indirizzo unità
* Impostando la modalità da 01 a 04, impostare il N° dell’indirizzo dell’unità su “00”.
* Impostando le modalità da 07, 25, 27:
• Impostando ogni sezione interna, impostare il N° dell’indirizzo dell’unità su “01-04”.
• Nell’impostazione discontinua di ogni sezione interna, impostare il N° dell’indirizzo dell’unità su “AL”.
5 Registrazione indirizzo refrigerante e N° indirizzo unità
] E. Vengono registrati l’indirizzo del refrigeranPremere il pulsante [
te e il N° dell’indirizzo dell’unità.
Dopo un certo tempo, il display del N° della modalità “– –” lampeggia.
Display N° modalità
Se si registra utilizzano il pulsante [
] E, la sezione interna registrata inizia a far funzionare il ventilatore. Se si desidera conoscere la posizione
delle sezioni interne del N° dell’indirizzo dell’unità le cui funzioni sono state
selezionate, controllare qui. Quando il N° dell’indirizzo dell’unità è 00 o AL,
tutte le sezioni interne dell’indirizzo del refrigerante selezionato fanno funzionare il ventilatore.
P
E
Es) Quando l’indirizzo del refrigerante è 00, viene registrato 01 come N° dell’indirizzo dell’unità.
Indirizzo refrigerante = 00
* Quando “
” lampeggia nel display della temperatura ambiente, l’indirizzo
del refrigerante selezionato non è nel sistema.
Quando viene visualizzato “F” nel display del N° dell’indirizzo dell’unità, e quando lampeggia insieme con il display dell’indirizzo del refrigerante, il N° dell’indirizzo dell’unità selezionata non esiste. Impostare correttamente l’indirizzo del
refrigerante e il N° dell’indirizzo dell’unità ripetendo i punti 2 e 3.
Sezione esterna
Sezione interna
N° indirizzo
unità 01
Funzionamento ventilatore
Registrazione
Comando a distanza
* Raggruppando diversi sistemi refrigeranti e quando una sezione interna diversa da quella dell’indirizzo del refrigerante specificato fa funzionare il ventilatore,
l’indirizzo del refrigerante impostato qui è probabilmente duplicato.
Riassegnare l’indirizzo refrigerante con gli interruttori DIP dell’unità esterna.
86
6 Selezione N° modalità
Selezionare il N° della modalità che si desidera impostare utilizzando i pulsanti [
impostabili.)
TEMP. (
) and (
)] F. (Si possono selezionare solo i numeri delle modalità
Display N° modalità
Modalità N° 04 = Tensione
7 Selezionare il contenuto dell’impostazione della modalità selezionata.
Quando viene premuto il pulsante [ MENU] G, il N° dell’impostazione attuale lampeggia. Utilizzarlo per controllare il contenuto attualmente impostato.
Selezionare il N° dell’impostazione utilizzando i pulsanti [
F.
TEMP. (
)e(
)]
Impostazione N° display
Impostazione N° 2 = 220 V, 230 V
Impostazione N° 1 = 240 V
” lampeggia nel display della temperatura ambiente, vi è un problema di
* Quando appare “– –” nei display del N° della modalità e del N° dell’impostazione, e “
comunicazione. Accertarsi che non vi siano sorgenti di rumore nelle vicinanze della linea di trasmissione.
GB
8 Il contenuto impostato ai punti da 3 a 7 viene registrato.
Quando si preme il pulsante [
] E , il N° della modalità e il N° dell’impostazione lampeggiano e la registrazione inizia. Il N° della modalità e il N° dell’impostazione
cessano di lampeggiare e l’impostazione termina.
9 Per selezionare più funzioni, ripetere i punti da 3 a 8.
D
0 Fine della selezione delle funzioni.
Tenere premuti i pulsanti [FILTER] A e [TEST] B contemporaneamente per almeno due secondi.
Dopo un certo tempo, il display di selezione delle funzioni scompare e il comando a distanza ritorna nella posizione OFF.
F
* Non far funzionare il climatizzatore dal comando a distanza per 30 secondi dopo il termine della selezione delle funzioni.
Nota:
Ogni volta che vengono modificate le impostazioni di funzione dell’unità interna al termine dell’installazione, accertarsi di registrare le funzioni impostate
immettendo un o un altro simbolo nel campo appropriato della Tabella 1 e della Tabella 2.
Cambiamento dell’impostazione di tensione
Assicurarsi di cambiare l’impostazione di tensione in relazione alla tensione in
uso.
<Tipo regolatore a distanza>
1 Attivare la modalità selezione funzioni
TEMP
a distanza verso il ricevitore della sezione interna e premere il tasto
F
VANE
AUTO START
CHECK LOUVER
TEST RUN
SET
h
min
RESET
2 Impostazione del numero dell’unità
Premere il pulsante temp
Ce
D per impostare il numero dell’unità “00”.
Dirigere il regolatore a distanza verso il ricevitore della sezione interna e premere il
tasto
A
min
B.
3 Selezione di una modalità
Introdurre il codice 04 per modificare l’impostazione della tensione di alimentazione usando i tasti
Ce
D. Dirigere il regolatore a distanza verso il ricevitore
B
CLOCK
della sezione e interna e premere il tasto
Numero dell’impostazione in corso:
1
CHECK
4 Selezione del numero di impostazione
Usare i tasti
Ce
D per modificare l’impostazione della tensione di alimentazione su 02 (220 V, 230 V). Dirigere il regolatore a distanza verso il sensore della
sezione interna e premere il tasto
3
h
A.
5 Selezione in continuazione di funzioni multiple
Ripetere le fasi 3 e 4 per modificare in continuazione le impostazioni di funzioni
multiple.
4
CHECK
A.
1 = 1 bip (ogni secondo)
2 = 2 bip (ogni secondo)
3 = 3 bip (ogni secondo)
2
CHECK
h
E
MODE
AUTO STOP
A.
I
C,D
FAN
h
CHECK
6 Completamento della selezione di funzione
Dirigere il regolatore a distanza verso il sensore della sezione interna e premere il
tasto
E.
P
ON/OFF
E
NL
CHECK
F.(Iniziare questa operazione
Premere due volte continuamente il pulsante
dallo stato del display del comando a distanza in posizione di arresto.)
CHECK si accende e “00” lampeggia.
C per impostare “50”. Dirigere il regolatore
Premere una volta il pulsante temp
CHECK
Nota:
Ogni volta che vengono modificate le impostazioni di funzione dopo operazioni di installazione o manutenzione, accertarsi di registrare le funzioni aggiunte con un “ ” nella colonna “Controlli” della tabella.
87
10. Cablaggi elettrici
Precauzioni da adottare per i cablaggi elettrici
Avvertenza:
4. Accertarsi che le connessioni di tutti i cavi non siano allentate.
GB
5. È possibile che alcuni cavi (di alimentazione, del comando a distanza o di
trasmissione) sopra il soffitto siano morsi dai topi. Proteggere il più possibile i
cavi inserendoli in tubi metallici.
6. Non collegare mai il cavo di alimentazione ai conduttori dei cavi di trasmissione, per evitare che questi si rompano.
7. Accertarsi di collegare dei cavi di controllo alla sezione interna, al comando a
distanza ed alla sezione esterna.
8. Collegare l’unità a terra sul lato della sezione esterna.
F
D
9. Accertarsi di effettuare il collegamento fra il blocco terminale del cavo di comando della sezione esterna e quello della sezione interna. (I cavi presentano una
polarità, cosicché devono essere collegati rispettando i numeri sul terminale.)
10. Fissare il cavo di alimentazione alla scatola di comando usando una speciale
boccola per forze di tensione (connessione PG o simile). Collegare il cavo di
comando al blocco terminale di comando attraverso il foro sagomato della
scatola di comando usando una boccola normale.
In caso di cablaggio con controllo A, è presente alta tensione sul terminale
S3 a causa del tipo di circuito elettrico, poiché non vi è alcun isolamento
elettrico tra il cavo di alimentazione e il cavo segnale comunicazioni. Pertanto disattivare l’alimentazione durante gli interventi di manutenzione. Inoltre
evitare di toccare i terminali S1, S2 e S3 quando l’alimentazione è sotto tensione. Qualora sia necessario utilizzare un isolatore tra l’unità interna e l’unità
esterna, usare un tipo a 3 poli.
NL
Cautela:
Accertarsi di collegare l’unità a terra sul lato della sezione esterna. Non collegare il cavo di massa a qualsiasi tubo del gas, tubo dell’acqua, asta di
illuminazione o cavo di messa a terra del telefono. In caso di non rispetto di
queste norme vi è il rischio di scosse elettriche.
B Interruttore dispersione di massa
I
C Cablaggio dell’alimentazione della sezione esterna
D Cablaggio dell’alimentazione della sezione interna
E Sezione esterna
F
Sezione interna
G Collegamento delle sezioni interna/esterna (polarità)
H Comando a distanza
I Collegamento sezione interna/comando a distanza (assenza di polarità)
J Messa a terra
K Cavi per il segnale di sbrinamento alternativo
L Interruttore di circuito cablaggio o interruttore di isolamento
P
E
[Fig. 10.0.2] (P.5)
88
Cablaggio del cavo di alimentazione
D
Sezione esterna
F Interruttore di circuito cablaggio o interruttore di isolamento
H Scatola terminale del cavo di comando
I
Slot dei terminali dei cavi del segnale di sbrinamento
J Disposizione dei cavi del segnale di sbrinamento
Cautela:
Il tubo del refrigerante e ed i cavi devono essere collegati dall’unità esterna
n. 1 all’unità interna n. 1 e dall’unità esterna n. 2 all’unità interna n. 2, rispettivamente.
I fili provenienti dall’unità esterna n. 1 devono essere collegati allo slot terminale TB4-1 del regolatore di tensione dell’unità interna n. 1, mentre i fili provenienti dall’unità esterna n. 2 devono essere collegati allo slot terminale
TB4-2 del regolatore di tensione dell’unità interna n. 2.
Qualsiasi errore in questi collegamenti può provocare una temperatura anomala del tubo del refrigerante ed altri inconvenienti.
[Esempio di cablaggio] (Per tubazioni metalliche)
Cavo del Cavo del segnale
Capacità
Cavo di
dell’inter- Fusibile comando a
alimentazione
di sbrinamento
distanza
ruttore
PEH-P400MYA 1,5 mm2 o più spesso 15 A
15 A Cavo o filo
–
PUH-P200MYA 4 mm2 o più spesso
30 A
32 A da 0,3 ~ 1,25 0,5 mm2 o più spesso
PEH-P500MYA 1,5 mm2 o più spesso 15 A
15 A mm 2 (max.
–
PUH-P250MYA 6 mm2 o più spesso
40 A
40 A DC 12 V) 0,5 mm2 o più spesso
* Il cavo di messa a terra deve essere dello stesso diametro dei cavi di alimentazione.
[Selezione di un interruttore del circuito per dispersione verso terra (NV)]
Per selezionare un interruttore NF o NV, invece di una combinazione di fusibili
della Classe B con interruttore, procedere come segue:
•
Nel caso di fusibili Classe B di specifica 15 A.
Fuse (class B)
Interruttore del circuito per
dispersione verso terra ELB
(con protezione contro sovraccarico)
15 A
NV100-SW
15 A
max 30 mA 0,1s
40 A
NV100-SW
40 A
max 100 mA 0,1s
50 A
NV100-SW
50 A
max 100 mA 0,1s
NV è la denominazione del prodotto Mitsubishi.
•
I cavi di alimentazione delle apparecchiature non devono essere più leggeri
del modello 245 IEC 53 o 227 IEC 53.
•
I cavi di collegamento dell'unità interna/unità esterna non devono essere più
leggeri del modello 245 IEC 57.
•
Un interruttore con la separazione per contatto di almeno 3 mm in ciascun
polo deve essere fornito con l’installazione del condizionatore d’aria.
•
È possibile estendere il cablaggio di collegamento tra le unità esterna e interna fino a un massimo di 80 m.
Se utilizzati 4 mm2 e S3 separato, max. 50 m.
Se utilizzati 6 mm2 e S3 separato, max. 80 m.
[Fig. 10.0.1] (P.5)
A Alimentazione
B
Cablaggio del cavo di comando
G Scatola terminale del cavo di alimentazione
1. Accertarsi di alimentare l’unità con lo speciale circuito.
3. Installare l’unità in modo da impedire che uno qualsiasi dei cavi del circuito di
comando (comando a distanza, cavi di trasmissione) entri in contatto diretto
con il cavo di alimentazione situato al di fuori dell’unità.
Sezione interna
C
E Interruttore dispersione di massa
I collegamenti elettrici devono essere eseguiti da personale qualificato conformemente agli standard tecnici per le installazioni elettriche, forniti con i
manuali d’installazione. Occorre inoltre usare circuiti speciali. Qualora il circuito non possieda la capacità sufficiente o sia stato installato in modo non
corretto, può esservi un rischio di cortocircuito o di incendio.
2. Accertarsi di installare un interruttore del circuito per dispersione verso terra
sul circuito di alimentazione.
A
Cautela:
Utilizzare esclusivamente interruttori e fusibili di capacità corretta. L’utilizzo
di fusibili o di cavi o fili di rame con una capacità troppo elevata, può creare
un rischio di cattivo funzionamento del sistema o di incendio.
Ubicazione dei fori dei cavi
[Fig. 10.0.3] (P.5)
A
Per cavi del comando a distanza
B
Per cavi della sezione esterna
C
Per cavi dell’alimentazione
11. Prova di funzionamento
11.1. Operazioni preliminari alla prova di funzionamento
3 Premere il pulsante [
La prova di funzionamento può essere eseguita sia con la sezione esterna che
con quella interna.
4 Controllare il corretto funzionamento del ventilatore della sezione esterna
Le caratteristiche di comando automatico della sezione esterna consentono di
impostare sempre la velocità ottimale del ventilatore. Detto ventilatore, infatti,
funziona alla velocità più adatta alle condizioni ambientali esterne. Esso può
anche arrestarsi o funzionare in senso inverso, in funzione appunto delle caratteristiche dell’aria esterna, senza che ciò sia considerato un cattivo funzionamento del sistema.
Usare un misuratore di resistenza di isolamento da 500 V per controllare che
la resistenza tra il terminale di alimentazione e la terra sia pari a 1,0 MΩ o
superiore. Se così non fosse (1,0 MΩ o meno), non azionare l’unità. * Non
toccare in alcun modo il misuratore dei terminali della connessione interna/
esterna S1, S2 e S3. Sussiste il rischio di incidenti.
5 Premere il pulsante [
mento
ON/OFF] per ripristinare la prova di funziona-
•
La prova di funzionamento verrà disattivata automaticamente dopo due ore,
conformemente all’avvenuta impostazione di due ore con la procedura AUTO
STOP (IMPOSTAZIONE AUTOMATICA).
•
La sezione esterna deve funzionare perfettamente. (L’eventuale cattivo funzionamento potrà essere diagnosticato con il LED1 del pannello.)
•
Durante la prova di funzionamento, il display della temperatura ambiente
visualizza le temperature della tubazione della sezione interna.
•
Controllare se la valvola a sfera del liquido e del gas è completamente aperta.
•
•
Controllare la fase di alimentazione elettrica. Qualora sia invertita, il ventilatore potrà ruotare nella direzione sbagliata, fermarsi o emettere un suono strano.
Nel caso della prova di funzionamento, si attiva il timer di spegnimento (OFF)
e la prova di funzionamento si interrompe automaticamente dopo due ore.
•
La sezione di indicazione della temperatura della stanza indica la temperatura
di controllo per le unità interne durante la prova di funzionamento.
•
Controllare che tutte le unità interne funzionino correttamente per il funzionamento doppio o triplo.
6 Registrare un numero di telefono
È possibile registrare nel telecomando il numero di telefono del negozio di
riparazioni, dell’ufficio vendite, ecc., da contattare in caso di problemi. Se si
verifica un errore, il numero di telefono viene visualizzato sul display.
Per le procedure di registrazione, vedere la sezione 9.4 relativa alle impostazioni
di funzione del comando a distanza.
In caso di installazione di modelli specifici che richiedono una modifica delle
impostazioni per la presenza di soffitti più alti o di dispositivi di attivazione/
disattivazione dell’alimentazione, fare riferimento alla sezione relativa alla selezione delle funzioni tramite il comando a distanza.
Ultimati i controlli di cui sopra, eseguire la prova di funzionamento come da
istruzioni sottostanti.
Display della modalità di funzionamento
“TEST RUN” (PROVA DI FUNZIONAMENTO) e
“OPERATION MODE” (MODALITÀ DI FUNZIONAMENTO) vengono visualizzati alternatamente.
Il timer arresta la prova di funzionamento dopo due ore.
11.2. Procedure per la prova di funzionamento
1) Sezione interna
˚C
MENU
1 Accendere l’interruttore di alimentazione principale
BACK
PAR-21MAA
Quando il display del comando a distanza visualizza “ ”, il comando a distanza è disattivato. Disattivare l’indicatore “ ” prima di usare il comando a
distanza.
Indicatore “CENTRALLY
CONTROLLED” (CONTROLLATO CENTRALMENTE)
˚C
˚C
TEMP.
ON/OFF
2 Premere due volte il pulsante [TEST] successivamente entro tre secondi. Inizia la prova di funzionamento.
“TEST RUN” (PROVA DI FUNZIONAMENTO) e “OPERATION MODE” (MODALITÀ DI FUNZIONAMENTO) vengono visualizzati alternatamente.
MONITOR/SET
ON/OFF
ON/OFF
FILTER
DAY
CLOCK
CHECK TEST
OPERATION
CLEAR
Display della temperatura della tubazione
Arrestare la prova di funzionamento premendo il pulsante
[ ON/OFF].
Durante la prova di funzionamento, la spia RUN resta accesa.
Pulsante [TEST]
Pulsante [
NL
Procedure operative
]
(*1)
Dopo l’accensione, il sistema passa al modo di avviamento e la spia di funzionamento del comando a distanza (verde) e l’indicazione “PLEASE WAIT” (ATTENDERE) nel display lampeggiano. Inoltre per i LED sottostrato dell’unità interna,
LED 1 e LED 2 si illuminano (quando l’indirizzo è 0) o diventano fiochi (quando
l’indirizzo non è 0) e LED 3 lampeggia. Per l’indicazione LED sottostrato dell’unità
esterna,
e
sono visualizzati alternatamente a intervalli di 1 secondo.
•
I
TEMP.
Se una delle operazioni sopra descritte non funziona correttamente, considerare le seguenti cause e se necessario porvi rimedio. (I seguenti sintomi sono
stati determinati nel modo di prova di funzionamento. Notare che “avviamento” nella tabella indica la visualizzazione *1 sopra.)
E
•
Accendere il sistema almeno 12 ore prima di eseguire la prova di funzionamento, in modo da alimentare la resistenza del carter. Qualora il sistema non
sia rimasto acceso per almeno 12 ore, il compressore ne può essere danneggiato.
P
•
D
•
F
Al termine dell’installazione, della sistemazione delle tubazioni e del cablaggio
delle sezioni interna ed esterna, controllare eventuali perdite di refrigerante,
l’eventuale allentamento dei cavi di alimentazione e di controllo e che i poli
non siano stati invertiti.
GB
1. Elenco per la spunta
•
]
Modalità di raffreddamento/deumidificazione: Viene soffiata l’aria fredda.
Modalità di riscaldamento: Viene soffiata l’aria calda (dopo un certo periodo).
89
Sintomi
Indicazione sul comando a distanza
Il comando a distanza visualizza “PLEASE WAIT”
(ATTENDERE) e il funzionamento non è possibile.
Dopo l’accensione, “PLEASE WAIT” (ATTENDERE)
rimane visualizzato per 3 minuti e quindi viene
visualizzato un codice di errore.
Il sistema si accende e “EE” o “EF” sono visualizzati
dopo che è stato visualizzato “PLEASE WAIT” (ATTENDERE).
GB
Non appaiono messaggi di indicazione anche se l’interruttore di funzionamento del comando a distanza
è attivato (ON) (la spia di funzionamento non si illumina).
*
F
D
Le indicazioni di funzionamento appaiono ma scompaiono poco dopo anche se si eseguono le operazioni del comando a distanza.
Indicazione LED sottostrato unità esterna
Dopo la visualizzazione di “avviamento”, viene visualizzato “00” (funzionamento corretto).
Dopo la visualizzazione di “avviamento”, viene visualizzato un codice
di errore.
Dopo la visualizzazione di “avviamento”, viene visualizzato “F1” (fase
negativa).
Dopo la visualizzazione di “avviamento”, viene visualizzato “00” o “EE” (“EE”
viene visualizzato quando si esegue
la prova di funzionamento).
Dopo la visualizzazione di “avviamento”, viene visualizzato “EA” (errore per il numero di unità) o “Eb”
(errore di numero unità).
Dopo la visualizzazione di “avviamento”, viene visualizzato “00” (funzionamento corretto).
Dopo la visualizzazione di “avviamento”, viene visualizzato “00” (funzionamento corretto).
Dopo la visualizzazione di “avviamento”, viene visualizzato “00” (funzionamento corretto).
Causa
• Dopo l’accensione, l’avviamento del sistema dura circa 2 minuti e viene
visualizzato “PLEASE WAIT” (ATTENDERE) (funzionamento corretto).
• Il connettore di installazione protettiva dell’unità esterna è aperto.
• Fase negativa e fase aperta del blocco terminali di alimentazione dell’uni/fase tripla: L1, L2, L3, N,
)
tà esterna (fase singola: L, N,
• Collegamento erroneo del blocco terminali esterno (fase singola: L, N,
/fase tripla: L1, L2, L3, N,
collegamento a massa e S1, S2, S3)
• La costruzione dell’unità esterna e dell’unità interna differiscono.
• Il cablaggio per le unità interne e quella esterna non è collegato correttamente. (La polarità è errata per S1, S2, S3)
• Cortocircuito del filo di trasmissione del comando a distanza
• Non esiste un’unità esterna per l’indirizzo 0 (l’indirizzo è diverso da 0).
• Bruciatura del filo di trasmissione del comando a distanza
• Dopo l’annullamento della selezione funzioni, il funzionamento non è possibile per circa 30 secondi (funzionamento corretto).
Premere due volte di seguito il tasto “CHECK” (CONTROLLI) del comando a distanza per eseguire l’autocontrollo. Vedere la tabella seguente per il significato delle
indicazioni di codice di errore.
LCD
Natura dell’anomalia
LCD
Natura dell’anomalia
LCD
P1
P2
P4
P5
Errore sensore di suzione
Errore sensore tubazioni (liquido)
Errore sensore di drenaggio
Operazione di protezione sovrafflusso drenaggio
Operazione di protezione congelamento/
surriscaldamento
P8
P9
Errore di temperatura tubazioni
Errore sensore tubazioni (tubazione a 2
fasi)
Anomalia dell’unità esterna
Anomalia dell’unità esterna
Errore di segnale tra comando a distanza
e unità interna
E6 ~ EF
---FFFF
P6
U0 ~ UP
F1 ~ FA
E0 ~ E5
Natura dell’anomalia
Errore di segnale tra unità ed esterna
Nessun errore rilevato
Nessuna unità rilevante
NL
Vedere la tabella sotto per dettagli sulle indicazioni LED (LED 1, 2, 3) sottostrato dell’unità interna.
LED 1 (alimentazione microcomputer)
LED 2 (fornitura comando a distanza)
LED 3 (segnali interni ed esterni)
Visualizza lo stato ON/OFF dell’alimentazione per il controllo. Controllare che sia illuminato durante l’uso normale.
Visualizza lo stato ON/OFF della fornitura per il comando a distanza con filo. Si illumina solo per l’unità interna collegata all’unità
esterna con indirizzo “00”.
Visualizza il segnale tra unità interna ed esterna. Controllare che lampeggi durante il funzionamento normale.
[Fig. 11.2.1] (P.6)
1) Punti da controllare
•
Dopo l’installazione delle unità interna ed esterna e il collegamento delle tubazioni e dei cablaggi, controllare che l’unità non presenti perdite di refrigerante,
collegamenti allentati o polarità errate.
•
Controllare che non esistano fasi negative e fasi aperte. (Il messaggio F1 per
la fase negativa e il messaggio F2 per la fase aperta lampeggiano al LED 1
sottostrato dell’unità esterna. In questo caso ricollegare correttamente.)
•
Misurare l’impedenza tra i terminali di alimentazione (fase singola: L, N,
/
fase tripla: L1, L2, L3, N,
) e la massa con un Megger da 500 V e verificare
che sia di 1,0 MΩ o più. Non attivare il sistema se la misurazione è inferiore a
1,0 MΩ. * Non eseguire mai questa operazione sui terminali di collegamento
esterni (S1, S2, S3) perché causa danni.
•
Quando non ci sono errori all’unità esterna.
(Se c’è un errore all’unità esterna, può essere stimato al LED 1 [indicazione
digitale] sottostrato dell’unità esterna.)
•
Le valvole di arresto sono aperte su entrambi i lati liquido e gas.
Dopo aver controllato quanto sopra, eseguire la prova di funzionamento secondo quanto segue.
E
I
2) Unità esterna
P
2) Inizio e fine della prova di funzionamento
•
Operazione dall’unità interna
Eseguire la prova di funzionamento con il manuale di installazione per l’unità
interna.
•
Operazione dall’unità esterna
Eseguire le impostazioni per inizio, fine e modo di funzionamento (raffreddamento, riscaldamento) della prova di funzionamento usando l’interruttore DIP
SW 4 sul sottostrato dell’unità esterna.
90
A Arresto
B Raffreddamento
C Funzionamento
D
Riscaldamento
1 Impostare il modo di funzionamento (raffreddamento, riscaldamento)
usando SW 4-2
2 Regolare SW 4-1 su ON. Il modo di funzionamento impostato con SW 4-2
viene usato e la prova di funzionamento comincia
3 Regolare SW 4-1 su OFF per concludere la prova di funzionamento
Si possono sentire deboli battiti emessi vicino alla ventola durante la prova di
funzionamento. Queste sono fluttuazioni di momento di forze dovute al controllo dei giri della ventola. Non si tratta di un problema del prodotto.
Nota:
Il modo di funzionamento impostato con SW 4-2 non può essere cambiato
durante la prova di funzionamento. (Per cambiare il modo della prova di funzionamento, fermare l’apparecchio con SW 4-1, cambiare il modo di funzionamento e quindi riavviare la prova di funzionamento con SW 4-1.)
•
•
Il timer viene attivato per interrompere automaticamente la prova di funzionamento dopo due ore.
•
Nel corso della prova di funzionamento, sul display della temperatura ambiente della sezione interna verrà visualizzata la temperatura della tubazione della
sezione interna.
11.3. Autocontrollo
Ricerca lo storico degli errori di ciascuna unità utilizzando il comando a distanza.
1 Commutare sulla modalità di autocontrollo.
Premendo due volte il pulsante di controllo [CHECK] H in successione entro
tre secondi, appare il display mostrato sotto.
Autocontrollo indirizzo o autocontrollo indirizzo refrigerante
2 Impostare il N° dell’indirizzo o il N° dell’indirizzo del refrigerante di cui si desidera fare l’autocontrollo.
Quando vengono premuti i pulsanti [
TEMP. ( ) and ( )] F, l’indirizzo
aumenta e diminuisce fra 01 e 50 o fra 00 e 15. Impostarlo sul N° dell’indirizzo
o sul N° dell’indirizzo del refrigerante di cui si desidera eseguire l’autocontrollo.
Circa tre secondi dopo l’operazione di modifica, l’indirizzo del refrigerante cessa di lampeggiare e inizia l’autocontrollo.
3 Display risultati autodiagnosi <Storico errori> (Per il significato dei codici di errore, vedere l’elenco dei codici di errore nella sezione 13. Ricerca dei guasti)
ERROR CODE
ERROR CODE
Indirizzo a 3 cifre o N° indirizzo unità a 2 cifre
<Quando non esiste il lato opposto>
ERROR CODE
GB
<Quando non c’è lo storico degli errori>
4 Reset storico errori
Lo storico degli errori viene visualizzato nel display dei risultati di autocontrollo 3.
ERROR CODE
Quando si preme due volte il pulsante [ MENU] D successivamente per tre
secondi, l’autocontrollo dell’indirizzo o dell’indirizzo del refrigerante lampeggia.
ERROR CODE
Quando è stato ripristinato lo storico degli errori, appare il display mostrato sotto.
Quando il resettaggio dello storico degli errori non funziona, viene nuovamente
visualizzato il contenuto degli errori.
D
Codice di errore a 4 cifre o codice di errore a 2 cifre
5 Reset autocontrollo
Vi sono due modi per ripristinare l’autocontrollo.
Premere due volte il pulsante di controllo [CHECK] H in successione entro tre secondi. → Ripristinare l’autocontrollo e ritornare nello stato precedente all’autocontrollo.
Premere il pulsante [ ON/OFF] I. → Viene ripristinata l’autocontrollo e le sezioni interne si arrestano.
(Se il funzionamento è vietato, questa operazione è inefficace.)
NL
11.4. Controllare del comando a distanza
Se non è possibile eseguire operazioni dal comando a distanza, usare questa funzione per diagnosticare il comando a distanza.
Segno della corrente
I
1 Per prima cosa controllare il segno della corrente.
Quando non viene applicata la tensione normale (DC12V) al comando a distanza, il segno della corrente sparisce.
Quando il segno della corrente è sparito controllare il cablaggio del comando a
distanza e della sezione interna.
F
ERROR CODE
2 Commutare sulla modalità di controllo del comando a distanza.
Quando si tiene premuto il pulsante di controllo [CHECK] H per almeno cinque
secondi, appare il display mostrato sotto.
Quando si preme il pulsante [FILTER] A, inizia il controllo del comando a distanza.
3 Risultato controllo comando a distanza
Quando il comando a distanza è normale
E
Quando il comando a distanza è difettoso
(Display errore 1) “NG” lampeggia → Circuito invio/ricezione comando a distanza anormale
Poiché non vi sono problemi con il comando a distanza, verificare le altre cause.
È necessario commutare il comando a distanza.
Se il problema non riguarda il comando a distanza controllato
(Codice errore 2) “E3” “6833” “6832” lampeggiano → Non è possibile inviare
(Display errore 3) “ERC” e il conteggio degli errori nei dati vengono visualizzati → Generazione errori nei dati
P
ERROR CODE
Se la linea di trasmissione è rumorosa o la sezione interna o un altro comando a
distanza sono difettosi, controllare la linea di trasmissione e l’altro comando a
distanza.
“Conteggio errori nei dati” è la differenza fra il numero di bit dei dati inviati con il comando
a distanza e il numero di bit effettivamente inviati alla linea di trasmissione. In questo
caso, i dati inviati erano disturbati dal rumore, ecc. Controllare la linea di trasmissione.
Quando il conteggio degli errori nei dati è 02
Dati inviati con il comando a distanza
Dati inviati sulla linea di trasmissione
91
4 Reset controllo comando a distanza
Quando si tiene premuto il pulsante di controllo [CHECK] H per almeno cinque secondi, il controllo del comando a distanza viene ripristinato e le spie “PLEASE WAIT”
(ATTENDERE) e “RUN” lampeggiano. Circa 30 secondi dopo, il comando a distanza ritorna nello stato precedente al controllo.
12. Prova di funzionamento [Per telecomando senza fili]
12.1. Prima della prova di funzionamento
12.2. Autocontrollo
s Dopo aver completato l’installazione, i collegamenti elettrici e le tubazioni delle sezioni interne ed esterne, controllare le eventuali perdite di refrigerante, l’eventuale allentamento dei cavi dell’alimentazione o di controllo e la polarità.
1 Attivare l’alimentazione.
s Controllare, mediante un megaohmmetro da 500 volt, se la resistenza fra
i morsetti dell’alimentazione e la massa èdi almeno 1,0 MΩ .
s Non eseguire questa prova sui morsetti del cablaggio di controllo (circuito a bassa tensione).
Avvertenza:
Non avviare il condizionatore d’aria se la resistenza dell’isolamento è inferiore a 1,0 MΩ .
GB
Cautela:
Il compressore non si avvierà se la connessione della fase di alimentazione
non è corretta.
A
CHECK
CHECK
2 Premere due volte il pulsante
.
(Avviare questa operazione con il display
del comando a distanza spento.)
A L’indicatore CHECK inizia a illuminarsi.
B
Il messaggio “00” inizia a lampeggiare.
B
ON/OFF
TEMP
4
h
3 Premere il pulsante
mentre il comando a distanza viene tenuto rivolto
verso il ricevitore dell’unità. Il codice di
controllo verrà indicato dal numero di
volte che il segnale sonoro della ricevitore sarà attivato e dal numero di volte
che la spia di funzionamento lampeggerà.
MODE
2
FAN
AUTO STOP
VANE
AUTO START
CHECK LOUVER
TEST RUN
SET
h
3
min
RESET
CLOCK
4 Premere il pulsante di accensione/spegnimento ON/OFF per arrestare la funzione di autocontrollo.
NL
F
D
•
•
Per la descrizione di ciascun codice di controllo, fare riferimento alla tabella sottostante.
1 Codice di controllo
P1
P2
P4
P5
P6
P8
P9
Anomalia
Errore sensore d’ingresso
Errore sensore di tubazione
Errore nel sensore di drenaggio
Errore nella pompa di drenaggio
Protezione da congelamento/surriscaldamento
Errore di temperatura tubazione
Errore sensore TH5
U0–UP
Errore nell’unità esterna
F1–FA
Errore nell’unità esterna
E0–E5
E6–EF
––
FFFF
Errore di segnale tra comando a distanza e unità interna
Errore di comunicazione fra le sezioni interne ed esterne
Nessun storico dell’allarme
Nessuna unità
2 Segnale sonoro
1 singolo bip
2 singoli bip
4 singoli bip
5 singoli bip
6 singoli bip
8 singoli bip
2 singoli bip
3 LED FUNZ.
1 accensione di 1 secondo
2 accensioni di 1 secondo
4 accensioni di 1 secondo
5 accensioni di 1 secondo
6 accensioni di 1 secondo
8 accensioni di 1 secondo
2 accensioni di 1 secondo
Accensione di 0,4 secondi
1 doppio bip
+ 1 accensione di 0,4 secondi
Accensione di 0,4 secondi
1 doppio bip
+ 1 accensione di 0,4 secondi
Segnali sonori diversi da quelli descritti sopra Accensioni diverse da quelle descritte sopra
Segnali sonori diversi da quelli descritti sopra Accensioni diverse da quelle descritte sopra
Nessun segnale sonoro
Nessuna accensione
Triplo bip
Nessuna accensione
Sul comando a distanza senza filo
2 Il cicalino suona ininterrottamente dalla sezione ricevente dell’unità interna.
I
3 Lampeggiamento della spia di funzionamento
•
Sul comando a distanza con filo
1 Controllare il codice visualizzato sul display LCD.
•
Qualora non sia possibile far funzionare l’unità correttamente dopo aver eseguito la prova di funzionamento di cui sopra, fare riferimento alla tabella sottostante per
eliminare la causa della disfunzione.
Sintomo
Comando a distanza con filo
PLEASE WAIT (ATTENDERE)
E
PLEASE WAIT (ATTENDERE) → Codice di errore
Non appaiono i messaggi sul display
anche quando l’interruttore di funzionamento è acceso (ON) (la spia di funzionamento non si accende).
P
Per 2 minuti circa
dopo l’accensione
Dopo che sono
trascorsi 2 minuti
dall’accensione
LED 1, 2 (scheda a circuiti stampati della sezione interna)
LED 1 e LED 2 sono accesi, quindi LED 2 si
spegne e solo LED 1 è acceso (funzionamento corretto).
• Per circa 2 minuti dopo l’accensione dell’unità, l’attivazione con il comando a distanza non è possibile a causa
dell’avviamento del sistema (funzionamento corretto).
Solo LED 1 è accesso. → LED 1 e LED 2
lampeggiano.
• Il connettore del dispositivo di protezione della sezione
esterna non è collegato.
• Cablaggio della fase aperta o di inversione del blocco terminale di alimentazione della sezione esterna (L1, L2, L3)
Solo LED 1 è acceso. → LED 1 lampeggia
due volte, LED 2 lampeggia una volta.
• Cablaggio non corretto fra le sezioni interne e esterne
(polarità non corretta di S1, S2, S3)
• Cortocircuito del filo del comando a distanza
Sul comando a distanza senza filo con le condizioni di cui sopra, si possono verificare i seguenti fenomeni.
•
Non vengono accettati i segnali provenienti dal comando a distanza.
•
La spia OPE lampeggia.
•
Il cicalino fa un breve suono acuto.
92
Motivo
Nota:
Il funzionamento non è possibile per circa 30 secondi dopo la cancellazione della selezione della funzione (funzionamento corretto).
Per una descrizione di ciascun LED (LED 1, 2, 3) previsto per l’unità di controllo interna, fare riferimento alla tabella seguente.
LED1 (alimentazione del microcomputer)
Indicata la presenza dell’alimentazione di comando. Accertarsi che questo LED sia sempre acceso.
LED2 (alimentazione del regolatore a distanza)
IIndica se il regolatore a distanza è alimentato. Questo LED si accende solo nel caso in cui la sezione
interna collegata alla sezione esterna di refrigerante abbia indirizzo “0”.
LED3 (comunicazione fra le sezioni interne ed esterne)
Indica lo stato della comunicazione fra le sezioni interne ed esterne. Accertarsi che questo LED
lampeggi sempre.
12.3. Metodo per eseguire la prova di funzioA
namento
5 Premere il pulsante
bia.
ON/OFF
A Vengono visualizzati l’indicatore
TEST RUN ed il modo operativo in cor-
TEMP
FAN
AUTO STOP
VANE
AUTO START
5
6
3,4
CHECK LOUVER
so.
TEST RUN
RESET
Nota:
• Rivolgere frontalmente il comando a distanza verso il ricevitore dell’unità interna mentre si eseguono le fasi da 2 fino a 6 della procedura.
• Non è possibile che funzioni in modo FAN (ventilatore),
DRY(deumidificazione) o AUTO (automatico).
CLOCK
D
SET
h
min
2
e verificare se la velocità del ventilatore cam-
6 Premere il pulsante di accensione/spegnimento ON/OFF (ATTIVAZIONE/
DISATTIVAZIONE) per arrestare la prova di funzionamento.
7
MODE
FAN
GB
.
(Avviare questa operazione con il
display del comando a distanza
spento.)
MODE
TEST RUN
2 Premere due volte continuamente
TEST RUN
e con-
per attivare il modo HEAT (riscal4 Premere il pulsante
damento) e controllare se l’aria riscaldata viene soffiata dall’unità.
1 Attivare l’alimentazione almeno 12
ore prima della prova di funzionamento.
il pulsante
MODE
3 Premere il pulsante
per attivare il modo COOL
trollare poi se l’aria fredda viene soffiata dalla sezione interna.
13. Ricerca dei guasti
13.1. Come risolvere i problemi della prova di funzionamento
F
Elenco dei codici di errore: particolarità
Particolarità degli errori
Ubicazione problemi
NL
Comando a Distanza
Comunicazione dell’unità di comando a distanza – errore di ricezione
Comando a Distanza
Errore della scheda del comando a distanza
Comando a Distanza
Comunicazione dell’unità di comando a distanza – errore di trasmissione
Sezioni interne
Comunicazione dell’unità di comando a distanza – errore di ricezione
Sezioni interne
Comunicazione dell’unità di comando a distanza – errore di trasmissione
Sezioni interne
Comunicazione tra le sezioni interna ed esterna – errore di ricezione
Sezioni interne
Comunicazione tra le sezioni interna ed esterna – errore di trasmissione
Sezioni esterna
Comunicazione tra le sezioni interna ed esterna – errore di ricezione
Sezioni esterna
Comunicazione tra le sezioni interna ed esterna – errore di trasmissione
Errore del cablaggio di connessione interno/esterno, sovraccarico della sezione interna (5 unità o più)
Sezioni esterna
Sezioni esterna
Errore del cablaggio di connessione interno/esterno (interferenze, allentamento)
Sezioni esterna
Uso prolungato
Errore di comunicazione in serie
Sezioni esterna
Pannello in rete
Errore di comunicazione in serie
Sezioni esterna
Fase di inversione, oltre la fase di verifica
Circuito di entrata difettoso
Sezioni esterna
Pannello in rete
Duplicazione impostazione indirizzo in rete
Errore dell’unità di trasmissione in PH/W
Pannello in rete
Pannello in rete
Linea di trasmissione occupata
Pannello in rete
Errore di comunicazione dell’unità con trasmissione P
Pannello in rete
Errore dell’unità – non ACK
Pannello in rete
Errore dell’unità – nessuna risposta
–
Codice di errore indeterminato
Sezioni esterna
Errore temperatura di scarico
Connettore cortocircuito CN23 non inserito
Sezioni esterna
Sezioni esterna
Termistore aperto/corto della temperatura di scarico
Termistore aperto/corto della temperatura evaporatore/condensatore della temperatura del liquido
Sezioni esterna
Interruzione del compressore per sovracorrente (funzionamento 51C)
Sezioni esterna
Anomalia dovuta a pressione troppo elevata (funzionamento 63H1)
Sezioni esterna
Anomalia dovuta a pressione troppo bassa (funzionamento 63L)
Sezioni esterna
Errore del circuito vuoto dell’alimentazione sincronica
Sezioni esterna
Anomalia del sensore di ingresso
Sezioni interne
Anomalia del sensore della tubazione
Sezioni interne
Anomalia del sensore di drenaggio
Sezioni interne
Funzionamento dell’unità di protezione per traboccamento drenaggio
Sezioni interne
Errore perdita acqua (soltanto PDH)
Sezioni interne
Operazione di prevenzione gelo
Sezioni interne
Operazione di prevenzione sovracorrenti
Sezioni interne
Anomalia temperatura tubazione
Sezioni interne
I
6831, 6834
6201, 6202
6832, 6833
6831, 6834
6832, 6833
6740, 6843
6841, 6842
6840, 6843
6841, 6842
6844
6845
6846
0403
0403
4103
4115
6600
6602
6603
6606
6607
6608
indeterminato
1102
1108
5104
5105
4101
1302
1300
4115
5101
5102
2503
2502
2500
1503
1504
1110
E
Display MELANS
E0
E1, E2
E3
E4
E5
E6
E7
E8
E9
EA
EB
EC
ED
EE
F1
F8
A0
A2
A3
A6
A7
A8
EF
U2
U2
U3
U4
U6
UE
UL
F8
P1
P2
P4
P5
P5
P6
P6
P8
P
Display dell’unità del
comando a distanza
93
•
A seconda della posizione dell’interruttore SW2 sul pannello della sezione esterna, i segmenti si illuminano per indicare le condizioni di funzionamento dell’unità e i
particolari del codice di controllo.
Impostazione
Articolo
dell’interruttore SW 2 123456
Modalità di funzionamento/uscita relè
000000
Visualizzazione del display
decimali
unità
O: arresto
C: raffreddamento
H: riscaldamento
d: sbrinamento
1: SV1
2: 21S4
4: 52C
Quando si verifica un guasto, il relativo codice e il segnale (*1) vengono
visualizzati alternativamente.
Condizione di controllo della sezione
esterna
011110
(IC1)
(IC2)
Condizione di controllo della sezione interna
GB
010110
(IC3)
(IC4)
Condizione di controllo della sezione interna
Sezioni interne
N.2
Sezioni interne
N.4
Sezioni interne
N.1
Sezioni interne
N.3
Sezioni esterna
Es. Durante la modalità di raffreddamento, quando 52C e
SV1 vengono attivati: C5
Modalità di controllo
Sezioni interne
Sezioni esterna
Display
0
Normale
←
1
Regolazione calore
←
2
Sbrinamento
←
3
—
←
4
Riscaldatore attivato
←
5
Prevenzione gelo
←
6
Prevenzione sovracorrenti
←
7
Compressore disattivato
←
F
D
110110
Sistema di display della modalità
di controllo
Uscita relè = SV1 + 21S4 + 52C
011100
Cronologia codici di errore 1
111100
Cronologia codici di errore 2
Il codice di errore (ad es., U8, UA) e il relativo indicatore (*1) vengono visualizzati alternativamente.
*1 Sistema di display per indicatori di errore
L’indicatore equivale ai numeri seguenti
0 ............. Sezioni esterna
1 ............. Sezioni interne N.1
2 ............. Sezioni interne N.2
3 ............. Sezioni interne N.3
4 ............. Sezioni interne N.4
13.2. Le situazioni seguenti non costituiscono né problemi né errori
Display dell’unità del
comando a distanza
Causa
L’impostazione del ventilatore viene modifica
durante la fase di riscaldamento.
Display normale
Con il termostato disattivato, verrà attivato il funzionamento a velocità lenta.
Con il termostato attivato, l’aria raggiungerà automaticamente il valore impostato in
base alla temperatura della tubazione e ai tempi.
Il ventilatore si arresta durante la fase di riscaldamento.
Display di sbrinamento
Quando l’interruttore viene attivato, il ventilatore non entra in funzionamento.
Operazioni di riscaldamento in
corso
Dopo aver attivato l’interruttore o finché la temperatura della tubazione non avrà raggiunto i 35 °C, il funzionamento avverrà a velocità lenta per 5 minuti. Quindi, si avrà un
funzionamento a bassa velocità per 2 minuti potendo poi procedere all’impostazione.
(Controllo di regolazione dell’aria calda.)
Il ventilatore della sezione esterna ruota in
senso contrario o si arresta e si rileva un rumore strano.
Display normale
Dato il rischio di collegare l’alimentazione alla sezione esterna in fase di inversione,
controllare la correttezza della fase stessa.
I
NL
Problema
Il ventilatore si arresta durante la fase di sbrinamento.
E
Nota:
Qualora il ventilatore dell’unità interna non dovesse funzionare, controllare se non è scattato il relè di sovracorrente del motore del ventilatore.
Se il relè di sovracorrente è scattato, ristabilirlo dopo avere eliminato la causa del problema (per esempio blocco del motore).
Per ristabilire il relè di sovracorrente, aprire il regolatore di tensione e premere il gancetto verde sulla parte inferiore del relè fino ad udire uno scatto. Liberare
il gancetto ed assicurarsi che torni nella posizione originale.
Si fa rilevare che in caso di pressione eccessiva, il gancetto non tornerà nella posizione originale.
14. Controllo del sistema
14.1. Impostazioni del sistema
[Fig. 14.1.1] (P.6)
P
A Unità esterna
B Unità interna
C Comando a distanza principale
D Comando a distanza secondario
E Standard 1:1 (Indirizzo refrigerante = 00)
F Indirizzo refrigerante = 01
G Indirizzo refrigerante = 02
* Impostare l’indirizzo refrigerante usando l’interruttore DIP dell’unità esterna.
94
1 Collegamento dal comando a distanza
Questo filo è collegato a TB5 (blocco terminali per comando a distanza) dell’unità
interna (non polare).
2 Quando si usano diversi raggruppamenti di sistema refrigerante.
Si possono controllare come gruppo unico fino a 16 sistemi refrigerante usando il
comando a distanza MA.
Nota:
In un sistema con un unico refrigerante, non occorre il cablaggio 2.
SW1
Tabella delle
funzioni
<SW1>
ON
OFF
1 2 3 4 5 6
Funzione
1 Sbrinamento
obbligatorio
2 Azzeramento
SW1
cronistoria errore
Impostazioni
3 Impostazione
funzione
4 indirizzo sistema
5 refrigerante
6
Funzionamento secondo
l’impostazione dell’interruttore
Attivazione Disattivazione
Avvio
Normale
Azzeramento
Normale
Impostazioni per gli indirizzi
unità esterna da 0 a 15
14.2. Esempi di impostazioni dell’indirizzo
sistema refrigerante
1
Sezioni
interne
PEH-P400,
500MYA
Sezioni Indirizzo sistema refrigerante Unità di alimentazione
di comando a distanza
esterna
dell’unità esterna
N.1
00
N.2
01~15
GB
Es.
D
* Impostare l’indirizzo sistema refrigerante di una unità esterna su 00 per l’alimentazione del comando a distanza.
(l’indirizzo sistema refrigerante è impostato su 00 come impostazione predefinita.)
Non duplicare l’impostazione dell’indirizzo sistema refrigerante nello stesso sistema.
14.3. Metodo di impostazione controllo capacità (solo PEH-P400, 500MYA)
E
I
NL
Unità esterna laterale N.1 Unità esterna laterale N.2
Disattivazione
Attivazione
P
DipSW5-1
F
Per PEH-P400, 500MYA con due unità esterne, la capacità può essere impostata
su 0%, 50% o 100%.
Prima di collegare l’alimentazione, impostare l’unità esterna utilizzando i relativi
interruttori DIP, come indicato nella seguente tabella.
95