1
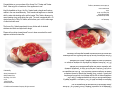
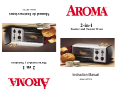
Model: ABT-318
Instruction Manual
2 en 1
Horno tostador y Tostadora
Toaster and Toaster Oven
2-in-1
Manual de Instrucciones
Modelo: ABT-318
Felicidades por su compra del Tostador y Horno Tostador 2 en 1 de Aroma.
¡Ahora disfrutará de la conveniencia de dos aparatos en uno!
Ideal para un desayuno rápido, el 2 en 1 tuesta pan o rosquillas (bagels) y
calienta panecillos en el horno de manera simultánea. El pan y las
rosquillas gruesos no son ningún obstáculo con los orificios extra anchos
para tostar, y el botón "Stop" (detener) del tostador le permite cancelar el
tostado en cualquier momento durante el ciclo. El horno está equipado con
un reloj de 15 minutos y una función de "stay on" (encendido constante)
que le permite cocinar una amplia gama alimentos con facilidad.
© 2006 Aroma Housewares Company All rights reserved.
Aroma Housewares Co.
6469 Flanders Drive
San Diego, CA 92121
U.S.A.
1-800-276-6286
www.aromaco.com
Published By:
El 2 en 1 de Aroma combina a la perfección con cualquier cocina por su
terminado de acero inoxidable cepillado y diseño retro estilizado.
Por favor visítenos en línea en el sitio www.AromaCo.com para informarse
más acerca de las soluciones de aparatos pequeños que ofrecemos.
Please visit us online at www.AromaCo.com to learn more about the small
appliance solutions that we offer.
The Aroma 2-in-1 blends seamlessly into any kitchen with its brushed
stainless steel finish and stylish retro design.
Publicado por:
Aroma Housewares Co.
6469 Flanders Drive
San Diego, CA 92121
U.S.A.
www.aromaco.com
© 2006 Aroma Housewares Company
Ideal for breakfast on the go, the 2-in-1 toasts bread or bagels and heats up
muffins in the oven simultaneously. Thick breads and bagels are no obstacle
with the extra wide toasting wells, and the toaster "Stop" button allows you to
cancel toasting at any point during the cycle! The oven is equipped with a 15minute timer and a "Stay On" feature, which allows you to cook a wide range
of other foods with ease.
Congratulations on your purchase of the Aroma 2-in-1 Toaster and Toaster
Oven. Now enjoy the convenience of two appliances in one!
1
When using electrical appliances, basic safety precautions should always be
followed, including the following:
1.
Read all instructions.
2.
Do not touch hot surfaces. Use handles or knobs.
3.
To protect against electric shock do not immerse cord, or plug in
water or any other liquid.
4.
Close supervision is necessary when any appliance is used by or
near children.
5.
Unplug from outlet when not in use and before cleaning. Allow to
cool before putting on or taking off parts.
6.
Do not operate any appliance with a damaged cord or plug or after
the appliance malfunctions or has been damaged in any manner.
Return appliance to the nearest authorized service facility for
examination, repair, or adjustment.
7.
The use of accessory attachments not recommended by the
appliance manufacturer may cause injuries.
8.
Do not use outdoors.
9.
Do not let cord hang over edge of table or counter or touch hot
surfaces.
10.
Do not place on or near a hot gas or electric burner or in a heated
oven.
11.
Extreme caution must be used when moving an appliance
containing hot oil or other hot liquids.
12.
Always attach plug to appliance first, then plug cord into the wall
outlet. To disconnect, turn any control to "off", then remove plug
from wall outlet.
13.
Do not use appliance for anything other than intended use.
14.
Oversize foods or metal utensils must not be inserted in the
toaster-oven as they may create a fire or risk of electric shock.
15.
A fire may occur if the toaster-oven is covered or touching
flammable material, including curtains, draperies, walls, and the
like, when in operation. Do not store any item on top of the
appliance when in operation.
16.
Do not clean with metal scouring pads. Pieces can break off the
pad and touch electrical parts involving a risk of electric shock.
17.
Extreme caution should be exercised when using containers constructed
of anything other than metal or glass.
IMPORTANT SAFEGUARDS
IMPORTANTES INSTRUCCIONES DE SEGURIDAD
Siempre se deben seguir las precauciones de seguridad básicas al usar
electrodomésticos, incluidas las siguientes:
1. Antes de usar esta unidad, lea todas las instrucciones.
2. No toque las superficies calientes. Utilice las asas o manijas. Las superficies
metálicas se calientan mucho.
3. Para protegerse y evitar un choque eléctrico, no sumerja en agua o en cualquier
otro líquido el cordón, la clavija o el aparato mismo.
4. Cuando un aparato electrodoméstico es utilizado por niños, o cerca de ellos, es
necesaria una atenta supervisión.
5. Desenchufe la unidad cuando no esté en uso y antes de limpiarla.
6. No opere ningún aparato electrodoméstico cuyo cable o enchufe estén dañados,
que haya dejado de funcionar correctamente, que se haya caído o que se
encuentre dañado de cualquier manera. Lleve el aparato a un centro de servicio
autorizado para su revisión, reparación o ajuste eléctrico o mecánico.
7. No se recomienda el uso de accesorios no aprobados por el fabricante del aparato
electrodoméstico, ya que podrían ocurrir lesiones.
8. No lo utilice en exteriores.
9. No permita que el cable cuelgue del borde de la mesa o mostrador, ni que toque
superficies calientes.
10. No coloque el aparato sobre o cerca de una rejilla de gas o eléctrica encendidas ni
dentro de un horno caliente.
11. Se deberán tomar precauciones extremas al mover el aparato cuando contenga
arroz u otros líquidos calientes.
12. Antes de retirar el enchufe de la toma de corriente eléctrica de la pared, asegúrese
de que el aparato haya sido apagado.
13. No utilice la tostadora para ningún otro fin que el indicado.
14. No coloque porciones demasiado grandes de alimentos, envolturas de papel de
aluminio o utensilios en la tostadora, ya que podrían incendiarse o provocar un
choque eléctrico.
15. El aparato puede causar un incendio si se utiliza cuando está tapada o en
contacto con materiales inflamables, como cortinas, telas y paredes.
16. No limpie con fibras para tallar metal. Se pueden romper pedazos de la almohadilla y
tocar las partes eléctricas, creando un riesgo de una descarga eléctrica.
17. Deberá tener extremo cuidado cuando use recipientes hechos de cualquier otro
material que no sea metal o vidrio dentro de la unidad.
GUARDE ESTAS INSTRUCCIONES
1
IMPORTANTES INSTRUCCIONES DE SEGURIDAD
18. No almacene ningún material que no sea los accesorios recomendados por el
fabricante en este horno cuando no esté en uso.
19. No coloque ninguno de los siguientes materiales en el horno: cartón, plástico,
papel o cualquier material similar.
20. No cubra la bandeja para migajas ni ninguna otra parte del horno con papel
aluminio. Esto podría causar que el horno se sobrecaliente.
21. Tenga mucha precaución cuando retire la bandeja o deseche grasa caliente.
22. No intente sacar alimentos cuando el horno tostador esté conectado a un toma
corriente eléctrico.
23. Para evitar la posibilidad de un incendio, NUNCA deje el horno tostador sin vigilar
mientras esté en uso.
24. No coloque utensilios de cocina ni platos para hornear sobre la puerta de cristal.
25. Para apagar el horno tostador, dé vuelta al botón selector para colocarlo en la
posición " Off" (apagado).
26. No toque el plato caliente mientras el aparato esté en operación ni inmediatamente
después de desconectarlo ya que el plato estará caliente.
27. Para reducir el riesgo de incendio o choque eléctrico, no intente desarmar el
aparato. No contiene partes para que el usuario haga reparaciones. La reparación
sólo la deberá realizar el personal de servicio autorizado.
28. Para reducir el riesgo de incendio o choque eléctrico, no retire la bandeja para
migajas mientras el aparato esté en operación.
29. No opere el aparato debajo de gabinetes de pared.
GUARDE ESTAS INSTRUCCIONES
2
SAVE THESE INSTRUCTIONS
Do not store any materials, other than manufacturer's recommended
accessories, in this oven when not in use.
Do not place any of the following materials in the oven: paper, cardboard or
plastic.
Do not cover crumb tray or any part of the oven with metal foil. This will cause
overheating of the oven.
Use extreme caution when removing tray or disposing of hot grease.
Do not attempt to dislodge food when the toaster oven is plugged into an
electrical outlet.
To avoid possibility of fire, NEVER leave toaster oven unattended during use.
Do not rest cooking utensils or baking dishes on glass door.
Turn the Timer dial to the OFF position to turn off toaster oven.
Do not touch the hot plate while the appliance is in operation or immediately
after being switched off as the hot plate will be hot.
To reduce the risk of fire or electric shock, do not attempt to disassemble the
appliance. There are no user serviceable parts inside. Repair should only be
done by an authorized service personnel.
To reduce the risk of fire or electric shock, do not remove the crumb tray while
the appliance is in operation.
Do not operate under wall cabinets.
2
29.
28.
27.
23.
24.
25.
26.
21.
22.
20.
19.
18.
IMPORTANT SAFEGUARDS
3
This appliance is for household use only.
This appliance has a polarized plug (one blade is wider than the other); follow
the instructions below:
To reduce the risk of electric shock, this plug is intended to fit into a polarized
outlet only one way. If the plug does not fit fully into the outlet, reverse the plug.
If it still does not fit, contact a qualified electrician. Do not attempt to modify the
plug in any way.
POLARIZED PLUG
INSTRUCCIONES PARA USAR EL CABLE CORTO
1. Se proporciona un cable eléctrico corto con el propósito de reducir el riesgo
de tropezarse o enredarse con un cable más largo.
2. Hay cables de extensión más largos disponibles y deben ser usados co
sumo cuidado.
3. Si se usa un cable de extensión más largo:
a. La clasificación eléctrica marcada en el cable de extensión debe ser
por lo menos igual que la clasificación eléctrica del aparato.
b. El cable más largo debe ser colocado de manera que no cuelgu
por el borde del mostrador o mesa en donde pudiera ser jalado por
un niño o alguien pudiera tropezarse con el cable sin querer.
¡NO DEJE QUE EL CABLE CUELGUE!
¡MANTÉNGASE
LEJOS DE LOS
NIÑOS!
CLAVIJA POLARIZADA
1. A short power-supply cord is provided to reduce risk resulting from becoming
entangled in or tripping over a longer cord.
2. Longer extension cords are available and may be used if care is exercised in their
use.
3. If a longer extension cord is used:
a. The marked electrical rating of the extension cord should be at least as great as
the electrical rating of the appliance.
b. The longer cord should be arranged so that it will not drape over the counter top
or tabletop where it can be pulled by children or tripped over unintentionally.
SHORT CORD INSTRUCTIONS
Este aparato cuenta con una clavija polarizada (una espiga es más ancha que la
otra); siga las siguientes instrucciones:
Para reducir el riesgo de choque eléctrico, esta clavija debe ser conectada a una
salida o enchufe eléctrico polarizado solamente de una manera. Si la clavija no entra
completamente en el enchufe, voltee la clavija.
Si aún no queda bien en el enchufe, póngase en contacto con un electricista
especializado. No trate de modificar la clavija.
Este aparato fue diseñado
Solamente para Uso Doméstico.
3
IDENTIFICACIÓN DE LAS REFACCIONES
14
13
1
3
2
4
5
4
Glass Door
Broil Setting
Temperature Knob
Toasting Wells
Toaster Lever
Toaster Crumb Tray
Toaster Stop Button
Browning Control Knob
Timer Knob
Oven ON Setting
Toaster Oven Crumb Tray
Handle
Broiling Pan
Chrome Rack
12
1.
2.
3.
4.
5.
6.
7.
8.
9.
10.
11.
12.
13.
14.
6
9
8
7
7
10
11
9
8
Puerta de cristal
Rostizar
Perilla de temperatura
Oroficios del tostador
Palanca del tostador
Bandeja para migajas del tostador
Botón para detener el tostador
Perilla de control de dorado
Perilla del reloj
Horno Encendido
Bandeja para migajas del horno tostador
Agarradera
Bandeja para rostizar
Rejilla de cromo
4
1
3
1.
2.
3.
4.
5.
6.
7.
8.
9.
10.
11.
12.
13.
14.
11
10
6
5
12
2
13
14
PARTS IDENTIFICATION
4
5
USING ALUMINUM FOIL
• Aluminum foil may be used to cover food or to line the broiling pan for easier
cleanup.
• DO NOT allow foil to come into contact with the sides of the oven or the heating
elements.
• DO NOT use aluminum foil to cover the chrome rack or the crumb trays.
CHROME RACK AND BROILING PAN
1. Slide the chrome rack into the grooves on the inside walls of the toaster oven.
On page 6 of this manual you will find an illustration of the correct installation of
the chrome rack.
2. When using the broiling pan, slide it on top of the chrome rack. The broiling pan
may also be used as a roasting pan. DO NOT slide the broiling pan underneath
the chrome rack or let it come into direct contact with the heating elements.
3. When not using the broiling pan, remove it from the toaster oven for better
performance, especially while toasting.
BEFORE USING FOR THE FIRST TIME
1. Remove all packaging material from the oven/toaster.
2. Wipe inner walls of the toaster oven with a damp cloth. Do not use any
abrasive cleaners or scrubbers, as they may create a risk of electric shock or
damage the finish.
3. Wipe the outer surface of the toaster oven with a damp cloth.
4. Wash the chrome rack, broiling pan, and crumb trays in warm, soapy water.
Rinse and dry thoroughly before placing in the unit. Do not place wet
accessories in this appliance.
5. Plug the unit into a proper wall outlet.
INSTRUCCIONES
ANTES DE USAR POR PRIMERA VEZ
1. Retire todo el material de empaque del horno/tostador.
2. Limpie las paredes internas del horno tostador con un paño húmedo.
No use ningún limpiador abrasivo o fibra, ya que podrían dañar el acabado
o producir un riesgo de choque eléctrico.
3. Limpie la superficie externa del horno tostador con un paño húmedo.
4. Lave la rejilla de cromo, la bandeja para rostizar y las bandejas para
migajas con agua jabonosa tibia. Enjuáguelas y séquelas bien antes de
colocarlas en la unidad. No coloque accesorios mojados en este aparato.
5. Conecte la unidad a la toma de corriente eléctrica de la pared.
REJILLA DE CROMO Y BANDEJA PARA ROSTIZAR
1. Deslice la rejilla de cromo en las ranuras de las paredes internas del horno
tostador. Ver el dibujo en la página 6.
2. Cuando use la bandeja para rostizar, deslícela sobre la rejilla de cromo.
La bandeja para rostizar también se puede usar como bandeja para asar.
NO deslice la bandeja para rostizar por debajo de la rejilla de cromo ni
permita que entre en contacto directo con los elementos de calentamiento.
Cuando no use la bandeja para rostizar, retírela del horno tostador para
que funcione mejor, en especial mientras esté tostando.
3.
USO DE PAPEL ALUMINIO
• Se puede usar papel aluminio para cubrir los alimentos o forrar la bandeja
para rostizar con fines de facilidad de limpieza.
• NO permita que el papel aluminio entre en contacto con los lados del
horno o los elementos de calentamiento.
• NO use papel aluminio para cubrir la rejilla de cromo ni las bandejas para
migajas.
INSTRUCTIONS
5
COMO USAR EL HORNO TOSTADOR
6
USO DEL HORNO TOSTADOR
1. Coloque la rejilla de cromo en el horno deslizándola en las ranuras de los
lados de la unidad. Asegúrese de que la rejilla de cromo esté segura
antes de usar el horno. Ver la esquema 1a abajo. De ser necesario, inserte
también la bandeja para rostizar sobre de la rejilla de cromo. NO permita que
la rejilla de cromo o la bandeja para rostizar entren en contacto directo con los
elementos de calentamiento.
2. Seleccione la temperatura o función de rostizado. Para tostar, gire la perilla
de la temperatura a la función "450°/toast".
1a
TOASTING IN THE TOASTER OVEN
1. Before turning the unit on, place bread onto the chrome rack and close the
glass door. For best results, place no more than two slices of bread in the
toaster oven at a time.
2. Turn the temperature knob to the "450/toast" function.
3. On the timer knob, select the desired browning level. The toaster oven will then
begin to heat up, and the timer will begin. Toasting times may vary for frozen or
thicker breads. Monitor your toast through the full-view glass door until it has
reached the desired level of browning.
4. When toast is done, the timer will automatically turn the oven off.
Elementos
de
Calentamiento
Heating
Elements
TOSTADO EN EL HORNO TOSTADOR
1. Antes de encender la unidad, coloque el pan sobre la rejilla de cromo y
cierre la puerta de cristal. Para mejores resultados, no coloque más de
dos rebanadas de pan en el horno tostador al mismo tiempo.
2. Gire la perilla de la temperatura a la función "450°/toast".
3. En la perilla del reloj, seleccione el color de tostado que desee. Entonces
el horno tostador comenzará a calentarse.
4. Cuando el tostado esté listo, el reloj apagará el horno en forma
automática.
COCINADO
1. Coloque los alimentos dentro del horno y cierre la puerta de cristal. Deje al
menos 2 pulgadas entre los alimentos y los elementos de calentamiento
superiores cuando cocine.
2. Seleccione la temperatura deseada en la perilla de la temperatura. Para
rostizar, seleccione la función "broil".
Select temperature or broil function. For toasting, turn the temperature knob
to the "450°/toast" function.
contact with the heating elements.
Place the chrome rack into the oven by sliding it into the grooves on the sides of
the oven walls. Make sure that the chrome rack is secure before using the oven.
See Diagram 1a below. If needed, insert the broiling pan on top of the chrome
rack. DO NOT allow the chrome rack or broiling pan to come into direct
6
1a
2.
1.
USING THE TOASTER OVEN
HOW TO USE THE TOASTER OVEN
7
COMO USAR EL HORNO TOSTADOR
WHEN COOKING:
• Leave at least 2 inches between food and the top heating elements when
cooking.
• To prevent the risk of fire posed by grease dripping on the heating elements,
always use the broiling pan or other toaster oven-safe dish to cook foods such
as steak, pork chops, sausages, hamburgers, or other greasy foods.
• The broiling pan and all other cooking containers must be placed on TOP of
the chrome rack. Never set broiling pan or containers directly on the lower
heating elements.
• Always use a heat-proof, toaster oven-safe dish when cooking in the oven.
• Remove all paper or plastic packaging materials from TV dinners or other
convenience foods before cooking in the toaster oven. Only packaging that
states "Toaster Oven Safe” may be placed into the toaster for cooking.
• When removing a hot dish or food from the chrome rack, do not pull the rack
more than halfway out. Pulling the rack out more than halfway may cause it to
become unstable and cause accidents.
• Do not leave the oven unattended during cooking.
COOKING IN THE TOASTER OVEN
1. Place food in the broiling pan or other toaster oven safe dish and slide onto the
chrome rack inside of the oven. Close the glass door. Leave at least 2
inches between food and the sides and top of the oven.
2. Select the desired temperature on the temperature knob. To broil, select the
"broil" function.
3. Turn the timer to the desired number of minutes or to the "Oven On" function,
which will keep the oven at a continuous temperature until it is manually
turned off. For best results, allow the oven to preheat for about 5 minutes.
CAUTION: Close supervision is necessary when using the "Oven On"
feature. Be sure to turn the oven off when cooking is finished.
4. Timer will automatically turn the oven off when done. If using the "Oven On"
feature, turn the timer knob to OFF when finished cooking.
5. The top and sides of the unit will be HOT. It is best to use an oven mitt when
removing food from the unit. Use the handle when opening the glass door.
6. Unplug the unit when not in use.
HOW TO USE
THE
OVEN
HOW
TOTOASTER
USE
3. Gire el reloj al número de minutos deseado o a la función "Oven On"
(horno encendido), que mantendrá el horno a una temperatura continua
hasta que se apague de manera manual. Para mejores resultados, permita
que el horno se precaliente durante cerca de 5 minutos.
PRECAUCIÓN: Es necesario supervisarlo con cuidado cuando se use la
función "Oven On". Asegúrese de apagar la unidad cuando
haya terminado de cocinar.
4. El reloj se apagará en forma automática cuando esté listo. Si usa la
función "Oven On" (horno encendido), gire la perilla del reloj a OFF
(apagado) cuando termine de cocinar.
5. La parte superior y los lados de la unidad estarán CALIENTES. Es mejor
usar un guante para horno cuanto retire los alimentos de la unidad. Use
la agarradera cuando abra la puerta de cristal.
Desconecte la unidad cuando no esté en uso.
6.
AL COCINAR:
• Deje al menos 2 pulgadas entre los alimentos y los elementos de
calentamiento superiores cuando cocine.
• Para prevenir el riesgo de incendio que representa el escurrimiento de grasa
sobre los elementos de calentamiento, use siempre la bandeja para
escurrimientos u otro recipiente apropiado para el horno tostador cuando
cocine alimentos como carne, chuletas de cerdo, salchichas, hamburguesas u
otros alimentos grasosos.
• La bandeja para escurrimientos y cualquier otro recipiente para cocinar se
deben colocar SOBRE la rejilla de cromo. Nunca coloque la bandeja para
escurrimientos o cualquier otro recipiente directamente sobre los elementos de
calentamiento en la parte inferior.
• Use siempre un recipiente apropiado para el horno tostador a prueba de calor
cuando cocine en el horno.
• Retire todos los materiales de empaque de papel o plástico de las cenas
rápidas u otros alimentos de conveniencia antes de cocinarlos en el horno
tostador. Sólo los empaques que digan "Toaster Oven Safe" (seguros para
horno tostador) se pueden colocar en el tostador para cocinarlos.
• Cuando retire un recipiente o alimento caliente de la rejilla de cromo, no jale la
rejilla hacia afuera a más de la mitad de su tamaño. Jalar la rejilla hacia afuera
a más de la mitad de su tamaño puede causar que esté inestable y provocar
algún accidente.
• No deje el horno sin vigilar cuando cocine.
7
COMO USAR EL TOSTADOR
8
USO DEL TOSTADOR
1. Retire todas las envolturas o empaques de los alimentos antes de
tostarlos. No ponga mantequilla, mermelada ni otros líquidos sobre
el pan antes de tostarlo, ya que puede generar un peligro de incendio
o causar que la unidad no funcione bien.
2. Coloque el pan en los orificios del tostador. Cuando tueste una sola
rebanada de pan, la puede colocar en cualquiera de los dos orificios
del tostador.
3. Seleccione el color de tostado deseado en la perilla de control de
tostado.
4. Presione la palanca hacia abajo hasta que se trabe en su lugar. Esto
iniciará el proceso de tostado.
5. Para detener o cancelar el tostado en cualquier momento durante el
ciclo, presione el botón "Stop" (detener) que está abajo de la perilla
de control de tostado. El pan tostado saldrá en forma automática.
6. Cuando termina el ciclo de tostado, el pan tostado saldrá en forma
automática.
7. El tostador y la parte superior así como los lados de la unidad estarán
CALIENTES. Use un guante para horno y tenga precaución cuando
retire el pan tostado del tostador.
1. Remove all wrappers or packaging from food before toasting. Do not place
butter, fruit spread, or other liquids on bread before toasting, as they may
create a fire hazard or cause the unit to malfunction.
2. Place bread in the toast wells. When toasting a single slice, bread can be
placed in either of the two toast wells.
3. Select the desired setting on the browning control knob.
4. Press the lever down until it locks into place. This will begin the toasting cycle.
5. To stop or cancel toasting at any time during the cycle, press the "Stop" button
below the browning control knob. Toast will pop up.
6. When toasting cycle is finished, toast will automatically pop up.
7. The toast and the top and sides of the unit will be HOT. Use an oven mitt and
exercise caution when removing toast from the toaster.
USING THE TOASTER
8
HOW TO USE THE TOASTER
9
ADVERTENCIA
• Use siempre guantes protectores cuando maneje alimentos calientes.
• BE SURE to clean the crumb trays after each use. Build up of crumbs and
food debris may cause fire.
• La parte exterior de la unidad, la puerta de cristal y la rejilla estarán
CALIENTES durante el uso. Use guantes protectores y tenga precaución
cuando toque o abra la unidad, o cuando retire la bandeja de cromo, la
bandeja para escurrimientos o cualquier otro utensilio de la unidad.
• Nunca opere el horno mientras la puerta de cristal esté abierta.
• Deje de usar este aparato si comienza a salir humo del cable de corriente o si
el cable de corriente se daña de alguna manera. Desconéctelo de inmediato
y contacte a servicio al cliente para que le ayuden.
• DO NOT place the oven accessories inside the unit if still wet.
• Gire el reloj del horno a OFF (apagado) cuando no esté en uso y desconéctelo
de la toma de corriente eléctrica de la pared.
• DO NOT place oven or any accessories in the dishwasher to clean. This
appliance is not dishwasher safe.
• DO NOT wipe the heating elements during cleaning.
• DO NOT use abrasive cleaners or scouring pads to clean the appliance.
Pieces can break off the pad and touch electrical parts, creating a risk of
electric shock.
• DO NOT immerse the unit in water or any other liquid.
• Stop using this appliance if smoke begins to come from the power cord or if the
power cord is otherwise damaged. Unplug immediately and contact customer
service for help.
• Turn the oven timer to OFF when not in use and unplug from the wall outlet.
• Never operate the oven while the glass door is open.
• The outside of the unit, glass door, broiling pan and chrome rack will become
HOT during use. Use protective mitts and excersize caution when touching
or opening the unit, or when removing the chrome tray, broiling pan, or other
dishes from the unit.
• NUNCA sumerja la unidad en agua ni cualquier otro líquido.
• NO use limpiadores abrasivos ni fibras para limpiar el aparato. Las piezas se
pueden desprender de la cobertura y tocar las partes eléctricas, generando
un riesgo de choque eléctrico.
• NO coloque los accesorios del horno dentro de la unidad si todavía está
húmedo.
• NO limpie los elementos de calentamiento durante la limpieza.
• NO coloque el horno ni ninguno de sus accesorios en la máquina lava platos
para limpiarlos. Este aparato no es apto para máquinas lava platos.
• ASEGÚRESE de sacudir/limpiar las bandejas para migajas después de cada
uso. La acumulación de migajas y restos de alimentos genera un peligro de
incendio.
• Always wear protective mitts when handling hot food.
CAUTION
9
COMO LIMPIAR
10
LIMPIEZA Y CUIDADOS
1.
2.
3.
Cuando termine de cocinar, coloque el reloj en la posición OFF (apagado).
Desconecte la unidad de la toma de corriente eléctrica de la pared.
Permita siempre que la unidad se enfríe por completo antes de limpiarla.
BANDEJAS PARA MIGAJAS
1. Las bandejas para migajas están ubicadas en la parte inferior de la unidad,
debajo de la puerta de cristal y en el lado derecho debajo del tostador. Ver
la Identificación de las Refacciones en la página 4.
2. Coloque el horno sobre una superficie firme a nivel del mostrador y deslice
con cuidado las bandejas para migajas hacia afuera. Vacíe las bandejas
para migajas y límpielas con un paño humedecido en jabón. Enjuáguelas y
séquelas bien antes de colocarlas de nuevo en la unidad.
3. La acumulación de migajas y restos de alimentos genera un peligro de
incendio. Limpie las bandejas para migajas después de cada uso para evitar
esta acumulación.
HORNO TOSTADOR
1. Retire los residuos de alimentos del interior del horno limpiándolo con un
paño limpio y húmedo. NO use limpiadores abrasivos ni fibras.
2. Retire la bandeja para escurrimientos y la rejilla de cromo de la unidad.
Lávelas con agua jabonosa tibia. Enjuáguelas y séquelas bien antes de
colocarlas de nuevo en la unidad.
Limpie la puerta de cristal y la agarradera con un paño limpio y húmedo.
Séquelas con toalla de papel y retire las manchas o los rayones.
3.
EXTERIOR
1. Limpie el exterior de la unidad con un paño limpio y húmedo. Deje que se
seque al natural o pase un paño seco para eliminar los rayones.
NUNCA sumerja la unidad en agua ni cualquier otro líquido.
2.
EXTERIOR
1. Wipe down the exterior of the unit with a clean, damp cloth. Allow to air-dry
or wipe down with a dry cloth to remove streaks.
2. NEVER immerse the unit in water or any other liquid.
TOASTER OVEN
1. Remove food residue from the inside of the oven by wiping with a clean,
damp dishcloth. DO NOT use abrasive cleaners or scouring pads.
2. Remove broiling pan and chrome rack from the unit. Wash in warm soapy
water. Rinse and dry thoroughly before returning to the unit.
3. Wipe down the glass door and handle with a clean, damp dishcloth. Dry
with a paper towel to remove smudges or streaks.
CRUMB TRAYS
1. The crumb trays are located on the bottom of the unit, below the glass door
and on the right side below the toaster. See Parts Idendification on page 4.
2. Be sure the oven is on a sturdy, level countertop and carefully slide out
crumb trays. Empty crumb trays and wipe clean with a damp, soapy
dishcloth. Rinse and dry thoroughly before returning to the unit.
3. Build up of crumbs and food debris creates a fire hazard. Clean out the
crumb trays after each use to prevent such accumulation.
1. When done cooking, set the timer to the "OFF" position
2. Unplug the unit from wall outlet.
3. Always allow the unit to cool completely before cleaning.
CLEANING AND CARE
10
HOWTOTOUSHOW
CLEANE
HOW
11
GARANTÍA LIMITADA
Aroma Housewares Company garantiza que este producto no tenga defectos en
sus materiales y fabricación durante un período de un año a partir de la fecha
comprobada de compra dentro de la parte continental de los Estados Unidos.
AROMA HOUSEWARES COMPANY
6469 Flanders Drive
San Diego, California 92121
1-800-276-6286
M-F, 8:30 AM - 5:00 PM, Pacific Time
Website: www.aromaco.com
This warranty gives you specific legal rights and which may vary from state to state
and does not cover areas outside the United States.
This warranty does not cover improper installation, misuse, abuse or neglect on the
part of the owner. Warranty is also invalid in any case that the product is taken
apart or serviced by an unauthorized service station.
Within this warranty period, Aroma Housewares Company will repair or replace, at
its option, defective parts at no charge, provided that the product is returned, freight
prepaid with proof of purchase and U.S. $15.00 for shipping and handling charges
payable to Aroma Housewares Company. Before returning an item, please call the
toll free number below for a return authorization number. Allow 2-4 weeks for return
shipping.
Dentro de este período de garantía, Aroma Housewares Company reparará o
reemplazará, a su opción, las partes defectuosas sin ningún costo, siempre y
cuando el producto sea devuelto, con el flete prepagado, con comprobación de
compra y $15.00 dólares para cargos de envío y manejo a favor de Aroma
Housewares Company. Antes de devolver un producto, sírvase llamar al número
telefónico gratuito que está más abajo para obtener un número de autorización de
devolución. Espere entre 2-4 semanas para recibir el aparato nuevamente.
Esta garantía no cubre la instalación incorrecta, el uso indebido, maltrato o
negligencia por parte del usuario. La garantía también es inválida en caso de que
el aparato sea desarmado o se le dé mantenimiento en un centro de servicio no
autorizado.
Esta garantía le da derechos legales específicos los cuales podrán variar de un
estado a otro y no cubre áreas fuera de los Estados Unidos.
AROMA HOUSEWARES COMPANY
6469 Flanders Drive
San Diego, California 92121
1-800-276-6286
L-V, 8:30 AM - 5:00 PM, Tiempo del Pacífico
Sitio Web: www.aromaco.com
Aroma Housewares Company warrants this product free from defects in material
and workmanship for one year from the provable date of purchase in the continental
United States.
LIMITED WARRANTY
11