Download Airlinkplus WLL013 Installation guide
Transcript
11Mbps Wireless LAN Card
Quick Installation Guide
802.11b USB Adapter
This Quick Installation Guide only provides you with the basic instructions.
For more detailed information, please refer to the Manual file on the provided CD.
* All other product names and trademarks in this document are trademarks of their respective companies.
1
2
System Requirements
To use the Wireless LAN Card, your computer must meet the following minimum requirements:
Ø
Ø
Ø
Ø
Windows 98(SE)/Me/2000/XP
32 MB of RAM, additional memory recommended
Standard USB port
UL listed I.T.E. computers.
Software and Hardware Installation
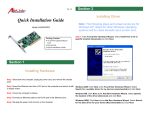
Caution: Do not connect the Wireless LAN Card device to your computer before installing its software. If this happens,
the Windows PnP function will detect the Wireless LAN Card and issue a dialog box requesting its driver. Click Cancel
to quit the wizard and unplug the Wireless LAN Card.
1. Close all Windows programs that are running.
2. Insert the provided Software Utility CD into your CD-ROM drive and select Utility&Driver. Or, run Setup.exe
from D:\Utility&Driver folder of the Software Utility CD where D is the drive letter. When the welcome screen
pops up, click Next.
3. When the License Agreement screen appears, click Yes.
4. Select Typical and click Next. The program will auto-process the software installation.
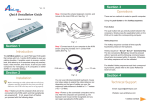
5. Later, a screen will pop up asking you to insert your wireless card into the USB port of your computer. Please do
as the dialog request.
6. Subject to your Windows OS, the following situation may occur:
For Windows 98(SE)
a.
The Add New Hardware Wizard screen will pop up. Click Next.
b.
Select Search for the best driver for your device. Click Next.
c.
By default, in the search screen, Windows will be able to find the path where the driver is located. Click
Next to continue.
d.
Windows will find the location of the driver. Click Next to continue.
e.
You will be prompted for Windows 98 CD. Click OK. Then enter the path to your Windows 98(SE) CD (if
Windows 98 CD files are not in you host computer, remove the Software Utility CD and insert the Windows
98 CD into your CD-ROM at this step) and click OK.
f.
Click Finish. If prompted to restart your computer. Click No.
For Windows 2000
If you are prompted with the Digital Signature not Found alarm message, just click Yes to continue with the
installation.
1
For Windows XP
3
a.
Upon hardware detection, Windows OS will pop up a dialog requesting for driver. Select Install the
software automatically and click Next.
b.
If Windows logo compatibility message appears, click Continue Anyway to proceed with the installation.
c.
Click Finish.
7. Click Finish to complete the installation.
Using the Wireless LAN Monitor Utility
After software and hardware installation, the Wireless LAN Monitor Utility should be launched automatically with
its icon located on the system tray. Double-clicking the tray icon will pop up the Wireless LAN Monitor Utility
screen.
The Wireless LAN Monitor Utility comes with these tabs: Status, Statistics, Site Survey, Encryption, Advanced,
Profiles and Info as described below.
Note: For Windows XP users, if you want to disable the Windows XP Wireless Zero Configuration Utility and have
your device managed by the Wireless LAN Monitor Utility, please refer to the section 4.
Status
The configuration parameters of current profile are displayed. You can click Change to make the setting items
configurable, change the settings and then click Submit to save your changes. The following describes the basic
settings for Ad-Hoc and Infrastructure mode connection. If you need to set the WEP settings, refer to the description
of Encryption tab.
Connecting to Other Wireless LAN Cards (Ad-Hoc Mode)
To connecting to other Wireless LAN Card equipped computers to form a wireless network, make the configurations
as below:
Operating Mode
Select Ad-Hoc.
Channel
Select the channel number that you want to use.
Note that the available channels are different according to your geographic location. Make sure
to select the legal frequency channels allowed in your regulatory domain.
„
„
„
„
1-11 channels for US, Canada (FCC)
1-14 channels for Japan (TELEC)
1-13 channels for Europe (ETSI)
10-13 channels for France
SSID
Type the Service Set ID (SSID) of the Wireless LAN group. A network name is mandatory
for Ad Hoc mode. All wireless clients must use the same SSID in order to communicate with
each other.
Tx Rate
Select the transmit rate to use. If Auto is selected, the wireless adapter will adaptively adjust
its data rate from 11 Mbps to 5.5, 2 or 1 Mbps as the signal strength warrants.
Radio
Select On to enable the radio signal.
After finishing required settings, click Submit and the Wireless LAN Card will scan the specified channel to make
connection.
2
Connecting to Access Points (Infrastructure Mode)
To connect to a wired/wireless network through an Access Point, make the configurations as below:
Operating Mode
Select Infrastructure .
SSID
In the SSID field, type the SSID of the Access Point you are going to connect to. The wireless
client must use the same SSID as the Access Point in order to communicate with other
computers via the Access Point.
Tx Rate
Select the transmit rate to use. If Auto is selected, the wireless adapter will adaptively adjust
its data rate from 11 Mbps to 5.5, 2 or 1 Mbps as the signal strength warrants.
Int. Roaming
Select whether to enable the roaming feature.
Radio
Select On to enable the radio signal.
After finishing required settings, click Submit and the Wireless LAN Card will start to make connection.
Checking Link Quality (Infrastructure Mode Only)
The Status field displays the information about the status of the current communication. If connected, it shows the
BSSID of the Access Point to which the card is associated. Signal Strength and Link Quality allow you to check the
current connection status.
Statistics
The Statistics tab allows you to view the available statistic information, including the Data Packets, Management
Packets and Rejected Packets. Tx indicates data transmitted whereas Rx indicates data received. Optionally you can
click the Reset button to reset the statistic counters to zero.
Site Survey
In any of the two modes, this feature allows you to scan all the channels to find out all the available Access Points and
wireless stations (Ad-Hoc mode) within the range of your card. With each Access Point or wireless station listed, these
information are provided: the BSSID and SSID of the Access Point/wireless station, the signal strength, the channel,
the encryption and the BSS mode.
In order to update this list, click the Re-scan button. If you want to associate with any of the Access Point/stations
listed, double-click on your choice and the system will take you back to the Status tab showing you the parameters of
the connection newly established.
Encryption
In any of the two modes, this option allows you to set up encryption parameters. Note that your encryption settings
must match those used by the Access Points/wireless stations (Ad-Hoc mode) with which you want to associate.
First, either enable (by selecting 64 Bit or 128 Bit) or disable encryption from the Encryption field. If encryption is
enabled, enter your WEP keys in HEX or ASCII format. Note that if you use HEX format, only digits 0-9 and letters
A-F, a-f are valid.
The four keys, including the one selected as WEB Key to use, are used to decrypt the data you receive. In the WEP
Key to use box, select one of the four keys to encrypt the data you are going to transmit.
In the WEP Mode list, select Mandatory or Optional as required.
Finally, you can select whether to use Open System, Shared Key or Auto as the authentication type. Your
authentication type must be the same as those on the Access Point/wireless station (Ad-Hoc mode) with which you
want to associate.
To enable the settings, click the Submit button.
3
Advanced
In any of the two modes, this option allows you to change advanced configuration settings, including Preamble Type,
Fragmentation Threshold, RTS/CTS Threshold and Power Save.
The Preamble Type allows selecting Short to communicate with other 802.11b devices that support short preamble to
boost the throughput. Make sure to use the appropriate preamble type according to your network environment.
Both Fragmentation and RTS/CTS thresholds are disabled by default. To change the parameters, move the slide bar
with your mouse and then use the right and left arrow keys of your keyboard to select an exact number in bytes.
In the Power Save check box, select whether to enable power saving feature as required.
Profiles
The Profiles feature allows you to create multiple profiles to reflect specific WLAN settings for each place you may
roam. You can easily retrieve the required profile from the Current Profile drop-down list. Selecting a profile from
the Existing profiles list displays the corresponding parameters on the bottom of this tab. To create a new profile,
click New and then enter the name for the profile. If you need to customize the settings for certain profile, you must
select the profile from the Current Profile drop-down list, go to the Status tab and then click Change to change the
settings.
Info
4
This option displays the basic information about the device, including the Driver, Firmware, Application version and
MAC address of your Wireless LAN Card.
Using Windows XP Wireless Zero Configuration Utility
Windows XP provides built-in Wireless Zero Configuration Utility for wireless configuration and monitor. When it
is active, it will override the management of the Wireless LAN Monitor Utility. In this situation, when you open the
Wireless LAN Monitor Utility, you are only allowed to view the statistics and version information. Configuration
fields and buttons are dimmed.
If you want to disable Wireless Zero Configuration Utility and have your Wireless LAN Card managed by the
manufacturer’s Wireless LAN Monitor Utility,
1. Double-click the Windows XP wireless tray icon and then click Advanced (or Properties) > Wireless
Networks.
2. On the Wireless Networks tab, uncheck the Use Windows to configure my wireless network settings box and
click OK.
The following describes the essential instructions on using Windows XP wireless utility to get your wireless network
established. For more information please refer to Windows XP on-line help.
Connecting to an Access Point or Wireless LAN Card
Double-clicking the network connection icon to open the Connect to Wireless Network window. You will see all the
Access Points or Wireless LAN Cards (Ad-Hoc mode) that are available in the air.
Select the Access Point or Wireless LAN Card that you want to connect to. Enter the WEP key in Network Key field,
if necessary, and click Connect. Then you will join its network.
Viewing Wireless Connection Status
After you successfully connect to the target Access Point or Wireless LAN Card, double-click the wireless icon on the
system tray again. The Wireless Network Connection Status window displays the general data of the current
connection, such as Status, Duration, Speed, Signal Strength, etc.
Configuring Your Wireless Properties
In the Wireless Network Connection Status window, click Properties to open the Wireless Network Connection
Properties window. The following describes each tab of the properties window to help you do more settings of the
Wireless LAN Card.
4
General
This tab allows you to specify the network methods to be used with your Wireless LAN Card. The network policy
depends on your wireless network. For TCP/IP protocol, you should configure its properties as instructed by your
network administrator.
Wireless Networks
Under Available networks section, you can also see all the Access Points and Wireless LAN Cards (Ad-Hoc mode)
available in the air. Clicking Refresh will update the list of Access Points and Wireless LAN Cards (Ad-Hoc mode).
Under Preferred networks section, you can add any wireless networks that you wish to connect to. To do this, just
click Add and enter necessary network setting in Wireless Network Properties window and then click OK.
Authentication
The most important setting for the Wireless LAN Card is to disable Enable network access control using
IEEE802.1X to ensure successful connection between your Wireless LAN Card and Access Point or other wireless
client (Ad-Hoc mode). You must disable this function for any reason. Otherwise, there may be some problems
happening during connection. For other settings, we recommend you keep the default settings to minimize the
problems during connection.
5
Technical supportt
t
Email: [email protected]
Web: www.airlinkplus.com
5


