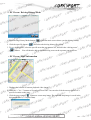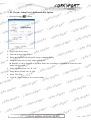
1
ORT SP T R O SP RKSP T T OR P S RK CO CO T ORDrive SP K R CO RT O P S ORT C T OR P S RK T OR P S RK CO CO T OR P S RK OR P S K COR T OR P S RK CO RT User's Manual O P RKS R O P S K R CO T T R O SP T R O SP K R O Recorder SZ-1000 T CO R O CO CO CO SP K R CO T KS R O C OR P S RK ORT OR P S RK T POR K COR OR P S K COR SP K R CO K R O C T T CO T CO K COR OR P S RK OR P S RK RT O P RKS RT O P S K COR ORT T SP K R CO CO O P S K COR KS R O C RT O P O C KS Version 1.001 R P O T C OR P OR T S C R K O R T SP CO R K O R SP CO RT K O R P CO RT KS O P CO RT KS O R P O C RT KS O R P O T S C R K O R P O T S C R O P ORK RT KS O R P O C RT KS O R P O T C KS OR R P O T S C K OR P T S COR R K O R P O T S C R K O R SP CO RT K O R P CO RT KS O R P O C RT KS O R P O C KS OR R P O T S C R K O contained in this manual was correct at RtheT R [The information time of publication. However, as our engineers are always P O S C your hardware & software may have a slightly different Othisdevice’s RK and improving our products & software, P S COupdating appearance or modified functionality than presented in manual.] RT K O R P O T C KS R O T 1 SP C R K O R P T S CO ORT ORT SP RKSP ORT CO K COR T R O SP SP K R CO K COR RT O P S RT O P RKS CO T OR P S RK CO -OTABLE RT OF CONTENTS - T CO P S K OR R • What’s in the BoxCO · · · · · · · · · · · · · · · · · · · ·S · · ·P ······························· 3 T R K O R P O RT & Function • Description · · · · ·C · · · · · · · · · · · · · · · · · · · · · · · · · · · · · · · · · · · · · ·R · ·K ··S ·· 4 O P CO RT KS • Key Features O R ························································ 5 P O T S C R K O R P O • Installation PrecautionsC · · · · · · · · · · · · · · · · · ·S K · · · · · · · · · · · · · · · · · · · · · · · · · · · · · · 6SPORT R O T RProcedure • Installation · · · · · · · · ·C · · · · · · · · · · · · · · · · · · · · · · · · · · · · · · · · · · · · · ·R · ·K 7 O P O T S C R K ··············· 8 COR • Installation Warnings ORKSPO · · · · · · · · · · · · · · · · · · · · · · · · · ·P· · ·O· · R· · ·T • LED Indicator and Button C · · · · · · · · · · · · · · · · · ·K · ·S ·························· 9 OR R P O T S C R • Product P Upgrade · · · · · · · · · · · · · · · · · · · · · · · · · · · · · · · · · · · · · · · · · · · · · · · · · · · · · 10RK O O T S C R K O R P · · · · · · · · · · · 11 S· · · · · · · · · · · · · · · · · · · · · · · · · · · · · · · · ·P· · ·O· · ·R· ·T CO• PC Viewer: Setup K R T CO • PC Viewer: Main Screen · · · · · · · · · · · · · · · · · · · · · · ·K ··S · · · · · · · · · · · · · · · · · · · · · · 12 O R P O T S C R O • PC Viewer: Information · · · · · · · · · · · · · · · · · · · · · · · · · · · · · · · · · · · · · · · · · · · · · · · · 12 RK P O T S C R K O R Add File List P · · · · · · · · · · · · · · · · · · · · · · · · · · · · · · · · · · · · · · · ·T S C• PCOViewer: R · · · · · · · 13 K O R P O T C • PC Viewer: Delete File List · · · · · · · · · · · · · · · · · · · · · · · · ·K · · ·S · · · · · · · · · · · · · · · · · 14 OR R O T S C R K O • PC Viewer: Data and File Download · · · · · · · · · · · · · · · · · · · · · · · · · · · · · · · · · · · · · · · 14 R P O S C R· · ·T O P ORKDisplay Video Image • PCC Viewer: · · · · · · · · · · · · · · · · · · · · · · · · · · · · · · · · · · · · · · 15 RT KS O R P O T C Information · · · · · · · · · · · · ·R · ·K · · ·S · · · · · · · · · · · · · 15 POR • PC Viewer: Speed & Acceleration O T C R O • PC Viewer: GPS Information · · · · · · · · · · · · ·T · · · · · · · · · · · · · · · · · · · · · · · · · · · · · · · 15 P OR S C R K O R T S· ·P· · · · · · · · · · · · · · · · · · · · · · · · · · · · · · · · P • PC Viewer: · · · · · ·R · 16 CODriving History Mode K O R S CO · · · · · · · · · · · · · · · · · · · · · · · · · · · O RT • PC Viewer: Map Information · · ·R ··K · · · · · · · · · · · · 16 O P T S C R K P • PC Viewer: Password Setup andO Release · · · · · · · · ·T · · · · · · · · · · · · · · · · · · · · · · · · · · · 17 S CO R K O R P O C Directly Folder • PC Viewer: Setup ·K · · ·S · · · · · · · · · · · · · · · · · · · · · · · · · · · · · · · · · · · · · 18 RT O R P O T S C R K O• PC Viewer: Setup User’s Information & ROption · · · · · · · · · · · · · · · · · · · ·R · · · · · · · · · · 19 P O T S C K O P OR • PC Viewer: Event Log · · · · · · · · · · · · · · · · · · · · · · · · ·T · · · · · · · · · · · · · · · · · · · · · · · 20 S R K O R CO • Product Specification · · · · · · · · · · · · · ·K · · ·S · ·P · · · · · · · · · · · · · · · · · · · · · · · · · · · · · · · 21 RT O R P O T S C OR •P Troubleshooting ·······································R · · ·K · · · 22 O T S C R K · · · · · · · ·T · · · · · · · · · · · · · · · · · · · 23 COR • Limited Warranty ORKSPO · · · · · · · · · · · · · · · · · · · · · · · · · P R O T S C R K O R SP CO RT K O R P CO RT KS O R P O C RT KS O R P O C KS OR R P O T S C R K O R P O T S C R K O P S COR RT K O R P O T C KS R O T 2 SP C R K O R P T S CO SP ORT CO K COR T R O SP T in the Box O•RWhat’s SP K R CO K COR RT O P S RT O P RKS CO T OR P S RK CO CO RT O RKSP※ Before getting started, please P T S check to see that your X-CorderPpackage includes the following R K O R O T items. S C R K O R SP CO RT Unit K O R • X-Corder P CO RT KS • SD Card O R P O C RT KS • 12 Volt Vehicle Power Cable O R P O • Adhesive Tape C RT KS O R P O T S C • Mount Clip R K O R P O T C R K• SUser's Manual O R P O S your dealer immediately. PORT C If you are missing any parts, please Kcontact R O C KS OR R P O T S C R O RK P O T S C R K O P T S COR R K O R P T S CO K O R P O T S C R O RK P O T S C R K O P S COR RT K O R P O T C KS OR R O T S C R K O R P O C RT 12V Vehicle Power KS Unit O R X-Corder SD Card (2GB) P O Cable C RT KS O R P O T C KS R POR O T C OR P OR T S C R K O R T SP CO R K O R SP CO RT K O R P CO RT KS O P CO RT KS O R P O C RT KS O R P O T S R Mount Clip AdhesiveC Tape User's Manual K O R P O T S C R O P ORK RT KS O R P O C RT KS O R P O T C KS OR R P O T S C K OR P T S COR R K O R P O T S C R K O R SP CO RT K O R P CO RT KS O R P O C RT KS O R P O C KS OR R P O T S C R K O R P O T S C R K O P S COR RT K O R P O T C KS R O T 3 SP C R K O R P T S CO SP ORT CO K COR T R O SP SP K R CO RT O P S CO RT O P RKS CO RT K O R P O T KS O•RDescription & Function RT C R P O S C O RK P T S R K O R P O T S C R K O R SP CO RT K O R P CO RT KS O R P O C RT KS O R P O C RT KS O R P O T S C R K O R P O T C R KS O R P O C RT KS O R P O C KS OR R P O T S C R O RK P O T S C R K O P T S COR R K O R P T S CO K O R P O T S C R O RK P O T S C R K O P S COR RT K O R P O T C KS OR R O T S C R video image. 1) Camera Lens: Capture K O R P O C RTforeign materials blocking the lens. Note:RPlease to avoid KS clean the camera lens before using O P O C KS real-time GPS satellite data. SPORT R 2) GPS Receiver: Built in GPS receiver receives O T C RK POR 3) Hinge button: Control O T viewing angle of the unit. C R O P OR T S C R K 4) SD Memory Card Slot: Insert SD memory card into the slot before power on. O R P O T S C R K O R 5) Power connector: Connect to vehicle 12V power source or other power source. SP CO RT K O R P CO RT 6) Power LED Indicator: Power on/off indicator. KS O P CO RTdata. KS SD Card LED will blink while O R 7) SD Card LED Indicator: recording P O T S C R K O R P O T 8)R GPS LED Indicator: GPS LED will light C up when receiving GPS satellite data. S K O R P O T S C R on/off indicator. sound recording O P ORK 9) MUTE LED Indicator: T Revent KS Toggle between full time recording O R 10) Event Recording button: and recording by pressing P O S C RT K O R the button. P O T S C R K O R P O T S C R on/off. K 11) MUTE button: Selectable sound Orecording P T S COR 12) Emergency button:OTime R button, it will Klapse image recording. By holding SthePemergency O R T C Surveillance Mode on/off. ORK R convert into Parking O SP C vehicle. RT Record voice and sound insideTand around K O R 13) Microphone: P CO R KS O R P O C 14) Adhesive plate: Attach O the plate KSto the windshield of vehicle SPORT R C K screen or navigation unit). SPOR 15) AV-Out: Video output connector to other display device (i.e.Rin-dash O T C R K O R P O T S C R K O P S COR RT K O R P O T C KS R O T 4 SP C R K O R P T S CO SP ORT CO K COR T R O SP T Features O•RKey SP K R CO K COR RT O P S RT O P RKS CO T OR P S RK CO CO ORT RKSP※ Recording accident videoSimage P T R K O R P When an accident of a RT Sthe shock automatically by way P COoccurs while driving, the deviceOdetects K O R T 3-axisRaccelerometer, and records the video 15 seconds before and 15 seconds after the event took S C O RK P place. O T S C R K O P S COR ※ Manually recording video RT K O R image P O S C RT Kmanually. O R When the user press Emergency button, it records video O image P T S C R K O R P O T S C KRecording ※ location information POR R O C Record & Save the locationOinformation, RanTaccident occurs. KS time, and speed by GPS sensor when O R P C KS OR R P O T S C R ※ RecordingO driving condition information RK P O T S Built-in 3-axis accelerometer detects and records the severity of a crash as well as acceleration, C R K O R and cornering gravitational forces. P T S CObraking R K O R P O T S C(DIT) K O R ※ Digital Image Tachometer Function P O T S C R Oand speed data together with images RK Save route, time while driving. DIT data stored to SD Card P O T S C R K Ocomputer by using the viewer software R You can analyze the data on your supplied P O T S Cautomatically. R K with the device. O R P O T S C R K O R O T S C R ※ Data analysis & Playback of an accident or event K O R P O S video image, which can showPO RT on the speed, coordinates, T PlaybackR anKaccident information gravity,C O C and sensor value at the timeOofRKtheSaccident happened. Data can be collected acceleration from the R O P T KS R POR viewer program. ORT C O C P OR T S C R K O R T SP CO R K O R SP CO RT K O R P CO RT KS O P CO RT KS O R P O C RT KS O R P O T S C R K O R P O T S C R O P ORK RT KS O R P O C RT KS O R P O T C KS OR R P O T S C K OR P T S COR R K O R P O T S C R K O R SP CO RT K O R P CO RT KS O R P O C RT KS O R P O C KS OR R P O T S C R K O R P O T S C R K O P S COR RT K O R P O T C KS R O T 5 SP C R K O R P T S CO SP ORT CO K COR T R O SP SP K R CO RT O P S CO RT O P RKS CO RT K O R P O T KS O•RInstallation Precautions RT C R P O S Othoroughly before installation. RT C RK ※ Please read the following Scontent P K O R P O T S C R K O R T all components were included in the packaging. 1. Be sure SP CO Rthat K O R P CO RT KS2. Make sure to power off the vehicle O R before proceeding with installation. P O C RT KS O R P O C power cable. RT KS 3. Do not break or damage O R P O T S C R K O R P O T Snot install the device in an area thatPwill C Raffect the driver’s eyesight. 4.K Do O R O C RT KS with any other vehicle deviceSorPcomponent. O R O 5. Make sure installation does not interfere C OR RK P O T S C R Oclean area where device is to be installed 6. Thoroughly to ensure the device adheres securely. ORK P T S C R K O R P O T S C Please use enclosed SD card, power R the K and accessories only. We do notSguarantee cable O R P O T 7.compatibility C of third party components. O RK P O T S C R O RK P O T S C R K O P S COR RT K O R P O T C KS OR R O T S C R K O R P O C RT KS O R P O C RT KS O R P O T C KS R POR O T C OR P OR T S C R K O R T SP CO R K O R SP CO RT K O R P CO RT KS O P CO RT KS O R P O C RT KS O R P O T S C R K O R P O T S C R O P ORK RT KS O R P O C RT KS O R P O T C KS OR R P O T S C K OR P T S COR R K O R P O T S C R K O R SP CO RT K O R P CO RT KS O R P O C RT KS O R P O C KS OR R P O T S C R K O R P O T S C R K O P S COR RT K O R P O T C KS R O T 6 SP C R K O R P T S CO SP ORT CO K COR T R O SP SP K R CO RT O P S CO RT O P RKS CO RT K O R P O T KS O•RInstallation Procedure RT C R P O S C Oof the product is top or bottom of front RK ※ The basic mounting location P T S R windshield of vehicle. Kposition where safe driving is not Sobstructed. O R P O T Attach the product on the C R K O R SP CO RT K O R P CO RT KS O R P O C RT KS the area in which you choose toSinstall O 1. R Locate the P O C Remove one side of the tape and OstickRKto device. device. RT O P T S C R K O R P O T C R KS O R P O C RT KS O R P O Sattach device base to 2.CRemove the other side of the adhesive and K OR R P O T windshield. S C R O RK P O T S C R K OX-Corder to windshield firmly. RT Note: Be sure toSattach P COR K O P T S COR O RtoKplumb in the surface P O T S C R 3. Adjust hinge button so the camera angle is O of earth. RK P O T S C R K O P S COR RT K O R Note: You may want to adjust the angle based upon personal P O T Cas well. KS OR R preference O T S C R K O R P O C RT KS O R P O C RT KS O R P O T C CARD into the device. ORKS 4. Insert SD Memory POR T C OR P OR T S C R K O R T SP CO R K O R SP CO RT K O R P O T C R KS O P of the device. CO RT KS5. Connect power cable to powerSconnector O R P O C RT K O R P O T S C R K O R P O T S C R O P ORK S RTpower cable to 12V KAfter O R P O 6. routing cable in desired location, connect C power supply. RT KS O R P O T C KS OR R P O T S C K OR P T S COR R K O R P O T S C R K O R SP CO RT K O R P CO RT KS O R P O C RT KS O R P O C KS OR R P O T S C R K O R P O T S C R K O P S COR RT K O R P O T C KS R O T 7 SP C R K O R P T S CO SP ORT CO K COR T R O SP SP K R CO RT O P S CO RT O P RKS CO RT K O R P O T KS O•RInstallation Warnings RT C R P O S C O to ensure proper installation andRuse. RK ※ Please read the followingScarefully P T K O R P O T S C R K O R • Do notR disassemble, repair or alter the device. This will void the warranty. T SP CO K O R P T CO KS• When cleaning the inside of a vehicle, R doO notRspray water directly onto the device. It may cause damage, fire or P O C RT KS electric shock. O R P O C RT KS O R P O T S Rfrom chemicals or detergents as they mayTchangeCthe surface of the device or ruin the interior • Keep away ofKthe O R P O device. C R KS O R P O C • Avoid excessive impact and doOnotRinsert RTshock or foreign KSany foreign objects into the device.SSevere O P impact, C OR RK materials may causeT damage the device. P O S C R O RK P O T S C R K • When operation O is impossible, so always clean theRlensTbefore use. Also, R foreign materials block the lens, normalSP COwhen K other objects are placed around camera OR they may reflect on the windowRandKmay T so please SPbeOincluded in the image, do not leave unnecessaryC objects around the device. O P O T S C R O RK P O • Excessive road bumps and vibrations may cause the deviceRtoT become misaligned. Simply correct the angle to S C K O P OR position. the S Cdesired RT K O R P O T C KS OR • Do not stare at or operate RtheT R device while driving. O S C K O R P O C RT KSaway from excessive impact, humiditySand • Keep the device salt. O R P O C RT K O R P O T S in this device. C certain impact or acceleration may notObeRKrecorded Be aware that the data from an accident under POR •(Please T refer to the function of black image Cmanually with Emergency OR box) In this case, it is possible toRrecord P OR button. T S C K O R P O T S C R K O R • Be aware that the image and additional data from the device may not be valid in the court of law. SP CO RT K O R P T CO Rinformation. KS • The time is set by using GPS satellite O P CO RT KS O R P O • This device is C designed to connect to an automobile 12 volt source RT KS only (DC12V ~24V). O R P O T S C R K O R P O T a replacement S • This device records real time videoPimages C SD card R onto an SD Card. If your SD card fails, O ORK may be used. RT KS O R P O C KSHowever, it may cause harmful SPORT R • This device meets requirements for EMI limits of Europe and USA. O T C K as OR to other devices, so please try andRlocate interference the device away from other electronic devices asR well P O T S C K O P T S COR antennas. R K O R P S may be reproduced, copied or PORT COas expressly provided herein, no partO • All rights reserved. Except of thisK manual R Tform or by any means including hardware andCsoftware, for any purpose without the express transmitted inR any KS O R P O prior written permission of manufacturer. T S C K OR P T S COR K OR P S COR OR RK P O T S C R K O R P O T S C R K O P S COR RT K O R P O T C KS R O T 8 SP C R K O R P T S CO SP K R CO CO ORT SP T R O SP RT O P S K COR RT O P RKS CO CO RT K O R P O T KS O•RLED Indicator & Button RT C R P O S C RK 1. LED Indicator Content SPO T R K O R P O T S C R K O R SP CO RT K O R P CO RT KS O R P O C RT KS O R P O C RT KS O R P O T S C R K O R P O T C R KS O R P O C RT KS O R P O C KS OR R P O T S C R O RK P O T S C R K O P T S COR R K O R P T S CO K O R P O T S C R O RK P O T S C R K O P S COR RT K O R P O T C KS OR R O T S C R K O R P O C 2. Beep Sound K&SLED indicator according to operation SPORT R O C RT K O R P O T C KS R POR O T C OR P OR T S C R K O R T SP CO R K O R SP CO RT K O R P CO RT KS O P CO RT KS O R P O C RT KS O R P O T S C R K O R P O T S C R O P ORK RT KS O R P O C RT KS O R P O T C KS OR R P O T S C K OR P T S COR R K O R P O T S C R K O R SP CO RT K O R P CO RT KS O R P O C RT KS O R P O C KS OR R P O T S C R K O R P O T S C R K O P S COR RT K O R P O T C KS R O T 9 SP C R K O R P T S CO LED POWER Status Description OFF Power off or failure ON Working by power supply or battery Blink slowly OFF Indicates Parking Surveillance Mode, synchronized with SD CARD LED Empty SD Card or recognition error Blink slowly Indicates Parking Surveillance Mode, synchronized with POWER LED SD CARD Blink GPS Data recording ON Working properly OFF GPS reception error Blink Waiting to receive GPS information ON Receiving GPS information (valid data) OFF Mute Off. (Recording sound data) ON Mute On. (Not recording sound data) MUTE ALL Blink System error Button Operation Status Beep sound LED Indicator - Power on Booting Beep-Beep-Beep After all LEDs turn on for 2 sec. and convert to current situation mode. - Upgrade Upgrade the device through SD Card Starting Beep~ Finishing Beep~ All LEDs turn on and turn off sequentially Press once from OFF mode Full Time Recording ON (Start full time recording) Beep-Beep when event situation occurs. Beep once after recording Blinking SD CARD LED Press once from ON mode Full Time Recording OFF (switch to Event mode) Beep-Beep when event situation occurs. Beep once after recording SD CARD LED ON Blinking when event occurs Press EMERGENCY button Record video image manually Beep-Beep when starting record. Beep after finishing record Blinking SD CARD LED during recording data Press EMERGENCY button for 2sec. from parking surveillance OFF mode Convert to Parking Surveillance Mode Beep-Beep (short 2 times) Blinking POWER LED & SD CARD LED slowly Press EMERGENCY button for 2sec. from packing surveillance ON mode Convert to previous mode Beep-Beep (short 2 times) Indicate LED according to previous mode Press once in MUTE OFF Convert to MUTE ON Beep (shortly once) Turn On MUTE LED Press once in MUTE ON Convert to MUTE OFF Beep (shortly once) Turn off MUTE LED Press MUTE button for 2sec. Convert to Buzzer Sound OFF Beep-Beep - Press MUTE button for 2sec. Convert to Buzzer Sound ON Beep-Beep - Event Recording button EMERGENCY button MUTE button ORT SP RKSP ORT SP K R CO CO T R O SP CO RT O P S K COR T OR P S RK CO RT O P RKS T K COR T OR P S K COR OR P S RK CO CO T R O SP RT K O R P The product may be changed or improved notify any COperson or RTfor content without obligation toT KS※organization O R P O of such changes orKimprovements. S C OR R P O S C RT Kfor current updates and O R Visit websiteT or call the service center of dealer or manufacturer P O S C of this device. R information concerning the use and K O R supplemental operation P O T C R KS O R P O C RT KS O R P O C R KS ※ How to upgrade. O R P O T S C R 1. Connect Card to PC. OSDupdate RK P O T S 2. Download files to SD Card from website of dealer or manufacturer. C R K O T on, it will then be automatically upgraded with LED CO3.R Insert SD Card to the deviceOandRKturnSP R O P T indicator blinking sequentially. S C K O R P O T S C R O RK P O T S C R K O P S COR RT K O R P O T C KS OR R O T S C R K O R P O C RT KS O R P O C RT KS O R P O T C KS R POR O T C OR P OR T S C R K O R T SP CO R K O R SP CO RT K O R P CO RT KS O P CO RT KS O R P O C RT KS O R P O T S C R K O R P O T S C R O P ORK RT KS O R P O C RT KS O R P O T C KS OR R P O T S C K OR P T S COR R K O R P O T S C R K O R SP CO RT K O R P CO RT KS O R P O C RT KS O R P O C KS OR R P O T S C R K O R P O T S C R K O P S COR RT K O R P O T C KS R O T 10 SP C R K O R P T S CO • Product Upgrade SP ORT CO K COR T R O SP O•RPCTViewer Setup SP K R CO K COR RT O P S RT O P RKS CO T OR P S RK CO CO ORPCTViewer program RKSP ※ Follow these instructionsStoPinstall T R K O R P T S CO R K O R SPbe RSDTCard into the SD Card slot of theTdevice.CO(The PC Viewer Program and Manual 1. Insert will K O R P CO R KScopied to SD Card.) O R P O C RT KSby SD Card reader. 2. Connect SD Card to computer O R P O C RT KS O R P 3. Open theR program folder located on the SD Card. O T S C K O R P O T S C Rfolder. 4. “SZ1000.exe” in the program KDouble-click O R P O C 5. Click the “Next” button. TheORinstallation KS program will then begin. SPORT C OR RK P O T S C R O RK P O T S C R K O P T S COR R K O R P T S CO K O R P O T S C R O RK P O T S C R K O P S COR RT K O R P O T C KS OR R O T S C R K O R P O C RT KS O R P O S and then, Click “Install”. PORT C the folder in which to install Viewer 6. Choose Kprogram R O T C KS R POR O T C OR P OR T S C R K O R T SP CO R K O R SP CO RT K O R P CO RT KS O P CO RT KS O R P O C RT KS O R P O T S C R K O R P O T S C R O P ORK RT KSsetup program. O R 7. Click “Finish” to complete P O C RT KS O R P O T C KS OR R P O T S C K OR P T S COR R K O R P O T S C R K O R SP CO RT K O R P CO RT KS O R P O C RT KS O R P O C KS OR R P O T S C R K O R P O T S C R K O P S COR RT K O R P O T C KS R O T 11 SP C R K O R P T S CO SP ORT CO K COR T R O SP SP K R CO RT O P S CO RT O P RKS CO RT K O R P O T KS OR • PC Viewer Screen RT C R P O S C O RK P T S R K O R P O T S C R K O R SP CO RT K O R P CO RT KS O R P O C RT KS O R P O C RT KS O R P O T S C R K O R P O T C R KS O R P O C RT KS O R P O C KS OR R P O T S C R O RK P O T S C R K O P T S COR R K O R P T S CO K O R P O T S C R O RK P O T S C R K O P S COR RT K O R P O T C video playback. KS OR 1. Main screen: DisplaysRT R O S C K O R 2. Speed & Acceleration: Displays speed and acceleration information. P O C RT KS O R P O C Displays the location of current O 3. Map: playback RT KSvideo image. O R P T C KS location information by text. R POR 4. GPS Information: Displays O T ORthe file list being played back. RT C P 5. File list screen: Displays OR S C K O R T SP CO R K O R T Viewer Information SP CO R• PC K O R P CO RT KS O P CO RT KS( ) button. O R 1. Click “Information” P O T S C R K O R P O T 2. R You can see the PC Viewer Information. C S K O R P O T S C R O P ORK RT KS O R P O C RT KS O R P O T C KS OR R P O T S C K OR P T S COR R K O R P O T S C R K O R SP CO RT K O R P CO RT KS O R P O C RT KS O R P O C KS OR R P O T S C R K O R P O T S C R K O P S COR RT K O R P O T C KS R O T 12 SP C R K O R P T S CO SP ORT CO K COR T R O SP SP K R CO RT O P S CO RT O P RKS CO RT K O R P O T R Viewer: Add File List T C KS O PC R P O S C OR RK ※ Adding file list by open file P T S R K O R P O T S C R K O R SP RT“PC Viewer” after connecting SDTCard Cto O 1. Execute computer. K O R P R files to playback from the SD CardT CO KS2. Click file open button ( ) SandPSelect O R O C K OR P S COR RT K O R P O T S C R K O R P O T C R KS O R P O C RT KS O R P O C KS OR R P O T S C R O RK P O T S C R K O P T S COR R K O R P T S CO K O R P O T S C R 3. The selected files are listed in the file list screen O RK P O T S C R K O is shown in the main screen RT 4.CDouble OR click the file to playback and RtheKvideo SPimage O P O T S C 5. Playback will occur one after the other for all selected files. R K O R O T S C R K O R P O S by file searching C RT ※ Adding R fileKlist O P O C RT KS O R P O T C SD Card to computer. connecting KS R POR 1. Execute “PC Viewer” after O T C O( R ) and open the file search screen. 2. Click file search button P OR T S C R K O R T SP CO R K O R SP CO RT K O R P CO RT KS O P CO RT KS O R P O C RT KS O R P O T S C R K O R P O T S C R O P ORK RT KS O R P O C RT KS O R P O T C KS ORfolder or file to search. R 3.P Select O T S C R K O P T S COR 4. The searched file will O be listed R K in the file list screen. O R P T S C R K 5. Find the desired file and Click “OK”. O R P O T S C R K O R P 6. Double RTimage will be shown in the mainTscreen.CO KS click the file to playback andSPtheOvideo R O C 7. Files will play back one afterORanother K until the selected files have allSplayed. OR P C OR RK P O T S C R K O R P O T S C R K O P S COR RT K O R P O T C KS R O T 13 SP C R K O R P T S CO SP ORT CO K COR T R O SP SP K R CO RT O P S CO RT O P RKS CO RT K O R P O T KS O•RPC Viewer: Delete File ListRT C R P O S C O RK P T S K connecting SD Card to computer.SPOR 1. Execute “PC Viewer” after R O T C R K O R SP CO RT K O R P CO RT KS O R P O C RT KS O R P O C RT KS O R P O T S C R K O R P O T C R KS O R P O C RT KS O R P O C KS OR R P O T S C R O RK P O T S C R K O( ) button. P the delete T S CO2. RSelect the file to delete and Click R K O R P T 3. To delete all file lists, ClickCtheOdelete all ( ) button. S K O R P O T S C R O RK P O T S C R K O P ORViewer: Data and File Download S C• PC RT K O R P O T OR 1. Download the data orRfileTstoredCin SD Memory Card to computer.CORKS S K O R P O T the following dialogue screen willC Rbutton, 2. ConnectR SD KSCard to computer and click the download O P O be C opened. RT KS O R P O T C KS R POR O T C OR P OR T S C R K O R T SP CO R K O R SP CO RT K O R P CO RT KS O P CO RT KS O R P O C RT KS O R P O T S C R K O R P O T S C R O P ORK RT KS O R P O C RT KS O R P O T C KS OR R P O T S C K OR P T S COR R K O R P O T S C R K 3. Select the file or data that you want to download and click the “Download” button in the dialogue O R SP CO RTthe selected file will be downloaded K screen. Then to the designated folder. O R P CO RT KS O R P O C RT KS O R P O C KS OR R P O T S C R K O R P O T S C R K O P S COR RT K O R P O T C KS R O T 14 SP C R K O R P T S CO ORT SP RKSP ORT CO K COR T R O SP SP K R CO K COR RT O P S RT O P RKS CO T OR P S RK CO O T C R O P • PC Viewer: Playback T S Video Image R K O R P O T Sbutton after selecting file Cfile R K O R 1. Double click the to playback or Click the “Play”( ) SP CO RT K O R P CO RT pause KS2. Click PAUSE ( ) button forSP O R O C RT Kto end playback O R 3. Click STOP ( ) button P O T S C R K O R P O T 4. Click theRscroll bar to playback specific time. S C K O R P O T S SPEED UP/DOWN( C Rfor playback speed KClick 5. ) button O R P O C 6. Click Volume UP/DOWN(ORKS) button for volume control PORT C KS OR R P O T S 7. To secureO captured image from video image, Click imageC capture ( ) button. R RK P O T S C R K Ofolder. P T S CORThe captured image is saved inOa designated R K O R P T 8. Click the print screen ( C) button to print image S K O R P O T S C R O RK P O T S C R K O Information P ORViewer: Speed & Acceleration S C• PC RT K O R P O T C KS OR R O T S C R K O R P O C RT KS O R P O C RT KS O R P O T C KS R POR O T C OR P OR T S C R K 9. Displays vehicle speed. O R T SP CO R K O R O graph is displayed and the iconRKSP the 10. Cspeed RTWhen clicking the speed( ) button, O P changes to the acceleration( ) icon. CO RT KS O P CO RT KS O R P O C RT KS O R P O T S C R K O R P O T S C R O P ORK • PC Viewer: GPSRInformation RT KS O P O C RT KS O R P O T C KS OR R P O T S C K OR P T S COR 1. Displays time information( R K) O R P O T S C information( ) R K O R 2. Displays maximum impulse SP CO RT K O R P S Latitude( ) & Longitude Pinformation( 3. K Displays CO RT ) O R O C RT KS O R P O C KS OR R P O T S C R K O R P O T S C R K O P S COR RT K O R P O T C KS R O T 15 SP C R K O R P T S CO SP ORT CO K COR T R O SP SP K R CO RT O P S CO RT O P RKS CO RT K O R P O T KS Mode C O•RPC Viewer: Driving HistoryRT R P O S C O RK P T S R K O R P O T S C R K O R SP CO RT K O R P CO RT KS O R P O C RT KS O R P O C RT KS O R P O T S C R K O R P O T C R KS O R P O C RT KS O R P O C KS OR R P O T S C R PO History Mode button ( ),OthenRT ORK SDriving 1. R Click the main screen shows you the driving history. C K P T CO2. Click the open file button ( O)RandKSselect R O the driving history file (*.dat) P T S C K R Tselect the specific area that you want to Csee,Oand click the “driving route” RKSPO R 3. To see drivingO route, SP CO RT route on the separate pop-up screen. (ORK ) button. You will then be able to seeP the driving O C RT KS O R P O T C KS OR R O T S C RInformation • PC Viewer: MAP K O R P O C RT KS O R P O C RT KS O R P O T C KS R POR O T C OR P OR T S C R K O R T SP CO R K O R SP CO RT K O R P CO RT KS O P CO RT KS O R P O C RT KS O R P O T S C R K O R P O T S C R O P ORK S RT Kcurrent O R P O 1. Displays the location of playback video image C RT KS O R P O T Sa Rthe “+” & “-” buttons to Zoom In orTZoom COut. You can also click the mouse toOmove 2. Click to K O R P S C K specific location on the map. SPOR T COR 3. Click the map capture O Rmap image is saved in the O ( RK ) button to secure map image. The captured P T S C R K designated folder (C:\Capture Data). O R SP CO RT K O R P CO RT KS O R P O C RT KS O R P O C KS OR R P O T S C R K O R P O T S C R K O P S COR RT K O R P O T C KS R O T 16 SP C R K O R P T S CO SP ORT CO K COR T R O SP SP K R CO RT O P S CO RT O P RKS CO RT K O R P O T C KS and Release O•RPC Viewer: Password SetupRT R P O S C RK 1. Click the password setupS( PO) button to create a password to protect T R from unauthorized use. K O R P O T S C R K O R SP CO RT K O R P CO RT KS O R P O C RT KS O R P O C RT KS O R P O T S C R K O R P O T C R KS O R P O C RT KS O R P O C KS OR R P O T S C R O RK O T S 2. Select aP folder on the SD Card to setup a password. C R K O P T S CO3. RType in your password and retype R K in the Confirm Password box. Click Save. O R P T S CO K O R P O 4. Click user setting(RT)button S C O RK P O T S C R K O P S COR RT K O R P O T C KS OR R O T S C R K O R P O C RT KS O R P O C RT KS O R P O T C KS R POR O T C OR P OR T S C R K O R T SP CO R K O R SP CO RT K O R P CO RT KS O P CO RT KS O R P O T S C R K O R P O T 5. Select and C click the “Save” button. S R “use” on the file password setting K O R P O T S Rand Click the password release ( T) button.C O select file P ORK 6.To release the password, R KS O R P O C RT KS O R P O T C KS OR R P O T S C K OR P T S COR R K O R P O T S C R K O R SP CO RT K O R P CO RT KS O R P O C RT KS O R P O C KS OR R P O T S C R K O R P O T S C R K O P S COR RT K O R P O T C KS R O T 17 SP C R K O R P T S CO ORT SP T R O SP T OR P S RK ORT SP K R CO ORT OR P S RK OR P S K COR T R O SP T POR KS R O C T R O SP C T OR P S RK CO T CO T CO T OR P S RK OR P S K COR T OR P S RK CO R O P S K R CO T CO T R O SP K R O OR P S RK OR P S RK CO CO SP K R CO K COR K R O C OR P S RK ORT CO RT O P S T T T CO T T CO) button. 1. Click the Setting ( CO K COR OR P S RK • PC Viewer Setting RT O P RKS RT O P S K COR ORT RKSP SP K R CO CO O P S K COR KS R O C RT K O R P O 2. Select C the folder to download the SD Card Data.ORKS RT O P T the folder to capture screen image. C KS R POR 3.4. Select O T C OR video image. Select the folder to saveP decrypted OR T S C R K O R 5. Select desired T COlanguage (Korean / English / Japanese)ORKSP R O or km/hour) SP C R6.TSelect speed display options (mile/hourT K O R P CO R in the Map Display Setup Interval KS 7. Setup Mark Route and Display O P CO RT KSsetting. 8. Click "Save" to saveR current O P O C RT KS O R P O T S C R K O R P O T S C R O P ORK RT KS O R P O C RT KS O R P O T C KS OR R P O T S C K OR P T S COR R K O R P O T S C R K O R SP CO RT K O R P CO RT KS O R P O C RT KS O R P O C KS OR R P O T S C R K O R P O T S C R K O P S COR RT K O R P O T C KS R O T 18 SP C R K O R P T S CO SP ORT CO K COR T R O SP SP K R CO RT O P S CO RT O P RKS CO RT K O R P O T C & Option KS O•RPC Viewer: Setup User’s Information R P O T S C OR RK 1. Click the settings ( ) button. P T S R K O R P O T S C R K O R SP CO RT K O R P CO RT KS O R P O C RT KS O R P O C RT KS O R P O T S C R K O R P O T C R KS O R P O C RT KS O R P O C KS OR R P O T S C R O RK P O T S C R K O P T S COR R K O R P T S CO K O R P O T S C R O RK P O T S C R K O R P 2.CO Type in the driver name S RT K O R P O T number C KS OR 3. Enter the license plateRT R O S C K O R 4. Setup the impulse level with quick setting or manual setting. P O C RT KS O R P O C the frame rate of video image toObeRsaved. 5. Setup RT KS O P T C frame rate according to circumstances Remarks: it can be changed to optimum KS when the video R POR ★image O T C is being saved. OR R P O T S C R K O R 6. Setup File T COEncryption “On” & “Off”. ORKSP R O SP C R7.TSetup Buzzer Sound "On" & "Off" K O R P CO KS 8. Setup Time Zone. SPORT CO K to save current setting. SPORT R 9. Click the “Save” button O C RT K O R P O T S C R K O R P O T S C R O P ORK RT KS O R P O C RT KS O R P O T C KS OR R P O T S C K OR P T S COR R K O R P O T S C R K O R SP CO RT K O R P CO RT KS O R P O C RT KS O R P O C KS OR R P O T S C R K O R P O T S C R K O P S COR RT K O R P O T C KS R O T 19 SP C R K O R P T S CO ORT SP T R O SP CO T 1. Click the Event Log ( OR P S RK ORT SP K R CO T ORT T ) button OR P S RK OR P S K COR T R O SP T POR KS R O C T R O SP C T OR P S RK CO T CO T CO T OR P S RK OR P S K COR T OR P S RK CO R O P S K R CO T CO T R O SP K R O OR P S RK OR P S RK CO CO SP K R CO K COR K R O C OR P S RK ORT CO RT O P S T T T CO CO K COR OR P S RK • PC Viewer: Event Log RT O P RKS RT O P S K COR ORT RKSP SP K R CO CO O P S K COR KS R O C RT K O R P O 2. Click C the "Search" button and Select theOfolder KSwhere the event file is stored. SPORT R T POR 3. Veiw the event log. ORT C ORK C R P "Save File As" button, then it will 4. To save event log,Sclick beT saved as a text file in the designated O C R K O R folder. O T SP C R K O R SP CO RT K O R P CO RT KS O P CO RT KS O R P O C RT KS O R P O T S C R K O R P O T S C R O P ORK RT KS O R P O C RT KS O R P O T C KS OR R P O T S C K OR P T S COR R K O R P O T S C R K O R SP CO RT K O R P CO RT KS O R P O C RT KS O R P O C KS OR R P O T S C R K O R P O T S C R K O P S COR RT K O R P O T C KS R O T 20 SP C R K O R P T S CO SP ORT CO K COR T R O SP SP K R CO RT O P S CO RT O P RKS CO RT K O R P O T KS O•RProduct Specification RT C R P O S C O RK P T S R K Camera • Camera: Color CMOSRDigital O P O T S C R K O R • Pixel: 320K pixel SP CO RT K O R P CO RT KS• Video resolutions: 640x480 (VGA) O R P O C RT KS • GPS: Internal GPS Module O R P O C RT KS O R P O • G-Sensor:R Internal 3D G-Sensor (Collision, Q-brake, Q-acceleration) T S C K O R P O T S Storage: SD Memory Card (Min.P512MB, C R Max. SDHC 16GB) •K Data O R O C • Audio: Built in Mic. & Buzzer RT KS O R P O S C K OR R P O T • Size: 87mm XR 90mm X 30mm S C O RK P O T S C R K Weight: O R 115g P T S CO•• Power R K O R P supply: 12V ~ 24V (Cigar-jack) T S CO K O R P O T S C R • Power Consumption: below 2W O RK P O T S C R K • Working T COR Temp: -20°C ~ 70°C ORKSPO R O P T C KS OR • Storage Temp: -40°C ~R85°C R O T S C K O R P O C RT KS O R P O C • COMPUTER SYSTEM REQUIREMENTSRKS RT O P O T C KS R POR - Windows XP/VISTA/7 O T C OR P OR - CPU : moreKthan Pentinum4 1.5Ghz (Recommend) T S C R O R O : 256MB T SP CRAM R K - Min. O R SP RT- Recommend RAM : 512MB T CO K O R P CO R KS O P S 10GB - Min. Hard Disk CO RT KDrive: O R P O C RT KS O R P O T S C R K O R P O T S C R O P ORK RT KS O R P O C RT KS O R P O T C KS OR R P O T S C K OR P T S COR R K O R P O T S C R K O R SP CO RT K O R P CO RT KS O R P O C RT KS O R P O C KS OR R P O T S C R K O R P O T S C R K O P S COR RT K O R P O T C KS R O T 21 SP C R K O R P T S CO ORT SP T R O SP RT O P S K COR T O•RTroubleshooting RKSP SP K R CO CO T OR P S RK K COR RT O P RKS CO T CO OR P S RK CO T R O P O points when the device is not ※ Please look at the working T S properly. Cfollowing R K O R SP CO RT O 1.PPlease check the vehicle power cable if you do not see the POWER LED turned on. ORK C RT KS O R P O T S C 2. Please make sure the provided K SD Card in loaded in the device.SPOR COR RT K O R P O T 3. Make sure R the SD Card is not in the “locked”TpositionC(not all cards have this feature). ORKS O P S R impacts may not be recorded basedTuponCthe KThe O R P O 4. data from an accident under certain light C R manually by KSIn this case, it is possible to recordSvideo Oimage R sensitivity of the accelerometer. P O C OR RK pressing the Emergency button. P O T S C R K O R P O T S C R K sure that no objects emitting light areO reflecting off of the windshield and into the lens of the P T S CO5. RMake device. This will cause the image to be distorted, especially at night. R K O R P T S CO K O R P O T 6. GPS data will notRtransmit in some areas such as: underground parking lots, tunnels, tall buildings, S C O RK P valleys and large trees. This is normal. O T S C R K O P OR T S C Rcloth. K O R 7. If image quality has degraded, please check lens and clean if necessary using aP clean O T C KS OR R O T C of the device until the desired ORKS Ris not at the right angle, please adjustTthe angle 8. If the image recorded O P C R image isR achieved. KS O P O C RT KS O R P O T C KS R POR O T C OR P OR T S C R K O R T SP CO R K O R SP CO RT K O R P CO RT KS O P CO RT KS O R P O C RT KS O R P O T S C R K O R P O T S C R O P ORK RT KS O R P O C RT KS O R P O T C KS OR R P O T S C K OR P T S COR R K O R P O T S C R K O R SP CO RT K O R P CO RT KS O R P O C RT KS O R P O C KS OR R P O T S C R K O R P O T S C R K O P S COR RT K O R P O T C KS R O T 22 SP C R K O R P T S CO ORT SP CO K COR T R O SP RT Warranty • Limited O RKSP 1. SP K R CO K COR RT O P S RT O P RKS CO T OR P S RK CO CO RT O P T prove to be defective in S or replace any defective part or PpartsORwhich The company will repair K R O materials and not due to abnormal workmanshipC and/or or improper usage, at its sole discretion RT Soriginal K O R within the warranty period (one (1) year from the date of purchase). P O T S C R O RK P O T S C R K OSHALL NOT APPLY IF THE DEFECT LIMITED WARRANTY WAS CAUSED P T S COR 2. THIS R K THROUGH ANY OF THE O R FOLLOWING: P S COdamages K 1) The defect and arise from improper installation, misuse, abuse, alternation or ORT R P O T S C R modification, and unauthorized repair by undesignated third parties. K O R T moving or dropping the device. CO S2)PThe defect or damage arising from transportation, R K O R incorrect voltage or SPfrom fire, earthquake, flood, pollution, CO 3) The defect or damageOresulting RT K O R P frequency and by natural disaster. C KS OR R P O T S C R O Warranty is only valid and enforceable 3. This Limited in countries where the Product is sold. ORK P T S C R K O R P O T S C OR P ORK T ※ Regards to Warranty and afterCservice S O RK P O T S C R O will remain valid within one (1)Ryear RK P O T S 1. The warranty period from the date of purchase. C K O P T S COR R K O R P O T returning any unit for service and requesting repair, please checkSthe power cable and C that, K OR 2. Before malfunctions in operation first. After if there is still a problem or R malfunction, please request O T S C R K O R repair at the dealer purchased or designated service center. P O C RT KS O R P O C RT KS O R P O T C KS R POR O T C OR P OR T S C R K O R T SP CO R K O R SP CO RT K O R P CO RT KS O P CO RT KS O R P O C RT KS O R P O T S C R K O R P O T S C R O P ORK RT KS O R P O C RT KS O R P O T C KS OR R P O T S C K OR P T S COR R K O R P O T S C R K O R SP CO RT K O R P CO RT KS O R P O C RT KS O R P O C KS OR R P O T S C R K O R P O T S C R K O P S COR RT K O R P O T C KS R O T 23 SP C R K O R P T S CO