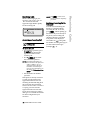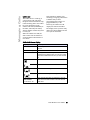
1
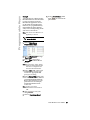
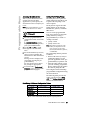
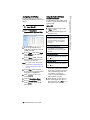
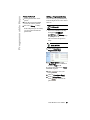
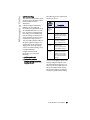
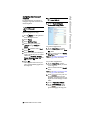
9133i IP PHONE
RELEASE 1.4
USER GUIDE
41-000113-00 -08
Aastra Telecom will not accept liability for any damages and/or long
distance charges, which result from unauthorized and/or unlawful
use.
While every effort has been made to ensure accuracy, Aastra Telecom
will not be liable for technical or editorial errors or omissions
contained within this documentation. The information contained
in this documentation is subject to change without notice.
Copyright 2005 Aastra Telecom. www.aastra.com
All Rights Reserved.
SOFTWARE LICENSE AGREEMENT
Aastra Telecom Inc., hereinafter known as "Seller", grants to Customer a
personal, worldwide, non-transferable, non-sublicenseable and non-exclusive, restricted use license to use Software in object form solely with the
Equipment for which the Software was intended. This Product may integrate programs, licensed to Aastra by third party Suppliers, for distribution
under the terms of this agreement. These programs are confidential and
proprietary, and are protected as such by copyright law as unpublished
works and by international treaties to the fullest extent under the applicable law of the jurisdiction of the Customer. In addition, these confidential
and proprietary programs are works conforming to the requirements of
Section 401 of title 17 of the United States Code. Customer shall not disclose to any third party such confidential and proprietary programs and
information and shall not export licensed Software to any country except in
accordance with United States Export laws and restrictions.
Customer agrees to not reverse engineer, decompile, disassemble or display Software furnished in object code form. Customer shall not modify,
copy, reproduce, distribute, transcribe, translate or reduce to electronic
medium or machine readable form or language, derive source code without the express written consent of the Seller and its Suppliers, or disseminate or otherwise disclose the Software to third parties. All Software
furnished hereunder (whether or not part of firmware), including all copies
thereof, are and shall remain the property of Seller and its Suppliers and
are subject to the terms and conditions of this agreement. All rights
reserved.
Customer's use of this software shall be deemed to reflect Customer's
agreement to abide by the terms and conditions contained herein. Removal
or modification of trademarks, copyright notices, logos, etc., or the use of
Software on any Equipment other than that for which it is intended, or any
other material breach of this Agreement, shall automatically terminate this
license. If this Agreement is terminated for breach, Customer shall immediately discontinue use and destroy or return to Seller all licensed software
and other confidential or proprietary information of Seller. In no event
shall Seller or its suppliers or licensors be liable for any damages whatsoever (including without limitation, damages for loss of business profits,
business interruption, loss of business information, other pecuniary loss, or
consequential damages) arising out of the use of or inability to use the software, even if Seller has been advised of the possibility of such damages.
9133i IP Phone User Guide
iii
About This Guide .........................1
Making Calls ...............................20
Documentation.............................1
Dialing a Number ......................20
Using Handsfree Speakerphone ...
20
Using a Headset........................20
Incoming Intercom Calls............21
Redial ........................................22
Mute ..........................................23
Introduction ..................................1
Phone Features ..........................1
Requirements..............................2
Installation and Setup..................2
Getting Started.............................3
When You First Plug in Your
Phone.......................................3
Updating Your Phone..................3
Start up Screens .........................3
Incomplete Config. ......................3
No Service ..................................3
Setting Your Options ...................4
Aastra Web UI...............................5
Finding Your Phone’s IP Addres .5
Accessing the Aastra Web UI .....5
User Password .............................6
Using Your Phone ........................7
Hard Keys ...................................7
Navigation Arrow Keys................7
Multiple Line and Call Appearances .............................................8
Programmable Keys ....................9
Setting a Line Key .......................9
Setting a Speeddial Key..............9
Setting a "Do Not Disturb" (DND)
Key .........................................11
Setting a "Busy Lamp Field" (BLF)
Key .........................................12
Setting a "BLF List Key" ............12
Setting a "Flash Key" ................14
Setting an "XML" Key ................14
Setting "Park/Pickup" Keys .......15
Editing a Programmable Key ....17
Deleting a Programmable Key ..18
Receiving Calls ..........................24
Answering an Incoming Call......24
Sending an Incoming Call to
Voicemail................................24
Handling Calls ............................25
Placing a Call on Hold ...............25
Transferring Calls......................25
Conferencing Calls....................26
Ending Calls ..............................27
Managing Calls...........................28
Directory List .............................28
Callers List ................................31
Call Forwarding .........................33
Additional Features....................36
Suppress DTMF Playback ........36
Ring Tones and Tone Sets........37
Stuttered Dial Tone ...................39
Call Waiting Tone ......................39
Language ....................................40
Troubleshooting Solutons.........41
Limited Warranty........................37
Restarting your phone...............19
v
Table of Contents
Table of Contents
About This Guide
About This Guide
Introduction
This guide explains how to use
your new 9133i phone. Not all
features listed are available by
default. Contact your system
administrator to find out which
features and services are available
on your system. Your system
administrator also has the ability to
customize some features on this
phone.
This 9133i IP telephone has all the
features of a regular business
phone, allowing you to make and
receive calls, transfer, conference
and more. The 9133i IP telephone
provides communications over an
IP Network using the SIP IP
telephony protocol.
Documentation
• Three-line adjustable backlit
display screen
• Aastra 9133i IP Installation
Guide – installation and set-up
instructions, general features
and functions, and basic options
list customization. This guide is
included in the box with your
phone.
• Aastra SIP 9133i IP Phone User
Guide – explains the most
commonly used features and
functions. This guide can be
downloaded from
www.aastra.com.
• Aastra SIP 480i/480i CT/9112i/
9133i IP Phone Administration
Guide – explains how to set the
9133i phone up on the network
and contains advanced configuration instructions for the 9133i.
This is an administrator level
guide. This guide can be downloaded from www.aastra.com.
Phone Features
• 3 line/call appearance buttons
with corresponding lights
• 7 programmable buttons with
lights that can be programmed
with specific functions
• Full-duplex speakerphone for
handsfree calls
• Built-in-two-port, 10/100
Ethernet switch which lets you
share a connection with your
computer
• Inline power support, which
eliminates power adapters.
9133i IP Phone User Guide
1
Installation and Setup
• A SIP-based IP PBX system or
network installed and running
with a number created for the
new 9133i IP phone.
If your system administrator has
not already setup your 9133i
phone, please refer to the Aastra
9133i Installation Guide for basic
installation and physical setup of
the 9133i. For more advanced
administration and configuration
information, system administrators
should refer to the Aastra SIP 480i/
480i CT/9112i/9133i IP Phone
Administration Guide
• Adherence to SIP standard
RFC 3261.
• Access to a configuration server
where you can store the firmware image and configuration
files.
The configuration server must
be able to accept connections
anonymously.
• The IP phone must be configured for a specific type of protocol to use. (TFTP is enabled by
default). You can configure the
following protocols on the IP
phone:
- TFTP (Trivial File Transfer
Protocol)
- FTP (File Transfer Protocol)
- HTTP (Hypertext Transfer
Protocol)
• A 802.3 Ethernet/Fast Ethernet
LAN
• Category 5/5e straight through
cabling
• Power over Ethernet (PoE)
power supply (optional
accessory that is necessary only
if no inline power is provided on
the network).
2
9133i IP Phone User Guide
Introduction
Requirements
Getting Started
Getting Started
The 9133i must be set up and
configured prior to its first use.
This section describes phone
behavior and start up screens you
may see when the phone is first
plugged in, or when it is restarted.
When You First Plug in Your
Phone
The 9133i automatically begins the
start up sequence as soon as it is
connected. The phone goes
through this process the first time
you plug in your phone and every
time you restart your phone. The
first screen the phone displays is
the Aastra splash screen.
Aastra 9133i
Updating Your Phone
After displaying the Aastra splash
screen, the 9133i checks settings
and looks for new configuration
and firmware updates for the
phone from the server. If a new
update is found, the phone
displays the message “Updating
Config” or “New Firmware”. This
may take a few moments while the
phone downloads the latest
updates.
NOTE: New updates to your phone can
be automatically scheduled
from the server. This is set up
on the phone system by your
system administrator and
should be scheduled during
non-business hours or slow call
periods.
Cheking for new
firmware...
Important! Do not unplug or remove
power to the phone while it is checking
or installing firmware.
Start up Screens
After the phone displays the
Aastra splash screen or after
downloading an update, the phone
displays the Idle State screen:
John Burns
9054550055
Jun 8 2:55pm
The basic Idle State screen lists
your name, extension, and today's
date and time. This screen is
shown whenever your phone is not
in use.
Incomplete Config.
If your phone displays a
“No Service” message without any
extension or user name at the end
of the start up sequence instead of
the Idle State screen, this means
your system administrator has not
set up your extension correctly.
Contact your system administrator
for assistance.
No Service
The “No Service” or “Network
disconnected” prompt appears on
the display and the telephone
status light turns on when the
phone is not properly connected to
the network, or the account has not
been configured by the
administrator. The phone also
displays the default time and date
of 12:00am Jan. 1st, 2000. Check
that the cables are tightly
connected to the phone and to the
wall jack. The phone should
automatically detect when the
connection is reconnected and will
display the “Network Connected”
prompt temporarily.
9133i IP Phone User Guide
3
For more information about
connecting your phone, refer to the
Aastra 9133i Installation Guide
under the section "Connecting to
the Network and to Power". Check
with your system administrator for
assistance.
Setting Your Options
Pressing the I button
gives you a list of configurable
options.
These options allow you to
customize your phone settings.
1
Language
2
Time and Date
3
Set Ring Tone
4
Clear Msg. Wtg.
5
Contrast Level
6
Live Dialpad
7
Headset Settings
8
Call Forward
9
Network Settings
10
SIP Settings
11
Phone Status
12
User Password
The "Network Settings" and "SIP
Settings" selections are
administrator level options, and
require an administrator password
to access. Setting defaults under
"Phone Status" also requires an
administrator password. These
options should only be set up and
changed by your system
administrator.
4
9133i IP Phone User Guide
For more information about
customizing your phone, see the
section "Customizing Your Phone"
in the Aastra 9133i Installation
Guide.
For more information about
administrator options, contact your
system administrator.
Getting Started
If changes have been made to your
phone settings, you may need to
restart your phone. For more
information on restarting your
phone, see "Restarting your
phone" on page 19.
Aastra Web UI
Aastra Web UI
Accessing the Aastra Web UI
You can access the 9133i phone’s
options using the Aastra Web UI.
In order to access the Aastra
Web UI, you will need to know the
IP address of your phone.
Finding Your Phone’s IP Addres
IP Phone UI
1. Press the I button on
the phone to enter the Option
List.
2. Use the V key to scroll down
the list of options to
Phone Status and press the U
key to select.
Aastra Web UI
1. Open your web browser and
enter the phone’s IP address or
host name into the address field.
2. At the prompt, enter your username and password and click
.
Note: For a user, the default user name
is “user” and the password field
is left blank.
The Network Status window displays for the IP phone you are
accessing.
11 Phone Status
=Next
=Enter
3. Select "Network Port" and press
the U key.
1 Network Port
=Next
=Enter
The IP address of your 9133i IP
phone displays in the "IP
Address" field.
IP Address:
10.40.50.112
=Exit
=Next
3. You can logout of the Aastra
Web UI at any time by clicking
LOGOFF.
The following categories display in
the side menu of the Aastra Web
UI: Status, Operation, Basic
Settings.
Status
The Status section displays the
network status and the MAC
address of the IP phone. It also
displays hardware and firmware
information about the IP phone.
The information in the Network
Status window is read-only.
9133i IP Phone User Guide
5
The Operation section provides the
following options:
- User Password - Allows you to
change user password
- Programmable Keys - Allows
you to configure up to 7
programmable keys for a
specific function (line,
speeddial, do not disturb
(DND), Busy Lamp Field (BLF),
BLF list, flash, Extensible
Markup Lanaguage (XML),
Park, and Pickup.)
- Directory - Allows you to copy
the Callers List and Directory
List from your IP phone to
your PC.
- Reset - Allows you to restart
the IP phone when required.
and press U.
4. Enter the new user password
and press U.
5. Re-enter the new user password
and press U.
A message, "Password
Changed" displays on the
screen.
Aastra Web UI
1. Click on Operation->User
Password.
Basic Settings
The Basic Settings section provides
the following options:
- Preferences - Allows you to set
suppression of DTMF
playback, incoming intercom
call settings, ring tones (global
and per-line basis), and ring
tone sets.
- Call Forward - Allows you to
set a phone number
destination for where you want
calls forwarded.
User Password
This category allows you to change
the web-access password for your
phone. Changing your password
ensures that only you can alter
your phone settings, and helps
keep your system secure. You can
change your user password using
the IP phone UI or the Aastra Web
UI.
IP Phone UI
1. Press I on the phone to
enter the Options List.
2. Select User Password and
press U.
3. Enter the current user password
6
9133i IP Phone User Guide
2. In the "Current Password" field,
enter the current user password.
Note: By default, the user name is
“user” (all lowercase) and the
password field is left blank. If
you have forgotten your password, contact your system
administrator for assistance.
3. In the "New Password" field,
enter the new user password.
4. In the "Password Confirm"
field, enter the new user password again.
5. Click
changes.
to save your
User Password
Operation
Using Your Phone
Using Your Phone
The following sections describe the
various 9133i phone key functions,
and how they help you make and
manage your calls and caller
information.
Hard Keys
The following hard keys labeled on
your phone are configured for the
call handling features:
• Callers n
• Conference l
The following keys are configured
for managing phone features and
settings:
• Options I
• Directory J
• Save K
• Delete L
These keys are static and cannot be
programmed or changed. They are
located to the far upper right of the
dial pad.
• Transfer k
• Redial m
These keys are static and cannot be
programmed or changed. They are
located to the right of the dial pad.
There are also 3 line keys
Options
Directory
(f , g ,
h), located below the
Save
hard keys. See the section 9.
Delete
Navigation Arrow Keys
Conf
Xfer
The arrow keys located below the
display are navigation keys that
allow you to scroll through and
select various options.
L3
L2
L1
9133i IP Phone User Guide
7
The 9133i has 3 hard line/call
appearance buttons each with a
corresponding status light.
These line/call appearance buttons
and lights can represent physical
lines, calls for your extension or
calls from a group that your
extension is part of. By pressing a
line/call appearance button, you
connect to the line or a call it
represents. The line/call
appearance light indicates the
status of that line or call. When the
phone is taken off-hook, the phone
automatically selects a line for you.
Line/Call
Appearance
Light Behavior
Line/Call
Appearance
Status
Off
Idle line or no
call activity
Light flashes
quickly
Ringing
Light is solid
Connected
Light flashes
slowly
Hold
8
9133i IP Phone User Guide
Using Your Phone
Multiple Line and Call
Appearances
Programmable Keys
Programmable Keys
There are 7programmable keys on
the 9133i phone, located beneath
the Delete key, to the far right of
the dial pad.
You can set the programmable
keys with any of the following
functions:
•
•
•
•
•
•
•
line
speeddial
DND (do not disturb)
BLF (busy lamp field)
BLF list
flash
XML (Extensible Markup Language)
• Park
• Pickup
These keys can also be set up to
quickly access features such as Call
return (*69) or Voicemail.
Note: Quick access features like Call
return and Voicemail must first be
configured on your PBX in order to
work on your phone. See your system administrator for more information.
Setting a Line Key
Aastra Web UI
1. Click on Operation->
Programmable Keys.
2. Select from "Hard Key 1"
through "Hard Key 7".
3. In the "Type" field, select line to
apply to the programmable key.
4. Entering a value in the "Value"
field is optional. For example,
you could enter L4.
5. In the "Line" field, select a line
for which to apply this programed hard key. Valid values
are 1 through 9.
6. Click
changes.
to save your
7. Click on Operation->Reset.
8. In the "Restart Phone" field
click
to restart the IP
phone.
You can set a programmable key as
an additional line on the 9133i. The
programmable key acts as a line
that behaves the same as a hard
line key. For more information
about the behavior of line keys, see
"Multiple Line and Call
Appearances" on page 8.
Setting a Speeddial Key
You can use the Aastra Web UI
only to set a programmable key as
a line.
You can save up to 7 speed dial
numbers and names on the 9133i.
These can be programmed to dial
directly to another person’s line or
extension, or set up to quickly
access features such as Caller ID
(*69), Voicemail.
Note: Your system administrator can
also set a programmable key as a
line using the configuration files.
Use the following procedure to set
a programmable key to function as
a line.
The speeddial function can be set
using the IP phone UI or the Aastra
Web UI. DND and XML can only
be set using the Aastra Web UI.
Note: Your system administrator can
also set speeddial using the
configuration files.
Use the following procedures to set
speeddial on the 9133i IP phone.
9133i IP Phone User Guide
9
IP Phone UI
6. Press K to finish.
To enter a number and name in a
programmable key:
1. Press K.
The screen displays "Save to?"
2. Select a Programmable Key M
you want to save to.
3. At the "Enter Number" prompt,
use the dial pad key to enter the
number.
Aastra Web UI
1. Click on Operation->
Programmable Keys.
4. Press K.
Note: To add a one second pause during number editing press
O.
5. At the "Enter Name" prompt, use
the dial pad keys to select the
letters. Continue to press the
number key to access the next
letter for that key (i.e. press 2
three times to access C). Press
U to move to the next space, or
wait a moment and the cursor
automatically advances. To
insert a space between letters,
press U. To backspace and
erase a mistake, press T or
L. You can save up to 16
letters and numbers on each
programmable key entry.
10 9133i IP Phone User Guide
2. Select from "Hard Key 1"
through "Hard Key 7".
3. In the "Type" field, select
speeddial to apply to the programmable key.
4. In the "Value" field, enter the
phone number or extension to
apply to this hard key for speeddialing .
5. In the "Line" field, select a line
for which to apply this programed hard key. Valid values
are 1 through 9.
6. Click
changes.
to save your
7. Click on Operation->Reset.
8. In the "Restart Phone" field
click
to restart the IP
phone.
Programmable Keys
Entering a Name/Number for
Speeddial Key
Programmable Keys
Saving an Entry from the Redial,
Callers, or Directory Lists to a
Speeddial key
IP Phone UI
To save an entry from your Redial,
Callers, or Directory lists from the
IP phone:
1. Press the desired hard key
n or m.
From Callers or Redial, scroll
through the list to find the name
and number that you wish to
save to your speed dial.
2. Press K.
3. Press the selected speed dial. If
the name is displayed with the
number, both are saved to the
speed dial. If no name is displayed, you can enter the name
using the dial pad.
Setting a "Do Not Disturb"
(DND) Key
The IP phones have a feature you
can enable called "Do not Disturb
(DND). The DND function allows
you to turn "do not disturb" ON
and OFF.
If DND is ON, callers calling into
the phone hear a busy signal or a
message, depending on how your
system administrator set up the
configuration server. The second
line on the screen of the IP phone
shows when DND is set.
If the phone shares a line with
other phones, only the phone that
has DND configured is affected.
You can set DND on the
programmable keys using the
Aastra Web UI only. DND is not
configurable from the IP phone UI.
Note: Your system administrator can
also set DND using the configuration files.
Aastra Web UI
1. Click on Operation->
Programmable Keys.
2. Select a "Hard Key 1" through
"Hard Key 7".
3. In the "Type" field, select do not
disturb to apply to the programmable key.
4. Click
to save your
changes.
5. Click on Operation->Reset.
6. In the "Restart Phone" field
click
to restart the IP
phone.
9133i IP Phone User Guide
11
The BLF feature on the IP phones
allows a specific extension to be
monitored for state changes. BLF
monitors the status (busy or idle)
of extensions on the IP phone.
Note: The BLF setting is applicable to
the Asterisk server only.
Example
A Supervisor configures BLFs on
his phone for monitoring the status
of a worker’s phone use (busy or
idle). When the worker picks up
his phone to make a call, a busy
indicator on the Supervisor’s
phone shows that the worker’s
phone is in use and busy.
On the 9133i, the busy and idle
indicators are the LEDs next to
each BLF programmable key. The
LED illuminates steady to indicate
the monitored line is off-hook or
unregistered. The LED goes off
when the line is idle.
You can set BLF on the
programmable keys using the
Aastra Web UI only. BLF is not
configurable from the IP phone UI.
Note: You can also use a BLF configured key to dial out.
4. In the "Value" field, enter the
phone number or extension you
want to monitor.
5. In the "Line" field, select a line
for which to apply this programmed key. Valid values are 1
through 9.
6. Click
to save your
changes.
7. Click on Operation->Reset.
8. In the "Restart Phone" field
click
to restart the IP
phone.
Setting a "BLF List Key"
(For use with the BroadSoft
Broadworks Rel 13 or higher
platform only)
The BLF\List feature on the IP
phones is specifically designed to
support the BroadSoft Broadworks
Rel 13 Busy Lamp Field feature.
This feature allows the IP phone to
subscribe to a list of monitored
users defined through the
BroadWorks web portal.
Note: Your system administrator must
have BLF List enabled on the
BroadWorks Server. Contact
your system administrator for
more information.
1. Click on Operation->
Programmable Keys.
In addition to monitoring the idle
and busy state, the BLF\List feature
also supports the ringing state. On
the 9133i phone, the LED lights
next to each BLF programmable
key illuminate steady to indicate
the monitored line is off-hook or
unregistered. The LED goes off
when the is idle. When the
monitored extension is ringing, the
LED flashes.
2. Select a "Hard Key 1" through
"Hard Key 7".
3. In the "Type" field, select BLF to
apply to the programmable key.
The Broadworks BLF feature is not
the same as the Broadworks
Shared Call Appearance (SCA)
feature and does not permit call
control over the monitored
extension.
Aastra Web UI
12 9133i IP Phone User Guide
Programmable Keys
Setting a "Busy Lamp Field"
(BLF) Key
Programmable Keys
Example
A receptionist has a 9133i running
Broadsoft firmware that subscribes
to a list of extensions from the
BroadWorks Application Server.
On the 9133i running Broadsoft
firmware, the programmable key
LEDs illuminate either flashing,
solid, or turn off depending on the
state of those extensions.
8. In the "Restart Phone" field
click
to restart the IP
phone.
Note: You can also use a BLF/List configured key to dial out.
Aastra Web UI
1. Click onOperation->
Programmable Keys.
2. Select a "Hard Key 1" through
"Hard Key 7".
3. In the "Type" field, select
"BLF\List" (BroadSoft BroadWorks).
Note: No value in the "Value" field is
required. The BroadWorks BLF
List name is configured in the
"BLF List URI" field instead.
4. In the "Line" field, select a line
number that is actively registered to the appropriate SIP
proxy you are using.
5. In the "BLF List URI" field, enter
the name of the BLF list defined
on the BroadSoft BroadWorks
Busy Lamp field page for your
particular user. For example,
[email protected].
Note: Contact your system
administrator for the BLF List
URI.
6. Click
to save your
changes.
7. Click on Operation->Reset.
9133i IP Phone User Guide
13
You can set a programmable key to
generate a flash event when it is
pressed on the 9133i. You do this
by setting the programmable key
to "flash". The IP phone generates
flash events only when a call is
connected and there is an active
RTP stream (for example, when the
call is not on hold).
Aastra Web UI
You can set a programmable key
on the 9133i phone to use XML
using the Aastra Web UI.
However, the XML services must
be set up by your system
administrator before you can use
the key. Contact your system
administrator for more
information.
Aastra Web UI
1. Click on Operation->
Programmable Keys.
1. Click onOperation->
Programmable Keys.
2. Select a "Hard Key 1" through
"Hard Key 7".
3. In the "Type" field, select flash.
4. Click
to save your
changes.
5. Click on Operation->Reset.
6. In the "Restart Phone" field
click
to restart the IP
phone.
Setting an "XML" Key
The 9133i IP phone has a feature
you can enable called "XML"
(Extensible Markup Language).
Setting a programmable key to
XML allows you to access special
services set up by your system
administrator. These services
include things like weather and
traffic reports, contact information,
company info, stock quotes, or
custom call scripts. Contact your
system administrator for more
information.
14 9133i IP Phone User Guide
2. Select a "Hard Key 1" through
"Hard Key 7".
3. In the "Type" field, select xml to
apply to the programmable key.
4. In the "Value" field, enter the IP
address of the XML application.
Note: Contact your system administrator for the appropriate value to
enter in the "Value" field.
5. Click
to save your
changes.
6. Click on Operation->Reset.
7. In the "Restart Phone" field
click
to restart the IP
phone.
Programmable Keys
Setting a "Flash Key"
Programmable Keys
Accessing the XML Service
Setting "Park/Pickup" Keys
After a system administrator has
created and saved an XML
application to your IP phone, the
customized service is ready for you
to use.
The 9133i phone has a park and
pickup call feature that allows you
to park a call and pickup a call
when required.
Note: The programmable key on your
phone must be set to "XML".
IP Phone UI
1. Press the programmable key
configured for XML on the 9133i
phone.
A "Custom Features" screen
displays or a title configured by
your system administrator.
2. Use the r and s to scroll
through the customized features.
3. For menu and directory services,
select a service to display the
information for that customized
service.
Message services display to the
screen after pressing the programmable key.
For user input services, follow
the prompts as appropriate.
4. To exit from the "Customized
Features" screen, press the XML
programmable key again.
The IP phones support the Park/
Pickup feature on the Asterisk,
BroadWorks, Sylantro, and ININ
PBX servers.
You can set the programmable
keys on the 9133i to use the park/
pickup feature by setting a
programmable key as "Park" or
"Pickup" and then:
• specify a value
• specify a line to use
Note: The values you enter for each
softkey are dependent on the
type of server you are using
(Asterisk, BroadWorks, Sylantro,
or ININ PBX).
The park/pickup feature performs
as follows:
• When a call comes in, and you
pickup the handset, you can
press the applicable "Park" programmable key to park the call.
• After the call is parked, you can
press the "Pickup" programmable key, followed by the applicable value to pickup the call.
You configure a Park and Pickup
programmable configuration using
the Aastra Web UI.
The following table provides the
values you enter for the "Park
Call" and "Pickup Parked Call"
fields in the Aastra Web UI.
Park/Pickup Call Server Configuration Values
Park Values*
Pickup Values*
Aasterisk
Server
700
700
Sylantro
*98
*99
BroadWorks
*68
*88
callpark
pickup
ININ PBX
*Leave "value" fields blank to disable the park and pickup feature.
9133i IP Phone User Guide
15
Use the following procedure to
configure park/pickup on the 9112i
phone.
Aastra Web UI
1. Click on Operation->
Programmable Keys and XML.
.
Using the Park Call/Pickup
Parked Call Feature
Use the following procedure on the
IP phone to park a call and pick up
a parked call.
Park a Call
1. While on a live call, press the
"Park" softkey.
2. Perform the following for your
specific server:
For Asterisk Server
- Server announces the extension
number where the call has been
parked. Once the call is parked,
press the Nkey to complete
parking.
For BroadWorks Server
2. Pick a programmable key to
configure for parking a call and
picking up a call.
3. In the "Type" field, select Park.
Select Pickup for the other programmable key.
4. In the "Value" fields, enter the
approriate values based on the
server in your network.
Note: For values to enter in this field,
see the table "Park/Pickup Call
Server Configuration Values" on
page 15.
5. In the "Line" field, select the
lines for which to apply the Park
and pickup configuration.
6. Click
changes.
to save your
7. Click on Operation->Reset.
8. In the "Restart Phone" field
click
to restart the IP
phone.
16 9133i IP Phone User Guide
- After you hear the greeting from
the CallPark server, enter the
extension where you want to park
the call.
For Sylnatro Server
- Enter the extension number where
you want to park the call, followed
by "#" key.
For ININ Server
- Enter the extension number where
you want to park the call, followed
by "#" key.
If the call is parked successfully,
the response is either a greeting
voice confirming that the call
was parked, or a hang up
occurs. The parked call party
will get music on hold.
3. If the call fails, you can pick up
the call (using the next procedure) and press the "Park" softkey again to retry step 2.
Programmable Keys
Configuring Park/Pickup
Programmable Keys
Pickup a Parked Call
Editing a Programmable Key
1. Pick up the handset on the
phone.
2. Enter the extension number
where the call was parked.
You can edit a programmable key
from the IP phone UI or the Aastra
Web UI.
3. Press the "Pickup" softkey.
If the call pick up is successful,
you are connected with the
parked call.
IP Phone UI
• Save a new number to the key
through the n ,
m or J keys
on your phone.
This overwrites the previous
entry.
Aastra Web UI
1. Click on Operation->
Programmable Keys.
2. For "Hard Key 1" through
"Hard Key 7", select a function
from the "Type" field.
3. Change the value in the "Value"
field if required.
4. Click
changes.
to save your
5. Click on Operation->Reset.
6. In the "Restart Phone" field
click
to restart the IP
phone.
9133i IP Phone User Guide
17
You delete a programmable key
function using the Aastra Web UI.
Aastra Web UI
Click on Operation->
Programmable Keys.
7. For "Hard Key 1" through
"Hard Key 7", select none from
the "Type" field.
8. Click
changes.
to save your
9. Click on Operation->Reset.
10.In the "Restart Phone" field
click
to restart the IP
phone.
The programmable function is
deleted from the IP phone
memory.
18 9133i IP Phone User Guide
Programmable Keys
Deleting a Programmable Key
Restarting your phone
Restarting your phone
You may want to restart your
phone to check for updates for
your phone on the server. You may
occasionally need to restart your
phone to set changes or updates to
your phone or network settings.
You may also need to restart your
phone if you have been asked to do
so by your system administrator, or
should you experience any
unexpected behaviour.
You can also restart your phone
through the Aastra Web UI.
Aastra Web UI
1. Click on Operation->Reset.
2. Click
IP Phone UI
.
3. Click OK at the confirmation
prompt.
1. Press the I button on
the phone to enter the Option
List.
2. Use the V key to scroll down
the list of options to Phone Status and press the U key to
select.
3. Press the V key to scroll to
the Restart Phone option.
4. Press the U key to confirm and
restart the phone. If you do not
wish to restart your phone,
press the T key to cancel.
Note: Your phone will be out of service
temporarily during the restart
and downloading process.
9133i IP Phone User Guide
19
This section describes ways to
make calls on your 9133i phone,
using your handset, speakerphone
or headset.
Dialing a Number
First, take the phone off-hook by:
•
•
• lifting the handset
• pressing q or
• pressing a line/call appearance
button.
At the dial tone, enter the number
you wish to call. If you are unable
to make calls within certain area
codes, check with your system
administrator for any toll
restrictions placed on your
extension that may restrict your
access to long distance area codes
or dialing prefixes.
=Dial
When your party picks up, a timer
appears on your display that
records the length of your call.
Using Handsfree Speakerphone
The handsfree feature allows you
to speak to someone without using
the handset or headset. Your
phone must be in either the
Speaker or Speaker/Headset audio
mode. You can set your desired
audio mode through #7. Headset
Settings in the Options list. For
more information, see the section
"Customizing Your Phone" in the
9133i Installation Guide.
IP Phone UI
• To dial using handsfree, first
20 9133i IP Phone User Guide
•
•
press q and enter a
number at the dial tone.
To answer a call on your phone
using handsfree, press
q or the line/call
appearance button.
If you are in Speaker audio
mode, lift the handset and press
q to switch between
handsfree and handset.
If you are in Speaker/headset
audio mode, press q
to switch between handsfree
and headset.
When the handset is on hook,
press N to disconnect the
call. When handsfree is on, the
speaker light turns on.
Using a Headset
The 9133i accepts headsets through
the modular RJ9 jack on the back
of the phone. Contact your
telephone equipment retailer or
distributor to purchase a
compatible headset.
NOTE: Customers should read and
observe all safety recommendations contained in headset
operating guides when using
any headset.
Advanced Volume Controls for
the Headset Mic
On the 9133i, there are 3 options
for the headset microphone
volume.
IP Phone UI
To change the volume:
1. Press I to enter the
options list.
2. Use V to scroll down the list
of options to 7. Headset
Settings and press U to select,
Making Calls
Making Calls
Making Calls
or
3. Press 7 to jump directly to this
option, and press U to select.
4. Press V to scroll down to
headset/mic volume and press
U to select.
5. Use V to scroll down the list
and press U to select your
desired volume.
6. Press U to save changes and
T to exit.
7. If you do not wish to save
changes, press T to return to
the previous screen.
NOTE: By default, the volume for the
headset microphone is set to
medium.
Making and Receiving Calls
Using a Headset
Incoming Intercom Calls
On the 9133i, you can receive
incoming intercom calls only. By
default, the microphone for an
incoming intercom call is OFF, and
the automatic answer for an
intercom call is ON.
Using the Aastra Web UI, you can
enable (turn ON) or disable (turn
OFF) the microphone or automatic
answering (auto-answer) on the IP
phone for incoming intercom calls.
If auto-answer is enabled on the IP
phone, the phone plays a tone to
alert the user before answering the
intercom call. If auto-answer is
disabled, the phone rejects the
incoming intercom call and sends a
busy signal to the caller.
Enabling/Disabling Microphone and
Auto-Answer
Use the following procedure to
enable/disable the microphone
and/or auto-answer on the IP
phone.
IP Phone UI
1. Ensure that you have selected a
headset audio mode by accessing the options list (under option
#7 √Headset Settings).
2. Plug the headset into the jack.
Aastra Web UI
1. Click on Basic Settings->Preferences->Incoming Intercom
Settings.
3. Press the q key to
obtain a dial tone or to answer an
incoming call. Depending on the
audio mode selected from the
options menu, a dial tone or an
incoming call will be received on
either the headset or the
handsfree speakerphone.
4. Press the N key to end the
call.
The "Microphone Mute" field is
enabled by default (turned
OFF).
The "Auto-Answer" field is
enabled by default (turned ON).
9133i IP Phone User Guide
21
3. To disable the "Auto-Answer"
field (turn OFF), uncheck the
check box.
4. Click
changes.
to save your
5. Click on Operation->Reset.
6. In the "Restart Phone" field
click
to restart the IP
phone.
Redial
IP Phone UI
Press m to dial the most
recent number you dialed from the
phone. If you are off-hook and
press m the last number
you called will be called back. If
you are on-hook and press
m, a Redial Directory list
appears on-screen. The redial list
stores up to the last 100 numbers
you called, allowing you to scroll
through and select the number you
wish to redial.
Note: Your system administrator can
set your Redial key to speedial a
specific number. Contact your
system administrator for more
information.
22 9133i IP Phone User Guide
Accessing the Redial List
IP Phone UI
1. If you are off-hook and press
m, the telephone
automatically dials the last
number you called.
2. If you are not on the phone,
press m to display the
most recently dialed number
and use V W to scroll
through the list to view the
other numbers
3. Press V to see the second
most recently dialed number, or
W to see the oldest call on
your list.
4. To dial the displayed number
press q , or lift the
Handset or press any line keys.
5. Press N or the
m key to cancel.
Making Calls
2. To disable the "Microphone
Mute" field (turn ON), uncheck
the check box.
Making Calls
Deleting from the Redial List
NOTE: You cannot delete individual
entries in the Redial List.
IP Phone UI
To Delete All Items:
1. Press m .
2. Press L, then press
L again at the prompt to
erase all items.
DELETE again to
erase all items
Redial List is
empty
Mute
IP Phone UI
Press the e button at any time
to mute handset, headset or
handsfree. The speaker light will
flash slowly and you can hear the
caller, but they cannot hear you. To
switch mute on or off, press
e.
9133i IP Phone User Guide
23
When a call is ringing at your
extension, you see the "Inbound
Call" Screen. The line/call
appearance light flashes quickly
for the incoming call.
Laflamme & Assoc
555-1234
Answering an Incoming Call
IP Phone UI
To answer the call:
• For handsfree operation, press
q or the line/call
appearance button for the
incoming call.
• Press q for handsfree or headset operation.
NOTE: The audio mode setting you
have selected in the options list
under 7. Headset Settings
determines if the call goes to
handsfree or headset operation. For more information, see
the section "Customizing Your
Phone" in the 9133i Installation
Guide.
• Lift the handset for handset
operation.
If the phone is already connected
to a call, pressing the line/call
appearance button for the new
incoming call automatically places
the connected call on hold and
answers the new call. To reconnect
to a party, press the line/call
appearance button for that call.
If you cannot answer the call, the
caller goes to voicemail if voicemail
has been configured for your
extension.
24 9133i IP Phone User Guide
N
NOTE: The
button can be
used to cancel the call pickup
procedure.
Sending an Incoming Call to
Voicemail
You can send an incoming call
directly to voicemail without
answering the call. To do this,
press N without picking up
the handset. If you're already on
the phone your incoming call
should go directly to voicemail.
Your phone screen displays a
voicemail icon (
) along with
the number of waiting messages, if
you have unheard messages
(example:
x4).
Receiving Calls
Receiving Calls
Handling Calls
Handling Calls
When you are connected to a call,
you can use the hard keys on the
phone to place a call on hold,
transfer a call, or conference.
Placing a Call on Hold
When you place a call on hold,
only your phone can retrieve the
call.
IP Phone UI
To place a call on hold:
1. Connect to the call (if not
already connected).
2. Press the Hold O key.
Call held
Jun 8 2:55pm
The line/call appearance light will
begin to flash slowly and after a
short time the phone will beep
softly to remind you that you still
have a call on hold. The screen
displays "Call Held" with the line
number the call is held at the
phone.
John 1051
01:17
button to go from one call to the
next. The phone automatically puts
your current call on hold as soon as
you press a new line/call
appearance button. If you have
more than one call on hold, you
can reconnect to a held call by
pressing the line/call appearance
button where that call is being
held. Press N to disconnect
the call.
Transferring Calls
Blind Transfer
A blind transfer is when you
transfer a call directly to another
extension without consulting with
the person receiving the call. To do
this, simply complete the transfer
immediately after you have
entered the number. The call goes
directly to the extension or outside
line you transferred to. If the party
you are transferring the call to does
not answer, the transferred call
rings back to your extension.
NOTE: The phone will not beep to
remind you that you still have a
call on hold if you are connected to another call.
When on Hold
To let your caller know that they
are still on hold, music plays softly
(if this has been set up for your
system). The call/line appearance
light for the line you are on
remains solid to indicate that you
are still connected.
Automatic Hold
When juggling between calls, you
do not have to press the hold
9133i IP Phone User Guide
25
Conferencing Calls
You also have the option to consult
with the person you are
transferring the call to, before you
complete the transfer. To do this,
remain on the line until the
receiving party answers the call.
After consulting with the receiving
party, you can either complete the
transfer or cancel the transfer to go
back to the original call.
The 9133i phone system supports
up to 3 parties (including yourself)
in a conference call.
Note: Your system administrator can
set your Conf key to speedial a
specific number. Contact your
system administrator for more
information.
IP Phone UI
IP Phone UI
To transfer a call to another
extension:
1. Connect to the call you wish to
transfer (if not already connected).
2. Press k . You will
hear a dial tone as a second line
opens up.
3. Enter the extension number of
the person you wish to transfer
the call to, or dial the outside
number of the person you wish
to transfer the call to.
4. To complete a "blind" transfer,
press k again before
the phone begins dialing. To
complete a consultive transfer,
remain on the line to speak with
the party before pressing
k again. To cancel
the transfer, select Cancel on the
display screen.
To create a conference call
1. Connect to the first party you
wish to include in the conference (if not already connected).
2. Press l . A new line
opens.
2
=Dial
3. Enter the extension number, or
dial the outside number of the
person you wish to add to the
conference.
4. Wait for the new party to
answer. You can consult with
the new party first before adding them to the conference.
5. To add the new party to the conference, press l
again.
6. To drop a party from the conference, press l once
more.
7. To exit the conference leaving
the other two parties connected, disconnect by placing
the handset back on-hook or by
pressing N.
26 9133i IP Phone User Guide
Handling Calls
Consultive Transfer
Handling Calls
You can use V W to scroll
through and see the numbers and
names (if available) of the parties
in the conference call.
To conference two calls you are
already connected to
IP Phone UI
1. Begin with active calls on two
different lines.
2. Press l . A new line
will open.
3. Press the line key of the call you
wish to conference with.
4. Press l again. The
two lines link into a conference
call.
NOTE: When a name is displayed,
U
drops the dispressing
played party from the call.
Ending Calls
IP Phone UI
To end a call, you first need to
reconnect to the call if not already
connected (for example, if your
caller is on hold). Press Nto
end the call. If connected through
the handset, you can also place the
handset back on hook to end the
call.
9133i IP Phone User Guide
27
The 9133i has several features that
make it easier to make and manage
calls, and to keep track of your
caller history, as well as your
business and personal contacts.
Directory List
The Directory List is your personal
phone book, conveniently stored
within your phone. You can enter
up to 200 entries into the 9133i
Directory by adding them
manually, or by saving the number
and name from other lists stored
on your phone. Each entry can
contain a maximum of 16 letters
and numbers.
Accessing Your Directory
IP Phone UI
1. Press J. The directory
displays the number of entries
in your list. If the Directory list
is empty, "Directory Empty/Use
Save to add" is displayed.
Directory empty
Use Save to add
2. You can access entries by pressing V W to scroll through
the list.
3. To search for an entry by name,
press the dial pad number corresponding to the first letter of
the name (for example, press 7
for the letter P). Continue to
press the dial pad number to
access other letters on the same
key (for example, press 7 three
times for ‘Ron’). If there are multiple entries under the same letter, you can use V W to
scroll through the list, or continue to press the next letters of
the name to find a better match.
28 9133i IP Phone User Guide
4. To dial the displayed number
press j or just lift the
handset or press any line keys.
5. Press Jto cancel.
Saving Numbers and Names to
the Directory
You can save a number to your
Directory from your display during
a call, from the Redial list or
Callers list, or by entering a new
number and name.
Saving from the Display
IP Phone UI
You can save the name and/or
number displayed on your screen
during a call to the Directory, or to
one of your programmable keys.
1. Press K during the call.
Save to?
John Burns
9054550055
2. Press J or an empty
programmable key. If a name is
displayed both the number and
name are saved in Directory or
the programmable key. If no
name or "Unknown Name" are displayed you can enter the name
using the dial pad.
3. Press K to finish.
Managing Calls
Managing Calls
Managing Calls
Saving from Hard keys to the
Directory
4. To backspace and erase a mistake, press T or L.
5. Press K to finish.
IP Phone UI
To save an entry from your Redial
list or Callers list:
1. Press the desired hard key
n or m.
From Callers or Redial, scroll
through the list to find the name
and number that you wish to
save to your directory.
2. Press K.
3. Press J. If the name is
displayed with the number,
both are saved to the Directory.
If no name is displayed, you can
enter the name using the dial
pad.
Entering a New Number and
Name into the Directory
IP Phone UI
1. Press K. At the "Save to?"
prompt, press J.
2. Use the dial pad key to enter the
number.
NOTE: To add a one second pause during number editing press
N.
3. Press K. At the "Enter
Saved: Directory
John Burns
Editing in Directory
IP Phone UI
To edit a listing in your directory:
1. Press J.
2. Access the entry you want to
edit by pressing the first letter of
the name on the dial pad, and
V W to scroll through the
list.
3. To begin editing press T.
Press T again to erase the
numbers or letters to the left or
use the dial pad to enter additional digits or characters once
you have saved the number. If
you don't want to change the
number or name just press
J at any time to
exit.
4. Press K to finish.
Name" prompt, use the dial pad
to select the letters. Continue to
press the number key to access
the next letter for that key (for
example, press 2 three times to
access C). Press U to move to
the next space, or wait a
moment and the cursor automatically advances. To insert a
space between letters, press
U.
9133i IP Phone User Guide
29
There are two ways to delete calls
from your directory.
IP Phone UI
To delete items one by one:
1. Press J.
2. Press V W to find the item
you want to delete.
3. Press L, then L
again at the prompt to erase the
item.
DELETE again to
erase this item
IP Phone UI
To delete all items in the directory:
1. Press J.
2. Press L, then L
again at the prompt to erase all
items.
Directory empty
Use Save to add
30 9133i IP Phone User Guide
Managing Calls
Deleting Items from Directory
Managing Calls
Callers List
The Callers list is a stored log of
your incoming calls. The 9133i
telephone stores information on up
to 200 incoming calls in the Callers
list. Your telephone logs the
number and name (if available) of
the caller, when they last called,
and the number of times they tried
to reach you.
If the telephone number of an
incoming or outgoing call matches
a number that you have
programmed with a name in a
programmable key or the
Directory, the Callers list will
display the name and number.
The display shows you how many
callers have been added to the list
since you last checked it.
When the Callers list is full, the
oldest call records are deleted to
accommodate the information of
new callers.
Caller’s List Screen Display
Display Item
Description
450-349-0438
Indicates you have returned the call from the Callers list.
N MAR 04 3:30pm 2x
"N" indicates a new call.
XX New Callers
When you’re not on the telephone and not in the
Callers list, the display shows you how many callers
have been added to the list since you last checked
it.
Indicates an unanswered call in the Callers list.
Indicates an answered call in the Callers list.
Indicates a Call Waiting call in the Callers list.
Indicates an incoming Call Waiting call.
John Burns
9054550055
Jun 8 2:41pm 2X
"2x" indicates this caller has called twice. The display shows the date and time of the last call from
that caller.
9133i IP Phone User Guide
31
IP Phone UI
1. Press n . Press V
W to move through the Callers list. Press V to see the
most recent call, or W to see
the oldest call on your list.
2. To dial the displayed number
just press j or lift the
Handset or press any line keys.
3. Press n to cancel.
007
N
John Burns
9054550055
Jun 8 2:55pm
Editing in the Callers List
Important: The Callers list does not
save changes. Editing in the callers
list is generally used if you plan to
call the number and need to add a
prefix.
In the Callers list, if a dial pad key
is pressed when a number and/or a
name is displayed, the cursor will
automatically add the digit at the
left side of the number to enable
the entry of the prefix.
IP Phone UI
1. Press n .
2. Press V W to find the
entry you want to edit. Press
V to view the most recent
call, or W to see the oldest
call on your list.
5. Press any key on the dial pad to
begin editing.
32 9133i IP Phone User Guide
3. To move the cursor one digit to
the right, press U. To erase
one digit to the left of the cursor,
press T.
4. To dial the displayed number
press j , or just lift
the handset or press any line
keys.
NOTE: To add a one second pause during number editing press
O.
Deleting from the Callers List
There are two ways to delete calls
from the Caller’s list.
IP Phone UI
Deleting items one by one:
1. Press n .
2. Press V W to find the item
you want to delete.
3. Press L, then L
again at the prompt to erase the
item.
IP Phone UI
Deleting All Calls:
1. Press n .
2. Press L, then L
again at the prompt to erase all
calls.
Managing Calls
Accessing the Callers List
Managing Calls
Call Forwarding
The call forwarding feature on the
IP phone allows incoming calls to
be forwarded to another
destination.
Call forwarding is disabled by
default. You can enable call
forwarding on a global basis or on
an individual line-basis, for each
line. If you have configured call
forwarding on an individual line,
then the settings for this line are
used; otherwise, the phone-wide
call forward settings are used.
You can enable call forwarding on
all phones (global settings) or on
specific lines (local settings) of a
single phone. For local settings,
you can set call forwarding on up
to 9 individual lines.
For global and local call
forwarding, you can set the
following:
• Call forward mode
• Destination number
• Number of rings before forwarding the call (from 1 to 9
rings)
The following are the call forward
modes you can set:
Call
ForwardMode
Description
Off
(Aastra
Web UI
only)
Disables call forward
All
Phone forwards all
incoming calls immediately to the specified
destination.
Busy
Phone forwards
incoming calls if the
line is already in use.
No
Answer
Phone forwards the
call if it is not
answered in the specified number of rings
Busy No
Answer
Phone forwards the
call if either the line is
already in use or the
call is not answered in
the specified number
of rings.
You can set the global call forward
settings using the IP phone UI or
the Aastra Web UI. However, you
must use the Aastra Web UI to set
the per-line call forward settings.
The per-line settings override the
settings for global call forwarding.
9133i IP Phone User Guide
33
Use the following procedure to set
global call forwarding.
For Global Call Forward Settings:
Aastra Web UI
1. Click on Basic Settings->Call
Forward.
IP Phone UI
1. Press I on the phone to
enter the Options List.
2. Select Call Forward and press
U.
3. Select Cfwd Number and press
U.
2. In the "Mode" field, select the
mode you want to set on your
phone.
4. Enter the number destination
for which you want your incoming calls to be forwarded and
press U.
Note: To disable call forwarding in the
Aastra Web UI, set the mode to
OFF and remove the phone number in the "Number" field.
Note: If you leave the "Number" field
blank, call forwarding is disabled.
Press V to scroll to Cfwd Mode
and press U.
5. Use the V W to select a
value and press U. Valid values are All, Busy, No Answer,
Busy No Answer.
6. Press V to scroll to No. Rings
and press U.
7. Use the V W to select a
value and press U. Valid values are 1 to 9.
Note: "Number of Rings" field applys
to No Answer and Busy No
Answer modes only.
A message displays "confirmed".
3. In the "Number" field, enter the
call forward number for which
you want your calls to be call
forwarded.
4. In the "Number of Rings" field,
enter the number of rings you
want to set before the call is
forwarded. Valid values are 1 to
9.
5. Click
to save the Call
Forward settings. The changes
are dynamic and are immediately applied to the phone.
For Per-Line Call Forward Settings:
Aastra Web UI
1. Select a line to set Call Forwarding on.
2. In the "Mode" field, select the
mode you want to set on this
line.
Note: To disable call forwarding in the
Aastra Web UI, set the mode to
OFF and remove the phone number in the "Forward Number"
field.
34 9133i IP Phone User Guide
Managing Calls
Setting Call Forwarding
Managing Calls
Note: To force a line to use the global
settings, set the "Mode" field to
Global.
3. In the "Forward Number" field,
enter the call forward number
for which you want your calls on
this line to be call forwarded.
4. In the "Number of Rings" field,
select the number of rings on
the line before the call is forwarded. Valid values are 1 to 9.
5. Click
to save the Call
Forward settings. The changes
are dynamic and are immediately applied to the phone.
9133i IP Phone User Guide
35
This section describes additional
features you can use on the 9133i
phone.
Suppress DTMF Playback
A feature on the IP phones allows
you to enable or disable the
suppression of DTMF playback
when a number is dialed from the
programmable keys.
Configuring Suppression of
DTMF Playback
Use the following procedure to
configure suppression of DTMF
playback.
Aastra Web UI
1. Click on Basic Settings->
Preferences.
When suppression of DTMF
playback is disabled, and you press
a programmable key, the IP phone
dials the stored number and
displays each digit as dialed in the
LCD window.
When the suppression of DTMF
playback is enabled, the IP phone
dials the stored number and
displays the entire number
immediately in the LCD window,
allowing the call to be dialed faster.
DTMF playback suppression is
disabled by default. Suppressing
DTMF playback can be configured
using the Aastra Web UI.
2. Go to the "General" section.
3. Enable the "Suppress DTMF
Playback" field by checking the
check box. (Disable this field by
unchecking the box). Default is
disabled.
4. Click
to save your settings. These changes are not
dynamic. You must restart your
IP phone for the changes to take
affect.
5. Click on Operation->Reset.
6. In the "Restart Phone" field
click
to restart the IP
phone and apply the changes.
36 9133i IP Phone User Guide
Additional Features
Additional Features
Additional Features
Ring Tones and Tone Sets
Ring Tone Sets
You can configure ring tones and
ring tone sets on the IP phone.
In addition to ring tones, you can
configure ring tone sets on a
global-basis on the IP phone. Ring
tone sets consist of tones
customized for a specific country.
The ring tone sets you can
configure on the IP phones are:
Ring Tones
There are several distinct ring
tones a user can select from to set
on the IP phones. You can enable/
disable these ring tones on a global
or per-line basis.
The following table identifies the
valid settings and default values
for each type of configuration
method.
Ring Tone Settings Table
Configuration
Method
IP Phone UI
Aastra Web
UI
Valid
Values
Default
Value
Global:
Tone 1
Tone 2
Tone 3
Tone 4
Tone 5
Silent
Global:
Tone 1
Global:
Tone 1
Tone 2
Tone 3
Tone 4
Tone 5
Silent
Global:
Tone 1
Per-Line:
Global
Tone 1
Tone 2
Tone 3
Tone 4
Tone 5
Silent
Per-Line:
Global
• US (Default - also used in Canada)
• United Kingdom
• Italy
• Germany
• France
• Europe (generic tones)
• Australia
When you configure the country's
tone set, the country-specific tone
is heard on the phone for the
following:
- dial tone
- secondary dial tone
- ring tone
- busy tone
- congestion tones
- call waiting tone
- ring cadence pattern
You configure global ring tones
and tone sets using the Aastra Web
UI and the IP Phone UI.
9133i IP Phone User Guide
37
Use the following procedures to
configure ring tones and tone sets
on the IP phone.
Aastra Web UI
1. Click on Basic Settings->
Preferences->Ring Tones.
IP Phone UI
(global configuration only)
1. Press I on the phone to
enter the Options List.
2. Select Tones.
3. Select Set Ring Tone.
4. Select the type of ring tone
(Tone 1 through Tone 5, or
Silent).
5. Select Set and then select Next.
6. Select Tone Set.
7. Select the country for which you
want to apply the tone set. Valid
values are Australia, Europe,
France, Germany, Italy, UK, and
US. Default is US.
8. Select Set.
The ring tone and tone set you
select is immediately applied to
the IP phone.
For global configuration:
2. In the "Ring Tones" section,
select a country from the "Tone
Set" field.
3. Select a value from the "Global
Ring Tone" field.
Note: See the Ring Tone Settings Table
on page 37 for valid values.
For per-line configuration:
4. In the "Ring Tone" section,
select a line for which you want
to set ring tone.
5. Select a value from the "LineN"
field.
Note: See the Ring Tone Settings Table
on page 37 for valid values.
6. Click
to save your settings. These changes are not
dynamic. You must restart your
IP phone for the changes to take
affect.
7. Click on Operation->Reset.
8. In the "Restart Phone" field
click
to restart the IP
phone and apply the ring tone.
38 9133i IP Phone User Guide
Additional Features
Configuring Ring Tones and
Tone Sets
Additional Features
Stuttered Dial Tone
Call Waiting Tone
You can enable or disable the
playing of a stuttered dial tone
when there is a message waiting on
the IP phone.
You can enable or disable the
playing of a call waiting tone when
a caller is on an active call and a
new call comes into the phone.
You can configure this feature
using the Aastra Web UI.
You can configure this feature
using the Aastra Web UI.
Configuring Stuttered Dial Tone
Configuring Call Waiting Tone
Use the folllowing procedures to
configure stuttered dial tone on the
IP phone.
Use the folllowing procedures to
configure a call waiting tone on the
IP phone.
Aastra Web UI
Aastra Web UI
1. Click on Basic Settings->
Preferences->General.
1. Click on Basic Settings->
Preferences->General.
2. Stuttered dial tone is enabled by
default. If required, disable the
"Stuttered Dial Tone" field by
unchecking the check box.
2. A call waiting tone is enabled by
default. If required, disable the
"Play Call Waiting Tone" field
by unchecking the check box.
3. Click
to save your settings.
4. Click on Operation->Reset.
5. In the "Restart Phone" field
click
to restart the IP
phone.
3. Click
to save your settings.
4. Click on Operation->Reset.
5. In the "Restart Phone" field
click
to restart the IP
phone.
9133i IP Phone User Guide
39
Using the IP phone UI, you can set
the phones to use a specific
language to display.
When you set the language to use
on the phone, all of the display
screens (menus, services, options,
etc.) display in that language. Valid
languages for the IP phones
include English, French, Spanish,
German, and Italian. Default is
English.
Setting Language
You set the language on the IP
phone using the Options key
(I) on the IP phone.
Note: A check mark displays beside the
language currently configured on
the IP phone.
Use the following procedure to set
the language for the IP phone.
IP Phone UI
1. Press I on the phone to
enter the Options List.
2. Select Language and press U.
3. Use the V W to select a
language to display on the IP
phone and press U. Valid values are In English (English),
En francais (French), En espanol
(Spanish), In Deutsch (German),
or In italiano (Italian). Default is
English.
A message displays "confirmed".
Note: The language you select is immediately applied to the IP phone
UI display.
40 9133i IP Phone User Guide
Language
Language
Troubleshooting Solutons
Troubleshooting Solutons
Why is my display blank?
Ensure that power is being
provided to your phone. Make sure
your phone is plugged into a
power source.
Why is my speakerphone
not working?
If you press the d /f button
and the speaker light flashes and
you do not hear dial tone through
the speaker phone, the Set Audio
option in the phone’s Options list
has been set up for headset use.
Press d /f a second time and if
the light goes out, the phone has
been set up to be used only with a
headset or handset. If the light
stays on steady and you hear dial
tone, the phone has been set up so
that you can alternate between the
speakerphone and the headset by
pressing d /f . See the section
“Customizing your phone” in
the 9133i Installation Guide for
instructions on how to change
the Set Audio option.
Why can’t I get a dial tone?
Check for any loose connections
and that the phone has been
installed properly. For installation
instructions, please refer to the
“Installation and Setup” section in
the Aastra 9133i Installation Guide
provided with your phone.
Why doesn’t my phone ring?
Check the ring volume on your
phone. It may be turned down or
turned off. To adjust the ringer
volume setting, press the volume
button when the phone is on-hook
and idle. For more information,
refer to the “Adjusting Volume
section” in the Aastra 9133i
Installation Guide provided with
your phone.
Why is the light not coming on
with a new Voice Mail Message?
Your phone system or service
provider must provide “Visual”
Message Waiting service for this
function to work. Check with
your system administrator for
more information.
How do I find the IP address of
my phone?
Instructions on where to find
the IP address of your phone can
be found in this guide in the section, "Finding Your Phone’s IP
Addres" on page 5.
How do I change my user
password?
You can change the user password
from the IP phone UI or the Aastra
Web UI.
IP Phone UI
1. Press I on the phone to
enter the Options List.
2. Select User Password and
press U.
3. Enter the current user password
and press U.
4. Enter the new user password
and press U.
5. Re-enter the new user password
and press U.
A message, "Password
Changed" displays on the
screen.
9133i IP Phone User Guide
41
Aastra Web UI
1. Click on Operation->User
Password.
2. In the "Current Password" field,
enter the current user password.
Note: By default, the user name is
“user” (all lowercase) and the
password field is left blank. If
you have forgotten your password, contact your system
administrator for assistance.
3. In the "New Password" field,
enter the new user password.
4. In the "Password Confirm"
field, enter the new user password again.
5. Click
changes.
IP Phone UI
1. Press the I button on
the phone to enter the Option
List.
2. Use the V key to scroll down
the list of options to Phone Status and press the U key to
select.
3. Press the V key to scroll to
the Restart Phone option.
4. Press the U key to confirm and
restart the phone. If you do not
wish to restart your phone,
press the T key to cancel.
Note: Your phone will be out of service
temporarily during the restart
and downloading process.
to save your
For information on how to access
the Aastra Web UI, go to the section "Accessing the Aastra Web
UI" on page 5.
Aastra Web UI
1. Click on Operation->Reset.
Why does my phone display
"Bad Encrypted Config"?
The IP phone displays "Bad
Encrypted Config" because
encrypted configuration files are
enabled but the decryption process
has failed.
Report this error to your system
administrator.
42 9133i IP Phone User Guide
2. Click
.
3. Click OK at the confirmation
prompt.
Troubleshooting Solutons
How do I restart the IP phone?
Limited Warranty
Limited Warranty
Aastra Telecom warrants this
product against defects and
malfunctions during a one (1) year
period from the date of original
purchase. If there is a defect or
malfunction, Aastra Telecom shall,
at its option, and as the exclusive
remedy, either repair or replace
the telephone set at no charge, if
returned within the warranty
period.
If replacement parts are used in
making repairs, these parts may be
refurbished, or may contain
refurbished materials.
If it is necessary to replace the
telephone set, it may be replaced
with a refurbished telephone of the
same design and color. If it should
become necessary to repair or
replace a defective or
malfunctioning telephone set
under this warranty, the provisions
of this warranty shall apply to the
repaired or replaced telephone set
until the expiration of ninety (90)
days from the date of pick up, or
the date of shipment to you, of the
repaired or replacement set, or
until the end of the original
warranty period, whichever is
later. Proof of the original purchase
date is to be provided with all
telephone sets returned for
warranty repairs.
Exclusions
Aastra Telecom does not warrant
its telephone sets to be compatible
with the equipment of any
particular telephone company.
This warranty does not extend to
damage to products resulting from
improper installation or operation,
alteration, accident, neglect, abuse,
misuse, fire or natural causes such
as storms or floods, after the
telephone is in your possession.
Aastra Telecom shall not be liable
for any incidental or consequential
damages, including, but not
limited to, loss, damage or expense
directly or indirectly arising from
the customers use of or inability to
use this telephone, either
separately or in combination with
other equipment. This paragraph,
however, shall not apply to
consequential damages for injury
to the person in the case of
telephones used or bought for use
primarily for personal, family or
household purposes.
This warranty sets forth the entire
liability and obligations of
Aastra Telecom with respect to
breach of warranty, and the
warranties set forth or limited
herein are the sole warranties and
are in lieu of all other warranties,
expressed or implied, including
warranties or fitness for particular
purpose and merchantability.
Warranty Repair Services
Should the set fail during the
warranty period;
In North America, please call
1-800-574-1611 for further
information.
Outside North America, contact
your sales representative for return
instructions.
You will be responsible for
shipping charges, if any. When you
return this telephone for warranty
service, you must present proof of
purchase.
After Warranty Service
Aastra Telecom offers ongoing
repair and support for this product.
This service provides repair or
replacement of your Aastra
Telecom product, at Aastra
Telecom's option, for a fixed
charge. You are responsible for all
9133i IP Phone User Guide
37
In North America, contact our
service information number: 1-800574-1611. Outside North America,
contact your sales representative.
Note: Repairs to this product may be made
only by the manufacturer and its
authorized agents, or by others who
are legally authorized. This restriction
applies during and after the warranty
period. Unauthorized repair will
void the warranty.
38 9133i IP Phone User Guide
Limited Warranty
shipping charges. For further
information and shipping
instructions;
Index
Index
A
I
Aastra Web UI
basic settings description 6
operation description 6
status description 5
about this guide 1
auto-answer, enabling/disabling 21
incomplete configuration 3
installation and setup, 9122i 2
Intercom calls 21
IP address, finding 5
B
BLF list 12, 14
BLF, setting 12
C
call forwarding 33
configuring 34
call waiting tone 39
callers list 31
calls, ending 27
calls, handling 25
calls, making 20
calls, managing 28
calls, placing on hold 25
calls, receiving 24
calls, transferring 25
conference calls 26
D
dial tones, stuttered 39
dialing a number 20
directory list 28
do not disturb (DND) 11
documentation 1
DTMF, suppressing playback 36
F
features, 9133i 1
Flash key 14
G
getting started 3
H
hard keys 7
headset, using 20
L
language
configuring 40
overview 40
line, setting on programmable key 9
lines settings 8
M
microphone, enabling/disabling 21
N
navigation keys 7
no service 3
O
options, setting 4
P
park/pickup
using on the IP phone 16
plugging in the phone 3
programmable key
deleting 18
description 9
editing 17
R
redial 22
requirements, 9133i 2
restarting the phone 19
ring tone sets 37
ring tones 37
S
speakerphone, using 20
speeddial 9
startup screens 3
9133i IP Phone User Giude
Index-1
T
troubleshooting solutions 41
How do I change my user password? 41
How do I find the IP address of
my phone? 41
How do I restart the IP phone?
42
Why can’t I get a dial tone? 41
Why does my phone display
"bad encrypted config"?
42
Why doesn’t my phone ring?
41
Why is my display blank? 41
Why is my speakerphone not
working? 41
Why is the light not coming on
with a new Voice Mail
Message? 41
U
updating the phone 3
user password 6
using the 9133i 7
V
voicemail 24
W
Warranty 37
Web interface 5
X
XML service 14
Index-2
9133i IP Phone User Giude
Index
Index
If you’ve read this owner’s manual and consulted the Troubleshooting section and
still have problems, please visit our website at www.aastra.com or call 1-800-574-1611
for technical assistance.
© Aastra Telecom Inc.2005 41-000113-00-08