1
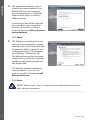
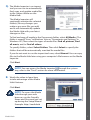
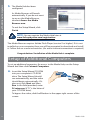
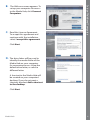
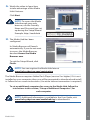
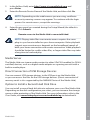
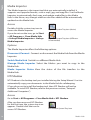
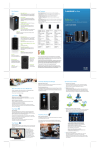
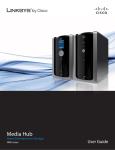
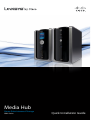
Media Hub
Home Entertainment Storage
NMH Series
Quick Installation Guide
Table of Contents
Overview. . . . . . . . . . . . . . . . . . . . . . . . . . . . . . . . . . . . . . . . . . . . . . . . . . . . . . . . . . 2
Installation. . . . . . . . . . . . . . . . . . . . . . . . . . . . . . . . . . . . . . . . . . . . . . . . . . . . . . . . 2
Setup of Additional Computers . . . . . . . . . . . . . . . . . . . . . . . . . . . . . . . . . . . . 8
Tools. . . . . . . . . . . . . . . . . . . . . . . . . . . . . . . . . . . . . . . . . . . . . . . . . . . . . . . . . . . . . 12
Online Resources
Website addresses in this document are listed without http:// in front of the address
because most current web browsers do not require it. If you use an older web
browser, you may have to add http:// in front of the web address.
Resource
Website
Linksys
www.linksysbycisco.com
Glossary
www.linksysbycisco.com/glossary
Network Security
www.linksysbycisco.com/security
Support
www.linksysbycisco.com/support
Copyright and Trademarks
Linksys, Cisco and the Cisco Logo are registered trademarks or trademarks of Cisco Systems,
Inc. and/or its affiliates in the U.S. and certain other countries. Copyright © 2008 Cisco Systems,
Inc. All rights reserved. Other brands and product names are trademarks or registered
trademarks of their respective holders.
Overview
Overview
The “Installation” section explains how to install the Media Hub and set up your
computer for access to the Media Hub. The “Setup of Additional Computers”
section explains how to set up additional computers for access to the Media
Hub. The “Tools” section describes different ways to take advantage of the
Media Hub’s features.
The pictures in the Quick Installation Guide show the Media Hub with LCD
(NMH400 Series); however, the instructions also apply to the NMH300 Series of
the Media Hub.
Installation
NOTE: One hard disk drive is pre-installed. You should install the
Media Hub before installing a second hard disk drive.
A. Make sure the Media Hub is
powered off.
Insert the Setup Wizard CD-ROM
into your computer’s CD-ROM
drive. The Setup Wizard should
run automatically, and the video
should begin automatically. If it
does not, click Start and then
Run. In the field provided, enter
D:\setup.exe (if “D” is the letter of
your CD-ROM drive).
NOTE: Windows or other personal firewalls may ask for permission
to run the software or program. You will need to allow the software
to run in order to continue.
B.
2
An introductory video plays. To bypass the video, click the X button in the
upper right corner of the screen.
Media Hub
The Welcome screen appears.
To begin installation, click Start
Setup.
Installation
C.
D. Read the License Agreement.
To accept this agreement and
continue with the installation,
select I accept this agreement.
Click Next.
E.
Connect one end of the included
Ethernet network cable to the
Ethernet port of the Media Hub.
Click Next.
F.
Connect the other end of the
Ethernet network cable to one
of the local network ports on the
router or gateway.
Click Next.
Media Hub
3
Installation
G. Connect the included power
adapter to the Power port of the
Media Hub.
Click Next.
H. Plug the power cord into an
electrical outlet.
Click Next.
I.
Please wait while the Media Hub
boots up. This may take a few
minutes.
J.
Create a password to protect
access to the Media Hub. The
password must have 1-32
characters and may only contain
numbers, letters, or punctuation
(do not use any spaces).
Click Next.
4
Media Hub
the Media Hub. (Examples:
HomeMedia or Media1)
Click Next.
L.
Installation
K. Enter a descriptive name for
Please wait while the Setup
Wizard configures the Media Hub.
This may take a few minutes.
M. The Setup Wizard saves the
settings of the Media Hub in
a text file on your computer’s
desktop. Click OK.
N. To set up your computer for
access to the Media Hub, click
Next.
Media Hub
5
Installation
O. The drive letter will be used to
identify the media folder of the
Media Hub on your computer
for convenient access. Keep the
default drive letter, or select a
different letter.
A shortcut to the Media Hub will
be created on your computer’s
desktop. If you do not want a
shortcut, deselect Add a shortcut
to the desktop.
Click Next.
P.
NTI Shadow is a backup tool you
can use to automatically create a
backup of your files located in the
Documents folder (named “Users”
in Windows Vista or “Documents
and Settings” in Windows XP).
The default backup job has been
created to run every hour to back
up files to the \backup folder on
the Media Hub.
NTI Shadow will be installed on
your computer. If you do not
want to install it, deselect Install
Backup Tool now.
Click Next.
NOTE: Refer to the “Tools” section for more information on how to
back up your computer.
6
Media Hub
tool you can use to automatically
find, copy, and update media files
to the \import folder on the
Media Hub.
Installation
Q. The Media Importer is an import
The Media Importer will
continually monitor the selected
folder(s) for any changes you
make or any new files you add,
and it will automatically update
the Media Hub with your latest
changes or files.
To find and copy all media in the Documents folder, select All Media. (The
folder is named “Users” in Windows Vista or “Documents and Settings” in
Windows XP.) Then select the types of media files: Find all pictures, Find
all music, and/or Find all videos.
To specify folders, select Select Folders. Then click Select to specify the
folders that will be automatically searched for media files.
If you do not want to use the import tool now, select Manual. You can copy
files to the Media Hub later using your computer’s file browser or the Media
Importer.
Click Next.
NOTE: You can access the Media Importer through the system
tray; refer to the “Tools” section for more information.
R. Watch the video to learn how
to take advantage of the Media
Hub’s features.
Click Next.
NOTE: To access the Media
Hub through your web
browser, use the Friendly
Name and Password you set
up during the Setup Wizard.
Example: http://mediahub
Media Hub
7
Setup of Additional Computers
S.
The Media Hub has been
configured.
Its Media Browser will launch
automatically. If you do not want
to access the Media Browser,
deselect Access the Media
Browser now.
To exit the Setup Wizard, click
Finish.
NOTE: You can register the Media Hub later at
www.linksysbycisco.com/registration
The Media Browser requires Adobe Flash Player (version 9 or higher). If it is not
installed on your computer, then you will be prompted to download and install
it. Follow the on-screen instructions. (An active Internet connection is required.)
Congratulations! Installation of the Media Hub is complete.
Setup of Additional Computers
To set up additional computers for access to the Media Hub, run the Setup
Wizard and then click Connect Computers.
A. Insert the Setup Wizard CD-ROM
into your computer’s CD-ROM
drive. The Setup Wizard should
run automatically, and the video
should begin automatically. If it
does not, click Start and then
Run. In the field provided, enter
D:\setup.exe (if “D” is the letter of
your CD-ROM drive).
To bypass the video, click the X button in the upper right corner of the
screen.
8
Media Hub
The Welcome screen appears. To
set up your computer for access
to the Media Hub, click Connect
Computers.
C.
Read the License Agreement.
To accept this agreement and
continue with the installation,
select I accept this agreement.
Setup of Additional Computers
B.
Click Next.
D. The drive letter will be used to
identify the media folder of the
Media Hub on your computer
for convenient access. Keep the
default drive letter, or select a
different letter.
A shortcut to the Media Hub will
be created on your computer’s
desktop. If you do not want a
shortcut, deselect Add a shortcut
to the desktop.
Click Next.
Media Hub
9
Setup of Additional Computers
E.
NTI Shadow is a backup tool you
can use to automatically create a
backup of your files located in the
Documents folder (named “Users”
in Windows Vista or “Documents
and Settings” in Windows XP).
The default backup job has been
created to run every hour to back
up files to the \backup folder on
the Media Hub.
NTI Shadow will be installed on your computer. If you do not want to install
it, deselect Install Backup Tool now.
Click Next.
NOTE: Refer to the “Tools” section for more information on how to
back up your computer.
F.
Media Importer is an import tool
you can use to automatically find,
copy, and update media files to
the \import folder on the
Media Hub. The Media Importer
will continually monitor the
selected folder(s) for any changes
you make or any new files you
add. Then it will automatically
update the Media Hub with your
latest changes or files.
To find and copy all media in the Documents folder (named “Users” in
Windows Vista or “Documents and Settings” in Windows XP), select All
Media. Then select the types of media files: Find all pictures, Find all
music, and/or Find all videos.
To specify folders, select Select Folders. Then click Select to specify the
folders that will be automatically searched for media files.
If you do not want to use the import tool now, select Manual. You can copy
files to the Media Hub later using your computer’s file browser or the Media
Importer.
Click Next.
NOTE: You can access the Media Importer through the system
tray; refer to the “Tools” section for more information.
10
Media Hub
to take advantage of the Media
Hub’s features.
Click Next.
NOTE: To access the Media
Hub through your web
browser, use the Friendly
Name and Password you set
up during the Setup Wizard.
Example: http://mediahub
Setup of Additional Computers
G. Watch the video to learn how
H. The Media Hub has been
configured.
Its Media Browser will launch
automatically. If you do not want
to access the Media Browser,
deselect Access the Media
Browser now.
To exit the Setup Wizard, click
Finish.
NOTE: You can register the Media Hub later at
www.linksysbycisco.com/registration
The Media Browser requires Adobe Flash Player (version 9 or higher). If it is not
installed on your computer, then you will be prompted to download and install
it. Follow the on-screen instructions. (An active Internet connection is required.)
To set up additional computers for access to the Media Hub, follow the
instructions in this section, “Setup of Additional Computers”, for
each computer.
NOTE: Additional information is available in the User Guide; visit
www.linksysbycisco.com/mediahub/ug to download it.
Media Hub
11
Tools
Tools
The Media Hub offers different ways to take advantage of its features.
Video Player Support
The Media Hub plays video content through a browser plug-in. Download and
install your favorite media player to enable video playback within the Media
Browser. Please note that media players have varying levels of support for
different video formats. If the video format you want to play is not supported,
you may want to search the Internet for a media player that can run on your
computer and support the desired video formats. (Make sure you download the
latest version.) Some suggested players include QuickTime, VLC, and Windows
Media Player.
For more information about video support, visit
http://www.linksysbycisco.com/support.
Remote Access
If you enable and set up the Remote Access service†, then you can access the
Media Hub and its files over the Internet. To set up the Remote Access service,
follow these instructions:
1. In your web browser, enter
http://<Friendly_Name>
(Example: http://mediahub)
2. Click Configuration.
3. Enter the password you created during the Setup Wizard (the default is
admin). Click Submit.
4. Click the Services tab.
5. For the Remote Access section, click Configure.
6. Select Enable Remote Access to the Media Hub.
7. Enter the Remote Device Name you want to assign to the Media Hub. (This
name can be different from the Media Hub’s Friendly Name.)
8. Click Submit.
The Remote Access service will be available in approximately two to five
minutes. To remotely access the Media Hub, follow these instructions:
1. Open the web browser of the computer you are using.
††Includes Remote Access service for one year from date of purchase. Fees may apply thereafter
and are subject to change. Go to www.linksysbycisco.com for further information.
12
Media Hub
Tools
2. In the Address field, enter http://www.ciscomediahub.com and
press Enter.
3. Enter the Remote Device Name of the Media Hub, and then click Go.
NOTE: Depending on the web browser you are using, certificate
or security warning screens may appear. To continue with the login
process for remote access, accept the warnings.
4. Enter the password you created during the Setup Wizard (the default is
admin). Click Submit.
Remote access to the Media Hub is now established.
NOTE: Playing video files over remote access requires the same
plug-ins you have installed on your home computer. Video playback
support over remote access depends on the broadband speeds of
both your home connection and remote connection. Video playback
should be limited to smaller video files, as larger video files may take
a long time to load and play.
Media Server
The Media Hub can stream media content to other UPnP AV‑enabled (or DLNAcertified) devices, such as a digital media adapter or a gaming console with a
built-in media player.
Direct Connection of USB Storage Devices
You can connect USB storage devices to the USB ports on the Media Hub,
so you can access the files on the USB storage devices. (Direct connection of
memory cards is also supported by the NMH400 Series of the Media Hub.)
Option to Install a Second Hard Disk Drive
You can install a second hard disk drive to enhance your use of the Media Hub.
Depending on the disk configuration you select, you can increase the storage
space or data protection of the Media Hub. For more information, refer to the
User Guide; visit www.linksysbycisco.com/mediahub/ug to download it.
Media Hub
13
Tools
Media Importer
The Media Importer is the import tool that was automatically installed. It
supports most popular formats, such as mp3, jpg, and mpg files. Use the Media
Importer to automatically find, copy, and update media files to the Media
Hub. In the future, any changes made or new files added will be automatically
updated on the Media Hub.
Access
Double-click the system tray icon to
access the Media Importer.
Importer System Tray Icon (Active)
If you do not see the icon, go to Start
> All Programs > Cisco Media Hub
> Linksys Media Importer > Linksys
Media Importer.
Importer System Tray Icon (Offline or
Disconnected)
Options
The Media Importer offers the following options:
Disconnect/Connect Connect or disconnect the Media Hub from the Media
Importer.
Switch Media Hub Switch to a different Media Hub.
Manage Media Importer Select the folders you want to copy to the
Media Hub.
Media Importer Status View the status of the file transfers to the
Media Hub.
NTI Shadow
NTI Shadow is the backup tool you installed during the Setup Wizard. Use it to
automatically copy your documents to the Media Hub for safekeeping.
(If you chose not to install the backup tool, then NTI Shadow will not be
available. To install NTI Shadow, refer to the previous section, “Setup of
Additional Computers”.)
Access
Go to Start > All Programs > Cisco Media Hub > NTI Shadow.
After you have accessed NTI Shadow
for the first time, the system tray icon
appears. Double-click the icon to
access NTI Shadow.
14
NTI Shadow System Tray Icon
Media Hub
The main menu appears.
Tools
Main Menu
The Setup Wizard creates a default
backup job that backs up specific files
in the Documents folder.
These files use the following file
formats and extensions: .doc, .xls, .pdf,
.ppt, .adb, .rtf, .xml, .htm, .html, .txt,
and .pst.
The backup files are saved to the \backup\<Computer_Name>\Documents
folder on the Media Hub and are organized by date. This default backup job is
listed in the Modify Backup Job section.
Create Backup Job
Create Backup Job Click this option to create a backup job. Follow the
on‑screen instructions of the Job Wizard. (Additional information is available in
the User Guide; visit www.linksysbycisco.com/mediahub/ug to download it.)
Modify Backup Job
All backup jobs, including the default backup job, are listed in this section. You
can change the default backup job created by the Setup Wizard; for example,
you can back up additional folders on your computer.
NOTE: For more information about NTI Shadow, click Help.
Copy and Paste
Use Windows Explorer and the copy-and-paste function to manually copy files
to the Media Hub. Copy and paste music to the Music folder, photos to the
Photos folder, and videos to the Videos folder.
Windows Access
1. To open Windows Explorer, go to Start > Programs > Accessories >
Windows Explorer.
Media Hub
15
Tools
2. During the Setup Wizard, you created a Friendly Name or device name for
the Media Hub.
In the Address field of Windows
Explorer, enter the Friendly Name
of the Media Hub:
\\<Friendly_Name> (Examples: \\mediahub)
3. Press Enter.
Instructions to Copy Media Files to the Media Hub
Follow these guidelines:
•• Copy files of a single file type together at one time. For example, copy
music files at one time; do not copy music, photo, and video files at the
same time.
•• Copy music files to the media\music folder of the Media Hub.
•• Copy photo files to the media\photos folder of the Media Hub.
•• Copy video files to the media\videos folder of the Media Hub.
File transfers may take minutes or hours depending on file transfer speeds,
which will vary, depending on network conditions, including use of wireless,
and the number and size of the selected files.
NOTE: The files you copy to the Media Hub can be accessed by all
users of the Media Hub.
NOTE: Additional information about the Media Hub is available
in the User Guide; visit www.linksysbycisco.com/mediahub/ug
to download it. Additional information about Windows Explorer is
available in Windows Help.
8112110NC-JL
16
Media Hub
Additional information or troubleshooting help is available in the User Guide; visit
www.linksysbycisco.com/mediahub/ug to download it. Additional support is also available
by phone or online.
24-Hour Technical Support
866-509-7452
RMA (Return Merchandise Authorization)
http://www.linksysbycisco.com/warranty
Website
http://www.linksysbycisco.com
Sales Information
800-546-5797 (800-LINKSYS)
Support
http://www.linksysbycisco.com/support
Linksys, Cisco and the Cisco Logo are registered trademarks or trademarks of Cisco Systems, Inc. and/or its affiliates in the U.S. and certain other
countries. Copyright © 2008 Cisco Systems, Inc. All rights reserved. Other brands and product names are trademarks or registered trademarks of
their respective holders.
3240-00359