1
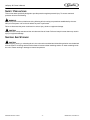
JETSPRAY JS7
Visual Display Dispenser Series
Owner’s Manual
Release Date: September 01, 1995
Publication Number: 18478
Revision Date: March 19, 2015
Revision: G
Visit the Cornelius web site at www.cornelius.com for all your Literature needs.
The products, technical information, and instructions contained in this manual are subject to change without notice.
These instructions are not intended to cover all details or variations of the equipment, nor to provide for every possible contingency in the installation, operation or maintenance of this equipment. This manual assumes that the person(s) working on the equipment have been trained and are skilled in working with electrical, plumbing, pneumatic,
and mechanical equipment. It is assumed that appropriate safety precautions are taken and that all local safety and
construction requirements are being met, in addition to the information contained in this manual.
This Product is warranted only as provided in Cornelius’ Commercial Warranty applicable to this Product and is subject to all of the restrictions and limitations contained in the Commercial Warranty.
Cornelius will not be responsible for any repair, replacement or other service required by or loss or damage resulting
from any of the following occurrences, including but not limited to, (1) other than normal and proper use and normal
service conditions with respect to the Product, (2) improper voltage, (3) inadequate wiring, (4) abuse, (5) accident,
(6) alteration, (7) misuse, (8) neglect, (9) unauthorized repair or the failure to utilize suitably qualified and trained persons to perform service and/or repair of the Product, (10) improper cleaning, (11) failure to follow installation, operating, cleaning or maintenance instructions, (12) use of “non-authorized” parts (i.e., parts that are not 100%
compatible with the Product) which use voids the entire warranty, (13) Product parts in contact with water or the
product dispensed which are adversely impacted by changes in liquid scale or chemical composition.
Contact Information:
To inquire about current revisions of this and other documentation or for assistance with any Cornelius product contact:
www.cornelius.com
800-238-3600
Trademarks and Copyrights:
This document contains proprietary information and it may not be reproduced in any way without permission from
Cornelius.
This document contains the original instructions for the unit described.
CORNELIUS INC
101 Regency Drive
Glendale Heights, IL
Tel: + 1 800-238-3600
Printed in U.S.A.
TABLE OF CONTENTS
Safety Instructions. . . . . . . . . . . . . . . . . . . . . . . . . . . . . . . . . . . . . . . . . . . . . . . . . . . . . . . . . . . . . . . . . 1
Read and Follow ALL Safety Instructions . . . . . . . . . . . . . . . . . . . . . . . . . . . . . . . . . . . . . . . . . . . . . 1
Safety Overview . . . . . . . . . . . . . . . . . . . . . . . . . . . . . . . . . . . . . . . . . . . . . . . . . . . . . . . . . . . . . . 1
Recognition . . . . . . . . . . . . . . . . . . . . . . . . . . . . . . . . . . . . . . . . . . . . . . . . . . . . . . . . . . . . . . . . . 1
Different Types of Alerts . . . . . . . . . . . . . . . . . . . . . . . . . . . . . . . . . . . . . . . . . . . . . . . . . . . . . . . . . . 1
Safety Tips . . . . . . . . . . . . . . . . . . . . . . . . . . . . . . . . . . . . . . . . . . . . . . . . . . . . . . . . . . . . . . . . . . . . . 1
Qualified Service Personnel. . . . . . . . . . . . . . . . . . . . . . . . . . . . . . . . . . . . . . . . . . . . . . . . . . . . . . . . 1
Safety Precautions. . . . . . . . . . . . . . . . . . . . . . . . . . . . . . . . . . . . . . . . . . . . . . . . . . . . . . . . . . . . . . . 2
Shipping And Storage . . . . . . . . . . . . . . . . . . . . . . . . . . . . . . . . . . . . . . . . . . . . . . . . . . . . . . . . . . . . 2
System Overview . . . . . . . . . . . . . . . . . . . . . . . . . . . . . . . . . . . . . . . . . . . . . . . . . . . . . . . . . . . . . . . . . . 3
Installation . . . . . . . . . . . . . . . . . . . . . . . . . . . . . . . . . . . . . . . . . . . . . . . . . . . . . . . . . . . . . . . . . . . . . . . 4
Delivery, Inspection & Unpacking . . . . . . . . . . . . . . . . . . . . . . . . . . . . . . . . . . . . . . . . . . . . . . . . . . . 4
Counter Location . . . . . . . . . . . . . . . . . . . . . . . . . . . . . . . . . . . . . . . . . . . . . . . . . . . . . . . . . . . . . . . . 5
Electrical Requirements . . . . . . . . . . . . . . . . . . . . . . . . . . . . . . . . . . . . . . . . . . . . . . . . . . . . . . . . . . . 5
Initial Unit Assembly. . . . . . . . . . . . . . . . . . . . . . . . . . . . . . . . . . . . . . . . . . . . . . . . . . . . . . . . . . . . . . 5
Pinch Tubes . . . . . . . . . . . . . . . . . . . . . . . . . . . . . . . . . . . . . . . . . . . . . . . . . . . . . . . . . . . . . . . . . 5
Cleaning the Dispenser (For First Use) . . . . . . . . . . . . . . . . . . . . . . . . . . . . . . . . . . . . . . . . . . . . . . . 6
Re-Assembly after Cleaning . . . . . . . . . . . . . . . . . . . . . . . . . . . . . . . . . . . . . . . . . . . . . . . . . . . . 6
Operating Procedures . . . . . . . . . . . . . . . . . . . . . . . . . . . . . . . . . . . . . . . . . . . . . . . . . . . . . . . . . 8
Maintenance Procedures . . . . . . . . . . . . . . . . . . . . . . . . . . . . . . . . . . . . . . . . . . . . . . . . . . . . . . . . . . . 9
Cleaning the Bowl (Daily). . . . . . . . . . . . . . . . . . . . . . . . . . . . . . . . . . . . . . . . . . . . . . . . . . . . . . . . . . 9
Cleaning the Condensate Drain (Weekly) . . . . . . . . . . . . . . . . . . . . . . . . . . . . . . . . . . . . . . . . . . . . . 9
Sanitizing the Unit . . . . . . . . . . . . . . . . . . . . . . . . . . . . . . . . . . . . . . . . . . . . . . . . . . . . . . . . . . . 10
Cleaning the Filter and Condenser (Quarterly) . . . . . . . . . . . . . . . . . . . . . . . . . . . . . . . . . . . . . . . . 10
Troubleshooting Guide . . . . . . . . . . . . . . . . . . . . . . . . . . . . . . . . . . . . . . . . . . . . . . . . . . . . . . . . . . . . 11
Bowl Leaks. . . . . . . . . . . . . . . . . . . . . . . . . . . . . . . . . . . . . . . . . . . . . . . . . . . . . . . . . . . . . . . . . . . . 11
Specifications. . . . . . . . . . . . . . . . . . . . . . . . . . . . . . . . . . . . . . . . . . . . . . . . . . . . . . . . . . . . . . . . . . . . 12
JetSpray JS7 Owner’s Manual
SAFETY INSTRUCTIONS
READ AND FOLLOW ALL SAFETY INSTRUCTIONS
Safety Overview
•
Read and follow ALL SAFETY INSTRUCTIONS in this manual and any warning/caution labels on the unit
(decals, labels or laminated cards).
•
Read and understand ALL applicable OSHA (Occupational Safety and Health Administration) safety regulations before operating this unit.
Recognition
Recognize Safety Alerts
!
This is the safety alert symbol. When you see it in this manual or on the unit,
be alert to the potential of personal injury or damage to the unit.
DIFFERENT TYPES OF ALERTS
! DANGER:
Indicates an immediate hazardous situation which if not avoided WILL result in serious injury, death or equipment
damage.
! WARNING:
Indicates a potentially hazardous situation which, if not avoided, COULD result in serious injury, death, or
equipment damage.
! CAUTION:
Indicates a potentially hazardous situation which, if not avoided, MAY result in minor or moderate injury or
equipment damage.
SAFETY TIPS
•
Carefully read and follow all safety messages in this manual and safety signs on the unit.
•
Keep safety signs in good condition and replace missing or damaged items.
•
Learn how to operate the unit and how to use the controls properly.
•
Do not let anyone operate the unit without proper training. This appliance is not intended for use by very young
children or infirm persons without supervision. Young children should be supervised to ensure that they do not
play with the appliance.
•
Keep your unit in proper working condition and do not allow unauthorized modifications to the unit.
QUALIFIED SERVICE PERSONNEL
! WARNING:
Only trained and certified electrical, plumbing and refrigeration technicians should service this unit. ALL WIRING
AND PLUMBING MUST CONFORM TO NATIONAL AND LOCAL CODES. FAILURE TO COMPLY COULD
RESULT IN SERIOUS INJURY, DEATH OR EQUIPMENT DAMAGE.
© 2007-2015, Cornelius Inc.
-1-
Publication Number: 18478
JetSpray JS7 Owner’s Manual
SAFETY PRECAUTIONS
This unit has been specifically designed to provide protection against personal injury. To ensure continued
protection observe the following:
! WARNING:
Disconnect power to the unit before servicing following all lock out/tag out procedures established by the user.
Verify all of the power is off to the unit before any work is performed.
Failure to disconnect the power could result in serious injury, death or equipment damage.
! CAUTION:
Always be sure to keep area around the unit clean and free of clutter. Failure to keep this area clean may result in
injury or equipment damage.
SHIPPING AND STORAGE
! CAUTION:
Before shipping, storing, or relocating the unit, the unit must be sanitized and all sanitizing solution must be drained
from the system. A freezing ambient environment will cause residual sanitizing solution or water remaining inside
the unit to freeze resulting in damage to internal components.
Publication Number: 18478
-2-
© 2007-2015, Cornelius Inc.
JetSpray JS7 Owner’s Manual
SYSTEM OVERVIEW
The Jets pray JS7 dispenser is a counter top visual display beverage dispenser. It is designed to dispense a variety
of pre-mixed products. The unit has a refrigeration system to chill product and a spray system for circulating the
product in the bowl.
! WARNING:
This unit must be grounded to avoid possible electrical shock to the operator. The unit power cord is equipped with a
three pronged plug. If a three pronged (grounded) outlet is not available use an appropriate method to ground the unit.
Failure to comply could result in serious injury, death or damage to the equipment.
! WARNING:
This unit is not suitable for use by unsupervised children.
Failure to comply could result in serious injury, death or damage to the equipment.
© 2007-2015, Cornelius Inc.
-3-
Publication Number: 18478
JetSpray JS7 Owner’s Manual
INSTALLATION
! WARNING:
This unit must be grounded to avoid possible electrical shock to the operator. The unit power cord is equipped with a
three pronged plug. If a three pronged (grounded) outlet is not available use an appropriate method to ground the unit.
Failure to comply could result in serious injury, death or damage to the equipment.
DELIVERY, INSPECTION & UNPACKING
NOTE: Cornelius is not responsible for damaged freight. If damage is found, you must save all
packaging material and contact the freight carrier. Failure to contact the carrier within 48 hours
of receipt may void your claim.
1. Inspect the carton and note any damage, regardless if it appears minor. If the carton is damaged, note on the
consignee copy of the freight invoice “exterior carton damage – concealed damage possible” and contact the
freight company immediately.
2. Cut the carton around the bottom edge (within 1 inch of the carton bottom) and lift the carton off of the unit.
3. Remove the packing fillers from the top of the unit.
4. Inspect the dispenser cabinet and make sure it has no scratches, dents or any other cosmetic defects.
5. Make sure that the plastic merchandiser panels are not scratched or cracked. Also make sure the bowl is
not scratched or cracked.
6. Open the packages of loose parts and inspect all of the parts for damage or missing parts. Check the parts
received against the packing list to insure receipt of all parts.
7. Unpack the drip tray and install it on the two mounting bars on the front of the unit.
8. Place the spray tube into the top of the pump tower. Make sure the tube faces the front of the unit, as
shown in Figure 1.
Pump Tower
Spray Tube
Figure 1.
Unit date of manufacture is incorporated in the unit serial no. as follows: The date code follows the first letter of the
serial number. The next four numbers reflect the date of manufacture. The first two represent the year, the next two
represent the week. For example, 62A0815xxxxxx would be a unit produced during the 15th week of 2008.
Publication Number: 18478
-4-
© 2007-2015, Cornelius Inc.
JetSpray JS7 Owner’s Manual
COUNTER LOCATION
The unit must be located with at least 3 inches of space on back and sides of dispenser, to ensure proper
ventilation. Keep space above unit open. Lint or dust collecting on the condenser will result in poor refrigeration.
The counter must be capable of supporting 100 lbs. (45.36 kg).
ELECTRICAL REQUIREMENTS
Refer to the nameplate to determine the power requirements before connecting electrical power to the unit. All of
the power cords shall comply with safety requirements outlined in the EC Standards (EN60335-1 1 Clause 24.1) in
countries where CE compliance is required.
The power circuit must have some sort of overload protection, such as a circuit breaker or fuse that meets local and
national electrical codes. Table 1 shows the power requirements for the various types of units.
Table 1.
Part No.
Model
Receptacle Type
A8701
JS7
115VAC, 60Hz, grounded
A8711
JS7-W25
230VAC, 50Hz, grounded
INITIAL UNIT ASSEMBLY
Pinch Tubes
NOTE: Bowl must be installed on unit prior to performing this procedure.
1. Remove the pinch tubes from the plastic bag and wash them with warm water and mild detergent or soap.
2. Before installing the pinch tubes, wet the bowl spout surface and sealing rings on the pinch tube.
3. Push back the handle until it touches the front panel.
4. With the other hand, pick up the pinch tube, as shown in Figure 2. Carefully insert the tube into the bowl
spout opening and through the lower opening of the handle support spout.
5. When the end of the tube passes beyond the bottom of the handle spout, pull the end of the tube to seat
the pinch tube top into the bowl spout seat. Tube should extend approximately 1/4 in. below the spout.
NOTE: Make sure that the tube is free of wrinkles.
6. Release the handle and install the second tube (JT20 or 30 only).
Pinch
Tube
Figure 2.
© 2007-2015, Cornelius Inc.
-5-
Publication Number: 18478
JetSpray JS7 Owner’s Manual
CLEANING THE DISPENSER (FOR FIRST USE)
1. Removing the push handles. See Figure 3.
Figure 3.
A. Push the handle back until it touches the front panel.
B. Grasp the clips on the sides of the handle.
C. Squeeze clips until they are free from the panel, then pull straight down on the handle as shown in
Figure 4, until it is free from the panel.
2. Disassemble the bowl, lid, gasket, and pump housing assemblies.
Lock
Figure 4.
! CAUTION:
Abrasive cleaners scratch plastic parts. Do not use abrasive cleaners.
Re-Assembly after Cleaning
1. Slide the drip tray with grill into place.
2. An optional drain hose may be purchased to connect to the outlet on the drip tray (Part No. S-3379).
3. Turn the bowl upside down and insert the gasket into the groove. Wet the gasket for ease of insertion,
pressing it into the groove while following the number sequence (1 - 8) shown in Figure 5.
Publication Number: 18478
-6-
© 2007-2015, Cornelius Inc.
JetSpray JS7 Owner’s Manual
Bowl Gasket
3
5
7
2
1
8
6
4
Figure 5.
4. Check that the bowl spout gasket is mounted properly to the base assembly, as shown in Figure 6.
Bowl Spout Gasket
Pinch Tube
Figure 6.
5. Slide the bowl over the cooling coil and assemble the bowl to the dispenser. Be careful not to wrinkle the
gasket. If gasket is wrinkled, beverage will leak out of bowl. (See Figure 7.)
Place Bowl
on Top of Unit
Cooling Coil
Figure 7.
6. Replace the push handle and pinch tube.
A. Push the handle assembly straight up through the rectangular hole until the clips snap into place.
(See Figure 8.)
© 2007-2015, Cornelius Inc.
-7-
Publication Number: 18478
JetSpray JS7 Owner’s Manual
Figure 8.
B. Remove pinch tube from the plastic bag and wash it.
C. Before installing, wet the bowl spout surface and pinch tube. Push back the handle until it stops.
D. Carefully insert pinch tube into the bowl spout opening and on into the lower opening of the handle support spout (See Figure 3.). Make sure the end of the tube does not get caught on the edge above the
handle support spout opening. Pull the end of the tube to seat it firmly into the bowl spout seat. Make
sure the tube is free of wrinkles and extends below the support spout about a 1/4 inch. (See Figure 9.)
Figure 9.
Operating Procedures
1. Follow beverage manufacturer's directions in filling bowls. To aid in filling, the bowls have gallon and liter
markings up the center of the front wall. Gallons are on the right and liters are on the left.
2. Turn on the spray switch. Product should be cold enough to serve in approximately 2 hours.
NOTE: The unit should be left ON 24 hours a day to insure efficient operation and consistent product
quality.
3. The thermostat is preset at the factory and should not normally be reset by owner. If unit temperature is not
correct, a service technician should be contacted.
Publication Number: 18478
-8-
© 2007-2015, Cornelius Inc.
JetSpray JS7 Owner’s Manual
MAINTENANCE PROCEDURES
CLEANING THE BOWL (DAILY)
! WARNING:
Disconnect power to the unit before servicing. Follow all lock out/tag out procedures established by the user. Verify
all power is off to the unit before performing any work.
Failure to comply could result in serious injury, death or damage to the equipment.
1. Turn off power to the unit.
2. Before removing the bowl, turn off the spray switch.
3. Drain any product left in the bowl.
4. Remove the pinch tube by pushing the handle until it stops and pulling up on the pinch tube until it is free
(See Figure 2.), then remove the handle (See Figure 4.). Lift off the bowl, drip trays and covers. Clean
them thoroughly.
5. Clean the unit, as described in the “Cleaning the Dispenser (For First Use)” section.
6. After cleaning, reassemble the unit as described in the “Re-Assembly after Cleaning” section. Replace the
push handle and insert the pinch tube into the bowl.
CLEANING THE CONDENSATE DRAIN (WEEKLY)
1. To remove the condensation drain, push in on the front panel, just under the drain and pull down with fingers, as
shown in Figure 10.
Condensation Drain
Figure 10.
2. To replace the condensate drain, place the drain against the front panel under the drain hole (opening in
side of drain should be toward front panel). Push up until the drain snaps into place (See Figure 11).
Toward
Front Panel
Figure 11.
© 2007-2015, Cornelius Inc.
-9-
Publication Number: 18478
JetSpray JS7 Owner’s Manual
Sanitizing the Unit
After cleaning, add one gallon of water at a temperature of between 75°F (24°C) and 100°F (38°C) to the bowl. Mix
approved powdered chlorine sanitizer* according to manufacturers instructions. When dissolved, pour into bowl.
Replace the lid and run the unit for two or three minutes. Shut off the unit and drain the contents through the pinch
tube valve.
*Kay-5 sanitizer or equivalent powder or liquid sanitizer.
! CAUTION:
Do not run the refrigeration system while sanitizing the unit.
CLEANING THE FILTER AND CONDENSER (QUARTERLY)
! WARNING:
Disconnect power to the unit before servicing. Follow all lock out/tag out procedures established by the user. Verify
all power is off to the unit before performing any work.
Failure to comply could result in serious injury, death or damage to the equipment.
1. Turn off the spray switch and unplug the power cord from the wall socket.
2. Remove back panel screws and remove the back panel by pulling out the bottom of the panel.
3. Clean the condenser with a vacuum cleaner or brush, being careful not to damage the condenser. Make
sure no loose dirt goes into the dispenser.
4. Clean the filter by running a stream of hot water through it. Filter does not need to be removed from the grill
to clean it.
5. Allow the filter to dry before replacing it.
6. Replace the back panel, placing the top edge up under the condensate tray and pushing it in at the bottom.
7. Reinstall the back panel screws.
8. Plug the power cord back into the wall socket and turn on the spray switch.
Publication Number: 18478
- 10 -
© 2007-2015, Cornelius Inc.
JetSpray JS7 Owner’s Manual
TROUBLESHOOTING GUIDE
BOWL LEAKS
1. Do not confuse condensation on the outside of the bowl with bowl or faucet leaks. High humidity causes
condensation on the bowl.
2. Be sure that the bowl gasket has been installed properly. Check the gasket for tears or cuts in the rubber.
Tears cause leaks in the gasket. Replace the gasket if it is torn.
3. Remove and inspect the pinch tube for holes. Replace it if it is damaged.
Figure 12. Model JS7 Wiring Diagram
© 2007-2015, Cornelius Inc.
- 11 -
Publication Number: 18478
JetSpray JS7 Owner’s Manual
SPECIFICATIONS
Table 2.
Sizes and Weights
in. Wide X 19 in. Long X 26.625 in. High (19.7 cm Wide
Size/Dimensions 7-3/4
X 48.3 cm Long X 67.7 cm High)
Shipping Weight Base Only: 45 lbs. (20.4 kg)
Base Only: 36.5 lbs. (16.6 kg)
Net Weight Large Bowl: 3.5 lbs. (1.59 kg)
Small Bowl: 2.5 lbs. (1.13 kg) (optional)
Bowl Capacity
Large bowl: Over 5 US gallons (19 liters)
Small bowl: Over 3 US gallons (11.4 liters) (optional)
Materials of Construction
Power Cord 7 ft. w/ground connection (2.1 meters)
Cabinet Materials Stainless steel, aluminum and plastic
Beverage Bowl & Cover Materials Transparent plastic
Power Drive Magnet Permanent INDOX Magnet
Spray Drive Motor Sealed, non-relubricatable
Fan Motor Sealed, non-relubricatable; class B winding
Refrigeration System
Power/Type JetSpray 1/6 h.p. Hermetically Sealed System
Refrigerant Type and Charge Volume R134a Refrigerant - 3.2 Oz. (90 g.)
Compressor Winding Class H (climatic rating: normal)
Operating Environment
Operating Temperature 60°F (16°C) to 110°F (43°C)
Storage/ Shipping Temperature Above 20°F (-7°C) with bowl empty and dry
Humidity Below 95%
Publication Number: 18478
- 12 -
© 2007-2015, Cornelius Inc.
Cornelius Inc.
www.cornelius.com