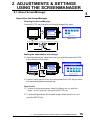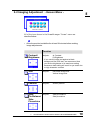
1
English
User's Manual
®
F980
Color Display Monitor
CONTENTS
PRECAUTIONS
4
INTRODUCTION
9
About This Manual ···························································· 9
Package Contents: ···························································· 9
Controls & Connectors ··················································· 10
Front ···················································································· 10
Rear ····················································································· 10
1 INSTALLATION
11
1-1 Connecting the Monitor to the PC ·························· 11
1-2 Using the AUTO-SIZING Button ······························ 12
1-3 Setting the Resolution ············································· 13
2 ADJUSTMENTS & SETTINGS USING THE
SCREENMANAGER
15
2-1 About ScreenManager ············································· 15
How to Use the ScreenManager ·········································
ScreenManager Menus ·······················································
Shortcut Keys ······································································
Adjustment Lock ··································································
15
16
18
18
2-2 Imaging Adjustment - Screen Menu - ···················· 19
Contrast/Brightness ····························································· 19
Size ······················································································ 19
Position ················································································ 19
Side-Pin Balance/Side-Pincushion ······································ 19
Parallelogram/Trapezoidal ··················································· 20
Tilt ························································································ 20
Uniformity ············································································ 20
Convergence ······································································· 20
Moiré ···················································································· 20
2-3 Color Adjustment - Color Menu - ··························· 21
Outline ················································································· 21
Adjusting the Standard Mode ·············································· 22
Adjusting the Custom Mode ················································ 24
2-4 Power-save Setup - PowerManager Menu - ··········· 26
Set-up Procedure ································································ 27
2
CONTENTS
2-5 Other Settings - Others Menu - ······························ 31
Degaussing ········································································· 31
Input Priority ········································································ 31
Beep ···················································································· 32
Menu Position, Menu Contrast ············································ 32
Signal Filter 1 ······································································ 33
Signal Filter 2 ······································································ 33
Off Timer ·············································································· 33
Reset ··················································································· 35
3 GETTING THE MOST FROM YOUR MONITOR
36
3-1 i·Sound™ Sound Unit ·············································· 36
3-2 Making use of USB (Universal Serial Bus) ·············· 36
4 TROUBLESHOOTING
40
5 CLEANING
46
6 SPECIFICATIONS
47
APPENDIX
i
Copyright© 1999 by EIZO NANAO CORPORATION. All rights reserved. No part of this
manual may be reproduced, stored in a retrieval system, or transmitted, in any form or by any
means, electronic, mechanical, or otherwise, without the prior written permission of Eizo Nanao
Corporation.
Eizo Nanao Corporation is under no obligation to hold any submitted material or information
confidential unless prior arrangements are made pursuant to Eizo Nanao Corporation's receipt of
said information.
Although every effort has been made to ensure that this manual provides up-to-date information,
please note that EIZO monitor specifications are subject to change without notice.
Apple and Macintosh are trademarks of Apple Computer Inc.,registered in the U.S. and other countries.
DPMS is a trademark and VESA is a registered trademark of Video Electronics Standards Association.
VGA is a registered trademark of International Business Machines Corporation.
ENERGY STAR is a U.S. registered mark.
Windows is a registered trademark of Microsoft Corporation.
ScreenManager, PowerManager, QuickSet, i·Sound and i·Station are trademarks of Eizo Nanao Corporation.
FlexScan, SuperErgoCoat and EIZO are registered trademarks of Eizo Nanao Corporation.
CONTENTS
3
E
PRECAUTIONS
IMPORTANT!
* This product has been adjusted specifically for use in the region to which it was originally
shipped. The performance of the product, (i.e. picture geometry, picture positioning and color
convergence and purity in the case of color monitors) is optimally adjusted to the earth's
magnetic field of the specific destination. If operated outside the region to which it was
originally shipped, the product may not perform as stated in the specifications.
* The manufacturer is not responsible for damage or malfunction caused by improper
connection. The power cord should be connected directly to a standard wall power outlet.
Location of the caution statements
The equipment must be connected to a grounded main
outlet.
Jordet stikkontakt skal benyttes når apparatet tilkobles
datanett.
Apparaten skall anslutas till jordat nätuttag.
IMPORTANT!
To ensure personal safety and proper maintenance. Please
read this section and the caution statements on the monitor
(refer to the figure above).
This manual uses the safety symbols below. They denote critical
information.
Please read them carefully.
Indicates a prohibited action.
Indicates to ground for safety.
WARNING
Failure to abide by the information in a WARNING may result in
serious injury and can be life threatening.
CAUTION
Failure to abide by the information in a CAUTION may result in
moderate injury and/or property or product damage.
4
PRECAUTIONS
WARNING
E
• If the monitor begins to emit smoke, smells like something
is burning, or makes strange noises, disconnect all power
connections immediately and contact your dealer for
advice.
Attempting to use a malfunctioning monitor can be dangerous.
• Do not dismantle the cabinet or modify the monitor.
Dismantling the cabinet or modifying the monitor may result in
electric shock or burn.
• Keep small objects away from the monitor.
Small objects may accidentally fall through the ventilation slots
into the cabinet, leading to fire, shock, or equipment damage.
• Keep liquids away from the monitor.
Spillage into the cabinet may result in fire, electric shock, or
equipment damage.
If an object or liquid falls/spills into the cabinet, unplug the
monitor immediately. Have the unit checked by a qualified
service engineer before using it again.
• Place the monitor on a strong, stable surface.
A unit placed on an inadequate surface may fall, resulting in
injury or equipment damage.
OK
If the monitor falls, disconnect the power immediately and have
the unit checked by a qualified service engineer before using it
again. Using a monitor after it has been dropped may result in
fire or electric shock.
• Keep the plastic packing bags away from children and
infants.
Plastic bags can be dangerous. To avoid danger of suffocation,
keep the bag away from babies and children.
• Keep power terminal covers for the optional i·Soundä
sound unit away from children and infants.
Children and infants may accidentally swallow the covers and
choke. If swallowed, consult a doctor immediately.
• The equipment must be connected to a grounded main
outlet.
PRECAUTIONS
5
• Use the enclosed power cord. If using the power cord
other than the enclosed one, use the following cord.
In USA and Canada, use a UL LISTED/CSA LABELED or
CERTIFIED power cord set meeting the following specifications:
* Rating: min. 125 V, 10 A * Length: max. 2.1 m
* Type:
SVT
* Plug type:NEMA 5-15P, Parallel blade, Grounding type,
125 V, 10 A
In Europe, use a proper European standard approved power cord
meeting the following specifications:
* Rating: min. 250 V, 10 A * Length: max. 2.1 m
* Type:
H05VV-F 3G 1 mm2
Use a plug type approved by the country where you use
Failure to do so may cause fire or electric shock.
• Do not overload your power circuit, as this may result in
fire or electric shock.
• For proper connections of the power cord, be certain to
plug the power cord to the provided monitor connector and
directly to a wall outlet.
By not doing so may result in fire or electric shock.
• Handle the power cord with care.
* Do not place the cord underneath the monitor or other heavy
objects.
* Do not pull on the cord.
* Do not attempt to repair a damaged cord.
If the power cord becomes damaged, stop using it. Use of a
damaged cord may result in fire or electric shock.
• To disconnect the power cord, grasp the plug firmly and
pull.
OK
Never tug on the cord, doing so may cause damage and could
result in fire or electric shock.
CAUTION
Be careful when taking the monitor out of the carton:
• Disconnect the power cord, signal cables and remove the
optional i·Sound™ sound unit and i·Station™ USB hub (if
applicable) when moving the monitor.
Moving the monitor with the cord attached or lifting it by the
i·Sound sound unit or i·Station USB hub is dangerous. It may
result in injury or equipment damage.
6
PRECAUTIONS
• Handle with care when carrying the monitor
E
Note that the monitor is heavier at the front than at the rear.
Do not move it alone. Always work with another person.
OK
The screen is optically coated to reduce glare. Keep hard
objects (such as buttons, tie pins, and other clothing
accessories) away from the screen surface to prevent scratches.
• Set the monitor in an appropriate location.
* Do not install in a dusty or humid environment.
* Do not place in a location where light shines directly on the
screen.
* Do not place near heat generating devices or a humidifier.
• Use an easily accessible power outlet.
This will ensure that you can disconnect the power quickly in
case of a problem.
• Do not sit on the cabinet or place any heavy objects on the
cabinet.
A unit with heavy objects on it may fall or be damaged and
result in injury.
• Do not block the ventilation slots on the cabinet.
* Do not place books or any other papers on the ventilation
slots.
* Do not install the monitor in a closed space.
* Do not use the monitor laying down or upside down.
* Do not remove the tilt-swivel stand.
Using the monitor in this way blocks the ventilation slots and
prevents proper airflow, leading to fire or other damage.
• Do not remove the tilt-swivel stand.
The stand is required to maintain clearance for the ventilation
slots on the bottom of the cabinet. Removing the stand will
block these slots and may result in fire or electric shock.
• Do not touch the plug with wet hands.
Touching the plug with wet hands is dangerous and can cause
electrical shock.
• At the end of the day or if you plan to leave the monitor
unused for an extended period, after turning off the power
switch disconnect the power cord from the wall socket so
that no power connections are made.
• Unplug the monitor before cleaning it.
Cleaning the monitor while it is plugged into a power outlet may
result in electric shock.
PRECAUTIONS
7
For users of the EIZO optional i·Sound™ sound
unit and i·Station™ USB hub
• When adjusting the viewing angle of the monitor, do
not do so by handling the sound unit or USB hub.
Adjusting the monitor in this way may break the unit or
cause bodily injury.
Others
• Do not install the monitor within an area subject to strong
magnetic fields (for example, in the vicinity of a speaker,
except the optional i·Sound unit, or a high-voltage
transformer). Magnetic fields can cause noise, image
shaking, and other distortions.
• Generally, for maximum viewing comfort position the
monitor slightly below eye level. Staring at the monitor
for prolonged periods can cause eye strain. Be sure to take
adequate rests. (A 10-minute rest period each hour is
suggested.)
• Do not remove the covers to the power terminal for the
optional i·Sound speaker unit for any reason except to
attach the unit.
8
PRECAUTIONS
INTRODUCTION
About This Manual
This manual explains the precautions, features, specifications, and
operation of your EIZO monitor. For convenience, a “ScreenManager
Quick Reference” guide has been included which shows how to implement
basic adjustments with the ScreenManager utility.
Package Contents:
Power Cord
EIZO CRT
Utility Disk
Monitor
EIZO USB Cable
(MD-C93)
Signal Cable
(MD-C88)
User’s Manual
Cleaning Cloth for
CRT Screen
Warranty
Registration Card
ScreenManager
Quick Reference
• If any of the above-listed items are missing or damaged, please contact
your local dealer for assistance.
• The EIZO CRT Utility Disk contains the followings:
*
*
*
*
Windows 95/98 monitor information file
EIZO ScreenManager Pro for USB
ICC Profiles
* Readme.txt file
Pattern.html file (refer to page 23.)
Please refer to the readme.txt file for further details.
INTRODUCTION
9
E
Controls & Connectors
Front
USB Port with a
Drop Down Access
Lid (Downstream
port x 1)
QuickSet™ Control Pad
(hereinafter “Control pad”)
See page 36 for
further details
BNC/D-SUB Selection
Button
Selects BNC or D-Sub
connector as active input.
This feature is only used
when two computers are
connected to the monitor.
AUTO-SIZING Button
Automatically centers the
displayed image, bringing
the image borders into
alignment with the monitor
frame. See page 12.
Rear
Power Switch
Power Indicator
Indicates the power-on status, as
follows:
Green:
Power is ON (normal mode)
Green:
- PowerManager Mode 1
(Flashing) - Power is switching off
within 15 minutes. See page 34.
Yellow:
PowerManager Mode 2
Yellow: Off Timer Mode
(Flashing) See page 34.
Power Terminal Covers for the Optional
i·Sound Sound Unit
Maintenance port
Allows EIZO optional
utilities to be attached.
USB Ports
Power Connector
D-Sub 13W3 input connector
BNC input connector
(Upstream port x 1,
Downstream ports x 3)
See page 36 for further
details.
Termination switch
Allows multiple monitors to be chained
together (Default termination is 75 Ω).
10
INTRODUCTION
1 INSTALLATION
1-1 Connecting the Monitor to the PC
E
1) Be sure that the power switches of both the PC and the monitor are
OFF.
2) Plug the signal cable into the connector at the rear of the monitor.
• When connecting the signal cable or cable adapter, first check
that the shape at the cable side matches the shape at the
connecting side. After connecting, secure the connection with the
screw-in fasteners.
3) Plug the other end of the cable into the video connector on the rear of
the PC. Refer to the figures below.
Standard PC graphics board
D-Sub
13W3 pin
D-Sub
mini 15 pin
Standard PC graphics board
MD-C88 (enclosed)
Using the monitor with Windows® 95/98
A monitor information file is saved in the EIZO CRT Utility Disk
included in the package. It includes all the required information
for best operation with Windows 95/98.
Please install the enclosed utility and select your model name from
the monitor list in Windows 95/98.
For installation procedure, please read the readme.txt file in the
utilily disk.
Macintosh
An optional Macintosh adapter must be connected to the PC
before connecting the signal cable. Please consult EIZO dealer.
D-Sub 15 pin
D-Sub
13W3 pin
D-Sub
mini 15 pin
Macintosh
MD-C88 (enclosed)
Macintosh Adapter (Optional)
1
INSTALLATION
11
4) Plug the power cord into the power connector at the rear of the monitor.
Then plug the other end of the cord into a power outlet.
WARNING
•
The equipment must be connected to a grounded main outlet.
5) Turn on the monitor power first, then switch on the PC power. The
monitor’s power indicator (LED) will light up (green). The monitor
will warm up briefly, then display an image. Whenever you finish
your operation, turn off the PC and the monitor.
• If an image does not appear, make sure that all connections have been
made properly. Refer to the “TROUBLESHOOTING” section on page
40 for additional advice.
1-2 Using the AUTO-SIZING Button
After connecting the monitor to the PC, first press the AUTO-SIZING
button on the front panel. The AUTO-SIZING function centers the
displayed image, aligning the image’s borders with respect to the monitor
frame.
When the timing of the computer is same as the preset timing or has been
recognized before, the following message will appear and remain on the
screen for 5 seconds. While the message is on the screen, push the button
again to automatically adjust the screen position. If not wishing to do
adjust the screen, do not push the button again or press the control pad.
The message will disappear.
In general, press the AUTO-SIZING button whenever changing the
graphics board or the resolution or when image size and/or position is
incorrect.
If further adjustment is required, adjust the picture size/position as
desired using the Size/Position function in the ScreenManager. Refer to
page 19.
12
1
INSTALLATION
• The AUTO-SIZING function is intended for use on Macintosh, and
IBM compatibles running Windows. It may not work properly if either
of the following applies:
- An AT-compatible PC running MS-DOS (not Windows).
- The background color for the “wallpaper” or “desktop” pattern is set
to black.
• Some signals from the graphics board may not function properly.
• A solid-color screen (i.e. red, green, blue) may appear for an instant
while performing the AUTO-SIZING function, this phenomenon is not
a failure.
1-3 Setting the Resolution
The following look-up table shows the maximum (Non-interlaced)
vertical refresh rates for this model with regard to standard resolutions
set forth by VESA. The best way to see if the monitor will work with a
given resolution and rate, is to compare the vertical refresh rate of the
graphics board to the monitor’s range (Refer to the graphics board
manual for specification). If the refresh rate is within the specified range
of the monitor, it should operate properly.
Maximum Vertical Refresh rate (Hz)
Horizontal
Scan
Frequency
(kHz)
~1024 x 768
160
1280 x 1024
127
1600 x 1200
109
30-137
1856 x 1392
91
1920 x 1440
91
2048 x 1536
85
What is Resolution?
Resolution is expressed as the number of dots (pixels) displayed on
the screen. A larger number of dots produces a more sharply defined
(a higher-resolution) image.
Note that for a given screen size the dot size decreases as the number
of dots increases: a 640 × 480 (dot × line) resolution uses larger pixels
than a 1024 × 768 resolution. The display size of a given font therefore
varies according to the resolution. Higher resolutions allow you to
display more information on the screen.
1
INSTALLATION
13
E
Connecting two PCs to the monitor
1) Be sure that the monitor and the PC are both switched off before
connecting them.
2) Connect one PC to the monitor’s D-Sub connector and another to the
BNC connector securely. The BNC connection should be made with
an EIZO BNC cable, available as an option. Contact EIZO dealers
for information about optional cables.
(Example)
MD-C53A (optional)
Selecting the active input
The BNC/D-Sub selection button on the front panel can be used to
select either BNC or D-Sub connection as the active input.
The ScreenManager’s “Input Priority” setting (in the “Others” menu)
can be used to set up the automatic selection of the input.
See page 31 for details.
14
1
INSTALLATION
2 ADJUSTMENTS & SETTINGS
USING THE SCREENMANAGER
2-1 About ScreenManager
E
How to Use the ScreenManager
Entering the ScreenManager
Press the ENTER key to display the ScreenManager Main menu.
Main menu
Making the adjustments and settings
1) Select the desired icon using the Arrow keys, and then press the ENTER
key to display the Sub menu.
Sub menu
2) Use the Control pad (the four Arrow keys and the ENTER key) to make
the required adjustments and settings.
Save & exit
1) To return to the previous menu, select the Return icon (or push the
“down” arrow key twice), then push the ENTER key.
2) To save settings and exit the ScreenManager, select the Exit icon and
press the ENTER key.
2
ADJUSTMENTS & SETTINGS USING THE SCREENMANAGER
15
ScreenManager Menus
ScreenManager consists of a main menu and six sub menus: “Screen”,
“Color”, “PowerManager”, “Others”, “Information” and “Language.”
Animated icons on each menu allow for easy adjustment.
Main menu
• The menu message for the ScreenManager can be displayed in six
languages: English, German, French, Italian, Spanish and Swedish.
First, select the preferred language through the “Language” menu.
This will become the default language when you use the
ScreenManager.
Sub menus
Menus
Functions
<Screen>
Reference
Page 19
• Brightness/Contrast
• Horizontal/Vertical Size
• Horizontal/Vertical Position
• Side-Pin Balance/
Side-Pin cushion
• Parallelogram/Trapezoidal
• Tilt
• Uniformity
• Convergence
• Moiré Reduction
<Color>
Standard color with selection of
color temperature and color
correction, and Custom color
with adjustment of color tone.
16
2
ADJUSTMENTS & SETTINGS USING THE SCREENMANAGER
Page 21
Menus
Functions
Reference
<PowerManager>
Power saving settings.
Page 26
<Others>
• Degaussing
• Input-signal priority selection
for two signal connections
• Beep On/Off
• ScreenManager menu position
• ScreenManager menu contrast
• Signal filter setting 1
• Signal filter setting 2
• Off Timer
• Reset to defaults
Page 31
<Information>
This menu shows the current
ScreenManager settings. The menu
contains four pages. Pressing the ENTER
key displays the following information:
• Page 1: Input port, horizontal and
vertical frequencies, moiré
reduction setting
• Page 2: Color-adjustment settings
• Page 3: PowerManager settings
• Page 4: Input priority (see note), beep,
signal filter 1 setting, Off timer
• The current ScreenManager setting is
displayed even if the input selection has
been manually overridden by the use of
the BNC/D-Sub selection button.
<Language>
First select the preferred language to use.
Six languages are available to choose from:
English, German, French, Spanish, Italian
and Swedish. The ScreenManager’s
messages will appear in the selected
language.
2
ADJUSTMENTS & SETTINGS USING THE SCREENMANAGER
17
E
Shortcut Keys
Before entering the ScreenManager, brightness and contrast can be
adjusted directly by moving the Control pad. To record the new setting
and exit the ScreenManager, press the ENTER key. (The brightness and
contrast functions are also available in the ScreenManager “Screen”
menu.) See the diagram described below for adjustment directions.
Brightness
Up
ENTER
Contrast
Down
Contrast
Up
Brightness
Down
Adjustment Lock
The ScreenManager operation can be disabled by holding down the
AUTO-SIZING button while switching on the monitor’s power. This will
disable (“lock”) the ScreenManager and AUTO-SIZING button,
protecting from accidental changes. To unlock the buttons: switch the
power off, then hold down AUTO-SIZING button once again and turn
the power back on.
Note that brightness and contrast can be adjusted using the shortcut keys
even while the Control pad is locked. After making such an adjustment,
push the ENTER key to clear the brightness/contrast adjustment menu
from the screen. Also, the BNC/D-Sub Selection button can still be used.
18
2
ADJUSTMENTS & SETTINGS USING THE SCREENMANAGER
2-2 Imaging Adjustment - Screen Menu -
E
All of the icons shown in the ScreenManager “Screen” menu are
described below.
• Allow the monitor to stabilize for at least 30 minutes before making
image adjustments.
Function
Contrast/
Brightness
Adjusts:
a) Contrast
b) Brightness
· If you use the white text against a black
background like DOS text, we recommend that
you set the brightness to its maximum setting
because a dark setting will result in eye strain due
to high character contrast.
Size
Adjusts:
Horizontal image size
Vertical image size
Position
Adjusts:
Screen position
SidePin Balance/
SidePincushion
Adjusts:
Side-pin balance
Side-pincushion
2
ADJUSTMENTS & SETTINGS USING THE SCREENMANAGER
19
Function
Parallelogram/
Trapezoidal
· Tilts:
image sides to sides
· Expands: top side/bottom side, shrinking the
other side
Tilt
Tilts:
the image
Uniformity
Adjusts:
the uniformity
Convergence
Adjusts:
Adjusts:
horizontal convergence
vertical convergence
What is convergence?
Convergence is the monitor’s ability to
precisely illuminate specific phosphors and
line them up properly in order to produce
pure color.
• The convergence adjustment adjusts the entire
screen. It is not possible to limit adjustment to
specific screen areas.
Moiré
Adjusts:
Adjusts:
horizontal moiré
vertical moiré
What is moiré?
Moiré refers to an interference pattern of dark
wavy lines on the screen. It is not a defect,
but rather an interference phenomenon caused
by the relationship between the phosphor
layout and the imaging signal. Moiré is often
an indication of a good focus level. Moiré is
particularly noticeable when using a light-gray
or every-other-dot pattern background.
Although moiré can not be eliminated, it can
be reduced with the moiré reduction feature.
20
2
ADJUSTMENTS & SETTINGS USING THE SCREENMANAGER
2-3 Color Adjustment - Color Menu -
E
Outline
EIZO monitors have incorporated two color adjustment modes, standard
and custom. The “Standard” mode allows the adjustment of the color
spectrum. The “Custom” mode allows extensive controls over the colors
of the displayed image on the screen.
Please find the details of the color mode adjustment capabilities below:
Content
Application
Standard mode
Sets color temperature.
Temperature can be set from 4,000K
to 10,000K, in 500K increments.
(Additionally, industry standard of
9,300K is set as default.)
For routine work and printing.
Custom mode
Sets color temperature.
Allows for specific adjustments to
Red, Green and Blue (R/G/B). This
consists of the Cutoff and Gain
functions.
For use when high precision
color adjustment is necessary
(i.e. when there is a need to
obtain identical colors on
multiple monitors* or match
the display color with printout
color**.)
* The color adjustment spectrum may vary between monitors.
** A color calibrator can be used for even higher-precision color
adjustment.
• Each monitor is slightly different, if two monitors are set to the same
color temperature value (i.e. 6,500K), they may not necessarily look
the same.
• Users should allow at least 30 minutes for the monitor to stabilize
before setting the color adjustments or color matching.
2
ADJUSTMENTS & SETTINGS USING THE SCREENMANAGER
21
Adjusting the Standard Mode
Function
Color Temperature (left/right)
Color Temperature Adjusts:
(Standard Mode)
What is color temperature?
Color temperature is a method to measure the
white color tone, generally indicated in degrees
Kelvin. At high temperatures the white tone
appears somewhat blue, while at lower temperatures it appears somewhat red. Computer
monitors generally give best performance at high
temperature settings.
5,000K: Slightly reddish white. Often used in
printing industry.
6,500K: Warm-white tone, similar to white
paper or daylight. This temperature
is good for video-image display.
9,300K: Slightly bluish white. This is the
default setting for your EIZO monitor.
Color Correction
Adjusts:
Color Correction
Because of the differences in video signal output
levels of graphics boards, disparities can be seen
in the color temperature and brightness of the
image shown on the monitor, even when the
settings are the same. Color Correction
corrects irregular video signal output levels to
eliminate disparities in color temperature and
brightness. This adjustment should be done
when a graphics board and the monitor are
connected.
For example, this adjustment is able adjust
tones of the color temperature when using two
computers with a monitor or using several
monitors. Differences in signal level will be
corrected and color temperature and brightness
will be nearly identical, regardless of the
graphics board used. The setup procedure
follows in the next page.
22
2
ADJUSTMENTS & SETTINGS USING THE SCREENMANAGER
Function
B N C / A U TO
D -S U B
White
Window
Pattern
1) Open a www browser, e.g. Internet Explorer,
and the Pattern.html in the utility disk.
· For compensation, if this file is not
available, please open a window on the
Windows or Macintosh OS for alternative
use. Set the background to black, and
open a white window whose size is more
than 1/5 and less than 1/2 of the whole
display area. Refer to the picture on the
left.
2) Press the Color Correction icon. Press OK
and the monitor automatilcally starts the
compensation. It takes about 20 to 30
seconds to compensate the color temperature from 4000 K to 10000.
· All other adjustments are off during
compensation.
3) When the compensation finishsed, a long
beep sounds and “OK” appears on the
screen. If the compensation fails, four short
beeps shounds and “Error” appears. Both
“OK” and “Error” blinks.
4) Press any adjustment button on the fron
panel makes this message menu off.
· Please allow 30 minutes for the monitor to
warm up.
· Approximately 20 to 30 seconds are needed to
adjust Color Correction.
· Color Correction does not work properly when
the input signal level is lower than 0.5 Vp-p or
higher than 1.0 Vp-p.
· Please adjust contrast and color temperature
adjustment after Color Correction.
2
ADJUSTMENTS & SETTINGS USING THE SCREENMANAGER
23
E
Adjusting the Custom Mode
Cutoff and Gain adjustments
Monitors use red, green and blue (R, G, and B) to convey color
information. They use an additive method to combine different
amounts of the primary colors to produce a desired color. In other
words, monitors start with no light (black) and add percentages of
red, green and blue to make colors. White is usually produced by
adding the same amount of all three colors, where black is usually
produced by adding no color.
However, colors are not only determined by the balance but also the
intensities of R, G, and B (how bright they are) which we call Gain,
and the saturation of R, G and B (how vivid or dull they are) which
we call Cutoff.
• If only a quick setting is required, that is close to the desired color,
but not exact, skip making any changes to the Cutoff adjustment
(step 4). If a precise match is desired, adjustment of the Cutoff
levels must be made. We recommend that for exact matching, use a
color calibrator.
(1) Set the display to maximum brightness and contrast.
(2) Return to the "Color" menu and select the "Custom mode" setting.
(3) Set the color temperature.
(4) Adjust the Cutoff.
(5) Adjust the Gain.
(6) Select the "Save" icon and then press the ENTER key.
(7) Readjust the contrast in the "Screen" menu to get the best
image clarity..
24
2
ADJUSTMENTS & SETTINGS USING THE SCREENMANAGER
Function
E
Color Temperature
Color Temperature Adjusts:
(Custom Mode)
a) Select the “Temperature” icon from the sub
menu.
b) Select the temperature as desired by moving the
arrow keys in any direction.
Cutoff
Adjusts:
Cutoff (select colors:
up/down)
(change percentages: right/left)
Cutoff
The Cutoff adjustment is the most powerful
adjustment. It alters the starting point (the
black level) and the ending point (the white
level). If the Cutoff level for color is raised or
lowered, black, white, and all levels between
are raised or lowered by the same degree.
Gain
Adjusts:
Gain
(select colors:
up/down)
(change percentages: right/left)
Gain
The Gain adjustment has no effect on the
starting point (the black level). It changes
only the ending point (the white level). The
Gain adjustment is used to fine tune the whites
and light grays to a good balance.
• If an inappropriate adjustment is made, corrections can be made by
repeating the above procedure starting from Step 3 (temperature
setting).
• The values shown in percentages (%) for both the Cutoff and Gain
adjustments represent the current level within the specific adjustment
only. They are available only as a reference tool. (To create a
uniform white or black screen, the percentages for each will probably
not be the same.)
2
ADJUSTMENTS & SETTINGS USING THE SCREENMANAGER
25
2-4 Power-save Setup - PowerManager menu -
What is PowerManager?
The PowerManager feature automatically reduces the monitor’s power
consumption during idle periods, in accordance with the PCs
ScreenSaver software.
There are two PowerSaving modes in the EIZO PowerManager:
Mode 1 and Mode 2. Even if the monitor is in a power saving mode,
it will return to a normal display immediately when the mouse or
keyboard is operated.
The EIZO PowerManager functions comply with EIZO MPMS and
VESA DPMS standard.
Power consumption:
Normal operation : 140 W
PowerManager Mode 1: less than 15 W*
(Power Indicator flashing green)
PowerManager Mode 2: less than 3 W*
(Power Indicator solid yellow)
* When the USB hub is not connected
As an ENERGY STAR® Partner, Eizo Nanao Corporation has determined
that this product meets the ENERGY STAR® guidelines for energy efficiency.
• Do your part to conserve energy, turn off the monitor when your
finished using it. Complete energy use can only be stopped by
disconnecting the monitor from the power supply.
• When the monitor is in a power saving mode, the optional EIZO
i·Sound speaker unit will turn off.
• Even if the monitor is in a power saving mode, USB compliant
devices function when they are connected to the monitor’s USB (both
the upstream and the downstream ports). Therefore, power
consumption of the monitor will change according to the connected
devices even if the monitor is in a power saving mode.
26
2
SCREEN ADJUSTMENT
Set-up Procedure
Set the monitor’s power-save environment to match the PC’s ScreenSaver
software.
• For the PC setup, please refer to the user’s manuals for the PC and
graphics board.
There are two power-save settings for the monitor.
“VESA DPMS” system works with the VESA DPMS signal.
“EIZO MPMS” system works with a screen saver software and Energy
Saver for Macintosh which blanks the screen (totally black screen).
Set the monitor to match the PC’s power saving software, as follows.
Monitor setting for matching the PC:
PC
PC Power saving
Monitor setting
PC/AT and compatibles
(VESA DPMS activated)
VESA DPMS (Signal)
VESA DPMS
PC/AT and compatibles
Windows
EIZO MPMS
(VESA DPMS
(Control Panel/Display/
inactivated)
ScreenSaver: “Blank Screen”)
Macintosh
Energy Saver
ScreenSaver software
After Dark/“Blank” settings
2
EIZO MPMS
EIZO MPMS
SCREEN ADJUSTMENT
27
E
VESA DPMS System
1) First, make the appropriate settings for the PC.
2) Then select “VESA DPMS”.
3) Set the delay period, which is the interval that the monitor will wait
after receiving a power saving signal from the PC, before entering into
Mode 1 or Mode 2.
VESA DPMS power saving method
VESA DPMS utilizes four signals: ON, STANDBY, SUSPEND, and OFF.
The monitor detects these signals from the graphics board and executes
power saving accordingly, as illustrated below.
15 W
28
2
SCREEN ADJUSTMENT
3W
EIZO MPMS System
E
1) First make the appropriate ScreenSaver settings (Macintosh/Energy
Saver) for the PC.
2) Then select “EIZO MPMS”.
3) Set the delay time, which is the interval between the time that the
ScreenSaver (Macintosh/EnergySaver) blanks the screen and the time
that the monitor enters Mode 1.
4) Set the Mode 1 duration time which is the user definable time (0-60
minutes) before the monitor enters Mode 2.
EIZO MPMS power saving method
Mode 1 operates for a user-definable period in “Duration” (in 0-60
minutes) before the monitor enters Mode 2. If the keyboard or the
mouse are not in use during this period, the monitor will then enter
PowerManager Mode 2.
15 W
2
3W
SCREEN ADJUSTMENT
29
What is VESA DPMS?
The acronym VESA stands for “Video Electronics Standards
Association,” and DPMS stands for “Display Power Management
Signaling.” DPMS is a communication standard that PCs and
graphics boards use to implement power savings at the monitor side.
What is EIZO MPMS?
EIZO MPMS, "EIZO Monitor PowerManager Signaling", also
enables to execute power saving at the monitor side. EIZO MPMS
recognizes the video signals from the PC when the PC is in a power
saving mode, and reduces energy consumption of the monitor.
What is ENERGY STAR®?
“ENERGY STAR®” is a set of power saving guidelines issued by the
U.S. Environmental Protection Agency (EPA). The guidelines apply to
PC systems and peripherals.
30
2
SCREEN ADJUSTMENT
2-5 Other Settings - Others Menu -
E
All of the icons shown in the ScreenManager “Others” menu are
described below.
Function
Degaussing
degausses
What is degaussing?
“Degaussing” refers to the process of removing
magnetic-field effects from the monitor.
Operation of the monitor within a magnetic
field may adversely effect color purity.
Degaussing can be used to correct the problem.
• The degauss circuitry takes about 30 minutes to
regain maximum power following degaussing.
Input Priority
selects:
Input Priority
The monitor constantly checks the input signals
and switches automatically in accordance with the
“Input Priority” settings (see chart on next page).
Once a priority is set, whenever a change of signal
is detected at the selected input, the monitor will
switch the input to that signal.
2
D-Sub
If signals from both inputs are present,
the monitor gives preference to D-Sub
for the cases shown below:
• When the power of the monitor is
turned ON.
• When the signal input to D-Sub is
changed even if active input was
BNC.
BNC
If signals from both inputs are present,
the monitor gives preference to BNC for
the cases shown below:
• When the power of the monitor is
turned ON.
• When the signal input to BNC is
changed even if active input was
D-Sub.
ADJUSTMENTS & SETTINGS USING THE SCREENMANAGER
31
Function
Manual The monitor will not detect signals
automatically in this mode. Select the
active input by pressing the input signal
selection button on the monitor’s front
panel.
· The Input Priority function does not
automatically reactivate when the monitor has
been in the power saving mode.
· The Input selection button on the front panel can
be used to select either D-Sub or BNC as the
active input at any time.
Beep
turns:
on/off the beeper
If the beepr is ON, the monitor will generate
beep signals as shown below. If the beeper is
OFF, the monitor will not beep.
Short beep
· ScreenManager item selected.
· ScreenManager parameter
adjusted to minimum or
maximum limit.
· BNC/D-Sub selection button
pressed.
Long beep
· AUTO-SIZING button pressed.
· ScreenManager data-save
executed.
Four short
beeps
· Monitor not connected correctly.
· PC turned off.
· Monitor received unsupported
signal fequency.
Two short
· Monitor is in the advance notice
beeps
mode of the Off Timer. The
every
monitor will be in the Off Timer
fifteen seconds Mode within 15 minutes.
Menu
Position
Menu
Contrast
32
2
adjusts:
Menu Position
adjusts:
Menu Contrast
ADJUSTMENTS & SETTINGS USING THE SCREENMANAGER
Function
Signal
Filter 1
This monitor provides signal filter adjustments
according to the characteristics of each graphics
board for displaying the image properly. If the
characteristics of the graphics board does not
match those of the monitor, the characters and
images displayed may have a slight shadow on
their right side (refer to figure below). If these
phenomenon is noticeable, use the “Signal Filter
1” functon. Select from mode 1 or mode 2,
whichever displays the image better.
Signal
Filter 2
This monitor provides signal filter adjustments
according to the characteristics of each graphics
board for displaying the image properly. If the
characteristics of the graphics board does not
match those of the monitor, the characters and
images displayed may have a couple of bars on
their right side. If these phenomenon is noticeable, use the “Signal Filter 2” function. Adjust
the percentage until the images seem clear.
Off Timer
The Off Timer function allows the user to set the
time in which the monitor will be in operation,
called the “On Period” and automatically shifts
the operation into the “Off Timer Mode” when
the set “On Period” expires. The energy
consumption of the monitor in the “Off Timer
Mode” is as low as the one of the monitor in
“PowerManger Mode 2” although no setting PC
to operate the Off Timer function is required. The
Off Timer will work while PowerManager is
active, but there would be no advance notice
before the monitor’s power switches off.
2
ADJUSTMENTS & SETTINGS USING THE SCREENMANAGER
33
E
Function
Setup Procedure
(1) Select the “Off Timer” icon and press the Enter
button to display “Off Timer” select menu.
(2) Select “Enable” and press the enter button.
(3) Press the right/left key to adjust how long (1 to
23 hours) the monitor should be in the “On
Period”. Then, press the enter button to return
to the “others” menu.
(4) Select the “Exit” icon and push the Enter
button to exit the ScreenManager.
To Delay Entering the “Off Timer Mode”
To delay entering the “Off Timer Mode”, press
any keys on the front panel located to the left
of the power switch during the “Advance
notice Mode”. The monitor will continue to
operate for an additional 90 minutes. There
will be another advance notice for 15 minutes
as described. Delayed entrance into the “Off
Timer Mode” can be extended as many times
as desired.
(Example)
(1) LED Solid Green
(2) LED Flashing Green
2 Beeps every 15
seconds
(3) LED Flashing Yellow
12 hrs.
12 hrs.
90 min.
15 min.
15 min.
On period
Advance
Notice
mode
Off Timer
Mode
Advance
Notice
mode
Advance
Notice
mode
Power Off
Switch the
power on
34
2
Advance End of
Notice “On Period” Press any keys on
the front/Switch the
Power off and then
on
Advance
Advance End of
Notice
“On Period”
Notice
Press the
any keys on
the front
ADJUSTMENTS & SETTINGS USING THE SCREENMANAGER
E
Function
Reset
Use this function to return all ScreenManager
parameters (size, position, geometry, color,
PowerManager, etc.) to their factory default
settings.
Default settings are as follows.
Screen:
• Contrast:
• Brightness
• Moiré:
100 %
50 %
OFF
Color
• Standard/9,300 K
PowerManager • VESA DPMS/5 sec.
2
Others
•
•
•
•
•
Input Priority:
Beep:
Signal Filter 1:
Signal Filter 2:
Off Timer:
Language
• English
D-Sub
ON
Mode 1
100 %
Disable
ADJUSTMENTS & SETTINGS USING THE SCREENMANAGER
35
3 GETTING THE MOST FROM
YOUR MONITOR
3-1 i·Sound™ Sound Unit
The i·Sound is a separately sold speaker system which connects directly
to the monitor and can be used to support multimedia applications. The
unit includes a microphone function and a headphone jack. For further
details, please consult an authorized EIZO dealer near you.
3-2 Making use of USB (Universal Serial Bus)
- For USB compliant system environmentsThis monitor provides a hub which supports the USB standard. When
connecting to a USB compliant PC or another hub, the monitor functions
as a hub to which the USB compliant peripherals can be easily connected.
As an added advantage, the monitor can be controlled from a PC with a
mouse or keyboard when utilizing the enclosed utility software
“ScreenManager Pro for USB”.
• To utilize the USB hub function or ScreenManager for USB, the
following system environment is required.
• PC equipped with USB ports or another USB hub connected to
the USB compliant PC
• OS (Windows 98/Mac OS 8.5.1 or later)
• EIZO USB cable (MD-C93, enclosed)
• The USB hub function may not work properly with some systems.
Please consult the manufacturer of each system for details about this
feature.
• When the monitor is not on, the peripherals connected to the downstream ports will not operate.
• Even if the monitor is in a power saving mode, USB compliant devices
will function when they are connected to the monitor's USB ports (both
the upstream and the downstream).
Monitor USB Function Setup
Before setup, connect the monitor to the PC with the signal cable (see
page 11) and boot the PC.
36
3
GETTING THE MOST FROM YOUR MONITOR
(For Windows 98)
1) Connect the upstream port of the monitor to the downstream port of
the USB compliant PC or another hub using the EIZO USB cable
(MD-C93).
• When connecting the USB cable, check that the shape of the connector
at the USB cable side matches the shape at the connecting side.
Upstream connector
Upstream Port:
Connect the USB compliant
PC or another hub using the
EIZO USB cable (MD-C93).
2) “EIZO USB Hub” appears on the screen. Insert the Windows 98 CDROM and Click “OK” in the “Insert Disk” window.
3) Follow the instruction of the window. “EIZO USB HID Monitor” will
be detected after the detection of EIZO USB Hub.
Once the above operation is completed, the monitor functions as a USB
hub and the USB compliant peripherals can be connected to the
downstream ports of the monitor.
• Please refer to the readme.txt file for setup, too. Please make sure if
the proper installation is completed by following the confirmation below.
(Confirmation of USB Setup)
1. Click the “Start” button and open the “Control Panel” from the
“Settings”.
2. Select and double click the “System” from the “Control Panel” to
open the “System Properties”.
3. Confirm if the two followings are in the “Device Manager”
window:
- “EIZO USB Hub” appears under “Universal serial bus controller”.
- “EIZO USB HID Monitor” appears under “Human Interface
Devices”.
(For MacOS 8.5.1 or newer)
There is no need to install any software to utilize the USB hub function
when connecting a USB compliant PC (or another USB hub) with the USB
cable (MD-C93).
3
GETTING THE MOST FROM YOUR MONITOR
37
E
Connect the USB compliant peripherals to the downstream ports of
the monitor:
(Connection examples)
EIZO USB
Cable
(MD-C93)
Scanner
Printer
Monitor
Digital
Camera
PC
Mouse
Keyboard
Front port (Example)
Rear port (Example)
Downstream ports:
Connect the cables from USB
compliant peripherals such as a
mouse, keyboard, etc.
Downstream connector
USB Specifications
38
3
USB standard
Rev. 1.0 complied self-powered hub
USB Monitor Control Class
Standard
Rev. 1.0 complied
Downstream power supply
500 mA for each (Max.)
Communication speed
12 Mbps (full), 1.5 Mbps (low)
USB ports
Upstream port x 1
Downstream ports x 4
GETTING THE MOST FROM YOUR MONITOR
Troubleshooting
Problems
Points to check with possible solutions
1) USB function
cannot be setup.
Check that the USB cable is correctly connected.
Check that the PC and OS is compliant to the
USB. (For the USB support of the system,
consult the manufacturer of each system.)
Check the PC’s BIOS setting for the USB. (For
details, refer to the manual of the PC.)
2) • PC hangs.
Check that the USB cable is correctly connected.
Conect the peripherals to other downstream
ports.
If the problem is solved by doing this, contact
an EIZO dealer.
Try the followings:
• Restart the PC.
• Connect the peripherals to the PC directly.
If the problem is solved by doing this, contact
an EIZO dealer.
The power button of the APPLE keyboard does
not operate if it is connected to the EIZO USB
Hub. Please connect the keyboard directly to the
PC. Refer to the instruction of the PC for details.
• The peripherals
connected to the
downstream
ports do not
operate.
ScreenManager Pro for USB (For Windows 98)
The utility software “ScreenManager Pro for USB” is included in the
enclosed utility disk. It is used for controlling the EIZO monitor from a
PC using a mouse or keyboard. It allows control of the screen
adjustment (size, position, distortion, color, contrast, moiré, etc.) from
the OS environment. Furthermore, the adjusted screen data and the
color data can be stored as data files in the PC.
• For more information about ScreenManager Pro for USB setup, refer
to the readme.txt file.
• When using this program, the monitor must be connected to a USB
compliant PC (OS) or another hub with the EIZO USB cable
(enclosed). For instructions, please refer to the previous page.
To set up the “ScreenManager Pro for USB”, execute the “setup.exe”
program in the “App” directory of the “EIZO CRT Utility Disk” and
follow the procedure displayed on the screen. Making sure if the setup is
completed, click “Advanced...” on the “Settings” tab in “Display
Properties” and see if the “EIZO” tab is added.
For details about the program, please refer to the Help menu in the
program.
3
GETTING THE MOST FROM YOUR MONITOR
39
E
4 TROUBLESHOOTING
This page presents problems that can be corrected by the user. If a
problem persists even after applying the suggested remedies, contact an
EIZO dealer.
n Problems caused by incorrectly setting of the termination switch
Problems
1) Misconvergence of colors.
2) Focus is dull.
3) PowerManager does not
work properly in VESA
setting.
4) Slight shadow appears on the
edges of the screen image or
text. (Only for the BNC
connections.)
Points to check with possible solutions
The termination switch on the rear of the monitor
should be set to 75 Ω position (default) for
connection to a single monitor.
If it is set to the ∞ position when using a single
monitor, some problems like 1) ~ 4) may occur.
Check that the switch position is set to 75 Ω
position.
n No picture
Problems
1) Indicator status: OFF
2) Indicator status: GREEN
3) Indicator status: GREEN
(flashing)
4) Indicator status: YELLOW
5) Indicator status: YELLOW
(flashing)
6) “No signal detected” error
message appears.
40
4
TROUBLESHOOTING
Points to check with possible solutions
Check that the power cord is correctly connected.
Try pressing a key on the keyboard, or clicking the
mouse. (The monitor may be in a power saving
mode.)
Check brightness and contrast settings. Minimum
settings will cause screen to be blank.
Try pressing any keys on the front panel. (The
monitor may be in “Advance Notice Mode”).
Try pressing a key on the keyboard, or clicking the
mouse. (The monitor may be in a power saving
mode.)
Try pressing any keys on the front panel or switch
the monitor off and then on. (The monitor may
be in “Off Timer Mode”.)
If the problem persists, switch off the monitor power
for a few minutes, then switch it back on and try
again.
Check that the PC is switched ON.
Check that the signal cable is properly connected
to the graphics board or PC.
Check that the graphics board is correctly inserted
in the PC.
Switch the signal input by pushing the BNC/ DSub selection button on the front control panel.
Problems
7) “Out of range” error
message appears.
(Example)
Points to check with possible solutions
Use the graphics board’s utility software to change
the frequency setting. (Refer to the manual of the
graphics board.)
• Whenever an error signal message appears, the signal frequency will be displayed
in red.
• Error messages will remain on the screen for 30 seconds, and then disappear. An
error message may not appear at all if the signal frequency is extremely high or
extremely low.
n Imaging problems
Problems
1) The screen is partially dark.
Points to check with possible solutions
The CRT is not warmed up. Allow 30 minutes for
the monitor to stabilize.
Degauss the screen. (Use the degaussing feature in
the ScreenManager’s “Others” menu. See page
31.)
This problem may be caused by the earth's
magnetism. Adjust the uniformity in the
ScreenManager's “Screen” menu. See page 20.
2) The entire screen is dark.
Adjust the contrast and brightness using the
ScreenManager’s “Screen” menu. See page 19.
Some signal timings can be the cause of this
problem. To correct this, turn off the monitor,
then hold down the AUTO-SIZING button and
“down” arrow key while turning on the monitor
again. This will change the signal timing and
brighten the screen. If the above operation is
repeated, the screen becomes dark again.
4
TROUBLESHOOTING
41
E
Problems
Points to check with possible solutions
3) The screen is tilted/distorted.
Adjust with the ScreenManager’s tilt and
distortion correcting function until tilt/distortion
seems unnoticeable. See page 20.
Check to see if there are any nearby interfering
electronic devices such as another monitor, an
electric motor, or a speaker (other than an
optional EIZO i·Sound speaker unit). If so, move
the device or move the monitor.
It is sometimes possible to correct distortion and
tilting by reorienting the monitor.
4)• The image vibrates on the
screen.
• A slight shaking movement
of the screen image or
text.
Use of the “Moiré Reduction” feature may cause a
slight vibration. To eliminate the vibration, switch
the feature OFF or reduce the moiré reduction
level. See page 20.
Check that the signal cable is properly connected
to the graphics board or PC.
Check that the graphics board is correctly
mounted in the PC.
The signal cable might be damaged. Please
contact the dealer.
The monitor may be located close to a device that
is generating a magnetic field. Such devices
include speakers (other than the EIZO optional
i·Sound speaker), electric motors, high-voltage
cables, and other monitors. It may be solved by
switching off or moving the interfering device, or
by relocating the monitor.
If the volume level of the EIZO optional i·Sound
speaker is too high, it may, in some cases, cause a
slight vibration. To eliminate, turn down the
volume of the speaker.
• An unstable signal from the graphics board may be the cause of the imaging problem 4)
when using the monitor with a high resolution or in a high refresh mode. (The video
signal from the graphics board might be made irregular due to the use of a high speed
dot clock.) Change the resolution or the refresh rate to another setting.
42
4
TROUBLESHOOTING
Problems
5) The image has a background
shadow.
E
Points to check with possible solutions
Try adjusting the convergence in the
ScreenManager’s Screen menu.
See page 20.
This problem can occur when using BNC
connection and the termination switch is set
incorrectly. The termination switch should be set
to 75 Ω for a connection to a single monitor. See
page 10.
6) The characters and images
have a slight shadow on their
right side.
Change the mode of “Signal Filter 1” function in
the ScreenManager “Others” menu. See page 33.
7) The characters and images
have several vertical bars on
their right side.
Decrease the vertical bars at the “Signal Filter 2”
function in the ScreenManager “Others” menu.
See page 33.
8) Moiré patterns are
distracting.
Go to the ScreenManager’s “Screen” menu.
Switch on the moiré reduction feature and adjust
as necessary. See page 20.
This may be solved by changing the refresh rate.
Change the horizontal and vertical dimensions of
the display area.
Change the selected desktop or wallpaper pattern
to any solid color pattern. For detailed
information on how to change these patterns, refer
to the documentation for the PC and operating
system.
9) The image is flickering.
Flicker will occur with interlaced scanning, or
non-interlaced scanning with a low refresh rate.
All EIZO monitors are capable of reproducing
high refresh rates for non-interlaced scanning. If a
problem occurs when using a non-interlaced
signal, try adjusting the graphics board to increase
the refresh rate (if possible). Refer to the graphics
board manual for information.
4
TROUBLESHOOTING
43
Non-Interlaced / Interlaced
In a “non-interlaced” scan, the electric guns draw the entire image in one vertical
pass, with each pass covering every horizontal line.
In a “interlaced” scan, the guns draw the entire image by scanning vertically twice.
At the first scanning, the guns draw every other horizontal line. At the second, they
draw the other lines. Thus, in a “interlaced scan”, the image flickers more visibly
when compared with a “non-interlaced” scan.
Flicker
The term “flicker” refers to noticeable shimmering that occurs when the image on the
screen is redrawn (“refreshed”) too slowly. A refresh rate of 80 Hz means the image
is redrawn 80 times per second. Most people will notice flicker at image refresh rates
as high as 60 or 70 Hz, whereas refresh rates of 72 Hz or above usually is not
noticeable. Flicker is known to be the cause of visual fatigue.
n Color problems
Problems
Points to check with possible solutions
1) The entire screen appears
bluish or reddish.
The CRT is not warmed up. Allow 30 minutes for
the monitor to stabilize.
2) Color purity is not uniform.
Allow 30 minutes for the monitor to warm up.
Degauss the screen. (Use the degaussing feature in
the ScreenManager’s “Others” menu. See page
31.)
3) Misconvergence of colors.
(red, green, blue)
Allow 30 minutes for the monitor to warm up.
Adjust the convergence using the Convergence
feature in the ScreenManager’s Screen menu. See
page 20.
This problem can occur when using a BNC
connection and the termination switch is set
incorrectly. The termination switch should be set
to 75 Ω for connection to a single monitor.
Explanation of the Characteristics of CRTs
When the monitor is not fully warmed up, the screen may look slightly colored, e.g.
reddish or bluish. This phenomenon is due to the unstableness of the electron gun
during its warm-up period. Please wait for about 30 minutes until the monitor
stabilizes in order to gain its proper color.
44
4
TROUBLESHOOTING
Problems
4) Color correction does not
work properly.
Points to check with possible solutions
E
Allow 30 minutes for the monitor to warm up.
Color Correction does not work properly when
the input signal level is lower than 0.5 Vp-p or
higher than 1.0 Vp-p.
The size of the window may not be appropriate.
Use the Pattern.html file for setup or adjust the
size of the window.
The termination switch on the rear of the monitor
should be set to 75 Ω position (default) when
connecting the monitor with BNC cable.
n Others
Problems
1) The monitor beeps or hums.
Points to check with possible solutions
The monitor emits a humming noise when
executing automatic degaussing at power-ON.
This is not a problem.
The monitor beeps at any time. This is not a
problem. See page 31 for full details.
2)• Control Pad “ENTER key”
does not operate.
• AUTO-SIZING button
does not operate.
3) AUTO-SIZING button does
not work properly.
The Adjustment Lock is probably on. To unlock:
switch off the monitor power, then hold down the
AUTO-SIZING button and switch the monitor
back on. See page 18.
The Auto-sizing function is intended for use on the
Macintosh and on IBM compatibles running
Windows. It may not work properly if either of
the following applies.
- You are running an AT-compatible PC on
MS-DOS (not Windows).
- The background color for the “wallpaper” or
“desktop” pattern is set to black.
Some signals from graphics boards may not
function properly.
• A solid-color screen (i.e. red, green, blue) may appear for an instant while
performing the auto-sizing function, this phenomenon is not a failure.
• For problems with the USB function, refer to the troubleshooting on page 39.
4
TROUBLESHOOTING
45
5 CLEANING
WARNING
• Keep liquids away from the monitor.
Spillage into the cabinet may result in fire, electric shock, or
equipment damage.
If an object or liquid falls/spills into the cabinet, unplug the monitor
immediately. Have the unit checked by a qualified service engineer
before using it again.
Using the monitor in this condition could cause serious injury or
equipment damage.
CAUTION
• To ensure safety, always unplug the monitor before cleaning it.
Failure to do so may result in electric shock.
• Periodically clean the area around the plug.
Buildup of dust, water, or oil on the plug may result in fire.
• Never use thinner, benzene, or other strong solvents, abrasive
cleaners, or alcohol (ethanol, methanol, or isopropyl alcohol) as
these may cause damage to the cabinet or CRT.
Periodic cleaning is recommended to keep the monitor looking new and
to prolong its operational lifetime. Clean the cabinet and CRT areas as
follows.
Cabinet
To remove stains, wipe the cabinet with a soft, lightly moistened cloth
using a mild detergent. Do not spray wax or cleaner directly onto the
cabinet.
CRT Surface
The monitor comes with a special cloth specifically designed to remove
fingerprints and dust from the screen. The cloth is washable, and will
remain effective regardless of the number of times it is washed. If the
supplied cloth is not available, you can clean the CRT surface with
cotton or lens paper.
If necessary, stubborn stains can be removed by moistening part of a
cloth with water to enhance its cleaning power.
46
5
CLEANING
6 SPECIFICATIONS
Electrical Specifications
CRT
55 cm (21 inch) class, 90° deflection invar shadow mask
CRT with Anti-Reflective SuperErgoCoat®
0.23 mm (Horizontal: 0.20 mm)
CRT Dot Pitch
Scan Frequency
Horizontal:
30 kHz-137 kHz (Automatic)
Vertical:
50 Hz-160 Hz (Automatic)
Max. Active Display Area 402 mm (H) × 300 mm (V) (15. 8” (H) × 11.8” (H))
(Viewable image size: 501 mm (19.7”))
* Display size can be set by the user through
microprocessor control panel.
* The actual size displayed can be dependent on the
graphics board or PC utilized.
Power Supply
100-120 VAC±10%, 50 Hz, 2.0 A
220-240 VAC±10%, 50/60 Hz, 0.9 A
Power Consumption
Normal/Max:
140 W/200 W*
(*with EIZO optional speaker & USB attached)
PowerManager Mode 1: Less than 15 W*
PowerManager Mode 2: Less than 3 W* (* When the USB hub is not connected)
Input Connector
D-Sub 13W3 and BNC × 5 (switchable)
Recommended Resolution 1600 dots × 1200 lines
Input Signal
Sync:
• H/V Separate, TTL, Positive/Negative
• H/V Composite, TTL, Positive/Negative
• Sync on Green 0.3 Vp-p, Negative
Video:
• Analog 0.7 Vp-p/75 Ω, Positive
Plug & Play
VESA DDC1/2B
Mechanical Specifications
Dimensions
Weight
494 mm (W) × 486 mm (H) × 520 mm (D)
(19.4” (W) × 19.1” (H) × 20.5” (D))
30.0 kg (66.1 lbs.)
USB Specifications
USB standard
Rev. 1.0 complied self-powered hub
USB Monitor Control Class Rev. 1.0 complied
Standard
Downstream power supply 500 mA for each (Max.)
Communication speed
12 Mbps (full), 1.5 Mbps (low)
USB ports
Upstream port x 1, Downstream ports x 4
Environmental Specifications
Temperature
Humidity
operating: 0°C to 35°C (32 °F to 95 °F)
storage: -20°C to 60°C (-4 °F to 140 °F)
30% to 80% R.H. Non-condensing
Certifications and Standards
100-120 VAC range
220-240 VAC range
UL/C-UL, FCC-B, DHHS, TÜV Rheinland/Ergonomics
Approved, TCO’99, EPA Energy Star® Program
CE, CB, TÜV Rheinland/GS, TÜV Rheinland/Ergonomics
Approved, TCO’99, EPA Energy Star® Program
6
SPECIFICATIONS
47
E
i
APPENDIX
Pin Assignment
Pin-Belegung
Affectation des Broches
D-Sub 13W3 Connector
Signals
A1
A2
A3
1
2
3
4
5
6
7
8
9
10
Separate sync Composite sync Sync on Green
Red
Red
Red
Green
Green
Green
Blue
Blue
Blue
Ground
Ground
Ground
V.Sync
N/A
N/A
Data
Data
Data
Clock
Clock (shorted Clock (shorted
(shorted with (shorted with
(shorted with
9 pin)
9 pin)
9 pin)
H.Sync
Composite sync
N/A
N/A
N/A
N/A
N/A
N/A
N/A
N/A
N/A
N/A
shorted with
shorted with
shorted with
4 pin
4 pin
4 pin
ground
ground
ground
BNC Connector
Connector
Input signal
Sync on green
Composite sync
Separate sync
ii
APPENDIX
H.Sync
V. Sync
Green
Red
Blue
N/A
N/A
Green
Composite
sync
Red
Blue
N/A
Green
Red
Blue
TTL
V. Sync
Green
Red
Blue
TTL H/V
composite
sync
TTL
H. Sync
USB ports
Upstream
(Series B connector)
Downstream
(Series A connector)
No.
Signal
Comments
1
VCC
Cable power
2
- Data
Serial data
3
+ Data
Serial data
4
Ground
Cable Ground
Preset Timing
Vordefinierte Timing-Werte
Signaux prédéfinis
A
2 factory presets shown below have been registered in the monitor’s microprocessor.
Der Monitor unterstützt 2 werkseitig vorgegebene Timing-Werte (siehe unten).
Diese Werte sind im Mikroprozessor Ihres Monitors gespeichert.
Les deux signaux ci-dessous ont été enregistrés en usine dans le microprocesseur du
moniteur.
Resolution
Frequencies
Interlace Sync Polarity
fH (kHz) fV (Hz)
VGA
(text)
VESA
720 × 400
Video Signal
Level
31.47
70.09
Non
H/Negative
V/Positive
0.7V(p-p)/75Ω
1600 × 1200 106.25
85.00
Non
H/Positive
V/Positive
0.7V(p-p)/75Ω
APPENDIX
iii
Dimensions
Abmessungen
Dimensions
mm
(inches)
368.6
(14.5)
494
(19.4)
402
(15.8)
486
(19.1)
10°
300
(11.8)
4°
126
72.5
(5.0)
(2.9)
306
(12.0)
42.8
(1.7)
FRONT VIEW
VORDERANSICHT
VUE DE FACE
iv
APPENDIX
520
(20.5)
SIDE VIEW
SETENANSICHT
VUE DE CÔTÉ
45°
45°
TOP VIEW
DRAUFSICHT
VUE D'EN HAUT
LIMITED WARRANTY
Eizo Nanao Corporation (“EIZO”) and EIZO’s authorized distributors warrant to the original purchaser that the product shall be free
from defect in material and/or workmanship for a period of three (3) years from the date of purchase. The service parts stock for this
model shall be maintained for 5 years after the production is discontinued. To ensure the warranty, EIZO highly suggests that you
return your “Warranty Registration” card to EIZO.
In the event of malfunction during the warranty period attributable directly to faulty material and/or workmanship, EIZO and EIZO’s
authorizes distributors will, at their option, either repair or replace the faulty product with the same or similar model. EIZO and EIZO’s
authorized distributors shall have no obligation under this warranty, however, in the following cases:
(a)
Any defect caused by freight damage, modification, alteration, abuse, misuse, accident, incorrect installation, disaster, faulty
maintenance or improper repair by third party other than EIZO and EIZO’s authorizes distributors.
(b)
Any deformation, discoloration, warping, losing brightness or focus, or whatsoever due to normal deterioration of the product.
(c)
Any incompatibility of the products with subsequent technical innovations or regulations.
(d)
Any defects that are caused by burning of the screen phosphor, scratches on the surface and/or the blistering, peeling or
flaking of the coating/panel on the CRT tube itself.
(e)
Any defect of the product caused by external equipment.
(f)
Any defect of the product on which the original serial number has been altered or removed.
To obtain service under this warranty, the original purchaser must deliver the product, freight prepaid, in its original package or other
adequate package affording an equal degree of protection, assuming the risk of damage and/or loss in transit, to your local EIZO
authorized distributor. The original purchaser must present proof of purchase establishing proof and date of purchase of the
product when requesting warranty service.
Once the warranty period has expired, the warranty on any replaced and/or repaired part also expires.
EIZO AND EIZO’S AUTHORIZED DISTRIBUTORS MAKE NO FURTHER WARRANTIES, EXPRESS OR IMPLIED, WITH RESPECT
TO THE PRODUCT AND ITS QUALITY, PERFORMANCE, MERCHANTABILITY OR FITNESS FOR ANY PARTICULAR USE. IN
NO EVENT SHALL EIZO AND EIZO’S AUTHORIZES DISTRIBUTORS BE LIABLE FOR ANY SPECIAL, CONSEQUENTIAL,
INCIDENTAL OR OTHERS DAMAGES (INCLUDING, WITHOUT LIMITATION, LOSS OR PROFIT) WHETHER OR NOT EIZO AND
EIZO’S AUTHORIZED DISTRIBUTORS HAVE BEEN ADVISED OF THE POSSIBILITY OF SUCH DAMAGES, ARISING OUT OF
ANY BREACH OR REPUDIATION OF CONTRACT, OR WARRANTY, NEGLIGENCE, OR OTHERWISE. THIS EXCLUSION ALSO
INCLUDES ANY LIABILITY WHICH MAY ARISE OUR OF THIRD PARTY CLAIMS AGAINST THE ORIGINAL PURCHASER. THE
ESSENCE OF THE PROVISION IS TO LIMIT THE POTENTIAL LIABILITY OF EIZO AND EIZO’S AUTHORIZES DISTRIBUTORS
ARISING OUT OF THIS AGREEMENT AND/OR SALES.
GARANTIE LIMITEE
Eizo Nanao Corporation (EIZO) et ses distributeurs agréés donnent à l’acquéreur une garantie couvrant les défauts matériels et/ou
de fabrication pendant trois ans à compter de la date d’acquisition. Pour bénéficier de la garantie de trois (3) ans veuillez
renvoyer la carte d'enregistrement à EIZO. Un stock de pièces détachées devra être maintenu dans les 5 années suivant la fin de
vie de ce produit.
Dans l’éventualité d’un défaut de fonctionnement, pendant la période de garantie, attribué directement à un défaut matériel et/ou de
fabrication, EIZO et ses distributeurs agréés, selon leur choix, répareront ou remplaceront le produit défectueux par un modèle
identique ou similaire. EIZO et ses distributeurs agréés, d’après cette garantie, n’ont aucune obligation dans les cas suivants:
(a)
Tous défauts causés par un transport sans précautions, par des modifications, par des changements, par une mauvaise
utilisation, par un accident, par une installation incorrecte, par un désastre, par un entretien défectueux ou une mauvaise
réparation par un tiers autre qu'EIZO et ses distributeurs.
(b)
Toutes déformations, décolorations, perte de luminosité ou de mise au point, ou tout autre défaut dû à la détérioration
normale du produit.
(c)
Toutes incompatibilités des produits avec des innovations ou règlements techniques ultérieurs.
(d)
Tous défauts causés par une brûlure du phosphore de l’écran, par des éraflures, par des décollements, par des écaillements
et/ou des boursouflures de la couche du panneau arrière du tube CRT.
(e)
Tous défauts du produit causés par des équipements externes.
(f)
Tous défauts du produit sur lequel le numéro de série originel a été retiré ou modifié.
Pour profiter de cette garantie, l’acheteur originel doit retourner le produit (en port payé) à son distributeur EIZO agréé, dans son
emballage d’origine ou dans un autre emballage offrant un degré de protection équivalent, et en prenant la responsabilité en cas de
détériorations et/ou de perte pendant le transport. Dans le cas de l’utilisation de la garantie, l’acheteur originel doit présenter
un document prouvant l’achat ainsi que la date d’achat.
Après l’expiration de la période de garantie, cette dernière expire aussi sur les pièces réparèes et/ou remplacées.
EIZO ET SES DISTRIBUTEURS AGREES, NE FOURNISSENT AUCUNE AUTRE GARANTIE, EXPRIMEE OU INSINUEE, EN CE
QUI CONCERNE LE PRODUIT ET SA QUALITE, SES PERFORMANCES, SA COMMERCIALISATION OU SON APTITUDE EN
CAS D’UTILISATIONS PARTICULIERES. EN AUCUN CAS, EIZO ET SES DISTRIBUTEURS AGREES NE SONT RESPONSABLES
DES DOMMAGES CONSECUTIFS, D’IMPORTANCE SECONDAIRE ET DE TOUT AUTRE SORTE (INCLUANT AUCUNE LIMITATION
DE PERTES OU DE PROFITS), QU’EIZO ET SES DISTRIBUTEURS AGREES AIENT ETE AVISES DE LA POSSIBILITE DE TELS
DEGATS, PROVENANT DE LA VIOLATION OU DU REFUS DU CONTRAT OU DE LA GARANTIE, DE NEGLIGENCES OU DANS
TOUT AUTRE CAS, CES RESTRICTIONS S’APPLIQUENT EGALEMENT EN CAS DE RECLAMATION D’UN TIERS CONTRE
L’ACHETEUR ORIGINEL, LE BUT DE CES PROVISIONS EST DE LIMITER LA RESPONSABILITE D’EIZO ET DE SES
DISTRIBUTEURS AGREES DANS LE CADRE DE CET ACCORD ET/OU DE CES VENTTES.
GARANTIE
Eizo Nanao Corporation (EIZO) und die autorisierten Distributoren garantieren dem Erstkäufer für drei (3) Jahre ab
Kaufdatum, daß das von ihnen gelieferte Produkt frei von Material- und Verarbeitungsfehlern ist. Ersatzteile für dieses
Modell werden für fünf (5) Jahre nach Produktionsende lieferbar sein. Um die Garantie zu gewährleisten, empfiehlt EIZO
die Rücksendung der „Warranty Registration Card“ an EIZO.
Im Fall einer Fehlfunktion innerhalb dieser Garantiezeit, die direkt auf Material- und Verarbeitungsfehler zurückzuführen ist,
werden EIZO bzw. die autorisierten Distributoren, nach freier Wahl, das defekte Produkt entweder reparieren oder durch ein
gleiches oder gleichwertiges ersetzen. EIZO bzw. den Distributoren entsteht in folgenden Fällen jedoch keine Verpflichtung
aus dieser Garantie:
(a)
bei jeglichen Transportschäden, Modifizierungen, Änderungen, Mißbrauch, nicht bestimmungsgemäßer Nutzung,
Unglücksfällen, fehlerhafter Installation, fehlerhafter Wartung oder nicht sachgemäßer Reparatur durch Dritte außer
EIZO oder deren autorisierten Distributoren.
(b)
bei jeglicher Verformung, Farbveränderung, Helligkeits- oder Schärfeverlust, oder sonstige Mängel, die durch
normale Abnutzung bedingt sind.
(c)
bei jeglicher Inkompatibilität der Produkte mit künftigen technischen Neuerungen und Regelungen.
(d)
bei jeglichen Defekten, die durch Einbrennen des Phosphors entstehen, Kratzer oder Bläschen auf der
Bildschirmoberfläche, Ablösung der Oberflächenbeschichtung der Bildröhre selbst.
(e)
bei jeglichem Defekt, der auf externes Equipment zurückzuführen ist.
(f)
bei jeglichem Defekt des Produktes, bei dem die Originalseriennummer verändert oder entfernt wurde.
Im Garantiefall muß das Produkt in Original- oder gleichwertiger Verpackung, die denselben Schutz bietet, an Ihren
autorisierten EIZO-Distributor frei zurückgeschickt werden, wobei der Käufer das Risiko für Verlust oder Beschädigung trägt.
Garantieleistungen können nur unter Nachweis des Kaufbeleges durch den Käufer in Anspruch genommen werden.
Die 3 jährige Garantiedauer verlängert sich durch Austausch und/oder Reparatur von Teilen nicht.
EIZO und die autorisierten Distributoren übernehmen keine weitergehende Garantie, weder ausdrücklich noch eingeschlossen, in
Hinsicht auf das Produkt und seine Qualität, auf Leistungsmerkmale, auf Vermarktungsfähigkeit oder seine Eignung für spezielle
Anwendungen. In keinem Fall haftet EIZO bzw. die Distributoren für besondere, zufällige, Folge- oder andere Schäden (einschl.
entgangenem Gewinn) gleichgültig, ob Sie auf die Möglichkeit eines solchen Schadens, der aus Verstoß oder Verletzung von Vertragsoder Garantiebestimmungen, sowie Fahrlässigkeit oder ähnlichem entstehen kann, hingewiesen wurden. Ausgeschlossen ist auch
jede Verantwortung, die aus möglichen Ansprüchen Dritter gegen den Erstkäufer entstehen kann. Die Absicht dieser Bestimmung ist
die Einschränkung der eventuellen Haftung EIZOs oder der autorisierten Distributoren, die aus dieser Vereinbarung und/oder dem
Kauf entstehen könnte.
GARANTIA LIMITADA
Eizo Nanao Corporation (“EIZO”) y los distribuidores autorizados de EIZO garantizan al comprador original que el producto
estará libre de defectos en material y/o mano de obra por un periodo de tres (3) años desde la fecha de compra. El stock de
piezas de repuesto será mantenido durante cinco años desde que acabe la producción de este modelo. Para que la garantía
sea válida, EIZO sugiere encarecidamente, que se envíe a EIZO la tarjeta de Registro de Garantía.
En el caso de mal funcionamiento atribuible directamente a defectos de material y/o mano de obra durante el periodo de
garantía, EIZO y sus distribuidores autorizados se reservan el derecho de reparar o reemplazar el producto defectuoso por el
mismo o similar modelo. No obstante, EIZO y sus distribuidores autorizados no están obligados por esta garantía en los
siguientes casos:
(a)
Cualquier defecto producido por daños en el transporte, modificación, alteración, abuso, maltrato, accidente, instalación
incorrecta, desastre, mal mantenimiento o reparación por parte de cualquiera que no sea EIZO o alguno de sus
distribuidores autorizados.
(b)
Cualquier deformación, decoloración, perdida debrillo o foco, o todo lo causad por eldeterioro normal del producto.
(c)
Cualquier incompatibilidad de los productos con reglamentaciones o innovaciones tecnológicas posteriores.
(d)
Cualquier defecto causado por el desgaste del fósforo de la pantalla, rayas en la superficie y/o la formación de burbujas,
desconchamientos o peladuras del panel del propio tubo de rayos catódicos.
(e)
Cualquier defecto del producto producido por equipamiento externo.
(f)
Cualquier defecto del producto en el cual el número de serie original haya sido alterado o retirado.
Para obtener la prestación del servicio bajo esta garantía, el comprador original debe devolver el producto al distribuidor
autorizado de EIZO, con los gastos de envío pagados, en su embalaje original o en otro que ofrezca igual grado de protección
y asumiendo el riesgo de daño y/o pérdida durante el envío. El comprador original debe presentar, cuando así se lo pida
el servicio de garantías, una prueba con la fecha y el lugar de compra del producto.
Una vez que el periodo de garantía finalice, también se da por terminada la garantía sobre cualquier parte reparada y/o
sustituida.
EIZO Y SUS DISTRIBUIDORES AUTORIZADOS NO CUBREN MAS GARANTIAS, EXPRESADAS O IMPLICITAS, CON
RESPECTO AL PRODUCTO Y SU CALIDAD, PRESTACIONES, CAPACIDAD COMERCIAL O SALUD PARA CUALQUIER
USO EN PARTICULAR. EN NINGUN CASO EIZO Y SUS DISTRIBUIDORES AUTORIZADOS SERAN RESPONSABLES DE
CUALQUIER OTRO DAÑO (INCLUYENDO, SIN LIMITACION, PERDIDAS O BENEFICIOS) HAYAN O NO AVISADO EIZO Y
SUS DISTRIBUIDORES AUTORIZADOS DE LA POSIBILIDAD DE TALES DAÑOS, COMO CONSECUENCIA DE CUALQUIER
INCUMPLIMIENTO O RECHAZO DE CONTRATO, GARANTIA, NEGLIGENCIA U OTROS. ESTA EXCLUSION TAMBIEN
INCLUYE CUALQUIER RESPONSABILIDAD QUE PUEDA SURGIR DE DEMANDAS DE TERCEROS CONTRA EL
COMPRADOR ORIGINAL. LA ESENCIA DE ESTA DISPOSICION ES LIMITAR LA RESPONSABILIDAD POTENCIAL QUE
PUEDA SURGIR A EIZO Y SUS DISTRIBUIDORES AUTORIZADOS DE ESTE ACUERDO Y/O VENTA.
GARANZIA LIMITATA
Eizo Nanao Corporation (in seguito denominata EIZO) e i distributori autorizzati EIZO garantiscono il prodotto per quanto riguarda
sia i difetti di materiale sia i difetti di lavorazione per il periodo di anni tre (3) dalla data di acquisto. Il magazzino delle parti di
ricambio per questo modello dovrà essere mantenuto per 5 anni dopo il termine della produzione. La scheda di registrazione del
cliente, qui allegata, deve essere compilata e spedita entro dieci (10) giorni dalla data di acquisto.
Nel caso in cui, nel periodo di garanzia, si verifichino dei malfunzionamenti imputabili ai materiali e/o alla manodopera, EIZO e i
distributori autorizzati EIZO, potranno, a loro scelta, riparare o sostituire il prodotto difettoso con uno identico o analogo. EIZO e i
distributori autorizzati EIZO non si assumono alcuna responsabilità nei seguenti casi:
(a)
Difetti causati da trasporto, modifiche, uso improprio, cause accidentali, installazione eseguita scorrettamente, manutenzione
carente o tentativi di riparazione eseguiti da terzi che non siano EIZO e i distributori autorizzati EIZO.
(b)
Qualsiasi deformazione, scolorament, perdita di luminosità o funco, o qualsiasi altro tipo di alterazione dovuto al normale
deteriorament del prodotto.
(c)
Qualsiasi incompatibilità del prodotto con standard industriali introdotti successivamente.
(d)
Qualsiasi difetto relativo alla bruciatura dei fosfori dello schermo e al degrado del rivestimento interno del tubo catodico.
(e)
Qualsiasi difetto derivante dall’uso di dispositivi esterni al prodotto.
(f)
Qualsiasi difetto di qualsiasi origine se il numero di serie del prodotto è stato alterato o cancellato.
Per usufruire del servizio di assistenza nei termini di questa garanzia, il cliente deve far pervenire il prodotto, franco di porto,
nell’imballo originale o in imballo analogo che garantisca lo stesso grado di protezione, a EIZO o a un distributore autorizzato
EIZO. Il cliente originale deve presentare un documento di prova che dimostri inequivocabilmente la data di acquisto
del prodotto.
Quando la garanzia del monitor termina, anche la garanzia sulle parti sostituite o riparate termina.
EIZO E I DISTRIBUTORI AUTORIZZATI EIZO NON RILASCIANO ALCUNA GARANZIA, IMPLICITA O ESPLICITA,
RELATIVAMENTE AL PRODOTTO E ALLA SUA QUALITÀ, ALLE SUE PRESTAZIONI, ALLA SUA VENDIBILITÀ E AL SUO
IMPIEGO PER SCOPI PARTICOLARI. IN NESSUN CASO EIZO E I DISTRIBUTORI AUTORIZZATI EIZO POSSONO ESSERE
RITENUTI RESPONSABILI DI QUALSIASI DANNO, DIRETTO O INDIRETTO (IVI COMPRESI QUELLI CONCERNENTI LA PERDITA
DI PROFITTI, L’INTERRUZIONE DELL’ATTIVITÀ E SIMILI) DERIVANTI DALL’IMPIEGO E DALL’IMPOSSIBILITÀ DI USO DI
PRODOTTI EIZO ANCHE SE EIZO È STATA AVVERTITA DELLA POSSIBILITÀ DI TALI DANNI. QUESTA ESCLUSIONE DI
RESPONSABILITÀ RIGUARDA ANCHE I RISARCIMENTI CHE TERZI POSSONO RECLAMARE NEI CONFRONTI
DELL’ACQUIRENTE. QUESTA NOTA VUOLE LIMITARE LA RESPONSABILITÀ DI EIZO E DEI DISTRIBUTORI AUTORIZZATI
EIZO AL CONTENUTO DELL’ACCORDO DI VENDITA.
GARANTIVILLKOR
Eizo Nanao Corporation (”EIZO”) och EIZOs auktoriserade distributörer garanterar ursprungskunden att produkten skall vara
fri från materialfel och/eller tillverkningsfel under tre (3) år från inköpsdatum. Reservdelar för denna modell kommer att lagerhållas
under 5 år efter att produktionen upphört. Vi rekommenderar att Ni skickar in det bifogade registreringskortet till oss för
att registrering av korrekt inköpsdatum skall kunna ske.
Om det skulle uppstå något fel på produkten under garantitiden som kan relateras till materialfel eller tillverkningsfel förbinder
EIZO och EIZOs distributörer sig att avhjälpa felet eller byta ut den felaktiga produkten (EIZO eller distributören bestämmer
vilket) mot samma eller likvärdig modell. EIZO och EIZOs distributörer tar dock inte något ansvar för fel som uppstått under
någon eller några av följande omständigheter:
(a)
Skador uppkomna vid frakt, olycka, katastrof, åverkan, modifiering, felaktig installation, felaktigt användande, bristfälligt
underhåll eller felaktig reparation utförd av annan än EIZO alternativt EIZOs auktoriserade distributör.
(b)
Bilddeformation, färgfel, vitjämnhetsfel, avtagande ljusstyrka, försämrad skärpa och andra bildfel som beror på normal
förslitning.
(c)
Inkompatibilitet som uppstått på grund av teknisk utveckling.
(d)
Defekter som uppkommit på grund av fosforbränning, repor på ytan och/eller övriga skador på ytbehandlingen/glaspanelen
på bildröret.
(e)
Defekter som orsakats av extern utrustning.
(f)
Defekter på produkter där serienumret har ändrats eller tagits bort.
För att få garantiservice måste ursprungskunden leverera produkten med betald frakt till EIZOs lokala distributör. Produkten
skall vara packad i originalförpackning, eller lämpligt förpackad med hänsyn till risken för transportskador. Ursprungskunden
skall kunna visa när produkten köpts med kvitto/faktura från inköpsstället för att garantin skall gälla.
När garantiperioden har gått ut, upphör även garantin på utbytta/reparerade delar.
EIZO OCH EIZOs AUKTORISERADE DISTRIBUTÖRER UTFÄSTER INGA YTTERLIGARE GARANTIER, KLART UTTRYCK
ELLER UNDERFÖRSTÅTT, MED AVSEENDE PÅ PRODUKTEN OCH DESS KVALITET, PRESTANDA, SÄLJBARHET ELLER
LÄMPLIGHET FÖR SPECIELLA ANVÄNDNINGSOMRÅDEN. INTE I NÅGOT FALL KAN EIZO ELLER EIZOs AUKTORISERADE
DISTRIBUTÖRER STÄLLAS ANSVARIGA FÖR EVENTUELLA FEL, SKADOR, FÖLJDFEL (INKLUDERAR ÄVEN, UTAN
BEGRÄNSNING, FÖRLORAD INKOMST ELLER AFFÄRSVINST) OAVSETT OM EIZO ELLER EIZOs AUKTORISERADE
DISTRIBUTÖRER UNDERRÄTTATS OM MÖJLIGHETEN AV SÅDANA SKADOR BEROENDE PÅ BROTT AV ELLER
FÖRNEKANDE AV AVTAL ELLER GARANTI, FÖRSUMMELSE ELLER ANNAT. DETTA UNDANTAG INNEFATTAR ÄVEN ALLT
ANSVAR TILL FÖLJD AV KRAV FRÅN TREDJE MAN RIKTADE MOT URSPRUNGSKUNDEN. DESSA VILLKOR SYFTAR
VÄSENTLIGEN TILL ATT BEGRÄNSA DET ANSVAR FÖR EIZO OCH EIZOs AUKTORISERADE ÅTERFÖRSÄLJARE SOM
KAN UPPSTÅ TILL FÖLJD AV DENNA ÖVERENSKOMMELSE OCH/ELLER FÖRSÄLJNING.
Congratulations!
You have just purchased a TCO’99 approved and labelled product! Your choice has provided you
with a product developed for professional use. Your purchase has also contributed to reducing the
burden on the environment and also to the further development of environmentally adapted
electronics products.
Why do we have environmentally labelled computers?
In many countries, environmental labelling has become an established method for encouraging the adaptation of goods and services to the environment. The main problem, as far as
computers and other electronics equipment are concerned, is that environmentally harmful
substances are used both in the products and during their manufacture. Since it is not so far
possible to satisfactorily recycle the majority of electronics equipment, most of these potentially
damaging substances sooner or later enter nature.
There are also other characteristics of a computer, such as energy consumption levels, that are
important from the viewpoints of both the work (internal) and natural (external) environments.
Since all methods of electricity generation have a negative effect on the environment (e.g. acidic
and climate-influencing emissions, radioactive waste), it is vital to save energy. Electronics
equipment in offices is often left running continuously and thereby consumes a lot of energy.
What does labelling involve?
This product meets the requirements for the TCO’99 scheme which provides for international
and environmental labelling of personal computers. The labelling scheme was developed as a
joint effort by the TCO (The Swedish Confederation of Professional Employees), Svenska
Naturskyddsforeningen (The Swedish Society for Nature Conservation) and Statens
Energimyndighet (The Swedish National Energy Administration).
Approval requirements cover a wide range of issues: environment, ergonomics, usability,
emission of electric and magnetic fields, energy consumption and electrical and fire safety.
The environmental demands impose restrictions on the presence and use of heavy metals,
brominated and chlorinated flame retardants, CFCs (freons) and chlorinated solvents, among
other things. The product must be prepared for recycling and the manufacturer is obliged to
have an environmental policy which must be adhered to in each country where the company
implements its operational policy.
The energy requirements include a demand that the computer and/or display, after a certain
period of inactivity, shall reduce its power consumption to a lower level in one or more stages.
The length of time to reactivate the computer shall be reasonable for the user.
Labelled products must meet strict environmental demands, for example, in respect of the
reduction of electric and magnetic fields, physical and visual ergonomics and good usability.
Below you will find a brief summary of the environmental requirements met by this product.
The complete environmental criteria document may be ordered from:
TCO Development
SE-114 94 Stockholm, Sweden
Fax: +46 8 782 92 07
Email (Internet): [email protected]
Current information regarding TCO’99 approved and labelled products may also be
obtained via the Internet, using the address: http://www.tco-info.com/
Environmental requirements
Flame retardants
Flame retardants are present in printed circuit boards, cables, wires, casings and housings.
Their purpose is to prevent, or at least to delay the spread of fire. Up to 30% of the plastic in a
computer casing can consist of flame retardant substances. Most flame retardants contain
bromine or chloride, and those flame retardants are chemically related to another group of
environmental toxins, PCBs. Both the flame retardants containing bromine or chloride and the
PCBs are suspected of giving rise to severe health effects, including reproductive damage in fisheating birds and mammals, due to the bio-accumulative* processes. Flame retardants have been
found in human blood and researchers fear that disturbances in foetus development may occur.
The relevant TCO’99 demand requires that plastic components weighing more than 25 grams
must not contain flame retardants with organically bound bromine or chlorine. Flame
retardants are allowed in the printed circuit boards since no substitutes are available.
Cadmium**
Cadmium is present in rechargeable batteries and in the colour-generating layers of certain
computer displays. Cadmium damages the nervous system and is toxic in high doses. The
relevant TCO’99 requirement states that batteries, the colour-generating layers of display
screens and the electrical or electronics components must not contain any cadmium.
Mercury**
Mercury is sometimes found in batteries, relays and switches. It damages the nervous system
and is toxic in high doses. The relevant TCO’99 requirement states that batteries may not
contain any mercury. It also demands that mercury is not present in any of the electrical or
electronics components associated with the labelled unit.
CFCs (freons)
The relevant TCO’99 requirement states that neither CFCs nor HCFCs may be used during
the manufacture and assembly of the product. CFCs (freons) are sometimes used for washing
printed circuit boards. CFCs break down ozone and thereby damage the ozone layer in the
stratosphere, causing increased reception on earth of ultraviolet light with e.g. increased risks of
skin cancer (malignant melanoma) as a consequence.
Lead**
Lead can be found in picture tubes, display screens, solders and capacitors. Lead damages the
nervous system and in higher doses, causes lead poisoning. The relevant TCO’99 requirement
permits the inclusion of lead since no replacement has yet been developed.
For Europe, etc. (220-240 Vac) Only
CE Marking
Declaration of Conformity
Kind of equipment:
Type-designation:
Monitor
F980 (Model No. MA-21D0)
is in compliance with:
Council Directive 73/23/EEC
Council Directive 89/336/EEC
○
○
○
○
○
○
○
○
○
○
○
○
○
EN60950:1992+A1+A2+A3+A4+A11
EN55022 (classB):1997
EN55024:1998
EN61000-3-2:1995
EN61000-3-3:1995
○
○
○
○
○
○
○
○
○
○
○
○
○
○
○
○
○
○
○
○
○
○
○
○
○
○
○
○
○
○
○
Konformitätserklärung
Geräteart :
Gerätetyp :
Monitor
F980 (Modell-Nr. MA-21D0)
den folgenden Normen oder Vorschriften entspricht:
EU-Richtlinie 73/23/EEC
EU-Richtlinie 89/336/EEC
○
○
○
○
○
○
○
○
○
○
○
○
○
EN60950:1992+A1+A2+A3+A4+A11
EN55022 (classB):1997
EN55024:1998
EN61000-3-2:1995
EN61000-3-3:1995
○
○
○
○
○
○
○
○
○
○
○
○
○
○
○
○
○
○
○
○
○
○
○
○
○
○
○
○
○
○
Déclaration de conformité
Nature de l’équipement :
Type-désignation :
Moniteur
F980 (No. de modèle MA-21D0)
est en conformité avec :
Directive Européenne 73/23/EEC
Directive Européenne 89/336/EEC
EN60950:1992+A1+A2+A3+A4+A11
EN55022 (classB):1997
EN55024:1998
EN61000-3-2:1995
EN61000-3-3:1995
Hinweis zur Ergonomie :
Dieser Monitor erfüllt die Anforderungen an die Ergonomie nach ZH1/618/10.80 durch die
Ansteuerung mit der VGA - Videokarte, 1600 Punkte x 1200 Zeilen, RGB analog, 0,7 Vp-p und
mindestens 85,0 Hz Bildwiederholfrequenz, non interlaced.
Weiterhin wird aus ergonomischen Gründen empfohlen, die Grundfarbe Blau nicht auf dunklem
Untergrund zu verwenden (schlechte Erkennbarkeit, Augenbelastung bei zu geringem Zeichenkontrast.)
PTB Note
Eigensichere Kathodestranlröhre nach Anlage III Röntgenverordnung. Die in diesem Geraet entstehende
Röntgenstrahlung ist durch die eigensichere Kathodenstrahlroehre ausreichend abgeschirmt.
Recycle Auskunft
Die Rücknahme dieses Produktes nach Nutzungsende übernimmt EIZO in Deutschland zusammen mit
dem Partner von Roll MBB Recycling GmbH.
Dort werden die Geräte in ihre Bestandteile zerlegt, die dann der Wiederverwertung zugeführt werden.
Um einen Abholtermin zu vereinbaren und die aktuellen Kosten zu erfahren, benutzen Sie bitte folgende
Rufnummber: 02153-73 35 00. Weitere Informationen finden Sie auch unter der Internet-Adresse:
www.eizo.de.
Hinweis
Die Bildroehre dieses Monitors is frei von Cadmium.
○
For U.S.A, Canada, etc. (rated 100-120 Vac) Only
FCC Declaration of Conformity
We, the Responsible Party
EIZO NANAO TECHNOLOGIES INC.
5710 Warland Drive, Cypress, CA 90630
Phone: (562) 431-5011
declare that the product
Trade name: EIZO
Model: FlexScan F980
is in conformity with Part 15 of the FCC Rules. Operation of this product is subject to
the following two conditions: (1) this device may not cause harmful interference, and (2)
this device must accept any interference received, including interference that may cause
undesired operation.
This equipment has been tested and found to comply with the limits for a Class B digital
device, pursuant to Part 15 of the FCC Rules. These limits are designed to provided
reasonable protection against harmful interference in a residential installation. This
equipment generates, uses, and can radiate radio frequency energy and, if not installed and
used in accordance with the instructions, may cause harmful interference to radio
communications. However, there is no guarantee that interference will not occur in a
particular installation. If this equipment does cause harmful interference to radio or
television reception, which can be determined by turning the equipment off and on, the user
is encouraged to try to correct the interference by one or more of the following measures.
*Reorient or relocate the receiving antenna.
*Increase the separation between the equipment and receiver.
*Connect the equipment into an outlet on a circuit different from that to which the receiver
is connected.
*Consult the dealer or an experienced radio/TV technician for help.
Changes or modifications not expressly approved by the party responsible for compliance
could void the user’s authority to operate the equipment.
Note
Use the attached specified cable below or EIZO signal cable with this monitor so as to keep
interference within the limits of a Class B digital device.
-AC Cord
-Signal Cable (D-SUB mini 15 pin - D-SUB 13W3, MD-C88)
Canadian Notice
This Class B digital apparatus complies with Canadian ICES-003.
Cet appareil numérique de le classe B est comforme à la norme NMB-003 du Canada.