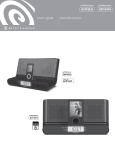
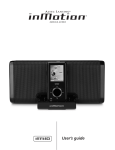
Download Altec Lansing inMotion IMV712 User`s guide
Transcript
IMV712
User’s guide
Guía del usuario
The lightning flash with arrowhead, within an
equilateral triangle, is intended to alert the user to the
presence of uninsulated “dangerous voltage” within the
product’s enclosure that may be of sufficient magnitude
to constitute a risk of electric shock to persons.
Caution: To prevent the risk of electric shock, do not
remove cover (or back). No user-serviceable parts
inside. Refer servicing to qualified service personnel.
IMPORTANT SAFETY INSTRUCTIONS
The exclamation point within an equilateral triangle is
intended to alert the user to the presence of important
operating and maintenance (servicing) instructions in
the literature accompanying the appliance.
ALTEC LANSING INC. ONE YEAR LIMITED WARRANTY
(TWO-YEAR LIMITED WARRANTY IN THE EUROPEAN UNION
1. Read these instructions.
AND
ASIA)
What Does The Warranty Cover?: Altec Lansing warrants that its products shall be free from
defects in materials or workmanship, with the exceptions stated below.
2. Keep these instructions.
3. Heed all warnings.
What Is The Period Of Coverage?: For units purchased in European Union or Asia, this warranty
runs for two years from the date of purchase. For units not purchased in Europe or Asia, this
warranty runs for one year from the date of purchase. The term of any warranties implied by
law shall expire when your limited warranty expires. Some states and/or Member States in the
European Union do not allow limitations on how long an implied warranty lasts, so the above
limitation may not apply to you.
4. Follow all instructions.
5. Do not use this apparatus near water — This apparatus shall not be exposed to dripping
or splashing, and no objects filled with liquids, such as vases, shall be placed on the
apparatus.
6. Clean only with dry cloth.
What Does The Warranty Not Cover?: This warranty does not cover any defect, malfunction or
failure that occurs as a result of: improper installation; misuse or failure to follow the product
directions; abuse; or use with improper, unintended or faulty equipment. (For information on
proper installation, operation and use consult the manual supplied with the product. If you
require a replacement manual, you may download a manual from www.alteclansing.com.)
Also, consequential and incidental damages are not recoverable under this warranty. Some
states do not allow the exclusion or limitation of incidental or consequential damages, so the
above limitation or exclusion may not apply to you.
7. Do not block any ventilation openings. Install in accordance with the manufacturer’s
instructions. The apparatus should not be situated on a bed, sofa, rug or similar surface
that may block the ventilation openings. The apparatus must not be placed in a built-in
installation, such as a closed bookcase or cabinet that may impede the flow of air
through the ventilation openings. Ventilation should not be impeded by covering the
openings with items such as newspapers, tablecloths, curtains, etc.
8. Do not install near any heat sources such as radiators, heat registers, stoves, or other
apparatus (including amplifiers) that produce heat.
What Will Altec Lansing Do To Correct The Problem?: Altec Lansing will, at its option, repair or
replace any product that proves to be defective in material or workmanship. If your product is
no longer being manufactured, or is out of stock, at its option, Altec Lansing may replace your
product with a similar or better Altec Lansing product.
9. No naked flame sources, such as lighted candles, should be placed on the apparatus.
10. Do not defeat the safety purpose of the polarized or grounding-type plug. A polarized
plug has two blades with one wider than the other. A grounding type plug has two
blades and a third grounding prong. The wide blade or the third prong are provided for
your safety. If the provided plug does not fit into your outlet, consult an electrician for
the replacement of the obsolete outlet.
How To Get Warranty Service: To get a covered product repaired or replaced, you must contact
Altec Lansing during the warranty period by email ([email protected]). You must
include in your email, your name, address, email address, telephone number, date of purchase
and a complete description of the problem you are experiencing. In the United States, you may
alternatively contact Altec Lansing by telephone at 1-800-ALTEC88 — please be prepared to
provide the same information. If the problem appears to be related to a defect in material or
workmanship, Altec Lansing will provide you a return authorization and instructions for return
shipment. Return shipments shall be at the customer’s expense, and the return must be
accompanied by the original proof of purchase. You should insure the shipment as appropriate
because you are responsible for the product until it arrives at Altec Lansing.
11. Protect the power cord from being walked on or pinched — particularly at plugs,
convenience receptacles, and the point where they exit from the apparatus.
12. Do not install in an area which impedes the access to the power plug. Disconnecting the
power plug is the only way to completely remove power to the product and must be
readily accessible at all times.
13. Power source — Use only power supplies of the type specified in the operating
instructions or as marked on the appliance. If a separate power supply is included with
this apparatus, do not substitute with any other power supply — use only manufacturerprovided power supplies.
How Will State Law Affect Your Rights?: This warranty gives you specific legal rights, and
you may also have other rights which vary from state to state. Please note that in the
European Union, you as a consumer might have other legal rights under national legislation of
European Union Member States governing the sale of Altec Lansing’s goods. Those rights are
not affected by this guarantee.
14. Unplug this apparatus during lightning storms or when unused for long periods of time.
15. Refer all servicing to qualified service personnel. Servicing is required when the apparatus
has been damaged in any way, such as power-supply cord or plug is damaged, liquid has
been spilled or objects have fallen into the apparatus, the apparatus has been exposed to
rain or moisture, does not operate normally, or has been dropped. For service, refer to
qualified service personnel, return to the dealer, or call the Altec Lansing service line for
assistance.
The above limited warranties and remedies are sole warranties and remedies available to
purchaser, if, and to the extent, valid and enforceable under the applicable law.
CUSTOMER SERVICE
16. For products which incorporate batteries, please refer to local regulations for proper
battery disposal.
The answers to most setup and performance questions can be found in the Troubleshooting
guide. You can also consult the FAQs in the customer support section of our Web site at
www.alteclansing.com. If you live in North America and still can’t find the information you
need, please call our customer service team for assistance before returning the speakers to
your retailer under their return policy.
17. Only use attachments/accessories specified by the manufacturer.
18. Use only with the cart, stand, tripod, bracket, or table specified by the
manufacturer or sold with the apparatus. When a cart is used, use caution
when moving the cart/apparatus combination to avoid injury from tip-over.
Tel: 800-258-3288
Email: [email protected]
If you live outside of North America, please visit our website at www.alteclansing.com and
select your region to locate your country’s distributor.
For the most up-to-date information, be sure to check our Web site at www.alteclansing.com.
INTERNATIONAL DISTRIBUTION
International customers: For information regarding the distribution of Altec Lansing products
in your country, please visit www.alteclansing.com and click on your region.
DISPOSAL
OF
OLD ELECTRICAL & ELECTRONIC EQUIPMENT
This symbol on the product or on its packaging indicates that this product shall not
be treated as household waste. Instead it shall be handed over to the applicable
collection point for the recycling of electrical and electronic equipment. By ensuring
this product is disposed of correctly, you will help prevent potential negative
consequences for the environment and human health, which could otherwise be
caused by inappropriate waste handling of this product. The recycling of materials will help to
conserve natural resources. For more detailed information about recycling of this product,
please contact your local city office or your household waste disposal service.
2
INMOTION IMV712
Connect your IPod
To connect your iPod to the IMV712:
• Place your iPod docking adaptor in the docking bay.
iPod docking adaptors may come with your iPod, or
may be purchased separately from Apple. (See Apple
stores or www.apple.com.)
• Place your iPod into the inMotion iMV712 iPod dock
and press down until it is fully seated.
• Connect the DC power supply to the rear of the
inMotion iMV712, then insert the power supply into
a wall outlet.
• Turn on the inMotion iMV712 by pushing the on/off
switch located at the rear of the unit. The LCD screen
will turn on.
• Push the source button (“SOURCE”) repeatedly until
“iPod” appears on the LCD screen.
• Turn on your iPod.
DIGITAL MINI-THEATER
®
FOR IPOD
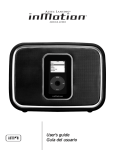
A MINI THEATER FOR YOUR IPOD VIDEO? HOW’S THAT
SOUND? Leave it to the makers of the first iPod speaker
system to come up with a mini-theater solution for the
home that’s this good! The iMV712 features crystal-clear
sound delivered by two specially engineered, 3-inch
neodymium speakers and a built-in, 4-inch, side-firing
subwoofer plus a large, 8.5-inch high resolution
widescreen display. It’s really convenient for charging
your iPod video. It features an enhanced wireless
remote for iPod navigation. And it’s compatible with
any dockable iPod or most other portable media players
with the included adaptor. Experience your iPod video
in a whole new light with the iMV712.
Connect other audio devices (AUX)
The inMotion iMV712 includes an audio input jack that
allows you to play audio from alternate sources, such
as non-dockable iPod models, CD players, MP3 players,
and computers. To connect the inMotion iMV712 to an
alternate audio source, follow the steps below.
• Connect one end of the 3.5 mm stereo cable to the
auxiliary input jack (AUX INPUT) located on the back
of the inMotion iMV712, and the other end to the
headphone or line out jack on your alternate audio
device.
• Connect the DC power supply to the rear of the
inMotion iMV712, then insert the power supply into
a wall outlet.
• Turn on the inMotion iMV712 by pushing the on/off
switch located at the rear of the unit. The LCD screen
will turn on.
• Push the “SOURCE” button repeatedly until “AUX”
appears on the LCD screen.
• Turn on the audio source.
• Set the volume on the audio source at mid-level.
• Set the volume on the inMotion iMV712 at minimum
level and adjust upward to a comfortable listening
level.
Made for:
•
•
•
•
•
iPod
iPod
iPod
iPod
iPod
nano
video
with color display
mini
Box Contents
Refer to the iMV712 Quick Connect Card to identify
these items.
• inMotion iMV712 mini theater system
• Power supply
• 3.5mm stereo cable
• RCA cable
• Universal well adaptors for iPod
• Remote control
• Universal MP3 cradle
• User’s guide and quick connect instructions
Placing the
INMotion IMV712
Position the inMotion iMV712 on a level surface.
Connect other audio/video devices
on the INMotion IMV712 (AV)
Connecting to audio and video devices
The inMotion iMV712 includes audio/video RCA input
jacks that allow you to connect alternate audio and
video sources, such as digital cameras, camcorders,
portable DVD players, VCRs, and video gaming consoles.
To connect the inMotion iMV712 to alternate audio and
video sources, follow the steps below:
Warning: Do not insert the inMotion iMV712’s power
plug into a wall outlet until you connect other devices
such as your iPod or alternate audio source. Also, turn
off any device before connecting it to the inMotion
iMV712.
3
Muting the System
• Connect one end of the RCA cable to the three RCA
input jacks located on the back of the inMotion
iMV712, and the other end to the three RCA output
jacks located on the back of the alternate audio and
video source.
• Connect the DC power supply to the rear of the
inMotion iMV712, then insert the power supply into
a wall outlet.
• Turn on the inMotion iMV712 by pushing the on/off
switch located at the rear of the unit. The LCD screen
will turn on.
• Push the “SOURCE” button repeatedly until “AV”
appears on the LCD screen.
• Turn on alternate audio and video source.
• Set the volume on the alternate audio and video
source at mid-level.
• Set the volume on the inMotion iMV712 at minimum
level and adjust upward to a comfortable listening
level.
To mute the inMotion iMV712, press the “MUTE”
button on the remote control once. The mute icon will
be displayed on the LCD screen. Press this button again
to restore the sound.
Navigating Menu options with the remote
The inMotion iMV712’s menu options allow you to
control picture, function, and system settings using the
remote control and the set-up menu on the LCD screen.
• Pause the iPod.
• Press the “MENU” button on the remote for three
seconds to display the set-up menu on the inMotion
iMV712 LCD screen.
• Press the “MENU” button again to navigate through
the menus for picture (“PICTURE”), function
(“FUNCTION”) and system (“SYSTEM”).
Picture (“PICTURE”) Menu – for brightness, contrast,
and color controls
• Press the “MENU” button located on the remote
control for three seconds to enter the set-up menu on
the LCD screen.
• Use the up and down arrows to select the brightness
(“BRIGHTNESS”), contrast (“CONTRAST”), and color
(“COLOR”) of the LCD screen to suit your preferences.
The default setting is 50.
• Use the left and right arrows to make adjustments to
the selected setting.
• To reset the picture menu to the manufacturer’s
default settings, select the “RESET” option and push
the left or right arrow.
Connect the IPod video or IPod photo
on a separate TV set (S-Video)
The inMotion iMV712 includes a pass-through video
feature that allows you to display videos and photos
from your iPod onto a separate television set. To
connect the inMotion iMV712 to a separate television
set or VCR, follow the steps below:
• Make sure the power to your television set or VCR is
turned off.
• Locate an S-Video cable (sold separately).
• Connect one end of the S-Video cable to the S-Video
port on the back of the inMotion iMV712 and the
other end to the S-Video input on your television set
or VCR.
• Connect the DC power supply to the rear of the
inMotion iMV712, then insert the power supply into
a wall outlet.
• Turn on the inMotion iMV712 by pushing the on/off
switch located at the rear of the unit. The LCD screen
will turn on.
• Turn on the television set or VCR.
Note: Only the video will play through the VCR. Enjoy
the sound using the inMotion iMV712 speakers.
Function (“FUNCTION”) Menu – for screen orientation
and screen aspect ratio selections
• Press the “MENU” button located on the remote
control for three seconds to enter the set-up menu on
the LCD screen.
• Press the “MENU” button again to select the function
(“FUNCTION”) menu.
• Use the up and down arrows to select the screen
orientation (“NORMAL”) or screen aspect ratio
(“ZOOM”). The screen orientation (“NORMAL”) flips
the screen upside down (“DOWN”) or back to right
side up (“NORMAL”). The screen aspect ratio
(“ZOOM”) allows you to adjust the screen aspect ratio
of your video source – 4:3 (standard TV) or 16:9
(widescreen).
• Use the left and right arrows to adjust the selected
setting.
Placing the system in standby mode
To place the inMotion iMV712 in standby mode, press
the standby button
on the remote control. Press this
button again to take the system off the standby mode.
4
level will appear on the LCD screen. The master volume
can also be controlled by pressing the “VOLUME +” and
“VOLUME VOL –“ buttons on the remote control.
System (“SYSTEM”) Menu – for video setting selection
• Press the “MENU” button located on the remote
control for three seconds to enter the set-up menu on
the LCD screen.
• Press the “MENU” button twice to select the system
(“SYSTEM”) menu.
• Use the left and right arrows to select the appropriate
video setting – TV SYSTEM PAL, TV SYSTEM NTSC, TV
SYSTEM SECAM, or TV SYSTEM AUTO. For additional
information on which setting is appropriate for your
video source, consult the user manual for your TV.
Controlling treble and bass
To control treble or bass levels, press the “+” and “–”
buttons located near the words “TREBLE” or “BASS” on
the remote control.
Changing the remote control battery
Remove the battery cover by pressing the tab and
pulling out the cover.
Caution: Danger of explosion if battery is incorrectly
replaced. Replace only with the same or equivalent
type. The battery shall not be exposed to excessive heat
such as sunshine, fire or the like.
Controlling the volume
The “VOL +” and “VOL –” buttons on the top of the
inMotion iMV712 are the master volume controls. Press
and hold the “VOL +” button to increase the volume and
the “VOL –” button to decrease the volume. The volume
Troubleshooting
Symptom
Possible Problem
Solution
The LCD
screen is off
(AC
Operation).
The power supply is not connected or
has not been turned on.
Insert the connector from the power supply into the DC
connector on the back of the inMotion iMV712. After this
connection is made, insert the power supply into a wall
outlet. Then, turn on the inMotion iMV712 by pushing the
on/off switch in the rear of the unit.
The surge protector (if used) is not
turned on.
If the power supply is plugged into a surge protector,
make sure the surge protector is also switched on.
The wall outlet is not functioning.
Plug another device into the same wall outlet to confirm
the outlet is working.
The volume is set too low.
The “VOL +” and “VOL –“ buttons on the top of the
inMotion iMV712 are the master volume controls. Press
and hold the “VOL +” button to increase the volume.
No sound
comes from
the speakers.
Check the volume level on alternate audio source device
and set at mid-level.
The iPod is not correctly seated into the
docking station.
Turn off the iPod, remove it from the docking station,
reseat it, and turn it on again.
If using an alternate audio source, the
audio source is not properly connected
to the inMotion iMV712 or there is a
problem with the alternate audio
source.
• Follow the instructions in the “Connecting to other
devices” section.
• Set the volume on the audio source at mid-level.
• Set the volume on the inMotion iMV712 at minimum
level and adjust upward to a comfortable listening level.
5
Symptom
Possible Problem
Solution
A crackling
sound comes
from the
speakers.
The iPod is not correctly seated into the
docking station.
Turn off the iPod, remove it from the docking station,
reseat it, and turn it on again.
If using an alternate audio source, the
audio source is not properly connected
to the inMotion iMV712 or there is a
problem with the alternate audio
source.
• Follow the instructions in the “Connecting to other
devices” section.
• Set the volume on the audio source at mid-level.
• Set the volume on the inMotion iMV712 at minimum
level and adjust upward to a comfortable listening level.
A crackling
sound comes
from the
speakers
(when
connected
to PC or
laptop).
The operating system’s volume level is
set too high.
Check the operating system volume level and decrease it
if necessary.
The sound is
distorted.
The inMotion iMV712’s volume level is
set too high.
The “VOL +” and “VOL –“ buttons on the top of the
inMotion iMV712 are the master volume controls. Press
and hold the “VOL –” button to decrease the volume.
The iPod EQ settings are turned on.
Turn off the iPod EQ settings (for more information, please
consult your iPod user’s guide.)
There is
radio
interference.
The unit is too close to a radio tower.
Move the unit to a different location.
Intermittent
buzzing.
The unit is located too close to a GSM
cell phone.
Move the GSM cell phone away from the unit.
6
La figura de relámpago que termina en punta de flecha
y se encuentra dentro de un triángulo equilátero, tiene
por finalidad alertar al usuario de la presencia de
“voltaje peligroso” sin aislamiento en el interior del
producto que podría tener potencia suficiente para
constituir riesgo de choque eléctrico para las personas.
INSTRUCCIONES
Precaución: Para evitar el riesgo de choque eléctrico,
no retire la cubierta (o parte posterior). En su interior
hay piezas que no debe manipular el usuario. El
servicio debe realizarlo personal de servicio calificado.
El signo de exclamación que se encuentra dentro de un
triángulo equilátero tiene por finalidad alertar al
usuario de la presencia de importantes instrucciones de
operación y mantenimiento (servicio) en la literatura
que viene incluida con el artefacto.
ALTEC LANSING TECHNOLOGIES, INC. GARANTÍA LIMITADA DE UN AÑO
(GARANTÍA LIMITADA DE DOS AÑOS EN LA UNIÓN EUROPEA Y ASIA)
IMPORTANTES DE SEGURIDAD
1. Lea estas instrucciones.
¿Qué cubre la garantía?: Altec Lansing garantiza que sus productos no tendrán defectos de
material o de mano de obra, con las excepciones que se indican a continuación. ¿Cuál es el
periodo de cobertura? Para las unidades adquiridas en la Unión Europea o Asia, la garantía es
de dos años, contados a partir de la fecha de compra. Para las unidades no adquiridas en la
Unión Europea o Asia, la garantía es de un año, contado a partir de la fecha de compra. El
término de cualquiera de las garantías de acuerdo a ley deberá expirar al vencimiento de la
garantía limitada. Algunos estados y/o Estados Miembros de la Unión Europea no permiten
limitaciones en el periodo de vigencia de la garantía, por lo tanto, las limitaciones antes
mencionadas pueden no aplicarse a su caso.
2. Guarde estas instrucciones.
3. Preste atención a todas las advertencias.
4. Siga todas las instrucciones.
5. No use este aparato cerca del agua — El aparato no debe estar expuesto a goteo o
salpicaduras, y no se deben colocar encima objetos llenos de agua, como jarrones.
6. Limpie únicamente con un paño seco.
7. No bloquee ninguna abertura de ventilación. Efectúe la instalación según las instrucciones del
fabricante. No coloque el aparato sobre una cama, sofá, alfombra o superficie similar que
pueda bloquear las aberturas de ventilación. El aparato no se debe colocar en una instalación
empotrada, como un estante o armario cerrado que pueda impedir el flujo de aire a través de
las aberturas de ventilación. No impida la ventilación cubriendo las aberturas con artículos
como periódico, manteles, cortinas, etc.
¿Qué es lo que no cubre la garantía? La presente garantía no cubre cualquier defecto, mal
funcionamiento o falla que resulte de: instalación inadecuada, mal uso o incumplimiento de
las instrucciones del producto; abuso o uso con equipo inadecuado, no correspondiente o
defectuoso. (Para obtener información sobre la instalación, operación y uso adecuado consulte
el manual proporcionado con el producto. Si necesita un manual de reemplazo, puede
descargar un manual visitando www.alteclansing.com). Asimismo, los daños incidentales e
indirectos no son recuperables de acuerdo con esta garantía. Algunos estados no permiten
exclusiones o limitaciones por daños incidentales o indirectos, por lo tanto, dicha limitación o
exclusión es posible que no sea aplicable a su caso.
8. No instale el aparato cerca de fuentes de calor como radiadores, termorregistradores, hornos
u otros aparatos (incluyendo amplificadores) que produzcan calor.
9. Las fuentes de llama descubierta, como velas encendidas, no se deben colocar sobre el
aparato.
¿Qué hará Altec Lansing para corregir el problema? Altec Lansing, de acuerdo a su criterio,
reparará o reemplazará cualquier producto que presente defectos en el material o en la mano
de obra. Si su producto ya no se fabrica más, o está agotado, de acuerdo a su criterio, Altec
Lansing puede reemplazarlo con otro producto similar o mejor de Altec Lansing.
10. No anule el propósito de seguridad del enchufe tipo conector a tierra o polarizado. Un
enchufe polarizado tiene dos puntas, una más ancha que la otra. Un enchufe de tipo
conexión a tierra tiene dos cuchillas y una tercera cuchilla que se conecta a tierra. La
cuchilla ancha o tercera cuchilla se proporciona para su seguridad. Si el enchufe
proporcionado no encaja en su tomacorriente, consulte con un electricista para
reemplazar el tomacorriente obsoleto.
Cómo obtener servicio de garantía: Para obtener el reemplazo o reparación de un producto
en garantía, debe ponerse en contacto con Altec Lansing durante el periodo de garantía vía
correo electrónico a ([email protected]). En su correo electrónico debe colocar su
nombre, dirección, dirección de correo electrónico, número de teléfono, fecha de compra y una
descripción completa del problema experimentado. En los Estados Unidos, también puede
comunicarse con Altec Lansing llamando al teléfono 1-800-ALTEC88 — por favor esté listo para
proporcionar la misma información. Si el problema aparenta ser un defecto en el material o
mano de obra, Altec Lansing le proporcionará una autorización de devolución y las
instrucciones para el envío de la misma. Los envíos de devolución deberán ser pagados por el
cliente, y el envío deberá incluir el comprobante de compra original. Deberá asegurar el envío
en forma adecuada puesto que usted es el responsable del producto hasta que éste llegue a
Altec Lansing.
11. Proteja el cordón de alimentación para que no lo pisen o prensen — especialmente en los
puntos de enchufes, receptáculos, y el lugar donde salen del aparato.
12. No lo instale en un área que impida el acceso al enchufe de alimentación. El único medio de
impedir completamente el ingreso de suministro eléctrico al producto es desconectar el
enchufe de alimentación que debe estar accesible en todo momento.
13. Fuente de alimentación — Use únicamente fuentes de alimentación del tipo especificado en
las instrucciones de operación o como se indique en el artefacto. Si se incluye una fuente de
alimentación separada con este aparato no la sustituya con ninguna otra fuente de
alimentación — use únicamente fuentes de alimentación suministradas por el fabricante.
14. Desenchufe el aparato durante las tormentas eléctricas o cuando permanezca sin uso por
largos periodos de tiempo.
¿Cómo afectará la legislación estatal sus derechos? Esta garantía le brinda derechos legales
específicos, y además puede contar con otros derechos que pueden variar de estado a estado.
Tome nota que en la Unión Europea, en su calidad de consumidor, podría tener otros derechos
de ley de acuerdo a la legislación nacional de los Estados Miembros de la Unión Europea que
rigen la venta de mercadería de Altec Lansing. Esos derechos no se verán afectados por la
presente garantía.
15. Para realizar el servicio técnico acuda al personal de servicio calificado. Es necesario que se
efectúe el servicio técnico cuando el aparato se haya dañado de alguna forma, como por
ejemplo, cuando el cordón o enchufe de alimentación esté dañado o cuando se haya
derramado líquido o se hayan caído objetos dentro del aparato, o que el mismo haya
estado expuesto a la lluvia o humedad, no funcione normalmente o se haya dejado caer.
Para efectuar el servicio técnico, envíe el artefacto al personal de servicio calificado,
devuélvalo al distribuidor o llame a la línea de servicio de Altec Lansing para solicitar ayuda.
Las garantías y recursos limitados antes mencionados constituyen las garantías y recursos
exclusivos disponibles para el comprador, siempre y cuando, y en la medida en que tengan
validez y sean exigibles bajo la ley aplicable.
16. Para los productos que usan baterías, refiérase a las normas locales para disponer de ellas
de manera adecuada.
SERVICIO
17. Use solamente dispositivos/accesorios especificados por el fabricante.
AL CLIENTE
En la Guía de solución de problemas encontrará respuestas a la mayoría de las preguntas
sobre configuración y rendimiento. De igual manera, puede consultar la sección de las FAQ
(Preguntas y respuestas frecuentes) de nuestro sitio Web en www.alteclansing.com. Si vive en
América del Norte y todavía no puede encontrar la información que necesita, comuníquese con
nuestro equipo de servicio al cliente para que le proporcione ayuda antes de devolver los
parlantes a su distribuidor en virtud de la política de devolución.
18. Use solamente con el carro, plataforma, trípode, soporte o mesa
especificados por el fabricante o que se vendan con el aparato. Cuando
use un carro, tenga precaución al mover la combinación carro/aparato
para evitar lesionarse si el sistema se da vuelta.
Teléfono: 800-258-3288
Correo electrónico: [email protected]
Si no vive en América del Norte, por favor visite nuestro sitio Web en www.alteclansing.com
y selecciones su región para ubicar al distribuidor de su país.
Para obtener la información más actualizada, asegúrese de visitar nuestro sitio Web en
www.alteclansing.com.
DISTRIBUCIÓN
INTERNACIONAL
Clientes internacionales: Para obtener información sobre la distribución de los productos Altec
Lansing en su país, visite www.alteclansing.com y haga clic en su región.
CÓMO
DISPONER DE EQUIPO ELÉCTRICO Y ELECTRÓNICO ANTIGUO
Este símbolo en el producto o en su empaque indica que este producto no debe
tratarse como un desecho doméstico. Por el contrario, debe entregarse en el punto
de recolección apropiado para el reciclado de equipo eléctrico y electrónico. Al
asegurar que este producto se deseche correctamente, ayudará a prevenir
consecuencias potencialmente negativas para el medio ambiente y la salud humana
que de otra manera pudiera causar el manejo incorrecto en la disposición apropiada de este
producto. El reciclado de materiales ayudará a conservar los recursos naturales. Para obtener
información más detallada sobre el reciclado de este producto, póngase en contacto con su
oficina local de la ciudad o servicio de desecho doméstico de desperdicios.
7
INMOTION IMV712
Conecte su IPod
Para conectar su iPod al IMV712:
• Coloque el adaptador de acople de su iPod en el
módulo de acople. Los adaptadores de acople del
iPod pueden venir con su iPod o pueden comprarse
en forma separada de Apple (ver las tiendas Apple o
www.apple.com).
• Coloque su iPod en el acople del iPod iMV712 y
presione hacia abajo hasta que esté bien colocado.
• Conecte la fuente de suministro CC a la parte
posterior del inMotion iMV712, luego introduzca la
fuente de suministro en un tomacorriente de pared.
• Encienda el inMotion iMV712 pulsando el interruptor
de encendido/apagado ubicado en la parte posterior
de la unidad. Se encenderá la pantalla LCD.
• Pulse el botón de la fuente (“SOURCE”) de manera
repetida hasta que aparezca “iPod” en la pantalla LCD.
• Encienda su iPod.
DIGITAL MINI-THEATER
(MINI-CINE DIGITAL) PARA IPOD®
¿UN MINI CINE PARA SU IPOD VIDEO? ¿QUÉ LE PARECE?
Deje que los fabricantes del primer sistema de parlantes
iPod hagan el trabajo de presentar una solución minicine para el hogar que sea ¡así de buena! El iMV712 se
caracteriza por un sonido cristalino que proveniente de
dos parlantes de neodimio de 3 pulgadas diseñados
especialmente y un parlante secundario para graves
incorporado side-firing de 4 pulgadas, además de una
pantalla ancha de alta resolución de 8.5 pulgadas. Es
realmente conveniente para cargar su iPod video.
Presenta un control remoto inalámbrico mejorado para
navegación iPod. Y es compatible con cualquier iPod
acoplable o con la mayor parte de otros reproductores
portátiles de medios con el adaptador incluido. Use su
iPod video bajo un concepto totalmente nuevo con el
iMV712.
Conecte otros dispositivos (AUX)
El inMotion iMV712 incluye una clavija de entrada de
audio que le permite reproducir audio desde fuentes
alternas, tales como modelos iPod no acoplables,
reproductores de CD, reproductores MP3 y computadoras.
Para conectar el inMotion iMV712 a una fuente de audio
alterna, siga los pasos que se indican a continuación.
• Conecte un extremo del cable estéreo de 3.5 mm en la
clavija auxiliar de entrada (AUX INPUT) ubicada en la
parte posterior del sistema inMotion iMV712, y el otro
extremo al audífono o clavija de la línea de salida de
su dispositivo de audio alterno.
• Conecte la fuente de suministro CC a la parte
posterior del inMotion iMV712, luego introduzca la
fuente de suministro en un tomacorriente de pared.
• Encienda el inMotion iMV712 pulsando el interruptor
de encendido/apagado ubicado en la parte posterior
de la unidad. Se encenderá la pantalla LCD.
• Pulse el botón “SOURCE” (FUENTE) de manera repetida
hasta que aparezca “AUX” en la pantalla LCD.
• Encienda la fuente de audio.
• Fije el volumen en la fuente de audio a un nivel medio.
• Fije el volumen del inMotion iMV712 a un nivel
mínimo y auméntelo hasta alcanzar un nivel
confortable de escucha.
Fabricado para:
•
•
•
•
•
iPod
iPod
iPod
iPod
iPod
nano
video
con pantalla a color
mini
Contenido de la caja
Refiérase a la Tarjeta Quick Connect del iMV712 para
identificar estos ítemes.
• Sistema mini cine inMotion iMV712
• Suministro de potencia
• Cable estéreo de 3.5mm
• Cable RCA
• Adaptadores universales para iPod
• Control remoto
• Bastidor universal MP3
• Guía de usuario e instrucciones de conexión rápida
Colocación del sistema
INMotion IMV712
Ubique el inMotion iMV712 sobre una superficie plana.
Conecte otros dispositivos de audio/video
al INMotion IMV712 (AV)
Conexión a dispositivos de audio y video
El inMotion iMV712 incluye clavijas de entrada de
audio/video RCA que le permiten conectar fuentes
alternas de audio y video, tales como cámaras digitales,
camcorders, reproductores portátiles de DVD, VCR y
consolas de juegos de video. Para conectar el inMotion
iMV712 a una fuente de audio y vídeo alterna, siga los
pasos que se indican a continuación.
Advertencia: No introduzca el enchufe de alimentación
del inMotion iMV712 en un tomacorriente de la pared
hasta que conecte otros dispositivos tales como su iPod
o fuente de audio alterna. Asimismo, apague cualquier
dispositivo antes de conectarlo al inMotion iMV712.
8
Colocación del sistema en modo silencio
• Conecte un extremo del cable RCA a las tres clavijas
de entrada RCA ubicadas en la parte posterior del
inMotion iMV712, y el otro extremo a las tres clavijas
de salida RCA ubicadas en la parte posterior de la
fuente de audio y video alterna.
• Conecte la fuente de suministro CC a la parte
posterior del inMotion iMV712, luego introduzca la
fuente de suministro en un tomacorriente de pared.
• Encienda el inMotion iMV712 pulsando el interruptor
de encendido/apagado ubicado en la parte posterior
de la unidad. Se encenderá la pantalla LCD.
• Pulse el botón “SOURCE” (FUENTE) de manera
repetida hasta que aparezca “AV” en la pantalla LCD.
• Encienda la fuente de audio y vídeo alterna.
• Configure el volumen en la fuente de audio y vídeo
alterna a un nivel medio.
• Fije el volumen del inMotion iMV712 a un nivel
mínimo y auméntelo hasta alcanzar un nivel
confortable de escucha.
Para colocar el inMotion iMV7112 en modo silencio,
pulse una vez el botón “MUTE” (SILENCIO) en el
control remoto. El icono mute (silencio) aparecerá en
la pantalla LCD. Pulse este botón nuevamente para
restablecer el sonido.
Opciones del Menú de Navegación con
el control remoto
Las opciones del menú del inMotion iMV712 le permiten
controlar la imagen, función, y parámetros del sistema
usando el control remoto y configurar el menú en la
pantalla LCD.
• Coloque el iPod en pausa.
• Presione el botón “MENU” en el control remoto
durante tres segundos para mostrar el menú de
configuración en la pantalla LCD del inMotion iMV712.
• Presione el botón “MENU” nuevamente para navegar
a través de los menús para imagen (“PICTURE”),
función (“FUNCTION”) y sistema (“SYSTEM”).
Conecte el IPod video o IPod photo a un
aparato de televisión separado (S-Video)
Menú Imagen (“PICTURE”) – para los controles de brillo
contraste y color
• Presione el botón “MENU” ubicado en el control
remoto durante tres segundos para ingresar al menú
de configuración en la pantalla LCD.
• Use las flechas arriba y abajo para seleccionar el brillo
(“BRIGHTNESS”), contraste (“CONTRAST”) y color
(“COLOR”) de la pantalla LCD para elegir sus
preferencias. La configuración por defecto es 50.
• Use las flechas izquierda y derecha para ajustar los
parámetros seleccionados.
• Para restaurar el menú de imágenes a las
configuraciones de fábrica, seleccione la opción
“RESET” (“RESTABLECER”) y pulse la flecha izquierda
o derecha.
El inMotion iMV712 incluye una opción de pasar a
través de video que le permite mostrar videos y fotos
desde su iPod a un aparato de televisión. Para conectar
el sistema iMV712 a un aparato de televisión o VCR, siga
los pasos que se indican a continuación:
• Asegúrese que el suministro de potencia a su televisor
o VCR se encuentre apagado.
• Ubique un cable S-Video (se vende por separado).
• Conecte un extremo del cable S-Video al puerto S-Video
ubicado en la parte posterior del inMotion iMV712 y el
otro extremo a la entrada S-Video en su aparato de
televisión o VCR.
• Conecte la fuente de suministro CC a la parte
posterior del inMotion iMV712, luego introduzca la
fuente de suministro en un tomacorriente de pared.
• Encienda el inMotion iMV712 pulsando el interruptor
de encendido/apagado ubicado en la parte posterior
de la unidad. Se encenderá la pantalla LCD.
• Encienda el aparato de televisión o VCR.
Nota: Solo el video se reproducirá a través del VCR.
Disfrute el sonido usando los parlantes inMotion iMV712.
Menú Función (“FUNCTION”) – para las selecciones de
orientación y de relación de aspecto de la pantalla
• Presione el botón “MENU” ubicado en el control
remoto durante tres segundos para ingresar al menú
de configuración en la pantalla LCD.
• Presione el botón “MENU” nuevamente para
seleccionar el menú función (“FUNCTION”).
• Use las flechas arriba y abajo para seleccionar la
orientación de la pantalla (“NORMAL”) o relación de
aspecto de la pantalla (“ZOOM”). La orientación de la
pantalla (“NORMAL”) hace pasar la pantalla de arriba
hacia abajo (“DOWN”) o de regreso al lado usual
(“NORMAL”). La relación de aspecto de pantalla
(“ZOOM”) le permite ajustar la relación de aspecto de
pantalla de su fuente de video – 4:3 (estándar de TV)
o 16:9 (pantalla completa).
• Use las flechas izquierda y derecha para ajustar los
parámetros seleccionados.
Colocación del sistema en modo en espera
(standby)
Para colocar el inMotion iMV712 en modo en espera,
pulse el botón standby
en el control remoto. Pulse este
botón nuevamente para desactivar el modo en espera.
9
Menú Sistema (“SYSTEM”) – para seleccionar la
configuración de video
• Presione el botón “MENU” ubicado en el control
remoto durante tres segundos para ingresar al menú
de configuración en la pantalla LCD.
• Presione el botón “MENU” dos veces para seleccionar
el menú sistema (“SYSTEM”).
• Use las flechas izquierda y derecha para seleccionar la
configuración de vídeo apropiada – SISTEMA DE TV
PAL, SISTEMA DE TV NTSC, SISTEMA DE TV SECAM o
SISTEMA DE TV AUTO. Para obtener información
adicional sobre cuál es la configuración adecuada para
su fuente de vídeo, consulte el manual del usuario
para su TV.
botón “VOL +” para aumentar el volumen y el botón
“VOL –“ para disminuirlo. El nivel de volumen aparecerá
en la pantalla LCD. El volumen maestro también se
puede controlar presionando los botones “VOLUME +”
y “VOLUME –“ en el control remoto.
Control de agudos y graves
Para controlar los niveles de agudos o graves, presione
los botones “+” y “–“ ubicados cerca de las palabras
“TREBLE” (AGUDOS) o “BASS” (GRAVES) en el control
remoto.
Cambio de batería del control remoto
Retire la cubierta de la batería presionando la lengüeta
y tirando hacia fuera la cubierta.
Precaución: Peligro de explosión por colocación
incorrecta de la batería. Reemplace solo con un tipo
igual o equivalente. La batería no debe estar expuesta a
calor excesivo como el sol, fuego u otros similares.
Control del volumen
Los botones “VOL +” y “VOL –“ ubicados en la parte
superior del inMotion iMV712 son los controles del
volumen maestro. Pulse y mantenga presionado el
Solución de problemas
Síntoma
Problema posible
Solución
La pantalla
LCD está
apagada
(Operación
de CA).
La fuente de suministro no está
conectada o no ha sido encendida.
Introduzca el conector de la fuente de suministro en el
conector de CC ubicado en la parte posterior del inMotion
iMV712. Después de hacer esta conexión, introduzca la
fuente de suministro en un tomacorriente de pared.
Luego, encienda el inMotion iMV712 pulsando el
interruptor de encendido/apagado ubicado en la parte
posterior de la unidad.
El supresor de picos (si se utiliza) no
está encendido.
Si la fuente de suministro está conectada a un supresor de
picos, asegúrese que el supresor de picos también esté
encendido.
El tomacorriente de pared no funciona.
Enchufe otro dispositivo en el mismo tomacorriente de
pared para confirmar que esté funcionando.
El volumen está fijado demasiado bajo.
Los botones “VOL +” y “VOL –“ ubicados en la parte
superior del inMotion iMV712 son los controles del
volumen maestro. Presione y mantenga presionado el
botón “+” para aumentar el volumen.
Los parlantes
no emiten
ningún
sonido.
Verifique el nivel de volumen del dispositivo alterno de la
fuente de audio y fíjelo a un nivel medio.
El iPod no está colocado correctamente
en la estación de acople.
Apague el iPod, retírelo de la estación de acople, vuelva a
colocarlo, y enciéndalo nuevamente.
Si está usando una fuente de audio
alterna, la fuente de audio no está
conectada de manera correcta al
inMotion iMV712 o hay un problema
con la fuente de audio alterna.
• Siga las instrucciones de la sección “Conexión a otros
dispositivos”.
• Fije el volumen en la fuente de audio a un nivel medio.
• Fije el volumen del inMotion iMV712 a un nivel mínimo
y auméntelo hasta alcanzar un nivel confortable de
escucha.
10
Síntoma
Problema posible
Solución
Los parlantes
emiten un
sonido
crepitante.
El iPod no está colocado correctamente
en la estación de acople.
Apague el iPod, retírelo de la estación de acople, vuelva a
colocarlo, y enciéndalo nuevamente.
Si está usando una fuente de audio
alterna, la fuente de audio no está
conectada de manera correcta al
inMotion iMV712 o hay un problema
con la fuente de audio alterna.
• Siga las instrucciones de la sección “Conexión a otros
dispositivos”.
• Fije el volumen en la fuente de audio a un nivel medio.
• Fije el volumen del inMotion iMV712 a un nivel mínimo
y auméntelo hasta alcanzar un nivel confortable de
escucha.
Los parlantes
emiten un
sonido
crepitante
(cuando se
conectan a la
computador
ao
computador
a portátil).
El nivel de volumen del sistema
operativo de su computadora está
fijado demasiado alto.
Verifique el nivel de volumen del sistema operativo y
disminúyalo si fuera necesario.
El sonido
está
distorsionado.
El nivel de volumen del inMotion
iMV712 está fijado demasiado alto.
Los botones “VOL +” y “VOL –“ ubicados en la parte
superior del inMotion iMV712 son los controles del
volumen maestro. Pulse y mantenga presionado el botón
“VOL –” para disminuir el volumen.
Los parámetros EQ del iPod están
activados.
Desactive los parámetros EQ del iPod (para mayor
información, por favor consulte la guía del usuario de
su iPod).
La unidad se encuentra demasiado
cerca de una torre de radio.
Mueva la unidad a otro lugar.
Hay
interferencia
de radio.
Zumbidos
La unidad está ubicada demasiado
intermitentes. cerca de un teléfono móvil GSM.
Traslade el teléfono móvil GSM lejos de la unidad.
11
This Class B digital apparatus complies with Canadian ICES-003. • Cet appareillage digital de Classe B est conforme au ICES-003 canadien.
Corporate Headquarters 535 Rte. 6 & 209, Milford, PA 18337-0277, USA • 866-570-5702 • 570-296-4434 • Fax 570-296-6887
Designed in USA. Made in China
A12307 R05
This document in other languages
- español: Altec Lansing inMotion IMV712


