1
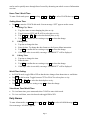
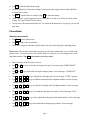
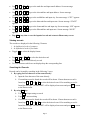
ROYAL EXTREME 3 INSTRUCTION MANUAL
Thank you for purchasing this PDA. Please read this manual carefully to become familiarized with
your PDA’s many features and to ensure years of reliable operation.
NOTICE
We assume no responsibility for any damage or loss resulting from the use of this manual.
We strongly recommend that separate, permanent printed records be kept of all data. Under
certain circumstances, such as exposure to an electrostatic discharge, data may be lost or altered, or
the unit may become inoperative until reset. Therefore, we assume no responsibility for data lost or
otherwise rendered unusable, whether as a result of improper use, repair, battery replacement, or
use after the specified battery life has expired from similar causes.
We assume no responsibility, directly or indirectly, for financial losses or claims from third persons
resulting from the use of this product and all of its functions, such as stolen credit card numbers, the
loss or alteration of stored data, etc.
This product was not designed to bend or survive extreme pressure or temperatures. Do not
carry it in your trouser or pants pockets. When in a bag or briefcase, make sure that it is stationary
and well padded and protected. Do not leave or store the PDA in environments where temperature
ranges can be extreme.
To provide a longer product life, a flip-top cover is provided with the PDA. This should prevent
scratches to the display. Do not apply harsh chemicals or water to the display.
The information provided in this manual is subject to change without notice.
SAFETY TIPS
•
Be careful not to scratch the touch screen. Use only the supplied stylus or other plastic-tipped
pens designed for a touch-sensitive screen. Never use an actual pen or pencil, fingernails or
other sharp objects on the surface of the touch screen.
•
The PDA should be protected from rain and moisture. Treat the PDA as you would other
electronic devices.
•
Do not drop your PDA or subject it to strong impacts.
•
Protect your PDA from extreme temperatures.
•
The touch screen can be cleaned with a soft cloth lightly moistened with a window cleaning
solution. Commercial cleaners are sold separately.
Page 1
INSTALLING THE BATTERIES
Your new PDA is powered by 3 CR2032 lithium batteries. Before using your new PDA for the first
time, you will need to install the batteries. You will find them in the PDA’s package. Check the
back of the PDA. You will see the battery compartment door. Slide the door lock switch to the
unlock position. Remove the battery compartment door. Install the batteries with the + sign on the
battery facing you. After you have installed the batteries, put the battery compartment door back on
the unit.
IMPORTANT NOTE – YOU MUST LOCK THE BATTERY COMPARTMENT DOOR BEFORE USING
THE PDA. YOUR PDA WILL NOT OPERATE UNTIL THE DOOR IS LOCKED IN PLACE BY MOVING
THE LOCKING SWITCH TO THE LOCKED POSITION!
To ensure smooth operation you now need to reset the PDA. Insert a pointed object, such as a
pencil point or the open end of a paperclip into the RESET hole located on the back of the unit.
Press lightly until the PDA displays “ERASE DATA” and “KEEP DATA”. Tap “ERASE DATA”
to reset or tap “KEEP DATA” to keep data.
Switching On/OFF
The unit can be switched on or off by touching the
key.
Lower Power Detection
“LOW BATTERY” will be displayed and the unit will turn off automatically if low battery power
is detected. Change the batteries to continue using your PDA.
Back Light
Tap the
icon to turn the back light on or off.
Insert & Overwrite
To toggle between insert or overwrite, tap ins .
Enter Numbers, Alphabets & Symbols:
To toggle between numerical keyboard or alphabetical keyboard, tap 2nd .
To enter special symbols, tap sym .
Navigating Through the Screen Prompts, Messages and Records
You can easily navigate through the different functions and operations by using the cursor keys.
You will find 4 cursor keys located directly below the screen, near the on/off key. Simply touch a
cursor key to move in the direction indicated on the key. There is also a set of cursor keys located
on the touch screen. Tap any of the screen cursor keys to move in the desired direction. For your
convenience your PDA has an up/down scroll key on the upper left side of the unit. This scroll key
Page 2
can be used to quickly move through lists of record by advancing one whole screen of information
at a time.
Home Time / World Time :
To enter Clock mode, press menu and tap ∧ / ∨ or Ï / Ð to select CLOCK then tap OK .
Setting Home Time:
•
Tap edit to enter the CLOCK edit mode. Screen message “SET” appears on the screen.
i.
ii.
Editing City/ Place:
¾ Tap place name to start changing the place or city.
¾ Toggle between CITY and PLACE to select place or city.
¾
Tap ∧ / ∨ or Ï / Ð to select the desired place or city.
¾
Tap OK to confirm the new setting or tap esc to abort the change.
Editing Date:
¾ Tap date to change the date.
¾ Enter the date. To change the date format see the System Menu instruction.
¾
Tap OK to confirm the new setting or tap esc to abort the change.
¾
If the input value is not valid, a message “INCORRECT” will be displayed.
iii.
Editing Time:
¾ Tap time to change the time.
¾ Enter the time.
¾
Tap OK to confirm the new setting or tap esc to abort the change.
¾
If the input value is not valid, a message “INCORRECT” will be displayed.
World Time Setting:
•
In CLOCK mode, toggle HM to WD so that the time changes from home time to world time.
•
Tap edit to edit location. Toggle between CITY or PLACE to select place or city.
•
Tap ∧ / ∨ or Ï / Ð to select the desired place or city.
•
Tap OK to confirm the new setting or tap esc to abort the change.
View Home Time/ World Time:
•
To view home time, press menu and select CLOCK to enter clock mode.
•
To view world time, enter clock mode and toggle HM to WD.
Daily Alarms
To enter Alarm mode, tap menu and tap ∧ / ∨ or Ï / Ð to select ALARM then tap OK .
Screen message “ALARM” appears.
Page 3
z
Tap edit to edit the daily alarm setting.
•
Input the alarm time. If the time setting is in am/ pm format, toggle between AM and PM to
select the time setting.
•
Tap OK to confirm the new setting or tap esc to abort the change.
•
At the “Alarm” screen, toggle between ON and OFF to switch on or off the new daily alarm
setting. The word “Alarm” will be shown.
•
A beep tone will sound automatically for 30 seconds at the alarm time. Tap any key to stop the
beep tone.
Phone Book:
Entering new records:
•
Tap phone to enter phone book.
•
Tap new to begin new record input.
•
There are 2 categories, Business and Personal. Select the desired group by touching group.
Please note: The example shown below assumes you will enter information in every field of the
phone record. You do not need to fill in all the fields. If you desire, you can simply enter a name
and phone number. Tap OK at any time to save the record.
•
Enter last name in the first line of screen.
•
Tap ∨ or Ð to go to second line and input first name. Screen message “FIRST NAME”
appears.
•
Tap ∨ or Ð to go to third line and input company name. Screen message “COMPANY”
appears.
•
Tap ∧ / ∨ or Ï / Ð to go to fourth line and input title. Screen message “TITLE” appears.
•
Tap ∧ / ∨ or Ï / Ð to go to fifth line and input home telephone number. Screen message
“HOME” appears.
•
Tap ∧ / ∨ or Ï / Ð to go to sixth line and input office telephone number. Screen message
“WORK” appears.
•
Tap ∧ / ∨ or Ï / Ð to go to seventh line and input fax number. Screen message “FAX”
appears.
•
Tap ∧ / ∨ or Ï / Ð to go to the eighth line and input mobile phone number. Screen message
“MOBILE” appears.
•
Tap ∧ / ∨ or Ï / Ð to go to the ninth line and input pager number. Screen message
“PAGER” appears.
Page 4
•
Tap ∧ / ∨ or Ï / Ð to go to the tenth line and input email address. Screen message
“EMAIL” appears.
•
Tap ∧ / ∨ or Ï / Ð to go to the eleventh line and input address. Screen message
“ADDRESS” appears.
•
Tap ∧ / ∨ or Ï / Ð to go to the twelfth line and input city. Screen message “CITY” appears.
•
Tap ∧ / ∨ or Ï / Ð to go to the thirteenth line and input state. Screen message “STATE”
appears.
•
Tap ∧ / ∨ or Ï / Ð to go to the fourteenth line and input zip. Screen message “ZIP” appears.
•
Tap ∧ / ∨ or Ï / Ð to go to the fifteenth line and input note. Screen message “NOTE”
appears.
•
Tap OK at any time to save the inputted record and return to Phone entry screen.
Viewing records:
The records are displayed in the following 2 formats:
i. In alphabetical order of company.
ii. In alphabetical order of last name.
•
Toggle
•
Tap ∧ / ∨ or Ï / Ð to select the desired record.
•
Tap OK or tap the record directly to read.
•
To view characters which are not displayed tap the corresponding line.
to select the display format.
Searching for Records:
Records can be located by searching in the following 2 ways:
1. By typing the first character of the name directly:
¾ Input the first character of the name directly
¾ If a matching record is found, the record will be shown. If more than one record is
found, tap ∧ / ∨ or Ï / Ð to select the desired record. If no matching record is
found, the message “NO RECORD” will be displayed on screen and press esc to return
to the Phone screen.
2. By using find key:
¾
Tap find and input string to search
¾
Tap OK to start searching
¾
If a matching record is found, the record will be shown. If more than one record is
found, tap ∧ / ∨ or Ï / Ð to select the desired record. If no matching record is
found, the message “NO RECORD” will be displayed on screen and press esc to return
to the Phone screen
Page 5
Editing records:
•
In Phone mode, search for the record to be edited and then tap edit.
•
Edit the record.
•
After editing, tap OK to save and return to Phone mode or tap esc to quit without saving.
Deleting records:
•
In Phone mode, search for the record to be deleted and then tap del.
•
The screen will display DELETE ?
►DELETE
NOT DELETE
Tap OK to delete or tap NOT DELETE to abort the deletion.
Memo
To enter memo mode, touch menu and scroll through the menu choices by tapping ∧ / ∨ or
Ï / Ð until you see the MEMO/ EMAIL prompt. Tap the MEMO/EMAIL prompt or OK .
Entering new records:
•
In Memo mode, tap new to begin new record input.
•
There are 2 categories. Select the desired category.
•
Enter the name of receiver or sender in the first line.
•
Tap ∨ to go to next line to enter subject.
•
Tap ∨ to go to second line to enter the note.
•
Tap OK to confirm the new record or tap esc to abort.
Viewing records:
The records are displayed in the following 2 formats:
i. In ascending order of date.
ii. In alphabetical order of note.
Searching for Records, Editing Records, and Deleting Records
Follow the procedures outline under Phone Mode
ToDo
To enter todo mode, touch menu and scroll through the menu choices by tapping ∧ / ∨ or Ï
/ Ð until you see the TODO prompt. Tap the TODO prompt or OK .
Entering new records:
•
In Todo mode, tap new to begin new record input.
Page 6
•
There are 2 categories. Select the desired category.
•
Tap ON: to enter date and tap OK to save the setting.
•
Toggle priority to define the priority of the job.
•
Toggle DONE to indicate the status.
•
Tap NOTE to enter note.
•
Tap OK to confirm the new record or tap esc to abort.
Viewing records:
The records are displayed in the following 2 formats:
i. In ascending order of priority.
ii. In ascending order of date.
•
Touch
•
In the format of ascending order of priority, the first character of each record shows working
stage of the job and the second character shows priority of job.
•
Tap ∧ / ∨ or Ï / Ð to select the desired record.
•
Tap OK or tap the record directly to read.
•
To view characters which are not displayed tap the corresponding line directly.
to select the display format.
Searching for Records, Editing Records, and Deleting Records
Follow the procedures outline under Phone Book Mode.
Planner:
Entering new records:
•
Tap schd to enter planner mode.
•
Tap new to begin new record input.
•
There are 2 categories. Select the desired category.
•
Tap ON: to enter date and tap OK to save the setting.
•
Tap FROM: to enter starting time and tap OK to save the setting.
•
Tap TO: to enter ending time and tap OK to save the setting.
•
Tap NOTE to enter note and tap OK to save the new record.
Viewing records
The records are displayed in the following 2 formats:
i. In ascending order of date.
ii. In alphabetical order of note.
Touch
to select the display format.
Page 7
Searching for Records, Editing Records, and Deleting Records
Follow the procedures outline under Phone Book Mode.
Anniversary/Event
To enter anniversary/event mode, press menu and tap ∧ / ∨ or Ï / Ð to select
ANNIVERSARY then tap OK . Screen message “ANNIVERSARY” appears.
Entering new records:
In Anniversary mode, tap new to begin new record input.
•
There are 2 categories. Select the desired category.
•
Tap date to start editing the date and enter date. Tap OK to confirm the new date setting or tap
esc to abort the change.
•
Input anniversary or event and tap OK to save the new record or tap esc to abort the change.
Viewing records:
The records are displayed in the following 2 formats:
i. In ascending order of date.
ii. In alphabetical order of note.
Toggle
to select the display format.
•
Select the desired category and display format.
•
Tap ∧ / ∨ or Ï / Ð to select the desired record.
•
Tap OK or tap the record directly to read.
•
To view characters which are not displayed tap the corresponding line directly.
Searching for Records, Editing Records, and Deleting Records
Follow the procedures outline under Phone Book Mode.
Calculator/ Metric Conversion/ EU Conversion:
Calculator:
•
Tap calc to enter calculator mode.
•
Tap screen-changing key
to get special symbols including %, +/-, MC, MR, M+ and M-.
Metric Conversion:
•
During Calculator mode, enter the amount for conversion.
•
Tap screen-changing key
•
Tap metric conversion key
•
There are 8 metric conversion units:
to enter conversion mode.
to enter the metric conversion mode.
Page 8
KM
<>
MILE
at
1 → 0.62137
HECT
<>
ACE
at
1 → 2.471
ACRE
<>
M2
at
1 → 4,046.94
L
<>
GAL
at
1 → 0.2643
PINT
<>
GAL
at
1 → 0.12499
TON
<>
POUND
at
1 → 2,204.6
GM
<>
OUNCE
at
1 → 0.03527
100°F
<>
°C
at
1 → 37.7778
•
Tap t Ï / Ð buttons on the side of the PDA to select one of the 8 metric conversions.
•
Tap < / > to convert to or from metric unit respectively.
•
Example, for 45 mile, how many is Kilometer?
In calculator mode, input 45, tap
, then tap
and select the metric conversion “KM < >
MILE”, at last tap < will see the value 72.42061895 on screen.
Currency Setting:
•
During Calculator mode, tap screen-changing key
•
Tap currency setting key SET to enter the currency-setting mode.
•
There are 8 currency conversion units:
HM$1 = OTHER
HM$1 = GBP
HM$1 = YEN
HM$1 = ITA
HM$1 = ESP
HM$1 = FR
HM$1 = SFR
HM$1 = EURO
•
Tap Ï/Ð to select one of the 8 currency conversions rate, and tap the corresponding rate for
to enter conversion mode.
inputting a new rate.
•
Tap OK to save or tap esc to quit without saving.
Currency Conversion:
•
During Calculator mode, enter the amount for conversion.
•
Tap screen-changing key
•
Tap currency conversion key ¥$ to enter the currency conversion mode.
•
Tap Ï / Ð to select one of the 8 currency conversions, as mentioned in B.
•
Tap < / > to convert to or from HM$1 respectively.
to enter conversion mode.
Page 9
•
Example, for HM$1, how much is YEN?
, then tap ¥$ and select the currency conversion “HM$1 < >
In calculator mode, input 2, tap
YEN”, at last tap > to see the corresponding value. If the rate is at 1 → 110, the corresponding
value 220 will display on screen.
EU Conversion:
•
During Calculator mode, enter the amount for conversion.
•
Tap screen-changing key
•
Tap EU conversion key EU to enter the EU conversion mode.
•
There are 8 EU conversion units:
to enter conversion mode.
€
<>
BEF
at
1 → 40.3399
€
<>
DEM
at
1 → 1.95583
€
<>
ESP
at
1 → 166.386
€
<>
FRF
at
1 → 6.55957
€
<>
IEP
at
1 → 0.78756
€
<>
ITL
at
1 → 1936.27
€
<>
LUF
at
1 → 40.3399
€
<>
NLG
at
1 → 2.20371
•
Tap Ï / Ð to select one of the 8 EU conversions.
•
Tap < / > to convert to or from EU respectively.
•
Example, for EU 100, how much is DEM?
In calculator mode, input 100, tap
, then tap EU and select the EU conversion “€ < > DEM”,
at last tap > will see the value 195.583 on screen.
Count Down:
•
To enter count down mode, press menu and tap ∧ / ∨ or Ï / Ð to select COUNTDOWN
then tap OK . Screen message “COUNT DOWN” appears. This is the Count Down entrance
screen.
•
Tap edit to start editing the time for counting down.
•
Enter the desired time for counting down where time is in “HH: MM” format. The maximum
time for counting down is 23:59.
•
Tap OK to confirm the new setting or tap esc to abort the change.
•
If the input value is not valid, a message “INCORRET” will be shown and return to count down
editing screen.
•
In Count Down entrance screen, toggle between ON or OFF to switch on/ off the count down
time.
Page 10
•
A beep tone will turn on automatically for 35 seconds when the time is counting down to 00:00
and count down is enabled. Tap any key to stop the beep tone.
Expense:
To enter Expense mode, touch menu and scroll through the menu choices by tapping ∧ / ∨ or
Ï / Ð until you see the Expense prompt. Tap the Expense prompt or OK .
Entering new records:
•
Tap exp to enter expenses mode.
•
Tap new to begin new record input.
•
Select the desired categories.
•
Tap date and enter date.
•
Tap OK to confirm the new setting or tap esc to abort the change.
•
If the input value is not valid, a message “INCORRECT” will be shown..
•
There are 8 payments term:
1. VS—Visa
2. MC—Master Card
3. AX—American Express
4. DI—Diners Club
5.
6.
7.
8.
CC—Credit Card
CH—Cheque
CA—Cash
OT—Others
•
Tap ∧ / ∨ or Ï / Ð to select one of the payment terms.
•
Tap OK to confirm the new setting or tap esc to abort the change.
•
The expenditure of money is classified into 13 types:
1. MEALS
8.
2. SHOPPING
9.
3. HOTEL
10.
4. TICKET
11.
5. TRAIN
12.
6. TAXI
13.
7. RENTAL
FUEL
PHONE
SAMPLE
SOUVENIR
GIFT
OTHERS
•
Tap ∧ / ∨ or Ï / Ð to select one of types.
•
Tap OK to confirm the new setting or tap esc to abort the change.
•
Tap $ to input the amount.
•
Tap NOTE to input characters.
•
Tap OK to save the new record or tap esc to abort.
Viewing records:
The records are displayed in the following 2 formats:
i. In ascending order of date.
Page 11
ii. In alphabetical order of note.
•
In Expense mode, tap group to select the desired category.
•
Toggle
•
Tap ∧ / ∨ or Ï / Ð to select the desired record.
•
Tap OK or tap the record directly to read.
•
To view characters which are not displayed tap the corresponding line directly.
to select the display format.
Searching for Records, Editing Records, and Deleting Records
Follow the procedures outline under Phone Book Mode.
Expense Sum:
•
In Expense mode, toggle exp to view the following screen message:
S: DD-MM-YY
E: DD-MM-YY
TY: ALL
BY: ALL
where S is the starting date
E is the ending date
TY is the money expenditure
BY is the payment term
•
Tap the above fields to select and input the desired summing criteria.
•
Tap OK to display the expense sum.
Web Book / Internet:
To enter the Web Book / Internet mode, touch menu and scroll through the menu choices by
tapping ∧ / ∨ or Ï / Ð until you see the Web Book / Internet prompt. Tap the Web Book /
Internet prompt or OK .
Entering new records:
•
In Web Book / Internet mode, tap new to enter a new record.
•
Select the desired category.
•
Tap URL to enter web page address.
•
Tap NOTE to enter description.
•
Tap OK to confirm the new record or tap esc to abort.
Viewing records:
The records are displayed in the following 2 formats:
Page 12
i. In alphabetical order of address.
ii. In alphabetical order of note.
•
Toggle
to select the display format.
Searching for Records, Editing Records, and Deleting Records
Follow the procedures outline under Phone Book Mode.
Spell Check:
To enter spell mode, tap ABC.
•
In Spell mode, enter word and tap OK to start checking.
•
If the word is correct, a message “CORRECT” shown.
•
If the word is incorrect, related words and the corresponding number of words found are shown.
The following screen message is displayed
FOUND
XX
?????
XX-the number of corresponding words found
?????-the related word
•
To view characters which are not displayed owing to the restriction of the screen width, tap ∧ /
∨ or Ï / Ð for off-screen characters.
Translator:
•
Tap trans to enter translator mode.
Screen message shown in the following format
S: ENGLISH
T: ITALIANO
INPUT STRING
Where S stands for source word and T stands for target word.
•
There are 7 languages for translation:
ENGLISH
ITALIANO
DEUTSCH
FRANÇAIS
ESPAÑOL
PORTUGUÊS
NEDERLANDS
•
Tap S and T to select source and target language.
•
Enter the word for translation, Tap OK to start translation. Maximum length is 11 characters.
•
The first line shows the inputted or corresponding source word, the second line shows the
translated word.
Page 13
•
Tap Ï / Ð to see the additional translated word if they are present.
•
To view characters which are not displayed owing to the restriction of the screen width, tap ∧ /
∨ for off-screen characters.
Memory:
To enter memory mode, press menu and tap ∧ / ∨ or Ï / Ð to select MEMORY then tap
OK . Screen message “MEMORY” appears.
•
In Memory mode, user can see the number of records store in 7 applications and the total
memory used. The following is the screen message:
SCHD
N1
PHONE
N2
TO DO
N3
ANNIV
N4
MEMO
N5
EXPENSE
N6
WEB
N7
MEMORY
XXX%
where N1- N7 are the numbers of records store in each application
XXX is the total memory used
•
Tap ∧ / ∨ or Ï / Ð to view the above applications and the memory used.
Password:
To enter password mode, press menu and tap ∧ / ∨ or Ï / Ð to select PASSWORD then tap
OK . Screen message “NEW PASSWORD” appears.
Setting Password:
•
In password mode, carefully input a desired password which consists of maximum 8 letters.
Remember this password well. Tap OK to confirm the input.
•
Message “RE-ENTER” appears .
•
Carefully input the same password again. Tap OK to save the password.
•
If the second input matches with the first input, the unit returns to the memo screen and the icon
is displayed. Otherwise, message “INCORRECT!” is displayed.
Deleting the Password:
•
If a password is set and the user wants to delete it, enter Password mode and message
“PASSWORD” appears.
•
Enter the correct password and tap OK.
•
If correct password is entered, the screen message “NEW PASSWORD” appear, tap OK to
confirm deletion or tap esc to abort delete.
Page 14
Changing the Password:
•
If a password is set and the user wants to change it, enter Password mode and message
“PASSWORD” appears.
•
Enter the correct password and tap OK.
•
If correct password is entered, the screen message “NEW PASSWORD” appear, enter the new
password as described above.
System
To enter system mode, press menu and tap ∧ / ∨ or Ï / Ð to select SYSTEM then tap OK .
Screen message “SYSTEM” appears.
•
In System mode, user can change the following items:
Language Prompt
Screen Contrast
Date Format
Hour Format
Auto Power Off
Key Tone
•
Tap ∧ / ∨ or Ï / Ð to select the desired item.
•
To change language prompt, tap ENGLISH to enter the language-editing mode. There are 7
language prompt message to select:
ENGLISH
ITALIANO
DEUTSCH
FRANÇAIS
ESPAÑOL
PORTUGUÊS
NEDERLANDS
•
Tap ∧ / ∨ or Ï / Ð to select the desired language.
•
Tap OK to confirm the new setting or tap esc to abort.
•
There are 10 levels of screen contrast to adjust, tap the contrast bar to adjust.
•
To change date format, toggle between M/D/Y and D/M/Y to change the date format.
•
To change hour format, toggle between AM/PM and 24HR to change the hour format.
•
Select a value within 1 to 5 to define the auto power off time.
•
Toggle between ON and OFF to switch on or off the key tone.
•
Tap OK to confirm the new setting or tap esc to abort.
Page 15
Game
To enter game mode, press menu and tap ∧ / ∨ or Ï / Ð to select GAME then tap OK .
Screen message “GAME” appears.
Hangman Game:
•
The user is required to guess the word with only the length of the word given initially.
•
Enter letters which may be contained within the word. If the guess is correct, the letter will be
shown on the screen in its appropriate position(s) within the word.
•
The user will win the game if the entire word is guessed correctly within 9 attempts.
Defrag
Perform this optimization regularly in order to fully utilize the memory. The defragmentation
process might take a few minutes. Once the procedure is started, do not turn the unit OFF. The unit
will not accept any input while the memory optimization is processing. The screen will
automatically return to the Menu screen after finishing the process.
Synchronizing Data with Your PC
1.
2.
3.
4.
5.
6.
7.
8.
Install the PDO Desktop software from the included CD Rom. The installation routine
should start automatically when you insert the supplied CD into your PC.
After installation you will have two shortcuts on the PC Desktop. They are labeled PDO
Desktop and SmartSync.
SmartSync must now be configured to work to your PC. To configure SmartSync double
click on the SmartSync desktop shortcut. SmartSync will launch and appear in the lower
right corner of the PC screen in the system tray.
Right click on the SmartSync icon and select SmartSync Settings. Here you can select the
appropriate Comport (COM1, COM2, etc) for your PC. Select the correct port and Click on
Apply and OK.
SmartSync must appear in the system tray in order for the synchronization process to
function. You will have to manually start the SmartSync process unless you have selected
the "Load SmartSync automatically when computer starts" option in SmartSync Settings.
Connect the provided cable between the PC Comport and the Extreme3 making sure to fit
the cable snugly into the Extreme3.
On the Extreme3 go to the Menu and scroll down to "Link". Click OK on Link and then
answer "Yes" to initiate the sync procedure.
You will see the sync process start on the PC and "In Progress" will appear on the
Extreme3. When successfully finished a message will appear on the PC, "Sync OK" and on
the Extreme3 you will see "Success".
Page 16