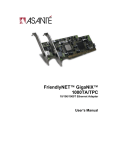
Download Asante GigaNIX 1000T Technical data
Transcript
Copyright 2000 Asanté Technologies, Inc., All rights reserved.
Legal Notice
This document is protected by copyright and distributed under licenses restricting its use, copying,
distribution, and decompilation. No part of this document may be reproduced in any form by any
means without prior written authorization of Asanté Technologies, Inc. Documentation is provided
“as is” without warranty of any kind, either express or implied, including any kind of implied or
express warranty of non-infringement or the implied warranties of merchantability or fitness for a
particular purpose.
U.S. Government End Users: This document is provided with a “commercial item” as defined by
FAR 2.101 (Oct. 1995) and contains “commercial technical data” and “commercial software
documentation” as those terms are used in FAR 12.211-12.212 (Oct. 1995). Government End Users
are authorized to use this documentation only in accordance with those rights and restrictions set
forth herein, consistent with FAR 12.211-12.212 (Oct. 1995), DFARS 227.7202 (Jun. 1995) and DFARS
252.227-015 (Nov. 1995).
Asanté Technologies, Inc. reserves the right to change any products described herein at any time,
and without notice. Asanté Technologies, Inc. assumes no responsibility or liability arising from the
use of products described herein, except as expressly agreed to in writing by Asanté Technologies,
Inc. The use and purchase of this product does not convey a license under any patent rights,
trademark rights, or any other intellectual property rights of Asanté Technologies, Inc.
Asante, the Asanté logo, FriendlyNET and GigaNIX are trademarks or registered trademarks of of
Asanté Technologies. All other brand names and products are trademarks or registered trademarks
of their respective holders. All features and specifications are subject to change without notice.
Regulatory Compliance
FCC Class B Notice. The equipment complies with Part 15 of the FCC Rules. Operation is subject to
the following two conditions: 1) The device may not cause harmful interference, and 2) This
equipment must accept any interference received, including interference that may cause undesired
operation.
The equipment has been tested and found to comply with the limits for a Class B digital device,
pursuant to Part 15 of the FCC Rules. These limits are designed to provide reasonable protection
against harmful interference in residential installation. The equipment generates, uses and can
radiate radio-frequency energy and, if not installed and used in accordance with the instructions,
may cause harmful interference to radio communications. However, there is no guarantee that
interference will not occur in a particular installation. If the equipment does cause harmful
interference to radio or television reception, which can be determined by turning the equipment off
and on, the user is encouraged to try to correct the interference by one or more of the following
measures: Reorient or relocate the receiving antenna, Increase equipment and the receiver, Connect
the equipment into an outlet on a circuit different from that to which the receiver is connected,
Consult the dealer or an experienced radio/TV technician for assistance.
Do not make mechanical or electrical modifications to the equipment.
VCCI Class B Notice. The equipment is a Class B product based on the standard of the Voluntary
Control Council for Interference from Information Technology Equipment (VCCI). If used near a
radio or television receiver in a domestic environment, it may cause radio interference. Install and
use the equipment according to the instruction manual.
CE Notice. The CE mark on this equipment indicates that this equipment meets or exceeds the
following technical standards: EN 50082-1, EN55022, EN60555-2, EN61000-4-1, EN61000-4-2, EN
61000-4-3, EN61000-4-4, and EN61000-4-5.
GigaNIX 1000T User Manual
Version 2.0
i
GigaNIX 1000T Table of Contents
Table of Contents
LEGAL NOTICE......................................................................................................................................... I
TABLE OF CONTENTS ...........................................................................................................................II
GIGANIX INTRODUCTION ......................................................................................................................1
GIGANIX INSTALLATION ON A G3 OR G4 PLATFORM .....................................................................4
GIGANIX INSTALLATION ON A MAC OS X SERVER PLATFORM ..................................................15
GIGANIX INSTALLATION ON A WINDOWS NT/2000 PLATFORM...................................................22
GIGANIX WINDOWS NT HARDWARE INSTALLATION.....................................................................23
CONTACTING ASANTÉ ........................................................................................................................29
List of Illustrations
GIGANIX FACEPLATE
GIGANIX LED ACTIVITY
SYSTEMS SUPPORTED
GIGANIX BOARD SPECIFICATIONS
OPENING THE G3/4 CASE
PCI CARD INSTALLATION IN MOTHERBOARD PCI SLOTS
DIAGRAM SHOWING ORIENTATION FOR UTP CAT-5 CABLE
DIAGRAM SHOWING STALLION GT FACEPLATE AND UTP CAT-5 CABLE
1 TO 1 UTP CABLE PIN OUT
CROSSOVER UTP CABLE PIN OUT
GIGANIX INSTALL CD-ROM
TYPICAL CONTROL PANEL DISPLAY
APPLETALK CONTROL PANEL
SELECTING GIGANIX AND APPLETALK
TYPICAL CONTROL PANEL DISPLAY
TCP/IP CONTROL PANEL
WINDOWS NT SYSTEM REQUIREMENTS TABLE
ii
Version 2.0
GigaNIX 1000T User Manual
2
2
3
3
5
6
7
7
8
8
9
11
12
12
13
14
22
GigaNIX 1000T Introduction
Asanté GigaNIX Introduction
GigaNIX Introduction
The Asanté GigaNIX series of Gigabit Ethernet PCI adapters for Apple Power
Macintosh, G3, G4, Windows NT, and Windows 2000 brings 1 Gigabit per second
network performance to your server or desktop.
GigaNIX is fully compliant with IEEE 802.3z, the Unshielded Twisted Pair (UTP)
GigaNIX solution is fully compliant with IEEE 802.3ab and IEEE 802.3u.
Included with all GigaNIX adapters are drivers for Mac OS 8,9, & X Server, as well as
Windows NT, Windows 2000 and Red Hat Linux.
System Options, Requirements and Specifications:
The table below lists the system requirements and specifications for the GigaNIX
adapter.
Major Features
The main characteristics of GigaNIX are listed below:
_ Installs in any PCI capable Power Macintosh, G3, or G4 computer
with a vacant PCI slot
_ Supports 33MHz., 32/64 bit PCI interfaces
_ Drag and drop data transfers across Gigabit Ethernet networks and
media
_ Fully compliant with the IEEE 802.3ab specification
_ Full Duplex Gigabit Ethernet interface
_ Sophisticated dual channel Direct Memory Access (DMA) with Dual
onboard RISC processor
_ 32/64 bit PCI Master and Slave interfaces
_ Complies with all PCI mechanical and electrical requirements
_ Seamless access to other GigaNIX Gigabit Ethernet equipped
workstations using standard AppleShare operations
GigaNIX 1000T User Manual
Version 2.0
1
GigaNIX 1000T Introduction
GigaNIX Connectors and Display:
The faceplate of the GigaNIX has a RJ-45 connector that supports connection of
Category 5 cabling and 4 LEDs. The diagram below depicts the GigaNIX faceplate:
GIGANIX FACEPLATE
The faceplate of the GigaNIX 10/100/1000 adapter has four LEDs; one for each port
speed option 10Mbps (Ethernet), 100Mbps (Fast Ethernet), and 1000Mbps (Gigabit
Ethernet). The fourth Yellow LED is data detected.
LED
Data
Color
Yellow
State
Blinking
On
Off
1000
Green
On
Off
100
Green
On
Off
10
Green
On
Off
Description
Data Detected on the port
Data Detected on the port
No Data Detected on the
port
1000 Mbit Link Negotiated
1000 Mbit Link Not
Negotiated
100 Mbit Link Negotiated
100 Mbit Link Not
Negotiated
10 Mbit Link Negotiated
10 Mbit Link Not
Negotiated
GIGANIX LED ACTIVITY
Note:
If all four LEDs remain on after power up or reset, the adapter driver software is
either missing or improperly installed.
2
Version 2.0
GigaNIX 1000T User Manual
GigaNIX 1000T Introduction
Workstation
Server
System
Software
Any Power Macintosh, G3, or G4 with an open PCI
slot.
Any Apple G3, G4 server. Windows NT, Windows
2000, or Linux server with an open PCI slot.
Mac OS 8,9, and X Server. Windows NT 4.0,
Windows 2000, and Red Hat Linux.
SYSTEMS SUPPORTED
GigaNIX
Systems Supported
PCI Bus Specifications
Connections
Operating Distance
Certifications
Emissions
CE Safety
Power Requirements
Mechanical
Environmental
Mac OS 8,9 & X Server
Windows NT
Windows 2000
Linux (Red Hat)
PCI bus master, 32/64-bit, 33/66 MHz
with adaptive DMA
RJ-45 UTP connector for
Category-5 copper cabling
Category-5 cable plant
4-pair , 100 meters
IEEE Compliancy
IEEE 802.3ab & 802.3u
FCC Class B, VCCI Class B
UL 1950, CUL, TUV
Voltage
Amps
Power
Board Length
Board Height
Board Weight
Operating temperature
Storage temperature
Relative Humidity
Operating Altitude
+5 VDC
4.0 Amps (Max.)
20 Watts (Max.)
6.6 inches
3.75 inches
9 ounces (Approx.)
0 to 70 C°
-50 – 100 C°
10 – 90%
0 – 10,000 Ft.
GIGANIX BOARD SPECIFICATIONS
GigaNIX 1000T User Manual
Version 2.0
3
GigaNIX Installation
GigaNIX Installation
GigaNIX Installation on a G3 or G4 Platform
Preparing your workstation to join the Gigabit Ethernet Network is a straightforward process involving only three basic steps:
1) Installing the GigaNIX Card and Software The GigaNIX card is specially
designed for easy plug-and-play installation. There are no user configurable
jumpers, or settings. Installation is accomplished by simply opening up your Mac,
locating an empty PCI slot, and plugging the GigaNIX card into it.
2) Connecting the GigaNIX to a Gigabit Ethernet Network A Macintosh
workstation can be installed into a Gigabit Ethernet network or other Macs using
several types of cable and interconnection schemes as described later in this chapter.
3) Activating the Gigabit Ethernet Interface After all the hardware and software is
installed, a simple procedure is required to activate the Gigabit Ethernet interface for
use.
After successful completion of the steps in this chapter, you will be able to use your
new GigaNIX Gigabit Ethernet Interface to communicate over any Gigabit Ethernet
Network.
Apple Power Macintosh, G3/G4 Board Installation Procedure
This manual describes installation in Apple G3 and G4 model computers. Older
platform case designs may require a slightly different installation procedure. If in
doubt, consult the User Guide for each machine.
Note:
Not all Power Macintosh Computers have a PCI Slot. The user should consult the
Reference Manual that came with the Mac for more information before attempting
installation. If the machine does have PCI capabilities, insure there is at least one
open PCI slot.
Power down the Macintosh Workstation & peripherals. Turn off power to the
Macintosh workstation and all attached peripheral devices, and remove the power
cable.
4
Version 2.0
GigaNIX 1000T User Manual
GigaNIX Installation
OPENING THE G3/4 CASE
Ground yourself — Many electronic components inside the Power Macintosh case
and on the GigaNIX card can be severely damaged by receiving a shock of static
electricity. Before touching any electronic components or boards, discharge any static
electricity on your body by touching the bare metal case around the power supply
inside you Mac.
While installing the GigaNIX card, avoid generating additional static electricity by
not walking across a carpet or other static generating areas. If you have to leave the
area at any point during the installation, be sure to ground yourself again before
going on.
Assess system power requirements —If you have one or more other PCI cards
already in your Mac, you may want to take a moment to make sure that your system
is able to provide necessary power to support the addition of the GigaNIX Interface
card.
GigaNIX 1000T User Manual
Version 2.0
5
GigaNIX Installation
Find Unused PCI Slot
PCI CARD INSTALLATION IN MOTHERBOARD PCI SLOTS
Align the GigaNIX PCI edge connector and the Macintosh motherboard socket as
indicated in the diagram above. The PCI card edge connector contains 'key' notches
that correspond to dividers in the motherboard slot. Once aligned, push down
firmly on the PCI card until it is completely seated in the slot.
Close the cover of your Mac — Once the GigaNIX card has been successfully
installed, close the G3/G4 system, reattach the power cable, and any other cables
that were removed for the card installation procedure.
6
Version 2.0
GigaNIX 1000T User Manual
GigaNIX Installation
Connecting to the GigaNIX 1000T
Connecting the GigaNIX 1000T to the external network This section explains how to connect the
GigaNIX 1000T to the external network using the standard Cat 5 cables.
The diagram below shows a typical UTP cable used to connect to the GigaNIX 1000T.
DIAGRAM SHOWING ORIENTATION FOR UTP CAT-5 CABLE
The GigaNIX 1000T utilizes a standard Cat 5 Unshielded Twisted Pair (UTP) copper
cable. Maximum cable length is 100 meters or 328 feet.
DIAGRAM SHOWING GIGANIX FACEPLATE AND UTP CAT-5 CABLE
Insert the Cat 5 cable into the UTP connector until self-locking tab clicks into position. Two types
of cables are used when connecting the GigaNIX 1000T to the network.. A 1 to 1 cable is typically
used to connect Ethernet adapters to Hubs and Switches, a Crossover cable may also be used to
adapters to other adapters.
GigaNIX 1000T User Manual
Version 2.0
7
Pinouts for both these cables are shown below.
Pin Number
1
2
3
4
5
6
7
8
GigaNIX Installation
Signal
Transmit+
TransmitReceive+
Unused
Unused
ReceiveUnused
Unused
1 TO 1 UTP CABLE PINOUT
CROSSOVER UTP CABLE PIN OUT
8
Version 2.0
GigaNIX 1000T User Manual
Installing the Mac OS 8/9 Driver
Installing the GigaNIX Mac OS 8, 9 driver software
Open GigaNIX CD-ROM — To start the installation, open the GigaNIX
Installation CD-ROM by double clicking on the CD-ROM ICON.
GIGANIX INSTALL CD-ROM
Launch the GigaNIX Installer — Double click the GigaNIX 1000 installer to start
the Installer.
GigaNIX 1000T User Manual Version 2.0
9
Installing the Mac OS 8/9 Driver
Select Folder for Installation — You may select the folder where the GigaNIX
folder and the GigaNIX control application will be placed. If you choose not to
select the location of the GigaNIX folder then the folder will be placed at the root
level of the active system drive.
Select the Install Button — Click on the install button to finish the install process.
If there are any active applications open the following window will appear. At
this point you may choose to continue in which case any active application will be
shutdown.
Restart the computer — The installation process is complete click on the restart
button to reset and restart your computer.
.
After installation of the software and restart of the computer, the GigaNIX Gigabit
Ethernet interface card and driver software must be activated for use. Unless you
radically change your Mac’s setup, this procedure will only have to be performed
once. After that, your Mac will be able to locate and activate the interface
automatically whenever you reset or power-up your machine.
10
Version 2.0
GigaNIX 1000T User Manual
Configuring GigaNIX 1000T for AppleTalk
Configuring GigaNIX for AppleTalk
Access the AppleTalk Control Panel — Pull-down the Apple ( ) menu and select
the AppleTalk Control Panel item to open a window that should look similar to
the one shown below:
TYPICAL CONTROL PANEL DISPLAY
Find and open the AppleTalk Control Panel — Scroll through the display of
Control Panel items, if necessary, until you see the AppleTalk item. Clicking on it
opens the AppleTalk Control Panel as shown in the display that follows.
Configuring the GigaNIX for AppleTalk — Configuring your G3/G4 to use the
GigaNIX for an AppleTalk connection is accomplished with the AppleTalk control
panel. Open the AppleTalk control, select the appropriate slot for the GigaNIX
interface card using the Connect Via: option. Additional options may be selected
based on the needs of the system, using options documented in the Apple network
system administration guides and manuals.
GigaNIX 1000T User Manual Version 2.0
11
Configuring GigaNIX 1000T for AppleTalk
APPLETALK CONTROL PANEL
Select Connect Via: window — To activate the GigaNIX interface, select the
Connect Via: window and drag cursor to the external Ethernet interface in the
appropriate slot and release. Close the panel to save your changes.
SELECTING GIGANIX AND APPLETALK
12
Version 2.0
GigaNIX 1000T User Manual
Configuring GigaNIX 1000T for TCP/IP
Configuring GigaNIX for TCP/IP
Access the TCP/IP Control Panel — Pull-down the Apple ( ) menu and select the
TCP/IP Control Panel item to open a window that may look similar to the one
shown below:
Configuring your G3/G4 to use the GigaNIX for TCP/IP connection is
accomplished with the TCP/IP control panel. Open the TCP/IP control, select the
appropriate slot for the GigaNIX interface card using the 'Connect Via: ' option.
Additional options may be selected based on the needs of the system, using
options documented in the Apple TCP/IP network system administration guides
and manuals.
TYPICAL CONTROL PANEL DISPLAY
GigaNIX 1000T User Manual Version 2.0
13
Configuring GigaNIX 1000T for TCP/IP
Find and open the TCP/IP Control Panel — Scroll through the display of Control
Panel items, if necessary, until you see the TCP/IP Icon. Clicking on it opens the
TCP/IP Control Panel as shown in the display below:
TCP/IP CONTROL PANEL
Select Connect Via: window — To activate the GigaNIX interface, select the
Connect Via: window and drag the cursor to Gigabit Ethernet and release. Close
the panel to save your changes.
This completes the hardware and software installation for the GigaNIX Gigabit
Ethernet interface and driver software.
14
Version 2.0
GigaNIX 1000T User Manual
GigaNIX Mac OS X Server Driver Installation
GigaNIX Installation on a Mac OS X Server platform
This section explains the driver installation under Mac OS X Server. Installation is
accomplished via a provided installation script file which is very easy to use.
Follow each step below to complete the installation process:
Insert the Asante_GigaNIX1000T install CD ROM into the CD ROM drive of your
Mac OS X Server.
GigaNIX 1000T User Manual Version 2.0
15
GigaNIX Mac OS X Server Driver Installation
After the CD ROM mounts, double click on CD Icon.
Double click on the giganix1000t.pkg icon, then select the asante_mac_osx _server
item in Column two.
16
Version 2.0
GigaNIX 1000T User Manual
GigaNIX Mac OS X Server Driver Installation
Double click on the osx item in column two.
Double click on the menu item asante.pkg.
GigaNIX 1000T User Manual
Version 2.0
17
GigaNIX Mac OS X Server Driver Installation
Double click on the Install button.
18
Version 2.0
GigaNIX 1000T User Manual
GigaNIX Mac OS X Server Driver Installation
Select the Install button to continue installation.
GigaNIX 1000T User Manual
Version 2.0
19
GigaNIX Mac OS X Server Driver Installation
The window above will be displayed during the actual installation.
20
Version 2.0
GigaNIX 1000T User Manual
GigaNIX Mac OS X Server Driver Installation
NOTE:
On successful completion of the GigaNIX adapter, the window above will be
displayed.
NOTE:
If you are re-installing the GigaNIX, this message will be displayed. Select
Continue button to re-install.
GigaNIX 1000T User Manual
Version 2.0
21
GigaNIX Windows NT/2000 Driver Installation
GigaNIX Installation on a Windows NT/2000 platform
This section describes the installation of the GigaNIX in Windows NT environment.
For specific details on performing the hardware installation, please refer to the
system’s user manual.
Windows NT Pre-Installation Checklist
Check to see that your server meets Hardware and Software requirements listed in
the Windows NT System Requirements table below:
Verify that your system is using the latest BIOS. Review the information in the
ReadMe file on the CD-ROM for more information not available at the time this
manual was written. If your system is active, shut it down
When the system shut down is complete, power off and unplug your system
Category
Hardware:
Requirements
Pentium based computer that
meets Window NT 4.0 software
requirements
One open 32/64 bit PCI slot
128 MB DRAM (Min.)
Software:
Operating System
Microsoft Windows NT 4.0 (server
or workstation) with Service Pack 4
or later
Microsoft Windows 2000
WINDOWS NT SYSTEM REQUIREMENTS TABLE
22
Version 2.0
GigaNIX 1000T User Manual
GigaNIX Windows NT/2000 Driver Installation
GigaNIX Windows NT Hardware installation
Observe all precautions in the Installation Checklist.
Remove the system cover, and select any open PCI slot.
Remove the blank cover plate from the slot you have selected (retain the screw).
Holding the GigaNIX card by its edges, align the adapter’s connector with the PCI
connector on the motherboard.
Applying even pressure at both corners of the card, push the adapter down until it is
firmly seated in the PCI slot.
Secure the adapter with the screw.
Replace the cover.
Power on the system.
For connecting network cables to the GigaNIX, please see the “Connecting to the
GigaNIX” section presented earlier in this manual.
Installing the GigaNIX Windows NT Driver
The GigaNIX adapter must be physically installed in your workstation or server
prior to installing the driver software. To install the network driver, perform the
following:
Verify that the Windows NT system is upgraded with Service Pack 4 (or the latest
available).
2)
Start your Windows NT system and log on.
Note:
You must have Network Administrator privileges to install the driver software!
GigaNIX 1000T User Manual
Version 2.0
23
3)
GigaNIX Windows NT/2000 Driver Installation
Open the Control Panel
4) In the Control Panel window, double click on the Network Icon:
24
Version 2.0
GigaNIX 1000T User Manual
GigaNIX Windows NT/2000 Driver Installation
5)
When the Network Control Panel opens, select the “Adapters” tab.
[2] GigaNIX PCI Adapter
Asanté GigaNIX 1000TPC Adapter [Bus 2 Slot 6]
6)
To install the driver software for the GigaNIX driver, click the “Add” button.
GigaNIX 1000T User Manual
Version 2.0
25
GigaNIX Windows NT/2000 Driver Installation
7)
When the Select Network adapter window opens, click the “Have Disk”
button.
When prompted, insert the GigaNIX CD-ROM into your system’s CD-ROM drive.
Type the path to the driver that matches your system and select “OK”.
E:\Asante_NT_driver
26
Version 2.0
GigaNIX 1000T User Manual
GigaNIX Windows NT/2000 Driver Installation
In the Select OEM Options window, “GigaNIX Adapter Release” will be highlighted.
Click the “OK” button.
Asanté GigaNIX Gigabit Ethernet Adapter
The GigaNix Driver Properties will open:
Asanté GigaNIX Adapter [1]
When the Properties window appears, the NIC status and configuration tab is
shown. The options under this tab are used for configuring basic adapter properties.
Other tabs may be available for configuring optional properties (such as failover
teaming and VLANs). Click on any tab to display its configurable options.
GigaNIX 1000T User Manual
Version 2.0
27
10)
GigaNIX Windows NT/2000 Driver Installation
Click the “Yes” button to restart your computer.
When the system returns to proper operation, verify that the adapter port LEDs
operate as described in the GigaNIX LED Activity Table in The GigaNIX
Introduction chapter.
GigaNIX installation on your Windows NT platform is now complete.
28
Version 2.0
GigaNIX 1000T User Manual
Contacting Asanté
Contacting Asanté
You can contact Asanté in one of several ways, via the Web, Email or telephone.
URL for Asanté:
http://www.asante.com
This web site contains technical as well as sales information for all Asanté products.
You may also register your products here online.
E-Mail Access:
[email protected]
Send all technical queries to the above Technical support address. Email access is
available to all accounts during product warranty period.
[email protected]
Send all sales related questions and comments to above address.
GigaNIX 1000T User Manual
Version 2.0
29


