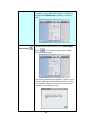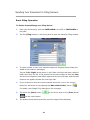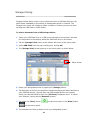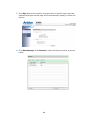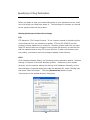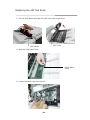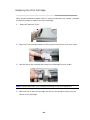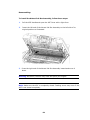
1
Multifunction Scan Center
User's Manual
Regulatory model: DT-1214H
manual-en-250-0823-E-SC8800-v100
Avision Inc.
Safety Information
When using this equipment, the following safety precautions should always be followed.
Safety During Operation
In this manual, the following important symbols are used:
WARNING:
Indicates potentially hazardous situations, which if instructions are not followed, could result in
death or serious injury.
CAUTION:
Indicates a potentially hazardous situation which, if instructions are not followed, may result in
minor or moderate injury or damage to property.
Important:
Indicates operational requirements and restrictions. Please read and follow these instructions
to ensure a proper operation and to avoid damage to the machine.
Note:
Indicates further explanation or clarification.
Reading this is highly recommended.
WARNING:
To avoid hazardous electric shock or fire, do not remove any covers or screws other than those
specified in this manual.
9
CAUTION:
To reduce the risk of fire, use only no.26AWG or larger telecommunication line cord.
9
Disconnect the power plug by pulling the plug, not the cable.
9
Do not touch the metal fingers of the ADF pad module. The edges are sharp and touching
them may result in injury.
ii
Precautions
Do not install the equipment near heating or air conditioning units.
Do not install the equipment in a humid or dusty place.
Place the equipment securely on an even, flat surface. Tilted or uneven surfaces may
cause mechanical or paper-feeding problems.
Retain the box and packing materials for shipping purposes.
Notice
Important
Do not make copies of any item for which copying is prohibited by law.
Copying the following items are normally prohibited by the local law:
Bank bills, revenue stamps, bonds, stock certificates, bank drafts, checks, passports,
driver's licenses.
Copyrights and Trademarks
Ethernet is a registered trademark of Xerox Corporation.
Microsoft, Windows, Windows NT, Windows XP, and Windows Vista are registered trademarks
of Microsoft Corporation in the United States and/or other countries.
Other product names used herein are for identification purposes only and may be trademarks
of their respective companies. We disclaim any and all rights to those marks.
Warranty
The information contained in this document(s) is subject to change without notice.
The manufacturer makes no warranty of any kind with regard to this material, including, but
not limited to, the implied warranties of fitness for a particular purpose.
The manufacturer shall not be liable for errors contained herein or for incidental or
consequential damages in connection with the furnishing, performance, or use of this material.
iii
Federal Communications Commission (FCC) compliance information
statement Part 15
The product has been tested and found to comply with the limits for a Class A digital device
pursuant to Part 15 of the FCC Rules.
Operation is subject to the following two conditions: (1)
this device may not cause harmful interference and (2) this device must accept any
interference received including interference that may cause undesired operation.
The FCC Class A limits are designed to provide reasonable protection against harmful
interference when the equipment is operated in a commercial environment.
This equipment
generates, uses, and can radiate radio frequency energy and, if not installed and used in
accordance with the instruction manual may cause harmful interference in which case the user
will be required to correct the interference at his own expense.
European Union Regulatory Notice
Products bearing the CE marking comply with the following EU Directives:
z
z
z
Low Voltage Directive 2006/95/EC
EMC Directive 2004/108/EC
Restriction of the use of certain hazardous substances (RoHS) Directive 2011/65/EU
CE compliance of this product is valid if powered with the correct CE-marked AC adapter
provide by Avision.
This product satisfies the Class A limits of EN55022, EN55024, safety requirements of EN
60950 and ROHS requirements of EN50581.
CE Warning
This is a class A product. In a domestic environment this product may cause radio interference
in which case the user may be required to take adequate measures.
iv
Table of Contents
1
Getting Started ......................................................... 1
Introduction ............................................................................................. 1
Features ................................................................................................... 1
External View ........................................................................................... 3
The Front View ................................................................................... 3
The Connection Ports ......................................................................... 4
The Control Panel ............................................................................... 5
Pre-installation & Symbol Information ..................................................... 6
Preinstallation.................................................................................... 6
Frequently Used Buttons on the Touch Panel ..................................... 9
2
Installing Your Machine.......................................... 10
Minimum Configuration Requirements ................................................... 10
Installing the ADF Output Tray............................................................... 11
Unlocking the Scan Unit ......................................................................... 12
Connecting the Cables ............................................................................ 14
Connecting the Ethernet Cables ....................................................... 14
Connecting the Power and Turning on the Machine.......................... 14
Installing the Print Cartridge ........................................................... 16
3
Operation ............................................................... 18
Document Loading Tips .......................................................................... 18
Placing Document(s) in the ADF............................................................. 19
Placing Document(s) on the Flatbed Glass ............................................. 21
Copying .................................................................................................. 22
Basic Copy Operation ....................................................................... 22
Change More Copy Settings.............................................................. 24
Advanced Copy................................................................................. 31
Sending Your Document to E-mail Addresses ......................................... 36
Basic E-mail Operation ..................................................................... 36
Change More E-mail Settings ........................................................... 38
Sending Your Document to Filing Servers .............................................. 40
Basic Filing Operation ...................................................................... 40
Change Filing Settings...................................................................... 42
Using the Shortcut Button ...................................................................... 45
Storage Printing ..................................................................................... 46
Scanning and Broadcasting Your Images ............................................... 48
Creating A New Shortcut Button............................................................. 51
Viewing the User’s Manual ..................................................................... 57
v
4
Configuring the Machine ......................................... 58
Specifying the Product’s Network Settings .............................................59
Specifying More Administrator Settings by The Touch Panel...................62
Information Report.......................................................................... 63
Configuration................................................................................... 63
Network Settings ............................................................................. 64
Security Management ...................................................................... 65
Service Mode ................................................................................... 65
E-Mail Default .................................................................................. 65
Filing Default ................................................................................... 66
System Update ................................................................................ 66
Bug Report....................................................................................... 67
Activity Log Report .......................................................................... 67
Specifying More Administrator Settings by an Embedded Web Page.......68
Summary of the Web Pages ....................................................................70
Specifying A Filing Destination ...............................................................83
5
Customizing Your Scan Options .............................. 85
6
Troubleshooting...................................................... 97
Clearing Paper Jams ...............................................................................97
Errors Indicated in the Operational Panel ...............................................98
Technical Support .................................................................................103
7
Maintenance ......................................................... 105
Cleaning the Touch Panel Monitor.........................................................105
Cleaning the Flatbed Glass....................................................................106
Cleaning the ADF ..................................................................................107
Cleaning the Skew Sensor.....................................................................110
Cleaning the Imprinter .........................................................................111
Cleaning the Print Cartridge..................................................................112
Consumables and Replacement Cycle ...................................................114
Replacing the ADF Friction Roller Assembly ..........................................114
Replacing the ADF Pick Roller ...............................................................116
Replacing the Print Cartridge................................................................120
Replacing the Attract Ink Box Assembly ...............................................123
8
Specifications ....................................................... 125
Index
................................................................... 128
vi
1
Getting Started
Introduction
Thank you for purchasing this multi-functional product (MFP). With the product, you
can instantly scan single-sided or double-sided paper-based document and deliver
the electronic image to various destinations including e-mail addresses, ftp servers,
a network printer, web site, or someone else’s computer on the network. In addition,
the product allows you to save the scanned image to a network printer, a USB flash
drive, or the product’s own memory.
Features
Digital Copying:
Connected to a network printer in an intranet environment, the product allows you
to perform digital copies with outstanding copy quality. With an intuitive control
panel and a quality LCD Touch Panel, making digital copy becomes fast and easy.
E-mailing:
Connected to an ethernet network and a SMTP server, the product allows you to
transmit document(s) to your e-mail as attachment. With a tap of the e-mail key
and the selection of your recipients' e-mail addresses, the document(s) is/are first
scanned and converted into an image file, and then transmitted to remote recipients
within minutes.
Filing (Scan to a Network Folder):
The product allows you to send the scanned documents to a server or a personal
computer’s file folder over intranet with FTP (File Transfer Protocol), FTPS (FTP
Secure), CIFS (Common Internet File System). This feature off-loads the mail
server from handling large attachments.
1
Duplex Scanning:
Through the auto document feeder, the product allows you to scan double-sided
documents to digitize your documents more effectively.
Sending Multi-Page Document:
With the Auto Document Feeder, the product allows a stack of 50-page document(s)
to be continuously scanned at one time in reliable quality to increase your efficiency.
Managing the Product Remotely:
The product provides a convenient way to manage your e-mail address book, filing
destinations (folders), and telephone book remotely. By simply typing the
machine's IP address in the URL field of your browser, the product web page will be
prompted. This web page allows the administrator to create up to 2000 e-mail
addresses, 40 filing destinations, and 200 fax numbers to conveniently deliver the
scanned documents to multiple recipients.
Using Convenient Shortcuts:
By assigning your frequently used working modes as shortcut buttons, the product
allows you to scan your document and send the scanned images to your desired
destinations in seconds including Google Drive and Microsoft SharePoint.
Scanning and Saving Your Images to a USB Flash Drive:
By plugging a USB flash drive into the USB port of the product, the product allows
you to scan your document and save the scanned images to your USB flash drive.
Scanning and Saving Your Images to the Product’s Memory:
By selecting a public folder as a filing destination, the product allows you to scan
and save the scanned image in the product’s memory and access the file from the
product’s embedded web page.
Preview:
Before sending your documents over the network, the product allows you to view a
reduced size of the scanned document to verify if the scanned image has been skew,
or upside down. If one of the pages is skew, you can delete and rescan that page to
save your time.
Scancast:
Scan and broadcast the images respectively to various destinations including a
public folder (the product’s memory), a USB flash drive, an e-mail address, a file
server on the network such as FTP、CIFS, or a network printer.
2
External View
The Front View
ADF Input Tray
ADF
Cover Open Lever
Load the document
Cover Open Lever
Automatic document
Pull this lever to open
onto this part when
feeder.
the ADF cover.
scanning document.
Pull this lever to open
the imprinter cover.
Flatbed Cover
Paper Stopper
Close this cover when
scanning document
from the platen glass.
Hold your documents
to prevent them from
falling apart.
Platen Glass
Stacker
Place single-page or
For using this part,
pull it out as shown.
Documents are
ejected from the ADF
to the tray.
fragile document face
down on the glass.
Power Button
Touch Panel
Monitor
Operator Panel
Card Reader
product.
Operate your machine
through the Touch
To turn on the
Insert memory card
See page 5.
into the card reader.
Panel.
3
The Connection Ports
LAN Port
Main Power Switch
The main power
switch of the
product.
COM Ports
Connect the product
to an external
keyboard.
To turn on the
product, press 「l」.
Connect the product
to network with a
LAN cable.
Audio Ports (x6)
Connect the product
to audio devices.
Power Receptacle
USB Port (x4)
Plug the power cord.
Connect the product
to USB devices..
PS/2 Mouse Port
Keyboard Port
Monitor Port
Connect the product
to an additional
mouse (PS/2) if
required.
Connect the product
to an additional PS 2
keyboard if required.
Connect the product
to an external
monitor if required.
4
The Control Panel
LED Indicator Lights
Power
Turn on the power
and the Power LED
light will be solidly lit.
Check
If there is an error
condition, the Check
LED light will blink in
red color.
HDD
Stop Button
Press to stop
scanning during
operation.
Start Button
Press to start a
scan.
5
The HDD LED light
blinks continuously
to indicate the hard
disk is processing
data.
Pre-installation & Symbol Information
Preinstallation
The product has to be setup properly on your network to perform e-mail and filing
functions. The following network parameters have to be set.
Important !
Make a copy of the following table and ask your Network Administrator to
complete the information.
1. DHCP Enable:
2. IP Address:
3. Subnet Mask:
4. Gateway IP:
5. DNS Server:
6. WINS Server:
7. SMTP Server:
8. SMTP Port:
9. LDAP Server:
10. LDAP Port:
.
.
.
.
.
.
.
.
.
.
.
.
.
.
.
.
.
.
25
6
Explanation of contents:
1. *DHCP Enable:
Choose Yes to obtain IP/subnet/gateway/DNS
server/WINS server addresses automatically
from DHCP server.
2. *IP Address:
The Internet Protocol (IP) address assigned to
your machine by your network administrator or
by DHCP server.
3. Subnet Mask:
The net mask address assigned by your
network administrator or by DHCP server.
4. Gateway IP:
The gateway IP address assigned by your
network administrator or by DHCP server or by
DHCP server.
5. *DNS server:
The IP address of DNS server assigned by your
network administrator.
6. *WINS Server:
The IP address of WINS server assigned by
your network administrator.
7. *SMTP Server:
The IP address of your SMTP mail server
assigned by your network administrator.
8. SMTP Port:
The port number of your SMTP Mail Server.
9. *LDAP Server:
The IP address of your LDAP server.
10. LDAP Port:
The port number of your LDAP server.
7
Note:
1. DHCP server: With DHCP (Dynamic Host Configuration Protocol), a host can
automatically be given a unique IP address each time it connects to a
network--making IP address management an easier task for network
administrators. If the DHCP server is available from your network, you do not
need to enter TCP/IP, subnet mask, gateway, and DNS information. Instead,
this information will be automatically given for the product.
2. IP Address: An IP (Internet Protocol) address uniquely identifies a host
connection to an IP network. System administrator or network designer
assigns the IP address. The IP address consists of two parts, one identifying
the network and the one identifying your node. The IP address is usually
written as four numbers separated by periods. Each number can be zero to
255. For example, 10.1.30.186 could be an IP address.
3. SMTP: Stands for Simple Mail Transfer Protocol. It is the main communication
protocol used to send and receive e-mail on the internet.
4. DNS: Stands for Domain Name System. The DNS server identifies hosts via
names instead of IP addresses. If the DNS server is available on your network,
you can enter the domain name instead of digits for the IP address.
5. WINS: Stands for Windows Internet Naming Service. WINS resolves Windows
network computer names (also known as NetBIOS names) to Internet IP
addresses, allowing Windows computers on a network to easily find and
communicate with each other.
6. LDAP: Stands for Lightweight Directory Access Protocol. LDAP enables users to
access directories and address books directly from external networked devices
to simplify document distribution.
8
Frequently Used Buttons on the Touch Panel
The following table lists the frequently used buttons and their functions on the touch
panel:
The Shutdown button:
Choose to shutdown, reboot, sleep, or refresh the machine.
The Information button:
Choose to inform you current status of the machine.
The Start button:
Choose to start scanning the document and sending the
scanned image to E-mail, Public Folder, USB Flash Drive, or
other destinations.
The Exit button:
Choose to exit current dialog box.
The OK button:
Choose to confirm the current settings and leave current
dialog box.
The Abort button:
Choose to abort the current action.
9
2
Installing Your Machine
This chapter is specifically targeted to the persons who are responsible for the
administration of the product. It is recommended that the administrator read this
chapter before installing the machine.
Minimum Configuration Requirements
To make the best use of the product, the following configuration is required:
To send e-mails from the product:
•
•
TCP/IP network
A SMTP server
To file document(s) via intranet
•
•
FTP, FTPS, or CIFS protocol environment
Windows 2000, Windows Me, Windows XP, Windows Vista, Windows 7,
Windows 8
To make copies:
•
A network printer
10
Installing the ADF Output Tray
1.
Raise the Stacker Tray to about 45 degrees and then insert the left pin of the
Stacker Tray to the left hole in the back of the product as illustrated.
2.
Hold the left side of the Stacker Tray with your left hand and press the right
end of the Stacker Tray inward to position the right pin above the right hole in
the back of the product as illustrated. Press down the right pin to slide it into
the right hole.
1
2
3.
Pull out the Stacker Extension to the length of the document (3), and raise the
Stopper to stop the document (4) to prevent documents from falling.
4
3
11
Unlocking the Scan Unit
Before using the product, please first unlock the product. The Transportation Lock is
designed to prevent the optical unit from moving during transportation.
To unlock the product, follow these steps:
1. Open the Flatbed Scanner Backside Cover.
2. The Transportation Lock is located at the upper-left corner as indicated.
3. Move the lock to the “Unlocked position” .
4. Close the Flatbed Scanner Backside Cover.
Warning:
z Turning on the product without unlocking the product will generate a noise and
cause the optical unit to vibrate. This might result in product malfunction.
z To transport the product, you need to move the Transportation Lock back to the
“Locked” position to protect the optical unit. Transporting the product without
locking the product might cause product malfunction.
12
Note:
To lock the product, please do the following,
1. Turn off the product.
2. If the scan unit is not located at the home position, turn on the product.
the scan unit returns to home position, turn off the product.
Home Position
3.
Move the lock switch to the “Locked Position”.
13
After
Connecting the Cables
Connecting the Ethernet Cables
Connecting to the Network
1.
Connect one end of your Ethernet LAN cable to an available port of your
Ethernet Hub.
2.
Connect the other end to the LAN port at the back of the product.
Connecting the Power and Turning on the Machine
1.
Connect one end of the power cable to the power receptacle of the product.
2.
Connect the other end to an appropriate power outlet.
14
3.
Press the [-] side of the main Power Switch.
4.
Press the [Power] button on the lower right corner of the product. The
product is turned on, and the Power LED lights in green. After showing the
booting up message, the LCD Touch Panel prompts the preset ready status.
Note:
1.
If you turn off the product by pressing the main Power switch while the
touch panel has not been completely shut down, this may cause damage to
the product.
2.
If the product will not be used for a long time, press the [0] side of the
Power Switch to turn off the power. Then unplug the product from the
power outlet.
3.
To wake up the product in the sleeping mode, simply short press the [Scan]
or the [Stop] button on the control panel.
15
Installing the Print Cartridge
1.
Open the box of the print cartridge and remove the protective tape from
the bottom of the cartridge.
2. Do not touch the ink nozzles (1) or the gold contacts (2) after the tape
has been removed.
1
2
3. Open the Imprinter Cover.
4.
Open the Print Cartridge Holder by lifting up the locking lever with your
finger.
16
5. Grasp the tab of the cartridge and insert the cartridge into the holder with
the label facing up and the tab pointing to the left.
6. Lower the locking lever of the Print Cartridge Holder until it locks in.
7.
Position the print cartridge holder along where the document will pass
through.
8. Close the Imprinter Cover.
17
3
Operation
Document Loading Tips
Feeding the following types of documents might result in paper jams or damages to
the documents. To scan these documents, use the flatbed (platen glass) instead.
z
Documents with paper clips or staples
z
Documents on which the ink is still wet
z
Documents
document)
z
Coated paper
z
Wrinkled or curled document
z
Folded or torn document
z
Photosensitive paper
z
Photos
z
Carbon-backed paper
z
Documents smaller than 50mm (width) x 88mm (height)
z
Documents larger than 297 mm(width) x 432 mm (height) (A3 size)
z
Documents other than paper such as fabric, metal foil, or transparencies
z
Document weight is less than 28 g/m2
z
Document weight is more than 209 g/m2
z
Documents that are not uniformed in width, or documents that are not square or
rectangle
z
Documents that are old and contain paper dusts
z
Paper with wet substances such as glue or correction fluid
z
Paper with adhesive notes or flags
z
A stack of document with mixed weight and types
of
non-uniformed
18
thickness
(eg.
envelopes,
photo-attached
Placing Document(s) in the ADF
1. Check if your documents are within these guidelines and make sure your
document is free of staples, paper clips and is not tore out.
Type
High Quality Paper, PPC Paper (Xerox specified paper),
Carbonless Paper
Weight
28 ~ 209 g/m2
Size
A3, A4, A5, A6, A7, B4, B5, B6, B7, B8, Letter, Double
Letter
Minimum size: 50 mm (width) x 88 mm (height)
Maximum size: 297 mm (width) x 420 mm (height)
2. If you have multiple pages, fan your document(s) to avoid occasional paper
jam.
3. Align the edges of the documents by tapping the bottom of the stack against
the table top. Rotate the stack 90 degrees and repeat.
4. Place your document(s) with the text FACE Down in the ADF and the 1st
page facing down and the top of the pages pointing to the feeder.
19
Paper Guide
5. Adjust the Paper Guides to center the document(s) in the ADF. Side the
paper guide so that they will touch the edges of document lightly.
20
Placing Document(s) on the Flatbed Glass
1. Open the document(s) cover to reveal the glass.
2. Place your document with the text FACE DOWN on the glass and align the
document in the upper-right corner.
Document
Cover
Document
Facing
Down
3. Close the document cover.
21
Copying
Basic Copy Operation
Important!
Before making copies through a network printer, please make sure the printer has
been connected to the network and that the power of the printer has been turned on
FIRST. Otherwise, the copy function may not work properly.
To make copies:
1. Place your document(s) with text FACE DOWN in the ADF or FACE DOWN on
the glass.
2. Tap the [Copy] button on the touch panel to open the following Copy window.
3.
Tap the [Copies] dropdown list in the upper right corner of the touch panel to
choose the number of copies.
22
4.
Tap the [Output Printer] button to open the following Printer Manager.
5.
Tap the [Add Printer] button. Select Browse for a printer to list all available
printers in the same domain section and choose a printer, or Add a printer by
name and enter a desired printer path with its login name and password to
specify a printer you want.
6.
If desired, change the other copy settings. For details, see Change more copy
settings on the next page.
7.
Tap either the [Start] button (
on the control panel.
8.
The product starts scanning and the preview image will be displayed.
9.
On the Preview screen,
z
) on the touch panel or the [Scan] button
If the scanned image is OK, press the [Start] button (
) on the touch
) on the control panel to distribute the
panel or the [Scan] button (
scanned image. You may also insert more pages by taping the [Insert
Pages (
z
)] button on the bottom of the screen.
If the scanned image is not OK, tap the [Cancel] button to abort the job.
10. In a second, the scanned image will be printed out from a specified printer.
23
Change More Copy Settings
You can customize copy jobs using the various settings available from the touch
panel, including the following:
• Copies
• Reducing or Enlarging the originals
• Color Mode
• Image Quality
• Density
• Output Printer
• Paper Tray
• Paper Size
• Preview
• Stamp
• Advanced Copy
Copies
Use the Copies feature to set the number of copies for the current copy jobs.
To select the number of copies:
1. Tap the [Copies dropdown list] button.
2.
Under the Copies dropdown list, specify the number of copies by tapping any
number respectively in the left/right column. The maximum number is up to 99.
Reducing or Enlarging the Originals
Reduce the original to as little as 25% of its size or enlarge it as much as 200%.
To reduce an original’s image, tap the [Down arrow] button to specify a scaling
percentage that is less than 100. To enlarge the image, tap the [Up arrow] button
to specify a scaling percentage that is greater than 100.
You can also choose one of the preset values including 100%, 25%, 50%, 78%,
127%, 200%, and Fit to Page (Automatically rescaling your original to fit the output
paper) .
24
Color Mode
Use the Color Mode feature to specify whether to print copies in color or black/white.
To select the color mode for your output color:
1.
Tap the [Color Mode] button.
2.
Select B/W or Color.
Image Quality
There are 3 types of image quality modes you can choose to optimize the output for
a particular type of content. These image quality modes are:
Speed: Suitable when you prefer scan speed to quality.
Photo: Suitable when your original contains photos.
Text: Select to sharpen your text.
To choose the image quality modes for your output:
1.
Tap the [Image Quality] button.
2. Choose Speed, Photo, or text.
Density
Density allows you to lighten or darken your original’s image. There are 7 levels of
density available.
To specify the density level for your output:
Tap the [Right arrow] button to increase the density level, or [Left] to decrease
the density level.
25
Output Printer
Use the Output Printer feature to add a printer for the product.
To add a printer for the product:
1. Tap the [Output Printer] button to open the following Printer Manager.
2. Tap the [Add Printer] button.
3. Select Browse for a printer to list all available printers in the same domain
section and choose a printer, or Add a printer by name and enter a desired
printer path with its login name and password to specify a printer you want.
Options for Printer Manager
Printer Manager
Item
Description
Add Printer
Adds a printer for the product.
Set As Default
Checks to specify a default printer.
Print Test Page
Prints a test page from the chosen printer.
Delete Printer
Deletes the chosen printer.
More Detail
Displays the chosen printer’s information such as
name, location, IP, status, color, default, and Duplex.
26
Paper Tray
Use the Paper Tray feature to specify what printer tray to use for copy job. There are
3 types of paper tray available, including Auto (Automatic selection of paper tray),
Tray1, and Bypass (Multi-purpose tray).
To choose what printer tray to use:
1.
Tap the [Paper Tray] button.
2.
Choose Auto, Tray1, or Bypass.
Paper Size
Choose your paper size in the printer tray. There are 8 types of paper size available,
including A4, A5, B5, Letter, Legal, A3, B4, and Ledger (double size of Letter).
To choose a paper size in the printer tray:
1.
Tap the [Paper Size] button.
2.
Choose a desired paper size.
Stamp
The Stamp feature allows you to add some text (such as CONFIDENTIAL,
IMPORTANT, DRAFT, etc) on your document.
To add some stamp text for your output:
1.
Tap the blank space in the Stamp field to open the keyboard.
2.
Type in your desired stamp text in the Stamp field, and then tap [Done].
27
Preview
The preview feature allows you to view the scanned images in a low resolution to
check if the scanned image is corrected.
To preview your scanned documents:
1.
Tap [Preview] to show ON in the [Preview] button.
2.
Tap [Start], and the [Preview] window appears after scanning as shown
below:
Options on the Preview screen
Preview
Item
Move Page
Description
On the horizontal scroll bar at the top, tap a
thumbnail page that you want to move its order. Tap
this [Move Page] button, and a Tilted arrow, as
shown below. The selected page is moved to order of
the tilted arrow’s position.
28
The page is now moved from Position1 to Position3
(the specified Tilted arrow’s position), as shown
below:
Tap a thumbnail page and then the [Insert Pages]
Insert Page
button (
). The scanned images will be added
after the selected page.
The following message box appears to instruct you to
continue scanning your desired original that is going
to be inserted. Follow the on-screen instructions to
complete the remaining process.
29
Delete Page
Tap a thumbnail page that you want to delete.
The chosen page is deleted, and the rest pages
remain on the horizontal scroll bar.
Rotate 90∘to Left
Rotates the previewed image by 90 degrees
counterclockwise.
Rotate 90∘to Right
Rotates the previewed image by 90 degrees
clockwise.
Enlarge the previewed image.
Zoom in
Reduce the previewed image.
Zoom out
30
Advanced Copy
Use the Advanced Copy features to further customize your scanned document. These
features include Collate, Duplex, Orientation, N-up, Deskew, Shrink, Color Dropout,
Blank Removal, and Position. Tap the [Advanced Copy] button to open the
following Advanced Copy window.
To use these advanced copy features, see the table depicted below:
Options for Advanced Copy
Advanced Copy
Item
Collate
Description
Choose your copies to be placed in “Sort” (e.g. pages
1,2,3/1,2,3/1,2,3) or “Stack” (e.g. pages
1,1,1/2,2,2/3,3,3) orders.
Collated Documents
Choice: *Stack, Sort
* Factory Default
31
Duplex
Choose one of the four types for your duplex printing.
(Check if your printer includes a duplex option.)
Choice: *1 to 1 Sided, 1 to 2 Sided, 2 to 2 Sided,
2 to 1 Sided
1 to 1 Sided: Copy single-sided originals onto one
side of one sheet of paper.
1 to 2 Sided: Copy single-sided original onto two
sides of one sheet of paper.
2 to 1 Sided: Copy double-sided original onto one
side of one sheet of paper.
2 to 2 Sided: Copy double-sided original onto two
sides of one sheet of paper.
1 to 1 Sided
1 to 2 Sided
2 to 1 Sided
2 to 2 Sided
Example:
1 to 1 Sided
1 to 2 Sided
2 to 1 Sided
2 to 2 Sided
* Factory Default
32
Orientation
Specify how you would bind your duplex printing.
Note: This feature is only available for a printer which
supports the duplex feature.
Choice: *Long Edge to Long Edge, Long Edge to Short
Edge, Short Edge to Long Edge, Short Edge to Short
Edge
Long Edge means documents to be bound or to be flipped
on the long edge of paper.
Short Edge means documents to be bound or to be flipped
on the short edge of paper.
Long Edge to Long Edge
Long Edge to Short Edge
Turn your documents from
long-edge binding to
long-edge binding.
Turn your documents from
long-edge binding to
short-edge binding.
Short Edge to Long Edge
Short Edge to Short Edge
Turn your documents from
short-edge binding to
long-edge binding.
Turn your documents from
short-edge binding to
short-edge binding.
Note: The selection of orientation varies depending on
type of duplex printing.
Duplex Type
Availability of Orientation
1 to 1 sided
All options are unavailable.
2 to 1 sided
Only Long Edge to Long Edge and Short
Edge to Long Edge are available.
1 to 2 sided
Only Long Edge to Long Edge and Long
Edge to Short Edge are available.
2 to 2 sided
All options are available.
* Factory Default
33
N-up
When copying multiple-page documents, you can copy more
than one page on a single sheet of paper. The scanned images
are resized to fit on the copied page.
Choice: *Off (
sheet of paper.
):Copies an original onto one
2-up(2-in-1
onto one sheet of paper.
): Copies two separate originals
): Copies four separate
4-up(4-in-1
originals onto one page. The copy direction is Down, then
Right.
) Copies four separate
4-up(4-in-1
originals onto one page. The copy direction is Right, then
Down.
The diagram for 4-up copy directions on a single sheet is
shown below:
Right, then Down
Down, then Right
Deskew
Use this option to automatically straighten your image.
Choice: *ON, OFF
* Factory Default
34
Color Dropout
Color Dropout allows you to drop either of the red, blue, or
green color in your scanned image. If your image contains red
color watermark or background, choose the R (Red) channel
then any red watermark or background will be removed. This
feature is used to sharpen your text when using OCR (Optical
Character Recognition) software.
Original
After Removing the Blue Color
Choice: *NONE, Red, Green, Blue
Blank Page
Removal
Removes a blank page by your chosen threshold, including
20%, 40%, 60%, 80%, and 100%.
The threshold is defined by how many percentages the blank
area in an original occupies.
Choice includes *None, 20%, 40%, 60%, 80%,100%.
Position
Specifies the print position on the output paper.
Choice: *Upper Left, Center
* Factory Default
35
Sending Your Document to E-mail Addresses
Basic E-mail Operation
To Send a Scanned Image as an attachment to an Email Address:
1.
Place your document(s) with text FACE DOWN in the ADF or FACE DOWN on
the glass.
2.
Tap the [E-mail] button on the touch panel to open the following [E-mail]
window.
3.
To enter e-mail addresses with their relevant information:
a. Tap the [To], [Cc], or [Bcc] tab from the E-mail window respectively.
b. Tap the [Touch here for input text] field to bring up the virtual keyboard
to type in your email address. Press Enter to type the next e-mail address
if you have an additional email address.
c. Tap Next and enter the From address, Subject of your e-mail, File Name
of the scanned document, Reply to address, or e-mail Message
respectively.
d. When you are done, tap Done to return to the [E-mail] window.
36
4.
To enter email addresses from the address book:
, to choose your email addresses from
Tap the [Address Book] button,
E-mail list or Group List. You can also type a key word to search a complete
email address by tapping the [Public] folder or [LDAP] server button. To add
an email address to the address book, see the section of the E-mail settings on
the embedded web page.
5.
If desired, change the other E-mail settings. For details, see Change more
E-mail settings on the next page.
6.
Tap either the [Start] button
(
on the touch panel or the [Scan] button
) on the control panel.
7.
The product starts scanning and the preview image will be displayed.
8.
On the Preview screen,
z
If the scanned image is OK, press the [Start] button (
) on the touch
) on the control panel to distribute the
panel or the [Start] button (
scanned image. You may also insert more pages by taping the [Insert
z
9.
Pages (
)] button on the bottom of the screen.
If the scanned image is not OK, tap the [Cancel] button to abort the job.
In a second, the scanned image will be sent to your email addresses.
37
Change More E-mail Settings
You can customize E-mail jobs using the various settings available from the touch
panel, including the following:
• Scan Options
• File Separation
• Attachment
Scan Options
The product roughly classifies regular scanning jobs into 3 main document types,
including:
Photo: Used for the original containing pictures or photographs.
Document: Used for documents containing mostly text.
Mix: Used for documents mixing with text and photographs.
If these 3 document types do not meet your favorite scan job, Custom may help
you to customize your scan settings.
To change your scan options:
1.
Tap the [Change] button to bring up the following Document Type window.
2.
Select and tap your favor document type button.
38
Tapping the [Custom] button will open the following Custom window.
Refer to Chapter 5 Customizing Scan Options for further details.
File Separation
Choose default maximum image size for attachment sent by the product. The purpose to set
file separation is to avoid the file size limitation of SMTP servers.
To choose a file separation size for your attachment :
1.
Tap the [File Separation] button.
2.
Choose a maximum image size for attachment.
Choice: Unlimited, 3MB, *5MB, 10MB
Attachment
This option allows you to scan and send your current document image or select and send
images from your USB flash drive to your specified destination.
z
Scan: Select this button to scan and send your document to your e-mail address as
attachments.
z
Storage: Select this button to choose current files from your USB flash disk to your
e-mail address as attachments.
z
Scan + Storage: Select this button to attach both of your documents and current
image files from your USB flash disk to your e-mail address as attachments.
39
Sending Your Document to Filing Servers
Basic Filing Operation
To Send a Scanned Image to a Filing Server:
1.
Place your document(s) with text FACE DOWN in the ADF or FACE DOWN on
the glass.
2.
Tap the [Filing] button on the touch panel to open the following Filing window.
3.
To select a folder to save your scanned image into (Suppose some folders are
added in the product’s web page):
Tap the [Left / Right] arrow button in the Folder scroll box and then a desired
folder name from the list. If the product has too many folders to find, tap Freq.
and the most frequently used folder appears at the most left side, and the least
frequent one appears toward the most right side.
4.
If your location to save the current scanned document is not in the current
folder list, add a new one by tapping the [Add a New Folder] button (
For details, see Change Filing settings on the next page.
5.
6.
) on the touch panel or the [Scan] button
Tap either the [Start] button (
(
).
)on the control panel.
The product starts scanning and the preview image will be displayed.
40
7.
On the Preview screen,
z
If the scanned image is OK, press the [Start] button (
) on the touch
) on the control panel to distribute the
panel or the [Scan] button (
scanned image. You may also insert more pages by taping the [Insert
Pages (
z
8.
)] button on the bottom of the screen.
If the scanned image is not OK, tap the [Cancel] button to abort the job.
In a second, the scanned image will be sent to your specified destination.
41
Change Filing Settings
Tapping the [Add New Folder] button opens the following New Folder window.
The New Folder screen contains server destinations with various parameters. Refer
to the following table to enter the relevant values.
New Folder
Item
Folder Name
Folder URL
Description
Enter name of your folder.
Tap and choose a type of protocol of your filing server in
the Folder URL. Choice includes * ftp://, file://, ftps://.
Enter the Folder URL in the second field. You can enter
either the domain name or the IP address with the
directory path.
Choice: *ftp://, file://, ftps://
Port #
Enter the port number for the server into which you want
to store your scanned document.
If the default value is different from the real case, input
the correct port number in this field. Tap anywhere on the
“Port” field to bring up the soft keyboard to enter the
text.
Choice: *FTP:21, *FTPS:21
42
Passive Mode
If your ftp connection in the active mode fails, select the
passive mode instead.
Choice: *ON, OFF.
Login Name
Enter your login name for the server.
Password
Enter your password for the server.
Report to
E-mail
The product will send a report to the Report to E-mail
address after sending a file to the target server. The
receiver can be notified and choose to download your
scanned document after the document is sent to the
target filing server.
File Name
Give your desired file name.
Subfolder
Name
Give your desired subfolder name in the target server.
If file name
exist
If the file name you enter is duplicated in the target
server, the current date/time will be appended to the
newly added file name in order to distinguish the new file
from the old one.
Append date/time: Using #Y#M#D#h#m#s makes a
file name change as time goes. Y, M, D, h, m, and s
represents year, month, date, hour, minute, and second
respectively. For example, typing the file name,
myscanfile, will bring your filing file name as
myscanfile-20121101140519-000.pdf, in which 2012
represents Year, 11 Month, 01 Date, 14 Hour, 05 Minute,
and 19 Second, respectively.
Replace:Replace the content of the same file name if
there is a same file name existing in the target server.
Choice: *Append date/time, Replace.
* Factory Default
Note:
After sending the scanned document to your target server, the new folder will not be
automatically added to the folder list in the Folder main screen.
On how to add a new folder to the folder list in the Folder main screen, please refer to
the section, “Specifying More Administrator Settings by the Product’s
Web Page”.
43
Sending Source
This option allows you to scan and send your current document image or select and send
images from your USB flash drive to your specified destination.
z
Scan: Select this button to scan and send your document to your specified filing
destination.
z
Storage: Select this button to choose current files from your USB flash disk to your
specified filing destination.
z
Scan + Storage: Select this button to attach both of your documents and current
image files from your USB flash disk to your specified filing destination.
Scan Options
The scan options in Filing are the same with those in E-mail. Refer to Section Change More
E-MAIL Settings or Chapter 5 Customizing Scan Options to configure your favorite scan
options for Filing.
44
Using the Shortcut Button
To use a shortcut button,
1.
Select and tap the green [Start] button of a shortcut button to use from the
shortcut button list on the main screen of the touch panel.
Green Start Button
of Shortcut Button
Note: If you want to change settings of your shortcut button before tapping
the green [Start] button, simply tap the [Change] button on the shortcut
button to update your settings, and then tap OK.
2.
The product starts scanning and the preview image will be displayed.
3.
On the Preview screen,
z
If the scanned image is OK, press the [Start] button (
) on the touch
) on the control panel to distribute the
panel or the [Scan] button (
scanned image. You may also insert more pages by taping the [Insert
z
4.
Pages (
)] button on the bottom of the screen.
If the scanned image is not OK, tap the [Cancel] button to abort the job.
The scanned images are sent to your specified destination.
45
Storage Printing
Storage Printing allows a user to print a document from a USB flash device or the
public folder embedded in the product to a designated printer in network. The
Storage Print screen will change to reflect a number of choices you can use when
working with USB Flash or Public Folder.
To print a document from a USB storage device,
1. Insert your USB Flash Drive in a USB port at the back of the product, and wait
for the product to successfully detect the USB Flash Drive in a moment.
2. Tap the [Storage Print] button at the bottom-left corner of the touch panel.
3. Select USB Flash from the pop-up dialog box, and tap OK.
4. The [Storage Print] screen pops up on the touch panel, as shown below:
Select Printer
5. Select your designated printer by tapping the [Change] button.
6. Tap and select a file from the graphical interface displaying all folders and files in
your USB flash device. (If more than one USB storage devices are inserted,
select your desired USB drive from the [File From] dropdown menu. To cancel
your selection, simply tap the [Deselect] button.)
7. Tap either the [Start] button (
(
) on the touch panel or the [Scan] button
) on the control panel.
8. The selected file will be printed out from your designated printer.
46
To print a document from the public folder,
1. Tap the [Storage Print] button at the bottom-left corner of the touch panel.
2. Select the [Public Folder] button and enter your PIN number (If necessary)
from the pop-up dialog box, and tap OK.
3. Storage Print screen pops up on the touch panel, as shown below:
Select Printer
4. Select your designated printer by tapping [Change].
5. Tap and select a file from the graphical interface displaying all files in your public
folder. (If your PIN numbers are forgotten, search your desired PIN number from
the [PIN] dropdown menu. To cancel your selection, simply tap the [Deselect]
button.)
6. Tap either the [Start] button (
(
) on the touch panel or the [Scan] button
) on the control panel.
7. The selected file will be printed out from your designated printer.
47
Scanning and Broadcasting Your Images
The Scancast (Scan and broadcast) feature allows you to scan a document and save
the image to the product's memory and then respectively specify various
destinations to send the images to these destinations.
To send a scanned document to multiple destinations,
1. Tap the [Scancast] button on the main screen of the touch panel.
Scancast Button
2. The [Scancast] window is shown, prompting you to check and confirm if the
scan options meet your requirements.
48
3. The scan options in Scancast are the same with those in E-mail or Filing. Tap the
[Change] button to update scan options. Refer to Section Change More
E-MAIL Settings or Chapter 5 Customizing Scan Options to configure your
favorite scan options for Scancast.
on the touch panel or the [Scan] button
4. Tap either the [Start] button
on the control panel.
5. The product starts scanning and the preview image will be displayed.
6. On the Preview screen,
z
If the scanned image is OK, press the [Start] button (
) on the touch
) on the control panel to distribute the
panel or the [Scan] button (
scanned image. You may also insert more pages by taping the [Insert
Pages (
z
)] button on the bottom of the screen.
If the scanned image is not OK, tap the [Cancel] button to abort the job.
7. The scanned document is temporarily saved to the product’s memory.
8. The [Scancast] window for multiple destinations appears on the touch panel,
prompting you to choose a destination, as shown below:
9. Select and tap one of destinations (Public Folder/USB Flash/E-mail/Filing/Copy)
you want your scanned document to send to, and then tap OK.
10.The scanned documents are sent to your selected destination while the
document images remain in the product’s memory until deleted from Step 13.
49
11.The [Scancast] window for multiple destinations appears again to allow a user
to select another destination where to resend the same scanned document.
12.Repeat Step 8 to 10 until you finish sending all your desired destinations.
13.If your job has been completed, tap the [Close (X)] button to close the window
and delete the scanned images.
50
Creating A New Shortcut Button
The product’s Shortcut buttons provides you an effective way to make copy or
distribute your documents in seconds. This function saves you a considerable
amount of time in typing or choosing your favorable settings.
Before using a shortcut button, you need to first create a shortcut button. There are
two ways to create a shortcut button, via the product’s web page and through the
touch panel on the product. Up to 30 ShortCut buttons can be set.
To create a new shortcut button via the embedded web page,
1. Type the IP address of the product in the URL field of your browser and then
press Enter. The product’s embedded web page with limited options appears as
shown below.
2. Click Sign in since the Device Settings, Data Manager, and Import/Export
are blocked by system administrator’s login name and password. You will be
prompted to enter a login name and password.
51
3. Click Sign in since the machine is shipped with no specific login name and
password and then the web page will be automatically display to contain full
options.
4. Click Data Manager, and Shortcut to open the Shortcut screen, as shown
below:
52
5. Click New to open the following shortcut-setting screen, as an example:
6. Choose your desired shortcut mode from the Shortcut Mode drop-down list box.
The shortcut-setting screen will change to reflect a number of choices you can
use when working with Copy, E-mail, Filing, Public Folder, USB Flash Drive,
Google Drive, or Microsoft SharePoint.
7. Type in your desired shortcut name (For example, My Copy) in the Shortcut
Name box.
8. Enter or modify specific settings under all these Tabs to meet your custom need.
Refer to Chapter 4 Operation or Section Summary of the Web Pages for these
settings.
53
9. Click the [Add] button to create a shortcut button, My Copy, on the touch panel,
as shown below:
New Shortcut
Button
54
To create a new shortcut button via the Touch Panel,
1. Tap the [Login] button (
) to bring up the administrator Login screen
since you need the administrator privilege to create a shortcut button. Enter your
login name and password respectively in the Login Name and Password field via
the soft keyboard, and then tap OK.
2. Tap Copy, E-mail, or Filing on the touch panel to open the Copy, E-mail, or Filing
window. The [Add A New ShortCut] button is shown near to the upper-right corner
on the touch panel screen. The following is an example screenshot of the Copy’s
touch panel screen.
Add A New
ShortCut Button
3. Enter or modify specific settings on Copy, E-mail, or Filing window to meet your
custom need.
55
4. Tap the [Add A New ShortCut] button on the touch panel screen to enter your
favor shortcut name in the following dialog box.
5. Your new shortcut button will be added to the main screen of the touch panel, as
shown below:
New Shortcut
Button
56
Viewing the User’s Manual
The SC8800 provides a very convenient feature to view the user’s manual on the
touch screen. To view or download the user’s manual, please follow these steps:
1. On the main operation screen, tap the Information button (
Information/Report page appears.
2. On the Information/Report page, tap
manual will be displayed on the screen.
), the
on the screen. The user’s
3. Use the scroll bar on the screen to go through the rest pages. Or you may
download the manual (PDF file) to your computer by inserting a SD card or a
USB flash drive on the card reader of the machine and saving the manual to
your SD card or USB flash drive.
To download the user’s manual to the SD card or USB flash drive,
1. Insert a SD card or USB flash drive to the SD card port or USB port on the card
reader of the machine.
2. On the User’s Manual’s page, tape
on the screen.
3. Select your desired destination if you have inserted more than one disk drive.
4. Tap
on the screen to start download the file to your selected disk drive.
5. In a second, the file will be downloaded and the “Sending file successful”
message will be displayed on the screen. Tap
the main screen.
57
on the screen to return to
4
Configuring the Machine
The following settings or destinations must be defined by the system administrator
before the product is used to distribute the scanned document in the network.
z
Network and E-mail parameters: Defines the parameters for TCP/IP, and SMTP
protocols to send your scanned document to e-mail addresses.
z
Filing Destinations: Defines the protocols and destinations to send your
scanned document to FTP servers, web, or any personal computers in the
network.
To specify these settings or destinations, the administrator can enter relevant
values from the Network Settings, E-Mail Default, and Filing Default under Menu on
the touch panel. In addition to using the touch panel, the product allows the
administrator to remotely configure the machine by launching the product’s
embedded web page.
Note:
z
If the system administrator has chosen DHCP, then the IP address of TCP/IP,
gateway, subnet mask, and DNS server will be automatically given.
z
When installing the product for the first time, it is recommended that the
Administrator retain the default system settings. The settings can be
customized at a later date once you are familiar with the operation and
functionality.
z
To ensure your system reflects correct date and time, please tap the [Menu]
button and select Configuration to revise the system clock.
58
Specifying the Product’s Network Settings
1.
Turn on the product. After the product is warming up for a few seconds, the
Main (also called Shortcut) screen appears on the touch panel, as shown
below:
2.
) to bring up the administrator Login
Tap the [Login] button (
screen since you need the administrator privilege to make initial setup. Enter
your login name and password respectively in the Login Name and Password
field via the soft keyboard, and then tap OK. (Note: the machine is shipped
without a specified login name and password.)
59
3.
Tap the [Menu] button on the touch panel. This opens the following [Menu]
screen.
4.
Tap the [Network Settings] button to open the following Network
Settings screen.
60
5.
Tap anywhere respectively on the IP Address/Subnet Mask/Gateway
IP/DNS Server/WINS Server field to bring up the soft keyboard and then
enter the relevant values. (Of course, you don’t need to specify the first
three settings if you enable DHCP by tapping the [DHCP Enable] button.)
6.
Tap Done to return to the Network Settings screen after entering your
information.
7.
In the Network Settings screen, tap OK to return to the [Menu] screen.
61
Specifying More Administrator Settings by The Touch Panel
After the product is turned on, an administrator has privilege to bring up the [Menu]
button on the touch panel. Tapping the [Menu] button opens the [Menu] screen,
which displays 10 buttons for an administrator to view or modify various settings.
To view or modify various settings from the 10 buttons on the Menu screen,
) on the touch panel to bring up the
1. Tap the [Login] button (
administrator Login screen.
2. Enter your login name and password respectively in the Login Name and Password
field via the soft keyboard, and then tap OK. The [Menu] button pops up on the
touch panel.
3. Tap the [Menu] button to open the following Menu screen.
These 10 buttons displaying in Menu screen are: Information Report, Configuration,
Network Settings, Security Management, Service Mode, E-Mail Default, Filing
Default, System Update, Bug Report, and Activity Log Report. (Tap the right arrow
key to show the Bug Report and the Activity Log Report button.) For each
respective option of the 10 buttons, refer to the descriptions of the next few pages.
62
Information Report
Displays the product’s basic information.
Item
Description
Device
Displays the product’s model name,
manufacturer, serial number, and Mac address.
Version
Displays the product’s system version, scanner
firmware version, scan library version, and
image library version.
Page Count
Displays the page count respectively for color
and black/white modes. The types of counters
are classified as Public Folder, USB Flash, E-mail,
Filing, Copy, ADF, ADF Pad, and ADF Roller.
Configuration
Presets the basic settings on the product.
Item
Description
Machine Name
Presets a machine name for the product.
NTP Server
Presets a NTP Server for the product.
Date
Sets up the current date on the product.
Time
Sets up the current time on the product. The
time format is 12-hour system.
Time Zone
Sets a time zone for the product.
Administrator Profile
Sets up an Administrator’s login name,
password, and E-mail address.
Device Management
Presets language, energy saver timer, and return
to default timer.
Language: Sets up the language displayed in the
touch panel. Languages supported: English,
Traditional Chinese, Simplified Chinese,
Portuguese, Spanish, Russian
Energy Saver Timer: Sets up the time the
product spends in idle mode before it transitions
to lower power status. Timers included: Disable,
5min, 15min, 30min, 60min, 240min
Return to Default Timer: Sets up the time for
resetting to the default settings. Timers included:
20sec, 40sec, 60sec, 120sec, 180sec
63
Network Settings
Presets the settings and defaults for network features.
Item
Description
DHCP Enable
If a DHCP server is available in your network and the
DHCP is also enabled, the IP, subnet mask, Gateway
IP, WINS server, and DNS server will be
automatically given.
IP Address
If DHCP is disabled, set up IP Address for your Static
IP.
Subnet Mask
If DHCP is disabled, set up Subnet Mask for your
Static IP.
Gateway IP
If DHCP is disabled, set up Gateway IP for your
Static IP.
DNS Server
If DHCP is disabled, set up a DNS server address for
the product.
Wins Server
If DHCP is disabled, set up a Wins server address for
the product.
Device E-mail Address
Enter the email address of the device.
Login Name
Enter the login name for SMTP authentication.
Password
Enter the password for SMTP authentication.
Mail Server(SMTP)
Enter the SMTP IP.
Port#
Enter the SMTP Port number.
Authentication Method
Disable the SMTP Authentication by selecting None.
Enable the SMTP Authentication by selecting SMTP.
64
Security Management
Assigns local users’ privileges to perform the individual product function such as the
Copy, E-mail, Filing, or USB Flash function.
Item
Description
ShortCut And
Check the names of functions to be allowed to perform.
Choice:Copy, Email, Filing, USB Flash
ShortCut Only
Allowed to use only the shortcut buttons shown on the
main (or Shortcut) screen of the touch panel.
Service Mode
Tapping this button lets you enter the Windows 7 operating system.
E-Mail Default
Presets the settings and defaults for E-mail features.
Item
Description
Default Subject
Enter your favor default subject for your E-mail.
File Separation
Choose default maximum image size for attachment
sent by the product.
Scan Options
Previews all available settings of scan options.
Tapping the [Change] button allows you to update
scan options. Refer to Section Change More E-MAIL
Settings or Chapter 5 Customizing Scan Options to
configure your favorite scan options.
65
Filing Default
Presets the settings and defaults for Filing features.
Item
Description
Folder URL
Tap and choose a type of protocol of your filing server
in the Folder URL. Choice includes * ftp://, file://,
ftps://.
Enter the Folder URL in the text field. You can enter
either the domain name or the IP address with the
directory path.
Port #
Passive Mode
Enter the port number for the server into which you
want to store your scanned document.
Select the passive mode.
File Name
Give your default file name.
Report to E-mail
The product will send a report to the Report to E-mail
address after sending a file to the target server.
Scan Options
Previews all available settings of scan options.
Tapping the [Change] button allows you to update
scan options. Refer to Section Change More E-MAIL
Settings or Chapter 5 Customizing Scan Options to
configure your favorite scan options.
System Update
Update system firmware (.sc file) for the product.
To update your product system,
1.
Download the latest firmware file (.sc file) to your USB Flash Drive.
2.
Insert this USB Flash drive in a USB port at the back of the product, and wait for
the product to successfully detect the USB Flash Drive in a moment.
3.
Tap the [System Update] button to update the system settings in the product.
66
Bug Report
Tap the option to create a bug report and then send it to your USB flash drive or an
e-mail address. The bug report is useful for a service personnel to troubleshoot your
problem.
To send the product’s bug report to your USB flash,
1.
Insert this USB Flash drive in a USB port at the back of the product, and wait for
the product to successfully detect the USB Flash Drive in a moment.
2. Tap the right-arrow button at the bottom from Menu screen to move to the next
Menu screen.
3.
Tap the [Bug Report] button.
4.
Select USB Flash to send the product’s bug report to your USB flash.
To send the product’s bug report to your E-mail address,
1.
Tap the right-arrow button at the bottom from Menu screen to move to the next
Menu screen.
2.
Tap the [Bug Report] button.
3.
Select E-mail to send the product’s bug report to your E-mail address.
Activity Log Report
Tap the option to create an activity log report and then send it to your e-mail
address.
To send the product’s activity log report to your E-mail address,
1.
Tap the right-arrow button at the bottom from Menu screen to move to the next
Menu screen.
2.
Tap the [Activity Log Report] button.
3. Select E-mail to send the product’s activity log report to your E-mail address.
67
Specifying More Administrator Settings by an Embedded
Web Page
1. Specify the network settings on the touch panel via the soft keyboard. (Please
refer to the preceding section, Specifying the Product’s Network Settings.)
2. The product is designed with an embedded web page to allow the system
administrator to remotely manage the product. Simply type the IP address of
the product in the URL field of your browser and then press Enter. The
product’s embedded web page with limited options appears as shown below.
3.
Click Sign in on the upper right corner of the web page since the Device
Settings, Data Manager, and Import/Export are blocked by login name and
password. (Note the machine is shipped without a specified login name and
password.) You will be prompted to enter a login name and password on the
Sign-in dialog box as shown below:
68
4.
Click Sign in on the Sign-in dialog box since the machine is shipped with no
specific login name and password and then the web page will be automatically
updated to contain full options.
5.
In the left side of the web page, click each item on the menu to enter relevant
value respectively. For details on each setting, please refer to the subsequent
section, Summary of the Web Pages.
Note:
z
The Device Setting, Data Manager, Data Exchange, and System
Update are blocked by login name and password. Click Login to enter the
detailed settings since the machine is shipped with no specific password. You
can create a password later and write it in your notes in case you may forget
it.
z
For effective management, it is recommended to create administrator’s login
name and password later.
z
Please note that some of the settings in the “Menu” can also be set by users
while they are making copies, sending individual mails, or sending individual
files to folder when they press the “Copy”, “E-mail”, or “Folder”, button on
the control panel. However, if the users fail to set these settings, then the
default settings will be automatically applied to the copier, e-mails, or folder
sent by the users. That is to say, the administrator assigns default settings
for common functions. Yet, an individual user also has a chance to set his or
her own settings when he or she is performing one of the function modes.
69
Summary of the Web Pages
Information/Report: Used to display the product’s basic information.
Item
Description
Model
Displays the product’s model name.
Manufacturer
Displays the manufacturer name.
MAC Address
Displays the scan unit’s MAC address.
Serial Number
Displays the product’s serial number.
System F/W Version
Displays the system’s firmware version.
Scan Library Version
Displays the scanner’s library version.
Image Library Version
Displays the image library version.
Page Count
Displays the counters of Public Folder, USB Flash,
Copy, E-mail, Filing respectively in Black/White
and Color mode.
Displays the counters of ADF roller, ADF pad,
ADF, and Scan Total.
Clear: Tap the [Clear] button of Page Count to
reset all counter values.
Public Folder:
Used to download a file name to your computer from the host
device in the product. A user may be required to enter a pin number if the file was
given a pin number by the sender. Note the files in the Public Folder can be saved for
24 hours. After 24 hours, the files will be automatically deleted.
Item
Description
Download
Check a file name to download the file to the
default path in your computer. For example,
C:\Documents and Settings\John(login
name)\My Documents\Downloads
Search
Enter a key word in the box, and click Search to
list all file names containing the key word.
Delete
Check a file name to delete the file.
Delete All
Delete all files in the list.
70
IP information on Network Settings: Used to specify the product’s network
settings.
Item
Description
DHCP Enable
If you have a DHCP server available on your
network and the DHCP has been enabled, the IP,
subnet mask, Gateway IP, WINS server, and
DNS server will be automatically given.
Choice: *ON, OFF
IP Address
The Internet Protocol (IP) address assigned to
your machine by your network administrator.
Subnet Mask
The net mask address assigned by your network
administrator.
Gateway IP
The gateway IP address assigned by your
network administrator.
DNS Server
The Domain Name Server assigned by your
network administrator.
WINS Server
The WINS (Windows Internet Naming Service)
assigned by your network administrator.
Update
Update all the above information.
* Factory Default
71
Mail information on Network Settings: Used to specify the product’s mail server
information.
Item
Description
Mail Server
Enter the SMTP IP.
Port#
Enter the SMTP Port number.
Device E-mail Address
E-mail Address
Enter the email address of the device. This is also
the default “From” address when you are sending
email from the device.
After sending the email with the mail server not
specified, the product will automatically detect a
mail server with its authentication method, and
queries a user to determine the acceptance of the
detected mail server.
Authentication
Method
Enter the email authentication method.
Choice: *None, SMTP
Login Name
Enter the login name for SMTP authentication.
Password
Enter the password for SMTP authentication.
Update
Update all the above information.
* Factory Default
Note:
The login name and password are case-sensitive and are up to 28 characters.
72
LDAP Settings:
Used to specify the product’s LDAP server information.
Item
Description
Server Name
Enter your LDAP server name.
IP/URL
Enter your LDAP server IP or URL address.
Port#
Enter the Port number of the LDAP server.
Login Name
Enter the login name of the LDAP server.
Note:
1.
In Microsoft Active Directory, some servers
may require you to add “domain name” as
your full login name. For example, if your
domain name is “company” and your user
name is “administrator”, then your full login
name is “company\administrator”.
2.
When your LDAP server requests an
“anonymous login”, please leave your login
name and password blank instead of typing
“anonymous” as your login name and
password.
Password
Enter the password of the LDAP server.
Base DN
Enter your base DN. Base DN (distinguished
name) identifies the starting point of a search. A
dn indicates what record to view in an LDAP tree.
The top level of the LDAP directory tree is the base,
referred to as the "base DN". For example, you
could indicate a base of dc=com,dc=net for a
search that starts at the top and proceeds
downward.
SSL Enable
Enable or disable SSL.
Choice: ON, *OFF
New/Delete/Modify
Add/delete/modify a LDAP server.
Update
Update a LDAP server information.
Quit
Leave without updating a LDAP server information.
* Factory Default
73
Configuration: Used to specify the product’s general information, administration’s
profile and other management settings such as energy saver (timer), display
language, and so on.
Item
Description
General
Machine
Name
Sets product’s machine name. (The name that you
wish to show in recipient’s e-mail.)
NTP Server
Specify the NTP server address.
Date/Time
Specify the year, month, and day for the device./
Specify the hour, minute, and second for the device.
Time Zone
Sets local time zone based on Greenwich Mean Time
(GMT). With the time zone setting, your overseas
e-mail will display your local time instead of sender’s
local time.
Administrator Profile
Enter the administrator’s login name to use the [Menu]
Login Name
button.
Up to 32 characters or digits are allowed and is
case-sensitive.
Password
Enter the administrator’s password to use the [Menu]
button.
Up to 8 characters or digits are allowed and is
case-sensitive.
E-mail
Address
Enter the e-mail address of the administrator of the
product so that the system can send the error or
warning message. Up to 64 characters or digits are
allowed and is case-sensitive.
Device Management
Energy Saver
(Timer)
Choose how long the machine will be idle before it
automatically enters the energy saving mode after the
last action.
Choice:Disable, *5, 15, 30, 60, 240 minutes
Return to
Default
(Timer)
Specify the system’s auto reset time. If users have not
performed any action during the limited reset time, the
LCD Touch Panel will automatically return to the default
operation mode.
Choice: 20, 40, 60, 120, *180 seconds
74
Language
Choose the language you wish to show in the LCD Touch
Panel.
Choice: *English, Chinese Traditional, Chinese
Simplified, Spanish, Portuguese, Russian.
Update
Update all the above information.
*Factory Default
Account Management: Used to set user’s privileges including using the copy, e-mail,
or filing function of the product by assigning an account authentication method.
Basic
Item
Description
Default Enable Functions
ShortCut And
Check the names of functions to be allowed to perform.
Choice:Copy, E-mail, Filing, USB Flash Drive
ShortCut Only
Allow to use only the shortcut buttons shown on the Main
(or Shortcut) screen.
Account List
User Name
Set up your user name for a new account.
The name is case-sensative and up to 64 characters can
be entered in the Name field.
Password
Set up your password for a new account.
The password is case-sensative and up to 16 characters
can be entered in the Name field.
E-mail Address
Enter the e-mail address for a new account.
Enable Functions
Check the names of functions (Copy, E-mail, Filing, USB
Flash Drive) to be allowed to perform.
New/Delete/Modify
Add/delete/modify an account.
Update
Update account information.
Quit
Leave without updating account information.
75
E-Mail Default: Used to specify the default settings set by the administrator when
sending an e-mail from the product.
The default settings mean the e-mail settings
will be reset to these values when the system auto reset time is over or when the
product turns off and on again.
Basic
Item
Description
Default Subject
Enter text for the default email subject for all outgoing
mails sending from the product. Up to 64 characters are
allowed.
Default File
Separation
Choose default maximum image size for attachment sent
by the product. The purpose to set file separation is to
avoid the file size limitation of SMTP servers. Use the
combo box to select from the list.
Choice: 3MB/5M/10MB/*Unlimited
Scan Options &
Imprinter
Scan Options & Imprinter in the product’s embedded web
page are the same with those E-mail options on the touch
panel. Refer to Section Change More E-MAIL Settings or
Chapter 5 Customizing Scan Options to configure your
favorite scan options.
* Factory Default
76
Filing Default: Used to specify the parameters for a Filing Template.
Basic
Item
Target
URL
Description
Choose a type of protocol of your filing server in the Folder URL.
Choice includes * ftp://, file://, ftps://.
Enter the Folder URL in the second field. You can enter either
the domain name or the IP address with the directory path.
Choice: *ftp://, file://, ftps://.
Port #
Enter the port number for the server into which you want to
store your scanned document.
If the default value is different from the real case, input the
correct port number in this field.
Choice: *FTP:21, *FTPS:21
Reply to
E-mail
The product will send a report to the Reply to E-mail address
after sending a file to the target server. The receiver can be
notified and choose to download your scanned document after
the document is sent to the target filing server.
File Name
Give your desired file name.
Passive
Mode
If your ftp connection in the active mode fails, select the passive
mode instead.
Choice: *ON, OFF.
Scan
Options &
Imprinter
Scan Options & Imprinter in the product’s embedded web page
are the same with those E-mail options on the touch panel.
Refer to Section Change More E-MAIL Settings or Chapter 5
Customizing Scan Options to configure your favorite scan
options.
* Factory Default
77
Address Book: Used to add/delete/modify an E-mail address information in the
address book containing the Email list and Group list.
Item
Email List
Description
Name
Enter the name of your E-mail Address.
E-mail Address
Enter an email address in the list.
Description
Enter the description of an E-mail address.
New/Delete/Modify
Add/delete/modify an E-mail address.
Update
Update an E-mail address information.
Quit
Leave without updating an E-mail address information.
Group List
Group Name
Enter a group name for your E-mail Addresses.
Choose and check your desired E-mail Addresses in the
list, which will be contained in the group name.
Description
Enter the description of the group name.
New/Delete/Modify
Add/delete/modify a group name.
Update
Update group name information.
Quit
Leave without updating group name information.
Filing Folder: Used to add/delete/modify a Filing Template containing server
destinations with various parameters.
Item
Folder Name
Description
Enter name of your folder.
Folder URL
Tap and choose a type of protocol of your filing server in
the Folder URL. Choice includes * ftp://, file://, ftps://.
Enter the Folder URL in the second field. You can enter
either the domain name or the IP address with the
directory path.
Choice: *ftp://, file://, ftps://
Port #
Enter the port number for the server into which you want
to store your scanned document.
If the default value is different from the real case, input
the correct port number in this field. Tap anywhere on the
“Port” field to bring up the soft keyboard to enter the
text.
Choice: *FTP:21, *FTPS:21
78
Passive Mode
If your ftp connection in the active mode fails, select the
passive mode instead.
Choice: *ON, OFF.
Login Name
Enter your login name for the server.
Password
Enter your password for the server.
Reply to E-mail
The product will send a report to the Reply to E-mail
address after sending a file to the target server. The
receiver can be notified and choose to download your
scanned document after the document is sent to the
target filing server.
File Name
Give your desired file name.
Subfolder Name
Give your desired subfolder name in the target server.
New/Delete/Modify
Add/delete/modify a filing folder.
Update
Update a folder information.
Quit
Leave without updating a folder information.
Scan Options &
Imprinter
Scan Options & Imprinter in the product’s embedded web
page are the same with those E-mail options on the touch
panel. Refer to Section Change More E-MAIL Settings or
Chapter 5 Customizing Scan Options to configure your
favorite scan options.
* Factory Default
79
Shortcut: Refer to these two sections, Creating A New Shortcut Button & Using the
Shortcut Button for further details.
Item
Description
Shortcut Mode
Shortcut modes are classified as Copy, E-mail, Filing,
Public Folder (The product’s built-in hard disk), USB
Flash Drive, Google Drive, and Microsoft SharePoint.
Shortcut Name
Gives a shortcut name for your shortcut button.
Public Folder
Report to E-mail
Sends a report to the Report to E-mail address. The
receiver can be notified and choose to download your
scanned document.
File Name
Give your desired file name.
USB Flash
Driver
File Name
Give your desired file name.
Subfolder Name
Give your desired subfolder name.
Google Drive
E-mail Address
Enter your E-mail address for Google Drive.
Password
Enter your password for Google Drive.
Directory
Enter the preset directory for Google Drive.
Convert the file
to comply with
the format of
Google Drive
Check to comply with the format of Google Drive.
Use proxy
Check to use proxy for Google Drive.
Automatically
detect the
proxy
Select “Automatically detect the proxy” without
manually specifying Proxy Host and port number for
Google Drive.
Specify the
Proxy
Select “Specify the Proxy” to manually specify Proxy
Host and port number for Google Drive.
Login's
certificate
Use Login's certificate without manually specifying user
name and password for Google Drive.
Specify the
certificate
Specify the certificate to manually specify user name
and password for Google Drive.
80
Microsoft
SharePoint
Use Microsoft
SharePoint
account
Specify your user name/ password for Microsoft
SharePoint.
Use Windows
login account
Use Windows login account for Microsoft SharePoint.
Host/Website
Specify your Microsoft SharePoint’s address.
Document
Library/Folder
Specify your Microsoft SharePoint’s folder for storing
scanned documents..
Use proxy
Check to use proxy for Microsoft SharePoint.
Automatically
detect the
proxy
Select “Automatically detect the proxy” without
manually specifying Proxy Host and port number for
Microsoft SharePoint.
Specify the
Proxy
Select “Specify the Proxy” to manually specify Proxy
Host and port number for Microsoft SharePoint.
Login's
certificate
Use Login's certificate without manually specifying user
name and password for Microsoft SharePoint.
Specify the
certificate
Specify the certificate to manually specify user name
and password for Microsoft SharePoint.
81
Import/Export: Used to export the product’s current settings to an xnd file as a
backup. The advantage of this xnd file is to allow an administrator to use this backup
file to import your product settings to other products with the same model and
firmware version.
Item
Description
Export
Click to export all settings in the product to an xnd file
as a backup.
The default name for the file is ScanCenter8800.xnd.
Import All
Click to import all settings in an xnd file to the product,
and all current settings in the product will be
overwritten. Under the pop-up Import File dialog box,
browse to locate the file, and click OK. This procedure
causes the product to restart and be unavailable over
the network for several minutes.
Import Menu
Click to import an xnd file to the product.
Under the pop-up Import File dialog box, browse to
locate the file, and click OK.
Check any of the 5 menu item boxes including
Configuration, NetWork Setting, Security Manager,
Email Default, and Filing Default, and then click Import.
All of the current settings in the chosen menu will be
overwritten.
Import Account
Management
Click to import an xnd file to the product, check an
account name, and then click Import. The current
settings in the Account Management will be overwritten.
Import Address
Book
Click to import an xnd file to the product, check an
E-mail address name, and then click Import. The
current settings in the Address Book will be overwritten.
Import Filing
Folder
Click to import an xnd file to the product, check a folder
name, and then click Import. The current settings in the
Filing Folder will be overwritten.
Import LDAP
Settings
Click to import an xnd file to the product, check a LDAP
name, and then click Import. The current names in the
LDAP Settings will be overwritten.
Import Shortcut
Click to import an xnd file to the product, check a
Shortcut name, and then click Import. The current
names in the Shortcut will be overwritten.
82
Specifying A Filing Destination
Before you begin to send your scanned document to your destination server, there
are a few things you need to be aware of. The following will introduce you several
server systems used with the product.
Setting the Servers to Store Your Image
FTP
FTP Stands for “File Transfer Protocol.” It is a common method of transferring files
via the Internet from one computer to another. FTP use RFC 959[FTP] as their
protocol, and the default Port is usually 21. Therefore, please make sure you have
legal FTP account with the privilege of writing under the directory to save the files
and the password before using FTP to save the files. To add a sub-directory from
the product, you need to have the privilege of adding a new directory.
CIFS
CIFS (Windows Network Share) is a file saving protocol generally used for “recourse
sharing” of network in Microsoft Windows systems. Please set up the “shared
directory” per the network settings for sharing in MS Windows. Generally, on the
shared directory Properties dialog box under the Windows XP, select “Sharing” tab,
and select “Share this folder”.
Click the [Permissions] button to open
“Permissions for the shared directory” dialog box.
83
Check the “Full Control“ to have full privileges of the shared directory.
Check “Full
Control”
84
5
Customizing Your Scan
Options
The product classifies regular scanning jobs into 3 main document types, including
Photo, Document, and Mix.
If the current scan settings of Photo, Document, or Mix do not fit your requirement
for a particular scanning task, tap the [Custom] button to change your scan
settings.
To customize scan options:
Tap the [E-mail (or Filing)] button on the touch panel to open the following
[E-mail] window.
Tap the [Change] button under Scan Options to open the [Document Type]
window.
85
Tap the [Custom] button on the [Document Type] window to open the following
[Custom] window.
The following table shows detailed option instructions in [Custom] Window.
86
Options for Custom Window
Custom
Item
Description
Image Mode
Auto Color Detection (B/W): Automatically detects and scans
your color document in color. If your original is not in color, the
product will scan the original in black & white.
Auto Color Detection (Gray): Automatically detects and scans
your color document in color. If your original is not in color, the
product will scan the original in gray.
Color: Choose Color if you wish to scan a color image for your
original in color.
Gray: Choose Gray image if your original contains actual shades
of gray.
Gray(Document): chosen if your original contains lots of text or
a little graphic. Brightness and Contrast can not be adjusted.
Gray(Photo): chosen if your original contains lots of pictures and
a little text. Brightness and Contrast can not be adjusted.
Gray(Normal): chosen if the pictures in your original are almost
of the same importance as that of text. Brightness and Contrast
can be adjusted.
B/W: Choose B&W if your original contains only text, pencil or ink
sketch.
Halftone: In addition to the black and white display, Halftone can
present a somehow gray shade of image by using different size of
dots. Halftone image looks like the picture we have seen in the
newspaper. The output effects of Halftone1~5 are available.
Halftone Image
87
Diffusion: Diffusion is a type of Halftone. Diffusion gives good
image texture and makes text in images more readable than
Halftone.
Diffusion Image
Fixed Processing: Used for black-and-white and other high
contrast documents. A single level is set to determine the
black-and-white transition. The threshold is programmable over
the entire density range.
Fixed Processing sets Contrast to 0.
If
Fixed Processing is selected, Contrast is not available.
Dynamic Threshold: Selecting Dynamic Threshold allows the
product to dynamically evaluate each document to determine the
optimal threshold value to produce the highest quality image.
This is used to scan mixed document containing faint text, shaded
background, or color background with a single setting.
Choice: Auto Color Detection, *Color, Gray, B/W
Color
Dropout
Color Dropout allows you to drop either of the red, blue, or green
color in your scanned image. If your image contains red color
watermark or background, choose the R (Red) channel then any
red watermark or background will be removed. This feature is
used to sharpen your text when using OCR (Optical Character
Recognition) software.
Choice: *None, Red, Green, Blue
Original
After Removing the Blue Color
* Factory Default
88
File Format
Six types of Portable Document Format (PDF) file formats are
supported.
Standard: A Standard PDF file
Password: A PDF with password
Digital Signature: The PDF file with a digital signature.
Searchable: A PDF file with searchable text. .
Mix: A PDF file combines with its password, digital sign, and
OCR capabilities.
PDF/A: An ISO-standardized version of the PDF specialized for
the digital preservation of electronic documents.
JPEG2000: A PDF file which has images compressed using
jpeg2000 compression.
Choice: *PDF, TIFF, MTIFF, JPEG
ADF Scan Mode
Simplex(Front): If your original is a single-sided document,
select Simplex(Front) to scan your documents only in its front
side.
Simplex(Rear): If your original is a single-sided document,
select Simplex(Rear) to scan your documents only in its back
side.
Duplex: If your original is a double-sided document, select
Duplex to scan your document in the front and rear side.
Choice: Simplex(Front), Simplex(Rear), *Duplex
* Factory Default
89
Resolution
The resolution is measured in pixels per inch (ppi) (sometimes
referred to as dots per inch or dpi). Higher resolutions result in
more detail in the scan, slower scanning and in general, greater
file sizes. For example, an A4 size color image scanned at 300
dpi with color mode consumes approximately 25 MB of disk
space. When OCR (Optical Character Recognition) is to be
performed on a scan, 300dpi should be used for most
languages except Asian languages. For Asian languages, 400
dpi is recommended.
Resolution: 75 dpi
Resolution: 150 dpi
Choice: 75dpi, 100dpi, 150dpi, *200dpi, 300dpi, 400dpi,
600dpi.
Brightness
Lighten or darken the image by adjusting the brightness slider
right or left.
Brightness: 1
Brightness: 4
(Normal)
Choice: Level1~7. Default value: 4
* Factory Default
90
Brightness: 7
Contrast
Adjust the Contrast slider right or left to increase or decrease
the contrast.
Contrast: 1
Contrast: 4
Contrast: 7
(Normal)
Choice: Level1~7. Default value: 4
Compression
Choose the compression level for your scanned image.
The compression levels of MTIFF or TIFF includes G4 only.
Choice: Low, *Medium, High, G4, None
Blank Page
Removal
Remove a blank page by your chosen threshold.
The threshold is defined by how many percentages the blank
area in an original occupies.
Choice: None, *20%, 40%, 60%, 80%,100%.
* Factory Default
91
Scan Area
Choose your paper size in the printer tray.
Choice: *Auto, A4, A5, B5, Letter, Legal, A3, B4, Ledger.
Imprinter
The [Imprinter] button allows you to print alphanumeric characters,
date, time, document count and custom message on your scanned
image if digital imprinter is selected or at the back of your document
if external imprinter is selected. Tapping the [Imprinter] button
opens the following Imprinter window:
External Imprinter, Digital Imprinter: External Imprinter provides
a vertical and rear-side print capability while digital printer provides a
horizontal and front-side print capability.
Choice: ON, *OFF.
Print All: Select ON from Print All to automatically print the text at
all pages of your documents. Select OFF from Print All to print the
text for the first page of your documents only.
Choice: *ON, OFF.
Content: Enter your custom text to be included in your print string.
* Factory Default
92
Counter: Show the document count for the scan session. This
value is increased sequentially by the scanner.
Choice: *Number(1234), Number(12345),
Number(123456), Number(123457), Number(12345678),
Number(123456789), Number(1234567890)
Date/Time: Choose if you wish to include the date and time in
your print string.
Format: YYYYMMDDHHSS
For example, 20090402170645-check0001 indicates year, month,
date, hour, seconds, your custom text and the counter.
Choice: *None, Date, Time, Date+Time.
Custom Font: Choose your desired font.
Fixed Width (Mono spaced) fonts have a fixed character spacing.
So each character occupies the same width.
Choice: *Normal, Fixed Width.
Font Attribute: Choose your font attributes.
Choice: *Normal, Underline, Double, Bold.
* Factory Default
93
String Orientation: Choose your string orientation.
Choice: *Normal, Rotated, Vertical, Vertical Inversion, 90
degrees CW, 90 degrees CCW
Normal
Rotated
Vertical
Vertical Inversion
90 degrees CW
90 degrees CCW
If you select the digital imprinter to stamp text on your scanned
image, the illustration of normal and rotated string is shown
below:
Rotated
Normal
Print Position (Digital)
Choose the position of your printed string.
Choice: Top, *Middle, Bottom.
* Factory Default
94
Print Position (External)
Choose the position you wish to print your string. Tap Up arrow
button to increase the value or Down arrow to decrease the value.
Range: 0~355mm, default:30mm
The value indicates the height from the bottom of your paper to
the last letter of your string.
0001abc 2010
The value of
Print Position
Choice: 0~355mm. Default value: 355
Font Density
Choose your desired font density value by tapping the Up/Down
arrow button.
Choice: 0~255mm. Default value: 0
Font Transparency
Choose your desired font transparency value by tapping the
Up/Down arrow button.
Choice: 0~100%. Default value: 0
95
Font Transparency
Choose your desired font transparency value by tapping the Up/Down
arrow button.
Choice: 0~100%. Default value: 0
Font Size
Choose your desired font size value by tapping the Left/Right arrow button.
Choice: Level1~10. Default value: 5
Clean Printhead
If the print quality is not good or the imprinter does not print, it is probably
the ink emission holes in the nozzle plate (printhead) are blocked. Selecting
ON from the [Printhead] button to clean the print head on the imprinter.
Choice: ON, *OFF.
Bind
The Bind feature allows you to scan and combine separate documents
continuously at the same scan settings. If your scanner comes with a
flatbed option and you place your paper on the flatbed, this feature allows
you to start auto scan to increase your efficiency.
Choice: ON, *OFF
Preview
Enable the Previewing function. See the Preview section of Change More
Copy Settings.
Choice: *ON, OFF.
Rotation
Even though some page’s orientation is opposite to that of others, Rotation
will adjust all page orientations to one consistent direction.
Choice: ON, *OFF.
Multi-Feed
Detection
Multi-Feed Detection allows you to detect overlapped document that go
through the auto document feeder. Multi-Feed usually occurs due to stapled
documents, adhesives on documents, or electro-statically charged
document. Whenever a multi-feed error occurs, the product stops scanning
to allow a user to remove the troubled page.
Choice: ON, *OFF.
* Factory Default
96
6
Troubleshooting
Clearing Paper Jams
If document is jammed, follow the procedure in below to remove it.
1.
Pull the Handle of the ADF to open the ADF cover.
2.
Gently pull the jammed paper out of the ADF.
3.
Close the ADF cover by pressing down on the center of the ADF until it clicks into
place.
Warning:
Be careful, the ADF may close and pinch your fingers.
97
Errors Indicated in the Operational Panel
When an error occurs, the Check LED will blink in red.
Error Code and Error Messages
Error Code
Error Message
Suggested Solution
Hardware Error
110103
Remove the jammed paper. Fan your
Paper jam
paper, flatten the corners of your
documents and try again.
110104
110105
ADF cover open
Close the ADF cover.
No paper in
automatic document
feeder
110010
Sensor error.
Load paper in the auto document
feeder.
Unlock the scanner by turning the
scanner lock to the use position.
110101
Power off or cable
Turn on the product or check if the
failure.
cable connection is correct.
Restart and try again. If this error still
110252
ADF rear lamp error
happens, contact the service personnel
to replace the lamp.
110129
Can not find scanner
98
Check if the cable connection is
correct.
910019
110172
110173
Connection failure
110176
Home position sensor fails. Contact the
service personnel to replace the sensor or
main board.
Back to home
position error
Restart and try again. If this error still
happens, contact the service personnel to
replace the lamp.
110178
Lamp failure
110179
Ping the IP address of the product from
another PC in DOS prompt. For
example, type “Ping 10.1.20.144” in Dos
prompt. If the product has no response,
then perform the following steps.
1. Check if the RJ-45 connector is firmly
plugged-in.
2. Check the Ethernet cable.
3. Check the product’s IP address.
4. Check the destination IP address.
5. Check Subnet Mask.
6. Check Gateway IP.
Move the scanner lock to the “unlock”
position.
Scanner lock
99
Error Code
Error Message
Suggested Solution
Scan Error
110127
Restart the product and try again. If this
Memory is not
error still occurs, contact your system
enough.
110150
administrator.
Wait until the scan job is completed.
Driver busy
Free more space by deleting some files
910163
Disk is full.
stored in the public folder or the USB
flash drive.
110253
Open the Auto document cover to remove
Occurs skew
the skewed paper. Rearrange or fan your
paper and try again.
110187
Open the Auto document cover to remove
Multi-Feed.
the multi-fed paper. Rearrange or fan
your paper and try again.
110131
Failed to take next step during a specified
Time out
time.
Try again.
110186
Disk does not have
enough space to
store temporary
scanning data.
100
Free more disk space by reducing the
page number of your batch document or
choosing a lower resolution.
Error Code
Error Message
Suggested Solution
Network Error
410094
Check password.
Check with your System Administrator
and make sure the password is correct.
310156
Check your login
Check with your System Administrator
name and password. and make sure your login name and
password are correct.
630159
E-Mail address is too Check your e-mail address and retype.
long.
210160
Make sure the name
Check the name of your specified network
of the network
printer and try again.
printer
310164
110197
110198
110199
Please Check Mail
Make sure the settings of your mail
Server Settings.
server are correct.
IP format incorrect
Make sure your IP format is correct.
Invalid IP gateway
Invalid IP mask
Check the gateway of your IP address.
Check the subnet mask of your IP
address.
110200
Invalid IP
Check your IP address and retype.
101
640165
Storage or Scan+
Storage can not be
made as ShortCut
210166
Inserting current images from storage
device can not be made as ShortCut.
When sending the
image to a printer, if
you scan in black and
white mode in less
than 600 dpi, the
output image will be
reduced.
102
Recommend to set resolution to 600 dpi.
Technical Support
If your problem still exists after trying the above solution, please contact our
technical support.
Headquarter
Avision Inc.
No. 20, Creation Road I, Science-Based Industrial Park,
Hsinchu 300, Taiwan, ROC
TEL: +886 (3) 578-2388
FAX: +886 (3) 577-7017
E-MAIL: [email protected]
Web Site: http://www.avision.com.tw
US and Canada Area
Avision Labs, Inc.
6815 Mowry Ave., Newark CA 94560, USA
TEL: +1 (510) 739-2369
FAX: +1 (510) 739-6060
E-MAIL: [email protected]
Web Site: http://www.avision.com
China Area
Hongcai Technology Limited
7A, No.1010, Kaixuan Road, Shanghai 200052 P.R.C.
TEL :+86-21-62816680
FAX :+86-21-62818856
E-MAIL: [email protected]
Web Site: http://www.avision.com.cn
Europe Area
Avision Europe GmbH
Bischofstr. 101 D-47809 Krefeld Germany
TEL: +49-2151-56981-40
FAX: +49-2151-56981-42
E-MAIL: [email protected]
Web Site: http://www.avision.de
103
South American
Avision Brasil Ltda.
Rua Bamboré 41, Vila Monumento, Ipiranga. CEP: 04278-060, São Paulo, Brasil
TEL: +55-11-2737-2005
E-MAIL: [email protected]
Web Site: http://www.avisionbrasil.com.br/
104
7
Maintenance
This section describes how to clean the product, and replace the consumables.
Before you clean the inside of the scanner, turn off its power and
unplug the power cable from the power outlet.
Cleaning the scanner without turning off its power may cause an electric
Caution!
shock.
Use only the specified cleaner to clean the scanner.
Using other cleaners such as household cleaner or neutral detergent
may damage the finish of the product or result in scanner malfunction.
Do not use aerosol or alcohol based sprays to clean the product.
Dust blown up by strong air from the sprays may enter the inside of the
Warning!
scanner. This may cause the scanner to malfunction. Sparks caused by
static electricity, generated when blowing up dust and dirt from outside
of the scanner, may cause a fire.
Cleaning the Touch Panel Monitor
Wipe the Touch Panel Monitor with a wet cloth first then wipe it with a dry cloth.
Touch
Panel
Monitor
Warning:
Do not use liquids, household cleaners, or neutral detergents, as they may
damage the touch screen.
105
Cleaning the Flatbed Glass
Wipe the platen glass with a soft, lint-free cloth moistened with a specified cleaner
to clean the smudges and fingerprints on the platen glass. If the platen glass is dirty,
dirt will appear on the scanned image.
Notice:
Wait a few minutes until the cleaner is completely vaporized.
106
Cleaning the ADF
After using the scanner for a long period of time, the rollers and glass inside the
scanner may become contaminated with ink, toner particles or paper dust. It is
necessary to perform routine cleaning to ensure the optimum image quality and
performance. As a guideline, please clean the rollers and glass after first 4,000 to
5,000 scans and then perform the cleaning on a weekly basis. Note that the
guideline varies according to the type of documents you are scanning.
Tip!
If documents do not feed easily, if several documents feed at the same time
or if streaks appear on the scanned images, it is time to clean your scanner.
1.
Pull the Handle and open the ADF cover with a light force.
ADF Handle
ADF Cover
The ADF Glass:
Clean the following locations with a soft cloth moistening with a included cleaner.
Wipe the upper and lower ADF glass (c) with a soft, and lint-free cloth moisten
with a specified cleaner.
1
107
Warning:
The glass surface inside the ADF becomes hot during the scanner operation.
Before you start cleaning the inside of the scanner, turn off the product and wait
a few minutes to let the product cool down.
The ADF Friction Roller Assembly
Clean the ADF Pad (2):
Wipe the pad from side to side (') with a soft, lint-free cloth moistened with a
specified cleaner. When cleaning the ADF Pad, take care to prevent the cloth
from catching the metal parts.
2
Clean the Separator Rollers (3) that do not rotate freely:
Push one of the ADF Roller inward, rotate it, this will reposition the other
Separator Roller, too. Then wipe the Rollers from side to side (') with a soft,
lint-free cloth moistened with a specified cleaner. Rotate the roller to clean the
entire surface.
3
108
The Feeding Rollers that do not rotate freely
Clean the Feeding Rollers (4) that do not rotate freely.
a.
b.
Wipe the roller from side to side (') with a soft, lint-free cloth moistened
with a specified cleaner.
To rotate the rollers, push one of the Feeding Rollers as shown inward,
rotate it. This will reposition the rest rollers that do not rotate freely. Wipe
each roller to clean the entire surface.
4
The Feeding Rollers that rotate freely
Clean the Rollers (5) that rotate freely.
Wipe the rollers from side to side (') with a soft, lint-free cloth moistened with
a specified cleaner. Rotate the rollers to clean the entire surface. Be careful not
to snag or damage the hopper tray sensor while cleaning the pickup rollers.
5
Wait 3 minutes to let the rollers dry.
Then close the ADF by pressing down on the center of the ADF to return it to its
original position until it clicks into place.
Note:
When the ADF has returned to its original position, make sure that it is
completely closed. Feeding errors may occur if the ADF is not completely closed.
109
Cleaning the Skew Sensor
Dust or paper residue on the skew sensors can cause scan quality issues or false
paper jam messages. Make sure there is no residue on the surface of the skew
sensors.
1. Pull the Handle and open the ADF cover with a light force.
ADF Handle
ADF Cover
2. Remove the dust or paper residue left on the surface of the Skew Sensors (x4
pcs,
1) with an air blower.
1
3. Close the ADF by pressing down on the center of the ADF to return it to its
original position until it clicks into place.
Note:
When the ADF has returned to its original position, make sure that it is completely
closed. Feeding errors may occur if the ADF is not completely closed.
110
Cleaning the Imprinter
After frequent use, the waste ink will begin to accumulate on the base surface of the
print cartridge holder which can damage the printouts. Make sure to maintain the
base surface clean.
1.
Wipe off any dirt or dust on the base surface of the Print Cartridge Holder with a
soft lint-free cloth.
Print Cartridge Holder
2. Reinsert the Print Cartridge and close the Print Cartridge Cover.
a. Grasp the tab of the Cartridge
and insert the Cartridge into the
holder with the text side facing
up and the tab pointing to the
left.
111
b.
Lower the locking lever of the Print
Cartridge Holder until it locks in.
Cleaning the Print Cartridge
Poor quality prints may occur due to blocked ink emission holes in the Ink Nozzles of
the Print Cartridge. Leaving the imprinter unused for a long period of time can also
cause the ink emission holes to become blocked. When these holes are blocked,
clean the Ink Nozzles.
1. Remove the Print Cartridge.
a. Open the Print Cartridge Holder by lifting
up the locking lever with your finger.
b. Hold the tab of the cartridge and
remove the Cartridge from its holder.
2. Wipe the Ink Nozzles at the bottom of the Print Cartridge with a clean, damp
lint-free cloth lightly moistened with clean distilled water.
Ink
Nozzles
3. Once again, gently and slowly wipe the residual ink off of the Ink Nozzle with a
clean cotton swab.
112
4. Reinsert the Print Cartridge and close the Print Cartridge Cover.
b. Lower the locking lever of the Print
a. Grasp the tab of the Cartridge and
Cartridge Holder until it locks in.
insert the Cartridge into the holder
with the text side facing up and the
tab pointing to the left.
113
Consumables and Replacement Cycle
The following table shows the consumables and their standard replacement cycle.
Consumables
Standard Replacement Cycle
ADF Friction Roller Assembly
100,000 sheets
P/N 002-5966A-0-SP
ADF Pick-Up Roller Assembly
200,000 sheets
P/N 002-5949A-0-SP
Print Cartridge (Black Ink)
P/N 008-0236A-09-SP
Attract Ink box Assembly
Over 7 million characters (economical,
non-stop printing)
or 6 months after the package is opened
2 years
002-5944A-0-SP
The replacement cycles above are rough guidelines for the case using A4/Letter
sized woodfree or wood containing paper of 80 g/m2 (20 lbs) in weight. These cycles
vary according to the type of paper used and how frequently the product is used
and cleaned. Please replenish the consumables from the store where you purchased
the product or a Avision authorized service provider.
Replacing the ADF Friction Roller Assembly
1. Pull the ADF Handle and open the ADF cover with a light force.
ADF Cover
ADF Handle
114
2.
Pinch the ADF Friction Roller Assembly and slide it outward to remove it.
ADF Friction Roller
3. Reinsert the new ADF Separator Roller Assembly to its original slot and slide it
inward.
115
Replacing the ADF Pick Roller
1. Pull the ADF Handle and open the ADF cover with a light force.
ADF Cover
ADF Handle
2. Open the Pick Roller Cover.
Pickup Roller
Cover
3. Loosen the lower roller from its slot.
116
4.
Move the tab of the Upper Pickup Roller outward to remove it from the
scanner.
Pickup Roller
5.
Reinsert the new ADF Pick Rollers by first insert the right end of the Upper
Pick Roller to its slot.
Upper Pickup
Roller
6.
Move the tab of the Upper Pickup Roller inward as shown.
117
7.
Position the lower ADF Pickup Roller to its slot.
8. After installing ADF Pickup Roller to the slot, lubricate the corresponding
gear on the machine as shown with EM-D110 P/N 076-0010A-0-SP. Rotate
the gear until all surface is completed lubricated.
Lubricate this gear
with EM-D110 P/N
076-0010A-0-SP
9. Close the ADF Pickup Roller Cover.
118
Pick Roller
Cover
10. Reset the ADF Pick Roller counter from the touch panel
(login>Menu>Information/Report).
Notice:
Do not close the ADF while the Pickup Roller Cover is kept open.
z
z
Note: Make sure the ADF is completely closed. Feeding errors may occur if
the ADF is not closed completely.
z
Confirm that the Pickup Rollers are attached firmly. If not, paper feed errors
such as paper jams will occur.
119
Replacing the Print Cartridge
When printed characters appear light or missing characters are evident, complete
the following steps to replace your print cartridge:
1.
Open the Imprinter Cover.
2.
Open the Print Cartridge Holder by lifting up the locking lever with your finger.
3.
Hold the tab of the cartridge and remove the Cartridge from its holder.
Note: Dispose the empty Print Cartridge according to the local regulations.
4.
Open the box of the print cartridge and remove the protective tape from the
bottom of the cartridge.
120
5.
Do not touch the ink nozzles (1) or the gold contacts (2) after the tape
has been removed.
1
2
6. Grasp the tab of the cartridge and insert the cartridge into the holder with
the print side face up and the tab pointing to the left.
7. Lower the locking lever of the Print Cartridge Holder until it locks in.
121
8. Position the print cartridge holder along where the document will pass
through.
9.
Close the Imprinter Cover.
122
Replacing the Attract Ink Box Assembly
1. Pull the ADF Handle and open the ADF cover with a light force.
2. Press the right end of the Attract Ink Box Assembly and lift it up to remove it from the device.
Attract Ink
Box
Assembly
Note:
How to judge the Attract Ink Box Assembly is near its life time:
The life time of the Attract Ink Box Assembly is approximately two years. When the
assembly is near its life time, there will be a lot of ink on the surface of the
assembly as shown in the following figure. If so, it is time to replace the Attract
Ink Box Assembly.
Attract Ink
Box Assembly
Ink
123
Reassembling:
To install the Attract Ink Box Assembly, follow these steps:
1.
Pull the ADF Handle and open the ADF Cover with a light force.
2.
Insert the left end of the Attract Ink Box Assembly to the left side of its
original position as illustrated.
3.
Press the right end of the Attract Ink Box Assembly inward and move it
down.
Warning: Be careful, the ADF may close and pinch your fingers.
Note: Make sure the ADF is completely closed. Feeding errors may occur if the
ADF is not closed completely.
124
8
Specifications
All specifications are subject to change without notice.
Items
Specifications
Model Number : DT-1214H
General Specifications
System Description
Image Sensor
Light Source
Optical Resolution
Output Quality
Memory Size
LCD Size
External Connections
Network Connection
Networked Workgroup
Solution for:
Output Format
Duty Cycle
Dimension (WxDxH)
Weight
Power Requirement
Power Consumption
Operating Temperature
Humidity
Stand-alone Internet Appliance
Color Charged-Coupled Device (CCD)
LED Light Bar
600 x 600 dpi
Input: 48 bits color
Output: 24 bits Color
8 bits Gray
4 bits CMYK
1 bit Monochrome
2GB
10" XGA
(1,024 x 768) TFT touch panel
1. RJ-45 (for Network connection)
2. USB COPYPORT
3. USB keyboard
4. ADF port
10/100 Mbits auto-negotiation
Stand-alone Copy
E-Mail via Internet/Intranet
Filing
PDF, JPEG, PCX, TIFF, MTIFF, PCX, GDI
1,000 pages/day
24.4” x 26.4” x 10.8” (620 x 670 x 275 mm)
30 Kg (66.1 lb)
100-240Vac, 50-60Hz, 3.5A
<133 W (operation)
<58 W (standby)
10%~85% RH
10°C~35°C
125
Scan Size
ADF Paper Capacity
ADF Paper Size
Flatbed Max. Paper Size
Paper Thickness
Copy Specification
USB Copy Port
First copy time
Multiple Copies
Copy Resolution
Copy Mode
Density Control
Output Format
Enlarge / Reduce
Network Specification
Connectivity
Communication Protocol
Supported Browsers
Configuration
Requirement
E-mail Specification
Communication Protocol
File Formats
B&W
Gray/Color
Default File Format
Separation Limit
Resolution
Default Resolution
Address Book Volume
Max. Addresses
Group
No. of Addresses in
Each Group
Multiple Recipients Allow
Security Check
100 sheets (75 g/m+² or 20 lb. Paper)
150 sheets (60 g/m² or 16 lb. Paper)
2” x 3.5” (50 x 88 mm) ~ 11.7” x 36” (297 x 914 mm)
8.5” x 11.7” (216 x 297 mm)
28 ~ 209 g/m²
USB2.0 Copy port
Depend on printer
Up to 99
600 x 600 dpi
Speed, Fine
7 Levels
GDI
Fit to Page (98%)
25%~400% in 1% increment/decrement
Pre-set Scales
Ethernet 10BaseT/100BaseTX auto-negotiation with
RJ-45 connector
TCP/IP, SMTP, MIME, FTP, CIFS, DHCP, DNS, LDAP
Microsoft IE 5.0 or higher
Netscape Navigator 6.0 or higher
1. IP address
2. Subnet mask
3. Gateway
4. SMTP server/POP3 server
5. FTP server
6. Web server
SMTP, MIME, POP3
PDF, TIFF, MTIFF
PDF, TIFF, MTIFF, JPEG
PDF
1MB, 3MB, 5MB, 10MB,30MB, Unlimited
75, 100, 150, 200, 300, 400, 600 dpi
200 dpi
2000
100
99
Yes
Yes
126
Mail Server Authentication
Supported Mail Server
Application
Supported LDAP Server
Supported Mail Application
Filing Specification
Communication Protocol
File Formats
B&W
Gray/Color
Default File Format
Resolution
Default Resolution
B&W
Gray/Color
Number of Most Used Profiles
Max. Number of Profiles
SMTP, POP3
Lotus Mail Server 5.0
MS Exchange Server 2000
RedHat 7.0 SendMail
MAC Mail Server in OS 9.04
Windows 2000 Active Directory
Windows NT 4.0 + MS Exchange 5.5
Lotus Notes R5
Microsoft Outlook 2000
Microsoft Outlook Express 5.0
Microsoft Outlook Express 6
Netscape Messenger 4.7
Netscape Messenger 4.73
MAC built-in MAIL application
Eudora 4.3.2J
Lotus Notes R5
FTP, CIFS, FTPS
PDF, TIFF, MTIFF, PCX
PDF, TIFF, MTIFF, JPEG
PDF
75, 100, 150, 200, 300, 400, 600 dpi
200 dpi
200 dpi
5
50
127
Index
Duplex
A
1 to 1 Sided, 1 to 2 Sided, 2 to 2 Sided, 2
to 1 Sided, 32
Account Management, 75
Activity Log Report, 67
E
Address Book, 78
ADF Friction Roller Assembly, 108
Energy Saver
Advanced Copy, 31
5, 15, 30, 60, 240 minutes, 74
Attachment, 39
Ethernet Hub, 14
B
F
Bug Report, 67
File Separation, 39
Fixed Width, 93
C
FTP, 83
Full Control, 84
Change Filing Settings, 42
Change More Copy Settings, 24
I
Change More E-mail Settings, 38
CIFS, 83
Import/Export, 82
Cleaning the Imprinter, 111
Information Report, 63
Cleaning the Skew Sensor, 110
Installing the ADF Output Tray, 11
Clearing Paper Jams, 97
Installing the Print Cartridge, 16
Collate
IP Address, 8
Sort, Stack, 31
L
Connecting the Cables, 14
Connecting the Power, 14
LAN, 14
Creating A New Shortcut Button, 51, 57
LDAP, 8
D
M
Making Copies, 22
Default File Separation
3MB/5M/10MB/Unlimited, 76
Menu screen, 62
Deskew, 34
Minimum Configuration Requirements, 10
DHCP server, 8
N
Digital Copying, 1
DNS, 8
network parameters
Document Loading Tips, 18
DHCP Enable, IP Address, Subnet Mask,
128
Security Management, 65
Gateway IP, SMTP Server, SMPT Port, 6
Sending Multi-Page Document, 2
Network Settings
ShortCut And
IP address, Subnet mask, Gateway IP, DNS
Copy, Email, Filing, USB Flash, 65
Server, 60
SMTP, 8
O
soft keyboard, 61
Specifying More Administrator Settings by an
Orientation
Embedded Web Page, 68
Long Edge to Long Edge, Long Edge to Short
Specifying More Administrator Settings by The
Edge, Short Edge to Long Edge, Short Edge
Touch, 62
to Short Edge, 33
Specifying the Product’s Network Settings, 59
P
Storage Printing
USB storage device, public folder, 46
Page Count, 70
Placing Document(s) in the ADF, 19
Summary of the Web Pages, 70
Placing Document(s) on the Flatbed Glass, 21
System Update, 66
Preview, 28
T
Print All, 92
Target URL
R
CIFS filing format, 77
TCP/IP network, 10
Replacing the ADF Pick Roller, 116
Replacing the Print Cartridge, 120, 123
U
Rotate 90∘to Left, 30
Rotate 90∘to Right, 30
unlocked position, 12
Using the Shortcut Button, 45
S
Z
Scan Options, 85
Scan to Network Folder, 1
Zoom in, 30
Scancast
Zoom out, 30
Public Folder/USB Flash/E-mail/Filing/Copy, 48
129