1
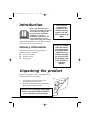
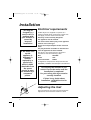
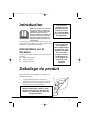
40005612Eng.qxd
07/07/2008
16:12
Page 1
®
Instruction Book
GO DC 68G
Condenser Tumble Dryer
English
Français
40005612Eng.qxd
07/07/2008
16:12
Page 2
English . . . . . . . . . . . . . . . . . . . . . . . . . . . . . . . . . . . . . . . . . . . . 2
Français . . . . . . . . . . . . . . . . . . . . . . . . . . . . . . . . . . . . . . . . . . . 20
Introduction
...............................................3
Delivery information . . . . . . . . . . . . . . . . . . . . . . . . . . . . . . . . . . . . . . . . . . . . . 3
Unpacking the Product . . . . . . . . . . . . . . . . . . . . . . . . . . . . . . . . . . . 3
Safety reminders . . . . . . . . . . . . . . . . . . . . . . . . . . . . . . . . . . . . . . . . . . 4
Installation . . . . . . . . .
Use . . . . . . . . . . . . . . .
The Laundry . . . . . . . .
Environmental Issues .
GIAS Service . . . . . . . .
.
.
.
.
.
.
.
.
.
.
.
.
.
.
.
.
.
.
.
.
.
.
.
.
.
.
.
.
.
.
.
.
.
.
.
.
.
.
.
.
.
.
.
.
.
.
.
.
.
.
.
.
.
.
.
.
.
.
.
.
.
.
.
.
.
.
.
.
.
.
.
.
.
.
.
.
.
.
.
.
.
.
.
.
.
.
.
.
.
.
.
.
.
.
.
.
.
.
.
.
.
.
.
.
.
.
.
.
.
.
.
.
.
.
.
.
.
.
.
.
.
.
.
.
.
.
.
.
.
.
.
.
.
.
.
.
.
.
.
.
.
.
.
.
.
.
.
.
.
.
.
.
.
.
.
.
.
.
.
.
.
.
.
.
.
.
.
.
.
.
.
.
.
.
.
.
.
.
.
.
.
.
.
.
.
.
.
.
.
.
.
.
.
.
.
.
.
.
.
.
.
.
.
.
.
.
.
.
.
.
.
.
.
.
.
.
.
.
.
.
4
4
4
5
5
Installation . . . . . . . . . . . . . . . . . . . . . . . . . . . . . . . . . . . . . . . . . . . . . . . . . 6
Electrical requirements . . . . . . . . . . . . . . . . . . . . . . . . . . . . . . . . . . . . . . . . . . . 6
Adjusting the feet . . . . . . . . . . . . . . . . . . . . . . . . . . . . . . . . . . . . . . . . . . . . . . . 6
Ventilation . . . . . . . . . . . . . . . . . . . . . . . . . . . . . . . . . . . . . . . . . . . . . . . . . 7
Preparing the load . . . . . . . . . . . . . . . . . . . . . . . . . . . . . . . . . . . . . . . . 8
Clothes preparation . . . . . . . . . . . . . . . . . . . . . . . . . . . . . . . . . . . . . . . . . . . . . . 8
Sorting the load. . . . . . . . . . . . . . . . . . . . . . . . . . . . . . . . . . . . . . . . . . . . . . . . . 9
Drying advice . . .
Do not tumble dry . . . .
Energy saving. . . . . . . .
Drying guide . . . . . . . .
.
.
.
.
.
.
.
.
.
.
.
.
.
.
.
.
.
.
.
.
.
.
.
.
.
.
.
.
.
.
.
.
.
.
.
.
.
.
.
.
.
.
.
.
.
.
.
.
.
.
.
.
.
.
.
.
.
.
.
.
.
.
.
.
.
.
.
.
.
.
.
.
.
.
.
.
.
.
.
.
.
.
.
.
.
.
.
.
.
.
.
.
.
.
.
.
.
.
.
.
.
.
.
.
.
.
.
.
.
.
.
.
.
.
.
.
.
.
.
.
.
.
.
.
.
.
.
.
.
.
.
.
.
.
.
.
.
.
.
.
.
.
.
.
.
.
.
.
.
.
.
.
.
.
.
.
.
.
.
.
.
.
.
.
.
.
.
.
10
10
10
10
Controls and indicators . . . . . . . . . . . . . . . . . . . . . . . . . . . . . . . . . 11
Door and Filter . . . . . . . . . . . . . . . . . . . . . . . . . . . . . . . . . . . . . . . . . . . 12
Opening the door . . . . . . . . . . . . . . . . . . . . . . . . . . . . . . . . . . . . . . . . . . . . . . 12
Filter. . . . . . . . . . . . . . . . . . . . . . . . . . . . . . . . . . . . . . . . . . . . . . . . . . . . . . . . . 12
Filter care indicator . . . . . . . . . . . . . . . . . . . . . . . . . . . . . . . . . . . . . . . . . . . . . 12
Water container . . . . . . . . . . . . . . . . . . . . . . . . . . . . . . . . . . . . . . . . . . 13
To remove the container . . . . . . . . . . . . . . . . . . . . . . . . . . . . . . . . . . . . . . . . . 13
Condenser
. . . . . . . . . . . . . . . . . . . . . . . . . . . . . . . . . . . . . . . . . . . . . . . . 14
To remove the condenser . . . . . . . . . . . . . . . . . . . . . . . . . . . . . . . . . . . . . . . . 14
Selecting the Programme . . . . . . . . . . . . . . . . . . . . . . . . . . . . . . . 14
Operation . . . . . . . . . . . . . . . . . . . . . . . . . . . . . . . . . . . . . . . . . . . . . . . . . 16
Cancelling and resetting the programme . . . . . . . . . . . . . . . . . . . . . . . . . . . . 16
Start Delay . . . . . . . . . . . . . . . . . . . . . . . . . . . . . . . . . . . . . . . . . . . . . . . . . . . . 16
Cleaning and Routine Maintenance . . . . . . . . . . . . . . . . . . . . 17
Cleaning the dryer . . . . . . . . . . . . . . . . . . . . . . . . . . . . . . . . . . . . . . . . . . . . . . 17
Technical specifications . . . . . . . . . . . . . . . . . . . . . . . . . . . . . . . . . . . . . . . . . . 17
Troubleshooting . . . . . . . . . . . . . . . . . . . . . . . . . . . . . . . . . . . . . . . . . . 18
Customer Service . . . . . . . . . . . . . . . . . . . . . . . . . . . . . . . . . . . . . . . . . 19
Spares. . . . . . . . . . . . . . . . . . . . . . . . . . . . . . . . . . . . . . . . . . . . . . . . . . . . . . . . 19
GIAS Service . . . . . . . . . . . . . . . . . . . . . . . . . . . . . . . . . . . . . . . . . . . . . . . . . . . 19
2
40005612Eng.qxd
07/07/2008
16:13
Page 3
Introduction
Please read and follow these
instructions carefully and operate
the machine accordingly. This
booklet provides important
guidelines for safe use,
installation, maintenance and
some useful advice for best
results when using your machine.
Check that no
damage has
occurred to the
machine during
transit. If it has,
call for service by
GIAS.
Keep all documentation in a safe place for future
reference or for any future owners
Delivery information
Please check that the following items are
delivered with the appliance:
●
Instruction manual
●
Guarantee card
●
Energy label
Failure to comply
with the above
can compromise
the safety of the
appliance. You
may be charged
for a service call
if a problem with
your machine is
caused by
misuse.
Unpacking the product
Remove the machine from its packaging close to
the final location of the machine.
1.
Cut carefully around the base of the
packaging and up one corner.
2.
Remove the polythene sleeve and lift the
dryer off the polystyrene base.
Dispose of the packaging safely. Make
sure it is out of the reach of children,
it is a potential source of danger.
3
40005612Eng.qxd
07/07/2008
16:13
Page 4
Safety reminders
Installation
●
●
●
●
Check that the product has no visible signs of damage before use. If damaged do
not use and please call GIAS Service.
Do not use adapters, multiple connectors and/or extensions.
Never install the dryer against curtains and be sure to prevent items from falling
or collecting behind the dryer.
The appliance must not be installed behind a lockable door, a sliding door or a
door with a hinge on the opposite side to that of tumble dryer.
Use
●
●
●
●
●
●
●
●
●
●
●
●
●
●
This appliance is not intended for use by persons (including children) with
reduced physical, sensory or mental capabilities, or lack of experience and
knowledge, unless they have been given supervision or instruction concerning
use of the appliance by a person responsible for their safety.
Children should be supervised to ensure that they do not play with the appliance.
WARNING Misuse of a tumble dryer may create a fire hazard.
This machine is solely for domestic use, i.e. to dry household textiles and garments.
This machine should only be used for its intended purpose as described in this
manual. Ensure that the instructions for installation and use are fully understood
before operating the appliance.
Do not touch the appliance when hands or feet are damp or wet.
Do not lean on the door when loading the machine or use the door to lift or
move the machine.
Do not allow children to play with the machine or its controls.
WARNING Do not use the product if the fluff filter is not in position or is
damaged; fluff could be ignited.
WARNING Where the hot surface symbol
is located the temperature rise
during operation of the tumble dryer may be in excess of 60 degrees C.
Remove the plug from the electricity supply. Always remove the plug before
cleaning the appliance.
Do not continue to use this machine if it appears to be faulty.
Lint and fluff must not be allowed to collect on the floor around the outside of
the machine.
The drum inside may be very hot. Always allow the dryer to complete the cool
down period before removing the laundry.
The Laundry
●
●
●
●
●
4
Do not dry unwashed items in the tumble dryer.
WARNING Do not tumble dry fabrics treated with dry cleaning fluids.
WARNING Foam rubber materials can, under certain circumstances, when heated
become ignited by spontaneous combustion. Items such as foam rubber (latex
foam), shower caps, waterproof textiles, rubber backed articles and clothes or
pillows fitted with foam rubber pads MUST NOT be dried in the tumble dryer.
Always refer to the laundry care labels for directions on suitability for drying.
Clothes should be spin dried or thoroughly wrung before they are put into the
40005612Eng.qxd
●
●
●
●
07/07/2008
16:14
Page 5
tumble dryer. Clothes that are dripping wet should NOT be put into the dryer.
Lighters and matches must not be left in pockets and NEVER use flammable
liquids near the machine.
Glass fibre curtains should NEVER be put in this machine. Skin irritation may
occur if other garments are contaminated with the glass fibres.
Items that have been soiled with substances such as cooking oil, acetone, alcohol,
petrol, kerosene, spot removers, turpentine, waxes and wax removers should be
washed in hot water with an extra amount of detergent before being dried in
the tumble dryer.
Fabric softeners, or similar products, should be used as specified by the fabric
softener instructions.
Environmental Issues
●
●
All packaging materials used are environmentally-friendly and recyclable. Please
help dispose of the packaging via environmentally-friendly means. Your local
council will be able to give you details of current means of disposal.
To ensure safety when disposing of an old tumble dryer disconnect the mains
plug from the socket, cut the mains power cable and destroy this together with
the plug. To prevent children shutting themselves in the machine break the door
hinges or the door lock.
GIAS Service
●
To ensure the continued safe and efficient operation of this appliance we
recommend that any servicing or repairs are only carried out by an authorised
GIAS Service engineer.
European directive 2002/96/EC
This appliance is marked according to the European directive 2002/96/EC on Waste
Electrical and Electronic Equipment (WEEE).
By ensuring this product is disposed of correctly, you will help
prevent potential negative consequences for the environment
and human health, which could otherwise be caused by
inappropriate waste handling of this product.
The symbol on the product indicates that this product may
not be treated as household waste. Instead it shall be
handed over to the applicable collection point for the
recycling of electrical and electronic equipment
Disposal must be carried out in accordance with local
environmental regulations for waste disposal.
For more detailed information about treatment, recovery
and recycling of this product, please contact your local city
office, your household waste disposal service or the shop
where you purchased the product.
If the appliance is not running properly or breaks down,
switch it off and disconnect the plug from the socket.
Consult GIAS Service for possible repair.
5
40005612Eng.qxd
07/07/2008
16:14
Page 6
Installation
You may be
charged for a
service call if a
problem with
your machine is
caused by
incorrect
installation.
Electrical requirements
Tumble dryers are supplied to operate at a
voltage of 230V, 50 Hz single phase. Check that
the supply circuit is rated to at least 10A.
Electricity can be extremely dangerous.
This appliance must be earthed.
The socket outlet and the plug on the appliance
must be of the same type.
Do not use multiple adapters and/or extension
leads.
If the mains cord
on this
appliance is
damaged, it
must be
replaced by a
special cord
which is ONLY
obtainable from
the spares
service. It must
be installed by a
competent
person.
The plug should be accessible for disconnection
after the appliance has been installed.
The wires in the mains lead are coloured in
accordance with the following codes:
Blue
NEUTRAL
Brown
LIVE
Green and Yellow
EARTH
CE Appliance complies with European Directive
89/336/EEC, 73/23/EEC and subsequent amendments.
Do not plug the machine in and
switch it on at the mains until the
installation is completed.
For your safety, this dryer must be
correctly installed.
If there is any doubt about
installation, call GIAS Service for
advice.
Adjusting the feet
Once the machine is in place the feet should be
adjusted to ensure that the machine is level.
6
40005612Eng.qxd
07/07/2008
16:14
Page 7
Ventilation
Adequate ventilation must be provided in the
room where the tumble dryer is located to
prevent gases from appliances burning other
fuels, including open fires, being drawn into the
room during operation of the tumble dryer.
●
Exhaust air must not be discharged into a
flue which is used for exhausting fumes
from appliances burning gas or other fuels.
●
Check regularly that the air flowing through
the dryer is not restricted.
●
Check the fluff filter after use, and clean, if
necessary.
●
The inlet and outlets should be kept free
from obstructions. To ensure adequate
ventilation the space between the bottom
of the machine and the floor must not be
obstructed. There should be a gap of at
least 12mm between the machine and any
obstructions.
●
Prevent items from falling or collecting
behind the dryer as these may obstruct the
air inlet and outlet.
●
NEVER install the dryer up against curtains.
AIR INLET VENTS
AIR OUTLETS
AIR OUTLETS IN THE BASE
7
40005612Eng.qxd
07/07/2008
16:14
Page 8
Preparing the load
Before using the tumble dryer for the first time:
●
Please read this instruction book thoroughly.
●
Remove all items packed inside drum.
●
Wipe the inside of the drum and door with
a damp cloth to remove any dust which may
have settled in transit.
Clothes preparation
Make sure that the laundry you are going to dry
is suitable for drying in a tumble dryer, as shown
by the care symbols on each item.
Do not overload
the drum, large
items when wet
can exceed the
maximum
admissible
clothes load
(for example:
sleeping bags,
duvets).
8
Check that all fastenings are closed and that
pockets are empty. Turn the articles inside out.
Place clothes loosely in the drum to make sure
that they don't get tangled.
Maximum drying weight
●
Cottons Max. 8 kg
●
Synthetics Max. 4 kg
40005612Eng.qxd
07/07/2008
16:14
Page 9
Sort the load as follows:
●
By care symbols
These can be found on the collar or inside
seam:
Suitable for tumble drying.
Tumble drying at high temperature.
Tumble drying at low temperature only.
Do not tumble dry.
If the item does not have a care label it
must be assumed that it is not suitable
for tumble drying.
●
By amount and thickness
Whenever the load is bigger than the dryer
capacity, separate clothes according to
thickness (e.g. towels from thin underwear).
●
By type of fabric
Cottons/linen: Towels, cotton jersey, bed and
table linen.
Synthetics: Blouses, shirts, overalls, etc.
made of polyester or polyamid, as well as
for cotton/synthetic mixes.
●
By drying level
Sort into: iron dry, cupboard dry, etc. For
delicate articles press the ‘Séchage Délicat’
button to select low drying temperature.
9
40005612Eng.qxd
07/07/2008
16:14
Page 10
Drying advice
IMPORTANT: Do
not dry articles
which have been
treated with a
dry cleaning fluid
or rubber clothes
(danger of fire or
explosion).
During the last
15 minutes the
load is always
tumbled in cool
air.
Do not tumble dry:
Woollens, silk, delicate fabrics, nylon stockings,
delicate embroidery, fabrics with metallic
decorations, garments with PVC or leather
trimmings, training shoes, bulky items such as
sleeping bags, etc.
Energy saving
Only put into the tumble dryer laundry which has
been thoroughly wrung or spin-dried. The drier
the laundry the shorter the drying time thus
saving electricity.
ALWAYS
●
Try to dry the maximum weight of laundry,
this will save time and electricity.
●
Check that the filter is clean before every
drying cycle.
NEVER
●
Exceed the maximum weight, this will waste
time and electricity.
●
Put dripping wet items into the tumble
dryer, this may damage the appliance.
Drying guide
The table shows approximate drying times,
depending on the type of fabric and dampness of
the clothes.
10
40005612Eng.qxd
07/07/2008
16:22
Page 11
Controls and indicators
EMPTY WATER
INDICATOR
(Réservoir Plein)
PROGRAMME
SELECTOR
ACRYLICS/
SYNTHETICS
BUTTON
(Séchage
Délicat)
COUNTDOWN
DISPLAY
START
BUTTON
(Départ)
FILTER CARE
INDICATOR
(Entretien Filtre)
START DELAY
BUTTON
(Départ
Différé)
ON/OFF
BUTTON
(Marche
Arrêt)
Control panel and indicator lights
Programme Selector – Select the required programme
‘Marche Arrêt’ button and indicator – Press to switch on, the indicator will light
‘Départ’ – Press Départ to commence the selected drying programme. Press for 5 seconds
to cancel/reset the programme
‘Séchage Délicat’ button – Press to reduce the heat level for delicate items, the indicator
above the button will light up. To change the heat setting the programme must be reset
Low Heat – Indicator light ON
High Heat – Indicator light OFF
‘Réservoir Plein’ indicator – Lights when the water container is full
‘Entretien Filtre’ indicator – Lights when the filter needs cleaning
‘Départ Différé’ button – Allows the user to delay the start of the drying cycle (see
details of operation page 17)
Display
START – When the dryer is switched On the START indicator will flash, when the
programme starts the START indicator will light up
60' – Indicator lights when there is less than 60 minutes left until completion of the
programme
15' - Indicator lights when there is less than 15 minutes left until completion of the
programme. At this stage of the drying cycle the machine enters the Cool Down phase
STOP - Indicator lights when the programme is finished
6h - 6 hour start delay (light flashes when in operation)
9h - 9 hour start delay (light flashes when in operation)
11
40005612Eng.qxd
07/07/2008
16:14
Page 12
Door and Filter
Opening the door
Pull on handle to open the door.
To restart the dryer, close the door and press
Départ.
WARNING!
When the tumble dryer is in use the
drum and door may be VERY HOT.
Never stop a tumble dryer before
the end of the drying cycle unless
all items are quickly removed and
spread out so that the heat is
dissipated.
Filter
IMPORTANT: To maintain the efficiency of the
dryer check that the fluff filter is clean before
each drying cycle.
1.
Pull the filter upwards.
2.
Open filter as shown.
3.
Gently remove lint using a soft brush or
your fingertips.
4.
Snap the filter together and push back into
place.
Filter Care Indicator
‘Entretien Filtre’ lights when the filter needs
cleaning.
If the laundry is not drying check that the filter is
not clogged.
12
40005612Eng.qxd
07/07/2008
16:14
Page 13
Water Container
The water removed from the laundry during the
drying cycle is collected in a container at the
bottom of the dryer.
When the container is full the ‘Réservoir Plein’
indicator on the control panel will light, and the
container MUST be emptied. However, we
recommend that the container is emptied after
each drying cycle.
NOTE: Very little water will collect during the
first few cycles of a new machine as an internal
reservoir is filled first.
To remove the container
1.
Gently pull the bottom of the kickplate so
that it unclips from the dryer. The top
section can then be unhinged allowing the
kickplate to be completely removed.
2.
Pull firmly on the handgrip and slide the
water container out of the dryer.
Support the container with both hands. When
full, the water container will weigh about 4kg.
3.
Open the lid located on the top of the
container and empty the water.
4.
Refit the lid and slide the water container
back into position. PUSH FIRMLY INTO
PLACE.
5.
Refit the kickplate by engaging the hinges
at the top and 'snapping' the lower clips
into place.
13
40005612Eng.qxd
07/07/2008
16:14
Page 14
Condenser
Important: Always switch off and remove the plug from the electricity supply
before cleaning the condenser.
To maintain the efficiency of the dryer regularly check that the condenser is clean.
To remove the condenser
1.
Remove the kickplate (see page 13).
2.
Turn the two locking levers anti-clockwise and pull out the condenser.
3.
Pull out the condenser unit.
4.
Gently remove any dust or fluff with a cloth,
then wash the unit by holding it under a
running tap turning it so that water flows
between the plates, to remove any dust or
fluff.
5.
Refit the condenser ensuring it is in the
correct way (as indicated by the arrow) and
pushed firmly into place. Lock the two levers
by turning them clockwise.
6.
Refit the kickplate.
Selecting the
Programme
The Sensor Dry machine gives many options
for drying the laundry to suit all
circumstances.
Note: The sensor may not detect a small load
of small articles. For small loads and separate
items or pre-dried fabrics with low moisture
14
40005612Eng.qxd
07/07/2008
16:14
Page 15
content, use the timed programmes. Set the programme between 30 and
75 minutes depending on the load size and dryness required, and select high
or low heat depending upon the fabric type.
If the sensor does not detect the item the dryer will only operate for 10
minutes before going into cooldown.
If the load is too large or too wet to tumble dry the dryer will automatically
go into cooldown after 185 minutes.
The table below lists the programmes and the function of each programme.
Programme
Drying
(A ranger)
Iron Dry
(Prêt à repasser)
Description
Select the degree of dryness that you require.
This ranges from
for bath towels and bathrobes,
through
for items that will be put away without
ironing, to the programme that leaves the laundry
suitable for ironing.
Wool
(Laine)
A gentle programme specially created to get woollens
softer after air-drying.
This delicate warm air cycle, lasting 12 minutes, can
also be used to get woollens 'refreshed' after being
stored in the wardrobe.
Fast Iron
(Repassage
facile)
The Fast Iron programme provides a conditioning and
anticrease function. The dryer will heat the load for
9 minutes followed by a 3 minute cool down period
and is especially good for garments which may have
been left for some time prior to ironing, in a linen
basket for example. Garments may also become
stiffened when dried outside on a washing line or
inside on radiators. The Fast Iron process relaxes the
creases in the fabric making ironing quicker and easier.
120'
120 minutes of drying
75'
75 minutes of drying
60'
60 minutes of drying
45'
45 minutes of drying
30'
30 minutes of drying
FROID
Tumbling of laundry in cool air for 30 minutes
15
40005612Eng.qxd
07/07/2008
16:14
Page 16
Operation
1.
2.
3.
4.
5.
6.
7.
8.
9.
10.
11.
Open the door and load the drum with laundry. Ensure that garments do
not hinder closure of the door.
Gently close the door pushing it slowly until you hear the door 'click' shut.
Press the ‘Marche Arrêt’ button to switch on the dryer. The indicator will
light up and the START indicator will flash.
Turn the Programme Selector dial to select the required drying programme
(see Programme Guide).
If drying synthetics, acrylics or delicate items, press the ‘Séchage Délicat’
button to reduce the heat level.
The light above the push button will light up when the machine is in low
heat setting. To deselect this status when the drying cycle has started it is
necessary to reset the machine.
Press the ‘Départ’ button. The dryer will start automatically and the START
indicator will be continuously lit.
The
display will show the drying progress in terms of time remaining.
If the door is opened during the programme to check the laundry, it is
necessary to press ‘Départ’ to recommence drying after the door has been
closed.
When the 15' indicator is lit the machine will enter the cool down phase,
the clothes will be tumbled in cool air allowing the load to cool down.
When the programme is complete the STOP indicator will light.
Following the completion of the cycle the drum will rotate intermittently
to minimise creasing. This will continue until the machine is reset or
switched OFF.
Cancelling and resetting the
programme
To cancel a programme switch the machine off and on again. The machine will
indicate that it has been reset by the START indicator flashing.
Buzzer Operation
The buzzer will operate when the selector is rotated and when function buttons
are pressed.
To cancel the operation of the buzzer, follow this sequence. Press and hold on
the Acrylic/Synthetic (Séchage Délicat) and Start (Départ) buttons and then turn
the machine ON using the ON/OFF switch (Marche Arrêt).
To switch the buzzer back on repeat the above sequence.
16
40005612Eng.qxd
07/07/2008
16:14
Page 17
Start Delay
The ‘Départ Différé’ function allows the user to
delay the start of the drying cycle by 6 or 9 hours.
When the function is first selected the display will
show a delay of 6 hours, a subsequent press of
the button will increase the delay to 9 hours.
To commence the programme press ‘Départ’ and
the appliance will complete the drying cycle at
the end of this time. The 6 or 9 hour indicator
light will flash to indicate that the start delay is in
progress.
WARNING!
The drum, door
and load may be
very hot.
Cleaning and Routine
Maintenance
Cleaning the dryer
●
Clean the filter and empty the water
container after every drying cycle.
●
Regularly clean the condenser.
●
After each period of use, wipe the inside of
the drum and leave the door open for a
while to allow circulation of air to dry it.
●
Wipe the outside of the machine and the
door with a soft cloth.
●
DO NOT use abrasive pads or cleaning
agents.
●
To prevent the door sticking or the build up
of fluff periodically clean the inner door and
gasket with a damp cloth.
Technical specifications
Drum capacity
115 litres
Maximum load
8 kg
Height
85cm
Width
60cm
Depth
60cm
Energy Label Band
B
IMPORTANT
Always switch
off and remove
the plug from
the electricity
supply before
cleaning this
appliance.
For electrical data
refer to the
rating label on
the front of the
dryer cabinet
(with the door
open).
17
40005612Eng.qxd
07/07/2008
16:14
Page 18
Troubleshooting
What might be the cause of...
Defects you can remedy yourself
Before calling GIAS Service for technical advice please run through the
following checklist. A charge will be made if the machine is found to be
working or has been installed incorrectly or used incorrectly. If the problem
persists after completing the recommended checks, please call GIAS Service,
they may be able to assist you over the telephone.
Drying time is too long/clothes are not dry enough…
●
●
●
●
●
●
●
Have you selected the correct drying time/programme?
Were the clothes too wet? Were the clothes thoroughly wrung or spindried?
Does the filter need cleaning?
Does the condenser need cleaning?
Is the dryer overloaded?
Are the inlets, outlets and base of the dryer free from obstructions?
Has the ‘Séchage Délicat’ option been selected from a previous cycle?
The dryer does not operate…
●
●
●
●
●
●
●
●
●
Is there a working electricity supply to the dryer? Check using another
appliance such as a table lamp.
Is the plug properly connected to the mains supply?
Is there a power failure?
Has the fuse blown?
Is the door fully closed?
Is the dryer switched on, both at the mains supply and at the machine?
Has the drying time or the programme been selected?
Has the machine been switched on again after opening the door?
Has the dryer stopped operating because the water tray is full and needs
emptying?
The dryer is noisy…
●
Switch off the dryer and contact GIAS Service for advice.
The ‘Entretien Filtre’ Indicator is on…
●
●
Does the filter need cleaning?
Does the condenser need cleaning?
The ‘Réservoir Plein’ Indicator is on…
●
18
Does the water container need emptying?
40005612Eng.qxd
07/07/2008
16:14
Page 19
Customer Service
Should there still be a problem with your dryer
after completing all the recommended checks,
please call GIAS Service for advice. They may be
able to assist you over the telephone or arrange
for a suitable appointment for an engineer to call
under the terms of your guarantee. However, a
charge may be made if any of the following
applies to your machine:
●
Is found to be in working order.
●
Has not been installed in accordance with
the installation instructions.
●
Has been used incorrectly.
Spares
Always use genuine spares, available direct from
GIAS Service.
GIAS Service
For service and repairs call your local GIAS
Service engineer.
The manufacturer declines all responsibility in the
event of any printing mistakes in this booklet.
The manufacturer also reserves the right to make
appropriate modifications to its products without
changing the essential characteristics.
19
40005612Fre.qxd
09/07/2008
13:01
Page 20
Introduction . . . . . . . . . . . . . . . . . . . . . . . . . . . . . . . . . . . . . . . . . . . . . . 21
Informations sur la livraison . . . . . . . . . . . . . . . . . . . . . . . . . . . . . . . . . . . . . . 21
Déballage du produit . . . . . . . . . . . . . . . . . . . . . . . . . . . . . . . . . . . . 21
Rappels de sécurité . . . . . . . . . . . . . . . . . . . . . . . . . . . . . . . . . . . . . . 22
Installation . . . . . . . . . . . . . . . .
Utilisation. . . . . . . . . . . . . . . . .
Le linge . . . . . . . . . . . . . . . . . .
Protection de l’environnement
Service GIAS . . . . . . . . . . . . . . .
.
.
.
.
.
.
.
.
.
.
.
.
.
.
.
.
.
.
.
.
.
.
.
.
.
.
.
.
.
.
.
.
.
.
.
.
.
.
.
.
.
.
.
.
.
.
.
.
.
.
.
.
.
.
.
.
.
.
.
.
.
.
.
.
.
.
.
.
.
.
.
.
.
.
.
.
.
.
.
.
.
.
.
.
.
.
.
.
.
.
.
.
.
.
.
.
.
.
.
.
.
.
.
.
.
.
.
.
.
.
.
.
.
.
.
.
.
.
.
.
.
.
.
.
.
.
.
.
.
.
.
.
.
.
.
.
.
.
.
.
.
.
.
.
.
.
.
.
.
.
.
.
.
.
.
.
.
.
.
.
.
.
.
.
.
.
.
.
.
.
.
.
.
.
.
.
.
.
.
.
22
22
22
23
23
Installation . . . . . . . . . . . . . . . . . . . . . . . . . . . . . . . . . . . . . . . . . . . . . . . . 24
Besoins électriques. . . . . . . . . . . . . . . . . . . . . . . . . . . . . . . . . . . . . . . . . . . . . . 24
Ajustement des pieds. . . . . . . . . . . . . . . . . . . . . . . . . . . . . . . . . . . . . . . . . . . . 24
Ventilation . . . . . . . . . . . . . . . . . . . . . . . . . . . . . . . . . . . . . . . . . . . . . . . . 25
Préparation de la charge . . . . . . . . . . . . . . . . . . . . . . . . . . . . . . . . 26
Préparation des vêtements . . . . . . . . . . . . . . . . . . . . . . . . . . . . . . . . . . . . . . . 26
Tri de la charge . . . . . . . . . . . . . . . . . . . . . . . . . . . . . . . . . . . . . . . . . . . . . . . . 27
Conseils de séchage. .
Ne séchez pas en machine . . . .
Économies d’énergie . . . . . . . .
Guide de séchage. . . . . . . . . . .
.
.
.
.
.
.
.
.
.
.
.
.
.
.
.
.
.
.
.
.
.
.
.
.
.
.
.
.
.
.
.
.
.
.
.
.
.
.
.
.
.
.
.
.
.
.
.
.
.
.
.
.
.
.
.
.
.
.
.
.
.
.
.
.
.
.
.
.
.
.
.
.
.
.
.
.
.
.
.
.
.
.
.
.
.
.
.
.
.
.
.
.
.
.
.
.
.
.
.
.
.
.
.
.
.
.
.
.
.
.
.
.
.
.
.
.
.
.
.
.
.
.
.
.
.
.
.
.
.
.
.
.
.
.
.
.
.
.
.
.
.
.
.
.
28
28
28
28
Commandes et indicateurs . . . . . . . . . . . . . . . . . . . . . . . . . . . . . 29
Porte et filtre . . . . . . . . . . . . . . . . . . . . . . . . . . . . . . . . . . . . . . . . . . . . . 30
Ouverture de la porte . . . . . . . . . . . . . . . . . . . . . . . . . . . . . . . . . . . . . . . . . . . 30
Filtre. . . . . . . . . . . . . . . . . . . . . . . . . . . . . . . . . . . . . . . . . . . . . . . . . . . . . . . . . 30
Indicateur Entretien Filtre . . . . . . . . . . . . . . . . . . . . . . . . . . . . . . . . . . . . . . . . 30
Réservoir d’eau . . . . . . . . . . . . . . . . . . . . . . . . . . . . . . . . . . . . . . . . . . . 31
Pour retirer le réservoir . . . . . . . . . . . . . . . . . . . . . . . . . . . . . . . . . . . . . . . . . . 31
Condenseur . . . . . . . . . . . . . . . . . . . . . . . . . . . . . . . . . . . . . . . . . . . . . . . 32
Pour retirer le condenseur . . . . . . . . . . . . . . . . . . . . . . . . . . . . . . . . . . . . . . . . 32
Sélection du programme . . . . . . . . . . . . . . . . . . . . . . . . . . . . . . . . 32
Fonctionnement . . . . . . . . . . . . . . . . . . . . . . . . . . . . . . . . . . . . . . . . . 34
Annulation et réinitialisation du programme . . . . . . . . . . . . . . . . . . . . . . . . . 34
Départ Différé . . . . . . . . . . . . . . . . . . . . . . . . . . . . . . . . . . . . . . . . . . . . . . . . . 34
Nettoyage et Entretien de Routine . . . . . . . . . . . . . . . . . . . . 35
Nettoyage du sèche-linge . . . . . . . . . . . . . . . . . . . . . . . . . . . . . . . . . . . . . . . . 35
Spécifications techniques . . . . . . . . . . . . . . . . . . . . . . . . . . . . . . . . . . . . . . . . . 35
Dépistage de pannes . . . . . . . . . . . . . . . . . . . . . . . . . . . . . . . . . . . . 36
Service clientèle . . . . . . . . . . . . . . . . . . . . . . . . . . . . . . . . . . . . . . . . . . 37
Pièces de rechange. . . . . . . . . . . . . . . . . . . . . . . . . . . . . . . . . . . . . . . . . . . . . . 37
Service GIAS . . . . . . . . . . . . . . . . . . . . . . . . . . . . . . . . . . . . . . . . . . . . . . . . . . . 37
20
40005612Fre.qxd
09/07/2008
13:01
Page 21
Introduction
Veuillez lire et suivre ces instructions
avec soin et utiliser la machine en
conséquence. Ce livret contient des
instructions importantes sur la
sécurité d’utilisation, l’installation et
l’entretien de la machine, ainsi que
des conseils utiles pour obtenir les
meilleurs résultats possibles lors de
son utilisation.
Conservez toute la documentation dans un endroit sûr
pour pouvoir vous y reporter à une date ultérieure ou la
transmettre aux prochains propriétaires
Informations sur la
livraison
Vérifiez que les articles suivants ont bien été livrés avec
l’appareil :
●
Manuel d’utilisation
●
Carte de garantie
●
Étiquette d’énergie
Vérifiez que la
machine ne s’est
pas détériorée en
transit. Si c’est le
cas, contactez GIAS
pour une opération
de dépannage.
Le non-respect de
ces instructions
peut compromettre
la sécurité de votre
appareil. Un appel
de service peut
vous être facturé si
la défaillance de
votre appareil est
causée par une
mauvaise
utilisation.
Déballage du produit
Retirez la machine de l’emballage, à proximité de son
emplacement définitif.
1.
Coupez délicatement autour de la base de
l’emballage en remontant vers l’angle supérieur.
2.
Retirer le manchon en polyéthylène et sortez le
sèche-linge de la base en polystyrène.
Mettez l’emballage au rebut en toute
sécurité. Conservez hors de portée des
enfants car il représente une source de
danger potentielle.
21
40005612Fre.qxd
09/07/2008
13:01
Page 22
Rappels de sécurité
Installation
●
●
●
●
Vérifiez que la machine ne présente aucun signe visible de détérioration avant de l’utiliser. En
cas de détérioration, assurez-vous de ne pas l’utiliser et de contacter le service GIAS.
N’utilisez pas d’adaptateurs, de multi-prises et/ou de rallonges.
Veillez à ne pas installer le sèche-linge contre des rideaux et assurez-vous que rien ne pourra
tomber ou s’accumuler derrière le sèche-linge.
Cet appareil ne doit pas être installé derrière une porte verrouillable, une porte coulissante
ou une porté munie de gonds placée en face de la porte du sèche-linge.
Utilisation
●
●
●
●
●
●
●
●
●
●
●
●
●
●
Cet appareil ne doit pas être utilisé par des personnes (notamment des enfants) jouissant de
capacités mentales, sensorielles ou physiques réduites ou d’un manque d’expérience ou de
connaissances, sauf si elles sont surveillées ou ont reçu des instructions concernant l’utilisation
de cet appareil par une personne responsable de leur sécurité.
Les enfants doivent être surveillés afin de s’assurer qu’ils ne s’amusent pas avec l’appareil.
ATTENTION La mauvaise utilisation d’un sèche-linge risque de causer un d’incendie.
Cette machine est conçue uniquement pour usage domestique, à savoir pour sécher le linge
domestique et les vêtements.
Cette machine ne doit être utilisée que pour l’emploi auquel elle est destinée et qui est décrit
dans ce manuel. Assurez-vous d’avoir bien compris les instructions d’installation et
d’utilisation avant de faire fonctionner la machine.
Ne touchez pas la machine si vous avez les mains ou les pieds mouillés ou humides.
Ne vous appuyez pas sur la porte lorsque vous chargez la machine et n’utilisez pas la porte
pour soulever ou déplacer la machine.
Ne laissez pas des enfants jouer avec la machine ou avec ses commandes.
ATTENTION N’utilisez pas cette machine si le filtre à peluches n’est pas en place ou s’il est
endommagé ; les peluches risquent en effet de s’allumer.
ATTENTION L’augmentation de température pendant le fonctionnement du sèche-linge peut
être supérieure à 60°C là où se trouve le symbole de surface chaude
.
Débranchez du courant de secteur. Retirez toujours la prise avant de nettoyer la machine.
Cessez d’utiliser la machine si elle semble défectueuse.
Veillez à ce que les peluches ne puissent pas s’accumuler sur le sol, à l’extérieur de la machine.
Il se peut que l’intérieur du tambour soit très chaud. Veillez à ce que le sèche-linge termine
son cycle de refroidissement avant d’en sortir le linge.
Le linge
●
●
●
●
22
Ne séchez pas des vêtements non lavés dans le sèche-linge.
ATTENTION NE séchez PAS les tissus qui ont été traités avec des liquides de nettoyage à sec.
ATTENTION Quand elles sont chauffées, les mousses alvéolaires peuvent dans certains cas
brûler par combustion spontanée. Les articles tels que le caoutchouc mousse (mousse de
latex), les bonnets de douche, le textile imperméable, les articles caoutchoutés et les
vêtements ou coussins rembourrés de caoutchouc mousse NE DOIVENT PAS être séchés dans le
sèche-linge.
Reportez-vous toujours aux étiquettes d’entretien du linge pour vérifier le mode de séchage
recommandé.
40005612Fre.qxd
●
●
●
●
●
09/07/2008
13:02
Page 23
Les vêtements doivent être essorés en machine ou à la main avant d’être placés dans le sèchelinge. Les vêtements qui dégoulinent NE DOIVENT PAS être mis dans le sèche-linge.
Enlevez les briquets et les allumettes des poches et veillez à ne JAMAIS utiliser de liquides
inflammables à proximité de la machine.
Les rideaux en fibres de verre ne doivent JAMAIS être placés dans cette machine. La
contamination d’autres vêtements par les fibres de verre peut entraîner des irritations de la peau.
Les articles qui ont été souillés par des substances telles que huile de cuisson, acétone, alcool,
pétrole, kérosène, produit anti-taches, térébenthine, cire et décapant pour cire doivent être lavés
à l’eau chaude avec une quantité supplémentaire de détergent avant d’être séchés dans le sèchelinge.
Les agents adoucissants, et autres produits similaires, doivent être utilisés conformément aux
instructions fournies par le fabricant du produit.
Protection de l’environnement
●
●
Tous les matériaux de conditionnement utilisés sont écologiques et recyclables. Veuillez les
éliminer de manière écologique. Votre municipalité pourra vous donner le détail exact des
méthodes d’élimination en vigueur.
Pour assurer la sécurité lors de l’élimination d’un vieux sèche-linge, veuillez débrancher la fiche
du courant de secteur, couper le câble d’alimentation et le détruire avec la fiche. Pour empêcher
que les enfants ne s’enferment dans la machine, cassez les charnières de la porte ou son dispositif
de verrouillage.
Service GIAS
●
Pour veiller au fonctionnement efficace et sans risque de cet appareil, nous vous recommandons
de faire exclusivement appel à un technicien GIAS agréé pour son entretien ou sa réparation
éventuelle.
Directive européenne 2002/96/CE
Cet appareil est commercialisé en accord avec la directive
européenne 2002/96/CE sur les déchets des équipements électriques
et électroniques (DEEE).
En vous assurant que ce produit est correctement recyclé, vous
participez à la prévention des conséquences négatives sur
l’environnement et la santé publique qui pourrait être causé par une
mise au rebut inappropriée de ce produit.
Le symbole sur ce produit indique qu’il ne doit pas être traité comme
un déchet ménager. Il doit être rapporté jusqu’à un point de
recyclage des déchets électriques et électroniques.
La collecte de ce produit doit se faire en accord avec les
réglementations environnementales concernant la mise au rebut de
ce type de déchets.
Pour plus d’information au sujet du traitement, de la collecte et du
recyclage de ce produit, merci de contacter votre mairie, votre centre de traitement des déchets ou le
magasin où vous avez acheté ce produit.
Si l’appareil ne fonctionne pas correctement ou s’il tombe en
panne, mettez-le à l’arrêt et débranchez-le du courant de secteur.
Consultez le service GIAS pour prévoir une éventuelle réparation.
23
40005612Fre.qxd
09/07/2008
13:02
Page 24
Installation
Un appel de
service peut vous
être facturé si la
défaillance de
votre appareil est
causée par une
installation
incorrecte.
Besoins électriques
Les sèche-linges sont prévues pour une tension
monophasée de 230 V, 50 Hz. Vérifiez que la tension
nominale du circuit d’alimentation est réglée sur 10 A
minimum.
L’électricité peut être extrêmement dangereuse.
Cet appareil doit être mis à la terre.
La prise de courant et la fiche de la machine doivent
être du même type.
N’utilisez pas de multi-prises et/ou de rallonges.
La fiche doit être accessible pour débrancher l’appareil
une fois qu’il a été installé.
Si le cordon
électrique de cet
appareil est
endommagé, il doit
être remplacé par
un cordon spécial
qui est
UNIQUEMENT
disponible auprès
du service des
pièces de rechange.
Il doit être installé
par une personne
compétente.
Les fils du câble de secteur sont colorés en fonction des
codes suivants :
Bleu
NEUTRE
Marron
SOUS TENSION
Vert et jaune
TERRE
La machine est conforme aux directives européennes
89/336/EEC, 73/23/EEC et à leurs modifications ultérieures.
Ne branchez pas l’appareil et ne mettez
pas en marche l’interrupteur de secteur
tant que l’installation n’est pas
terminée.
Par mesure de sécurité, veillez à
installer ce sèche-linge correctement.
En cas de doute concernant son
installation, veuillez demander conseil à
GIAS Service.
Ajustement des pieds
Lorsque la machine est en place, les pieds doivent être
ajustés pour mettre la machine de niveau.
24
40005612Fre.qxd
09/07/2008
13:02
Page 25
Ventilation
La pièce où se trouve le sèche-linge doit avoir une
ventilation adéquate de manière à ce que les gaz des
appareils qui brûlent d’autres combustibles, y compris
les cheminées, ne soient pas attirés dans la pièce
pendant que le sèche-linge est en marche.
●
L’air d’échappement ne doit pas être évacué par
un conduit qui est également utilisé pour évacuer
les fumées d’échappement d’appareils qui brûlent
du gaz ou d’autres combustibles.
●
Vérifiez régulièrement que l’air peut circuler
librement autour du sèche-linge.
●
Vérifiez le filtre à peluches après usage, et
nettoyez-le le cas échéant.
●
Les entrées et sorties doivent être libres
d’obstructions. Pour veiller à une ventilation
adéquate, l’espace entre le bas de la machine et
le sol ne doit pas être obstrué. Il doit y avoir un
espace d’au moins 12 mm entre la machine et
d’éventuelles obstructions.
●
Veillez à ce que rien ne puisse tomber ou
s’accumuler entre les côtés et l’arrière du sèchelinge, afin de ne pas obstruer l’entrée et la sortie
d’air.
●
N’installez JAMAIS le sèche-linge contre des
rideaux.
ENTREES D’AIR
PRISES D’AIR
PRISES D’AIR DANS LA BASE
25
40005612Fre.qxd
09/07/2008
13:02
Page 26
Préparation de la charge
Avant d’utiliser le sèche-linge pour la première fois :
●
Veuillez lire ce manuel d’instruction en détail.
●
Retirez tous les articles qui se trouvent à
l’intérieur du tambour.
●
Essuyez l’intérieur du tambour et de la porte avec
un chiffon humide pour éliminer la poussière
éventuelle qui aurait pu s’y infiltrer en transit.
Préparation des
vêtements
Ne surchargez pas
le tambour ;
lorsqu’ils sont
mouillés, les
grands articles
peuvent dépasser
le poids de
maximum
admissible
(ex : sacs de
couchage,
couettes).
26
Vérifiez sur les étiquettes comportant les symboles
d’entretien que le linge que vous souhaitez sécher
convient au séchage en machine.
Vérifiez que toutes les fermetures sont fermées et que
les poches sont vides. Mettez les articles à l’envers.
Placez les vêtements en vrac dans le tambour en veillant
à ce qu’ils ne s’emmêlent pas les uns avec les autres.
Poids de séchage
maximum
●
Coton, 8 kg maxi
●
Synthétiques, 4 kg maxi
40005612Fre.qxd
09/07/2008
13:02
Page 27
Triez la charge comme
suit :
●
Par symbole de soin d’entretien
Vous les trouverez sur le col ou la couture
intérieure :
Convient pour séchage en machine.
Séchage à haute température.
Séchage à basse température uniquement.
Ne séchez pas en machine.
Si le vêtement ne comporte aucune étiquette
de conseils de lavage, considérez qu’il ne
convient pas pour le séchage en machine.
●
Par quantité et épaisseur
Lorsque la charge est plus importante que la
capacité du sèche-linge, séparez les vêtements
selon leur épaisseur (ex : les serviettes des sousvêtements fins).
●
Par type de tissu
Coton/toile de lin : Serviettes, jersey en coton,
linge de lit ou de table.
Synthétiques : Chemisiers, chemises, blouses etc.
en polyester ou polyamide, ainsi que pour les
mélanges de coton/synthétique.
●
Par degré de séchage
Triez selon : sec pour repassage, sec pour
rangement, etc. Pour les articles délicats, appuyez
sur le bouton Séchage Délicat pour sélectionner
une température de séchage basse.
27
40005612Fre.qxd
09/07/2008
13:02
Page 28
Conseils de séchage
IMPORTANT : Ne
séchez pas les
articles qui ont été
traités avec un
liquide de
nettoyage à sec ou
les vêtements en
caoutchouc (risque
d’incendie ou
d’explosion).
Ne séchez pas en
machine :
Les lainages, la soie, les tissus délicats, les bas de nylon,
les broderies délicates, les tissus ayant des décorations
métalliques, les vêtements avec des bordures en PVC ou
en cuir, les chaussures de sport, les articles volumineux
comme les sacs de couchage, etc.
Économies d’énergie
Ne mettez que du linge essoré en machine ou à la main
dans le sèche-linge. Plus le linge est sec, plus le temps
de séchage sera court, ce qui économisera de l’énergie.
TOUJOURS
Pendant les 15
dernières minutes,
la charge est
toujours séchée
dans de l’air froid.
●
Essayez de sécher le poids de linge maximum,
pour économiser du temps et de l’électricité.
●
Vérifiez que le filtre est propre avant chaque cycle
de séchage.
JAMAIS
●
Ne dépassez pas le poids maximum pour ne pas
gaspiller du temps ou de l’électricité.
●
Ne mettez pas d’articles dégoulinant d’eau dans
le sèche-linge pour ne pas endommager l’appareil
Guide de séchage
Ce tableau indique les temps de séchage approximatifs,
selon le type de tissu et le degré d’humidité des
vêtements.
28
40005612Fre.qxd
09/07/2008
13:02
Page 29
Commandes et indicateurs
INDICATEUR
RESERVOIR
PLEIN
SELECTEUR DE
PROGRAMMES
BOUTON
SÉCHAGE
DÉLICAT
AFFICHEUR
COUNTDOWN
BOUTON
DÉPART
BOUTON
DÉPART
DIFFÉRÉ
INDICATEUR
ENTRETIEN
FILTRE
BOUTON
MARCHE
ARRÊT
Panneau de commande et témoins indicateurs
Sélecteur de programmes – sélectionnez le programme requis
Bouton et indicateur Marche/Arrêt – appuyez pour mettre en marche ; l’indicateur
s’allume
Bouton Départ – appuyez sur ce bouton pour lancer le programme de séchage
sélectionné. Appuyez pendant 5 secondes pour annuler/réinitialiser le programme.
Bouton Séchage Délicat – appuyez pour réduire la température pour les articles
délicats ; l’indicateur situé au-dessus du bouton s’allume. Pour modifier le réglage de la
température, le programme doit être réinitialisé.
Basse température - témoin lumineux ALLUME
Haute température - témoin lumineux ETEINT
Indicateur Réservoir Plein – s’allume lorsque le réservoir d’eau est plein
Indicateur Entretien Filtre – s’allume lorsque le filtre a besoin d’être nettoyé.
Bouton Départ Différé – permet à l’utilisateur de différer le démarrage du cycle de
séchage (voir les détails de fonctionnement en page 34)
Afficheur
START – le témoin de START clignote lorsque le sèche-linge est en marche, et est allumé
lorsque le programme débute.
60' – le témoin s’allume lorsqu’il reste moins de 60 minutes avant la fin du programme.
15' – le témoin s’allume lorsqu’il reste moins de 15 minutes avant la fin du programme.
A ce stade du cycle de séchage, la machine se met en mode Refroidissement
STOP – ce témoin s’allume lorsque le programme est terminé.
6h – temporisation de 6 heures (le témoin clignote lorsque cette fonction est activée).
9h – temporisation de 9 heures ((le témoin clignote lorsque cette fonction est activée)
29
40005612Fre.qxd
09/07/2008
13:02
Page 30
Porte et filtre
Ouverture de la porte
Tirez sur la poignée pour ouvrir la porte.
Pour remettre le sèche-linge en marche, fermez la porte
et appuyez Départ.
ATTENTION !
Lorsque le seche-linge est en cours
d’utilisation, il se peut que le tambour
et la porte soient TRES CHAUDS.
N’arrêtez jamais le sèche-linge avant la
fin du cycle de séchage sauf si tous les
articles sont rapidement retirés et
étendus de façon à dissiper la chaleur.
Filtre
IMPORTANT : Pour assurer l’efficacité du sèche-linge,
vérifiez que le filtre à peluches est propre avant chaque
cycle de séchage.
1.
Tirez le filtre vers le haut.
2.
Ouvrez le filtre, comme illustré.
3.
Retirez doucement les peluches à l’aide d’une
brosse douce ou du bout des doigts.
4.
Réenclenchez le filtre et poussez-le en place.
Indicateur Entretien
Filtre
L’indicateur Entretien Filtre s’allume lorsqu’il faut
nettoyer le filtre.
Si le linge ne sèche pas, vérifiez que le filtre n’est pas
colmaté.
30
40005612Fre.qxd
09/07/2008
13:02
Page 31
Réservoir d’eau
L’eau récupérée du linge pendant le cycle de séchage
est recueillie dans un bac situé en bas du sèche-linge.
Quand le réservoir est plein, l’indicateur ‘Réservoir Plein’
s’allume sur le panneau de commande et le réservoir
DOIT ABSOLUMENT être vidé. Cependant, nous
recommandons de vider le réservoir après chaque cycle
de séchage.
NOTE : Il n’y a que très peu d’eau qui est récupéré
pendant les premiers cycles d’une nouvelle machine, car
le réservoir intérieur est rempli en premier.
Pour retirer le réservoir
1.
Tirez doucement le bas de la plaque de protection
pour la décrocher du sèche-linge. La section
supérieure peut être ôtée de ses charnières pour
permettre le retrait total de la plaque de
protection.
2.
Tirez fermement sur la poignée et faites glisser le
réservoir d’eau en dehors du sèche-linge.
Tenez-le fermement à deux mains. Lorsque le bac est
plein, il pèse environ 4 kg.
3.
Ouvrez le couvercle qui se trouve sur le dessus du
bac et videz l’eau.
4.
Refermez le couvercle et glissez le bac de
récupération de l’eau en place. POUSSEZ-LE
FERMEMENT EN PLACE.
5.
Remettez la plaque de protection en place en
engageant les charnières du haut et en
enclenchant les attaches inférieures en place.
31
40005612Fre.qxd
09/07/2008
13:02
Page 32
Condenseur
Important : Coupez toujours le courant et débranchez la prise avant de nettoyer le
condenseur.
Pour maintenir l’efficacité du sèche-linge, vérifiez régulièrement la propreté du condenseur.
Pour retirer le condenseur
1.
Retirez la plaque de protection (voir page 31).
2.
Tournez les deux leviers de blocage dans le sens contraire des aiguilles d’une
montre et retirez le condenseur.
3.
Tirez l’ensemble du condenseur vers l’extérieur.
4.
Retirez doucement la poussière ou les peluches
avec un chiffon, puis lavez-le en le tenant sous un
robinet d’eau pour que l’eau coule entre les
plaques afin d’enlever la poussière ou les peluches
éventuelles.
5.
Remettez correctement le condenseur en place
(en suivant la flèche) en le poussant fermement.
Bloquez les deux leviers en position en les
tournant dans le sens des aiguilles d’une montre.
6.
Remettez la plaque de protection en place.
Sélection du
programme
La machine Sensor Dry propose diverses options de
séchage du linge répondant à tous les besoins.
Note : Il se peut que le capteur ne détecte pas les
petites charges de petits articles. Pour les petites
charges et les articles individuels ou les tissus préséchés ayant une faible teneur en humidité,
32
40005612Fre.qxd
09/07/2008
13:02
Page 33
utilisez les programmes à durée déterminée. Réglez le programme entre 30 et 75
minutes selon la taille de la charge et le degré de séchage voulu, et sélectionnez une
température haute ou basse selon le type de tissu.
Si le capteur ne détecte pas l’article, le sèche-linge ne fonctionnera que pendant 10
minutes avant de se mettre en mode refroidissement.
Si la charge est trop importante ou trop mouillée, le sèche-linge se met
automatiquement en mode refroidissement après 185 minutes.
Le tableau ci-après répertorie les programmes et leurs fonctions correspondantes.
Programme
Le séchage
(A ranger)
Prêt à Repasser
Description
Sélectionnez le degré de séchage souhaité.
Celui-ci s’étend de
pour le linge de bain et les peignoirs,
à
pour les articles qui seront rangés sans être repassés,
et comprend également le programme séchant le linge qui
sera repassé.
Laine
(Laine)
Un programme délicat spécialement créé pour rendre les
lainages plus doux après le séchage à l’air.
Ce cycle délicat à l’air chaud, d’une durée de 12 minutes,
permet aussi de “rafraîchir” les lainages rangés depuis un
certain temps dans votre armoire.
Fast Iron
(Repassage
facile)
Le programme Repassage rapide comporte une fonction
assouplissant et antifroissement. Le sèche-linge chauffera la
charge pendant 9 minutes et le refroidira ensuite pendant 3
minutes, ce qui est particulièrement utile pour les vêtements
qui ont été laissés pendant un certain temps avant le
repassage, dans le sac à linge par exemple. Les vêtements
peuvent également raidir lorsqu’ils sont séchés en plein air sur
une corde à linge ou à l’intérieur sur des radiateurs. Le
processus de Repassage rapide détend les froissements du
tissu pour rendre le repassage plus rapide et plus facile.
120'
120 minutes de séchage
75'
75 minutes de séchage
60'
60 minutes de séchage
45'
45 minutes de séchage
30'
30 minutes de séchage
FROID
Séchage de linge dans de l’air froid pendant 30 minutes
33
40005612Fre.qxd
09/07/2008
13:02
Page 34
Fonctionnement
1.
2.
3.
4.
5.
6.
7.
8.
9.
10.
11.
Ouvrez la porte et chargez le sèche-linge de linge. Vérifiez qu’aucun vêtement
n’entrave la fermeture de la porte.
Fermez doucement la porte en la poussant lentement jusqu’à ce que vous
entendiez un déclic.
Appuyez sur le bouton Marche/Arrêt pour mettre le sèche-linge en marche. Le
témoin s’allume et le témoin de START clignote.
Tournez le sélecteur de programme pour choisir le programme de séchage requis
(consultez le guide de programmation).
Pour sécher des articles délicats, synthétiques ou en acrylique, appuyez sur le
bouton Séchage Délicat pour diminuer la température.
Le témoin lumineux situé au-dessus du bouton s’allume lorsque la machine est en
mode basse température. Pour désactiver ce mode lorsque le cycle de séchage a
commencé, la machine doit être réinitialisée.
Appuyez sur le bouton ‘Départ’. Le sèche-linge démarre automatiquement et
l’indicateur START reste allumé de façon continue.
L’afficheur
indique le l’avancement du séchage en termes de temps restant.
Si vous ouvrez la porte pendant le cycle de séchage pour vérifier le linge, il est
nécessaire d’appuyer sur Départ pour recommencer le séchage une fois la porte
refermée.
Lorsque l’indicateur 15' s’allume, la machine se met en mode refroidissement et les
articles sont séchés dans de l’air froid.
Lorsque le programme est terminé, le témoin STOP s’allume.
À la fin du cycle, le tambour continuera à tourner de manière intermittente pour
minimiser les froissements. Cette opération se poursuit jusqu'à ce que la machine
soit réinitialisée ou éteinte.
Annulation et réinitialisation du
programme
Pour annuler un programme, appuyez sur Arrêt puis sur Marche. L'indicateur START
clignote, signifiant que la machine a été réinitialisée.
Fonctionnement de la sonnerie
La sonnerie est activée en tournant le sélecteur et en appuyant sur les boutons de
fonction.
Pour annuler le déclenchement de la sonnerie, veuillez procéder comme suit. Appuyez
sur les boutons Séchage Délicat et Départ et maintenez-les enfoncés, puis mettez en
marche la machine en appuyant sur l'interrupteur ON/OFF (Marche Arrêt).
Pour réactiver la sonnerie, observez la même procédure que celle qui vient d'être
décrite.
Départ Différé
La fonction de Départ Différé permet à l’utilisateur de programmer le démarrage du
cycle de séchage dans un délai de 6 à 9 heures.
34
40005612Fre.qxd
09/07/2008
13:02
Page 35
Lorsque cette fonction est sélectionnée pour la première
fois, l’afficheur indique un délai de 6 heures. Il convient
d’appuyer une nouvelle fois sur le bouton pour
repousser le délai à 9 heures.
Pour lancer le programme, appuyez sur Départ. Le cycle
de séchage débutera à l’issue de ce délai. Le témoin
lumineux de 6 ou 9 heures clignote alors pour indiquer
que la temporisation est activée.
ATTENTION !
Il est possible que
le tambour, la
porte et la charge
soient très chauds.
Nettoyage et entretien de
routine
Nettoyage du sèchelinge
●
●
●
●
●
●
Nettoyez le filtre et videz le réservoir d’eau après
chaque cycle de séchage.
Nettoyez le condenseur à intervalles réguliers.
Après chaque période d’utilisation, essuyez
l’intérieur du tambour et laissez la porte ouverte
pendant un moment pour qu’il puisse sécher
grâce à la circulation d’air.
Essuyez l’extérieur de la machine et la porte avec
un chiffon doux.
N’utilisez PAS de tampons ou d’agents de
nettoyage abrasifs.
Pour empêcher que la porte n’adhère ou que les
peluches ne s’accumulent, nettoyez régulièrement
la surface intérieure et le joint de la porte avec un
chiffon humide.
Spécifications
techniques
Capacité du tambour
115 litres
Charge maximale
8 kg
Hauteur
85 cm
Largeur
60 cm
Profondeur
60 cm
Étiquette d’énergie
B
IMPORTANT
Coupez toujours le
courant et
débranchez la fiche
de l’alimentation
électrique avant de
nettoyer cet
appareil.
Pour les données
électriques,
veuillez consulter
l’étiquette des
valeurs nominales
qui se trouve à
l’avant de l’armoire
du sèche-linge
(avec la porte
ouverte).
35
40005612Fre.qxd
09/07/2008
13:02
Page 36
Dépistage de pannes
Qu’est-ce qui peut être à l’origine de...
Défauts que vous pouvez rectifier vous-même
Avant d’appeler le service GIAS pour obtenir des conseils, veuillez suivre la liste des
vérifications ci-dessous. L’intervention sera facturée si la machine fonctionne
correctement ou si elle a été installée ou utilisée de manière incorrecte. Si le problème
persiste alors que vous avez terminé les vérifications recommandées, veuillez appeler le
service GIAS qui pourra peut-être vous aider par téléphone.
La période de séchage est trop longue/les vêtements
ne sont pas suffisamment secs…
●
●
●
●
●
●
●
Avez-vous sélectionné le temps de séchage/le programme qui convient ?
Les vêtements étaient-ils trop mouillés ? Les vêtements avaient-ils été
adéquatement essorés en machine ou à la main ?
Le filtre doit-il être nettoyé ?
Faut-il nettoyer le condenseur ?
Le sèche-linge est-il surchargé ?
Les entrées, sorties et la base du sèche-linge sont-elles libres d’obstructions ?
Avez-vous sélectionné le bouton Séchage Délicat au cours d’un cycle précédent ?
Le sèche-linge ne fonctionne pas…
●
●
●
●
●
●
●
●
●
Le sèche-linge est-il branché sur une alimentation électrique adéquate ? Vérifiez à
l’aide d’un autre appareil, par exemple une lampe de chevet.
La fiche est-elle bien branchée sur l’alimentation de secteur ?
Y a-t-il une panne de courant ?
Le fusible a-t-il sauté ?
La porte est-elle bien fermée ?
Le sèche-linge est-il en position de marche, au niveau du courant de secteur et de
la machine ?
La période de séchage ou le programme a-t-il été sélectionné ?
La machine a-t-elle été remise en marche après l’ouverture de la porte ?
Le sèche-linge s’est-il arrêté parce que le réservoir d’eau est plein et qu’il faut le
vider ?
Le sèche-linge est bruyant…
●
Arrêtez le sèche-linge et contactez le service GIAS pour obtenir des conseils.
L’indicateur Entretien Filtre est allumé…
●
●
Le filtre doit-il être nettoyé ?
Faut-il nettoyer le condenseur ?
L’indicateur Réservoir Plein est allumé…
●
36
Le réservoir d’eau doit-il être vidé ?
40005612Fre.qxd
09/07/2008
13:02
Page 37
Service clientèle
En cas de problème après avoir effectué toutes les
inspections recommandées, veuillez contacter le Service.
Il pourra vous aider par téléphone ou organiser la visite
d’un technicien, en vertu des conditions de votre
garantie. Cependant, vous serez facturé dans l’un des
cas suivants :
●
Si la machine est en bon état de marche.
●
Si la machine n’a pas été installée conformément
aux instructions d’installation.
●
Si la machine a été utilisée incorrectement.
Pièces de rechange
Utilisez toujours des pièces de rechange du fabricant,
disponibles auprès du service GIAS.
Service GIAS
Pour les entretiens et les réparations, contactez votre
technicien local du service GIAS.
Le constructeur décline toute responsabilité en cas
d’erreurs d’impression dans le présent document. Le
constructeur se réserve le droit d’apporter les
modifications nécessaires à ses produits sans en changer
les caractéristiques de base.
37
40005612Eng.qxd
07/07/2008
16:14
Page 20
40005612