Download AMG Medical Physio logic Operating instructions
Transcript
TM
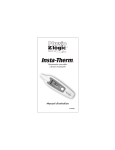
Insta-Therm
TM
MC
All-in-One Thermometer
Ear • Forehead • Ambient Room Temperature
Instructions
016-650
2
Contents
Introduction................................................................... 4
Important notes ............................................................ 5
Exterior appearance and functions............................... 6
Operating instructions ............................................. 7-10
Battery replacement ................................................... 10
Display messages....................................................... 11
Technical specifications ......................................... 11-12
Care and cleaning ...................................................... 12
Protection ................................................................... 12
Troubleshooting.......................................................... 13
Warranty ..................................................................... 14
3
Introduction
Dear Customer,
Thank you for purchasing your new AMG PhysiologicTM
Insta-Therm All-In-One thermometer. This thermometer's
innovative 3 in 1 design offers 3 convenient and accurate
temperature measures instantly.
Speed:
• Advanced technology allows for instant digital readings in
just 0.1 seconds.
Accurate:
• Proven clinical accuracy for readings you can trust.
• 512 scanning sequences per second ensures accuracy.
• At each power-on, the Physiologic Insta-Therm All-In-One
thermometer performs an automatic self-test to ensure
accurate readings.
Comfortable:
• Requires no probe covers!
• Modern and versatile compact design makes taking
temperature readings easier.
Hygienic:
• Easy to clean waterproof probe design.
Convenient:
• Innovative design allows for choice of 3 temperature
measures: Ear, Forehead and Ambient Room.
User Friendly:
• One-button easy operation and large easy-to-read large
4-digit LCD give convenience in a touch of a finger.
In order to obtain accurate measurements make sure to read
this instruction manual thoroughly and carefully before using.
Keep it handy for future reference.
4
Important notes:
• This thermometer is designed for use without probe covers.
• The thermometer is a delicate electronic device. Please
handle with care.
• The thermometer body is NOT waterproof except for the
infrared probe, direct contact of the body with water or
other liquids must be avoided.
• Do not expose the thermometer to direct sunlight.
• Store at normal room temperature and humidity. Keep it in
its storage base and out of reach of children.
• The thermometer is produced with high quality materials.
• Use of this thermometer should not replace a visit to your
doctor.
• This thermometer is designed for taking temperatures from
the ear, forehead and ambient room only. DO NOT use it
for measuring rectal, oral or underarm temperatures.
• Do not measure temperature within 30 minutes of eating,
exercising or bathing.
5
Exterior appearance and functions
Front
Cover
Probe
Label
Power /
Scan
Button
Battery
Cover
Release
Button
Time
Setting
Button
Battery
Cover
(accessible by
removing the
battery cover)
Base Stand
Note: Use thumb for easy removal of front cover from
thermometer.
6
Operating Instructions
The clock function must be set when using the thermometer
for the first time or when re-installing the battery.
This step is critical to activating the ambient room
temperature measurement function and to ensure the
proper operation of the thermometer.
(1) To set the clock, press the battery release button
downwards to remove the battery cover from the
thermometer. Next, press the time-setting button.
This will make the hour digits blink. Adjust the hour to the
correct time using the power/scan button. Next, press the
time-setting button and power/scan button again to set
the minute digits.
(2) Two Display Modes:
Clock/Ambient Room
Temperature Mode:
The thermometer
can display the clock and
ambient room temperature
interchangeably.
Body Temperature Mode:
The thermometer can
display body temperature
readings in Celsius.
7
How to switch from forehead scan mode to ear scan mode
To switch from forehead scan mode to ear scan mode, simply
take off the front cover. Alternatively, replace the front cover
onto the thermometer when switching from forehead scan
mode to ear scan mode.
Taking temperature readings with the ear scan mode
To take the temperature in the ear, first ensure the front cover
is removed from the thermometer, next press the power/scan
button. The screen will display in sequence the symbols of all
segments, followed by the last temperature reading taken.
Next, the thermometer will beep twice and enter into standby
mode. It is now ready for use.
Insert the probe into the ear canal. To ensure an accurate
reading, be sure to position the probe properly by setting the
probe tip to scan down the ear canal to the eardrum. Press
the power/scan button without releasing it to activate the
automatic scanning sequences.
You will hear a beep sound to indicate the end of the
measurement. The temperature reading accompanying with
an indicating ear drawing will be show on the display.
8
Taking temperature readings with the forehead scan mode
To take the body temperature using the forehead mode, first
ensure the front cover is on the thermometer, next press the
power/scan button. The screen will display in sequence the
symbols of all segments, followed by the last temperature
reading taken.
Next, the thermometer will beep twice and enter into standby
mode. It is now ready for use.
Place the tip of the probe onto either side of your temples,
while keeping the power/scan button pressed. Slowly move
the thermometer tip across the forehead from one temple to
the other. Release the power/scan button to complete the
measurement.
You will hear a beep sound to indicate the end of the
measurement. The temperature reading accompanying with
an indicating face drawing will show on the display.
9
Notes:
• A “Hi” symbol will appear when the temperature exceeds
the measuring range.
• The remark “Err” appears if the operating temperature is
not within the permissible range.
• Multiple readings should be at least 5 seconds apart to
ensure precise temperature readings.
• Once finished taking measurements, thermometer will
automatically revert to clock/ambient room temperature mode.
• Condition of skin and surrounding environment affect
forehead temperature readings.
• Forehead measurements are automatically converted to
relative oral temperatures.
Battery Replacement and Installation
For battery removal, press the battery cover release button
downwards to open the battery cover. For battery installation,
use one 3V CR2032 lithium battery, place negative lead down,
insert the battery into the bracket and replace battery cover
onto thermometer (see diagram) .
Replace the battery when the “low battery” warning symbol
appears on the display. Dispose of the battery in a safe
manner, keeping it away from children and heat.
Note: removal of the battery will require resetting of the clock
function in order to activate the clock/ambient room
temperature mode.
3
1 Release Button
2
10
Display Messages:
Reading Display.............................................
Measuring in Progress...................................
Ear Scan Mode ..............................................
Forehead Scan Mode ....................................
Celsius Scale .................................................
Clock..............................................................
Low Battery....................................................
Last Memorized
Temperature Display......................................
Technical specifications
Measurement Range: 10°C - 50°C
Measuring accuracy: ± 0.2°C: from 36°C to 39°C
± 0.3°C: less than 36°C or
greater than 39°C
Response time:
A temperature reading is obtained in merely 0.1 second.
Memory function:
Displaying the last taken temperature when powered-on.
Easy-cleaning and environmentally friendly:
The probe tip is equipped with waterproof lens allowing
water rinsing. No extra probe cover is required.
Power Saving:
Automatically reverts to clock/ambient room
temperature mode
11
Warning indication:
“Low battery” symbol and “Hi” symbol indicating out of
measuring range.
Operating environment:
16°C to 40°C with relative humidity up to 95%
(non condensing).
This thermometer meets the requirements of
ASTM E 1965-98, “Standard specification for infrared
thermometers for intermittent determination of patient
temperature”.
Care and cleaning
Clean the uniquely-designed waterproof probe with a soft,
alcohol-moistened cloth after each use.
Clean the body of the ear thermometer with a soft, dry cloth.
NO WATER RINSING OF THE THERMOMETER BODY IS
ALLOWED.
Never use an abrasive cleanser or submerge the body of the
ear thermometer in water or other liquids.
Protection
Do not expose the thermometer to extreme temperature,
very high humidity, or direct sunlight. Avoid extreme shock or
accidental drop-down.
Do not touch the probe tip with fingers. Do not disassemble
the thermometer.
12
Troubleshooting
1. Consistent low temperature readings:
• The probe is not positioned properly in the ear canal.
- The tip of the probe must be fully seated against the
opening of the ear canal. Failure to properly position
the probe may lead to a low temperature reading.
• The waterproof lens is dirty.
- Thoroughly clean the lens with a soft, alcoholmoistened cotton cloth.
2. Temperature taken is not within the measuring range.
• Scanning sequences are not operated in the ear canal.
- It may occur if you operate the scanning sequences
before placing the ear thermometer in the ear while the
ambient room temperature is not within the measuring
range (see “Technical specifications”). Remember not
to release the SCAN button until the thermometer has
been removed from the ear canal.
3. Low battery warning
• Battery is too low to take measurement.
- Replace the battery (see “Battery installation).
4. The thermometer will emit short and rapid beep sounds
and the ear or forehead symbols will flash if the
thermometer is not ready to take a measurement.
Simply press any button to stop the temperature
measurement process. Wait until the symbol stops
flashing and beeping sounds stop before attempting to
re-take a temperature reading.
13
Warranty
One year limited warranty. All AMG Medical Inc. products are
warranted against defects in materials and workmanship.
AMG’s warranty does not cover product abuse or normal
wear. AMG’s warranty is for the original user only.
14
15
Consumer Info-Line
1-800-363-2381
TM
AMG MEDICAL INC.
8505 Dalton, Montreal, QC H4T 1V5
www.amgphysiologic.com
www.amgmedical.com
16
REV. 1.0 0604


