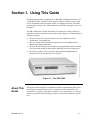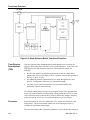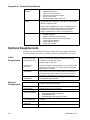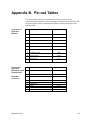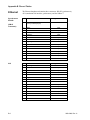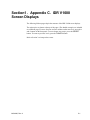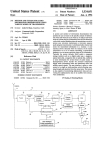
1
IDR V1000
User’s Guide
Installing and Operating the
Intelligent Data Receiver V1000
MS-4900, Rev. A
January 1998
This equipment complies with the requirements in Part 15 of the FCC rules for a Class
Computing Device. Operation of this equipment in a residential area may cause
unacceptable interference to radio and TV reception, requiring the operator to take
whatever steps are necessary to correct the interference.
The IDR V1000 passes the European Community’s CE mark in the basic unit (single
port) and 4-port daughtercard (five ports) models. Other models will be tested and
approved as necessary.
WavePhore Networks™ is a trademark of WavePhore, Inc.
Copyright © 1998 WavePhore Networks Inc.
All rights reserved.
Table of Contents
Section 1. Using This Guide
About This Guide ......................................................................................................... 1-1
Audience ...............................................................................................................................1-2
Organization ..........................................................................................................................1-2
Procedures.................................................................................................................... 1-2
Overview ...................................................................................................................... 1-2
Supplementary Information ........................................................................................... 1-2
Terminology ..........................................................................................................................1-3
Style Conventions..................................................................................................................1-3
Customer Support ....................................................................................................... 1-3
Safety Issues ................................................................................................................ 1-4
Section 2. Installing the IDR V1000
Before You Begin......................................................................................................... 2-1
Step 1: Connect the Cables ....................................................................................... 2-1
Step 2: Verify Initial Lock on Carrier .......................................................................... 2-2
Step 3: Check Eb/N0 and AGC Readings .................................................................... 2-3
Step 4: Call the Network Operator .............................................................................. 2-4
Step 5: Maintain the Equipment.................................................................................. 2-4
Section 3. Using the Front Panel
Viewing the Main Topics.............................................................................................. 3-1
Using the Front Panel Buttons ................................................................................... 3-1
Understanding the Identification Screen.................................................................................3-2
Choose Operation: Messages ...............................................................................................3-2
Viewing and Deleting Messages .................................................................................... 3-2
Choose Operation: Show Status..........................................................................................3-3
Choose Operation: View Setup.............................................................................................3-3
Choose Operation: Specify Setup ........................................................................................3-4
To Enable or Disable a Screen Login ............................................................................ 3-4
To Specify a Password.................................................................................................. 3-5
To Enable or Disable the Screen Lock........................................................................... 3-5
Choose Operation: Set Features...........................................................................................3-6
Set Local Time.............................................................................................................. 3-6
Choose Operation: Device Restart........................................................................................3-6
Choose Operation: Logoff.....................................................................................................3-7
MS-4900, Rev. A
iii
Table of Contents
Section 4. Interpreting Screen Displays
Identifying Problem Indications .................................................................................. 4-1
Check Signal Quality............................................................................................................. 4-2
Superscreen Fields........................................................................................................ 4-2
Demodulator Screen Fields ........................................................................................... 4-3
TDD Screen Fields ........................................................................................................ 4-4
Active Sessions Screen Fields....................................................................................... 4-5
Check Output Ports............................................................................................................... 4-6
Show Status/Logical Receivers...................................................................................... 4-6
View Setup of Logical Receivers.................................................................................... 4-7
TDD Channels ............................................................................................................... 4-8
Diagnostic Screens........................................................................................................ 4-9
Verifying Ethernet Screens ....................................................................................... 4-10
View Setup.......................................................................................................................... 4-10
Local IP Address..........................................................................................................4-10
Subnet Mask................................................................................................................4-10
Gateway IPO Address .................................................................................................4-10
SNMP Trap IP Address................................................................................................4-11
Host IP Address...........................................................................................................4-11
Specify Setup: IP Addresses .............................................................................................. 4-11
Changing an Address...................................................................................................4-11
Examining System Messages ................................................................................... 4-12
Error and Warning Messages .............................................................................................. 4-12
Section 5. Functional Overview
Network Overview........................................................................................................ 5-1
Network Components ............................................................................................................ 5-1
The NCC: Input and Output................................................................................................... 5-2
The Receiver: Input and Output ............................................................................................ 5-4
Modes of Moving Data ................................................................................................. 5-4
Transparent Sync and Async Data ........................................................................................ 5-4
Stat Mux Data ....................................................................................................................... 5-5
Logical Receivers .......................................................................................................... 5-5
TVCs and PVCs .................................................................................................................... 5-6
PAD and Node Modes........................................................................................................... 5-6
PAD Mode and PVC Sessions ....................................................................................... 5-7
PAD Mode and TVC Sessions ....................................................................................... 5-7
Node Mode.................................................................................................................... 5-7
IDR V1000: Functional Overview ................................................................................ 5-8
Signal Input: LNB and Tuner ................................................................................................. 5-9
Demodulating and Error-Correcting ....................................................................................... 5-9
Time-Division Demultiplexer (TDD)..................................................................................... 5-10
Processor............................................................................................................................ 5-10
Statistical Demultiplexer (Stat Demux)................................................................................ 5-10
Buffering and Flow Control.................................................................................................. 5-11
Serial Output Ports.............................................................................................................. 5-11
iv
MS-4900, Rev. A
Table of Contents
Supplementary Information
Appendix A. Technical Specifications ............................................................................ A-1
Appendix B. Pin-outs .......................................................................................................... B-1
Asynchronous Serial Port ........................................................................................... B-1
Synchronous Serial Port ............................................................................................. B-1
4-Port Daughtercard .................................................................................................... B-2
Ethernet Daughtercard ................................................................................................ B-2
Appendix C. Screen Display Diagram ..............................................................................C-1
Messages, Show Status, View Setup, Device Restart and Logoff............................C-1
Specify Setup, Set Features, Diagnostics..................................................................C-2
Additional Screens, Ethernet Model Only ..................................................................C-3
Glossary .................................................................................................................................G-1
Index ......................................................................................................................................... I-1
MS-4900, Rev. A
v
Section 1. Using This Guide
This guide describes how to install and use a WavePhore Intelligent Data Receiver™
V1000 (IDR V1000). The IDR V1000s comprise a family of satellite receivers that
receive, demodulate, and process data streams over high-speed carriers. These data
streams supply real-time news, market information, and other subscription services to
businesses.
The IDR V1000 family includes four models. The models are virtually identical in
appearance and basic operation, but they each provide a unique set of data handling or
connectivity options:
•
•
•
•
The basic model (1235) provides the basic receiver capabilities with one
asynchronous, serial output port.
The 4-port model (1236) includes the optional 4-port serial daughtercard for
multiple serial output connections.
The Reed-Solomon model (1216) includes the integrated Reed-Solomon Forward
Error Correction capability along with the additional 4-port serial output ports.
The Ethernet model (1233) includes the optional Ethernet daughtercard for
connection to Local Area Network (LAN) devices.
Figure 1-1. The IDR V1000
About This
Guide
MS-4900, Rev. A
This guide provides the high level information needed to understand the IDR V1000
in its context as a network receiver. Site- or customer-specific information is not
provided here. Typically, a WavePhore customer service representative or a network
operator provides the detailed settings, procedures, and contact numbers for specific
sites.
1-1
Using This Guide
Audience
Two types of audiences are assumed to be users of this guide:
The primary audience is the technical user who is assumed to have a working
knowledge of satellite and telecommunications equipment. These users include
installation technicians, network operators, and on-site technical staff who work
directly with the equipment to install it, verify its functionality, or perform network
maintenance or troubleshooting procedures.
The second type of audience may not deal directly with the equipment, but needs a
general understanding of the context in which the IDR V1000 operates and an
overview of the receiver’s operational capabilities.
Organization
Sections 2 and 3 are intended for the technical user who needs procedures for
installing the IDR V1000 and verifying or troubleshooting its operation. Terminology
and concepts are not described within the procedures; users unfamiliar with this
information are referred to Section 4.
Section 4 is a functional overview that describes data transfer, general network
functions, and data handling within the IDR V1000. Terms and concepts encountered
within the IDR V1000 screens are defined and described here
The Appendixes include supplementary technical information such as equipment
specifications, cabling pinouts, and screen display structure.
The Glossary includes the italicized terms used in this guide.
•
•
•
•
•
•
•
•
If you are:
installing the IDR V1000
learning how to use the front panel and screen displays
verifying signal quality
verifying basic functionality of the receiver
troubleshooting operational problems
monitoring a network download
interpreting screens for stat mux operations
interpreting screens for transparent asynchronous operation
Refer to:
Section 2
•
•
•
•
•
•
If you need to understand:
an overview of the network
the internal functions of the IDR V1000
statistical demultiplexing operation
transparent asynchronous operation
flow control
data transmission
Refer to:
Section 4
Procedures
Overview
If you need a quick reference to:
Supplementary
Information
1–2
Section 3
Refer to:
•
technical specifications of the IDR V1000
Appendix A
•
electrical connections for the output connectors
Appendix B
•
complete set of screen displays
Appendix C
MS-4900, Rev. A
Using This Guide
•
•
Terminology
terms
abbreviations and acronyms
Glossary
The terms “IDR,” “IDR V1000,” or “the receiver,” used in this manual, refer to all of
the IDR V1000 models. A specific model is noted where the information applies only to
that model.
Terms that are unique to the IDR V1000 or WavePhore products are defined in
context, as well as included in the Glossary. Industry-standard terms, acronyms, and
abbreviations are listed and defined in the Glossary.
Style
Conventions
A note (NOTE: ) within this guide provides supplemental information that may be
useful in procedures or may indicate an exception or anomaly.
A caution (CAUTION: ) indicates a condition or a risk factor that could disrupt
normal operations or create difficulty with data reception or output.
Italicized terms are defined in the Glossary.
Customer
Support
Most sites establish their own specific support procedures. Check with your customer
service representative for specific contact instructions for your site.
MS-4900, Rev. A
1–3
Using This Guide
Safety
Issues
Following some basic, common-sense procedures will protect you and will help keep
the IDR V1000 operating without disruption.
Do:
•
•
•
Unplug power before changing external cables.
This reduces the chance of electrical shorts that could damage the receiver.
Protect the IDR V1000 from liquids and excessive heat, humidity, or dust.
These elements can damage or wear electrical components.
Connect the IDR V1000 to grounded power outlets.
Do Not:
•
Open the casework.
Nothing inside the IDR V1000 is field-repairable.
NOTE: Opening the casework for any reason is prohibited and will void the
warranty.
•
1–4
Stack the receivers.
Vents in the receiver’s casework are designed to provide the necessary ventilation
to the components. While the foot pads on the receiver may help provide
sufficient space for ventilation, stacking is not recommended.
MS-4900, Rev. A
Section 2. Installing the IDR V1000
The installation process covers the following steps:
1. Ensuring all cables are properly connected.
2. Tuning the IDR V1000 to its maximum achievable levels for that site
3. Notifying the network operator that installation is complete and to download the
appropriate services as necessary.
For more descriptive detail on the screen displays, refer to Sections 3 and 4.
Before You
Begin:
First, verify the current conditions:
1. A suitable satellite dish (with lightning protection) is already installed
2. Coaxial cable is already run from the dish to the receiver location. (RG-6 cable
is recommended, length not to exceed 500 feet.)
3. RF coaxial cable shield is connected to earth ground with a #10 gauge (or
heavier) solid copper wire at the point of entry to the building.
4. Output data cables are shielded, with shield wire attached to connector shell at
both ends of the cable.
5. Power module is not yet connected to the IDR V1000.
CAUTION: To prevent accidental shorts from causing circuit damage, the power
module should always be disconnected during installation or
whenever cables are being changed.
In addition:
•
You should know the expected Eb/N0 reading and AGC levels for the site.
Contact the network operator now if you do not have this information.
•
Read through the safety issues in Section 1.
CAUTION: Rain, snow, high winds, or extreme cloudiness can attenuate the
signal. Do not attempt to install the receiver during inclement
weather.
MS-4900, Rev. A
2–1
Installing the IDR V1000
Step 1:
Connect
The Cables
1. Connect the coaxial cable to the RF Input connector
2. Connect data cables between the serial or Ethernet outputs on the IDR V1000
and the external devices. See Figures 2-1 and 2-2.
3. Connect the power module to the IDR V1000 power input and to the power
source.
Figure 2-1. Rear Panel Connectors, 4-Port Daughtercard
Figure 2-2. Rear Panel Connectors, Ethernet Output
2–2
MS-4900, Rev. A
Installing the IDR V1000
Step 2:
Verify
Initial Lock
On Carrier
As soon as power is supplied to the IDR V1000, an automatic self-test runs. The IDR
V1000 then locates and “locks” onto the preset frequency. When this completes
successfully, the following identification screen appears (Figure 2-3).
IDR V1000
Model #
©1997 WavePhore
00:00
1236
S/N:xxxxxxxx
L
L = locked on
signal
Figure 2-3. WavePhore Identification Screen
If you do not see the identification screen within two minutes of powering on, or if you
see a character other than the “L”after a minute or two of the screen being displayed,
refer to Section 4 to troubleshoot the cause.
Step 3:
Check
Eb/N0 and
AGC
Readings
After the receiver has achieved initial lock on the carrier, you should try to “peak,”
or maximize both the Eb/N0 and AGC numbers. You can see both readings in the
Show Status screen (Figure 2-4).
NOTE: Refer to Section 3 for instructions on using the front panel buttons to
display screens.
LOCKED
AGC:XXX
table:xxxxxx
Eb/No: X.X dB
Figure 2-4. Show Status Screen: AGC and Eb/N0 Readings
1. The AGC level indicates that cabling is complete and the LNB is powered.
Ideally, the reading should be near 200. If the number is under 100, check the
coaxial cable connections and the LNB on the satellite dish.
2. The Eb/N0 reading indicates signal quality; it is possible to fine tune that
reading by slightly adjusting the positioning of the satellite dish. The Eb/N0
should be at least 5.0, usually higher. (The site will have specific
requirements.)
MS-4900, Rev. A
2-3
Installing the IDR V1000
Step 4:
Call the
Network
Operator
Step 5:
Maintain
the
Equipment
2–4
Once the Eb/N0 and AGC readings are at the expected levels and the Eb/N0 has been
maximized by adjusting the dish alignment, notify the network operator that the
receiver has been installed and is ready to be downloaded.
The operator may provide you additional instructions following the download.
NOTE: If the IDR V1000 was pre-configured at the factory, the necessary
settings may already be established and do not need to be downloaded.
Verify this with your site coordinator.
Satellite transmission can be adversely affected by bad weather. High winds can
knock a satellite dish out of alignment, and heavy snows, rain, or cloud cover can
severely diminish signal quality. You, or another designated individual at the site,
should attend to the following:
•
•
•
Check satellite dish alignment (by monitoring the Eb/N0 reading) following
heavy or gusty winds.
Remove snow from satellite dish using a stiff whisk broom.
Make sure snow doesn’t accumulate on the dish and that the LNB window is
clear.
MS-4900, Rev. A
Section 3. Using the Front Panel
This section describes how to use the front panel of the IDR V1000 to view or modify
receiver settings. This information includes the following:
•
•
•
Displaying and deleting messages
Viewing and modifying configuration parameters
Changing screen locks, password access, and local time
Configuration parameters typically are preset at the factory or are downloaded by the
network operator. The 2-line, 24-character LCD display on the front panel of the IDR
V1000 provides useful access to view these parameters, along with current activity
and status messages. You may be asked to monitor some of these displays routinely,
or you may be asked by telephone support personnel to describe the current settings.
Appendix C is an illustration of the entire screen display structure. Refer to Section 4
to interpret the displays.
Viewing
the Main
Topics
The eight screens shown in Figure 3-1 are the main topics of the screen display
hierarchy. (The identification screen is not one of the main topic screens, but it is the
top tier of the hierarchy and displays automatically after the self-test completes.)
Figure 3-1. Main Topics of the Screen Displays
Using the
Front
Panel
Buttons
Use the front panel buttons to move through the screens and to enter changes:
•
•
•
Pressing the SELECT button displays one level deeper into a main topic or
activates a new setting.
Pressing the < and > buttons move backward and forward within the same
hierarchical level.
Pressing the CANCEL button returns to the previous display level.
Pressing CANCEL several times moves you from any main topic level back to the
identification screen.
From the identification screen, press SELECT once to access the first main topic,
Choose Operation: Messages.
MS-4900, Rev. A
3–1
Using the Front Panel
Figure 3-2. IDR V1000 Front Panel
Understanding
the
Identification
Screen
The first screen that appears after the self-test is the identification screen. It displays
the IDR V1000 model number, locally set time of day, main serial number, and
current lock status.
Model number
00:00
Time
S/N:xxxxxxxx
L
Locked on carrier
Main serial
number
Figure 3-3. Identification Screen
Choose
Operation:
Messages
Two types of messages can appear under this display: user messages and system
messages. User messages notify you that the network operator has sent a message to
the receiver. You can choose to view the message or erase it. System messages record
events such as errors or carrier signal loss, along with the time of the occurrence
(logged according to the time set in the receiver). The IDR V1000 stores up to three
messages of each type.
If the network operator has sent a user message, a * appears in the bottom line of the
identification screen.
Viewing and
Deleting
Messages
3–2
From the Messages main topic screen, press SELECT to view the first message.
•
To access subsequent messages use the < > keys.
•
•
To delete a message, press SELECT.
To read another message or return to the previous level, press CANCEL.
MS-4900, Rev. A
Using the Front Panel
Choose
Operation:
Show Status
Press SELECT from the Show Status main topic to access the following displays:
•
•
•
•
•
Logical receiver activity
S
“ ummary”screen of active stat mux sessions and memory utilization
S
“ uperscreen”data (stat mux status, data errors, packets received, lock on carrier)
AGC and Eb/N0 reading (demodulator status)
Network control channel activity, carrier ID, cluster (group) number
NOTE: For information on interpreting these screens, refer to Section 4.
Choose
Operation:
View Setup
Press SELECT from the View Setup main topic to access the following displays:
•
•
•
•
•
•
Current communications parameters for each asynchronous serial port (baud
rate, flow control, etc.)
Pools, groups, PVC assignments for stat mux channels
Time of the latest network download to each logical receiver
IP address (for the Ethernet model only)
IDR V1000 software version; modulation type
Password login and screen lock requirements
•
TDM channels assigned to the IDR V1000 output paths.
NOTE: You cannot modify parameter settings within the View Setup screens. For
information on interpreting these screens, refer to Section 4.
MS-4900, Rev. A
3–3
Using the Front Panel
Choose
Operation:
Specify Setup
Press SELECT from the Specify Setup main topic. Then use the < > buttons to
access screens for the following purposes:
•
•
•
•
•
Change output port configuration settings
Enable or disable a screen login
Enter a password to restrict access to certain screens
Enable or disable a screen lock
Enter or change IP addresses (Ethernet model only)
CAUTION: Changes you enter on these screens are not visible to the network
operator and could be reset with a network download, possibly
interrupting site operation. It is a good idea to record (and report to
the network operator) important changes you make to parameters
onsite, in case you need to re-install those settings.
To Enable or
Disable a Screen
Login:
Enabling the login requires a user to enter a password to access any IDR V1000
screens where parameters can be modified. (The Set Features screen can still be
changed and all settings can still be viewed without entering a password.)
Use the > button to access this screen:
Specify:
Enable Login
Press SELECT to display this screen:
Login Enabled:
3N
Y
1.
2.
3.
4.
Use the < > buttons to change from n“ o”to y“ es”.
Press SELECT to set the entry.
Enter your password.
Press CANCEL twice to return to the main topics
NOTE: You must enable the screen login if you want to use the Logoff function to
turn off asynchronous data output (from the main topic Logoff).
3–4
MS-4900, Rev. A
Using the Front Panel
To Specify a
Password:
This set of screens enables you to enter the password that restricts access to many
screens.
CAUTION: Before you enter and activate the password protection, be sure the site
requires that level of security. The password/login function restricts
access to many screens and could pose an unnecessary inconvenience
to you or to future technicians. If you can’t remember your password,
you need to contact network operations and request that they
download clear the password.
Use the > button to access this screen:
Specify:
New Password
Press SELECT to access this screen:
New Password:
END
ABCDEFGHIJKLMNOP
1.
2.
3.
4.
Use the < > buttons to move to the underline c“ursor”beneath a letter.
Press SELECT to enter the letter. (The selected letters appear in the first line.)
When the password is complete, use the < key to move the cursor to END.
Press SELECT establish the password. Press CANCEL twice to return to the
main topics.
NOTE: Only one password can be in effect at any time.
To Enable or
Disable the
Screen Lock
Enabling the screen lock allows only the identification screen to be displayed without
entering a password. This safeguard helps prevent unauthorized access to the
receiver.
Use the > button to access this screen:
Specify:
Screen Lock
Press SELECT to display this screen:
Screen Lock:
3N
Y
1.
2.
3.
4.
MS-4900, Rev. A
Use the <> buttons to move between N
“ o”and Y
“ es.”
Press SELECT to enter your choice.
Enter the password.
Press CANCEL return to the main topics.
3–5
Using the Front Panel
Choose
Operation:
Set Features
Set Local Time
The first screen within the Set Features topic allows you to set the time that this
receiver will use to log messages and events.
Press SELECT once to display this screen:
Specify:
Local Time
Press SELECT again to display this screen:
Set Time
hh:mm
1.
2.
3.
4.
5.
Use the <> buttons to increment or decrement the hours (hh)
Press SELECT to set your entry. The cursor jumps to the minutes field (mm).
Set the minutes fields in the same way.
After entering the minutes, press SELECT to activate the time.
Press CANCEL twice to return to the main topics.
NOTE: Local time is lost if power to the IDR V1000 is interrupted. The clock
automatically resets to 00:00 and counts from that time, unless you reestablish local time through these screens.
Choose
Operation:
Device Restart
Press SELECT from the Device Restart main topic to reset the logical receiver
assigned an asynchronous output port. The second screen, accessed with the >
button, clears any data stored in the received-data buffer.
These commands are useful if the port or device connected to the port suddenly stops
passing data. You can reset an individual port without resetting the entire IDR
V1000.
3–6
MS-4900, Rev. A
Using the Front Panel
Choose
Operation:
Logoff
Press SELECT from the Logoff main topic to disable stat mux or transparent
asynchronous mode output. (The E
“ nable Login”option in the Specify Setup screens
must first be enabled.)
The password entry screen appears. Enter the password to re-enable data output and
to gain access to the other screens.
MS-4900, Rev. A
3–7
Using the Front Panel
3–8
MS-4900, Rev. A
Section 4. Interpreting Screen Displays
The IDR V1000 screens provide detailed information on the status of the receiver, the
satellite signal, the received data, and the output ports. This section describes how to
interpret the screen information to troubleshoot problems or to monitor IDR V1000
status. The descriptions of the screens are organized in the order of the
troubleshooting steps listed in Table 4-1.
If you need additional background information or definition of terms, refer to Section
5 and the Glossary
Identifying
Problem
Indications
The first indications of a problem typically show up as missing or damaged data on
the end user’s display monitor:
•
•
•
Data was being passed to the monitor and suddenly stops for extended periods
Data isn’t being displayed in the expected format
Data is garbled or pieces of data are missing
Table 4-1. Screens Related to Troubleshooting Steps
Step
Check These Basics:
Refer to these screens:
1
Verify cables (output, coaxial, and power) are
connected.
Make sure the IDR V1000 is receiving data.
•
Check the quality of the signal
•
Check for indications of errors in
transmissions
Not applicable
2
•
•
•
3
Check the output port to see that data is
getting through
•
Check data buffering in logical receiver
•
Check flow control at output port
•
•
•
Show status
Superscreen
Demodulator screen (AGC
and EbNo readings)
TDD screen (CTL CH)
Show status
Serial port status
Session activity
Diagnostics
Test serial port output
NOTE: The structure of the screen displays— the order in which screens are
accessed, the position of the fields, as well as the contents of some of the
fields—stays the same, even when the type of received data may affect some
of the interpretations.
Statistically-multiplexed data requires, and yields, more processing
information, much of which is captured within the screen displays. The
other data types, transparent asynchronous and transparent synchronous,
are handled differently at both ends and generate different types of status.
Different field interpretations are noted here if they vary depending on the
type of data being handled.
MS-4900, Rev. A
4–1
Interpreting Screen Displays
Check Signal
Quality
The “superscreen” under the Show Status topic provides a quick summary of signal
status, but most of the fields relate to stat mux operation (*):
CRC
errors*
Link block
frame loss*
Incoming packet
counter* or
character counter
Carrier lock
status
0
X
0
0
Modulation type
0L
BPSK
0 0 0 0
Not applicable
Type of data
Packet framing
errors*
Not applicable
Corrected
FEC errors*
Uncorrected
FEC errors*
Figure 4-1. Superscreen
NOTE: In general, any incrementing number field of the superscreen, other than
the “incoming packets” field, indicates poor signal quality.
Table 4-2. Superscreen Fields, Stat Mux Data
Superscreen
Fields
4–2
Field:
Should be:
Meaning:
Incoming
packet
counter
CRC errors
Incrementing
Stat mux data is being received; no action
is needed.
Not incrementing
Link block
frame loss
Carrier lock
status
Not incrementing
Modulation
type
Type of data
BPSK/QPSK
An incrementing number indicates data
errors.
Check receiver installation; monitor
weather conditions.
An incrementing number indicates data
loss.
Check receiver installation and monitor
weather conditions if lock (L) is not
established or if the receiver keeps losing
its lock
Information only; no action is needed.
L = Locked on signal
B = blocks (sync data)
P = packets (no blocks)
C = characters (no packets)
Corrected
FEC errors
Not incrementing rapidly
Uncorrected
FEC errors
Not incrementing
Packet
framing
errors
Not incrementing
Data mode of current input stream.
A blank field means no data is being
received.If Eb/No reading is low, check
receiver installation and monitor weather
conditions.
Data probably has not been lost if the
number increments slowly. If Eb/No
reading is low, check receiver installation
and monitor weather conditions.
Data possibly has been lost if this number
increments. Check receiver installation
and monitor weather conditions.
Check receiver installation and monitor
weather conditions.
MS-4900, Rev. A
Interpreting Screen Displays
Table 4-3. Superscreen Fields, Transparent Asynchronous Data
Demodulator
Screen Fields
Field:
Character
counter
Carrier lock
status
Should be:
Incrementing
Meaning:
asynchronous data is being received
L = locked on signal
Modulation
type
Type of data
BPSK or QPSK
if lock is not established (L), or if the
receiver keeps losing its lock, check the
dish alignment
network setup determines which
modulation type is used; does not vary
C=characters
The demodulator screen gives the current tuning status of the receiver. This screen is
meaningful for any mode of operation:
Tuning status
Locked
AGC:162
AGC relative
voltage
table:xxxxxx
Eb/No= 5.0 dB
Signal to noise
ratio
Figure 4-2. Demodulator Screen
Table 4-4. Demodulator Screen Fields
Field
Tuning status
MS-4900, Rev. A
Should be:
Locked
AGC voltage
At least 100
(as high as possible)
Eb/No
(signal to noise
ratio)
5.0 dB to 12 dB,
(site dependent)
Meaning:
Other displays could be Scanning,
Checking, or No Sig Check.
If not locked, check receiver installation
and monitor weather conditions.
A low AGC voltage often reflects bad
weather conditions. If weather is not the
problem:
•
Check dish alignment
•
Check LNB connection
•
Check length of coaxial cable; install
line amplifiers if length exceeds 500
feet
A low or fluctuating Eb/No reading may
indicate bad weather. If weather is not
the problem:
•
Check dish alignment
•
Check coaxial cabling
4–3
Interpreting Screen Displays
TDD Screen
Fields
The time-division de-multiplexer screen reflects control channel information logged
by the TDD. This screen is meaningful with all data modes.
Cluster ID
Carrier ID
Cluster:00000 CID: 255
CTL CH: IdOkNow PKT:000
Control channel
status
Valid control
packets
Figure 4-3. TDD Screen
Table 4-5. TDD Screen Fields
Field
Cluster ID
Should be:
Assigned ID
(Allows control
commands to be issued
to a group of receivers
with this ID)
Assigned network ID
number
Meaning:
Status only; no action is needed.
Control
channel
status
IdOkNow
Assigned ID and ID in
control packet match
Assigned carrier ID matches received ID.
Valid
control
packets
Incrementing during
download
Status only; no action is needed. (This
indicates the number of received control
channel packets addressed to this receiver.)
Carrier ID
4–4
A value of 65535 is the default setting that
means no cluster ID has been assigned
If the carrier ID received in the control channel
matches this ID, the receiver remains locked.
Other displays could be:
TddUnlk: Not receiving a valid data stream
NoIdNow: Locked to TDM frames, not
receiving a control character
WrongId: Receiver is still locked, but is
reading a control channel carrier ID that does
not match the assigned ID; receiver will unlock
in less than 10 seconds.
MS-4900, Rev. A
Interpreting Screen Displays
Active Sessions
Screen Fields
This summary screen lists the total number of active sessions for all logical receivers,
and is meaningful only in terms of stat mux processing. An active session means the
receiver currently has data addressed to it and is passing it to the output ports.
NOTE: Logical receivers are available only with stat mux processing, which has
the capability of addressing those virtual destinations. (See “Functional
Overview”.)
Active Sessions: x
Memory Utilization: xx%
Figure 4-4. Active Sessions Screen
Table 4-6. Active Sessions Screen Fields
Field
Should be:
Active sessions
constant, if PVCs
changing, if TVCs
Memory
utilization
variable; less than
100%
Meaning:
Number of enabled PVCs plus the number of
active TVC sessions.
If the data type is not L1, L2, SL, or TA (see
Figure 4-7), the field is not meaningful and will
ordinarily display 0.
Total memory buffer usage among all logical
receivers
If this reaches 99% you are probably starting to
lose data.
NOTE: Refer to Section 5, “TVCs and PVCs” for more information.
MS-4900, Rev. A
4–5
Interpreting Screen Displays
Check Output
Ports
Evaluate the output error indications based on whether output was being displayed
successfully:
Output data has been displaying successfully and has suddenly stopped:
Check flow control and logical receiver memory utilization, as indicated in
the following Show Status screens. Frequently, overflow problems occur
within the software on the external device; rebooting the attached PC may
clear the problem. If the output PC is handling other processing-intensive
tasks, data flow from the IDR V1000 to the PC could be temporarily
blocked, causing a buffer overflow in the IDR V1000.
Output data has not been successfully displayed from a newly installed receiver:
Check cable connections, then verify incoming signal quality. Verify that
appropriate values are set for the serial ports. Verify that the communications
software on the external device is set up with baud rate, parity, and flow
control matching the IDR V1000.
Show Status/
Logical Receivers
The first of a series of screens within the Show Status main topic shows the current
activity of the logical receivers and their assigned ports. (R0 for stat mux or
transparent async mode; R1 through R3 in stat mux mode only).
Logical receiver 0
through 3
R0 Serial 1
Not active
Status x%
RTS ON
Current processing
activity on received
packet
% of total
memory
currently
allocated for this
Flow control
status (blank
if disabled)
Figure 4-5. Logical Receiver Status
4–6
MS-4900, Rev. A
Interpreting Screen Displays
Table 4-7. Logical Receiver Status Fields
Field
Should be:
Logical
receiver
R0 through R3
Serial port
R0 = Serial 1
R1 = Serial 2
R2 = Serial 3
R3 = Serial 4
0 to 100
% of buffered
data
Current activity
Flow control
Meaning:
Status only
NOTE: Logical receivers are assigned in
stat mux operation only
Port being displayed
Active/Inactive
Can reach 100% only when one logical
receiver is delivering data
Status only
RTS ON/RTS OFF
XON/XOFF
RR-RNR
Active = the output data is in the receiver
buffer
Inactive = no output data remains in the
receiver buffer
Hardware flow control.
Software flow control.
Software flow control.
Continuous display of RTS OFF, XOF, or
RNR may indicate a possible PC software
problem or a cabling problem between the
PC and the IDR V1000.
View Setup of
Logical Receivers
The first set of screens under the View Setup main topic refer to the settings for the
stat mux logical receivers R0 through R3. Each logical receiver has an individual
serial number based on the serial number for the IDR V1000. For example, if the
IDR V1000 serial number is 9000000, the serial number assigned to logical receiver
R0 is 9000000. (The serial number for R1 would be 9000001, and so on.) These are
the numbers being displayed in the first screen
NOTE: If serial port 4 hardware is set at the factory as a synchronous output port,
then logical receiver R3 is not available for stat mux operation.
A serial port is automatically assigned to each logical receiver. You can view the
current output settings for that port:
View Setup
of Receiver 0 xxxxxx0
Serial 1/PAD/DF,PD
19200/8/None/1/No Flow
Figure 4-6. View Setup of Serial Ports
MS-4900, Rev. A
4–7
Interpreting Screen Displays
Table 4-8. Setup of Serial Ports
Field
Port Mode
Port
configuration
•
•
Should be:
PAD or NODE
DF
•
PD/ND
•
•
•
•
•
Baud rate (see Note)
Bits per word
Parity
Stop bits (see Note)
Flow control
Meaning:
Mode
Default destination; data addressed
to DF ports will go to this receiver
•
Data addressed to PAD ports will
go to this receiver; data addressed
to Node ports will go to this
receiver
NOTE: These communications settings
must match the communication
settings of the attached
terminal.
•
•
NOTE: For baud rates 57600 and 115200, “1 stop bit” operation is required.
Also, the serial ports will not accept data input, so XON/XOFF flow control
will not operate.
TDD channels
This screen within the View Setup topic shows the assigned TDM channels to each
TDD output path in the receiver. This identifies which head-end feed is delivered to
each port.
Data type
to CPU
CPU partition
CPU:CH3
Ser4:Choff
Type:L1
Ser5:Ch2
Synchronous
serial ports
Figure 4-7. Display Based on TDM Channel Assignment
A variation of this screen occurs when TDM allocations are based on product, rather
than TDM channel assignments.
Product 3
CPU: 3
Ser4: Off
Type: L1
Ser5: 2
Product 2
Figure 4-8. Display Based on Product
4–8
MS-4900, Rev. A
Interpreting Screen Displays
Check Output
Ports (cont’d)
The Diagnostics screens provide a serial port test through which you can send a
repeating test pattern to the designated port.
Diagnostics:
Test Serial 1
Serial 1 Output
Test in Progress
The test pattern continues through that port until you press the CANCEL button.
Any network data output received during the test is interleaved with the test pattern.
NOTE: The test pattern is selected through the Set Features/Diagnostic Out Style
screen. The test can be either a repeating Roman alphabet or a “head”
data stream, which is a special, incrementing number stream.
Diagnostics
Screens
The last Diagnostics screen, Statistics Logger, is useful primarily for extended
monitoring or debugging. The Stat Logger uses one of the serial ports to send
superscreen updates to the connected PC or serial printer, using that serial port’s
asynchronous settings. (Normal data cannot be output through that serial port while
the Stat Logger is on.)
NOTE: Call your support representative if you need to use the Stat Logger.
MS-4900, Rev. A
4–9
Interpreting Screen Displays
Verifying
Ethernet
Screens
Additional screens within the View Setup and Specify Setup main topics provide
information relevant to the Ethernet model of the IDR V1000. This section describes
the contents of those screens.
NOTE: The following screens do not appear on IDR V1000 models other than the
Ethernet model.
View Setup
The first logical receiver (Receiver 0) refers to the stat mux logical receiver within the
IDR V1000. The second receiver (Receiver 1), applies to the Ethernet logical receiver
and its configured IP addresses.
Figure 4-9. Ethernet Screens, View Setup
Pressing SELECT from the View Setup: IP Addresses screen allows you to view
the loaded IP addresses currently in effect. Use the < and > buttons to move through
those addresses.
All IP addresses are formatted in the same xxx.xxx.xxx.xxx pattern, with each of the
four blocks representing a specific “field” of the address. The “255” number in an IP
address field functions like a “wild card.”
NOTE: Be sure to communicate to the network control center any IP address
changes that are made onsite.
Local IP Address
This is the IDR V1000 address on the end user’s local area network. It identifies the
receiver as a node on the LAN.
Subnet Mask
The subnet mask can be used to prevent the IDR V1000 from establishing point-topoint connections with individual PCs outside the defined subnetwork.
Gateway IP
Address
The gateway IP address is the end user’s Internet gateway address. If the end user is
not connected to the Internet, this address should be all zeroes.
The IDR V1000 can report its status to the network control center through the
gateway if the receiver has this address loaded.
4–10
MS-4900, Rev. A
Interpreting Screen Displays
SNMP Trap IP
Address
This is the address of the computer running the SNMP manager software and to
which the IDR V1000 can report its status events (such as acquiring or losing carrier
lock). Assuming both the SNMP server and the IDR V1000 are connected to the
Internet, you can poll the receiver status from anywhere in the Internet.
NOTE: This address must be set to either the SNMP manager address (to report
status), or all zeroes (to not report status).
Host IP Address
The host IP address is that of the end user PC receiving the IDR V1000 output data.
This establishes a point-to-point connections between the IDR V1000 and the
individual PC. A valid address is required in this screen if the IDR V1000 must
initiate the connection to the PC using either a TCP/IP socket connection or a Unicast
socket connection based on UDP packets.
Specify Setup:
IP Addresses
Through the Specify Setup: IP Addresses screens, you can change IP-related
addresses locally. Be sure to notify the network operator anytime such changes have
been made.
Changing an
Address
To change an address, you must step through all 12 character (all four fields) of the
address.
•
•
•
Use the < and > buttons to increase or decrease a number.
Press SELECT to confirm the number.
Press CANCEL to return to the previous number without updating the current
number.
If you press SELECT through each of the fields of the IP address, the address is
confirmed and saved to memory. If you exit the screen by pressing CANCEL, no
changes are saved, and the receiver continues to use the previously loaded address.
MS-4900, Rev. A
4–11
Interpreting Screen Displays
Examining
System
Messages
You can examine system messages to get an indication of receiver activity over a
span of time. The IDR V1000 stores up to three user messages and three system
messages in memory, each of which reflects an event in the receiver’s operation. For
example, the initial system message when the receiver is first powered on indicates it
is not locked to a carrier. As soon as the receiver acquires a lock on the carrier, the
system stores that message. Each message is time-stamped, based on the time set in
the Set Features/Local Time screen.
User messages are rare occurrences. They are sent by the network operator to
individual receivers. New messages replace the earliest ones if the message buffer is
full.
You can scroll through the messages using the arrow buttons. Pressing SELECT on
a displayed message deletes it. Pressing CANCEL returns you to the previous screen
level.
Error and
Warning
Messages
The following table lists messages that could indicate a hardware problem within the
IDR V1000. If you see any of these messages:
1. Make a note of the message
2. Disconnect the IDR V1000 power, then re-connect it to clear and reset the
receiver.
3. Contact support personnel if the same message reoccurs.
NOTE: The first message you always see when IDR V1000 power is turned on is
“Self-Test in Progress.” You should not see this message at any other time
during normal operation.
Table 4-9. Error Messages
Message:
Code ROM Check
should be 38 was C8
RAM Memory Check @xxxxx
should be 00 was 20
RAM Address Check @xxxxx
should be FE was FB
Interrupt check
Error occurred reading program memory during self-test
Input Queue Overflow
Input to the IDR V1000 cannot be processed fast enough
to keep up with data received
EEPROM Check X
Call Technical Support
EEPROM Check X
Attempting S/N Recovery
Configuration Reset X
EEPROM Check X
Return for Service
Failed TDD RAM
4–12
Means:
Error occurred while writing a data pattern in RAM during
self-test
Error occurred writing address in RAM during self-test
Error causing spurious interrupts
Failure in non-volatile memory.
Failure in time-division demultiplexer RAM
MS-4900, Rev. A
Section 5. Functional Overview
This section describes the function of the IDR V1000 within a WavePhore network:
•
“Network Overview” gives the “big picture” from point of origin to display on
•
“Modes of Moving Data” describes some of the fundamental terms and concepts
you need to understand first.
“IDR V1000” describes the functional characteristics of the IDR V1000 itself.
•
Network
Overview
The function of the network is to transmit data (such as weather information, stock
prices, or news stories) generated by the various subscription services from their
point of origin to an end-user’s output display. This network can be owned by
WavePhore or by another private entity using WavePhore equipment. Requirements
for data handling, communication protocols, security considerations, and other
characteristics vary from one network to another. However, the following
description supplies a generic picture of one of these networks.
Network
Components
The network comprises the following main areas:
•
•
•
•
MS-4900, Rev. A
Network Control Center (NCC)
Gathers and processes incoming data; uplinks data directly to a satellite or
transmits data to another site for uplinking; provides network management
services
Access network
Various means by which data arrives at the NCC: from remote sites over wide
area networks as well as through local computers
Satellite
Transmits data received from the uplinking source to the receiver
IDR V1000
Receives and processes the incoming data; passes the data to the attached output
device, such as a personal computer
5–
1
Functional Overview
The NCC:
Input and
Output
Input to the NCC consists of data feeds arriving through the access network. This
can be data originating from a remote or local computer. Some of this data is
processed in the statistical multiplexer, commonly called a stat mux. The stat mux
assembles that data into a series of packets. The packets contain information about
the data, such as message length, source, specific output destination, encryption or
compression keys, as well as the data itself. Packets are then placed into link blocks,
to which are also added Reed-Solomon type FEC bits.
The stat mux data, control channel information, and other data passing directly from
the access network, moves to the time-division multiplexer, or TDM. The TDM
combines and orders the data into a single aggregate data stream. The TDM sends
this data stream to a modulator to be converted into an analog signal, ready for
uplinking to a satellite. Data may be uplinked from the NCC itself or transmitted to
another site for modulating and uplinking. Figure 5-1 illustrates this network. The
top half of the figure shows NCC side, at which data from multiple sources is
assembled and “packaged” for uplinking to the satellite. The lower half of the figure
shows the receiver, where the transmitted data is disassembled and processed as
necessary, and output to an end user’s server or an individual computer.
5–
2
MS-4900, Rev. A
Functional Overview
Figure 5-1. A Sample Wavephore Network and the Flow of Data
MS-4900, Rev. A
5–
3
Functional Overview
The Receiver:
Input and
Output
Input to the IDR V1000 comes from the satellite dish. The downlinked data stream
is amplified and shifted to a lower frequency by the LNB on the satellite dish and
passed through the coaxial cable to the IDR V1000. The receiver demodulates the
data, converting the analog signal to digital data, and tries to correct reception errors
before moving the digitized data stream to the time-division demultiplexer, or TDD.
The TDD decodes the aggregate data stream into partitions that correspond to the
TDM input channels. Some of the data stream can pass directly from the TDD to an
output port. Other streams are routed through the CPU for additional processing.
For example, the data originally statistically multiplexed at the NCC—must be
processed through a statistical demultiplexer in the CPU.
The statistical demultiplexer,or stat demux reads the data in the channel, applies a
second level of error correction, and reads packets in the resulting data stream. It
strips the packets of control information, and processes the message accordingly,
applying any necessary decrypting, decompressing, or routing to a specific output
device.
The IDR V1000 processor also interfaces with the front panel. The processor
updates the LCD screens and processes the user input from the front panel buttons
to change tuner settings, port configurations, logging, etc. Network operators can
update receiver settings, individually or as groups, by downloading new
configuration parameters to the receiver or receivers.
Modes of
Moving
Data
The data being moved throughout the network originate in multiple locations, each
of which might be subject to different economic, environmental, and speed
requirements. These requirements translate into a variety of modes of moving data
from one place to another.
Data in a WavePhore network are transmitted and received in one of three modes: as
transparent synchronous, transparent asynchronous, or statistically-multiplexed
data.
Transparent
Sync and
Async Data
Transparent synchronous and asynchronous modes refer to the data link protocol by
which the originating source sent the data to the TDM. The time-division multiplexer
at the NCC head-end assembles those data into the aggregate data stream without
applying additional processing or overhead to the message. Likewise, on the receiver
side, the transparent synchronous and asynchronous data move through an output
port without additional processing. These modes of data transmission either require
no processing to display coherently, or assume that any processing required is
handled by a computer application at the end-user’s site.
If the CPU partition of the aggregate data stream coming from the TDD is
transparent asynchronous, only Serial 1 can be used as an output (see Figure 5-2
and Table 5-1.)
5–
4
MS-4900, Rev. A
Functional Overview
Stat Mux Data
Statistically-multiplexed data contains the message itself—a part of a news story or
weather report—along with overhead information about the message, such as its
length, its origin, and its destination. Destination information directs data to a
specific logical receiver within the IDR V1000.
Logical Receivers
Stat mux operation has the capability of addressing messages to virtual, or logical,
receivers within an IDR V1000. A serial output port is automatically assigned to
each logical receiver. In stat mux mode, the CPU’s TDD partition of the data
stream can address all asynchronous output ports (Serial 1 through 4).
Most of the IDR V1000 status screen displays relate to statistically-multiplexed
packets and their destinations to one of four logical receivers within the IDR V1000.
Data handling in stat mux mode is more flexible than the transparent pass-through
data handling that occurs with transparent synchronous or asynchronous data.
Figure 5-2 and Table 5-1 specify the data stream processing destinations handled by
software within the IDR V1000.
TA = transparent asynchronous data
L1 = stat mux data
Figure 5-2. Data Stream Processing Destinations
MS-4900, Rev. A
5–
5
Functional Overview
Table 5-1 reflects the availability and usage of the five possible serial ports,
depending on the nature of the received data: transparent asynchronous, statisticallymultiplexed, or transparent synchronous, or combinations thereof.
NOTE: The functionality of Serial 4 port is dependent on the hardware
configuration established at the factory.
Table 5-1. Matrix of Serial Port Availability
Stat mux
Transparent
Async
Possible Serial Port
Configurations:
Configuration A
Configuration B
Configuration C
Configuration D
Configuration E
TVCS and
PVCs
Serial 1
Serial 1
Serial 2
Transparent
Sync
Serial 3
Serial 4
4
4
4
4
4
4
4
4
4
4
4
Serial 4
Serial 5
4
4
4
4
4
4
4
4
4
Temporary Virtual Circuits (TVCs) and Permanent Virtual Circuits (PVCs) are the
two connection options available through a stat mux channel on a WavePhore
Network. A TVC is like a switched connection in which a session is established only
for the duration of a given transmission. A PVC establishes a perpetual
communications session between the head-end and the receiver. An IDR V1000 can
run TVC-only sessions, PVC-only sessions, or a mixture of PVC and TVC sessions.
TVC sessions open and close. Therefore, the number of active sessions reported on
the Show Status screen at any given time is dynamic. TVCs are enabled by
downloading pool and group codes to the IDR V1000.
PVC sessions never close. Therefore, the reported number of active sessions is
always the same number in an exclusively PVC environment. The IDR V1000 can
support one PVC session per logical receiver in PAD mode and up to four PVC
sessions per logical receiver in Node mode. (A maximum of 10 PVC sessions can be
enabled across all logical receivers.)
PAD and Node
Modes
5–
6
Each stat mux output port of the IDR V1000 is configured to deliver data in either
PAD or Node mode. The mode determines the manner in which the received data is
sequenced and output. Depending on the type of session delivering that data (PVC or
TVC), the selected mode ultimately affects the formatting and appearance of the
output data. (Each port outputs data in the selected mode, regardless of whether that
data comes to the receiver as a PVC or a TVC session.)
MS-4900, Rev. A
Functional Overview
PAD Mode and
PVC Sessions
PAD mode ports output original news stories directly. For PVC sessions, the output
is straightforward: for any PVC session (of which only one is deliverable to any
PAD logical receiver), incoming stories are delivered to the logical receiver in proper
sequence from the head end, and the IDR V1000 delivers those stories exactly as
received.
PAD Mode and
TVC Sessions
For TVC sessions, however, multiple sessions can be delivered at the same time to
any given logical receiver. Since different TVC sessions contain different news
stories, displaying those stories in the order received would cause separate stories to
run together. Instead, to ensure that a TVC news story is delivered intact and that
news stories do not blend together, the IDR V1000 in PAD mode acts in a special
way: While any particular story of a logical receiver is being output, other stories
accumulate in the IDR V1000 buffer. At the same time each particular news story is
fully output, one next story is selected for continued output. The buffer of the IDR
V1000 is well utilized in these cases: if a story currently being output is quite slowly
delivered across the network multiple stories can fully accumulate, to completion, in
the buffer. This “accumulating” usually causes no trouble, because the buffer is
large.
Node Mode
The IDR V1000 does not need to buffer news stories in Node mode operation as it
does in PAD mode.
Node mode output is repacketized. The data originally received from the data
provider at the head end is output in specially formed “extract” packets (a protocol
proprietary to WavePhore Networks). Special “extracting” software running in the
output computer extracts the news stories from these Node mode packets. Each
“extract” packet is output in the order received and contains session identifiers and
control information. The advantage of Node mode is that the extract computer can
assemble simultaneous incoming stories in separate computer buffers, store them as
separate entities, format them in response to embedded commands, and display them
in preferred (and possibly user controlled) sequences.
MS-4900, Rev. A
5–
7
Functional Overview
IDR V1000:
Functional
Overview
The IDR V1000 receives, demodulates, and corrects errors in the transmission,
disassembles the data stream to extract discrete messages, processes the blocks and
packets of information for display, and can monitor and log its own operation.
The internal functions of the IDR V1000 comprise the following elements:
•
•
•
•
•
•
•
Tuner
Demodulator
Error detection and correction
Time-division demultiplexer
Processor (CPU, memory, statistical demultiplexer)
Optional daughtercards
Serial output ports
Figure 5-3 illustrates these functional elements within an IDR V1000 basic model.
Figure 5-3. IDR V1000-Basic Model, Functional Depiction
5–
8
MS-4900, Rev. A
Functional Overview
Signal Input:
LNB and Tuner
The IDR V1000 connects to the LNB on the satellite dish through the coaxial cable
attached to the rear panel RF connector. The LNB (low noise block converter)
receives power from the receiver, maps satellite signals to a pre-determined range of
frequencies (950 to 1525 MHz) and sends the appropriate commands to the tuner.
The tuner selects the specific signals (out of many delivered by the LNB) that
contain the desired aggregate data stream.
The coaxial cable needs to meet certain specifications so that interference from
nearby electrical equipment does not affect the signal before it reaches the receiver.
(The recommended coaxial cable is RG-6, not to exceed 152 meters, or 500 feet
between LNB and receiver). Line amplifiers can be added to help boost the signal if
necessary.
Demodulating
and ErrorCorrecting
The selected signal coming from the LNB is demodulated, or re-converted to digital
data. Reception errors are then detected and corrected. All IDR V1000 models
include Viterbi forward error correction; the Reed-Solomon model includes a
separate hardware chip that incorporates an additional error correction process—the
Reed-Solomon forward error correction technique.
NOTE: This corrects reception errors across the aggregate data stream. This
level of error correction is different from the software Reed-Solomon error
correction that operates only in the stat mux portion of the data stream
and then only if stat mux data is selected for use by the IDR V1000.
MS-4900, Rev. A
5–
9
Functional Overview
Figure 5-4. Reed-Solomon Model, Functional Depiction
Time-Division
Demultiplexer
(TDD)
After the signal has been demodulated and passed through error-correction, the
aggregate data stream moves into the time-division demultiplexer, or the TDD. The
TDD separates the data stream into partitions. These partitions include the
following:
•
the CPU data partition (transparent asynchronous or stat mux data) that is
passed to the processor for output to Serial 1 (and for stat mux data, possibly to
Serial 2, 3, and 4, as well).
•
two additional partitions funneled directly for output through Serial 5 (and
Serial 4, if configured at the factory for synchronous output).
•
a network control channel directed to the processor that includes nondisplayable, internal control data only.
The network control channel occupies a pre-assigned portion of the aggregate data
stream. The control channel is used to modify settings within the receiver, as in the
case of first-time setup or when the NCC needs to dynamically change a frequency
setting for a group of receivers, or to suspend output on a given serial port.
Processor
In this description, the processor includes the CPU, random access memory, and
flash memory. The processor board contains one serial output port (Serial 1),
available for asynchronous data output.
The processor controls other components within the receiver and provides statistical
5–
10
MS-4900, Rev. A
Functional Overview
demultiplexing capability.
As shown in Figure 5-3, the processor connects to the tuner, controlling its
frequency setting and the bit rate used by the demodulator. The processor programs
the TDD at start-up to match the frame image stored in memory. The TDD routes
the aggregate data according to this image. Some of the bits in the frame can be
routed to the processor and may be processed there by the statistical demultiplexer.
The UART chip in the processor drives the Serial 1 output to an external device.
(The Serial 1 port is the only output port in an IDR V1000 basic unit.)
Statistical
Demultiplexer
(Stat Demux)
Packetized data, sent in stat mux format from the NCC, is de-multiplexed (and depacketized) in the receiver. The packets include session, data, and control
information used by the to decrypt, decompress, and direct the result to specific
serial port destinations.
Since statistically multiplexed data provides so much information about how the
message is to be handled, the IDR V1000 screen displays show useful status
information about the reception and delivery of the packets. (Refer to Section 4 on
interpreting these screens.)
MS-4900, Rev. A
5–
11
Functional Overview
Buffering and
Flow Control
Buffering and flow control are important concepts related to moving the data
through the output ports.
The buffer is the area of RAM in the IDR V1000 allocated to temporarily store
processed data when the external computer is unready or unable to accept it. As
soon as the external computer can accept incoming data, the buffers empty as the
data is moved out of the receiver. The memory utilization fields in the IDR V1000
screens describe the current percentage of buffer space being used to temporarily
store data. Memory utilization of 100 percent means the buffer space is overrun;
data is being lost.
Flow control provides a means for the external computer to regulate the data coming
out of the IDR V1000. The following options are available to implement flow
control:
•
•
•
•
RTS (request to send); a hardware-implemented method
XON/XOFF (transmit on/transmit off); a software-implemented method
RR/RNR (receiver ready/receiver not ready; a WavePhore proprietary software
method)
“Both” (an IDR V1000 setup option meaning that both hardware and software
methods are selected)
Another option is to select “none”: to not implement any method of flow control.
Whatever option is selected, both the IDR V1000 and the communications software
running in the external computer must match each other.
If the output device cannot handle the data coming into it from the IDR V1000, it
signals the IDR V1000 to suspend the data flow, using one of four methods. The
IDR V1000 buffers the data until it receives another signal to continue data flow.
Often times, display problems on end users’ computers are caused by flow control
issues. Either rebooting the computer, or reconfiguring it to handle fewer processing
tasks may clear the display problem.
NOTE: Neither RR/RNR or XON/XOFF operate at baud rates of 57600 or
115200.
Serial Output
Ports
The output from the receiver typically consists of charts, text, or graphics, and is
intended for display on a personal computer (either standalone or part of a network.)
The IDR V1000 supports a variety of output methods, depending on the model:
•
•
•
The basic model supplies one asynchronous serial output port, Serial 1
The 4-port daughtercard (Figure 5-5) provides four additional serial ports
The Ethernet daughtercard (Figure 5-6) provides a synchronous (high-speed)
output port, an asynchronous output port, and a 10BaseT output to a local area
network.
The settings within the IDR V1000 can be modified to suspend output to a given
port or to isolate a single port for test transmissions only.
5–
12
MS-4900, Rev. A
Functional Overview
Figure 5-5. Four-Port Daughtercard Model
MS-4900, Rev. A
5–
13
Functional Overview
Figure 5-6. Ethernet Model, Functional Depiction
The Ethernet model contains two independent logical receivers:
• Serial 1 asynchronous
• Ethernet high-speed synchronous
Sync/Ethernet logical receiver status can be checked in two ways:
1. LEDs on the rear panel
2. Poll Ethernet link status through “poll packets.”
5–
14
MS-4900, Rev. A
Functional Overview
MS-4900, Rev. A
5–
15
Appendix A. Technical Specifications
IDR V1000
The following specifications relate to the receiver’s functional characteristics and
its external and environmental characteristics.
RF input level
RF input frequency
RF tuning
EbNo requirements
Channel modulation
Channel bit rates
Channel bandwidth
Power-up lock time
Data buffer
Data output port
-85 dBm to -40 dBm
950 MHz to 1,525 MHz
Synthesized, front panel selectable in 50 kHz steps. Receiver
uses local scan, and locks to a valid carrier between step
sizes.
Operates less than 0.9 dB from theoretical performance limit
(<6.5 dB Eb/No for 1E-7 BER with Viterbi error correction only
BPSK or QPSK with ½ rate Viterbi error correction
Selectable between 64 kbps and 2048 kbps. QPSK operation
from 512 to 2048 kbps
Selectable: -30 dB at 1.8 Rs or -30 dB at 1.4 Rs.
Less than 90 seconds for carrier offsets +/- 200 kHz of
frequency setting
512k byte buffer for asynchronous output ports
Asynchronous: 1.2, 2.4, 4.8, 9.6, 19.2, 38.4, 57.6, 115.2
kbps RS-232 on DB-9 connector.
Time-division demultiplexer extracts control channel and one
to three data services from the nine services on the carrier.
Data services can be transparent asynchronous, statisticallymultiplexed asynchronous, or synchronous data.
NOTE: Baud rates 57600 and 115200 do not operate XON/XOFF or RR/RNR
methods of flow control.
External and
Environmental
Characteristics
Casework
Front panel
indicators
Packaging
Rear panel
connectors
Rear panel indicators
(applies to Ethernet
operation only)
Regulatory approvals
MS-4900, Rev. A
Metal, painted white.
Dimensions:
Width:12.5 inches
Height: 3 inches
Depth: 9.5 inches
2 x 24-character LCD display with 4-button keypad:
•
Carrier lock status
•
Signal strength
•
Signal quality
•
Permission status
•
Port configuration
Cardboard shipper with foam or cardboard inserts. Includes:
•
IDR V1000 unit
•
Power module (external 120/240 VAC , black)
Standard:
•
Power
•
RF input
•
Serial output port
Optional:
•
Four serial output ports
•
Ethernet ports (10BaseT, AUI, RS-422)
LEDs for Transmit, Receive, and Link Status
United States: FCC Class A and UL/CSA
Europe: CE (on the basic and 4-port models only)
A-1
Appendix A. Technical Specifications
Remote control
functions
Remote receiver
control
Software functions
•
Carrier bit rate and modulation type
•
TDM channel selection
•
Tune to new carrier frequency
•
Statmux service selection (optional)
•
Output port baud rate
•
Permission/depermission output port
TDM Control Channel: controls receiver hardware
configuration (carrier frequency, carrier bit rate, TDM channel
selection, output baud rate)
Optional Statistical Multiplexer control: controls data output
configuration (permission/depermission of individual data
services). Also, provides for data compression, ReedSolomon Forward Error Correction, Group addressing
•
Display current status
•
Self-test diagnostics
•
Display or modify RF carrier frequency
•
Modify output port baud rate and configuration
•
Process stat mux data feed
•
Select TDM data channel
•
Accept factory upload
Optional Daughtercards
Daughtercards are installed at the factory and provide optional output capabilities.
Two daughtercards are currently available: the Ethernet card and the 4-port card.
4-Port
Daughtercard
Asynchronous
connection (for stat
mux operation only)
Supported rates in kbps: 1.2, 2.4, 4.8, 9.6, 19.2, 38.4, 57.6,
and 115.2. (Baud rates 57600 and 115200 do not support
XON/XOFF or RR/RNR flow control.)
RS-232 on DB-9 connectors.
Synchronous
connection
Synchronous RS-422 rates available in “0.1% if carrier bit rate”
steps up to carrier capacity, less control channel and optional
Reed Solomon overhead.
Extracts control channel and up to three data services from the
nine services on the carrier. Allows simultaneous extraction of
one asynchronous service with two synchronous services, or
one stat mux service and one or two synchronous services.
Up to four asynchronous ports can output stat mux data. Ports
are individually permissionable.
Time-division
demultiplexer
Statistical
demultiplexer
Ethernet
Daughtercard
Data rate
1 Mbps sustained TCP/IP throughput
2 Mbps sustained UDP throughput
Management protocol
Centralized management using SNMPv2.
Output support
10BaseT Ethernet, AUI, and RS-422
Remote control
functions (additional)
•
IP addresses, HDLC addresses
•
Enable/disable SNMP management
•
Enable/disable TFTP
•
Enable/disable TCP/IP session auto-start
Set IP addresses for receiver, host, gateway, and SNMP
manager.
Process HDLC and Ethernet data channels
Remote receiver
control (additional)
Software functions
(additional)
TCP/IP connections
A-2
RFC-compliant
MS-4900, Rev. A
Appendix B. Pin-out Tables
The pin-out tables describe the signal functions of the pin sockets for the
asynchronous and synchronous serial output ports on the basic, Reed-Solomon, and
the 4-port models, and the synchronous and 10Base T output connections on the
Ethernet model.
Asynchronous
Serial Port
(RS-232)
Synchronous
Serial Port
(RS-422 on 4-Port
Daughtercard)
DB-9 Male
Connector
MS-4900, Rev. A
Pin
Function
Signal Direction
1
+12 volts output from receiver
output
2
Data
output
3
Data
input
4
No Connect
n/a
5
Ground
n/a
6
+12 volts output from receiver
output
7
Request to Send
input
8
Clear to Send
output
9
No Connect
Pin
n/a
Function
Signal Direction
1
No Connect
n/a
2
3
Data +
Clock out +
output
output
4
5
6
7
8
9
No connect
Signal ground
No Connect
Data Clock No Connect
n/a
n/a
output
output
n/a
B-1
Appendix B Pin-out Tables
Ethernet
Synchronous
RS-422
The Ethernet daughtercard contains three connectors: RS-422 (synchronous),
AUI (attachment unit interface, synchronous), and the 10Base T.
Pin
B-2
Signal Direction
1
Optional signal ground
(set by internal jumper)
2
Data -
3
Control -
output
4
Data -
output
5
Indicate -
6
Clock -
output
7
Clock -
input
8
Signal ground
9
Data +
input
10
Control +
ouput
11
Data +
output
12
Indicate +
13
Clock +
output
14
Clock+
input
15
Not used
Pin
1
Function
Frame ground
(DB-15
Connector)
AUI
Function
n/a
input
input
n/a
input
Signal Direction
n/a
2
Carrier +
input
3
Data +
4
Frame Ground
5
Data +
6
Signal Ground
n/a
7
No Connect
n/a
8
No Connect
n/a
9
Carrier -
10
Data -
11
Frame Ground
12
Data -
13
+12 Volts
14
Frame Ground
n/a
15
No Connect
n/a
output
n/a
input
input
output
n/a
input
MS-4900, Rev. A
Appendix B Pin-out Tables
10Base T
MS-4900, Rev. A
Pin
1
Function
Twisted Pair +
Signal Direction
output
2
Twisted Pair -
output
3
Twisted Pair +
input
4
No connect
n/a
5
No connect
n/a
6
Twisted Pair -
7
No connect
n/a
8
No connect
n/a
input
B-3
Appendix B Pin-out Tables
B-4
MS-4900, Rev. A
Section1 . Appendix C. IDR V1000
Screen Displays
The following fold-out pages depict the structure of the IDR V1000 screen displays.
The main topics are shown at the top of the pages. (The shaded-out topics are included
on a different page.)To move from one screen to another on the same level, press the <
and > buttons on the front panel. To move deeper into a topic, press the SELECT
button. To return to previous levels, press the CANCEL button.
Refer to Section 3 to interpret the screens.
MS-4900, Rev. A
C-1
Glossary
access network
the various routes by which data feeds originating in diverse locations come
into the network control center for uplinking to WavePhore networks
acquisition
the process by which the demodulator adjusts frequency, phase, gain, and
code-word synchronization to match that of the incoming carrier and lock to
it.
AGC
Automatic Gain Control. Relative reading of signal strength.
aggregate data
stream
The non-partitioned data uplinked from the network control center and
received in the IDR V1000. The aggregate data stream must be
disassembled, reordered, and usually processed before it can be output to an
external device.
asynchronous
also async. Data transmission mode that transmits one character at a time,
does not use a data clock, and must supply its own start and stop bits and its
own error detection pattern.
AUI
Attachment Unit Interface. A serial connection available only on the IDR
V1000 Ethernet model
BPSK
Bi-Phase Shift Keying. A method of modulation in which zeroes and ones are
represented by two phases of the RF carrier signal which differ by 180
degrees.
CRC
Cyclic Redundancy Check. An effective error detection technique
carrier ID
CID. A WavePhore-assigned number from 0 to 254 that identifies a specific
carrier to the IDR V1000.
cluster
a group of receivers that operates with the same set of characteristics,
enabling them to be simultaneously downloaded with network changes.
codec
coder-decoder
control channel
also network control channel. Information sent by the network control center
to a receiver to control its configuration; not intended for output processing.
data feeds
Transmittal of information from an originating source or from the network
control center.
demodulator
The component in the IDR V1000 that converts an incoming analog signal to
digital data for further processing.
MS-4900, Rev. A
G-1
Glossary
downlink
Information transmitted to an earth station from a satellite.
download
Control information transmitted from a network control center to a receiver
EEPROM
Electronic Eraseable Programmable Read-Only Memory.
Ethernet
A popular local area network (LAN) implementation.
FEC
Forward Error Correction.
head-end
The network control center, or the location that assembled and transmitted
the received data stream
HDLC
High-Level Data Link Control. A version of synchronous protocol.
IDR
Intelligent Data Receiver. A WavePhore product trademark.
L-band
Used to denote LNB output and IDR V1000 input frequency range, which is
between 950 mHz and 1,525 mHz.
LCD
Liquid Crystal Display. Used as the mechanism displaying the front panel
screens.
LNB
Low Noise Block Converter. The device attached to the satellite dish that
extracts a set of satellite carriers, lowers their frequency to the L-Band range,
and amplifies the signal to an appropriate input level for the tuner.
link blocks
Associated with stat mux data, the partition of the aggregate data stream that
contains packets. The link blocks are extracted by the time-division
demultiplexer and sent to the processor for “de-packetizing.”
lock
proper carrier is located and is being received and demodulated.
logical receivers
separate entities defined by software that function as distinct destinations for
incoming data. The IDR V1000 with a 4-port daughtercard can have four
logical receivers operating simultaneously within a single physical unit.
NMS
Network Management Services. A means of controlling and monitoring
operations at the network control center.
network control
center
NCC. The “head-end” or hub where data feeding in from multiple origination
points is assembled, statistically-multiplexed, time-division multiplexed,
modulated, and prepared for uplinking to a satellite. The NCC would
typically notify receiver sites of network changes required at their site and
then download those changes.
G-2
MS-4900, Rev. A
Glossary
Node
mode of operation using a transport protocol that enables packets to be
individually read, error-checked, reassembled, and output as integral blocks
of information. The output blocks are packets of type “extract protocol.”
Used only with WavePhore proprietary software.
nonvolatile memory
portion of the memory that retains information even when power is turned
off; settings stored in nonvolatile memory do not have to be reissued after a
power interruption unless a change to an operating parameter is required.
PAD
Packet Assembler-Disassembler . A mode of operation using a transport
protocol that outputs data in the same format and order in which it was sent.
PSK
Phase Shift Keying. Form of modulation used to impress information onto an
RF carrier for transmission from one location to another
PVC
Permanent Virtual Circuit. A dedicated communications circuit that allows
for continuous data transmission. Contrast with TVC, that requires each
transmission session to be opened, then closed when the session ends.
packet
Contains data and processing information such as the source of the data, the
length of the message, and its destination. Packets must be statistically
demultiplexed in the IDR V1000 before the message can be processed and
output.
partition
Segment of an aggregate data stream. In the IDR V1000, the aggregate data
stream is extracted into four partitions: the transparent asynchronous or statmuxed data that is sent to the processor, two transparent synchronous data
streams that are sent to Serial 4 and 5, and a network control channel that
contains only internally-used control commands.
propagation delay
the delay from the time a signal is sent until it is received.
QPSK
Quadrature Phase Shift Keying. Phase shift keying in which four discrete
phases of the RF carrier are used, each differing by 90 degrees from the next.
Each set of four phases represent two consecutive bits of the data stream.
Reed-Solomon
codec
block-oriented coder/decoder hardware that is applied on top of standard
Viterbi coding to correct most data errors that are not detected by the other
coding systems; significantly reduces the bit error rate. (Available in IDR
V1000 model 1216 systems)
RS-232
an Electronic Industries Association (EIA) standard for low-speed,
asynchronous and synchronous transmission
RS-422
an EIA standard for synchronous transmission
RF
Radio Frequency
SCPC
Single Channel Per Carrier.
MS-4900, Rev. A
G-3
Glossary
session
A communication circuit selected for use by the IDR V1000 when configured
for stat demux operation. Active sessions in the screen display describe
current stat mux activity
statistical
multiplexer
also stat mux. A technique of time-sharing on a data stream that allows for
more efficient usage of the carrying capacity. To accomplish this, additional
information must be added to each data packet to identify its characteristics
and its routing. Extracting this information at the receiver end requires
analogous demultiplexing.
In the IDR V1000, the function that occurs is demultiplexing, or stat demux
subscription
services
the news or information products that end users pay to receive
superscreen
One of the primary Show Status screens that identifies current activity in the
receiver, including carrier lock and modulation status, incoming data packets,
and miscellaneous error correction reports. Most of the superscreen
indications are relevant only to stat mux operation.
synchronous
also sync. Data transmission mode that establishes a clocking mechanism
between sender and receiver to identify the data. Synchronous data is
typically transmitted in blocks, rather than the character-at-a-time method of
asynchronous transmission.
TVC
Temporary Virtual Circuit. A communication link established only for the
duration of the transmission. Contrast with PVC, which is an open, dedicated
circuit used for continuous transmission.
time-division
multiplexer
a component that divides transmission time into separate time slices allocated
for each sending source.
In the IDR V1000, incoming data is time-division demultiplexed to deliver
selected partitions of the aggregate data stream for further processing or for
direct output to a synchronous port.
transparent
asynchronous
TA. Asynchronous transmission mode that is output through Serial 1 on the
IDR V1000 without stat mux processing in the receiver.
transparent
synchronous
Synchronous transmission mode that is output through Serial 4 or 5 on the
IDR V1000 without requiring additional CPU processing in the receiver.
uplink
Transmitting data from an earth station to a satellite.
upload
Transferring data from a computer to the IDR V1000. In WavePhore
operation, uploading usually refers to setting or modifying the configuration
parameters of an IDR V1000 at the factory.
G-4
MS-4900, Rev. A
Glossary
volatile memory
Segment of processor memory that is lost when power is turned off or
interrupted. In the IDR V1000, certain commands or settings, such as those
used to perform a real-time function or enter a test mode, are temporarily
stored in volatile memory. (Configuration parameters are not volatile; they
remain in memory even if receiver power is turned off.)
Viterbi
a standard method of forward error correction decoding that is applied by the
IDR V1000 to all data received.
MS-4900, Rev. A
G-5
Glossary
G-6
MS-4900, Rev. A
Section1 . Index
A
F
AGC
troubleshooting signal strength, 4-3
verifying after installation, 2-3
active sessions
fields, 4-5
Automatic Gain Control See AGC
flow control
described, 5-11
front panel
described, 3-1
using, 3-1
front panel buttons, 3-1
B
I
buffering
described, 5-11
identification screen, 3-2
IDR V1000
basic unit,
defined, 1-1
output ports, 5-10
components of, 5-8
family of receivers, 1-1
functional overview, 5-4
processor, 5-10
stat demux, 5-10
technical specifications, A-1
installing the IDR
pre-installation conditions, 2-1
verifying lock on carrier, 2-3
IP addresses
specifying setup, 4-11
C
cables
coaxial cable specifications, 5-9
connecting, 2-2
troubleshooting, 4-2, 4-3
checking AGC. 2-3
checking Eb/No, 2-3
D
data protocols
transparent asynchronous, 5-4
transparent synchronous, 5-4
data stream
aggregate, 5-2
error correcting, 5-9
time-division demultiplexing, 5-10
tuner picking up, 5-9
daughtercards
4-port, specifications, A-2
Ethernet, specifications, A-2
demodulator screen
checking current tuning status on,4-3
fields, 4-3
download,
clear password, 3-5
post-installation settings, 2-4
L
LNB, 5-9
Logoff screen, 3-7
logical receivers
activity monitored, 4-6
flow control, 4-7
status fields, 4-7
view setup, 4-7
E
Ethernet Screens
viewing setup, 4-10
MS-4900, Rev. A
I-1
Index
M
S
main topics
illustrated, 3-1
Device Restart, 3-6
Diagnostics, 4-9
Logoff, 3-7
Messages, 3-2
Set Features, 3-6, 4-12
Show Status, 3-3, 4-2, 4-6
Specify Setup, 3-4
View Setup, 3-3, 4-7, 4-8
viewing, 3-1
maintaining the equipment
check alignment, 2-4
remove snow, 2-4
memory utilization, 4-5 See also buffering
messages
main topic, 3-2
system and user, 3-2
safety issues, 1-4
Set Features
set local time, 3-6
Show Status
logical receiver activity, 3-3
main topic, 3-3
network control channel activity, 3-3
summary screen. See memory utilization
superscreen. See memory utilization
Signal quality
using superscreen to check, 4-2
Specify Setup
enabling or disabling screen lock, 3-5
enabling or disabling screen login, 3-4
specifying a password, 3-5
statistical demultiplexor
described, 5-10
statistically-multiplexed data
described, 5-5
different interpretations of screen displays, 4-1
packets, 5-5
Superscreen
stat mux fields, 4-2
system messages
interpreting, 4-12
N
Network Control Center
input to and output from, 5-2
network overview
components of, 5-1
node mode
described, 5-7
O
output ports
available configurations of, 5-6
Serial 4/5 usage, 5-6, 5-10
troubleshooting, 4-6
transparent asynch fields, 4-3
P
PAD mode
described, 5-7
with PVC sessions, 5-7
with TVC sessions, 5-7
PVCs
described, 5-6
R
T
TDD
described, 5-10
fields, 4-4
TDD screen
carrier ID, 4-4
checking control channel information on, 4-4
cluster ID, 4-4
TVCs
described, 5-6
time-division demultiplexing. See TDD
troubleshooting
checking signal quality, 4-2
screens related to problem indications, 4-1
U
UART chip, 5-10
Reed-Solomon forward error correction technique,
5-9
I-2
MS-4900, Rev. A