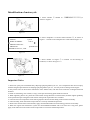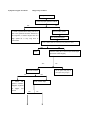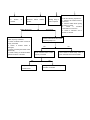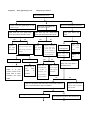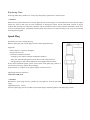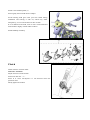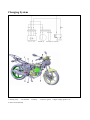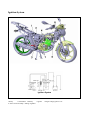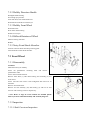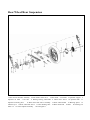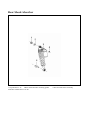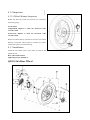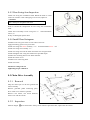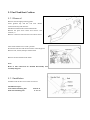
1
Worx 125
Service Manual
Holtvej 8-10, Høruphav, 6470 Sydals
Telefon: +45 73 15 11 00
Fax: +45 73 15 11 01
E-mail: [email protected] · www.scanmi.dk
CVR: 27 73 31 07
April 2013
Two-wheel Motorcycle QJ125-26A
Instruction and Maintenance Manual
ZHEJIANG QIANJIANG MOTORCYCLE CO., LTD.
Contents
Contents .......................................................................................................................................................................... 2
Preface ............................................................................................................................................................................ 5
Preparatory Data ..................................................................................................................................................... 6
Inspection/Adjustment .......................................................................................................................................... 43
Inspection and Maintenance of Electric System ........................................................................................................... 57
I
Battery/Charging System ...................................................................................................................................... 59
1.1 Preparatory Data ............................................................................................................................................. 59
1.2 Fault Diagnosis ............................................................................................................................................... 60
1.3 Storage Battery ............................................................................................................................................... 61
1.4 Charging System ............................................................................................................................................. 62
1.5 Voltage-current Regulator ............................................................................................................................... 62
1.6 Magneto Charging Coil .................................................................................................................................. 63
1.7 Magneto Removal ........................................................................................................................................... 64
II Ignition System ..................................................................................................................................................... 67
2.1 Preparatory Data ............................................................................................................................................. 67
2.2 Fault Diagnosis ............................................................................................................................................... 68
2.3 Ignition System Inspection ............................................................................................................................. 69
2.4 CDI Assembly................................................................................................................................................. 70
2.5 Ignition Coil .................................................................................................................................................... 71
2.6 Trigger ............................................................................................................................................................ 72
III Starting System ..................................................................................................................................................... 74
3.1 Preparatory Data ............................................................................................................................................. 74
3.2 Fault Diagnosis ............................................................................................................................................... 75
3.3 Starting Motor ................................................................................................................................................. 75
3.4 Starting Relay ................................................................................................................................................. 77
IV Bulbs/Switches/Instruments ................................................................................................................................. 79
4.1 Preparatory Data ............................................................................................................................................. 79
4.2 Fault Diagnosis ............................................................................................................................................... 79
4.3 Headlamp Bulb Replacement ......................................................................................................................... 80
4.5 Taillamp Bulb Replacement............................................................................................................................ 81
4.6 Instrument ....................................................................................................................................................... 81
4.7 Ignition Switch and Steering Lock ................................................................................................................. 82
4.8 Electric Horn................................................................................................................................................... 82
4.9 Handle Switch................................................................................................................................................. 82
Chassis Inspection and Maintenance ............................................................................................................................ 84
V Braking System .................................................................................................................................................... 87
5.1 Maintenance Instruction ................................................................................................................................. 87
5.2 Fault Diagnosis ............................................................................................................................................... 87
5.3 Front Hydraulic Brake .................................................................................................................................... 88
5.4 Rear Drum Brake ............................................................................................................................................ 90
VI Motorcycle Exterior .............................................................................................................................................. 93
VII Front Wheel/Front Suspension ............................................................................................................................. 97
7.1 Preparatory Data ............................................................................................................................................. 97
7.2 Fault Diagnosis ............................................................................................................................................... 97
7.3 Front Wheel .................................................................................................................................................... 98
7.4 Steering Handle ............................................................................................................................................ 100
7.5 Front Fork ..................................................................................................................................................... 101
VIII Rear Wheel/Rear Suspension ............................................................................................................................. 107
8.1 Preparatory Data ........................................................................................................................................... 107
8.2 Fault Diagnosis ............................................................................................................................................. 107
8.3 Rear Wheel ................................................................................................................................................... 108
8.4 Rear Shock Absorber/Rear Swing Arm ........................................................................................................ 110
8.4.1 Remove Rear Shock Absorber ................................................................................................................... 110
8.5 Chain Drive Assembly ...................................................................................................................................111
IX Fuel Tank/Seat Cushion .......................................................................................................................................116
9.1 Preparatory Data ........................................................................................................................................... 116
9.2 Fault Diagnosis ............................................................................................................................................. 116
9.3 Fuel Tank/Seat Cushion ................................................................................................................................ 117
Engine Inspection and Maintenance ............................................................................................................................118
X Lubricating System ............................................................................................................................................. 120
10.1 Preparatory Data ......................................................................................................................................... 120
10.2 Fault Diagnosis ........................................................................................................................................... 120
10.3 Oil Pump ..................................................................................................................................................... 121
XI Carburetor ........................................................................................................................................................... 125
11.1 Preparatory Data ......................................................................................................................................... 125
11.2 Fault Diagnosis ........................................................................................................................................... 125
11.3 Removal of Carburetor ............................................................................................................................... 126
11.4 Installation .................................................................................................................................................. 127
XII Cylinder Head/Valve........................................................................................................................................... 129
12.1 Preparatory Data ......................................................................................................................................... 129
12.2 Fault Diagnosis ........................................................................................................................................... 130
12.3 Cylinder Head ............................................................................................................................................. 130
12.4 Valve Inspection.......................................................................................................................................... 132
12.5 Valve Guide Replacement ........................................................................................................................... 134
12.6 Valve Race Fixing and Adjustment ............................................................................................................. 135
12.7 Cylinder Head Installation .......................................................................................................................... 136
XIII Cylinder Block and Piston .................................................................................................................................. 138
13.1 Preparatory Data ......................................................................................................................................... 138
13.2 Fault Diagnosis ........................................................................................................................................... 139
13.3 Cylinder Block ............................................................................................................................................ 139
13.4 Piston .......................................................................................................................................................... 140
13.5 Install Cylinder ........................................................................................................................................... 143
XIV Clutch ................................................................................................................................................................. 145
14.1 Preparatory Data ......................................................................................................................................... 145
14.2 Fault Diagnosis ........................................................................................................................................... 145
14.3 Clutch.......................................................................................................................................................... 146
14.4 Disassemble Main Shaft and Countershaft ................................................................................................. 148
XV Reduction Gear ................................................................................................................................................... 151
15.1 Preparatory Data ......................................................................................................................................... 151
15.2 Fault Diagnosis ........................................................................................................................................... 151
15.3 Gearshift Mechanism .................................................................................................................................. 152
15.4 Installation .................................................................................................................................................. 154
XVI Crankcase ........................................................................................................................................................... 156
16.1 Preparatory Data ......................................................................................................................................... 156
16.2 Fault Diagnosis ........................................................................................................................................... 156
16.3 Crankcase.................................................................................................................................................... 157
16.4 Crankshaft Connecting Rod Assembly ....................................................................................................... 160
Exhaust System Inspection and Maintenance............................................................................................................. 161
XVII Emission Control System .................................................................................................................................. 162
17.1 Emission Control System Guarantee .......................................................................................................... 162
17.2 Periodical Maintenance Instructions ........................................................................................................... 163
17.3 Emission Control System Mechanical Functions ....................................................................................... 163
17.4 Solutions to Idle Exhaust Exceeding Specified Value (4-stroke)................................................................ 164
Preface
The Instruction and Maintenance Manual contains an introductory description of
maintenance on QJ 125-26A motorcycle.
Preparatory data include attentions that shall be paid on all the maintenance operations
in the Instruction and Maintenance Manual. Please read the manual carefully before
operation.
Inspection and adjustment contains main aspects for inspection and adjustment, safety
of the vehicle, performance and maintenance of each component. This shall be started
from the time of periodical inspection.
The parts following Chapter One demonstrate the main point of disassembly,
installation and check of electrics parts, finished vehicle, engine and other components.
System diagrams, breakdown drawings, fault diagnosis, maintenance and other
explanatory contents are presented before each part.
Note:
For any pattern and structure change of the motorcycle, or any difference between the
product and pictures, drawings and instructions in the manual, the product shall prevail.
The product is subject to changes without prior personal notice.
ZHEJIANG QIANJIANG MOTORCYCLE CO., LTD.
Preparatory Data
General Safety
Maintenance Rules
Specification Table
Fault Diagnosis
General Safety
Carbon monoxide (CO)
When it is necessary to start the engine, please make sure the operation area is well ventilated. Never run the engine
in an enclosed place.
Attention
Gas exhausted from the motorcycle contains harmful carbon monoxide, which may lead to loss of
consciousness and death.
It is necessary to run the engine in an open area. To run the engine in an enclosed site, ventilation system shall be
used.
Gasoline
Operate in well-ventilated site. No fire or smoking is allowed in operation site and gasoline storage place.
Storage Battery
Battery shall be away from spark, fire and smoking places since it may emit explosive gases. Keep it in
well-ventilated condition while charging.
Battery has sulphuric acid (electrolyte) in it, which will cause burns when it touches skin or eyes. Please wear
protective clothing and mask.
-- If the electrolyte splashes to skin, please flush it with water immediately.
-- If the electrolyte gets into eyes, flush immediately with water for over 15 minutes and call physician.
Electrolyte is poisonous. If swallow by mistake, please drink plenty of water, milk and milk of magnesia (a kind of
laxative antacid) or vegetable oil and call physician. Keep it out of reach of Children.
Maintenance Rules
While repairing and servicing, use tools of metric system as possible. Incorrect tools may damage the motorcycle.
Before taking down or opening protecting plate for repair work, please clean the dirt on the external surfaces of
components or combination parts and prevent the dirt from falling into engine, chassis or braking system
After disassembly and before measuring friction, please clean the
components and blow them with compressed air.
Plastic parts may age and deteriorate, which are apt to be damaged by
solvent or oil. Check before re-installation and replace if necessary.
To loose component with many assembling units, it shall start from
external to internal and loosen smaller assemblies first. The
complicated assemblies such as transmission case shall be put in
proper assembling order for easy assembly in the future.
Pay special attention to the key fitting position before disassembly.
The components that are not used any more shall be replaced on time
before disassembly.
Length of bolts and screws are different for assembly components and protecting plates. They shall be installed at
correct positions. If confused, just put the bolt in the hole and see if it matches.
Fill lubricating grease into the groove during oil seal installation.
Check if the oil seal is smooth and if there is any damage to it.
Installation of rubber hose (fuel, vacuum, or coolant): insert its end
into bottom of connector so that there is enough room for the hose
clamp to grip the connector. Install the rubber or plastic dust cover
back to its originally designed position
Disassembly of ball bearing: use a tool to push against one or two
(internal and external) bearing races. If the force works only on one
bearing race (whatever internal or external), it may be damaged when
the bearing is disassembled, in which case, it must be replaced
Slack cable implies potential safety hazard on electrics. Check
the next cable when the cable is clamped to ensure electric safety;
Cable clamp shall not be bent towards solder joint;
Tie the cable at appointed position;
Do not lay the cable at the end of frame or at the closed angle;
Do not lay the cable at the end of a bolt or screw;
Wiring of cable shall be away from heat source or places where
cable may be clipped while moving;
Prevent the cable from being pulled too tightly or slacking too
much when the cable is wired along the handle pipe. The cable
shall not be affected by any neighbored components at any
turning position;
The cable shall be wired smoothly and shall not be knotted or
twisted;
Check if the sheath of connector is damaged and if the connector
is over stretched before butt joint connection;
If cable runs around the closed angle or the corner, please protect
it with tape or hose;
Tie the cable with adhesive tape reliably when it is repaired;
The controlling cable shall not be bent or twisted. Broken
controlling cable will result in non-flexible control.
Identification of motorcycle
1. Frame number ① labeled as: *LBBJ8300?????????*,,as
shown in Figure 1-1.
Figure 1-1
MODEL
QJ150
DISPLACEMENT
150CC
PRODUCTION D.T.
ZHEJIANG
QIANJIANG
MOTORCYCLE CO., LTD
2. Frame nameplate is riveted at frame Position ②, as shown in
Figure 1-1. Words on the nameplate are as described in Figure 1-2.
Figure 1-2
3. Serial number of engine ① is marked on the housing of
crankcase, as shown in Figure 1-3.
Figure 1-3
Important Notice
1. Please use spare parts manufactured by Zhejiang Qianjiang Motorcycle Co., Ltd. Components that cannot comply
with the designed specifications of Zhejiang Qianjiang Motorcycle Co., Ltd. may result in damage of the engine.
2. Only metric tools can be used for maintenance work. Metric bolts, nuts and screws cannot be exchanged with inch
fasteners.
3. While re-assembling, new washers, O rings, cotter pins and locking plates shall be renewed.
4. While tightening bolt or nut, please first fasten bolts of large-diameter or internal bolts; and then tighten gradually
to the specified torque in diagonal order. Those with special requirements are excluded.
5. Clean the removed components with cleaning liquid. Lubricate all the sliding surfaces before assembly.
6. After assembly, check that all the components are correctly installed and operated.
7. Remove dirt and oil before measurement; apply recommended lubricant at lubricating positions at assembly.
8. When the engine and transmission system are disassembled/assembled and to be stored for a long time, please
apply some lubricant on the surface of the components to avoid rust and dust deposition.
Special Tools
Special tools are known as specially designed tools used at particular places for assembly or disassembly of certain
components on a motorcycle. Suitable special tools are essential for complete and accurate adjusting and
assembling work. Use of special tools can realize safe, reliable and quick disassembly or assembly of components,
as well as working efficiency improvement and labor saving.
1.Tools used for engine overhaul
Specially designed tools are required for smooth assembly and disassembly of some components on the engine.
Special tools and pictures for engine component assembly and disassembly are listed in Table 1-1 and Table 1-2.
Table 1-1
Name
Remarks
Special socket wrench
Used for disassembly/assembly of flywheel bolt, Figure 1-3
Clutch holder
Figure 1-4
Flywheel extractor
Figure 1-5
Feeler gauge
Figure 1-6
Bearing puller
Figure 1-7
Bearing installer
Figure 1-8
Oil seal remover
Figure 1-9
Puller handle
Figure 1-10
Piston pin puller
Figure 1-11
Piston ring pliers
Figure 1-12
Spark plug socket wrench
Figure 1-13
Clutch thickness measurement gauge
Cylinder bore tester
Dial gauge
Dial gauge, V-block
Micrometer
Valve guide remover
Valve guide installer
Valve clearance adjuster
Valve spring remover
Valve guide reamer
Crankcase remover
Figure 1-14
Figure 1-15
Measuring inner diameter of piston pin,Figure 1-16
Measuring bending of valve stem, Figure 1-17
Measuring OD of valve stem, Figure 1-18
Figure 1-19
Figure 1-20
Figure 1-21
Figure 1-22
Figure 1-23
Figure 1-24
Continued Table 1-2
Figure 1-3
Figure 1-4
Figure 1-5
Figure 1-6
Figure 1-7
Figure 1-8
Figure 1-9
Figure 1-10
① Handle
Figure 1-11
Figure 1-12
① Pliers
② Piston
Figure 1-13
Figure 1-14
Figure 1-15
Figure 1-16
Figure 1-17
Figure 1-18
Figure 1-19
Figure 1-20
Figure 1-21
Figure 1-22
Figure 1-23
Figure 1-24
2.Tools used for chassis overhaul
Common and special tools, as well as their pictures for chassis component assembly and disassembly are listed in
Table 1-25 and Table 1-26.
Table 1-25
Name
Remarks
Torque wrench
Figure 1-27
Allen wrench
Figure 1-28
Socket wrench
Figure 1-29
Micrometer
Figure 1-30
Magnetic stand, V-block
Figure 1-31
Dial gauge
Figure 1-32
Vernier caliper
Figure 1-33
Spring clamp ring pliers
Figure 1-34
Hammer screwdriver
Figure 1-35
Front fork oil seal installer
Figure 1-36
Front fork seal driver
Figure 1-37
Steering nut wrench
Figure 1-38
(1)General tools used for chassis overhaul
Continued Table 1-26
Figure 1-27
Figure 1-28
Figure 1-29
Figure 1-30
Figure 1-31
Figure 1-32
Figure 1-33
Figure 1-34
Figure 1-35
Figure 1-36
(2)Special tools for chassis overhaul: Front fork seal driver
Figure 1-37
(3)Steering nut wrench
Figure 1-38
3.Tools used for electrical components
Special tools and their pictures for electrical component measurement are listed in Table 1-39 and Table 1-40.
Table 1-39
Name
Remarks
Multimeter
Figure 1-41
Ignition tester
Figure 1-42
Continued Table 1-40
Figure 1-41
Figure 1-42
Specifications (QJ125-26A)
Model
QJ125-26A
Engine type
QJ157FMI-2B
90#
or
higher
unleaded gasoline
2040mm
Fuel type
Overall Width
780mm
Number
cylinders
Overall height
1,050mm
Bore*stroke
57.0×48.0
1,270mm
Total
displacement
125cc
Starting mode
Electric
Cooling mode
Air cooled
Wheelbase
Front
shaft
Rear
shaft
Weight (kg)
(Dry weight)
58
69
Total
Tyre specification
Engine
Overall Length
127
Front
tubeless
tyre
Rear
tubeless
tyre
of
1
Lubricating
mode
Force-feed and splash
lubrication
Air cleaner
Dry
90/90-17
110/80-17
Wet multi-plate
friction type
16±0.5L
Five-speed left foot
control
Carburetor type
PD26JS
Transmission
Chain drive
Idle speed-rpm
1400±100rpm/min
Battery
capacity/type
12V dry-charged type
Max. torque
9.2N·m/7000rpm
Max. power
8.2kW/9000rpm
Compression
ratio
10.6 :1
Peak speed
100km/h
Drive Train
Gear shift
pattern
Max.
load
magneto
Electrical
Spark plug
120W
B7RC
plug
Ignition type
0.6-0.7mm
TCI ignition
Braking system
Spark
clearance
Performance
Fuel tank
capacity
Clutch type
Diameter of
front brake
disc
Diameter of
rear brake
drum
φ260mm
φ130mm
Fault Diagnosis
Symptom: Engine will not start or is hard to start
Diagnosis procedures
Engine will not start or is hard to start
Check ignition system
Remove the spark plug and check if electrodes of the plus are connected by carbon.
No
Yes
Perform spark-over test
Clean deposited carbon
Spark is weak between electrodes or no spark at all.
Strong blue or violet spark leaps between electrodes
Screw off spark plug cap, perform high-voltage wire spark over test
Use an ignition timing lamp to check ignition timing of engine
No
Strong blue spark leaps
Weak or no spark
Check spark plug and cap
Yes
1. Check CDI igniter 2.
Loosen drain screw of
Check
magneto
carburetor and check
flywheel or trigger coil
if there is oil flowing
looses.
out from overflow pipe
if
Yes
Check ignition
Check
if
Check if wires in
power
ignition coil is
the ignition system
supply.
shorted
are
or
broken.
shorted
or
Check
if
Check
CDI igniter
pressure
fails.
compression
in
the
Non-contact magneto ignition system
Compression
Compression
pressure
1. Check electric quantity
1. Check if ignition
pressure
of battery; 2.Check if
power supply coil is
the
in
cylinder
the
broken
or
circuit
is
shortened or broken; 2.
shorted;
3
Check if trigger coil is
Check if trigger coil is
shorted or broken.
shorted or broken.
Yes
No
in
cylinder
is low.
low-voltage
Check oil in
the fuel tank.
cylinder.
broken.
Non-contact battery ignition system
No
Refuel
is normal.
gasoline
1.
Remove
spark
plug
and check.
Check
leakage
at
1. Check if breather on
external connection parts
the fuel tank cap is
of engine; 2.Check valve
clogged; 2. Check if
timing;
fuel
3.
Check
filter
and
fuel
tightness between valve
switch are clogged; 3.
and valve seat; 4. Check
Check if fuel switch
if valve clearance is too
works
small; 5.Check if piston
Check if oil intake of
ring is stuck inside the
carburetor is clogged;
ring groove or of less
5. Check if carburetor
elasticity; 6. Check wear
float is too high.
normally;
4.
and tear of piston ring
and cylinder.
Electrodes of spark plug are dry.
Electrodes of spark plug are wet.
Check overflow of carburetor
Yes
No
1. Check if there is
Check if air filter
foreign substance
is clogged.
between needle valve
and valve seat of
carburetor float and it
cannot be closed; 2.
Drop a little gasoline into the cylinder for a trial start.
Engine can
Engine stalls when it
continue to run
runs a very short
when it is started.
time.
Check if the conical
surface of needle valve of
carburetor float is worn
into a step form; 3. Check
if the float is broken; 4.
Check if float is too low.
Carburetor
Carburetor is
starter (i.e.
clogged inside or
cranking
float is too high.
enrichment
system) fails.
Symptom: Engine Overheats
Diagnosis procedures
Engine Overheats
Check improper operation method
Yes
No
1. Check if gasoline brand being used is too
Check cooling system
low or the gasoline has been stored for a
too long time; 2. Check if engine runs at a
Air cooling the engine
high speed for a very long time or
overloaded
Check if radiator plates are covered by mud, greasy oil or sand,
Yes
Clean
No
Check if cooling fan or wind scooper is damaged
(forced air cooled engine)
Yes
Check and solve it
No
Use an ignition timing lamp to
check ignition timing of engine
No.
1.
Check
Yes
CDI
Check if clutch slips.
igniter. 2. Check if
magneto flywheel
or
trigger
looses.
coil
Yes
No
Clutch slips
Remove the spark plug and check
color of skirt section of insulating part
and
Handle it according to
other
abnormalities
to
judge
mixture ratio of air/fuel.
Item 1.7.
Skirt section of insulating part is black and when the
Skirt section of insulating part is
Skirt section of insulating part is brown.
white and engine generates an
engine runs at middle or low speed, exhaust muffler gives
interval, carburetor has backfire
off black smoke or explodes, acceleration capability is
Mixture ratio of air/fuel is normal.
and engine power is not enough.
poor, idle speed is unstable and the engine is apt to stall;
but it runs normally at high speed.,
Air/fuel concentration is too high.
Check if exhaust of cylinder
Check
and exhaust muffler is clogged
system
lubricating
Air/fuel concentration is too low
due to carbon deposition.
1.
Check
if
air
cleaner
is
clogged; 2. Check if Carburetor
1.
starter (i.e. cranking enrichment
switch is perfect; 2.
system)
works
normally;
3.
2-stroke
Check if float of carburetor is too
engine
lubricating system
4-stroke
engine
lubricating system
low.
Check
if
fuel
Check if carburetor
float is too high; 3.
Check if the jets and
channels
1. Check if there is
1. Check if there is enough
carburetor
engine oil in the oil
engine oil in the crankcase;
clogged.
tank; 2. Check if
2. Check if viscosity of
engine
pump
engine oil in the crankcase
works normally; 3.
is too low or the oil is badly
Check
contaminated; 3.Check if
oil
if
delivery
pipe is clogged.
engine oil filter is clogged;
4. Check if engine oil pump
works normal; 5. Check if
lubricating pipe is clogged.
in
the
are
Symptom: Engine lacks power
Diagnosis procedures
Engine lacks power
Lift it with main stand to have the wheels off the ground. Rotate wheels by hands.
Wheels rotate freely.
Wheels rotate inflexibly.
Check tire pressure
1. Check braking drag; 2. Check if
bearing of wheels are over worn or
injured; 3. Check if the middle spacers in
Air pressure too low
the hub are missed or short.
Air pressure normal
Check if valve core leaks
Remove spark plug and block the screw hole of spark plug with a
or tyre is broken.
finger. Press starter button or kick starter pedal.
Finger can feel strong air blasting out
Finger cannot feel strong air blasting out.
and meantime make a pitpat sound
Compression pressure in the cylinder is not enough.
Compression pressure in the cylinder is normal.
1. Check leakage at external
Start engine and accelerate gradually and
connection
observe variation of engine RPM.
2.Check valve timing; 3. Check if
parts
of
engine;
valve clearance is too small; 4.
Check tightness between valve
and valve seat; 5.Check if piston
Engine RPM rises as accelerator enlarges
Engine RPM does not increase as accelerator enlarges
ring is broken or stuck inside the
ring groove or of less elasticity; 6.
1.
Check
if
clutch
slips;
2.
Check
if
transmission belt is excessively worn; 3.
Check if the centrifugal roller of driving wheel
is excessively worn; 4. Check if conical
surfaces of driving wheel and mobile friction
wheel is excessively worn or worn to groove;
5. Check if conical surface of driven wheel
and mobile driven wheel are excessively worn
or worn to groove; 6. Check if raceway on the
inner end face of friction wheel is excessively
worn or pitted due to crush.
Use an ignition timing lamp to check
Check wear and tear of piston ring
ignition timing of engine
and cylinder.
Yes
No
1. Check if fuel supply system is smooth;
1.
2. Check if carburetor, air cleaner and
igniter. 2. Check if
exhaust muffler are clogged; 3. Check if
magneto flywheel
vacuum diaphragm of plunger valve on
or
carburetor is cracked or broken; 4. Check
looses.
if height of carburetor float is proper.
Check
trigger
CDI
coil
Symptom: Poor idle speed of engine
Diagnosis procedures
Poor idle speed
Engine has no idle speed.
Check compression pressure in cylinder
Higher idle speed
Pull throttle valve of carburetor by hand
Use an ignition timing lamp to
and see if it is completely closed.
check ignition timing of engine
Yes
Insufficient compression
Y
No
N
Compression pressure
pressure in cylinder
in cylinder is normal.
Check
Check
if
throttle control
cable can pull
flexibly in the
cable jacket
and if throttle
spring is too
soft
if
idle jet is
1. Check leakage
at external
connection parts
of engine; 2.Check
valve timing; 3.
Check if valve
clearance is too
small; 4. Check
tightness between
valve and valve
seat; 5.Check if
piston ring is
broken or stuck
inside the ring
groove or of less
elasticity; 6. Check
wear and tear of
piston ring and
cylinder.
Re-adjust carburetor
idle speed.
too big.
Engine has no idle
Engine has idle speed
after adjustment.
of
carburetor
throttle
speed
Check
if
clearance
1. Check CDI
igniter. 2. Check
of
electrodes
if
in
flywheel
spark
plug is too
small.
magneto
trigger
or
Yes
No
Adjust electrode
Check
clearance.
mixture
Check if carburetor idle
jet, idle oil path and air
of mixed gas.
No
Yes
Check if float is too high.
standard height.
ratio
path are clogged
adjusted.
Clean and dredge.
No
to
coil
looses.
after
adjusting
screw is improperly
float
or
adjustment
Air adjusting screw
Yes
Adjust
Unsteady idle speed
1. Check if carburetor insulator is cracked; 2. Check
if connecting and fixation nut on carburetor looses; 3.
Check if negative pressure hose on fuel switch is
broken; 4. Check if leaf valve leaks air.
Symptom: Too much fuel consumption by the engine
Diagnosis procedures
Too much fuel consumption
Check operation method
Yes
No
Lift it by main stand, rotate wheels by hands
1. Check if motorcycle is driven
over speed or not at economical
speed or driven at low gear; 2.
1.
Check
Check if gasoline grade being
Wheels rotate freely.
Wheels rotate inflexibly.
braking
used is correct.
Check tire pressure
drag; 2. Check if
bearings of wheels
are over worn or
Air pressure too low
injured; 3. Check if
middle
spacers
Air pressure normal
in
the hub are missed
Gas up as specified.
or shorter.
Check if fuel tank, fuel switch, delivery pipe
or carburetor leaks oil.
Yes
No
Exclude as practical situations,
Mixture ratio of air/fuel is normal.
Check mixture ratio.
Air/fuel concentration is too high.
Check if idle speed of engine is too high.
Yes
No
Check and adjust
Use an ignition timing lamp to
carburetor.
check ignition timing of engine
Yes
Check if transmission belt
of cluth slips.
Air/fuel concentration is too low.
1. Check if air cleaner is
1. Check if carburetor
clogged; 2. Check if float
is clogged inside; 2.
of carburetor is too low;
Check if float is too
3. Check if main jet of
high.
carburetor is too big.
No
Check ignition system.
Symptom: Clutch slips
Diagnosis procedures
Clutch slips
Manually controlled wet multi-plate clutch slips
Automatic centrifugal dry type shoe clutch slips
Check if braking shoe of shoe-type clutch is contaminated by oil
Check if clearance of clutch handle
bar is within 10mm~20mm.
No
No
Yes
Check if throttle cable can pull
Re-adjust
flexibly in the cable jacket.
Check if braking shoe
Clean
is excessively worn.
dirt
No
No
Check if engine oil level in
replace
the crankcase is too low.
Yes
oil.
Yes
Yes
Check if contact area between
Replace
braking shoe and friction disc
whole
is less than 70%.
clutch shoe.
No
engine
greasy
Yes
Clean, lubricate or
Refill
Yes
No
Check if viscosity of engine oil in the
crankcase is too low or the oil is
badly contaminated
No
Repair
between braking shoe
replace
and friction disc is worn
shoe.
Replace
1. Check if adjusting screw for clutch
engine oil.
push rod is properly adjusted; 2. Check if
pinch bolt for clutch spring is loosing; 3.
Check if braking shoe of clutch is burnt or
excessively worn; 4. Check if elasticity of
clutch spring is enough; 5. Check if the
contact end face between driven hub,
pressure plate and braking shoe is over
worn. 6. Check if splines on clutch driven
and drive hubs are worn into zigzag form.
of
Yes
Check if contact area
terribly.
the
set
or
clutch
Symptom: 4-stroke engine exhaust muffler gives off blue-white smoke
Diagnosis procedures
4-stroke engine exhaust muffler gives off blue-white smoke
Check if engine oil level in the crankcase exceeds the upper limit line
Yes
No
Too much engine oil in the crankcase, bleed surplus oil
Start engine and run it at high speed; screw off
and decline oil level to upper limit line.
oil ruler and check if oil filler smokes.
No
Yes
Check if clearance between valve
1. Check if cylinder, piston or
and valve guide is too big.
piston ring is over worn; 2.
Check if elasticity of piston ring
Yes
No
is not enough or stuck in the ring
groove; 3. Check if openings of
Check if valve or valve guide is over worn.
Valve
oil
seal
piston ring are staggered with
is
each other.
damaged.
Symptom: Incomplete separation of clutch
Diagnosis procedures
Incomplete separation of clutch
Check if clearance of clutch handle bar is within
10mm-20mm.
No
Yes
Check if adjusting screw for clutch push rod is properly adjusted
Re-adjust
No
Yes
Check if elasticity of clutch spring is even.
Yes
Re-adjust
No
Check if splines on clutch active and drive hubs are worn into zigzag form
Replace the whole set of clutch
spring.
Yes
Repair or replace
No
1. Check if clutch driven plate is warping and distorted;
2. Check if separation cam shaft, separation push rod and other
components of clutch control mechanism are excessively worn.
Symptom: Difficult gearshift on transmission
Diagnosis procedures
Difficult gearshift on transmission
Start engine and check if idle is too high.
No
Yes
Re-adjust
Check if the operation is harmonious at gearshift.
Yes
No
Check if clutch is completely separated.
No
Improve operation method.
Yes
Check if gearshift box is distorted and shift lever is deformed or over worn.
No
1. Check if clearance of clutch handle bar is
within 10mm~20mm; 2. Check if elasticity of
Yes
clutch spring is even; 3. Check if splines on
clutch active and drive hubs are worn into
Replace
1. Check if groove of gearshift camshaft is
zigzag form; 4. Check if clutch driven plate is
over worn or injured; 2. Check if shift fork
warping
and
distorted;
5.
Check
if
hole is excessively worn; 3. Check if shift
components of clutch control mechanism are
fork is deformed; 4. Check if fork shaft is
excessively worn.
distorted or over worn.
Symptom: Drum-type brake fails
Diagnosis procedures
Drum-type brake fails.
Check if clearance of brake handle bar is within 10mm~20mm
or clearance of brake pedal within 20mm ~ 30mm range.
No
Yes
Re-adjust
Brake
rocker
arm
rotates
Separate cable of brake rocker arm from brake control cable. Move rocker arm by hands.
Rocker
Arrow on the indicating board
Arrow on the indicating board of cam does
freely but there is resistance
arm turns
of cam aims at or exceeds“▽”
not align to the“▽” mark on hub cap.
feeling from brake handle.
inflexibly
mark on hub cap.
1.Check if there is oil adhered to the
cable
Movable parts of
1. Check if crown face of brake cam
surface of brake shoe friction disc;
does not pull flexibly in
brake cam rusts or
is over worn; 2. Check if brake shoe
2.Check if contact area between
the jacket.
is stuck by foreign
friction disc is over worn; 3. Check if
braking shoe and friction disc
substances.
bore of brake hub is excessively
less than 70%
Brake
control
worn.
is
Symptom: Transmission jumps of gear
Diagnosis procedures
Transmission jumps of gear
Check if spring of position wheel is broken or of insufficient elasticity.
Yes
Replace
No
Disassemble crankcase and check if meshing depth of each gear meets requirement.
Enough meshing depth
Insufficient meshing depth
Check if meshing end of cam pawl on end face of meshing gear is worn or
Check if shift fork is over worn or distorted.
forms great roundness; and if corresponding gear end groove is worn or like a
horn mouth.
No
Yes
Yes
No
1. Check if fork hole and fork shaft are over
Replace
Check if spline gear of main shaft
and counter shaft, or spline
gear
Replace fork.
worn; 2. Check if matching clearance
between fork pin and cam groove of shift
groove of sliding gear is over
gear shaft is big. 3. Check if transmission is
worn.
correctly installed.
Symptom: Hydraulic disc brake fails
Diagnosis procedures
Hydraulic disc brake fails
Check brake liquid level in the liquid tank of main brake pump
Brake liquid level is lower than lower limit line of tank.
Refill brake liquid to
Brake liquid level is higher than lower limit line of tank.
If there is sponge-like feeling while operating brake handle.
the upper limit line of
tank,
meantime,
Yes
No
check if oil leaks at
brake caliper, brake
hose
and
connector.
hose
Check if brake shoe has been worn to the limit mark and brake disc is over worn.
Yes
No
Air
contained
in
the
hydraulic brake system.
Replace brake shoe
1. Check if piston surface of main brake pump and cylinder wall surface are
and brake disc.
over worn or injured; 2.Check if piston cup of main brake pump is damaged,
cracked or aged; 3. Check if sealing ring of brake caliper is damaged,
cracked or aged; 4.Check if piston surface of brake caliper and cylinder wall
surface are over worn or injured.
Symptom: Battery cannot charge
Diagnosis procedures
Battery cannot charge
Disconnect connectors of magneto lead wire tied to the cables of the whole motorcycle.
Measure with an Ohmmeter between out-put wires from charging coil
Resistance is less than standard.
Resistance meets the standard.
Resistance is infinitely great.
Connect connectors of magneto lead wire harness to the
Charging coil is shorted.
cables of the whole motorcycle; break off connectors of rectifier
or regulator to cables of the whole vehicle.
Charging
output
coil
wires
shorted.
Measure with an Ohmmeter on the resistance in the connectors
between output wires from charging coil, and check if the result
is in accordance with the resistance of the charging coil itself.
Yes
No
Set multimeter on 0V~20V DC voltage, measure the
Wire from magneto to rectifier or wires
voltage between lead wire terminal from connector to the
among rectification regulators are not well
battery (usually a red or red/white wire) and the ground.
connected or broken.
No voltage display
Wire
from
connector
battery is broken.
Voltage displays
to
Check with an Ohmmeter if rectifier or
rectification regulator fails.
or
its
are
Symptom: Battery runs down quickly
Diagnosis procedures
Battery runs down quickly
Check if braking lamp is always on.
Yes
No
Adjust or replace braking
Set ignition switch to “OFF” position, disconnect negative wire from battery, and then put
lamp switch.
negative probe of ammeter onto the negative pole terminal and positive probe on the
negative wire to check current leakage.
Leaking current is smaller than specified.
Leaking current is bigger than specified(usually
It shall be no more than 1mA.)
Check if charging coil of magneto is shorted.
Wire
from
rectifier
or
rectification
regulator or battery to ignition switch is
Yes
Replace charging coil
No
shorted.
1. Check if electrolyte in the battery is enough.
2. Check if density of electrolyte in the battery is
too low
3. Check if plates in the battery is vulcanized or
shorted.
Symptom: Starting motor does not run
Diagnosis procedures
Starter motor does not run.
Turn on ignition switch; press horn button or slide
turn signal lamp switch.
Electric horn does not sound or sound
Electric horn
sounds
weakly. Turn signal lamp is dim.
Turn signal lamp is bright.
loudly.
Battery is low or the wire terminal
Grasp brake handle bar (autoscooter), or shift
connected with battery is poorly
transmission into neutral, or grasp clutch handle
contacted.
bar, push starter button.
Push starter button and the “click” sound from
Push starter button and a “click” sound from
starter relay cannot be heard.
starter relay can be heard.
Disassemble the connector of starter relay from cables of
Use a screwdriver or a piece of thick wire to
the whole vehicle; connect the two hatching wires from
connect battery terminal on the starter relay with
relay coil to negative and positive terminals of battery with
starter relay terminal.
two pieces of wires.
After
connection,
the
starter motor does not
run either and no click
sound can be heard from
starter relay.
After
connection,
starter motor works.
After
short
circuit,
After
short
circuit,
starting motor runs
starting motor does not
normally
run.
Coil in starter coil
Check
wiring
is
electrical
starter
broken
or
shorted.
inside
Contact
control
Autoscooter
Grasp brake handle and check
if braking lamp is on.
Yes
Inner contact of brake lamp switch is
is poorly contacted
poor contacted or its wire is broken.
replace
starter button.
No
Check if starter button contact
Yes
or
1. Check if the carbon brush is
over worn;
2. Check if carbon brush spring
is broken or weak.
3.
Check
if
armature
commutator is over worn.
4. Check if armature coil is
broken or shorted.
burnt or injured.
Striding Motorcycle
Repair
make the following inspections:
starting relay is
system
1. Check if contact inside clutch
switch is poorly contacted;
2. Check if starter button contact is
poorly contacted;
3. Check if rectifier diode is
damaged;
4. Check if neutral gear switch works
abnormally;
5. Check if wiring of electrical starter
system is broken or shorted.
Disassemble starter motor and
of
No
Wiring of electrical starter system
is broken or shorted.
Symptom: Starting motor runs weakly
Diagnosis procedures
Starting motor runs weakly.
Turn on ignition switch; press horn button or slide
turn signal lamp switch.
Electric horn does not sound or sound
Electric horn
sounds loudly.
weakly.
Turn signal lamp is bright.
Battery is low or the lead wire
Check if the lead wire connector from starter relay
connector connected with battery is
to starter motor is poorly contacted.
badly contacted.
No
Yes
Remove the starter motor lead wire and battery lead wire
from starter relay, press starter button; when starter relay
gives a click sound, measure with an ohmmeter resistance
between battery terminal on the relay and starter motor
Check if starter button
contact
contacted.
terminal and check if it is on state.
Yes
Disassemble starter motor and make the
following inspections:
1. Check if the carbon brush is over worn;
2. Check if carbon brush spring is broken or
weak.
3. Check if armature commutator is over worn,
burnt, or injured, or contaminated.
No
Starter relay contact is
burnt or injured.
is
poorly
Symptom: All the lights are not on
Diagnosis procedures
All the lights are not on
AC power supplied lighting system
DC
power
supplied
lighting system
Separate conductors of lead wire bundle of magneto from the cables
of the whole vehicle. Check if there is power output from lighting coil
Press horn button or slide turn signal light.
of magneto with lamp test method.
Test lamp is not lit
Test lamp is lit.
Start
engine
and
Electric horn sounds loudly
Electric horn does not sound
and turn signal light is lit.
and turn signal light is not lit.
separate
Normal
connectors of rectification regulator
supply
from cables of the whole vehicle.
battery
Lights are lit.
Lights are not lit
power
from
Use a piece of wire to touch
quickly
positive
and
negative
terminal of battery to check spark.
No spark at touch
Spark at touch
Short circuit inside
Battery is out
1.
Check if fuse is burnt;
rectifier
of power.
2. Check wiring between
battery and ignition switch
Disassemble headlamp assembly
for short circuit and break
and check if the bulb is burnt.
3. Check if ignition switch is
broken or shorted.
Yes
No
Replace headlamp bulb and
Check if there is power output from power
check other bulbs one by one.
input wire of light switch by lamp test
Yes
Use a piece of wire to short circuit power line and
output line of lighting switch.
No
Wiring from magneto or ignition
switch to lighting switch is broken
or shorted.
Lamp is lit after short circuit.
Inner contact of lighting switch
is poorly contacted.
Lamp is still not lit after short circuit.
Wiring from lighting switch to lamp
is broken or shorted.
Symptom: Light bulb is burnt frequently
Diagnosis procedures
Light bulb is burnt frequently
Turn on ignition switch; press horn button
or slide turn signal lamp switch.
Electric horn does not sound or sound
Electric horn sounds loudly.
hoarse. Turn signal lamp is dim.
Turn signal lamp is bright.
1. Check if the connector to the battery is poorly
Separate conductors of rectification regulator from
contacted;
cables of the whole vehicle. Measure and check with
2. Check if electrolyte in the battery is not enough.
an Ohmmeter if wirings between lighting and
3. Check if density of electrolyte in the battery is
charging coil of magneto and regulator are broken.
too low; check if pole plates inside the battery are
vulcanized or broken.
No
Yes
Set multimeter on 0V~20V DC voltage, measure
Connect well the
voltage between the wire from connector to battery
broken wire.
terminal (usually a red or red/white line) and the
ground.
No voltage display
Wiring from connector to
battery is broken.
Voltage displays
Check if regulator malfunctions.
Symptom:
Headlamp is dim.
Diagnosis procedures
Headlamp is dim
AC power supplied lighting system
DC power supplied lighting system
Separate conductors of lead wire bundle of magnet from
Turn on ignition switch; press horn button
cables of the whole vehicle. Measure and check with an
or slide turn signal lamp switch.
ohmmeter if resistance between lead wire section output
from magneto lighting coil is smaller than the standard.
Yes
No
Electric horn sounds hoarse.
Lighting coil is
Start engine and limit its RPM. Separate
shorted.
Turn signal lamp is dim.
conductors of rectification regulator from the
cables of the whole vehicle. Check brightness of
light
Battery is low or the connection
position between ignition switch
and battery is badly contacted.
Light
recovers
after
Headlamp is still dim
separation.
after separation.
Electric
horn
sounds
loudly. Turn signal lamp
Stable
voltage
of
Check
if
charging
coil
rectification regulator is
magneto and wirings in the
too low.
charging system are shorted.
Yes
Check
problem.
and
solve
is bright.
of
No
Disassemble headlamp assembly and check if
the bulb glass black or yellowish-green.
No
Yes
Check if power of bulb in the lighting
system is up to the requirement.
Yes
1. Check if contacts in headlamp
switch and side-lamp switch are
poorly contacted;
2. Check if connectors and earth
wire are poorly contacted.
No
Replace bulb.
Replace the bulb.
Symptom:
Turn signal lamp is off.
Diagnosis procedures
Turn signal lamp is not on.
Some of the turn signal lamps on one
side is not on.
All the turn signal lamps are not on.
All the turn signal lamps on
one side are not on.
Take down the turn signal lamp
Take down the turn signal lamp
Press horn button and
cover and check if the bulb is burnt.
cover and check if the bulb is burnt.
check
Yes
No
Measure
Replace
turn signal
voltage
Yes
Electric
between
power line contact of lamp
holder and the ground with a
lamp bulb.
No
Replace
Separate
turn signal
of turn signal lamp,
connectors
Electric
or
sounds loudly
measure and check
lamp bulb.
horn
horn
does not sound
sounds
hoarse.
with an ohmmeter if
voltmeter.
turn signal lamp switch
Power
works on faulty side.
supply
from
Battery
battery is normal.
is
low.
No voltage display
Yes
No voltage display
No
Take down the turn signal
lamp cover and check if
Power
Grounding wire of lamp
Power line to
holder
the
is
of
poor
contact or bulb of turn
holder
signal lamp is badly
broken.
contacted
with
lamp
line
on
Inner contact
the troubled side
of turn signal
is
lamp is poorly
the bulb is burnt.
lamp
broken
or
is
grounding
wire
contacted.
of lamp holder is
poorly contacted.
No
holder.
Yes
Slide turn signal lamp switch and short circuit it with a piece of
Replace turn signal lamp
wire or a screwdriver two lugs of scintillator.
bulb and check if regulator
works normally.
Turn signal lamp is still off after short circuit.
Turn signal lamp is still on after short circuit.
Separate connectors of turn signal lamp switch and use
Scintillator is damaged.
a piece of wire to short circuit respectively power input
line of the switch and power lines output to left and right
turn signal lamps.
Turn signal lamp is on after short
Turn signal lamp is still off after short circuit.
Inner contact of turn signal lamp is
poor contacted.
Check if there is power output from power input line of
turn signal lamp switch by lamp test
Test lamp is on
Power line of turn signal lamp
is broken or shorted.
Test lamp is off
Wire
from
ignition
switch
to
scintillator or from scintillator to
turn signal lamp switch is shorted
or broken.
Symptom:
Electric horn mutes.
Diagnosis procedures
Electric horn mutes.
Turn on ignition switch; slide turn signal
lamp switch and check.
Turn signal lamp is not lit or dim.
Turn signal lamp shines brightly.
Battery is low or the wire from battery
Power supply from battery is normal.
to ignition switch is broken or shorted.
Pull out power line from power terminal of electric horn; touch
the power line quickly with ground wire to check spark.
Spark at touch
No spark at touch
Connect power line of horn, use a screwdriver to
Power line between ignition switch
connect non-power terminal (terminal to button)
and electric horn is broken.
of horn with ground wire.
Electric horn sounds after connection.
Electric horn does not sound after connection.
Inner contact of horn is poorly
Adjust volume and tune of horn.
contacted or the wire from
horn to button is broken.
Horn does not work after adjustment.
Horn is damaged.
Horn works normally after adjustment.
Horn is improperly adjusted
Symptom:
Brake lamp does not work.
Diagnosis procedures
Brake lamp does not work.
Take down cover of brake lamp and check if bulb is burnt.
Yes
No
Replace bulb
Use a piece of wire to short circuit two terminals of
brake lamp switch or plugs of two hatching lines.
Lamp is not lit after short circuit.
Brake lamp is lit after short circuit.
Use a screwdriver or a piece of wire to touch
Brake lamp switch is not
quickly power line of brake lamp switch and
properly adjusted or its
grounding wire and check sparks.
inner contact is not well
contacted.
Spark at touch
No spark at touch
Wire from brake lamp
Power line from ignition
switch to brake lamp is
switch to brake lamp switch
broken or shorted.
is broken or shorted.
Inspection/Adjustment
Preparatory standard
Compression pressure of cylinder
Periodic maintenance schedule
Engine oil
Engine oil/filter
Replacement of engine oil
Steering stem bearing and handle fixation
Drive chain slackness
Throttle cable adjustment
Front/rear brake clearance
Air cleaner
Headlamp
Spark plug
Clutch
Battery
Front/rear suspension system
Carburetor
Bolt/nut/fastening part
Ignition timing
Tyre specification
Wheel rim/tyre
Preparatory Standard
General
Warning!
• Before running the engine, please make sure the area you are working in is well ventilated. You shall never
run the engine in an enclosed site. Gas exhausted from the motorcycle contains carbon monoxide, which may
lead to loss of consciousness and result in death
• Under certain conditions, gasoline is highly volatile. Work in well-ventilated site. Fire and smoking are
forbidden in working site or gasoline storage place.
Specifications
Engine
Idle speed rpm
1400±100rpm/min
Spark plug clearance
0.6-0.7mm
Spark plug type
B7RC
Combustion chamber
Ball type
Ignition time
BTDC15°±1° 1400±100rpm
Frame
Clearance of front brake handle
10-20mm
Clearance of rear brake pedal
20-30mm
Specification
Pneumatic pressure unit of tyre:
Kpa
Torque
Tyre pressure
Front wheel
90/90-17
190±10kPa
Rear wheel
110/80-17
210±10kPa
QJ125-26A
Front shaft locknut
55-62
N··m
Rear shaft locknut
85-98
N·m
Periodic Maintenance Schedule
Mileage and
Every
300
KM
Every
1000
KM
Every
3000
KM
Every
6000
KM
Every
12000
KM
Every
14500
KM
New
Vehicle
One
month
three
months
Six
months
Twelve
months
Fifteen
months
C
C
R
C
interval
Tools
Items
*
Air cleaner
I
Common tool
*
Gasoline filter
I
I
R
Common tool
*
Engine oil filter
C
C
C
Common tool
Common tool
Tyre pressure gauge,
air inflator
Densimeter,
multimter
Engine oil replacement
I
I
I
I
I
I
Battery inspection
I
I
I
I
I
I
I
I
I
I
I
I
I
I
I
Common tool
I
I
I
Common tool
inspection
Inspection of steering
handle bar looseness
Shock absorber actuating
inspection
Inspection of looseness of
bolts at all positions
Check if gearbox leaks oil
*
Once every 1000KM
Tyre pressure
Actuating clearance
*
R
Spark plug inspection and
replacement
Gearbox oil replacement
Common tool
I
I
I
I
I
I
Torque wrench
I
I
I
I
I
I
Common tool
I
R
R
I
Common tool
I
I
Once every 5000KM
Lubrication of all the places
on the vehicle
Common tool
L
L
Lubricant injector
Muffler
I
I
I
I
I
I
Common tool
*
Ignition timing
I
I
I
I
I
I
Timing light
*
Carburetor
A
I
A
A
A
A
Tachometer,
*
Idle exhaust gas inspection
A
I
A
A
A
A
CO HC analyzer
*
Throttle inspection
I
I
I
I
I
Common tool
Fuel hose inspection
I
I
I
I
I
Common tool
I
I
I
I
Visual multimeter
I
I
I
I
I
I
Common tool
I
I
I
I
Torque wrench
I
I
I
I
Common tool
I
I
I
A
Common tool
I
I
I
I
Common tool
I
I
I
I
Feeler gauge
Light instrument and
electric apparatus
Main stand and side stand
I
I
I
Shock absorber
*
Torque of engine bolt
I
Front/rear brake
Drive chain
I
Clutch
*
Valve
I
Common tool
Expected Inspection
1
Ignition system -- perform maintenance inspection on obvious and continuous ignition malfunctions,
engine fire, overheated back burning and others.
2
Carbon deposition removal -- obvious underpowered, get rid of carbon deposition on cylinder head, piston
head and air exhaust system.
3
Piston and cylinder -- when cylinder is over worn or stuck, please replace it.
Please go to your local Qianjing Motorcycle dealer periodically for inspection and adjustment to keep your vehicle in
best conditions.
In the above table, monthly 1000km travel is employed as reference.
I— Inspect A—Adjust R—Replace C—Clean
L—Lubricate
Note: 1. “*” for items involved in exhaust gas, which meets regulations of China Environmental Protection Agency.
Normal maintenance shall be performed according to the specifications on the user’s manual; unauthorized repair and
adjustment are forbidden. We will not be responsible for the results.
2. You shall clean more frequently the air cleaner to extend its service life when your motorcycle is used on
sand-gravel roads or in severely polluted environment.
3. More frequent servicing may be required when the motorcycle is often driven at high speed or travels a long
distance.
Engine Oil/Filter
Engine oil level
*Attention
• Motorcycle shall stand on the flat ground while checking engine oil
level.
•Inspect engine oil level when the engine has run for 2~3mintues or
stopped for 2~3minutes.
Check engine oil level
When the engine oil level sensor alarms, refill engine oil to its upper
limit.
Engine oil replacement
* Attention
When the engine is warmed up, replace engine oil. The oil can
flow out easily.
Shut down engine.
Screw off the drain plug at the bottom of crankcase (1) to drain
engine oil.
When the engine oil is completely drained, put back cleaned drain plug and sealing ring.
Refill engine oil to specified level.
Check if there is engine oil leakage. Start the engine and run the engine on idle for a few minutes.
Check engine oil level again.
Throttle Cable Adjustment
*Attention
Adjust properly engine idle before
adjustment of throttle cable clearance.
Check clearance of throttle cable, clearance
shall be 3-5mm.
If the clearance is not up to the specified,
adjust it.
Adjust clearance of throttle cable.
Procedures:
Loosen locknut (1).
Rotate adjusting nut (2) inward or outward
till it gains specified clearance.
Rotate inward to increase clearance; rotate outward to reduce clearance.
Tighten locknut.
When the clearance is adjusted, rotate handle leftward and rightward to make sure idle of engine does not change.
Air Cleaner
Replace air cleaner.
Take down the left protecting plate.
Take air cleaner cover.
Take out filter element and filter element guide of air
cleaner.
Check if filter element is polluted or injured. If necessary,
replace it with a new one.
Clean air filter element.
Thoroughly and gently wash filter element with detergent.
Never use gasoline oil as cleaning agent, it may cause fire.
Please do not twist filter element in case the foam material
is damaged.
Apply engine oil onto the filter element and then compress surplus engine oil so that the filter element is wet but not
dropping oil.
Replacing Time
If driving under dusty condition or in rainy days frequently, replace the air cleaner earlier.
* Attention
While removing filter element of air cleaner, please do not run the engine, in case unfiltered air comes into the engine,
which may result in fast wear of some components or damage the engine. On the other hand, rotation of engine
without filter element may affect the carburetor and the carburetor will not work normally afterwards, which may
result in overheated engine. Install filter element guide, filter element, air cleaner housing cover, stop valve assembly
and left protecting plate
Spark Plug
Disconnect lead wire of spark plug cap.
Remove spark plug with a spark plug wrench or other applicable tools.
Inspection
.If the insulator is cracked or damaged;
.If electrodes are worn;
.Combustion condition and color
—Light grey color means excellent combustion condition.
—Pale color indicates that ignition system fails or lean fuel/air mixture.
—Wet appearing or dark carbon deposition means higher fuel/air mixture.
If the above-mentioned appear, please remove them with spark plug cleaner or
wire brush. If necessary, replace the spark plug.
If the insulator is cracked or worn, please replace it with a new one.
Spark plug clearance inspection
Clearance: 0.6-0.7mm
* Attention
Reinstall the spark plug into the cylinder cap and tighten it with the specified
torque.
Tightening torque:18N.m
Screw the spark plug into the cylinder cap first with fingers, and then tighten it with spark plug wrench.
Battery
Removal
Remove the seat and take down the right protecting plate.
Remove the battery from the battery case(1).
Disconnect the battery negative (-) lead wire first and then the
positive (+) lead wire.
Remove the battery.
Warning!
During positive lead wire disconnection, be sure to prevent the tools being used from touching the frame; or it will
result in short circuit sparks, which may ignite gasoline and damage battery. It is dangerous!
Install the battery in reverse order of removal.
Warning!
To avoid short circuit, please connect positive (+) lead wire first,
then the negative (-) lead wire.
During the whole motorcycle adjustment, please do not
disconnect the battery, which may result in interior component
damage of the whole vehicle.
Battery charging (circuit voltage) inspection
Open the seat cushion and take down the right protecting plate.
Disassemble the battery from the battery case.
Disconnect the battery negative (-) lead wire first and then the positive (+) lead wire.
Remove the battery.
Measure the battery voltage using a voltmeter.
Fully charged: 13.1V
Undercharge: 12.3V(battery not work for one hour)
* Attention
Voltmeter shall be used for charging inspection.
Charging
Connection method: Positive pole of battery charger is
connected to battery positive lead wire; Negative pole of battery
charger is connected to battery negative lead wire.
Warning!
• Battery shall be away from fire.
• Shut off charger switch first before or after charging in case sparks may be generated at connection parts, which
may result in explosion.
• During charging, please take the current time labeled on the battery as basic time.
* Attention
• Battery quick recharging is not recommended except in case of emergency.
• After recharging, wait at least 30minutes and then measure the battery voltage.
Recharging current:
Recharging time:
After recharging:
Standard: 0.3A
Quick recharging: 3.0A
Standard: 10-15hours
Quick recharging: 30minutes
Open circuit voltage: over 12.8V
Carburetor
Idle speed adjustment
*Attention
Perform idle speed adjustment when the engine is warm.
Warm up the engine and then adjust idle speed.
Run the engine and connect engine tachometer.
Adjust the throttle cable lock-screw to specified RPM.
Idle speed RPM: 1400±100rpm/min
If idle speed RPM is unsteady, or idle speed is not smooth when
gently raise engine speed, adjust idle speed adjusting screw again.
Ignition Timing
* Attention
Inspect ignition system when the ignition timing is incorrect.
Warm up the engine for 3~5 minutes
Stop the engine and connect the timing lamp to lead wire of spark
plug.
Remove timing hole cap.
Start engine and idle it.
Inspect ignition timing.
If symbol “F” aligns to the mark on the right crankcase, it indicates that the ignition timing is correct. Increase engine
speed and check if Symbol “F” begins to move.
Compression Pressure of Cylinder
Warm up engine.
Insert the pressure gauge.
Turn choke valve to its full open position.
Set throttle handle to its full open position and kick start the
engine.
Compression pressure of cylinder: 1-1.2mpa
* Attention
Start the engine till reading of pressure gauge does not rise.
Causes for low pressure:
. Valve improperly adjusted
. Valve leaks air.
. Worn piston ring or cylinder
Causes for high pressure:
. Carbon deposition in combustion chamber or on piston
Stop engine and remove spark plug and spark plug cap.
Engine Oil
Engine oil level inspection
* Attention
During engine oil level inspection, please do not tighten engine
oil ruler.
Oil level inspection. Stop the motorcycle on the flat ground
with its middle stand and support the vehicle vertically.
When engine oil is consumed continually, you shall inspect oil
level regularly and refill to proper position if necessary.
Engine oil volume:
0.8L for oil replacement
1.1L for engine overhaul
If engine oil level is too high, operation of engine and clutch
will be affected;
Too low engine oil level will result in overheated engine and
premature component wear.
Refilling engine oil of poor quality or different types or
brands will reduce lubrication effects.
Remove engine oil ruler when the engine stops. Dry the oil
on the ruler with a piece of clean cloth.
Stand the engine on a horizontal plane and put the engine oil
ruler into the engine. Do not tighten the ruler.
Take out the engine oil ruler and inspect oil level.
If oil level is lower or approaches the lower limit, add recommended oil to the upper limit mark.
* Attention
Check if sealing ring is damaged.
Install the engine oil ruler.
Engine Oil Replacement
Warm up engine.
Place an oil pan below the engine and drain engine oil by
removing drain plug and oil ruler.
Kick start engine several times to drain thoroughly the engine
oil.
After drainage, inspect and clean engine oil filter.
Be sure that filter screen, spring, O ring and drain plug are
perfect and then put them back onto the engine.
* Attention
Oil should be changed when the engine is warm. Place the
engine on the side stand.
Make sure all the engine oil is completely and quickly drained.
When the drain plug is removed, engine oil filter and spring
will be ejected.
Tighten the drain plug.
Add recommended engine oil into the crankcase.
Install engine oil leveler. Start the engine and let it run for
2~3minutes at idle.
Stop the engine and check if engine oil level is at upper limit
mark in a few minutes.
Stand the engine vertically on the ground to check oil level.
Make sure no oil leaks.
Drive Chain Slackness
Stand vertically the motorcycle on the flat ground and check
drive chain slackness
○,a.
Drive chain slackness: 10-20mm
If the drive chain does not meet the specification, adjust it.
Adjust drive chain slackness:
Screw off rear shaft nut and lock-nuts of adjusters on both drive chains.
Rotate uniformly both adjusters till the drive chains gain normal slackness.
* Attention
Do not install new drive chains onto worn sprockets or install worn drive chains onto the new sprockets.
Keep both sprocket and drive chain in good conditions, or
newly replaced chain or sprocket will be worn soon.
Clearance of front/rear brake
Front brake clearance
Measure the clearance of front brake at the tip of front brake
handle.
Clearance: 10-20mm
Brake pedal clearance
Measure brake pedal clearance.
Clearance: 20-30mm.
If the clearance measured does not meet the specified value,
adjust it.
Adjust clearance of brake pedal.
Screw in or screw off adjuster.
If the adjuster is screwed in, clearance is decreased; if screwed
out, clearance is increased.
Adjust till the clearance is up to the specification.
After adjustment, brake does not drag.
Headlamp
Remove mounting screw (1) of cowling.
Remove cowling(3), headlamp hood and headlamp.
Pull out headlamp holder and remove the reflector.
Release the circlip and take out lamp adapter.
* Attention
When the bulb is lit, keep your hands and inflammable materials with some distance away from it. If lighting bulb is
hot, touch it when it cools down.
Install a new headlamp bulb (7).
Screw tightly the new bulb into the adapter.
Avoid touching bulb glass with your bare hands during
installation and staining it with oil, which may affect
transparency, service life and luminous flux of bulb.
If oil is adhered to the bulb, clean it with a cloth moistened
with alcohol or highly volatile rubber solution.
Install headlamp assembly.
Clutch
Check clearance of clutch cable.
Clearance: 10-15mm.
Adjust clearance of clutch cable.
First loosen lock nut(1).
Screw in or screw off adjuster(2)till clearance meets the
specified value.
Finally tighten the locknut.
Front/Rear Suspension System
Front suspension
Grasp the front brake handle and compress upward and
downward the front shock absorber to check its
actuator.
Check if the front shock absorber leaks oil and if the
components are loosened.
Rear Suspension
Compress upward and downward the rear shock
absorber to check its actuator.
Check if components on the rear shock absorber are
loosened or injured.
Lift and support the rear wheel and swing the wheel to
check if engine suspension bushing is loosened.
Bolt/Nut/Fastening Part
Inspect bolts, nuts and fastening parts at every part of the
motorcycle for looseness.
If it is loose, tighten it to specified torque.
Wheel Rim/Tyre
Check if there is crack, nails and similar sharp objects, and other injuries on the tyres.
Inspect pneumatic pressure of tyres.
* Attention
Measure the tyre pressure in cool state.
Specified air pressure
Unit: Kpa
Tyre specifications
Tyre
pressure
Front tyre
100/70-17
190±10kPa
Rear tyre
130//60-17
210±10kPa
QJ125-26A
Tyre Specifications
QJ125-26A
Front tubeless tyre
100/70-17
Rear tubeless tyre
130//60-17
Check if lock nut of front shaft is loosened.
Check if lock nut of rear shaft is loosened.
If loosened, tighten it to specified torque.
Tightening torque:
Front shaft lock nut
Rear shaft lock nut
40-60 N·m
85-98 N·m
Steering Stem Bearing and Handle Fixation
Move left and right handle and check if lead wires disturb it.
Rotate front wheel and confirm handle can move smoothly.
If the handle does not move smoothly and is loosened, check steering
stem bearing.
Inspection and Maintenance of Electric System
Table of tightening torque for fastening parts used in electric system
Fastening position and fastening part name
Tightening torque(N·m)
Starting motor clutch cover bolt
12
Starting motor clutch locknut
95
Rectifier bolt
5.0
High-voltage coil mounting bolt
9.0
Flywheel locknut
5.0
Vehicle block protecting plate bolt
9.0
Charging System
1. Starting relay
2. Scintillator
6. Power lock assembly
3. Battery
4. Electric igniter
5 High-voltage ignition coil
I Battery/Charging System
Preparatory data------------1.1
Battery-------------------1.3
Fault diagnosis--------------1.2
Charging system-------------1.4
Voltage/current adjuster----------------------------------------------1.5
Magneto charging coil-------------------------------------------------1.6
Removal of magneto---------------------------------------------------1.7
1.1 Preparatory Data
Precautions on operation
* Attentions
1. The battery can be charged and discharged, and used repeatedly. If a battery is laid aside after discharging, its
service life will be shortened and its performance is degraded. Performance of a battery is usually reduced after about
2-3 years’ run. Voltage of the performance-reduced (capacity drops) battery can be resumed, but the voltage will run
down quickly while loading.
2. Overcharging of battery: Usually overcharging is demonstrated by the battery itself. If short circuit occurs inside
the battery, there will be no voltage or very low voltage on the terminals of the battery. Adjuster fails: it indicates
too high voltage on the battery, the life-span of the battery will be shortened.
3. When the battery is not be used for a long period, it will self-discharge and its capacitance will drop. The battery
should be recharged every three months.
4. Charging system inspection: please perform inspection in the sequence listed in the fault diagnosis table.
5. If there is current going through the electric part, please do not remove the connector, or the voltage will be very
high and electronic components inside the voltage adjuster will be damaged. Set ignition switch at “Off” position and
then begin your operation.
6. It is not necessary to inspect maintenance-free (dry-charged type) battery. You don’t need to add electrolyte and
distilled water for it.
7. Inspect the entire electric load.
8. Quick charging is forbidden except in emergency.
9. During quick recharging, the battery must be removed from the motorcycle and recharged.
10. While battery is exchanged, please do not use liquid-feeding battery.
11. A voltmeter shall be employed to check recharged battery.
Preparatory Standard
Item
Specification
Capacity/type
Battery
Magneto
Voltage
(20 )
12V dry-charged type
Fully recharged
13.1V
Must be recharged
12.3V(not work for one hour)
Recharging current
Standard: 0.9A, Quick: 9A
Recharging time
Standard: 10-15hours; Quick: 30minutes
Max. capacity
120W
Coil impedance value(20 )
White-white 0.5-10Ω
Type
Full-wave rectification
Battery recharging voltage
14.5V±0.4V/5.000rpm
Voltage regulator
Tightening torque
Rectifier bolt
High-voltage coil mounting bolt
Flywheel locknut
Vehicle block protecting plate bolt
Tools
5.0 N·m
9.0 N·m
5.0 N·m
9.0 N·m
Universal non-adjustable spanner
Flywheel remover
Testing device
Multimeter
1.2 Fault Diagnosis
No power
Unstable power
Battery over discharged
Lead wire of battery is not connected.
Fuse is broken.
Power switch is poorly contacted.
Lead wire of battery is poorly contacted.
Discharging system is of poor contact.
Lighting system is of poor contact or short circuit.
Low voltage
Poor charging system
Battery is poorly recharged.
Poor contact.
Poor charging system
Bad voltage and current adjuster
Wire connector is of poor contact, short circuit or short line.
Defective voltage and current adjuster
Magneto does not work well.
1.3 Storage Battery
1.3.1 Battery Removal
Take down the right protecting plate (1).
Disconnect the battery negative (-) lead wire first and then the positive (+) lead wire.
Remove the battery breather.
Remove battery mounting bracket(2).
Remove the battery(3).
Warning!
During positive lead wire disconnection, be sure to prevent
the tools being used from touching the frame; or it will result
in short circuit sparks, which may ignite gasoline and damage
battery. It is dangerous!
During the whole motorcycle adjustment, please do not
disconnect the battery, which may result in interior
component damage of the whole vehicle
Install the battery in the reverse order of removal.
*Attention
To avoid short circuit, please connect positive (+) lead wire first, then the negative (-) lead wire.
Battery charging (circuit voltage) inspection
Open the battery cover and remove battery pressure plate assembly.
Disconnect lead wire of the battery connector.
Measure voltage between terminals of the battery
Fully charged: 13.1V
Undercharged: 12.3V (battery does not work for 1hour)
Attention
A voltmeter shall be employed to check recharged battery.
1.3.2 Charging
Connection method: positive pole of battery charger is
connected to battery positive lead wire; Negative pole of
battery charger is connected to battery negative lead wire
Warning!
• Battery shall be away from fire.
• Shut off charger switch first before or after charging in case sparks may be generated at connection parts, which
may result in explosion.
• During charging, please take the current time labeled on the battery as basic time.
* Attention
• Battery quick recharging is not recommended except in emergency.
• After recharging, wait at least 30minutes and then measure the battery voltage.
Recharging current:
Standard: 0.3A
Quick charging: 3.0A
Recharging time:
Standard: 10-15hours
Quick recharging: 30minutes
Recharging completed: open circuit voltage: over 12.8V
1.4 Charging System
1.4.1 Short circuit test
Disconnect the grounding wire from the battery and use a
voltmeter to connect battery negative lead wire with grounding
wire. Set the switch at OFF position and check if it is shorted.
* Attention
Positive lead wire of multimeter is connected to negative lead
wire of battery.
If abnormality is found, check if there is short circuit on ignition switch and main wiring
1.4.2 Charging state inspection
While inspection, battery shall be fully charged and a multimeter be used for the test.
Warm up the engine and then install fully charged battery onto the
motorcycle.
Connect voltmeter between terminals of the battery.
Remove the main fuse and connect ammeter between the two terminals.
Start engine and slowly raise RPM. Measure limited voltage and current.
Limited voltage/rpm: 14-15V (5.000rpm)
If limited voltage is beyond the specified range, check voltage regulator.
Inspect limited voltage in lighting system.
* Attention
Set multimeter to position of AC voltage
1.5 Voltage-current Regulator
1.5.1 Loop inspection on main wiring terminals
Disconnect the 6P plug on the voltage-current regulator.
Check continuity between main wiring terminals in the following way:
Item (wire color)
Battery (red) and ground
of vehicle block
Ground wire (black) and
ground of vehicle block
Charging coil (white) and
ground of vehicle block
Between charging coils
(while 1 and white 2)
Judgment
It is battery voltage.
There is a lead wire.
No power flowing
between magneto coil
and ground
There is resistance
between coils
1.5.2 Voltage-current regulator inspection
When main wiring terminal is normal, check if plug of voltage-current regulator is of poor contact and measure
impedance value between terminals of
Multimeter
voltage-current regulator itself.
Red/white
White1
Red
Black
White2
+
* Attention
Unit: MΩ
• Do not touch the metal part of multimeter
probe with your finger.
• Check with a multimeter. If impedance
values measured by different multimeters
are not the same, it perhaps the inspection is
not correct.
When impedance value between terminals is
abnormal, replace voltage regulator.
White1
red/white
Red
No
No
0.1~3
No
0.1~3
10~90
No
0.1~3
No
1.2~5
0.1~3
No
Black
No
No
No
White2
60~80
No
No
1.6 Magneto Charging Coil
* Attention
Inspection of magneto charging coil can be performed on the engine.
Inspection
Disconnect the 6P connector on the magneto.
Use a multimeter to measure impedance value between white coil of magneto and vehicle block.
Standard value: 0.5-10Ω(20 )
If measured value exceeds the standard, the magneto coiling shall be replaced.
No
0.1~3
1.7 Magneto Removal
* Attention
Inspection of magneto lighting coil can be performed on
the engine.
1.7.1 Inspection
Disconnect the 4P connector on the magneto.
Use a multimeter to measure impedance value between
yellow coil of magneto and ground wire of vehicle block.
Standard value:0.4-0.6Ω(20 )
If measured value exceeds the standard, the magneto coiling shall be replaced.
1.7.2 Removal
Remove vehicle block protecting plate.
Remove protecting plate of engine on the left side.
Remove flywheel locknut.
Use a flywheel remover to take down the flywheel.
Remove the fixation key.
Disconnect lead-wire connector of magneto.
Remove stator of magneto.
1.7.3 Installation
Install the magneto stator onto the engine box.
Connect lead-wire connector of magneto.
Clean crankshaft and conical part of flywheel.
Make sure the fixation key is installed into the key slot on the crankshaft.
Align the groove on the flywheel to the fixation key on the crankshaft.
* Attention
There is magnetism on the inner surface of flywheel, ensure there
is no bolt on it.
Fix the flywheel using a universal non-adjustable spanner and
then tighten the locknut.
Torque value: 9.0 N·m
Install protecting plate on the left side.
Ignition System
Ignition System
1 Relay
2 Scintillator 3 Battery
4 Igniter
6. Power lock assembly 7 Voltage regulator
5 High-voltage ignition coil
II Ignition System
Preparatory data-------------------2.1
CDI assembly--------------2.4
Fault diagnosis--------------------2.2
Ignition coil----------------2.5
Ignition system inspection-------2.3
Trigger----------------------2.6
2.1 Preparatory Data
Precautions on operation
1. Ignition system inspection: please perform inspection in the sequence listed in the fault diagnosis table.
2. Ignition system uses electronic-type automatic timing device, which is solidified in the CDI assembly, so it is
unnecessary to adjust the ignition time.
3. Ignition system inspection: please perform inspection in accordance with the sequence listed in the fault diagnosis
table.
4. Ignition system CDI shall not be dropped and hung, or heavily knocked (this is also the main reason for its failure).
Pay special attention to this while removing it.
5. Most of the ignition system problem due to poor contact of sockets. Please check first if parts of the connector are
well contacted.
6. Check if heat value of spark plug is proper. Improper spark plug may result in unsmooth engine running or burn of
spark plug
7. The maximum voltage is taken to introduce inspection items in this Part. Inspection methods for impedance value
of ignition coil are also recorded and judged.
8. Check ignition switch according to the continuity test table.
9. Remove magneto and stator on operation instructions.
Preparatory data
Item
Standard Value
Standard
B7RC
Primary coil
0.4Ω±10%
Spark plug
Spark plug clearance
Ignition coil impedance value(20 )
Secondary coil
With spark plug cap
8-11KΩ
Without spark plug cap
3-5.5KΩ
Impedance value of trigger(20 )
100-200Ω
Impedance value of charging coil(20 )
600-800Ω
Ignition coil primary peak voltage
300V
Trigger voltage
Higher than 1.7V
Tools
Accessory for voltmeter with maximum range
Multimeter
2.2 Fault Diagnosis
Spark plug no spark-over
Symptom
Possible causes(Determine the cause from 1 in sequence)
Inner impedance is too small. Use appointed tester to test.
Crankshaft rpm is too low.
Ignition coil
When the high voltage power is too
low.
Tester is disturbed (it is normal when more than one time’s measured
voltage is above the basic).
Wiring of ignition system is poorly contacted.
Ignition
coil is no good.
Charging coil is bad. (Peak voltage measurement)
Tester is wrongly connected.
Poor ignition switch.
Connector of CDI assembly is poorly contacted.
While no high-voltage power supply,
Secondary
high voltage power is sporadic.
side voltage
Ground wire for CDI assembly is shorted or poorly contacted.
Poor charging coil (Peak voltage measurement).
Defective trigger (Peak voltage measurement).
Connector of high voltage wire is not good.
Inferior CDI assembly.(after items
-
are tested and proved
abnormal or spark plug no sparking.)
High-voltage power is normal, spark
Inferior spark plug or secondary leakage of the ignition coil.
plug no sparking.
Bad ignition coil.
Inner impedance is too small. Use appointed tester to test.
Crankshaft rpm is too low.
No high-voltage power supply
Tester is disturbed (it is normal when more than one time’s measured
voltage is above the basic).
Charging coil
Charging coil is bad. (when items
No high-voltage power supply or
Defective ignition coil.
high voltage power is sporadic.
Defective charging coil.
-
are proved normal)
Inner impedance is too small. Use appointed tester to test.
When high-voltage power supply is
Trigger
too low.
Crankshaft rpm is too low.
Tester is disturbed (it is normal when more than one time’s measured
voltage is above the basic).
Trigger is bad. (when items ( -
•
No high-voltage power supply or
Bad ignition coil.
high voltage power is sporadic.
Bad trigger.
are proved normal)
2.3 Ignition System Inspection
* Attention
• When there is no spark-over from the spark plug, check if
components of wiring are loosened or badly contacted and make
sure if all the voltage values are normal.
• There are many brands of multimeters with different interior
impedance. The values they measured are not the same.
Connect a high-voltage shunt or an ammeter with input impedance
higher than 10MΩ 10CV to the multimeter.
2.3.1 Primary voltage of ignition coil
If an old spark plug is removed and replaced with a good one, ground it with engine.
* Attention
Test when wirings of all the circuits are correct.
Normal cylinder compression pressure means to test
the pressure with spark plug installed on the cylinder
head.
Connect lead wire of ignition coil; a shunt is connected between
the terminal (black/white) of primary coil and the grounding
vehicle block.
Press starting motor button or kick starting pedal to measure the
primary peak voltage of ignition coil.
Min. voltage: higher than 95V.
*Attention
Please do not touch the metal parts of testing probe with your fingers while
measuring the voltage, or you will be shocked. Please take care.
2.3.2 Trigger
* Attention
Inspect when spark plug is installed on the cylinder head and
compression pressure is normal.
Disconnect connectors 4P and 2P from CDI assembly. A
peak-voltage shunt is indirectly connected to the 4P connector
(black terminal) and 2P wiring-terminal connector of trigger
(blue/white terminal). Press starting motor button or kick pedal
level to measure primary peak voltage of trigger.
Connecting method: positive (+) to blue/white, negative (-) to green/white.
Min. voltage: higher than 1.7V.
* Attention
Please do not touch the metal parts of testing probe with your
fingers while measuring the voltage, or you will be shocked.
Please take care.
When the peak voltage measured at connector of CDI
assembly is abnormal, take down the protecting plate on the
right side of vehicle and remove connector of magneto.
Trigger (blue/white) is connected with a shunt.
• When the measured voltage at CDI assembly terminal is abnormal, but measured voltage at magneto terminal is
normal, it indicates that the connector is of poor contact or wiring is broken.
• When measured results at both sides are abnormal, the trigger is damaged. Please refer to items listed in Diagnosis
Table and check.
2.4 CDI Assembly
2.4.1 System Inspection
System inspection
Remove CDI assembly and check components related to the ignition
system at wiring terminal.
2.4.2 Inspection
Remove CDI assembly and check if connectors are loosen or
corrosive.
Item
Measuring terminal
Standard Value(20 )
Main switch
Red—Red/White
On continuity when main switch is
“OFF”.
Trigger
Blue/White-White/Green
100-200Ω
Primary coil of ignition
coil
Black/White—Black
0.4Ω±10%
Secondary coil of ignition
coil
Black—spark plug cap(not including spark
plug)
3-5.5KΩ±10%
2.5 Ignition Coil
2.5.1 Removal
Remove protecting plate of vehicle block.
Remove spark plug cap.
Remove primary lead wire of ignition coil.
Remove locknut of ignition coil and take out the ignition coil.
Install it in the reverse order of removal.
*Attention
The primary coil is installed with black/white wire connector.
2.5.2 Primary coil inspection
Measure impedance between terminals of primary coil
Standard value: 0.4Ω±10%(20 )
Impedance value within the range is good.
Impedance value “∞” indicates broken wire inside the coil. The
coil shall be replaced.
2.5.3 Secondary coil
Attached with the spark plug, and measure the impedance
between lead-wire side of spark plug cap and terminal.
Standard value; 8-11KΩ(20 )
Impedance value within the range is good.
Impdeance value “∞” indicates broken wire inside the coil.
Remove the spark plug cap and measure impedance value
between primary side lead-wire and negative terminal.
Standard value: 3-5.5KΩ±10%(20 )
2.6 Trigger
* Attention
Trigger inspection can be performed on the engine.
Inspection
Remove protecting plate of vehicle block.
Remove lead-wire connector of trigger.
Measure the impedance between blue/white terminal of lead
wire at engine side and grounding vehicle block.
Standard value: 100-200Ω(20 )
If measured impedance value is beyond the range, please
replace the magneto.
Starting System
Starting Diagram
1 Starting relay
2 Scintillator
6 Power lock assembly
7 Rectifier
3 Battery
4 Electronic igniter
8 Electric horn
5 high-voltage ignition coil
III
Starting System
Preparatory data-------3.1
Fault diagnosis--------3.2
Starting motor-----------3.3
Starting relay------------3.4
3.1 Preparatory Data
Precautions on operation
Starting motor removal can be performed on the engine.
Starting clutch removal refers to removal instruction.
Basic data
Item
Standard
Service Limit
Length of starting brush
12.5mm
8.5mm
Starting idler shaft bushing
8.3mm
Starting idler shaft OD
7.94mm
Tightening torque
Starting motor clutch cap bolt
Starting motor clutch locknut
12 N·m
95 N·m
Tools
Locknut wrench
Universal un-adjustable wrench
3.2 Fault Diagnosis
Starting motor will not run
Starting motor runs weakly
•Broken Fuse
•Low battery
•Low battery
•Poor connecting wire contact
•Defective ignition switch
•Starting motor gear stuck by
•Defective starting clutch
foreign substances
•Defective braking switch
•Defective starting relay
•Poor connecting wire contact
•Defective starting motor
Starting motor rotates but the engine does not
•Defective starting clutch
•Starting motor counter-rotate
•Low battery
3.3 Starting Motor
3.3.1 Removal
* Attention
Before removing starting motor, the ignition switch must be set at
“OFF” position. Disconnect battery grounding wire and then turn
on the power supply to check if starting motor runs to confirm
your operation is safe.
First remove the lead-wire clip of starting engine.
Remove starting motor mounting bolt and take down the starting
motor.
Roll up the rubber waterproof jacket and remove starting motor connector.
3.3.2 Disassembly
Disassemble housing screw, front cover, motor housing and other
parts.
3.3.3 Inspection
Inspect other component assemblies.
Replace with a new one when there is surface partial friction,
injuries or burn.
The commutator shall be cleaned when there is metal particles
adhered to its surface.
Inspect for continuity between contact surfaces of other assemblies.
Confirm the discontinuity of armature shaft among surfaces of commutator.
Inspect for continuity of starting motor housing.
Confirm the continuity between conducting terminal and starting motor housing.
Inspect continuity between conducting terminal and brush.
Replace it with a new one if abnormality exits.
Inspect carbon brush holder for continuity. If there is continuity, replace it.
Measure brush length
Service limit: replace it when it is shorter than 8.5mm
Check rotation smoothness of the needle bearing in the front cover and whether it is loosened when it is pressed in.
If there is abnormality, replace it with a new one.
Check the oil seal for wear and injury.
3.3.4 Assembly
Apply lubricating grease on the oil seal in the front cover.
Install brush onto the brush holder.
Apply lubricating grease on movable parts at both ends of
brush shaft.
Press brush into its holder and install front cover of electrodes.
* Attention
• There should be no hurt on the contact surface of brush and
armature. Take care.
• Installation shaft of armature cannot hurt lip of oil seal. Take care.
Install a new O ring onto the front cover.
Align and install the boss of motor housing to the recess of front cover.
Tighten housing screws.
* Attention
When assembling housing and front cover, armature can work as a magnet to easily pull the front cover up; and then
gently press it down to complete the assembly.
3.3.5 Installation
Install lead wire of starting motor and be sure to install the dust seal.
Check if the O ring is damaged and replace it if there is abnormal.
Apply some engine oil onto the O ring and then install the starting motor
Install rear brake wire clip.
3.4 Starting Relay
3.4.1 Actuation Inspection
Take down the protecting plate of vehicle block.
When the ignition switch is set at “ON” position, press starting
motor and a “Click” sound can be heard.
Inspect Sound.
“Click” sound indicates normal.
No sound:
• Check starting relay voltage.
• Check starting relay ground wire loop.
• Inspect starting relay actuation.
3.4.2 Starting relay voltage inspection
Lift and support the main stand. Measure the voltage between
negative pole (green/yellow) of starting relay connector and
vehicle ground wire.
Set ignition switch at “ON” position and catch the brake lever. Battery voltage shall meet the specified.
When there is no voltage at wire terminal of starting relay, inspect braking switch continuity and lead wire.
3.4.3 Starting relay ground loop inspection
Remove starting relay connector.
Inspect continuiy between black wire of connector terminal
and vehicle ground wire.
When the starting button is pressed, continuity between black
wire of connector and vehicle ground wire shall be fine.
If there is no continuity, inspect starting button continuity and
lead wire.
3.4.4 Acutation Inspection
Connect starting relay with battery and connect terminal of
starting motor with multimeter.
Connect fully charged battery between black wire and
green/yellow wire of relay. A “tap” sound of operation can be
heard on the relay and resistance displayed by multimeter is
zero.
Bulbs/Switches/Instruments
1 Headlamp
2 Instruments 3 Electric horn
4 Left rear turn signal lamp
IV
Bulbs/Switches/Instruments
Preparatory data---------------------------------------------------4.1
Fault diagnosis----------------------------------------------------4.2
Headlamp bulb replacement------------------------------------4.3
Front turn signal lamp bulb replacement---------------------4.4
Tail lamp bulb replacement ------------------------------------4.5
Instrument--------------------------------------------------------4.6
Ignition switch---------------------------------------------------4.7
Electric horn------------------------------------------------------4.8
Handle switch----------------------------------------------------4.9
4.1 Preparatory Data
Precautions on operation
Remove switches from the motorcycle and perform continuity test.
All the plastic connectors have pawls on them. Release clamping of the pawl before removal. Align pawl to its hole
when it is reinstalled.
While trouble shooting electric faults, please check continuity of electric component as current flowing over it.
Confirm state of battery before any inspection, including battery voltage.
4.2 Fault Diagnosis
“ON” lamp of Ignition switch is not on.
• Bulb burnt.
• Defective switch.
• The connector is poorly contacted or the wire to it is broken.
• Low battery power or no voltage.
4.3 Headlamp Bulb Replacement
4.3.1 Removal
Screw off with a wrench locknut(1) of headlamp and take
down the headlamp.
Pull out socket of headlamp adapter and remove the rear
cover. Release circlip and take out of the lamp adapter.
* Attention
When the bulb is lit, keep you hands and inflammable
materials some distance away from it. Lighting bulb is hot;
touch it when it cools down.
4.3.2 Installation
Install the new bulb, adapter and headlamp rear cover.
Tighten the new bulb into the socket.
Avoid touching bulb glass with your bare hands during installation and staining it with oil, which may affect
transparency, service life and luminous flux of bulb.
If oil is adhered to the bulb, clean it with a cloth moistened with alcohol or highly volatile rubber solution.
Install headlamp assembly.
4.4 Front turn signal lamp bulb replacement
4.4.1 Removal
Disconnect wire to turn signal lamp.
Screw off self-tapping screw(2)on the turn signal lamp.
Remove the bulb socket from the lamp.
Remove the bulb from lamp adapter.
4.4.2 Installation
Install the bulb in the reverse order of removal.
4.5 Tail Lamp Bulb Replacement
4.5.1 Removal
Screw off the two bolts(1).
Remove the tail lamp hood.
Disconnect wire connector to the tail lamp.
While pressing down the tail lamp, rotate it counterclockwise
Remove the tail lamp
4.5.2 Installation
Install the tail lamp in the reverse order of removal.
* Attention
While installing tail lamp, be sure that sealing washer on the
tail lamp hood is in good condition and correct position.
4.5.3 Tail lamp bulb replacement
4.5.3.1 Removal
Screw off mounting bolts on the tail lamp hood.
Remove tail lamp hood(3)so that tail lamp bulb can be removed.
Remove the tail lamp bulb from lamp adapter(2).
4.5.3.2 Installation
Install the tail lamp bulb in the reverse order of removal
4.6 Instrument
Remove rear mirror.
Take down the handle hood and pull out waterproof connector.
Remove the screw.
Remove odometer assembly.
Remove the instrument.
Install the instrument orderly in the reverse order of removal.
4.7 Ignition Switch and Steering Lock
4.7.1 Inspection
Remove the headlamp from the cover.
Remove ignition switch-wire connector.
“ ” (OFF) position:All the circuits are broken.
“ ” (ON)position:Ignition circuit is switched on and engine can be
started. When the switch is at this position, the key cannot be pulled out.
“ ”(Stop) position:At night, when you have to stop the motorcycle at
roadside, turn the key to“ ”position and you will be able to pull out the
key and the tail lamp (Stop Lamp) will be kept on.
4.7.2 Ignition switch replacement
Remove the headlamp.
Screw off the mounting bolts and remove the ignition switch holder.
Remove the mounting bolts and replace ignition switch.
4.8 Electric Horn
Inspection
Disconnect wire to the electric horn.
Connect lead wire of horn with the battery. When the electric horn
sounds, it indicates the horn is in good condition.
4.9 Handle Switch
Remove protecting plate of steering handle.
Screw off mounting bolt on the brake lever and take down the bracket.
Remove the draw-bar bracket for the rear brake lever.
Remove throttle handle and bolts.
Take down throttle handle from the handle and remove the throttle cable.
Remove locknut on the handle and take down the handle.
Chassis Inspection and Maintenance
Table of Tightening Torque of Fastening Part on Chassis
Fastening position and part name
Tightening Torque(N·m)
Oil pump block assembly mounting bolt
5-9
Front brake cylinder assembly mounting bolt
22-29
Rear brake rocker arm mounting bolt
5-9
Rear shaft locknut
85-98
Upper bracket assembly mounting bolt
40-60
Front shaft locknut
55-62
Front shock absorber mounting bolt
37-44
Rear shaft locknut
85-98
Rear shock absorber top nut
37-44
Rear shock absorber bottom nut
22-29
Seat cushion mounting bolt
22-29
Fuel tank mounting bolt
5-9
Gasoline switch mounting bolt
5-9
Protecting hood mounting bolt
5-9
Sprocket mounting bolt
22-29
Rear swing arm shaft nut
70-83
Front Hydraulic Brake
A
B
C
D
Front brake disc diameter:240mm
Front brake disc thickness:4.0mm
Service limit:3.0
Brake shoe thickness:4 mm
Service limit:3mm
Mounting torque for Bolt 7 in the
diagram:22-29 N·m
1 Oil pump block assembly 2 Hydraulic brake handle 3 Handle mounting bolt 4 Nut M6 5 Fixed cover
6 Bolt M6×23
7 Front hydraulic brake mounting bolt 8 Front hydraulic brake assembly 9 Washer
10 Oil hose mounting bolt 11 Brake hose assembly 12 Brake cylinder assembly 13 Brake shoe assembly
Rear Drum Brake
A
Rear brake ID:130mm
B
Service limit:131
C
D
Brake shoe thickness:4mm
Service limit:3mm
Mounting torque for Bolt 21 in the
diagram:22-29 N·m
1 Nut M14 2 Rear hub cap assembly 3 Copper pin 2×18 4 Nut M8 5 Rear hub cap mounting bolt
6 Bolt M6×30 7 Washer 6 8 Rear brake rocker arm 9 Nut M6 10 Washer 11 Cam shaft O sealing ring
12 Rear braking cam shaft 13 Rear wheel right bush 14 Rolling bearing 6302-2RS 15 Braking shoe tension
spring 16 Braking shoe assembly 17 Tube and tyre 110/80-17 18 Rear rim assembly 19 Rear buffer
20 Rolling bearing 6202-2RS 21 Rear wheel shaft 22 Valve cap 23 Rear wheel left bush
24 Rear wheel assembly 25 Rear wheel hub assembly
V Braking System
Maintenance instruction--------------------5.1
Fault diagnosis-------------------------------5.2
Front hydraulic disc brake----------------- 5.3
Rear drum brake-----------------------------5.4
5.1 Maintenance Instruction
Precautions on operation
* Attention
• Please do not contaminate braking assembly with oil while assembly or disassembly.
• Please use specified detergent to clean the braking assembly, or it may reduce braking performance.
* Please check braking system before driving your motorcycle.*
5.1.1 Specifications
Item
Standard Value (mm)
Service Limit (mm)
Front brake disc thickness
4.0
3.0
Front brake shoe thickness
4.0
3.0
Front brake disc diameter
φ240
-
Rear brake drum ID
130
131
Rear brake shoe thickness
4.0
3.0
5.1.2 Tightening Torque Value
Front wheel shaft locknut
Rear wheel shaft locknut
55-62
85-98
N·m
N·m
Front brake cylinder assembly mounting bolt
22-29
5.2 Fault Diagnosis
Braking System
Poor braking performance
Brake drags or tight handle
1. Improper brake adjustment
2. Worn braking shoe assembly and brake disc
1. Improper brake adjustment
2. Worn braking shoe assembly and brake disc
N·m
3. Braking shoe assembly improperly installed
3. Braking shoe assembly improperly installed
4. Braking shoe assembly and brake disc contaminated
Noisy Braking
1. Braking shoe assembly and brake disc are worn.
2. Braking shoe assembly and brake disc are contaminated
5.3 Front Hydraulic Brake
5.3.1 Removal
* Attention
• Replace braking shoe assembly.
• If a braking shoe assembly will be used
again, please mark it on the side before
removal so as to re-install it to its original
place
Remove from right handle and front shock
absorber the following assemblies.
Front brake:
1. Hydraulic brake handle(7)
2. Oil pump block assembly(5)
3. Braking hose assembly(4)
4. Braking cylinder assembly(6)
5. Hydraulic brake disc (2)
Note: Detailed breakdown drawing refers to P85.
* Attention
•Please do not contaminate braking shoe assembly with oil
while assembly or disassembly
•Please use specified detergent to clean the braking assembly,
or it may reduce braking performance.
Screw off braking cylinder assembly mounting bolt.
Remove the braking cylinder assembly from front shock
absorber.
Remove front wheel shaft.
Remove front wheel.
Remove brake disc from the front wheel.
5.3.2 Inspection
Check if braking shoe assembly and brake disc are worn. Replace them if necessary.
Measure braking shoe and brake disc and record the maximum values.
Specifications
QJ125
Front brake disc diameter
φ260mm
Front brake disc thickness
4.0mm
* Attention
• Micrometer shall be used for the measurement.
Measure the thickness of braking shoe.
If brake disc and braking shoe are contaminated by grease or
their thickness is smaller than service limit, replace them.
Service limit:
Braking shoe: 3mm
Brake disc: 3mm
Note:
Braking shoes shall be replaced in pairs.
5.3.3 Installation
Install brake disc and front wheel.
Install front brake hose assembly and brake cylinder assembly.
Please do not contaminate braking shoe and brake disc with oil.
* Attention
A contaminated braking shoe will reduce braking performance and result in brake failure.
Tighten bolt and nut to their specified torque value.
Torque value:
Oil pump block assembly mounting bolt
Front brake cylinder assembly mounting bolt
5-9
22-29
N·m
N·m
Do not contaminate braking shoe with oil.
If a braking shoe is polluted by oil, clean it with brake cleaner.
*Attention
A contaminated braking shoe will reduce braking performance.
* Attention
•Please do not contaminate braking shoe assembly with oil while assembly or disassembly
•Please use specified detergent to clean the braking assembly, or it may reduce braking performance.
5.4 Rear Drum Brake
•5.4.1
Removal
* Attention
• Replace braking shoe.
• If a braking shoe assembly will be used again,
please mark it on the side before removal so that is
can be re-installed easily to its original place.
Remove the following rear brake assembly from the
rear wheel:
1. Bolt M6Χ35(6)
2. Rear brake rocker arm(8)
3. Nut M6(9)
4. Rear wheel shaft locknut (1)
5. Rear brake return spring
6. Rear brake cam shaft(12) 7. Braking shoe
assembly(16)
8. Braking shoe spring(15)
9. Tyre 3.00-18(17)
10. Rear wheel rim(18)
Note: Detailed exploded view refers to P86.
5.4.2 Inspection
Check if braking shoe assembly and brake drum are worn. Replace them if necessary.
Measure braking shoe thickness and brake drum ID and record the maximum values.
* Attention
• Micrometer shall be used for the measurement.
Measure the thickness of braking shoe and the inner diameter of brake drum.
If the braking shoes are contaminated by oil or their thickness is smaller than service limit, replace them.
Note: Braking shoes shall be replaced in pairs.
Rear brake drum ID
φ130mm
Thickness of rear brake shoe
4mm
Service limit:
Braking shoe
3mm
Rear brake drum ID 131mm
5.4.3 Installation
Install braking shoe assembly
Install rear wheel.
Install muffler assembly (24).
Install brake pedal assembly(21)
* Attention
A contaminated braking shoe will reduce braking performance and result in braking failure.
Tighten bolt and nut to their specified torque value.
Torque value:
Rear wheel locknut:
85-98 N·m
Do not contaminate braking shoe with oil.
If a braking shoe is polluted by oil, clean it with brake cleaner.
* Attention
A contaminated braking shoe will reduce braking performance
Note: Detailed breakdown drawing refers to P86.
Exterior Parts
Attention
Do not damage exterior parts during disassembly and assembly.
Do not damage the pawls on the exterior parts of the vehicle during assembly or disassembly.
Align built-in panel and cover plate to their grooves respectively.
Correctly install pawl of each part during combination.
Do not damage the fittings during exterior part installation.
1 Right cowling installation plate 2 Cowling installation plate 3 Right decorative panel II
4 Left cowling installation plate 5 Right decorative panel II 6 Left decorative panel I 7 Right protecting plate
8 Left decorative panel II
9 Left protecting plate 10 Front mudguard
11 Front part of rear mudguard
12 Rear mudguard I
13 Rear mudguard II
VI
Motorcycle Exterior
Disassemble the motorcycle body in the following sequence:
Seat cushion assembly → Left and right protecting plate assemblies → Left and right tail covers → Left and right
hanger → Left and right hanger →
↓
Left and right pedals → Front mudguard brace panel → Front mudguard → Rear mudguard assembly → Rear rail →
Rear tail cover connectiong board → Tail lamp → Tail lamp support
* Attention
Do not damage exterior parts during assembly and disassembly.
Do not damage the pawls on the exterior parts of the vehicle body during disassembly and assembly.
Align built-in panel and cover plate to their grooves respectively.
Correctly install paw of each part during combination.
Do not damage the fittings during exterior part installation.
Front wheel / Front Suspension
1 Front wheel shaft 2 Gear seat assembly 3 Gear seat oil seal 4 Drive plate 5 Bearing 6 Front wheel
middle sleeve 7 Front brake disc 8 Front brake disc mounting bolt 9 Front wheel oil seal assembly 10 Front
wheel left sleeve 11 Tubeless tyre
12 Front wheel rim
Control Assembly
A
Tightening torque of hexagon Socket screw 2:37-44 N·m
B
Tightening torque of Nut 19:5-9 N·m
C
Tightening torque of Screw 20:5-9N·m
1 Right rear mirror assembly 2 Left rear mirror assembly 3 Bolt
4 Handle gear block 5 Right handle
assembly 5 Right combination switch 6 Right combination switch 7 Steering handle welded assembly 8 Left
combination switch 9 Left steering handle jacket 10 Left handle assembly 11 Left handle 12 Slotted Nut 13
Handle mounting bolt 14 Bolt M6×25
15 Fixed cover 16 Adjusting screw tube 17 Slotted nut 18 Left and
right rear mirror holders 19 Clutch cable jacket 20 Shaft pin 12×20 21 Brake adjusting nut 22 Rear brake
pull rod assembly
23 Rear brake spring
24 Rear brake switch tension spring
25 Cotter pin 2×18
26
Washer 6 27 Bolt M8×30
28 Connect seat assembly
29 Brake pedal welded assembly 30 Rear brake
return spring 31 Choke cable assembly 32 Throttle cable assembly 33 Bolt M6×16 34Pin 6×14 36 Clutch
cable assembly
Front Fork Assembly
Tightening
A
torque
for
Bolt
16
(Steering stem mounting bolt) in
the diagram:40-60 N·m
B
C
D
Tightening torque for Bolt 19 in the
diagram:22-29 N·m
Tightening torque for Bolt 29 in the
diagram:37-44N·m
Number of upper steel balls:23
Number of lower steel balls:19
1 Right front shock absorber assembly 2 Inner pipe 3 Oil seal 4 Left front shock absorber assembly 5 Lower
steel bowl of upper bearing 6 Upper steel bowl of lower bearing 7 Cable clip 8 Lower steel bowl of lower
bearing 9 Headlamp lower bracket 10 Main cable clip
11 Hexagon socket screw 8x30 12 Steering handle
upper holder 13 Bracket lower washer
14
15 Bolt M6×16
16 Bush
17 Steering shaft lever nut 18
Rubber boot stem fixing bolt 19 Lower bracket assembly
20 Combination screw M6×12 21 Upper bracket
assembly 22 Nut M6 23 Side reflector assembly
24 Washer 10 25 Dust cover 26 27 Combination
screw M6×16 28 Location pin 29 Upper steel bowl of upper bearing 30 Steel ball 3/16 inch 31
32
33
Steel ball 1/4 inch 34 Front mudguard left bracket II assembly 35 Screw M6×15.2 36 Hexagon socket screw
M6×16
37 38 Hexagon socket screw M6×30
39 Front mudguard right bracket II assembly
40 Front
mudguard right bracket I assembly
VII Front Wheel/Front Suspension
Preparatory data-----------------7.1
Fault diagnosis------------------7.2
Front wheel----------------------7.3
Control assembly---------------7.4
Front fork assembly------------7.5
7.1 Preparatory Data
Precautions on operation
Before removing the front wheel, lift and support the bottom of motorcycle with a jack or other available device. The
front wheel is off the ground. Take care not to rotate the wheel reversely.
Attention: Please do not let oil contaminate braking shoe, braking shoe assembly and brake disc.
Basic data of the motorcycle as a whole
Measuring position
Item
Front wheel shaft
Curvature
Front wheel
Wheel shimmy
Standard value(mm)
0.2
Longitudinal
Transversal
2.0
Within 1.0
Tightening torque
Upper bracket assembly mounting bolt
Front wheel shaft locknut
Front shock absorber mounting bolt
7.2 Fault Diagnosis
7.2.1 Heavy Steering Handle
Handle bearing damaged
Too low tyre pressure
Tyre leakage
Service Limit(mm)
2.0
Tools
40-60
55-62
37-44
N·m
N·m
N·m
Bearing remover
Locknut wrench
7.2.2 Wobbly Direction Handle
Damaged handle bearing.
Not enough tyre pressure.
Front fork bent, front wheel shaft bent.
Distorted and crooked front wheel tyre.
7.2.3 Wobbly Front Wheel
Distorted wheel
Worn front wheel bearing
Defective front tyre
7.2.4 Difficult Rotation of Wheel
Shaft or bearing seat fault
Braked
7.2.5 Noisy Front Shock Absorber
Friction sound of shock absorber protecting plate
Loosened bolts on the shock absorber.
7.3 Front Wheel
7.3.1 Disassembly
Attention:
Stand the motorcycle reliably.
Screw off speedometer mounting bolts and remove
speedometer cable.
Screw off front shaft locknuts.
Remove front shaft (1), take down bearing seat assembly (2) and
front wheel.
Screw off bolts and remove front mudguard and lead wire of
odometer.
Remove front brake hose.
Remove oil seal assembly (10) and bearing (5) with an oil seal
remover and a bearing remover respectively.
* Note: Refer to Page 95 of the manual for detailed QJ125
Motorcycle front wheel disassembly and assembly diagram.
7.3.2 Inspection
7.3.2.1 Shaft Curvature Inspection
Place the shaft onto a V block and measure its
eccentricity with a dial gauge.
Service limit: When the measured value exceeds
0.2mm, replace it.
7.3.2.2 Wheel Shimmy Inspection
Place the wheel onto a precise support and check its
amplitude of shimmy.
Rotate the wheel with your hands and read out shimmy
amplitude.
Service limit:
Longitudinal: replace it when it is over 2.0mm
Transversal: replace it when it is over 2.0mm.
7.3.2.3 Front Bearing Inspection
Remove front shaft (1) and brake disc (12).
Remove left sleeve (11) of front wheel.
Remove oil seal assembly (10).
Remove bearing (5).
Inspect rolling of bearing.
If bearing does not roll, roll smoothly or steadily, or
bearing is worn or loosened, replace it with a new one.
7.3.3 Bearing Replacement
Remove front shaft, front wheel and left sleeve and middle
sleeve (6) of front wheel.
Remove oil seal and bearing with an oil seal remover and a
bearing remover respectively.
Note:Removed bearing shall be replaced with a new
bearing.
Apply some lubricating grease on the bearing at
installation.
And then press the bearing in with bearing installer.
* Attention
• The bearing must be pushed in parallel
7.3.4 Installation
Install the bearing in the reverse order of removal.
Attentions:
Lubricate front shaft, gear seat assembly, oil seal (lip), sleeve, bearing 6301-2RS, and middle sleeve.
Recommended lubricant is calcium base grease.
Install front shaft(3), front wheel, gear seat assembly(2)and Nut M12Χ1.25.
Gear seat assembly shall be halved at installation.
If odometer gear seat assembly does not align and lock the front shaft, the odometer gear seat will be distorted.
Install front brake assembly to the front brake disc.
Tighten front shaft.
Note: Refer to Page 95 of the manual for
detailed
QJ125
Motorcycle
front wheel
disassembly and assembly diagram
Front wheel locknut tightening torque: 55-62
N·m
7.4 Steering Handle
7.4.1 Removal
Remove left and right rear mirror assemblies(1)
and(2).
Open the fixed cover.
Remove left handle assembly(10)of front brake.
Remove balancing assemblies(3)and (4).
Remove left and right combination switches(6)and (10)..
Remove left handle grip assembly(9), throttle control handle
(5) and steering handle upper holder mounting screw.
Take down steering handle upper holder.
Remove steering handle assembly.
7.4.2 Installation
* Note: Refer to Page 96 of the manual for QJ125-26A
Motorcycle steering handle disassembly and assembly
diagram.
Install the steering handle in the reverse order of removal.
Top bracket assembly mounting bolt
Tightening torque:40-60 N·m
7.5 Front Fork
7.5.1 Removal
Support the motorcycle with the middle stand.
Remove front wheel.
Remove brake caliper and brake pipe clip.
Remove front mudguard(1) and reflector(2).
Remove the handle.
Screw off upper bracket mounting bolt and lower bracket pinch bolt.
Remove headlamp bracket.
Remove the front fork.
Tools:
Steering handle welded assembly mounting bolt wrench
Locknut wrench
Special remover for bearing steel bowl
* Attention:
Clean the opening part of protecting plate of motorcycle block with a cloth.
Upper and lower bearing steel bowls shall be removed with special bearing steel bowl remover.
7.5.3 Installation
Apply lubricating grease onto the bottom bearing steel
bowl and confirm the number of steel balls (23balls).
Steering handle shall not be rotated in case of steel ball
falling off; then install steering rod.
Support the steering handle and apply lubricating
grease on to the top bearing steel bowl and confirm the
number of steel balls (19 balls)
Apply lubricating grease on the top holder race.
Turn steering handle left and right to have steel balls
closely fit.
Tools:
Locknut wrench
Rotate the front fork left and right to be sure of its
smoothness and there shall be no looseness.
Procedures:
Install it in the reverse order of removal.
Before installing the front fork, tighten pinch bolt first.
Make sure that the end of inner fork pipe is parallel and level with handle head.
Tighten lower bracket pinch bolt(6)and steering stem pinch bolt(17).
* Note: Refer to Page 97 of the manual for QJ125 Motorcycle front fork disassembly and assembly diagram.
Rear Wheel/Rear Suspension
1 Rear shock absorber assembly 2 Rear brake rocker arm 3
Sprocket 43 teeth 7 Oil seal
8 Rolling bearing 6204-2RS
Sprocket mounting bolt
12 Rear wheel left sleeve assembly
Tubeless tyre 16 Rear wheel left sleeve 17 Rear braking shoe
M14×1.5 21 Chain adjuster assembly
22 Chain guard
Rear shaft 4 Nut M8 5 Sprocket stopper 6
9 Chain drive sleeve 10 Sprocket hub 11
13 Rear wheel buffer 14 Bearing spacer 15
18 Rear wheel hub 19 Bolt 20 Locking nut
Rear Shock Absorber
1 Cap nut M10×1.25
2 Rear shock absorber mounting gasket
4 Washer 12 Bolt M10×1.25×40
3 Rear shock absorber assembly
Rear Swing Arm
A
Side clearance(opening swing arm end) limit value:1.0mm
B
Tightening torque of Nut 1 in the diagram is:70-83 N·m
1 Locking nut M14X1.5 2 Dust ring assembly
3 Bush 4 Oil seal 5 Middle sleeve 6 Rubber gasket for
protecting plate
7 Rear swing arm welding assembly
8 Washer φ12
9 Chain adjuster spacer
10
Connecting rod assembly
11 Bolt 12 Washer 13 Nut M8 14 Cotter pin 2×18 15 Chain protector 16
Rear swing arm bush 17 Rear swing arm assembly
Chain Drive Assembly
Tightening torque of
A
Bolt 1 in the diagram
is:22-29 N·m
Drive chain
B
specification:
428H-1×126
1 Sprocket mounting bolt 2 Sprocket hub
6 Sprocket 43 teeth
7 Sprocket stopper
3 Chain drive sleeve 4 Rolling bearing 6204-2RS 5 Oil seal
8 Nut M8 9 Chain 428H-1×126 10 Chain guard 11 Boss bolt
VIII Rear Wheel/Rear Suspension
Preparatory data----------------------------------- 8.1
Fault diagnosis-------------------------------------8.2
Rear wheel----------------------------------------- 8.3
Rear shock absorber/rear swing arm----------- 8.4
Chain drive assembly-----------------------------8.5
8.1 Preparatory Data
Precautions on operation
Do not contaminate braking shoe ad brake disc with oil.
Basic preparatory data
Item
Rear wheel
Shimmy
Standard Value(mm)
Service Limit(mm)
Longitudinal
2.0
Transversal
2.0
Tightening torque
Rear shat locknut
Rear shock absorber top nut
Rear shock absorber bottom nut
8.2 Fault Diagnosis
8.2.1 Shimmy Rear Wheel
Distorted wheel rim
Worn rear bearing
Troubled tyre
Worn or injured swing arm pivot bush
Improper adjustment of drive chain adjuster
Bent frame or swing arm
85 - 98 N·m
37 - 44 N·m
37 - 44 N·m
8.2.2 Inflexible Wheel Rotation
Incorrect brake adjustment
Worn rear bearing
Too tight the drive chain
8.2.3 Poor Braking Performance
Incorrect brake adjustment
Worn braking shoe
Worn brake drum
Incorrect installation of braking shoe
8.2.4 Brake Pedal Inflexible or Slow
Return
Worn or broken return spring
Incorrect brake adjustment
Worn or contaminated brake drum
Incorrect installation of braking shoe
8.2.5 Noisy Brake
Worn braking shoe
Worn brake drum
Contaminated braking shoe
Contaminated brake drum
8.3 Rear Wheel
8.3.1 Removal
Stand the motorcycle steadily and rear wheel is off
the ground.
Remove rear brake pedal assembly(1).
Remove muffler assembly(2).
Screw off rear wheel adjuster.
Take down the brake rod from brake arm.
Remove connector and spring on the brake arm.
Remove brake pin, washer, rear wheel buffer and
brake nut.
Remove torque linked arm from rear drum brake.
Screw off drive chain adjuster(20).
Remove rear shaft locknut(21)and rear shaft(4).
Move forward rear wheel. Remove the drive chain
from the drive sprocket.
Remove the rear wheel.
8.3.2 Inspection
8.3.2.1 Wheel Shimmy Inspection
Rotate the wheel by hands and measure its eccentricity
with a dial gauge.
Service limit:
Longitudinal: Replace it when the measured value
exceeds 2.0mm.
Transversal: Replace it when the measured value
exceeds 2.0mm.
When rear wheel shimmy exceeds service limit, rear wheel
bearing is loosened, which results in wobbly rear wheel.
Check and replace rear wheel bearing.
8.3.3 Installation
Install the rear wheel in the reverse order of removal and
tighten the nut.
Rear wheel shaft locknut
Tightening torque: 85-98N·m
QJ125-26A Rear Wheel
8.4 Rear Shock Absorber/Rear Swing Arm
8.4.1 Remove Rear Shock Absorber
Remove left and right protecting plates, seat cushion assembly and hood.
Screw off top and bottom mounting bolts and cap nut (1) from rear shock
absorber.
Remove the rear shock absorber.
8.4.2 Rear Shock Absorber Inspection
Check rear shock absorber rod. If the rod is bent or damaged, please replace
rear shock absorber assembly.
Check fatigue of spring. If it is, replace rear shock absorber assembly.
8.4. Install Rear Shock Absorber
Install the rear shock absorber in the reverse order of removal.
Install upper locknut and lower mounting bolt on the rear shock absorber
Tighten them to specified torque.
Locknut
Tightening torque:37-44 N·m
8.4.4 Remove Rear Swing Arm
Remove rear wheel.
Remove bolt and drive chain cover.
Screw off the lower mounting bolts on the shock absorber at both sides.
Screw off swing arm pivot nut (3) from the frame.
Remove rear swing arm shaft(2) and rear swing arm assembly(1).
Note: Refer to Page 106 for detailed disassembly and assembly diagram.
8.4.5 Rear Swing Arm Inspection
Check rear swing arm installation shaft. Rotate the shaft on a flat
surface or measure it with a dial gauge. If it is bent, replace it.
* Attention
Don’t attempt to straighten bent shaft.
Wash in solvent the components for rear swing arm installation
shaft.
Check sleeve assembly of rear swing arm(7) and intermediate
sleeve (5).
If they are damaged, replace them.
8.4.6 Install Rear Swingarm
Install the rear swing arm in the reverse order of removal.
Apply lubricating grease on to pivot bush.
Install rear swing arm sleeve assembly(15) and intermediate sleeve(14).
Install rear swing arm assembly(6).
Install rear swing arm onto the frame and insert rear swingarm shaft.
Install and tighten rear swing arm shaft nut to specified torque.
Install lower mounting bolt on rear shock absorber.
Install drive chain cover.
Install the two connecting bolts.
Install rear wheel.
Install rear swing arm nut
Tightening torque: 70-83N·m
8.5 Chain Drive Assembly
8.5.1.Removal
Stop the motorcycle on the flat ground and
stand it steadily.
Remove gearshift pedal connecting parts,
drive chain cover and drive sprocket.
Remove rear wheel, rear shock absorber,
chain cover and drive chain.
8.5.2.Inspection
Measure length
of 10 chain links. If they cannot meet the specified value, replace the drive chain.
Length limit of 10 chain links is 127 mm.
* Attention:
• Stretch the chain by hands and then measure it.
• The measuring range is from chain link roller
side of roller ○,11.
to inner
• Measure length of 10 chain links.
• Measure length of 10 chain links for 2-3 times at different
positions.
Clean drive chain. Immerse it into kerosene and brush the
dust on it as possible as one can.
Take the cleaned chain from kerosene and dry it in the air.
Inspect roller and its side plate . If it is damaged or worn,
replace the drive chain.
Lubricate drive chain. Drive chain lubricant can be purchased
from the local dealer.
Inspect rigidity of drive chain. If it is rigid, you can clean,
lubricate or replace it.
Check driving sprocket and driven sprocket.
If 1/4 of the gear teeth are worn
, replace the sprocket;
so does with bent teeth
Check rear brake. If it is cracked or worn, replace it.
Check rear wheel buffer, replace it with a new one if it is
worn or damaged.
Check wheel bearing. If there is bearing clearance in the wheel hub or rotation of the wheel is unbalanced, replace it
with a new one.
Check oil seal. If it is worn or broken, replace it with a new one.
8.5.4. Installation
Install it in the reverse order of removal.
Install drive chain, chain cover, rear left shock absorber, rear wheel and drive sprocket cover.
Adjust slackness of drive chain and clearance of brake pedal.
If slackness of drive chain is too small, engine and other important components will work overload.
Keep the slackness of drive chain in specified limit range.
Seat Cushion
1 Seat cushion assembly
2 Rear rail
3 Rear luggage carrier screw II
4 Rear luggage carrier screw I
Fuel Tank Assembly
A
Max. capacity of fuel tank:16L
B
Tightening torque of Bolt 13 in the diagram:5-9 N·m
D
Tightening torque of Bolt 15 in the diagram:5-9 N·m
E
Note:Fuel switch shall be set at “OFF” position while removing fuel
tank.
1 Fuel tank lock 2 Fuel tank block assembly
3 Protecting plate rubber gasket 4 Right fuel tank protecting
plate 5 Left fuel tank protecting plate 6 Fuel tank installation gasket 7 Fuel sensor assembly 8 Sensor rubber
gasket 9 Nut M6 10 Fuel switch assembly
11 Wire clamp 8
12 Oil hose φ4.5×2×140 13 Wire clamp 9
14 Oil hose φ7×11×500 15 Screw M4×25 16 Fuel tank installation gasket 17 Fuel tank installation shaft sleeve
18 Rubber boot 19 Fuel tank installation washer 20 Bolt M6×35 21 Hexagon socket screw M5×30 22
Hexagon socket screw M5×14
23 Mounting screw for fuel tank protecting plate 24 Fuel cap seal ring 25
Fuel tank support assembly
26 Switch handle
IX
Fuel Tank/Seat Cushion
Preparatory data----------------------9.1
Fault diagnosis-------------------9.2
Fuel tank/seat cushion-----------9.3
9.1 Preparatory Data
Precautions on Operation
Working site for removal shall be away from fire source.
Fuel switch shall be set at “OFF” position while removing fuel tank.
While installation, tighten bolt and nut to their specified torque.
After installation, check if all the components are correctly fixed and work normally.
Basic data
Item
Standard
Service limit
Fuel tank capacity
16
16.5
Tightening torque
Cushion mounting bolt
Fuel tank mounting bolt
9.2 Fault Diagnosis
Reducing Fuel Level
Natural consumption
Oil leakage
22-29 N·m
5 - 9 N·m
9.3 Fuel Tank/Seat Cushion
9.3.1 Removal
Remove left and right protecting plates.
Insert ignition key into the seat lock. Rotate
clockwise the key and unlock it.
Pull downward and take out the helmet hook.
Release the pawl from frame and remove seat
cushion (1)
Remove connector from lead wire of oil level sensor.
Fuel switch shall be set at “OFF” position.
Disconnect fuel hose and carbon canister connecting hose.
Remove bolt, washer, damper and fuel tank.
Remove the fuel tank from the frame.
Note:
Refer to P115 and P116 for detailed disassembly and
assembly diagram.
9.3.1 Installation
Install the tank in the reverse order of removal.
Installation torque:
Seat cushion mounting bolt
Fuel tank mounting bolt
22-29 N·m
5 - 9 N·m
Engine Inspection and Maintenance
Table of tightening torque for fastening parts used in Engine
Fastening position and part name
Tightening torque(N·m)
Cylinder cap nut M8
25~28
Cylinder cap nut M6
8~12
Cylinder cap bolt
8~12
Cylinder block connecting bend bolt
8~12
Cylinder block connecting nut
8~12
Flywheel locknut
50~55
Valve clearance adjuster
10~15
Gearshift changeover contact screw
8~12
Closing bolt
8~12
Right side cover bolt
8~12
Front left cover bolt
8~12
Coil screw
8~12
Clutch separating disc bolt
6~8
Clutch locknut
45~50
Filter screen cover bolt
8~12
Tensioner pinch bolt
8~12
Drive gear locknut
50~60
Drive sprocket bolt
18~22
Engine oil pump screw
8~12
Ratchet upper and lower baffler screw
8~12
Spark plug
18~22
Components that cannot be reused:
Please be sure to use new paper pad, sealing ring, O ring, cotter pin, circlip, retainer and so on while
installing or assembling components.
Lubricating System
Note: When the engine oil pump
is removed, clean carefully all the
components and purge them with
high-pressure gas.
During engine oil pump removal
and installation, pay attention not to
drop anything into the crankcase.
1 Rocker arm 2 Cam mechanism 3 Piston 4 Crankshaft
7 Filter screen 8 Engine oil pump 9 Filter element assembly
5 Main shaft assembly
6 Countershaft assembly
X Lubricating System
Preparatory data--------10.1
Fault diagnosis---------10.2
Oil engine pump-------10.3
10.1 Preparatory Data
Precautions on Operation
When the engine oil pump is removed, clean carefully all the components and purge them with high-pressure gas.
During engine oil pump removal and installation, pay attention not to drop anything into the crankcase.
Function of lubricating system:Function of engine lubricating system is to supply lubricating oil
to friction surfaces of engine parts so that dry surface friction will turn to liquid friction between
plasmids of lubricating oil. It is used to reduce wear of component, cool components of higher
heat, absorb impact from bearing and other parts, weaken noise, increase tightness between
piston ring and cylinder wall, clean and take away impurities from surface of component, etc.
Basic data
Engine oil capacity
Oil pump rotor
Item
Standard
Service Limit
Oil replacement
1.0±0.1L
_
Engine overhaul
1.3±0.1L
_
Radial clearance between inner and external rotors Less than 0.15
0.2
Clearance between external rotor and pump block
0.15-0.18
0.2
Clearance of rotor end face
0.08-0.12
0.15
10.2 Fault Diagnosis
Reducing engine oil
Engine burnt
Natural consumption
Oil leakage
No oil pressure or too low oil pressure
Clogged oil way
10.3 Oil Pump
Oil pump gear
10.3.1 Removal
Remove right cover. Take down the engine oil filter and release
oil pump mounting screw.
Take down oil pump block, drive gear and pump shaft.
Oil pump block
Screw off the screw
Take down pump seat.
Screw
Screw
Engine oil pump
Engine
oil pump
Remove the screw and take down pump cover.
Disassemble oil pump
Testing gauge
Check radial clearance between inner rotors
Allowable limit: 0.2mm.
Check clearance between external rotor and oil pump seat.
Allowable limit: 0.2mm.
Testing gauge
Check clearance between rotor end faces.
Allowable limit: 0.15mm.
Flat board
Testing gauge
10.3.2 Assemble Engine Oil Pump
As shown in the following figure:
* Attention:
After assembly, inner and external rotors shall rotate smoothly and be out of nimbleness.
10.3.2 Installation
Install the oil pump in the reverse order of removal.
Carburetor
Attention:
Gasoline
is
very
dangerous. Fire and smoking are
forbidden in working site.
When the carburetor is removed,
plug the intake pipe side with a cloth
in case foreign matters coming in.
1- Upper cover 2- Upper cover seal ring 3- Plunger spring 4- Plunger assembly 5- Lower housing connecting
screw 6- Lower housing assembly 7- Seal ring 8- Float assembly 9- Float pin 10- Needle valve core
11- Idle jet 12- Main jet 13- Main nozzle 14- Main foam pipe 15-Mixture screw 16- Mixture screw spring
17-Fixture screw washer 18- Mixture screw seal ring 19-Plunger adjusting screw spring 20- Plunger adjusting
screw
XI
Carburetor
Preparatory data--------------11.1
Fault diagnosis--------------- 11.2
Carburetor removal---------- 11.3
Carburetor installation-------11.4
11.1 Preparatory Data
Precautions on Operation
·Gasoline is very dangerous. Fire and smoking are forbidden in working site.
·Pay specially attention to sparks.
·Please do not pull and bend wires and cables by force. Distortion and injury may affect operation of cables.
·When the carburetor is removed, plug the intake pipe side with a cloth in case foreign matters coming in.
·When the carburetor has not been used for more than one month, the gasoline inside the float must be drained. Since
gasoline inside the float may deteriorate, which will clog idle nozzle and idle may become dangerous.
Function of carburetor:Carburetor is one of the key parts for oil supply system of the engine. Its
working performance has direct effect on engine stability and power and economical indexes.
Carburetor can atomize gasoline into tiny oil drops and then mix them with certain amount of
air. Depending on different working conditions of engine, carburetor can form combustible
mixed gas of various concentrations and supply to the engine so that normal and continuous
rotation of engine is guaranteed.
Basic data
Unit: mm
Item
Standard Value
Main nozzle
A07
Main jet
173
Idle jet
42.5
Needle
A08-3
11.2 Fault Diagnosis
Poor starting
No fuel in carburetor
Difficult start, stalling after start, unstable idle
Clogged carburetor
Clogged oil filter
Clogged oil pipe
Sticky needle value
Improper oil level adjustment
Too high or too low mixed gas concentration
Secondary air sucked by the intake system
Improper idle adjustment
Improper oil level adjustment
Clogged idle system or electric enrich valve
Too much fuel in engine
Too low mixed gas concentration
Oil outflow
Secondary air sucked by fuel system
Degraded fuel
Improper work of enrich valve
Clogged idle system or choke system
Clogged oil nozzle
Clogged needle valve
Too low oil level
Clogged fuel system
Improper work of plunger
Secondary air sucked by the intake system
Too high mixed gas concentration
Intermittent spark while acceleration
Improper work of enrich valve
Improper work of needle valve
Too high oil level
Oil outflow from carburetor
Clogged airway
Dirty air cleaner
Too low mixed gas concentration
11.3 Removal of Carburetor
11.3.1 Removal
Remove the locknut between carburetor and bakelite washer.
Remove carburetor assembly.
11.3.2 Disassemble Carburetor
Screw off upper cover and remove sealing ring, plunger spring and plunger assembly on it.
Screw off lower housing connecting screw and remove lower housing assembly and sealing ring.
Remove float assembly, float pin and needle valve core.
Remove idle jet, main jet, main nozzle and main foam pipe.
Remove mixture screw, mixture screw spring, mixture screw washer and mixture screw sealing ring.
Remove plunger adjusting screw and plunger adjusting screw spring.
For details, refer to breakdown diagram in P125.
11.3.3 Inspection
Check if needle valve assembly, needle valve seat and float assembly are worn or broken.
If needle valve core is worn or broken, replace it with a new one.
If needle valve seat is worn, the main carburetor body shall be
replaced.
If the tongue plate of float is worn, replace it.
Check if oil needle of carburetor is worn or broken. If it is,
replace it and main nozzle together.
Check if idle jet, main jet or main nozzle is worn, broken or
contaminated. If it is, replace it.
Check if plunger is worn. Replace it if necessary.
Check carburetor itself and fuel pipe. If they are dirty, clean it
according to the user’s manual.
11.4 Installation
Assembly
Install idle jet, main jet, main nozzle and main foam pipe.
Install float, float pin and needle valve core.
Install upper and lower housing sealing rings, lower housing assembly and lower housing connecting screw.
Install mixture screw washer, mixture screw sealing ring, mixture screw spring and mixture screw. Put the mixture
screw on to the housing body.
Install plunger adjusting screw spring and plunger adjusting screw.
Install plunger spring and plunger assembly.
Install top cover sealing ring and top cover.
Installation
Install the carburetor in the reverse order of removal.
Cylinder Head/Valve
1 Limit screw 2 Washer 3 Cylinder cover hood bolt 4 Valve cover 5 O ring 6 Cylinder cover hood bolt
7 Plug 8 O ring 9 Rocker arm shaft 10 Wave spring washer 11 Rocker arm 12 Rocker arm return spring
13 Cylinder cover hood 14 Spark plug assembly
15 Cover nut 16 Washer 17 C-type gasket 18 Cylinder
cover nut 19 Copper washer 20 Round pin 21 Locknut 22 Adjusting screw 23 Valve collet 24 Valve spring
upper retainer 25 Valve spring 26 Valve rod sealing assembly 27 Valve guide 28 Valve spring lower retainer
29 O ring 30 Rubber air intake assembly 31 Stud 32 Nut 33 Clamp assembly
34 Carburetor assembly
35 Cylinder cover 36 Elastic round pin 37 Cam shaft 38 Cam shaft sprocket 39 Lock washer 40 Bolt 41
Cylinder cover plug 42 Exhaust valve 43 Timing chain assembly 44 Inlet valve 45 Nut
46 Stud 47
Cylinder cover sealing washer 48 Right chain guide plate assembly 49 Sealing washer 50 Chain guide plate bolt
51 Left chain guide plate
XII Cylinder Head/Valve
Preparatory data-----------------12.1
Valve guide replacement-------------12.5
Fault diagnosis------------------12.2
Valve race fixing and adjustment---12.6
Cylinder head--------------------12.3
Cylinder head installation------------12.7
Valve Inspection---------------- 12.4
12.1 Preparatory Data
Precautions on Operation
To ensure sealing between cylinder head and cylinder body, there is a great bolt pretension on the cylinder head.
Pretension value: 50Nm.
All the components shall be cleaned before inspection and test, and purged with high-pressure air.
Function of cylinder head: Cylinder head is used to seal cylinder and form a combustion chamber with piston to
hold high-temperature and high-pressure fuel gas. It accomplishes air intake and exhausting operation with valve
mechanism.
Basic Data
Unit:mm
Item
Standard
Service Limit
Cylinder cover flatness
0.03
0.05
Intake
0.03-0.05
_
Exhaust
0.03-0.05
_
Intake
4.97-4.98
4.9
Exhaust
4.96-4.97
4.9
Intake
5 -5.012
5.1
Exhaust
5-5.012
5.1
Intake
0.02-0.042
0.08
Exhaust
0.03-0.052
0.10
Intake/Exhaust
0.7
1.5
38.8
37.8
Valve clearance
Valve stem OD
Valve
Valve guide
Valve guide ID
Clearance between valve stem and valve guide
Valve race width
Valve spring
Rocker arm
Valve
Valve guide
Clearance
Rocker arm shaft OD
Intake/Exhaust
11.980-11.988
11.95
Rocker arm hole ID
Intake/Exhaust
12-12.012
12.05
Clearance between rocker arm shaft and rocker arm hole
Intake/Exhaust
0.012-0.032
0.08
Intake
0.03-0.05
_
Valve clearance
12.2 Fault Diagnosis
Low compression pressure
Noisy cylinder head
Improperly adjusted valve clearance
Valve burnt or bent
Improperly adjusted valve clearance
Valve spring hurt
Poorly sealed valve race
Too high compression pressure
Air leakage at cylinder head
Improperly installed spark plug
Too much carbon deposited in the combustion chamber
12.3 Cylinder Head
12.3.1 Removal
Bolt
Screw off the ten locknuts and remove cylinder cover.
Cylinder cover
Cylinder cover hood
Bolt
Return spring
Remove cylinder cover hood.
Screw off two locknuts and remove the rocker arm, return spring
and rocker arm shaft.
Rocker arm
Rocker arm shaft
Measure rocker arm shaft OD.
Allowable limit: 11.95mm.
Measure rocker arm hole ID
Allowable limit: 12.05mm.
Clearance between rocker arm and rocker arm shaft
Micrometer
Allowable limit: 0.08mm
Tester
Screw off the two locknuts and remove the lock washer, cam
shaft and C-type gasket. Screw off the three cap nuts and
hexagon nut, remove cylinder head
Cam shaft
C-type gasket
Cylinder head
Bolt
Lock washer
Valve collet
Compress valve spring with a valve spring compressor, and remove the valve collet.
Remove in sequence spring disc, external and inner valve springs, external valve spring washer and valve.
12.3.2 Disassemble Valve
Washer
Inner valve spring
Valve collet
Valve
Spring disc
External valve
spring
Valve oil seal
Ruler
12.4 Valve Inspection
Clean carbon deposition on the cylinder cover.
Measure flatness of junction surface of cylinder cover
Allowable limit: 0.05mm.
If flatness of junction surface of cylinder cover exceeds the
service limit, put a piece of fine sandpaper on the flat plate and
fit the sandpaper with junction surface of cylinder cover; and
then push the sandpaper to grind in figure of “8” way.
Measure the free length of valve inner /external spring.
Testing gauge
Allowable limit:
Internal spring: 30mm.
External spring: 37.8mm.
Measure OD of valve stem
Allowable limit: 4.9mm.
Check valve guide. Please eliminate the carbon deposition in the
valve guide with a reamer before inspection
Attention: Rotate the reamer in clockwise. Please do not rotate
he reamer in counterclockwise.
Measure valve guide ID.
Allowable limit: Intake/Exhaust: 5.5mm.
Clearance between valve and valve guide
Allowable limit: Intake Valve: 0.08m.
Exhaust valve: 1.0mm
Vernier caliper
Micrometer
Valve reamer
Tester
Opener
12.5 Valve Guide Replacement
* Attention:
When the clearance between valve and valve guide exceeds
service limit value, please replace the valve guide. When a
valve guide is replaced, surface of valve seat retainer shall be fixed and adjusted.
Put the valve guide into the freezing chamber of refrigerator for
one hour to freeze it.
Heat with electric furnace or oven the cylinder head to
100-150 .
Fix the cylinder head and remove the valve guide from upper
side of cylinder head with a special valve guide remover.
Opener
Install a new O ring onto the new valve guide.
Install the valve guide from the top of cylinder head.
* Attention: Please do not hurt cylinder head while installing valve guide.
Valve reamer
When the valve guide is inserted, fix and adjust it with a valve
guide reamer.
* Attention: When a reamer is used to cut, please apply
some amount of cutting lubricant onto it.
Rotate the reamer in clockwise direction.
Remove carbon deposited in combustion chamber and valve
and clean thoroughly intake and exhaust valves.
Inspect width of contact surface of valve seat(width of valve
race)
Allowable limit: intake/exhaust: 1.6mm.
Valve seat contact surface
12.6 Valve Race Fixing and Adjustment
Hackly part
Remove hackly and ragged parts on the valve race with a
45°angled milling cutter.
Note:
Apply a layer of transparent or Prussian blue film onto the
valve race so that it can be observed clearly.
Remove 1/4 of external edge of valve race with a 32° angle
milling cutter.
32°
Remove 1/4 of bottom of valve race with a 60° angle milling
cutter.
Remove the milling cutter and check the places processed.
60°
Grind and cut valve race with a 45°angle precise milling cutter
till it gains a proper width.
All the dents and ragged parts must be removed.
Standard valve race width:
1mm
Intake: 1.0mm
Exhaust: 1.0mm
45°
If contacted place is the higher part of valve, please use a 32°angle
plain milling cutter to lower the valve race.
If contacted place is the lower part of valve, please use a 60°angle
internal milling cutter to raise the valve race.
Grind and cut valve race with a 45°angle precise milling cutter till it
meets the required specification.
After completion of valve race grinding and cutting, please apply
some polishing agent on the surface of valve. Polish the valve
gently.
High contact face
32°
Low contact face
60°
12.7 Cylinder Head Installation
Install the cylinder head in the reverse order of removal.
* Attention:
While installing valve spring, the end with short spring links heads combustion chamber.
While installing valve collet, please compress valve spring with a valve spring compressor and install the valve
collet.
While installing valve, please apply appropriate amount of engine oil on the surface of valve stem, and then install it
into valve guide.
Cylinder Block and Piston
Attention:
All
the
components
shall
be
cleaned before inspection
and test, and purged with
high-pressure air.
1 Piston 2 Retainer 3 Piston pin 4 Combined oil ring 5 Second compressing ring 6 Top ring 7 Location pin
8 Washer 9 Cylinder cover connecting bent pipe assembly 10 Bolt 11 Cylinder cover connecting bent pipe
washer assembly 12 Cylinder block 13 Washer 14 Tensioner assembly 15 Bolt 16 Bolt 17 Screw
XIII Cylinder Block and Piston
Preparatory data------------13.1
Fault diagnosis--------------13.2
Cylinder block--------------13.3
Piston---------------------- 13.4
Cylinder installation-----13.5
13.1 Preparatory Data
Precautions on Operation
All the components shall be cleaned before inspection and test, and purged with high-pressure air.
Function of cylinder block: Cylinder block provides the space for gas compression, combustion
and expansion and guides piston movement. It also transfers part of heat in the cylinder to
surrounding coolant.
Function of piston:
Piston can bear the pressure generated by combustion of mixed combustible gas in the cylinder and transmit the
pressure to connecting rod to drive crankshaft to rotate.
It forms a combustion chamber with cylinder head.
It works as a slide valve to compress regularly fresh mixed gas from crankcase into cylinder and exhaust combustion
gas from the cylinder.
Basic data
Unit:mm
Item
Standard Value
Service Limit
57-57.01
57.10
Cylindricity
0.005
0.05
Roundness
0.004
0.05
Flatness
0.02
0.05
ID
56.987-56.977
Piston OD(measuring point)
Cylinder
(8 mm at the bottom of piston skirt)
56.93
Piston pin hole ID
14.002-14.008
14.04
Piston pin OD
13.994-13.997
13.96
0.005-0.014
0.05
Clearance between piston and piston pin
Clearance between piston ring and ring groove
Joint clearance of piston rings
Connecting rod small end ID
Clearance between linkage rod and piston pin
Top ring
0.020-0.060
Second ring
0.020-0.060
Top ring
0.25-0.35
Second ring
0.20-0.35
Oil ring
0.20-0.70
14.010-14.018
0.013-0.024
14.06
0.10
13.2 Fault Diagnosis
Low compression pressure
White smoke from exhaust pipe
Worn, burnt or broken piston
Work or damaged cylinder and piston
Broken washer, air leakage on crankcase
Worn or damaged piston ring
Worn or damaged cylinder and piston
Higher compression pressure
Noisy piston
Too much carbon deposited in the combustion chamber
Damaged cylinder, piston and piston ring
Worn piston pin hole and piston pin
13.3 Cylinder Block
Cylinder block
13.3.1 Cylinder Block Removal
Screw off cylinder block mounting bolt.
Remove cylinder block(together with cam follower).
Mounting bolt
13.3.2 Cylinder Block Inspection
Inspect wear of cylinder inner wall. If it is seriously worn,
replace it.
Location pin
Remove washer and location pin.
Washer
13.4 Piston
13.4.1 Removal
Remove piston pin retainer.
* Attention: Please do not drop the retainer into crankcase
during removal.
Take out piston pin and remove piston.
Piston pin ring, piston pin
Remove piston ring.
Inspect piston, piston pin and piston ring.
* Attention: Please do not break or hurt piston ring.
Remove deposited carbon inside the piston ring.
Piston
Testing gauge
Install the piston ring.
Push
Measure the clearance between piston ring and piston ring
groove.
Allowable limit: Top ring: 0.09mm.
Second ring: 0.09mm.
Piston ring
Remove piston ring and install all the piston rings onto bottom
of cylinder.
* Attention:Compress piston rings into the cylinder with
piston head.
Measure the joint clearance between piston rings.
Allowable limit: 0.5mm.
Testing gauge
Piston ring
Measure piston pin hole ID.
Allowable limit: 14.04mm.
3
Measure piston pin OD.
Allowable limit: 13.96mm.
Measure the clearance between piston pin hole and piston pin.
Allowable limit: 0.05mm.
Measure piston OD
* Attention: Measuring position forms a 90°angle with
piston pin, about 11mm below piston skirt.
Allowable limit: 56.93mm.
Inspect wear and scratch on inner wall of cylinder.
* Attention: Measure cylinder ID at three positions, i.e.
upper, intermediate and lower positions. The position forms
a 90°angle with piston pin.
Allowable limit: 57.1mm.
Measure the clearance between cylinder and piston. Take the
maximum clearance as standard.
Allowable limit: 0.17mm.
Tester
1
2
3
90°
11mm
Plastigauge
Measure the roundness of cylinder inner wall.
(internal diameter difference between X direction and Y
direction).
Allowable limit: 0.05mm.
Measure the cylindricity of inner wall of cylinder.
(internal diameter difference of three positions (upper,
intermediate and lower) along X direction or Y
direction).
Allowable limit: 0.05mm.
Check flatness of cylinder surface.
Allowable limi: 0.05mm.
Ruler
Testing gauge
Cylinder
Connecting rod small end ID
Measure Connecting rod small end ID.
Allowable limit: 14.06mm.
13.4.2 Installation of piston
Install location pin.
Apply engine oil evenly on each piston ring and piston. Install
piston to its place with bevel upward.
* Attention:
Piston shall not be scratched and piston ring shall not be
broken.
When the piston ring is installed, it can rotate freely in the
piston ring groove.
Top ring
Second ring
Oil ring
Scrape the washer attached to the crankcase.
* Attention:
No foreign matters can be dropped into the crankcase.
Install piston, piston pin and piston pin retainer.
* Attention:
Install with the “Point” mark at the bottom of piston facing the
exhaust valve.
“point” Mark
13.5 Install Cylinder
Install washer and location pin onto the crankcase.
Location pin
Washer
Apply evenly engine oil on inner wall of cylinder, piston and piston ring.
Install carefully the piston ring into the cylinder.
Cylinder
* Attention: Do not hurt piston ring.
Clutch
Attention: You don’t have to remove the
engine from frame while overhauling clutch.
Viscosity and level of engine oil will affect
operation of clutch. Please check first engine oil
and oil level before inspect clutch.
If one of the cluth springs, discs or plates
does not work, you shall replace them in pairs.
1 Nut 2 Cross recessed adjusting screw 3 Thrust washer 4 Plane needle bearing 5 Locknut 6 Bearing seat
7 Lock washer 8 Bolt combination assembly 9 Pressure plate 10 Clutch spring 11 Friction disc assembly
12 Driven friction plate 13 Center bracket 14 Sleeve 15 Thrust washer 16 Housing assembly
XIV Clutch
Preparatory data-----------------------------------------------14.1
Fault diagnosis------------------------------------------------14.2
Clutch---------------------------------------------------------- 14.3
Kick start mechanism----------------------------------------14.4
Disassembly of main shaft and countershaft--------------14.5
14.1 Preparatory Data
Precautions on Operation
You don’t have to remove the engine from frame while overhauling clutch.
Viscosity and level of engine oil will affect operation of clutch. Please check first engine oil and oil level before
clutch inspection.
Function: Clutch and driven wheel constitutes a continuously variable transmission
Basic data
Clutch
Unit: mm
Braking shoe thickness
2.9-3
2.6
Length of pressure spring
31
29.7
14.2 Fault Diagnosis
Tight clutch release lever
Clutch slips at acceleration
Transmission jumps gear
Clutch cable injured, twisted or contaminated No clearance on clutch release lever
Weak or broken brake pad arm return spring
Injured clutch lifter
Faulty clutch lifter bearing
Injured brake pad arm
Worn or injured gearshift cam
Gearshift difficult
Incorrect clutch adjustment
Worn clutch disc
Weak clutch spring
Sticky clutch lifter
Clutch not released or motorcycle drags when clutch released
Too big clutch release lever clearance
Bent gearshift spindle
Injured gearshift cam
Bent or injured gearshift plate
Warped clutch plate
Faulty clutch push rod
Abnormal engine oil and oil level
14.3 Clutch
14.3.1 Removal
Screw off the four bolts for separating plate in criss-cross mode.
Remove release lever, sleeve, bearing, separating plate and clutch
spring.
Removed components refer to exploded view.
Use a special tool to screw off clutch locknut.
Remove locknut and washer.
Remove clutch center bracket.
Remove clutch drive and driven friction plates.
Remove clutch pressure plate.
Removed components refer to exploded view.
Four-pawl bush
wrench
Universal fixer
Remove spline washer.
Remove housing assembly.
Install clutch in the reverse order of removal.
Housing assembly
14.3.2 Disassemble Clutch
14.3.3 Inspection
Check if there are burs or broken parts on the housing groove
of clutch. If there are, fix and adjust with a file.
If there is a lot for fix and adjustment, replace it.
Check if teeth of pressure plate and center bracket are injured.
If they are, replace them.
Measure the free length of pressure spring.
Allowable limit: replace it if it is below 29.7mm.
Free Length
Measure the thickness of friction plate with a vernier caliper.
Allowable limit: Replace it when it is below 2.6mm.
Thickness
14.4 Disassemble Main Shaft and Countershaft
Tooth
齿面
Surface
Inspection
Check respectively wear of tooth surface and drive pawls. If
they are seriously worn or damaged, replace them.
Remove bearing and oil seal on left crankcase.
Check if bearing and oil seal are injured. Replace if necessary.
传动爪
Drive pawls
* Attention:
Hammered-out bearing cannot be reused. Replace it with a new
one.
Remove bearing and oil seal with special tools.
Bearing hole, oil seal hole
Remove bearing on right crankcase.
Check if bearing is injured. Replace if necessary.
* Attention:
Hammered-out bearing cannot be reused. Replace it with a new
one.
Remove bearing and oil seal with special tools.
Main shaft and countershaft combination
* Attention: Apply each gear and shaft with lubricating grease evenly at combination.
Make sure there is no stuck after combination.
Note:
Install the crankcase in the reverse order of removal.
Reduction Gear
Function: Transfer torque
and determinate the final
output torque and rotary
speed.
1 Gearshift drum
2 Shift fork
3 Shift fork shaft
4 Main shaft assembly 5 Countershaft assembly
XV Reduction Gear
Preparatory data-----------------15.1
Fault diagnosis------------------15.2
Gearshift mechanism----------15.3
Installation----------------------15.4
15.1 Preparatory Data
Function: Transfer torque and determinate the final output torque and rotary speed.
Basic data
Gearshift
mechanism
Unit: mm
Shift fork shaft OD
Diameter of shift fork inner hole
Shift fork thickness
Gearshift hub OD
Gearshift hub lock groove width
9.98-9.995
10-10.015
4.8-4.9
39.8-40
6.1-6.2
9.96
10.05
4.6
39.75
6.35
15.2 Fault Diagnosis
Hard to engage gear
Difficult gearshift
Worn or distorted gearshift fork
Broken shift fork guide pin
Worn gear pawl
Clutch is not completely separated.
Defective transmission pull spring
Worn gearshift drum lock groove
Automatic gearshift
Connecting pawl is worn and its edge turns round.
Weak transmission unit return spring.
Spline gear of spline shaft and spline groove of sliding gear are worn, which result in a greater axial force during
operation of gears.
Worn gearshift drum and shift fork.
15.3 Gearshift Mechanism
15.3.1 Removal
Remove gearshift shaft assembly.
Remove the bolt on the upper baffle plate of ratchet, the
ratchet upper baffle plate and gearshift ratchet gear ring.
Remove the bolt on lower baffle plate of ratchet, the
ratchet lower baffle and the ratchet, etc.
Removed parts refer to exploded view. .
15.3.2 Exploded View
15.3.3
Inspection
Before disassembly, gearshift plate shall work flexibly and
smoothly.
Check if gearshift plate and gearshift shaft assembly are
worn.
If they are seriously worn, replace them.
Check if gearshift locking plate is worn.
If it is seriously worn, replace it.
Check if gearshift shaft is bent. If it is over bent, replace it.
Check if return spring is weakened. If necessary, replace it.
Screw off closing bolt.
Disassemble crankcase.
*Attention: Please do not hurt washer and closing surface.
Remove left case block.
Pull out shift fork shaft.
Remove gearshift drum.
Remove gearshift fork.
Shift fork shaft
Gearshift drum
Shifting fork
Measure shift fork OD.
Allowable limit: 9.96mm.
Micrometer
Measure shift fork hole ID.
Allowable limit: 10.05mm.
Tester
Vernier caliper
Measure shift fork thickness.
Allowable limit: 4.6mm.
Measure OD of gearshift drum
Allowable limit: 39.75mm.
Measure the width of gearshift drum lock groove
Allowable limit: 6.35mm.
Lock groove width
Remove balance shaft gear
Balance shaft gear
15.4 Installation
Install it in the reverse order of removal.
Crankcase
Attention: Crankcase is a thin-wall
casting part. Avoid impact on it during
operation in case it may be distorted or
broken.
Clean carefully all the components
before inspection and test and purge them
with high-pressure gas.
Drain
the
lubricating
oil
from
crankcase before working on it.
1 Right crankcase
2 Left crankcase
3 Crankshaft connecting rod assembly
4 Piston pin
5 Bolt
6 Piston
XVI Crankcase
Preparatory data-----------------16.1
Fault diagnosis--------------16.2
Crankcase--------------------16.3
16.1 Preparatory Data
Precautions on Operation
Attention: Crankcase is a thin-wall casting part. Avoid impact on it during operation in case it may be
distorted or broken.
Clean carefully all the components before inspection and test and purge them with high-pressure gas.
Drain the lubricating oil from crankcase before working on it.
Function of crankcase: Crankcase is the force bearing part of engine. It is mainly used to support
crankshaft, clutch, transmission, cylinder block and cylinder head. It bears impact from combustion
and inertia force from movement of crankshaft connecting rod; and forms a partial enclosed space (for
air and oil).
Suspension hole is set on the crankcase, which can be connected with the suspension hole in the vehicle block so that
the engine can be linked together with frame and other parts.
Basic data
Unit:mm
Item
Standard
Allowable limit
Connecting rod big end left and right clearance
0.1-0.35
0.55
Connecting rod big end radial clearance
0.008-0.012
0.05
Shimmy
0.03
0.1
Crankshaft
Tools
Universal fixer
Screwdriver rod
Guide rod
Clutch spring compressor
Socket wrench
Bearing screwdriver
16.2 Fault Diagnosis
Noise in the Crankcase
Engine stops automatically
Spare pars falling off or broken in the crankcase
Stuck clutch
16.3 Crankcase
16.3.1 Crankcase Removal
Screw off starting motor mounting bolts,and remove starting
motor.
Release starting motor gear chamber cover mounting bolt and
remove gear chamber cover.
Remove starting motor gear, needle bearing and washer.
Screw off bolts on left front cover and left rear cover of
crankcase.
Remove left front cover and left rear cover.
Remove starting motor idle gear.
Remove washer and location pin.
Use an electric or pneumatic tool to screw off flywheel
locknut.
Pull out flywheel assembly (including the star wheel).
Remove gear display.
Remove cam shaft limit plate and take down cam assembly.
Remove bearing locating device.
16.3.2 Exploded View of Cam Assembly
Camshaft gear
Cam mechanism shaft
Cam shaft spring
Cam
Measure cam bush ID.
Allowable limit: 14.10mm.
Measure cam height
Allowable limit: 32.5mm.
16.3.3 Crankcase Right Cover Removal
Tester
Bolt
Screw off mounting bolt and take down the crankcase right
cover.
Remove clutch release lever assembly from the right cover.
Right cover
Right cover
Release lever
assembly
Remove screws, engine oil filter roller cover and its cover
washer.
Remove washer and location pin.
Washer
Cover of oil
filter roller
Location pin
Use an electric or pneumatic tool to screw off locknut.
Remove oil filter roller and take down the drive gear.
Screw off engine oil pump screws and remove oil pump
assembly.
Drive chain
Locknut
Oil filter roller
Oil pump
16.4 Crankshaft Connecting Rod Assembly
Crankshaft connecting
Removal
rod assembly
Drive gear
Location pin
Remove left crankcase.
Remove washer and location pin.
Remove drive gear.
Washer
Remove the crankshaft connecting rod assembly from the right
crankcase.
* Attention: Please do not hurt washer and closing surface.
Inspection
Measure connecting rod big end left-to-right clearance.
Allowable limit: 0.55mm.
Measure connecting rod big end clearance along X-Y direction.
Allowable limit: 0.05mm.
Measuring position of C.R big end
Crankshaft shimmy measurement.
Allowable limit: 0.01mm.
Check if there is abnormal noise and looseness when the
crankshaft is rotating.
If there is, replace the crankshaft.
* Attention:
Install together crankshaft connecting rod assembly and gearshift
mechanism on the crankcase.
Crankshaft bearing
Exhaust System Inspection and Maintenance
Muffler Assembly
A
Tightening torque of mounting bolt 5 for muffler connector in the diagram:5-9 N·m
B
Dual catalysts are added into the muffler welding assembly in the diagram.
C
Tightening torque of combined screw 6 for muffler protecting plate in the diagram:5-9 N·m
1 Exhaust pipe gasket assembly
2 Bolt M8×30
3 Washer 8 4 Spring washer
6 Muffler cushion rubber
7 Muffler decorative plate 8 Thermal insulation spacer
5 Muffler welding assembly
9 Combination screw
XVII
Emission Control System
Emission control system guarantee----------------------------------------- 17.1
Periodical maintenance instructions/ensure emission standard--------- 17.2
Emission control system mechanical function-----------------------------17.3
Solutions to Idle exhaust exceeding specified value ---------------------17.4
17.1 Emission Control System Guarantee
1. The emission control system of the motorcycle is up to the Standard of China Stage III. The company will
guarantee it in its effective service life, under normal use and specified maintenance.
2. Scope of Guarantee
1> Emission control system function guarantee
The company guarantees that the system meets regular or irregular exhaust emission inspection carried out by
relevant government authorities within 15,000km drive.
3. The guarantee article is not applicable to the following situations, but local dealers or service departments of the
company are still willing to provide maintenance service for the customers at a reasonable price.
1> Without performing regular maintenance according to the time and traveled distance specified by the company.
2> Users not performing regular inspection, adjustment or maintenance at local dealer or service center of the
company, or unable to provide evidence of maintenance record.
3> Overloading or improper use.
4> Remounting the motorcycle, removing original spare parts or install extra devices on to the vehicle at will.
5> Using the motorcycle as a racing vehicle or driving on the roads not suitable for it.
6> Damages because of typhoon, flood or other natural disasters; or injuries or trouble caused by gross negligence,
traffic accident or subject to impact by external objects.
7> Stopping use for a long time without regular maintenance.
8> Odometer is damaged, but not repair it promptly; or the odometer is artificially altered, stopped or replaced.
9> Please come to the inspection station every three months for regular exhaust gas inspection.
· The new motorcycle delivered by the company has passed noise inspection and is up to EPA Standard.
17.2 Periodical Maintenance Instructions
·To reduce environment pollution, it is required by the country that all the motor vehicles manufactured by each
company shall meet the regulations of emission standard of air pollutants. Besides the production process is up to the
regulations of emission standard of air pollutants, the company is also devoted to purifying air and reducing air
pollution.
·Strict inspection is performed on the motorcycle delivered from the company; all the specifications can meet the
regulations of emission standard of air pollutants. Due to different situations the users are in, we make the following
regular inspection table relating to exhaust emission. To ensure normal gas exhaust, please inspect, adjust or repair
your motorcycle in the specified time intervals.
·If you have any other individual problem, please contact or call your local dealer or service center of Qian Jiang
Motorcycle Co., Ltd.
· Relevant emission specifications:
Emission Specifications
CO
HC
NOX
Emission standard
≤ 2.0g/km
≤ 0.3g/km
0.5 g/km
※The latest version shall prevail when emission standard is updated.
· The motorcycle that does not perform regular inspection in local dealer or service center of the company may be
prohibited to use. The company will not be responsible for that. Please have your motorcycle inspected whenever
necessary to keep it in best condition.
Note:
You shall clean more frequently the air cleaner to extend service life of the engine when your
motorcycle is often used on sand-gravel roads or in severely polluted environment.
More frequent servicing may be required when the motorcycle is often driven at high speed or travels a
long distance.
Pay attention to the followings to ensure standard emission
1> Please use only 92 or 95 unleaded gasoline.
2> Please use only specified type of engine oil.
3> Please service your motorcycle according to your periodical maintenance table.
4> Emission control system is forbidden to be adjusted or replaced (including spark plug use,idle speed adjustment,
ignition timing, carburetor adjustment, etc.).
5> Attentions:
·Improper ignition system, charging system or fuel system will have great effect on muffler, so please go to your
local dealers or service center of the company for inspection, adjustment or maintenance when you encounter it.
·Please use only 92 or 95 unleaded gasoline, or the muffler device (four-stroke system) may be injured.
6> Emission control system of the motorcycle meets national standard. If you have to replace any component of the
system, please use the spare part made by Qian Jiang Motorcycle Co., Ltd. and ask your local dealer or service center
to replace it for you.
17.3 Emission Control System Mechanical Functions
General introduction
The emission control system is based on four-stroke single cylinder engine and carburetor. It uses air intake device
and keep excellent exhaust gas level; Activated carbon canister mode is used for vaporized waste gas process.
※ Air intake device
Guide air into exhaust pipe and CO and HC of incomplete combustion will be reacted into harmless gas.
Classification
Equipment
Constituted Part
Emission control system
Catalytic device
Catalytic converter
Desired Function
Oxidize CO, HC and NOX.
17.4 Solutions to Idle Exhaust Exceeding Specified Value (4-stroke)
Qualified
Perform regular inspection(Repair and maintenance plan)
Qualified
Measure Idle exhaust (Note 1)
Qualified
Adjust carburetor(Note 2)
Qualified
Disassemble and clearn carburetor
(SJ, MJ, SAJ, MAJ, etc.)
For Delivery.
Qualified
Qualified
Replace Carburetor
Disassemble and repair engine.
• Valve (Leak)
Qualified
• Piston (Worn)
• Combustion chamber(clean)
Note 1: Measure according to the idle speed measuring procedures.
Note 2: Adjust with lock screw engine rpm to the specified and measure idle CO/HC.
QJ125-26A Schematic Circuit Diagram