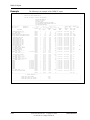
1
User Reference
Version 7 Release 1B
Disk/Tape Management Tool
Copyright © 2006 by CSI International, Inc.
BIM-EPIC is an proprietary product of CSI
International, Inc. It cannot be reproduced,
changed, copies, or stored in any form
(including, but not limited to, copies on
magnetic media) without the express prior
written permission of CSI International, Inc.
Contents
Trademark Information . . . . . . . . . . . . . . . . . . . . . . . . . . . . . . . . . . ix
Preface . . . . . . . . . . . . . . . . . . . . . . . . . . . . . . . . . . . . . . . . . . . . . . . . . .x
Contacting BIM-EPIC Technical Support . . . . . . . . . . . . . . . . . . xiii
Related Publications. . . . . . . . . . . . . . . . . . . . . . . . . . . . . . . . . . . . . .xv
Chapter 1
Introduction
Configuration Options . . . . . . . . . . . . . . . . . . . . . . . . . . . . . . . . . 1-2
Controlled Datasets . . . . . . . . . . . . . . . . . . . . . . . . . . . . . . . . . . . 1-3
Start Track 1 Datasets . . . . . . . . . . . . . . . . . . . . . . . . . . . . . . . . . 1-4
Other Types of Datasets. . . . . . . . . . . . . . . . . . . . . . . . . . . . . . . . 1-6
Dataset Name Catalog Entries . . . . . . . . . . . . . . . . . . . . . . . . . . . 1-7
Dataset Name Catalog Management . . . . . . . . . . . . . . . . . . . . . . 1-8
Dataset Name Catalog Maintenance . . . . . . . . . . . . . . . . . . . . . . 1-9
BIM-EPIC Dataset Definition Components . . . . . . . . . . . . . . . 1-10
BIM-EPIC Dataset Definition–Tapes . . . . . . . . . . . . . . . . . . . . 1-13
BIM-EPIC Dataset Definition–Disks . . . . . . . . . . . . . . . . . . . . 1-15
Versioning Datasets . . . . . . . . . . . . . . . . . . . . . . . . . . . . . . . . . . 1-17
Cataloging Datasets Automatically . . . . . . . . . . . . . . . . . . . . . . 1-21
Retaining and Scratching Datasets . . . . . . . . . . . . . . . . . . . . . . 1-23
Retaining Dataset. . . . . . . . . . . . . . . . . . . . . . . . . . . . . . . . . . . . 1-24
Retaining Start Track 1 Datasets . . . . . . . . . . . . . . . . . . . . . . . . 1-26
Overriding Standard Retention . . . . . . . . . . . . . . . . . . . . . . . . . 1-27
Purging Dataset Information . . . . . . . . . . . . . . . . . . . . . . . . . . . 1-28
Recording Dataset Activity . . . . . . . . . . . . . . . . . . . . . . . . . . . . 1-29
Allocating Logical Unit Blocks (LUB) . . . . . . . . . . . . . . . . . . . 1-30
Managing Tape Devices . . . . . . . . . . . . . . . . . . . . . . . . . . . . . . 1-31
User Reference
Connectivity Systems, Inc.—Copyright © 2006
Use Pursuant to Company Instructions
i
Managing Tape Volumes . . . . . . . . . . . . . . . . . . . . . . . . . . . . . . 1-33
Managing Disk Devices . . . . . . . . . . . . . . . . . . . . . . . . . . . . . . . 1-34
Starting and Stopping Partitions. . . . . . . . . . . . . . . . . . . . . . . . . 1-35
Creating Reports. . . . . . . . . . . . . . . . . . . . . . . . . . . . . . . . . . . . . 1-36
Activating BIM-EPIC . . . . . . . . . . . . . . . . . . . . . . . . . . . . . . . . 1-37
Scratching or Deleting Datasets . . . . . . . . . . . . . . . . . . . . . . . . . 1-38
Using Job Control Language (JCL) . . . . . . . . . . . . . . . . . . . . . . 1-39
Using Job Control Language Options . . . . . . . . . . . . . . . . . . . . 1-41
Using Tape Processing . . . . . . . . . . . . . . . . . . . . . . . . . . . . . . . . 1-42
Using Disk Processing . . . . . . . . . . . . . . . . . . . . . . . . . . . . . . . . 1-44
Chapter 2
BIM-EPIC Online Manager
Cataloging Manually . . . . . . . . . . . . . . . . . . . . . . . . . . . . . . . . . . 2-2
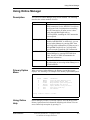
Using Online Manager . . . . . . . . . . . . . . . . . . . . . . . . . . . . . . . . . 2-3
Executing Management Commands. . . . . . . . . . . . . . . . . . . . . . . 2-5
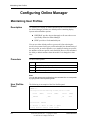
Maintaining User Profiles . . . . . . . . . . . . . . . . . . . . . . . . . . . . . . 2-6
Customizing Dataset Screen Displays . . . . . . . . . . . . . . . . . . . . . 2-8
Customizing Version Displays . . . . . . . . . . . . . . . . . . . . . . . . . . 2-10
Customizing Profile Defaults . . . . . . . . . . . . . . . . . . . . . . . . . . . 2-12
Using Online Manager Help . . . . . . . . . . . . . . . . . . . . . . . . . . . 2-14
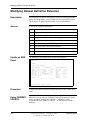
Searching for Dataset Definitions . . . . . . . . . . . . . . . . . . . . . . . 2-16
Managing Dataset Definitions . . . . . . . . . . . . . . . . . . . . . . . . . . 2-18
Displaying a Dataset Definition . . . . . . . . . . . . . . . . . . . . . . . . . 2-20
Creating a Dataset Definition. . . . . . . . . . . . . . . . . . . . . . . . . . . 2-22
Updating a Dataset Definition . . . . . . . . . . . . . . . . . . . . . . . . . . 2-24
Releasing a Locked Dataset Definition . . . . . . . . . . . . . . . . . . . 2-26
Unlocking a Dataset Definition . . . . . . . . . . . . . . . . . . . . . . . . . 2-28
Deleting a Dataset Definition. . . . . . . . . . . . . . . . . . . . . . . . . . . 2-30
Displaying Version Information . . . . . . . . . . . . . . . . . . . . . . . . . 2-32
Selecting a Version from a List . . . . . . . . . . . . . . . . . . . . . . . . . 2-34
Displaying Version Attributes . . . . . . . . . . . . . . . . . . . . . . . . . . 2-36
Adding Version Information. . . . . . . . . . . . . . . . . . . . . . . . . . . . 2-37
Locking a Version. . . . . . . . . . . . . . . . . . . . . . . . . . . . . . . . . . . . 2-39
Closing a Version . . . . . . . . . . . . . . . . . . . . . . . . . . . . . . . . . . . . 2-41
Removing Version Information from the DSN Catalog. . . . . . . 2-43
Managing Tapes . . . . . . . . . . . . . . . . . . . . . . . . . . . . . . . . . . . . . 2-44
BIM-EPIC Tape Selection Process . . . . . . . . . . . . . . . . . . . . . . 2-46
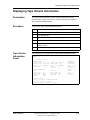
Displaying Tape Volume Information . . . . . . . . . . . . . . . . . . . . 2-47
ii
Connectivity Systems, Inc.—Copyright © 2006
Use Pursuant to Company Instructions
User Reference
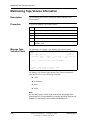
Maintaining Tape Volume Information . . . . . . . . . . . . . . . . . . . 2-48
Purging a Tape Volume . . . . . . . . . . . . . . . . . . . . . . . . . . . . . . . 2-50
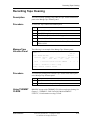
Recording Tape Cleaning . . . . . . . . . . . . . . . . . . . . . . . . . . . . . 2-51
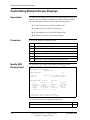
Understanding Retention Concepts . . . . . . . . . . . . . . . . . . . . . . 2-52
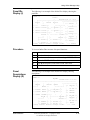
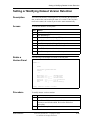
Setting Dataset Definition Retention . . . . . . . . . . . . . . . . . . . . . 2-53
Modifying Dataset Definition Retention . . . . . . . . . . . . . . . . . . 2-54
Setting or Modifying Dataset Version Retention. . . . . . . . . . . . 2-55
Cycling a Dataset Version . . . . . . . . . . . . . . . . . . . . . . . . . . . . . 2-57
Scratching a Dataset Version . . . . . . . . . . . . . . . . . . . . . . . . . . . 2-59
Establishing Online Security . . . . . . . . . . . . . . . . . . . . . . . . . . . 2-61
Creating Security Profiles . . . . . . . . . . . . . . . . . . . . . . . . . . . . . 2-64
Chapter 3
TSIDMNT—DSN CATALOG
MANAGEMENT UTILITY
TSIDMNT Commands and Functions. . . . . . . . . . . . . . . . . . . . . 3-2
TSIDMNT Command Overview . . . . . . . . . . . . . . . . . . . . . . . . . 3-4
ADD Command . . . . . . . . . . . . . . . . . . . . . . . . . . . . . . . . . . . . . . 3-6
ADS Command . . . . . . . . . . . . . . . . . . . . . . . . . . . . . . . . . . . . . 3-10
CAPACITY Command . . . . . . . . . . . . . . . . . . . . . . . . . . . . . . . 3-13
CATALOG Command . . . . . . . . . . . . . . . . . . . . . . . . . . . . . . . . 3-14
CLEAN Command . . . . . . . . . . . . . . . . . . . . . . . . . . . . . . . . . . 3-22
CLOSE Command . . . . . . . . . . . . . . . . . . . . . . . . . . . . . . . . . . . 3-23
CYCLE Command. . . . . . . . . . . . . . . . . . . . . . . . . . . . . . . . . . . 3-24
DELETE Command. . . . . . . . . . . . . . . . . . . . . . . . . . . . . . . . . . 3-26
DEQ Command . . . . . . . . . . . . . . . . . . . . . . . . . . . . . . . . . . . . . 3-27
DISPLAY Command . . . . . . . . . . . . . . . . . . . . . . . . . . . . . . . . . 3-28
ENQ Command . . . . . . . . . . . . . . . . . . . . . . . . . . . . . . . . . . . . . 3-31
LOCK Command. . . . . . . . . . . . . . . . . . . . . . . . . . . . . . . . . . . . 3-32
MCATALOG Command . . . . . . . . . . . . . . . . . . . . . . . . . . . . . . 3-33
MOVE Command . . . . . . . . . . . . . . . . . . . . . . . . . . . . . . . . . . . 3-35
OFFLINE Command . . . . . . . . . . . . . . . . . . . . . . . . . . . . . . . . 3-36
ONLINE Command. . . . . . . . . . . . . . . . . . . . . . . . . . . . . . . . . . 3-37
PASSWORD Command . . . . . . . . . . . . . . . . . . . . . . . . . . . . . . 3-38
PURGE Command. . . . . . . . . . . . . . . . . . . . . . . . . . . . . . . . . . . 3-39
QUIESCE Command . . . . . . . . . . . . . . . . . . . . . . . . . . . . . . . . 3-41
RELEASE Command . . . . . . . . . . . . . . . . . . . . . . . . . . . . . . . . 3-42
RENAME Command. . . . . . . . . . . . . . . . . . . . . . . . . . . . . . . . . 3-44
RETAIN Command . . . . . . . . . . . . . . . . . . . . . . . . . . . . . . . . . . 3-45
User Reference
Connectivity Systems, Inc.—Copyright © 2006
Use Pursuant to Company Instructions
iii
SCRATCH Command . . . . . . . . . . . . . . . . . . . . . . . . . . . . . . . . 3-48
TRANSFER Command . . . . . . . . . . . . . . . . . . . . . . . . . . . . . . . 3-50
UNLOCK Command . . . . . . . . . . . . . . . . . . . . . . . . . . . . . . . . . 3-52
UPDATE Command. . . . . . . . . . . . . . . . . . . . . . . . . . . . . . . . . . 3-54
Chapter 4
BIM-EPIC TLBL and DLBL
Statements
TLBL Statements . . . . . . . . . . . . . . . . . . . . . . . . . . . . . . . . . . . . . 4-2
TLBL Options . . . . . . . . . . . . . . . . . . . . . . . . . . . . . . . . . . . . . . . 4-7
DLBL Statements . . . . . . . . . . . . . . . . . . . . . . . . . . . . . . . . . . . 4-10
DLBL Options . . . . . . . . . . . . . . . . . . . . . . . . . . . . . . . . . . . . . . 4-11
Chapter 5
Accessing the DSN Catalog
TSIDUTL DSPLY . . . . . . . . . . . . . . . . . . . . . . . . . . . . . . . . . . . . 5-2
TSIDAC2 Subroutine. . . . . . . . . . . . . . . . . . . . . . . . . . . . . . . . . . 5-6
Search Arguments and Calls . . . . . . . . . . . . . . . . . . . . . . . . . . . . 5-9
ADDRESS EPIC . . . . . . . . . . . . . . . . . . . . . . . . . . . . . . . . . . . . 5-13
Chapter 6
BIM-EPIC DD Statement
DD Statement Overview . . . . . . . . . . . . . . . . . . . . . . . . . . . . . . . 6-2
DD Statement Syntax . . . . . . . . . . . . . . . . . . . . . . . . . . . . . . . . . . 6-4
DD Statement Names . . . . . . . . . . . . . . . . . . . . . . . . . . . . . . . . . . 6-7
Parameters for Tape and Disk Datasets . . . . . . . . . . . . . . . . . . . 6-10
Parameters for Processing Datasets . . . . . . . . . . . . . . . . . . . . . . 6-12
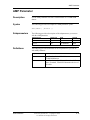
AMP Parameter . . . . . . . . . . . . . . . . . . . . . . . . . . . . . . . . . . . . . 6-15
DCB Parameter . . . . . . . . . . . . . . . . . . . . . . . . . . . . . . . . . . . . . 6-16
DISP Parameter . . . . . . . . . . . . . . . . . . . . . . . . . . . . . . . . . . . . . 6-19
DSN Parameter. . . . . . . . . . . . . . . . . . . . . . . . . . . . . . . . . . . . . . 6-26
FREE Parameter. . . . . . . . . . . . . . . . . . . . . . . . . . . . . . . . . . . . . 6-29
LABEL Parameter . . . . . . . . . . . . . . . . . . . . . . . . . . . . . . . . . . . 6-30
OPTION Parameter . . . . . . . . . . . . . . . . . . . . . . . . . . . . . . . . . . 6-32
SPACE Parameter. . . . . . . . . . . . . . . . . . . . . . . . . . . . . . . . . . . . 6-38
UNIT Parameter . . . . . . . . . . . . . . . . . . . . . . . . . . . . . . . . . . . . . 6-42
VOLUME Parameter . . . . . . . . . . . . . . . . . . . . . . . . . . . . . . . . . 6-45
DD Statements For Printer and Punch Datasets. . . . . . . . . . . . . 6-48
DD Statements for In-Stream Datasets . . . . . . . . . . . . . . . . . . . 6-50
DD Statements for Dummy Datasets . . . . . . . . . . . . . . . . . . . . . 6-52
iv
Connectivity Systems, Inc.—Copyright © 2006
Use Pursuant to Company Instructions
User Reference
Chapter 7
Running Jobs With BIM-EPIC
Using Unsupported Datasets . . . . . . . . . . . . . . . . . . . . . . . . . . . . 7-2
Using JCL and the DSN Catalog . . . . . . . . . . . . . . . . . . . . . . . . . 7-3
Using TLBL and DLBL Statements for Input . . . . . . . . . . . . . . . 7-4
Defining Datasets with TBL, DBL and DD Statements . . . . . . . 7-5
Naming Datasets . . . . . . . . . . . . . . . . . . . . . . . . . . . . . . . . . . . . . 7-6
Using LUB Allocation and the ASSGN Statement . . . . . . . . . . . 7-7
Controlled Datasets . . . . . . . . . . . . . . . . . . . . . . . . . . . . . . . . . . . 7-9
Start Track 1 Datasets . . . . . . . . . . . . . . . . . . . . . . . . . . . . . . . . 7-10
Reusing Space . . . . . . . . . . . . . . . . . . . . . . . . . . . . . . . . . . . . . . 7-11
Labeled and Unlabeled Tapes . . . . . . . . . . . . . . . . . . . . . . . . . . 7-12
Rewind Options and MTC Statements . . . . . . . . . . . . . . . . . . . 7-13
Multi-Volume Processing . . . . . . . . . . . . . . . . . . . . . . . . . . . . . 7-14
Multi-Dataset Processing. . . . . . . . . . . . . . . . . . . . . . . . . . . . . . 7-15
Sequential Datasets . . . . . . . . . . . . . . . . . . . . . . . . . . . . . . . . . . 7-25
Direct Access Datasets . . . . . . . . . . . . . . . . . . . . . . . . . . . . . . . 7-26
ISAM Datasets. . . . . . . . . . . . . . . . . . . . . . . . . . . . . . . . . . . . . . 7-27
VSAM and VSAM-Managed SAM Datasets . . . . . . . . . . . . . . 7-29
Common Work Datasets . . . . . . . . . . . . . . . . . . . . . . . . . . . . . . 7-30
CPU and Partition Independence. . . . . . . . . . . . . . . . . . . . . . . . 7-31
Common Work Datasets . . . . . . . . . . . . . . . . . . . . . . . . . . . . . . 7-33
TYPEFLE=WORK DTF Datasets. . . . . . . . . . . . . . . . . . . . . . . 7-34
Compiler Work Datasets . . . . . . . . . . . . . . . . . . . . . . . . . . . . . . 7-35
Uncontrolled Datasets . . . . . . . . . . . . . . . . . . . . . . . . . . . . . . . . 7-36
Physical IOCS Processing . . . . . . . . . . . . . . . . . . . . . . . . . . . . . 7-37
Sorting with BIM-EPIC. . . . . . . . . . . . . . . . . . . . . . . . . . . . . . . 7-39
Using the Sort Interface (TSIDSRT) . . . . . . . . . . . . . . . . . . . . . 7-39
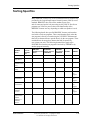
Sorting Specifics . . . . . . . . . . . . . . . . . . . . . . . . . . . . . . . . . . . . 7-41
Using SORTWK Datasets . . . . . . . . . . . . . . . . . . . . . . . . . . . . . 7-43
Controlling IDCAMS Backup Datasets. . . . . . . . . . . . . . . . . . . 7-45
Controlling IDCAMS REPRO Datasets . . . . . . . . . . . . . . . . . . 7-46
Using IDCAMS IMPORT/EXPORT Commands . . . . . . . . . . . 7-47
Using LIBR BACKUP/RESTORE Commands . . . . . . . . . . . . 7-48
Using DITTO. . . . . . . . . . . . . . . . . . . . . . . . . . . . . . . . . . . . . . . 7-49
Using VSE/POWER ACCOUNT Command . . . . . . . . . . . . . . 7-51
Using VSE/POWER PDISPLAY, POFFLOAD and Printer/Punch
Tape Spooling . . . . . . . . . . . . . . . . . . . . . . . . . . . . . . . . . . . . . . 7-52
Setting DB2 Tape Output Functions . . . . . . . . . . . . . . . . . . . . . 7-54
User Reference
Connectivity Systems, Inc.—Copyright © 2006
Use Pursuant to Company Instructions
v
Identifying VSE/ICCF and Interactive Partition GETVIS
Requirements . . . . . . . . . . . . . . . . . . . . . . . . . . . . . . . . . . . . . . . 7-56
Using the COBOL II Library Management Feature . . . . . . . . . 7-57
Restarting From a Checkpoint . . . . . . . . . . . . . . . . . . . . . . . . . . 7-59
Choosing the Device Type . . . . . . . . . . . . . . . . . . . . . . . . . . . . . 7-61
Controlling System Datasets with VSE Device Independence . 7-64
Using Dummy Datasets and ASSGN IGNORE. . . . . . . . . . . . . 7-65
Using Concatenating Datasets . . . . . . . . . . . . . . . . . . . . . . . . . . 7-66
Processing Multiple Datasets with the Same DTF Name (Dataset
Drop) . . . . . . . . . . . . . . . . . . . . . . . . . . . . . . . . . . . . . . . . . . . . . 7-68
Running Test Jobs With Production Datasets . . . . . . . . . . . . . . 7-69
Chapter 8
BIM-EPIC Utilities
Pre-Open Processing (TSIDASS) . . . . . . . . . . . . . . . . . . . . . . . . 8-2
Sort Interface (TSIDSRT) . . . . . . . . . . . . . . . . . . . . . . . . . . . . . . 8-8
Deleting Datasets (TSIDDEL) . . . . . . . . . . . . . . . . . . . . . . . . . . 8-10
Copying and Merging Datasets (TSIDDTD) . . . . . . . . . . . . . . . 8-12
Printing Datasets (TSIDDMP) . . . . . . . . . . . . . . . . . . . . . . . . . . 8-20
Accessing the VSE Label Area (TSIDGLB and TSIDPLB) . . . 8-26
BIM-EPIC Catalog-VTOC Reconciliation System . . . . . . . . . . 8-28
Selecting files to compare by pool (TSIDCVF). . . . . . . . . . . . . 8-29
Comparing catalog to VTOC (TSIDCVC). . . . . . . . . . . . . . . . . 8-30
Chapter 9
Job Management Control Language
VSE JCL Statements . . . . . . . . . . . . . . . . . . . . . . . . . . . . . . . . . . 9-2
Using JOB Statements . . . . . . . . . . . . . . . . . . . . . . . . . . . . . . . . . 9-3
Using Comment Statements . . . . . . . . . . . . . . . . . . . . . . . . . . . . . 9-4
JCL Syntax Checking. . . . . . . . . . . . . . . . . . . . . . . . . . . . . . . . . . 9-5
Condition Checking and Branching . . . . . . . . . . . . . . . . . . . . . . . 9-8
IF and Conditions . . . . . . . . . . . . . . . . . . . . . . . . . . . . . . . . . . . . 9-10
Setting Values. . . . . . . . . . . . . . . . . . . . . . . . . . . . . . . . . . . . . . . 9-13
Symbolic Replacements . . . . . . . . . . . . . . . . . . . . . . . . . . . . . . . 9-15
RESET . . . . . . . . . . . . . . . . . . . . . . . . . . . . . . . . . . . . . . . . . . . . 9-17
TSIDJC2. . . . . . . . . . . . . . . . . . . . . . . . . . . . . . . . . . . . . . . . . . . 9-19
Retrieving JMCL Data . . . . . . . . . . . . . . . . . . . . . . . . . . . . . . . . 9-21
Updating JMCL Data . . . . . . . . . . . . . . . . . . . . . . . . . . . . . . . . . 9-22
TSIDJC2 Return Codes . . . . . . . . . . . . . . . . . . . . . . . . . . . . . . . 9-24
Executing CP Commands. . . . . . . . . . . . . . . . . . . . . . . . . . . . . . 9-25
vi
Connectivity Systems, Inc.—Copyright © 2006
Use Pursuant to Company Instructions
User Reference
Chapter 10
BIM-EPIC Job Scheduling
Scheduling Activities. . . . . . . . . . . . . . . . . . . . . . . . . . . . . . . . . 10-2
Event Posting and Release of Matching Jobs (TSIDREL and
TSIDCREL). . . . . . . . . . . . . . . . . . . . . . . . . . . . . . . . . . . . . . . . 10-3
Event Posting (TSIDLOC and TSIDCLOC) . . . . . . . . . . . . . . . 10-4
Event Checking (TSIDCHK and TSIDCCHK). . . . . . . . . . . . . 10-5
Event Deletion (TSIDUNL and TSIDCUNL). . . . . . . . . . . . . . 10-6
Executing in Batch Jobs. . . . . . . . . . . . . . . . . . . . . . . . . . . . . . . 10-7
Executing Standard Processing Subroutines . . . . . . . . . . . . . . . 10-8
CICS Subroutines . . . . . . . . . . . . . . . . . . . . . . . . . . . . . . . . . . . 10-9
Return Codes . . . . . . . . . . . . . . . . . . . . . . . . . . . . . . . . . . . . . . 10-10
Processing Requirements. . . . . . . . . . . . . . . . . . . . . . . . . . . . . 10-12
Creating Job Setup/Run Sheets (TSIDFAV) . . . . . . . . . . . . . . 10-13
SET Control Statement . . . . . . . . . . . . . . . . . . . . . . . . . . . . . . 10-14
Chapter 11
Job Activity Reports
Recorder History . . . . . . . . . . . . . . . . . . . . . . . . . . . . . . . . . . . . 11-2
Activity Log Report (TSIDARP). . . . . . . . . . . . . . . . . . . . . . . . 11-3
DSN/Job Cross-Reference Report (TSIDBRP) . . . . . . . . . . . . . 11-5
Job Time Activity Report (TSIDJAC). . . . . . . . . . . . . . . . . . . . 11-8
Maintaining the Job Accounting Database . . . . . . . . . . . . . . . . 11-9
CICS Access to Job Accounting Database . . . . . . . . . . . . . . . 11-12
Chapter 12
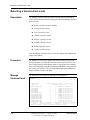
Managing Tape Volumes
Attention Routine Commands . . . . . . . . . . . . . . . . . . . . . . . . . . 12-6
FREE and STATUS Commands . . . . . . . . . . . . . . . . . . . . . . . . 12-8
Initializing Tapes for BIM-EPIC Control . . . . . . . . . . . . . . . . 12-11
Assigning Vaulting Methods to Datasets. . . . . . . . . . . . . . . . . 12-21
Moving Volumes (TSIDVLT) . . . . . . . . . . . . . . . . . . . . . . . . . 12-22
Reporting Current Locations of Vaulted Tapes . . . . . . . . . . . . 12-24
Manually Controlled Vaults. . . . . . . . . . . . . . . . . . . . . . . . . . . 12-25
Vault To Dataset Cross-Reference Report (TSIDPRV) . . . . . 12-26
Tape to Dataset Report (TSIDSDS). . . . . . . . . . . . . . . . . . . . . 12-28
Chapter 13
Disk Space Management
Dataset Fragmentation . . . . . . . . . . . . . . . . . . . . . . . . . . . . . . . . 13-2
Converting Uncontrolled Disk Datasets . . . . . . . . . . . . . . . . . . 13-4
Placing Datasets on Specific Volumes in a Pool . . . . . . . . . . . . 13-6
User Reference
Connectivity Systems, Inc.—Copyright © 2006
Use Pursuant to Company Instructions
vii
VTOC Utilities . . . . . . . . . . . . . . . . . . . . . . . . . . . . . . . . . . . . . . 13-7
VTOC Listings (TSIDLVT) . . . . . . . . . . . . . . . . . . . . . . . . . . . . 13-8
Online VTOC Displays . . . . . . . . . . . . . . . . . . . . . . . . . . . . . . 13-11
Offload System. . . . . . . . . . . . . . . . . . . . . . . . . . . . . . . . . . . . . 13-16
Selecting Datasets To Be Offloaded (TSIDOFD) . . . . . . . . . . 13-18
Offloading and Backing Up Datasets (TSIDOFL). . . . . . . . . . 13-24
Onloading and Restoring Datasets (TSIDONL) . . . . . . . . . . . 13-30
TSIDONL Control Statements . . . . . . . . . . . . . . . . . . . . . . . . . 13-35
Consolidating Offload Versions (TSIDOFC) . . . . . . . . . . . . . . 13-39
Appendix A
BIM-EPIC Report Fields and
Examples
Customized Reports . . . . . . . . . . . . . . . . . . . . . . . . . . . . . . . . . . A-2
TOJA Report Examples . . . . . . . . . . . . . . . . . . . . . . . . . . . . . . . A-3
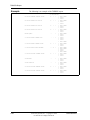
TSIDARP Report . . . . . . . . . . . . . . . . . . . . . . . . . . . . . . . . . . . . A-7
TSIDBRP Report . . . . . . . . . . . . . . . . . . . . . . . . . . . . . . . . . . . A-10
TSIDDIS Report. . . . . . . . . . . . . . . . . . . . . . . . . . . . . . . . . . . . A-13
TSIDJAC Report . . . . . . . . . . . . . . . . . . . . . . . . . . . . . . . . . . . A-15
TSIDLVT Report . . . . . . . . . . . . . . . . . . . . . . . . . . . . . . . . . . . A-17
TSIDMNT Report . . . . . . . . . . . . . . . . . . . . . . . . . . . . . . . . . . A-19
TSIDOFD Report . . . . . . . . . . . . . . . . . . . . . . . . . . . . . . . . . . . A-22
TSIDOFL Report . . . . . . . . . . . . . . . . . . . . . . . . . . . . . . . . . . . A-24
TSIDONL Report. . . . . . . . . . . . . . . . . . . . . . . . . . . . . . . . . . . A-26
TSIDPRV Report . . . . . . . . . . . . . . . . . . . . . . . . . . . . . . . . . . . A-27
TSIDSDS Report . . . . . . . . . . . . . . . . . . . . . . . . . . . . . . . . . . . A-29
TSIDTAC Report . . . . . . . . . . . . . . . . . . . . . . . . . . . . . . . . . . . A-31
TSIDUTL Report . . . . . . . . . . . . . . . . . . . . . . . . . . . . . . . . . . . A-33
Tape Dataset Summary Report. . . . . . . . . . . . . . . . . . . . . . . . . A-37
Display Active Report . . . . . . . . . . . . . . . . . . . . . . . . . . . . . . . A-39
DSPLY NEW Report . . . . . . . . . . . . . . . . . . . . . . . . . . . . . . . . A-40
DSPLY PULL Report. . . . . . . . . . . . . . . . . . . . . . . . . . . . . . . . A-41
DSPLY VAULT Report . . . . . . . . . . . . . . . . . . . . . . . . . . . . . . A-42
DSPLY SCRATCH Report. . . . . . . . . . . . . . . . . . . . . . . . . . . . A-43
PSCRATCH Report (Projected Scratch) . . . . . . . . . . . . . . . . . A-44
TSIDVLT Report . . . . . . . . . . . . . . . . . . . . . . . . . . . . . . . . . . . A-46
viii
Connectivity Systems, Inc.—Copyright © 2006
Use Pursuant to Company Instructions
User Reference
Trademark Information
Trademark Information
This manual refers to the following brand or product names, registered
trademarks, and trademarks which are listed according to their respective
owners.
Software Diversified Systems, Inc.
DUSP™
MAXBACK/VSE®
International Business Machines
Corporation (IBM®)
CMS
IBM®
Computer Associates International,
Inc. (CA)
MVS
MVS/ESA™
CA-ALERT®
MVS/SP®
CA-DRIVER
MVS/XA™
CA-DYNAM®
VM
CA-DYNAM®/D
VM/CMS
CA-DYNAM®/FI
VM/ESA®
CA-DYNAM®/T
VM/SP
CA-Easytrieve®
VM/XA™
CA-EPIC®
VSE
CA-FAQS®
VSE/ESA®
CA-FAQS®/ASO for VSE
VTAM®
CA-FAQS™/PCS
CA-JARS
Memorex Telex Corporation
CA-JCL/MANAGER®
Automatic Tape Library (ATL)
CA-Librarian®
Library Management Software (LMS)
CA-LIBRARIAN®
CA-PANVALET®
CA-SORT
CA-SPACE/MANAGER®
Storage Technology Corporation
(Storage Tek®)
Host Software Component (HSC)
CA-Super-EPAT®
CA-System/Manager®
CA-TAPE/MANAGER®
MVT/VSE®
CA-VOLLIE®
SPRI®
Compuware Corporation
Abend- AID®
Fundamental Software Inc. (FSI)
User Reference
Software Pursuits, Inc.
Syncsort Inc.
SyncSort®
Universal Software, Inc.
FakeTape™
ADAS™
FLEX-ES®
PSAM™
Connectivity Systems, Inc.—Copyright © 2006
Use Pursuant to Company Instructions
ix
Preface
Preface
Most BIM-EPIC features operate in conjunction with controlled datasets,
which BIM-EPIC catalogs and maintains. Controlled datasets are
assumed in the discussion of each feature. Uncontrolled datasets are noted
explicitly.
BIM-EPIC configuration options govern how BIM-EPIC performs.
Default options are assumed in the main body of this manual. Variations
caused by non–default options are described in the BIM-EPIC Installation
and System Guide. Please consult your systems programmer if BIM-EPIC
performs differently from the description in the documentation.
This manual contains references to the products BIM-GSS and
BIM-FAQS/ASO. Unless specifically stated otherwise, the products
CA-GSS and/or CA-FAQS/ASO from Computer Associates can be used
instead of the BIM products.
Special Terms
Command
Syntax
The following terms have specific meanings in this manual.
Term
Meaning
Enter
Type the boldfaced characters and press the Enter key.
Type
Type the boldfaced characters without pressing Enter.
Character
Alphanumeric characters A to Z and 0 to 9.
BIM-EPIC commands and control statement descriptions have the correct
syntax or format used. The following example shows a command syntax
convention.
value
COMMAND
[,PARM1=(value1,value2,...valuen)]
{,NOFUNCTION | ,FUNCTION}
[,DOTHIS=YES|NO]
x
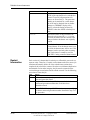
Element
Example
Description
Upper-case
characters
COMMAND
Upper-case characters
must be specified as
shown.
Italics
value
Italics represent variable
information. When
entering variable
information, do not enter
the characters shown.
Replace the characters
shown with the
information the
characters represent.
Connectivity Systems, Inc.—Copyright © 2006
Use Pursuant to Company Instructions
User Reference
Preface
Element
Example
Description
Square brackets
[,PARM1=(value1,
value2,...valuen)]
information within square
brackets indicates
optional information. If
the optional information
is provided, do not
include the brackets.
Parentheses
(value1,value2,
...valuen)
Parentheses indicate
required subparameters
or values grouped
together within a single
parameter. If a parameter
contains only one value,
you do not need to
include parentheses in
your command or control
statement.
Braces
{}
Braces surround a list of
required values or
parameters; however,
only one value or
parameter is required.
Braces should not be
included in your
command or control
statement.
Vertical bar
DOTHIS=YES | NO
Vertical bars separate
values that are mutually
exclusive, YES | NO.
Enter only one of the
values.
Underline
YES
Underlined items indicate
a default value that is
used if the parameter is
not specified, YES | NO.
Note:
You must specify the parameters in the order shown, unless other
instructions are provided.
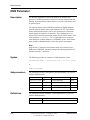
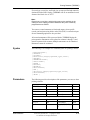
Parameter
Tables
User Reference
Most commands, control statements, and macro statements use
parameters. Parameter tables indicate whether the parameter is required or
Connectivity Systems, Inc.—Copyright © 2006
Use Pursuant to Company Instructions
xi
Preface
optional, valid values, and any default setting. Parameter tables display
information in the following format:
Parameter
Required?
Valid Entry
Default
value
Yes
1 to 99
characters
-----
PARM1
No
See syntax
VALUEA
One of the following two is required:
FUNCTION
-----
-----
-----
NOFUNCTION
-----
-----
-----
No
YES or NO
YES
DOTHIS
xii
Connectivity Systems, Inc.—Copyright © 2006
Use Pursuant to Company Instructions
User Reference
Contacting BIM-EPIC Technical Support
Contacting BIM-EPIC Technical Support
Normal
Business Hours
Support
You can reach BIM-EPIC Technical Support at any time. Our normal
operating hours are from 6:00 AM to 4:00 PM Pacific Time. In addition
to our regular customer support, we have technicians available for
emergency support 24 hours a day, 7 days a week. The phone number to
call for emergency support is listed on the www.bimoyle.com home page.
If you are outside the United States or Canada, contact your BIM sales
representative.
BIM-EPIC Technical Support relies on your description of a problem in
order to accurately determine the cause of your problem. The more
information you can provide, the more promptly a solution can be
determined. By following the guidelines below, you can help BIM-EPIC
Technical Support provide you with the exceptional service our
customers have learned to expect.
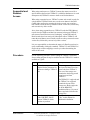
Procedure
Before contacting BIM-EPIC Technical Support, obtain the required
information by completing the following procedure:
Step
1
User Reference
Action
Obtain as many details describing the problem as you can. Based
on the information that you have gathered, classify your call using
one of the following categories:
MALFUNCTION IN A USER PROGRAM: A user program
behaves differently with BIM-EPIC turned on than with
BIM-EPIC turned off.
MALFUNCTION IN VSE: VSE malfunctions when
BIM-EPIC is turned on. For example, you receive
non-interruptible wait states or system loops.
BIM-EPIC FAILURE: An overall BIM-EPIC failure (abend).
OPERATIONAL MALFUNCTION: A particular BIM-EPIC
function or message does not operate correctly.
QUESTION: Seeking “how-to” information or general
knowledge.
Connectivity Systems, Inc.—Copyright © 2006
Use Pursuant to Company Instructions
xiii
Contacting BIM-EPIC Technical Support
Step
2
Action
If your problem is classified in category 1, 2, 3, or 4, you will
need the following:
A current TSIDDEB Summary Report. This contains details
concerning BIM-EPIC and VSE environment.
The CONSOLE LOG with our messages turned on. This
provides a step-by-step history of the situation.
The JCL, including expansions of // EXEC PROC and *
$$SLI statements. This provides the information necessary to
enable the technical staff to re-create the problem.
A DUMP, if one is produced. This is necessary if the
technical staff cannot re-create your problem due to
differences in hardware or software.
Have your documentation ready and available before proceeding
to step 3.
3
Contact BIM-EPIC Technical Support by telephone at
800-795-4914 Ext 4025, which is also located on the
www.bimoyle.com home page. Or by sending an e-mail with the
associated documentation to [email protected]. When
calling, you will be asked a series of questions. Please answer
them as accurately as possible. This will enhance our ability
analyze your situation promptly and provide you a timely
response.
Note: If you have classified your problem in category 1, 2, 3, or
4 and are sending an e-mail, please include the additional
documentation requested in step 2.
After-Hours
Emergency
Support
Complete the procedure indicated above.
When calling for after-hours emergency support, an outside answering
service will answer your call. Please be clear and concise when providing
the following: your name, the company name, the telephone number
where you can be reached, and a brief description of the problem. Be sure
to mention clearly that you need assistance with the BIM-EPIC product.
The answering service will page the support technician on call. Please
remain within hearing distance of the phone number you provided. A
response will take approximately 20-30 minutes. If you do not receive a
response within this time frame, call again to verify that we have the
correct phone number. Long delays usually indicate that we are having
difficulty contacting you based on the information you provided.
xiv
Connectivity Systems, Inc.—Copyright © 2006
Use Pursuant to Company Instructions
User Reference
Related Publications
Related Publications
Description
The following documents describe important BIM-EPIC technical
information. They assume appropriate knowledge of the relevant IBM
operating system.
BIM-EPIC Installation and System Guide contains detailed
procedures for BIM-EPIC system installation, configuration, and
maintenance. It assumes that you have access to the BIM-EPIC
User Reference Guide.
BIM-EPIC User Reference Guide serves as both user guide and
reference to BIM-EPIC operating features.
BIM-EPIC Messages and Codes lists and describes BIM-EPIC
messages and codes, including message responses and problem
resolution.
BIM-EPIC Conversion Guide contains instructions for converting
to BIM-EPIC from another tape and disk management system.
BIM-EPIC Technical Release Notice lists enhancements and
feature changes that have been put in place since the last release.
It also describes any special information required for upgrading
to the current release.
Technical Notes, distributed on the BIM-EPIC installation tape, contains
the latest technical information, including updates to BIM-EPIC printed
documentation. This document is contained in the TECHNOTE.Z
member in the VSE sub-library where BIM-EPIC is installed.
User Reference
Connectivity Systems, Inc.—Copyright © 2006
Use Pursuant to Company Instructions
xv
Related Publications
xvi
Connectivity Systems, Inc.—Copyright © 2006
Use Pursuant to Company Instructions
User Reference
1
Introduction
This chapter is an overview of the BIM-EPIC product. The BIM-EPIC
Disk/Tape Management System User Reference manual is written to
include all levels of programmer expertise. Even if you are very familiar
with the topics discussed in this chapter, we encourage you to review this
material, since several topics in this chapter contain information unique to
BIM-EPIC.
Chapter Contents
BIM-EPIC Fundamentals
BIM-EPIC Datasets
BIM-EPIC Dataset Definitions
BIM-EPIC Versioning and Retention
BIM-EPIC Job Control Language
BIM-EPIC Tape Processing
BIM-EPIC Disk Processing
User Reference
Connectivity Systems, Inc.—Copyright © 2006
Use Pursuant to Company Instructions
1-1
Configuration Options
BIM-EPIC Fundamentals
Configuration Options
Description
1-2
BIM-EPIC provides configuration options which allow you to customize
many aspects of your processing. Consult your systems programmer or
the BIM-EPIC Installation and System Guide if you have a question about
a specific configuration option.
Connectivity Systems, Inc.—Copyright © 2006
Use Pursuant to Company Instructions
User Reference
Controlled Datasets
Controlled Datasets
Description
BIM-EPIC controls datasets best when the dataset has a Dataset Name
(DSN) Catalog entry. The information contained in a DSN Catalog entry
determines how BIM-EPIC processes a dataset.
When a dataset is controlled by the DSN Catalog, the following is
available.
User Reference
Where each existing version is written
Where new versions can be written
How each version is written (for example, allocation size, block
size, density, multi-dataset)
How long each version is retained
How many versions are kept at one time
Processing statistics for each version (creation date, last access
date, block count)
Vault location of tape versions
Connectivity Systems, Inc.—Copyright © 2006
Use Pursuant to Company Instructions
1-3
Start Track 1 Datasets
Start Track 1 Datasets
Description
A Start Track 1 dataset is a disk dataset that is defined by specifying the
number 1 (one) in the relative track field of the VSE EXTENT statement.
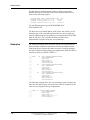
For example:
// DLBL MYFILE,’ANY.FILE’
// EXTENT SYS005,SYSWK3,1,0,1,20
In the above example, BIM-EPIC allocates 20 tracks to the MYFILE
dataset since the number 1 is in the relative track field. Using any other
number in relative track field indicates that BIM-EPIC will not handle the
allocation. The usual VSE JCL rules and requirements apply.
Start Track 1 datasets are only partially controlled. BIM-EPIC allocates
disk space for the dataset on output and will find the dataset on input.
However, no entry is made in the DSN Catalog, so no additional
information about the dataset is kept. You must supply the name of the
BIM-EPIC disk pool to use and the number of tracks or blocks to allocate
for the dataset. JCL supplies all remaining information.
A benefit of using Start Track 1 datasets is that the datasets do not need to
be entered in the DSN Catalog. However, Start Track 1 datasets require
significantly more I/O operations when opened, and only one version can
be kept on disk.
Because Start Track 1 dataset extents are not recorded in the DSN
catalog, BIM-EPIC must find the dataset extents in the VTOC. All
controlled datasets are written in pools, which can contain more than one
volume. For Start Track 1 datasets, this requires BIM-EPIC to read the
VTOC of every volume in the pool until it finds the dataset extents. This
activity occurs for both input and output. For output datasets, BIM-EPIC
deletes the previous version of a Start Track 1 dataset and then creates a
new Start Track 1 dataset. In contrast, BIM-EPIC only needs to read a few
records in the DSN Catalog to locate a cataloged dataset extent, no matter
where it is written, and multiple versions can be kept on disk.
Start Track 1 datasets are retained and scratched like uncontrolled
datasets. BIM-EPIC does not protect them from being deleted if their
expiration date has passed. You can protect the dataset from deletion by
using JCL, providing an expiration date or by indicating a number of days
before the dataset is expired. If you do not specify an expiration date,
BIM-EPIC provides the VSE default retention period of seven days.
To minimize overhead, Start Track 1 datasets should be cataloged to
improve performance, no matter how often the job is run.
1-4
Connectivity Systems, Inc.—Copyright © 2006
Use Pursuant to Company Instructions
User Reference
Start Track 1 Datasets
Configuration
Options
User Reference
Start Track 1 datasets are affected by the AUTOCAT, CATRT1,
MINRET, NCATDSK, and STRTRK configuration options. In addition,
the datasets can be affected by other configuration options that apply to
disk. See the BIM-EPIC Installation and System Guide for additional
information.
Connectivity Systems, Inc.—Copyright © 2006
Use Pursuant to Company Instructions
1-5
Other Types of Datasets
Other Types of Datasets
Description
BIM-EPIC can control SAM, ISAM, and DA datasets.
If the VSAM configuration option is set to YES, BIM-EPIC logs VSAM
extent information in the DSN Catalog. Logging occurs each time a
VSAM dataset is opened. BIM-EPIC always reflects the extents currently
in use, even if the dataset contains multiple secondary allocations.
BIM-EPIC controls TYPEFLE=WORK files on disk only. BIM-EPIC
cannot control TYPEFLE=WORK files on tape.
BIM-EPIC does not control datasets processed with the file names
IJSYSNR, IJSYSPC, or IJSYSRx, even if the dataset name is cataloged.
The system programmer can exclude additional file names from
BIM-EPIC control by adding the file name to the TSIDMAP ILIST
parameter.
Configuration
Options
1-6
The CNTRL, UNCDSK, UNCTAP, and UNCTL configuration options
affect the way uncontrolled datasets are processed. See the BIM-EPIC
Installation and System Guide for details about TSIDMAP.
Connectivity Systems, Inc.—Copyright © 2006
Use Pursuant to Company Instructions
User Reference
Dataset Name Catalog Entries
BIM-EPIC Datasets
Dataset Name Catalog Entries
Description
The Dataset Name (DSN) Catalog information controls dataset actions
based on information contained in the DSN Catalog. All information
pertaining to a cataloged dataset name is called a DSN Catalog entry. The
format and contents of an entry are described below.
DSN Catalog information is divided into two levels: the BIM-EPIC
Dataset Definition (EDD) level and the Version level.
Each EDD contains all attributes associated with a unique dataset name.
When a controlled dataset is opened or closed, BIM-EPIC uses these
attributes to manage processing. The EDD is discussed later in this
chapter.
BIM-EPIC enters version information automatically as each version is
created. At least one catalog record is created for each version of the
dataset. If the version spans more than one volume or extent, a catalog
record is created for each additional volume or extent.
Version information includes information such as the location of the
version, the expiration date, and the creation date. BIM-EPIC uses this
data to control the use and retention of each version.
The following sections provide detailed explanations of the data
contained in each DSN Catalog entry and how the various fields operate
in conjunction with each other.
User Reference
Connectivity Systems, Inc.—Copyright © 2006
Use Pursuant to Company Instructions
1-7
Dataset Name Catalog Management
Dataset Name Catalog Management
Description
Most updates to the Dataset Name (DSN) Catalog are made automatically
as datasets are processed. However, sometimes you may want to add a
special dataset or change the defaults you have supplied for an existing
BIM-EPIC dataset definition. This can be done using either the
BIM-EPIC Online Manager or TSIDMNT.
The BIM-EPIC Online Manager (EOM) is a panel-driven catalog
management facility. EOM leads you step-by-step through the catalog
management process and allows you to view the changes you have made
to a dataset entry. The TSIDMNT program provides the same functions in
batch mode.
See Chapter 2, “BIM-EPIC Online Manager” and Chapter 3,
“TSIDMNT—DSN CATALOG MANAGEMENT UTILITY,” for
additional information.
1-8
Connectivity Systems, Inc.—Copyright © 2006
Use Pursuant to Company Instructions
User Reference
Dataset Name Catalog Maintenance
Dataset Name Catalog Maintenance
Description
The Dataset Name (DSN) Catalog must be maintained regularly.
Maintenance includes regular backups and scratch runs, as well as
periodic re-indexing.
Catalog maintenance is done using TSIDUTL. See the BIM-EPIC
Installation and System Guide for additional information.
User Reference
Connectivity Systems, Inc.—Copyright © 2006
Use Pursuant to Company Instructions
1-9
BIM-EPIC Dataset Definition Components
BIM-EPIC Dataset Definitions
BIM-EPIC Dataset Definition Components
Description
The BIM-EPIC dataset definition (EDD) consists of several components.
The following sections describe each component.
Dataset Name
BIM-EPIC uses the dataset name in the DSN Catalog to identify a dataset
as a controlled dataset. Each time a controlled dataset is opened or closed,
BIM-EPIC participates in the processing of the dataset.
The rules for dataset naming are:
Non-generation dataset names can be up to 44 characters long.
Generation dataset names can be up to 35 characters long.
Special considerations apply to tape datasets that belong to a multi-dataset
group. See “Prime Dataset Name” for additional information.
Comment
You can include one 30-character comment with any BIM-EPIC dataset
definition. Comments provide additional documentation for the dataset
and are printed in BIM-EPIC reports.
Passwords
Passwords protect datasets and their associated versions against
unauthorized uses of RELEASE and UNLOCK. A password does not
LOCK, RELEASE, or UNLOCK the dataset. See Chapter 2, “BIM-EPIC
Online Manager,” and Chapter 3, “TSIDMNT—DSN CATALOG
MANAGEMENT UTILITY,” for additional information on RELEASE
and UNLOCK.
Encryption
Password
Data encryption encodes tape datasets as they are written. The datasets
are decoded only when they are read using the same DSN Catalog that
was used to write them. Data encryption can be used to prevent tape
datasets from being read at external locations. However, data encryption
provides no protection against unauthorized internal use.
Entering an encryption password for a dataset invokes data encryption for
each tape version you create. You do not need to remember this password.
The encryption password and the dataset password function
independently of each other. You can use both passwords, if necessary.
1-10
Connectivity Systems, Inc.—Copyright © 2006
Use Pursuant to Company Instructions
User Reference
BIM-EPIC Dataset Definition Components
!
WARNING:
Encrypted dataset versions must not be deleted from the DSN
Catalog. Once a dataset version is deleted, its data cannot be
decoded, making the dataset version is unreadable. In addition,
once the dataset is cataloged, the encryption password cannot
be added, changed, or deleted.
User ID and
System ID
User ID and system ID assist in grouping tape datasets for reporting and
scratching purposes. Each ID can contain any two-character code that is
significant to you or your installation. There is no difference in how the
IDs function. You can use either or both the user ID and system ID to
group datasets at the various levels.
SYS Number
You can specify a specific SYS number to use for a dataset by entering
the SYS number in the dataset definition. This inhibits the BIM-EPIC
Logical Unit Block (LUB) allocation for the dataset each time the dataset
is processed. You should avoid specifying a SYS number unless it is
absolutely necessary. You can allow the BIM-EPIC LUB Allocation
feature to assign a SYS number for you or you can inhibit LUB allocation
through JCL. If you choose to assign a SYS number in the dataset
definition, do not use the same number for a different dataset in the same
job step in your JCL.
Block Size
Block size reblocks datasets and overrides any block size coded in the
program file definition. If the block size specified is not a multiple of the
record length, BIM-EPIC automatically rounds down to the closest
multiple.
Reblocking is valid only for sequential datasets with fixed or variable
record formats. In addition, the program must specify fixed or variable
length record formats in its file definition coding. Reblocking is
supported for all datasets processed by logical input/output control
services (LIOCS), but may be ignored by programs that use physical
PIOCS to process the dataset. Reblocking is not valid for tape datasets
which will be read backward.
Block size and CISIZE are mutually exclusive. You can specify only one,
either the block size or CISIZE, in an BIM-EPIC dataset definition.
Generation or
Work Dataset
BIM-EPIC provides four retention criteria: generation or work, retention
days, and date after last access (DLA) retention. All of the criteria work
together to determine retention for active versions.
The generation or work field specifies whether to keep more than one
version of the dataset at a time. When you designate a dataset as a
generation dataset, BIM-EPIC maintains at least the number of versions
specified in the Cycles Retention field. Because each version is also
User Reference
Connectivity Systems, Inc.—Copyright © 2006
Use Pursuant to Company Instructions
1-11
BIM-EPIC Dataset Definition Components
retained for the periods indicated in the Retention Days field and the DLA
Retention field, BIM-EPIC can retain more versions than the number
specified in the Cycles Retention field. Cycles 5 and Retentions Days 0
will insure that 5 versions are always present. Cycles 5 and Retention
Days 60 may result in more than 5 versions being present.
When you designate a dataset as a non-generation dataset or work dataset,
BIM-EPIC retains only one version of the dataset at a time. As long as no
new version is created, the version is retained for the time period
indicated in the Retention Days field and the DLA Retention field. When
you create a new disk version of a non-generation/work dataset, the old
version is scratched automatically, even if the old version has not expired.
In addition, entries are automatically scratched from the VTOC to avoid
the OVERLAP ON UNEXPIRED FILE message VSE generates. When
you create a new tape version of a non-generation/work dataset, the old
tape version is scratched when you execute TSIDUTL SCRATCH.
When you specify a cycles retention value of one (1) for a non-generation
dataset, BIM-EPIC always retains one version, even if the other retention
criteria have expired.
Retention Days
Retention days specify the number of days each version should be
retained after its creation date.
You can use retention days to specify permanent retention (PERM).
When a disk version is created with permanent retention, an expiration
date of 2099366 is recorded in the VTOC entry. When BIM-EPIC sees
the 2099366 expiration date, the dataset cannot be deleted in response to
an INSUFFICIENT SPACE condition.
Cycles
Retention
Cycles retention specifies the minimum number of active versions
(cycles) to maintain at all times. To maintain more than one version, you
must designate the dataset as a generation dataset.
DLA Retention
Days after Last Access (DLA) retention relates expiration to dataset use.
Even if other retention criteria have expired, the dataset cannot expire if it
has been accessed as input during the last n days.
1-12
Connectivity Systems, Inc.—Copyright © 2006
Use Pursuant to Company Instructions
User Reference
BIM-EPIC Dataset Definition–Tapes
BIM-EPIC Dataset Definition–Tapes
Description
BIM-EPIC dataset definitions (EDD) for tapes consist of several
components. The following sections provide an overview of each
component.
Standard Label
The label specifies whether an output tape dataset is created on a labeled
tape or an unlabeled tape.
Tape Density
Tape density specifies which density to use when creating a tape dataset.
When a density is specified, BIM-EPIC scans only the tape drives that
support the specified density when looking for a valid scratch tape. For
example, you can use the tape density field to create a dataset on cartridge
tapes only.
You can specify a default density for your site using the MODE
configuration option. However, specifying a density in the BIM-EPIC
dataset definition overrides the MODE default. Specifying a density in
the JCL overrides both the MODE default and the BIM-EPIC dataset
definition tape density. If no density is specified in any of these places,
BIM-EPIC uses the last density that was used on the selected drive.
Prime Dataset
Name
The prime dataset name links all datasets in a multi-dataset group. The
link is created in the DSN Catalog record and allows BIM-EPIC to group
datasets automatically. The first dataset on the tape is called the prime
dataset. The second and subsequent datasets on the tape are called
subdatasets.
Multi-dataset processing can be complex and requires pre-processing
before a multi-dataset group can be created.
Tape Pool ID
The tape pool ID associates a dataset with a particular tape pool. Once a
dataset is assigned to a tape pool, the dataset version can be written only
on scratch tapes from the assigned tape pool. Datasets not assigned to a
tape pool can be written only on scratch tapes that are not assigned to a
tape pool.
Owner ID
The owner ID is a secondary pooling mechanism for tape datasets. An
owner ID is a two-character code that matches the first two characters of a
tape volume serial number. Owner ID is provided primarily for
compatibility with older tape management systems. If an owner ID is
specified for a dataset, all new tape versions must be created on tape
volumes which begin with the owner ID two-character code.
User Reference
Connectivity Systems, Inc.—Copyright © 2006
Use Pursuant to Company Instructions
1-13
BIM-EPIC Dataset Definition–Tapes
Revolving Tape
Datasets
When you specify Revolving Tapes=YES for a dataset, you establish an
exclusive relationship between a dataset and the tape serial numbers the
dataset uses. A revolving tape volume can contain one version of a
specific dataset and can be written only on specific tape volumes. A
revolving tape volume cannot be used in an Automated Cartridge Library
(ACL).
Tape Size
If you specify tape size as SMALL, BIM-EPIC requests a small scratch
tape when the dataset is created. If a tape volume serial number ends in S,
BIM-EPIC considers the tape small. Large tapes are the default and have
no restriction on their volume serial numbers. This option cannot be used
for tape cartridges.
Vault Method
Number
A vault method establishes a pattern of movement through tape vaults for
each tape version in the dataset. The vault method number field assigns a
vault method and activates vaulting for the dataset.
1-14
Connectivity Systems, Inc.—Copyright © 2006
Use Pursuant to Company Instructions
User Reference
BIM-EPIC Dataset Definition–Disks
BIM-EPIC Dataset Definition–Disks
Description
BIM-EPIC dataset definitions (EDD) for disks consist of several
components. The following sections provide an overview of each
component.
CISIZE
CISIZE specifies a CISIZE for FBA devices and forces the dataset to be
written to maximize the number of records written to a control interval.
Use CISIZE instead of block size for datasets written on FBA devices.
CISIZE and block size are mutually exclusive. You can specify only one
of these in an EDD.
Disk Pool Name
Use a disk pool name to assign disk datasets to a disk pool. Disk pools are
referenced by a six-character pool name which can be a real volume serial
number or an assigned name. The systems programmer creates disk pools.
The systems programmer can also create CPU or partition-independent
disk pools:
To specify CPU disk pools, use three dashes at the end of the disk
pool name, for example, POL - - -.
To specify partition-independent disk pools, use two dashes at the
end of the disk pool name, for example, POOL - -.
If you do not assign a disk pool and a default disk pool has been specified
by the DEFPOL configuration option, the dataset will be assigned to the
default disk pool.
Primary Extent
Size
The primary extent size defines the number of tracks or blocks allocated
to the first extent. The minimum size is 1 CKD track or your CISIZE for
FBA.
Secondary
Extent Size
The secondary extent size defines the number of tracks or blocks
allocated to every extent after the first extent. The default secondary
extent size is half the size of the primary extent.
When the primary extent is filled, secondary extents are allocated
automatically to a version of a sequential disk dataset. Secondary extents
are supported only for programs that use logical IOCS and, if they support
secondary allocations, programs that use physical IOCS.
Secondary
Allocations
User Reference
You can specify the maximum number of secondary extents allowable for
a single dataset version. The maximum number is 255 secondary extents.
Connectivity Systems, Inc.—Copyright © 2006
Use Pursuant to Company Instructions
1-15
BIM-EPIC Dataset Definition–Disks
Allocation by
Logical
Records
Allocation by logical records (ALR) automatically calculates the primary
extent size. ALR overrides the primary extent size, if a primary extent
size has been previously set. BIM-EPIC calculates the primary extent size
based on:
record length
estimated number of records
block size
track/block capacity of the selected volume
ALR allows you to migrate from one device type to another without
changing the allocation size.
ALR is valid only for sequential disk datasets created with a DTFSD.
1-16
Connectivity Systems, Inc.—Copyright © 2006
Use Pursuant to Company Instructions
User Reference
Versioning Datasets
BIM-EPIC Versioning and Retention
Versioning Datasets
Description
As each version of a dataset is created, BIM-EPIC automatically records
attributes specific to that version in the DSN Catalog. This section
describes the attributes that are recorded.
Version Number
The version number identifies the version of a dataset. The current or
most recently created version is always version 1. Whenever a new
version of a dataset is created, previous version numbers are
automatically incremented. Versions in scratch status, open status, or
conditionally cataloged status do not have version numbers.
Generation
Number
The generation number is a nine-character suffix, for example,
.G=nnnnnn, appended to the dataset name when the dataset is written to
the VTOC. A generation number begins in position 36 of the dataset
name and is assigned to each generation disk version.
Since several versions of a generation dataset can be written on the same
disk volume, BIM-EPIC appends a unique generation number to each
dataset name to ensure that the dataset name is unique in the VTOC.
Although the VSE VTOC dataset name includes the generation number,
BIM-EPIC does not consider the generation number to be part of the
dataset name. Therefore, do not include the dataset name in your JCL
when using BIM-EPIC to process the dataset under DSN Catalog control.
Specify the dataset name only as it appears in the BIM-EPIC dataset
definition.
Version Status
User Reference
BIM-EPIC tracks the status of each version. The following information
describes each BIM-EPIC status type.
Status Type
Indicator
Description
Active
A
The default status of an unlocked active
version.
Open
O
Indicates a version did not close successfully.
An open version cannot be used or scratched
until you declare it closed using Online
Manager or TSIDMNT.
Connectivity Systems, Inc.—Copyright © 2006
Use Pursuant to Company Instructions
1-17
Versioning Datasets
Status Type
Indicator
Conditional C
Catalog
Description
Indicates the version was created with the
TESTJOB utility or a conditional catalog
option in the JCL. The version is accessible as
input only if it is the latest version for the
specific dataset. In addition, the version can be
accessed only by a job with the same name as
the job that created it. To make the version an
active version, declare the version closed using
Online Manager or TSIDMNT.
Versions with an open status or conditional
catalog status have different retention rules than
versions with an active status. See “Retaining
Dataset” for additional information.
Scratch
S
Indicates a tape version with a scratch status.
The tape can be overwritten at any time. Disk
version records are deleted, not marked as
scratch.
Lock
L
Indicates a version in locked status. A locked
version cannot be accessed as input until it is
unlocked or released using Online Manager or
TSIDMNT.
Subdataset
N
Indicates a dataset in a multi-dataset group with
file sequence number 2 or greater.
Work
W
Indicates a non-generation dataset.
Unlabeled
U
Indicates the version was created on an
unlabeled tape.
MCAT
M
Indicates that the version has been
MCATALOGed. The version can be an MCAT
master version or alias version.
Offload
status
Indicates the disk version has been moved to
tape. See Chapter 13, “Disk Space
Management,” for additional information.
Volume Serial
Number
The volume serial number field indicates the volume serial number of the
tape or disk volume on which the version is written. For multi-volume
datasets, there is one volume serial number recorded for each volume.
Reel Number
The reel number indicates the tape volume sequence number for
multi-volume datasets.
File Sequence
Number
The file sequence number indicates the position of the dataset in a
multi-dataset group.
1-18
Connectivity Systems, Inc.—Copyright © 2006
Use Pursuant to Company Instructions
User Reference
Versioning Datasets
Extent Number
and Address
BIM-EPIC records the extent addresses for each disk dataset. This
information includes:
extent sequence (1 for primary, 2 for the first secondary, and so
on)
beginning relative track or block number
size of the initial allocation
amount of allocation used
The amount of allocation used is smaller than the initial allocation if the
dataset has been truncated.
BIM-EPIC may allocate an additional extent if the extent being processed
is nearly full when the dataset is closed. This extra extent is called an EOF
extent.
Record Format,
Length, Block
Count, Block
Size
The actual record format, record length, block count, and block size are
recorded for each version. This information is recorded when the dataset
is created by a program that uses logical IOCS. The information can be
zeros if the dataset is created by a program that uses physical IOCS.
Creation
Date/Time
BIM-EPIC records the date and time the version was written.
Job/Device
Address
BIM-EPIC records the name of the job that created the version, the
partition in which it was created, and the address (cuu) of the device on
which it was created.
Last Access:
Job and Date
BIM-EPIC records the date the version was accessed and the name of the
job that requested access, each time the version is opened.
Expiration Date
BIM-EPIC calculates an expiration date for each version based on
retention days and DLA retention. A version remains active past its
expiration date if it is still needed to satisfy cycles retention.
Tape Use and
Error Count
The tape use count indicates the number of times the tape has been
accessed. The tape error count indicates the number of read/write errors
encountered.
User Reference
Connectivity Systems, Inc.—Copyright © 2006
Use Pursuant to Company Instructions
1-19
Versioning Datasets
Tape use count and tape error count are kept for each tape while the tape
is associated with a version. Both counts start from the last date the tape
was cleaned.
Current Vault
and Slot
Location
1-20
The current vault and slot locations are recorded for each tape if the
dataset is subject to a vault rotation method.
Connectivity Systems, Inc.—Copyright © 2006
Use Pursuant to Company Instructions
User Reference
Cataloging Datasets Automatically
Cataloging Datasets Automatically
Description
If the new dataset and version are to be controlled, they must have an
entry in the DSN Catalog. Dataset entries and version entries can be
created automatically for uncontrolled datasets using AUTOCAT and
AUTOLOG. In addition, dataset entries and version entries can be created
automatically using the DD statement parameter DISP=(x,CATLG).
AUTOCAT and AUTOLOG operate globally on all qualifying datasets.
DISP=(x,CATLG) operates locally on the dataset specified in the DD
statement. AUTOCAT and AUTOLOG are independent but perform
parallel functions using the same rules. However, there is an important
functional difference between them. AUTOCAT catalogs uncontrolled
output tape datasets and versions. AUTOLOG catalogs uncontrolled input
tape datasets only; versions are not cataloged.
See the BIM-EPIC Installation and System Guide for additional
information on AUTOCAT and AUTOLOG. See Chapter 6, “BIM-EPIC
DD Statement,” for additional information on the DISP=(x,CATLG)
parameter.
AUTOCAT
AUTOCAT creates a dataset definition for an output dataset if that dataset
is not in the DSN Catalog. All subsequent versions created under the
dataset name will be cataloged also, including the version that triggered
the AUTOCAT operation.
When automatically cataloging multi-dataset groups that are read out of
sequence, verify that the prime dataset is entered in the DSN Catalog
before reading any subdataset in the group. If the prime dataset is read
first and the datasets are read in sequence, this requirement is satisfied.
The following fields are entered in each autocataloged dataset definition.
Retention Days
Cycles Retention
Default Disk Pool
Default Primary Extent
Datasets that are automatically cataloged are identified by a user ID and
given the comment **** AUTO CATALOGUE **** when shown on
reports and displays. The user ID is AC. All automatically cataloged
datasets are generation datasets. These dataset definitions can be changed
later using Online Manager or TSIDMNT.
User Reference
Connectivity Systems, Inc.—Copyright © 2006
Use Pursuant to Company Instructions
1-21
Cataloging Datasets Automatically
AUTOLOG
AUTOLOG creates a BIM-EPIC dataset definition (EDD) for an input
tape dataset that is not already in the DSN Catalog. However, unlike
AUTOCAT, AUTOLOG does not automatically catalog any versions to
the EDD. You can use AUTOLOG to force standard EP001 MOUNT
messages for previously uncontrolled input tape datasets.
When automatically logging multi-dataset groups that are read out of
sequence, ensure that the prime dataset is entered in the DSN Catalog
before any subdataset in the group is read. If the prime dataset is read first
and the datasets are read in sequence, this requirement is satisfied.
Configuration
Options
AUTOCAT, AUTOLOG, CATRT1, NCATDSK, CYCL, RETEN,
DEFPOL, and DEFEXT configuration options affect automatic
cataloging. AUTOCAT options can be specified differently for tape and
disk.
There are three automatic cataloging options:
Global
SYSPARM
None
Global AUTOCAT automatically catalogs all datasets if they are not
already in the catalog.
SYSPARM AUTOCAT catalogs selected datasets. The datasets are
automatically cataloged if the current SYSPARM matches the
SYSPARM in the AUTOCAT configuration option or AUTOLOG
configuration option.
If you turn off automatic cataloging, new datasets can only be cataloged
using Online Manager or TSIDMNT.
1-22
Connectivity Systems, Inc.—Copyright © 2006
Use Pursuant to Company Instructions
User Reference
Retaining and Scratching Datasets
Retaining and Scratching Datasets
Description
Versions of catalog-controlled datasets must be scratched before their
tapes and disk space can be reused. Because BIM-EPIC does not scratch
datasets unless specifically instructed to do so, you must provide
BIM-EPIC specific instructions. There are four methods of providing
instructions to BIM-EPIC:
Using JCL options (work/non-generation dataset versions only)
Defining a dataset as “work” or as a common work dataset
(CWDS)
Using Online Manager or TSIDMNT
Using TSIDUTL SCRATCH
The JCL scratch parameters can be used to delete work/non-generation
dataset versions when the versions are closed for input or at the end of the
job or job step. These versions are scratched regardless of whether or not
the retention criteria have been satisfied.
By design, BIM-EPIC maintains only one version of a
work/non-generation dataset. When a new version is opened, the previous
disk version is deleted or the previous tape version is set to scratch status.
CWDS are retained only for the duration of a VSE job. CWDS are always
deleted at the end of the job, whether the job ends normally or
abnormally.
Online Manager and TSIDMNT SCRATCH can be used to scratch
versions even if the retention criteria have not been satisfied.
The TSIDUTL SCRATCH function reviews all datasets in the DSN
Catalog and deletes all versions that are eligible for scratch. A dataset is
considered eligible for scratch when ALL the retention criteria have been
satisfied.
You can also preview a scratch run using the TSIDUTL PSCRATCH
function. This function gives you a listing of all tape datasets that are
eligible for scratch on a particular date. Use this report to identify any
expired datasets you might want to save and to obtain an estimate of the
number of scratch tapes you will have available at any point.
User Reference
Connectivity Systems, Inc.—Copyright © 2006
Use Pursuant to Company Instructions
1-23
Retaining Dataset
Retaining Dataset
Description
The retention rules for cataloged datasets are:
!
Tapes are not made available for reuse and disk space is not
released until dataset versions are scratched.
Non-temporary versions are not scratched until the TSIDUTL
SCRATCH function is executed. Versions are not scratched
unless they meet eligibility criteria. A version is not eligible to be
scratched until ALL the retention criteria have been satisfied.
Any version can be scratched at any time using Online Manager
or TSIDMNT SCRATCH. When a new work dataset version is
opened, the previous work dataset version is scratched
immediately.
Work dataset versions opened as input can be scratched at close
or at end-of-job or job step. JCL parameters are available to
instruct BIM-EPIC to scratch disk versions, free space, and erase
the entry from the VTOC. Tapes become available for reuse as
output.
Multi-dataset tape volumes are not made available for reuse until
all dataset versions on the tape have been scratched.
Conditionally cataloged versions can be scratched the day after
they are created.
Common work dataset versions are always scratched at
end-of-job.
Open versions can be scratched based on settings in the
THLDOPEN parameters and DHLDOPEN parameters of the
TSIDUTL SCRATCH function. The default is to retain open tape
versions for one day and open disk versions for two days after
their creation dates.
WARNING:
Tapes in open status can be reused before they are scratched.
These tapes are accepted as scratch tapes if they are accessed
in the same partition with a different job name. While this means
that the tape is vulnerable to accidental reuse, it also means that
the tape is immediately available as scratch. You can use special
EPS configuration options to modify this setting.
The following provides examples of retention when using multiple
criteria.
1-24
Connectivity Systems, Inc.—Copyright © 2006
Use Pursuant to Company Instructions
User Reference
Retaining Dataset
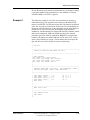
Example 1
The following is an example of retaining x versions for y days. In the
example, you need to retain each version of an inventory dataset for 100
days. You also need to retain the last 10 versions, regardless of when the
versions were created. The dataset definition specifies:
Generation Dataset......YES
Retention Days.......100
Retention Cycles.....10
Retention DLA........0
Example 2
Case 1
During the first 100 days after creating the first version, you create a total
of nine versions. On day 101, no versions are scratched because you still
have not completed 10 cycles.
Case 2
If you create version 11 after 60 days, no version is eligible for scratch
because the first version you created is only 60 days old. This version is
retained until day 100 regardless of the number of versions created as of
that time.
The following is an example retaining a work dataset for x number of
days after its last access. In the example, an accounting job produces
results from work datasets in multiple stages. If you decide to save the
work datasets for 15 days as of the last date you use the data, you would
catalog the dataset with:
Generation Dataset......NO
Retention Days.......0
Retention Cycles.....0
Retention DLA........15
Each version is saved for 15 days after its last access.
Example 3
The following is an example of what is required if you want a temporary
dataset.
Generation Dataset......NO
Retention Days.......0
Retention Cycles.....0
Retention DLA........0
All versions are eligible for scratch at all times.
User Reference
Connectivity Systems, Inc.—Copyright © 2006
Use Pursuant to Company Instructions
1-25
Retaining Start Track 1 Datasets
Retaining Start Track 1 Datasets
Description
BIM-EPIC retains Start Track 1 datasets with period retention only.
Expiration is determined by the JCL or by the default retention for Start
Track 1 datasets specified in the DSKRET configuration option. The
existing version is deleted when a new version is created.
TSIDUTL SCRATCH does not examine Start Track 1 datasets. The space
occupied by a Start Track 1 dataset becomes available for re-use when the
VTOC expiration date has been reached.
1-26
Connectivity Systems, Inc.—Copyright © 2006
Use Pursuant to Company Instructions
User Reference
Overriding Standard Retention
Overriding Standard Retention
Description
Since the default retention criteria may not be suitable for every version
of every dataset, you may want to occasionally modify retention criteria.
You can change retention for new versions, for existing versions, or for
the entire dataset.
Retention days or an expiration date specified on a TLBL statement,
DLBL statement, or DD statement for an output dataset overrides the
catalog default.
You can change the retention of a cataloged version using RETAIN
and/or CYCLE in Online Manager or TSIDMNT. To update the retention
for all new versions of a dataset, you must update the retention of
previous versions explicitly using RETAIN and/or CYCLE.
You can update existing Start Track 1 datasets to permanent retention
using the TSIDVUT RETAIN, PERM, or PACKSCAN functions. You
can delete the datasets before the expiration date is reached using the
TSIDVUT DELETE or TSIDVUT PACKSCAN.
User Reference
Connectivity Systems, Inc.—Copyright © 2006
Use Pursuant to Company Instructions
1-27
Purging Dataset Information
Purging Dataset Information
Description
When Automatic Generation Purge (AGP) is enabled, BIM-EPIC
automatically deletes DSN Catalog information pertaining to any disk
dataset version with a version number that exceeds the cycle retention in
the BIM-EPIC dataset definition (EDD).
AGP is enabled by setting AGP=YES when creating or updating an EDD
in the DSN Catalog.
If the PURBYP configuration option is set to YES, an automatic delete
will not occur if the job cancels before completion. If the PURBYP
configuration option is set to NO, AGP remains in effect and the version
is deleted.
Example
The following TSIDMNT command adds an EDD to the DSN Catalog.
BIM-EPIC retains three versions of the dataset DSNA at all times. When
a new version is created, the oldest version is automatically deleted at the
end of the job.
CAT
1-28
'DSNA',CYC=3,AGP=YES,...
Connectivity Systems, Inc.—Copyright © 2006
Use Pursuant to Company Instructions
User Reference
Recording Dataset Activity
Recording Dataset Activity
Description
The BIM-EPIC Recorder logs control dataset activity to a file, including:
All DSN Catalog maintenance transactions, excluding TSIDVLT
(vaulting) maintenance
All open and close activities of controlled datasets
Machine use and job accounting statistics
The Recorder file is vital to emergency recovery of the DSN Catalog. The
file contains a record of all changes made to the DSN Catalog since the
last catalog backup. In the event of a lost or corrupted catalog, BIM-EPIC
uses the data in the Recorder file to recover the DSN Catalog.
You can use Recorder data to produce job-specific accounting reports. In
addition, you can log your own comments in the Recorder file using the
TSIDRFS utility. See the BIM-EPIC Installation and System Guide for
additional information on the Recorder maintenance utility and related
configuration options.
!
WARNING:
Keep the Recorder active at all times and verify that there is
enough disk space to ensure the Recorder does not run out of
space between DSN Catalog backups.
Configuration
Options
User Reference
The RECORD configuration option, RECWARN configuration option,
RECWMSG configuration option, and RECSHR configuration option
affect the functioning of the Recorder file. See the BIM-EPIC Installation
and System Guide for additional information on the Recorder
maintenance utility and related configuration options.
Connectivity Systems, Inc.—Copyright © 2006
Use Pursuant to Company Instructions
1-29
Allocating Logical Unit Blocks (LUB)
Allocating Logical Unit Blocks (LUB)
Description
The VSE Logical Unit Blocks (LUB) connects the logical unit (SYS
number) in a file definition DTF with the physical device address (cuu)
that controls the dataset.
When a disk or tape dataset is opened, if the SYS number specified in the
program is already in use, the LUB allocation feature assigns logical units
for tape and disk devices. This eliminates potential conflicts in SYS
number assignments when:
A program or job stream uses the same SYS number for two
different datasets and the datasets are stored on two different
DASDs or tape units.
The requested SYS number is permanently assigned to another
device.
The LUB allocation feature reassigns new SYS numbers to both datasets
and continues processing without interruption. In addition, LUB
allocation allows BIM-EPIC to write multiple extents for a single dataset
on separate disk volumes to more efficiently use the disk pooling feature.
When a dataset is opened and the SYS number is already in use,
BIM-EPIC selects an unused SYS number. For disk datasets, BIM-EPIC
begins assigning SYS numbers with the number specified in the
DSKLUB configuration option. For tape datasets, BIM-EPIC begins with
the number specified in the TAPLUB configuration option.
In most cases, LUB allocation is automatic. However, in some cases,
LUB allocation is inhibited automatically. You can also inhibit the LUB
allocation using JCL parameters. See Chapter 5, “BIM-EPIC TLBL and
DLBL Statements,” for additional information.
1-30
Connectivity Systems, Inc.—Copyright © 2006
Use Pursuant to Company Instructions
User Reference
Managing Tape Devices
Managing Tape Devices
Drive
Assignments
BIM-EPIC makes and releases drive assignments automatically using the
Automatic Volume Recognition (AVR), Autoattach, and Early Drive
Release features. Using these features, tape drives are assigned to a
partition or virtual machine between open and close only. Performing the
assignments in this manner frees up the tape drives between job start and
open time or between close time and end-of-job, increasing the
availability of the tape drives.
Tape drive assignments are affected by the SHARE and AUTOATT
configuration options. Early Drive Release is activated for uncontrolled
tapes if the configuration option UNCTAP=YES is specified.
Automatic
Volume
Recognition
BIM-EPIC does AVR processing for both tape and disk. When necessary,
BIM-EPIC searches available drives for the correct volume and assigns
that drive to the partition running the job.
A tape drive is considered available for output if it:
Contains a valid tape with a tape volume serial number located in
the DSN Catalog in scratch status or it has been initialized by
DITTO
Is ready and at load point
Supports the mode setting selected for the dataset
Is not in device down status
Is not assigned to any partition
Is not attached to another LPAR or Guest Virtual Machine if
Autoattach is on or is attached to your LPAR or Guest Virtual
Machine if Autoattach is off
Note:
When AVR finds the tape, BIM-EPIC assigns the drive to the partition
running the job. To maximize performance, you must remove ASSGN
statements from your JCL. See “Using LUB Allocation and the ASSGN
Statement” for additional information on assignments and JCL.
Auto Stop
User Reference
While scanning the drive, if AVR cannot find an appropriate tape,
BIM-EPIC pauses the partition and waits for the interval specified by the
AUTOSTP configuration option and then rescans the drive. This process
is repeated at the interval specified by the AUTOSTP configuration
option. If AVR still cannot find the appropriate tape after this process has
Connectivity Systems, Inc.—Copyright © 2006
Use Pursuant to Company Instructions
1-31
Managing Tape Devices
completed, a mount message is sent to the operator. AVR puts the
partition in a wait state until the operator responds.
Autoattach
Autoattach automatically attaches a tape drive to a Guest Virtual Machine
(VM), and then AVR assigns the tape drive to the partition.
Autoattach adds two new commands to VM:
VATTACH corresponds to the IBM ATTACH command.
VDETACH corresponds to the IBM DETACH command.
BIM-EPIC issues these commands during AVR to search for the desired
tape on a drive that VM owns. These commands differ from their IBM
counterparts in the following ways:
VDETACH detaches the tape drive without unloading the tape.
This leaves the tape accessible for another AVR search.
Both the VATTACH and VDETACH commands operate in silent
mode. That is, they do not issue messages.
If you are using zVM release 4.2 or higher, these commands are not
needed and, therefore, are not available.
Early Drive
Release
At close, BIM-EPIC releases the tape drive assignment with Early Drive
Release and if in a VM Autoattach environment, detaches the drive from
the guest machine.
Early Drive Release and Autoattach are automatic. However, they are
inhibited if you use alternate assignments.
1-32
Connectivity Systems, Inc.—Copyright © 2006
Use Pursuant to Company Instructions
User Reference
Managing Tape Volumes
Managing Tape Volumes
Description
The BIM-EPIC tape initialization program, TSIDINIT, prevents
initializing tapes with duplicate volume serial numbers and adds
newly-acquired tape volumes to the DSN Catalog.
TSIDLBL creates gummed volume labels for your tapes.
Vault management facilities control tape vaulting functions.
Tape versions are added to the DSN Catalog automatically as you process
datasets. In most circumstances, tapes do not need to be added manually.
To add tapes to the DSN Catalog manually, use Online Manager or
TSIDMNT ADD. You can also reinitialize tapes using TSIDINIT.
You can automatically migrate to cartridge tapes by specifying a cartridge
density as the global default for all output tapes. Use the MODE
configuration option to specify the default setting. See the BIM-EPIC
Installation and System Guide for additional information on the MODE
configuration option.
User Reference
Connectivity Systems, Inc.—Copyright © 2006
Use Pursuant to Company Instructions
1-33
Managing Disk Devices
Managing Disk Devices
Disk Pooling
BIM-EPIC uses disk pooling to make disk allocation more flexible and
more efficient. The systems programmer defines disk pools to use in your
installation. Disk pools can include one or more disk volumes. In
addition, part of a volume can be allocated to a disk pool.
Each disk dataset must be assigned to a disk pool before allocation. Each
time a dataset version is written, an allocation is made in that pool. Disk
pools are referenced using a six-character pool name. However, the same
pool can also be referenced by alias pool names. In addition, you can have
CPU and partition-independent pool names. If these pools are defined,
you can reference a partition independent pool by adding two dashes to
the end of the name, for example, P O O L - -. For CPU and partition
independent pools, add three dashes to the end of the name, for example,
P O O L - - -.
Pool names are assigned to datasets using JCL or the DSN Catalog.
Leveling
Leveling reduces head contention by distributing allocations over the
entire disk pool, rather than concentrating the allocations on a single
volume. Each time a new extent is written, BIM-EPIC makes the
allocation on the next volume in the pool sequence. To minimize disk
fragmentation, leveling uses a “best fit” algorithm to allocate space. For
example, you need to allocate 3,000 tracks. Pool disk 1 has 12,000
contiguous tracks, disk 2 has 5,000 contiguous tracks, and disk 3 has 4,
000 contiguous tracks. The allocation will be made on disk 3 since that is
the “best fit.” If disk 1 is the only disk that has at least 3,000 contiguous
tracks, the allocation will be made on disk 1. Leveling is activated for a
disk pool when the pool is defined.
Offload Utilities
The BIM-EPIC offload utility moves datasets from disk to tape and back
again. Processing is done logically, so you can use the offload utility for
backup, to reorganize your disk space, or just to offload infrequently used
datasets. BIM-EPIC automatically reloads to a temporary disk dataset
whenever needed. For offload actions, the only restriction is that the
offload utility processes be controlled sequential datasets. For backup
actions, the offload utility also processes Start Track 1 sequential datasets.
VTOC Utilities
BIM-EPIC provides three utilities for displaying and updating VTOC
entries:
1-34
TSIDLVT lists VTOC entries in batch mode.
TVTO, a CICS transaction, displays the entries online.
TSIDVUT allows you to modify existing VTOC entries.
Connectivity Systems, Inc.—Copyright © 2006
Use Pursuant to Company Instructions
User Reference
Starting and Stopping Partitions
Starting and Stopping Partitions
Description
You can stop a partition by entering STOP in response to most BIM-EPIC
messages. To restart, submit the following command to the attention
routine (AR).
MSG
xx
where xx specifies the partition identifier, for example, BG, F1, F2.
Partitions can also be stopped and restarted at any time using VSE STOP
and VSE START.
User Reference
Connectivity Systems, Inc.—Copyright © 2006
Use Pursuant to Company Instructions
1-35
Creating Reports
Creating Reports
Description
BIM-EPIC programs provide a variety of reports describing tape and disk
datasets, storage use, and job accounting.
You can create customized reports containing BIM-EPIC data from the
DSN Catalog and the Recorder file. See “Customized Reports” for
additional information.
1-36
Connectivity Systems, Inc.—Copyright © 2006
Use Pursuant to Company Instructions
User Reference
Activating BIM-EPIC
Activating BIM-EPIC
Description
BIM-EPIC is available for use if you have performed an IPL on your
system or you have deactivated and reactivated BIM-EPIC. Unless
specifically instructed not to activate in a particular partition, BIM-EPIC
becomes functional when the first OPEN command is issued in the
partition. BIM-EPIC does no processing until it is activated. This means
that JCL enhancements, such as dataset definition statements, cannot be
processed until BIM-EPIC is activated.
There is one exception to this rule. QDAS can always be active, whether
BIM-EPIC is active or not. QDAS is described later in this document.
User Reference
Connectivity Systems, Inc.—Copyright © 2006
Use Pursuant to Company Instructions
1-37
Scratching or Deleting Datasets
Scratching or Deleting Datasets
Description
BIM-EPIC provides several methods for scratching datasets. Datasets can
be scratched upon request using JCL, Online Manager, TSIDMNT, or
TSIDUTL. Regardless of which method you use, the BIM-EPIC scratch
process performs the same actions.
When BIM-EPIC scratches a disk dataset, three events occur:
BIM-EPIC deletes the VTOC entry.
The disk space is made available for reuse.
The DSN Catalog entry for that version is deleted.
For tapes that contain only one dataset, the tape volume is made eligible
for reuse immediately (scratched). For multi-dataset tapes, the tape
volume is not scratched until all of the datasets on it have been scratched.
The dataset version entry in the DSN Catalog is changed to scratch status;
however, the version entry is not deleted. If the BIM-EPIC dataset
definition (EDD) still exists, the scratched version record remains in the
DSN Catalog. When the tape is made eligible for reuse, a scratched
dataset can be retained or re-activated as a version.
For both tape and disk, only the version record is affected in normal
scratch processing. However, an EDD can be deleted from the DSN
Catalog using the DELETE function or the PURGE function.
DELETE scratches all versions and VTOC entries but does not
remove tape volumes from the DSN Catalog.
PURGE scratches all versions and VTOC entries and removes
tape volumes from the DSN Catalog.
When deleting (not purging) a tape version, the record is moved to the
definition name ** DSN DELETED **.
1-38
Connectivity Systems, Inc.—Copyright © 2006
Use Pursuant to Company Instructions
User Reference
Using Job Control Language (JCL)
BIM-EPIC Job Control Language
Using Job Control Language (JCL)
Description
BIM-EPIC changes the way you use job control language (JCL) and
offers many enhancements to standard VSE job controls. However,
BIM-EPIC may require some changes in order to function properly.
Physical Input/
Output Control
System
Programs that use physical input/output control systems (PIOCS) cause
conflicts with tape and disk management programs.
Physical IOCS (PIOCS) programs can cause conflicts because they often
do not follow most logical IOCS program conventions. For example,
PIOCS programs perform pre-open checking to determine the type of
device to use to process a dataset before the dataset can be opened or
before BIM-EPIC can make the assignment. Most PIOCS programs do
not update the DTF with block size, record size, record count, and address
of the last record written. Therefore, BIM-EPIC cannot find the necessary
information describing the dataset at end-of-volume/extent or close.
However, processing controlled datasets with PIOCS is not difficult. It
requires some special definitions in the JCL and, in some cases, special
settings in the BIM-EPIC dataset definition (EDD). See “Physical IOCS
Processing” for additional information.
Cancel Status
When a version record is opened, the descriptive data is entered into the
DSN Catalog and the entry is set to open status. When a version record is
closed, BIM-EPIC updates the version record and indicates that the
version has been closed and is now active/available for use as input.
If the job cancels before a version is closed, the version remains in open
status. Open versions cannot be used as input and become eligible for
scratch differently than closed versions. Open Status Generation datasets
become eligible for scratch according to the time limits set for the
TSIDUTL SCRATCH parameters THLDOPEN and DHLDOPEN. The
default is to scratch open disk datasets after two days and tape datasets
after one day. Non-generation datasets are automatically scratched the
next time an output version is created. You can also use BIM-EPIC JCL
options to delete non-generation disk datasets immediately if a job
cancels.
If a dataset successfully closes before the job cancels, the dataset becomes
an active version and is handled as if the job processed normally.
User Reference
Connectivity Systems, Inc.—Copyright © 2006
Use Pursuant to Company Instructions
1-39
Using Job Control Language (JCL)
Depending on the processing situation, it may or may not be desirable to
manually scratch the version.
1-40
Connectivity Systems, Inc.—Copyright © 2006
Use Pursuant to Company Instructions
User Reference
Using Job Control Language Options
Using Job Control Language Options
Description
User Reference
Because BIM-EPIC offers DLBL, TLBL, and DD JCL options which
VSE cannot process, BIM-EPIC processes these options and then
generates the required VSE label information before providing the JCL
statement to VSE for processing.
Connectivity Systems, Inc.—Copyright © 2006
Use Pursuant to Company Instructions
1-41
Using Tape Processing
BIM-EPIC Tape Processing
Using Tape Processing
Description
Open processing, end-of-volume processing, and close processing are the
most significant BIM-EPIC processing periods. In each case, processing
is different for tape than for disk.
Open
Processing
Open processing is the most important processing period. When a tape
dataset is opened, BIM-EPIC carries out the following tasks:
BIM-EPIC checks the JCL and DSN Catalog to determine if the
dataset is tape or disk.
BIM-EPIC determines whether the dataset is controlled. If the
dataset is controlled, BIM-EPIC reads the catalog entry to
determine how to process the version. If the dataset is not
controlled, BIM-EPIC passes control to VSE immediately.
BIM-EPIC performs Automatic Volume Recognition (AVR)
processing by searching available drives for the correct input tape
or for a BIM-EPIC scratch tape for output.
If BIM-EPIC does not find an appropriate tape, BIM-EPIC issues
a message to the operator and waits for an operator response.
When the tape is found, BIM-EPIC assigns the drive to the
requesting partition. If Autoattach is active, BIM-EPIC attaches
the drive to the VSE Guest.
BIM-EPIC updates the DSN Catalog, creating a dataset definition
if automatic cataloging is required and records information about
the version being created. If OPEN is for Output, the version is
placed in open status.
BIM-EPIC updates the VSE Label Area. On input, BIM-EPIC
clears the dataset name from the label and substitutes the correct
volume serial number. On output, BIM-EPIC adds a period (.) in
the VOL1 Label Area to mark the tape as a BIM-EPIC tape.
BIM-EPIC then writes a 99365 expiration value in the HDR1
label to protect the tape against accidental overwrites.
1-42
BIM-EPIC passes control to VSE before the dataset is
written. VSE then uses the information in the VSE Label
Area to process the dataset.
Connectivity Systems, Inc.—Copyright © 2006
Use Pursuant to Company Instructions
User Reference
Using Tape Processing
End-of-Volume
Processing
Close
Processing
BIM-EPIC performs similar steps for end-of-volume (EOV) processing
as those performed for open processing. When performing EOV
processing, BIM-EPIC gains control and then passes control to VSE. To
perform EOV processing, BIM-EPIC carries out the following tasks:
BIM-EPIC releases the most recent drive assignment. If
Automatch is active, BIM-EPIC detaches the drive from the VSE
machine.
BIM-EPIC performs Automatic Volume Recognition (AVR) for
the next volume.
If BIM-EPIC cannot locate the next volume, it issues a message
to the operator.
When the tape is mounted on an available drive, BIM-EPIC
assigns and attaches the drive.
BIM-EPIC updates the DSN Catalog. On output, BIM-EPIC
writes another volume record for the version, places that volume
in open status, and places the previous volume into conditional
catalog status. On input, BIM-EPIC updates the date last
accessed, use count, and other statistical information.
BIM-EPIC passes final control to VSE.
When BIM-EPIC is invoked for close processing, it passes instructions to
VSE for positioning the tape. In addition BIM-EPIC performs the
following tasks:
BIM-EPIC releases the drive assignments. If Autoattach is active,
BIM-EPIC detaches the drive from the VSE guest.
BIM-EPIC writes to the DSN Catalog, placing all volumes in a
closed status, if the version is an output version.
BIM-EPIC passes control to VSE.
Positioning options are: unload the tape, rewind the tape, or leave the tape
in place.
User Reference
Connectivity Systems, Inc.—Copyright © 2006
Use Pursuant to Company Instructions
1-43
Using Disk Processing
BIM-EPIC Disk Processing
Using Disk Processing
Description
The tasks performed for disk open, close, and end-of-extent processing
are similar to the tasks performed for tape processing. For disk
processing, BIM-EPIC must make the space allocation, which is more
complicated than finding the correct tape volume.
Quick Disk
Allocation
(QDAS)
During every open process, VSE reads the VTOC sequentially, which can
require thousands of I/O operations. BIM-EPIC provides the Quick Disk
Allocation System (QDAS) which dramatically decreases the time
required to allocate an output dataset.
QDAS maps disk volume free space to virtual storage. One map is created
for each QDAS-controlled volume when the BIM-EPIC is initialized.
When disk space is used or freed for any controlled dataset or
uncontrolled dataset, QDAS updates the map in storage.
Note:
QDAS updates the maps only when the VTOCs of the disk volumes under
its control are updated using the VSE common VTOC handler
($IJJHCVH). Programs that update the VTOC directly may bypass the
QDAS interface and cause the maps to get out of sync with the VTOC.
This applies to a very limited number of programs, such as DITTO.
However, should this condition occur, you can refresh the QDAS map
tables at any time. See Chapter 4 of the BIM-EPIC Installation and
System Guide for additional information.
Because QDAS maps free space, you must refresh the map tables daily to
reallocate the space made available by expired Start Track 1 files. This
refresh is not necessary if the disk files are catalog controlled. It is
recommended that this procedure be performed as part of the BIM-EPIC
daily maintenance procedures which should occur after midnight. See the
BIM-EPIC Installation and System Guide for additional information.
The following events occur on output.
1-44
BIM-EPIC locates the pool where the dataset is assigned. For
cataloged datasets, BIM-EPIC locates the pool in the DSN
Catalog entry. For Start Track 1 datasets, BIM-EPIC locates the
pool in the JCL EXTENT statement.
If the dataset is non-generation, BIM-EPIC deletes the old
version from the VTOC. For cataloged datasets, a new version is
Connectivity Systems, Inc.—Copyright © 2006
Use Pursuant to Company Instructions
User Reference
Using Disk Processing
created. in the DSN Catalog and on the VTOC. For Start Track 1
datasets, BIM-EPIC must read each VTOC in the pool until the
old dataset is located.
BIM-EPIC decides which pool volume to allocate. BIM-EPIC
checks the VTOC or QDAS map for a free extent with sufficient
space. If BIM-EPIC cannot locate sufficient space in the pool for
the extent, it issues a message and waits for a response from the
operator.
BIM-EPIC updates the VSE Label Area, creating an extent and
assigning the disk volume.
The following events occur on input.
BIM-EPIC locates the dataset. For cataloged datasets, BIM-EPIC
locates the dataset’s location allocation in the DSN Catalog. For
Start Track 1 datasets, BIM-EPIC reads each VTOC in the pool
until it finds the first extent of the dataset. Depending on how
many VTOCs must be read, this process can involve a large
amount of I/O.
BIM-EPIC updates the VSE Label Area, creating an extent and
assigning the disk volume.
It is strongly recommend that you use cataloged datasets instead of Start
Track 1 datasets. Cataloged dataset processing is more efficient than Start
Track 1 processing. Although BIM-EPIC must write to the DSN Catalog
each time it accesses a cataloged dataset, BIM-EPIC uses far fewer I/O
operations than would be required to read all the VTOC entries in the disk
pool. In general, if you want to use Start Track 1 datasets, consider doing
so only for disk pools that contain fewer than three volumes.
Space Holder
Records
Each time BIM-EPIC allocates an extent for a dataset, BIM-EPIC writes a
VTOC entry called a Space Holder record. Space Holder records prevent
the same space from being used when allocating another BIM-EPIC
dataset. The VTOC entry for a Space Holder record contains the name of
the dataset with a right parenthesis substituted for the first letter, for
example, )ATASET.NAME for DATASET.NAME. The entry is written
with the current date as the expiration date.
Close Processing provides additional detail on Space Holder record
usage.
Close
Processing
User Reference
When a program requests close processing for a dataset, some records
may remain in the buffer. These records are written to disk when VSE
closes the dataset. In some cases, there are too many records in the buffer
to fit in the space remaining in the current extent. When this occurs,
another extent is necessary to accommodate the excess records.
Connectivity Systems, Inc.—Copyright © 2006
Use Pursuant to Company Instructions
1-45
Using Disk Processing
When BIM-EPIC closes a dataset, it takes the buffer size into account.
Using the buffer size and the amount of space left in the extent,
BIM-EPIC determines if another extent is needed. If another extent is
needed, BIM-EPIC makes the allocation.
If VSE runs out of space when writing the buffered records, BIM-EPIC
checks the VSE Label Area for another extent. If an extent is not there,
BIM-EPIC will cancel the job. With BIM-EPIC, VSE finds the Space
Holder extent that BIM-EPIC placed there. VSE then reads the VTOC,
finds an expired dataset, and replaces the )DATASET VTOC entry using
the correct dataset name.
If the Space Holder extent is not necessary, the VTOC entry remains as a
Space Holder record. Since the entry indicates the dataset is expired, the
space can be used for any uncontrolled dataset at any time. BIM-EPIC
reuses Space Holder extents on an as-needed basis.
You may see Space Holder records in your VTOC listings. You may also
see an extra extent in the DSN Catalog entry for the version. Neither of
these conditions adversely affects processing.
When closing an output disk dataset, BIM-EPIC:
1-46
Determines whether the previously-described Space Holder
extent is required. If the Space Holder is required, a precautionary
extent is required. BIM-EPIC writes the Space Holder record,
updates the VSE Label Area with the new extent information, and
writes the extent information into the DSN Catalog entry for the
version.
Places the version in closed status in the DSN Catalog.
Passes control to VSE.
Connectivity Systems, Inc.—Copyright © 2006
Use Pursuant to Company Instructions
User Reference
2
BIM-EPIC Online Manager
This chapter describes the BIM-EPIC Online Manager.
Chapter Contents
Using Online Manager
Configuring Online Manager
Managing Dataset Versions
Retaining and Scratching Datasets
User Reference
Connectivity Systems, Inc.—Copyright © 2006
Use Pursuant to Company Instructions
2-1
Cataloging Manually
Using Online Manager
Cataloging Manually
Description
There are several reasons for performing manual DSN cataloging and
catalog management instead of using automatic cataloging. Automatic
cataloging is global in scope, so it will not match the exact requirements
of all datasets. You may want to:
Ensure that precise catalog defaults are established before the
dataset is written for the first time
Update a definition after it is created in a job
Change the requirements for a dataset as the result of changes in
government regulations or data center procedures
BIM-EPIC provides Online Manager for manual DSN cataloging and
maintenance. Online Manager, a panel–driven GSS system uses
fill–in–the–blank formats that leads you step–by–step through the catalog
management tasks.
BIM-EPIC also provides TSIDMNT, a batch catalog management
program. You can use TSIDMNT for batch cataloging of new datasets
and versions, for updating fields in existing dataset entries, and for DSN
Catalog reporting. See Chapter 3, “TSIDMNT—DSN CATALOG
MANAGEMENT UTILITY,” for additional information describing
TSIDMNT.
BIM-EPIC programs do not require leading zeros. Numeric values are
automatically zero–filled on the left. However, when using Online
Manager and TSIDMNT, you can suppress the zero–fill by entering a
volume serial number as a six–character string with blanks on the right,
for example, "12 " would be a valid character string.
Using BIM-EPIC
with CA-EPIC
2-2
If you run both BIM-EPIC and CA-EPIC for CMS and share a DSN
Catalog on VSE, you can update tape datasets from your CMS machine.
You can also scratch tapes used for CA-EPIC for CMS backup/archive
datasets.
Connectivity Systems, Inc.—Copyright © 2006
Use Pursuant to Company Instructions
User Reference
Using Online Manager
Using Online Manager
Description
Primary Option
Menu
You can access Online Manager using several methods. The following
describes the various methods of access.
Method of Access
Description
CICS
You can access Online Manager with a CICS
EPIC transaction. See the BIM-EPIC Installation
and System Guide for information on installing
the CICS transaction. If online access is done
solely through BIM-FAQS/ASO or
CA-FAQS/ASO, installing the CICS transaction
is not required.
BIM-FAQS/ASO
If BIM-FAQS/ASO or CA-FAQS/ASO is
installed and BIM-EPIC is defined to it, you can
access Online Manager by entering EPIC from
any FAQS/ASO command line. If online access is
through BIM-FAQS/ASO or CA-FAQS/ASO,
you do not need to install the CICS transaction.
CA-EPIC-CMS
When using CA-EPIC for CMS, you can access
Online Manager by entering EPICCMS from
CMS. See the CA-EPIC documentation for
additional information.
VTAM
See the BIM-EPIC Installation and System Guide
for information on accessing Online Manager as a
VTAM APPLID.
When you access Online Manager, the Primary Option Menu panel
displays. The following is an example of the Primary Option Menu panel:
OPTION
===>
OPTION
F1=Help
Using Online
Help
User Reference
COMMAND
DESCRIPTION
M
D
S
P
C
MANAGE
DEFINE
SYSTEM
PROFILE
CAPACITY
Search and manage BIM-EPIC Catalog
Define BIM-EPIC dataset (EDD)
Manage BIM-EPIC system configuration
Manage BIM-EPIC user profiles
Display BIM-EPIC Catalog statistics
H
X
HELP
EXIT
Learn about online help
Exit BIM-EPIC
F3=Return
F5=Recall
F12=Exit
Online Manager provides several Help options. Select H (Help) on the
Primary Option menu for information describing each feature. You can
access online help at anytime by pressing F1.
Connectivity Systems, Inc.—Copyright © 2006
Use Pursuant to Company Instructions
2-3
Using Online Manager
Exiting Online
Manager
2-4
To exit an online session, select X (Exit) from the Primary Option menu.
Connectivity Systems, Inc.—Copyright © 2006
Use Pursuant to Company Instructions
User Reference
Executing Management Commands
Executing Management Commands
Description
You can execute TSIDMNT commands in command mode, while using
Online Manager panels for your catalog management.
Procedure
To execute TSIDMNT commands:
1
Place the cursor in the panel command area.
2
Type EPIC followed by a space.
3
Place the cursor in the panel command area.
4
Type the normal TSIDMNT command syntax.
See Chapter 3, “TSIDMNT—DSN CATALOG MANAGEMENT
UTILITY,” for command formats.
User Reference
Connectivity Systems, Inc.—Copyright © 2006
Use Pursuant to Company Instructions
2-5
Maintaining User Profiles
Configuring Online Manager
Maintaining User Profiles
Description
To customize the display for dataset definitions and version information,
the Online Manager provides two default profiles containing display
layouts and confirmation options.
$DEFPROF provides layouts that apply to all users who are not
specifically defined to Online Manager.
$EPIC provides a fixed-standard layout.
You can use either default profile as your model. After selecting the
model, select a name for the new profile and modify the characteristics of
the new profile, as needed. Whenever you model an existing user profile,
the attributes of the new profile can be modified. However, this terminates
the ability to inherit attributes from the model if it is changed at a later
time.
Procedure
To access a user profile:
Step
Action
1
Open the Primary Options panel.
2
Type P (Profile).
3
Press Enter to open the User Profiles panel.
Note:
You can also access user profiles from the command line on most panels
by typing PROFILE and pressing Enter.
User Profiles
Panel
The following is an example of the User Profiles panel.
TSIO0300.0 ----------- BIM-EPIC - User Profiles ---------------- USER=SJA
COMMAND ===>
The SJA profile has been added using the $EPIC profile as a model.
Profile
(MODEL)
_ $DEFPROF
Active Profile:
Profile
_ $EPIC
Profile
_ SJA
(MODEL)
$EPIC
$DEFPROF
A = Activate
L = Delete
M = Model
F1=Help F3=Return F5=Recall F6=Add
2-6
(MODEL)
U = Update
F12=Exit
Connectivity Systems, Inc.—Copyright © 2006
Use Pursuant to Company Instructions
User Reference
Maintaining User Profiles
From the User Profiles panel, you can create and modify user profiles to
display different formats and confirmation options.
Definitions
The following describes the profiles displayed in the User Profiles panel.
User ID
Definition
$DEFPROF Provides layouts that apply to all users who are not
specifically defined to Online Manager.
Procedures
$EPIC
Unsecured profile. $EPIC, which cannot be modified, is
provided by the Online Manager to use as a model. After
$DEFSEC is secured, you can grant total system access to
selected users by modeling their user profiles after $EPIC.
Profiles modeled on $EPIC can be modified to create
custom security profiles. To prevent unauthorized access to
the Online Manager, you cannot use $EPIC as a user ID.
Use caution when modeling user profiles after $EPIC and
leaving the user profiles unmodified. If the user profiles are
left unmodified, a user can obtain the profile name and use
it to obtain total system access.
SJA
SJA is an example of an unsecured profile that was modeled
after $EPIC.
To create a copy of $EPIC or any other existing profile, from the User
Profiles panel:
Step
Action
1
Open the Primary Options panel.
2
Type P (Profile).
3
Press Enter to open the User Profiles panel.
4
Tab to the user profile you want to copy (model).
5
Type M (Model).
6
Press Enter to return to the command line.
7
Enter a unique name for the new user profile.
8
Press Enter.
Once you have created a copy of an existing profile, you are ready to
update the new profile with the new user information. To complete the
update process, you will need to complete three User Profile Definition
panels. These panels are:
User Reference
Modify EDD Display
Modify Version Display
Modify Profile Defaults
Connectivity Systems, Inc.—Copyright © 2006
Use Pursuant to Company Instructions
2-7
Customizing Dataset Screen Displays
Customizing Dataset Screen Displays
Description
Procedure
The Modify EDD Display panel provides the options that enable you to
customize the screen display for BIM-EPIC dataset definitions (EDDs).
The Current Display Order area provides the following options:
F (Following) moves a field after another field.
M (Move) moves a field to a new location.
P (Preceding) moves a field before another field.
R (Remove) removes a field from the display.
To access the Modify EDD Display panel:
Step
Modify EDD
Display Panel
Action
1
Open the Primary Options panel.
2
Type P (Profile).
3
Press Enter to open the User Profiles panel.
4
Tab to the profile you want to modify.
5
Type U (Update).
6
Press Enter to open the Modify EDD Display panel.
The following is an example of the Modify EDD Display panel.
TSIO0301.u ------ BIM-EPIC - User Profile Definition ----------- USER=SJA
COMMAND ===>
The SJA profile is modeled after $EPIC.
** MODIFY EDD DISPLAY **
CURRENT DISPLAY FORMAT
More: +>
Dataset Name
Width ===> 25
Cyc Reten DLA ----- Attributes ------ GEN or
Lock Rel Rev Unlbl NSub WRK
CURRENT DISPLAY ORDER
_
_
_
_
_
_
1
5
9
13
17
Cyc
GEN or WRK
Prime Dataset
SYSnnn
System ID
Primary Alloc
_
_
_
_
_
_
Profile: SJA
2
6
10
14
18
Reten
Tape Pool
Owner ID
Reblock Value
Last Output
Sec Alloc
Model: $EPIC
_
_
_
_
_
_
3
7
11
15
19
DLA
Tape Mode
AGP
Comment
Create Date
Max Sec
_
_
_
_
_
4
8
12
16
Attributes
Vault Method
Alloc Req
User ID
Disk Pool
F = Following M = Move P = Preceding R = Remove
F1=Help F3=Return F6=Update F8=Fwd F11=Right F12=Exit
You can use function keys to perform certain tasks.
2-8
If you need to…
Press
access the online help for additional information
F1
Connectivity Systems, Inc.—Copyright © 2006
Use Pursuant to Company Instructions
User Reference
Customizing Dataset Screen Displays
User Reference
If you need to…
Press
return to the previous panel
F3
accept the new display order
F6
scroll to additional User Profile Definition panels
F8
move one panel right
F11
exit
F12
Connectivity Systems, Inc.—Copyright © 2006
Use Pursuant to Company Instructions
2-9
Customizing Version Displays
Customizing Version Displays
Description
Procedure
The Modify Version Display panel provides the options that enable you to
customize the screen display for BIM-EPIC dataset versions. The Current
Display Order area provides the following options:
F (Following) moves a field following another field.
M (Move) moves a field to a new location.
P (Proceeding) moves a field to precede another field.
R (Remove) removes a field from the display.
To access the Modify Version Display panel:
Step
Modify Version
Display Panel
Action
1
Open the Primary Options panel.
2
Type P (Profile).
3
Press Enter to open the User Profiles panel.
4
Tab to the profile you want to modify.
5
Type U (Update) to display the User Profile Definition, Modify
EDD Display panel.
6
Press Enter to open the User Profile Definition, Modify EDD
Display panel.
7
Press F8 to display the User Profile Definition, Modify Version
Display panel.
The following is an example of the Modify Version Display panel.
TSIO0302.8 ------ BIM-EPIC - User Profile Definition ----------COMMAND ===>
USER=SJA
** MODIFY VERSION DISPLAY **
CURRENT DISPLAY FORMAT
More: -+>
Dataset Name
Width ===> 25
Version Number-of First --- Creation --Vols/Exts Volser Date
Time
CURRENT DISPLAY ORDER
_ 1 Version
_ 5 Create Job
_ 9 Last Acc Info
_ 13 File Seq
_ 17 Block Size
_ 21 GEN or WRK
_
Create Info
_
Reten
_
_
_
_
_
_
_
_
Profile: SJA
2
6
10
14
18
22
Exts/Vols
Expire Date
Media Type
Vault Method
Record Size
SYSLOG ID
Last Acc Date
Cyc
Model: $EPIC
_
_
_
_
_
_
_
_
3
7
11
15
19
23
First Volser
Gen Number
Attributes
Slot
Tape Pool
CPU ID
Last Acc Job
DLA
F = Following
M = Move
P = Preceding
R = Remove
F1=Help F3=Return F6=Update F7=Bkwd F8=Fwd F11=Right
2-10
Connectivity Systems, Inc.—Copyright © 2006
Use Pursuant to Company Instructions
_
_
_
_
_
_
_
_
4
8
12
16
20
24
Create Date
Status
Extent Info
Blocks
Tape Mode
Reel
Reten Info
Last Backup
F12=Exit
User Reference
Customizing Version Displays
You can use function keys to perform certain tasks:
User Reference
If you need to…
Press
access the online help for additional information
F1
return to the previous panel
F3
accept the new display order
F6
scroll back to the Modify Version Display panel
F7
scroll to the Modify Profile Defaults panel
F8
move one panel left
F10
move one panel right
F11
exit
F12
Connectivity Systems, Inc.—Copyright © 2006
Use Pursuant to Company Instructions
2-11
Customizing Profile Defaults
Customizing Profile Defaults
Description
The Modify Profile Defaults panel provides options that enable you to
customize certain profile defaults. Use the Modify Profile Defaults panel
to enable or disable confirmation prompts to a variety of BIM-EPIC
functions and to change the default level for a catalog search.
Note:
The $EPIC default profile always requests confirmation.
Procedure
To access the Modify Version Display panel:
Step
Modify Profile
Defaults Panel
Action
1
Open the Primary Options panel.
2
Type P (Profile).
3
Press Enter to open the User Profiles panel.
4
Tab to the profile you want to modify.
5
Type U (Update) to display the User Profile Definition, Modify
EDD Display panel.
6
Press Enter to open the User Profile Definition, Modify EDD
Display panel.
7
Press F8 to display the User Profile Definition, Modify Version
Display panel.
8
Press F8 to display the User Profile Definition, Modify Profile
Defaults panel.
The following is an example of the Modify Profile Defaults panel.
TSIO0303.8 ------ BIM-EPIC - User Profile Definition ----------COMMAND ===>
USER=SJA
** MODIFY PROFILE DEFAULTS **
More: Profile: SJA
Model: $EPIC
CONFIRMATION SETTINGS
Add Ver
Close
Define
Lock
Move
Release
Retain
Sys Opts
Unlock
F1=Help
2-12
===>
===>
===>
===>
===>
===>
===>
===>
===>
Y
Y
Y
Y
Y
Y
Y
Y
Y
F3=Return
Clean
Cycle
Delete
MCatalog
Purge
Rename
Scratch
Transfer
Update
LEVEL FOR CATALOG SEARCH
===>
===>
===>
===>
===>
===>
===>
===>
===>
F6=Update
Y
Y
Y
Y
Y
Y
Y
Y
Y
F7=Bkwd
Level ===> E
E = EDD
V = Version
( X = Exploded list )
SYSTEM PASSWORD PROMPT
Prompt on initial entry ===> Y
F12=Exit
Connectivity Systems, Inc.—Copyright © 2006
Use Pursuant to Company Instructions
User Reference
Customizing Profile Defaults
You can use function keys to perform certain tasks:
User Reference
If you need to…
Press
access the online help for additional information
F1
return to the previous panel
F3
accept the new display order
F6
scroll back to the Modify Version Display panel
F7
exit
F12
Connectivity Systems, Inc.—Copyright © 2006
Use Pursuant to Company Instructions
2-13
Using Online Manager Help
Using Online Manager Help
Description
Procedure
The Online Manager provides online help in several formats. These
formats include:
Panel Help
Field Help
Command Help
Panel Help—Navigation
Panel Help—General
To access a specific Help format:
Format
Method
Help for Help
Select the H (Help) option on the Primary Option
menu to obtain a description of the Help system.
Panel Help
Press F1 at the command line at anytime to
display panel-specific help.
Field Help
Place the cursor at the beginning of any input
field and press F1 to display field-specific help.
Command Help
The CMDHELP at the command line on any
panel to view a list of help topics that explain
BIM-EPIC management commands.
Panel Help—
Navigation
Online Manager provides help that explains panel
navigation. To view a diagram of the panel
system:
1. Open the desired panel.
2. Type EPICFLOW at the command line.
3. Press Enter.
Panel Help—
General
The Online Flow panel displays along with a
highlighted path showing the path you took to get
to the current location.To access help for any
panel on a diagram:
1. Open the Online Flow panel.
2. Type the panel ID at the command line.
3. Press Enter.
2-14
Connectivity Systems, Inc.—Copyright © 2006
Use Pursuant to Company Instructions
User Reference
Using Online Manager Help
Panel IDs
Display (I)
The following is an example of the Online Flow display showing the
panel IDs.
TSIO0901.b ------------ BIM-EPIC - Online Flow ----------------- USER=SJA
COMMAND ===>
TSIO0001
v
EPICFLOW Titles ===> I (D/I)
+---------+---------+---------+------------------------------------>
|
|
|
|
+------>--------------+
TSIO0300
|
TSIO0500
TSIO0100
|
|
v
v
v
|
+--> TSIO0400
v
+-------+
TSIO0103 <-+
+----->---+----+
|
v
|
|
|
v
v
|
TSIO0401 <--+
+-> TSIO0301 TSIO0104 <-+
+--< TSIO0101 >---+
|
|
+<--+
v
|
+--> TSIO0205
+-> TSIO0302 TSIO0105 <-+
+--< TSIO0102 <---+
|
|
|
v
|
+--> TSIO0206
+-> TSIO0303 TSIO0106 <--<--+
+---------+
|
|
^
v
+--> TSIO0207 ---+
TSIO0202 <-+
+-------<---- TSIO0200 -->+
v
|
v
|
|
v
|
TSIO0208
v
+-------+
|
v
TSIO0201 -->+
v ^
|
|
|
|
|
|
TSIO0209 <--+
+-> TSIO0203 <-+
+-> TSIO0212 <---+
|
|
|
|
|
+--> TSIO0210
+-> TSIO0204 <-+
+-> TSIO0213 <---+
|
F1=Help F3=Return F5=Recall F11=Right F12=Exit
+--> TSIO0211
Procedure
To view an Online Flow in terms of its panel functions:
Step
Panel
Descriptions
Display (D)
Action
1
Open the desired panel.
2
Place the cursor at the command line and type EPICFLOW.
3
Tab to the EPICFLOW Titles field.
4
Type D (Descriptions) in the EPICFLOW Titles field.
5
Press Enter.
The following is an example of the Online Flow display showing
descriptions.
TSIO0901.b ------------ BIM-EPIC - Online Flow ----------------- USER=SJA
COMMAND ===>
MAINMENU
|
EPICFLOW Titles ===> D (D/I)
+---------+---------+---------+-------------------------------------->
|
|
|
|
+------->--------------+
PROFILE
|
CAPACITY
MANAGE
|
|
v
v
|
|
+--> TAPE MGT
v
+-------+
DEFINE <-+
+----->---+---+
|
v
|
|
|
|
v
^
VOL INFO <--+
+-> E FORMAT
UPDATE <-+
+--< EDD MGMT >---+
|
|
|<--+
|
|
+--> MCATALOG
+-> V FORMAT
RENAME <-+
+--< EDD INFO <---+
|
|
|
v
|
+--> TRANSFER
+-> CONFIRM
PASSWORD <--<--+
+
+
|
|
|
v
+--> EXT MGMT >--+
ADD VER <-+
+-------<----- VER MGMT -->|
v
|
v
|
|
v
|
RECOVERY
v
+-------+
|
v
VER INFO -->|
v ^
|
|
|
|
|
|
EXT INFO <--+
+-> ADDTAPEV <-+
+-> APP TAPE <---+
|
|
|
|
|
+-->
RETAIN
+-> ADDDISKV <-+
+-> APP EXT <---+
|
F1=Help F3=Return F5=Recall F11=Right F12=Exit
+-->
CYCLE
User Reference
Connectivity Systems, Inc.—Copyright © 2006
Use Pursuant to Company Instructions
2-15
Searching for Dataset Definitions
Searching for Dataset Definitions
Description
You can use the Search Catalog panel to search for a BIM-EPIC dataset
definition (EDD) in the DSN Catalog. You can search using the following
criteria:
Dataset name–displays the dataset
Part of dataset name with the last character an asterisk
(*)–displays all dataset names beginning with the characters
preceding the asterisk
Asterisk (*)–displays all DSNs in the catalog
Tape pool ID–displays tape pool IDs matching search criteria
Two-character user–defined user ID (not your system USERID)
Two-character user–defined system ID (not the SMFID)
In addition, you can use the Manage EDDs panel to view, modify, or
update dataset definitions.
Procedure
To display the Search Catalog panel:
Step
Search Catalog
Panel
Action
1
Open the Primary Option menu.
2
Tab to M (Manage).
3
Press Enter to open the Search Catalog panel.
The following is an example of the Search Catalog panel.
TSIO0100.M ---------- BIM-EPIC - Search Catalog ---------------COMMAND ===>
Specify a dataset/token or volser.
USER=SJA
CATALOG SEARCH
Name
===> ____________________________________________
Level ===> E
E = EDD
or
V = Version ( X = Exploded List )
Volser ===> ______
DISPLAY FORMAT
Active Profile ===> $DEFPROF (1-8 characters)
Profile Level ===> _
E = EDD
V = Version
C = Confirmation
EDD FILTERS
User ID
===> __
System ID ===> __
Tape Pool ===> __
F1=Help
2-16
F3=Return
(2 chars)
(2 chars)
(0-9 or A-Z)
F5=Recall
VERSION FILTERS
Tape or Disk ===> _
(T/D)
Scratched
===> _
(Y/N)
Create Job
===> ________
F12=Exit
Connectivity Systems, Inc.—Copyright © 2006
Use Pursuant to Company Instructions
User Reference
Searching for Dataset Definitions
Procedure
To search for dataset definitions in the DSN Catalog:
Step
User Reference
Action
1
Type a fully or partially qualified dataset name in the Name
field. If you specify a partial dataset name, all EDDs containing
that name criteria will display. You can use an asterisk (*) to
substitute dataset levels or a question mark (?) to substitute an
individual character.
2
Type E or X in the Level field to view selected EDDs. If you
want more specific search criteria, use the EDD filters at the
bottom of the panel.
3
Press Enter to open the EDD matching your search criteria.
4
Press F3 to exit the Search Catalog panel without listing the
EDDs.
Connectivity Systems, Inc.—Copyright © 2006
Use Pursuant to Company Instructions
2-17
Managing Dataset Definitions
Managing Dataset Definitions
Description
Procedure
The Manage EDDs panel lists BIM-EPIC dataset definitions (EDDs)
matching the dataset name or expression you entered in the Search
Catalog panel. From the Manage EDDs panel, you can perform any of the
following tasks:
Select a dataset definition to display
Select a dataset definition to update
Delete a dataset definition
Lock a dataset definition
Purge a dataset definition
Release a dataset definition
Unlock a dataset definition
Request a list of dataset definition versions
To access the Manage EDDs panel:
Step
1
Open the Primary Option menu.
2
Type M (Manage).
3
Press Enter to open the Search Catalog panel.
4
Type one of the following in the Name field:
5
2-18
Action
Dataset name to display a specific dataset
Part of a dataset name with an asterisk as the last character to
display all dataset names beginning with the characters
preceding the asterisk
* to display all DSNs in the catalog
Press Enter to display a list of dataset definition names.
Connectivity Systems, Inc.—Copyright © 2006
Use Pursuant to Company Instructions
User Reference
Managing Dataset Definitions
Manage EDDs
Panel
The following is an example of the Manage EDDs panel.
TSIO0101.Z ----------- BIM-EPIC - Manage EDDs ------------------
USER=SJA
COMMAND ===>
More: >
_
_
_
_
_
_
_
_
_
Dataset Name
Width: 25
Cyc Reten
BATCH CONVERT OUT
BILL BACKUP
BILL.REPRINT.FILE
BILLING.PAN.ORDER
BILRECS BKUP TAPE
BLS.REC
BUD.ACASH.BKUP
BUDGET.SQLBKUP
BUDGET.SQLBKUP1
1
4
2
1
60
6
1
3
3
0
0
0
0
0
0
0
0
0
DLA ----- Attributes ------ GEN or
Lock Rel Rev Unlbl NSub WRK
0
0
0
0
0
0
0
0
0
N
N
N
N
N
N
N
N
N
N
N
N
N
N
N
N
N
N
N
N
N
N
N
N
N
N
N
N
N
N
N
N
N
N
N
N
N
N
N
N
N
N
N
N
Y
GEN
GEN
GEN
GEN
GEN
GEN
GEN
GEN
GEN
A = Add-Ver C = Close F = Release I = Info
J = Lock K = Unlock L = Delet
M = Model
P = Purge R = Rename U = Update V = Versions ( X = Exploded Lst
F1=Help F3=Return F5=Recall F11=Right F12=Exit
Procedure
To manage a dataset entry:
Step
Action
1
Locate the dataset name you want to manage.
2
Type the letter of the command you want to execute in front of
the dataset name. You can enter commands for as many entries
as you want.
Note: The valid commands are listed at the bottom of the
Manage EDDs panel.
Using TSIDMNT
DISPLAY
User Reference
3
Press Enter to execute the command(s).
4
Press F3 to exit without executing the command(s).
BIM-EPIC also provides TSIDMNT DISPLAY to list dataset definitions.
See Chapter 3, “TSIDMNT—DSN CATALOG MANAGEMENT
UTILITY,” for information on using DISPLAY.
Connectivity Systems, Inc.—Copyright © 2006
Use Pursuant to Company Instructions
2-19
Displaying a Dataset Definition
Displaying a Dataset Definition
Description
The EDD Information panel displays the BIM-EPIC dataset definition
(EDD) attributes. You can update the attributes or create a new definition
based on the displayed dataset definition.
Procedure
To display the EDD Information panel:
Step
EDD
Information
Panel
Action
1
Open the Primary Option menu.
2
Type M (Manage).
3
Press Enter to open the Search Catalog panel.
4
Type one of the following in the Name field:
Dataset name to display a specific dataset
Part of a dataset name with an asterisk as the last character to
display all dataset names beginning with the characters
preceding the asterisk
* to display all DSNs in the catalog
5
Press Enter to produce a list of dataset definition names.
6
Tab to the dataset definition name you want to display.
7
Type I (Information) in front of the selected dataset definition.
8
Press Enter to open the EDD Information panel.
The following is an example of an EDD Information panel.
TSIO0102.G ---------- BIM-EPIC - EDD Information --------------- USER=SJA
COMMAND ===>
( _ ) Dataset: BATCH CONVERT OUT
TAPE INFORMATION
TPAdev: N Mode: NO
Tape Pool:
.
Vault Method: 0
Owner ID:
.
Tape Size:
LARGE
DATASET INFORMATION
GEN or WRK: GEN
BLKSZ:
Reten:
0
Create Date:
Cycles:
1
Last Output:
DLA:
0
System ID:
SYSnnn:
0
User ID:
DISK INFORMATION
Disk Pool:
DISK02
Primary:
50
Secondary:
25
Max Sec:
255
Primary ALR: Auto Purge:
N
DATASET ATTRIBUTES
Prime:
Y
Revolving:
Locked:
N
Unlabeled:
Newsub:
N
Released:
Pswd Prot: N
Comment:
Prime DSN:
OPT
01/31/1997
08/01/1997
.
.
N
N
N
.
.
A = Add-Ver C = Close F = Release J = Lock
K = Unlock
L = Delete
M = Model
P = Purge R = Rename U = Update V = Versions ( X = Exploded L
F1=Help F3=Return F5=Recall F12=Exit
2-20
Connectivity Systems, Inc.—Copyright © 2006
Use Pursuant to Company Instructions
User Reference
Displaying a Dataset Definition
Using TSIDMNT
DISPLAY
User Reference
BIM-EPIC also provides TSIDMNT DISPLAY to list dataset definitions.
See Chapter 3, “TSIDMNT—DSN CATALOG MANAGEMENT
UTILITY,” for information on using DISPLAY.
Connectivity Systems, Inc.—Copyright © 2006
Use Pursuant to Company Instructions
2-21
Creating a Dataset Definition
Creating a Dataset Definition
Description
The Define an EDD panel allows you to create a new BIM-EPIC dataset
definition (EDD). If you are using a modeled dataset, the attributes on the
Define an EDD panel are the attributes of the modeled dataset.
Procedure
To display the Define an EDD panel:
Step
Action
1
Open the Primary Option menu.
2
Type D (Define).
3
Press Enter to open the Define an EDD panel.
You can display the Define an EDD panel from the Manage EDDs panel
or from the EDD Information panel. To display the Define an EDD panel
from the Manage EDDs panel or from the EDD Information panel:
Step
Define an EDD
Panel
Action
1
Open the Manage EDDs panel or the EDD Information panel.
2
Type M (Model) in front of the selected dataset definition to
obtain the most definitions or complete the necessary fields to
produce a more concise search results list of definitions.
3
Press Enter to open the Define an EDD panel.
The following is an example of a Define an EDD panel.
TSIO0103.D ----------- BIM-EPIC - Define an EDD ---------------COMMAND ===>
USER=SJA
DEFINE
Dataset ===> ____________________________________________
Model
===> ____________________________________________
TAPE INFORMATION
TPAdev: N Mode: __
Tape Pool ===> __
Vault Meth ===> ___
Owner ID
===> __
Unlabeled ===> _
Tape Size ===> _
Revolving ===> _
DISK INFORMATION
Disk Pool
===>
Primary
===>
Secondary
===>
Max Sec
===>
Primary ALR ===>
Auto Purge ===>
______
_______
_______
___
_______
_
Comment
===> ______________________________
Prime DSN ===> _________________
F1=Help
Procedure
F5=Recall
___
____
___
____
_____
___
__
__
F12=Exit
To create a new EDD from scratch:
Step
1
2-22
F3=Return
DATASET INFORMATION
GEN or WRK
===>
Retention
===>
Cycles
===>
DLA
===>
BLKSZ( _ CISZ) ===>
SYSnnn
===>
System ID
===>
User ID
===>
Password
===>
Encrypt Key
===>
Action
Open the Define an EDD panel.
Connectivity Systems, Inc.—Copyright © 2006
Use Pursuant to Company Instructions
User Reference
Creating a Dataset Definition
Step
Action
2
Type a dataset name in the Dataset field. BIM-EPIC uses the
dataset name as the key to locate a record in the DSN Catalog.
Therefore, the dataset name must be unique. Use the Model field
when you are defining a new dataset and want to model the new
dataset after a previously defined dataset.
3
Update the dataset attributes.
Note: Any changes you make on the Create an EDD panel
override modeled attributes.
Using TSIDMNT
CATALOG
User Reference
4
Press Enter to create the new EDD. Default values are added and
all data fields are verified for syntactic correctness.
5
Press F3 to exit without creating a new EDD.
BIM-EPIC also provides TSIDMNT CATALOG to create EDDs. See
Chapter 3, “TSIDMNT—DSN CATALOG MANAGEMENT
UTILITY,” for information on using CATALOG.
Connectivity Systems, Inc.—Copyright © 2006
Use Pursuant to Company Instructions
2-23
Updating a Dataset Definition
Updating a Dataset Definition
Description
Online Manager provides the Update an EDD panel to enable you to
modify BIM-EPIC dataset definitions (EDDs). The attributes displayed
on this panel are defaults for all output datasets using the dataset name.
Modifications affect subsequent versions only.
Procedure
To display the Update an EDD panel:
Step
Update an EDD
Panel
Action
1
Open the Primary Option menu.
2
Type M (Manage).
3
Press Enter to open the Search Catalog panel
4
Type one of the following in the Name field:
Dataset name to display a specific dataset
Part of a dataset name with an asterisk as the last character to
display all dataset names beginning with the characters
preceding the asterisk
* to display all DSNs in the catalog
5
Press Enter to open the Manage EDDs panel
6
Tab to the name of the dataset definition name you want to
update.
7
Type U (Update) next to the name of the dataset definition you
want to update.
8
Press Enter to open the Update an EDD panel.
The following is an example of an Update an EDD panel.
TSIO0104.e ----------- BIM-EPIC - Update an EDD ---------------COMMAND ===>
USER=SJA
UPDATE
Dataset: BATCH CONVERT OUT
TAPE INFORMATION
TPAdev: N Mode: NO
Tape Pool ===> __
Vault Meth ===> 0
Owner ID
===> __
Unlabeled ===> N
Tape Size ===> L
Revolving ===> N
Comment
F1=Help
2-24
DISK INFORMATION
Disk Pool
===>
Primary
===>
Secondary
===>
Max Sec
===>
Primary ALR ===>
Auto Purge ===>
DISK02
50
25
255
_______
N
===> ______________________________
F3=Return
F5=Recall
DATASET INFORMATION
GEN or WRK
===>
Retention
===>
Cycles
===>
DLA
===>
BLKSZ( _ CISZ) ===>
SYSnnn
===>
System ID
===>
User ID
===>
Password
===>
GEN
0
1
0
OPT
0
__
__
F12=Exit
Connectivity Systems, Inc.—Copyright © 2006
Use Pursuant to Company Instructions
User Reference
Updating a Dataset Definition
Procedure
To update the attributes for a dataset definition:
Step
1
Using TSIDMNT
UPDATE
User Reference
Action
Update any attribute for the EDD using one of the following
methods:
To remove the Disk Pool specification, replace the current
value with the word NO.
To remove the Primary, Secondary, Max Sec, or Primary
ALR value, replace the current value with a zero (0).
2
Press Enter to update the EDD.
3
Press F3 to exit without updating the EDD.
BIM-EPIC also provides TSIDMNT UPDATE to modify EDDs. See
Chapter 3, “TSIDMNT—DSN CATALOG MANAGEMENT
UTILITY,” for information on using UPDATE.
Connectivity Systems, Inc.—Copyright © 2006
Use Pursuant to Company Instructions
2-25
Releasing a Locked Dataset Definition
Releasing a Locked Dataset Definition
Description
Releasing a locked BIM-EPIC dataset definition (EDD) allows the EDD
to be used for a one-time output. Once this occurs, the EDD is placed in a
locked state. You can release an EDD from the Manage EDDs panel. To
permanently release an EDD, use the UNLOCK command.
Procedure
To access the Manage EDDs panel:
Step
1
Open the Primary Option menu.
2
Type M (Manage).
3
Press Enter to open the Search Catalog panel.
4
Type one of the following in the Name field:
5
Manage EDDs
Panel
Action
Dataset name to display a specific dataset
Part of a dataset name with an asterisk as the last character to
display all dataset names beginning with the characters
preceding the asterisk
* to display all DSNs in the catalog
Press Enter to open the Manage EDDs panel.
The following is an example of a Manage EDDs panel.
TSIO0101.Z ----------- BIM-EPIC - Manage EDDs ------------------ USER=SJA
COMMAND ===>
More: >
_
_
_
_
_
_
_
_
_
Dataset Name
Width: 25
Cyc Reten
DLA ----- Attributes ------ GEN or
Lock Rel Rev Unlbl NSub WRK
BATCH CONVERT OUT
BILL BACKUP
BILL.REPRINT.FILE
BILLING.PAN.ORDER
BILRECS BKUP TAPE
BLS.REC
BUD.ACASH.BKUP
BUDGET.SQLBKUP
BUDGET.SQLBKUP1
1
4
2
1
60
6
1
3
3
0 N
0 N
0 N
0 N
0 N
0 N
0 N
0 N
0 N
0
0
0
0
0
0
0
0
0
N
N
N
N
N
N
N
N
N
N
N
N
N
N
N
N
N
N
N
N
N
N
N
N
N
N
N
N
N
N
N
N
N
N
N
Y
GEN
GEN
GEN
GEN
GEN
GEN
GEN
GEN
GEN
A = Add-Ver C = Close F = Release I = Info
J = Lock K = Unlock L = Delete
M = Model
P = Purge R = Rename U = Update V = Versions ( X = Exploded Lst)
F1=Help F3=Return F5=Recall F11=Right F12=Exit
Procedure
To release a locked dataset definition:
Step
1
2-26
Action
Place the cursor in front of the name of the dataset definition you
want to release.
Connectivity Systems, Inc.—Copyright © 2006
Use Pursuant to Company Instructions
User Reference
Releasing a Locked Dataset Definition
Step
Using TSIDMNT
RELEASE
User Reference
Action
2
Type F (Release) to release the dataset definition.
3
Press Enter.
BIM-EPIC also provides TSIDMNT RELEASE to allow a one-time use
of a locked EDD. See Chapter 3, “TSIDMNT—DSN CATALOG
MANAGEMENT UTILITY,” for information on using RELEASE.
Connectivity Systems, Inc.—Copyright © 2006
Use Pursuant to Company Instructions
2-27
Unlocking a Dataset Definition
Unlocking a Dataset Definition
Description
Unlocking a BIM-EPIC dataset definition (EDD) allows the EDD to be
used for output (creating new versions with the EDD name and
attributes). You can unlock an EDD from the Manage EDDs panel.
Procedure
To access the Manage EDDs panel:
Step
1
Open the Primary Option menu.
2
Type M (Manage).
3
Press Enter to open the Search Catalog panel.
4
Type one of the following in the Name field:
5
Manage EDDs
Panel
Action
Dataset name to display a specific dataset
Part of a dataset name with an asterisk as the last character to
display all dataset names beginning with the characters
preceding the asterisk
* to display all DSNs in the catalog
Press Enter to open the Manage EDDs panel.
The following is an example of a Manage EDDs panel.
TSIO0101.Z ----------- BIM-EPIC - Manage EDDs ------------------ USER=SJA
COMMAND ===>
More: >
Dataset Name
Width: 25
_
_
_
_
_
_
_
_
_
BATCH CONVERT OUT
BILL BACKUP
BILL.REPRINT.FILE
BILLING.PAN.ORDER
BILRECS BKUP TAPE
BLS.REC
BUD.ACASH.BKUP
BUDGET.SQLBKUP
BUDGET.SQLBKUP1
Cyc Reten
1
4
2
1
60
6
1
3
3
0
0
0
0
0
0
0
0
0
DLA ----- Attributes ------ GEN or
Lock Rel Rev Unlbl NSub WRK
0
0
0
0
0
0
0
0
0
N
N
N
N
N
N
N
N
N
N
N
N
N
N
N
N
N
N
N
N
N
N
N
N
N
N
N
N
N
N
N
N
N
N
N
N
N
N
N
N
N
N
N
N
Y
GEN
GEN
GEN
GEN
GEN
GEN
GEN
GEN
GEN
A = Add-Ver C = Close F = Release I = Info
J = Lock K = Unlock L = Dele
M = Model
P = Purge R = Rename U = Update V = Versions ( X = Exploded Ls
F1=Help F3=Return F5=Recall F11=Right F12=Exit
Procedure
To unlock a dataset definition:
Step
1
2-28
Action
Place the cursor in front of the name of the dataset definition you
want to unlock.
Connectivity Systems, Inc.—Copyright © 2006
Use Pursuant to Company Instructions
User Reference
Unlocking a Dataset Definition
Step
Using TSIDMNT
UNLOCK
User Reference
Action
2
Type K (Unlock) to unlock the dataset definition.
3
Press Enter.
BIM-EPIC also provides the TSIDMNT UNLOCK command to unlock
an EDD. See Chapter 3, “TSIDMNT—DSN CATALOG
MANAGEMENT UTILITY,” for information on using UNLOCK.
Connectivity Systems, Inc.—Copyright © 2006
Use Pursuant to Company Instructions
2-29
Deleting a Dataset Definition
Deleting a Dataset Definition
Description
When you delete a BIM-EPIC dataset definition (EDD), all version
information is removed from the DSN Catalog, but tape volume
information is kept under the internal-use dataset name ** DSN
DELETED ** until the volume serial number is reused or purged. You
can delete an EDD from the DSN Catalog using the Manage EDDs panel.
Procedure
To access the Manage EDDs panel:
Step
1
Open the Primary Option menu.
2
Type M (Manage).
3
Press Enter to open the Search Catalog panel.
4
Type one of the following in the Name field:
5
Manage EDDs
Panel
Action
Dataset name to display a specific dataset
Part of a dataset name with an asterisk as the last character to
display all dataset names beginning with the characters
preceding the asterisk
* to display all DSNs in the catalog
Press Enter to open the Manage EDDs panel.
The following is an example of a Manage EDDs panel.
TSIO0101.Z ----------- BIM-EPIC - Manage EDDs ------------------ USER=SJA
COMMAND ===>
More: >
Dataset Name
Width: 25
_
_
_
_
_
_
_
_
_
BATCH CONVERT OUT
BILL BACKUP
BILL.REPRINT.FILE
BILLING.PAN.ORDER
BILRECS BKUP TAPE
BLS.REC
BUD.ACASH.BKUP
BUDGET.SQLBKUP
BUDGET.SQLBKUP1
Cyc Reten
1
4
2
1
60
6
1
3
3
0
0
0
0
0
0
0
0
0
DLA ----- Attributes ------ GEN or
Lock Rel Rev Unlbl NSub WRK
0 N
0 N
0 N
0 N
0 N
0 N
0 N
0 N
0 N
N
N
N
N
N
N
N
N
N
N
N
N
N
N
N
N
N
N
N
N
N
N
N
N
N
N
N
N
N
N
N
N
N
N
N
Y
GEN
GEN
GEN
GEN
GEN
GEN
GEN
GEN
GEN
A = Add-Ver C = Close F = Release I = Info
J = Lock K = Unlock L = Delete
M = Model
P = Purge R = Rename U = Update V = Versions ( X = Exploded Lst)
F1=Help F3=Return F5=Recall F11=Right F12=Exit
Procedure
To delete a dataset definition:
Step
1
2-30
Action
Place the cursor in front of the name of the dataset definition you
want to delete.
Connectivity Systems, Inc.—Copyright © 2006
Use Pursuant to Company Instructions
User Reference
Deleting a Dataset Definition
Step
Using TSIDMNT
DELETE
User Reference
Action
2
Type L (Delete) to delete the dataset definition.
3
Press Enter.
BIM-EPIC also provides TSIDMNT DELETE to remove an EDD. See
Chapter 3, “TSIDMNT—DSN CATALOG MANAGEMENT
UTILITY,” for information on using DELETE.
Connectivity Systems, Inc.—Copyright © 2006
Use Pursuant to Company Instructions
2-31
Displaying Version Information
Managing Dataset Versions
Displaying Version Information
Description
In order to view or modify a dataset version online, you must first locate
the dataset entry in the DSN Catalog. Online Manager provides the
Search Catalog panel for providing a list of dataset versions that match
specific criteria. You can search for dataset versions using the following
criteria:
Type one of the following in the Name field:
Dataset name to display a specific dataset
Part of a dataset name with an asterisk as the last character to
display all dataset names beginning with the characters preceding
the asterisk
* to display all DSNs in the catalog
Two-character, user-defined User ID (not system USERID)
Two-character, user-defined System ID (not SMFID)
Procedure
Tape pool ID
Creation job name
To access the Manage EDDs panel:
Step
2-32
Scratch or active
Action
1
Open the Primary Option menu.
2
Type M (Manage).
3
Press Enter to open the Search Catalog panel.
Connectivity Systems, Inc.—Copyright © 2006
Use Pursuant to Company Instructions
User Reference
Displaying Version Information
Search Catalog
Panel
The following is an example of a Search Catalog panel.
TSIO0100.3 ---------- BIM-EPIC - Search Catalog ---------------COMMAND ===>
USER=SJA
CATALOG SEARCH
Name
===> ____________________________________________
Level ===> E
E = EDD
or
V = Version ( X = Exploded List )
Volser ===> ______
DISPLAY FORMAT
Active Profile ===> $DEFPROF (1-8 characters)
Profile Level ===> _
E = EDD
V = Version
C = Confirmation
EDD FILTERS
User ID
===> __
System ID ===> __
Tape Pool ===> __
F1=Help
Procedure
User Reference
F5=Recall
VERSION FILTERS
Tape or Disk ===> _
(T/D)
Scratched
===> _
(Y/N)
Create Job
===> ________
F12=Exit
To display version information from the Search Catalog panel:
Step
Using TSIDMNT
DISPLAY
F3=Return
(2 chars)
(2 chars)
(0-9 or A-Z)
Action
1
Type a fully or partially qualified dataset name in the Name
field. If you specify a partially qualified dataset name, all
versions that meet the specified criteria are displayed. An
asterisk (*) can be substituted for a series of characters. A
question mark (?) can be substituted for an individual character.
2
Tab to the Level field.
3
Type V (Versions) in the Level field to view selected versions.
4
Use the version filters at the bottom of the panel to obtain more
specific search criteria.
5
Press Enter to open the Manage Versions panel listing the dataset
versions that match your search criteria.
6
Press F3 to exit without listing the dataset versions.
BIM-EPIC also provides TSIDMNT DISPLAY to list version
information. See Chapter 3, “TSIDMNT—DSN CATALOG
MANAGEMENT UTILITY,” for information on using DISPLAY.
Connectivity Systems, Inc.—Copyright © 2006
Use Pursuant to Company Instructions
2-33
Selecting a Version from a List
Selecting a Version from a List
Description
The Manage Versions panel lists dataset versions based on the search
criteria specified on the Search Catalog panel. From the Manage Versions
panel, you can:
Select a specific version to display
Close a specific version
Lock a specific version
Unlock a specific version
Release a specific version
Scratch a specific version
Retain a specific version
Cycle a specific version
From the Manage Versions panel, you can also display and maintain tape
volume information.
Procedure
The Manage Versions panel displays the Search Catalog search results
showing all dataset versions that meet the search criteria specified. The
list of results begins with the dataset name. If you did not enter a dataset
name, the listing begins with the first dataset in the DSN Catalog meeting
any criteria you specified. The size of the DSN Catalog determines how
long it will take to retrieve the data.
Manage
Versions Panel
The following is an example of a Manage Versions panel.
TSIO0200.D ---------- BIM-EPIC - Manage Versions --------------COMMAND ===>
USER=SJA
More: +>
Dataset Name
Width: 25
_
_
_
_
_
_
_
_
_
_
_
_
_
2-34
Version Number-of First --- Creation --Vols/Exts Volser Date
Time
BATCH CONVERT OUT
1
1
DUMMY6 08/01/1997
BILL BACKUP
1
1
DUMMY1 08/01/1997
BILL BACKUP
2
1
DUMMY1 07/31/1997
BILL BACKUP
3
1
DUMMY1 07/30/1997
BILL BACKUP
4
1
DUMMY3 07/29/1997
BILL.REPRINT.FILE
1
1
DUMMY3 08/01/1997
BILL.REPRINT.FILE
2
1
DUMMY6 07/31/1997
BILLING.PAN.ORDER
1
1
DUMMY0 08/01/1997
BILRECS BKUP TAPE
1
1
000050 07/29/1997
BILRECS BKUP TAPE
2
1
000024 06/26/1997
BILRECS BKUP TAPE
3
1
000061 05/28/1997
BILRECS BKUP TAPE
4
1
000019 04/29/1997
BILRECS BKUP TAPE
5
1
000143 03/28/1997
A = Append C = Close E = Ext/Reels F = Release H = Retain
I
J = Lock
K = Unlock M = Mcatalog S = Scratch T = Transfer Y
F1=Help F3=Return F5=Recall F8=Fwd F11=Right F12=Exit
Connectivity Systems, Inc.—Copyright © 2006
Use Pursuant to Company Instructions
18:20
19:51
20:57
19:23
19:30
11:27
15:05
17:55
14:14
14:20
16:42
09:57
09:00
= Informatio
= Cycle
User Reference
Selecting a Version from a List
Procedure
To manage a version entry:
Step
Using TSIDMNT
User Reference
Action
1
Type the letter of the command you want to execute in front of
the version you want to process. You can enter commands for as
many entries as you want.
2
Press Enter to invoke the commands entered.
3
Press F3 to exit without performing any commands.
BIM-EPIC provides TSIDMNT to manage dataset versions. See Chapter
3, “TSIDMNT—DSN CATALOG MANAGEMENT UTILITY,” for
information on using TSIDMNT.
Connectivity Systems, Inc.—Copyright © 2006
Use Pursuant to Company Instructions
2-35
Displaying Version Attributes
Displaying Version Attributes
Description
The Version Information panel lists information specific to a dataset
version. From the Version Information panel, you can add a new version
or display information on associated volumes.
Procedure
To display version attributes:
Step
Version
Information
Panel
Action
1
Open the Manage Versions panel.
2
Type I (Information) next to the selected dataset name.
3
Press Enter to open the Version Information panel.
The following is an example of a Version Information panel.
TSIO0201.G -------- BIM-EPIC - Version Information ------------COMMAND ===>
( _ ) Dataset: BILL.REPRINT.FILE
Version: 1
VERSION HISTORY
Create Date:
08/01/1997
Create Time:
11:27
Create Job:
OCNRPRNT
Last Acc Date: 08/02/1997
Last Acc Job: TSIBACK
Expire Date:
DLA:
Cycles:
Reten:
Last Backup:
08/01/1997
0
2
0
000235
STATUS
Scratched:
Open:
Locked:
Released:
CondCat:
Offloaded:
N
N
N
N
N
N
VERSION INFORMATION
GEN or WRK:
GEN
Generation:
138
File Seq:
SYSLOG ID:
C2
CPU ID:
9
Vault ID:
Tape Pool:
NA
Block Size:
Record Size:
Blocks:
Tape Mode:
Media Type:
Slot:
Extents:
999
3
0
DISK
1
ATTRIBUTES
Newsub:
Revolving:
MCataloged:
Unlabeled:
Cycled:
Prime:
N
N
N
N
N
Y
A = Append C = Close
E = Extents F = Release
K = Unlock M = Mcatalog S = Scratch T = Transfer
F1=Help F3=Return F5=Recall F12=Exit
Using TSIDMNT
DISPLAY
2-36
USER=SJA
H = Retain
Y = Cycle
J = Lock
BIM-EPIC also provides TSIDMNT DISPLAY to list version information
in batch mode. See Chapter 3, “TSIDMNT—DSN CATALOG
MANAGEMENT UTILITY,” for information on using DISPLAY.
Connectivity Systems, Inc.—Copyright © 2006
Use Pursuant to Company Instructions
User Reference
Adding Version Information
Adding Version Information
Description
The Add a Tape Version panel allows you to add a new version to an
existing BIM-EPIC dataset definition (EDD) or to add new volume serial
numbers to an existing dataset version.
Procedure
To add a new tape version to a controlled dataset definition:
Step
Action
1
Open the Primary Option menu.
2
Type M (Manage).
3
Press Enter to open the Search Catalog panel.
4
Type the name of the dataset definition in the Name field.
5
Type V (Versions) in the Level field to view selected versions.
6
Press Enter to open the Manage Versions panel.
7
Type A (Add).
8
Press Enter to open the Add a Tape Dataset panel.
To append reels to an existing dataset version:
Step
1
Open the Primary Option menu.
2
Type M (Manage).
3
Press Enter to open the Search Catalog panel.
4
Type the name of the dataset definition in the Name field.
5
Type V (Versions) in the Level field.
6
Press Enter to open the Manage Versions panel.
7
Tab to the name of the dataset that requires the additional reel.
8
Type A (Append).
9
Press Enter to open the Append Extents to Disk Version panel.
10
User Reference
Action
Type the required information.
Connectivity Systems, Inc.—Copyright © 2006
Use Pursuant to Company Instructions
2-37
Adding Version Information
Add a Tape
Dataset Version
Panel
The following is an example of an Add a Tape Dataset Version panel.
TSIO0203.t ---- BIM-EPIC - Add a Tape Dataset Version ---------COMMAND ===>
Dataset ===> BILRECS BKUP TAPE
VERSION INFORMATION
Version Number
Version Block Size
File Seq Number
Offload Seq Number
Use scratch tapes
VOLSER(S)
1 ______
7 ______
13 ______
19 ______
25 ______
31 ______
37 ______
43 ______
F1=Help
Procedure
2-38
2
8
14
20
26
32
38
44
F3=Return
______
______
______
______
______
______
______
______
===>
===>
===>
===>
===>
3
9
15
21
27
33
39
45
F5=Recall
1
(1 - 9999)
_____ (1 - 32767)
____
(2 - 9999)
____
(1 - 9999)
_
(Y/N)
______
______
______
______
______
______
______
______
F8=Fwd
4
10
16
22
28
34
40
46
______
______
______
______
______
______
______
______
5
11
17
23
29
35
41
47
F11=Disk Add
More: +
______
6 ______
______ 12 ______
______ 18 ______
______ 24 ______
______ 30 ______
______ 36 ______
______ 42 ______
______ 48 ______
F12=Exit
To add new information to a volume:
Step
Using TSIDMNT
ADD
USER=SJA
Action
1
Specify the desired attributes and volume serial numbers
(volsers) for the new version.
2
Press Enter to add the tape version.
BIM-EPIC also provides TSIDMNT ADD to add a version to a controlled
dataset. See Chapter 3, “TSIDMNT—DSN CATALOG
MANAGEMENT UTILITY,” for information on using ADD.
Connectivity Systems, Inc.—Copyright © 2006
Use Pursuant to Company Instructions
User Reference
Locking a Version
Locking a Version
Description
Locking a dataset version prevents the version from being used as input.
You can lock a dataset version from any panel that allows general version
management.
Procedure
To access the Manage Versions panel:
Step
Manage
Versions Panel
Action
1
Open the Primary Option menu.
2
Type M (Manage).
3
Press Enter to open the Search Catalog panel.
4
Type the dataset name and Level V on the Search Catalog panel.
5
Type V (Versions) in the Level field.
6
Press Enter to open the Manage Versions panel.
The following is an example of a Manage Versions panel.
TSIO0200.D ---------- BIM-EPIC - Manage Versions --------------- USER=SJA
COMMAND ===>
More: +>
Dataset Name
Width: 25
Version Number-of First --- Creation --Vols/Exts Volser Date
Time
_ BATCH CONVERT OUT
1
1
DUMMY6 08/01/1997 18:20
_ BILL BACKUP
1
1
DUMMY1 08/01/1997 19:51
_ BILL BACKUP
2
1
DUMMY1 07/31/1997 20:57
_ BILL BACKUP
3
1
DUMMY1 07/30/1997 19:23
_ BILL BACKUP
4
1
DUMMY3 07/29/1997 19:30
_ BILL.REPRINT.FILE
1
1
DUMMY3 08/01/1997 11:27
_ BILL.REPRINT.FILE
2
1
DUMMY6 07/31/1997 15:05
_ BILLING.PAN.ORDER
1
1
DUMMY0 08/01/1997 17:55
_ BILRECS BKUP TAPE
1
1
000050 07/29/1997 14:14
_ BILRECS BKUP TAPE
2
1
000024 06/26/1997 14:20
_ BILRECS BKUP TAPE
3
1
000061 05/28/1997 16:42
_ BILRECS BKUP TAPE
4
1
000019 04/29/1997 09:57
_ BILRECS BKUP TAPE
5
1
000143 03/28/1997 09:00
A = Append C = Close E = Ext/Reels F = Release H = Retain
I = Information
J = Lock
K = Unlock M = Mcatalog S = Scratch T = Transfer Y = Cycle
F1=Help F3=Return F5=Recall F8=Fwd F11=Right F12=Exit
Procedure
To lock a version of a dataset:
Step
User Reference
Action
1
Place the cursor next to the version you want to lock.
2
Type J (Lock).
3
Press Enter to lock the version.
Connectivity Systems, Inc.—Copyright © 2006
Use Pursuant to Company Instructions
2-39
Locking a Version
Using TSIDMNT
LOCK
2-40
BIM-EPIC also provides TSIDMNT LOCK to lock a version. See
Chapter 3, “TSIDMNT—DSN CATALOG MANAGEMENT
UTILITY,” for information on using LOCK.
Connectivity Systems, Inc.—Copyright © 2006
Use Pursuant to Company Instructions
User Reference
Closing a Version
Closing a Version
Description
It may be necessary to manually close a dataset version if it is in open
status or if it is in conditionally cataloged status as a result of an abnormal
termination of a job. You can close a version from the Manage Versions
panel. You may want to delete the version after setting it to closed status
since the data may be incomplete as the result of the abnormal
termination.
Procedure
To access the Manage Versions panel:
Step
Manage
Versions Panel
Action
1
Open the Primary Option menu.
2
Type M (Manage).
3
Press Enter to open the Search Catalog panel.
4
Type the name of the dataset definition in the Name field.
5
Type V (Versions) in the Level field to view selected versions.
6
Press Enter to open the Manage Versions panel.
The following is an example of the Manage Versions panel.
TSIO0200.D ---------- BIM-EPIC - Manage Versions --------------- USER=SJA
COMMAND ===>
More: +>
Dataset Name
Width: 25
Version Number-of First --- Creation --Vols/Exts Volser Date
Time
_ BATCH CONVERT OUT
1
1
DUMMY6 08/01/1997 18:20
_ BILL BACKUP
1
1
DUMMY1 08/01/1997 19:51
_ BILL BACKUP
2
1
DUMMY1 07/31/1997 20:57
_ BILL BACKUP
3
1
DUMMY1 07/30/1997 19:23
_ BILL BACKUP
4
1
DUMMY3 07/29/1997 19:30
_ BILL.REPRINT.FILE
1
1
DUMMY3 08/01/1997 11:27
_ BILL.REPRINT.FILE
2
1
DUMMY6 07/31/1997 15:05
_ BILLING.PAN.ORDER
1
1
DUMMY0 08/01/1997 17:55
_ BILRECS BKUP TAPE
1
1
000050 07/29/1997 14:14
_ BILRECS BKUP TAPE
2
1
000024 06/26/1997 14:20
_ BILRECS BKUP TAPE
3
1
000061 05/28/1997 16:42
_ BILRECS BKUP TAPE
4
1
000019 04/29/1997 09:57
_ BILRECS BKUP TAPE
5
1
000143 03/28/1997 09:00
A = Append C = Close E = Ext/Reels F = Release H = Retain
I = Information
J = Lock
K = Unlock M = Mcatalog S = Scratch T = Transfer Y = Cycle
F1=Help F3=Return F5=Recall F8=Fwd F11=Right F12=Exit
Procedure
To close a version:
Step
User Reference
Action
1
Place the cursor next to the version you want to close.
2
Type C (Close).
3
Press Enter to close the version.
Connectivity Systems, Inc.—Copyright © 2006
Use Pursuant to Company Instructions
2-41
Closing a Version
Using TSIDMNT
CLOSE
2-42
BIM-EPIC also provides TSIDMNT CLOSE to close a dataset version.
See Chapter 3, “TSIDMNT—DSN CATALOG MANAGEMENT
UTILITY,” for information on using CLOSE.
Connectivity Systems, Inc.—Copyright © 2006
Use Pursuant to Company Instructions
User Reference
Removing Version Information from the DSN Catalog
Removing Version Information from the DSN Catalog
Description
Dataset version information can be removed from the DSN Catalog by
deleting the associated dataset definition or by purging the associated tape
volume serial number. If a disk-resident version, scratching the version
will remove it from the DSN Catalog, as well.
Procedure
See “Deleting a Dataset Definition” or “Purging a Tape Volume” for
specific information. If a disk-resident version, see “Scratching a Disk
Dataset” for additional information.
Using TSIDMNT
DELETE and
PURGE
BIM-EPIC also provides TSIDMNT DELETE and TSIDMNT PURGE to
remove a dataset definition or purge a tape volume from the DSN
Catalog. See Chapter 3, “TSIDMNT—DSN CATALOG
MANAGEMENT UTILITY,” for information on using DELETE and
PURGE.
User Reference
Connectivity Systems, Inc.—Copyright © 2006
Use Pursuant to Company Instructions
2-43
Managing Tapes
Managing Tapes
Tapes in the
DSN Catalog
Every tape BIM-EPIC uses for a controlled dataset is recorded in the DSN
Catalog. Tapes are identified in the DSN Catalog by volume serial
number. New tapes are automatically added to the DSN Catalog when
BIM-EPIC-controlled datasets residing on tapes are processed. You can
also enter tape information into the DSN Catalog using Online Manager
or TSIDMNT ADD.
Valid Volume
Serial Numbers
(Volsers)
Every controlled tape that BIM-EPIC uses must have a unique volume
serial number (volser). Even unlabeled tapes must be identified with
unique volume serial numbers. This strict identification rule simplifies
tape control and retrieval processes. For controlled datasets that are
opened for output, BIM-EPIC checks the volume serial number of a new
tape against the numbers in the DSN Catalog. If there is a duplicate
dataset or an active dataset on the tape, BIM-EPIC requires you to enter a
new volume serial number or use a different tape.
Volume serial numbers can be any unique combination of alphanumeric
characters but cannot exceed the VSE limit of six characters in length.
BIM-EPIC reserves volume serial number 000000 to use as a special
marker in the DSN Catalog. Groups of volume serial numbers do not need
to be consecutive. However, since tape pools are defined by ranges of
volume serial numbers, it is helpful to initialize tape pools with
consecutive volume serial numbers.
Producing
Scratch Tapes
Online Manager, TSIDUTL, and TSIDMNT SCRATCH produce scratch
tapes. In addition, TSIDUTL DSPLY produces a report listing all
available scratch tapes. If a tape resides in an Automatic Cartridge
Library (ACL) when it is scratched in the DSN Catalog, the tape is
scratched in the ACL also. See “Retaining and Scratching Datasets” for
more information on scratch functions.
Tape Pooling
You can use tape pooling to group similar types of tapes into tape pools.
For example, you can have a volume serial number range in one or more
pools, 3590 tape cartridges in a pool, ACL-resident tape cartridges in a
pool, and so on. Datasets are assigned to tape pools through their
BIM-EPIC dataset definition (EDD) entry in the DSN Catalog.
BIM-EPIC requests a scratch tape from the appropriate pool when a
pooled dataset is created.
Each pool is given a one-character pool code (A to Z or 0 to 9) and is
assigned one or more volume serial number ranges. If a volume serial
number falls within a specific pool range, the tape is assigned to that pool.
A tape pool can only be used to write datasets assigned to that pool. If a
volume serial number does not fall in any of the defined ranges, the tape
2-44
Connectivity Systems, Inc.—Copyright © 2006
Use Pursuant to Company Instructions
User Reference
Managing Tapes
is not associated with any pool. The tape can only be used to write
datasets which are not assigned to a tape pool. Datasets can be assigned to
a tape pool using manual cataloging or automatic cataloging.
If you use ACL support with pooling, the same pools must also be defined
to the ACL system. Refer to the vendor ACL documentation for
information on defining pools to the ACL system.
User Reference
Connectivity Systems, Inc.—Copyright © 2006
Use Pursuant to Company Instructions
2-45
BIM-EPIC Tape Selection Process
BIM-EPIC Tape Selection Process
Description
IM-EPIC controls which tapes can be used for output by checking the
volume serial number of every tape processed. If the tape is controlled,
the serial number is compared with the corresponding DSN Catalog entry
for scratch status before the tape is used as output.
If the tape is uncontrolled, BIM-EPIC checks to see if the volume serial
number was initialized by VSE DITTO and if it is in expired status. If
both conditions are not met, BIM-EPIC does not use the tape. If no
qualified volumes are found, the operator is requested to mount a tape.
If the operator is requested to mount a tape, it must be a valid scratch tape,
and if a “mount for Pool x” is part of the request, the volume must be
within the serial number range defined for “Pool x.”
If revolving tapes are used, BIM-EPIC issues a general request for a
scratched revolving tape for that dataset.
For input tapes, BIM-EPIC scans the tape drives looking for the required
volume serial number. If the volume serial number is not found, the
operator is requested to mount the tape. If the tape is not mounted,
BIM-EPIC requests the operator mount the volume serial number of the
last tape used for that multi-file group.
Note:
BIM-EPIC-controlled tapes cannot be used to write an uncontrolled
dataset.
ACL Support
If Automatic Cartridge Library (ACL) support is activated, BIM-EPIC
checks to see if the required volume is in an ACL, and of so, instructs the
ACL to mount the volume. If the volume is not in the ACL, the previously
described “non-ACL” logic is followed.
ACL cartridges for BIM-EPIC controlled tapes should never be mounted
by the operator. BIM-EPIC expects to issue the mount request to the
ACL. If the operator does a manual mount, the results are unpredictable.
2-46
Connectivity Systems, Inc.—Copyright © 2006
Use Pursuant to Company Instructions
User Reference
Displaying Tape Volume Information
Displaying Tape Volume Information
Description
The Tape Volume Information panel displays information on any
controlled tape volume. You can also execute tape functions from the
Tape Volume Information panel.
Procedure
To access the Tape Volume Information panel:
Step
Tape Volume
Information
Panel
Action
1
Open the Primary Option menu.
2
Type M (Manage).
3
Press Enter to open the Search Catalog panel.
4
Tab to the Volser field.
5
Type the volume serial number in the Volser (Volume Serial
Number) field.
6
Press Enter to display tape volume information.
The following is an example of the Tape Volume Information panel.
TSIO0401.V ------ BIM-EPIC - Tape Volume Information ----------COMMAND ===>
USER=SJA
( _ ) Volser ===> 000143
VOLUME HISTORY
Expire Date:
Last Acc Date:
Last Acc Job:
Clean Date:
03/28/1997
03/28/1997
TVMBRRST
.
VOLUME INFORMATION
Reel:
1
Tape Pool:
NA
Device Addr:
0610
Tape Size:
LARGE
Blocks:
9987
Current Dataset:
First DS on Volume:
Create Date:
Create Time:
Create Job:
CPU ID:
SYSLOG ID:
03/28/1997
09:00
TVMBRBKP
9
C1
ATTRIBUTES
Scratched:
Unlabeled:
Open:
Revolving:
CondCat:
N
N
N
N
N
Use Count:
Error Count:
Media Type:
Tape Mode:
6
NA
CART
F8
LOCATION
Vault:
Slot:
ACL Name:
ACL Cell:
0
0
.
.
.
BILRECS BKUP TAPE
C = Clean M = Move P = Purge
F1=Help F3=Return F5=Recall F12=Exit
User Reference
Connectivity Systems, Inc.—Copyright © 2006
Use Pursuant to Company Instructions
2-47
Maintaining Tape Volume Information
Maintaining Tape Volume Information
Description
You can manage tape volume information using the Manage Tape
Volumes panel.
Procedure
To access the Manage Tape Volumes panel:
Step
Manage Tape
Volumes Panel
Action
1
Open the Primary Option menu.
2
Type M (Manage).
3
Press Enter to open the Search Catalog panel.
4
Tab to the Volser field.
5
Type the volume serial number in the Volser (Volume Serial
Number) field.
The following is an example of the Manage Tape Volumes panel.
TSIO0400.r -------- BIM-EPIC - Manage Tape Volumes ------------COMMAND ===>
More: NO
Version: 5
Dataset: BILRECS BKUP TAPE
Volser Reel
_ 000143
Creation
Date
USER=SJA
Expire
Date
--- Last Access --- Use Vault
Date
Job
Count
1 03/28/1997 03/28/1997 03/28/1997 TVMBRRST
6
Slot
0
0
C = Clean I = Information M = Move P = Purge
F1=Help F3=Return F5=Recall F12=Exit
The Manage Tape Volumes panel and the Tape Volume Information
panel provide access to the following commands:
Clean
Information
Move
Purge
Note:
You are able to purge volume serial numbers from the Manage Tape
Volumes panel. If you want BIM-EPIC to confirm all PURGE requests, set
PURGE=Y in the Modify Profile Defaults (CONFIRM) panel.
2-48
Connectivity Systems, Inc.—Copyright © 2006
Use Pursuant to Company Instructions
User Reference
Maintaining Tape Volume Information
Using TSIDMNT
User Reference
BIM-EPIC also provides TSIDMNT to manage tape volumes. See
Chapter 3, “TSIDMNT—DSN CATALOG MANAGEMENT
UTILITY,” for additional information on using TSIDMNT.
Connectivity Systems, Inc.—Copyright © 2006
Use Pursuant to Company Instructions
2-49
Purging a Tape Volume
Purging a Tape Volume
Description
You can purge a tape volume from the DSN Catalog using the Manage
Tape Volumes panel.
Procedure
To access the Manage Tape Volumes panel:
Step
Manage Tape
Volumes Panel
Action
1
Open the Primary Option menu.
2
Type M (Manage)
3
Press Enter to open the Search Catalog panel.
4
Tab to the Volser field.
5
Type the volume serial number in the Volser (Volume Serial
Number) field.
The following is an example of the Manage Tape Volumes panel.
TSIO0400.r -------- BIM-EPIC - Manage Tape Volumes ------------- USER=SJA
COMMAND ===>
More: NO
Dataset: BILRECS BKUP TAPE
Version: 5
Volser Reel
_ 000143
Creation
Date
Expire
--- Last Access --- Use
Date
Date
Job
Count
1 03/28/1997 03/28/1997 03/28/1997 TVMBRRST
6
Vault
0
Slot
0
C = Clean I = Information M = Move P = Purge
F1=Help F3=Return F5=Recall F12=Exit
Procedure
To purge a tape volume:
Step
Using TSIDMNT
PURGE
2-50
Action
1
Type P next to the volume serial number (volser).
2
Press Enter.
3
Type YES to confirm the purge, if prompted.
BIM-EPIC also provides TSIDMNT PURGE to remove tape volume
information from the DSN Catalog. See Chapter 3, “TSIDMNT—DSN
CATALOG MANAGEMENT UTILITY,” for information on using
PURGE.
Connectivity Systems, Inc.—Copyright © 2006
Use Pursuant to Company Instructions
User Reference
Recording Tape Cleaning
Recording Tape Cleaning
Description
You can record tape cleaning using either the Tape Volume Information
panel or the Manage Tape Volumes panel.
Procedure
To access the Tape Volumes Information panel:
Step
Manage Tape
Volumes Panel
Action
1
Open the Primary Option menu.
2
Type M (Manage).
3
Press Enter to open the Search Catalog panel.
4
Tab to the Volser field.
5
Type the volume serial number in the Volser (Volume Serial
Number) field.
The following is an example of the Manage Tape Volumes panel.
TSIO0400.r -------- BIM-EPIC - Manage Tape Volumes ------------- USER=SJA
COMMAND ===>
More: NO
Dataset: BILRECS BKUP TAPE
Version: 5
Volser Reel
_ 000143
Creation
Date
Expire
--- Last Access --- Use
Date
Date
Job
Count
1 03/28/1997 03/28/1997 03/28/1997 TVMBRRST
6
Vault
Slot
0
0
C = Clean I = Information M = Move P = Purge
F1=Help F3=Return F5=Recall F12=Exit
Procedure
To record tape cleaning from either the Tape Volume Information panel
or the Manage Tape Volumes panel:
Step
Using TSIDMNT
CLEAN
User Reference
Action
1
Type C next to the volume serial number.
2
Press Enter to record tape cleaning.
BIM-EPIC also provides TSIDMNT CLEAN to record tape cleaning. See
Chapter 3, “TSIDMNT—DSN CATALOG MANAGEMENT
UTILITY,” for information on using CLEAN.
Connectivity Systems, Inc.—Copyright © 2006
Use Pursuant to Company Instructions
2-51
Understanding Retention Concepts
Retaining and Scratching Datasets
Understanding Retention Concepts
Description
Retention is the amount of time a dataset is kept before the dataset is
scratched. Retention is one of the most critical areas of information
control. Scratching or making a tape available for reuse, occurs when a
dataset version’s retention criteria have been met. Retention criteria for
automated tape management systems must be monitored and controlled
by users in order to protect their information.
Implementing
Retention
BIM-EPIC maintains a variety of retention criteria. A version is scratched
only when all criteria are met.
BIM-EPIC commands DELETE and SCRATCH are used for scratching
versions. Single-file tape volumes associated with scratched dataset
versions become valid scratch tapes immediately after using either of
these commands. Multi-file tape volumes become valid scratch tapes
when all associated datasets are scratched. Scratched disk versions are
immediately removed from the VTOC.
DELETE removes a dataset definition and all associated versions from
the DSN Catalog and from BIM-EPIC control. All tape volumes
associated with the dataset definition become scratch tapes according to
the rules for single-file and multi-file tape volumes and are listed in the
DSN Catalog under the dataset name ** DSN DELETED **. See
“Managing Dataset Definitions” for additional information. All disk
versions are removed from the VTOC.
SCRATCH scratches one or more versions of a specific dataset. You can
use associated tape volumes immediately as output tapes. BIM-EPIC
resequences version numbers as you scratch each version. For example, if
you scratch version number 1, version 2 now becomes version 1, version
3 now becomes version 2, and so on.
Initiating the
Scratch
Process
You must run a scratch process before BIM-EPIC expires a dataset or
allows a tape to be reused. Scratch processes can be performed manually
using either Online Manager or TSIDMNT.
TSIDUTL SCRATCH searches the entire DSN Catalog for all dataset
versions which have satisfied their retention criteria and scratches them.
You can limit the scratch process to tape only, disk only, or to certain user
IDs or system IDs.
2-52
Connectivity Systems, Inc.—Copyright © 2006
Use Pursuant to Company Instructions
User Reference
Setting Dataset Definition Retention
Setting Dataset Definition Retention
Description
When a BIM-EPIC dataset definition (EDD) is created manually using
the Define an EDD panel, a new set of retention criteria is defined which
will apply to all future versions of that dataset.
Access
To access the Define an EDD panel:
Step
Define an EDD
Panel
Action
1
Open the Primary Option menu.
2
Type D (Define).
3
Press Enter to open the Define an EDD panel.
The following is an example of a Define an EDD panel.
TSIO0103.D ----------- BIM-EPIC - Define an EDD ---------------COMMAND ===>
USER=SJA
DEFINE
Dataset ===> ____________________________________________
Model
===> ____________________________________________
TAPE INFORMATION
TPAdev: N Mode: __
Tape Pool ===> __
Vault Meth ===> ___
Owner ID
===> __
Unlabeled ===> _
Tape Size ===> _
Revolving ===> _
DISK INFORMATION
Disk Pool
===>
Primary
===>
Secondary
===>
Max Sec
===>
Primary ALR ===>
Auto Purge ===>
______
_______
_______
___
_______
_
Comment
===> ______________________________
Prime DSN ===> _________________
F1=Help
F3=Return
F5=Recall
DATASET INFORMATION
GEN or WRK
===>
Retention
===>
Cycles
===>
DLA
===>
BLKSZ( _ CISZ) ===>
SYSnnn
===>
System ID
===>
User ID
===>
Password
===>
Encrypt Key
===>
___
____
___
____
_____
___
__
__
F12=Exit
Procedure
Enter the desired criteria to create the new dataset definition.
Using TSIDMNT
CATALOG
BIM-EPIC also provides the TSIDMNT CATALOG command to set
dataset definition retention. See Chapter 3, “TSIDMNT—DSN
CATALOG MANAGEMENT UTILITY,” for information on using
CATALOG.
User Reference
Connectivity Systems, Inc.—Copyright © 2006
Use Pursuant to Company Instructions
2-53
Modifying Dataset Definition Retention
Modifying Dataset Definition Retention
Description
When using the Update an EDD panel to modify an existing BIM-EPIC
dataset definition (EDD), you can change the existing retention criteria.
The changes will apply to all subsequent versions of that dataset.
Access
To access the Update an EDD panel:
Step
Update an EDD
Panel
Action
1
Open the Primary Option menu.
2
Type M (Manage).
3
Press Enter to open the Search Catalog panel.
4
Type the name of the dataset definition you want to update.
5
Press Enter to open the EDD Information panel.
6
Tab to the name of the dataset definition.
7
Type U (Update).
8
Press Enter to open the Update an EDD panel.
The following is an example of an Update an EDD panel.
TSIO0104.e ----------- BIM-EPIC - Update an EDD ---------------COMMAND ===>
USER=SJA
UPDATE
Dataset: BATCH CONVERT OUT
TAPE INFORMATION
TPAdev: N Mode: NO
Tape Pool ===> __
Vault Meth ===> 0
Owner ID
===> __
Unlabeled ===> N
Tape Size ===> L
Revolving ===> N
Comment
F1=Help
DISK INFORMATION
Disk Pool
===>
Primary
===>
Secondary
===>
Max Sec
===>
Primary ALR ===>
Auto Purge ===>
DISK02
50
25
255
_______
N
===> ______________________________
F3=Return
F5=Recall
DATASET INFORMATION
GEN or WRK
===>
Retention
===>
Cycles
===>
DLA
===>
BLKSZ( _ CISZ) ===>
SYSnnn
===>
System ID
===>
User ID
===>
Password
===>
GEN
0
1
0
OPT
0
__
__
F12=Exit
Procedure
To modify the dataset definition, change the values in the desired input
fields.
Using TSIDMNT
UPDATE
BIM-EPIC also provides the TSIDMNT UPDATE command to modify
dataset definition retention. See Chapter 3, “TSIDMNT—DSN
CATALOG MANAGEMENT UTILITY,” for information on using
UPDATE.
2-54
Connectivity Systems, Inc.—Copyright © 2006
Use Pursuant to Company Instructions
User Reference
Setting or Modifying Dataset Version Retention
Setting or Modifying Dataset Version Retention
Description
You can use the Retain a Version panel to set or modify the expiration
date, creation date, and creation job name of a version. If the version is
not in active status, the version is put in active status automatically.
Access
To access the Retain a Version panel:
Step
Retain a
Version Panel
Action
1
Open the Primary Option menu.
2
Type M (Manage).
3
Press Enter to open the Manage EDDs panel
4
Type V (Version) in the Level field.
5
Press Enter to open the Manage Versions panel.
6
Tab to the name of the dataset definition you want to retain.
7
Type H (Retain) next to the dataset name.
8
Press Enter to open the Retain a Version panel.
The following is an example of a Retain a Version panel.
TSIO0210.R --------- BIM-EPIC - Retain a Version --------------- USER=SJA
COMMAND ===>
RETAIN
Tape Dataset: BILRECS BKUP TAPE
Version:
1
to
Expire Date
Days + Today
Create Date
Create Job
TPA Device
Mode
F1=Help
Procedure
_______ (YYYYDDD format)
___
(1 to 999 days)
_______ (YYYYDDD format)
________ (1 to 8 characters)
_
(Y or N)
__
(Creation Density)
F5=Recall
F12=Exit
To modify dataset version retention:
Step
User Reference
F3=Return
===>
===>
===>
===>
===>
===>
Action
1
Update the desired fields.
2
Press Enter. All data entered are verified for syntactic
correctness and defaults added. Review the data before
proceeding.
3
Press Enter to update the version retention.
Connectivity Systems, Inc.—Copyright © 2006
Use Pursuant to Company Instructions
2-55
Setting or Modifying Dataset Version Retention
Step
4
Using TSIDMNT
RETAIN
2-56
Action
Press F3 to exit without performing any updates.
BIM-EPIC also provides TSIDMNT RETAIN to set and modify dataset
version retention. See Chapter 3, “TSIDMNT—DSN CATALOG
MANAGEMENT UTILITY,” for information on using RETAIN.
Connectivity Systems, Inc.—Copyright © 2006
Use Pursuant to Company Instructions
User Reference
Cycling a Dataset Version
Cycling a Dataset Version
Description
Cycling is a special purpose function that allows you to change the
creation date, change the creation job name, or override the number of
versions (cycles) retained for a dataset.
You can also use this function to take one version out of the normal
retention cycle and reserve it for special retention. The recycled version
is:
Removed from cycle retention for the dataset (it no longer counts
as a version in the cycle)
Retained until the expiration date you specified
For example, if you have instructed BIM-EPIC to keep three versions of a
particular dataset and you cycle one version, BIM-EPIC maintains four
versions (the cycled version plus three normal versions) until the cycled
version reaches its expiration date. All uncycled versions previous to the
cycled version are retained by cycle control only. Days Retention and
Days Last Accessed Retention values no longer apply. If the datasets are
not retained under cycle control, the versions are eligible for scratch
during the next run of TSIDUTL. Versions which have been cycled in the
past are retained until their expiration date. Cycling a dataset has no effect
on versions created after the cycled version.
Use the Cycle a Version panel to execute the cycling function.
CYCLE vs.
RETAIN
CYCLE looks very similar to RETAIN. However, CYCLE is quite
different. Using RETAIN only affects the version you modify. Using
CYCLE affects the version you modify and all previous versions.
Access
To access the Cycle a Version panel:
Step
User Reference
Action
1
Open the Primary Option menu.
2
Type M (Manage).
3
Press Enter to open the Search Catalog panel.
4
Enter the name of the dataset definition you want to cycle.
5
Type V (Version) in the Level field to open the Manage Versions
panel.
6
Tab to the version of the tape you want to cycle.
7
Type Y next to a version name.
8
Press Enter.
Connectivity Systems, Inc.—Copyright © 2006
Use Pursuant to Company Instructions
2-57
Cycling a Dataset Version
Cycle a Version
Panel
The following is an example of a Cycle a Version panel.
TSIO0211.Y ---------- BIM-EPIC - Cycle a Version --------------- USER=SJA
COMMAND ===>
CYCLE
Tape Dataset: BILRECS BKUP TAPE
Version:
1
to
Expire
Days +
Create
Create
F1=Help
Procedure
2-58
F3=Return
===>
===>
===>
===>
_______
___
_______
________
F5=Recall
(YYYYDDD format)
(1 to 999 days)
(YYYYDDD format)
(1 to 8 characters)
F12=Exit
To cycle a version:
Step
Using TSIDMNT
CYCLE
Date
Today
Date
Job
Action
1
Update any desired fields to cycle the version.
2
Press Enter. All data entered are verified for syntactic
correctness and defaults are added. Review the data before
proceeding.
3
Press Enter to cycle the version.
4
Press F3 to exit without performing any commands.
BIM-EPIC also provides TSIDMNT CYCLE to cycle dataset versions.
See Chapter 3, “TSIDMNT—DSN CATALOG MANAGEMENT
UTILITY,” for information on using CYCLE.
Connectivity Systems, Inc.—Copyright © 2006
Use Pursuant to Company Instructions
User Reference
Scratching a Dataset Version
Scratching a Dataset Version
Description
There are several different status types that affect when a dataset version
becomes eligible for scratch. Datasets in open status are eligible for
scratch only after they have been closed using Online Manager or
TSIDMNT. All other versions are eligible for scratch only after all of the
retention criteria specified for the dataset version have been satisfied.
Scratching a dataset version using Online Manager or TSIDMNT
SCRATCH expires a specific dataset version. That version is scratched
whether or not the retention criteria has been satisfied.
Access
To access the Cycle a Version panel:
Step
Manage
Versions Panel
Action
1
Open the Primary Option menu.
2
Type M (Manage).
3
Press Enter to open the Search Catalog panel.
4
Enter the name of the dataset definition you want to cycle.
5
Type V (Version) in the Level field to open the Manage Versions
panel.
6
Tab to the version of the tape you want to cycle.
7
Type Y next to a version name.
8
Press Enter.
The following is an example of a Manage Versions panel.
TSIO0200.D ---------- BIM-EPIC - Manage Versions --------------- USER=SJA
COMMAND ===>
More: +>
Dataset Name
Width: 25
Version Number-of First --- Creation --Vols/Exts Volser Date
Time
_ BATCH CONVERT OUT
1
1
DUMMY6 08/01/1997 18:20
_ BILL BACKUP
1
1
DUMMY1 08/01/1997 19:51
_ BILL BACKUP
2
1
DUMMY1 07/31/1997 20:57
_ BILL BACKUP
3
1
DUMMY1 07/30/1997 19:23
_ BILL BACKUP
4
1
DUMMY3 07/29/1997 19:30
_ BILL.REPRINT.FILE
1
1
DUMMY3 08/01/1997 11:27
_ BILL.REPRINT.FILE
2
1
DUMMY6 07/31/1997 15:05
_ BILLING.PAN.ORDER
1
1
DUMMY0 08/01/1997 17:55
_ BILRECS BKUP TAPE
1
1
000050 07/29/1997 14:14
_ BILRECS BKUP TAPE
2
1
000024 06/26/1997 14:20
_ BILRECS BKUP TAPE
3
1
000061 05/28/1997 16:42
_ BILRECS BKUP TAPE
4
1
000019 04/29/1997 09:57
_ BILRECS BKUP TAPE
5
1
000143 03/28/1997 09:00
A = Append C = Close E = Ext/Reels F = Release H = Retain
I = Information
J = Lock
K = Unlock M = Mcatalog S = Scratch T = Transfer Y = Cycle
F1=Help F3=Return F5=Recall F8=Fwd F11=Right F12=Exit
User Reference
Connectivity Systems, Inc.—Copyright © 2006
Use Pursuant to Company Instructions
2-59
Scratching a Dataset Version
Procedure
To scratch a version:
Step
Print Options
Action
1
Type S (Scratch) in front of the version you want to scratch.
2
Press Enter.
Print output is controlled using the JCL // OPTION LOG. If the option is
specified, all processed maintenance is printed on SYSLST. If // OPTION
NOLOG is specified, only invalid commands are printed. If your system
log option is NO LOG and you want a list of submitted commands, you
must provide // OPTION LOG prior to //EXEC TSIDMNT.
Note:
NOLOG is often the default setting in production environments.
Using TSIDMNT
SCRATCH
2-60
BIM-EPIC also provides TSIDMNT SCRATCH to scratch dataset
versions. See Chapter 3, “TSIDMNT—DSN CATALOG
MANAGEMENT UTILITY,” for information on using SCRATCH.
Connectivity Systems, Inc.—Copyright © 2006
Use Pursuant to Company Instructions
User Reference
Establishing Online Security
Establishing Online Security
Description
Securing the
Online Manager
If security is desired, a panel-driven online security facility provides
security for the Online Manager by performing the following tasks:
Allows online catalog management functions and some
BIM-EPIC system functions to be restricted to specific users
Allows multiple users to inherit (model) an individual set of
security attributes.
Provides a set of security defaults for users who are not defined to
BIM-EPIC online security
Defining a security profile for every potential user at a large site can be a
tedious task. Online Manager security minimizes this effort by allowing
flexible combinations for global defaults, group modeling, and unique
individual profiles. For example, one site may want to grant wide system
access and restrict only a few users, while another site may want
widespread restrictions and limited user access. Each combination is
easily accomplished using Online Manager security.
The initial setting for Online Manager is unsecured. However, global
security defaults can be modified as needed. A default security profile,
$DEFSEC, automatically governs all unsecured users. Users with security
system access can use a non–modifiable unsecured profile, $EPIC, as a
model for adding new profiles. The first time you modify a profile that
was modeled on another profile, the modified profile becomes
independent. However, if you modify any profile on which other profiles
are modeled, the changes are inherited by the other profiles. This allows
you to create any combination of independent and related security
profiles.
Planning
Security
User Reference
When using the Online Manager security system, consider the following:
The online security profile names that you create must follow the
convention appropriate for your operating environment. For
example, if you are running BIM-EPIC under BIM-FAQS/ASO,
user IDs defined for BIM-EPIC security must be known to
BIM-FAQS/ASO.
You should always reserve exclusive security system access for
your security administrator. Secure $DEFSEC against security
system access.
You should determine if the global default settings are adequate
for most users or whether you need a number of different security
profiles for specific users or groups of users. For example, you
Connectivity Systems, Inc.—Copyright © 2006
Use Pursuant to Company Instructions
2-61
Establishing Online Security
can create specific security profiles by department. Use
$DEFSEC to access the default security settings.
Procedure
Secured Users
Panel
To access the Online Manager security system:
From the Primary Option menu, type SECURITY on the
command line to display a list of SECURED USERS or select
SYSTEM to display the System Configuration menu.
From the System Configuration menu, select SECURITY.
The Secured Users panel displays the names of security profiles that are
defined in the Online Manager. Authorized users can use the Secured
Users panel to delete, model (copy), and update security profiles.
The following is an example of the Secured Users panel.
TSIO0800.T ----------- BIM-EPIC - Secured Users ---------------- USER=TR91
COMMAND ===>
User ID
(MODEL)
_ $DEFSEC
User ID
(MODEL)
_ $EPIC
L = Delete
M = Model
U = Update
F1=Help F3=Return F5=Recall F6=Add
User ID
_ SJA
(MODEL)
$EPIC
F12=Exit
The Secured Users panel provides two security profiles you can use as
models for creating additional security profiles. These security profiles
are $DEFSEC and $EPIC.
Definitions
The following describes the User ID profiles displayed in the Secured
Users panel.
User ID
Definition
$DEFSEC Default security profile. $DEFSEC is supplied unsecured
and is the default security profile for all unsecured users.
Using $DEFSEC, the security administrator does not need
to define a profile for every user. To prevent unauthorized
access to the Online Manager, $DEFSEC cannot be used as
a user ID, even if the profile remains unsecured. If the
$DEFSEC setting for Bypass the Sign–On Panel is set to N,
all unsecured users are locked out of the Online Manager
unless the users know the secured ID and password.
2-62
Connectivity Systems, Inc.—Copyright © 2006
Use Pursuant to Company Instructions
User Reference
Establishing Online Security
User Reference
User ID
Definition
$EPIC
Unsecured profile. $EPIC, which cannot be modified, is
provided by the Online Manager to use as a model. After
$DEFSEC is secured, you can grant total system access to
selected users by modeling their user profiles after $EPIC.
Profiles modeled on $EPIC can be modified to create
custom security profiles. To prevent unauthorized access to
the Online Manager, you cannot use $EPIC as a user ID.
Use caution when modeling user profiles after $EPIC and
leaving the user profiles unmodified. If the user profiles are
left unmodified, a user can obtain the profile name and use
it to obtain total system access.
SJA
SJA is an example of an unsecured profile that was modeled
after $EPIC.
Connectivity Systems, Inc.—Copyright © 2006
Use Pursuant to Company Instructions
2-63
Creating Security Profiles
Creating Security Profiles
Description
You can use an existing security profile as a model when creating new
security profiles.
Procedure
To create (model) a new secured profile based on an existing security
profile:
Step
User Security
Panel
Action
1
Type SECURITY at the Online Manager command line to
display the User Security panel.
2
Type M (Model) in front of the $DEFSEC profile.
3
Press Enter to open the new profile.
4
Enter the desired user ID (USER99, for example) when
prompted for a new profile name. The list displays the new user
ID and shows that the profile was modeled on $DEFSEC. This
user ID now possess the same security attributes as $DEFSEC.
Authorized users can use the User Security panel to modify and model
security settings for a selected user ID or group ID. The User Security
panel allows users to change the security password, set user global
options for security access, and enable or disable specific DSN Catalog
management functions for a selected user ID or group ID.
The following is an example of the User Security panel.
TSIO0801.u ----------- BIM-EPIC - User Security ---------------- USER=TR91
COMMAND ===>
USER INFORMATION
UserID:
SJA
Password ===>
Verify
===>
Model
===> $EPIC
USER GLOBAL OPTIONS
Security system access
Bypass the SIGN-ON panel
VSE System option access
Profile system access
Confirmation changes?
Other users' profiles?
2-64
===>
===>
===>
===>
===>
===>
Y
Y
Y
Y
Y
Y
DSN CATALOG COMMAND ALLOWED?
Add
===> Y Clean
===>
Close
===> Y Cycle
===>
Define
===> Y Delete
===>
Display ===> Y Lock
===>
MCatalog ===> Y Move
===>
Purge
===> Y Release ===>
Rename
===> Y Retain
===>
Scratch ===> Y Transfer ===>
Unlock
===> Y Update
===>
Poolcmd: Off/Onl/Qui
===>
Connectivity Systems, Inc.—Copyright © 2006
Use Pursuant to Company Instructions
Y
Y
Y
Y
Y
Y
Y
Y
Y
Y
User Reference
Creating Security Profiles
Descriptions
The following describes the input fields for the User Security panel.
Field
Definition
Password
Specifies the user password.
An asterisk (*) at the end of the Password field or
Verify field indicates that the field has an existing
password. For privacy, neither the Password field
nor Verify field is displayed on the screen. You can
use the Model field to import security settings from
another secured user profile.
Verify
Confirms the password.
An asterisk (*) at the end of the Password field or
Verify field indicates that the field has an existing
password. For privacy, neither the Password field
nor Verify field is displayed on the screen. You can
use the Model field to import security settings from
another secured user profile.
Changing
Security
Settings
User Reference
Security system
access
Specifies whether the selected user can change
security system settings.
Bypass the
SIGN-ON panel
Specifies if Online Manager access requires a
sign-on panel.
VSE System
option access
Controls access to the BIM-EPIC processing
options.
Profile system
access
Controls access to the profile display formats.
Subsequent fields can be used to restrict users from
accessing their confirmation settings and other
profiles, if desired. Access to other profiles should
be set to N, so that profile modeling cannot be
affected by anyone besides the owner of a model
profile.
DSN CATALOG
COMMAND
ALLOWED?
Fields control access to individual DSN Catalog
management functions.
You can change the security settings using the Secured Users panel. To
change the security settings:
Step
Action
1
Type SECURITY at the Primary Option Menu to display the
Secured Users panel.
2
Tab to the selected security profile.
3
Type U (Update) in front of the selected security profile.
4
Press Enter to open the User Security panel.
5
Modify the security settings as needed.
6
Verify your changes and F6 to accept the changes.
Connectivity Systems, Inc.—Copyright © 2006
Use Pursuant to Company Instructions
2-65
Creating Security Profiles
If the security profile is modeled after an existing profile, the relationship
is removed and the Model fields should be empty.
Sign–On Panel
If a user profile requires a password to access Online Manager, the
Sign-On panel is displayed when the user enters the EPIC transaction.
The Sign-On panel prompts the user for a user ID and password. The
panel recognizes only user IDs listed on the Secured Users panel. If the
Bypass Sign-On panel is set to N in $DEFSEC, all users are locked out of
Online Manager unless they know a user ID and password.
The following is an example of the Sign-On panel.
TSIOSIGN.0 head
COMMAND ===>
BBBB
B
B
B
B
BBBB
B
B
B
B
BBBB
USER=SJA
IIIII
I
I
I
I
I
IIIII
M
M
MM
MM
M M M M
M M M
M
M
M
M
M
M
OOO
O
O
O
O
O
O
O
O
O
O
OOO
Y
Y L
Y
Y
L
Y Y
L
Y
L
Y
L
Y
L
Y
LLLLL
EEEEE
E
E
EEEE
E
E
EEEEE
BIM-EPIC - ONLINE MANAGER
User ID ===> ________
Password ===>
F1=Help
Security
Administration
F3=Return
F12=Exit
To create or change security profiles:
Step
Action
1
Type SECURITY at the Primary Option panel.
2
Press Enter to open the Secured Users panel.
3
Tab to the selected security profile.
Note:
2-66
F5=Recall
This profile should be modeled after $EPIC.
4
Type U (Update) in front of the selected security profile.
5
Press Enter to open the User Security panel.
6
Set Bypass the SIGN ON panel to N updating the new
administrator profile with password protection and enabling
password prompting.
7
Press F6 to update the rules before exiting from the modified
administrator profile. If you do not update, your changes will not
be saved and the new profile will model $EPIC.
8
Press F3 to return to the Secured Users panel.
9
Tab to $DEFSEC.
Connectivity Systems, Inc.—Copyright © 2006
Use Pursuant to Company Instructions
User Reference
Creating Security Profiles
User Reference
Step
Action
10
Type U (Update) in front of $DEFSEC.
11
Press Enter to open the new model.
12
Modify $DEFSEC to deny all system access, including security,
and catalog update functions to unsecured users.
13
Create the desired group security profiles. For example, you can
create a department profile named DEPT1 and provide the
profile with desired catalog update access for the entire
department. Using DEPT1 as your model, you can create several
key departmental user IDs reflecting the same security profiles.
Connectivity Systems, Inc.—Copyright © 2006
Use Pursuant to Company Instructions
2-67
Creating Security Profiles
2-68
Connectivity Systems, Inc.—Copyright © 2006
Use Pursuant to Company Instructions
User Reference
3
TSIDMNT—DSN CATALOG
MANAGEMENT UTILITY
BIM-EPIC provides the TSIDMNT program for managing the DSN
Catalog. You can perform the same functions using Online Manager.
Chapter Contents
TSIDMNT Command Summary
TSIDMNT Command List
User Reference
Connectivity Systems, Inc.—Copyright © 2006
Use Pursuant to Company Instructions
3-1
TSIDMNT Commands and Functions
TSIDMNT Command Summary
TSIDMNT Commands and Functions
Description
The following table provides a list of TSIDMNT commands and their
associated functions.
Command
Function
ADD
Add a version of a controlled dataset to the DSN
Catalog.
ADS
Add a new version to a controlled dataset.
CAPACITY
Display DSN Catalog utilization statistics.
CATALOG
Define a new EDD in the DSN Catalog.
CLEAN
Reset tape usage, error counts, and clean date.
CLOSE
Change status of a version from open or conditionally
cataloged to active.
CYCLE
Override the cycle control of a dataset.
DELETE
Remove a dataset and all associated versions from the
DSN Catalog—tapes are set to scratch status.
DEQ
Dequeue the DSN Catalog.
DISPLAY
Display DSN Catalog entries including BIM-EPIC
dataset definitions (EDDs), versions, and volumes.
ENQ
Enqueue the DSN Catalog.
LOCK
Lock an EDD for output or a version from input.
MCATALOG Specify that a tape dataset can be accessed by more than
one dataset name.
3-2
MOVE
Change the vault and slot locations of a tape volume.
OFFLINE
Prevent a disk volume from being accessed
ONLINE
Enable access to a disk volume.
PASSWORD
Specify or reset the system password for catalog update.
PURGE
Remove an EDD or version from the DSN Catalog. If an
EDD is removed, its associated versions will be removed
also. Tape volume serial numbers will also be deleted.
QUIESCE
Make a disk volume ineligible for use when creating
controlled datasets.
RELEASE
Enable a locked EDD or version to be used once.
RENAME
Change the name of a controlled dataset.
RETAIN
Change the expiration date, creation date, or creation
job, and/or make the version active.
Connectivity Systems, Inc.—Copyright © 2006
Use Pursuant to Company Instructions
User Reference
TSIDMNT Commands and Functions
User Reference
Command
Function
SCRATCH
Scratch a version of a dataset.
TRANSFER
Move a version from one dataset to another dataset.
UNLOCK
Unlock a locked EDD or version.
UPDATE
Change the attributes of a BIM-EPIC dataset definition
(EDD).
Connectivity Systems, Inc.—Copyright © 2006
Use Pursuant to Company Instructions
3-3
TSIDMNT Command Overview
TSIDMNT Command List
TSIDMNT Command Overview
Description
TSIDMNT commands must conform to the following syntax:
command [ 'dataset-name' ] [ parameter-expressions ]
The command must always be entered first and can be specified in full
syntax or abbreviated to the first three letters. For example, to indicate the
DISPLAY command, you can enter either DISPLAY or DIS.
Definitions
JCL
Requirements
The following describes each parameter in the command syntax.
Parameter
Definition
dataset-name
Positional. When used, it must always
follow the command and be enclosed
in apostrophes.
parameter-expressions
Can follow in any order, except where
noted otherwise. A
parameter-expression
consists of a parameter and its
value(s) joined by an equal sign (=).
These expressions must be separated
from each other using commas or
blank spaces. Numeric values are
automatically zero-filled on the left, if
required, eliminating the need to use
leading zeros.
Use TSIDMNT to scratch datasets, as necessary, and perform other
periodic catalog management tasks such as MCATALOG or CYCLE.
The following example shows how to submit TSIDMNT commands.
[// OPTION LOG]
// EXEC TSIDMNT
control-statements
.
.
/*
BIM-EPIC
Statements
3-4
Statements can be entered in columns 1 through 71 and can span up to 3
cards. To continue a statement, place a non–blank character in column 72.
Connectivity Systems, Inc.—Copyright © 2006
Use Pursuant to Company Instructions
User Reference
TSIDMNT Command Overview
Example
The following provides an example of a command syntax.
ADD ‘INVENTRY.FILE’,
SER=‘IN0192,IN2323,IN2987,IN9870,IN4573,IN1029,IN3049’
User Reference
Connectivity Systems, Inc.—Copyright © 2006
Use Pursuant to Company Instructions
X
3-5
ADD Command
ADD Command
Description
ADD creates a new version to a controlled dataset. For tape versions, the
volume serial number must not be in the BIM-EPIC Catalog unless the
ESER parameter is used. See below for information describing the ESER
parameter.
Note:
You can use CATALOG to create a new BIM-EPIC dataset definition
(EDD) for a previously uncontrolled dataset. See “CATALOG
Command” for additional information.
When a version is added that resides on an FSI Faketape device or if the
version is a TSIDOFL-created tape backup (not an offload) of a Start
Track 1 DSN, ADD must be followed by RETAIN. See the “RETAIN
Command” for additional information.
You can use ADD to add a new version that was created outside
BIM-EPIC control or to recatalog a deleted version. Once a dataset is
controlled, all new versions created under BIM-EPIC are added to the
DSN Catalog automatically.
BIM-EPIC resequences version numbers as you add new versions. For
example, if you add a new version, the previous version 1 becomes
version 2, version 2 becomes version 3, and so on. To add more than one
version in a specific sequence, you must add the oldest version first and
the newest version last.
It is possible for some versions of a tape dataset to have standard labels,
while other versions are unlabeled. When you add a tape version to the
DSN Catalog, the entry automatically receives the label type specified in
the “owning” EDD. If a particular tape label type differs from the label
for the specified EDD, use UPDATE to temporarily modify the EDD
label type, then use ADD to add the new tape version. When the version
has been added, you can change the EDD back to the previous label type.
If an Automated Cartridge Library (ACL) is supported, ADD sets the tape
volume to non-scratch status in the ACL inventory. This is done because
the version is in “active” status in the BIM-EPIC catalog.
!
WARNING:
If the VTOC entry for a disk dataset has been deleted, ADD does
not recreate it. As long as the VTOC entry is deleted, that disk
space is free and can be reused for another dataset. If this occurs,
do the following tasks:
3-6
Ensure that the disk space, previously occupied by the
VTOC, has not been reused.
Connectivity Systems, Inc.—Copyright © 2006
Use Pursuant to Company Instructions
User Reference
ADD Command
Syntax
Use TSIDVUT PACKSCAN ADD to recreate the VTOC
entry as soon as possible.
Use ADD to add the version to the DSN Catalog.
The following provides an example of the ADD command syntax.
ADD
Parameters
'dataset-name'
SER=volser1,volser2,....,volser23
ESER=volser1,volser2,....,volsern
VOL=volser,start-track,tracks,...
EVOL=volser,start-track,tracks,...
[ ,VER=n ]
[ ,GEN=n ]
[ ,FIL=n ]
[ ,BLK=n ]
[ ,OFL=1 ]
The following provides a description of the parameters you can use with
ADD.
Parameter
Required?
Valid Entry
Default
dataset-name
Yes
1 to 44 characters
None
Specify one of the following (required):
SER (or ESER) No
1 to 6 characters
None
VOL (or EVOL) No
1 to 6 characters
None
Specify one of the following (optional):
VER
No
1 to 999
1
GEN
No
1 to 999999
None
Specify any combination of the following (optional):
Definitions
FIL
No
2 to 255
None
BLK
No
1 to 65535|MAX|OPT
None
OFL
No
1
None
The following provides definitions for the parameters you can use with
ADD.
Parameter
Definition
dataset-name Specifies the name of the dataset that will contain
the new version.
SER/ESER
User Reference
Use for tape versions. Specifies the volume serial
number(s) on which this version is written. Specify
the volume serial numbers of multi–volume datasets
in reel sequence order. Use the ESER parameter
instead of SER when a version is written on more
than 23 tapes. You can also use ESER to add tapes
to a version that is already in the DSN Catalog.
Connectivity Systems, Inc.—Copyright © 2006
Use Pursuant to Company Instructions
3-7
ADD Command
Parameter
Definition
VOL/EVOL
Use for disk versions. Specifies the extents the
version occupies. The volume serial number
specifies the volume that contains the extent. VOL
subparameters are positional. If there are multiple
extents, repeat the subparameters in extent
sequence. Use EVOL instead of VOL if the version
has more than 10 extents. You must also use EVOL
to add extents to a version that is already in the DSN
Catalog. Supply extent information using the same
process as VOL.
Note: For both VOL and EVOL, TSIDMNT does
not access the disk volume(s) to determine whether
the version exists or whether the extents match the
extents you specify.
VER
Use to assign a specific version number to the
dataset. If VER is not specified, VER=1 is assumed.
GEN
Use to specify the absolute generation number for
the dataset. You cannot use a generation number
that is already assigned to an existing version.
However, you can specify a previously used
generation number from a version that has been
deleted. To assign a new (never used) generation
number, the number must be greater than the next
generation number scheduled to be created. For
example, if the highest current generation number,
usually assigned to version 1, is 000120, specify a
new generation number of 000122 or greater. The
new version is always version 1.
FIL
Specifies the file sequence number if the version of
a tape dataset is not the first dataset in a
multi–dataset group.
BLK
Specifies the block size of the current version of the
dataset. Block size options are:
OFL=1
3-8
MAX sets the block size to full track capacity
for disk datasets and for tape datasets—64K for
VSE/ESA 2.5 and later, or 32K for earlier VSE
releases.
OPT sets the block size to half track capacity
for disk and for tape—32K for VSE/ESA 2.5
and later, or 16K for earlier VSE releases.
Use to identify the version as an offload version.
While it is not recommended that you purge offload
datasets, you can use the OFL parameter to assign
offload status to a disk dataset that has been added
to the catalog.
Connectivity Systems, Inc.—Copyright © 2006
Use Pursuant to Company Instructions
User Reference
ADD Command
Examples
The following example adds version number 3 to the
PAYROLL.MASTER dataset. Version 3 is on tapes PY1234 and PY2764
with a block size of 10000.
ADD 'PAYROLL.MASTER',VER=3,BLK=10000,SER=PY1234,PY2764
The following example adds version number 1 to the INVENTRY.237
dataset. Version 1 is on tape E93837.
ADD 'INVENTRY.237',SER=E93837
The ADD statement is all one line with an * at the end. The VOL
statement is indented a few spaces.
The following example adds a multi-extent disk file. It does NOT create
the VTOC entry. Use TSIDVUT PACKSCAN as described above to
complete this task.
ADD 'PAYROLLTEST' VER=1 BLK=18620
VOL=CKD001,45,90,CKD001,165,300
User Reference
Connectivity Systems, Inc.—Copyright © 2006
Use Pursuant to Company Instructions
*
3-9
ADS Command
ADS Command
Description
ADS adds a new tape version to a controlled dataset. The volume serial
numbers (volsers) must be in the BIM-EPIC catalog and in scratch status
to use the ADS command.
ADS cannot be used for Faketape volume serial numbers. Use PURGE
and ADD to accomplish the desired action.
BIM-EPIC resequences version numbers as you add new versions. For
example, if you add a new version, the previous version 1 becomes
version 2, version 2 becomes version 3, and so on. To add more than one
version in a specific sequence, you must add the oldest version first, then
the newest version last.
It is possible for some versions of a tape dataset to have standard labels,
while other versions are unlabeled. When you add a tape version to the
DSN Catalog, the entry automatically receives the label type in the
BIM-EPIC dataset definition (EDD). If a particular tape label type differs
from the EDD label type, use UPDATE to modify the EDD label type
temporarily. You can use ADS to add the new tape version and then
change the EDD back to the previous label type.
If an Automated Cartridge Library (ACL) is supported, ADD sets the tape
volume to non-scratch status in the ACL inventory.
Syntax
The following provides an example of the ADS command syntax.
ADS
Parameters
'dataset-name' SER=volser1,volser2,....,volser23
ESER=volser1,volser2,....,volsern
[ ,VER=n ]
[ ,GEN=n ]
[ ,FIL=n ]
[ ,BLK=n ]
[ ,OFL=1 ]
The following provides a description of the parameters you can use with
ADS.
Parameter
Required?
dataset-name Yes
Valid Entry
Default
1 to 44 characters
None
Specify one of the following (required):
1 to 6 characters
None
1 to 6 characters
No
Specify one of the following (optional):
None
SER
No
ESER
3-10
VER
No
1 to 999
1
GEN
No
1 to 999999
None
Connectivity Systems, Inc.—Copyright © 2006
Use Pursuant to Company Instructions
User Reference
ADS Command
Parameter
Required?
Valid Entry
Default
Specify any combination of the following (optional):
Definitions
FIL
No
2 to 255
None
BLK
No
1 to 65535|MAX|OPT
None
OFL
No
1
None
The following provides definitions for the parameters you can use with
ADS.
Parameter
Definition
dataset-name Specifies the name of the dataset to which the new
version belongs.
User Reference
SER/ESER
Specifies the tape volume serial number(s) on
which this version is written. Specify the volume
serial numbers of multi–volume datasets in reel
sequence order. Use the ESER parameter instead of
SER when a version is written on more than 23
tapes. You can also use ESER to add tapes to a
version that is already in the DSN Catalog.
VER
Use to assign a specific version number to the
dataset. If VER is not specified, VER=1 is assumed.
GEN
Use to specify the absolute generation number for
the dataset. You cannot use a generation number
that is already assigned to an existing version.
However, you can specify a previously used
generation number from a version that has been
deleted. To assign a new (never used) generation
number, the number must be greater than the next
generation number scheduled to be created. For
example, if the highest current generation number is
000120, specify a new generation number of
000122 or greater. The new version is always
version 1.
FIL
Specifies the file sequence number if this version of
a tape dataset is not the first dataset in a
multi–dataset group.
Connectivity Systems, Inc.—Copyright © 2006
Use Pursuant to Company Instructions
3-11
ADS Command
Parameter
Definition
BLK
Specifies the block size of this version of the
dataset. Block size options include:
OFL=1
Examples
MAX sets the block size to full track
capacity for disk datasets and for tape
datasets—64K for VSE/ESA 2.5 and later,
or 32K for earlier VSE releases.
OPT sets the block size to half track
capacity for disk and for tape—32K for
VSE/ESA 2.5 and later, or 16K for earlier
VSE releases.
Use to identify the version as an offload version.
While it is not recommend that you purge offload
datasets, the OFL parameter can be used to assign
offload status to a disk dataset that has been added
to the catalog.
The following example adds version number 3 to the
PAYROLL.MASTER dataset. Version 3 is on tapes PY1234 and
PY2764, with a block size of 10000.
ADS 'PAYROLL.MASTER',VER=3,BLK=10000,SER=PY1234,PY2764
The following example adds version number 1 to the INVENTRY.237
dataset. Version 1 is on tape E93837.
ADS 'INVENTRY.237',SER=E93837
3-12
Connectivity Systems, Inc.—Copyright © 2006
Use Pursuant to Company Instructions
User Reference
CAPACITY Command
CAPACITY Command
Description
CAPACITY displays DSN Catalog usage. The DSN Catalog usage is
displayed as both the number of active/free records and as a percentage of
catalog space.
Syntax
The following provides an example of the CAPACITY command syntax.
CAPACITY
Example
(no parameters)
The following is an example of a CAPACITY display.
119 TOTAL
119 CAPACITY
119 4560
User Reference
CATALOG UTILIZATION
ACTIVE
FREE
PCT
959
3601
21
Connectivity Systems, Inc.—Copyright © 2006
Use Pursuant to Company Instructions
INDEX UTILIZATION
ACTIVE
FREE
PCT
560
4000
12
3-13
CATALOG Command
CATALOG Command
Description
CATALOG creates a new BIM-EPIC dataset definition (EDD) in the
DSN Catalog. After the EDD has been created, versions can be created by
running jobs that specify this dataset name in JCL or by using ADD.
Syntax
The following provides an example of the CATALOG command syntax.
CATALOG
'dataset-name'
[ ,AGP=YES|NO ]
[ ,ALR=n ]
[ ,BLK=n|MAX|OPT]
[ ,CIZ=n]
[ ,COM='comment' ]
[ ,COP='existing-dataset-name' ]
[ ,CYC=n ]
[ ,DEC=NO|password ]
[ ,DLA=n ]
[ ,EX2=n ]
[ ,EXT=n ]
[ ,LBL=YES|NO ]
[ ,MOD=<see mode table below> ]
[ ,NSU='prime-dataset-name' ]
[ ,OWN=xx ]
[ ,POL=poolname ]
[ ,PWD=password ]
[ ,RET=n|PERM ]
[ ,REV=NO|YES ]
[ ,SEC=NO|n ]
[ ,SID=NO|xx ]
[ ,SIZ=SMALL|LARGE ]
[ ,SYSnnn ]
[ ,TPA=NO|YES ]
[ ,TPL=x|NO ]
[ ,UID=NO|xx ]
[ ,VLT=n ]
[ ,WRK=NO|YES ]
There are two additional parameters. They can only be used in the
UPDATE command, but are listed here for the sake of "completeness."
Please refer to the UPD section for their descriptions.
The parameters are:
Parameters
DPW - Password for use with ENC
ENC - Encryption type
The following provides a description of the common parameters you can
use with CATALOG.
Parameter
Required?
dataset-name Yes
BLK
3-14
No
Valid Entry
Default
1 to 44 characters or if
Generation – 1-35
None
NO|1 to
65535|MAX|OPT
NO
Connectivity Systems, Inc.—Copyright © 2006
Use Pursuant to Company Instructions
User Reference
CATALOG Command
Definitions
Parameter
Required?
Valid Entry
Default
COM
No
1 to 30 characters
None
COP
No
1 to 44 characters
None
CYC
No
0 to 999
None
DLA
No
1 to 9999
None
PWD
No
1 to 8 characters
NO
RET
No
1 to 9999|PERM
None
SID
No
NO|2 characters
NO
SYSnnn
No
000 to 253
000
UID
No
NO|2 characters
NO
WRK
No
YES|NO
NO
The following provides definitions for the common parameters you can
use with CATALOG.
Parameter
Definition
dataset-name Use to locate a BIM-EPIC dataset definition (EDD)
in the DSN Catalog. The dataset name must be
unique. Generation dataset names can be a
maximum of 35 characters long. BIM-EPIC uses
the trailing nine characters for the Generation
Number.
Note: When adding CPU and
partition–independent datasets, the dataset name
must contain the specific CPU and partition IDs.
For example, to use the dataset name
===.SORTWK1 on a DLBL in a job that will run
on CPU 4 in the BG partition, specify the dataset
name BG4.SORTWK1. You might want to consider
using Common Work Datasets (CWDS) instead.
CWDS require only one definition instead of one
definition per partition and per CPU. For example,
$$$.SORTWK1 will create a uniquely-identified
work dataset name in any CPU/partition
combination.
User Reference
BLK
Specifies the maximum output file block size to be
used. When the file is opened for output, the actual
block size used will be the largest possible value not
exceeding the BLK value. This parameter is
mutually exclusive with the disk CIZ parameter. If
both parameters are specified for the same dataset
definition, the last parameter specified will be used.
COM
Use to make comment notes about the use of a
dataset. The comment can be deleted by specifying
COM=' '.
Connectivity Systems, Inc.—Copyright © 2006
Use Pursuant to Company Instructions
3-15
CATALOG Command
Parameter
Definition
COP
Use to define a new dataset that is similar to a
previously cataloged dataset. You must specify the
COP parameter immediately following the dataset
name. Any parameters specified before the COP
parameter will be ignored. You can specify
additional parameters after the COP parameter if
you need to change the copied attributes.
CYC
Specifies the number of cycles (versions) to retain.
See the note below for additional information.
DLA
Specifies the number of days to retain the dataset
after its last access date. See the note below for
additional information.
PWD
Use to:
Protect the dataset from unauthorized
UNLOCK or RELEASE actions.
Allow the UPDATE ENC parameter to be
specified. For details refer to the UPDATE
command later in this chapter.
If NO is specified, UNLOCK and RELEASE
actions are not restricted and an encryption
algorithm cannot be specified.
If a password is specified, UNLOCK and
RELEASE actions require the password to be
specified, and if the BIM-EPIC Dr.Crypto feature is
used, an encryption algorithm can be specified with
the ENC parameter of the UPDATE command.
3-16
RET
Specifies the number of days to retain the dataset
after its creation date. See the note below for
additional information.
SID and UID
Use to group a dataset with other datasets for
catalog functions. If you specify SID=NO or
UID=NO, the ID is inactive.
SYSnnn
Specifies a logical unit number to use for the
dataset. Using the SYSnnn parameter inhibits the
BIM-EPIC automatic LUB allocation feature. If you
specify SYS000, BIM-EPIC will select the LUB to
be used. In modern VSE this facility is rarely
needed. The default 000 is recommended.
WRK
Specifies whether this is a generation dataset
(WRK=NO) or a non–generation dataset
(WRK=YES). See the note below for additional
information.
Connectivity Systems, Inc.—Copyright © 2006
Use Pursuant to Company Instructions
User Reference
CATALOG Command
Note:
RET, CYC, DLA, and WRK (Retention Days, Cycles Retention, DLA
Retention, and Generation or Work) work together to determine dataset
retention. These are some of the most important attributes of any dataset.
You must carefully make your selection. RET, CYC, and DLA criteria
must be satisfied before a version can be automatically scratched by
TSIDUTL SCRATCH.
Parameters
Definitions
User Reference
The following provides a description of the tape parameters you can use
with CATALOG.
Parameter
Required?
Valid Entry
Default
DEC
No
1 to 8 characters
None
LBL
No
YES|NO
YES
MOD
No
<see mode table below>
None
NSU
No
1 to 17 characters
None
OWN
No
1 to 2 characters
None
REV
No
YES|NO
NO
SIZ
No
LARGE|SMALL
LARGE
TPA
No
YES|NO
NO
TPL
No
1 character
NO
VLT
No
1 to 255
None
The following provides definitions for the tape parameters you can use
with CATALOG.
Parameter
Definition
DEC
Use to enter an encryption password if the tape
version data is to be encrypted by BIM-EPIC at the
time of creation. The encryption password cannot
be added, changed, or deleted once it is entered in a
BIM-EPIC dataset definition. This password will
not be re-entered at anytime after the initial entry.
LBL
Specifies how a tape is labeled. Indicate LBL=NO
for unlabeled. Indicate LBL=YES for standard
labeled.
Connectivity Systems, Inc.—Copyright © 2006
Use Pursuant to Company Instructions
3-17
CATALOG Command
Parameter
Definition
MOD
Specifies the tape density.
densities supported for 3480/3490 devices:
00—Buffered write mode
08—Buffered write mode with IDRC
20—Unbuffered write mode
28—Unbuffered write mode with IDRC
densities supported for 8809/9347 devices:
30—High speed / short gap
50—Low speed / long gap
60—Low speed / short gap
90—High speed / long gap
densities supported for 3424/9348 devices:
42—Buffered write mode 1600 bpi
62—Unbuffered write mode 1600 bpi
C2—Buffered write mode 6250 bpi
E2—Unbuffered write mode 6250 bpi
densities supported for 3410/3420/3422/3430
devices:
D0—6250 bpi
C0—1600 bpi
C8—800 bpi
densities supported for 3490E devices:
F0—Buffered write mode (3490E)
F8—Buffered write mode with IDRC (3490E)
Internally, BIM-EPIC uses modes F0 and F8 to
distinguish 3490E tape cartridge drives from
3480/3490. Because VSE/ESA does not recognize
these modes, BIM-EPIC sends mode 00 or mode 08
to the 3490E tape cartridge drives whenever mode
F0 or mode F8 is specified.
densities supported for 3590 TPA devices:
00-07—Buffered model dependent formats
08-0F—Buffered compressed model dependent
formats
20-27—Unbuffered, like densities 00-07
28-2F—Unbuffered, like densities 08-0F
Density 08 should be used for performance reasons.
The following coding must be used for 3592
devices:
TPA=YES MOD=31
3-18
Connectivity Systems, Inc.—Copyright © 2006
Use Pursuant to Company Instructions
User Reference
CATALOG Command
Parameters
User Reference
Parameter
Definition
NSU
Specifies the dataset tape versions are part of a
multi–dataset group. You must enter the name of
first dataset on the tape. This dataset is referred to as
the prime dataset elsewhere in BIM-EPIC
documentation. The datasets that specify NSU are
referred to as subdatasets. If used, the NSU
parameter must be specified when the dataset is first
cataloged. BIM-EPIC does not allow the addition of
a prime dataset name to an existing BIM-EPIC
dataset definition.
OWN
Specifies the Owner ID. If you specify a tape pool,
make sure the Owner ID falls within the tape pool
range. If you specify OWN=NO, no Owner ID is
used.
REV
Regulates tape selection for output tapes. Revolving
tape volumes and revolving tape datasets have an
exclusive relationship. A revolving tape volume can
be used only for the dataset it is assigned to. A
revolving tape version can be written only on tape
volumes that are assigned to the revolving dataset
via the ADD or ADS function. If you use ADD to
assign a volume to the dataset, the volume must
then be set to scratch status before it can be used for
output. Revolving tape datasets cannot be used in an
Automated Cartridge Library (ACL).
SIZ
Specifies a tape size.
TPA
Specifies whether versions are to be written to and
read from TPA device types. Specify TPA=NO for
non-TPA devices. Specify TPA=YES for TPA
devices. If MOD is set for a TPA device, TPA=YES
must be coded before the MOD parameter.
TPL
Specifies a tape pool ID.
VLT
Specifies a vault method number if this dataset
name is to participate in the BIM-EPIC Vaulting
facility.
Although disk information is meaningful only to BIM-EPIC, disk
information can be updated from CA-EPIC for CMS. The following
provides a description of the disk parameters you can use with
CATALOG.
Parameter
Required?
Valid Entry
Default
AGP
No
Yes or NO
NO
ALR
No
1 to 99999
None
CIZ
No
NO|512 to 32768
None
Connectivity Systems, Inc.—Copyright © 2006
Use Pursuant to Company Instructions
3-19
CATALOG Command
Definitions
3-20
Parameter
Required?
Valid Entry
Default
EXT
No
1 to 999999
DEFEXT value
EX2
No
0 to 999999
50% of EXT
POL
No
1 to 6 characters
None or
DEFPOL value
SEC
No
0 to 255
255
The following provides definitions for the disk parameters you can use
with CATALOG.
Parameter
Definition
AGP
Specifies if dataset retention is controlled by the
Automatic Generation Purge feature.
ALR
Specifies that disk space allocation for a version is done
on the basis of the number of logical records expected to
be written. Specifying allocation by the number of
logical records overrides the primary extent size
indicated by the EXT parameter, if both parameters are
specified. ALR cannot be used if files are created under
DTFPH conditions (Physical IOCS).
CIZ
Specifies the desired control interval size used when
allocating an FBA DASD file. You should avoid this
parameter when using CKD DASD files.The CIZ value
specified will be adjusted to an even multiple of 512. In
addition, CIZ will override reblocking and is mutually
exclusive with BLK. If both parameters are specified for
the same dataset definition, the last parameter specified
will be used.
EXT
Specifies the primary extent size in blocks or tracks. The
minimum size is 3 tracks for CKD devices or the value
specified in the CIZ parameter for FBA devices. If the
default extent configuration option (DEFEXT=) is set to
a non-zero value for your installation, you can use that
setting as a default primary extent and omit the EXT
parameter in the EDD definition.
EX2
Specifies the secondary extent size which defaults to
half of the size of the primary extent. The minimum
extent size is three tracks for CKD devices or the value
specified in the CIZ parameter for FBA devices.
POL
Specifies a disk pool name if disk versions are to be
created. Only disk pool names defined in the TSIDPOL
macro can be used. If the default disk pool configuration
option is (DEFPOL=) for your installation, you can use
that setting as a default disk pool and omit the POL
parameter in the EDD definition.
Connectivity Systems, Inc.—Copyright © 2006
Use Pursuant to Company Instructions
User Reference
CATALOG Command
Examples
Parameter
Definition
SEC
Specifies the maximum number of secondary extents
that can be allocated for a version. If SEC=NO (default)
is specified, 255 secondary extents are allowed. To
inhibit all secondary allocations, specify SEC=0 (zero).
The following example catalogs the PAYROLL.MASTER dataset. This
example includes copying dataset attributes from the AP.MASTER
dataset and changing the dataset password to PASSWORD.
CATALOG 'PAYROLL.MASTER',COP='AP.MASTER',PWD='PASSWORD'
The following example catalogs the BALANCE.BUDGET dataset. This
example includes setting day retention to 3 and setting days last accessed
retention to 3. Disk datasets are written in disk pool POOLA1 with a
primary extent size of 20 and maximum secondary extents of 3.
CAT 'BALANCE.BUDGET',RET=3,DLA=3,POL=POOLA1,EXT=20,SEC=3
The following example results in BIM-EPIC retaining three versions of
the BALANCE.BUDGET dataset at all times. When a new version is
created, the oldest version is automatically deleted at end–of–job.
CAT 'BALANCE.BUDGET',CYC=3,AGP=YES...
User Reference
Connectivity Systems, Inc.—Copyright © 2006
Use Pursuant to Company Instructions
3-21
CLEAN Command
CLEAN Command
Description
CLEAN records tape cleaning. CLEAN sets the use count and error count
for cleaned tapes to zero (0).
Syntax
The following provides an example of the CLEAN command syntax.
CLEAN
Parameters
Definition
Example
SER=volser1,volser2,...
The following provides a description of the parameters you can use with
CLEAN.
Parameter
Required?
Valid Entry
Default
volsern
Yes
1 to 6 characters
None
The following provides the definition for the parameter you can use with
CLEAN.
Parameter
Definition
volsern
Specifies the volume serial numbers of the cleaned
tapes.
The following example records the cleaning of tapes A38472, A94874,
and 857594.
CLEAN SER=A38472,A94874,857594
3-22
Connectivity Systems, Inc.—Copyright © 2006
Use Pursuant to Company Instructions
User Reference
CLOSE Command
CLOSE Command
Description
CLOSE changes only the DSN Catalog status of a version. CLOSE does
not perform VSE close processing, such as writing tape or disk labels.
BIM-EPIC accesses only active versions of a dataset. Datasets that are in
open status or conditionally cataloged status cannot be accessed for
reading and writing. Closed datasets become eligible for scratch
differently than active datasets. To access or activate an open or
conditionally cataloged dataset, you must use CLOSE.
Depending on the program processing condition that caused the Open or
Conditionally Catalog status to occur, data on the closed version may be
incomplete. If this is the case, the version should be scratched
immediately after closing to prevent accidental use as input.
If an Automated Cartridge Library (ACL) is supported, CLOSE sets the
tape volume to non–scratch status in the ACL inventory.
Syntax
The following provides an example of the CLOSE command syntax.
CLOSE
Parameters
'dataset-name' [ ,SER=volser ] [ ,GEN=nnn ]
The following provides a description of the parameters you can use with
CLOSE.
Parameter
Required?
dataset-name Yes
Definitions
Valid
Default
1 to 44 characters
None
SER
No
1 to 6 characters
None
GEN
No
1 to 999999
None
The following provides definitions for the parameters you can use with
CLOSE.
Parameter
Definition
dataset-name Specifies the name of the dataset.
SER
Specifies the tape volume serial number.
GEN
Specifies the generation number of a disk dataset.
If neither SER nor GEN is specified, BIM-EPIC closes the most recently
created version of the dataset.
Example
The following example closes the BATCH.BALANCE dataset.
CLOSE 'BATCH.BALANCE'
User Reference
Connectivity Systems, Inc.—Copyright © 2006
Use Pursuant to Company Instructions
3-23
CYCLE Command
CYCLE Command
Description
CYCLE is a special command for overriding the normal Cycles Retention
(CYC) of a dataset. CYCLE causes one version to be removed from the
Cycles Retention logic. The cycled version is scratched only on the basis
of the retention period. For example, you might use the cycled version to
isolate the correct balance sheet from a series of trial balance runs.
CYCLE looks very similar to RETAIN. Both commands affect a single
version, but a retained version continues to participate in any cycle
retention that is defined for the dataset, while a cycled version does not.
When you use CYCLE, the version is:
Removed from Cycles Retention for the dataset. As a result, the
version no longer counts as a version in the cycle retention logic.
Retained until the expiration date you specify.
For example, if the dataset has CYC=3 retention and you CYCLE one
version, BIM-EPIC maintains four versions until the cycled version
reaches its expiration date, the cycled version plus three normal versions.
Versions which have been cycled in the past are retained until their
expiration date.
CYCLE also allows you to change the creation date and the creation job
name. These two fields have no effect on dataset retention.
If ENC has been used to specify an encryption algorithm for this dataset,
CYCLE will not change the Creation Date or Job Name. See UPDATE
Command for additional information.
Syntax
The following is an example of the CYCLE command syntax.
CYCLE 'dataset-name',{VER=n|SER=volser|GEN=n}
{,EXD=yyyyddd|,DAY=n|,CDT=yyyyddd|,JOB=new-name}
Parameters
The following provides a description of the parameters you can use with
CYCLE.
Parameter
Required?
Valid Entry
Default
dataset-name
Yes
1 to 44 characters None
Specify one of the following (required):
3-24
VER
No
1 to 999
None
SER
No
1 to 6 characters
None
GEN
No
1 to 999999
None
Connectivity Systems, Inc.—Copyright © 2006
Use Pursuant to Company Instructions
User Reference
CYCLE Command
Parameter
Required?
Valid Entry
Default
Specify at least one of the following (required):
Definitions
EXD
No
1900001 to
2099366
None
DAY
No
1 to 999
None
CDT
No
1900001 to
2099366
None
JOB
No
1 to 8 characters
None
The following provides definitions for the common parameters you can
use with CATALOG.
Parameter
Definition
dataset-name Specifies the dataset name.
Example
VER
Specifies the version number.
SER
Specifies the volume serial number of the first (or
only) volume of a tape version.
GEN
Specifies the generation number of a disk version.
EXD
Specifies the new expiration date of the cycled
version. If neither an expiration date nor period
retention is specified, the version is retained
according to the period retention established in the
dataset defaults. Dates should be specified in Julian
format with a 4–digit year followed by a 3–digit
day, for example January 1, 2005 would be entered
as 2005001.
DAY
Specifies period retention. BIM-EPIC calculates the
expiration date as the current date plus the number
of days entered.
CDT
Specifies a new creation date. CDT has no effect on
when a dataset expires. Dates should be specified in
Julian format with a 4–digit year followed by a
3–digit day, for example January 1, 2005 would be
entered as 2005001.
JOB
Changes the name of the job that created the
associated version. JOB has no effect on when a
dataset expires.
The following example cycles the AGED.TRIAL.BALANCE dataset,
setting apart version 3 with a 7–day retention and changing the creating
job name to TRIALBAL.
CYCLE 'AGED.TRIAL.BALANCE',VER=3,DAY=7,JOB=TRIALBAL
User Reference
Connectivity Systems, Inc.—Copyright © 2006
Use Pursuant to Company Instructions
3-25
DELETE Command
DELETE Command
Description
DELETE removes a dataset and all associated versions from the DSN
Catalog and from BIM-EPIC control. All tapes associated with the dataset
become scratch tapes and are listed under the dataset name ** DSN
DELETED ** on BIM-EPIC reports and Online Manager panels. Disk
space allocated to the dataset is freed.
If an Automated Cartridge Library (ACL) is supported, DELETE sets the
tape volume to scratch status in the ACL inventory.
!
Syntax
WARNING:
Encrypted datasets must not be deleted from the DSN Catalog if
you ever plan to use them again as input. Once an encrypted
dataset definition is deleted, it cannot be decrypted and will be
unreadable.
The following provides an example of the DELETE command syntax.
DELETE
Parameters
'dataset-name
The following provides a description of the parameters you can use with
DELETE.
Parameter
Required?
dataset-name Yes
Definition
Valid Entry
Default
1 to 44 characters
None
The following provides definitions for the common parameters you can
use with CATALOG.
Parameter
Definition
dataset-name Specifies the dataset name to be deleted.
Example
The following example deletes the dataset
AP.BATCH.BALANCE.TEST.
DEL 'AP.BATCH.BALANCE.TEST'
3-26
Connectivity Systems, Inc.—Copyright © 2006
Use Pursuant to Company Instructions
User Reference
DEQ Command
DEQ Command
Description
DEQ dequeues the DSN Catalog after it has been enqueued with ENQ.
In CA-EPIC for CMS, the DEQ command is only meaningful when
sharing a BIM-EPIC DSN Catalog.
Syntax
The following provides an example of the DEQ command syntax.
DEQ
User Reference
(no parameters)
Connectivity Systems, Inc.—Copyright © 2006
Use Pursuant to Company Instructions
3-27
DISPLAY Command
DISPLAY Command
Description
DISPLAY displays entries in the DSN Catalog. DISPLAY lists all
cataloged information about a dataset and all associated versions. If a
version resides on multiple volumes or extents, each volume or extent has
a separate line in the display. Scratched tape versions continue to be
displayed until the tapes are used to write other datasets.
Most of the items listed in the reports are self–explanatory. However, the
ST (file status) column heading and the TYPE (file type) column heading
require additional explanation.
The ST column displays codes indicating the status of a dataset. The valid
status codes are:
(blank) specifies active version.
C specifies conditional catalog status.
L specifies active version in a locked status.
M specifies MCAT version.
O specifies open status.
S specifies scratch status.
The TYPE column lists dataset types. There are three dataset types:
TAPE and DISK specify the type of media used.
EMPTY specifies that the dataset has been cataloged, but
contains no versions.
A dataset is empty when it is first cataloged, before any versions are
created. A dataset can also be empty if all associated versions have been
scratched and all tapes have been reused.
Syntax
The following provides an example of the DISPLAY command syntax.
DISPLAY
[
[
[
[
[
[
[
[
[
[
3-28
{'dataset-name'|SER=volser|ALL|'string.ALL'}
,ACTIVE ]
,DSK | TAP ]
,DSN ]
,JOB=creation-jobname ]
,NEW ]
,POL=poolname ]
,PULL ]
,SCRATCH ]
,SID=xx ]
,UID=xx ]
Connectivity Systems, Inc.—Copyright © 2006
Use Pursuant to Company Instructions
User Reference
DISPLAY Command
Parameters
The following provides a description of the parameters you can use with
DISPLAY.
Parameter
Required?
Valid Entry
Default
Specify one of the following (required):
dataset-name
[DPW=password]
No
1 to 44 characters
[1-8 characters]
None
SER
No
1 to 6 characters
None
ALL
No
ALL
None
string.ALL
No
1 to 44 characters
None
Specify one of the following (optional):
DSK
No
DSK
OFF
TAP
No
TAP
OFF
Specify any combination of the following (optional):
Definitions
ACTIVE
No
ACTIVE
OFF
DSN
No
DSN
OFF
JOB
No
1 to 8 characters
None
NEW
No
NEW
OFF
POL
No
1 to 8 characters
None
PULL
No
PULL
OFF
SCRATCH
No
SCRATCH
OFF
SID
No
2 characters
None
UID
No
2 characters
None
The following provides definitions for the parameters you can use with
DISPLAY.
Parameter
Definition
dataset-name Requests a detailed display of the dataset named. If
[DPW=password] the dataset version has been encrypted with the
BIM-EPIC Dr.Crypto feature, DPW=password will
display the encryption method that was specified by
the UPDATE ENC parameter. The password used
in DPW must be the same as the password specified
in the PWD parameter. See CATALOG Command
for additional information.
User Reference
SER
Requests a detailed display of the contents for the
tape volume specified.
ALL
Requests a summary display of all datasets and
entries in the DSN Catalog. ALL is the default when
you specify any optional parameters.
string.AL
Requests a summary display of all datasets
beginning with the specified character string.
Connectivity Systems, Inc.—Copyright © 2006
Use Pursuant to Company Instructions
3-29
DISPLAY Command
Examples
Parameter
Definition
ACTIVE
Displays only active versions.
DSK
Displays only disk versions.
DSN
Displays only dataset names, set summaries are
omitted.
JOB
Displays the latest version of all datasets that were
created by the specified job name. JOB also
displays any open or conditionally cataloged
datasets created by that job since the latest version
was created.
NEW
Displays all datasets that have been created since
the last execution of TSIDUTL DSPLY NEW.
POL
Displays only datasets from the specified disk pool.
PULL
Displays only the latest version. Place PULL after
the ALL parameter or string.ALL parameter, for
example: DIS 'PB.PAY.ALL',PULL.
SCRATCH
Displays only scratch tapes.
SID
Displays only those datasets with the specified
system ID. If used, the SID parameter or UID
parameter must be the last parameter in the
command.
TAP
Displays only tape versions.
UID
Displays only those datasets with the specified user
ID. If used, the SID parameter or UID parameter
must be the last parameter in the command.
The following example produces a summary display of all active datasets
with the creation job name of AR8000.
DISPLAY ALL,ACTIVE,JOB=AR8000
The following example produces a summary display of all the scratched
versions of datasets that begin with the character string SDR3.
DIS 'SDR3.ALL',SCRATCH
The following example displays a detailed display of the AP.BALANCE
dataset.
DIS 'AP.BALANCE'
3-30
Connectivity Systems, Inc.—Copyright © 2006
Use Pursuant to Company Instructions
User Reference
ENQ Command
ENQ Command
Description
ENQ enqueues the DSN Catalog and prevents access to the catalog by
jobs running in other partitions or CPUs. To enqueue a DSN Catalog that
is shared by two or more CPUs, you must specify MULTCPU=YES as a
configuration option.
In CA-EPIC for CMS, ENQ is meaningful only when sharing a
BIM-EPIC DSN Catalog.
Syntax
The following provides an example of the ENQ command syntax.
ENQ
User Reference
(no parameters)
Connectivity Systems, Inc.—Copyright © 2006
Use Pursuant to Company Instructions
3-31
LOCK Command
LOCK Command
Description
LOCK locks a dataset or version. If you do not specify a version, volume
serial number, or generation number, the BIM-EPIC dataset definition
(EDD) is locked for output. BIM-EPIC does not permit additional
versions to be created until you release or unlock the EDD. If you do
specify a version, volume serial number, or generation number, only that
version of the dataset is locked for input, which means that the version
cannot be read until you release or unlock it.
Syntax
The following provides an example of the LOCK command syntax.
LOCK
Parameters
'dataset-name'
[VER=n|SER=volser|GEN=n]
The following provides a description of the parameters you can use with
LOCK.
Parameter
Required?
dataset-name Yes
Valid Entry
Default
1 to 44 characters
None
Specify one of the following (optional):
Definitions
VER
No
1 to 999
None
SER
No
1 to 6 characters
None
GEN
No
1 to 999999
None
The following provides definitions for the parameters you can use with
LOCK.
Parameter
Definition
dataset-name Specifies the name of the dataset to be locked.
Example
VER
Specifies the version number.
SER
Specifies the volume serial number of the first (or
only) volume of a tape version.
GEN
Specifies the generation number of a disk version.
The following example locks all versions of the PAYROLL.MASTER
dataset. New versions cannot be created.
LOCK 'PAYROLL.MASTER'
The following example locks only version 1 of the
'PAYROLL.MASTER' dataset. This version cannot be accessed for input.
LOC 'PAYROLL.MASTER',VER=1
3-32
Connectivity Systems, Inc.—Copyright © 2006
Use Pursuant to Company Instructions
User Reference
MCATALOG Command
MCATALOG Command
Description
MCATALOG specifies that a tape dataset can be accessed by more than
one dataset name. The new dataset names are known as MCAT aliases.
After MCATALOG has been specified for a version, the version is
accessible by both the original dataset name and the MCAT alias(es). The
dataset is retained until all retention criteria from all associated
BIM-EPIC dataset definitions (EDDs) have been satisfied. You can use
MCATALOG to create special retention for a tape version. However, you
cannot use MCATALOG for subdatasets. When a display of datasets in
volume serial number sequence is requested, only the original dataset
names are displayed. MCAT aliases are not displayed.
Syntax
The following provides an example of the MCATALOG command
syntax.
MCAT
Parameters
'from-dataset-name' {,VER=from-ver|SER=from-ser},
'to-dataset-name' [ ,VER=to-ver ]
The following provides a description of the parameters you can use with
MCATALOG.
Parameter
Required?
Valid Entry
Default
from-dataset-name
Yes
1 to 44 characters None
Specify one of the following (required):
from-ver
No
1 to 999
None
from-ser
No
1 to 6 characters
None
to-dataset-name
Yes
1 to 44 character
None
to-ver
No
1 to 999
1
Specify the following:
Definitions
User Reference
The following provides definitions for the parameters you can use with
MCATALOG.
Parameter
Definition
from-dataset-name
Specifies the name of the original dataset.
from-ver
Specifies the version number of the original
dataset.
from-ser
Specifies the volume serial number of the
first (or only) volume of the original dataset.
to-dataset-name
Specifies the MCAT alias.
to-ver
Specifies the version number of the MCAT
alias.
Connectivity Systems, Inc.—Copyright © 2006
Use Pursuant to Company Instructions
3-33
MCATALOG Command
Note:
Only MCAT parameters are positional.
Example
The following example associates version 2 of the PAYROLL.MASTER
dataset to version 1 of the PAYROLL.PERM dataset, so the version can
be accessed using either dataset name.
MCA 'PAYROLL.MASTER',VER=2,'PAYROLL.PERM',VER=1
3-34
Connectivity Systems, Inc.—Copyright © 2006
Use Pursuant to Company Instructions
User Reference
MOVE Command
MOVE Command
Description
MOVE changes the vault location and slot location of a tape volume. If a
non-virtual Automated Cartridge Library (ACL) is supported and the tape
is moved from the main vault (Vault 0), the volume is ejected from the
ACL at the time MOVE is processed. MOVE is of no value for a virtual
ACL because virtual tapes cannot be vaulted. Examples of virtual ACLs
include VTS, Faketape, MAS, and Opti-Tape.
!
Syntax
WARNING:
Vaulting reports do not reflect changes done by MOVE. If any
dataset on the volume is controlled by automatic vaulting, the
vaulting program will undo the MOVE changes and will return
the tape to its original place in the rotation.
The following provides an example of the MOVE command syntax.
MOVE
Parameters
Definitions
Example
SER=volser,vault,slot
The following provides a description of the parameters you can use with
MOVE.
Parameter
Required?
Valid Entry
Default
volser
Yes
1 to 6 characters
None
vault
Yes
1 to 255
None
slot
Yes
1 to 9999
None
The following provides definitions for the parameters you can use with
MOVE.
Parameter
Definition
volser
Specifies the volume serial number of the tape to be
moved.
vault
Specifies the new vault number where the tape will
reside.
slot
Specifies the new slot number where a tape will
reside.
The following example moves tape AP3847 to vault 6, slot 234.
MOV SER=AP3847,6,234
User Reference
Connectivity Systems, Inc.—Copyright © 2006
Use Pursuant to Company Instructions
3-35
OFFLINE Command
OFFLINE Command
Description
OFFLINE prevents BIM-EPIC from accessing a disk volume. When a
volume is in OFFLINE status, BIM-EPIC will not use the volume for
input or output actions. OFFLINE cannot disable volume access across
machines. You must issue the OFFLINE command from each machine
that has access to the device. If it is necessary to issue a VSE DVCDN
command to a drive, the BIM-EPIC OFFLINE command should be
issued first.
Use ONLINE to restore BIM-EPIC access to a volume that has been
declared OFFLINE. See “QUIESCE Command” for additional
information.
Syntax
The following provides an example of the OFFLINE command syntax.
OFFLINE
Parameters
Definition
Example
volser
The following provides a description of the parameters you can use with
OFFLINE.
Parameter
Required?
Valid Entry
Default
volser
Yes
1 to 6 characters
None
The following provides definitions for the parameters you can use with
OFFLINE.
Parameter
Definition
volser
Specifies the serial number of the volume you want
to remove from BIM-EPIC access.
The following example removes the disk volume SYSWK1 from
BIM-EPIC access.
OFFLINE SYSWK1
3-36
Connectivity Systems, Inc.—Copyright © 2006
Use Pursuant to Company Instructions
User Reference
ONLINE Command
ONLINE Command
Description
ONLINE enables BIM-EPIC to access a disk volume for both input and
output datasets. If a disk volume has been placed in OFFLINE status or
QUIESCE status, use ONLINE to restore access to the volume. ONLINE
cannot enable a volume across machines. You must use the ONLINE
command for each machine in which the OFFLINE command was used.
See “OFFLINE Command ” for additional information.
Syntax
The following provides an example of the ONLINE command syntax.
ONLINE volser
Parameters
Definition
Example
The following provides a description of the parameters you can use with
ONLINE.
Parameter
Required?
Valid Entry
Default
volser
Yes
1 to 6 characters
None
The following provides definitions for the parameters you can use with
OFFLINE.
Parameter
Definition
volser
Specifies the serial number of the volume you want
to place online.
The following example gives BIM-EPIC access to disk volume
SYSWK2.
ONLINE SYSWK2
User Reference
Connectivity Systems, Inc.—Copyright © 2006
Use Pursuant to Company Instructions
3-37
PASSWORD Command
PASSWORD Command
Description
PASSWORD enables you to enter the required password if your
installation uses the PASSWD configuration option to invoke DSN
Catalog update protection. The DSN Catalog password is required for all
commands except for the following commands:
CAPACITY
DISPLAY
HELP
PASSWORD
You must submit the PASSWORD command before any protected
operation. The password is not printed on SYSLST if the command name
(PASSWORD or PAS) begins in column 1. The password is cleared when
the program ends.
Example
The following is an example of the PASSWORD command syntax.
PASWORD LOLLIPOP
3-38
Connectivity Systems, Inc.—Copyright © 2006
Use Pursuant to Company Instructions
User Reference
PURGE Command
PURGE Command
Description
PURGE removes BIM-EPIC dataset definitions (EDDs), versions, and
tape volume serial numbers from the DSN Catalog. With PURGE, you
can delete an entire dataset and all associated versions (tape and disk) or
simply remove a tape volume and the associated versions.
Datasets which are part of a multi–dataset group cannot be purged until
all other datasets in the group are scratched or deleted. In addition, all
versions must be in closed status before they can be purged.
If an Automated Cartridge Library (ACL) is supported, PURGE sets the
tape volume to scratch status in the ACL inventory.
!
WARNING:
Do not use this command for routine deletion of datasets.
When a tape volume is purged, BIM-EPIC does not attempt to determine
whether it is a valid scratch tape. For this reason, use this command only
when a physical tape volume is destroyed or permanently removed from
your installation.
Encrypted dataset versions must not be purged from the DSN Catalog.
Once information about an encrypted version is deleted, it cannot be
decoded and is forever unreadable.
Syntax
The following provides an example of the PURGE command syntax.
PURGE
Parameters
{'dataset-name'|SER=volser1,volser2,...}
The following provides a description of the parameters you can use with
PURGE.
Parameter
Required?
Valid Entry
Default
Specify one of the following (required):
dataset-name No
SER
Definitions
No
1 to 44 characters
None
1 to 6 characters
None
The following provides definitions for the parameters you can use with
PURGE.
Parameter
Definition
dataset-name Specifies a dataset name when you want to delete an
EDD and all associated versions from the DSN
Catalog. The dataset is no longer controlled.
User Reference
Connectivity Systems, Inc.—Copyright © 2006
Use Pursuant to Company Instructions
3-39
PURGE Command
Examples
Parameter
Definition
SER
Specifies a tape volume serial number when you
want to remove that serial number from the DSN
Catalog but leave the dataset under BIM-EPIC
control. If the volume serial number contains
non–alphanumeric characters, enclose the volume
serial number in apostrophes.
The following example purges PAYROLL.TABLE and all associated
tape volumes.
PURGE 'PAYROLL.TABLE'
The following example purges volume PR3746 and the version written on
it.
PUR SER=PR3746
3-40
Connectivity Systems, Inc.—Copyright © 2006
Use Pursuant to Company Instructions
User Reference
QUIESCE Command
QUIESCE Command
Description
QUIESCE prevents disk volumes from being used for the creation of
controlled datasets. BIM-EPIC will not allocate output datasets on a
quiesced volume. Quiesced volumes are still eligible for BIM-EPIC input
processing and for uncontrolled processing. QUIESCE cannot disable a
volume across machines. You must use QUIESCE on all machines that
have access to the volume.
Use ONLINE to remove a volume from QUIESCE status. Use OFFLINE
to remove a volume from both input and output processing.
Syntax
The following provides an example of the QUIESCE command syntax.
QUIESCE volser
Parameters
Definition
Example
The following provides a description of the parameters you can use with
QUIESCE.
Parameter
Required?
Valid Entry
Default
volser
Yes
1 to 6 characters
None
The following provides definitions for the parameters you can use with
QUIESCE.
Parameter
Definition
volser
Specifies the serial number of the volume you want
to quiesce.
The following example quiesces the disk volume SYSWK1.
QUIESCE SYSWK1
User Reference
Connectivity Systems, Inc.—Copyright © 2006
Use Pursuant to Company Instructions
3-41
RELEASE Command
RELEASE Command
Description
RELEASE temporarily unlocks a BIM-EPIC dataset definition (EDD) or
a locked version. RELEASE allows a one-time only access, while
UNLOCK allows unlimited access. If you do not indicate a specific
version, the EDD is released for output one time only. This release allows
you to create one additional version of the dataset. The new version is
placed in locked status automatically.
If a specific version is indicated, that version is released for input.
BIM-EPIC allows you to read the released version only once. After a
released version is read, the version is put back into locked status. You
must use LOCK before you can use RELEASE.
Syntax
The following provides an example of the RELEASE command syntax.
RELEASE 'dataset-name' [,specifier-expression] [,PWD=password]
Parameters
The following provides a description of the parameters you can use with
RELEASE.
Parameter
Required?
Valid Entry
Default
dataset-name
Yes
1 to 44 characters None
specifier-expression No
None
If specifier-expression is used, specify one of the following:
VER
No
1 to 999
None
SER
No
1 to 6 characters
None
GEN
No
1 to 999999
None
1 to 9
None
Specify if dataset is password protected:
PWD
Definition
No
The following provides definitions for the parameters you can use with
RELEASE.
Parameter
Definition
dataset-name
Specifies the name of the dataset you
want to release.
specifier-expression
3-42
VER
Specifies a version number from 1 to
999.
SER
Specifies the first (or only) volume of a
tape version.
Connectivity Systems, Inc.—Copyright © 2006
Use Pursuant to Company Instructions
User Reference
RELEASE Command
Examples
Parameter
Definition
GEN
Specifies a generation number from 1 to
999999.
PWD
Use if the dataset is password protected.
The following example releases the PAYROLL.MASTER dataset,
supplies the associated password, HARRY, and permits the creation of an
additional version.
RELEASE 'PAYROLL.MASTER',PWD=HARRY
The following example releases the version of the PAYROLL.MASTER
dataset which starts on volume serial number PR9485 and permits that
version to be read as input one time only.
REL 'PAYROLL.MASTER',SER=PR9485
User Reference
Connectivity Systems, Inc.—Copyright © 2006
Use Pursuant to Company Instructions
3-43
RENAME Command
RENAME Command
Description
RENAME allows you to change the name of a cataloged dataset. All
existing versions of the original dataset will be referenced by the new
dataset name. Dataset characteristics do not change.
If the dataset is a disk dataset, the associated VTOC entries are renamed,
as well.
!
Syntax
WARNING:
Do not rename prime datasets or offload datasets. Results are
unpredictable.
The following provides an example of the RENAME command syntax.
RENAME 'old-dataset-name','new-dataset-name'
Parameters
Definitions
Example
The following provides a description of the parameters you can use with
RENAME.
Parameter
Required?
Valid Entry
Default
old-dataset-name
Yes
1 to 44 characters None
new-dataset-name
Yes
1 to 44 characters None
The following provides definitions for the parameters you can use with
RENAME.
Parameter
Definition
old-dataset-name
Specifies the name of the dataset you want
to rename.
new-dataset-name
Specifies the new dataset name.
The following example changes the name of the dataset
CURRENT.MASTER to APRIL.MASTER.
REN 'CURRENT.MASTER','APRIL.MASTER'
3-44
Connectivity Systems, Inc.—Copyright © 2006
Use Pursuant to Company Instructions
User Reference
RETAIN Command
RETAIN Command
Description
RETAIN completes the following tasks:
Alters an expiration date, a creation date, or a creation job name
for a specific version. If the version is not in active status, it is set
to active status. RETAIN specifies that a version is a
TSIDOFL-created tape backup, not an offload of a Start Track 1
disk DSN created by TSIDOFL.
Specifies that a version resides on an FSI Faketape device.
If an Automated Cartridge Library (ACL) is supported, RETAIN changes
the tape volume to non–scratch status in the ACL inventory. RETAIN
also changes the status of a version from scratch, open, or conditional
catalog to active status.
If ENC has been used to specify an encryption algorithm for this dataset,
RETAIN will not change the Creation Date or Job Name. See UPDATE
Command for additional information.
Syntax
The following provides an example of the RETAIN command syntax.
RETAIN 'dataset-name',specifier-expression,
modifier-expression[,OF2] [,ST1] [,FKT]
Parameters
The following provides a description of the parameters you can use with
RETAIN.
Parameter
Required?
Valid Entry
dataset-name
Yes
1 to 44 characters None
specifier-expression Yes
Specify one of the following:
None
VER
No
1 to 999
None
SER
No
1 to 6 characters
None
GEN
No
1 to 999999
None
modifier-expression
Yes
Specify one of the following (required):
User Reference
Default
None
EXD
No
yyyyddd
None
DAY
No
yyyyddd
None
CDT
No
yyyyddd
None
JOB
No
None
TPA
No
None
MOD
No
None
Connectivity Systems, Inc.—Copyright © 2006
Use Pursuant to Company Instructions
3-45
RETAIN Command
Definition
The following provides definitions for the parameters you can use with
RETAIN.
Parameter
Definition
dataset-name
Specifies the name of the dataset you
want to retain.
specifier-expression
VER=nnn
Specifies the version number, where
nnn is any number from 1 to 999.
SER=xxxxxx
Specifies the serial number, where
xxxxxx identifies the first or only tape
volume version. The serial number can
be up to 6 characters.
GEN=nnnnnn
Specifies the generation number, where
nnnnnn can be any number from 1 to
999999.
modifier-expression
3-46
EXD
Specifies the new expiration date
(expiration-date) of the version
in yyyyddd format.
DAY
Specifies retention period
(retention-days). BIM-EPIC
calculates the expiration date as the
current date plus the number of retention
days.
CDT
Specifies the creation date
(creation-date) in Julian format:
4–digit year followed by 3–digit day, for
example, January 1, 1991 = 1991001.
JOB
Specifies the name of the job
(jobname) that created this version of
the dataset.
TPA
Specifies that the tape device is TPA.
TPA=YES indicates a TPA device.
TPA=NO indicates a non-TPA device. If
MOD is specified with a TPA density,
then you must specify TPA=YES before
the MOD parameter.
MOD=xx
Specifies the density used to create the
version. See “CATALOG Command”
for allowable MOD specifications.
Connectivity Systems, Inc.—Copyright © 2006
Use Pursuant to Company Instructions
User Reference
RETAIN Command
Example
Parameter
Definition
OF2
(Optional keyword parameter) If used,
place the parameter at the end of the
RETAIN statement. You can use OF2 to
identify the retained version as having
FAVER2 offload format. In addition,
you can use OF2 to assign FAVER2
offload format to a tape after the tape
has been added to a dataset using the
OF2 parameter.
ST1
(Optional parameter) Use if a new
version is a tape backup created by
TSIDOFL BACKUP, not an offload of
an EPIC Start Track 1 dataset. ST1 sets
the necessary switch in the BIM-EPIC
catalog entry for this new version.
FKT
(Optional parameter) Use if a new
version resides on an FSI Faketape
device. FKT sets the necessary switch in
the BIM-EPIC catalog entry for this new
version.
The following example retains version 3 of the
AGED.TRIAL.BALANCE dataset. Version 3 is closed and is retained for
seven days from today. The creating job name is changed to TRIALBAL.
RETAIN 'AGED.TRIAL.BALANCE',VER=3,DAY=7,JOB=TRIALBAL
The following example retains the version of
PAYROLL.UNEDITED.TRANSACTIONS which starts on volume
PR5867. The version is closed and expires on November 23, 1997.
RET 'PAYROLL.UNEDITED.TRANSACTIONS',SER=PR5867,EXD=1997327
The following example informs the BIM-EPIC Catalog that this version is
on an FSI Faketape device.
RET 'PAYROLL.UNEDITED.TRANSACTIONS',VER=1,FKT
User Reference
Connectivity Systems, Inc.—Copyright © 2006
Use Pursuant to Company Instructions
3-47
SCRATCH Command
SCRATCH Command
Description
SCRATCH scratches a version of a dataset. The version must be in active
status to be scratched. If the version is in open status or conditionally
cataloged status, use CLOSE to make the version active.
If an Automated Cartridge Library (ACL) is supported, SCRATCH sets
the tape volume to scratch status in the ACL inventory.
In BIM-EPIC, you can use SCRATCH in a job stream to scratch disk
datasets without supplying the dataset password. As long as the current
job name and partition are the same as the creating job name and
partition, BIM-EPIC disregards password protection.
!
Syntax
WARNING:
You must not scratch encrypted dataset versions. If an encrypted
dataset version is scratched, the version cannot be decoded and is
unreadable even it is retained prior to reuse.
The following provides an example of the SCRATCH command syntax.
SCRATCH
Parameters
'dataset-name' {,VER=n|,SER=volser|,GEN=n} [FOR]
The following provides a description of the parameters you can use with
SCRATCH.
Parameter
Required?
dataset-name Yes
Valid Entry
Default
1 to 44 characters
None
Specify one of the following (required):
VER
No
1 to 999
None
SER
No
1 to 6 characters
None
GEN
No
1 to 999999
None
Specify the following optional parameter only if the disk volume on
which a dataset resides is no longer available:
FOR
Definitions
No
None
N/A
The following provides definitions for the parameters you can use with
SCRATCH.
Parameter
Definition
dataset-name Specifies the dataset name.
3-48
VER
Specifies the version number.
SER
Specifies the volume serial number of the first
volume of a tape version.
Connectivity Systems, Inc.—Copyright © 2006
Use Pursuant to Company Instructions
User Reference
SCRATCH Command
Parameter
Definition
GEN
Specifies the generation number of a disk version.
FOR
Specifies that the disk volume on which a dataset
resides is no longer available and the entry is to be
removed from the catalog.
Note:
Scratching by volume serial number is not valid for an NSU subdataset or
an MCAT alias.
Examples
The following example scratches version 1 of the
INVENTRY.SANDIEGO.3847 dataset.
SCRATCH 'INVENTRY.SANDIEGO.3847',VER=1
The following example scratches the version of the
INVENTRY.SANDIEGO.3847 dataset which starts on volume IN4658.
SCR 'INVENTRY.SANDIEGO.3847',SER=IN4658
User Reference
Connectivity Systems, Inc.—Copyright © 2006
Use Pursuant to Company Instructions
3-49
TRANSFER Command
TRANSFER Command
Description
TRANSFER moves a version from one dataset to another dataset. The
transferred version is no longer associated with the original dataset name.
However, a transferred version retains all of the original characteristics,
except for the version number.
Note:
If the version is a disk dataset, the associated VTOC entry is also
renamed.
Syntax
The following provides an example of the TRANSFER command syntax.
TRANSFER 'from-dataset-name', from-specifier,
'to-dataset-name'[,VER=to-version]
Parameters
The following provides a description of the parameters you can use with
TRANSFER.
Parameter
Required?
Valid Entry
Default
from-dataset-name
Yes
1 to 44 characters None
from-specifier
Yes
See definitions,
below
to-dataset-name
Yes
1 to 44 characters None
to-version
No
1 to 999
N/A
None
Specify one of the following (optional):
Definitions
Example
3-50
VER
No
1 to 999
1
SER
No
1 to 6 characters
None
The following provides definitions for the parameters you can use with
TRANSFER.
Parameter
Definition
from-dataset-name
Specifies original dataset name.
from-specifier
Specifies original specifier.
to-dataset-name
Specifies the destination dataset name.
to-version
Specifies the destination version.
VER
Specifies the version number.
SER
Specifies the volume serial number of
the first volume of a tape version.
The following example transfers version 7 of the IRVINE.INVENTRY
dataset to version 1 of the SANDIEGO.INVENTRY dataset.
Connectivity Systems, Inc.—Copyright © 2006
Use Pursuant to Company Instructions
User Reference
TRANSFER Command
TRA
User Reference
'IRVINE.INVENTRY',VER=7,'SANDIEGO.INVENTRY'
Connectivity Systems, Inc.—Copyright © 2006
Use Pursuant to Company Instructions
3-51
UNLOCK Command
UNLOCK Command
Description
UNLOCK permanently unlocks a locked dataset or version. To unlock a
dataset or version for a one-time only use, use RELEASE. You must use
LOCK before you can use UNLOCK.
To permit unlimited access to a specific version, use UNLOCK with a
version qualifier. To permit creation of an unlimited number of new
versions, use UNLOCK without a version qualifier.
Syntax
The following provides an example of the UNLOCK command syntax.
UNLOCK
Parameters
'dataset-name',dataset-specifier [,PWD=password]
The following provides a description of the parameters you can use with
UNLOCK.
Parameter
Required?
Valid Entry
Default
dataset-name
Yes
1 to 44 characters None
dataset-specifier
No
None
Specify one of the following (required):
Definitions
VER
No
1 to 999
None
SER
No
1 to 6 characters
None
GEN
No
1 to 999999
None
PWD
No
None
The following provides definitions for the parameters you can use with
UNLOCK.
Parameter
Definition
dataset-name
Specifies the dataset name.
dataset specifier
Examples
VER
Specifies the version number.
SER
Specifies the serial number.
GEN
Specifies the generation number.
PWD
Use if the dataset is password protected.
The following example unlocks the PAYROLL.MASTER dataset,
supplying the associated dataset password, HARRY. Unlimited versions
of the dataset can now be created.
UNLOCK 'PAYROLL.MASTER',PWD=HARRY
3-52
Connectivity Systems, Inc.—Copyright © 2006
Use Pursuant to Company Instructions
User Reference
UNLOCK Command
The following example unlocks version 6 of the INVENT.958575 dataset.
The dataset can now be read as input an unlimited number of times.
UNL 'INVENT.958575',VER=6
User Reference
Connectivity Systems, Inc.—Copyright © 2006
Use Pursuant to Company Instructions
3-53
UPDATE Command
UPDATE Command
Description
UPDATE changes the characteristics associated with a BIM-EPIC dataset
definition (EDD) in the DSN Catalog. The updated characteristics will
affect only versions created after an update. To update previously created
versions, use CLOSE, CYCLE, or RETAIN.
The parameters available with UPDATE are nearly identical to the
CATALOG parameters. However, you cannot update the prime dataset
name and encryption password. To change those items, you must create a
new dataset name for the dataset in your DSN Catalog and then change
existing JCL.
If the following parameters are already cataloged, set the parameters to
NO to remove them.
disk pool
password
system ID
tape pool
user ID
There are two parameters that can be used only in the UPDATE
command. They cannot be used with CATALOG or ADD.
DPW - Password for use with ENC
ENC - Encryption type
These parameters can be used on any BIM-EPIC dataset definition, but
they are effective only if the BIM-EPIC Dr. Crypto product is being used.
Syntax
Except for DPW and ENC, see CATALOG Command earlier in this
chapter for complete syntax rules.
Neither DPW nor ENC are available in the BIM-EPIC Online Manager.
They can only be used with the TSIDMNT program.
Use DPW=xxxxxxxx to specify a 1-8 byte password that must be
entered when the ENC parameter is used. This password is the password
specified in the PWD parameter.
Use ENC=xxx to specify the encryption algorithm. When specified and a
new version of the dataset is created by Dr.Crypto, all of the data in the
version will be encrypted using the algorithm specified in the ENC
3-54
Connectivity Systems, Inc.—Copyright © 2006
Use Pursuant to Company Instructions
User Reference
UPDATE Command
parameter. When the version is read by Dr.Crypto, the encryption key
used to create the version is presented to Dr.Crypto to decrypt the data. If
the ENC parameter is used to change the algorithm, new versions will be
encrypted with that algorithm, but previously created versions will remain
encrypted in the prior algorithm.
The ENC parameter can be one of the following values:
DES–Data Encryption Standard
DE3–Data Encryption Standard 3
AES–Advanced Encryption Standard
NO–No encryption is done. This is the default.
When used, the DPW parameter must precede the ENC parameter.
Examples
The following example updates the
PAYROLL.EDITED.TRANSACTIONS dataset, changing the associated
vault method to number 3.
UPDATE 'PAYROLL.EDITED.TRANSACTIONS',VLT=3
The following example updates the SR3.INVENTRY.45768 dataset,
changing the associated default block size to 10,000 and changing the
default density to 3490E with IDRC.
UPD 'SR3.INVENTRY.45768',BLK=10000,MOD=F8
The following example shows how to define and display an encryption
algorithm for a new dataset.
// EXEC TSIDMNT
CAT 'PAYROLL.MASTER' PWD=NX8W6R POL= .....
UPD 'PAYROLL.MASTER' DPW=NX8W6R ENC=DES
DIS 'PAYROLL.MASTER' DPW=NX8W6R
/*
User Reference
Connectivity Systems, Inc.—Copyright © 2006
Use Pursuant to Company Instructions
3-55
UPDATE Command
3-56
Connectivity Systems, Inc.—Copyright © 2006
Use Pursuant to Company Instructions
User Reference
4
BIM-EPIC TLBL and DLBL
Statements
This chapter describes the TLBL statement and DLBL statement.
BIM-EPIC TLBL statements can have a slightly different format than
VSE TLBL statements and, as a result, provide additional options.
BIM-EPIC DLBL statements have the same format as VSE DLBL
statements but can also provide additional options. In addition,
BIM-EPIC provides an MVS-style dataset definition (DD) statement for
VSE. Each type of BIM-EPIC label statement provides unique benefits.
Which label statement you choose depends largely on what you want to
do with the dataset you are processing.
Chapter Contents
TLBL Statements and Options
DLBL Statements and Options
User Reference
Connectivity Systems, Inc.—Copyright © 2006
Use Pursuant to Company Instructions
4-1
TLBL Statements
TLBL Statements and Options
TLBL Statements
Description
Typically, a user does not need to change existing TLBLs. However
BIM-EPIC provides modifications to the standard VSE TLBL statement
that can provide additional capability.
Note:
All TLBL fields are positional.
TLBL Format
The following identifies similarities and differences in TLBL formats.
Pos
Parameters
BIM-EPIC Format and Terminology
VSE Format and Terminology
1
// TLBL dtfname
// TLBL filename
2
[ ,'dataset-name
[,alpha-opts]' ]
[ ,'fileid' ]
3
[ ,retention ]
[ ,retention ]
4
[ ,volser ]
[ ,file-serial-number ]
5
[ ,reel-number ]
[ ,volume-sequence-number ]
6
[ ,file-sequence-number ]
[ ,file-sequence-number ]
7
[ ,version-number ]
[ ,generation-number ]
8
[ ,numeric-options ]
[ ,version-number ]
9
[ ,disposition ]
[ ,disposition ]
The following provides a description of the parameters you can use with
TLBL statements.
Parameter
Required?
Valid Entry
Default
dtfname
Yes
1 to 7 characters
None
dataset-name
For output
See description
below
dtfname
alpha-opts
No
See description
below
None
retention
No
1 to 9999 or
yyyy/ddd
None
volser
No
1 to 6 characters
None
reel-number
No
1 to 256
1
1 to 9999
1
file-sequence-number No
4-2
version-number
No
1 to 999
1
numeric-options
No
0 to 99
0
Connectivity Systems, Inc.—Copyright © 2006
Use Pursuant to Company Instructions
User Reference
TLBL Statements
Definitions
User Reference
Parameter
Required?
Valid Entry
Default
disposition
No
See description
below
None
The following provides definitions for the parameters you can use with
CATALOG.
Parameter
Definition
dtfname
Specifies the symbolic name that the
program uses for the dataset. For
example TAPEIN and SORTIN. IBM
refers to the dtfname field as the
filename.
dataset-name
Specifies the name of the dataset that
will be used. IBM refers to this field as
the fileid. For BIM-EPIC to control
the dataset, dataset-name must be
identical to a BIM-EPIC dataset
definition (EDD) name in the DSN
Catalog. The maximum length of
dataset-name for a prime dataset in
a multi-file group is 17 characters.
Single dataset or subdataset names can
be up to 44 characters. The dataset name
field consists of dataset-name and
any desired alpha-opts. Beginning
and ending apostrophes are required.
The dataset name field is a required field
for output. For input, the dataset name
field can be omitted and a volume serial
number can be supplied instead.
However, if you want BIM-EPIC to
select the tape, you must specify the
dataset name field. The maximum length
of the dataset name field, including
dataset-name, commas, options,
and parentheses, is 58 characters.
Connectivity Systems, Inc.—Copyright © 2006
Use Pursuant to Company Instructions
4-3
TLBL Statements
4-4
Parameter
Definition
alpha-opts
Provides compatibility with tape
management products from other
vendors. To use these options, the
JCLOPT configuration option must be
set to YES. The alpha-opts
parameters can be alphabetic codes,
version requests, and density requests, in
any order, as long as they are separated
from dataset-name and each other
by commas. See “TLBL Options” for
additional options. A specific version
can be requested by specifying a
parenthetical expression that contains a
minus sign (-) followed by a number that
is one less than the desired version. For
example, to use catalog version 2,
specify (-1).
densities supported for 3480/3490
devices:
00—Buffered write mode
08—Buffered write mode with
IDRC
20—Unbuffered write mode
28—Unbuffered write mode with
IDRC
densities supported for 8809/9347
devices:
30—High speed / short gap
50—Low speed / long gap
60—Low speed / short gap
90—High speed / long gap
densities supported for 3424/9348
devices:
42—Buffered write mode 1600 bpi
62—Unbuffered write mode 1600
bpi
C2—Buffered write mode 6250 bpi
E2—Unbuffered write mode 6250
bpi
densities supported for
3410/3420/3422/3430 devices:
D0—6250 bpi
C0—1600 bpi
C8—800 bpi
Connectivity Systems, Inc.—Copyright © 2006
Use Pursuant to Company Instructions
User Reference
TLBL Statements
Parameter
Definition
densities supported for 3490E
devices:
F0—Buffered write mode (3490E)
F8—Buffered write mode with
IDRC (3490E)
BIM-EPIC uses mode F0 and mode F8
to distinguish 3490E tape cartridge
drives from 3480/3490. Because
VSE/ESA does not support mode F0 and
mode F8, BIM-EPIC sends mode 00 or
mode 08 to the 3490E hardware,
whenever mode F0 or mode F8 is
specified.
retention
Specifies the number of days to retain
this version.
volser
Requests a specific tape volume serial
number. IBM refers to this as the file
serial number. This field is optional and
is not normally used for controlled tapes,
since BIM-EPIC knows the volser to
use.
reel-number
Specifies the first reel number to be
processed and is used to skip initial reels
in a multi-volume group. If you specify
a volume serial number,
reel-number is ignored.
file-sequence-number Specifies the file number of a dataset on
a tape that contains more than one
dataset; not usually used for BIM-EPIC
controlled tapes.
User Reference
version-number
Requests a specific version. Use the
DSN Catalog version number to obtain
this parameter. If you specify a volume
serial number, version-number is
ignored. This parameter replaces the
generation number in the VSE format.
numeric-options
Specifies numeric option codes. This
parameter replaces the version number
in the VSE format. See “TLBL Options”
below for additional information.
Connectivity Systems, Inc.—Copyright © 2006
Use Pursuant to Company Instructions
4-5
TLBL Statements
Examples
Parameter
Definition
disposition
Specifies file disposition. Values are
DISP=OLD, DISP=NEW, or
DISP=MOD. This parameter is identical
to the VSE parameter and is valid only
for Assembler language programs
written for VSE/AF Release 1 and
above. See the VSE System Control
Statements documentation for additional
information.
The following examples show how TLBL statements can be used with
BIM-EPIC. These examples show how BIM-EPIC specifies the tape
volume for version 1 of BACKUP.STR from the DSN Catalog. Because
version 1 is usually the desired version, the most-used form is
TLBL// TLBL TAPEIN,'BACKUP.STR'.
The following example describes how BIM-EPIC specifies version 3 of
BACKUP.STR from the DSN Catalog.
// TLBL TAPEIN,'BACKUP.STR,(-2)'
The following example describes how BIM-EPIC honors the request for
volume EP6173.
// TLBL TAPEIN,,,EP6173
The following example describes how BIM-EPIC selects version 1 of
BACKUP.STR and specifies “rewind and unload at close” and mode 08.
// TLBL TAPEIN,'BACKUP.STR,U,08'
4-6
Connectivity Systems, Inc.—Copyright © 2006
Use Pursuant to Company Instructions
User Reference
TLBL Options
TLBL Options
Description
BIM-EPIC TLBL option codes provide special processing that is
unavailable with standard VSE TLBL parameters. See “TLBL
Statements” for instructions and restrictions on specifying parameters.
Alphabetic option codes, also known as alpha options, provide
compatibility with other tape management products. Alpha options can be
specified only within the TLBL dataset name field.
Numeric codes can be specified only in the TLBL numeric-options
parameter. To specify multiple numeric codes, add the value of each
desired option and use the sum in the TLBL. For example, if you want to
specify option code 3 (do not rewind) and option code 64 (inhibit LUB
allocation), specify 67 in the numeric-options parameter.
You can use numeric options for controlled and uncontrolled datasets.
TLBL Option
Codes
User Reference
The following option codes can be used with the TLBL option.
Alpha
Code
Numeric
Code
Action
Description
0
No options in effect
(This is the default and
does not need to be
specified in the TLBL.)
When no options are
included, BIM-EPIC
recognizes the rewind
settings in your
program.
W
1
Rewind at close
Rewinds the tape at
close. This eliminates
operator intervention
when the same tape is
reused in another step or
job. If a cartridge is
being used on an ACL
drive, BIM-EPIC
unloads the cartridge at
close unless option 8 or
H (Hold assignment at
close) is specified. The
8/H is not recommended
for ACL volumes,
however.
U
2
Rewind and unload at
close
Rewinds and unloads
the tape at close.
Connectivity Systems, Inc.—Copyright © 2006
Use Pursuant to Company Instructions
4-7
TLBL Options
Alpha
Code
4-8
Numeric
Code
Action
Description
3
Do not rewind
Prevents rewinding the
tape at close. Use this
option when you are
creating multi-dataset
tapes.
R
4
Scratch at close
Scratches the dataset
when the dataset is
closed as input. This
option does not affect
subdatasets.
H
8
Hold the drive
assignment at close
Prevents BIM-EPIC
from releasing the tape
drive assignment at
close. If Autoattach is
on, this code prevents
the drive from being
detached. The drive will
be released at
end-of-job, when the
logical unit is assigned
to another device, or
when the tape drive is
down, whichever occurs
first.
D
16
Dataset drop
Use this option when the
program issues multiple
open requests for the
same DTF name. While
VSE alone will process
the original label each
time the same DTF
name is opened with the
drop option, BIM-EPIC
processes the next label
in the JCL with that
DTF name. Dataset drop
differs from
concatenation (48),
since concatenation
processes multiple
datasets with one open.
32
Conditional catalog
Puts the version in the
DSN Catalog with
conditional catalog
status.
Connectivity Systems, Inc.—Copyright © 2006
Use Pursuant to Company Instructions
User Reference
TLBL Options
Alpha
Code
User Reference
Numeric
Code
Action
Description
48
Concatenating datasets
Reads multiple files
using only one open
command. The files are
read as a single dataset.
This process is called
dataset concatenation.
Use concatenation to
read multiple files when
your program performs
only one open
command. This option is
valid for controlled
datasets only.
64
Inhibit LUB allocation
Inhibits LUB allocation
for the dataset.
Inhibiting LUB
allocation is necessary
when you are running
programs that use
physical IOCS or
BIM-EPIC TSIDASS.
You do not need to
specify this option when
LUB allocation is turned
off or when a SYS
number is specified in
the dataset definition.
Connectivity Systems, Inc.—Copyright © 2006
Use Pursuant to Company Instructions
4-9
DLBL Statements
DLBL Statements and Options
DLBL Statements
Description
The BIM-EPIC DLBL statement is identical to the VSE DLBL statement,
with additional BIM-EPIC options that provide special BIM-EPIC
processing.
BIM-EPIC DLBL options are specified within the file ID or dataset name
parameter, beginning after the dataset name itself and ending with the
closing apostrophe. Options must be separated from the dataset name and
from each other using commas. The option(s) specified must be enclosed
in parentheses.
BIM-EPIC uses blanks to replace the options, commas, and parentheses
before creating label information. As a result, only the dataset name
appears in VTOC entries.
The maximum length allowed for the dataset name, including options,
commas, and parentheses, is 44 characters.
4-10
Connectivity Systems, Inc.—Copyright © 2006
Use Pursuant to Company Instructions
User Reference
DLBL Options
DLBL Options
Description
DLBL option codes provide special BIM-EPIC processing that is
unavailable with standard VSE DLBL parameters. See “DLBL
Statements ” for an overview of DLBL statements.
DLBL Option
Codes
The following option codes can be used with the DLBL statement.
User Reference
Code
Action
Description
A
Align allocation on Aligns the disk allocation on cylinder
cylinder
boundaries. Valid for CKD devices only.
boundaries
Allocations for direct access (DA) and
ISAM datasets are aligned automatically.
B=n
Reblock (n=1 to
Changes the block size of the datasets
32767|MAX|OPT) without recompiling the programs. Valid for
datasets with either fixed or variable record
formats. Reblock with caution when
running programs that use physical IOCS.
These programs must be able to support
reblocking. Specify either MAX for
full-track blocking or OPT for half-track
blocking.
C
Conditionally
catalog
D
Delete after closed Deletes the dataset after the dataset is closed
as input
for input. The code is not required for
compiler work areas, BIM-EPIC Common
Work Datasets (CWDS), or SORTWK files.
These files are deleted automatically at
close.
E
Concatenate
datasets
Puts the version in the DSN Catalog in
conditional catalog status at close.
Invokes dataset concatenation, which
causes the problem program to read two or
more files as if they were a single file, using
just one open and one close. Dataset
concatenation can only be performed for
cataloged datasets. This code differs from
dataset drop, option code T, in that dataset
drop only processes one dataset when a
program issues a single open.
Connectivity Systems, Inc.—Copyright © 2006
Use Pursuant to Company Instructions
4-11
DLBL Options
4-12
Code
Action
Description
F
Allow
fragmentation
When the requested amount of space is not
available, this code allows BIM-EPIC to
allocate the largest amount of contiguous
space available. Do not use this code for
TYPEFLE=WORK files, for example,
compiler work files, and FORTRAN disk
files or for any other files that do not
support secondary extents. If you do not
specify the F code and BIM-EPIC cannot
find the requested contiguous extent in the
pool, message EP038 is issued. This
message enables the operator to respond
with FRAG to invoke fragmentation.
G=n
Access the
specified
generation (n=1 to
65535)
Accesses the specified generation of the
dataset. This is useful when you want to
access a specific version of a dataset
without reference to the associated relative
version number. The generation number of
a version is listed in TSIDUTL DSPLY and
catalog maintenance DISPLAY reports. The
generation number is valid for cataloged
datasets only. It is NOT the same as the
version number.
H
Prevent automatic Overrides the configuration option
fragmentation
FRAG=YES, preventing automatic file
fragmentation, if the space requested for
allocation is not available. If the EP038
message is issued, an operator can specify
FRAG to continue the allocation.
I
Ignore this dataset Overrides BIM-EPIC control of a dataset.
Valid ASSGN and EXTENT statements
must be included to process the dataset.
L
Inhibit LUB
allocation
Inhibits LUB allocation for the dataset.
Frequently, inhibiting LUB allocation is
necessary when you are running programs
that use physical IOCS. See Chapter 1,
“Allocating Logical Unit Blocks (LUB),”
for more information.
Connectivity Systems, Inc.—Copyright © 2006
Use Pursuant to Company Instructions
User Reference
DLBL Options
Code
Action
Description
M
Issue messages
open/close
Overrides configuration options
ALLMALL=NO (default) and
ALLMSG=NO for this dataset. Allocation
messages are issued for the dataset and for
all subsequent disk datasets that are opened.
For output datasets, EP039 is issued after
the dataset has been opened, displaying the
allocated extents. EP052 is issued after the
file has been closed, displaying the size of
the truncated extent.
For input datasets, EP053 is issued to
display the extent that has been opened.
EP051 is issued to indicate that the dataset
has been closed.
This option is ignored for system datasets,
such as IJSYSLN, that are held open across
job step boundaries.
User Reference
N
Bypass truncation
All unused space between the end-of-file
record and the end of the last extent remains
allocated to the dataset. Use the Bypass
truncation option if the file is to be accessed
later as a DA file to enable additional
records to be written to the file after the file
is closed. This option is required for any
dataset processed with a
TYPEFLE=WORK DTF. The Bypass
truncation option is also required when you
use the option code S, reuse same space.
O
Use extent size in
EXTENT
statement
Accepts the size specified in the EXTENT
statement as the primary extent rather than
the size specified in the DSN Catalog. Pool
name and secondary extent size are taken
from the BIM-EPIC dataset definition. Use
this option when the volume of data you are
processing is significantly different from
normal. This option is valid for cataloged
datasets only.
P
Delete (Purge) at
End of Job
(non-generation
files only)
Deletes the dataset at end of job. Use this
option for temporary datasets that are not
closed for input. This option is
automatically activated for all SORTWK
and affects only cataloged, non-generation
datasets. Configuration option
JOBACCT=YES is required.
Connectivity Systems, Inc.—Copyright © 2006
Use Pursuant to Company Instructions
4-13
DLBL Options
Code
Action
Description
R=n
Allocate by
Logical Records
(n=1 to 999999)
Specifies the number of logical records the
file is to contain. BIM-EPIC uses this
number to calculate the size of the extent
required.
S
Reuse same space
Reuses the same extent space occupied by
the current version for the next version of
the dataset. This option affects single extent
non-generation datasets only. When you use
this option, you must also inhibit truncation,
option code N, for the dataset.
T
Dataset drop
Deletes the label information for this dataset
from the label area when the dataset is
closed.
Note: The label information is not deleted
from the VTOC. If the problem program
subsequently issues another open for the
file, this label will not be found. This option
is useful for programs that issue more than
one open for the same DTF name. Dataset
drop differs from dataset concatenation,
option code E, in that concatenation causes
two or more datasets to be processed as a
single dataset when a single open is issued
by the program.
4-14
V=n
Access the
specified version
(n=1 to 65535)
Specifies a specific version to access. This
option is valid for cataloged datasets only.
Remember that the latest version is always
version 1.
X
Delete at close or
EOJ
(non-generation
files only)
Deletes the dataset at close if it is closed for
input or at end of job if the dataset still
exists. This option provides the same
function as the combination of the option
code P and the option code D. The
configuration option JOBACCT=YES is
required for this option. This option is valid
only for cataloged, non-generation datasets.
Connectivity Systems, Inc.—Copyright © 2006
Use Pursuant to Company Instructions
User Reference
5
Accessing the DSN Catalog
This chapter discusses several ways to access the DSN Catalog.
Chapter Contents
Displaying DSN Catalog Entries
Accessing DSN Catalog Records
User Reference
Connectivity Systems, Inc.—Copyright © 2006
Use Pursuant to Company Instructions
5-1
TSIDUTL DSPLY
Displaying DSN Catalog Entries
TSIDUTL DSPLY
Description
TSIDUTL DSPLY creates reports from the data maintained in the DSN
Catalog. Reports can be created containing data associated with all
datasets, all versions, specific datasets, or specific versions which match
specified criteria and by media type (tape or disk). These reports can also
be produced using different sort sequences.
TSIDUTL DSPLY creates reports listing all datasets or groups of datasets
in the DSN Catalog. In most cases, you will receive a full report of each
catalog entry for a specific dataset. If printed, the BIM-EPIC dataset
definition (EDD) can be output in bold print, by overprinting, for easier
viewing.
For report examples, see the BIM-EPIC Installation and System Guide for
additional information.
UPSI Values
The following provides descriptions of the values associated with the
TSIDUTL DSPLY catalog entry.
Value
Function
1xxxx
Lists dates in European format (dd/mm/yy).
x1xxx
Suppresses dataset name overprinting. Use this setting if the
report will be viewed at a terminal or if the report will be
printed on a printer that does not support overprinting.
xxx1x
Suppresses catalog update when using the NEW
subparameter.
xxxx1
Bypasses CA-EPIC for CMS Archive datasets.
Dataset
Requirements
SORTWK1 is required if you use the SEQ parameter.
Syntax
The following provides an example of the TSIDUTL DSPLY command
syntax.
DSPLY dataset-qualifier [,report-qualifier]
[,SEQ=sort-sequence]
5-2
Connectivity Systems, Inc.—Copyright © 2006
Use Pursuant to Company Instructions
User Reference
TSIDUTL DSPLY
Parameters
The following provides a description of the parameters you can use with
TSIDUTL DSPLY.
Parameter
Required?
dataset-qualifier
Yes
Valid Entry
Default
None
Specify one of the following (required):
ACTIVE
No
None
ALL
No
None
DISK
No
None
DSN
No
None
NEW
No
None
PULL
No
None
PULL,DSN
No
None
SCRATCH
No
None
TAPE
No
None
TAPEPOOL
No
None
VAULT
No
None
report-qualifier
No
None
Specify one of the following (optional)
OWNER
No
None
SYSID
No
None
TPL
No
None
TPV
No
None
USERID
No
None
VLT
No
None
sort-sequence
No
None
Specify one of the following (optional)
User Reference
CJOB
No
None
CDATE
No
None
DSN
No
None
ERROR
No
None
SERIAL
No
None
VAULT
No
None
TAPEPOOL
No
None
XDATE
No
None
Connectivity Systems, Inc.—Copyright © 2006
Use Pursuant to Company Instructions
5-3
TSIDUTL DSPLY
Definitions
The following provides definitions for the parameters you can use with
TSIDUTL DSPLY.
Parameter
Definition
dataset-qualifier
ACTIVE
Creates reports for active datasets only.
ALL
Creates reports for all datasets in the DSN
Catalog.
DISK
Creates reports for disk datasets only.
DSN
Creates reports for a specified dataset only.
NEW
Reports dataset versions created since the
last time the DSPLY NEW report was run.
Use NEW to track the datasets created within
a given time frame.
PULL
Lists the latest version of all datasets.
PULL,DSN
Identifies the latest version of the specified
dataset.
SCRATCH
Identifies scratch tapes.
TAPE
Identifies only tape datasets.
TAPEPOOL
Identifies the tapes in each tape pool. Page
breaks occur between tape pools.
VAULT
Identifies the tapes stored in each offsite
vault. Page breaks occur between vaults.
Only prime versions will be displayed.
report-qualifier
5-4
OWNER
Lists only dataset information having the
specified owner ID.
SYSID
Lists only dataset information having the
specified system ID.
TPL
Lists tapes whose EDD is set to the specified
pool ID.
TPV
Lists tapes whose VOLSER falls within
specified pool ID.
USERID
Lists datasets with the specified user ID.
VLT
Lists datasets stored in the specified vault.
Only prime versions will be displayed.
sort-sequence
Defines the sort sequence of your report and,
if used, must be the last parameter specified.
If you do not use sort-sequence (SEQ),
datasets are listed in the order they are found
in the catalog index. Therefore, if you do not
use SEQ, you might want to sort the index
using TSIDUTL INDEX before running
reports.
Connectivity Systems, Inc.—Copyright © 2006
Use Pursuant to Company Instructions
User Reference
TSIDUTL DSPLY
Examples
Parameter
Definition
CJOB
Lists the job name.
CDATE
Lists the creation date.
DSN
Lists the dataset name.
ERROR
Lists the total errors.
SERIAL
Lists the tape volume serial number.
VAULT
Lists the vault and slot numbers.
TAPEPOOL
Lists the tape pool ID.
XDATE
Lists the expiration date.
The following example produces a report listing all datasets belonging to
the system ID=TS and the user ID=MR. The datasets are listed in the
order they are found in the catalog index.
// JOB DISPLAY DSN CATALOG
// EXEC TSIDUTL
DSPLY ALL,SYSID=TS,USERID=MR
/*
/&
The following example produces a report listing all vaulted tapes. Tapes
are listed in dataset name sequence within the vault. The next example
produces the same reports but is used by users that only have the
BIM-EPIC tape component and do not have the BIM-EPIC disk
component.
// JOB DISPLAY DSN CATALOG
// DLBL SORTWK1,'$$$.SORTWK1,(X)' (if not in Standard
Labels)
// EXEC TSIDUTL
DSPLY VAULT,SEQ=DSN
/*
/&
// JOB DISPLAY DSN CATALOG
// ASSGN SYS001,150
// DLBL SORTWK1,'===.SORTWK1,(X)'
// EXTENT SYS001,MYPAK1,4820,90
// EXEC TSIDUTL
DSPLY VAULT,SEQ=DSN
/*
/&
The following job produces a report listing all tapes whose VOLSER falls
within the B pool range on the machine the job runs on. Tapes are listed in
VOLSER sequence.
// JOB DISPLAY DSN CATALOG
// EXEC TSIDUTL
DSPLY TAPE,TPV=B,SEQ=SER
/*
/&
User Reference
Connectivity Systems, Inc.—Copyright © 2006
Use Pursuant to Company Instructions
5-5
TSIDAC2 Subroutine
Accessing DSN Catalog Records
TSIDAC2 Subroutine
Description
TSIDAC2 provides the capability to access BIM-EPIC Catalog records
from non-BIM-EPIC programs. This subroutine would be useful, for
example, if you needed to produce reports not provided by BIM-EPIC.
TSIDAC2 can be invoked from any programming language that supports
the CALL facility/construct. TSIDAC2 is located in the BIM-EPIC
installation library as member TSIDAC2.OBJ.
A sample COBOL program, TSIDACC2, is located in the BIM-EPIC
installation library as member TSIDACC2.C.
A COBOL mapping of the BIM-EPIC Catalog records is in the
BIM-EPIC installation library as member TSIDAC2.C. Member
TSIDAC2.A is an Assembler mapping.
The BIM-EPIC installation library must be available when the calling
program is link-edited.
Note:
TSIDAC2 is not a reentrant program and must not be used in a CICS
environment.
DSN Catalog
Record
Structure
Each DSN Catalog dataset entry consists of two types of records.
A single BIM-EPIC dataset definition (EDD) record known as
the master record.
Individual version-level records known as detail records.
One record exists for each version, whether the version is valid,
open, conditionally cataloged, or scratched. If the version is
multi-extent or multi-volume, there is a detail record for each
additional extent or volume.
The DSN Catalog dataset also includes an index. Each time a new record
is added to the DSN Catalog file, another index entry is added to the end
of the index area. This means that information obtained sequentially may
not be in alphabetical order. To re-sequence the index, use TSIDUTL
INDEX before executing your program.
5-6
Connectivity Systems, Inc.—Copyright © 2006
Use Pursuant to Company Instructions
User Reference
TSIDAC2 Subroutine
Sequential and
Random
Access
When using random access, TSIDAC2 returns the master record for a
specific dataset the first time TSIDAC2 is called for that dataset. On each
subsequent call, TSIDAC2 returns a detail record for that dataset.
When using sequential access, TSIDAC2 returns each record in order for
a single dataset. TSIDAC2 then moves to the next dataset in the DSN
Catalog index and begins returning the index records, one record at a
time. Detail records are always returned current version first, followed by
each successively older version.
Also, when using sequential access, TSIDAC2 reads the EDD (Master)
record. Once the EDD record has been returned, subsequent TSIDAC2
calls return a Detail/Version record “belonging” to that EDD until all
Detail records have been retrieved. Subsequent calls to TSIDAC2 will
return the next Master record. Detail records are always returned current
version first, followed by successively older versions.
It is your responsibility to determine the status of a Detail record (active,
open, conditionally cataloged, scratched). TSIDAC2.C and TSIDAC2.A
copybooks provide the mappings to assist you when determining the
status of the record.
Procedure
Use the following procedure when invoking the TSIDAC2 subroutine
from a calling program. It may be useful to have the TSIDAC2.C member
available as a guide.
Step
1
Action
Description
Define the storage area
required for the parameter list
that occurs during a TSIDAC2
call.
This storage area begins with a
one-byte field that is used as a
return code from TSIDAC2.
The rest of the storage area
contains the data being passed
to and received from
TSIDAC2.
The TSIDAC2.C copybook and
the TSIDAC2.A copybook
contain the layout of this
storage area. Both copybooks
are in the BIM-EPIC
installation library. Use one of
these copybooks to define the
storage area.
2
User Reference
Place the appropriate argument See “Search Arguments and
in the USR-KEY field to
Calls” in this chapter for
instruct TSIDAC2 which
additional information.
function to perform.
Connectivity Systems, Inc.—Copyright © 2006
Use Pursuant to Company Instructions
5-7
TSIDAC2 Subroutine
Step
Return Codes
Action
Description
3
Call TSIDAC2 from your
program.
This call requires that a
parameter list be passed to
TSIDAC2. The parameter list
consists of only the storage
area discussed in step 1.
4
Following the TSIDAC2 call,
you should check the return
code that is passed back in the
USER-RETURN-CODE field.
The following return codes are used.
Return
Explanation
Code
1
Function completed normally and the data has been returned in
USER-CATALOG-DATA.
2
End-of-file has been reached. This return code is issued when
reading the entire DSN Catalog via sequential access or when
reading all versions of a specific dataset using random access.
3
Requested data was not found in the DSN Catalog during a
random access call.
4
BIM-EPIC system is not active.
Data is returned only if the return code is 0.
Example
The following is an example of COBOL coding that can be used to invoke
TSIDAC2.
WORKING-STORAGE SECTION.
01 ACC-RECORD COPY TSIDAC2.
PROCEDURE DIVISION.
MOVE (search argument) TO USR-KEY.
CALL 'TSIDAC2' USING ACC-RECORD.
IF USER-RETURN-OK GO TO PROCESS-THE-RECORD.
IF USER-RETURN-EOF GO TO END-OF-FILE.
IF USER-RETURN-NOT-ACTIVE GO TO SYSTEM-DOWN.
IF USER-RETURN-NOT-FOUND GO TO NOT-FOUND.
PROCESS-THE-RECORD.
5-8
Connectivity Systems, Inc.—Copyright © 2006
Use Pursuant to Company Instructions
User Reference
Search Arguments and Calls
Search Arguments and Calls
Description
The following explains specific procedures you can use to gain access to
the DSN Catalog when using TSIDAC2. Implement these procedures as
steps 2 and 3 of the procedure outlined in the previous section.
The examples use the COBOL copybook (TSIDAC2.C) to name the data
fields described in this section. All examples are in COBOL.
Random
Access
Example
To request a complete dataset entry:
Step
Action
1
Move the dataset name to the USR-KEY field.
2
Issue multiple calls to TSIDAC2.
The following is an example of COBOL coding that you can use to
request a dataset entry.
PROCEDURE DIVISION.
.
.
.
DSN-LOOP.
MOVE 'DATA.SET.NAME.A' TO USR-KEY.
CALL 'TSIDAC2' USING ACC-RECORD.
IF USER-RETURN-CODE = 1 GO TO END-OF-DSN
IF USER-RETURN-CODE NOT EQUAL ‘0’ GO TO ERROR.
(process the catalog information here)
GO TO DSN-LOOP.
To request a master record only:
Step
Example
Action
1
Move the dataset name to the USR-KEY field.
2
Call TSIDAC2 once.
The following is an example of COBOL coding that you can use to
request a master record only.
PROCEDURE DIVISION.
.
.
.
MOVE 'DATA.SET.NAME.A' TO USR-KEY.
CALL 'TSIDAC2' USING ACC-RECORD.
IF USER-RETURN-CODE NOT EQUAL ‘0’ GO TO ERROR.
.
.
User Reference
Connectivity Systems, Inc.—Copyright © 2006
Use Pursuant to Company Instructions
5-9
Search Arguments and Calls
To request a detail record by volume serial number:
Step
Example
Action
1
Move a hex 02 to USR-KEY-POS-1 and move the six-digit
volume serial number to USR-KEY-SER.
2
Call TSIDAC2.
The following is an example of COBOL coding that you can use to
request a detail record by volume serial number.
WORKING-STORAGE SECTION.
01 HEX-NUMBER
PIC S9(4) COMP VALUE +2.
01 HEX-REDEF REDEFINES HEX-NUMBER.
05 FILLER
PIC X.
05 HEX02
PIC X.
.
.
.
PROCEDURE DIVISION.
.
.
.
MOVE HEX02 TO USR-KEY-POS-1.
MOVE 'EP3452' TO USR-KEY-SER.
CALL 'TSIDAC2' USING ACC-RECORD.
IF USER-RETURN-CODE NOT EQUAL ‘0’ GO TO ERROR.
.
.
Sequential
Access
Example
To read the entire DSN Catalog sequentially:
Step
Action
1
Move spaces to the USR-KEY field.
2
Issue multiple calls to TSIDAC2.
The following is an example of COBOL coding that you can use to read
the entire DSN Catalog sequentially.
PROCEDURE DIVISION.
.
.
.
SEQUENTIAL-READ.
MOVE SPACES TO USR-KEY.
CALL 'TSIDAC2' USING ACC-RECORD.
IF USER-RETURN_CODE = 1
GO TO END-OF-CATALOG.
(process the catalog information here)
GO TO SEQUENTIAL-READ.
To specify a starting point for sequential processing:
Step
5-10
Action
1
Move the starting dataset name into the USR-KEY field.
2
Call TSIDAC2.
3
Move spaces to the USR-KEY field.
Connectivity Systems, Inc.—Copyright © 2006
Use Pursuant to Company Instructions
User Reference
Search Arguments and Calls
Step
4
Example
Action
Issue multiple calls to TSIDAC2.
The following is an example of COBOL coding that you can use to
specify a starting point for sequential processing.
PROCEDURE DIVISION.
.
.
.
MOVE 'DATA.SET.NAME.B' TO USR-KEY.
CALL 'TSIDAC2' USING ACC-RECORD.
SEQUENTIAL-READ.
MOVE SPACES TO USR-KEY.
CALL 'TSIDAC2' USING ACC-RECORD.
IF USER-RETURN_CODE = 1
GO TO END-OF-CATALOG.
(process the catalog information here)
GO TO SEQUENTIAL-READ.
Terminating
Sequential
Access
Sequential access to the DSN Catalog is terminated at end-of-file, under
normal conditions. In certain circumstances, however, you may want to
terminate sequential processing prior to end-of-file and allow your
programs to change between sequential and random processing. No
records are returned when performing this type of call.
To terminate sequential processing prior to end-of-file:
Step
Example
Action
1
Move high-values (hex FF) to the USR-KEY field.
2
Call TSIDAC2.
The following is an example of COBOL coding that you can use to
terminate sequential processing prior to end-of-file.
PROCEDURE DIVISION.
.
.
.
MOVE HIGH-VALUES TO USR-KEY.
CALL 'TSIDAC2' USING ACC-RECORD.
.
.
.
Releasing
GETVIS
The first time TSIDAC2 is called, TSIDAC2 acquires partition GETVIS
storage for various purposes. If your program has more processing to do
after finishing with TSIDAC2, the storage can be released. To release the
storage:
Step
User Reference
Action
1
Move low-values (hex 00) to USR-KEY.
2
Call TSIDAC2.
Connectivity Systems, Inc.—Copyright © 2006
Use Pursuant to Company Instructions
5-11
Search Arguments and Calls
Example
The following is an example of COBOL coding that you can use to
release the storage.
PROCEDURE DIVISION.
.
.
.
MOVE LOW-VALUES TO USR-KEY.
CALL 'TSIDAC2' USING DSN-RECORD.
.
.
.
5-12
Connectivity Systems, Inc.—Copyright © 2006
Use Pursuant to Company Instructions
User Reference
ADDRESS EPIC
ADDRESS EPIC
Description
ADDRESS EPIC provides an interface between BIM-EPIC and the
Global Subsystem (BIM-GSS). Knowledge of how to write and create
GREXX IMOD is assumed.
Return Codes
The following return codes are used.
Command
Forms
Return
Code
Explanation
0
Function completed normally.
-1
ADDRESS EPIC command is invalid.
-2
BIM-EPIC is not active.
-3
Unknown environment. Two possible causes:
The BIM-EPIC sub-library is not in the library search chain
VSE REXX is being used. As stated above, ADDRESS
EPIC is only valid in a GRExx environment
-4
Invalid keyword on ADDRESS EPIC command line.
-5
Invalid keyword value for numeric operand.
-6
STEM keyword is missing.
-8
ID keyword is missing.
-9
Period is missing from STEM operand.
-10
STEM name is invalid.
-11
Insufficient GETVIS for VBUF work area.
-12
GRXEXCOM error return.
-13
GETDSA failure.
The following returns the current BIM-EPIC release. STEM n will be in
the format vv.rr.mm.
ADDRESS EPIC 'EXTRACT RELEASE STEM
n.'
The following returns the master record for the specified dataset when
using the variable ii. If the dataset name is coded as a literal and has
embedded blanks, the dataset name must be enclosed in single quotes (‘)
or double quotes (“). If STEM n.0 is null, the requested dataset was not
found.
ADDRESS EPIC 'EXTRACT ID'
ii 'STEM n.'
The following returns a BIM-EPIC dataset definition (EDD) record for all
datasets whose dataset name begins with the character string in ii.
STEM n.0 indicates the total number of records returned as stem
User Reference
Connectivity Systems, Inc.—Copyright © 2006
Use Pursuant to Company Instructions
5-13
ADDRESS EPIC
variables. If n.0 is 0, there were no datasets found with a dataset name
starting with the character string ii.
COUNT is required. The value c or * specifies the number of EDD
records that can be returned. The value c specifies the maximum number
of EDD records that can be returned. COUNT * will return all matching
records.
SKIP may be used to specify the number of EDD records that will be
bypassed before returning the records as stem variables.
In the following examples, REXX coding rules apply. That is, if an
argument is a literal, the argument must be in quote marks. If the
argument is a variable, the argument must be outside the quote marks. For
example:
ADDRESS EPIC ‘EXTRACT DSN ID’ ii ‘STEM n. COUNT’ c ‘SKIP’ s
ADDRESS EPIC ‘EXTRACT DSN ID’ ii ‘STEM n. COUNT 5 SKIP 8’
The following returns the master record for all datasets in the BIM-EPIC
Catalog. The stem n.0 indicates the total number of records returned as
stem variables. If n.0 is null, no datasets were found. COUNT may be
used to specify the maximum number of records to return. Entering
COUNT *, the default, will return all records. SKIP may be used to
specify the number of records that will be bypassed before returning them
as stem variables.
ADDRESS EPIC ‘EXTRACT DSN ID * STEM n. COUNT’ c ‘SKIP’ s
The following returns detail records for the dataset ii. The stem n.0
indicates the total number of records returned stem variables. If n.0is
null, there were no detail records found for the dataset ii or the dataset
was not found in the BIM-EPIC Catalog. COUNT may be used to specify
the maximum number of records that should be returned. Entering
COUNT *, the default, will return all records associated with the datasets.
SKIP may be used to specify the number of records that will be bypassed
before returning them as stem variables.
ADDRESS EPIC ‘EXTRACT DETAIL ID’ ii ‘STEM
n. COUNT’c ‘SKIP’s
The following returns the detail record for the tape volume v. If stem n.0
is null, the requested volume serial was not found.
ADDRESS EPIC ‘EXTRACT VOL’ v ‘STEM
Processing
Output
5-14
n.’
If you need to use data records extracted by EXTRACT ID, EXTRACT
DETAIL, or EXTRACT VOL instructions, you can decode the data
records by including the GREXX member EPICREC.OAL in your
IMOD. EPICREC.OAL is loaded into the MON PDS when Online
Manager is installed.
Connectivity Systems, Inc.—Copyright © 2006
Use Pursuant to Company Instructions
User Reference
6
BIM-EPIC DD Statement
The BIM-EPIC statement is an MVS-style dataset label for VSE
installations. For many users, the primary benefit of using the dataset
definition (DD) statement is for compatibility with MVS, because the DD
statement simplifies moving JCL between the two operating systems. The
DD statement also offers several options which are unavailable with
standard VSE labels, even when using BIM-EPIC TLBL and DLBL
options.
Chapter Contents
DD Statements
DD Parameters
User Reference
Connectivity Systems, Inc.—Copyright © 2006
Use Pursuant to Company Instructions
6-1
DD Statement Overview
DD Statements
DD Statement Overview
Description
All dataset definition (DD) statements follow the same format. The
identifying characters are * //, which must be specified in columns 1
through 4. These are followed immediately by the DD name.
Syntax
The following provides an example of a DD statement syntax.
* //ddname
Definitions
6-2
DD
parameter-expressions
The following provides definitions for the parameters you can use with a
DD statement syntax.
Parameter
Definition
ddname
Specifies the logical name for the
dataset and performs the same function
as the DTF filename. The ddname
must begin in column 5.
DD
Identifies this as a DD JCL statement.
At least one blank is required
immediately before and immediately
after DD operation code. Do not use the
DD operation code in continuation
statements.
Connectivity Systems, Inc.—Copyright © 2006
Use Pursuant to Company Instructions
User Reference
DD Statement Overview
Parameter
Definition
parameter-expressions Can follow in any order, except where
noted otherwise. A
parameter-expression consists
of a parameter and its value(s) joined
by an equal sign (=). These expressions
must be separated from each other
using commas or blank spaces.
Numeric values are automatically
zero-filled on the left, if required,
eliminating the need to use leading
zeros.
Most DD parameters are
MVS-compatible. However, some
parameters are not compatible for:
Tape and disk datasets (including
GDIUR datasets)
Standard VSE system datasets
SYSIPT data
Dummy datasets
Not all MVS DD parameters are
supported by the BIM-EPIC DD
statement. BIM-EPIC ignores
unsupported and unrecognized
parameters and subparameters.
Supported parameters are discussed
later in this guide.
If you use a DD statement for a DTF that your program defines as a unit
record DTF (DTFCD or DTFPR), the ddname is the SYSnnn, where
nnn is the number specified in that DTF. A unit record DTF is generated
for COBOL programs when the SELECT statement contains an
assignment name that specifies the class UR.
Note:
Do not use ddname in continuation statements or concatenation
statements.
Some DTF names have special meanings and are invalid for DD
statements. See “DD Statement Names” in this chapter for additional
information.
User Reference
Connectivity Systems, Inc.—Copyright © 2006
Use Pursuant to Company Instructions
6-3
DD Statement Syntax
DD Statement Syntax
Description
You can specify multiple parameters in the dataset definition (DD)
statement syntax. Some parameters may have multiple subparameters.
BIM-EPIC DD conventions conform to MVS conventions, for example,
separating multiple parameters and subparameters with commas and
enclosing multiple subparameters in parentheses.
Many subparameters are positional. If you omit a positional
subparameter, you must include a comma in the position of the omitted
subparameter for all but the last subparameter. For example:
* //SYS007
* //
* //
DD
DSN=SORTWK,UNIT=SYSDA,DISP=(NEW,DELETE),
SPACE=(TRK,(5,5),RLSE),VOL=SER=DOSRES,
VOL=(,RETAIN,,,REF=*.TAPEOUT)
All DD statements and continuations can extend through column 71.
Parameters and their values cannot be continued and must be all on the
same line.
Syntax
The following provides another example of a DD statement syntax.
* //ddname
* //
Continuation
Rules
MVS
Compatibility
parameter,...,parameter,
parameter,...,parameter
The following are parameter continuation rules you must consider.
Rule
Action
1
Interrupt the statement on or before column 71. The break must
occur on a keyword boundary and must be a comma. Do not split
subparameters and do not specify a comment after the comma.
2
Begin the next statement with the statement identifier * // in
columns 1 through 4. Omit ddname and the DD operation code.
The continuation may begin in any column as long as there is at
least one blank after the * //. For ease in reading, it is
recommended that all continuations begin in the same column.
In MVS, the first parameter in a continuation line must begin in or before
column 16. If you are specifying a DD statement for later use in MVS,
begin your VSE continuations in or before column 18 to maintain
compatibility. When moving the statement to MVS, delete the asterisk
and the space that follows thereby shifting the rest of the statement two
columns to the left. For example:
* //SYS007
* //
* //
6-4
DD
DD
DSN=SORTWK,DISP=(NEW,DELETE),
UNIT=SYSDA,VOL=SER=DOSRES,
SPACE=(TRK,(5,5),RLSE)
Connectivity Systems, Inc.—Copyright © 2006
Use Pursuant to Company Instructions
User Reference
DD Statement Syntax
Specifying
Dataset Drop
To take advantage of the BIM-EPIC dataset drop option, use multiple DD
statements with the same dataset definition name. No special coding is
required.
Note:
The dataset drop option is not valid under MVS. In addition, VSAM
datasets, including VSAM-managed SAM datasets, are not eligible for a
dataset drop. For example:
* //TAPEIN
* //TAPEIN
* //TAPEIN
!
Concatenating
Datasets
DD
DD
DD
DSN=INVENTRY.1QTR(0),DISP=(OLD,KEEP)
DSN=INVENTRY.2QTR(0),DISP=(OLD,KEEP)
DSN=INVENTRY.3QTR(0),DISP=(OLD,KEEP)
WARNING:
Do not insert any other JCL, including * comment statements
between the DD statements that are part of the dataset drop.
Continuation statements are allowed since they are considered
part of the DD being coded.
BIM-EPIC and MVS automatically concatenate all versions of a single
input. You do not need to specify a version number on input, all versions
are read sequentially, beginning with the current version. For example:
* //TAPEIN
DD
DSN=INVENTRY.1QTR,DISP=(OLD,KEEP)
To concatenate several versions of the same dataset or several different
datasets, use a DD statement for each version or dataset and omit the
ddname on all but the first statement. Submit the statements in the order
they are to be processed. If block sizes differ, the version with the largest
BLKSIZE must be specified first.
Note:
VSAM datasets, including VSAM-managed SAM datasets, cannot be
concatenated. For example:
* //TAPEIN
* //
* //
!
DD
DD
DD
DSN=INVENTRY.1QTR(0),DISP=(OLD,KEEP)
DSN=INVENTRY.2QTR(0),DISP=(OLD,KEEP)
DSN=INVENTRY.3QTR(0),DISP=(OLD,KEEP)
WARNING:
Do not insert any other JCL, including * comment statements
between the DD statements that are part of the concatenating
datasets. Continuation statements are allowed since they are
considered part of the DD being coded.
You can have BIM-EPIC check the syntax of DD statements before you
run the job. To check the syntax, place a TYPRUN=SCAN parameter or
TYPRUN=SCANS parameter in your JOB statement. For example:
// JOB PAYROLL
User Reference
TYPRUN=SCAN
Connectivity Systems, Inc.—Copyright © 2006
Use Pursuant to Company Instructions
6-5
DD Statement Syntax
*// INPUT DD …..
See Chapter 9, “TYPRUN ,” for additional information.
6-6
Connectivity Systems, Inc.—Copyright © 2006
Use Pursuant to Company Instructions
User Reference
DD Statement Names
DD Statement Names
Description
Several dataset definition (DD) statement names (ddnames) have special
purposes in MVS. This section describes how BIM-EPIC uses these
names.
Unsupported
DD Names
Statements containing the following ddnames are ignored by BIM-EPIC.
If needed in the job step, use standard VSE JCL to define datasets
specified with the following names:
Special DD
Names
User Reference
JOBLIB
STEPLIB
SYSCHK
SYSCKEOV
SYSOUT
SYSPRINT (changed automatically to SYSOUT)
The following ddnames have special meaning to BIM-EPIC. If a DTF or
COBOL SELECT uses one of these names for a different purpose, use
standard VSE JCL to define the dataset.
JOBCAT
STEPCAT
SYSABEND
SYSMDUMP
SYSUDUMP
SYSIN
Connectivity Systems, Inc.—Copyright © 2006
Use Pursuant to Company Instructions
6-7
DD Statement Names
The following provides additional information describing the special
ddnames.
Name
Description
JOBCAT and
STEPCAT
JOBCAT and STEPCAT define VSAM catalogs
used for VSAM clusters. In the BIM-EPIC DD,
JOBCAT and STEPCAT also define catalogs used
for VSAM/SAM datasets. These extensions are not
available in MVS.
JOBCAT defines the catalog for the entire job
stream.
STEPCAT defines the catalog for a specific
step.
Note: STEPCAT overrides a JOBCAT definition
for that step. If used, a JOBCAT DD must
immediately follow the // JOB statement. If used, a
STEPCAT DD must precede all VSAM labels
which require that catalog. For example:
//JOB VSAM UPDATE
* //JOBCAT DD DSN=VSAM.JOB.CATALOG,DISP=SHR
…
…
…
* //STEPCAT DD DSN=VSAM.STEP.CATALOG,DISP=SHR
vsam labels
// EXEC PROGRAM
/&
6-8
Connectivity Systems, Inc.—Copyright © 2006
Use Pursuant to Company Instructions
User Reference
DD Statement Names
Name
Description
SYSABEND,
SYSUDUMP,
SYSMDUMP
SYSABEND, SYSUDUMP, and SYSMDUMP
determine the kind of dump that is produced when a
job cancels. Their parameters are similar to the
DUMP and PARTDUMP parameters of the VSE
OPTION statement.
SYSABEND and SYSUDUMP specify a
standard partition dump.
SYSMDUMP specifies a full supervisor and
partition dump.
You must specify the SYSOUT parameter with the
SYSABEND, SYSUDUMP, and SYSMDUMP
ddnames. In MVS, SYSOUT identifies a print class.
In BIM-EPIC, class A indicates SYSLST, class B
indicates SYSPCH.
The following statement calls for a standard
partition dump. The VSE JCL equivalent is
// OPTION PARTDUMP.
* //SYSABEND
DD
SYSOUT=A
The following statement calls for a full supervisor
and partition dump. The VSE JCL equivalent is
// OPTION DUMP.
* //SYSMDUMP
SYSIN
User Reference
DD
SYSOUT=A
Use SYSIN to assign a logical unit to SYSIPT data.
Connectivity Systems, Inc.—Copyright © 2006
Use Pursuant to Company Instructions
6-9
Parameters for Tape and Disk Datasets
DD Parameters
Parameters for Tape and Disk Datasets
Description
This section provides descriptions for the tape dataset parameters and the
disk dataset parameters as well as the purpose of each parameter.
Syntax
The following provides an example of the syntax showing the parameters
available for use with tape datasets and disk datasets.
* //ddname
Parameters
DD
DSN=dataset-name
[ ,AMP=x ]
[ ,DCB=x ]
[ ,DISP=x ]
[ ,FREE ]
[ ,LABEL=x ]
[ ,OPTION=x ]
[ ,SPACE=x ]
[ ,UNIT=x ]
[ ,VOL=x ]
The following provides a brief description of each parameter. Detailed
information describing each parameter can be found later in this chapter.
Parameter
Description
AMP
Use the AMP parameter to define a VSAM cluster or a
VSAM/SAM dataset.
DCB
Use the DCB parameter to define the dataset record
characteristics. DCB is an MVS term that stands for
dataset control block and is roughly analogous to the VSE
DTF macro set. DCB determines the block size, logical
record length, tape density, and dataset organization, for
example, sequential, direct access, or indexed sequential
for disk datasets.
DISP
Use the DISP parameter to specify the current status of
the dataset and its disposition at normal or abnormal
termination. For example, whether a dataset is new or
existing, whether it should be retained at close or deleted,
whether it should be cataloged or left uncontrolled.
Because the DISP parameter specifies so much about a
dataset, it can serve as documentation for your JCL and is
sometimes used solely for that purpose when only default
values are specified.
6-10
Connectivity Systems, Inc.—Copyright © 2006
Use Pursuant to Company Instructions
User Reference
Parameters for Tape and Disk Datasets
Parameter
Description
DSN
Use the DSN parameter to specify the name or version of
the dataset(s) you want to process. For input datasets, if
you do not specify a particular version, all versions are
read. This process is known as automatic concatenation.
DSN is required for all tape datasets and disk datasets.
The DSN parameter can specify CPU and partition
independence or common work datasets. This is a
BIM-EPIC extension not available with MVS.
FREE
Use the FREE parameter to specify how to handle tape
drive assignments when the dataset is closed. When doing
multi-dataset processing, use FREE to hold the
assignment until all datasets have been processed. FREE
is valid for tape datasets only.
LABEL
Use the LABEL parameter to determine how long to
retain output datasets. The LABEL parameter is normally
used for uncataloged datasets, but can be used for a
cataloged dataset when you want to override the
catalog-specified retention.
OPTION
Use the OPTION parameter to specify options available
in VSE and BIM-EPIC which have no equivalents in
MVS. OPTION is a BIM-EPIC extension.
SPACE
Use the SPACE parameter to specify disk space
requirements for output datasets. SPACE specifies how
much space to use and how to process the allocated space
after the dataset is closed.
SPACE is optional for cataloged datasets. You can use
the parameter to specify an allocation size that is different
from the size in the DSN Catalog or to inhibit truncation
for a version.
SPACE is required for Start Track 1 and uncontrolled
datasets.
User Reference
UNIT
Use the UNIT parameter to specify the type of device to
use for an output dataset and for an uncontrolled input
dataset. Device types include, but are not limited to, tape
or disk, 3380 or 3390.
VOL
Use the VOLUME (VOL) parameter to specify which
tape volume, disk volume, or disk pool to allocate for an
output dataset or for an uncontrolled input dataset. For
tape datasets, you can use VOL to specify rewind options
for multi-dataset processing. VOL is not normally used
for controlled datasets.
Connectivity Systems, Inc.—Copyright © 2006
Use Pursuant to Company Instructions
6-11
Parameters for Processing Datasets
Parameters for Processing Datasets
Description
This section describes the dataset definition (DD) statement parameters
you can use to process different types of datasets.
The JCLOVRDE configuration option determines how DD parameters
affect DSN Catalog entries. This configuration option applies only to
datasets that exist in the catalog at the time the dataset is opened for
output. If JCLOVRDE=NO, the DD parameters will override their
catalog counterparts on a “one-time” basis. If JCLOVRDE=YES, the DD
parameters will replace their catalog counterparts in the dataset catalog
entry. The override will be permanent.
Tape
Use caution when specifying the VOLUME parameter, FREE parameter,
and DISP parameter. VOLUME has several purposes. FREE holds and
releases tape drive assignments. DISP=(x,KEEP) unloads tapes at close.
By default a tape is rewound but not unloaded at close, if you specify
DISP=(x,KEEP), VOL=PRIVATE, or VOL=(,RETAIN).
Disk
The SPACE parameter is important when using disk processing. Use the
SPACE parameter to determine extent allocations for datasets that are not
in the DSN Catalog. SPACE is required for Start Track 1 and
uncontrolled datasets. You can reuse the same extent with DISP=MOD.
UNIT is required for disk output.
Cataloged
If the dataset is already defined in the catalog, specify DISP=(x,KEEP)
for both input and output. You do not need to provide parameters if the
information is in the catalog entry for that dataset. You can override
cataloged parameters for a version by specifying the equivalent parameter
in the DD statement. For example, you can override period retention by
specifying LABEL=RETPD=n. If you want to permanently modify the
current dataset definition in the BIM-EPIC Catalog, specify
DISP=(x,CATLG). You must also set the JCLOVRDE=YES
configuration option.
If a dataset is not in the catalog and you want to automatically catalog it
(autocatalog), specify DISP=(NEW,CATLG). The new dataset is
cataloged using the data in the DD statement. DD statements cannot be
used to autocatalog an input dataset.
Note:
If your BIM-EPIC configuration options specify the use of
autocataloging, when opened for output, a non-cataloged dataset will be
cataloged automatically even if you do not specify DISP=(x,CATLG).
The recommended method is to use DISP=(x,CATLG) to autocatalog all
6-12
Connectivity Systems, Inc.—Copyright © 2006
Use Pursuant to Company Instructions
User Reference
Parameters for Processing Datasets
uncataloged datasets defined with DD statements. See Chapter 1,
“Cataloging Datasets Automatically,” for additional information on
autocataloging using configuration options.
The following example creates a new version of a previously cataloged
dataset. The associated default block size is overridden. The actual block
size is 4080.
* //TAPEOUT
* //
DD
DSN=SARS.BACKUP,DISP=(NEW,KEEP),
DCB=BLKSIZE=4080
The following example creates a new, uncataloged dataset. When created,
the dataset is automatically cataloged. In addition, the values for block
size, period retention, and density are entered in the dataset definition.
* //TAPEOUT
* //
Start Track 1
Datasets
To create a Start Track 1 dataset, use the SPACE parameter
(SPACE=TRK, SPACE=CYL, or SPACE=ALR). You must use the
VOLUME parameter to allocate the space to a disk pool. Do not catalog
the dataset or specify DISP=(x,CATLG).
* //DISKOUT DD
* //
Uncontrolled
Datasets
DD DSN=SARS.BACKUP,DISP=(NEW,CATLG),
DCB=(BLKSIZE=4080,DEN=3),LABEL=RETPD=7
DSN=TWORK.BG,DISP=(NEW,PASS),
SPACE=(TRK,(10,5),RLSE),VOL=SER=POOL01,UNIT=DISK
To create an uncontrolled non-VSAM disk dataset on a POOL or
non-POOL volume, use the SPACE=ABSTR and VOL parameters. No
special parameters are required to create an uncontrolled tape dataset. Do
not specify DISP=(x,CATLG). If you specify DISP=(x,CATLG), the
dataset will be cataloged.
To use BIM-EPIC DD statements for uncontrolled disk datasets, the
UNCDSK=YES configuration parameter must be set.
* //OPTOUT
* //
VSAM/SAM
Datasets
DD
DSN=EPIC.LIBRARY,SPACE=(ABSTR,(100,20)),
DISP=NEW,VOL=SER=SYSWK1,UNIT=DISK
To process a VSAM/SAM dataset, use the AMP, DISP, and SPACE
parameters for both input and output. You can use the VOLUME
parameter to specify a disk volume. Identify the VSAM catalog using a
STEPCAT DD statement or JOBCAT DD statement.
In the following example, the STEPCAT DD statement defines the
catalog for the VSAM/SAM dataset. AMP=AMORG indicates that a
VSAM or VSAM/SAM dataset is being defined. DISP=SHR allows the
dataset to be accessed by other programs as it is processed. This example
uses ALR to allocate space to the dataset, using a record size of 240 bytes,
and allocates a primary extent large enough for 1000 records and a
secondary extent large enough for 500 records.
User Reference
Connectivity Systems, Inc.—Copyright © 2006
Use Pursuant to Company Instructions
6-13
Parameters for Processing Datasets
* //STEPCAT DD
* //VSAMSAM DD
* //
DSN=CUSTOMER.CAT,DISP=SHR
DSN=CUSTOMER.MASTER,DISP=SHR,AMP=AMORG,
SPACE=(240,(1000,500))
You can process existing VSAM datasets using BIM-EPIC DD
statements. To process an existing VSAM dataset, include the AMP
parameter in your statement. Define the VSAM catalog with a STEPCAT
DD statement or JOBCAT DD statement. BIM-EPIC cannot create new
VSAM IDCAMS datasets.
* //JOBCAT DD
* //VSAMCLU DD
6-14
DSN=CUSTOMER.CAT,DISP=SHR
DSN=CUSTOMER.MASTER,DISP=SHR,AMP=AMORG
Connectivity Systems, Inc.—Copyright © 2006
Use Pursuant to Company Instructions
User Reference
AMP Parameter
AMP Parameter
Description
Use the AMP parameter to define a VSAM cluster or a VSAM/SAM
dataset.
Syntax
The following provides an example of a AMP parameter syntax.
AMP=(AMORG [ ,BUFSP=x ])
Subparameters
Definitions
User Reference
The following provides a description of the subparameters you can use
with the AMP parameter.
Subparameter
Required?
Valid
Default
AMORG
Yes
None
None
BUFSP
No
0 to 9999999
None
The following provides definitions for the subparameters you can use
with AMP parameter.
Subparameter
Definition
AMORG
Specifies that this is a VSAM cluster or
VSAM/SAM dataset.
BUFSP
Specifies the number of bytes allocated as buffer
space. If omitted, VSAM will determine the size of
the buffer.
Connectivity Systems, Inc.—Copyright © 2006
Use Pursuant to Company Instructions
6-15
DCB Parameter
DCB Parameter
Description
Use the DCB parameter to define the characteristics of the dataset. DCB
subparameters override the DSN Catalog entry on output, but not on
input.
Syntax
The following provides an example of a DCB parameter syntax.
DCB=( [ BLKSIZE=x ][ ,DEN=x ][ ,DSORG=x ][ ,LRECL=x ] )
Subparameters
Definitions
The following provides a description of the subparameters you can use
with the DCB parameter.
Subparameter
Required?
Valid
Default
BLKSIZE
No
1 to 32767 or MAX|OPT
None
DEN
No
See DEN table (below)
None
DSORG
No
See DSORG table (below) PS
LRECL
No
1 to 32767
None
The following provides definitions for the subparameters you can use
with the DCB parameter.
Subparameter
Definition
BLKSIZE
Specifies a block size and is valid for sequential datasets
only. If an integer value is used, it must be a multiple of
the LRECL value. For MAX and OPT, BIM-EPIC will
calculate the appropriate block size.
MAX causes BIM-EPIC to use full-track blocking on
disk. For tape, when using VSE/ESA 2.5 and later
releases, BIM-EPIC uses a 64K block size. For earlier
VSE releases, a block size of 32K is used.
OPT causes BIM-EPIC to use half-track blocking for
disk. For tape, when using VSE/ESA 2.5 or later
releases, BIM-EPIC uses a 32K block size. For earlier
VSE releases, a 16K block size is used.
6-16
Connectivity Systems, Inc.—Copyright © 2006
Use Pursuant to Company Instructions
User Reference
DCB Parameter
Subparameter
Definition
DEN
Specifies a recording density for tape datasets. Valid
density codes are:
Code
Density
2
800 bpi
3
1600 bpi
4
6250 bpi
A
8809 streaming short gap
B
8809 start-stop long gap
C
8809 start-stop short gap
D
8809 streaming long gap
E
3480/3490 non-IDRC buffered write mode
F
3480/3490 IDRC buffered write mode
G
3424/9348 1600 bpi buffered write mode
H
3424/9348 1600 bpi unbuffered write mode
I
3424/9348 6250 bpi buffered write mode
J
3424/9348 6250 bpi unbuffered write mode
K
3490E cartridge device
L
3490E IDRC cartridge device
M
3592 cartridge device
¬ (X'5F')
None specified - use default density
Codes A through M are BIM-EPIC extensions and are
not recognized by MVS.
DSORG
Specifies the organization of the dataset. DSORG is
required for direct access and indexed sequentially
datasets only. Valid codes are:
Code
Organization
DA or
DAU
Direct access
IS or ISU
Indexed sequential
PS or PSU Sequential
When using MVS, there are two options for each type of
dataset organization. Specifying U indicates that the
dataset is unmovable, so the same extents are used every
time. When PSU, DAU, or ISU is specified and the
dataset is a disk work dataset, BIM-EPIC allocates the
same extents to the dataset that it already occupies. If
you are going to convert to MVS, choose your dataset
organization carefully.
User Reference
Connectivity Systems, Inc.—Copyright © 2006
Use Pursuant to Company Instructions
6-17
DCB Parameter
6-18
Subparameter
Definition
LRECL
Specifies the logical record length of a record in the
dataset. The number indicated must be less than or equal
to the record length specified in the DTF or FD entry. If
the logical record length is greater, the LRECL
subparameter is ignored.
Connectivity Systems, Inc.—Copyright © 2006
Use Pursuant to Company Instructions
User Reference
DISP Parameter
DISP Parameter
Description
Use the DISP parameter to identify how to open a dataset and what is to
be done to the dataset when it is closed. DISP subparameters define the
initial usage, normal termination, and abnormal termination disposition of
a dataset. If more than one subparameter is used, the subparameter list
must be enclosed in parentheses.
For all but the last subparameter, when a subparameter inside the list is
not specified, a comma must be used to specify that the default value will
be used.
Syntax
The following provides an example of a DISP parameter syntax.
DISP=[initial-usage-status][,normal-end-status]
[,abnormal-end-status]
Subparameters
The following provides a description of the subparameters you can use
with the DISP parameter.
Subparameter
Required?
Default
initial-usage-status
No
New
Specify one of the following (optional):
NEW
No
New
OLD
No
New
SHR
No
New
MOD
No
New
normal-end-status
No
Specify one of the following (optional):
CATLG
No
CONDCAT
No
DELETE
No
KEEP
No
KEEP if
initial-usage is
OLD or MOD
PASS
No
PASS if
initial-usage is
NEW or SHR
abnormal-end-status
No
Normal-end-status
Specify one of the following (optional):
User Reference
CATLG
No
None
DELETE
No
None
KEEP
No
None
Connectivity Systems, Inc.—Copyright © 2006
Use Pursuant to Company Instructions
6-19
DISP Parameter
Definitions
The following provides definitions for the subparameters you can use
with the DISP parameter.
Subparameter
Definition
initial-usage-status Specifies the status of a dataset at the
time the dataset is opened. If
initial-usage-status is not
specified, NEW is used.
6-20
normal-end-status
Specifies the action taken for the dataset
if the job step ends normally. If
normal-end-status is not
specified, PASS is used if
usage-status is NEW or MOD.
KEEP is used if usage-status is
OLD or SHR.
abnormal-end-status
Specifies the action taken for the dataset
if the job step ends abnormally. If
abnormal-end-status is not
specified, the normal-end-status
specification is used.
Connectivity Systems, Inc.—Copyright © 2006
Use Pursuant to Company Instructions
User Reference
DISP Parameter
Subparameter
Definition
CATLG
Performs one of two functions:
Catalogs the dataset automatically if
no DSN Catalog entry for the dataset
exists.
Updates selected dataset definitions
in the DSN Catalog, if configuration
option JCLOVRDE=YES is
specified. CATLG can also update
these dataset definitions for already
existing datasets:
Tape/Disk
Tape Only
Disk Only
Retention
Block size
Tape pool
Density
Disk pool
CISIZE
Primary extent size
Secondary extent size
Maximum number of
secondary extents
If the DDGEN configuration option is set
to NO, tape datasets are cataloged as
generation datasets and disk datasets are
cataloged as non-generation datasets.
The exception to this occurs when
LABEL=RETPD=xx is specified for a
disk dataset. When this occurs, the disk
dataset is cataloged as a generation
dataset.
Note: If the DDGEN configuration
option is set to YES, both the tape
datasets and disk datasets are
automatically cataloged as
non-generation datasets, unless a plus
sign (+) is found in the DSN parameter.
The settings for the automatic cataloging
configuration options, AUTOCAT and
AUTOLOG, do not affect CATLG.
CONDCAT
User Reference
Conditionally catalogs the version.
Note: The CONDCAT subparameter is
not available in MVS; it is a BIM-EPIC
extension.
Connectivity Systems, Inc.—Copyright © 2006
Use Pursuant to Company Instructions
6-21
DISP Parameter
Subparameter
Definition
DELETE
Causes the dataset to be scratched
automatically, after the dataset has been
closed. The setting of the DDGEN
configuration parameter determines
whether the scratch process is done when
the dataset is closed, at end-of-step
(EOS), or at end-of-job (EOJ). See DISP
Parameter for more information.
KEEP
Determines the status of a closed dataset.
For normal-termination, if KEEP
is explicitly specified for tape datasets,
the tape will be unloaded at close. If
KEEP is not explicitly specified, the tape
will not be unloaded at close.
VOL=RETAIN overrides KEEP. For
DISK datasets, KEEP means the Format
1 entry for the dataset remains in the
VTOC.
For abnormal termination,
KEEP is the default disposition unless
both of the following conditions are true:
6-22
Normal termination disposition is
DELETE.
Configuration option PURBYP is set
to NO.
Connectivity Systems, Inc.—Copyright © 2006
Use Pursuant to Company Instructions
User Reference
DISP Parameter
Subparameter
Definition
MOD
Specifies that new data is to be
added/appended to an existing tape
version. If using a disk version, the
existing data will be overwritten. For
both tape and disk, if there is no existing
version, a new version will be created.
When used for tape, MOD removes the
existing end-of-file (EOF) marker and
writes new data beginning at that point.
A new EOF will be created when the
dataset is closed.
When used for disk, MOD reuses the
extents used in the last/most recent
version. This destroys any existing data.
Note: MOD can be specified only for
non-generation disk datasets.
!
WARNING:
MOD does not extend an existing disk
dataset as it does for tape or as it does in
MVS. If MOD is specified for an existing
disk dataset that is opened as output, the
same extent is used but records are
written at the beginning of the dataset.
Any data already in the dataset is
overwritten and lost.
Using DDGEN
with the DISP
Parameter
User Reference
NEW
Specifies a new dataset or a new version
of an existing dataset.
OLD
Specifies a version of an existing dataset.
PASS
Retains the version for use in a later step
in the same job.
SHR
Specifies an existing dataset. Data in the
dataset will be appended if tapes are used
or overwritten if disks are used. Use
KEEP and CATLG to retain the dataset
if the job cancels via an abnormal
termination. The default disposition for
abnormal termination depends on both
the normal termination subparameter and
the PURBYP configuration option.
The DDGEN configuration option specifies when a dataset version is to
be deleted based on the DISP parameter.
Connectivity Systems, Inc.—Copyright © 2006
Use Pursuant to Company Instructions
6-23
DISP Parameter
The following table describes the basic DISP and DDGEN combinations.
For those combinations not explicitly defined in the table, the following
rules apply:
If usage-status is SHR, the status will be treated the same as
OLD.
If usage-status is MOD, the status will be treated the same
as OLD if there is an existing version. If an existing version does
not exist, the status will be treated the same as NEW.
The CONDCAT normal-end-status will be treated the
same as KEEP.
The CATLG normal-end-status and
normal-end-status will be treated the same as KEEP.
In all other cases, if there is no entry in the table, no deletion occurs.
6-24
When DISP=
If DDGEN=NO, then...
If DDGEN=YES, then...
NEW
deletes at end-of-job
deletes at end-of-step
NEW,KEEP
deletes at end-of-job
deletes at end-of-step
NEW,KEEP,KEEP
deletes at end-of-job only if
good eoj
deletes at end-of-step only if
good eoj
NEW,KEEP,DELETE
deletes at end-of-job only if
job abends
deletes at end-of-step only if
step abends
NEW,DELETE
deletes at end-of-job
deletes at end-of-step
NEW,DELETE,KEEP
deletes at end-of-job only if
good eoj
deletes at end-of-step only if
good eoj
NEW,DELETE,DELETE
deletes at end-of-job
deletes at end-of-step
NEW,PASS
deletes at end-of-job
deletes at end-of-job
NEW,PASS,KEEP
deletes at end-of-job only if
good eoj
deletes at end-of-job only if
good eoj
NEW,PASS,DELETE
deletes at end-of-job
deletes at end-of-job
OLD
(Note 1)
(Note 1)
OLD,KEEP
(Note 1)
(Note 1)
OLD,KEEP,KEEP
(Note 1)
(Note 1)
OLD,KEEP,DELETE
deletes at end-of-job only if
job abends
deletes at end-of-step only if
step abends
OLD,DELETE
deletes at close (Note 2)
deletes at end-of-step
OLD,DELETE,KEEP
deletes at end-of-job only if
good eoj
deletes at end-of-step only if
good eoj
OLD,DELETE,DELETE
deletes at close (Note 2)
deletes at end-of-step
OLD,PASS
deletes at end-of-job
deletes at end-of-job
OLD,PASS,KEEP
deletes at end-of-job only if
good eoj
deletes at end-of-job only if
good eoj
OLD,PASS,DELETE
deletes at end-of-job only if
job abends
deletes at end-of-step only if
job abends
Connectivity Systems, Inc.—Copyright © 2006
Use Pursuant to Company Instructions
User Reference
DISP Parameter
Note:
(1) DISP=(OLD,KEEP) and DISP=(OLD,KEEP,KEEP) will
automatically reset any “delete at end-of-step” or “delete at end-of-job”
action currently in effect for the specified dataset.
Note:
(2) Normal deletion will occur at file close but, when used in conjunction
with the automatic concatenation feature, deletion will occur at
end-of-step. If usage is MOD, deletion will occur at end-of-job.
In cases of abnormal termination, you can override the end-of-step and
end-of-job deletions. To do this, set the PURBYP configuration option to
YES.
BIM-EPIC does not delete datasets at end-of-step or end-of-job unless the
datasets have been opened. This default can be changed to do deletions
even though the dataset has not been opened. Both the DDGEN and
EPS049 configuration options must be set to YES.
Additional DISP
Settings
For both normal and abnormal terminations, DISP settings are treated as
follows:
Setting
Is Treated Like...
DISP=MOD
DISP=NEW
DISP=SHR
DISP=OLD
DISP=(xxx,CATLG)
DISP=(xxx,KEEP)
DISP=(xxx,CONDCAT)
DISP=(,xxx)
User Reference
defaults to DISP=(NEW,xxx)
Connectivity Systems, Inc.—Copyright © 2006
Use Pursuant to Company Instructions
6-25
DSN Parameter
DSN Parameter
Description
Use the DSN parameter to specify the name of the dataset being
processed. The DSN parameter is required for all tape datasets and disk
datasets. It also determines which version or versions of the dataset will
be used for input.
The rules for dataset names with DD statements are slightly different
from the rules for dataset names with standard VSE JCL. Tape dataset
names and disk dataset names can be up to 44 characters. Generation
dataset names are limited to 35 characters. These limitations are set
because EPIC places the generation number into the VSE Format 1 label
in the format of G=nnnnnnnn. The G= information does not appear
when displayed in Online Manager or TSIDMNT reports. If the dataset
name contains embedded blanks, enclose the name in apostrophes.
Note:
Only the first 17 characters of the dataset name are written on a tape
HDR1 label. BIM-EPIC internally manages the remaining characters if
the DSN exceeds 17 characters.
Syntax
The following provides an example of a DSN parameter syntax.
DSN=dataset-name
[.Gnnnn[Vnnn]|(0)|(-n)|(+n)|(area)]
or
DSN=&[&]dsname
Subparameters
The following provides a description of the subparameters you can use
with the DSN parameter.
Subparameter
Definitions
Required?
Valid
Default
dataset-name Yes
1 to 44 characters
None
.Gnnnn[Vnnn] No
Generation number
None
See text
n
No
Zero or signed integer
area
No
INDEX|PRIME|OVFLOW None
The following provides definitions for the subparameters you can use
with the DSN parameter.
Subparameter
Definition
dataset-name Specifies the dataset name.
6-26
Connectivity Systems, Inc.—Copyright © 2006
Use Pursuant to Company Instructions
User Reference
DSN Parameter
Subparameter
Definition
.Gnnnn[Vnnn] Specifies a disk version by generation number.
Insert the generation number after the G, but before
the V, if a generation number exists. The Vnnn
portion of the parameter is ignored by BIM-EPIC
and can be omitted. The Vnnn portion is included
for MVS compatibility only. In practice, as in MVS,
this form is not usually used. Use - or + forms
instead.
(0)
Specifies a version-by-version number.
(-n)
(0) Zero indicates the current version.
(+n)
(-) Minus indicates a previous version for input.
(+) Plus indicates a new version for output.
!
WARNING:
For generation datasets used as input, if a dataset
name does not contain a version, all existing
versions of the dataset will be concatenated and
read!
For MVS compatibility, a 0 (zero) specifies the
current version instead of 1, as in the DSN Catalog.
That means when you enter a version number
containing a minus sign, the version number should
be one less than the DSN Catalog version number.
For example, if the DSN Catalog version number is
3, specify DSN=dataset-name(-2).
Note: You do not need to specify (+n) for output
datasets. Specifying the dataset name is sufficient to
create a new version. However, if the DDGEN
configuration parameter is set to YES, specifying
(+n) with DISP=(x,CATLG) causes disk datasets to
be cataloged as generation datasets. If DDGEN is
set to NO and you do not specify LABEL=RETPD
or LABEL=EXPDT, the dataset is cataloged as a
non-generation dataset.
area
User Reference
Specifies which ISAM dataset area is being defined.
INDEX indicates the cylinder index component.
PRIME indicates the prime data area.
OVFLOW indicates the overflow area.
Connectivity Systems, Inc.—Copyright © 2006
Use Pursuant to Company Instructions
6-27
DSN Parameter
Subparameter
Definition
&&dsname
&dsname
Specifies work datasets. In MVS, placing two
ampersands (&&) before a dataset name indicate a
temporary dataset. In BIM-EPIC, two ampersands
(&&) before a dataset name indicate CPU and
partition independence. A single ampersand (&)
indicates CPU independence only. The dataset
name can be up to 44 characters.
CPU and partition independence can also be
indicated using an equal sign (=) or a dollar sign ($),
as with TLBL and DLBL statements. See Chapter 7,
“CPU and Partition Independence,” and “Common
Work Datasets” for additional information.
Note: These are BIM-EPIC extensions. MVS
does not support equal signs and dollar signs. The
MULTCPU configuration option affects CPU
independence.
6-28
Connectivity Systems, Inc.—Copyright © 2006
Use Pursuant to Company Instructions
User Reference
FREE Parameter
FREE Parameter
Description
Use the FREE parameter to specify when to release a tape drive
assignment. FREE is valid for tape datasets only. When you are
processing multi-dataset tapes, you must specify FREE=END for every
dataset except the last one processed in the job. An example of this is at
the end of this section.
Syntax
The following provides an example of a FREE parameter syntax.
FREE={CLOSE|END}
Subparameters
The following provides a description of the subparameters you can use
with the FREE parameter.
Subparameter
Required?
Valid
Default
Specify one of the following (required):
Definitions
Example
CLOSE
No
Yes
END
No
None
The following provides definitions for the subparameters you can use
with the FREE parameter.
Subparameter
Definition
CLOSE
Releases the assignment when the dataset is closed.
This is the default setting.
END
Releases the assignment at the end of the job.
The following example shows how the FREE parameter is used to hold
the assignment until the last dataset is closed.
*
*
*
*
*
*
*
*
*
*
*
*
*
User Reference
//INPUT1
//
//
//
//
//INPUT2
//
//
//
//
//INPUT3
//
//
DD
DD
DD
DSN='INPUT.DSN.1'
UNIT=TAPE,
DISP=(OLD,KEEP),
FREE=END,
VOL=(,RETAIN)
DSN='INPUT.DSN.2'
UNIT=TAPE,
DISP=(OLD,KEEP),
FREE=END,
VOL=(,RETAIN)
DSN='INPUT.DSN.3',
UNIT=TAPE,
DISP=(OLD,KEEP)
Connectivity Systems, Inc.—Copyright © 2006
Use Pursuant to Company Instructions
6-29
LABEL Parameter
LABEL Parameter
Description
Use the LABEL parameter to define the dataset retention. You can
specify an explicit expiration date or specify the number of days for the
dataset retention period.
The LABEL parameter overrides the CYCL and RETEN configuration
options. If a dataset is being autocataloged for the first time, the new EDD
will take the LABEL value. If a dataset is already cataloged, a new
version will take the LABEL value instead of the EDD value.
LABEL is valid only with DISP=NEW. If you specify LABEL=EXPDT
or LABEL=RETPD with DISP=(NEW,CATLG), the dataset is cataloged
as a generation dataset.
Syntax
The following provides an example of a LABEL parameter syntax.
LABEL={EXPDT={yyddd or yyyy/ddd}|RETPD=nnnn}
Subparameters
The following provides a description of the subparameters you can use
with the LABEL parameter.
Subparameter
Required?
Valid
Default
Specify one of the following (required):
Definitions
6-30
EXPDT
No
00001 to 99365
2000/001 to 2099/365
None
RETPD
No
1 to 9999
See below
The following provides definitions for the subparameters you can use
with the LABEL parameter.
Subparameter
Definition
EXPDT
Specifies an expiration date for a dataset. You must
enter the date in Julian format. For example, if the
date is December 31, 1992, enter 92365. If the date
is January 1, 2000 or later, you can specify the full
year with a slash between the year and the day. For
example, if the date is January 1,2000, enter
2000/001or you can omit the slash and enter
2000001.
RETPD
Specifies the number of days to retain the dataset. If
the LABEL parameter is omitted or
LABEL=RETPD=7 is specified, the RETEN
configuration option value will be used. Otherwise,
the value specified will be used.
Connectivity Systems, Inc.—Copyright © 2006
Use Pursuant to Company Instructions
User Reference
LABEL Parameter
Examples
The following is an example using the LABEL parameter.
*
*
*
*
User Reference
//OUTPUT
//
//OUTPUT
//
DD
DD
DSN=OUT.DATA.SET,LABEL=EXPDT=98365,
DISP=(NEW,KEEP)
DSN=OUT.DATA.SET,LABEL=RETPD=5,
DISP=(NEW,KEEP)
Connectivity Systems, Inc.—Copyright © 2006
Use Pursuant to Company Instructions
6-31
OPTION Parameter
OPTION Parameter
Description
Use the OPTION parameter to invoke a BIM-EPIC feature where there is
no equivalent MVS JCL parameter. OPTION can be used to:
Selectively activate disk allocation messages
Specify the name of an applicable VSAM catalog
Specify an FBA CISIZE
Specify a specific logical unit number
Specify a tape pool ID
Base current disk allocation size on the size used by a different
dataset
Selectively remove a VSE label from the label area
Override rewind options specified by DISP or VOL parameters
When you use multiple subparameters, they must be separated by
commas and the list must be enclosed in parentheses. The subparameters
are not positional, so it is not necessary to use commas in place of
unspecified subparameters.
Syntax
The following provides an example of an OPTION parameter syntax.
OPTION={
[ ,ALLMSGS ]|[ ,CAT=ddname ]|[ ,CISIZE=n ]|[ ,NOREW ]|
[ ,RESET ]|[ ,REW ]|[ ,RUN]|[ ,SPACE=*.ddname[x] ]|
[ ,SYSnnn ]|[ ,TPL=x ]
}
Subparameters
The following provides a description of the subparameters you can use
with the OPTION parameter.
Subparameter
Required?
ALLMSGS
No
Valid
ALLMSG and
ALLMALL
Configuration
Option settings
CAT=ddname No
6-32
Default
None
CISIZE=n
No
512, 1024, 2048, 3072,
4096
NOREW
No
See below
RESET
No
OFF
REW
No
See below
Connectivity Systems, Inc.—Copyright © 2006
Use Pursuant to Company Instructions
None
User Reference
OPTION Parameter
Definitions
Subparameter
Required?
Valid
Default
RUN
No
SPACE=
No
1 to 15 characters
None
SYSnnn
No
000 to
254|RDR|IPT|LST|PCH
None
TPL=
No
A to Z or 0 to 9 (Use "¬" None
{X'5F} to indicate no
TPL value is desired)
See below
The following provides definitions for the subparameters you can use
with the OPTION parameter.
Subparameter
Definition
ALLMSGS
Overrides configuration options ALLMALL=NO
(default) and ALLMSG=NO for the dataset in the
current job step only. ALLMSGS causes all
allocation messages for the disk dataset to be
displayed. The ALLMSGS subparameter performs
the same function as the BIM-EPIC DLBL option
code M. The ALLMSGS subparameter is valid for
disk datasets only and is ignored if specified for a
tape dataset.
CAT=ddname
Specifies the DD name used in a previous DD or
DLBL statement to define the VSAM catalog to be
used for this dataset. Use this parameter only when
you are defining a VSAM dataset. CAT=ddname
overrides any JOBCAT or STEPCAT statement for
the dataset.
CISIZE=nnnn
Specifies the CISIZE to use for an FBA disk dataset
according to IBM rules.
Note: If the dataset is a Start Track 1 dataset and
CISIZE=nnnn is specified, specification of the
maximum number of secondary extents in the
VOLUME parameter is ignored.
NOREW
User Reference
Specifies that the tape is not rewound at close.
NOREW overrides any rewind option set by the
DISP or VOL parameters.
Connectivity Systems, Inc.—Copyright © 2006
Use Pursuant to Company Instructions
6-33
OPTION Parameter
Subparameter
Definition
RESET
Ends the Generic Device Independence for Unit
Record (GDIUR) control of a dataset. If you use
OPTION=RESET, it must be the only parameter
specified on the DD statement with other OPTION
subparameters used.
A dataset definition (DD) statement with
OPTION=RESET is required when the job does not
contain TLBL, DLBL, or DD statements in any step
following the DD statement used to invoke GDIUR
control of the dataset. The ddname on the DD
statement that specifies OPTION=RESET must be
the same as the ddname on the DD statement used
to invoke GDIUR control of the dataset.
In the following example, SYSIPT control
statements are read by the first LIBR execution
from the tape or disk dataset SYSIPT.DATA. The
second DD statement for IJSYSIN with the
OPTION=RESET insures that the SYSIPT control
statements for the second LIBR execution will be
read from the instream data, not from the disk
dataset SYSIPT.DATA.
* //IJSYSIN DD
// EXEC LIBR
/*
* //IJSYSIN DD
// EXEC LIBR
LD L=IJSYSRS
/*
6-34
DSN=SYSIPT.DATA,DISP=OLD
OPTION=RESET
REW
Rewinds the tape at close. REW overrides any
default rewind options set for the DISP or VOL
parameters.
RUN
Unloads a tape at close. RUN overrides any default
run options set for the DISP or VOL parameters.
Connectivity Systems, Inc.—Copyright © 2006
Use Pursuant to Company Instructions
User Reference
OPTION Parameter
Subparameter
Definition
SPACE=*.ddname[x]
Specifies that the primary extent allocation will be
based on the amount of space used by the dataset
previously defined in the same job step. Use the
ddname parameter to identify the dataset. RLSE is
automatically invoked with SPACE refer-back.
There are several ways you can specify the size of
the allocation:
To specify dataset is to be exactly the same size
as the referenced dataset, use the format:
SPACE=*.ddname
To specify a dataset is to be larger than the
referenced dataset by an exact number of tracks
or FBA blocks, use the format:
SPACE=*.ddname+n
where n is the number of tracks or FBA blocks
to be added to the size of the referenced dataset.
To specify that a dataset is to be smaller than
the referenced dataset by an exact number of
tracks or FBA blocks, use the format:
SPACE=*.ddname-n
where n is the number of tracks or FBA blocks
to be subtracted from the size of the referenced
dataset. An error will result if the calculated
allocation is not a positive number.
To specify that the size of the dataset is to be a
percentage of the size of the referenced dataset,
use the format:
SPACE=*.ddname*n
where n is a number between 000.01 and
999.99. Leading zeroes are not required.
If the referenced dataset is cataloged, the
allocation will be based on the amount of space
the referenced dataset actually occupies. This
space includes the sum of the primary extent
allocation and all secondary extent allocation. If
the referenced dataset is uncataloged, the
allocation will be based on the amount of space
in the primary extent of the referenced dataset.
The following DD statement defines the
referenced dataset.
* //REFFILE DD DSN=dataset-name,DISP=SHR
User Reference
Connectivity Systems, Inc.—Copyright © 2006
Use Pursuant to Company Instructions
6-35
OPTION Parameter
Subparameter
SPACE=*.ddname[x]
Definition
(continued)
To allocate a new dataset one track larger than
the space the referenced dataset occupies,
specify:
* //FILEOUT DD DSN=dataset-name,DISP=(NEW,CATLG)
* //UNIT=SYSDA,OPTION=SPACE=*.REFFILE+1
To allocate a new dataset five tracks smaller
than the space the referenced dataset occupies,
specify:
* //FILEOUT DD DSN=dataset-name,DISP=(NEW,CATLG)
* //UNIT=SYSDA,OPTION=SPACE=*.REFFILE-5
To allocate a new dataset half of the space
occupied by the referenced dataset, specify:
* //FILEOUT DD DSN=dataset-name,DISP=(NEW,CATLG)
* //UNIT=SYSDA,OPTION=SPACE=*.REFFILE*.5
To allocate a new dataset twice the space
occupied by the referenced dataset, specify:
* //FILEOUT DD DSN=dataset-name,DISP=(NEW,CATLG)
* //UNIT=SYSDA,OPTION=SPACE=*.REFFILE*2
SYSnnn
Causes the specified SYS number to be assigned to
this dataset. Replace nnn with the appropriate
programmer logical unit number or RDR, IPT,
PCH, or LST.
If necessary, you can use OPTION=SYSnnn to
satisfy the checking that some programs do before a
dataset is opened. This checking is performed by
programs such as IBM's SORT/MERGE. For most
jobs, this checking eliminates the need to execute
TSIDASS ASSGN for tape datasets or to use //
ASSGN statements for disk datasets. For disk
datasets, ensure that the pool name is specified in
the DSN Catalog or on the VOL=SER parameter.
TPL=x
Example
Specifies a tape pool to be used for new tape
datasets. TPL=x is recognized only when
DISP=(NEW,CATLG) is specified causing a new
dataset to be automatically cataloged or an existing
dataset to be updated. Updating is only allowed with
configuration option JCLOVRDE=YES.
The following example shows how the OPTION parameter is used.
// JOB IDCAMS REPRO DISK TO TAPE
* //IN
DD DSN=DISK.SEQ,DISP=OLD,
* //
UNIT=DISK,OPTION=SYS007
* //OUT
DD DSN=DISK.SEQ.BACKUP,OPTION=SYS005,
* //
DISP=(NEW,KEEP,DELETE)
// EXEC IDCAMS,SIZE=AUTO
REPRO INFILE(IN ENVIRONMENT (RECFM(FIXBLK) BLKSZ(800) RECSZ(40) )) -
6-36
Connectivity Systems, Inc.—Copyright © 2006
Use Pursuant to Company Instructions
User Reference
OPTION Parameter
OUTFILE(OUT ENVIRONMENT ( PDEV(2400) RECFM(FIXBLK) BLKSZ(8000) RECSZ(40) ))
/*
/&
User Reference
Connectivity Systems, Inc.—Copyright © 2006
Use Pursuant to Company Instructions
6-37
SPACE Parameter
SPACE Parameter
Description
Use the SPACE parameter to specify the disk dataset allocation. In
addition, use SPACE to:
Specify allocation size
Permit or inhibit truncation at close for an output dataset
Invoke dataset fragmentation if contiguous space is unavailable
Align allocation on track or cylinder boundaries on CKD devices
Use parentheses to enclose the SPACE positional subparameters.
Additional parentheses are used to enclose the actual allocation amounts
when supplying a prime allocation size with a secondary size and/or an
index size. SPACE has two syntax types of syntax, one for
BIM-EPIC-controlled datasets and one for uncontrolled datasets.
Note:
The UNCDSK configuration option allows use of DD statements for
uncontrolled disk datasets.
Controlled
Dataset Syntax
The following provides an example of using SPACE for a controlled
dataset.
SPACE=(type,(size-spec)[,RLSE,frag-control,ROUND)]
Subparameters
The following provides a description of the subparameters you can use
with the SPACE control dataset. There are no defaults for the
subparameters.
Subparameter
Required?
Default
type
Yes
None
Specify one of the following (required):
TRK
No
None
CYL
No
None
block-length
Yes
None
size-spec
Yes
None
primary-qty
Yes
None
secondary-qty
Yes
None
index
Yes
None
RLSE
No
None
frag-control
No
None
Specify all that apply:
6-38
Connectivity Systems, Inc.—Copyright © 2006
Use Pursuant to Company Instructions
User Reference
SPACE Parameter
Subparameter
Required?
Default
If used, specify one of the following (optional):
Definitions
CONTIG
No
None
MXIG
No
None
ALX
No
None
ROUND
No
None
The following provides definitions for the subparameters you can use
with the SPACE control dataset.
Subparameter
Definition
type
Specifies type of allocation.
TRK
Specifies allocation in tracks or FBA blocks.
CYL
Specifies allocation in cylinders and forces the
dataset to begin and end on cylinder boundaries.
block-length
Specifies the block size of a dataset for allocation
by number of logical records (ALR). In addition,
block-length can used to specify the record
size of VSAM/SAM datasets.
size-spec
Specifies size, is required and must be enclosed in
parentheses. Size-spec takes the form:
primary-qty[,secondary-qty][,index]
primary-qty
Specifies the amount of the primary allocation in
tracks, FBA blocks, cylinders, or number of logical
records, depending on the value specified by type.
To use the SPACE parameter to indicate an option
for a cataloged dataset, such as fragmentation, no
truncation, or align on cylinder boundaries,
without affecting the allocation size, specify 0
(zero) in primary-qty. When primary-qty
is 0, BIM-EPIC uses the allocation size specified
in the dataset definition.
secondary-qty Specifies the size of secondary allocations. To
specify a maximum number of secondary
allocations, use the VOLUME.
index
User Reference
Specifies the size of the index component for an
ISAM dataset. Use index only when both the
prime area and the index area are defined with a
single set of parameters. If you use index but
omit secondary-qty, you must include a
comma for secondary-qty, since these
parameters are positional.
Connectivity Systems, Inc.—Copyright © 2006
Use Pursuant to Company Instructions
6-39
SPACE Parameter
Subparameter
Definition
RLSE
Causes unused allocated space to be truncated
when the dataset is closed. If RLSE is not
specified, truncation does not occur.
Note: For cataloged datasets, if the DD SPACE
parameter is not coded, truncation will occur.
frag-control
CONTIG
Specifies that each allocation must be made using
consecutive tracks or blocks for the entire
allocation amount. This is the same as the DLBL
option code H.
MXIG
ALX
Specify fragmentation without operator
intervention. This is the same as the DLBL option
code F.
You can specify only one of the CONTIG, MXIG,
or ALX subparameters.
MXIG and ALX have different meanings in MVS.
See an MVS JCL manual for additional
information.
Specifies allocation alignment on a cylinder
boundary.
ROUND
Examples
In the following example for a controlled dataset, the dataset asks for
primary and secondary allocations of 5 cylinders. Unused space will be
released. The dataset will be automatically cataloged.
* //DISKIN
* //
DD
DSN=INVENTRY.FILE,SPACE=(CYL,(5,5),RLSE),
DISP=(NEW,CATLG)
In the following example, the same exact space requirements are set.
However because the DISP parameter does not tell BIM-EPIC to
automatically catalog the dataset, the dataset is treated as a Start Track 1
dataset. The VOLUME parameter is also specified because it is required
for a Start Track 1 dataset.
* //DISKIN
* //
Uncontrolled
Dataset Syntax
DD
DSN=INVENTRY.FILE,SPACE=(CYL,(5,5),RLSE),
DISP=(NEW,KEEP),VOL=SER=SYSWK1
The following provides an example of a SPACE uncontrolled dataset
syntax:
SPACE=(ABSTR,(size-specification))
6-40
Connectivity Systems, Inc.—Copyright © 2006
Use Pursuant to Company Instructions
User Reference
SPACE Parameter
Subparameters
Definitions
The following provides a description of the subparameters you can use
with the SPACE uncontrolled datasets.
Subparameter
Required?
Valid
Default
ABSTR
Yes
None
size-specification Yes
None
start-address
No
512, 1024, 2048, None
3072, 4096
index
No
None
The following provides definitions for the subparameters you can use
with the SPACE uncontrolled dataset.
Subparameter
Definition
ABSTR
Specifies the allocation requirements for
an uncontrolled dataset. The dataset will
be allocated at the address you specify in
the parameters.
size-specification
Specifies size, is required and must be
enclosed in parentheses. Size-spec
takes the form:
primary-qty, start-address [,index]
primary-qty
Specifies the size of the primary allocation
in tracks or FBA blocks.
start-address
Specifies the starting relative track or FBA
block as in the VSE EXTENT statement.
index
Use for ISAM datasets only when both the
prime data area and index data area are
defined using a single set of parameters.
The parameter specifies the size of the
index component for an ISAM dataset.
Note:
The values for primary-qty, start-address, and index are
positional and must be enclosed in parentheses.
Example
The following example shows an uncontrolled dataset. BIM-EPIC creates
a label indicating the extent begins at relative track 1680 and is 5 tracks
long. It is on the SYSWK1 volume.
* //DISKIN
* //
User Reference
DD
DSN=INVENTRY.FILE,SPACE=(ABSTR,(5,1680)),
DISP=(NEW,KEEP),VOL=SER=SYSWK1
Connectivity Systems, Inc.—Copyright © 2006
Use Pursuant to Company Instructions
6-41
UNIT Parameter
UNIT Parameter
Description
Use the UNIT parameter to specifies a device or device type for
processing. UNIT is required for disk output datasets. UNIT is optional
for input datasets that are controlled by the DSN Catalog. If UNIT is not
specified, UNIT=TAPE is assumed, unless the dataset name begins with
$$$. When a dataset name begins with $$$, common work dataset,
UNIT=DISK is forced.
You can also use a group name to request a unit from a group of identical
units. For disk datasets, BIM-EPIC chooses a volume from a volume in
the disk pool specified in the VOLUME parameter. For tape datasets,
BIM-EPIC selects a tape drive based on the mode setting associated with
the device-type specified, if one exists, or associated to the default MODE
setting in the datasets’s catalog entry.
For uncontrolled disk datasets, you can use a group name such as
UNIT=DISK. However, you must also specify a specific volume serial
number in the VOLUME.
With MVS, you can specify a pool name when using UNIT. With
BIM-EPIC DD statements, you must also specify the VOL=SER
parameter.
Syntax
The following provides an example of a UNIT parameter syntax.
UNIT={group-name|device-type [,cuu]}
Subparameters
The following provides a description of the subparameters you can use
with the UNIT parameter.
Subparameter
Valid
Default
Specify one of the following (required):
group-name
DISK|SYSDA|TAPE|IDRC|CART TAPE
device-type
See text
cuu
6-42
Connectivity Systems, Inc.—Copyright © 2006
Use Pursuant to Company Instructions
None
None
User Reference
UNIT Parameter
Definitions
The following provides definitions for the subparameters you can use
with the UNIT parameter.
Subparameter
Definition
group-name
Specifies a generic request for a device group. This
is the most generic kind of request. In MVS,
group-name specifies a particular category of
device defined in MVS customization. In
BIM-EPIC, valid groups are:
device-type
User Reference
DISK or SYSDA specifies any disk device.
TAPE specifies any tape device (does not
override default MODE).
IDRC specifies an IDRC-capable tape drive.
CART specifies a 3480 non-IDRC drive.
TPA specifies a 3590 or 3592 drive. For 3592s,
DCB=(DEN=M) is also required.
Specifies a device type, such as FBA, 3390, 3480.
See the IBM VSE System Control Statements
manual for valid device types. See the tape and disk
device-classes for the ASSGN statement. The
following are the associated mode settings for tape
devices, if they have not been overwrote by DCB
DEN.
2400 specifies any tape device (does not
override default MODE).
3410 specifies any tape device (does not
override default MODE).
3420 specifies any tape device (does not
override default MODE).
3424 specifies any tape device (does not
override default MODE).
3430 specifies any tape device (does not
override default MODE).
3480 specifies a 3480 non-IDRC drive.
3490 specifies a 3490 IDRC drive.
3590 specifies a TPA device If 3592’s are
desired, DCB=(DEN=M) is also required.
3592 specifies a 3592 TPA device.
8809 specifies any tape device (does not
override default MODE).
9348 specifies any tape device (does not
override default MODE).
Connectivity Systems, Inc.—Copyright © 2006
Use Pursuant to Company Instructions
6-43
UNIT Parameter
Examples
Subparameter
Definition
cuu
Specifies the drive address to be used. If cuu is
specified, it must be separated from device-type by
a comma and both subparameters must be enclosed
in parentheses, for example, UNIT=(CART,3F0).
In the following example, the UNIT parameter indicates that this is a tape
dataset. BIM-EPIC will select a tape drive based on the dataset MODE
specification in its catalog entry.
* //TAPEOUT
* //
DD
DSN=INVENTRY.FILE,UNIT=TAPE,
DISP=(NEW,CATLG)
In the following example, a 3592 tape drive will be selected by
BIM-EPIC, and the output volume will be from Tape Pool A.
* //TAPEDD DD DSN=PAYROLL.WEEKLY,UNIT=TPA,DCB=(DEN=M),
* //
DISP=(NEW,CATLG),OPTION=(TPL=A)
6-44
Connectivity Systems, Inc.—Copyright © 2006
Use Pursuant to Company Instructions
User Reference
VOLUME Parameter
VOLUME Parameter
Description
For tape datasets, use VOLUME to specify tape rewind options and to
select a tape volume to process. These options are especially important
for multi-dataset processing.
For disk datasets, use VOLUME to specify a disk pool for allocation and
to specify a maximum number of secondary allocations. VOLUME is
required for Start Track 1 datasets.
The first four subparameters are positional. The last subparameter, SER
or REF, is both keyword and positional. If specified alone, no commas are
required. If other subparameters are specified, SER or REF must be the
last positional subparameter.
Syntax
The following provides an example of a VOLUME parameter syntax.
VOL=(
[ PRIVATE ]|[ ,RETAIN ]|[ ,volume-sequence-number ]|
[ ,secondary-max ]|[,SER=volser]|[,SER=poolname]
|[,REF=*.ddname]
)
Subparameters
Definitions
User Reference
The following provides a description of the subparameters you can use
with the VOLUME parameter.
Subparameter
Required?
Valid
Default
PRIVATE
No
None
RETAIN
No
None
volume-sequence-number
No
1 to 255
1
secondary-max
No
1 to 255
255
SER=volser
No
1 to 6 characters
None
SER=poolname
For ST1
1 to 6 characters
None
REF=*.ddname
No
1 to 7 characters
None
The following provides definitions for the subparameters you can use
with the VOLUME parameter.
Subparameter
Definition
PRIVATE
Unloads the tape when the dataset is closed.
RETAIN overwrites PRIVATE. If
PRIVATE is not specified, the tape is
rewound when the dataset is closed.
PRIVATE is ignored for disk datasets.
Connectivity Systems, Inc.—Copyright © 2006
Use Pursuant to Company Instructions
6-45
VOLUME Parameter
Subparameter
Definition
RETAIN
Prevents tape rewinding when the tape is
closed. RETAIN is frequently used when
processing multi-datasets. If neither
PRIVATE nor RETAIN is specified, the
tape is rewound when it is closed. RETAIN
is ignored for disk datasets.
volume-sequence-number
Selects the first reel to process in a
multi-volume group. The
volume-sequence-number parameter
is ignored for disk datasets.
secondary-max
Specifies the maximum number of
secondary allocations which can take place
for this disk dataset. The
secondary-max parameter is ignored for
tape datasets.
SER=volser
Selects a volume by volume serial number.
You can use SER=volser to specify a
disk volume for uncontrolled disk datasets.
SER=poolname
Tells BIM-EPIC to select volume from
specified disk pool. It is required for Start
Track 1 datasets.
The following example shows VOL
specifying the pool where the Start Track 1
dataset is located.
* //DISKIN
* //
REF=*.ddname
DD
DSN=INVENTRY.FILE,SPACE=(CYL,(5,5),RLSE),
DISP=(NEW,KEEP),VOL=SER=POOL01
Associates a subdataset with a prime
dataset. Use REF=*.ddname with
DISP=(NEW,CATLG) when you want to
automatically catalog a subdataset. You can
also use this subparameter when you want
to refer to a prime dataset other than the one
specified in the dataset definition. Both the
prime dataset and the subdataset must be
controlled. In addition, both must be
defined with DD statements. The prime
dataset's DD statement must precede all DD
statements for related subdatasets.
Specify the ddname that is on the DD
statement of the prime dataset. For example,
to refer to a prime dataset defined with the
ddname TAPEOUT, specify:
REF=*.TAPEOUT
6-46
Connectivity Systems, Inc.—Copyright © 2006
Use Pursuant to Company Instructions
User Reference
VOLUME Parameter
Examples
In the following example, the tape is unloaded at close.
* //TAPEIN
* //
DD
DSN=INVENTRY.FILE,
DISP=(NEW,KEEP),VOL=(PRIVATE)
The following example shows how to automatically catalog a prime
dataset and two new subdatasets. The datasets are stacked on one tape to
create a multi-dataset group. PRIME.DSN.1 is the first dataset on the
tape, NEWSUB.DSN.2 is the second dataset, and NEWSUB.DSN.3 is the
third dataset.
* //TAPEDUM DD
* //
* //
* //
* //
* //
* //TAPEOUT DD
* //
* //
* //
* //
* //
* //TAPEOUT DD
* //
* //
* //
* //
// EXEC PROGX
DSN='PRIME.DSN.1(+0)',
OPTION=SYS010,
UNIT=TAPE
DISP=(NEW,CATLG),
FREE=END,
VOL=(,RETAIN)
DSN='NEWSUB.DSN.2(+0)',
OPTION=SYS010,
UNIT=TAPE,
DISP=(NEW,CATLG),
FREE=END,
VOL=(,RETAIN,,,REF=*.TAPEDUM)
DSN='NEWSUB.DSN.3(+0)',
OPTION=SYS010,
UNIT=TAPE,
DISP=(NEW,CATLG),
VOL=(PRIVATE,,,,REF=*.TAPEDUM)
In the example, VOL=REF=subparameter passes the name of the
prime dataset to BIM-EPIC. VOL=(,RETAIN,,,REF=*.TAPEDUM)
specifies that both of the following are true:
This dataset is a subdataset and part of a multi-dataset group.
The prime dataset associated with this subdataset is
PRIME.DSN.1.
VOL=(PRIVATE,,,,REF=*.TAPEDUM) indicates the same process and
causes the tape to unloaded when the dataset is closed.
See Chapter 7, “Multi-Dataset Processing,” for additional information
pertaining to prime datasets and subdatasets.
User Reference
Connectivity Systems, Inc.—Copyright © 2006
Use Pursuant to Company Instructions
6-47
DD Statements For Printer and Punch Datasets
DD Statements For Printer and Punch Datasets
Description
DD statements used to assign printer and punch datasets.
Syntax
The following provides an example of a print command syntax.
* //ddname
Parameters
Definitions
6-48
DD
SYSOUT=x[,OPTION=SYSnnn]
The following parameters are valid for printer and punch datasets.
Parameter
Required?
Valid
ddname
Yes
None
DD
Yes
None
SYSOUT=x
Yes
OPTION
No
None
SYSnnn
No
SYS000 to SYS254 None
A to Z or 0 to 9
Default
None
The following provides definitions for the parameters valid for printer
datasets and punch datasets.
Parameter
Definition
ddname
Specifies the logical name for the dataset and
performs the same function as the DTF filename.
The ddname must begin in column 5.
DD
Identifies this as a DD JCL statement. At least one
blank is required immediately before and
immediately after DD operation code. Do not use
the DD operation code in continuation statements.
SYSOUT
Specifies the class used for printer and punch data.
For punch data, specify B. For print data, specify
any other valid character.
Connectivity Systems, Inc.—Copyright © 2006
Use Pursuant to Company Instructions
User Reference
DD Statements For Printer and Punch Datasets
Parameter
Definition
SYSnnn
Specifies the programmer logical unit. Use
SYSnnn if the ddname itself is not a logical unit
specification. For example, if your COBOL
program includes the statement:
SELECT PRINT-OUT ASSIGN
SYS006-UR-1403-S-PRINT.
then the DD statement would be:
* //PRINT
DD
SYSOUT=A,OPTION=SYS006
If no COBOL external name is used, do not use
OPTION, since the ddname is a logical unit
specification. For example, if your COBOL
program includes the statement:
SELECT PRINT-OUT ASSIGN SYS006-UR-1403-S.
then the DD statement would be:
* //SYS006
User Reference
DD
SYSOUT=A
Connectivity Systems, Inc.—Copyright © 2006
Use Pursuant to Company Instructions
6-49
DD Statements for In-Stream Datasets
DD Statements for In-Stream Datasets
Description
Use a DD statement to assign a logical unit to the data stream, when a job
stream contains in-stream data. VSE requires the in-stream data be placed
after the EXEC statement.
Syntax
The following provides an example of an in-stream dataset syntax.
* //ddname
Parameters
Definitions
6-50
DD
specifier[,OPTION=SYSnnn]
The following parameters are valid for in-stream datasets.
Parameter
Required?
Valid
ddname
Yes
None
DD
Yes
None
specifier
Yes
OPTION
No
None
SYSnnn
No
SYS000 to SYS254 None
* or DATA
Default
None
The following provides definitions for the parameters.
Parameter
Definition
ddname
Specifies the logical name for the dataset and
performs the same function as the DTF filename.
The ddname must begin in column 5.
DD
Identifies this as a DD JCL statement. At least one
blank is required immediately before and
immediately after DD operation code. Do not use
the DD operation code in continuation statements.
specifier
Specifies that this statement defines an instream
dataset. Valid values are DATA or *.
Connectivity Systems, Inc.—Copyright © 2006
Use Pursuant to Company Instructions
User Reference
DD Statements for In-Stream Datasets
Parameter
Definition
SYSnnn
Specifies a programmer logical unit. Use SYSnnn
if the ddname itself is not a logical unit
specification. For example, if your COBOL
program includes the following statement:
SELECT CARD-IN ASSIGN
SYS005-UR-2540R-S-CARDIN.
then the DD statement would be:
* //CARDIN
DD
*,OPTION=SYS005
DD
DATA,OPTION=SYS005
or
* //CARDIN
If no COBOL external name is used, do not use
OPTION, since the ddname is itself a logical unit
specification. For example, if your COBOL
program includes the following statement:
SELECT CARD-IN ASSIGN SYS005-UR-2540R-S.
then the DD statement would be:
* //SYS005
DD
*
DD
DATA
or
* //SYS005
Example
In the following example, the AJS00987 statement is read as in-stream
data using SYS005. Because the ddname is itself a logical unit
specification, no OPTION statement is necessary.
* //SYS005 DD
// EXEC PGM
AJS00987
/*
*
In the following example, LOG JE0987 and SP 9876 are read as in-stream
data using logical unit SYS005.
* //CARDIN DD
// EXEC PGM
LOG JE0987
SP 9876
/*
User Reference
DATA,OPTION=SYS005
Connectivity Systems, Inc.—Copyright © 2006
Use Pursuant to Company Instructions
6-51
DD Statements for Dummy Datasets
DD Statements for Dummy Datasets
Description
Dataset definition (DD) statements can define dummy datasets.
Syntax
The following provides an example of a dummy dataset syntax.
* //ddname
Parameters
Definitions
Example
DUMMY[,OPTION=SYSnnn]
The following parameters are valid for dummy datasets.
Parameter
Required?
ddname
Yes
None
DD
Yes
None
DUMMY
Yes
None
OPTION
No
None
SYSnnn
No
SYS000 to SYS254 None
Valid
Default
The following provides definitions for the parameters you can use with
CATALOG.
Parameter
Definition
ddname
Specifies the logical name for the dataset and
performs the same function as the DTF filename.
The ddname must begin in column 5.
DD
Identifies this as a DD JCL statement. At least one
blank is required immediately before and
immediately after DD operation code. Do not use
the DD operation code in continuation statements.
DUMMY
Specifies that this is a dummy dataset.
SYSnnn
Specifies a programmer logical unit. Use SYSnnn
if the ddname is not a logical unit specification.
The following example defines the dataset name SYS005 as a dummy
dataset. The result is equivalent to a VSE // ASSGN SYS005,IGN. Input
and output to the dataset are ignored.
* //SYS005
6-52
DD
DD
DUMMY
Connectivity Systems, Inc.—Copyright © 2006
Use Pursuant to Company Instructions
User Reference
7
Running Jobs With
BIM-EPIC
BIM-EPIC is designed to work with your existing JCL. However, on
occasion, JCL changes are necessary. Some situations require special
entries in the BIM-EPIC dataset definition (EDD). This chapter discusses
how to use BIM-EPIC and JCL with products from IBM and other
third-party vendors. Recommendations for JCL and EDDs are presented
for each topic when relevant. Refer to the $INDEXSAMPJOB VSE
sub-library member as reference to the many job samples provided on the
BIM-EPIC installation tape.The member is in the same sub-library that
BIM-EPIC was installed into. Familiarity with the TLBL statement and
DLBL statement and BIM-EPIC dataset definition statements is assumed.
Chapter Contents
Dataset Considerations
Disk Processing
Tape Processing
Types of Datasets
Sort Programs
Additional Functionality
JCL Functions
User Reference
Connectivity Systems, Inc.—Copyright © 2006
Use Pursuant to Company Instructions
7-1
Using Unsupported Datasets
Dataset Considerations
Using Unsupported Datasets
Description
BIM-EPIC does not control datasets that are defined in the JCL with the
following DTF names:
IJSYSNR
IJSYSPC
IJSYSRS
In addition, BIM-EPIC does not control datasets processed with the
following system utilities:
DITTO basic and control functions
Note:
BIM-EPIC can control DITTO file functions.
7-2
Connectivity Systems, Inc.—Copyright © 2006
Use Pursuant to Company Instructions
User Reference
Using JCL and the DSN Catalog
Using JCL and the DSN Catalog
Description
For tape output datasets, JCL parameters always override corresponding
DSN Catalog information.
For DASD output datasets, except for “retention period,” the only item in
the catalog entry that can be overridden is the “number of tracks to be
allocated.” This is taken from the // EXTENT following the appropriate //
DLBL statement. That DLBL statement must have the BIM-EPIC option
code “O” specified. See Chapter 5, “DLBL Options,” for additional
information.
For Tape or DASD output datasets, if a greater than zero retention value
is specified, the value will override the DSN retention value in the
catalog. The BIM-EPIC option code O is not required for this catalog
override.
For input datasets, tape, or DASD, the DSN Catalog values override any
corresponding JCL parameters, except for:
User Reference
Density (TLBL)
Block size or CISIZE (DLBL or DD DCB parameter)
Retention (days)
Expiration date
Connectivity Systems, Inc.—Copyright © 2006
Use Pursuant to Company Instructions
7-3
Using TLBL and DLBL Statements for Input
Using TLBL and DLBL Statements for Input
Description
When you use TLBL and DLBL statements for input, BIM-EPIC selects
the current version by default.
When you use DD statements for input, the entire dataset is concatenated
if you do not specify a version number. In this case, all versions of the
dataset are read, beginning with the current version and ending with the
oldest version.
You can use JCL to override these defaults by requesting a specific
version or generation. See Chapter 5, “TLBL Statements,” and Chapter 6,
“DD Statement Overview,” for additional information.
7-4
Connectivity Systems, Inc.—Copyright © 2006
Use Pursuant to Company Instructions
User Reference
Defining Datasets with TBL, DBL and DD Statements
Defining Datasets with TBL, DBL and DD Statements
Description
For every controlled dataset that it processes, BIM-EPIC uses the
information in the DSN Catalog entry to update the VSE label area when
the dataset is opened. Because this information is recorded automatically,
the JCL can be very concise. Using the DSN Catalog instead of JCL can
be simpler, less error-prone, and easier to change.
In most circumstances, all you need to specify for an input dataset is the
DTF name or the ddname and the dataset name that are used by the
program.
Examples
The following are examples of defining your datasets with TBL, DBL,
and DD statements.
// DLBL DISKOUT,’WEEKLY.PAYROLL’
// TLBL TAPEOUT,'SYSTEM.BACKUP'
* //TAPEOUT
DD
DSN=SYSTEM.BACKUP
When defining DD statements for output datasets, you may also need to
specify a device type.
* //DISKOUT
User Reference
DD
DSN’
Connectivity Systems, Inc.—Copyright © 2006
Use Pursuant to Company Instructions
7-5
Naming Datasets
Naming Datasets
Description
See “Multi-Dataset Processing” for guidelines on naming datasets.
For generation datasets, specify the dataset name as it appears in the
EDD. BIM-EPIC inserts this extension and uses it in its internal
processing.
Note:
For disk datasets, do not specify the G=nnnnnn extension that appears
in the VTOC.
7-6
Connectivity Systems, Inc.—Copyright © 2006
Use Pursuant to Company Instructions
User Reference
Using LUB Allocation and the ASSGN Statement
Using LUB Allocation and the ASSGN Statement
Using ASSGN
Statements
When using LUB allocation and Automatic Volume Recognition (AVR),
BIM-EPIC does the work of an ASSGN statement. LUB allocation
selects the SYS number and AVR selects the drive. As long as LUB
allocation is active, ASSGN statements are not necessary and should be
removed from your JCL. However, ASSGN statements must be used
whenever LUB allocation is inhibited. When LUB allocation is inhibited,
you should use the drive specified in the ASSGN statement.
LUB allocation is automatically inhibited:
For direct access datasets
If the logical unit number is currently assigned IGNORE
For system logical units
If the logical unit is assigned in the DSN Catalog entry for a
dataset
In addition, LUB allocation is automatically inhibited for DTF names:
UIN
UOUT
IJSYSxx
SYS000
SORTxxx (unless TSIDSRT is executed in place of SORT)
You can add other DTF names to this list by specifying the names in the
BIM-EPIC TSIDMAP macro. See the BIM-EPIC Installation and System
Guide for additional information.
You must inhibit LUB allocation for datasets opened by TSIDASS and
datasets processed by PIOCS. This includes datasets processed with many
utility programs and any dataset opened with a DTFPH. In most data
processing environments, there are not many programs that can perform
these functions. In most circumstances, the TSIDASS utility can replace
the use of a VSE ASSGN statement.
Uncontrolled tape datasets do not need ASSGN statements. BIM-EPIC
will request the operator to specify a tape drive address.
Inhibiting LUB
Allocation
User Reference
You can inhibit LUB allocation for a dataset using any of the following:
Option L in the dataset name on a DLBL
Connectivity Systems, Inc.—Copyright © 2006
Use Pursuant to Company Instructions
7-7
Using LUB Allocation and the ASSGN Statement
7-8
Option 64 in the numeric options on a TLBL
OPTION=SYSnnn parameter on a DD statement
A default SYS number in the BIM-EPIC dataset definition
Connectivity Systems, Inc.—Copyright © 2006
Use Pursuant to Company Instructions
User Reference
Controlled Datasets
Disk Processing
Controlled Datasets
EXTENT
Statements
For most controlled datasets, the EXTENT statement is not used. An
EXTENT statement can be required when you process direct access (DA)
datasets or any datasets with programs that use PIOCS processing. See
“Physical IOCS Processing” for additional information.
If you want to use a different allocation than the one specified in the
EDD, use the DLBL statement with option O in the dataset name and use
the EXTENT statement as you would for VSE. All EXTENT parameters
except the number of tracks/blocks on the EXTENT are ignored.
Example
The following example creates a dataset with a primary extent size of 210
tracks, overriding the primary extent size in the EDD. Except for the
“number of tracks” specification (210), all items in the EXTENT are
ignored by BIM-EPIC.
// DLBL DISKIN,'$$$.WORKFILE.1,(O)'
// EXTENT SYS004,SYSWK1,1,0,5,210
User Reference
Connectivity Systems, Inc.—Copyright © 2006
Use Pursuant to Company Instructions
7-9
Start Track 1 Datasets
Start Track 1 Datasets
Description
To define a Start Track 1 dataset, you must specify allocation information
with an EXTENT statement.
DLBL
Statements
The EXTENT statement for a Start Track 1 dataset differs slightly from
the standard VSE EXTENT statement. To use a Start Track 1 EXTENT,
do the following:
Example
Specify a BIM-EPIC disk pool instead of a volume serial number
Specify a relative starting track/block of 1
A Start Track 1 dataset is allocated in POOL01 with 20 tracks.
// EXTENT SYS003,POOL01,1,0,1,20
If you specify a Start Track 1 EXTENT for a controlled dataset,
BIM-EPIC ignores the EXTENT information. Start Track 1 allocations
can also be specified in DD statements.
7-10
Connectivity Systems, Inc.—Copyright © 2006
Use Pursuant to Company Instructions
User Reference
Reusing Space
Reusing Space
DSN Catalog
If you want to write a new version of a disk dataset in the same location in
order to reuse the space, catalog the dataset as work and zero secondary
allocations. For example, you can indicate WRK using Online Manager
or WRK=YES using TSIDMNT.
JCL
Requirements
Each time the dataset is created or modified, consider inhibiting
truncation. This leaves space in the extent for a larger dataset the next
time the dataset is processed. To inhibit truncation with a DLBL, specify
option N in the dataset name. To inhibit truncation with a DD statement,
use the SPACE parameter, but do not specify RLSE.
Each time the dataset is modified, you must indicate that you want to
reuse the same space. To reuse space with a DLBL, specify option S in
the dataset name. To inhibit truncation with a DD statement, specify
DISP=(MOD,KEEP).
Examples
The following is an example of a job statement for reusing space.
// DLBL OUTPUT,'DATA.FILE,(N,S)'
* //OUTPUT DD DSN=DATA.FILE,UNIT=DISK,
* //
DISP=(MOD,KEEP),SPACE=(TRK,0)
User Reference
Connectivity Systems, Inc.—Copyright © 2006
Use Pursuant to Company Instructions
7-11
Labeled and Unlabeled Tapes
Tape Processing
Labeled and Unlabeled Tapes
Description
BIM-EPIC supports both labeled and unlabeled tape processing.
BIM-EPIC automatically changes the DTF for an unlabeled tape
(FILABL=NO or LABEL RECORDS OMITTED) to a DTF for a labeled
tape (FILABL=STD or LABEL RECORDS STANDARD) when you
supply a TLBL with the DTF name. This enables you to convert to
labeled processing without making program changes. BIM-EPIC does not
affect user header label processing.
DSN Catalog
To indicate standard label processing, specify LBL=YES on the
TSIDMNT CATALOG statement or UNLABELED=N in the Online
Manager panel. To indicate unlabeled processing, specify LBL=NO on
the TSIDMNT CATALOG statement or UNLABELED=Y in the Online
Manager panel.
JCL
Requirements
When processing a BIM-EPIC controlled dataset on an unlabeled tape, a
TLBL or a DD statement for the dataset must be present. A label is not
written on the tape volume, but the BIM-EPIC Catalog requires a dataset
name for control purposes. Standard VSE processing does not require a
TLBL for unlabeled tape datasets.
7-12
Connectivity Systems, Inc.—Copyright © 2006
Use Pursuant to Company Instructions
User Reference
Rewind Options and MTC Statements
Rewind Options and MTC Statements
Description
You do not need to use MTC statements to rewind or FSF your tapes.
BIM-EPIC will position the tape automatically for input or output
processing. You can also use the BIM-EPIC rewind options for output or
input processing to override equivalent options in your program.
For additional information on tape rewind options, see the following
topics:
User Reference
Chapter 5, “TLBL Options”
Chapter 6, “OPTION Parameter”
Chapter 6, “VOLUME Parameter”
Connectivity Systems, Inc.—Copyright © 2006
Use Pursuant to Company Instructions
7-13
Multi-Volume Processing
Multi-Volume Processing
Description
Multi-volume processing can be used to process up to 255 volumes per
tape dataset version and up to 255 extents per disk dataset version.
JCL
Requirements
There are no JCL requirements. BIM-EPIC automatically performs
multi-volume processing.
7-14
Connectivity Systems, Inc.—Copyright © 2006
Use Pursuant to Company Instructions
User Reference
Multi-Dataset Processing
Multi-Dataset Processing
Description
This section explains the concept of multi-dataset groups and describes
their processing requirements and options.
A multi-dataset group consists of a prime dataset and up to 9,998
subdatasets. A multi-dataset group can reside on a single tape volume or
on multiple tape volumes. BIM-EPIC will automatically handle tape
positioning for both input and output processing.
!
WARNING:
All datasets participating in a multi-dataset group MUST conform
to a standard dataset format defined by the Logical Input Output
Control System (LIOCS).
The standard dataset format consists of three components for each
dataset:
Header label set, followed by a tape mark
Data, followed by a tape mark
Trailer label set, followed by at least one tape mark (the last
dataset on a volume will be followed by two tape marks.
Almost all programming languages and utility programs create datasets
which conform to this standard format.
!
WARNING:
Do not use the BIM-EPIC multi-dataset capability for VSE LIBR
and IDCAMS BACKUP commands.
The LIBR BACKUP command and the IDCAMS BACKUP command
create datasets which do not conform to the standard data format. They
insert additional tape marks in the output data, thereby making it
impossible for BIM-EPIC to properly position a volume to any
subsequent subdataset.
Prime Datasets
The first dataset on the first reel of a multi-dataset group is called the
prime dataset. The prime dataset owns all the volumes in the group and
controls their physical attributes.
All datasets that follow the prime dataset in the group are called
subdatasets. When defined, these subdatasets must be associated with the
prime dataset. BIM-EPIC supports two methods of establishing this
association:
User Reference
Automatically (using the DSN Catalog)
Connectivity Systems, Inc.—Copyright © 2006
Use Pursuant to Company Instructions
7-15
Multi-Dataset Processing
Explicitly (using JCL)
If the datasets are associated using TLBL statements, the length of the
prime dataset name is limited to 17 characters. However, the subdataset
names can be a maximum of 44 characters. This type of association is
made by specifying the prime dataset name when the subdataset names
are defined to the catalog.
If the datasets are associated using DD statements, the length of the prime
dataset name can be up to 44 characters. This type of association is made
by having the subdataset reference the prime dataset name on the DD
statement. Therefore, the DD statement for the prime dataset name is also
required to be in the same JCL stream as the subdataset that is being
created. This method allows the additional flexibility of associating the
same subdatasets with different prime datasets, depending on job
requirements.
Subdatasets
Each subdataset has its own EDD, but some subdataset attributes cannot
be specified because they are always inherited from the prime dataset.
These attributes are:
Density
Tape labeling
Tape size
Tape pool
Owner ID
Vaulting method
Scratching
Multi-Dataset
Tapes
Multi-dataset tape volumes are scratched when all active datasets on the
volume are scratched. None of the volumes in a
multi-dataset/multi-volume group is eligible for scratch until all active
datasets on all active volumes have been scratched.
DSN Catalog
If you want to write a group to a particular tape pool with a particular
density or you want to specify any other physical property or handling of
the tape, you must specify the parameters in the prime definition.
Applicable parameters on the TSIDMNT CATALOG or Online Manager
statement include:
7-16
Density (MOD)
Label type (LBL)
Owner ID (OWN)
Connectivity Systems, Inc.—Copyright © 2006
Use Pursuant to Company Instructions
User Reference
Multi-Dataset Processing
Tape size (SIZ)
Vaulting method (VLT)
Tape pool (TPL)
Several important limitations apply when creating a subdataset EDD.
These limitations are:
JCL
Requirements
User Reference
You must catalog the subdatasets using Online Manager or
TSIDMNT, or autocatalog them using DD statements. You
cannot use TLBL statements to autocatalog subdatasets.
You must enter the prime dataset name correctly when a
subdataset is defined to the catalog. The prime dataset name
cannot be changed later. You can supply independent retention
criteria, passwords, and block sizes for each subdataset.
You may find it helpful to give all the datasets in each
multi-dataset group a single, unique user ID or system ID. This
makes it easier to report or scratch the datasets as a group, rather
than as individual datasets.
There are several JCL requirements you must consider.
You must inhibit LUB allocation for all datasets using either
option 64 in a TLBL statement or option SYSnnn in a DD
statement.
You must inhibit LUB allocation through the DSN Catalog, if
you are creating subdatasets with a single program that opens
multiple DTFs with different logical units. To force BIM-EPIC to
use the same logical unit for each dataset, specify the same SYS
number in each EDD.
You can use a VSE // ASSGN statement to assign the SYS
number from the previous step to the SYS number in the current
step, if you are creating subdatasets with different programs using
DTFs with different logical units. This may be necessary when
using different utility programs to create subdatasets when the
utilities require different SYS numbers to be used.
BIM-EPIC corrects the file sequence number on your TLBL if it
is incorrect. You may omit the file sequence number.
You must specify TLBL option 16 (dataset drop), if your
program uses multiple open requests for the same DTF name.
Dataset drop is automatic when you use multiple DD statements
with the same ddname.
Connectivity Systems, Inc.—Copyright © 2006
Use Pursuant to Company Instructions
7-17
Multi-Dataset Processing
!
You must prevent the tape from being rewound for all datasets
except the last. This can be accomplished with any of the
following methods:
Option 3 in a TLBL statement
VOL=(,RETAIN) in a DD statement
OPT=NOREW in a DD statement
You may want to specify a rewind or unload option code for the
last dataset. This can be accomplished by any of the following
methods:
Option 1 (rewind) in a TLBL statement
FREE=CLOSE (rewind) in a DD statement
Option “2” (unload) in a TLBL statement or
VOL=(PRIVATE) (unload) in a DD statement
You can prevent the release of the assignment for each dataset
except the last. This can be accomplished with either of the
following methods:
Option 8 in a TLBL statement
FREE=END in a DD statement
You usually want the assignment to be released at close for the
last dataset. This can be accomplished by omitting the option
code (TLBL) or FREE=END (DD).
On output, BIM-EPIC continues to write new datasets at the end
of the current multi-dataset group. When you want to create a
new group, you must start by creating a new version of the prime
dataset.
You can process the datasets in any order on input. Because of
the physical limitations of tape media, it is most efficient to
process the datasets in ascending order by file sequence, but this
is not mandatory.
You must use DD statements to automatically catalog a
subdataset.
WARNING:
If the length of the prime dataset name is 17 characters or less,
BIM-EPIC enters the prime dataset name in the Comment field of
the subdataset definition. If the prime dataset name in the
comment field is longer than 17 characters, BIM-EPIC puts
XXXXXXXXXXXXXXXXX in the Comment field for the subdataset.
7-18
Connectivity Systems, Inc.—Copyright © 2006
Use Pursuant to Company Instructions
User Reference
Multi-Dataset Processing
Be sure the dataset is not already controlled before you attempt to catalog
it using this method. If the prime dataset or any subdataset is already
controlled, DISP=(x,CATLG) is ignored.
Example 1
The following example is one of the easiest situations for creating a
multi-dataset group. The program creates datasets with different DTF
names, but each DTF uses the same logical unit. The datasets are defined
in the first step and are created in the second step. The second dataset on
the tape is read in the third step. In the cataloging step, the prime dataset is
defined first. It is given a tape pool which applies to all associated
subdatasets. All other datasets are defined with the NSU parameter, which
makes them subdatasets. SUB1 and SUB2 have their own retention
parameters specified. SUB3 is assigned the BIM-EPIC system default
retention. All datasets are defined with the user ID value of TS, so they
can be easily identified as a group. The last dataset does not require the
tape and drive to be held, nor does it require a dataset drop.
// JOB XYZ
*
*
----------------------------------------------------------+
* CATALOG A PRIME DSN AND THREE SUB DSN'S
+
*
----------------------------------------------------------+
*
// EXEC TSIDMNT
CAT 'PRIME' CYC=2 UID=TS TPL=A
CAT 'SUB1' NSU='PRIME' RET=14 UID=TS
CAT 'SUB2' NSU='PRIME' CYC=3 UID=TS
CAT 'SUB3' NSU='PRIME' UID=TS
/*
*
*
----------------------------------------------------------+
* CREATE A PRIME AND 3 SUB DSN'S. PROGX PERFORMS 4 OPENS, +
* ONE EACH FOR TAPE1, TAPE2, TAPE3 AND TAPE4.
+
*
----------------------------------------------------------+
*
// TLBL TAPE1,'PRIME',,,,,,75
64 + 8 + 3
// TLBL TAPE2,'SUB1',,,,,,75
64 + 8 + 3
// TLBL TAPE3,'SUB2',,,,,,75
64 + 8 + 3
// TLBL TAPE4,'SUB3',,,,,,65
64 + 1
// EXEC PROGX
/*
*
*
----------------------------------------------------------+
* READ FILE=2 ONLY
+
*
----------------------------------------------------------+
*
// TLBL TAPEIN,'SUB1'
// EXEC PROGY
/*
/&
User Reference
Connectivity Systems, Inc.—Copyright © 2006
Use Pursuant to Company Instructions
7-19
Multi-Dataset Processing
The following describes the options used in the example above.
Example 2
Code
Action
1
Rewinds the tape (for the last dataset)
3
Inhibits rewind at close (for all but the last dataset)
8
Holds the drive assignment at close (for all but the last dataset)
64
Inhibits LUB allocation (for all datasets)
The following example creates multiple datasets with the same DTF
name. This process requires a dataset drop.
// JOB XYZ
*
* ------------------------------------------------+
* CATALOG A PRIME AND 2 SUB DSN'S
+
* ------------------------------------------------+
*
// EXEC TSIDMNT
CAT 'PRIME' CYC=3 UID=KM
CAT 'SUB1' NSU='PRIME' UID=KM CYC=4
CAT 'SUB2' NSU='PRIME' UID=KM RET=14
/*
*
* ------------------------------------------------+
* CREATE A PRIME AND 2 SUB DSN'S. PROGX PERFORMS+
* 3 OPENS FOR THE DTFNAME TAPEOUT.
+
* ------------------------------------------------+
*
// TLBL TAPEOUT,'PRIME',,,,,,91
64 + 16 + 8 + 3
// TLBL TAPEOUT,'SUB1',,,,,,91
64 + 16 + 8 + 3
// TLBL TAPEOUT,'SUB2',,,,,,66
64 + 2
// EXEC PROGX
/*
*
* ------------------------------------------------+
* READ A PRIME AND 2 SUB DSN'S. PROGY PERFORMS +
* 3 OPENS FOR THE DTFNAME TAPEOUT.
+
* ------------------------------------------------+
*
// TLBL TAPEIN,'PRIME',,,,,,91
64 + 16 + 8 + 3
// TLBL TAPEIN,'SUB1',,,,,,91
64 + 16 + 8 + 3
// TLBL TAPEIN,'SUB2',,,,,,66
64 + 2
// EXEC PROGY
/*
*
/&
The following describes the options used in the example above.
7-20
Code
Action
1
Rewinds the tape (for the last dataset)
2
Dismounts the tape (for the last dataset)
3
Inhibits rewind at close (for all but the last dataset)
8
Holds the drive assignment at close (for all but the last dataset)
16
Drops the TLBL from the VSE label area (for all but the last
dataset)
64
Inhibits LUB allocation (for all datasets)
Connectivity Systems, Inc.—Copyright © 2006
Use Pursuant to Company Instructions
User Reference
Multi-Dataset Processing
The last dataset does not require the tape and drive to be held, nor does it
require a dataset drop.
Example 3
The following example creates multiple datasets with different DTF
names. Because different DTFs use different logical units, a logical unit
must be supplied in the dataset definitions.
// JOB XYZ
*
*
----------------------------------------------------------+
* CATALOG A PRIME AND 2 SUB DSN'S
+
*
----------------------------------------------------------+
*
// EXEC TSIDMNT
CAT 'PRIME' SYS010
CAT 'SUB1' NSU='PRIME' SYS010
CAT 'SUB2' NSU='PRIME' SYS010
/*
*
*
----------------------------------------------------------+
* CREATE A PRIME AND 2 SUB DSN'S. PROGX PERFORMS 3 OPENS, +
* ONE EACH FOR TAPE1, TAPE2 AND TAPE3.
+
*
----------------------------------------------------------+
*
// TLBL TAPE1,'PRIME',,,,,,11
8 + 3
// TLBL TAPE2,'SUB1',,,,,,11
8 + 3
// TLBL TAPE3,'SUB2',,,,,,2
2
// EXEC PROGX
/*
*
/&
The following describes the options used in the example above.
Code
Action
2
Dismounts the tape (for the last dataset)
3
Inhibits rewind at close (for all but the last dataset)
8
Holds the drive assignment at close (for all but the last dataset)
Because LUB allocation is inhibited through the dataset definition, 64
does not need to be specified on the TLBL.
Note:
LUB allocation is inhibited as the result of SYS010 being specified in the
prime dataset definitions and the subdataset definitions.
Example 4
User Reference
The following example is similar to Example 2. Although, it may seem
more complicated, the BIM-EPIC DD facility offers greater flexibility
than TLBLs.
Connectivity Systems, Inc.—Copyright © 2006
Use Pursuant to Company Instructions
7-21
Multi-Dataset Processing
// JOB XYZ
* -----------------------------------------------------+
* CATALOG A PRIME DSN AND THREE SUB DSN'S
+
* -----------------------------------------------------+
*
// EXEC TSIDMNT
CAT 'PRIME'
CYC=2
CAT 'SUB1' NSU='PRIME' CYC=2
CAT 'SUB2' NSU='PRIME' CYC=2
/*
*
*
-----------------------------------------------------------+
* CREATE A PRIME AND 2 SUB DSN'S USING BIM-EPIC DD FACILITY.
+
* PROGX PERFORMS 3 OPENS FOR DTFNAME TAPEOUT.
+
*
-----------------------------------------------------------+
*
* //TAPEOUT DD DSN='PRIME(+0)',
* //
OPTION=(SYS010),
* //
UNIT=TAPE,
* //
FREE=END,
* //
DISP=(NEW,KEEP),
* //
VOL=(,RETAIN)
* //TAPEOUT DD DSN='SUB1(+0)',
* //
OPTION=(SYS010),
* //
UNIT=TAPE,
* //
FREE=END,
* //
DISP=(NEW,KEEP),
* //
VOL=(,RETAIN)
* //TAPEOUT DD DSN='SUB2(+0)',
* //
OPTION=(SYS010),
* //
UNIT=TAPE,
* //
DISP=(NEW,KEEP),
* //
VOL=(PRIVATE)
// EXEC PROGX
/*
*
----------------------------------------------------------+
* READ A PRIME AND 2 SUB DSN'S USING BIM-EPIC DD FACILITY. +
* PROGY PERFORMS 3 OPENS FOR DTFNAME TAPEIN.
+
*
----------------------------------------------------------+
* //TAPEIN DD DSN='PRIME(0)',
* //
OPTION=(SYS010),
* //
UNIT=TAPE,
* //
FREE=END,
* //
DISP=(OLD,PASS),
* //
VOL=(,RETAIN)
* //TAPEIN DD DSN='SUB1(0)',
* //
OPTION=(SYS010),
* //
UNIT=TAPE,
* //
FREE=END,
* //
DISP=(OLD,PASS),
* //
VOL=(,RETAIN)
* //TAPEIN DD DSN='SUB2(0)',
* //
OPTION=(SYS010),
* //
UNIT=TAPE,
* //
DISP=(OLD,KEEP)
// EXEC PROGY
/*
/&
7-22
Connectivity Systems, Inc.—Copyright © 2006
Use Pursuant to Company Instructions
User Reference
Multi-Dataset Processing
The following describes the options used in the examples above.
Option
Action
DSN='xxxx(+0)'
Sets the generation dataset. Use (+0) in
parentheses to indicate that this is a generation
dataset. See the BIM-EPIC Installation and
System Guide for additional information.
OPTION=(SYS010) Inhibits LUB allocation for this dataset. This is
equivalent to TLBL option code 64. In addition,
this forces the use of SYS010, which has no
TLBL equivalent.
UNIT=TAPE
Tells BIM-EPIC to use a tape for the data. This
would be determined in standard VSE JCL by
using a TLBL.
FREE=END
Holds the assignment at close for all but the last
dataset processed. This is equivalent to TLBL
option code 8.
DISP=(NEW,KEEP) Sets two parameters. The NEW subparameter
indicates that this dataset version will be created
as output. The KEEP subparameter causes the
tape to be unloaded at close unless
VOL=(,RETAIN).
VOL=(,RETAIN)
Inhibits rewinding the tape at close and overrides
the DISP subparameter KEEP. This is equivalent
to TLBL option code 3.
VOL=(PRIVATE)
Causes the tape to be unloaded at close. This is
equivalent to TLBL option code 2.
Additional options used in the read step are:
Example 5
User Reference
Option
Action
DSN='xxxx(0)'
The zero (0) in parentheses indicates that the
current version, version 1, is to be processed.
DISP=(OLD,PASS)
The OLD subparameter indicates that this dataset
version already exists and will be read as input.
The PASS subparameter indicates that this tape is
used later in the step or in a subsequent step of
this job.
Whenever a subdataset such as VERY.LONG.NAME.FOR.NEWSUB.3
is accessed, the prime dataset name must be referenced in the JCL. The
following example shows how VERY.LONG.NAME.FOR.NEWSUB.3
can be read as input.
Connectivity Systems, Inc.—Copyright © 2006
Use Pursuant to Company Instructions
7-23
Multi-Dataset Processing
// JOB XYZ
*
*
----------------------------------------------------------+
* READ VERY.LONG.NAME.FOR.NEWSUB.3 AS INPUT. THE PRIME
DATASET +
* NAME (VERY.LONG.NAME.FOR.PRIME.1) MUST BE SPECIFIED AND
+
* REFERRED TO BY THE DD FOR THE SUBDATSET. PROGY+
* PERFORMS 1 OPEN FOR DTFNAME TAPEIN.
*
----------------------------------------------------------+
*
* //DUMMY
DD DSN='VERY.LONG.NAME.FOR.PRIME.1(0)',
* //
UNIT=TAPE
* //TAPEIN DD DSN='VERY.LONG.NAME.FOR.NEWSUB.3(0)',
* //
UNIT=TAPE,
* //
DISP=(OLD),
* //
VOL=REF=*.DUMMY
// EXEC PROGY
/*
/&
Note:
The use of the DTF name DUMMY in DD statements is also known as the
ddname. You can use any ddname except TAPEIN because PROGY
performs an open for TAPEIN, not DUMMY.
7-24
Connectivity Systems, Inc.—Copyright © 2006
Use Pursuant to Company Instructions
User Reference
Sequential Datasets
Types of Datasets
Sequential Datasets
Description
For disk, allocation is on track boundaries for CKD devices. If you
specify DLBL option code A or SPACE=(...,ROUND) on a DD
statement, BIM-EPIC makes the allocation on cylinder boundaries.
Otherwise, there are no special requirements for sequential dataset
processing.
User Reference
Connectivity Systems, Inc.—Copyright © 2006
Use Pursuant to Company Instructions
7-25
Direct Access Datasets
Direct Access Datasets
Description
When using direct access datasets:
LUB allocation is inhibited automatically.
Allocation is on cylinder boundaries and datasets are not
truncated.
Secondary extents are not supported for controlled datasets.
When using uncontrolled direct access datasets with the configuration
option UNCDSK:
There is no limit to the number of extents when UNCDSK=NO.
There is a limit of 5 extents when UNCDSK=YES.
DSN Catalog
There are no special EDD requirements.
JCL
Requirements
The VSE job control program requires you to use a DLBL and a complete
EXTENT statement. For BIM-EPIC purposes, however, only the file type
(access method DA) on the DLBL and the extent sequence numbers on
the EXTENT statement must be correct. For both cataloged and Start
Track 1 datasets, the extent sequence numbers must begin with one (1).
VSE also requires that secondary extents reside on separate volumes.
Examples
The following example shows the EXTENT statement for a controlled
dataset. BIM-EPIC supplies the volume serial number, starting address,
and number of tracks/blocks from information in the catalog.
// DLBL RESDA,'dataset.name',,DA
// EXTENT SYS020,,1,1
The following example shows the EXTENT statement for a Start Track 1
dataset. BIM-EPIC supplies the actual volume serial number and starting
address.
// DLBL RESDA,'dataset.name',,DA
// EXTENT SYS020,POOL01,1,1,1,15
On BIM-EPIC DD statements, specify DCB=DSORG=DA or
DCB=DSORG=DAU. This example could be used to read or update a
controlled DA dataset.
* //RESDA
* //
7-26
DD
DSN=INVOICE.TICKETS,DISP=(OLD,KEEP),
DCB=DSORG=DA
Connectivity Systems, Inc.—Copyright © 2006
Use Pursuant to Company Instructions
User Reference
ISAM Datasets
ISAM Datasets
Description
BIM-EPIC can control ISAM datasets. The following MVT restrictions
affect BIM-EPIC ISAM dataset processing.
Note:
VSE no longer supports ISAM. The following restrictions apply only to
MVT and MVT/VSE.
BIM-EPIC can control only one prime data area, one overflow
area, and one index per ISAM dataset.
ISAM datasets are automatically allocated on cylinder
boundaries.
If UNCDSK=YES is specified as a configuration option or if you
specify DLBL options in your JCL, uncontrolled ISAM datasets
are limited to a maximum of 5 extents total.
DSN Catalog
There are no special requirements for the catalog entry. The extent size
specified in the catalog refers to the prime data area. Multiple extents are
not allowed. Extent information for the index and overflow are taken
from the JCL. The disk pool applies to all prime data, index, and overflow
areas.
JCL
Requirements
EXTENT statements are always required for the prime data, index, and
overflow areas.
For catalog controlled datasets, the number of tracks to allocate for the
prime area is taken from the catalog, unless you specify the DLBL, option
code O. The number of tracks to allocate for index and overflow areas
must be specified on the appropriate extent statement, as shown in the
following examples:
User Reference
//
//
//
//
DLBL MASTER,'EPIC.ISAM.MASTER.FILE',,ISE
EXTENT SYS040,,4,1
Index
EXTENT SYS041,,1,2
Prime
EXTENT SYS042,,2,4
Overflow
//
//
//
//
DLBL MASTER, 'EPIC.ISAM.MASTER.FILE',,ISC
EXTENT SYS040,,4,1,,15
Index
EXTENT SYS041,,1,2
Prime
EXTENT SYS042,,2,4,,30
Overflow
Connectivity Systems, Inc.—Copyright © 2006
Use Pursuant to Company Instructions
7-27
ISAM Datasets
For Start Track 1, the SYS number for the overflow extent must be
different from the SYS number for the index and prime data areas, as
shown in the following example:
//
//
//
//
DLBL MASTER,'EPIC.ISAM.MASTER.FILE',,ISE
EXTENT SYSO4O,POOL80,4,1,1,15
Index
EXTENT SYS041,POOL80,1,2,1,90
Prime
EXTENT SYSO42,POOL80,2,3,1,30
Overflow
For each DD statements, specify DCB=DSORG=IS or
DCB=DSORG=ISU.
The three areas of an ISAM dataset, prime, index, and overflow, are all
defined as part of the same DD statement. However, the overflow area
must be defined using its own parameters, for example DSN, DCB, DISP,
SPACE, and VOL. You can define the prime and index areas
independently or together using one set of parameters.
Examples
The following example shows each area with its own set of parameters.
Space and other information about the area follow the DSN parameter
identifying the area. Because the index area space is defined separately,
the space is defined with the primary-qty subparameter, SPACE=(TRK,1)
and not the index-qty, SPACE=(TRK(,,1)).
*
*
*
*
*
*
*
*
*
*
*
*
*
*
*
*
*
*
//DATA
//
//
//
//
//
//
//
//
//
//
//
//
//
//
//
//
//
DD
DD
DD
DSN=CUSTOMER.MASTER(PRIME),
DISP=(NEW,KEEP)
UNIT=DISK
DCB=DSORG=IS,
SPACE=(TRK,45)
VOL=SER=POOL01
DSN=CUSTOMER.MASTER(INDEX),
DISP=(NEW,KEEP)
UNIT=DISK,
DCB=DSORG=IS,
SPACE=(TRK,1)
VOL=SER=POOL01
DSN=CUSTOMER.MASTER(OVFLOW),
DISP=(NEW,KEEP)
UNIT=DISK,
DCB=DSORG=IS,
SPACE=(TRK,15)
VOL=SER=POOL01
The following example shows one set of parameters used to define both
the prime area and the index area. In this case, SPACE is defined for the
index area by using the index-qty subparameter.
*
*
*
*
*
*
7-28
//DATA
//
//
//
//
//
DD
DSN=CUSTOMER.MASTER,
DISP=(NEW,KEEP),
UNIT=DISK,
DCB=DSORG=IS,
SPACE=(TRK,(45,,1)),
VOL=SER=POOL01
Connectivity Systems, Inc.—Copyright © 2006
Use Pursuant to Company Instructions
User Reference
VSAM and VSAM-Managed SAM Datasets
VSAM and VSAM-Managed SAM Datasets
Description
BIM-EPIC does not control VSAM or VSAM-managed SAM datasets.
Therefore, no changes are required in your JCL. However, you can use
DD statements to access an existing VSAM cluster or VSAM-managed
SAM dataset. See your IBM documentation for additional information.
You can have the VSAM dataset location and activity recorded in the
DSN Catalog. If you catalog the VSAM cluster using Online Manager or
TSIDMNT, the catalog information appears on the BIM-EPIC reports and
displays, similar to non-VSAM datasets. At close, BIM-EPIC logs the
allocations used for any suballocated or unique VSAM clusters.
Configuration
Options
User Reference
The VSAM configuration option enables logging of VSAM datasets.
Connectivity Systems, Inc.—Copyright © 2006
Use Pursuant to Company Instructions
7-29
Common Work Datasets
Common Work Datasets
Description
BIM-EPIC can release disk space or tapes used for controlled temporary
datasets at close or at end-of-job. Examples of these datasets are compiler
work files which are intermediate output files from various “translation”
programs like those used for Command Level CICS, SQL, DB2, etc.
To automatically delete these datasets without using the JCL
requirements options below, use the BIM-EPIC Common Work Datasets
(CWDS). CWDS dataset names begin with $$$. See “CPU and Partition
Independence” in this chapter for additional information.
DSN Catalog
You must catalog the BMI-EPIC dataset definition as work. If you use
Online Manager, specify WRK. If you use TSIDMNT, specify
WRK=YES.
JCL
Requirements
Except for CWDS datasets, the following JCL options must be used.
7-30
For TLBLs, specify option code 4.
For DLBLs, specify option code D, P, or X in the dataset name.
For DD statements, specify DISP=(NEW,DELETE,DELETE).
Connectivity Systems, Inc.—Copyright © 2006
Use Pursuant to Company Instructions
User Reference
CPU and Partition Independence
CPU and Partition Independence
Description
CPU and partition independence are normally used with work datasets.
CPU and partition independence allow you to use a single set of JCL to
run in any partition or CPU. Because BIM-EPIC inserts a partition and/or
CPU ID into the dataset name to make the dataset name unique, there is
no duplication of the dataset names in different partitions or machines.
For example, in your JCL you could specify ===.SORTWRK1 as the
dataset name. The three equal signs (=) designate both CPU and partition
independence. When you run the job in the BG partition of CPU ID 1,
BIM-EPIC uses the dataset name BG1.SORTWRK1. When you run the
job in the F4 partition of CPU ID 2, BIM-EPIC uses the name
F42.SORTWRK1.
DSN Catalog
When using the “===.” format, you must catalog a separate dataset
definition for each partition/CPU ID combination you intend to use.
When cataloging your dataset, specify the partition/CPU ID first, then a
period, and then the dataset name. Using the previous example, the
catalog names would be BG1.SORTWRK1 and F12.SORTWRK1. When
using both CPU and partition independence, the partition ID precedes the
CPU ID.
When using Common Work Datasets (CWDS), it is not necessary to
catalog a separate dataset definition for each partition/CPU ID
combination used. You may also choose to use CWDS for temporary
datasets, especially compiler work files, such as IJSYSnn. However,
since they are deleted at end-of-job, they may not be appropriate for
everything.
JCL
Requirements
User Reference
There are several JCL requirements you must consider.
For both DLBL and DD statements, you must prefix your dataset
name with at least one equal sign (=) and a period (.). For
example:
Format
Specifies...
=.dataset.name
CPU independence only
==.dataset.name
Partition independence only
===.dataset.name
Both CPU and partition independence
The “=” and “.” are part of the 44 character dataset name.
For DD statements, you can substitute two ampersands (&&) for
the equal signs and omit the period. If you are concerned about
MVS compatibility, using the ampersands can be an advantage
because ampersands signify a temporary dataset to MVS.
Connectivity Systems, Inc.—Copyright © 2006
Use Pursuant to Company Instructions
7-31
CPU and Partition Independence
Example
The following dataset will have a unique name in the VTOC in any
partition or CPU in which the dataset is used.
// DLBL WORKOUT,'===.WORKFILE.1'
7-32
Connectivity Systems, Inc.—Copyright © 2006
Use Pursuant to Company Instructions
User Reference
Common Work Datasets
Common Work Datasets
Description
The easiest way to control sort work, compiler work areas, and any other
disk-only dataset that does not need to be kept after end-of-job is to use
the Common Work Dataset (CWDS) feature.
When a dataset name begins with three dollar signs and a period, for
example $$$. or £££. if in the U.K., BIM-EPIC recognizes the dataset as a
CWDS. The $$$. or £££. in the dataset name is replaced by the CPU ID
and partition ID that executed the job. This substitution is the reverse of
=== datasets to avoid any conflicts if both are used with the same dataset
name. In addition, a CWDS is automatically deleted at end-of-job, even if
the job cancels.
Since each version is deleted at the end of every job, no versions are
recorded in the DSN Catalog or kept on disk. If you attempt to open a
version as input in a new job, the job cancels with an appropriate error
message.
CWDS requires you to catalog only one dataset name. This is different
from CPU/partition independence which requires you to catalog a
partition/CPU independent dataset name for every partition and machine
combination in which the dataset can be used.
DSN Catalog
Example
In the DSN Catalog, you must:
Catalog the dataset name beginning with $$$. or £££. if in the
U.K. Use the remaining 40 characters to name the dataset.
Specify the dataset as work. If you use Online Manager, specify
WRK. If you use TSIDMNT, specify WRK=YES.
Cycle, retention period, and DLA retention are ignored if they are
specified.
The following control statement catalogs a CWDS using TSIDMNT.
CAT
JCL
Requirements
User Reference
'$$$.SORTWK1',WRK=YES,POL=POOL01,EXT=120
There are two JCL requirements you must consider.
Specify the dataset name beginning with $$$. or £££. if in the
U.K.
No delete options are necessary on the DLBL or DD statement.
Connectivity Systems, Inc.—Copyright © 2006
Use Pursuant to Company Instructions
7-33
TYPEFLE=WORK DTF Datasets
TYPEFLE=WORK DTF Datasets
Description
Datasets that have TYPEFLE=WORK DTFs are processed differently
from other sequential datasets. Common TYPEFLE=WORK DTFs
include compiler work datasets and FORTRAN disk datasets.
BIM-EPIC can process TYPEFLE=WORK DTFs on disk only (DTFSD).
You can, of course, still use TYPEFLE=WORK DTFs with tape if the
tape dataset is uncontrolled.
TYPEFLE=WORK DTFs can be controlled as Start Track 1 or cataloged
datasets. However, you should use the DSN Catalog to eliminate many
allocation problems. For example, BIM-EPIC automatically reuses the
same extents used by an earlier version of a cataloged dataset, if one
exists. If you use Start Track 1 datasets, the old dataset is deleted the next
time a dataset with the same dataset name is opened.
Secondary extents are not allowed.
DSN Catalog
JCL
Requirements
7-34
In the DSN Catalog, you must:
Catalog the dataset as work. If you use Online Manager, specify
WRK. If you use TSIDMNT, specify WRK=YES.
Inhibit LUB allocation for the dataset by specifying a SYS
number in the definition.
There are several JCL requirements you must consider.
Inhibit LUB allocation if this is not done through the DSN
Catalog.
For a DLBL, specify the DLBL option code N in the dataset
name.
For DD statements, include the OPTION=SYSnnn parameter.
Connectivity Systems, Inc.—Copyright © 2006
Use Pursuant to Company Instructions
User Reference
Compiler Work Datasets
Compiler Work Datasets
Description
\Compiler work datasets have the same requirements as
TYPEFLE=WORK DTF datasets, described earlier in this chapter.
However, there are a few additional requirements that are described in
this section.
DSN Catalog
Compiler work datasets should be controlled with a disk pool that
contains volumes of the same device type as SYS001, SYS002,SYS003,
SYS004, and SYSLNK.
JCL
Requirements
There are several JCL requirements you must consider.
Example
Each compiler does a pre-open check to determine the device
type prior to opening the work datasets. Logical units SYS001,
SYS002, SYS003, SYS004, and SYSLNK must be pre-assigned
to the same device type that will be used for the compiler work
datasets. You can use permanent or temporary assignments to
accomplish this task.
All compiler work dataset labels must be submitted before the
compiler is executed.
LUB allocation is inhibited automatically, since the DTF names
begin with IJSYS.
The following is an example of a compiler work dataset.
// JOB COMPILE AND LINK EDIT
// ASSGN SYS001,SYSWK1
// ASSGN SYS002,SYSWK1
// ASSGN SYS003,SYSWK1
// ASSGN SYS004,SYSWK1
// ASSGN SYSLNK,SYSWK1
// DLBL IJSYS01,'$$$.IJSYS01'
// EXTENT SYS001
// DLBL IJSYS02,'$$$.IJSYS02'
// EXTENT SYS002
// DLBL IJSYS03,'$$$.IJSYS03'
// EXTENT SYS003
// DLBL IJSYS04,'$$$.IJSYS04'
// EXTENT SYS004
// DLBL IJSYSLN,'$$$.IJSYSLN'
// OPTION CATAL
PHASE PROGX,*
// EXEC FCOBOL
(COBOL SOURCE)
/*
// EXEC LNKEDT
/&
User Reference
Connectivity Systems, Inc.—Copyright © 2006
Use Pursuant to Company Instructions
7-35
Uncontrolled Datasets
Uncontrolled Datasets
Description
Any dataset that is not controlled using the DSN Catalog or Start Track 1
is called an uncontrolled dataset. With a few exceptions, uncontrolled
datasets are not provided with any additional features than are available
when using standard VSE JCL.
For uncontrolled tape datasets, BIM-EPIC provides protection for all
output tapes to ensure that any tape with an active status in the BIM-EPIC
Catalog is not used. Additionally, if the configuration option
UNCTL=NO is set, uncontrolled tape datasets cannot use any tape in the
DSN Catalog, even if the tape has a scratch status. VSE ASSGN
statements are not required for uncontrolled tape datasets. If there is no
assignment, the operator is prompted to specify an available tape drive to
use and BIM-EPIC will make the appropriate assignment. Unlike
controlled tape datasets, the assignment is not released at close unless the
configuration option UNCTAP=YES is set.
Uncontrolled disk datasets can be placed within the disk pool extents if
the datasets are created with adequate retention. ASSGN and EXTENT
statements are normally required but if the configuration option
UNCDSK=YES, the ASSGN statement is optional.
JCL
Requirements
7-36
No special options are required for uncontrolled datasets.
Connectivity Systems, Inc.—Copyright © 2006
Use Pursuant to Company Instructions
User Reference
Physical IOCS Processing
Physical IOCS Processing
Description
Some VSE system utilities, sort programs, report writers, database
utilities, and other programs process datasets with Physical IOCS
(PIOCS) instead of Logical IOCS (LIOCS).
Many different issues can come into play when a program uses PIOCS to
process datasets that are under BIM-EPIC control. If you familiarize
yourself with the issues described below, you can make any PIOCS
program work with BIM-EPIC-controlled datasets.
PIOCS Issues
PIOCS issues to consider are:
When a program requires a specific logical unit, you must inhibit
LUB allocation for every dataset processed in that job step. There
are some cases in which LUB allocation is inhibited
automatically. See “Using LUB Allocation and the ASSGN
Statement” for additional information.
Satisfy pre-open checking.
Make an assignment to a device type, using any of the
following methods:
Make a permanent assignment, as for SYS001 through
SYS005 and SYSLNK
Make a temporary assignment
Use the DD OPTION=SYSnnn parameter
Execute TSIDSRT for SORT or TSIDASS ASSGN for
other programs
If you make a disk assignment using the VSE ASSGN
statement, assign the dataset the same type of device as
the device used for the dataset. For example, you can
assign a disk dataset with the following statement:
// ASSGN SYS003,DISK,VOL=SYSWK1,SHR
If SYSWK1 is a 3380, for example, your dataset can be
created on any 3380 volume.
User Reference
For other programs like DITTO, some IDCAMS commands,
and some SORT products, include an EXTENT card with the
assigned logical unit number. The xxx.SAMPJOB members
in the VSE sub-library containing BIM-EPIC have a large
number of examples for specific programs.
Connectivity Systems, Inc.—Copyright © 2006
Use Pursuant to Company Instructions
7-37
Physical IOCS Processing
Utility Programs
Many programs that use PIOCS do not issue an open request
that BIM-EPIC can recognize. In this case, you can satisfy
the BIM-EPIC open processing requirements by executing
the TSIDASS OPEN function to simulate the opening of both
input and output datasets. This is required only when the
program does not issue an open or does I/O to the dataset
before the dataset is opened. Examples include some DITTO
functions, LIBR stand-alone backups, and most FORTRAN
compilers.
Use caution when using the BIM-EPIC concatenation feature.
BIM-EPIC cannot recognize end-of-file processing for many
PIOCS programs. Therefore, the BIM-EPIC dataset
concatenation may not work with these programs.
Most PIOCS programs do not honor the BIM-EPIC dataset
reblocking facility. Alternate block sizes must be specified by
submitting control statements to the program. For sorts, you can
use TSIDSRT to automatically update the control statements with
the BIM-EPIC block size.
BIM-EPIC Generic Device Independence (GDI) cannot be used
with PIOCS.
Some PIOCS programs do not provide the address of the last
record written. Therefore, BIM-EPIC may not be able to truncate
the dataset when it is closed.
BIM-EPIC provides the following utility programs to assist in processing
with PIOCS programs.
Program
Can be used for...
TSIDASS Pre-open assignment checking and simulation of open
processing
TSIDSRT
Sort programs
TSIDDEL Deleting disk work datasets that have not been closed
See Chapter 8, “BIM-EPIC Utilities,” for additional information.
7-38
Connectivity Systems, Inc.—Copyright © 2006
Use Pursuant to Company Instructions
User Reference
Sorting with BIM-EPIC
Sort Programs
Sorting with BIM-EPIC
Description
This section describes the considerations necessary to use BIM-EPIC
controlled datasets with sort programs. Specifically, this section covers
the following sort programs:
SYNCSORT using BIM-EPIC Interface
IBM SORT beginning with DFSORT 3.3
CA-SORT
All sort programs check the assignment of a particular logical unit
number (SYSnnn) before actually opening a particular file. This process
is known as pre-open checking and uses Physical Input Output Control
Systems (PIOCS) to open, close, read, and write the datasets. Therefore,
when using some sort programs, special considerations may be necessary
when accessing BIM-EPIC controlled datasets. These considerations fall
into three categories:
Satisfying pre-open checking
Acquisition of necessary DTF information
Deletion of the SORTWK dataset(s)
Pre-open checking can be satisfied using JCL considerations. BIM-EPIC
automatically deletes controlled SORTWK datasets at the end of a job.
DTF information not supplied by the sort program either is lost or must be
acquired by other means.
Using the Sort Interface (TSIDSRT)
Description
The BIM-EPIC sort interface program, TSIDSRT, addresses all the
considerations described in the previous section. In addition, under
normal conditions, TSIDSRT does not require any JCL changes, except
the phase name on the EXEC statement. TSIDSRT performs the
following functions:
User Reference
Reads the sort control statements and modifies the input
BLKSIZE to match the block size in the BIM-EPIC Catalog
Connectivity Systems, Inc.—Copyright © 2006
Use Pursuant to Company Instructions
7-39
Using the Sort Interface (TSIDSRT)
Assigns tape datasets to a dummy tape device and opens disk
datasets to satisfy pre-open checking
Calls the sort program
Uses the SORTE35 exit routine to write the SORTOUT dataset
Allows access to DTF information necessary to support such
BIM-EPIC options as disk dataset truncation, reblocking, and
logging of block size, record size, and record count
Closes SORTWK datasets to enable the datasets to be deleted
Unless you are using a sort program that has a direct interface to
BIM-EPIC, such as SYNCSORT or DFSORT, it is recommended that
TSIDSRT be used when BIM-EPIC-controlled datasets are used.
BIM-EPIC special option EPS083 will instruct BIM-EPIC to
automatically change SORT to TSIDSRT on EXEC statements.
7-40
Connectivity Systems, Inc.—Copyright © 2006
Use Pursuant to Company Instructions
User Reference
Sorting Specifics
Sorting Specifics
Many BIM-EPIC features rely on DTF information that is automatically
provided by the Logical Input Output Control Systems (LIOCS) access
methods. BIM-EPIC also relies on the standard open, close,
end-of-extent, and end-of-reel processing used by LIOCS. Not all sort
programs use LIOCS to process data so the functionality of the
BIM-EPIC features can vary depending on which sort product is used.
The following details how specific BIM-EPIC features perform when
used with several sort programs. These considerations apply when the
sort program is directly executed using the VSE EXEC statement and
then only to datasets that are opened directly by the sort program. These
considerations do not apply to datasets that may be opened by
user-written sort exits. The following characteristics apply to the
SORTWK file when the sort program is invoked by TSIDSRT or by
another program internally.
BIM-EPIC
feature
IBM SORT
prior to
DFSORT
3.3
IBM SORT
SYNCSORT
DFSORT 3.3 and without interface
above
to BIM-EPIC
SYNCSORT
with interface CA-SORT
to BIM-EPIC
TSIDSRT
Reblocking
No
No
No
Yes
No
Yes
Truncation of disk No
output dataset
No
Yes
Yes
No
Yes
Deletion of
SORTWK (using
close)
No
Yes
Yes
Yes
Yes
Yes
DTF information
posting
No
No
No
Yes
No
Yes
LUB allocation
No
Yes
Yes
Yes
Yes
Based on
sort
program
Disk dataset
concatenation
No
Yes
No
Yes
Yes
Based on
sort
program
Tape dataset
concatenation
No
Yes
Yes
Yes
No
Based on
sort
program
Secondary
SORTWK
allocation
No
Yes
Yes
Yes
Yes
Based on
sort
program
Assignments
required before
SORTIN,
SORTOUT or
SORTWK
opened?
Yes
No
No
No
No
No
User Reference
Connectivity Systems, Inc.—Copyright © 2006
Use Pursuant to Company Instructions
7-41
Sorting Specifics
SYNCSORT
using BIM-EPIC
Interface
SYNCSORT offers options to improve compatibility with BIM-EPIC.
See the SYNCSORT Installation Guide for information describing these
options. In addition, BIM-EPIC has special options which must be
activated when using SYNCSORT. See the BIM-EPIC Installation and
System Guide for additional information.
When the special options are activated, LUB allocation and secondary
SORTWK allocations are supported. SORTWK datasets are closed to
allow the datasets to be deleted, and disk output datasets are closed to
allow file truncation. In addition, SYNCSORT communicates directly
with BIM-EPIC to determine input file block sizes and to allow output
file record and block sizes to be stored in the DSN Catalog and on tape
HDR2 labels.
As a result, problems typically associated with sort programs are solved
when using BIM-EPIC controlled datasets.
IBM SORT
beginning with
DFSORT 3.3
DFSORT offers an option to improve compatibility with BIM-EPIC. See
the DFSORT/VSE Installation and Tuning Guide for information on
customizing DFSORT/VSE for details. If DFSORT is used with its File
Management feature activated, LUB allocation and secondary SORTWK
allocations are supported, and input datasets can be concatenated. In
addition, pre-open checking checks the type of label that was submitted
for a dataset to determine if the label resides on tape or disk.
As a result, some of the problems typically associated with sort programs
are resolved when using BIM-EPIC controlled datasets.
CA-SORT
CA-SORT offers an option to improve compatibility with BIM-EPIC. See
the CA-SORT Systems Programmer Guide for information. When this
option is active and normal CA-SORT are used, LUB allocation and
secondary SORTWK allocations are supported, and input disk datasets
can be concatenated. In addition, the method by which pre-open checking
is accomplished is to check the type of label that is submitted for a dataset
to determine if it resides on disk or tape.
As a result, some problems typically associated with sort programs are
resolved when using BIM-EPIC controlled datasets.
7-42
Connectivity Systems, Inc.—Copyright © 2006
Use Pursuant to Company Instructions
User Reference
Using SORTWK Datasets
Using SORTWK Datasets
Description
To provide optimal use of disk work space, SORTWK datasets should be
defined as temporary datasets and deleted as soon as they are no longer in
use.
DSN Catalog
There are two DSN Catalog requirements to consider.
JCL
Requirements
Catalog SORTWK datasets as work. If you use Online Manager,
specify WRK. If you use TSIDMNT, specify WRK=YES.
Use the CWDS facility or partition/CPU-independent datasets so
that the datasets can be processed in any partition without
conflict.
You can use various BIM-EPIC options, listed below, to delete SORTWK
areas when the sort is complete. These options include:
Controlled SORTWK datasets are deleted automatically at end of
job.
Common work datasets ($$$) are also deleted at end of job.
If the sort program closes SORTWK, use the DLBL option code
D or the DD parameter DISP=(,DELETE) to delete SORTWK at
close.
If the sort program does not close SORTWK, use the DLBL
option code D or the DD parameter DISP=(,DELETE) and
execute TSIDDEL after every sort step.
For jobs that contain multiple sort steps, SORTWK datasets should be
deleted after each sort step, using either option 3 or option 4 above.
Pre-Open
Checking
User Reference
All sort functions check specific SYS numbers to determine the device
type for each dataset that is opened. The search stops as soon as a SYS
number is found. The sort functions search several sources, in the order
listed below, for the SYS number used for each dataset. These sources
are:
The SYS number found in the VSE label area for disk datasets
(from the EXTENT statement or the DD OPTION=SYSnnn
parameter)
Sort control statements (SORTIN, SORTOUT, SORTWK
keywords) which TSIDSRT can modify if necessary
Connectivity Systems, Inc.—Copyright © 2006
Use Pursuant to Company Instructions
7-43
Using SORTWK Datasets
Sort defaults (standard or user-specified: SYS001 for SORTOUT,
SYS002 for SORTIN1, SYS003 for SORTWK, and so on)
Note:
If LUB allocation is active for sort datasets, the SYS numbers checked by
the sort in the pre-open processing may not be the same SYS numbers
assigned by BIM-EPIC when the open actually occurs.
JCL
Requirements
Pre-open assignments can be completed by using any of the following
media:
Media
Method
Disk
Permanent assignments in partition start-up procedure.
Temporary assignments in each job
Tape
Execute TSIDASS with the ASSGN command
Tape or Disk
Use the DD OPTION=SYSnnn parameter. Execute
TSIDSR
One popular method of satisfying pre-open requirements for the sort and
compilers is to permanently assign SYS001 through SYS005 to disk in
every partition in which the compiler may be used. The disk assigned
must be the same device type as the device type in the BIM-EPIC disk
pool.
Examples
7-44
Many sample job streams for sort applications are supplied when
BIM-EPIC is installed. These are in the xxx.SAMJOB members of the
VSE sub-library where BIM-EPIC is installed. See the BIM-EPIC
Installation and System Guide for additional information.
Connectivity Systems, Inc.—Copyright © 2006
Use Pursuant to Company Instructions
User Reference
Controlling IDCAMS Backup Datasets
Additional Functionality
Controlling IDCAMS Backup Datasets
Description
You can use BIM-EPIC to control the IDCAMS backup dataset. This
backup dataset is produced by the BACKUP command and is used by the
RESTORE command. IDCAMS allows the backup dataset to reside on
either tape or disk.
DSN Catalog
Only prime dataset definitions are allowed. Therefore, multi-dataset tape
groups are specifically disallowed. For disk only, non-generation
single-extent disk datasets (WRK=YES) residing on CKD devices only
may be used. Truncation must be bypassed.
JCL
Requirements
There are several JCL requirements you must consider.
Each controlled tape dataset must be defined with a TLBL
statement or DD statement.
Each controlled disk dataset must be defined with a DLBL
statement and abbreviated EXTENT statement (// EXTENT
SYS00n) or a DD statement with OPTION=SYS00n.
LUB allocation must be inhibited since IDCAMS requires
SYS005 for the output backup dataset and SYS004 for the input
backup dataset.
Restrictions
Due to IDCAMS restrictions, you cannot use GDI to route a tape backup
to disk or vise-versa. When using disk for the backup dataset, a new
extent must be allocated and the correct assignment must be made before
starting the BACKUP command.
Examples
Many sample job streams for IDCAMS BACKUP and RESTORE are
supplied when BIM-EPIC is installed. See the BIM-EPIC Installation and
System Guide for additional information.
User Reference
Connectivity Systems, Inc.—Copyright © 2006
Use Pursuant to Company Instructions
7-45
Controlling IDCAMS REPRO Datasets
Controlling IDCAMS REPRO Datasets
Description
You can use BIM-EPIC to control IDCAMS REPRO non-VSAM
sequential datasets for both input and output.
DSN Catalog
No restrictions exist. For disk, both generation and non-generation
datasets with single or multiple extents may be used. For tape, both single
and multi-dataset groups and single or multiple tape volumes may be
used.
JCL
Requirements
for Tape
There are two JCL requirements you must consider.
Each controlled dataset must be defined with a TLBL statement,
a DLBL statement, or a DD statement.
LUB allocation must be inhibited since IDCAMS requires
SYS005 for output datasets and SYS004 for input datasets.
JCL
Requirements
for Disk
Each controlled dataset must be defined with a DLBL statement and
abbreviated EXTENT statement (// EXTENT SYS00n) or a DD
statement with OPTION=SYS00n. When using a DLBL and EXTENT,
the SYS number chosen must be assigned to a disk. Although you can use
the SYS number of your choice, typically SYS001 is an easy choice since
most installations have SYS001 permanently assigned to disk.
Examples
Many sample job streams for IDCAMS REPRO are supplied when
BIM-EPIC is installed. See the BIM-EPIC Installation and System Guide
for additional information.
7-46
Connectivity Systems, Inc.—Copyright © 2006
Use Pursuant to Company Instructions
User Reference
Using IDCAMS IMPORT/EXPORT Commands
Using IDCAMS IMPORT/EXPORT Commands
Description
You can use BIM-EPIC to control the portable file produced by the
EXPORT command and read by the IMPORT command.
DSN Catalog
No restrictions exist. For disk, both generation and non-generation
datasets with single or multiple extents may be used. For tape, both single
and multi-dataset groups and single or multiple tape volumes may be
used.
JCL
Requirements
for Tape
There are two JCL requirements you must consider.
Controlled portable files must be defined with a TLBL statement,
a DLBL statement, or a DD statement.
LUB allocation must be inhibited since IDCAMS requires
SYS005 when creating a portable file and SYS004 when reading
a portable file.
JCL
Requirements
for Disk
Each controlled dataset must be defined with a DLBL statement and
abbreviated EXTENT statement (// EXTENT SYS00n) or a DD statement
with OPTION=SYS00n. When using DLBL and EXTENT, the SYS
number chosen must be assigned to a disk. Although you can use the SYS
number of your choice, typically SYS001 is an easy choice since most
installations have SYS001 permanently assigned to disk.
Examples
Many sample job streams for IDCAMS EXPORT and IMPORT are
supplied when BIM-EPIC is installed. See the BIM-EPIC Installation and
System Guide for additional information.
User Reference
Connectivity Systems, Inc.—Copyright © 2006
Use Pursuant to Company Instructions
7-47
Using LIBR BACKUP/RESTORE Commands
Using LIBR BACKUP/RESTORE Commands
Description
You can use BIM-EPIC to control the tape datasets created by the LIBR
BACKUP command and read by the LIBR RESTORE command.
DSN Catalog
Only prime dataset definitions are allowed. Therefore, multi-dataset tape
groups are specifically disallowed.
JCL
Requirements
There are several JCL requirements you must consider.
Each controlled dataset must be defined with a TLBL statement
or DD statement.
LUB allocation must be inhibited since LIBR requires the SYS
number specified in BACKUP or RESTORE. In addition, the
tape drive assignment must be held after the dataset is closed
since LIBR may attempt to access the tape drive even after the
close has been completed.
When including the standalone restore programs,
RESTORE=STANDALONE, in BACKUP, use the TSIDASS
OPEN function to allocate the first tape output volume before
performing the // EXEC LIBR BACKUP.
LIBR Control
Statements
Use TAPELABEL parameter to specify a filename consisting of one to
seven alphanumeric characters. This is the same filename used in the
accompanying TLBL statement or DD statement.
Restrictions
Due to LIBR restrictions, you cannot use GDI to route a tape backup to
disk.
Examples
Many sample job streams for LIBR BACKUP and RESTORE are
supplied when BIM-EPIC is installed. See the BIM-EPIC Installation and
System Guide for additional information.
7-48
Connectivity Systems, Inc.—Copyright © 2006
Use Pursuant to Company Instructions
User Reference
Using DITTO
Using DITTO
Description
You can use BIM-EPIC to control tape and sequential disk files logically
accessed by DITTO. However, DITTO requires excessive JCL
requirements. You can use TSIDDTD and TSIDDMP, which require
minimal JCL, for equivalent results. When card-image processing is
required, use your sort program if your sort program supports card-image
processing or IDCAMS REPRO.
DSN Catalog
Only prime dataset definitions are allowed. Therefore, multi-dataset tape
groups are specifically disallowed.
JCL
Requirements
for Tape
When using tape, there are several JCL requirements to consider.
\
JCL
Requirements
for Disk
Restrictions
User Reference
Each controlled dataset must be defined with a TLBL statement
or DD statement.
LUB allocation must be inhibited since DITTO requires the SYS
number(s) specified in the DITTO control statement.
The input volume and output volumes must be allocated before
DITTO is invoked and then repositioned back to load point. Use
the TSIDASS OPEN function to allocate the volumes.
Configuration Option EPS022 must be set if BIM-EPIC
reblocking options are invoked.
Configuration Option EPS029 must be set to prevent BIM-EPIC
from clearing the dataset name from the input label statements.
When using disk, there are two JCL requirements you must consider.
Each controlled dataset must be defined with a DLBL statement
or DD statement.
As described above, input and output datasets must be allocated
before DITTO is invoked.
BIM-EPIC can only control datasets used by the DITTO tape file
functions and disk file functions, also called Sequential or SAM. Files
used by the DITTO basic tape functions and basic disk functions cannot
be controlled by BIM-EPIC since those functions do not use logical
IOCS.
Connectivity Systems, Inc.—Copyright © 2006
Use Pursuant to Company Instructions
7-49
Using DITTO
Examples
7-50
Many sample job streams for DITTO applications are supplied when
BIM-EPIC is installed. See the BIM-EPIC Installation and System Guide
for additional information.
Connectivity Systems, Inc.—Copyright © 2006
Use Pursuant to Company Instructions
User Reference
Using VSE/POWER ACCOUNT Command
Using VSE/POWER ACCOUNT Command
Description
You can use BIM-EPIC to control tape and sequential disk files created
by the VSE/POWER ACCOUNT command.
DSN Catalog
There are no tape dataset restrictions.
For disk, the pool must be made up of the exact same DASD type as the
type used for the VSE/POWER account file (IJAFILE). Specify an
adequate primary allocation value, as not all versions of VSE/POWER
will request secondary allocations even if they are needed. Historically, a
primary allocation value equal to the allocated size of IJAFILE has been
adequate.
JCL
Requirements
for Tape
JCL
Requirements
for Disk
User Reference
When using tape, there are two JCL requirements you must consider.
Controlled account files must be defined with a TLBL statement
and must be stored in the system standard label area,
VSE/POWER partition standard label area, or VSE/POWER
partition user label area.
LUB allocation must be inhibited since VSE/POWER will
dynamically choose the SYS number that will be used.
When using disk, there are several JCL requirements you must consider.
Controlled account files must be defined with the DLBL
statement and must be stored in the system standard label area,
VSE/POWER partition standard label area, or VSE/POWER
partition user label area.
If the controlled account file is inhibited for LUB allocation,
supply an abbreviated EXTENT (// EXTENT SYSnnn)
containing a SYS number that is not used by POWER.
If the controlled account file is not inhibited for LUB allocation,
supply an abbreviated EXTENT (// EXTENT SYSnnn)
containing any valid SYS number.
Connectivity Systems, Inc.—Copyright © 2006
Use Pursuant to Company Instructions
7-51
Using VSE/POWER PDISPLAY, POFFLOAD and Printer/Punch Tape Spooling
Using VSE/POWER PDISPLAY, POFFLOAD and
Printer/Punch Tape Spooling
Description
With the introduction of standard label support for POWER tape spooling
of print data, punch data, and POFFLOAD tapes, it is possible to use
BIM-EPIC controlled tapes and dataset names for these functions even
though some restrictions apply. To invoke BIM-EPIC control of these
tape datasets, specify the TLBL= operand and the LTAPE= operand in
the appropriate VSE/POWER command or JECL control statement.
DSN Catalog
BIM-EPIC datasets must be defined to the BIM-EPIC Catalog only as
prime datasets. Do not attempt to use sub-datasets. POWER may
successfully write data to sub-datasets, but may be unable to read it
because additional tape marks may be imbedded within that data.
Datasets may be cataloged as unlabeled. However, because VSE/POWER
is not able to recognize unlabeled multi-volume versions beyond the first
volume, labeled data sets are preferred. If unlabeled datasets are used, it is
your responsibility to recognize the presence of unlabeled multiple
volumes within a version. The remaining volumes can be processed with
additional VSE/POWER commands.
JCL
Requirements
7-52
There are several JCL requirements you must consider.
The actual TLBL control statement referenced by the TLBL=
operand MUST be stored in the standard label area, the
VSE/POWER partition label area, or the VSE/POWER user label
area.
LUB allocation must be inhibited since VSE/POWER will
dynamically choose a SYS number to use.
VSE/POWER continues to make and release tape device
assignments. This prevents BIM-EPIC from doing Automatic
Volume Recognition (AVR). VSE/POWER determines which
tape drive to use in PDISPLAY or POFFLOAD commands, or in
the TADDR operand on the * $$ LST or * $$ PUN JECL
statements. If the TADDR operand is not specified, the operator
response to the console message 1Q55D SPECIFY TAPE
ADDRESS will be used.
If the output fills more than a single tape volume, VSE/POWER
will invoke VSE/SAM End-of-Volume procedures, unload the
current tape, and issue the message:
Connectivity Systems, Inc.—Copyright © 2006
Use Pursuant to Company Instructions
User Reference
Using VSE/POWER PDISPLAY, POFFLOAD and Printer/Punch Tape Spooling
4140A NO ALTERNATE DRIVE ASSIGNED ... SYSXXX=CUU
Since VSE/POWER has the tape drive assigned, BIM-EPIC is
unable to use AVR on other tape drives to determine an available
scratch tape. The operator must mount a fresh scratch tape on the
indicated drive and respond with NEWTAP.
If input spans multiple tape volumes, VSE/POWER will invoke
VSE/SAM End-of-Volume procedures, unload the current tape,
and issue the message:
4140A NO ALTERNATE DRIVE ASSIGNED ... SYSXXX=CUU
Since VSE/POWER has the tape drive assigned, BIM-EPIC is
unable to use AVR on other tape drives to determine the next
volume in the version. The operator must mount the required
volume on the indicated drive and respond with NEWTAP.
User Reference
Connectivity Systems, Inc.—Copyright © 2006
Use Pursuant to Company Instructions
7-53
Setting DB2 Tape Output Functions
Setting DB2 Tape Output Functions
Description
DB2 is a long running task that manages database files in a VSE
environment. DB2 has the ability to archive database files and their
corresponding journal files. This is done by invoking the VSE Operator
Communications Facility in the DB2 partition, for example, MSGxx,
where xx is the DB2 partition ID. DB2 then prompts the console operator
with various questions that initiates the archive process.
If BIM-EPIC is to control the DB2 archive tapes, the LUB-allocation
process must be suppressed. This is because both BIM-EPIC and DB2
will want to manage the tape device allocation process, thereby causing a
conflict.
The technique described below allows BIM-EPIC to control DB2 output
tapes. The technique is specific to the DB2 ARCHIVE process, but
should also work for other DB2 tape output operations.
BIM-EPIC
Requirements
The BIM-EPIC LUB-allocation process must be suppressed. This is done
using any of the following methods:
Setting TAPLUB=NO; however, this may not be desirable for
non-DB2 processing
Using the TLBL option code 64 on each DB2 archive output tape
Defining each DB2 archive tape dataset name in the BIM
Catalog; do not specify a SYS number in the definition
Using prime dataset names; do not catalog these DSNs as
sub-datasets
If you use TAPLUB=YES or nnn, each DB2 archive TLBL should use
the TLBL option code 64. However, you can use the Unload At Close
TLBL option code 2. If both TLBL options are desired, the option entered
for the TLBL will be 66 (TLBL option code 64 plus TLBL option code
2).
Once the console operator has requested an archive, DB2 will prompt for
the address of a tape drive to use for archive output. Respond with the
drive address (cuu) of any available tape device.
7-54
Connectivity Systems, Inc.—Copyright © 2006
Use Pursuant to Company Instructions
User Reference
Setting DB2 Tape Output Functions
JCL Examples
If TAPLUB=NO is set:
// TLBL ARILARC,’yourDsn1’
// TLBL ARIARCH,’yourDsn2’
TAPLUB=YES
or TAPLUB=nnn
// TLBL ARILARC,’yourDsn1’,,,,,,64
// TLBL ARIARCH,’yourDsn2’,,,,,,64
or
// TLBL ARILARC,’yourDsn1’,,,,,,66
// TLBL ARIARCH,’yourDsn2’,,,,,,66
User Reference
Connectivity Systems, Inc.—Copyright © 2006
Use Pursuant to Company Instructions
7-55
Identifying VSE/ICCF and Interactive Partition GETVIS Requirements
Identifying VSE/ICCF and Interactive Partition
GETVIS Requirements
Description
The following GETVIS discussion applies to ICCF pseudo partitions and
not to the ICCF partition.
An ICCF pseudo partition has 48K of GETVIS. This allocation cannot be
changed. If BIM-EPIC is active in the pseudo-partition, more than 48K of
GETVIS will often be required to initiate many programs, for example,
DTSUTIL. If sufficient GETVIS is not available, abnormal termination
may result or BIM-EPIC messages EP042 and EP042A, (referring to an
insufficient GETVIS condition) may display. If DTSUTIL is invoked
from the command line with one of these commands, the following
insufficient GETVIS condition may occur:
$DTSUTIL
/RUN DTSUTIL
If you invoke DTSUTIL from the VSE Interactive Interface, a CDLOAD
failure has been allocated to the ICCF/CICS partition itself.
Circumvention
When using DTSUTIL, you can work around the GETVIS space
limitation by storing a member named DTSUTIL in a VSE/ICCF library,
preferably the common library. This member will contain the following:
/LOAD DTSUTIL
/OPTION GETVIS=256K
This same technique can be used for any program which ICCF runs in a
pseudo-partition.
When the library file has been stored, you can run the program with the
ICCF /EXEC command. Using DTSUTIL as an example, enter the
following ICCF command:
/EXEC DTSUTIL
ICCF searches for the first DTSUTIL member in an ICCF library and
executes the ICCF job control found in that member. If adequate GETVIS
storage is requested, the program will successfully execute.
7-56
Connectivity Systems, Inc.—Copyright © 2006
Use Pursuant to Company Instructions
User Reference
Using the COBOL II Library Management Feature
Using the COBOL II Library Management Feature
Description
BIM-EPIC requires the COBOL II Library Management feature be used
when compiling COBOL II programs. Use the COBOL II CBL RES
option to accomplished this task.
In some cases, you may have COBOL II software which was not
compiled with the Library Management feature. Special JCL is required
to run these programs with BIM-EPIC.
DSN Catalog
No special entries are required.
JCL
Requirements
There are several JCL requirements you must consider.
Examples
Each controlled disk datasets must be pre-opened by using the
TSIDASS OPEN function for each dataset.
For all uncontrolled disk datasets, instead of an EPIC pool name,
the correct volume serial number must be specified on the
EXTENT statement. You must also make an assignment to the
device with a VSE ASSGN statement.
For all tape datasets, you must assign the dataset to a tape drive
using VSE ASSGN statement or using the TSIDASS ASSGN
function.
The following example processes a controlled input disk dataset. The
dataset is pre-opened using TSIDASS.
// DLBL DISKIN,'TEST.INPUT.DISK, (L)'
// EXEC TSIDASS
OPEN DISKIN,SYS020,INPUT
/*
// EXEC PROGA
The following example processes an uncontrolled input disk dataset. VSE
ASSGN and EXTENT statements are used to satisfy the COBOL II
pre-open process.
//
//
//
//
ASSGN SYS020,154
DLBL DISKIN,'TEST.INPUT.DISK'
EXTENT SYS020,VOL154,1,0,15,75
EXEC PROGA
The following example processes a controlled tape dataset. The
TSIDASS ASSGN function is used to satisfy the COBOL II pre-open
process.
// DLBL TAPEIN,'TEST.TAPE',,,,,,64
// EXEC TSIDASS
ASSGN SYS011
User Reference
Connectivity Systems, Inc.—Copyright © 2006
Use Pursuant to Company Instructions
7-57
Using the COBOL II Library Management Feature
/*
// EXEC PROGA
7-58
Connectivity Systems, Inc.—Copyright © 2006
Use Pursuant to Company Instructions
User Reference
Restarting From a Checkpoint
JCL Functions
Restarting From a Checkpoint
Description
To prepare to restart programs from a checkpoint:
1. Close all output datasets using TSIDMNT or Online Manager
CLOSE function.
2. Use the console log to determine which input and output tape
volumes have been used and which checkpoints have been taken.
DSN Catalog
All datasets must be cataloged. Start Track 1 datasets cannot be used with
checkpoint/restart. You must specify the SYS number in the catalog entry
for disk datasets. You can also specify the SYS number for tape datasets.
JCL
Requirements
To prepare the restart job:
1. Verify that you use the same job name, supervisor, and partition.
2. Execute TSIDASS RSTRT in the step just prior to VSE
RESTRT. See “Pre-Open Processing (TSIDASS)” for additional
information.
3. Define each controlled dataset in the TSIDASS RSTRT step.
Remember that all the output datasets are now the current
versions in the DSN Catalog. Therefore, you must submit all
output RSTRT statements first and the input statements last.
4. For tape, specify the volume sequence number on the label, if you
restart with volume 2 or later. If you are processing a
multi-dataset group, BIM-EPIC positions the tape automatically.
You must inhibit LUB allocation
5. For disk, supply the EXT parameter to identify the last extent
opened.
6. Follow the TSIDASS step with VSE ASSGN statement for the
checkpoint dataset. Use the logical unit number that was used
when the dataset was opened in the previous execution. The
logical unit numbers can be found in the EP039 and EP053
messages that were displayed in the failing job.
7. Assign the SYS number used for the checkpoint dataset with VSE
ASSGN if checkpoints are not embedded in the output dataset.
User Reference
Connectivity Systems, Inc.—Copyright © 2006
Use Pursuant to Company Instructions
7-59
Restarting From a Checkpoint
8. Execute the restart job.
Example
The following example shows how TSIDASS restarts both input and
output datasets at volume 2, using the same SYS numbers that were used
when the checkpoint was taken. The TLBL option code 64 inhibits LUB
allocation. When a checkpoint is embedded, it is written to the same
output tape as the output dataset using an assignment of SYS019. Because
the checkpoints are embedded, a VSE ASSGN statement is used to assign
SYS019 to the checkpoint dataset. The job is restarted at checkpoint 3.
// JOB TESTCHKP
// TLBL TAPIN,'TEST.FILE1',,,2,,,64
// TLBL TAPOUT,'TEST.FILE2',,,2,,,64
// EXEC TSIDASS
RSTRT TAPOUT,SYS021,OUTPUT
RSTRT TAPIN,SYS020,INPUT
/*
// ASSGN SYS019,SYS021
// RSTRT SYS019,3
/&
7-60
Connectivity Systems, Inc.—Copyright © 2006
Use Pursuant to Company Instructions
User Reference
Choosing the Device Type
Choosing the Device Type
Description
Generic Device Independence (GDI) and Generic Device Independence
for Unit Record Devices (GDIUR), sometimes called storage media
independence, allow you to choose the type of media on which your
dataset will be stored.
With GDI, you can process the dataset on either tape or disk, without
having to change the media type in the program’s dataset definition.
GDIUR allows you to use disk or tape for datasets that have been defined
in your programs as unit record devices, for example DTF types DTFCD,
DTFPR, DTFCP, and DTFDI. GDIUR can be used for logical units
SYS000 through SYS255 and for SYSIPT, SYSLST, and SYSPCH.
GDIUR greatly simplifies the use of disk for VSE datasets that use the
logical units SYSIPT, SYSLST, and SYSPCH. The following standard
VSE JCL is an example of creating a disk dataset on logical unit SYSPCH
and then reading that dataset with logical unit SYSIPT.
// DLBL IJSYSPH,'COBOL.PROGRAM',0
// EXTENT SYSPCH,VOL251,1,0,200,2000
ASSGN SYSPCH,DISK,VOL=VOL251,SHR
// EXEC DFHECP1$
.
.
CLOSE SYSPCH,PUNCH
// DLBL IJSYSIN,'COBOL.PROGRAM'
// EXTENT SYSIPT,VOL251
ASSGN SYSIPT,DISK,VOL=VOL251,SHR
// EXEC FCOBOL
.
.
CLOSE SYSIPT,SYSRDR
There are two issues when using this approach.
If the first step (DFHECP1$) cancels, SYSPCH will remain
permanently assigned to disk. Manual intervention or additional
JCL is needed to re-assign SYSPCH correctly.
If the second step (FCOBOL) cancels, SYSIPT remains
permanently assigned to disk. Manual intervention or additional
JCL is needed to re-assign SYSIPT correctly.
In addition, the JCL required is complex and lengthy, especially when
compared to the following BIM-EPIC JCL which accomplishes the same
task.
* //IJSYSPH DD DSN=$$$.COBOL,UNIT=DISK,DISP=(,KEEP,DELETE)
// EXEC DFHECP1$
.
.
//IJSYSIN DD DSN=$$$.COBOL,DISP=(OLD,DELETE)
// EXEC FCOBOL
User Reference
Connectivity Systems, Inc.—Copyright © 2006
Use Pursuant to Company Instructions
7-61
Choosing the Device Type
No ASSGN statement or CLOSE statement is needed. GDIUR ensures
that system logical units can never be left assigned to disk.
Programs that use GDIUR can also take advantage of the BIM-EPIC
reblocking facility to save disk space and improve performance.
Eligibility
You can use GDI or GDIUR for uncontrolled and controlled datasets.
However, the following issues must be considered.
A dataset normally processed as a Start Track 1 disk dataset will
become uncontrolled if processed on a tape with GDI.
GDI applies to tape and disk sequential datasets DTFMT or
DTFSD. VSAM, direct access, and ISAM datasets are not
eligible.
GDI and GDIUR datasets must be processed with logical IOCS.
GDIUR does not support RPG-II SYSLST processing.
GDIUR datasets cannot have secondary extents.
Configuration
Options
The configuration options GDI and GDIUR control the generic device
independence.
Invoking Device
Independence
You can invoke device independence using any of the following methods:
DSN Catalog
7-62
In response to a message. A response of TAPE or DISK can be
used for an insufficient space message or a request for a scratch
tape to force the use of a different device type. (GDI only)
Automatically for input datasets. BIM-EPIC allocates the correct
device type when controlled datasets are processed as input. (GDI
only)
Using JCL. Your job control statements indicate the desired
device. For example, use TLBL instead of DLBL to specify that
the dataset is to be on tape instead of disk. On a DD statement,
specify UNIT=DISK instead of UNIT=TAPE to specify the
dataset is to be on disk instead of tape. (Both GDI and GDIUR)
Required information for tape and disk must be supplied in the dataset
definition for controlled datasets. This includes pooling and allocation
information. If the required information is not included, BIM-EPIC
prompts the operator for the necessary input.
Connectivity Systems, Inc.—Copyright © 2006
Use Pursuant to Company Instructions
User Reference
Choosing the Device Type
JCL
Requirements
For uncontrolled tape or disk datasets, use the proper label, for example,
TLBL, DLBL, or a DD statement with UNIT.
Note:
This applies to GDI only. You cannot use GDIUR with uncontrolled
datasets.
For controlled datasets, no JCL changes are required for GDI input (GDI
only). For GDI output and GDIUR input and output, you must invoke
GDI by changing the label type to TLBL or DLBL, or device type to
UNIT=type. No volume or allocation information needs to be supplied
in the JCL. For GDIUR, use DD statements. You cannot use a DLBL
statement or TLBL statement.
When using GDIUR, it may be necessary to insert the OPTION=RESET
parameter on the DD statement after the step to terminate GDIUR
processing if subsequent steps reference the same system dataset DTF
name and you don't need to control it further using GDIUR. See Chapter
6, “OPTION Parameter,” Reset, in this manual for more information.
Example
The following example routes punch output to a disk dataset using
GDIUR.
* //IJSYSPH DD
* //
// EXEC PROGRAM
/*
* //IJSYSPH DD
User Reference
DSN='CARD.OUTPUT',DISP=(NEW,PASS),
UNIT=DISK
OPTION=RESET
Connectivity Systems, Inc.—Copyright © 2006
Use Pursuant to Company Instructions
7-63
Controlling System Datasets with VSE Device Independence
Controlling System Datasets with VSE Device
Independence
Description
Although we recommend that you use GDIUR, you can also control a
system dataset that is routed to disk or tape using VSE device
independence.
DSN Catalog
No special entries are required.
JCL
Requirements
There are several JCL requirements you must consider.
Example
The dataset cannot have secondary extents
The dataset must be permanently assigned
Label information must precede the assignment
BIM-EPIC assigns VSE system datasets to the correct disk
volume, so the assignment can specify any volume in the disk
pool
The following example routes SYSPCH output to a BIM-EPIC controlled
work dataset, which is then processed using SYSIPT in the subsequent
step.
// JOB ASSEMBLE AND CATALOG AN OBJECT MODULE
// DLBL IJSYSPH,'==.WORKFILE.1'
ASSGN SYSPCH,DISK,VOL=SYSWK1,SHR
// EXEC ASSEMBLY
(SOURCE CODE)
/*
CLOSE SYSPCH,PUNCH
// DLBL IJSYSIN,'==.WORKFILE.1'
ASSGN SYSIPT, DISK,VOL=SYSWK1,SHR
// EXEC LIBR
CLOSE SYSIPT,READER
/&
7-64
Connectivity Systems, Inc.—Copyright © 2006
Use Pursuant to Company Instructions
User Reference
Using Dummy Datasets and ASSGN IGNORE
Using Dummy Datasets and ASSGN IGNORE
Description
Dummy processing and ASSGN IGNORE are only supported for LIOCS
sequential access methods.
DSN Catalog
No special entries are required.
JCL
Requirements
There are several JCL requirements you must consider.
Examples
Assign the logical unit to IGNORE, so that BIM-EPIC ignores
the dataset
Use an EXTENT statement for disk datasets defined with DLBL
For DD statements, specify the DUMMY parameter instead of
the DSN parameter
The following is an example of a dummy dataset with an ASSGN
IGNORE.
// ASSGN SYS020,IGN
// TLBL TAPEOUT,'DATA.SET.A'
// ASSGN SYS004,IGN
// DLBL DISKOUT,'DATA.SET.B(L)'
// EXTENT SYS004
* //TAPEOUT DD DUMMY
User Reference
Connectivity Systems, Inc.—Copyright © 2006
Use Pursuant to Company Instructions
7-65
Using Concatenating Datasets
Using Concatenating Datasets
Description
Dataset concatenation reads multiple versions of a dataset or multiple
datasets with one open. This allows you to process a number of datasets
as if they were a single dataset.
All versions of concatenated datasets must reside on the same device
type. If the datasets have different block sizes, you must read the dataset
with the largest block size first.
DSN Catalog
No special entries are required.
JCL
Requirements
When using a TLBL statement or a DLBL statement, there are several
JCL requirements you must consider.
!
Use a separate TLBL statement or DLBL statement for each
dataset to be read. Datasets are processed in the order in which
their label statements display.
Use the same DTF name for each statement and supply the
concatenation option code for all except the last version, for
example, TLBL option code 48 and DLBL option code E.
WARNING:
Do not specify the concatenation code on the last label statement
in a concatenation group.
Examples
The following example processes versions 1 through 5 of the
DAILY.TRANS dataset on disk with one open. The example also
processes WEEKLY.TRANS and WEEKLY.RERUN on tape with
another single open. Although there are mixed device types in the job,
they are not mixed within a single open, so the device types meet the
requirements for concatenation.
//
//
//
//
//
//
//
//
DLBL
DLBL
DLBL
DLBL
DLBL
TLBL
TLBL
EXEC
INPUT1,'DAILY.TRANS,(E,V=5)'
INPUT1,'DAILY.TRANS,(E,V=4)'
INPUT1,'DAILY.TRANS,(E,V=3)'
INPUT1,'DAILY.TRANS,(E,V=2)'
INPUT1,'DAILY.TRANS'
INPUT2,'WEEKLY.TRANS',,,,,,48
INPUT2,'WEEKLY.RERUN'
PROGRAM
When using DD statements, concatenation is automatic for all versions of
a single dataset on input. You must specify DSN=data.set.name without
specifying a particular version. When all versions of a single dataset are
concatenated, datasets are read in order from the most current version to
the oldest version.
7-66
Connectivity Systems, Inc.—Copyright © 2006
Use Pursuant to Company Instructions
User Reference
Using Concatenating Datasets
In the following example, all versions of DAILY.TRANS are read with
one open. For input with different dataset names, request concatenation
explicitly. You must specify the version number of each version to be
read in the DSN parameter. Specify a ddname only on the first statement.
* //INPUT1
DD
DSN='DAILY.TRANS',DISP=(OLD,KEEP)
The following example concatenates versions 1 through 4 of the
DAILY.TRANS dataset and version 1 of the DAILY.DEP dataset.
* //INPUT1 DD
* //
DD
* //
DD
* //
DD
* //
DD
// EXEC PROGRAM
User Reference
DSN='DAILY.TRANS(3)',DISP=(OLD,KEEP)
DSN='DAILY.TRANS(2)',DISP=(OLD,KEEP)
DSN='DAILY.TRANS(1)',DISP=(OLD,KEEP)
DSN='DAILY.TRANS(0)',DISP=(OLD,KEEP)
DSN='DAILY.DEP(0)'DISP=(OLD,KEEP)
Connectivity Systems, Inc.—Copyright © 2006
Use Pursuant to Company Instructions
7-67
Processing Multiple Datasets with the Same DTF Name (Dataset Drop)
Processing Multiple Datasets with the Same DTF
Name (Dataset Drop)
Description
BIM-EPIC allows you to open multiple datasets with the same DTF
name. Each dataset is opened and closed separately, in the order in which
its label is submitted.
DSN Catalog
No special entries are required.
JCL
Requirements
Specify the dataset drop option for all but the last dataset defined.
For...
Use...
DLBLs
T
TLBLs
16 or D
DD statements Automatic. Use multiple DD statements with the same
ddname. This technique is not compatible with MVS.
Examples
Dataset drop is invoked for three datasets using the ddname TAPEIN for
each.
* //TAPEIN DD DSN=PAYROLL.WEEKLY(2),DISP=(OLD,KEEP)
* //TAPEIN DD DSN=PAYROLL.WEEKLY(1),DISP=(OLD,KEEP)
* //TAPEIN DD DSN=PAYROLL.WEEKLY(0),DISP=(OLD,KEEP)
Dataset drop is invoked for three datasets using the DTF name TAPEIN.
Option code 16 is used for all but the last dataset.
// TLBL TAPEIN,'FILE1',,,,,,16
// TLBL TAPEIN,'FILE2',,,,,,16
// TLBL TAPEIN,'FILE3'
7-68
Connectivity Systems, Inc.—Copyright © 2006
Use Pursuant to Company Instructions
User Reference
Running Test Jobs With Production Datasets
Running Test Jobs With Production Datasets
Description
The BIM-EPIC test job feature allows you to run test jobs with production
datasets without affecting production processing. Test job names are
defined by the TSTJOB configuration option. The option can include
wildcard characters for greater flexibility in creating test job names. A
question mark (?) specifies that any character in that position is a valid
character. An asterisk (*) specifies that all characters in that position and
any following are valid.
All controlled dataset versions created using test jobs are recorded in the
DSN Catalog with a conditionally cataloged status. Only conditionally
cataloged versions can be accessed by subsequent test job executions.
Production jobs will not use the conditionally cataloged versions. These
conditionally cataloged versions are retained until the next day, when
they become eligible for scratch. If you use Online Manager or
TSIDMNT to close a conditionally cataloged version during that time, the
conditionally cataloged version becomes active version 1. This new
version can be accessed by production jobs and is maintained according
to its EDD retention criteria.
DSN Catalog
No special entries are required.
JCL
Requirements
To test a single dataset, specify a conditional catalog option on its label.
For...
Use...
DLBLs
C
TLBLs
32
DD statements
DISP=(xxx,CONDCAT)
To test an entire job, specify a valid test job name on the VSE JOB
statement.
Examples
If TSTJOB=A*, the test job feature is activated by any job name
beginning with A.
If TSTJOB=A?AAAA, the test job feature is activated by the job names
ABAAAA, AXAAAA, A1AAAA, and so on.
If TSTJOB=A?A*, the test job feature is activated by the job names
ABAAAA, AXA, ACAXX, and so on.
User Reference
Connectivity Systems, Inc.—Copyright © 2006
Use Pursuant to Company Instructions
7-69
Running Test Jobs With Production Datasets
7-70
Connectivity Systems, Inc.—Copyright © 2006
Use Pursuant to Company Instructions
User Reference
8
BIM-EPIC Utilities
This chapter describes how to use BIM-EPIC utility programs to control
files processed with physical IOCS (PIOCS) instead of logical IOCS
(LIOCS). In addition, this chapter presents the dataset copy and dump
utilities TSIDDTD and TSIDDMP and the VSE label access subroutines
TSIDGLB and TSIDPLB. See Chapter 7, “Running Jobs With
BIM-EPIC,” for additional information on using these utilities.
Chapter Contents
Utility Programs
User Reference
Connectivity Systems, Inc.—Copyright © 2006
Use Pursuant to Company Instructions
8-1
Pre-Open Processing (TSIDASS)
Utility Programs
Pre-Open Processing (TSIDASS)
Description
TSIDASS processes controlled files used in programs that do not issue
OPEN requests or that perform pre-open checking of assignments. You
can also use TSIDASS to make assignments to SYSRDR, SYSIPT,
SYSLST, and SYSPCH.
The TSIDASS functions are done with the following control statements:
ASSGN satisfies pre-open assignment checking for tape datasets.
OPEN opens datasets for programs which do not issue an OPEN
request.
RSTRT assists with using IBM checkpoint restart facility.
CHECK determines if a dataset has a version.
TSIDASS must be executed immediately before the program that requires
pre-open assignment checking or that does not do an OPEN. You must
inhibit LUB allocation for all datasets in the TSIDASS step using the
appropriate option codes on the TLBL statements and DLBL statements
in the step.
Note:
Pre-open assignment checking can also be satisfied with the DD
parameter OPTION=SYSnnn. In that case, TSIDASS is not required.
JCL
Requirements
The following is an example of the JCL requirements.
dataset
// EXEC
control
/*
// EXEC
labels
TSIDASS
statements
<program without an open or that does pre-open assignment checking>
When using TSIDASS, place the labels for all datasets before the EXEC
statement. Do not place any labels between the EXEC statement for
TSIDASS and the EXEC statement for your program.
UPSI Values
There are no UPSI values.
ASSGN
Statements
Use the ASSGN function for tape datasets only. This satisfies pre-open
assignment checking by assigning a logical unit to a dummy tape device.
8-2
Connectivity Systems, Inc.—Copyright © 2006
Use Pursuant to Company Instructions
User Reference
Pre-Open Processing (TSIDASS)
When the program issues an OPEN request for the dataset, BIM-EPIC
then performs a normal device assignment to the real device.
You can also use ASSGN to make assignments to the system logical units
SYSRDR, SYSIPT, SYSLST, and SYSPCH. When you make these
assignments, you must submit these statements last. TSIDASS stops
processing control statements after one of these assignments is made.
For sort programs, use TSIDSRT to perform the assign function instead
of TSIDASS, if pre-open or assignment processing is required. However,
most SORT products do not require this. See Chapter 7, “Sort Programs,”
for additional information and JCL examples.
When making an assignment to a system logical unit, you must supply a
dataset label for the IJSYSIN, IJSYSLS, or IJSYSPH DTF name. If a
SYSPCH or SYSLST dataset is created on tape, you must place the
dataset in closed status before you can use the dataset as input. Use
TSIDMNT CLOSE to close the dataset after it is created.
To simplify the JCL necessary to process the system files SYSIPT,
SYSLIST and SYSPCH, use the Generic Device Independence for Unit
Record (GDIUR) feature. The GDIUR feature eliminates the need for
extra TSIDASS execution, VSE CLOSE statements, and most of the
TSIDMNT CLOSE actions. GDIUR also protects your default system file
assignments in case the job terminates abnormally. See Chapter 7
“BIM-EPIC Utilities,” for additional information on using GDIUR.
Syntax
The following is an example of the assng statement syntax.
ASSGN SYSxxx
Example
The following example shows how the program BILLING uses SYS021
for TAPIN1 and SYS022 for TAPOUT. TSIDASS makes the assignment
for both of these files before the BILLING program executes. The TLBL
option code 64 inhibits LUB allocation.
// JOB MAKE ASSIGNMENT WITH TSIDASS
// TLBL TAPIN1,'DAILY.TRANS',,,,,,64
// TLBL TAPOUT,'DAILY.BILLING',,,,,,64
// EXEC TSIDASS
ASSGN SYS021
ASSGN SYS022
/*
// EXEC BILLING
/&
OPEN
Statements
User Reference
Use TSIDASS OPEN when processing controlled datasets with a
program that does not issue OPEN requests. TSIDASS OPEN issues a
logical open for the dataset so that BIM-EPIC can gain control of the
dataset.
Connectivity Systems, Inc.—Copyright © 2006
Use Pursuant to Company Instructions
8-3
Pre-Open Processing (TSIDASS)
Syntax
The following is an example of an OPEN statement syntax.
OPEN dtfname,SYSxxx {,INPUT|,OUTPUT}
Parameters
The following provides a description of the parameters you can use with
an OPEN statement.
Parameter
Required?
Valid Entry
Default
dtfname
Yes
1 to 7 characters
None
SYSxxx
Yes
000-254
None
Specify one of the following two (required):
Definitions
Example
INPUT
No
None
None
OUTPUT
No
None
None
The following provides definitions for the parameters you can use with
OPEN.
Parameter
Definition
dtfname
Identifies the dataset to be opened. Use the DTF
name or DD name as it appears on the label
statement.
SYSxxx
Specifies the logical unit to assign.
INPUT
Specifies that the dataset is to be opened as input.
OUTPUT
Specifies that the dataset is to be opened as output.
In the following example, TSIDASS issues an OPEN for the
AP.DAILY.TRANS dataset. LUB allocation is inhibited for that dataset.
// JOB OPEN TAPE DATASET
// TLBL TAPEIN,'AP.DAILY.TRANS',,,,,,64
// EXEC TSIDASS
OPEN TAPEIN,SYS020,OUTPUT
/*
// EXEC PROGRAM
/&
RSTRT
Statements
The TSIDASS RSTRT function is used to restart a cancelled job. Like
OPEN, TSIDASS RSTRT issues a logical open for named datasets,
allowing BIM-EPIC to maintain control of the datasets. TSIDASS
RSTRT also allows BIM-EPIC to do Automatic Volume Recognition
(AVR) processing and to assign tape drives. See Chapter 7, “Restarting
From a Checkpoint,” for restart procedures and for a JCL example.
LUB allocation must be inhibited for all restarted datasets. In addition, the
same SYS number that was in use when the checkpoint was taken must be
specified.
8-4
Connectivity Systems, Inc.—Copyright © 2006
Use Pursuant to Company Instructions
User Reference
Pre-Open Processing (TSIDASS)
Syntax
The following is an example of an RSTRT statement syntax.
RSTRT dtfname,SYSxxx{,INPUT|,OUTPUT}[ ,EXT=nn]
Parameters
The following provides a description of the parameters you can use with
an RSTRT statement.
Parameter
Required?
Valid
Default
dtfname
Yes
1 to 7 characters
None
SYSxxx
Yes
000-254
None
Specify one of the following two (required):
Definitions
INPUT
No
None
None
OUTPUT
No
None
None
EXT
No
1 to 255
1
The following provides definitions for the parameters you can use with an
RSTRT statement.
Parameter
Definition
dtfname
Identifies the dataset to be opened. Use the DTF
name or DD name as it appears on the label
statement.
SYSxxx
Specifies the logical unit to assign. It must be the
same logical unit number that was in use when the
checkpoint was taken.
INPUT
Specifies that the dataset was last opened as input.
OUTPUT
Specifies that the dataset was last opened as output.
EXT
Specifies the sequence number of the extent to be
re-opened. This is necessary only for disk datasets
and only if the dataset is to be opened at an extent
other than the primary extent. This number will be
equal to the number of BIM-EPIC EP053 messages
that were issued for the dataset prior to the
checkpoint from which the program will be
restarted.
CHECK
Statements
Use TSIDASS CHECK to determine if a specific version of a dataset
exists in the BIM-EPIC Catalog, or if a particular "Start Track 1" dataset
exits.
Syntax
The following is an example of an RSTRT statement syntax.
CHECK dtfname
User Reference
Connectivity Systems, Inc.—Copyright © 2006
Use Pursuant to Company Instructions
8-5
Pre-Open Processing (TSIDASS)
CHECK
Parameter
Definitions
The following provides a description of the parameters you can use with a
CHECK statement.
Parameter
Required?
Valid
Default
dtfname
Yes
1 to 7 characters
None
The following provides definitions for the parameters you can use with a
CHECK statement.
Parameter
Definition
dtfname
dtfname identifies the dataset to be opened.
dtfname specifies the DLBL, TLBL, or DD
statement that identifies the Dataset Version or Start
Track 1 DSN to be checked. The DLBL or TLBL
can be in the TSIDASS JCL or it can be in Standard
Labels. The DD statement must be in the TSIDASS
JCL.
If a CHECK statement is present, there can be only
one of them in a TSIDASS step. No other TSIDASS
control statements can be present.
At completion, TSIDASS will display one of the
following return codes on the VSE console.
0—The version is in the BIM-EPIC Catalog, or if a
Start Track 1 DLBL/EXTENT was provided, exists
as a Start Track 1 dataset.
8—The version is not in the BIM-EPIC Catalog, or
if a Start Track 1 DLBL/EXTENT was provided,
does not exist as Start Track 1 dataset.
16—BIM-EPIC is not active.
Examples
The following example determines if Start Track 1
PRODUCT.ID.MASTER exists.
// DLBL FILEIN,'PRODUCT.ID.MASTER'
// EXTENT SYS010,CKDP16,,,1,10
// EXEC TSIDASS
CHECK FILEIN
/*
The following example determines if version 1 of
PRODUCT.ID.MASTER exists.
// DLBL FILEIN,'PRODUCT.ID.MASTER'
// EXEC TSIDASS
CHECK FILEIN
/*
The following example determines if version 5 of
PRODUCT.ID.MASTER exists.
8-6
Connectivity Systems, Inc.—Copyright © 2006
Use Pursuant to Company Instructions
User Reference
Pre-Open Processing (TSIDASS)
// TLBL FILEIN,'PRODUCT.ID.MASTER',,,,,5
// EXEC TSIDASS
CHECK FILEIN
/*
User Reference
Connectivity Systems, Inc.—Copyright © 2006
Use Pursuant to Company Instructions
8-7
Sort Interface (TSIDSRT)
Sort Interface (TSIDSRT)
Description
TSIDSRT is an interface program between BIM EPIC and your sort
program. TSIDSRT solves problems that can occur with some SORT
utility programs during both open and close. TSIDSRT calls your sort
program to do the sort, but allows BIM EPIC to satisfy pre-open
assignment checking, to truncate the SORTOUT file, and to close and
delete SORTWK areas. TSIDSRT provides full support for the
BIM-EPIC Generic Device Independent (GDI) features and reblocking
features.
TSIDSRT is usually not required for SYNCSORT and DFSORT.
When using TSIDSRT, if you use unlabeled tape datasets in your sort, the
datasets must be controlled. In addition, you can use only one SORTOUT
dataset.
See Chapter 7, “Sorting with BIM-EPIC,” for additional information and
for JCL examples.
Configuration
Options
GDI=YES must be specified as a configuration option.
JCL
Requirements
The following is an example of the JCL requirements.
UPSI Values
There are no UPSI values.
Dataset
Requirements
You must supply labels for the datasets required by your sort program.
Control
Statements
You must supply the control statements required for your sort program.
Example
The following is an example of TSIDSRT.
// <labels for sort datasets>
// EXEC TSIDSRT
sort control statements
/*
// JOB EXECUTE SORT
// TLBL SORTIN1,'DAILY.TRANS',,,,,,2
// TLBL SORTOUT,'SORTED.DAILY.TRANS',,,,,,1
// DLBL SORTWK1,'$$$.SORTWK1,(D)'
// EXEC TSIDSRT
SORT FIELDS=(33,4,A),FORMAT=BI,WORK=1,FILES=1
8-8
Connectivity Systems, Inc.—Copyright © 2006
Use Pursuant to Company Instructions
User Reference
Sort Interface (TSIDSRT)
RECORD TYPE=F,LENGTH=80
INPFIL BLKSIZE=1600
OUTFIL BLKSIZE=4000
END
/*
/&
User Reference
Connectivity Systems, Inc.—Copyright © 2006
Use Pursuant to Company Instructions
8-9
Deleting Datasets (TSIDDEL)
Deleting Datasets (TSIDDEL)
Description
TSIDDEL deletes disk work datasets that are not closed by the same
program that opens them. At any point in the job or job step, TSIDDEL
can be used to free up disk space for other processing. These datasets can
be either Start Track 1 or cataloged work datasets. Deletion of generation
disk datasets is not supported.
TSIDDEL is available as a batch program and as a callable subroutine.
When using a DLBL, specify the DLBL option code D. When using a
BIM-EPIC DD statement, specify DISP=(NEW,DELETE).
If you are already using TSIDSRT as the interface to your sort program,
TSIDDEL execution is not necessary.
JCL
Requirements
The following is an example of the JCL requirements.
UPSI Values
There are no UPSI values.
Dataset
Requirements
The datasets must have been created in the step immediately prior to the
TSIDDEL step. There cannot be any label statements between the EXEC
statement for the program in the preceding step and the EXEC statement
for TSIDDEL.
Control
Statements
Control statements specify which datasets to delete. Each control
statement specifies one dataset to delete. You can submit as many control
statements as you want for each TSIDDEL execution. Control statements
must begin in column 1.
Syntax
The following is an example of a TSIDDEL command syntax.
// EXEC TSIDDEL
[ control statements ]
/*
dtfname
Parameter
8-10
The following provides a description of the parameters you can use with a
TSIDDEL statement.
Parameter
Required?
Valid
Default
dtfname
Yes
1 to 7 characters
None
Connectivity Systems, Inc.—Copyright © 2006
Use Pursuant to Company Instructions
User Reference
Deleting Datasets (TSIDDEL)
Definitions
Example
The following provides definitions for the parameters you can use with a
TSIDDEL statement.
Parameter
Definition
dtfname
Specifies the DTF name or DD name of the dataset
to be deleted.
The following example creates the SORTWK1 dataset in the first step.
Option code D is included on the DLBL to qualify the dataset for
deletion. In the second step, TSIDDEL deletes the SORTWK1 file and
frees the space it occupied. The TSIDDEL step is required only if the sort
program being used does not issue a close for SORTWK1. Most sort
products issue a close.
.
.
// DLBL SORTWK1,.SORTWK1,(D)'
// EXTENT SYS003
// EXEC SORT
[sort control statements]
/*
// EXEC TSIDDEL
SORTWK1
/*
.
.
Using TSIDDEL
as a Subroutine
When you use TSIDDEL as a subroutine, you must provide a parameter
list to specify which file to delete. In the parameter list, place the DTF
name or DD name as appears on the dataset label statement. You can
delete only one file per call.
Control is passed to the subroutine using standard IBM linkage
conventions. TSIDDEL does not provide any return codes or issue any
messages.
Assembler
Example
The following example is written in Assembler.
...
CALL TSIDDEL,(FILEID)
...
FILEID DC
CL7'SORTWK1'
...
COBOL
Example
User Reference
The following example is written in COBOL.
...
WORKING-STORAGE SECTION.
10 FILEID PIC X(7) VALUE 'SORTWK1'.
...
PROCEDURE DIVISION.
...
CALL 'TSIDDEL' USING FILEID.
...
Connectivity Systems, Inc.—Copyright © 2006
Use Pursuant to Company Instructions
8-11
Copying and Merging Datasets (TSIDDTD)
Copying and Merging Datasets (TSIDDTD)
Description
TSIDDTD is a dataset-to-dataset copy/merge utility program. You can
use TSIDDTD to copy a single dataset or to merge multiple input datasets
into a single output dataset. TSIDDTD uses standard LIOCS access
methods enabling BIM-EPIC to completely control the input and output
datasets.
TSIDDTD supports any sequential dataset with a fixed, variable,
spanned, or undefined record format. However, TSIDDTD can only
process tape datasets that follow the standard LIOCS format conventions.
See “Tape Formats Supported,” for additional information.
TSIDDTD performs one copy operation per execution. To copy a
multi-file tape, execute TSIDDTD once for every dataset on the tape. You
must include input and output labels for each dataset.
Configuration
Options
To use TSIDDTD for disk datasets, the GDI=YES configuration option
must be specified.
JCL
Requirements
The following is an example of the JCL requirements.
UPSI Values
There are no UPSI values.
Dataset
Requirements
You must submit a label for one output dataset and at least one input
dataset. The default DTF names are INPUT and OUTPUT, but you can
specify the use of other DTF names in your control statements.
input dataset label(s)
output dataset label
// EXEC TSIDDTD
[optional control statements ]
/*
The output dataset block size will be the same as the input dataset block
size unless you specify a new block size in the output dataset definition.
Uncontrolled disk datasets can be reblocked using option code B=n on the
DLBL statement.
When copying uncontrolled datasets, use SYS005 for output dataset and
SYS004 for input dataset.
If more than one input dataset is copied to the output dataset, specify
option code T for every input dataset label except the last dataset label.
Using option code T, you can merge tape and disk versions into a single
dataset. If all input is on the same device type, you can also use the
BIM-EPIC DD statement concatenation feature.
8-12
Connectivity Systems, Inc.—Copyright © 2006
Use Pursuant to Company Instructions
User Reference
Copying and Merging Datasets (TSIDDTD)
Tape Formats
Supported
Because TSIDDTD uses standard LIOCS access methods, TSIDDTD can
only process tapes which follow standard LIOCS format conventions.
For a labeled tape, the format is:
VOL and HDR labels, tapemark, data, tapemark, EOV or EOF
labels, tapemark[tapemark]
An unlabeled tape, the format is:
[tapemark], data, tapemark
Some utility programs, which appear to use LIOCS when writing
standard label tapes, actually use PIOCS and imbed additional tape marks
in the data area. Utilities known to imbed additional tape marks are
IDCAMS BACKUP and LIBR BACKUP. There may be others. When
LIOCS encounters one of these additional tape marks on input, it issues
the message “4130D EOF OR EOV INQUIRY?” because no EOV/EOF
label was found immediately following that tape mark. Therefore, if the
4130D message occurs while copying a file, the message indicates that
the tape format does not follow standard LIOCS conventions and cannot
be copied successfully using TSIDDTD.
Unfortunately, there is no method currently available to copy tapes which
use non-standard formats. Using DITTO is not recommended because it
will result in two or more volumes that have the same volume serial
number. The best solution is to execute the program which created the
original volume(s) a second time to create a second version.
Control
Statements
Control statements are used to define dataset characteristics and to specify
TSIDDTD processing options.
For controlled datasets, control statements are not necessary under normal
conditions. TSIDDTD will get the record type, record size, and block size
from the version record in the DSN Catalog.
For uncontrolled and Start Track 1 datasets, control statements specifying
the record type, record size, and block size are required.
The TSIDDTD maximum block size for tape is 32K on VSE releases
prior to ESA 2.5 and 64K for ESA 2.5 and above. A block size greater
than 32K is supported for disk. For uncontrolled labeled input tapes,
TSIDDTD uses HDR2 information. If record type, record size, and block
size are not specified and cannot be obtained from the DSN Catalog,
TSIDDTD defaults to an undefined record format with a block size of
32767. Record type, record size, and block size may not be in the catalog
for some controlled datasets that were created by programs that use
PIOCS.
User Reference
Connectivity Systems, Inc.—Copyright © 2006
Use Pursuant to Company Instructions
8-13
Copying and Merging Datasets (TSIDDTD)
You can use control statement parameters to:
Specify alternate DTF names
Specify record characteristics
Control unlabeled tape processing
Limit total output
Select specific records
End processing before end-of-file (EOF) is reached on input
All control statements will be processed before TSIDDTD begins the
copy or merge operation. Parameters can be placed in columns 1 through
71 and must be separated with commas. Multiple statements can be
submitted. Parameters cannot be continued.
Syntax
The following is an example of a TSIDDTD command syntax.
[
[
[
[
[
[
[
[
[
[
[
[
[
[
[
[
[
[
[
Control
Statement
Parameters
BLKSIZE=nnnnn ]
FEOF=start,length,operand,type,value ]
HDRINFO ]
INNAME=dtfname ]
INPUT=n ]
LRECL=nnnnn ]
NOREWIN ]
NOREWOUT ]
NOTPMK ]
OBLKSIZE=nnnnn ]
OUTNAME=dtfname ]
RECFM=x ]
RUNIN ]
RUNOUT ]
RECS=nnnnnn ]
SEL=start,length,operand,type,value ]
SKIP=nnnnnn ]
UNLBLIN ]
UNLBLOUT ]
The following provides a description of the control statement parameters
you can use with the TSIDDTD control statement.
Parameter
Required?
Valid
Default
BLKSIZE
No
1 to 32767 (or greater See
for disk)
explanation
below
FEOF
No
See subparameters
None
Specify one of the following:
8-14
start
No
1 to 999999
None
length
No
1 to 999999
None
operand
No
EQ|NE|GT|LT|GE|LE None
type
No
C or X
Connectivity Systems, Inc.—Copyright © 2006
Use Pursuant to Company Instructions
C
User Reference
Copying and Merging Datasets (TSIDDTD)
Parameter
Required?
Valid
value
No
See text
None
HDRINFO
No
None
OFF
INNAME
No
1 to 7 characters
INPUT
INPUT
No
'?' or 1 to 32767
None
LRECL
No
1 to 99999
None
NOREWIN/NORE No
WOUT
None
OFF
NOTPMK
No
None
OFF
OBLKSIZE
No
1 to 32767
Input
BLKSIZE
OUTNAME
No
1 to 7 characters
OUTPUT
RECFM
No
F|V|S|U
EDD
information
in catalog or
U
RECS
No
1 to 999999
All
RUNIN/RUNOUT
No
None
OFF
SEL
No
See FEOF
All
SKIP
No
1 to 999999
0
None
OFF
UNLBLIN/UNLBL No
OUT
Definitions
Default
The following provides definitions for the parameters you can use with a
TSIDDEL statement.
Parameter
Definition
BLKSIZE
Defines the block size for input datasets. If
BLKSIZE is not specified, it will be set to one of the
following:
The value of LRECL.
Undefined (if LRECL is not specified) - input
dataset is treated as unblocked
For controlled datasets, the version block size for
input datasets and the EDD reblock size for output
datasets are used, if available.
User Reference
Connectivity Systems, Inc.—Copyright © 2006
Use Pursuant to Company Instructions
8-15
Copying and Merging Datasets (TSIDDTD)
Parameter
Definition
FEOF
Specifies a condition that causes TSIDDTD to act
as if EOF was reached on input. If multiple
parameters are specified on a single control
statement, only another FEOF parameter may
follow an FEOF parameter. When any one of
multiple FEOF conditions is met, EOF will be
assumed. Up to a total of 20 FEOF parameters can
be submitted per TSIDDTD execution.
When FEOF is specified, all FEOF subparameters
are required and positional.
FEOF Subparameters:
HDRINFO
8-16
start
Specifies the starting position in
the record, relative to 1, of the
field to be tested.
length
Specifies the length of the field
to be tested.
length
operand
Specifies the type of test.
Use...
To specify that the
input data is ...
EQ
equal to value
NE
not equal to value
GT
greater than value
LT
Less than value
GE
greater than or equal
to value
LE
less than or equal to
value
type
Specifies the type of data to use
in the test. Data type C indicates
that the value is in character
format. Data type X indicates
that the value is in hexadecimal
format.
value
Specifies the constant to use in
the test. Specify the same
number of characters as the
length value for character
comparisons or two times that
number for hexadecimal
comparisons.
Causes VSE to display the tape header information
on the operator console when opening the input
datasets.
Connectivity Systems, Inc.—Copyright © 2006
Use Pursuant to Company Instructions
User Reference
Copying and Merging Datasets (TSIDDTD)
Parameter
Definition
INNAME
Specifies an alternate input DTF name.
INPUT
Specifies the number of input datasets to merge into
a single output. If the value ? is specified, for
example, INPUT=?, the message EP712 will be
issued. This message requires the operator to
respond with the number of files to merged.
LRECL
Defines the dataset record size. For
catalog-controlled datasets, the LRECL in the DSN
Catalog is used if available. If LRECL is not
specified, it will be set to one of the following
values:
LRECL
The value of BLKSIZE.
Undefined, if BLKSIZE is not specified. The
input dataset is treated as unblocked.
Prevents rewinding of input tape at close.
NOREWIN
User Reference
NOREWOUT
Prevents rewinding of the output tape at close.
NOTPMK
Suppresses the leading tape marks normally written
before the data on unlabeled output tapes.
OBLKSIZE
Defines the block size for the output dataset. If
OBLKSIZE is not specified, the BLKSIZE value
will be used.
OUTNAME
Specifies an alternate output DTF name.
RECFM
Specifies the record format of both input and output
datasets:
Code
Record Format
F
fixed length
V
variable length
S
spanned
U
undefined
RECS
Specifies the number of records to be copied.
RUNIN
Unloads input tape at close.
RUNOUT
Unloads the output tape at close.
Connectivity Systems, Inc.—Copyright © 2006
Use Pursuant to Company Instructions
8-17
Copying and Merging Datasets (TSIDDTD)
Parameter
Definition
SEL
Specifies selection criteria for copying.
Subparameters are identical to FEOF
subparameters. If the data matches the expression,
the data is copied. If the data does not match the
expression, the data is skipped. If multiple
parameters are specified on a single control
statement, only another SEL parameter may follow
a SEL parameter. When any SEL condition is met,
the data is copied. A maximum of 20 SEL
parameters can be submitted per TSIDDTD
execution. If no SEL parameters are specified, all
data is copied.
When SEL is specified, all SEL subparameters are
required.
Examples
SKIP
Specifies the number of records to skip before
beginning the copy operation.
UNLBLIN
Defines the input as an unlabeled uncontrolled tape
dataset. UNLBLIN is not required if the dataset is
controlled.
UNLBLOUT
Defines the output as an unlabeled uncontrolled
tape dataset. UNLBLOUT is not required if the
dataset is controlled.
The following example copies a controlled disk dataset to a controlled
tape dataset. TSIDDTD control statements are not required.
//
//
//
//
/*
/&
JOB TSIDDTD COPY DISK TO TAPE
DLBL INPUT,'input.data.set'
TLBL OUTPUT,'output.data.set'
EXEC TSIDDTD
The following example merges two input disk datasets and two input tape
datasets into a single output tape dataset. All of the datasets are
controlled. This example uses option code T (Drop) on the DLBL
statements. Use option code 16 (Drop) and option code 2 (Rewind) on the
TLBL statements.
// JOB TSIDDTD MERGE 2 DISK AND 2 TAPE DATASETS TO A SINGLE
OUTPUT
// DLBL INPUT,'input.data.set.1,(T)'
// DLBL INPUT,'input.data.set.2,(T)'
// TLBL INPUT,'input.data.set.3',,,,,,18
// TLBL INPUT,'input.data.set.4',,,,,,2
// TLBL OUTPUT,'output.data.set'
// EXEC TSIDDTD
INPUT=4
/*
/&
8-18
Connectivity Systems, Inc.—Copyright © 2006
Use Pursuant to Company Instructions
User Reference
Copying and Merging Datasets (TSIDDTD)
The following example makes a duplicate copy of a multi-file tape
containing three datasets. All of the datasets are controlled, so no control
statements are necessary. TSIDDTD is executed three times, once for
each dataset.
In this example, use TLBL option 64 (Inhibit LUB allocation), option
code 8 (Hold assignment), and option code 3 (No rewind) on the first two
TLBL statements. Use option code 64 (Inhibit LUB allocation) and
option code 2 (Unload) on the last TLBL statement.
//
//
//
//
/*
//
//
//
/*
//
//
//
/*
/&
JOB TSIDDTD COPY MULTI-FILE TAPE
TLBL INPUT,'input.prime.dsn',,,,,,75
TLBL OUTPUT,'output.prime.dsn',,,,,,75
EXEC TSIDDTD
TLBL INPUT,'input.sub.dsn.1',,,,,,75
TLBL OUTPUT,'output.sub.dsn.1',,,,,,75
EXEC TSIDDTD
TLBL INPUT,'input.sub.dsn.2',,,,,,66
TLBL OUTPUT,'output.sub.dsn.2',,,,,,66
EXEC TSIDDTD
The following example copies a Start Track 1 disk dataset to an output
dataset using alternate DTF names, selecting only those records with the
constant TAC in position 1 through position 3 or any data except
low-values in position 4 through position 6. The record format, record
size, and block size information are required for Start Track 1 datasets.
// JOB TSIDDTD CREATE NEWFIL
// DLBL OLDFIL,'input.data.set'
// EXTENT SYS005,POOL01,1,0,1,300
// TLBL NEWFIL,'output.data.set'
// EXEC TSIDDTD
INNAME=OLDFIL,OUTNAME=NEWFIL
RECFM=F,BLKSIZE=4000,LRECL=80
SEL=1,3,EQ,C,TAC
SEL=4,3,NE,X,000000
/*
/&
User Reference
Connectivity Systems, Inc.—Copyright © 2006
Use Pursuant to Company Instructions
8-19
Printing Datasets (TSIDDMP)
Printing Datasets (TSIDDMP)
Description
TSIDDMP is a dataset print utility program. You can use TSIDDMP to
completely or selectively print a dataset in hex or character format.
TSIDDMP will also print report files that have been written to disk or
tape. TSIDDMP uses standard LIOCS access methods enabling
BIM-EPIC to easily control the input datasets.
TSIDDMP supports any sequential dataset with a fixed, variable,
spanned, or undefined record format. However, TSIDDMP can only
process tape datasets that follow the standard LIOCS format conventions.
See “Tape Formats Supported” for additional information.
TSIDDMP performs one print operation per execution.
Configuration
Options
To use TSIDDMP for disk datasets, you must specify the GDI=YES
configuration option.
JCL
Requirements
The following are JCL requirements for TSIDDMP.
UPSI Values
There are no UPSI values.
Dataset
Requirements
You must submit a label for the input dataset. The default DTF name is
INPUT. An alternate DTF name can be specified in your control
statements.
input dataset label
// EXEC TSIDDMP
[ control statements ]
/*
For uncontrolled tape datasets, use SYS004 for the input dataset.
Control
Statements
Use control statements to define dataset characteristics and to specify
TSIDDMP processing options.
Control statements are not required for controlled datasets. TSIDDMP
will get the record type, record size, and block size from the DSN
Catalog.
Control statements are required for uncontrolled and Start Track 1
datasets. These control statements must specify the record type, record
size, and block size.
8-20
Connectivity Systems, Inc.—Copyright © 2006
Use Pursuant to Company Instructions
User Reference
Printing Datasets (TSIDDMP)
If record type, record size, and block size are not specified and cannot be
obtained from the DSN Catalog, TSIDDMP will use an undefined record
format with a block size of 32767.
Note:
Record type, record size, and block size may not be available in the
catalog for some catalog-controlled datasets if they were created by
programs that use PIOCS.
You can use control statements to limit total output, select specific
records, and end processing before end-of-file (EOF) is reached on input.
Several formatting options are also provided.
All control statements will be processed before TSIDDMP begins the
print operation. Parameters can be placed in columns 1 through 71 and
must be separated with commas. Multiple statements can be submitted.
Parameters cannot be continued.
Syntax
The following is an example of a command syntax for printing a dataset.
[
[
[
[
[
[
[
[
[
[
[
[
[
[
[
Parameters
BLKSIZE=nnnnn ]
CHARONLY ]
CTLCHAR ]
FEOF=start,length,operand,type,value ]
HDRINFO ]
INNAME=dtfname ]
LRECL=nnnnn ]
NOREW ]
NOSCALE ]
RECFM=x ]
RECS=nnnnnn ]
RUN ]
SEL=start,length,operand,type,value ]
SKIP=nnnnnn]
UNLBL ]
The following provides a description of the parameters you can use when
printing a dataset.
Parameter
Required?
Valid.7
Default
BLKSIZE
No
1 to 99999
See text
CHARONLY
No
None
OFF
CTLCHAR
No
None
OFF
FEOF
No
See subparameters
None
Select one of the following:
User Reference
start
No
1 to 999999
None
length
No
1 to 999999
None
operand
No
EQ|NE|GT|LT|GE|L
E
None
Connectivity Systems, Inc.—Copyright © 2006
Use Pursuant to Company Instructions
8-21
Printing Datasets (TSIDDMP)
Definitions
Parameter
Required?
Valid.7
Default
type
No
C or X
C
value
No
See text
None
HDRINFO
No
None
OFF
INNAME
No
1 to 7 characters
INPUT
LRECL
No
1 to 32767
None
NOREW
No
None
OFF
NOSCALE
No
None
OFF
RECFM
No
F|V|S|U
U
RECS
No
0 or 1 to 999999
All
RUN
No
None
OFF
SEL
No
See FEOF
All
SKIP
No
1 to 999999
0
UNLBL
No
None
OFF
The following provides definitions for the parameters you can use with a
TSIDDEL statement.
Parameter
Definition
BLKSIZE
Defines the block size for the input dataset. If
BLKSIZE is not specified, it will be set to one of the
following values:
LRECL.
Undefined, if LRECL is not specified. The
input dataset is treated as unblocked.
For controlled datasets, the block size in the catalog
will be used, if available.
CHARONLY
Specifies that only the character representation is
printed. If CHARONLY is omitted, both character
and hexadecimal representations are printed.
CTLCHAR
Specifies that the dataset has an ASA print control
character, to control printer spacing, in the first byte
of each record. Use CTLCHAR for print files that
have been written to disk or tape. CTLCHAR forces
CHARONLY printing and NOSCALE printing.
Note: If CTLCHAR is used for a dataset that does
not contain a valid ASA print character in the first
byte of every record, TSIDDMP can cancel with an
I/O error. To verify the print characters, print the file
in hex mode. The first character should be one of
the following characters:
space(X'40'), 0-9, A-C, +, or -
8-22
Connectivity Systems, Inc.—Copyright © 2006
Use Pursuant to Company Instructions
User Reference
Printing Datasets (TSIDDMP)
Parameter
Definition
FEOF
Specifies a condition that causes TSIDDMP to act
as if EOF was reached on input. If multiple
parameters are specified on a single control
statement, only another FEOF parameter may
follow an FEOF parameter. When any one of
multiple FEOF conditions is met, EOF will be
assumed. Up to a total of 20 FEOF parameters can
be submitted per TSIDDMP execution.
When FEOF is specified, all FEOF subparameters
are required and positional.
FEOF Subparameters:
HDRINFO
User Reference
start
Specifies the starting position in
the record, relative to 1, of the
field to be tested.
length
Specifies the length of the field
to be tested.
length operand
Specifies the type of test.
Use...
To specify that the
input data is ...
EQ
equal to value
NE
not equal to value
GT
greater than value
LT
Less than value
GE
greater than or equal
to value
LE
less than or equal to
value
type
Specifies the type of data to use
in the test. Data type C indicates
that the value is in character
format. Data type X indicates
that the value is in hexadecimal
format.
value
Specifies the constant to use in
the test. Specify the same
number of characters as the
length value for character
comparisons or two times that
number for hexadecimal
comparisons.
Causes VSE to display the tape header information
on the operator console when opening the input
datasets.
Connectivity Systems, Inc.—Copyright © 2006
Use Pursuant to Company Instructions
8-23
Printing Datasets (TSIDDMP)
Parameter
Definition
INNAME
Specifies an alternate input DTF name.
LRECL
Defines the dataset record size. For
catalog-controlled datasets, the LRECL in the DSN
Catalog is used, if available. If LRECL is not
specified, it will be set to one of the following
values:
The value of BLKSIZE.
Undefined, if BLKSIZE is not specified. In this
case, the input dataset is treated as unblocked.
NOREW
Prevents rewind of the input tape at close.
NOSCALE
Suppresses the printing of the position scale, which
normally appears under the print record.
RECFM
Specifies the record format of both input and output
datasets:
Code
Record Format
F
fixed length
V
variable length
S
spanned
U
undefined
RECS
Specifies the number of records to be printed. If the
value zero is specified, the input dataset version is
opened and closed without attempting to read any
records.
RUN
Unloads input tape at close.
SEL
Specifies selection criteria for printing records. SEL
subparameters are identical to FEOF subparameters.
If the data matches the expression, the record is
dumped or printed. If the data does not match, the
record is skipped. If multiple parameters are
specified on a single control statement, only another
SEL parameter may follow a SEL parameter. When
any one of multiple SEL conditions is met, the
record will be printed. A maximum of 20 SEL
parameters can be submitted per TSIDDMP
execution. If no SEL parameters are submitted, all
data is printed.
When SEL is specified, all SEL subparameters are
required.
8-24
SKIP
Specifies the number of records to skip before
beginning the print operation.
UNLBL
Defines the input as an unlabeled, uncontrolled tape
dataset. UNLBL is not required if the dataset is
controlled.
Connectivity Systems, Inc.—Copyright © 2006
Use Pursuant to Company Instructions
User Reference
Printing Datasets (TSIDDMP)
Examples
The following example prints the entire contents of a catalog-controlled
disk dataset in hex format. Control statements are not required.
// JOB TSIDDMP DUMP DISK DATASET IN HEX
// DLBL INPUT,'input.data.set'
// EXEC TSIDDMP
/*
/&
The following example prints the first 100 records of a file. The printout
will be in character format (CTLCHAR forces CHARONLY).
// JOB TSIDDMP PRINT BLOCKED REPORT TAPE IN CHARACTER FORMAT
// TLBL INPUT,'input.data.set'
// EXEC TSIDDMP
CTLCHAR,RECS=100
/*
/&
The following example prints a Start Track 1 disk dataset using an
alternate DTF name, in character-only format, with the position scale
suppressed. Only records containing the characters 10794 in positions 1
through 5 will be selected. End of file and end of job will be forced as
soon as high values are found in positions 7 through 9. The record format,
record size, and block size information are required for an uncataloged
disk dataset.
// JOB TSIDDMP SELECTIVE DUMP OF ST 1 FILE
// DLBL TPDATA,'input.data.set'
// EXTENT SYS005,POOL01,1,0,1,300
// EXEC TSIDDMP
INNAME=TPDATA
RECFM=F,BLKSIZE=4000,LRECL=80
CHARONLY,NOSCALE
SEL=1,5,EQ,C,10794
FEOF=7,3,EQ,X,FFFFFF
/*
/&
User Reference
Connectivity Systems, Inc.—Copyright © 2006
Use Pursuant to Company Instructions
8-25
Accessing the VSE Label Area (TSIDGLB and TSIDPLB)
Accessing the VSE Label Area (TSIDGLB and
TSIDPLB)
Description
TSIDGLB and TSIDPLB are subroutines that read and write VSE labels
in the VSE Label areas. TSIDGLB reads system-standard,
partition-standard, and partition user labels.
TSIDPLB modifies the label that TSIDGLB acquired. TSIDPLB writes
the label to an area BIM-EPIC maintains. When BIM-EPIC is active,
TSIDPLB checks for the label in this area before searching the VSE label
area.
Using the
Subroutines
You can call both subroutines at any time, before or after a dataset is
opened or closed. Both subroutines are called using standard IBM linkage
conventions.
You can read and modify the label of any dataset defined in your JCL.
However, tape dataset names are restricted to 17 characters. If you want
to create a new label, first read a TLBL or DLBL that has no parameters
except the DTF name.
A sample assembler program, TSIGLBL.A, and a sample COBOL
program, TSIGLBL.C, are provided as examples in the BIM-EPIC
installation library. These programs can be assembled or compiled to
demonstrate the coding techniques required to process VSE labels.
Data Area
Use the assembler copybook, TSIDGLB.A, or the COBOL copybook,
TSIDGLB.C, for both subroutines. The following descriptions refer to the
data names in the assembler copybook.
Specify FILENAME and LBLRETCD as parameter list entries in your
CALL statement.
FILENAME contains the DTF name of the label to be processed. The
same DTF name must be specified in a JCL DLBL, TLBL, or DD
statement.
Both subroutines return a 1-byte binary value in LBLRETCD. A zero
indicates that the label was returned by TSIDGLB or written by
TSIDPLB. Any non-zero value indicates the label was not found or was
not written.
In LBLLEN, TSIDGLB returns a 2-byte, unaligned, binary field that
contains the length of the label returned. A length of 80 bytes indicates a
tape label. Any length greater than 80 bytes indicates a disk label.
TSIDPLB uses the label length from this field.
8-26
Connectivity Systems, Inc.—Copyright © 2006
Use Pursuant to Company Instructions
User Reference
Accessing the VSE Label Area (TSIDGLB and TSIDPLB)
TSIDGLB returns the label beginning at LBLFILNM. TSIDPLB writes
the label from the same area.
To read a label:
Step
Action
1
Move the DTF name of the label to be processed to
FILENAME.
2
Call TSIDGLB, specifying FILENAME and LBLRETCD.
The following is an example of TSIDGLB.
...
MVC FILENAME,=CL7'INPFILE'
CALL TSIDGLB,(FILENAME,LBLRETCD)
...
COPY TSIDGLB
...
To write a label:
Step
Action
1
Read the label using the TSIDGLB procedure.
2
Modify the label information (see the warning below).
3
Move the DTF name of the label to be processed to
FILENAME.
4
Move the length of the label to LBLLEN (80 for tape, 200 for
disk).
5
Call TSIDPLB, specifying FILENAME and LBLRETCD.
!
WARNING:
TSIDPLB does not validate the data on the label you write.
Therefore, you must ensure that the data is correct. Although the
label can be written successfully, results are unpredictable if the
data is incorrect.
The following is an example of TSIDPLB.
...
MVC
MVC
CALL
...
COPY
...
User Reference
FILENAME,=CL7'OUTFILE'
LBLLEN,=H'80'
TSIDPLB,(FILENAME,LBLRETCD)
TSIDGLB
Connectivity Systems, Inc.—Copyright © 2006
Use Pursuant to Company Instructions
8-27
BIM-EPIC Catalog-VTOC Reconciliation System
BIM-EPIC Catalog-VTOC Reconciliation System
Description
8-28
The reconciliation system consists of two programs, TSIDCVF and
TSIDCVC.
TSIDCVF reads the catalog and the VTOCs associated with a
pool and outputs two files, one for the catalog and one for the
VTOC. The catalog will be enqueued while TSIDCVF runs.
TSIDCVC compares the two files, produced by TSIDCVF,
looking for discrepancies. TSIDCVC then outputs any
mismatches to SYSLST. The catalog will not be enqueued while
TSIDCVC runs, so it can run at any time after TSIDCVF runs.
Connectivity Systems, Inc.—Copyright © 2006
Use Pursuant to Company Instructions
User Reference
Selecting files to compare by pool (TSIDCVF)
Selecting files to compare by pool (TSIDCVF)
Description
TSIDCVF creates two files, one contains the list of VTOC files and one
contains the list of catalog files.
Syntax
The following is an example of a TSIDCVF command syntax.
POOL poolid
Definitions
Examples
The following provides the definition for the parameter you can use with
a TSIDDEL statement.
Parameter
Definition
poolid
Specifies the name of a BIM-EPIC DASD pool. The
poolid instructs the program to select all dataset
versions in the BIM-EPIC Catalog that are in the
pool specified as well as all DASD disk files that
are part of the pool specified. Only BIM-EPIC
controlled disk files will be selected.
The following are examples of BIM-EPIC controlled DSNs.
// DLBL CATOUT,'CATALOG.FILES'
// DLBL VTOCOUT,'VTOC.FILES'
// EXEC TSIDCVF
POOL POOL01
/*
The following are examples of BIM-EPIC Start Track 1 DSNs.
// DLBL CATOUT,'CATALOG.FILES'
// EXTENT SYS010,POOL01,1,0,1,90
// DLBL VTOCOUT,'VTOC.FILES'
// EXTENT SYS010,POOL01,1,0,1,90
// EXEC TSIDCVF
POOL POOL01
/*
User Reference
Connectivity Systems, Inc.—Copyright © 2006
Use Pursuant to Company Instructions
8-29
Comparing catalog to VTOC (TSIDCVC)
Comparing catalog to VTOC (TSIDCVC)
Description
TSIDCVC compares the two files created by TSIDCVF and creates a
report showing any discrepancies.
The files must first be sorted according to the example before being used
by TSIDCVC. The TSIDCVC program does not take any input cards.
Examples
The following example uses BIM-EPIC controlled DSNs. As in the above
TSIDCVF example, Start Track 1 DSNs can be used if desired.
// DLBL SORTIN1,'CATALOG.FILES'
// DLBL SORTOUT,'CATALOG.FILES.SORTED'
// EXEC SORT
SORT FIELDS=(46,6,CH,A,1,44,CH,A,45,1,BI,A)
RECORD TYPE=F,LENGTH=80
INPFIL BLKSIZE=80
OUTFIL BLKSIZE=80
END
/*
// DLBL SORTIN1,'VTOC.FILES'
// DLBL SORTOUT,'VTOC.FILES.SORTED'
// EXEC SORT
SORT FIELDS=(46,6,CH,A,1,44,CH,A,45,1,BI,A)
RECORD TYPE=F,LENGTH=80
INPFIL BLKSIZE=80
OUTFIL BLKSIZE=80
END
/*
// DLBL CATINP,'CATALOG.FILES.SORTED'
// DLBL VTOCINP,'VTOC.FILES.SORTED'
// EXEC TSIDCVC
/*
8-30
Connectivity Systems, Inc.—Copyright © 2006
Use Pursuant to Company Instructions
User Reference
9
Job Management Control
Language
The BIM-EPIC Job Management Control Language (JMCL) gives you
greater control over the execution of your job. The JMCL facility is
activated using the JCLLANG=YES configuration option as described in
the BIM-EPIC Installation and System Guide.
Chapter Contents
Using JMCL Statements
Using JMCL Parameters
Using the JMCL Interface
User Reference
Connectivity Systems, Inc.—Copyright © 2006
Use Pursuant to Company Instructions
9-1
VSE JCL Statements
Using JMCL Statements
VSE JCL Statements
Description
The BIM-EPIC Job Management Control Language (JMCL) parameters
are specified on VSE JCL statements. You can specify JMCL parameters
on:
EXEC statements
JOB statements
OPTION statements
Comment statements
Most JMCL parameters are valid on only one or two of the JCL statement
types. Check the description of the particular parameter to determine
where the parameter can be specified.
A VSE JCL statement can contain multiple JMCL parameters in keyword
format. If you specify more than one JMCL parameter on a single
statement, the parameters must be separated with commas. Many JMCL
parameters are interdependent. When using multiple parameters, ensure
that any interdependencies that may be present do not cause different
results than what you are expecting. An example of how the parameters
work together can be found later in this chapter.
9-2
Connectivity Systems, Inc.—Copyright © 2006
Use Pursuant to Company Instructions
User Reference
Using JOB Statements
Using JOB Statements
Description
When using JOB statements, EXEC statements, and OPTION statements,
the JMCL parameters must follow at least one VSE keyword, or a comma
between two spaces, and precede any comments.
Syntax
The following provides an example of an OPTION statement syntax.
// JOB jobname parameters comments
// EXEC program parameters comments
// OPTION option parameters comments
Example
In the following example, the job name is PAYROLL. RESET is a JMCL
parameter in the correct position. CHECKS is a comment.
// JOB PAYROLL RESET CHECKS
User Reference
Connectivity Systems, Inc.—Copyright © 2006
Use Pursuant to Company Instructions
9-3
Using Comment Statements
Using Comment Statements
Description
VSE comment statements can use special JMCL parameters to invoke
JMCL. See “Using JMCL Parameters” in this chapter for additional
information.
Syntax
The following is an example of a VSE command syntax.
* JMCL parameters
Example
The following is an example of a command statement with the parameters
defined.
* JMCL NAME=BGSTEP
9-4
Connectivity Systems, Inc.—Copyright © 2006
Use Pursuant to Company Instructions
User Reference
JCL Syntax Checking
Using JMCL Parameters
JCL Syntax Checking
Description
HOLD
JMCL parameters enable you to perform the following tasks:
Retain datasets that have been flagged for purge (HOLD)
Cancel a job if the job exceeds a specified time limit (TIME=n)
Specify special processing for restarting canceled jobs
(TYPRUN=RESTART)
Prevent some job cancellations by requesting DD statement
syntax checking (TYPRUN=SCAN and TYPRUN=SCANS)
HOLD prevents datasets that have been flagged for purge at EOJ from
being purged if the job cancels before EOJ is reached.
HOLD is valid on JMCL statements and is effective for the duration of
the job.
Syntax
The following is an example of a HOLD command syntax.
HOLD
TIME
TIME specifies a time limit for a job execution. If your job exceeds the
specified time limit, the job will terminate without a dump and with the
specified condition code CC=1.
Note:
TIME is valid on JOB statements.
!
WARNING:
The IBM SETIME instruction will override the TIME parameter. If
this occurs, your job may not cancel as expected.
Syntax
The following is an example of a TIME command syntax.
TIME=nnnn
User Reference
Connectivity Systems, Inc.—Copyright © 2006
Use Pursuant to Company Instructions
9-5
JCL Syntax Checking
Definition
Example
The following provides definitions for the parameters you can use with
TIME.
Parameter
Definition
nnnn
Specifies the time period in minutes. Valid time
periods are from 1 minute to 1440 minutes. No error
message occurs if a number is specified out of this
range. If you specify a number greater than 1440,
the time limit is set to 1440, which indicates an
unlimited time execution.
The following is an example of a TIME command syntax.
// JOB XYZ TIME=60
TYPRUN
TYPRUN specifies syntax checking for DD statements and special
processing for job restarts.
Note:
TYPRUN is valid on JOB statements only.
Syntax
The following is an example of a TYPRUN command syntax.
TYPRUN={SCAN | SCANS | RESTART}
Definitions
The following provides definitions for the parameters you can use with
TYPRUN.
Parameter
Definition
SCAN
Checks DD statement syntax and prints all JCL and
any error messages. SCAN scans the JCL until the
first end of job (/&) statement, after which normal
processing resumes. The job is not executed.
If there is SYSIPT data in your job stream you must
also specify the DATA parameter. See “Condition
Checking and Branching” in this chapter for
additional information.
SCANS
Checks DD statement syntax and prints only DD
statements in error and the resulting error messages.
The job is not executed. SCANS scans the JCL until
the first end of job (/&) statement, after which
normal processing resumes.
If there is SYSIPT data in your job stream, you
must also specify the DATA parameter. See
“Condition Checking and Branching” in this
chapter for additional information.
9-6
Connectivity Systems, Inc.—Copyright © 2006
Use Pursuant to Company Instructions
User Reference
JCL Syntax Checking
Example
Parameter
Definition
RESTART
Restarts your job. When a job cancels, you may
want to restart it at a job step other than the first step
of the job. You can branch to the desired step with a
JMCL GOTO parameter. However, if you have
specified the JMCL parameter HOLD or
configuration option PURBYP=YES, disk datasets
flagged for purge are not purged when a job cancels.
If you bypass steps with GOTO, work datasets
created in those steps need to be specially purged.
TYPRUN=RESTART purges those datasets when
they are flagged for purge with the DLBL option
code P option code X, or DD DISP=(x,DELETE).
The following is an example using TYPRUN command syntax.
// JOB XYZ TYPRUN=SCANS
User Reference
Connectivity Systems, Inc.—Copyright © 2006
Use Pursuant to Company Instructions
9-7
Condition Checking and Branching
Condition Checking and Branching
Description
The Condition Checking and Branching feature of JMCL allows you to
bypass JCL statements without deleting them or making them comments
before submitting the job.
Condition checking using the IF parameter allows you to check whether
certain conditions exist before you branch to a new part of the job using
GOTO.
Syntax
The following is an example of a JMCL command syntax.
* JMCL parameter
Parameters
Definitions
The following provides a description of the parameters you can use when
using condition checking and branching.
Parameter
Required?
Valid
Default
GOTO
No
1 to 8 characters
None
NAME
No
1 to 8 characters
None
DATA
No
1 to 127
1
SETG
No
See text
None
SET
No
See tedt
None
The following provides definitions for the parameters you can use when
using condition checking and branching.
Parameter
Definition
GOTO
Supports unconditional branching and conditional
branching when used in conjunction with the JMCL IF
parameter. Use GOTO for unconditional branching when
restarting a job. GOTO is valid on OPTION and JMCL
statements.
Note:
9-8
GOTO can only branch forward in a job.
Connectivity Systems, Inc.—Copyright © 2006
Use Pursuant to Company Instructions
User Reference
Condition Checking and Branching
Parameter
Definition
NAME
Marks the destination of the GOTO branch. If you bypass
SYSIPT data during the branch, you must use the DATA
parameter. See IF and Conditions for additional
information. For example:
{label | JOBEND}
If you are restarting a job, you may need to use
TYPRUN=RESTART.
GOTO=label
Note: If the step executed in the restart checks for a
condition code, that condition code may be invalid at
restart time.
NAME Subparameter
label Specifies the NAME label for the branch
destination. The value must match the label
specified on the NAME parameter. If you specify
GOTO=JOBEND, GOTO branches to end-of-job
(/&). A NAME parameter is not required. For
example:
* JMCL GOTO=SORT3
DATA
Bypasses SYSIPT data during a GOTO branch. Because
SYSIPT data is uniquely processed, BIM-EPIC cannot
bypass it automatically.
Place a DATA parameter on the EXEC statement of each
program followed by SYSIPT data. DATA is valid only on
EXEC statements. For example:
DATA [ =n ]
DATA Subparameter
n
Specifies the number of SYSIPT data streams to
bypass for a single EXEC. The default is one, so
you only need to specify n when there is more
than one data stream for the EXEC. For example:
// EXEC PAYROLL DATA
<SYSIPT data here>
/*\
User Reference
Connectivity Systems, Inc.—Copyright © 2006
Use Pursuant to Company Instructions
9-9
IF and Conditions
IF and Conditions
Description
IF tests for conditions that you specify. IF can test the current condition
code, highest condition code, VSE cancel code, date, time, CPU,
partition, and global constant.
You can use IF to test multiple conditions using either the AND condition
or the OR condition. See “Setting Values” in this chapter for additional
information.
When IF is used with GOTO, the branch occurs if the condition is true.
When IF is used on an EXEC, the step is executed only if the condition is
true. If the condition is false, BIM-EPIC bypasses the EXEC.
The IF parameter has three subparameters which must be separated by at
least one space. To test AND conditions, specify separate sets of
subparameters on the same IF parameter and separate them with commas.
To test OR conditions, use separate IF parameters.
When used with GOTO, IF is valid on OPTION and JMCL statements. IF
is also valid on EXEC statements, without GOTO. AND conditions are
valid on OPTION, EXEC, and JMCL statements. OR conditions are valid
on OPTION and JMCL statements only.
Syntax
The following provides an example of an IF statement syntax.
IF=(type
Parameters
9-10
operand value [ ,type operand value, ... ] )
The following provides a description of the parameters you can use when
using IF and conditions.
For...
Valid values are...
CC, HC, and DOSCC
1 to 999
PART
2 character partition ID
CPU
0 to 9, A to Z
DATE and TIME
2 to 8 characters
Gnnn
1 to 3 characters
Connectivity Systems, Inc.—Copyright © 2006
Use Pursuant to Company Instructions
User Reference
IF and Conditions
Definitions
The following provides definitions for the parameters you can use when
using IF and conditions.
Parameter
Definition
type
Specifies the type of input data to be tested:
operand
Use...
To test the...
CC
current condition code
CPU
CPU ID
HC
highest condition code
DOSCC
VSE cancel code
PART
partition ID
DATE
current date
TIME
current time
Gnn
global constant
Specifies the kind of test:
Use...
To test whether the input data
is...
EQ
equal to value
NE
not equal to value
GT
greater than value
LT
less than value
GE
greater than value
LE
less than or equal to value
value
Specifies the constant used in the comparison.
Global constants are set with the SETG JMCL
parameter.
DOSCC
Values are decimal codes generated by VSE. The
normal EOJ code is 16. You can check the DOSCC
across job boundaries.
CPU ID
Same number generated when you use BIM-EPIC
CPU independence—that is, the last digit specified
for CPUIDS configuration option.
In partition comparisons, only the EQ and NE
operands are valid, for example, IF=(PART EQ
BG) is valid; IF=(PART LE BG) is invalid.
CPU ID DATE
User Reference
Specified in yy-mm-dd format.
Connectivity Systems, Inc.—Copyright © 2006
Use Pursuant to Company Instructions
9-11
IF and Conditions
Example
Parameter
Definition
TIME
Specified in hh-mm-ss format. To test only a portion
of the date and time, supply only the portion you
want to test. You can use asterisks (*) as fillers for
beginning parts of the field. For example, to test for
the first day of the month, specify IF=(DATE EQ
**-**-01). To test for January, specify IF=(DATE
EQ **-01).
The following provides several examples of IF job statements.
* JMCL IF=(HC EQ 99),GOTO=JOBEND
* JMCL IF=(PART NE BG,CPU EQ 5),GOTO=BGSTEP
// EXEC PHASE1 IF=(CC LT 16)
The first statement tests the highest condition code. If the highest
condition code is 99, BIM-EPIC branches to the end of the job. The
second statement uses the AND condition. If the job is not running in the
BG partition but is running on CPU 5, a branch is made to BGSTEP. If
neither of these tests is true, the job continues with the EXEC statement.
However, PHASE1 only executes if the current condition code is less
than 16.
9-12
Connectivity Systems, Inc.—Copyright © 2006
Use Pursuant to Company Instructions
User Reference
Setting Values
Setting Values
Description
You can establish condition code values and a maximum of fifteen global
constants with JMCL parameters. These constants can be tested with the
IF parameter.
SETC
SETC sets the current condition code to a specified number. This action
updates the highest condition code, if appropriate.
The current condition code remains in effect until a new value is set by
another SETC parameter, until a RESET is encountered, or until a new
value is set by the TSIDJC2 subroutine.
SETC is valid on OPTION and JMCL statements, where SETC is in
effect as soon as the statement is processed. SETC is also valid on EXEC
statements, where the condition code is set only if the program executes
successfully. The following is an example of a SETC command
statement.
SETC=nnn
SETG
SETG sets global constants. You can have up to 15 global constants. Each
constant remains in effect until you perform an IPL VSE or until you set a
new value with SETG. SETG is valid on JMCL and OPTION statements
only. The following is an example of a SETG command statement.
SETGnn='constant'
Parameters
Definitions
User Reference
The following provides a description of the parameters you can use when
setting values.
Parameter
Required?
Valid
Default
nnn
No
1 to 255
None
nn
No
01 to 15
None
constant
Yes
1 to 16 characters
None
The following provides definitions for the parameters you can use when
setting values.
Parameter
Definition
nnn
Specifies the number for the current condition code.
nn
Identifies which global constant you are setting.
Valid constants are 1 through 15 or a constant of
from 1 to 16 characters.
Connectivity Systems, Inc.—Copyright © 2006
Use Pursuant to Company Instructions
9-13
Setting Values
9-14
Parameter
Definition
constant
Specifies the value of the constant. You can use
spaces.
Connectivity Systems, Inc.—Copyright © 2006
Use Pursuant to Company Instructions
User Reference
Symbolic Replacements
Symbolic Replacements
Description
Symbolic replacements replaces a set of characters found in your JCL.
These replacements are useful for setting JCL subparameters or
comments at execution time.
BIM-EPIC inserts the replacement value into the statement and shifts to
the right any data following the replacement symbol. For example:
* JMCL &1='INVENTRY.INPUT'
// TLBL SORTOUT,'&1',,,,,,2
would result in:
// TLBL SORTOUT,'INVENTRY.INPUT',,,,,,2
!
WARNING:
You must avoid truncation of a statement exceeding 71
characters. A JCL statement cannot exceed 71 characters.
Symbolic replacements are not valid on POWER JECL statements or in
SYSIPT data. Any other statement, including JMCL statements, can use
symbolic replacements.
You should assign values to symbolic replacements on OPTION
statements.
&n
The symbolic replacement parameter has the format &n, where n is a
number between 0 and 9. Use the symbolic replacement parameter to
replace characters with the value you assign to the symbol.
You can have up to 10 symbolic replacements in effect at the same time.
Each parameter remains in effect until it is re-assigned in a JMCL or
OPTION statement or until it is nullified with RESET, or end-of-job
occurs. The following is an example of a command statement containing
a symbolic replacement parameter.
&n='constant'
Definitions
User Reference
The following provides definitions for the parameters you can use when
setting symbolic replacements.
Parameter
Definition
n
Identifies the symbol being assigned.
constant
Specifies the value assigned to the symbol. The
symbol must be enclosed in apostrophes and can
contain spaces.
Connectivity Systems, Inc.—Copyright © 2006
Use Pursuant to Company Instructions
9-15
Symbolic Replacements
Example
In the following example, &1 is changed to PAYROLL.INPUT.
* JMCL &1='PAYROLL.INPUT'
// DLBL INPUT,'&1'
becomes
// DLBL INPUT,’PAYROLL INPUT’
9-16
Connectivity Systems, Inc.—Copyright © 2006
Use Pursuant to Company Instructions
User Reference
RESET
RESET
Description
RESET nullifies most JMCL parameters. You can use RESET to set the
current or highest condition code to zero, nullify GOTO branches, and
nullify TIME control over a job.
For best results, use the global RESET parameter on the JOB statements
and at the end of all jobs that do not have a logical dependency on
previous jobs.
RESET is valid on JOB, EXEC, JMCL, and OPTION statements. When
RESET is specified on a JOB statement, it is processed before any other
JMCL parameters.
Syntax
The following is an example of a RESET command syntax.
RESET=[CC | HC | NAME | TIME]
Parameters
Definitions
The following provides a description of the parameters you can use with
RESET.
Parameter
Required?
Valid
Default
CC
No
None
HC
No
None
NAME
NO
None
TIME
NO
None
The followng provides a definition of the parameters you can use
with RESET
Parameter
Definition
CC
Resets the current condition code.
HC
Resets the highest condition code.
NAME
Nullifies any branch in effect. Processing resumes with
the current statement.
TIME
Nullifies TIME control over the job.
!
WARNING:
When no parameters are specified, all values are reset to their
defaults.
User Reference
Connectivity Systems, Inc.—Copyright © 2006
Use Pursuant to Company Instructions
9-17
RESET
Example
The following restart job example shows JMCL parameters working
together.
// JOB EXAMPLE TYPRUN=RESTART,RESET,TIME=240
* JMCL HOLD
// OPTION LOG &1=PAYROLL
* JMCL &2=PAYROLL
* JMCL GOTO=STEP2
// ASSGN SYS001,DISK,VOL=VOLUME,SHR
// DLBL SORTWK1,'==.SORTWK1(P)'
// EXTENT SYS001
// DLBL SORTIN,'&1.INPUT'
// DLBL SORTOUT,'&2.OUTPUT'
// EXEC SORT DATA
sort statements
/*
* JMCL NAME=STEP2
* JMCL IF=(DATE EQ **-**-01,TIME LT 19-00-00),GOTO=STEP3
// DLBL INPUT,'&1.INPUT'
statements
* JMCL NAME=STEP3
statements
/&
RESET resets any JMCL parameters established in a previous job. The
TIME parameter limits the execution of the job to 4 hours.
Since the example is a restart job, GOTO bypasses the first step, which
completed successfully in a previous execution. GOTO is placed after the
symbolic replacement definitions so that the definitions remain in effect.
The DATA parameter allows BIM-EPIC to bypass the sort control
statements, SYSIPT data. TYPRUN=RESTART is specified so that the
sort work area in the bypassed step is deleted. The data was retained in the
previous execution because of JMCL HOLD, specified in the second
statement.
The * JMCL NAME=STEP2 statement defines the point at which
processing should resume after the GOTO branch. The next statement
tests the date and time. If it is the first of the month and earlier than 7:00
p.m., BIM-EPIC branches to the statement
* JMCL NAME=STEP3. If either condition is false, processing continues
with the // DLBL INPUT statement.
Both the &1 and &2 symbols are replaced with PAYROLL.
9-18
Connectivity Systems, Inc.—Copyright © 2006
Use Pursuant to Company Instructions
User Reference
TSIDJC2
Using the JMCL Interface
TSIDJC2
Description
Your batch program can interface with BIM-EPIC Job Management
Control Language (JMCL) by calling the TSIDJC2 subroutine.
TSIDJC2 can retrieve the following:
DOS job name
Program name
Current date (mm/dd/yy)
Current time (hh.mm.ss)
CPU ID character
Current JMCL condition code
Highest JMCL condition code
Task time limit
JMCL symbolic values
JMCL global constants
TSIDJC2 can update the following:
Parameters
User Reference
Current JMCL condition code
Highest JMCL condition code
JMCL symbolic values
JMCL global constants
TSIDJC2 uses a parameter list to indicate the function being performed,
for example, GET or PUT. In addition, TSIDJC2 provides the data areas
for returning or updating data fields. Two examples are provided in the
VSE sub-library where BIM-EPIC is installed:
TSIDJC2.C for COBOL programs
TSIDJC2.A for Assembler programs
Connectivity Systems, Inc.—Copyright © 2006
Use Pursuant to Company Instructions
9-19
TSIDJC2
The TSIDJC2 subroutine can be called from any language that uses
standard VSE calling conventions.
9-20
Connectivity Systems, Inc.—Copyright © 2006
Use Pursuant to Company Instructions
User Reference
Retrieving JMCL Data
Retrieving JMCL Data
GET REQUEST
(G)
Data can be retrieved from the JMCL system by passing the character G
to TSIDJC2 in the request byte of the parameter list.
If you are using TSIDJC2.A, this byte is labeled JCSREQ.
If you are using TSIDJC2.C, this byte is labeled JCS-REQ.
Control is returned to the next instruction following the CALL statement.
COBOL
Example
The following example is a GET request in COBOL.
Assembler
Example
The following example is a GET request in Assembler.
User Reference
WORKING-STORAGE SECTION.
COPY TSIDJC2.
.
.
.
PROCEDURE DIVISION.
MOVE
'G' TO JCS-REQ.
CALL
'TSIDJC2' USING JCS-START.
MVI
CALL
JCSREQ,JCSREQG
TSIDJC2,(JCSSTART)
Connectivity Systems, Inc.—Copyright © 2006
Use Pursuant to Company Instructions
9-21
Updating JMCL Data
Updating JMCL Data
Description
JMCL data can be updated by passing the character P to TSIDJC2 in the
request byte of the parameter.
If you are using TSIDJC2.A, this byte is labeled JCSREQ.
If you are using TSIDJC2.C, this byte is labeled JCS-REQ.
A PUT request updates the current JMCL condition code, the highest
JMCL condition code, all JMCL symbolics, and all global constants. A
GET request should precede each PUT request to ensure that all data
fields not explicitly being modified are updated to their previous values.
Control is returned to the next instruction following the CALL statement.
To update the current or highest JMCL condition code, move the new
condition code to the appropriate data field as a 2-byte binary value.
During the update process, the highest condition code is set first. Then the
current condition code is set. When the current condition code is set, it is
checked against the highest condition code to determine whether the new
condition code is now the new highest condition code.
If you are using TSIDJC2..A , the JMCL current condition code
is labeled JCSCC with the highest condition code labeled
JCSHC.
If you are using TSIDJC2.C, the condition code is labeled
JCS-CURR-COND-CODE with the highest condition code
labeled JCS-HIGH-COND-CODE.
To update a symbolic, move the new 1 through 20 character symbolic to
the appropriate data field.
If you are using TSIDJC2.A, symbolics &0 through &9 are
labeled JCSSYM0 through JCSSYM9.
If you are using TSIDJC2.C, symbolics &0 through &9 are
labeled JCS-SYMBOLIC-0 through JCS-SYMBOLIC-9.
If the new symbolic is less than 20 characters, the symbolic must be
left-justified and padded with spaces on the right. To remove a symbolic,
clear the symbolic data field with hex zeros or LOW-VALUES.
To update a global constant, move the new 1 through 16 character
constant to the appropriate data field.
If you are using TSIDJC2.A, global constants G01 through
G15 correspond to the parameter data fields JCSGBL1
through JCSGBL15.
9-22
Connectivity Systems, Inc.—Copyright © 2006
Use Pursuant to Company Instructions
User Reference
Updating JMCL Data
If you are using TSIDJC2.C, global constants G01 through G15
correspond to the parameter data fields JCS-GLOBAL-CONS-1
through JCS-GLOBAL-CONS-15.
If the new global constant is less than 16 characters, the global constant
must be left justified and padded with spaces on the right. To remove a
global constant, clear the global constant data field with hex zeros or
LOW-VALUES.
COBOL
Example
The following example is a PUT request in COBOL.
Assembler
Example
The following example is a PUT request in Assembler.
User Reference
WORKING-STORAGE SECTION.
COPY TSIDJC2.
.
.
.
PROCEDURE DIVISION.
MOVE
'G' TO JCS-REQ.
CALL
'TSIDJC2' USING JCS-START.
MOVE
0 TO JCS-CURR-COND-CODE.
MOVE
'MONTHLY' TO JCS-SYMBOLIC-2.
MOVE
LOW-VALUES TO JCS-GLOBAL-CONSTANT-10.
MOVE
'P' TO JCS-REQ.
CALL
'TSIDJC2' USING JCS-START.
MVI
CALL
MVC
MVC
XC
MVI
CALL
JCSREQ,JCSREQG
TSIDJC2,(JCSSTART)
JCSCC,=XL2'00'
JCSSYM2,=CL20'MONTHLY'
JCSGBL10,JCSGBL10
JCSREQ,JCSREQP
TSIDJC2,(JCSSTART)
Connectivity Systems, Inc.—Copyright © 2006
Use Pursuant to Company Instructions
9-23
TSIDJC2 Return Codes
TSIDJC2 Return Codes
Description
TSIDJC2 returns a value in the return code byte of the parameter list.
If you are using TSIDJC2.A, this byte is labeled JCSRC.
If you are using TSIDJC2.C, the byte is labeled JCS-RC.
All return codes are one-byte character values.
Values
9-24
The following describes the TSIDJC2 return codes.
Return
Code
Description
0
Successful completion of the GET or PUT request.
1
Neither BIM-EPIC nor the JMCL system is active.
2
A secondary routine (TSIDJCS) could not be loaded from the
BIM-EPIC system library. The normal cause for this problem
is not having the BIM-EPIC system library in the search chain
of the calling program’s partition.
3
There was insufficient Partition GETVIS available to load the
TSIDJCS routine. The simplest way to correct this problem is
to add a SIZE= parameter to the EXEC statement.
4
The request code in JCSREQ or JCS-REQ was not a GET or
PUT.
Connectivity Systems, Inc.—Copyright © 2006
Use Pursuant to Company Instructions
User Reference
Executing CP Commands
Executing CP Commands
Descriptoin
You can execute any VM/CP command in your VSE job stream using the
JMCL CP control statement. The CP control statement must begin in
column 1.
Configuration
Options
For CP commands to be valid, the VM configuration option must be set to
YES.
Syntax
The following is an example of a CP command syntax.
* CP command
Definition
Example
The followng provides a definition of the parameter you can use
with the CP commands
Parameter
Definition
command
Specifies which VM/CP command to execute.
The following statement lists all tape drives on the operator console.
* CP Q T ALL
User Reference
Connectivity Systems, Inc.—Copyright © 2006
Use Pursuant to Company Instructions
9-25
Executing CP Commands
9-26
Connectivity Systems, Inc.—Copyright © 2006
Use Pursuant to Company Instructions
User Reference
10
BIM-EPIC Job Scheduling
The BIM-EPIC job scheduling system can be used to control execution
across all partitions and VSE machines sharing the same DSN Catalog.
Chapter Contents
Job Scheduling Activities
Event Scheduling Activites
Executing Various Activities
Executing in CICS
User Reference
Connectivity Systems, Inc.—Copyright © 2006
Use Pursuant to Company Instructions
10-1
Scheduling Activities
Job Scheduling Activities
Scheduling Activities
Description
When a job, step, or process is complete, you can direct BIM-EPIC to
post an event. BIM-EPIC writes the name of the event in the DSN
Catalog as a version of the dataset *EPIC.EVENT.DSN*. This event
name is assigned by you so you can identify completed events. Like
versions of a tape or disk dataset, posted events become eligible for
scratch according to the retention criteria cataloged for the dataset.
If *EPIC.EVENT.DSN* is not already in the catalog, BIM-EPIC
automatically adds it the first time an event is posted. Default day and
cycle retention is used to retain posted events. However, you have the
option to change the retention with manual catalog maintenance using
Online Manager or TSIDMNT.
Posted events can be deleted using TSIDUTL SCRATCH or TSIDMNT
SCRATCH. However, in most cases, you should use TSIDUTL
SCRATCH.
Job scheduling subroutines put the event name in the SYSPARM value.
COBOL programs do special processing when SYSPARM values include
A or D.
!
WARNING:
To avoid potential conflict, do not use the letters A or D in event
names processed with BIM EPIC job scheduling subroutines.
There are four job scheduling functions:
Posting an event and releasing all matching jobs
Posting an event only
Checking for a posted event and releasing the requesting job
Deleting a posted event
For each job scheduling function, BIM-EPIC provides one batch utility,
one standard processing subroutine, and one CICS subroutine.
The batch utilities and subroutines share the same names. CICS
subroutine names begin with TSIDC.
10-2
Connectivity Systems, Inc.—Copyright © 2006
Use Pursuant to Company Instructions
User Reference
Event Posting and Release of Matching Jobs (TSIDREL and TSIDCREL)
Event Scheduling Activites
Event Posting and Release of Matching Jobs
(TSIDREL and TSIDCREL)
Description
TSIDREL and TSIDCREL post events and automatically release jobs
with matching job names from the POWER reader queue.
To be released, a job must be in disposition H or L in the POWER reader
queue. In addition, the POWER job name must match the event name
posted.
If the event name is 8 characters, BIM-EPIC releases the job with the
following POWER command:
R RDR,event-name
If the event name is less than 8 characters, BIM-EPIC releases the job
with the following POWER command:
R RDR,*event-name
If this results in multiple jobs being released into the same partition and
some or all of them have the same priority, they execute in the order they
were released.
User Reference
Connectivity Systems, Inc.—Copyright © 2006
Use Pursuant to Company Instructions
10-3
Event Posting (TSIDLOC and TSIDCLOC)
Event Posting (TSIDLOC and TSIDCLOC)
Description
10-4
TSIDLOC and TSIDCLOC post events. They do not release jobs. When
you use TSIDLOC or TSIDCLOC, dependent jobs must issue a check for
the posted event using TSIDCHK or TSIDCCHK.
Connectivity Systems, Inc.—Copyright © 2006
Use Pursuant to Company Instructions
User Reference
Event Checking (TSIDCHK and TSIDCCHK)
Event Checking (TSIDCHK and TSIDCCHK)
Description
TSIDCHK and TSIDCCHK are used within a job to determine if an event
has been posted before continuing with a dependent task. If the event has
been posted, the job continues without interruption.
If you use TSIDCHK to check for the event and the event is not posted,
execution is interrupted. TSIDCHK issues a message to the operator and
asks whether the job should be canceled or suspended. If the operator
responds with WAIT, the job is suspended. However, the partition is
stopped until the event is posted. When the event is posted, the partition is
restarted automatically. If the event is never posted, the operator must
recoginze the situation and cancel the suspended job.
TSIDCCHK, the CICS version, does not interrupt processing if the event
is not posted. Your program must check the return code passed and
proceed accordingly.
User Reference
Connectivity Systems, Inc.—Copyright © 2006
Use Pursuant to Company Instructions
10-5
Event Deletion (TSIDUNL and TSIDCUNL)
Event Deletion (TSIDUNL and TSIDCUNL)
Description
TSIDUNL and TSIDCUNL delete posted events. Use TSIDUNL and
TSIDCUNL to delete an event after all dependent tasks have completed.
This is important if another processing cycle occurs before the event is
scratched automatically during TSIDUTL processing.
If you do not delete the events, they become eligible for scratch.
10-6
Connectivity Systems, Inc.—Copyright © 2006
Use Pursuant to Company Instructions
User Reference
Executing in Batch Jobs
Executing Various Activities
Executing in Batch Jobs
Description
TSIDREL, TSIDLOC, TSIDCHK, and TSIDUNL can be executed in
batch jobs instead of being invoked through a CALL routine.
JCL
Requirements
The following example shows the JCL requirements for executing a batch
job.
// OPTION SYSPARM='event-name'
// EXEC TSIDxxx
// OPTION SYSPARM='
'
Two OPTION statements are required. One OPTION statement is
required to specify the event name as a SYSPARM. The second OPTION
statement is required to clear the SYSPARM so it does not affect later
processing.
Definitions
Example
The following provides definitions for the parameters you can use when
executing a batch job.
Parameter
Definition
event-name
Specifies the name of the event to be posted or the
name of the job to be released. The event-name may
be 1 to 8 characters long.
TSIDxxx
Specifies the utility you are executing. Specify
TSIDREL, TSIDLOC, TSIDCHK, or TSIDUNL.
The following example executes TSIDREL. The job posts an event with
the name PAY and releases all jobs in the POWER reader queue which
have job names beginning with PAY.
//
//
//
//
/&
User Reference
JOB RELEASE JOBS
OPTION SYSPARM='PAY'
EXEC TSIDREL
OPTION SYSPARM='
'
Connectivity Systems, Inc.—Copyright © 2006
Use Pursuant to Company Instructions
10-7
Executing Standard Processing Subroutines
Executing Standard Processing Subroutines
Description
TSIDREL, TSIDLOC, TSIDCHK, and TSIDUNL are callable
subroutines for non-CICS programs. Standard linkage conventions apply
to all four subroutines.
Processing
Requirements
To process requirements for TSIDREL, TSIDLOC, and TSIDUNL:
Examples
Step
Action
1
Perform the event task.
2
Move the event name to the EVENT-NAME field. See "Job
Scheduling Activities" in this chapter for additional information
on event name limitations.
3
Issue a call to the appropriate subroutine.
The following example calls TSIDUNL. The CALL deletes the PAY
event after PAYROLL checks have been processed.
...
WORKING-STORAGE SECTION.
01 EVENT-NAME
PIC X(8) VALUE SPACES.
PROCEDURE DIVISION.
PERFORM PAYROLL-CHECKS.
MOVE 'PAY' TO EVENT-NAME.
CALL 'TSIDUNL' USING EVENT-NAME.
...
Processing
Requirements
To process the TSIDCHK requirements:
Step
Action
1
Move the event name to the EVENT-NAME field. See "Job
Scheduling Activities" in this chapter for details about
event-name limitations.
2
Issue a call to TSIDCHK.
3
Perform the dependent task.
The following example calls TSIDCHK, with PAY as the
EVENT-NAME. If that event is posted, the task performs
PAYROLL-CHECKS.
...
WORKING-STORAGE SECTION.
01 EVENT-NAME
PIC X(8) VALUE SPACES.
PROCEDURE DIVISION.
MOVE 'PAY' TO EVENT-NAME.
CALL 'TSIDCHK' USING EVENT-NAME.
...
10-8
Connectivity Systems, Inc.—Copyright © 2006
Use Pursuant to Company Instructions
User Reference
CICS Subroutines
Executing in CICS
CICS Subroutines
Description
TSIDCREL, TSIDCLOC, TSIDCCHK, and TSIDCUNL are CICS
subroutines that can be called from a CICS command-level program.
The program must link to them using a 69-byte communications area with
the following format:
Byte
Contents
1–8
EVENT–NAME
9
EVENT–RETURN–CODE
10–69
EVENT–POWER–MESSAGE
For TSIDCREL, when EVENT–RETURN–CODE is P, bytes 10 through
69 contain the following contents:
User Reference
Byte
Contents
10–12
CTL Spool Return Code
13–21
reserved
15–22
XPCC Function That Failed
23–36
reserved
37–38
VSE Return Code
39
reserved
40–41
Reason Code
42–54
reserved
55–56
POWER Return Code
57
reserved
58–59
POWER Feedback Code
60–69
reserved
Connectivity Systems, Inc.—Copyright © 2006
Use Pursuant to Company Instructions
10-9
Return Codes
Return Codes
TSIDCREL
The following describes the TSIDCREL return codes.
Return
Code
Description
A
The event has already been posted. No jobs are released.
F
The DSN Catalog is full and the event cannot be posted.
M
The event name specified in EVENT–NAME is missing or
invalid.
P
The event was posted, but there was an error in releasing jobs
from the POWER reader queue.
W
The event was posted, but POWER is in a busy state and jobs
were not released.
X
The event was posted, but the XECB supervisor table is full.
Y
The event was posted and the jobs were released successfully.
5
The event was posted, but the POWER XPCC function failed.
6
The event was posted, but POWER is being terminated.
7
The event was posted, but POWER has terminated abnormally.
8
The event was posted, but TSIDCREL could not make a
connection to POWER within 30 seconds.
9
The event was posted, but the POWER file could not be
located.
Return codes 5 through 9 indicate highly unusual situations and should
not occur.
Each of the numeric return codes (n) is associated with a BIM-EPIC
message, numbered EPV3n. See BIM-EPIC Messages and Codes,
message EPV35 for additional information on finding the message
associated with return code 5.
TSIDCLOC
10-10
The following describes the TSIDCLOC return codes.
Code
Description
A
The event has already been posted.
F
The DSN Catalog is full and the event cannot be posted.
M
The event name is missing or invalid.
Y
The event was posted successfully.
Connectivity Systems, Inc.—Copyright © 2006
Use Pursuant to Company Instructions
User Reference
Return Codes
TSIDCCHK
TSIDCUNL
User Reference
The following describes the TSIDCCHK return codes.
Code
Description
M
The event name is missing or invalid.
N
The event is not posted.
Y
The event is posted.
The following describes the TSIDCUNL return codes.
Code
Description
E
The *EPIC.EVENT.DSN* dataset definition has been deleted
from the DSN Catalog.
F
The DSN Catalog is full.
M
The event name is missing or invalid.
N
The event was not posted.
Y
The event was deleted successfully.
Connectivity Systems, Inc.—Copyright © 2006
Use Pursuant to Company Instructions
10-11
Processing Requirements
Processing Requirements
Description
To process the TSIDCHK subroutines:
Step
Example
Action
1
Move the event name to the EVENT–NAME field. See "Job
Scheduling Activities" in this chapter for details describing
event–name limitations.
2
Link to the subroutine.
3
Check the return code passed and process accordingly.
The following is an example of a TSIDCHK subroutine.
WORKING-STORAGE SECTION.
01 EVENT.
02 EVENT-NAME
PIC X(08).
02 EVENT-RETURN-CODE
PIC X(01).
88 SUCCESS
VALUE 'Y'.
88 FAILURE
VALUE 'N'.
02 EVENT-POWER-MESSAGE PIC X(60)
PROCEDURE DIVISION.
MOVE 'PAY' TO EVENT-NAME.
EXEC CICS
LINK PROGRAM ('TSIDCCHK')
COMMAREA (EVENT)
LENGTH (69)
END EXEC.
IF SUCCESS
GOTO PERFORM
ELSE
GOTO WAIT.
...
This example checks to determine if an event has been posted with
TSIDCCHK. If the event has been posted, TSIDCCHK performs the
dependent task. If the event has not been posted, TSIDCCHK goes to the
WAIT routine.
10-12
Connectivity Systems, Inc.—Copyright © 2006
Use Pursuant to Company Instructions
User Reference
Creating Job Setup/Run Sheets (TSIDFAV)
Creating Job Setup/Run Sheets (TSIDFAV)
Description
Use TSIDFAV to create Job Setup/Run Sheets.
UPSI Settings
The following provides descriptions of the values associated with the
TSIDFAV utility.
Setting
Action
// UPSI 1XXXX Print comment cards.
Modes of
Execution
User Reference
// UPSI
X1XXX Print user data cards.
// UPSI
XX1XX Scan all VSE jobs for creation of input files.
// UPSI
XXX1X Scan all POWER JOBS for creation of input files.
// UPSI
XXXX1 Input JCL submitted backwards (POWER MODE).
TSIDFAV can be executed in VSE mode or in POWER mode. The
execution mode is determined by UPSI bit 4 (relative to zero).
To execute in VSE mode, set the UPSI bit to zero (off).
To execute in POWER mode, set the UPSI bit to 1 (on).
Connectivity Systems, Inc.—Copyright © 2006
Use Pursuant to Company Instructions
10-13
SET Control Statement
SET Control Statement
Description
Use the SET control statement to define the partition ID and CPUID
values used to replace equal signs (=) in the dataset name. SET must
precede all job controls submitted. The SET control statement must begin
on column 1.
Syntax
The folllowing is an example of a SET control statement syntax:
SET PART=xx CPUID=y
Parameters
Definitions
The following provides a description of the parameters you can use when
using the SET control statement.
Parameter
Required?
PART
Yes
CPUID
Yes
Valid
Default
The following provides definitions for the parameters you can use when
using the SET control statement.
Parameter
Definition
PART=xx
Defines the 2-character partition ID for replacing
the first two equal signs. If this parameter is
omitted, the first two equal signs are replaced by the
partition ID where TSIDFAV is being executed.
CPUID=y
Defines the 1-digit CPUID for replacing the third
equal sign. If this parameter is omitted, the third
equal sign is replaced by the last digit of the CPUID
where TSIDFAV is being executed
VSE Mode
In VSE mode, all job control is submitted to TSIDFAV in the order in
which it is executed. The JCL is submitted either as instream data,
following the EXEC statement, or via tape or disk input using the DTF
name DISKIN. If POWER JECL is included in the jobstream, the input
must be submitted via tape or disk. If the input is submitted after the
EXEC statement, SYS004 must be assigned to SYSIPT. Under all types
of input, the last record must be the EOF flag as determined by
TYPE=EOF in the TSIDFAV macro or defaulted to two dashes (--).
JCL Examples
for VSE Mode
The following are JCL examples when using VSE mode.
10-14
// JOB TSIDFAV
* INPUT INSTREAM DATA
// ASSGN SYS004,SYSIPT
// UPSI XXXX0
REQUIRED
Connectivity Systems, Inc.—Copyright © 2006
Use Pursuant to Company Instructions
User Reference
SET Control Statement
// EXEC TSIDFAV
VSE JCL
-/*
/&
// JOB TSIDFAV
* DISK INPUT
// DLBL DISKIN,'FAV.INPUT.JCL'
// ASSGN SYS004,DISK,...
// UPSI XXXX0
// EXEC TSIDFAV
/*
POWER Mode
REQUIRED
When using POWER mode, the job control must be submitted backwards,
in reverse order of execution, and upside down so that card column 1 is
submitted to TSIDFAV in card column 80. This prevents POWER from
processing any POWER JECL submitted as instream data. The JCL can
be submitted either as instream data, following the EXEC statement, or
via tape or disk input using the DTF name DISKIN. If the input is
submitted after the EXEC statement, SYS004 must be assigned to
SYSIPT.
The EOF flag must be submitted in columns 1 and 2, not reversed.
Note:
This technique can be used only in installations that still have physical
card readers.
JCL Examples
for POWER
Mode
The following are JCL examples when using POWER mode.
// JOB TSIDFAV
* INPUT INSTREAM DATA
// ASSGN SYS004,SYSIPT
REQUIRED
// UPSI XXXX1
// EXEC TSIDFAV
VSE JCL AND POWER JECL READ WITH 9 EDGE IN
-(EOF FLAG)
/*
/&
// JOB TSIDFAV
* DISK INPUT
// DLBL DISKIN,'FAV.INPUT.JCL'
// ASSGN SYS004,DISK,...
// UPSI XXXX1
// EXEC TSIDFAV
/*
REQUIRED
TSIDFAV reads the VSE procedures and POWER SLIs from the
appropriate VSE library. However, TSIDFAV does not support either
PROC or SLI overwrites. Nested SLIs are supported. However, nested
PROCs are not supported.
User Reference
Connectivity Systems, Inc.—Copyright © 2006
Use Pursuant to Company Instructions
10-15
SET Control Statement
10-16
Connectivity Systems, Inc.—Copyright © 2006
Use Pursuant to Company Instructions
User Reference
11
Job Activity Reports
BIM-EPIC provides several job accounting programs. These programs
produce job accounting statistics using data collected from the Recorder
File. All job accounting is affected by the JOBACCT and RECORD
configuration options.
Chapter Contents
Recorder History
Activity Log Report (TSIDARP)
DSN/Job Cross-Reference Report (TSIDBRP)
Job Time Activity Report (TSIDJAC)
Maintaining the Job Accounting Database
CICS Access to Job Accounting Database
User Reference
Connectivity Systems, Inc.—Copyright © 2006
Use Pursuant to Company Instructions
11-1
Recorder History
Recorder History
Description
BIM-EPIC Recorder Backup files can be used to create job activity
reports. For example, you may want to combine daily backups into a
single Recorder History dataset. You can create a new Recorder History
dataset weekly, monthly, or for any specified time period.
To create a Recorder History dataset:
Step
1
Action
Create a new Recorder History dataset using a tape-to-tape
copying utility, such as TSIDDTD. The Recorder Backup file
format is fixed-blocked, with a record length of 338 and a block
size of 5746.
//
//
//
//
/*
JOB INITIALIZE RECORDER HISTORY FILE
TLBL INPUT,'DAILY.RECORDER'
TLBL OUTPUT,'RECORDER.HISTORY'
EXEC TSIDDTD
/&
2
Combine the new Recorder Backup files into an existing
Recorder History dataset. The example below uses a sort
program. You can use whatever mechanism you prefer.
//
//
//
//
//
//
//
JOB MERGE VSE RECORDER FILES
TLBL SORTIN1,'VSE.DAILY.BACKUP',,,,,,2
TLBL SORTIN2,'VSE.MNTHLY.BACKUP',,,,,,2
TLBL SORTOUT,'VSE.MNTHLY.BACKUP',,,,,,2
DLBL SORTWK1,’===.SORTWK1’
EXTENT SYS004
EXEC TSIDSRT
SORT
FIELDS=(25,2,A,21,6,A,17,4,A),FILES=2,FORMAT=BI
RECORD TYPE=F,LENGTH=338
INPFIL BLKSIZE=5746
OUTFIL BLKSIZE=5746
OPTION PRINT=ALL
END
/*
/&
11-2
Connectivity Systems, Inc.—Copyright © 2006
Use Pursuant to Company Instructions
User Reference
Activity Log Report (TSIDARP)
Activity Log Report (TSIDARP)
Description
TSIDARP produces the Activity Log report which shows open and close
activity for controlled datasets. Open and close activity is sorted by:
System ID
Date and time
Job name
The Activity Log report can be limited to activity generated on any CPU
or occurring during a specific time period. TSIDARP also produces the
cross-reference dataset that is used as input to TSIDBRP.
Control
Statements
JCL
Requirements
There are two optional control statements for TSIDARP.
EXCLUDE control statement
TSIDARP control statement
The following is an example of the JCL requirements for an Activity Log
report.
// ASSGN SYS003,SYSIPT
// ASSGN SYS004,SYSLST
// ASSGN SYS001,DISK,VOL=volser,SHR
// TLBL SYS005,'daily.recorder.backup'
// DLBL SYS002,'recorder.cross.ref'
// DLBL SORTWK1,'===.sortwk1'
// EXTENT SYS001
// EXEC TSIDARP
control statements
/*
UPSI Values
There are no UPSI values.
Dataset
Requirements
SYS005 identifies the dataset used as input. You can use the TSIDRFS
Recorder Backup file or you can use a Recorder History dataset.
SYS002 identifies the cross-reference dataset produced as output. This
dataset is used as input for TSIDBRP.
SORTWK1 identifies a sort work area for an internal sort. You must
provide an ASSGN and a dummy EXTENT statement.
User Reference
Connectivity Systems, Inc.—Copyright © 2006
Use Pursuant to Company Instructions
11-3
Activity Log Report (TSIDARP)
EXCLUDE
Control
Statement
The EXCLUDE control statement specifies a job excluded from the
report. If used, EXCLUDE must come before the TSIDARP statement.
You can use up to 20 EXCLUDE statements, each statement specifying a
job name.
Syntax
The following is an example of an EXCLUDE control statement syntax.
EXCLUDE=jobname
TSIDARP
Control
Statement
The TSIDARP control statement specifies dates, CPUs, and partitions to
include in the report. TSIDARP is optional and, if omitted, the report will
contain all relevant data.
The TSIDARP statement is a 29-byte record, consisting of five fields:
Bytes
Field Contents
1–7
TSIDARP
8–14
Starting date, in Julian format (ccyyddd)
15–21
Ending date, in Julian format (ccyyddd)
22–27
CPU ID
28–29
Partition ID
The statement must begin with TSIDARP. All other fields are optional.
To omit a field, leave the field blank. If a field is omitted, the report will
contain all relevant data for that field.
Syntax
The following is an example of an TSIDARP control statement syntax.
TSIDARPssssssseeeeeeeiiiiiipp
Example
The following example produces an Activity Log report for jobs run from
December 1, 1994 to December 31, 1994. It includes only those jobs that
were run on CPU 55555 in the BG partition. It excludes all datasets from
the CICSPR16 job.
// JOB TSIDARP ACTIVITY LOG REPORT
// ASSGN SYS003,SYSIPT
// ASSGN SYS004,SYSLST
// ASSGN SYS001,DISK,VOL=WORK01,SHR
// TLBL SYS005,'DAILY.RCDR.BACKUP'
// DLBL SYS002,'RECORDER.CROSS.REF'
// DLBL SORTWK1,'==.SORTWK1'
// EXTENT SYS001
// EXEC TSIDARP
EXCLUDE=CICSPR16
TSIDARP1994335199436555555BG
/*
/&
11-4
Connectivity Systems, Inc.—Copyright © 2006
Use Pursuant to Company Instructions
User Reference
DSN/Job Cross-Reference Report (TSIDBRP)
DSN/Job Cross-Reference Report (TSIDBRP)
Descr‘iption
TSIDBRP generates two reports:
DSN/JOB Cross-Reference Report
Accepted Tapes Report
The DSN/JOB Cross-Reference report lists tape activity and is a
cross-reference to the TSIDARP Activity Log report.
The Accepted Tapes report lists the controlled tapes that were accepted as
input with the ACCEPT response to BIM-EPIC message EP009.
TSIDBRP uses one of three datasets as input, depending on the UPSI
value specified. For UPSI 000, 010, and 100, TSIDBRP uses the output
dataset created by TSIDARP, called the Recorder Cross-Reference
dataset. For UPSI 101, TSIDBRP uses either the TSIDRFS Recorder File
backup dataset created by TSIDRFS or the Recorder History dataset.
TSIDBRP uses the entire input dataset to create the contents of its the
reports. If you use the dataset created by TSIDARP, the time period for
the report is the same as the time period used for TSIDARP. If you use the
Recorder File backup or the Recorder History file dataset, the time period
for the report is the time period covered by the Recorder File backup or
the Recorder History dataset.
If you use the Recorder Cross-Reference dataset as your input dataset,
you may want to run TSIDARP and TSIDBRP in the same job stream.
JCL
Requirements
The following are examples of the JCL requirements for TSIDBRP.
//
//
//
//
//
//
//
//
/*
ASSGN SYS004,SYSLST
ASSGN SYS001,DISK,VOL=volser,SHR
DLBL SORTWK1,'===.sortwk1'
EXTENT SYS001
DLBL SYS002,'recorder.cross.ref'
DLBL SYS005,'recorder.xref.work.file'
UPSI 000
EXEC TSIDBRP
or
//
//
//
//
//
//
//
/*
User Reference
ASSGN SYS004,SYSLST
ASSGN SYS001,DISK,VOL=volser,SHR
DLBL SORTWK1,'===.sortwk1'
EXTENT SYS001
TLBL SYS005,'daily.recorder.backup'
UPSI 101
EXEC TSIDBRP
Connectivity Systems, Inc.—Copyright © 2006
Use Pursuant to Company Instructions
11-5
DSN/Job Cross-Reference Report (TSIDBRP)
UPSI Values
Dataset
Requirements
The following UPSI values can be used when creating DSN/JOB
Cross-Reference reports.
Value
Function
000
Creates both reports. UPSI 000 uses the TSIDARP Recorder
Cross-Reference dataset as input.
010
Creates only the DSN/JOB Cross-Reference report. UPSI 010
uses the Recorder Cross-reference dataset as input.
100
Creates only the Accepted Tapes report. UPSI 100 uses the
Recorder Cross-Reference dataset as input.
101
Creates only the Accepted Tapes report. UPSI 101 uses the
Recorder Backup file or the Recorder History dataset as input.
SYS002 identifies the Cross-Reference dataset created by TSIDARP.
SYS002 is required when using UPSI 000, UPSI 100, and UPSI 010.
SYS005 identifies the Recorder File backup or the Recorder History
dataset when used with UPSI 101. SYS005 It also identifies the Recorder
Cross-Reference dataset when used with UPSI 000.
SORTWK1 identifies a sort work area for an internal sort. You must
provide an ASSGN and a dummy EXTENT statement.
Control
Statements
TSIDBRP does not require any control statements.
Examples
The following example creates the DSN/JOB Cross-Reference report.
This example uses the TSIDARP Recorder Cross-Reference dataset as
input.
//
//
//
//
//
//
//
//
/*
/&
JOB TSIDBRP CROSS-REFERENCE REPORT
ASSGN SYS004,SYSLST
ASSGN SYS001,DISK,VOL=volser,SHR
DLBL SORTWK1,'==.SORTWK1(N,D,P)'
EXTENT SYS001
DLBL SYS002,'RECORDER.CROSS.REF'
UPSI 010
EXEC TSIDBRP
The following example creates the Accepted Tapes report. This example
uses the Recorder File backup as input.
//
//
//
//
//
//
//
//
11-6
JOB TSIDBRP CROSS-REFERENCE REPORT
ASSGN SYS004,SYSLST
ASSGN SYS001,DISK,VOL=volser,SHR
DLBL SORTWK1,'==.SORTWK1(N,D,P)'
EXTENT SYS001
TLBL SYS005,'DAILY.RCDR.BACKUP'
UPSI 101
EXEC TSIDBRP
Connectivity Systems, Inc.—Copyright © 2006
Use Pursuant to Company Instructions
User Reference
DSN/Job Cross-Reference Report (TSIDBRP)
/*
/&
User Reference
Connectivity Systems, Inc.—Copyright © 2006
Use Pursuant to Company Instructions
11-7
Job Time Activity Report (TSIDJAC)
Job Time Activity Report (TSIDJAC)
Description
TSIDJAC produces the Job Time Activity report, which reports machine
use statistics by job. Statistics are detailed by job step with totals for each
job. In addition, a grand total is generated for all jobs.
Use the Job Time Activity report to find out when a particular job was
run. For example, you can provide information detailing the resources
used, such as did the inventory program use 100% of the CPU. Statistics
include start and end times, duration, partition ID, CPU time, overhead,
and I/O activity.
JCL
Requirements
The following is an example of the JCL requirements for a Job Time
Activity report.
//
//
//
//
//
//
/*
ASSGN SYS004,SYSLST
ASSGN SYS001,DISK,VOL=volser,SHR
DLBL SORTWK1,'==.sortwk1'
EXTENT SYS001
TLBL SYS005,'daily.recorder.backup'
EXEC TSIDJAC
UPSI Values
There are no UPSI values
Dataset
Requirements
SYS005 identifies the dataset used as input. You can use either the
Recorder File backup or the Recorder History dataset.
SORTWK1 identifies a sort work area for an internal sort. You must
provide an ASSGN and a dummy EXTENT statement.
Control
Statements
TSIDJAC does not require any control statements.
Example
The following example creates a Job Time Activity report.
//
//
//
//
//
//
//
/*
/&
11-8
JOB TSIDJAC JOB ACTIVITY
ASSGN SYS004,SYSLST
ASSGN SYS001,DISK,VOL=WORK01,SHR
DLBL SORTWK1,'===.SORTWK1'
EXTENT SYS001
TLBL SYS005,'DAILY.RCDR.BACKUP'
EXEC TSIDJAC
Connectivity Systems, Inc.—Copyright © 2006
Use Pursuant to Company Instructions
User Reference
Maintaining the Job Accounting Database
Maintaining the Job Accounting Database
Description
TSIDJLD creates and maintains a job accounting database.
You can access this database through CICS with the online access to the
Job Accounting database (TOJA) transaction. You can also develop your
own reports and CICS transactions to access this data. To help you
develop your own access to this data, a COBOL copybook, TSIDOJA.C,
is provided.
TSIDJLD uses a VSAM KSDS to store data. See the BIM-EPIC
Installation and System Guide for additional information on creating a
database.
JCL
Requirements
The following is an example of the JCL requirements for maintaining the
Job Accounting database.
// ASSGN SYS003,SYSIPT
// ASSGN SYS004,SYSLST
// ASSGN SYS005,cuu
// ASSGN SYS001,DISK,VOL=volser,SHR
// DLBL SORTWK1,'===.sortwk1'
// EXTENT SYS001
// DLBL TSIJADB,'epicjadb.job.account',,VSAM,CAT=ucat
// TLBL SYS005,'daily.recorder.backup'
(or)
// DLBL SYS005,'daily.recorder.backup'
// EXEC TSIDJLD
control cards
/*
UPSI Values
There are no UPSI values.
Dataset
Requirements
SYS005 identifies the input dataset. You can use either the Recorder
Backup file or the Recorder History dataset.
TSIJADB identifies the database file that will be produced as output. This
dataset is a VSAM KSDS and must be defined prior to running TSIDJLD.
SORTWK1 identifies a sort work area for an internal sort. You must
provide an ASSGN and a dummy EXTENT statement.
Control
Statements
Control statements indicate what data is to be added to or deleted from the
database. You can submit up to 95 control statements per execution. All
fields are positional.
A control statement is required. All parameters are optional. When a field
is omitted, TSIDJLD uses all relevant data.
User Reference
Connectivity Systems, Inc.—Copyright © 2006
Use Pursuant to Company Instructions
11-9
Maintaining the Job Accounting Database
You can submit both ADD control statements and DEL control
statements in the same execution. All deletes are performed before new
information is added.
The control statement is 32 bytes long and consists of five fields:
Syntax
Bytes
Field Contents
1–3
ADD or DEL
4–11
Job name
12–21
Jobs started on or after this date
22
Blank
23–32
Jobs started on or before this date
The following is an example of a control statement syntax.
{ADD | DEL}jobnamemm/dd/yyyy mm/dd/yyyy
Parameters
The following provides a description of the parameters you can use when
maintaining the Job Accounting database.
Parameter
Required?
Valid
Default
Specify one of the following two (required):
Definitions
11-10
ADD
No
None
OFF
DEL
No
None
OFF
jobname
No
1 to 8 characters
None
mm/dd/yyyy
No
10 characters
None
The following provides definitions for the parameters you can use with a
Job Accounting statement.
Parameter
Definition
ADD
Adds data from the Recorder Backup file or the
Recorder History dataset. If ADD is the only
parameter on the statement, all data are added. If
other parameters are specified, only data matching
those parameters are added.
DEL
Deletes matching data from the database. At least
one other parameter must be specified. To delete all
records from the database, use IDCAMS to delete
and redefine the database.
Connectivity Systems, Inc.—Copyright © 2006
Use Pursuant to Company Instructions
User Reference
Maintaining the Job Accounting Database
Examples
Parameter
Definition
jobname
Specifies a particular job to be added to or deleted
from the database. You can specify a generic job
name by ending the name with an asterisk. For
example, specify TST* to process all jobs beginning
with TST. All occurrences of that job or those jobs
are added or deleted. If the job name is omitted, all
jobs on the Recorder Backup file or the Recorder
History dataset are added or all jobs matching the
dates specified in bytes 12 through 32 are deleted.
mm/dd/yyyy
Adds or deletes jobs started on or after this date.
You must use a 2-digit month, day, and a 4-digit
year, for example, 01/05/1997, in bytes 12 through
21.
mm/dd/yyyy
Adds or deletes jobs started on or before this date.
You must use a 2-digit month, a 2-digit day, and a
4-digit year, for example, 01/05/1997, in bytes 23
through 32.
The following example adds all information from the Recorder Backup
file to the database.
// JOB TSIDJLD UPDATE THE JOB ACCTNG DATA BASE
// ASSGN SYS003,SYSIPT
// ASSGN SYS004,SYSLST
// ASSGN SYS001,DISK,VOL=WORK01,SHR
// TLBL SYS005,'DAILY.RCDR.BACKUP'
// DLBL SORTWK1,'===.SORTWK1'
// EXTENT SYS001
// DLBL TSIJADB,'TSIJADB.JOB.ACCOUNT',,VSAM,CAT=UCAT
// EXEC TSIDJLD,SIZE=TSIDJLD
ADD
/*
/&
The following example deletes all jobs started on or before December 31,
1994 and adds all information from the Recorder Backup file to the
database.
// JOB TSIDJLD UPDATE THE JOB ACCTNG DATA BASE
// ASSGN SYS003,SYSIPT
// ASSGN SYS004,SYSLST
// ASSGN SYS001,DISK,VOL=WORK01,SHR
// TLBL SYS005,'DAILY.RCDR.BACKUP'
// DLBL SORTWK1,'===.SORTWK1'
// EXTENT SYS001
// DLBL TSIJADB,'TSIJADB.JOB.ACCOUNT',,VSAM,CAT=UCAT
// EXEC TSIDJLD,SIZE=TSIDJLD
ADD
DEL
12/31/1997
/*
/&
User Reference
Connectivity Systems, Inc.—Copyright © 2006
Use Pursuant to Company Instructions
11-11
CICS Access to Job Accounting Database
CICS Access to Job Accounting Database
Description
The CICS transaction TOJA provides online access to the BIM-EPIC job
accounting database.
TOJA consists of the following four panels:
Job Selection
Job Overview
Program Overview
Program Audit
The Job Selection panel is an entry panel. It allows you to select a job or a
set of jobs for display. The rest of the panels display job accounting
information at increasing levels of detail.
Panels
The following is an example of the Job Selection panel.
BIM-EPIC/VSE ONLINE JOB ACCOUNTING FACILITY
ENTER JOB NAME TO DISPLAY
ENTER (EOB) FOR ALL JOBNAMES FROM START OF FILE
ENTER PARTIAL JOBNAME FOR GENERIC DISPLAY
ENTER JOBNAME FOR SINGLE JOB DISPLAY
The highest level, the Job Overview panel, displays an overview of one or
more jobs.
BIM-EPIC/VSE ONLINE JOB ACCOUNTING FACILITY
.ALL
JOB NAME
CATOJA
CATPRV
CATSDS
CICSEPIC
CICSEPIC
CICSEPIC
CICSEPIC
CICSEPI3
CICSICCF
CLEARRF
11-12
PHASE NAME START DATE START TIME
DURATION CC PT
LNKEDT
11/17/1997
08:50:19
00:00:11 10 F4
LNKEDT
11/18/1997
10:19:24
00:00:21 10 F7
LNKEDT
11/18/1997
10:19:28
00:00:22 10 F8
DTSANALS
11/18/1997
06:17:02
00:00:08 10 F2
IESWAITT
11/18/1997
06:17:10
00:00:14 10
DFHSIP
11/18/1997
06:17:25
02:30:32 17
DTSANALS
11/18/1997
09:04:49
00:00:10 10 F2
IESWAITT
11/18/1997
09:05:00
00:00:04 10
DFHSIP
11/18/1997
09:05:04
00:06:37 17
DTSANALS
11/18/1997
09:12:29
00:00:03 10 F2
IESWAITT
11/18/1997
09:12:33
00:00:01 10
DFHSIP
11/18/1997
09:12:34
00:10:39 17
DTSANALS
11/18/1997
09:24:19
00:00:06 10 F2
IESWAITT
11/18/1997
09:24:26
00:00:02 10
DTSANALS
11/17/1997
08:19:40
00:00:52 10 F2
IESWAITT
11/17/1997
08:20:33
00:00:53 10
DTSANALS
11/18/1997
06:07:49
00:00:03 10 F2
IESWAITT
11/18/1997
06:07:53
00:00:23 10
DFHSIP
11/18/1997
06:08:16
00:03:37 18
TSIDRFS
11/14/1997
10:47:16
00:00:01 10 F4
PF3=END PF5=DETAIL PF7=BACKWARD PF8=FORWARD
Connectivity Systems, Inc.—Copyright © 2006
Use Pursuant to Company Instructions
AR
002
002
002
002
000
000
000
000
000
000
000
000
000
000
000
000
000
000
000
000
PAGE 02
CPU ID
444444
333333
333333
222222
222222
222222
222222
444444
222222
444444
User Reference
CICS Access to Job Accounting Database
At the next level, the Program Overview panel displays an overview of
the steps executed in a single job.
BIM-EPIC/VSE ONLINE JOB ACCOUNTING FACILITY
.ALL
PAGE 02
JOB NAME --------- CATSDS
CPUID ----------- 333333
START DATE ------- 11/18/1997
START TIME ------- 10:19:28
STOP TIME -------- 10:19:50
DURATION -------- 00:00:22
CANCEL CODE (HEX) ------ 10
PHASE NAME ---------- LNKEDT
PARTITION ----------- F8
END DATE ------------ 11/18/1997
CPU TIME ------------ 00:00:01:5
OVERHEAD ------------ 00:00:00:8
ALLBOUND ------------ 00:00:00
PHASE CODE -- L (S=STEP L=LAST)
PHASE SEQ --- 0001
********** INPUT OUTPUT TABLES **********
400
FEC
01F
140
141
142
160
00000155 00000012 00000007 00000073 00000183 00000378 00000100
173
FEE
00000132 00000228
*****************************************
USER INFORMATION -------NUMBER OF AUDIT RECORDS FOR THIS PHASE -- 002
USE PF5 TO VIEW AUDIT RECORDS
PF3=END
PF5=DETAIL
PF7=BACKWARD
PF8=FORWARD
Finally, the Program Audit panel displays the datasets used by a single
program.
BIM-EPIC/VSE ONLINE JOB ACCOUNTING FACILITY
FILEID
REC CREATION OPEN
EXPIRY
SERIAL REEL
END
DTF
PROCESSED
TYPE
TIME CLOSE CUU
DATE
ACCEPTED TRACK TRACK TYPE
*****************************************************************************
3F8.IJSYSLN
DO 10:19:29 C
400 11/18/1997 EPV400 030474 010000 32
3F8.IJSYSLN
DI 10:19:47 C
400 11/18/1997 EPV400 030474 010000 32
PF2=BACKWARD
PF4=END
See BIM-EPIC Report Fields and Examples for additional information
describing the fields displayed on these panels.
User Reference
Connectivity Systems, Inc.—Copyright © 2006
Use Pursuant to Company Instructions
11-13
CICS Access to Job Accounting Database
Accessing Job
Accounting
Database
To access the Job Accounting Database:
Step
Action
1
From a CICS terminal, enter the TOJA transaction. The Job
Selection panel displays.
2
To view all jobs, press Enter.
To view several jobs beginning with the same character string,
enter the string and press Enter.
To view a single job, enter the job name and press Enter.
Navigating in
TOJA
To navigate using TOJA:
Press
Action
F8
To move forward in a panel
F7
To move backward in a panel.
F5
To move to the next level of detail, place the cursor on the
item you want to display.
ENTER To move back a level of detail.
CLEAR To exit TOJA.
or F3
11-14
Connectivity Systems, Inc.—Copyright © 2006
Use Pursuant to Company Instructions
User Reference
12
Managing Tape Volumes
To protect controlled datasets effectively, BIM-EPIC controls the tape
volumes where the controlled datasets reside. BIM-EPIC also protects the
tape volume serial numbers. Every tape that contains a
BIM-EPIC-controlled dataset is recorded in the DSN Catalog. Tapes are
identified by volume serial number and controlled at the version level
under the dataset name they contain. Tape volume serial numbers are
cataloged individually, as they are used for controlled datasets or
initialized with TSIDINIT. BIM-EPIC provides utilities to assist you in
labeling, initializing, pooling, and vaulting controlled tapes. This chapter
describes BIM-EPIC tape control and tape protection utilities.
Chapter Contents
Tape Utilities and Commands
Tape Controls
Tape Print Requirements
Tape Vaulting Processes
Tape Reports
User Reference
Connectivity Systems, Inc.—Copyright © 2006
Use Pursuant to Company Instructions
12-1
Managing Tape Volumes
Tape Utilities and Commands
Tape Control and Protection Utilities
Tape Volume
Serial Numbers
Every tape volume used to write a BIM-EPIC-controlled dataset must
have a unique volume serial number. Even unlabeled tapes must be
identified with their own volume serial numbers. This identification is
essential for tape volume control.
Volume serial numbers can be any six-character combination of
alphanumeric characters. Groups of volume serial numbers do not need to
be consecutive; any unique volume serial number is valid. Tape pools are
defined within volume serial number ranges. Therefore, it can be helpful
to initialize pooled tape volumes with consecutive volume serial numbers.
Recognizing
and Controlling
Tape Volumes
When a tape volume is brought under BIM-EPIC control, BIM-EPIC
gives the tape volume a special VOL1 label which identifies the volume
as BIM-EPIC controlled and protects it against accidental overwrites.
BIM-EPIC looks for a controlled tape volume when performing
Automatic Volume Recognition (AVR). First, BIM-EPIC looks for the
special VOL1 label. If BIM-EPIC does not find the label, BIM-EPIC
checks the DSN Catalog to see if the tape was created by CA-EPIC for
CMS. If the tape was created by CA-EPIC for CMS, the volume is
accepted. If the tape was not created by CA-EPIC for CMS, BIM-EPIC
prompts the operator to specify a tape drive and requests the operator to
verify the volume serial number of the tape on that drive.
Unlabeled tapes do not have this special VOL1 label. As a result,
BIM-EPIC requires the operator to specify the drive containing the
volume and to verify the volume serial number every time unlabeled
processing is requested.
If an uncontrolled tape volume has a HDR1 label that has expired,
BIM-EPIC can use the tape, but prompts the operator to verify the volume
serial number. If that volume serial number duplicates a volume serial
number already in the DSN Catalog, the operator is asked to enter a new
volume serial number.
HDR1 Labels
and Retention
12-2
BIM-EPIC writes an expiration date of 99365, indicating permanent
retention on every HDR1 label created under BIM-EPIC control. This
helps to protect the tape from being overwritten when EPIC is not active.
BIM-EPIC uses the DSN Catalog, not the HDR1 label, to determine the
volume status of each tape as active or scratch.
Connectivity Systems, Inc.—Copyright © 2006
Use Pursuant to Company Instructions
User Reference
Managing Tape Volumes
Scratch Tapes
Scratch tapes are produced by the SCRATCH function of TSIDUTL,
TSIDMNT, and Online Manager. TSIDUTL DSPLY SCRATCH
produces a report listing of all available scratch tapes. TSIDUTL
PSCRATCH creates a report projecting which tapes will be eligible for
scratch on a certain date.
See the BIM-EPIC Installation and System Guide for additional
information describing the TSIDUTL JCL requirements.
Tape Pooling
You can use tape pooling to group similar types of tapes into tape pools.
For example, your ACL-resident tapes could constitute one pool, TPA
tapes another pool, 3490E tapes a third pool, and so forth. Datasets are
assigned to tape pools through the DSN Catalog. When a pooled dataset is
created, BIM-EPIC automatically requests the operator to mount a scratch
tape from the appropriate pool.
Tape pools are established using the TSIDPOL macro and the TAPPOL
configuration option. Each pool is given a one-character pool ID, A to Z
or 0 to 9, and is assigned one or more volume serial number ranges.
If a volume serial number falls within a pool range, the tape belongs to
that pool. A pool tape can be used only to write datasets assigned to that
pool. If a volume serial number does not fall in any of the defined ranges,
the tape is not a pool tape. The volume serial number can be used only to
write datasets that are not assigned to a tape pool.
Datasets can be assigned to tape pools through Online Manager,
TSIDMNT CAT and UPD functions, or by using OPTION=TPL=x on a
DD statement.
Tape
Ownership
The tape ownership feature provides another form of tape volume
association. Owner ID, a two-character code, is used as the first two
characters in a volume serial number.
When a DSN/Job Cross-Reference report dataset is cataloged with an
owner ID, it can be written only on tapes with volume serial numbers
which begin with the specified owner ID code.
Tape ownership is different from tape pooling because a pool tape can be
used only for datasets assigned to that pool. Tape ownership does not
restrict the use of tapes in that way, only the serial number is restricted.
The tape can be used for any dataset.
Specifying Tape
Size
User Reference
For reel tape volumes you can restrict datasets to small or large tapes with
the size specification feature.
Connectivity Systems, Inc.—Copyright © 2006
Use Pursuant to Company Instructions
12-3
Managing Tape Volumes
Small tapes are distinguished by their volume serial numbers which must
end with the character S. Large tapes have no restrictions to their volume
serial numbers. You can designate that a dataset should be written to
small tapes with online or manual catalog maintenance using the Tape
Size field.
Revolving Tape
Datasets
In some cases, you may want to use a specific set of tapes for a dataset to
ensure all versions of that dataset are contained on that specific set of
tapes only. This grouping is referred to as a revolving tape dataset.
The TSIDMNT CATALOG function or Online Manager CATALOG
function contains the parameter REV that allows you to define revolving
datasets.
Specifying REV=YES for a dataset establishes an exclusive relationship
between the dataset and the tapes used by the dataset. A revolving tape
can be used only to write its own dataset. A revolving tape dataset can be
written only on its own tapes.
If the dataset is new or does not have enough volumes in its revolving set,
you can use the Online Manager or TSIDMNT ADD function to add new
tapes and then use SCRATCH to scratch the tapes. These volume serial
numbers are now part of the datasets revolving set. Revolving tape
datasets cannot be used for ACL-resident tapes.
Multi-Dataset/
Multi-Volume
Processing
BIM-EPIC supports multi-dataset, multi-volume, and
multi-dataset/multi-volume processing. A tape volume that contains a
dataset that is a member of a multi-dataset group cannot be scratched until
all datasets in the group have been scratched.
Work Tape
Datasets
A work tape dataset has been cataloged with the attribute WRK=YES or
defined with DISP=(NEW,DELETE) on a DD statement. A work tape
dataset can be written on any available scratch tape. The data on a work
tape is not usually saved after the end of the job in which the tape was
created. Under normal conditions, there is no need to place an external
dataset label on a work tape. For this reason, the EP005 message,
**LABEL**, is not issued for work tapes unless configuration option
EPS043=YES is used.
Assigning Tape
Drives
BIM-EPIC uses Automatic Volume Recognition (AVR) to automatically
search available tape drives for a required output or input tape volume
whenever a program issues an OPEN request. When AVR locates the
required volume, BIM-EPIC makes the necessary VSE assignment. When
the program issues a CLOSE request, BIM-EPIC releases the assignment
and makes the drive available to other programs unless directed otherwise
by a parameter on the TLBL statement or DD statement.
12-4
Connectivity Systems, Inc.—Copyright © 2006
Use Pursuant to Company Instructions
User Reference
Managing Tape Volumes
It is the responsibility of the operator to ensure that tape drives are
available when BIM-EPIC searches for a tape. A tape drive is available if
the drive:
Contains a valid tape—a tape is considered valid if the volume
serial number is in the DSN Catalog or the tape has been
initialized by TSIDINIT or DITTO
Is not in the device down status
Is not attached to any virtual machine (if Autoattach is ON), or is
attached to the machine running the job (if Autoattach is OFF)
Is not assigned to any partition
Is ready and at load point
Supports the mode setting specified for the dataset
Under most circumstances, you do not need to make drive assignments
with the VSE ASSGN statement. If Autoattach is on, you should avoid
using VM/CP ATTACH or DETACH to control the tape drives. Instead,
ensure that all drives are in the “detached” state and let BIM-EPIC do the
work for you.
If Autoattach is on and you use VM/CP ATTACH, you must issue
VM/CP DETACH for the tape drive when you are finished, so that
BIM-EPIC can use the drive in another virtual machine.
BIM-EPIC uses AVR only for controlled tapes. If the required tape is not
a BIM-EPIC-controlled tape, the operator will be prompted to specify the
address of the tape drive to use.
User Reference
Connectivity Systems, Inc.—Copyright © 2006
Use Pursuant to Company Instructions
12-5
Attention Routine Commands
Attention Routine Commands
Description
Certain BIM-EPIC services can be invoked by commands that the
operator issues through the VSE Attention Routine (AR).
Command
Summary
The BIM-EPIC AR commands are:
Command
Description
EP ? (or EP HELP)
Displays help information for BIM-EPIC AR
commands.
EP END STname
Terminates a BIM-EPIC Dispatcher subtask.
name is the name of the subtask being ended.
Note: This command should be used only when
directed by BIM-EPIC Technical Support.
EP END TASK
Ends BIM-EPIC Dispatcher processing.
EP REW,cuu
Rewinds the selected tape drive.
EP RUN,cuu
Unloads the selected tape drive.
EP STATUS[,cuu]
Displays status of all accessible tape drives or of a
particular tape drive.
EP TRACEACLON Starts or stops a trace of BIM-EPIC ACL
EP TRACEACLOFF routines.
Note: This command should be used only when
directed by BIM-EPIC Technical Support.
EP TRACEON=xx
Starts or stops a trace of BIM-EPIC routines.
EP TRACEOFF=xx xx is the partition ID where the trace will run.
Note: This command should be used only when
directed by BIM-EPIC Technical Support.
EP TRQ CANCEL n Deletes a work request that has not been
processed by the BIM-EPIC Dispatcher.
The variable n is the identification number of the
request to be deleted. It is obtained using the EP
TSTAT command.
EP TSTAT
Entering
Commands
Displays any work requests waiting to be
processed by the BIM-EPIC Dispatcher.
BIM-EPIC AR commands must begin with EP followed by a space. For
example, the following command unloads a tape on drive 881.
EP RUN,881
EP930 Message
12-6
When using EP commands the warning message EP930 UNABLE TO
OBTAIN LOCK - COMMAND BYPASSED may be issued on some
systems when heavy activity is occurring, particularly when two physical
Connectivity Systems, Inc.—Copyright © 2006
Use Pursuant to Company Instructions
User Reference
Attention Routine Commands
CPUs are active with SHARE=YES. Because an AR cannot wait for a
successful lock, BIM-EPIC issues this warning message when it cannot
obtain a lock immediately. If you receive this warning message, try the
command again.
User Reference
Connectivity Systems, Inc.—Copyright © 2006
Use Pursuant to Company Instructions
12-7
FREE and STATUS Commands
FREE and STATUS Commands
Description
In addition to providing status information using Attention Routine (AR),
BIM-EPIC also allows the operator to respond with FREE or STATUS to
many BIM-EPIC messages.
The FREE command lists all tape drives that are:
In READY status or with no tape mounted
Not assigned to any partition
Not attached to any other machine
The STATUS command lists the current status of each tape drive.
12-8
Connectivity Systems, Inc.—Copyright © 2006
Use Pursuant to Company Instructions
User Reference
FREE and STATUS Commands
Tape Controls
Mounting Tapes
Description
BIM-EPIC controls which tapes can be used for output. BIM-EPIC
checks the volume serial number of every tape processed. If the tape
mounted is controlled, its volume serial number is checked with its
corresponding DSN Catalog entry to ensure that the tape is in scratch
status before being used as output.
If the tape is uncontrolled, BIM-EPIC checks to determine if the volume
serial number exists in the DSN Catalog. If the volume serial number
does not exist, the tape is cataloged and used automatically if
configuration option EPS033 is not set to YES. If the volume serial
number exists in the catalog, BIM-EPIC issues a message to allow the
operator to enter a new volume serial number.You do not need to
pre-initialize the tapes to put them under BIM-EPIC control.
This is not true for ACL-resident tapes. These volumes must have been
pre-processed by one of the following methods:
Initialized by the TSIDINIT utility
Added to the catalog using Online Manager or TSIDMNT and
setting configuration option EPS033=YES
See the BIM-EPIC Installation and User Guide for detailed information
on adding volumes to a catalog using Online Manager or TSIDMNT and
setting configuration option EPS033=YES.
Configuration option UNCTAP affects uncontrolled tape handling.
Requesting a
Previous
Version
To request the previous version of a dataset, type RERUN in response to a
request for a tape mount. A new tape mount request will be issued for the
previous version.
Example
If a tape mount request is issued for version 1 and you reply RERUN, a
new request is issued for version 2. You can reply RERUN as many times
as there are versions for the dataset.
User Reference
Connectivity Systems, Inc.—Copyright © 2006
Use Pursuant to Company Instructions
12-9
FREE and STATUS Commands
Requesting a
Specific
Version
To request a specific version, type RERUN,n in response to a request for
a tape mount, where n is the number of the version requested.
Example
To issue a new tape mount request for version number 3, type RERUN,3.
Using ACCEPT
The operator has the option to reply with ACCEPT to a mount request to
force BIM-EPIC to use any desired volume. Each time ACCEPT is used,
a notation is made in the TSIDBRP Accepted Tapes report. The use of the
ACCEPT reply is governed by the ACCEPT configuration option.
!
WARNING:
ACCEPT=YES disables BIM-EPIC’s supervision of the input
process and places responsibility for tape selection in the hands
of the operator.
12-10
Connectivity Systems, Inc.—Copyright © 2006
Use Pursuant to Company Instructions
User Reference
Initializing Tapes for BIM-EPIC Control
Initializing Tapes for BIM-EPIC Control
Description
TSIDINIT initializes tapes with BIM-EPIC VOL1 labels and enters the
labels in the DSN Catalog under the dataset name
***.VOLUME.DSN.***. The tapes can then be used as controlled
scratch tapes.
Up to 10 tape drives can be used in the initialization process.
TSIDINIT can be executed from JCL or from the operator console. If
TSIDINIT is executed from the console, the operator is prompted for all
processing information.
To execute from the console, after any VSE ‘// PAUSE’ statement, type
the following command:
EXEC TSIDINIT
JCL
Requirements
The following is an example of the JCL requirements for initializing tapes
for BMI-EPIC control.
// UPSI xxxx
// EXEC TSIDINIT [,PARM='CONSOLE']
or
// EXEC TSIDINIT [,PARM='ACL=aclname[,COUNT=nnnnn]']
cuu statement
volser statements
/*
UPSI Values
Types of
Initialization
User Reference
The following UPSI values can be used to initialize tapes for BIM-EPIC
control.
Value
Function
1xxx
Specifies sequential initialization
0xxx
Specifies random initialization
x1xx
Specifies forced initialization
xxx1
Specifies scratch tape reinitialization
xx1x
Specifies inclusion of the cuu statement
x0101
Specifies use of an ACL for initialization
When you want to initialize more than one tape, you can specify the tape
volume serial number for each tape in individual control statements, in
any order. This format is referred to as random initialization. Or, if you
specify the starting volume serial number, TSIDINIT will initialize
successive tapes in ascending volume serial number sequence. This
format is referred to as sequential initialization.
Connectivity Systems, Inc.—Copyright © 2006
Use Pursuant to Company Instructions
12-11
Initializing Tapes for BIM-EPIC Control
In sequential initialization, TSIDINIT continues to initialize tapes until
the operator replies STOP to the mount message.
Sequential initialization requires the last four characters of the volume
serial number be numeric, for example, EP1200 or A67019. Random
initialization places no restrictions on the volume serial number.
TSIDINIT normally checks the actual volume serial number of each tape
before writing to the tape to ensure that an active tape is not initialized by
mistake. This check also protects against the creation of duplicate volume
serial numbers. If one of the specified volume serial numbers already
exists in the DSN Catalog, BIM-EPIC issues an error message and
requests a new volume serial number.
Forced initialization is used if you are initializing new tapes that have not
been previously initialized. Forced initialization directs TSIDINIT to
bypass any attempt to read data from the volume and to immediately
initialize the volume with the requested volume serial number.
!
WARNING:
Forced initialization should be used with caution because it
bypasses tape label checking. This may cause active data to be
lost if the wrong tape is mounted. If the volume serial number
already exists in the DSN Catalog, TSIDINIT issues an error
message. The resulting tape will contain only tape marks.
If it is necessary to reinitialize a tape that is currently in scratch status,
execute TSIDINIT with UPSI xxx1.
If the initialization process is for ACL-resident tapes:
12-12
PARM=’CONSOLE’ cannot be used. The cuu and volume serial
information must be submitted via SYSIPT statements.
PARM=’ACL=aclname’ or
PARM=’ACL=aclname,COUNT=nnnnn’ must be present on
the // EXEC statement.
Random initialization, sequential initialization, and forced
initialization are permitted. Forced initialization should be used
with caution. If a volume serial number should accidentally be
specified for an existing volume serial number containing an
active dataset or if the volume serial number is owned by another
operating system or machine, EPIC will initialize the volume
serial number and its existing data will be lost.
If multiple ACLs are present, only one ACL can be used in a
TSIDINIT execution. If concurrent TSIDINIT executions are to
be done, each execution should specify a different ACL name.
Connectivity Systems, Inc.—Copyright © 2006
Use Pursuant to Company Instructions
User Reference
Initializing Tapes for BIM-EPIC Control
Parameters
For non-virtual ACLs, a robot reads the cartridge barcodes. This
requires the volume serial numbers specified to TSIDINIT match
the appropriate barcodes.
PARM='CONSOLE' can be specified on the VSE EXEC statement to
allow the operator to control initialization from the console. This has the
same effect as entering EXEC TSIDINIT after a VSE // PAUSE’
statement.
PARM=’ACL=aclname[,COUNT=nnnnn]’
ACL= must precede COUNT=
Definitions
CUU Statement
The following provides definitions for the parameters you can use when
initializing tapes.
Parameter
Definition
aclname
Designates the ACL to use for initialization. The
aclname must be same as the ACLNAME
parameter used in defining the cuu in the EPIC
Resource Dataset (ERD).
COUNT
Designates the number of volumes to initialize. Use
COUNT only in sequential initializations. COUNT is
ignored if present for random initializations. A
maximum of 99,999 volumes can be initialized in a
TSIDINIT execution. When deciding the number of
volumes to initialize in one execution, consider the
time involved in robotic mount/demount activity.
Under normal conditions, the operator is prompted to specify which tape
drives to use. Up to ten drives can be specified. However, if specific tape
drives should not be used, a cuu statement can eliminate operator
intervention.
If an ACL is used, operator intervention is not required. After a volume is
initialized, the volume is unloaded via a RUN command. After the RUN
completes, a robot “return to slot” action takes place. During this time,
another mount cannot take place until the return action is finished. It is
recommended that a minimum of two and no more than three drive
addresses (cuu) be used during a TSIDINIT execution.
The operator must verify that the ACL device addresses specified in the
cuu statements are not in use when TSIDINIT executes.
If the action takes place in a VM environment, the device addresses must
not be attached to a guest machine other than the machine in which
TSIDINIT executes. If unattached, TSIDINIT will attach the device
addresses when it begins execution and detach the devices when finished
executing.
User Reference
Connectivity Systems, Inc.—Copyright © 2006
Use Pursuant to Company Instructions
12-13
Initializing Tapes for BIM-EPIC Control
Syntax
The following is an example of a cuu statement syntax.
CUU=cuu,cuu,cuu,...
The cuu statement requires UPSI xx1x in the JCL.
VOLSER
Statements
VOLSER statements identify which volume serial numbers are written in
the VOL1 label.
If random initialization is requested, one VOLSER statement is required
for each volume serial number. If sequential initialization is requested,
use only one statement to specify the starting volume serial number.
Examples
The following example shows how TSIDINIT performs sequential
initialization of uncontrolled tapes that have labels or tape marks.
TSIDINIT initializes the first tape with the volume serial number
EP0001, the second tape with the volume serial number EP0002, the third
tape with the volume serial number EP0003, and so on until the operator
stops the process. In addition, TSIDINIT does label checking to ensure
that the tape does not contain an active dataset and then checks the DSN
Catalog to ensure that there is no duplication of the volume serial number
before initializing each tape.
// JOB INITTAPE
// UPSI 1000
// EXEC TSIDINIT
EP0001
/*
/&
The following example shows how TSIDINIT performs random
initialization of uncontrolled tapes that do not have labels or tape marks.
TSIDINIT initializes the first tape with the volume serial number
PR0001, the second tape with the volume serial number PR0024, the third
tape with the volume serial number PR0047. TSIDINIT does not prevent
duplication of the volume serial number and does not perform label
checking to ensure that the tapes mounted are valid scratch tapes.
// JOB INITTAPE
// UPSI 0100
// EXEC TSIDINIT
PY0001
PY0024
PY0047
/*
/&
The following example shows how TSIDINIT uses an ACL to do
sequential initialization of tapes not in the BIM-EPIC Catalog that have
labels or tape marks. TSIDINIT initializes the first tape with volume
serial number SR0010, the second with the volume serial number
SR0011, and so on until 10 volumes have been initialized, for example,
SR0010 through SR0019.
12-14
Connectivity Systems, Inc.—Copyright © 2006
Use Pursuant to Company Instructions
User Reference
Initializing Tapes for BIM-EPIC Control
// JOB INITTAPE
// UPSI 10101
// EXEC TSIDINIT,PARM=’ACL=B1VTS,COUNT=10’
CUU=480,481
SR0010
/*
/&
The following example shows how TSIDINIT uses an ACL to do random
initialization of tapes not in the BIM-EPIC Catalog that have labels or
tape marks. TSIDINIT initializes the first tape with volume serial number
JCSR09, the second with WXY981, and so on until all volume serial
number specifications have been read.
// JOB INITTAPE
// UPSI 00101
// EXEC TSIDINIT,PARM=’ACL=A2ATL’
CUU=480,481
JCSR09
WXY981
…..
…..
/*
/&
The following example shows how TSIDINIT uses an ACL to do random
initialization of tapes not in the BIM-EPIC Catalog that do not have labels
or tape marks or those created as the result of forced initialization.
TSIDINIT initializes the first tape with volume serial number JCSR09,
the second with WXY981, and so on until all volume serial number
specifications have been read.
// JOB INITTAPE
// UPSI 01101
// EXEC TSIDINIT,PARM=’ACL=A2ATL’
CUU=480,481
JCSR09
WXY981
…..
…..
/*
/&
User Reference
Connectivity Systems, Inc.—Copyright © 2006
Use Pursuant to Company Instructions
12-15
Initializing Tapes for BIM-EPIC Control
Tape Print Requirements
Printing External Volume Serial Labels (TSIDLBL)
Description
TSIDLBL creates external volume serial number labels in large block
characters. These labels contain the volume serial number and a short
comment, which is optional.
Standard spacing for each label is one line for the comment, seven lines
for the volume serial number, and two blank lines between labels.
Example
The following is an example of a volume serial number label.
THIRTY CHARACTER COMMENT
****
****
****
*
* *
* *
*
* *
* *
****
****
* *
*
*
* *
*
*
* *
****
*
****
JCL
Requirements
****
* *
* *
* *
* *
* *
****
****
* *
* *
* *
* *
* *
****
*
**
*
*
*
*
*
The following is an example of the JCL requirements for printing external
volume serial labels manually.
[// UPSI 1]
// EXEC TSIDLBL
control statements
/*
UPSI Value
UPSI 1 causes the printer to skip to channel 1, top-of-form, after each
label. This allows you to use labels of any size. When UPSI 1 is used,
TSIDLBL assumes that the printer has a correctly loaded forms control
buffer or carriage control tape that defines the size of the labels.
Syntax
The following is an example of a request for external volume serial
number labels.
volser[-volser] [ comment ]
Parameters
12-16
The following provides a description of the parameters you can use when
printing external volume labels.
Parameter
Required?
Valid Entry
Default
volser-volser
Yes
1 to 6 characters
None
comment
No
1 to 30 characters
None
Connectivity Systems, Inc.—Copyright © 2006
Use Pursuant to Company Instructions
User Reference
Initializing Tapes for BIM-EPIC Control
Definitions
The following provides definitions for the parameters you can use when
printing external volume labels.
Parameter
Definition
volser [ -volser ] Specifies the range of volume serial numbers
for the labels you want to create. If you want to
create only one label, omit the hyphen and
second volser. The last four characters in the
volume serial number must be numeric.
comment
Example
Specifies the comment to be printed on each
label.
The following is an example showing how EP0001-EP0100 DSN
CONTROLLED indicates that one label is to be created for each volume
serial number from EP0001 to EP0100, inclusive. Each label in this series
will contain the comment DSN CONTROLLED.
PR0001-PR0050 PAYROLL indicates that one label is to be created for
each volume serial number from PR0001-PR0050, inclusive. Each label
in this series will contain the comment PAYROLL.
// JOB PRINTLBL
// EXEC TSIDLBL
EP0001-EP0100 DSN CONTROLLED
PR0001-PR0050 PAYROLL
/*
/&
Printing Labels
Automatically
With BIM-EPIC, you can create external labels automatically when
datasets are opened for output.
You can create labels in a batch partition or through CICS. TSIDBPR
creates labels in a batch partition. TSIDPRT creates labels through CICS.
Automatic label creation requires you to write a subroutine. See the
BIM-EPIC Installation and System Guide for installation and subroutine
requirements. External label creation is enabled using the RMNTPRT
configuration option.
Creating Labels
in a Batch
Partition
You can execute TSIDBPR in any partition. However, you must use a
partition which is not needed for other jobs, since TSIDBPR remains
active in that partition until it is deactivated.
To deactivate TSIDBPR, execute TSIDPEN in any partition. This
terminates TSIDBPR and releases the label printer.
Creating Labels
in CICS
User Reference
TSIDPRT can be activated automatically through the CICS PLTPI table.
Connectivity Systems, Inc.—Copyright © 2006
Use Pursuant to Company Instructions
12-17
Initializing Tapes for BIM-EPIC Control
If TSIDPRT is not activated using the PLTPI, enter the TPRT transition
from a CICS terminal. When you activate TSIDPRT using this method,
the terminal you use is not released until the TPRT is deactivated or until
CICS is terminated.
To deactivate TPRT, execute TSIDPEN in any available partition. This
releases the label printer and any terminal used by TPRT.
12-18
Connectivity Systems, Inc.—Copyright © 2006
Use Pursuant to Company Instructions
User Reference
Initializing Tapes for BIM-EPIC Control
Tape Vaulting Processes
Tape Vaulting
Description
The BIM-EPIC vaulting subsystem controls tape vaulting automatically.
This section presents an overview of the programs and procedures
involved with tape vaulting.
Components
Vault locations are established using the VAULTDEF macro, which
defines the name and, if necessary, the size of each vault and the number
of slots each vault contains. Vaults are identified by integers. BIM-EPIC
assigns vault numbers to each vault in the sequence defined by the
VAULTDEF macro.The first vault is referred to as Vault 0 (zero) and/or
Main Vault.
Vaulting methods are established using the METHOD macro. Each
method defines a distinct sequence of vault locations for all versions of a
dataset vaulted with that method.
VAULTDEF and METHOD are documented in the BIM-EPIC
Installation and System Guide.
Using Vaulting
A dataset is designated for vaulting using its DSN Catalog definition. If a
dataset has a method specified, the associated versions are vaulted
automatically whenever the vault movement program is run.
TSIDVLT moves cataloged tape volumes to their new vault locations and
slot numbers if defined. In addition, TSIDVLT creates two vault
movement reports. Sorted by vault location, each report lists only the
tapes which need to be moved.
The two vaulting reports are:
Vaulting ACL
Cartridges
User Reference
Report
Displays...
Picking List
Tapes listed by their current vault and slot location and
indicating the vault and slot destination where each
tape is to be moved.
Receiving List
Tapes listed by their newly assigned vault and slot
destinations and indicating the current vault and slot
where each tape can be found.
If a non-virtual Automated Cartridge Library (ACL) is supported,
TSIDVLT also writes the volume serial numbers of all cartridges moved
Connectivity Systems, Inc.—Copyright © 2006
Use Pursuant to Company Instructions
12-19
Initializing Tapes for BIM-EPIC Control
from Vault 0 in the BIM-EPIC ACL Inventory Management library
member. At a later time, these volumes can be ejected from the ACL
using EP ACL EJECT command or TSIDUTL ACLEJECT function. See
the BIM-EPIC Installation and System Guide for additional information.
Additional
Reports
12-20
Reports listing current vault inventories can be created using TSIDUTL.
TSIDPRV creates a report that cross-references datasets with the vaulting
methods assigned to them.
Connectivity Systems, Inc.—Copyright © 2006
Use Pursuant to Company Instructions
User Reference
Assigning Vaulting Methods to Datasets
Assigning Vaulting Methods to Datasets
Description
User Reference
After vaults and vaulting methods have been defined, the methods must
be assigned to datasets before automatic vaulting can occur. Vaulting
methods are assigned to datasets using Online Manager or TSIDMNT
CATALOG or TSIDMNT UPDATE functions.
If you are using Online Manager, place the vault method number
in the Vault Method field of the BIM-EPIC dataset definition
(EDD).
If you are using TSIDMNT, use the VLT parameter to supply the
vault method number to the EDD.
Connectivity Systems, Inc.—Copyright © 2006
Use Pursuant to Company Instructions
12-21
Moving Volumes (TSIDVLT)
Moving Volumes (TSIDVLT)
Description
JCL
Requirements
TSIDVLT creates movement reports when moving tapes from one vault
to another. TSIDVLT should be executed daily. TSIDVLT can be
instructed to:
perform actual vaulting actions. A report is produced describing
the vault movements that occurred.
perform projected vaulting actions. A report is produced
describing what movements would take place, but no actual
vault/slot movement occurs.
The following is an example of the JCL requirements for moving
volumes.
// DLBL SORTWK1...
// EXTENT SYS001
// EXEC TSIDVLT
control statements
Control
Statements
Dataset
Requirements
12-22
Four input control statements are provided to tell TSIDVLT what action
to take. The control statements are read from SYSIPT and can begin in
any column. Only one control statement can be used in an execution of
TSIDVLT. A control statement must be present; however, there is no
default.
Control Statement
Function
MOVESLT
Performs vault movement and produces a report
sorted by vault and slot number
MOVESER
Performs vault movement and produces a report
sorted by volume serial number
PROJSLT
Performs no vault movement, but produces a
report of what movement would occur, sorted by
vault and slot number
PROJSER
Performs no vault movement, but produces a
report of what movement would occur, sorted by
volume serial number
SORTWK1 is required.
Connectivity Systems, Inc.—Copyright © 2006
Use Pursuant to Company Instructions
User Reference
Moving Volumes (TSIDVLT)
Example
The following is an example of a TSIDVLT control statements.
// JOB VAULTMOV
// DLBL SORTWK1,'===.SORTWK1,(D)'
// EXTENT SYS001
// EXEC TSIDVLT
MOVESLT
/*
/&
User Reference
Connectivity Systems, Inc.—Copyright © 2006
Use Pursuant to Company Instructions
12-23
Reporting Current Locations of Vaulted Tapes
Reporting Current Locations of Vaulted Tapes
Description
12-24
The TSIDUTL DSPLY function creates reports which provide vault
information for tape volumes. These reports can select and display tape
datasets by vault.
Parameter
Action
Example
ALL
Lists vault information for all
tape datasets.
DSPLY ALL,SEQ=DSN
VAULT
Lists the tapes contained in
every vault except vault 0
(main library). When
SEQ=VAULT is specified,
tapes are listed in vault and slot
sequence. A page break occurs
after each vault.
DSPLY VAULT,SEQ=VAULT
VLT
Lists the contents of a single
vault.
DSPLY ALL,VLT=2,SEQ=DSN
Connectivity Systems, Inc.—Copyright © 2006
Use Pursuant to Company Instructions
User Reference
Manually Controlled Vaults
Manually Controlled Vaults
Description
A manually controlled vault is any vault whose number is greater than the
value of the AVAULTS parameter in the VAULTDEF macro. Since
BIM-EPIC does not recognize manually controlled vaults, the vaults must
be manually maintained by the user.
Any version of any dataset can be moved to a manually controlled vault.
Tapes are moved to or from manually controlled vaults using the Online
Manager or TSIDMNT MOVE function.
!
WARNING:
If a dataset is under the control of an automatic vaulting method,
TSIDVLT executions override any manual vaulting.
User Reference
Connectivity Systems, Inc.—Copyright © 2006
Use Pursuant to Company Instructions
12-25
Vault To Dataset Cross-Reference Report (TSIDPRV)
Vault To Dataset Cross-Reference Report (TSIDPRV)
Description
TSIDPRV produces the Vault Method report. This report lists the
vaulting method for each dataset, in dataset name sequence. For a dataset
to appear on this report, the dataset must have a vaulting method assigned
to it in the DSN Catalog.
JCL
Requirements
The following is an example of the JCL requirements for creating a Vault
to Dataset Cross-Reference report.
// DLBL SORTWK1...
// EXTENT SYS001
// EXEC TSIDPRV
UPSI Values
There are no UPSI values.
Dataset
Requirements
SORTWK1 is required.
Example
The following is an example of the dataset requirements using
SORTWK1.
//
//
//
//
/&
12-26
JOB VLTMETH
DLBL SORTWK1'===.SORTWK1,(D)'
EXTENT SYS001
EXEC TSIDPRV
Connectivity Systems, Inc.—Copyright © 2006
Use Pursuant to Company Instructions
User Reference
Vault To Dataset Cross-Reference Report (TSIDPRV)
Tape Reports
Dataset to Tape Report (TSIDDIS)
Description
TSIDDIS produces a summary report correlating dataset versions and
tape volume serial numbers. The summary is listed in dataset name order
and contains one entry for each dataset version. If a version spans more
than one volume, there is an entry for each volume. See Appendix A,
“TSIDDIS Report,” for an example of the TSIDDIS report.
JCL
Requirements
The following is an example of the JCL requirements for creating a
Dataset to Tape report.
// DLBL SORTWK1
// EXEC TSIDDIS
UPSI Values
There are no UPSI values.
Dataset
Requirements
SORTWK1 is required.
Example
The following is an example of the dataset requirements using
SORTWK1.
//
//
//
//
/&
User Reference
JOB TAPE DATASET LISTING
DLBL SORTWK1,'==.SORTWK1'
EXTENT SYS001
EXEC TSIDDIS
Connectivity Systems, Inc.—Copyright © 2006
Use Pursuant to Company Instructions
12-27
Tape to Dataset Report (TSIDSDS)
Tape to Dataset Report (TSIDSDS)
Description
TSIDSDS produces a summary report correlating dataset versions and
tape volume serial numbers. The summary is in volume serial number
sequence and contains at least one entry for each version of a dataset. If a
version spans more than one volume, there is an entry for each volume.
See Appendix A, “TSIDSDS Report,” for an example of the TSIDSDS
report.
JCL
Requirements
The following is an example of the JCL requirements for creating the
Tape to Database report.
// DLBL SORTWK1
// EXEC TSIDSDS
UPSI Values
There are no UPSI values.
Dataset
Requirements
SORTWK1 is required.
Example
The following is an example of the dataset requirements using
SORTWK1.
//
//
//
//
/&
12-28
JOB TAPE VOLSER LISTING
DLBL SORTWK1,'==.SORTWK1'
EXTENT SYS001
EXEC TSIDSDS
Connectivity Systems, Inc.—Copyright © 2006
Use Pursuant to Company Instructions
User Reference
13
Disk Space Management
This chapter discusses how BIM-EPIC can help you to maximize and
manage your disk space.
Chapter Contents
Datasets
VTOC
Offload and Onload
User Reference
Connectivity Systems, Inc.—Copyright © 2006
Use Pursuant to Company Instructions
13-1
Dataset Fragmentation
Datasets
Dataset Fragmentation
Description
When you create a dataset with a large primary allocation, there may not
be enough contiguous free space in the pool to contain the entire primary
allocation. BIM-EPIC responds to this condition by allocating the largest
amount of contiguous free space to the primary extent and allocating
secondary extents, as necessary, when the primary extent becomes full.
This process is called dataset fragmentation.
Automatic dataset fragmentation can be enabled globally by specifying
the configuration option FRAG=YES. Dataset fragmentation can be
enabled for an individual dataset by:
Secondary
Allocation
Specifying option code F on a DLBL statement
Specifying the MXIG subparameter or ALX subparameter in the
SPACE parameter on a DD statement
Allowing the operator to respond with the FRAG command to the
EP038 message
BIM-EPIC automatically allocates secondary extents to eligible datasets
when the primary extent has been filled.
Secondary extent allocations are not available for direct access or
TYPEFLE=WORK datasets. Secondary extent allocations are available
for SORTWK datasets only if the SORT program being used specifically
allows it.
For cataloged datasets, you can specify the size of the secondary extents
and a maximum number of up to 255 secondary extents. If you use DD
statements for your disk datasets, the size of the secondary extents can be
specified in the SPACE parameter with the maximum number of
secondary extents specified in the VOLUME parameter. If you do not
define a secondary extent allocation requirement using one of these
methods, BIM-EPIC automatically allocates up to 255 secondary extents.
Each extent will be one-half the size of the primary extent.
Truncation
13-2
At close, any allocated extent that was not completely filled can be
truncated so that the unused portion of the extent is freed. BIM-EPIC
performs truncation for controlled datasets by altering both the VTOC
and the DSN Catalog to show only the space actually used. Extents are
always truncated on track or control interval boundaries.
Connectivity Systems, Inc.—Copyright © 2006
Use Pursuant to Company Instructions
User Reference
Dataset Fragmentation
Truncation occurs only on output for sequential disk datasets and is
automatic for datasets defined with DLBL statements. However when
using BIM-EPIC DD statements, truncation must be requested using the
RLSE subparameter of the SPACE parameter.
Truncation should be inhibited for TYPEFLE=WORK DTFs and for
datasets that are opened as sequential I/O but are not accessed
sequentially, for example, DL/1 datasets
Truncation can also be inhibited using the DLBL option code N.
User Reference
Connectivity Systems, Inc.—Copyright © 2006
Use Pursuant to Company Instructions
13-3
Converting Uncontrolled Disk Datasets
Converting Uncontrolled Disk Datasets
Description
Existing uncontrolled disk datasets can be placed under BIM-EPIC
control. Any existing dataset can be controlled as long as all the
associated extents reside in a single-disk pool that is defined to
BIM-EPIC. You can convert a disk dataset to catalog control or Start
Track 1 control.
Converting to a
Disk Dataset
Procedure
To convert a disk dataset to catalog control:
Converting to
Start Track 1
Procedure
13-4
Step
Action
1
Catalog the dataset name as a work file. You can use Online
Manager and specify WRK on the Define an EDD panel or you
can use TSIDMNT CATALOG function and specify
WRK=YES parameter.
2
Renumber the dataset extents using the TSIDVUT RENUM
function. (BIM-EPIC-controlled disk files must begin with
extent sequence number 1.)
3
Change the dataset VTOC expiration date to permanent using
TSIDVUT RETAIN function. Catalog-controlled disk files are
scratched according to the retention criteria specified in the
EDD, not the VTOC expiration date.
4
Add the version to the DSN catalog using Online Manager or
TSIDMNT ADD functions. Be sure to specify the block size, if
it is known.
5
Update the file type from WRK to GEN using the Online
Manager or the TSIDMNT UPDATE function, if generation
retention for the dataset has been specified.This must be done
after the step 4 has been successfully completed.
To convert a disk dataset to Start Track 1:
Step
Action
1
Renumber the dataset extents using TSIDVUT RENUM.
BIM-EPIC-controlled disk files must begin with extent sequence
number 1.
2
If necessary, change the dataset VTOC expiration date using
TSIDVUT RETAIN. Expired files in a BIM-EPIC disk pool are
eligible for immediate reallocation.
3
In all JCL that refers to the dataset, change the dataset EXTENT
statements to specify a starting track of 1 or the number
specified in the STRTRK configuration option.
Connectivity Systems, Inc.—Copyright © 2006
Use Pursuant to Company Instructions
User Reference
Converting Uncontrolled Disk Datasets
Example
The following is an example of converting a Start Track 1 dataset.
// EXTENT SYS001,POOL50,1,0,1,10
User Reference
Connectivity Systems, Inc.—Copyright © 2006
Use Pursuant to Company Instructions
13-5
Placing Datasets on Specific Volumes in a Pool
Placing Datasets on Specific Volumes in a Pool
Description
All disk datasets can be assigned to a BIM-EPIC pool. If your pool is
made up of more than one volume, BIM-EPIC can allocate a version of
the dataset on any of those volumes.
Procedure
To allocate a disk dataset to a specific volume:
Step
13-6
Action
1
QUIESCE all other volumes in the pool.
2
Create the dataset and inhibit truncation.
3
Reuse the same space when re-creating the dataset. See Chapter
7, “Reusing Space,” for additional information.
4
ONLINE the “quiesced” volumes.
Connectivity Systems, Inc.—Copyright © 2006
Use Pursuant to Company Instructions
User Reference
VTOC Utilities
VTOC
VTOC Utilities
Description
BIM-EPIC provides the following VTOC utilities:
!
TSIDLVT displays VTOCs by BIM-EPIC pool sequence, volume
sequence, extent sequence, or dataset sequence. In addition,
VTOCs can display both active and expired datasets or active
datasets only.
TVTO is a CICS transaction that displays VTOCs by volume
only.
TSIDVUT allows modification of existing VTOC entries.
TSIDVUT can delete active datasets, retain a dataset
permanently, rename a dataset, or converts an uncontrolled
dataset to BIM-EPIC control. See the BIM-EPIC Installation and
System Guide for additional information.
WARNING:
Use TSIDVUT to update the entries of uncataloged datasets only.
User Reference
Connectivity Systems, Inc.—Copyright © 2006
Use Pursuant to Company Instructions
13-7
VTOC Listings (TSIDLVT)
VTOC Listings (TSIDLVT)
Description
TSIDLVT produces printed reports of VTOC entries. TSIDLVT can
display entries for all volumes in a BIM-EPIC pool or a specific volume.
TSIDLVT prints expired datasets, unexpired datasets, and free space.
Extents are shown in track/block format and dates in mm/dd/yyyy
format. Control statements can be used to change the display format.
At the end of each report, TSIDLVT prints the total free space in the pool
or volume. This total includes expired extents as well as unused space.
JCL
Requirements
The following is an example of the JCL requirements for creating a
VTOC Listings report:
// DLBL SORTWK1,...
// EXTENT SYS001
// EXEC TSIDLVT
control statements
/*
UPSI Values
There are no UPSI values.
Dataset
Requirements
SORTWK1 is required for all functions.
Control
Statements
You must include at least one control statement per report. The control
statement must specify the volume or pool to display.
The EXP, UNEXP, and FREE parameters limit the contents of your
report. You can use control statement parameters to customize the report.
For example, to list only unexpired datasets, your control statement
should specify:
SER=SYSWK1,UNEXP
To receive a report containing only expired datasets and free space, use a
control statement similar to:
SER=SYSWK1,EXP,FREE
If none of these parameters are specified, all three types of data will
appear on the report.
13-8
Connectivity Systems, Inc.—Copyright © 2006
Use Pursuant to Company Instructions
User Reference
VTOC Listings (TSIDLVT)
Control
Statement
Parameters
The following provides an example of the control statement parameters.
Parameters
The following provides a description of the parameters you can use with
TSIDLVT.
{SER=volser
[
[
[
[
[
[
[
[
| poolname}
,EXP ]
,UNEXP ]
,FREE ]
,DSN ]
,INPOOL ]
,EURO ]
,CCHH ]
,SUM ]
Parameter
Required?
Valid
Default
One of the following two is required:
Definitions
User Reference
volser
No
1 to 6 characters
None
poolname
No
1 to 6 characters
None
EXP
No
OFF
UNEXP
No
OFF
FREE
No
OFF
DSN
No
OFF
INPOOL
No
OFF
EURO
No
OFF
CCHH
No
OFF
SUM
NO
OFF
The following provides definitions for the parameters you can use with
TSIDLVT.
Parameter
Definition
volser
Specifies the disk volume serial number.
poolname
Specifies the name of the BIM-EPIC disk pool.
EXP
Prints expired datasets.
UNEXP
Prints unexpired datasets.
FREE
Prints free space.
DSN
Prints in dataset name sequence.The default listing
is in EXTENT sequence. DSN is ignored if FREE is
specified.
INPOOL
lists entries whose extents are within the
BIM-EPIC Pool definition for the volume or
volumes. If INPOOL is not specified, TSIDLVT
lists the entire VTOC.
Connectivity Systems, Inc.—Copyright © 2006
Use Pursuant to Company Instructions
13-9
VTOC Listings (TSIDLVT)
Parameter
Definition
EURO
Prints dates in European format (dd/mm/yyyy).
By default dates are printed in USA format
(mm/dd/yyyy).
CCHH
Prints extents in cylinder/head (cchh) format. If
cchh is not specified, extents will be shown in
relative track/block format.
SUM
Skips detailed VTOC information and prints only
summary information for the VOLSER or POOL.
Note:
You must specify either SER=volser or poolname.
Examples
The following example creates a report of the VTOC of volume
SYSWK1.
// JOB VTOC
// DLBL SORTWK1,'===.SORTWK1,(X)'
// EXTENT SYS001
// EXEC TSIDLVT
SER=SYSWK1
/*
/&
The following example creates two reports. The first report prints the
standard report for all volumes in POOL50. The second report lists only
unexpired and expired datasets for all volumes in POLFBA. The datasets
are listed in dataset name sequence.
// JOB VTOC
// DLBL SORTWK1,’===.SORTWK1,(X)’
// EXTENT SYS001
// EXEC TSIDLVT
POOL50
POLFBA,UNEXP,EXP,DSN
/*
/&
13-10
Connectivity Systems, Inc.—Copyright © 2006
Use Pursuant to Company Instructions
User Reference
Online VTOC Displays
Online VTOC Displays
Description
The TVTO CICS transaction displays information about entries found in
the VTOC on a specific DASD volume.
TVTO consists of the following characteristics:
Syntax
Is a pseudo-conversational transaction
Can be utilized only on an 80-character wide screen
Will utilize 31-bit storage for the majority of the work areas it
uses, if available
Will automatically utilize the alternate screen size if larger than
the default screen size
The following are several VTOC syntax examples that will produce
different outputs:
TVTO
(<=== displays the TVTO HELP screen)
or
TVTO cuu
(<=== displays the VTOC screen)
or
TVTO volser
Help Screen
(<=== displays the VTOC screen)
The following is an example of a VTOC Help screen.
CUU ??? <== Enter CUU or set cursor at desired entry (PF3=END)
Name|Area|Space|Cdate|Edate: AREA
YES
140=DOSRES
141=SYSWK1
142=FBA001
160=CKD001
161=CKDP11
162=CKDP12
163=CKDP13
164=CKDP14
165=CKDP15
172=VSEPWR
173=VSELBL
174=VSEPAG
178=VSEPW2
179=FBAP11
17A=FBAP12
17B=FBAP13
17C=FBAP14
17D=FBAP15
400=EPV400
402=VDI402
Cyl|Trk: TRK
Pool: ALL
High|Size: SIZE
Expire:
The Help screen is displayed when only the TVTO transaction ID is
entered from a blank CICS screen, whenever an invalid request is
User Reference
Connectivity Systems, Inc.—Copyright © 2006
Use Pursuant to Company Instructions
13-11
Online VTOC Displays
attempted, or by pressing F1/PF1 from the VTOC screen. Error and
informational messages are displayed on the top screen line just to the
right of the CUU field. Pressing F3/PF3 from the Help screen terminates
the TVTO transaction and returns control to CICS with a blank screen.
The right-most fields on screen line 1 and screen line 2 display all the
current settings which control the manner and sequence for entries that
will display on the VTOC screen.
Definitions
The following provides definitions for the fields located on the VTOC
screen.
Parameter
Definition
POL
Controls which DASD entries will be displayed on
the Help screen. In addition, Pool controls whether
disk pool information, extracted from the current
TSIDPOL phase, will be included in the VTOC
display.
Note: Disk pool information will be included in the
VTOC display only when an AREA or NAME sort
sequence is chosen. See the BIM-EPIC Installation
and System Guide for additional information on
TSIDPOL phases.
ALL
Indicates only DASD entries that are members of
any disk pool will be displayed on the Help screen.
You must include both the lower limits and upper
limits for every disk pool containing space on the
requested volume on the VTOC screen (may also be
specified as YES, Y, or A).
NONE
(Default)
Ignores all disk pool information. All DASD entries
defined to this VSE system will be displayed on the
Help screen. No pool limits will be displayed on the
VTOC screen (may also be specified as NO or N).
Poolname
Includes only disk pool information for this
poolname. Only DASD entries defined to this VSE
system that are also members of this poolname will
be displayed on the Help screen. Only the lower and
upper limits for this poolname will be displayed on
the VTOC screen.
Name|Area|
Controls the VTOC screen sort sequence. Enter
Space|Cdate| only the first letter of each choice:
Edate
Name sorts entries by file name
13-12
Area (default) sorts entries by starting location
Space sorts entries by size (space occupied)
Cdate sorts entries by creation date
Edate sorts entries by expiration date
Connectivity Systems, Inc.—Copyright © 2006
Use Pursuant to Company Instructions
User Reference
Online VTOC Displays
Parameter
Definition
Cyl|Trk
Controls the display of disk addresses for CKD
devices only. Enter only the first letter of each
choice:
High|Size
Expire
Cyl (default with EPS065=NO) displays disk
addresses in cylinder-head format
Trk (default with EPS065=YES) displays disk
addresses in track format
Controls the display to show either the high disk
address or the size occupied. The display also shows
the starting, or low, disk address. High is
incompatible when requesting the VTOC Space
screen sort sequence and will be reset automatically
to Size when that screen sort sequence is requested
with High. Enter only the first letter of each choice:
High displays high disk address in addition to
the starting or low disk address
Size (default) displays size occupied in addition
to the starting or low disk address
Controls the inclusion of expired entries in the
VTOC display. Enter only the first letter of each
choice:
Yes (default) includes expired entries, which
are flagged with an asterisk between the
creation date and expiration date
No excludes expired entries and shows that
space as available space, indicated as
Free.Space
Screen lines beginning with screen line 3 are divided into 7 columns and
contain a list of all DASD entries available for display. These entries will
be filtered by any specification, except NONE, at the POOL field on
screen line 1.
You can type the device address (cuu) of your choice on the first screen
line just to the right of the constant device address or position the cursor
on one of the available DASDs and press Enter. To refresh the list of
available DASDs displayed based on a new poolname, enter the desired
poolname to the right of the constant POOL, clear any value found to the
right of the constant cuu, and press Enter. Available DASDs are shown as
cuu=volser in up to 7 columns beginning on screen line 3.
VTOC Screen
User Reference
The VTOC screen displays when the TVTO transaction ID and either a
CUU or VOLSER are entered from a blank CICS screen or from a
successful selection made from the Help screen.
Connectivity Systems, Inc.—Copyright © 2006
Use Pursuant to Company Instructions
13-13
Online VTOC Displays
Screen line 1 includes the cuu, VOLSER, and DASD models for the unit
being displayed as well as the current date, time, current screen page
number, and last screen page number.
Screen line 2 provides titles for the columns that occupy all the remaining
screen lines, except the last line, beginning on screen line 3.
File Name is the full 44-character name of the file occupying this extent.
The file name may also be shown right justified indicating the following
values:
Value
Indicates…
Free.Space
Available space.
Volume.Table.Of.Cont Indicates that VTOC occupies this space.
ents
Begin pool poolname
The lower limit for this poolname.
End pool poolname
The upper limit for this poolname.
Low
The starting disk address for this entry.
High
The ending disk address for this entry.
Size
The amount of disk space occupied by this
entry.
Seq
The sequence number of this extent.
Created
The Julian date, in the format yyyyddd, when
this entry was placed in the VTOC.
Expires
The Julian date, in the format yyyyddd, when
this entry is scheduled to expire.
Note: If this date is not greater then the
corresponding date created, an asterisk (*) is
placed between this date and the
corresponding date created.
The last screen line shows the action performed by each programmed
function key and the total number of available tracks or blocks in the total
number of free space extents.
BIM-EPIC VTOC Display for 140=DOSRES (9336-10) 1997/345 15:31:52
________ File Name _________________________
Low
Size Seq
VSE.SYSRES.LIBRARY
2
59134 000
DOS.LABEL.FILE.FF0000017490.AREA1
59136
320 000
VSE.POWER.QUEUE.FILE
59456
384 000
Free.Space
59840
384
Z9999996.VSAMDSPC.TADDB87D.T1DF884A
60224
2880 000
Z9999992.VSAMDSPC.TADDB87D.T90FF048
63104
62400 000
Volume.Table.Of.Contents 125504
64
DOS.PAGING.FILE.FF0000017490
125568
16896 000
Z9999992.VSAMDSPC.TADDB87D.T3C13E4E
142464 155520 000
Free.Space 297984
12032
VSE.SYSTEM.HISTORY.FILE
310016
5056 000
DOS.PAGING.FILE.FF0000017490
315072
16384 002
DOS.PAGING.FILE.FF0000017490
331456 319488 003
Free.Space 650944 270578
PF 1=HLP 2=RFSH 3=END 4=FST 5=LST 7=BWD 8=FWD
13-14
Page
1 of
1
Created Expires
1996337 1999365
1997255 1999366
1997013 1999366
1996337 1999366
1996337 1999366
1997273 1999366
1996337 1999366
1997345 1999366
1997273 1999366
1997273 1999366
282994 Free Blocks in
Connectivity Systems, Inc.—Copyright © 2006
Use Pursuant to Company Instructions
3 Extents
User Reference
Online VTOC Displays
Valid PF keys
User Reference
The following provides a description of each valid function key:
Function
Key
Function
Action
F1/PF1
HELP
Display Help screen
F2/PF2
RFSH
Read all VTOC entries again
F3/PF3
END
Return to CICS
F4/PF4
FST
Go to the first screen
F5/PF5
LST
Go to the last screen
F7/PF7
BWD
Back one screen
F8/PF8
FWD
Forward one screen
Connectivity Systems, Inc.—Copyright © 2006
Use Pursuant to Company Instructions
13-15
Offload System
Offload and Onload
Offload System
Description
BIM-EPIC provides offload/onload, backup/restore, offload version
consolidation, and offload version copy functions for controlled
sequential disk dataset versions. These functions are only available on
BIM-EPIC systems supporting both disk and tape management. Control
statements identify the datasets processed by the offload, backup, version
consolidation, and version copy functions. The control statements are
created either manually or by the offload system itself.
The offload/onload function processes only controlled sequential disk
dataset versions identified in the BIM-EPIC Catalog. The offload
function copies a dataset version to tape and then deletes the disk VTOC
entry and changes the catalog entry for the version to show that it is
identified as residing on tape. The onload function copies the dataset
version residing on tape back to disk and changes the catalog entry for the
version to show that it is on disk. Performing an onload of a version
already identified as residing on disk will produce the same results as
RESTORE and should not be done.
BACKUP and RESTORE functions process controlled sequential disk
dataset versions identified in the BIM-EPIC Catalog as well as controlled
Start Track 1 sequential disk datasets.
BACKUP copies a dataset version to tape leaving the disk
version in place.
RESTORE copies a dataset to disk creating a new version for
generation files or replacing the current version for work files.
When copying a dataset to disk, the dataset characteristics currently in
effect will be recognized. Some changes may occur because of changes in
DASD architecture and geometry, for example, CKD to FBA, 3380 to
3390, etc. If specified in the BIM-EPIC pool definition, disk leveling is
done when writing multiple datasets as well as multiple extents for a
single dataset.
The Offload Version Consolidation function consolidates one or more
offload versions into a new version. This function can be useful for
offload versions that have most of their datasets in scratch status. For
example, an offload dataset may have version 5 consisting of four tapes
with 80% of the files on the tape in scratch status and version 7 consisting
of three tapes with 70% of the files in scratch status. These two versions
13-16
Connectivity Systems, Inc.—Copyright © 2006
Use Pursuant to Company Instructions
User Reference
Offload System
could be consolidated into a new version of perhaps 1 or 2 tapes, freeing
the five remaining tapes for other uses.
The Offload Version Copy function copies an offload version into
BIM-EPIC backup format. The Offload Version Copy function will copy
an existing backup version or an existing offload version.
Programs
High
Performance I/O
The offload system consists of the following four programs:
TSIDOFD selects datasets for offload and backup by creating
control statements for TSIDOFL.
TSIDOFL offloads or backs up selected datasets.
TSIDONL restores offload and backup datasets back to disk or
creates a listing of datasets on an offload tape.
TSIDOFC consolidates offload tapes and copies offload and
backup tapes.
The BIM-EPIC offload system uses proprietary disk and tape I/O routines
that provide extraordinary high performance through the use of physical
I/O, maximum block sizes, and a single tape file. The offload system is
implemented automatically as soon as BIM-EPIC is activated and is fully
compatible with the prior offload system. All JCL, control statements,
program names, and procedures remain unchanged. This onload program
automatically recognizes and processes offload and backup tapes created
under the prior offload system. This process provides complete access to
existing offload and backup datasets. Prior offload systems include EPIC
4.14 and earlier.
!
WARNING:
Whenever an offloaded dataset is read, the tape-resident data is
temporarily copied to DSAD and then deleted when the dataset is
closed. This means that sufficient disk space must be available to
temporarily copy the data to the disk pool specified in the EDD. If
an insufficient space condition occurs while creating this
temporary disk file, BIM-EPIC allocation configuration options will
be used, for example, FRAG and alternate pools.
Note:
The BIM-EPIC Start Track 1 feature is required to automatically access a
dataset that has been offloaded. The STRTRK configuration option is set
for this feature. When this feature is active, if a program opens a dataset
version that has been offloaded to tape, BIM-EPIC will automatically load
the version to a Start Track 1 disk area. Then, when the program closes
the version, this Start Track 1 disk area will be deleted. This process is
sometimes described as staging an offloaded version.
User Reference
Connectivity Systems, Inc.—Copyright © 2006
Use Pursuant to Company Instructions
13-17
Selecting Datasets To Be Offloaded (TSIDOFD)
Selecting Datasets To Be Offloaded (TSIDOFD)
Description
TSIDOFD creates control statements for input to TSIDOFL based on
specific selection criteria specified in INCLUDE and OMIT control
statements. These control statements determine which datasets will be
offloaded or backed up.
Selection
Criteria
Disk dataset versions identified in the BMI-EPIC Catalog are selected for
offload/backup using the following criteria:
Pool name
Volume serial number
Dataset name
Dataset names beginning with a specific character string
Version number
Versions created since the last time TSIDUTL was executed with
the DSPLY NEW function.
User ID
System ID
Access within the last n days (SLA)
No access within the last n days (DLA)
Note:
SLA and DLA are mutually exclusive meaning they cannot be used at the
same time.
Datasets can be omitted from the inclusion list by:
13-18
Pool name
Volume serial number
Dataset name
Dataset names beginning with a specific character string
Number
User ID
System ID
Connectivity Systems, Inc.—Copyright © 2006
Use Pursuant to Company Instructions
User Reference
Selecting Datasets To Be Offloaded (TSIDOFD)
Start Track 1 disk datasets are selected for backup using the following
criteria:
Pool name
Dataset name
Dataset names beginning with a specific character string
Datasets can be omitted from the inclusion list by:
JCL
Requirements
Dataset name
Dataset names beginning with a specific character string
The following is an example of the JCL requirements for using
TSIDOFD:
[// xLBL OUTPUT,'sysin.data.set']
//EXEC TSIDOFD
control statements
/*
An internal table is used during the dataset selection process to store each
selected dataset version. The capacity of this internal table depends on the
amount of excess partition storage available. The capacity, which can be
up to but does not include partition GETVIS storage, will never be less
than 100 entries. This internal table size is increased by approximately 21
entries for each 1K of excess partition storage available beyond the first
5K. For example, if SIZE=(TSIDOFD,50K) is specified on the EXEC
statement, then the internal table capacity will be about 1060 entries.
Specifying a SIZE operand value that results in 200K for partition
maximizes this internal table. For example, when utilizing a 2048K
partition, including GETVIS, a SIZE operand value of 1848K would be
appropriate.
If the Dataset Selection report is produced, the actual capacity of the
internal table for the current processing is stated on the second report
heading line. If TSIDOFD attempts to select more dataset versions than
can be held in the internal table, no output will be created. The program
will issue an EP618 message and terminate with a return code of 4.
UPSI Values
There are no UPSI values.
Dataset
Requirements
The control statements created by TSIDOFD are created on SYSPCH if
SYS005 is assigned to SYSPCH. Otherwise, control statements can be
written to tape or disk by supplying a TLBL, DLBL, or DD with the DTF
name OUTPUT.
User Reference
Connectivity Systems, Inc.—Copyright © 2006
Use Pursuant to Company Instructions
13-19
Selecting Datasets To Be Offloaded (TSIDOFD)
Control
Statements
Dataset selection criteria are specified using INCLUDE and OMIT
control statements. You can specify multiple parameters on any
INCLUDE or OMIT control statement, but parameter expressions cannot
be continued. Multiple INCLUDE and OMIT control statements can be
submitted reflecting the DSN=, POL=, and VOL= parameters up to the
following limits:
25 dataset names (DSN=) for INCLUDE processing
25 dataset names (DSN=) for OMIT processing
50 pool names (POL=) for INCLUDE processing
50 pool names (POL=) for OMIT processing
50 volume serial numbers (VOL=) for include processing
50 volume serial numbers (VOL=) for omit processing
Note:
AND logic always applies when multiple selection criteria are specified,
regardless of whether the logic is submitted on a single control statement,
multiple control statements, or both.
One set of parentheses must enclose all parameter expressions on a single
control statement. Commas or blanks can separate multiple parameter
expressions. The parameters ALLVER, VOL, and POL each allow you to
specify more than one value. When more than one value is required, the
values must be separated by commas within a set of parentheses.
Syntax
The following is an example of the TSIDOFD command syntax.
REPORT=YES|NO
CATALOG=YES|NO
INCLUDE
(
)
OMIT
(
[ DSN='dataset-name' ]
[ ,VER=n ]
[ DSN='string.all' ]
[ ALLVET=n ]
[ UID=x ]
[ SID=x ]
[ POL=poolid,poolid,...]
[ VOL=volid,volid,...]
)
Parameters
13-20
The following provides a description of the parameters you can use with
the INCLUDE/OMIT control statements:
Parameter
Required With
Required With
Valid
CATALOG=YES? CATALOG=NO?
Default
ALLVER
No
None
Not Allowed
Connectivity Systems, Inc.—Copyright © 2006
Use Pursuant to Company Instructions
1 to 9999
User Reference
Selecting Datasets To Be Offloaded (TSIDOFD)
Definitions
User Reference
Parameter
Required With
Required With
Valid
CATALOG=YES? CATALOG=NO?
Default
DLA
No
Not Allowed
1 to 365
None
DSN
No
No
1 to 44
characters
None
NEW
No
Not Allowed
None
OFF
POL
No
Yes
1 to 6
characters
None
SID
No
Not Allowed
2 characters
None
SLA
No
Not Allowed
1 to 365
None
UID
No
Not Allowed
2 characters
None
VER
No
Not Allowed
1 to 9999
None
VOL
No
Not Allowed
1 to 6
characters
None
The following provides the definitions for the parameters you can use
with the INCLUDE/OMIT control statements.
Parameter
Definition
REPORT
Specifies if the Preliminary Dataset Selection report
is to be printed. The default is YES. The
Preliminary Dataset Selection report shows the size
of the internal selection table, in heading 2, the
selection criteria used, and the actual dataset
versions selected.
CATALOG
Specifies whether selection should be for controlled
disk datasets found in the BIM-EPIC Catalog or for
controlled Start Track 1 disk datasets.
CATALOG=YES, the default, indicates selection
should be for controlled disk datasets found in the
BIM-EPIC Catalog. CATALOG=NO indicates
selection should be for controlled Start Track 1 disk
datasets and applies only to the BACKUP function.
INCLUDE
Specifies that the datasets to be included for offload
or backup are identified by the subparameters that
follow the datasets. You must use at least one
INCLUDE statement.
OMIT
Specifies that the datasets to be omitted from
offload or backup are identified by the
subparameters on the statement. OMIT acts only on
dataset versions that have been specified with an
INCLUDE statement.
Connectivity Systems, Inc.—Copyright © 2006
Use Pursuant to Company Instructions
13-21
Selecting Datasets To Be Offloaded (TSIDOFD)
Parameter
Definition
POL
Selects datasets that are allocated to a specified
pool. For INCLUDE, you can specify a maximum
of 10 pool IDs. For CATALOG=YES only and if
you are using OMIT, you can specify an additional
10 pool IDs to be OMITTED. You can specify
multiple pool IDs on a single POL parameter, for
example, POL=pool01,pool02,pool03.
If CATALOG=YES, the POL parameter is checked
against the current pool name in the dataset
definition. If the pool name was changed after the
dataset version was created, you must use other
options to include or omit that dataset version.
If CATALOG=NO, the dataset must have been
created using the specified pool name and must
satisfy all additional criteria:
SAM file
Prime Data extents
Reside completely within the current pool
limits
NOT be defined in the BIM-EPIC Catalog
In addition, datasets created by PIOCS programs
will not be selected unless specifically requested
using an INCLUDE statement with a fully qualified
DSN parameter. For example, if .ALL. is part of the
PIOCS-created DSNs, none of them will be
included. This is because PIOCS created datasets do
not use logical IOCS and therefore cannot interface
with BIM-EPIC.
13-22
VOL
Selects datasets from the specified disk volume
serial number. For INCLUDE, you can specify up
to 10 volume serial numbers. If you are using
OMIT, you can specify an additional 10 volume
serial numbers on the OMIT. You can specify
multiple volume serial numbers on a single VOL
parameter, for example,
VOL=vol001,vol002,vol003.
DSN
Selects a single dataset name or a set of datasets
beginning with the same character string. The value
specified must be enclosed in apostrophes (‘). To
indicate a group of datasets, specify .ALL at the end
of the dataset name.
Connectivity Systems, Inc.—Copyright © 2006
Use Pursuant to Company Instructions
User Reference
Selecting Datasets To Be Offloaded (TSIDOFD)
Parameter
Definition
VER
Selects a version number for a particular dataset.
VER can be supplied only if the DSN parameter is
also supplied. If the DSN parameter is omitted, all
versions of the dataset are selected.
Note: Subparameters can be specified only once
for INCLUDE and once for OMIT.
User Reference
ALLVER
Selects datasets by version number. ALLVER
affects all selected datasets; VER affects only a
specific dataset. You can specify up to five versions
with a single ALLVER parameter, for example,
ALLVER=n,n,n,n,n.
SID
Selects datasets with the specified system ID.
UID
Selects datasets with the specified user ID.
DLA
Selects datasets which have not been accessed for
the specified number of days. DLA is valid only for
INCLUDE.
SLA
Selects datasets which have been accessed within
the specified number of days. SLA is valid only for
INCLUDE.
NEW
Selects datasets which have been created since the
last time TSIDUTL was executed with DSPLY
NEW. NEW is valid only for INCLUDE.
Connectivity Systems, Inc.—Copyright © 2006
Use Pursuant to Company Instructions
13-23
Offloading and Backing Up Datasets (TSIDOFL)
Offloading and Backing Up Datasets (TSIDOFL)
Description
TSIDOFL offloads or backs up selected datasets according to the settings
on the UPSI statement and the contents of control statements.
Control statements specify which datasets and versions are to be
processed and are supplied as SYSIPT data. These control statements can
be generated by TSIDOFD or specified manually. Unless UPSI x1 is
present, TSIDOFL sorts the control statement information into
descending version within dataset name before beginning writing the
specified data to tape.
The offload tape is always associated with a cataloged dataset. You can
use the default offload dataset, OFFLOAD.DATA.SET, or you can create
your own dataset. If you create your own dataset, you must catalog the
dataset and supply a TLBL or DD statement using the DTF name
OUTPUT.
A tape version containing offloaded disk versions is not eligible for
scratch until all the offloaded disk versions either expire or are loaded
back to disk. In addition, any additional retention criteria attributed to the
tape version must be satisfied.
JCL
Requirements
The following are JCL requirements necessary when the control
statements are supplied as SYSIPT data:
[// TLBL OUTPUT,'offload.dataset.name']
// UPSI xx
// EXEC TSIDOFL
control statements
/*
The following are JCL requirements necessary when the control
statements are supplied from a tape or disk dataset using GDI for
SYSIPT:
[// TLBL OUTPUT,'offload.dataset.name']
// UPSI xx
* //IJSYSIN DD DSN=sysin.dataset,DISP=(OLD,DELETE,KEEP)
// EXEC TSIDOFL
/*
The following are JCL requirements necessary when the control
statements are supplied from a tape or disk dataset using a standard VSE
assignment for SYSIPT:
{// TLBL OUTPUT,'offload.dataset.name'}
// DLBL IJSYSIN,'sysin.dataset'
// EXTENT SYSIPT
ASSGN SYSIPT,DISK,VOL=volser,SHR
// UPSI xx
// EXEC TSIDOFL
/*
CLOSE SYSIPT,SYSRDR
13-24
Connectivity Systems, Inc.—Copyright © 2006
Use Pursuant to Company Instructions
User Reference
Offloading and Backing Up Datasets (TSIDOFL)
{// TLBL OUTPUT,'offload.dataset.name'}
// TLBL IJSYSIN,'sysin.dataset'
// EXEC TSIDASS
OPEN IJSYSIN,SYS020,INPUT
/*
// ASSGN SYSIPT,SYS020
// UPSI xx
// EXEC TSIDOFL
/*
// RESET SYSIPT
UPSI Values
The following UPSI values can be used when offloading and backing up
datasets.
Position
Setting
Function
0
0
Specifies OFFLOAD function
1
Specifies BACKUP function.
Note: If control statements for Start Track 1
datasets are submitted, UPSI 1 is automatically
forced since OFFLOAD cannot be done for Start
Track 1 datasets.
1
1
Specifies the control statements are not sorted and
datasets are offloaded in the order in which the
control statements were submitted.
2
1
Specifies that the DSN selection will be by
generation number rather than by version number.
Do not use if TSIDOFD created the control
statements.
!
WARNING:
If UPSI x1 is used with a TSIFOFL execution where the TSIDOFL
control statements were NOT created by the TSIDOFD program,
it becomes the your responsibility to verify that, when multiple
versions of a dataset are restored using TSIDONL, the oldest
version is restored first, the second oldest version is restored
second, and so on.
Dataset
Requirements
OUTPUT specifies a tape dataset that will be the offload/backup tape.
Note:
This dataset name must be cataloged. If a label is not supplied for the
OUTPUT dataset, TSIDOFL catalogs the dataset using the dataset name
OFFLOAD.DATA.SET.
IJSYSIN specifies that the input control statements reside on a
TSIDOFD-created tape or disk dataset instead of on SYSIPT. You can
use either standard VSE assignments or GDI.
PARM Values
User Reference
PARM=’DLAUPD=NO’ can be specified on the EXEC Job Control
statement. This prevents the offload/backup job name and current date
Connectivity Systems, Inc.—Copyright © 2006
Use Pursuant to Company Instructions
13-25
Offloading and Backing Up Datasets (TSIDOFL)
from being stored as the last accessed job and date for each version read
by TSIDOFL. If you specify PARM=’DLAUPD=YES’ or do not specify
the PARM operand, the offload/backup job name and current date will be
stored as the last accessed job and date for each version read by
TSIDOFL.
Control
Statements
Use control statements to indicate which datasets to offload or backup.
You can use TSIDOFD to generate these control statements. Control
statements for disk dataset versions identified in the BIM-EPIC Catalog
and control statements for Start Track 1 datasets cannot be combined in
the same execution of TSIDOFL.
If UPSI xx1 is used, TSIDOFD must not be used to generate the control
statements.
Syntax
The syntax for a sequential disk version is:
'dataset-name',version-number
'dataset-name',generation-number
The syntax for a Start Track 1 disk dataset is:
'dataset-name',POL=poolnm
Parameters
Definitions
The following provides a description of the parameters you can use with a
sequential disk version.
Parameter
Required?
Valid
Default
dataset-name
Yes
1 to 44 characters
None
version number
No
1 to 9999/1-65534
None
generation number
No
1 to 9999/1-65534
None
poolnm
Yes
6 characters
None
The following provides the definitions for the parameters you can use
with a sequential disk version.
Parameter
Definition
dataset-name Specifies the name of the dataset to offload or
backup.
13-26
version
Specifies the version to offload or backup.
generation
Specifies the generation number to offload or
backup. UPSI xx1 must be set and TSIDOFD must
not create the input control statements.
Connectivity Systems, Inc.—Copyright © 2006
Use Pursuant to Company Instructions
User Reference
Offloading and Backing Up Datasets (TSIDOFL)
Parameter
Definition
version/
generation
number
Positional and only one number can be specified. If
UPSI xx1 is not set, EPIC regards the number as a
version number. If UPSI xx1 is set, EPIC regards
the number as a generation-number. They are only
valid for datasets defined in the catalog.
poolnm
Specifies the name of the pool where the dataset
resides. It is only valid for Start Track 1 datasets.
Restart
Information
TSIDOFL copies each dataset that is to be backed up or offloaded to the
output tape. In addition, OFFLOAD deletes the VTOC entry for a dataset
version as soon as the data has been transferred to the output tape. If for
any reason a backup or offload job that involves more than one dataset
terminates abnormally and, as a result, must be restarted, a special restart
procedure is required. This special restart procedure is discussed in the
next section.
Restarting
Backups
Backups must be restarted from the beginning because TSIDOFL sorts
the control statements internally. To restart a backup:
Step
Restarting
Offloads
1
Scratch the incomplete backup dataset version.
2
Restart the TSIDOFL backup step.
The same dataset cannot be offloaded twice. Therefore, TSIDOFL
automatically restarts with the next dataset to be offloaded. The datasets
already offloaded are in the incomplete offload dataset version. To restart
an offload:
Step
Examples
User Reference
Action
Action
1
Do not scratch the incomplete offload dataset version.
2
Restart the job at the TSIDOFL step. Use the same input
control statements and disregard any error messages for
missing datasets. These datasets were offloaded by the
incomplete run and have been deleted from the VTOC.
3
Keep the TSIDOFL offload report and tapes from both the
incomplete and restarted runs.
4
If the offloaded datasets are subsequently onloaded, run
TSIDONL with the offload dataset versions from both the
incomplete and restarted runs.
The following job offloads datasets based on control statements supplied
using the IJSYSIN input dataset SYSIN.DATASET. This tape or disk
dataset is deleted when the dataset is closed. Because no TLBL or DD for
OUTPUT was supplied, all datasets will be offload to a tape as version 1
Connectivity Systems, Inc.—Copyright © 2006
Use Pursuant to Company Instructions
13-27
Offloading and Backing Up Datasets (TSIDOFL)
of output dataset name OFFLOAD.DATA.SET. If the dataset name does
not exist, BIM-EPIC will create it as part of the OFFLOAD processing.
// JOB OFFLOAD
* //IJSYSIN DD DSN=SYSIN.DATASET,DISP=(OLD,DELETE)
// UPSI 0
// EXEC TSIDOFL
/*
/&
The following example backs up datasets based on the control statements
supplied using the IJSYSIN input dataset SYSIN.DATASET. This input
dataset is deleted when the dataset is closed. Because a TLBL for
OUTPUT was supplied, all datasets will be backed up to a tape as version
1 of the output dataset name BACKUP.DATASET. This dataset must
have been defined to the BIM-EPIC catalog before the backup step is
executed.
// JOB BACKUP
* //IJSYSIN DD DSN=SYSIN.DATASET,DISP=(OLD,DELETE)
// TLBL OUTPUT,'BACKUP.DATASET'
// UPSI 1
// EXEC TSIDOFL
/*
/&
The following example offloads versions of four datasets named on the
control statements supplied as SYSIPT data. All datasets are offloaded to
a tape as version 1 of the output dataset name USER.OFFLOAD.DATA.
This dataset must have been defined to the BIM-EPIC catalog before the
backup step is executed.
All versions of TECON.TRANS will be offloaded. Only the specified
version of the other datasets will be offloaded.
// JOB OFFLOAD
// TLBL OUTPUT,'USER.OFFLOAD.DATA'
// UPSI 0
// EXEC TSIDOFL
'PAYROLL.CHECKS',2
'BILLING.MASTER',9
'BILLING.MASTER',10
'RECON.TRANS'
/*
/&
The following example backs up five Start Track 1 datasets named on the
control statements supplied as SYSIPT data. All datasets are offloaded to
a tape as version 1 of the output dataset name START.TRACK1.DATA.
This dataset must have been defined to the BIM-EPIC catalog before the
backup step is executed.
// JOB BACKUP
// TLBL OUTPUT,’START.TRACK1.DATA'
// UPSI 1
// EXEC TSIDOFL
‘SNOOPY.DOG’,POL=WDPOOL
‘MICKEY.MOUSE’,POL=WDPOOL
‘TAZ.DEVIL’,POL=WBPOOL
‘WILEY.COYOTEIUS.MAXIMUMUS.HURTUM’,POL=WBPOOL
13-28
Connectivity Systems, Inc.—Copyright © 2006
Use Pursuant to Company Instructions
User Reference
Offloading and Backing Up Datasets (TSIDOFL)
‘CRAYZY.RABBUTTE’,POL=WBPOOL
/*
/&
User Reference
Connectivity Systems, Inc.—Copyright © 2006
Use Pursuant to Company Instructions
13-29
Onloading and Restoring Datasets (TSIDONL)
Onloading and Restoring Datasets (TSIDONL)
Description
TSIDONL onloads or restores datasets back to disk. TSIDONL can also
produce a report listing the datasets contained on an offload tape. Use
UPSI settings to specify TSIDONL functions.
You can onload a dataset only from an offload tape. TSIDONL assigns
the newly created disk version a version number based on the absolute
generation number the version had when it was offloaded.
You can restore a dataset from either an offload or a backup tape. For
sequential disk versions identified in the BIM-EPIC Catalog, RESTORE
assigns the dataset version number 1.
!
WARNING:
Careful thought should be given before doing RESTORE
functions. A detailed description of the Restore action is provided
later in this chapter.
JCL
Requirements
The following is an example of the JCL requirements for using
TSIDONL.
// UPSI xxxx
[// TLBL INPUT,'user-dataset-name']
// EXEC TSIDONL
[control statements]
/*
UPSI Settings
13-30
The following UPSI settings are used with TSIDONL.
Setting
Function
000
Onloads all datasets from the offload tape. No control
statements are read.
010
Onloads only datasets selected by control statements.
100
Restores all datasets from the offload or backup tape. No
control statements are read.
110
Restores datasets selected by control statements only.
xx1
Creates a report of datasets on the offload or backup tape. No
datasets are onloaded or restored. No control statements are
read.
xxx1
Assumes uncataloged input tapes are in the new offload
format. See the note below or additional information.
0x0x1
Prevents onloading of a dataset version that has been
scratched from the BIM-EPIC Catalog. See the note below for
additional information.
Connectivity Systems, Inc.—Copyright © 2006
Use Pursuant to Company Instructions
User Reference
Onloading and Restoring Datasets (TSIDONL)
Setting
Function
0xx0x1
Use the original generation number from the offloaded file(s)
and change the creation date in the VTOC entry to the original
creation date of the offloaded file(s). The version will not be
onloaded if it is in SCRATCH status in the BIM-EPIC
Catalog.
Note:
UPSI xxx1 applies to tapes containing offload or backup data for
sequential disk versions identified in the BIM-EPIC Catalog. UPSI xxx1,
should be used only when the accessed tape volume(s) are not cataloged
and if they were created using the new proprietary high performance
offload system EPIC 4.15/BIM-EPIC 5.1 or later. The following events
could cause this situation to occur:
The tape volume was purged from the catalog.
The tape volume was created at a different site and is not known
to the catalog at the site where it is being restored.
In all cases, the disk dataset that is the target of the restore must be
defined in the BIM-EPIC Catalog. Instead of using UPSI xxx1 for an
uncataloged tape, you can use the Online Manager or TSIDMNT ADD
function to add the tape volume to the BIM-EPIC Catalog. When the tape
volume has been added to the BIM-EPIC Catalog, use the Online
Manager or TSIDMNT RETAIN function with the OF2 parameter. See
the BIM-EPIC Installation and System Guide for information describing
the OF2 parameter.
When onloading a version that has been scratched from the BIM-EPIC
Catalog, BIM-EPIC sets the onloaded version to 1. The user may not want
this to happen since the data is probably older than the current version 1.
If UPSI bit 4 is ON, BIM-EPIC will not onload any dataset version found
on the input tape that has been scratched from the BIM-EPIC Catalog.
UPSI bit 4 is effective only when doing an onload function and not
report-only processing. To perform an onload function, set UPSI bit 0 to
OFF. To set UPSI to a report-only processing format, set UPSI bit 2 to
ON. If UPSI bit 4 is OFF and a dataset is restored as version 1 because it
has been scratched from the BIM-EPIC Catalog, SCR’D will display on
the TSIDONL report entry for that dataset version as a “warning flag.”
Dataset
Requirements
User Reference
INPUT specifies the offload dataset name used when TSIDOFL was
executed. If no TLBL or DD statement is supplied, TSIDONL uses
version 1 of the dataset OFFLOAD.DATASET. No statements are
required for the output datasets.
Connectivity Systems, Inc.—Copyright © 2006
Use Pursuant to Company Instructions
13-31
Onloading and Restoring Datasets (TSIDONL)
Onload versus
Restore
The following scenario describes the differences between TSIDONL
Onload and TSIDONL Restore.
Suppose you have a dataset named DATASET.A with the following
information in the BIM-EPIC Catalog.
Version
Number
Absolute Generation
Number (AGN)
Location
1
46
Disk
2
45
Disk
3
44
Disk
4
43
Disk
5
42
Disk
6
41
Disk
An Absolute Generation Number (AGN) is a one-up number assigned to a
disk-resident version by BIM-EPIC at the time the version is created.
Version numbers change as a version becomes older or if a newer version
is scratched. However, an AGN does not change as long as the version
remains on disk. For example, if version 4 were scratched, version 5
would become version 4 and version 6 would become version 5 but their
AGNs would not change.
In the above table, when version 2 was first created as version 1,
BIM-EPIC assigned AGN 45. The 45 means that this was the 45th time a
version of this dataset was created to the BIM-EPIC catalog. The next
time a version 1 for this dataset is created, the version will be assigned an
AGN of 46, the next AGN will be 47, and so on.
Suppose version 3 through version 6 were offloaded to tape by TSIDOFL.
Now DATASET.A contains the following:
Version
Absolute Generation
Number (AGN)
Location
1
46
Disk
2
45
Disk
3
44
Tape
4
43
Tape
5
42
Tape
6
41
Tape
Version information still exists in DATASET.A for version 3 through
version 6. However, now those versions display as tape datasets instead of
disk. Version 3 through version 6 are still available for scratching,
assuming all retention criteria have been met, even though the versions
have been offloaded.
13-32
Connectivity Systems, Inc.—Copyright © 2006
Use Pursuant to Company Instructions
User Reference
Onloading and Restoring Datasets (TSIDONL)
If versions 3 through version 6 are not scratched and two new versions are
created, DATASET.A contains the following:
Onload Results
Version
Absolute Generation Number
(AGN)
Location
1
48
Disk
2
47
Disk
3
46
Disk
4
45
Disk
5
44
Tape
6
43
Tape
7
42
Tape
8
41
Tape
If the previously offloaded versions (version 3 through version 6) are
onloaded, DATASET.A contains the following:
Version
Absolute Generation Number
(AGN)
Location
1
48
Disk
2
47
Disk
3
46
Disk
4
45
Disk
5 (old ver. 3) 52 (old AGN=44)
Disk
6 (old ver. 4) 51 (old AGN=43)
Disk
7 (old ver. 5) 50 (old AGN=42)
Disk
8 (old ver. 6) 49 (old AGN=41)
Disk
After the versions have been onloaded, BIM-EPIC will change the
catalog entires for the versions to show that they now resided on disk
instead of tape. Since the most recent onloaded versions are once again on
disk, they are assigned new AGNs.
Restore Results
Instead of doing an onload, you restore the previously offloaded datasets.
DATASET.A now contains the following:
Version Absolute generation Location
number (AGN)
User Reference
1 (old ver. 3) 52 (old AGN=44)
Disk
2 (old ver. 4) 51 (old AGN=43)
Disk
3 (old ver. 5) 50 (old AGN=42)
Disk
4 (old ver. 6) 49 (old AGN=41)
Disk
5
Disk
48
Connectivity Systems, Inc.—Copyright © 2006
Use Pursuant to Company Instructions
13-33
Onloading and Restoring Datasets (TSIDONL)
6
47
Disk
7
46
Disk
8
45
Disk
BIM-EPIC restores each version as version 1 in descending sequence
based on the original version order. Since the most recent onloaded
versions are once again on disk, they are assigned new AGNs.
These TSIDONL Onload and TSIDONL Restore examples show why
using onload instead of restore is the most used method for returning
offloaded data to disk. The Onload function keeps the original version
sequence in the catalog, while the Restore function sets the version to
version 1 in the catalog.
13-34
Connectivity Systems, Inc.—Copyright © 2006
Use Pursuant to Company Instructions
User Reference
TSIDONL Control Statements
TSIDONL Control Statements
Description
TSIDONL control statements are read if UPSI 010 or UPSI 110 is
specified. There are two types of TSIDONL control statements:
dataset-name specifies a dataset version to be onloaded or
restored.
START begins an onload or restore at a particular dataset and
version on the tape.
You can continue the control statement by placing a comma after the last
parameter and then beginning the next parameter with the next control
statement.
If no control statements are supplied when UPSI x10 is specified, all
datasets and versions on the tape are written to disk.
Syntax
The syntax for dataset-name version in the BIM-EPIC Catalog is:
'dataset-name',generation-number
The syntax for a dataset-name Start Track 1 dataset is:
'dataset-name'[,POL=poolnm][,’alt-dataset-name’]
Parameters
The following describes the parameters you can use for a Start Track 1
dataset.
Parameters
Required?
Valid
dataset-name
Yes
1 to 44 characters None
generation-number see below
Definitions
User Reference
Default
1 to 999999
None
poolnm
No
6 characters
see below
alt-dataset-name
No
1-44 characters
None
The following provides the definitions for the parameters you can use for
a Start Track 1 dataset.
Parameter
Definition
dataset-name
Specifies the name of the dataset to be
onloaded or restored.
Connectivity Systems, Inc.—Copyright © 2006
Use Pursuant to Company Instructions
13-35
TSIDONL Control Statements
Parameter
Definition
generation-number Specifies the absolute generation number
(AGN) of the tape dataset to be onloaded or
restored. To specify all generations of a
dataset, use an asterisk (*). The generation
number can be omitted for a work dataset.
The AGN can be obtained from an Online
Manager or TSIDMNT display of the
dataset, or from the listing produced by
TSIDOFL when the offload or backup was
done.
Restart
Information
poolnm
Specifies the name of the pool where the
dataset is to be restored. If poolnm is not
specified, the dataset will be restored to the
same pool where the dataset was originally
located.
alt-dataset-name
Specifies the dataset name to use for the
restored dataset. If an alt-dataset name is not
specified, the dataset name will be used. This
parameter can be used only when restoring
Start Track names. It cannot be used for
BIM-EPIC Catalog controlled dataset names.
Each version of a dataset that is backed up or offloaded is processed as a
separate entity. Therefore, if a multi-version/dataset onload or restore job
terminates abnormally before all of the onload/restore actions have
completed, the job must be restarted. In order to avoid dataset duplication
and maintain version order integrity, the job must be restarted on the
version being processed at the time the abend occurred. Use the following
procedure to restart the job.
Step
13-36
Action
1
Refer to the restore/onload report and obtain the last dataset
name and generation listed.
2
Compare this to the backup/offload report and obtain the next
version and generation number that would have been
onloaded/restored.
3
Restart TSIDONL using a START control statement specifying
the dataset name and generation number identified in step 2 of
this procedure.
Connectivity Systems, Inc.—Copyright © 2006
Use Pursuant to Company Instructions
User Reference
TSIDONL Control Statements
Syntax
The following is an example of a START control statement syntax.
START='dataset-name',generation-number
Definitions
The following provides the definitions for the parameters you can use for
a Start Track 1 dataset.
Parameter
Definition
dataset-name
Specifies the name of the dataset to use to
begin onload or restore processing.
generation-number Specifies the absolute generation number of
the disk dataset. The generation number can
be omitted for a work dataset identified in the
BIM-EPIC Catalog and must be omitted for a
Start Track 1 dataset.
Examples
The following onload example onloads all versions on a tape using
version 1 of the default offload dataset (OFFLOAD.DATA.SET).
Existing versions will be written in the correct version sequence unless a
particular version has been scratched since it was offloaded. If a version
has been scratched, it will written as version 1 of the dataset.
// JOB ONLOAD
// EXEC TSIDONL
/*
/&
The following restore example restores all generations of the
ACCOUNTS.PAY dataset. Each generation is assigned version number 1
as it is restored. The last version restored is version number 1. Because
versions are copied in reverse version order, the last version restored is
the newest version on the tape.
// JOB RESTORE
// UPSI 110
// EXEC TSIDONL
'ACCOUNTS.PAY',*
/*
/&
The following onload restart example onloads all datasets starting with
and written after generation 112 of the ACCOUNTS.PAY dataset. The
versions remain assigned to their current relative version number unless
that version has been scratched. If the version has been scratched, the
version will be version 1.
// JOB ONLOAD
// TLBL INPUT,'USER.DATA.SET'
// UPSI 010
// EXEC TSIDONL
START='ACCOUNTS.PAY',112
/*
/&
User Reference
Connectivity Systems, Inc.—Copyright © 2006
Use Pursuant to Company Instructions
13-37
TSIDONL Control Statements
The following example restores all datasets found on version 1 of the
OFFLOAD.DATA.SET tape.
// JOB RESTORE
// UPSI 100
// EXEC TSIDONL
/*
/&
The following restore example restores three Start Track 1 datasets named
on the control statements. The second control statement contains the
POL= parameter which causes that Start Track 1 dataset to be restored to
the specified pool, WDPOOL, rather than the pool where the dataset was
originally located. The fourth control statement contains both the POL=
parameter and an alternate dataset name that causes that Start Track 1
dataset to be restored to the specified pool, DPOUND, using the alternate
dataset name, WOODSTOCK, rather than the pool and dataset name of
the original file. The last control statement, which continues across two
records, contains an alternate dataset name that causes only that Start
Track 1 dataset to be restored using the alternate dataset name,
SYLVESTER, rather than the dataset name of the original file.
// JOB RESTORE
// UPSI 110
// EXEC TSIDONL
‘WILEY.COYOTEIUS.MAXIMUMUS.HURTUM.IV.CERTUM’
‘CRAYZY.WABBUTTE’,POL=WDPOOL
‘TAZ.DEVIL’
‘SNOOPY’,POL=DPOUND,’WOODSTOCK’
‘TWEETY’,
’SYLVESTER’
/*
/&
13-38
Connectivity Systems, Inc.—Copyright © 2006
Use Pursuant to Company Instructions
User Reference
Consolidating Offload Versions (TSIDOFC)
Consolidating Offload Versions (TSIDOFC)
Description
TSIDOFC consolidates one or more offload versions into a single
version. Control cards are used to report on consolidation candidates and
to specify the versions to be consolidated.
TSIDOFC can also copy an OFL-created offload or backup tape volume
to another tape volume.
JCL
Requirements
Control statements are supplied as SYSIPT data. The following is an
example of the JCL requirements:
// TLBL
// TLBL
// DLBL
// EXEC
control
/*
OFCINP,’inputdatasetname’
OFCOUT,’outputdatasetname’
SORTWK1,’datasetname’
TSIDOFC
statements
The REPT function does not require TLBLs.
DLBL for SORTWK1 is required for the REPT function only and can be
omitted if it is in standard labels.
UPSI Values
There are no UPSI values.
Dataset
Requirements
The dataset names used in OFCINP and OFCOUT must be the same if
version consolidation, CONI, is being performed. The dataset names must
be different if COPY is being performed.
Offload and backup data must have been created in EPIC 4.2 or higher.
Control
Statements
User Reference
TSIDOFC uses the following control statements:
REPT produces the Offload Consolidation Candidate report. The
report provides a list of all offload datasets in the BIM-EPIC
Catalog and their environmental detail, for example, media type,
expire date, volume serial number, etc. If requested, appropriate
datasets will be flagged as consolidation candidates.
CONI specifies the offloaded versions that are to be consolidated
into a new version.
CONO specifies the version number of the consolidated output. If
CONO is not present, the new version will be version 1.
COPY specifies the offload or backup version that will be copied
to a new version.
Connectivity Systems, Inc.—Copyright © 2006
Use Pursuant to Company Instructions
13-39
Consolidating Offload Versions (TSIDOFC)
Syntax
Control statements can begin in any column. Continuations cannot be
used.
REPT
CONI
CONO
COPY
Definitions
[PCT=n]
n n [n]...[n]
NV=n
n
If used, REPT must be the only control statement submitted. The
following provides the definition for the parameter you can use with the
REPT control statement.
Parameter
Definition
PCT=n
Optional and is most accurate for offload
datasets that reside on cartridge media. If
PCT=n is present, the Offload Consolidation
report will print the phrase Consolidation
Candidate next to each dataset version with a
number of blocks in non-scratch status
percentage equal to or less than n. For
example, if PCT=30 is specified and version
7 of an offload dataset has 25% of its
available blocks in use, the dataset will have
Consolidation Candidate listed next to its
report line. The value for blocks available is
based on an estimate of the number of 64K
blocks that will fit on the various cartridge
media. The value for the number of available
blocks in non-scratch status is taken from
data in the BIM-EPIC Catalog. For example:
REPT
REPT
13-40
PCT=40
Connectivity Systems, Inc.—Copyright © 2006
Use Pursuant to Company Instructions
User Reference
Consolidating Offload Versions (TSIDOFC)
The following provides the definition for the parameter you can use with
the CONI control statement.
Parameter
Definition
n n [n]...[n]
Specifies a version numbers that are input to
the consolidation process. There must be at
least two values present with each value
separated by a space. There can be as many
versions specified as will fit on columns 1
through 72 of the control statement. Only one
CONI statement can be present.
Unless the CONO statement is used, the
version number of the consolidated output
will be version 1.
Upon completion of the consolidation, the
input versions are set to scratch status in the
BIM-EPIC Catalog. For example:
CONI 5 12
CONI 6 14 23 30
User Reference
Connectivity Systems, Inc.—Copyright © 2006
Use Pursuant to Company Instructions
13-41
Consolidating Offload Versions (TSIDOFC)
The following provides the definition for the parameter you can use with
the CONO control statement.
Parameter
Definition
NV=n
Specifies the version number assigned to the
consolidated output version if you want a
version other than 1. The default value is 1.
The version number is not assigned until the
consolidation process has completed and the
input versions have been scratched. At that
time, if the NV number would cause a gap in
the numbering sequence, the version will
remain at 1. For example, if at the beginning,
versions 1, 2, 3, 4, 5, and 6 exist, the control
statements are:
CONI 1 2 3 4
CONO NV=4
At completion of consolidation and prior to
CONO processing, the versions are:
1 – result of the consolidation
2 – previously version 4
The original versions 1, 2, 3 and 4 are
scratched.
The CONO value NV=5 would cause a
sequence numbering gap since version 3
does not exist. NV=3 or NV=2 would be
acceptable since no sequence numbering gap
would occur. CONO must come after CONI.
For example:
CONI 5 12
CONO NV=5
13-42
Connectivity Systems, Inc.—Copyright © 2006
Use Pursuant to Company Instructions
User Reference
Consolidating Offload Versions (TSIDOFC)
The following provides the definition for the parameter you can use with
the COPY control statement.
Parameter
Definition
n
Specifies the version number of the dataset
that is input to the copy process. The version
number of the output dataset will be version
1. Only one version can be copied at a time.
The input dataset name and output dataset
names must be different.
The output will be in TSIDOFL BACKUP
format and NOT in OFFLOAD format, even
if the input is in OFFLOAD format, so the
version in the COPY cannot be onloaded.
Only one COPY statement can be present.
For example:
COPY 4
Examples
The following example produces an Offload Consolidation Candidate
report.
// JOB OFCREP
// DLBL SORTWK1,’SORT.WK1’
// EXEC TSIDOFC
REPT
/*
/&
The following example produces an Offload Consolidation Candidate
report and identifies the versions that are candidates for consolidation.
// JOB OFCREP
// DLBL SORTWK1,’SORT.WK1’
// EXEC TSIDOFC
REPT PCT=35
/*
/&
The following example consolidates version 4, version 8, and version 11
into a new version 1.
// JOB OFCCONS
// TLBL OFCINP,'PAYR.MONTHLY.OFLD’
// TLBL OFCOUT,'PAYR.MONTHLY.OFLD’
// EXEC TSIDOFC
CONI 4 8 11
/*
/&
The following example consolidates version 4, version 8, and version 11
into a new version 6.
// JOB OFCCONS
User Reference
Connectivity Systems, Inc.—Copyright © 2006
Use Pursuant to Company Instructions
13-43
Consolidating Offload Versions (TSIDOFC)
// TLBL OFCINP,'PAYR.MONTHLY.OFLD’
// TLBL OFCOUT,'PAYR.MONTHLY.OFLD’
// EXEC TSIDOFC
CONI 4 8 11
CONO NV=6
/*
/&
The following example copies offload version 7 and creates version 1 in
PAYR.MON.COPY. The new version 1 will be in BACKUP format.
Version 7 may be in OFFLOAD or BACKUP format.
// JOB OFCCONS
// TLBL OFCINP,'PAYR.MONTHLY.OFLD’
// TLBL OFCOUT,'PAYR.MON.COPY’
// EXEC TSIDOFC
COPY 7
/*
/&
13-44
Connectivity Systems, Inc.—Copyright © 2006
Use Pursuant to Company Instructions
User Reference
A
BIM-EPIC Report Fields and
Examples
BIM-EPIC produces several standard reports. This appendix lists the
standard reports by report name, report examples, and general reports.
Chapter Contents
Customized Reports
TOJA Report Examples
TSIDARP Report
TSIDBRP Report
TSIDDIS Report
TSIDJAC Report
TSIDLVT Report
TSIDMNT Report
TSIDOFD Report
TSIDOFL Report
TSIDONL Report
TSIDPRV Report
TSIDSDS Report
TSIDTAC Report
TSIDUTL Report
Tape Dataset Summary Report
Display Active Report
DSPLY NEW Report
DSPLY PULL Report
DSPLY VAULT Report
DSPLY SCRATCH Report
PSCRATCH Report (Projected Scratch)
TSIDVLT Report
User Reference
Connectivity Systems, Inc.—Copyright © 2006
Use Pursuant to Company Instructions
A-1
Customized Reports
Customized Reports
Description
In addition to the standard reports, you can use your own report writers to
produce customized reports using BIM-EPIC data.
The DSN Catalog contains all tape and dataset information, including
BIM-EPIC dataset definitions (EDDs) and version data. BIM-EPIC
provides the TSIDAC2 subroutine for access to the DSN Catalog and the
TSIDAC2.C or TSIDAC2.A copy books to map the catalog records.
The Recorder File contains all DSN Catalog changes, job accounting
information, and user comments. You can use the Recorder File to report
data such as catalog use and machine use. Use the Recorder Copybook,
TSIDREC.C, to map Recorder File records.
A-2
Connectivity Systems, Inc.—Copyright © 2006
Use Pursuant to Company Instructions
User Reference
TOJA Report Examples
TOJA Report Examples
Description
TOJA displays job accounting information online. See Chapter 11, “CICS
Access to Job Accounting Database,” for information on the TOJA report.
The TOJA report has three displays:
Job Overview
Display
Job Overview
Program Overview
Program Audit
The Job Overview display presents an overview of job activity based on a
job name. For each job, there is one entry for each program executed in
that job.
BIM-EPIC/VSE ONLINE JOB ACCOUNTING FACILITY
.ALL
JOB NAME
CATOJA
CATPRV
CATSDS
CICSEPIC
CICSEPIC
CICSEPIC
CICSEPIC
CICSEPI3
CICSICCF
CLEARRF
Definitions
User Reference
PHASE NAME START DATE START TIME
DURATION CC PT
LNKEDT
11/17/1997
08:50:19
00:00:11 10 F4
LNKEDT
11/18/1997
10:19:24
00:00:21 10 F7
LNKEDT
11/18/1997
10:19:28
00:00:22 10 F8
DTSANALS
11/18/1997
06:17:02
00:00:08 10 F2
IESWAITT
11/18/1997
06:17:10
00:00:14 10
DFHSIP
11/18/1997
06:17:25
02:30:32 17
DTSANALS
11/18/1997
09:04:49
00:00:10 10 F2
IESWAITT
11/18/1997
09:05:00
00:00:04 10
DFHSIP
11/18/1997
09:05:04
00:06:37 17
DTSANALS
11/18/1997
09:12:29
00:00:03 10 F2
IESWAITT
11/18/1997
09:12:33
00:00:01 10
DFHSIP
11/18/1997
09:12:34
00:10:39 17
DTSANALS
11/18/1997
09:24:19
00:00:06 10 F2
IESWAITT
11/18/1997
09:24:26
00:00:02 10
DTSANALS
11/17/1997
08:19:40
00:00:52 10 F2
IESWAITT
11/17/1997
08:20:33
00:00:53 10
DTSANALS
11/18/1997
06:07:49
00:00:03 10 F2
IESWAITT
11/18/1997
06:07:53
00:00:23 10
DFHSIP
11/18/1997
06:08:16
00:03:37 18
TSIDRFS
11/14/1997
10:47:16
00:00:01 10 F4
PF3=END PF5=DETAIL PF7=BACKWARD PF8=FORWARD
AR
002
002
002
002
000
000
000
000
000
000
000
000
000
000
000
000
000
000
000
000
PAGE 02
CPU ID
444444
333333
333333
222222
222222
222222
222222
444444
222222
444444
The following describes the fields located in the Job Overview display.
Field
Definition
JOB NAME
Specifies the name of the job that initiated the open
and close activity. Different jobs are separated from
each other by a dotted line.
PHASE NAME
Specifies the name of the executed phase.
START DATE
Specifies the date the program started.
START TIME
Specifies the time the program started.
DURATION
Specifies the length of time the program ran.
CC
Specifies the VSE cancel code, if the program.
PT
Specifies the partition where the job ran.
Connectivity Systems, Inc.—Copyright © 2006
Use Pursuant to Company Instructions
A-3
TOJA Report Examples
Program
Overview
Display
Field
Definition
AR
Specifies the number of audit records for the phase.
There is one audit record for each open and one
audit record for each close processed.
CPU ID
Specifies the CPU where the job ran.
The Program Overview panel displays statistics at the program level.
BIM-EPIC/VSE ONLINE JOB ACCOUNTING FACILITY
.ALL
PAGE 02
JOB NAME --------- CATSDS
CPUID ----------- 333333
START DATE ------- 11/18/1997
START TIME ------- 10:19:28
STOP TIME -------- 10:19:50
DURATION -------- 00:00:22
CANCEL CODE (HEX) ------ 10
PHASE NAME ---------- LNKEDT
PARTITION ----------- F8
END DATE ------------ 11/18/1997
CPU TIME ------------ 00:00:01:5
OVERHEAD ------------ 00:00:00:8
ALLBOUND ------------ 00:00:00
PHASE CODE -- L (S=STEP L=LAST)
PHASE SEQ --- 0001
********** INPUT OUTPUT TABLES **********
400
FEC
01F
140
141
142
160
00000155 00000012 00000007 00000073 00000183 00000378 00000100
173
FEE
00000132 00000228
*****************************************
USER INFORMATION -------NUMBER OF AUDIT RECORDS FOR THIS PHASE -- 002
USE PF5 TO VIEW AUDIT RECORDS
PF3=END
Definitions
A-4
PF5=DETAIL
PF7=BACKWARD
PF8=FORWARD
The following describes the fields located on the Program Overview
display.
Field
Definition
JOB NAME
Specifies the name of the job.
CPUID
Specifies the CPU where the program ran.
START DATE
Specifies the date the program was started.
START TIME
Specifies the time the program was started.
STOP TIME
Specifies the time the program finished.
DURATION
Specifies the amount of time the program ran.
CANCEL CODE
(HEX)
Specifies the VSE cancel code, if the program
canceled.
PHASE NAME
Specifies the name of the program (EOJ reported as
a phase).
PARTITION
Specifies the partition where the program ran.
END DATE
Specifies the date the program finished.
CPU TIME
Specifies the amount of CPU time the program
used.
OVERHEAD
Specifies the program's overhead, as defined by
IBM.
Connectivity Systems, Inc.—Copyright © 2006
Use Pursuant to Company Instructions
User Reference
TOJA Report Examples
Program Audit
Display
Field
Definition
ALLBOUND
Specifies the allbound times for the program as
defined by IBM.
PHASE CODE
Specifies STEP for a phase record; LAST for an
EOJ record.
PHASE SEQ
Specifies the step number of the phase.
INPUT OUTPUT
TABLES
Specifies the I/O counts for each device.
USER
INFORMATION
Specifies user information from the JOB statement.
NUMBER OF
AUDIT
RECORDS FOR
THIS PHASE
Specifies one audit record for each open and one for
each close processed by the phase.
The Program Audit panel displays information about datasets processed
by the program.
BIM-EPIC/VSE ONLINE JOB ACCOUNTING FACILITY
FILEID
REC CREATION OPEN
EXPIRY
SERIAL REEL
END
DTF
PROCESSED
TYPE
TIME CLOSE CUU
DATE
ACCEPTED TRACK TRACK TYPE
*****************************************************************************
3F8.IJSYSLN
DO 10:19:29 C
400 11/18/1997 EPV400 030474 010000 32
3F8.IJSYSLN
DI 10:19:47 C
400 11/18/1997 EPV400 030474 010000 32
PF2=BACKWARD
Definitions
User Reference
PF4=END
The following describes the fields located on the Program Audit display.
Field
Definition
FILEID
PROCESSED
Specifies the name of the file processed. MT
indicates that the phase was TSIDMNT and these
records are DSN Catalog transactions.
REC TYPE
Specifies the record type of the file. Valid types are
DO=disk output, DI=disk input, TO=tape output,
TI=tape input, and MT=manual catalog
maintenance transaction.
CREATION
TIME
Specifies the time the dataset was created.
OPEN CLOSE
Indicates whether the file was opened or closed.
CUU
Specifies the device address accessed.
EXPIRY DATE
Specifies the projected expiration date of the
dataset.
Connectivity Systems, Inc.—Copyright © 2006
Use Pursuant to Company Instructions
A-5
TOJA Report Examples
A-6
Field
Definition
SERIAL
ACCEPTED
Specifies the volume serial number if the ACCEPT
command was issued.
REEL TRACK
Specifies the starting address of a disk dataset or the
reel sequence number of a tape dataset.
END TRACK
Specifies the ending address of a disk dataset.
DTF TYPE
Specifies the DTF type of the dataset.
Connectivity Systems, Inc.—Copyright © 2006
Use Pursuant to Company Instructions
User Reference
TSIDARP Report
TSIDARP Report
Description
TSIDARP produces the Activity Log report listing open and close activity
by job name. Job data is listed in sections with information about the job
and program information listed in the first line of the section. Dataset
activity for that job is listed under the job name.
Definitions
The following describes the fields located on the Activity Log.
Field
Definition
JOB NAME
Specifies the name of the job which
initiated the open and close activity.
Different jobs are separated from each
other by a dotted line.
PHASE NAME
Specifies the name of the program being
reported.
Note: Under each job and phase name,
the Activity Log report lists the datasets
processed by each phase. The Activity
Log report indicates what kind of dataset
was processed and whether the dataset
was opened or closed.
User Reference
PART
Specifies the partition the job ran in.
CPU TIME
Specifies the amount of CPU time the
program used.
OVERHEAD
Specifies the program overhead, as
defined by IBM.
GEN/REEL
Specifies the generation number of a disk
version or the reel sequence of a tape
version.
SERIAL NO
Specifies the serial number of the tape or
disk pack accessed.
DTF TYPE
Specifies the DTF type of the dataset
processed.
UNIT
Specifies the address of the drive used.
TOTAL I/O
Specifies the amount of I/O issued by the
program to that device.
START/OPEN
Specifies the time, in HH.MM.SS format,
the dataset was opened.
END/CLOSE
Specifies the time in HH.MM.SS format,
the dataset was closed.
USAGE MIN/SEC
Specifies the amount of time the dataset
was processed.
Connectivity Systems, Inc.—Copyright © 2006
Use Pursuant to Company Instructions
A-7
TSIDARP Report
A-8
Field
Definition
D/S CREATION: JOB
Specifies the dataset creation job.
D/S CREATION: DATE
Specifies the dataset creation date.
DISK SPACE ALLOCAT:
START
Specifies the beginning address of a disk
extent.
DISK SPACE ALLOCAT:
REQST
Specifies the amount of allocation
requested for the extent.
DISK SPACE ALLOCAT:
TRUNC
Specifies the extent size after truncation.
Connectivity Systems, Inc.—Copyright © 2006
Use Pursuant to Company Instructions
User Reference
TSIDARP Report
Example
The following is an example of a TSIDARP Activity Log report.
C.P.U. NO. 111111
DATE 12/02/1997
JOB
PHASE
C.P.U.
OVER GEN/
NAME
NAME
PART
TIME
HEAD
J O B
A C C O U N T I N G
S Y S T E M
TSIDARP= 6.01.00
A C T I V I T Y
L O G
RUN DATE 12/04/1997 TIME 13.19.49 PAGE
1
DTF
TOTAL
START/
END/
USAGE -D/S CREATION----DISK SPACE ALLOCATNO. TYPE UNIT
I/O
OPEN
CLOSE MIN/SEC
JOB
DATE
START REQST TRUNC
SERIAL
REEL
DUMMY
BG
00.1
00.1
09.30.15 09.30.17
.02 PROG TERMINATED INTERR.HEX CODE 00
...........................................................................................................................
BGINIT
IESWAIT BG
00.3
00.2
09.29.40 09.30.10
.30
VERIFYJ1 VERIFYJO BG
00.7
00.5
09.56.19 09.56.39
.20
DISK OUTPUT VERIFYJ.CONTROLLED.CAT
11 CKD001 20
160
91 09.56.31
VERIFYJ1 097336 10176
33
33
CLOSED AS OUTPUT VERIFYJ.CONTROLLED.CAT
11 CKD001 20
160
09.56.35
VERIFYJ1 097336 10176
33
2
...........................................................................................................................
VERIFYJ1 VERIFYJO BG
00.7
00.5
09.57.47 09.58.05
.18
DISK OUTPUT VERIFYJ.CONTROLLED.CAT
12 CKD001 20
160
91 09.57.58
VERIFYJ1 097336 10176
33
33
CLOSED AS OUTPUT VERIFYJ.CONTROLLED.CAT
12 CKD001 20
160
09.58.02
VERIFYJ1 097336 10176
33
2
...........................................................................................................................
VERIFYJ1 VERIFYJO BG
00.7
00.5
10.01.52 10.02.16
.24
VERIFYJ1 VERIFYJO BG
00.7
00.5
10.03.40 10.04.05
.25
VERIFYJ1 VERIFYJI BG
00.6
00.5
10.09.02 10.09.19
.17
DISK OUTPUT VERIFYJ.CONTROLLED.CAT
13 CKD001 20
160
70 10.08.57
VERIFYJ1 097336 10176
33
33
CLOSED AS OUTPUT VERIFYJ.CONTROLLED.CAT
13 CKD001 20
160
10.09.01
VERIFYJ1 097336 10176
33
2
CLOSED AS INPUT
VERIF.CONTROLLED.CAT
13 CKD001 20
160
10.09.16
VERIFYJ1 097336 10176
33
2
DISK INPUT VERIFYJ.CONTROLLED.CAT
13 CKD001 20
160
* 10.09.13
VERIFYJ1 097336 10176
33
2
...........................................................................................................................
VERIFYJ1 JCOPY
BG
00.7
00.3
10.08.53 10.09.02
.09
VERIFYJ1 VERIFYJI BG
00.6
00.5
10.10.17 10.10.31
.14
DISK OUTPUT VERIFYJ.CONTROLLED.CAT
14 CKD001 20
160
70 10.10.13
VERIFYJ1 097336 10176
33
33
CLOSED AS OUTPUT VERIFYJ.CONTROLLED.CAT
14 CKD001 20
160
10.10.15
VERIFYJ1 097336 10176
33
2
CLOSED AS INPUT
VERIFYJ.CONTROLLED.CAT
14 CKD001 20
160
10.10.28
VERIFYJ1 097336 10176
33
2
DISK INPUT VERIFYJ.CONTROLLED.CAT
14 CKD001 20
160
* 10.10.25
VERIFYJ1 097336 10176
33
2
...........................................................................................................................
VERIFYJ1 JCOPY
BG
00.7
00.3
10.10.10 10.10.16
.06
VERIFYJ1 VERIFYJI BG
00.5
00.5
10.16.11 10.16.25
.14
VERIFYJ1 VERIFYJI BG
00.5
00.4
10.14.33 10.14.55
.22
VERIFYJ1 JCOPY
BG
00.6
00.3
10.15.59 10.16.10
.11
* INDICATES THAT TOTAL I/O IS FOR MULTIPLE FILES IN SAME DEVICE
J O B
A C C O U N T I N G
S Y S T E M
TSIDARP= 6.01.00
C.P.U. NO. 111111
DATE 12/02/1997
A C T I V I T Y
L O G
RUN DATE 12/04/1997 TIME 13.19.49 PAGE
2
JOB
PHASE
C.P.U.
OVER GEN/ SERIAL DTF
TOTAL
START/
END/
USAGE -D/S CREATION----DISK SPACE ALLOCATNAME
NAME
PART
TIME
HEAD REEL
NO. TYPE UNIT
I/O
OPEN
CLOSE MIN/SEC
JOB
DATE
START REQST TRUNC
VERIFYJ1 JCOPY
BG
00.6
00.3
10.14.20 10.14.33
.13
...........................................................................................................................
TSIDRFS TSIDRFS F4
00.5
00.3
09.28.33 09.30.03
1.30
JAY
JCOPY
F4
00.6
00.3
09.47.48 09.47.56
.08
DISK OUTPUT VERIFYJ.CONTROLLED.CAT
9 CKD001 20
160
23 09.45.15
JAY
097336 10176
33
33
DISK OUTPUT VERIFYJ.CONTROLLED.CAT
10 CKD001 20
160
* 09.46.44
JAY
097336 10176
33
33
DISK OUTPUT VERIFYJ.IJSYSLS
18 EPV400 20
400
17 09.46.09
JAY
097336
474
2000 2000
DISK OUTPUT VERIFYJ.IJSYSLS
19 EPV400 20
400
* 09.47.29
JAY
097336
474
2000 2000
CLOSED AS OUTPUT VERIFYJ.CONTROLLED.CAT
9 CKD001 20
160
09.45.20
JAY
097336 10176
33
2
CLOSED AS OUTPUT VERIFYJ.CONTROLLED.CAT
10 CKD001 20
160
09.46.51
JAY
097336 10176
33
2
CLOSED AS OUTPUT VERIFYJ.IJSYSLS
18 EPV400 20
400
09.46.13
JAY
097336
474
2000
416
CLOSED AS OUTPUT VERIFYJ.IJSYSLS
19 EPV400 20
400
09.47.32
JAY
097336
474
2000
416
CLOSED AS INPUT
VERIFYJ.CONTROLLED.CAT
9 CKD001 20
160
09.45.36
JAY
097336 10176
33
2
CLOSED AS INPUT
VERIFYJ.CONTROLLED.CAT
10 CKD001 20
160
09.47.05
JAY
097336 10176
33
2
CLOSED AS INPUT
VERIFYJ.IJSYSLS
18 EPV400 20
400
09.46.28
JAY
097336
474
2000
416
CLOSED AS INPUT
VERIFYJ.IJSYSLS
User Reference
Connectivity Systems, Inc.—Copyright © 2006
Use Pursuant to Company Instructions
A-9
TSIDBRP Report
TSIDBRP Report
Description
TSIDBRP creates the DSN/JOB Cross Reference report, which is a
cross-reference to the Activity Log report, listing open and close activity
sequenced by dataset name. TSIDBRP also creates the Accepted Tapes
report which lists each time ACCEPT was used as a response to message
EP008 or EP009.
Each dataset is reported with a separate line for each open and each close.
The last column, which has no header, specifies whether the line refers to
open or close activity and whether the file was used as input or output.
The message OPEN OUTPUT|INPUT NEXT REEL|EXTENT indicates
that an open was initiated for the next reel or extent in the sequence.
Definitions
A-10
The following describes the fields located on the DSN/JOB
Cross-Reference report.
Field
Definition
FILE NAME
Specifies the name of the dataset opened
or closed.
JOB NAME
Specifies the name of the job which
initiated the activity.
PHASE NAME
Specifies the name of the program being
reported.
CPUID
Specifies the CPU the program ran in.
RUN DATE
Specifies the date the job ran.
TIME
Specifies the time the job started.
PART
Specifies the partition the job ran in.
SERIAL NO.
Specifies the volume serial number which
was opened or closed.
DEVICE:
Specifies the type of device used and the
device address.
TYPE NO.
REEL NO.
Specifies the reel or extent sequence
number.
START TRACK
Specifies the starting address of disk
extents.
NO. OF TRACKS
Specifies the number of tracks requested
for the allocation.
TRACKS TRUNCT.
Specifies the number of tracks after
truncation.
Connectivity Systems, Inc.—Copyright © 2006
Use Pursuant to Company Instructions
User Reference
TSIDBRP Report
Example
The following is an example of a TSIDBRP DSN/JOB Cross Reference
report.
J O B
A C C O U N T I N G
DSN / JOB CROSS REFERENCE
JOB
NAME
FILE NAME
S Y S T E M
RUN DATE 04/16/1998
PHASE
NAME
VERIFY6.FILE01
CPUID
TSIDBRP= 6.1
TIME 13.16.35
PAGE
RUN
DATE
TIME
1
SERIAL -DEVICEPART
NO. TYPE NO.
REEL
NO.
START
TRACK
NO OF
TRACKS
TRACKS
TRUNCT.
VERIFY6
JCOPY
G=0000002
222222 04/15/1998 06.19.25 BG CKD001 DISK
222222
06.19.31 BG CKD001 DISK
160
160
9645
9645
15
15
15 OPENED OUTPUT
7 CLOSED OUTPUT
VERIFY6
JCOPY
G=0000003
222222 04/15/1998 06.19.35 BG CKD001 DISK
222222
06.19.44 BG CKD001 DISK
160
160
9652
9652
15
15
15 OPENED OUTPUT
7 CLOSED OUTPUT
VERIFY6
JCOPY
G=0000004
222222 04/15/1998 06.19.47 BG CKD001 DISK
222222
06.19.54 BG CKD001 DISK
160
160
9659
9659
15
15
15 OPENED OUTPUT
7 CLOSED OUTPUT
VERIFY6
JCOPY
G=0000005
222222 04/15/1998 06.20.00 BG CKD001 DISK
222222
06.20.06 BG CKD001 DISK
160
160
9666
9666
15
15
15 OPENED OUTPUT
7 CLOSED OUTPUT
VERIFY6
JCOPY
VERIFY6
JCOPY
VERIFY6
JCOPY
VERIFY6
VERIFY6.FILE01
VERIFY6.FILE01
VERIFY6.FILE01
VERIFY6.FILE01
G=0000006
222222 04/15/1998
222222
TSIDOFL 222222
222222
06.20.10
06.20.18
06.27.30
06.27.31
BG
BG
BG
BG
CKD001
CKD001
CKD001
CKD001
DISK
DISK
DISK
DISK
160
160
160
160
9749
9749
9749
9749
15
15
15
15
15
7
7
7
OPENED
CLOSED
OPENED
CLOSED
OUTPUT
OUTPUT
INPUT
INPUT
G=0000007
222222 04/15/1998
222222
TSIDOFL 222222
222222
06.20.20
06.20.27
06.27.32
06.27.33
BG
BG
BG
BG
CKD001
CKD001
CKD001
CKD001
DISK
DISK
DISK
DISK
160
160
160
160
9756
9756
9756
9756
15
15
15
15
15
7
7
7
OPENED
CLOSED
OPENED
CLOSED
OUTPUT
OUTPUT
INPUT
INPUT
G=0000008
222222 04/15/1998
222222
TSIDOFL 222222
222222
06.20.29
06.20.35
06.27.33
06.27.34
BG
BG
BG
BG
CKD001
CKD001
CKD001
CKD001
DISK
DISK
DISK
DISK
160
160
160
160
9763
9763
9763
9763
15
15
15
15
15
7
7
7
OPENED
CLOSED
OPENED
CLOSED
OUTPUT
OUTPUT
INPUT
INPUT
JCOPY
G=0000009
222222 04/15/1998 06.20.37 BG CKD001 DISK
222222
06.20.44 BG CKD001 DISK
160
160
9770
9770
15
15
15 OPENED OUTPUT
7 CLOSED OUTPUT
VERIFY6
TSIDONL
G=0000010
222222 04/15/1998 06.28.11 BG CKD001 DISK
222222
06.28.14 BG CKD001 DISK
160
160
9787
9787
15
15
15 OPENED OUTPUT
7 CLOSED OUTPUT
VERIFY6
JCOPY
VERIFY6
VERIFY6
JCOPY
JCOPY
VERIFY6
JCOPY
VERIFY6
JCOPY
VERIFY6.FILE01
VERIFY6.FILE01
VERIFY6.FILE01
VERIFY6.FILE01
VERIFY6.FILE02
VERIFY6.FILE02
VERIFY6.FILE02
VERIFY6.FILE02
User Reference
G=0000002
222222 04/15/1998
222222
222222
TSIDOFL 222222
222222
222222
06.20.48
06.20.55
06.20.56
06.27.16
06.27.16
06.27.17
BG
BG
BG
BG
BG
BG
CKD001
CKD001
CKD001
CKD001
CKD001
CKD001
DISK
DISK
DISK
DISK
DISK
DISK
160
160
160
160
160
160
9673
9678
9678
9673
9678
9673
5
2
2
5
2
5
5
2
2
5
2
5
OPENED
OUTPUT
CLOSED
OPENED
OPENED
CLOSED
OUTPUT
NEXT EXTENT
OUTPUT
INPUT
INPUT
INPUT
G=0000003
222222 04/15/1998
222222 04/15/1998
222222
222222
TSIDOFL 222222
222222
222222
06.20.59
06.20.59
06.21.04
06.21.06
06.27.18
06.27.19
06.27.19
BG
BG
BG
BG
BG
BG
BG
CKD001
CKD001
CKD001
CKD001
CKD001
CKD001
CKD001
DISK
DISK
DISK
DISK
DISK
DISK
DISK
160
160
160
160
160
160
160
9777
9777
9680
9680
9777
9777
9680
5
5
2
2
5
5
2
5
5
2
2
5
5
2
OPENED
OPENED
OUTPUT
CLOSED
OPENED
CLOSED
OPENED
OUTPUT
OUTPUT
NEXT EXTENT
OUTPUT
INPUT
INPUT
INPUT
G=0000004
222222 04/15/1998
222222
222222
TSIDOFL 222222
222222
222222
06.21.08
06.21.14
06.21.16
06.27.20
06.27.21
06.27.22
BG
BG
BG
BG
BG
BG
CKD001
CKD001
CKD001
CKD001
CKD001
CKD001
DISK
DISK
DISK
DISK
DISK
DISK
160
160
160
160
160
160
9782
9682
9682
9782
9682
9782
5
2
2
5
2
5
5
2
2
5
2
5
OPENED
OUTPUT
CLOSED
OPENED
OPENED
CLOSED
OUTPUT
NEXT EXTENT
OUTPUT
INPUT
INPUT
INPUT
G=0000005
222222 04/15/1998
222222
222222
TSIDOFL 222222
222222
222222
06.21.18
06.21.24
06.21.25
06.27.23
06.27.24
06.27.24
BG
BG
BG
BG
BG
BG
CKD001
CKD001
CKD001
CKD001
CKD001
CKD001
DISK
DISK
DISK
DISK
DISK
DISK
160
160
160
160
160
160
9787
9792
9792
9787
9787
9792
5
2
2
5
5
2
5
2
2
5
5
2
OPENED
OUTPUT
CLOSED
OPENED
CLOSED
OPENED
OUTPUT
NEXT EXTENT
OUTPUT
INPUT
INPUT
INPUT
Connectivity Systems, Inc.—Copyright © 2006
Use Pursuant to Company Instructions
A-11
TSIDBRP Report
Definitions
The following describes the fields located on the Accepted Tapes report.
Field
Definition
REQUESTED FILE NAME
Specifies the name of the dataset
requested by the job.
REQUESTED SERIAL NO. Specifies the volume serial number
requested by the job. A serial number of
000000 indicates that the real volume
number is not known.
Example
J O B
ACCEPTED FILE NAME
Specifies the name of the dataset
accepted.
ACCEPTED SERIAL NO.
Specifies the volume serial number
accepted. A serial number of 000000
indicates that the real volume number is
unknown.
JOB NAME
Specifies the job that was running when
the operator accepted the tape.
PHASE NAME
Specifies the phase that was running
when the operator accepted the tape.
DATE
Specifies the date the tape was accepted.
TIME
Specifies the time the tape was accepted.
PART
Specifies the partition the job was
running in.
The following is an example of the TSIDBRP Accepted Tapes report:
A C C O U N T I N G
S Y S T E M
TSIDBRP= 6.1
ACCEPTED TAPES REPORT
---------REQUESTED-------SERIAL
FILE NAME
NO.
----------ACCEPTED-------SERIAL
JOB
PHASE
FILE NAME
NO.
VERIFY4.EMPTY
VERIFY4.EMPTY
VERIFY4.TAPE
VERIFY4.EMPTY
VERIFY4.TAPE2
VERIFY4.TAPE2
VERIFY4.SEVENTEEN
VERIFY4.MORE.THAN
VERIFY4.SEVENTEEN
VERIFY4.MORE.THAN
*** UNLABELED ***
VERIFY4.UNCONTROL
VERIFY4.UNCONTROL
VERIFY4.TAPE1
VERIFY4.TAPE1
VERIFY4.TAPE1
VERIFY4.MORE.THAN
VERIFY4.SEVENTEEN
VERIFY4.MORE.THAN
VERIFY4.SEVENTEEN
A-12
000000
000000
VRFY42
000000
VRFY42
VRFY42
VRFY41
VRFY42
VRFY41
VRFY42
000000
VRFY41
VRFY41
VRFY41
VRFY41
VRFY41
VRFY42
VRFY41
VRFY42
VRFY41
NAME
VERIFY41
VERIFY41
VERIFY41
VERIFY41
VERIFY41
VERIFY41
VERIFY41
VERIFY41
VERIFY41
VERIFY41
NAME
JCOPY
JCOPY
JCOPY
JCOPY
JCOPY
JCOPY
JCOPY
JCOPY
JCOPY
JCOPY
RUN DATE 12/30/1997
DATE
TIME
12/30/1997
12/30/1997
12/30/1997
12/30/1997
12/30/1997
12/30/1997
12/30/1997
12/30/1997
12/30/1997
12/30/1997
06.16.42
06.16.59
06.17.33
06.17.56
06.18.05
06.18.18
06.18.47
06.18.59
06.19.13
06.19.25
Connectivity Systems, Inc.—Copyright © 2006
Use Pursuant to Company Instructions
TIME 07.28.58
PAGE
1
PART
U1
U1
U1
U1
U1
U1
U1
U1
U1
U1
User Reference
TSIDDIS Report
TSIDDIS Report
Description
TISDDIS produces a summary report correlating dataset versions and
tape volume serial numbers. The information in the TISDDIS summary
report is listed by dataset name order with one entry for each dataset
version. However, if a version spans more than one volume, there is an
entry for each volume.
See Chapter 12, “Dataset to Tape Report (TSIDDIS),” for additional
information on the TSIDDIS report.
Definitions
The following describes the fields located on the TSIDDIS report.
Field
Definition
DATASET NAME Specifies the dataset name. Versions and reels listed
between this name and the next name belong to this
dataset name.
User Reference
VER
Specifies the relative version number of the version.
REEL
Specifies the reel sequence number associated with
the tape, which is important for multi-volume
versions.
SER NO
Specifies the volume serial number of the tape
associated with the version.
Connectivity Systems, Inc.—Copyright © 2006
Use Pursuant to Company Instructions
A-13
TSIDDIS Report
Example
The following is an example of the TSIDDIS Dataset Management report.
TSIDDIS= 6.01.00
TIME 14 06 30
DATA SET NAME
$$$.VERIFY8.JUAN
A-R TAPE
ALERT.AUDIT.HIST
AR.PROD.LGX.AR192BKP.GVEXPORT.AR192RST
AR.PROD.LGX.EL588BKP.GVEXPORT.EL588RST
AR.PROD.NCL.CASHRCT.CASHRBKP.DAILY
AR.PROD.NCL.ELME3BKP.GVEXPORT.ELME3RST
AR.PROD.NCL.ELME3BKP.GVEXPORT.OFFSITE
AR.PROD.NCL.ERBFWD.EL863.MONTHEND
AR.PROD.NCL.EREXTR.EL860.MONTHEND
AR.PROD.NCL.EREXTR.EL860.OFFSITE
AR.PROD.NCL.ERPNDB.EL860.MONTHEND
AR.PROD.NCL.ERPNDB.EL860.OFFSITE
AR.PROD.NCL.ERPYAJ.EL860.MONTHEND
AR.PROD.NCL.ERPYAJ.EL860.OFFSITE
BILRECS BKUP TAPE
BUD.ACASH.BKUP
BUDGET.SQLBKUP
BUDGET.SQLBKUP1
CASH.BUD1.BKUP
CASH.BUD2.BKUP
CI.PROD.LGX.EL512BKP.GVEXPORT.EL512RST
A-14
D A T A
S E T
M A N A G E M E N T
VER REEL SER NO
*** EMPTY ***
1
1 001249
2
1 000114
1
1 000092
2
1 000057
3
1 000455
1
1 011609
2
1 011918
3
1 012056
1
1 011615
2
1 011932
3
1 012087
1
1 011610
2
1 011904
3
1 012057
1
1 010523
2
1 011185
3
1 011495
1
1 090783
2
1 090651
3
1 090529
4
1 090424
5
1 090217
2 090218
6
1 090123
7
1 090122
1
1 010405
1
1 012145
2
1 012062
3
1 010340
1
1 090785
2
1 090653
3
1 090531
4
1 090425
5
1 090209
6
1 090149
7
1 090126
1
1 012149
2
1 012067
3
1 010351
1
1 090786
2
1 090654
3
1 090532
4
1 090426
5
1 090208
6
1 090128
7
1 090127
1
1 012147
2
1 012038
3
1 010355
1
1 090880
2
1 090784
3
1 090652
4
1 090530
5
1 090423
6
1 090210
7
1 090125
8
1 090124
1
1 000050
2
1 000024
3
1 000061
4
1 000019
5
1 000143
6
1 000305
7
1 000035
1
1 000182
1
1 001056
2
1 000252
3
1 000432
1
1 001056
2
1 000252
3
1 000432
1
1 000149
1
1 000149
1
1 011625
2
1 011967
3
1 011953
4
1 011938
5
1 011850
6
1 011851
S Y S T E M
PAGE
1
DATE 12/04/1997
DATA SET NAME
CI.PROD.NCL.EL511WA.MTH511.ENTRY
CI.PROD.NCL.EL511WA.VNB511.ENTRY
CI.PROD.NCL.EL513WA.EL513.ENTRY
CI.PROD.NCL.E001WA.P4107WRK.JE004RPT
CI.TEST.LGX.EL512BKP.GVEXPORT.EL512RST
CI.TEST.NCL.EL511WA.CI003CNV.ENTRY
CI.TEST.NCL.EL511WA.CI005CNV.ENTRY
CI.TEST.NCL.EL511WA.VNB511.ENTRY
CI.TEST.NCL.EL513WA.EL513.ENTRY
CL.PROD.LGX.CLDLYBKP.GVEXPORT.CLDLYRST
CL.PROD.LGX.CLEOMBKP.GVEXPORT.CLEOMRST
CL.PROD.LGX.CL311BKP.GVEXPORT.CL311RST
CL.PROD.LGX.ELEXTR.CLEXTBKP.CLDLY
CL.PROD.LGX.ELEXTR.CLEXTEOM.OFFSITE
CL.PROD.LGX.ELHAF.CLHAFCPY.MONTHEND
CL.PROD.LGX.ELHAF.EL309.MONTHEND
CL.PROD.LGX.EL000BKP.CLEOMREN.OFFSITE
Connectivity Systems, Inc.—Copyright © 2006
Use Pursuant to Company Instructions
VER REEL
SER NO
1
1 012086
1
1 011950
2
1 012093
1
1 011635
2
1 011989
3
1 011966
4
1 011954
5
1 011859
6
1 012130
7
1 012122
8
1 012105
9
1 012085
10
1 012099
1
1 010947
2
1 012111
3
1 010108
4
1 011489
5
1 010189
6
1 011560
7
1 011559
1
1 011498
2
1 012223
1
1 010464
1
1 011505
2
1 011496
3
1 012226
4
1 012236
1
1 011521
1
1 011494
2
1 012228
1
1 011621
2 011629
2
1 011961
2 011947
3
1 012135
2 012089
1
1 011530
2 011516
1
1 011623
2 011644
2
1 011968
2 011969
3
1 012097
2 012139
1
1 011637
2
1 011974
3
1 012136
4
1 010787
5
1 010767
6
1 011322
7
1 010220
1
1 090765
2
1 090635
3
1 090491
4
1 090340
5
1 090156
6
1 090102
7
1 090101
1
1 011393
2 011395
3 011397
2
1 011865
2 011855
3 011867
1
1 010715
2 010716
3 010718
2
1 011861
2 011854
3 011864
3
1 010798
2 010804
3 010839
1
1 090769
2 090770
3 090771
4 090772
5 090773
6 090774
7 090775
User Reference
TSIDJAC Report
TSIDJAC Report
Description
TSIDJAC creates the Job Time Activity report, which lists job accounting
information by CPU and by job.
Definitions
The following describes the fields located on the Job Time Activity
report.
Field
Definition
CPU NO.
Specifies the CPU being reported.
JOB NAME
Specifies the name of the job which initiated the
activity.
RUN DATE
Specifies the date the job ran.
PHASE NAME
Specifies the name of the program being reported.
PART ID
Specifies the partition in which the job ran.
START TIME
Specifies the time, in hh.mm.ss format, the phase
started.
END TIME
Specifies the time the phase completed.
DURATION TIME
Specifies the length of time the phase ran.
CPU TIME
Specifies the amount of CPU time the program
used.
OVERHEAD
Specifies the program overhead, as defined by
IBM.
TOTAL I/O
Specifies the amount of I/O issued by the
program to that device.
In addition, grand totals for DURATION TIME, CPU TIME,
OVERHEAD, and TOTAL I/O are listed at the end of the report.
User Reference
Connectivity Systems, Inc.—Copyright © 2006
Use Pursuant to Company Instructions
A-15
TSIDJAC Report
Example
The following is an example of the TSIDJAC Job Time Activity report:
J O B
A C C O U N T I N G
S Y S T E M
C.P.U. NO. 111111
RUN DATE 12/04/1997
JOB
RUN
PHASE
PART
NAME
DATE
NAME
ID
BGINIT
12/02/1997
DUMMY
TSIDJAC= 6.01.00
J O B T I M E A C T I V I T Y *
START
END
DURATION
TIME
TIME
TIME
TIME 13.20.07
CPU
OVER
TIME
HEAD
PAGE
TOTAL
I/O
1
BG
09.29.40
09.30.10
00.00.30
00.00.30*
00.00.30**
00.00.3
00.00.3*
00.00.3**
00.00.2
00.00.2*
00.00.2**
238
238*
238**
12/02/1997
BG
09.30.15
09.30.17
00.00.02
00.00.02*
00.00.02**
00.00.1
00.00.1*
00.00.1**
00.00.1
00.00.1*
00.00.1**
44
44*
44**
DYNBGN1
12/02/1997
Z1
09.28.33
09.30.29
00.01.56
00.01.56*
00.01.56**
00.01.0
00.01.0*
00.01.0**
00.00.4
00.00.4*
00.00.4**
191
191*
191**
F6BGN
12/02/1997
F6
09.27.56
09.30.07
00.02.11
00.02.11*
00.02.11**
00.01.1
00.01.1*
00.01.1**
00.00.5
00.00.5*
00.00.5**
189
189*
189**
F7BGN
12/02/1997
F7
09.27.58
09.30.14
00.02.16
00.02.16*
00.02.16**
00.01.1
00.01.1*
00.01.1**
00.00.5
00.00.5*
00.00.5**
189
189*
189**
F8BGN
12/02/1997
F8
09.27.59
09.30.13
00.02.14
00.02.14*
00.02.14**
00.01.0
00.01.0*
00.01.0**
00.00.5
00.00.5*
00.00.5**
189
189*
189**
F9BGN
12/02/1997
F9
09.28.01
09.30.16
00.02.15
00.02.15*
00.02.15**
00.01.1
00.01.1*
00.01.1**
00.00.5
00.00.5*
00.00.5**
189
189*
189**
JAY
12/02/1997
12/02/1997
12/02/1997
12/02/1997
12/02/1997
12/02/1997
12/02/1997
12/02/1997
12/02/1997
12/02/1997
12/02/1997
12/02/1997
12/02/1997
12/02/1997
12/02/1997
12/02/1997
12/02/1997
12/02/1997
12/02/1997
12/02/1997
12/02/1997
12/02/1997
12/02/1997
12/02/1997
12/02/1997
12/02/1997
12/02/1997
12/02/1997
12/02/1997
12/02/1997
12/02/1997
12/02/1997
12/02/1997
12/02/1997
12/02/1997
12/02/1997
12/02/1997
12/02/1997
12/02/1997
12/02/1997
12/02/1997
12/02/1997
12/02/1997
12/02/1997
12/02/1997
12/02/1997
12/02/1997
12/02/1997
12/02/1997
12/02/1997
12/02/1997
F4
F4
F4
F4
F4
F4
F4
F4
F4
F4
F4
F4
F4
F4
F4
F4
F4
F4
F4
F4
F4
F4
F4
F4
F4
F4
F4
F4
F4
F4
F4
F4
F4
F4
F4
F4
F4
F4
F4
F4
F4
F4
F4
F4
F4
F4
F4
F4
F4
F4
F4
09.44.59
09.45.22
09.45.39
09.45.46
09.46.15
09.46.32
09.46.38
09.46.54
09.47.07
09.47.14
09.47.33
09.47.48
09.50.11
09.50.32
09.50.45
09.51.03
09.51.08
09.51.11
09.51.17
09.51.32
09.51.54
09.52.07
09.56.03
09.56.46
09.56.53
09.57.16
09.57.35
09.57.44
09.58.10
09.58.16
09.58.35
09.58.48
10.01.37
10.02.24
10.02.58
10.03.24
10.03.34
10.04.11
10.04.30
10.04.42
10.08.41
10.09.23
10.09.28
10.09.45
10.09.58
10.10.06
10.10.35
10.10.38
10.10.48
10.10.56
10.14.05
09.45.22
09.45.39
09.45.45
09.46.15
09.46.31
09.46.38
09.46.53
09.47.07
09.47.14
09.47.33
09.47.47
09.47.56
09.50.31
09.50.44
09.51.02
09.51.07
09.51.11
09.51.17
09.51.31
09.51.54
09.52.06
09.52.15
09.56.46
09.56.52
09.57.16
09.57.35
09.57.43
09.58.10
09.58.15
09.58.34
09.58.48
09.58.55
10.02.23
10.02.58
10.03.23
10.03.34
10.04.11
10.04.29
10.04.42
10.04.50
10.09.22
10.09.27
10.09.45
10.09.57
10.10.06
10.10.35
10.10.37
10.10.48
10.10.56
10.11.09
10.15.01
00.00.23
00.00.17
00.00.06
00.00.29
00.00.16
00.00.06
00.00.15
00.00.13
00.00.07
00.00.19
00.00.14
00.00.08
00.00.20
00.00.12
00.00.17
00.00.04
00.00.03
00.00.06
00.00.14
00.00.22
00.00.12
00.00.08
00.00.43
00.00.06
00.00.23
00.00.19
00.00.08
00.00.26
00.00.05
00.00.18
00.00.13
00.00.07
00.00.46
00.00.34
00.00.25
00.00.10
00.00.37
00.00.18
00.00.12
00.00.08
00.00.41
00.00.04
00.00.17
00.00.12
00.00.08
00.00.29
00.00.02
00.00.10
00.00.08
00.00.13
00.00.56
00.01.1
00.00.5
00.00.8
00.01.7
00.01.1
00.00.6
00.00.6
00.00.5
00.00.7
00.01.7
00.01.1
00.00.6
00.01.0
00.00.5
00.01.7
00.01.0
00.00.5
00.00.6
00.00.5
00.01.7
00.01.1
00.00.6
00.00.8
00.00.7
00.01.7
00.01.1
00.00.6
00.00.4
00.00.7
00.01.7
00.01.1
00.00.6
00.00.9
00.01.7
00.01.1
00.00.5
00.00.4
00.01.7
00.01.1
00.00.6
00.00.9
00.00.7
00.01.7
00.01.1
00.00.5
00.00.4
00.00.7
00.01.7
00.01.1
00.00.6
00.00.9
00.00.7
00.00.5
00.00.3
00.00.7
00.00.4
00.00.3
00.00.4
00.00.5
00.00.3
00.00.7
00.00.4
00.00.3
00.00.6
00.00.5
00.00.7
00.00.4
00.00.3
00.00.3
00.00.5
00.00.7
00.00.4
00.00.3
00.00.5
00.00.2
00.00.7
00.00.4
00.00.3
00.00.2
00.00.2
00.00.8
00.00.4
00.00.3
00.00.5
00.00.7
00.00.4
00.00.3
00.00.2
00.00.7
00.00.4
00.00.3
00.00.5
00.00.2
00.00.7
00.00.4
00.00.3
00.00.2
00.00.2
00.00.7
00.00.4
00.00.3
00.00.5
A-16
IESWAIT
*
JCOPY
VERIFYJI
JCOPY
TSIDLVT
JCOPY
JCOPY
JCOPY
VERIFYJI
JCOPY
TSIDLVT
JCOPY
JCOPY
JCOPY
VERIFYJI
TSIDLVT
JCOPY
JCOPY
JCOPY
VERIFYJI
TSIDLVT
JCOPY
JCOPY
JCOPY
JCOPY
TSIDLVT
JCOPY
JCOPY
JCOPY
JCOPY
TSIDLVT
JCOPY
JCOPY
JCOPY
TSIDLVT
JCOPY
JCOPY
JCOPY
TSIDLVT
JCOPY
JCOPY
JCOPY
JCOPY
TSIDLVT
JCOPY
JCOPY
JCOPY
JCOPY
TSIDLVT
JCOPY
JCOPY
JCOPY
Connectivity Systems, Inc.—Copyright © 2006
Use Pursuant to Company Instructions
User Reference
705
524
336
696
1448
245
357
521
336
684
1457
400
635
485
684
1446
248
284
487
695
1446
404
595
336
684
1457
244
251
336
686
1446
389
613
684
1457
242
269
684
1455
389
600
336
684
1446
244
256
336
693
1446
398
619
TSIDLVT Report
TSIDLVT Report
Description
TSIDLVT lists VTOC data in batch. The report format varies depending
on the options you choose when submitting the JCL.
See Chapter 12, “Moving Volumes (TSIDVLT),” for additional
information on printing reports.
Definitions
User Reference
The following describes the fields located on the TSIDLVT report.
Field
Definition
DISPLAY OF
Identifies the content of the report, either
SER=volser or the name of the pool.
FILE NAME
Specifies the name of the dataset residing in the
specified pools of the VTOC.
SERIAL
Specifies the volume serial number the extent
resides on.
EXT SEQ
Specifies the extent sequence number.
EXTENT START
Specifies the starting extent address.
EXTENT END
Specifies the ending extent address.
EXTENT
NUMBER
Specifies the number of extents occupied by the
dataset.
CREATE DATE
Specifies the date the dataset was created.
EXPIRE DATE
Specifies the expiration date written on the VTOC.
DISK TYPE
Specifies the type of disk device.
FILE TYPE
Specifies the dataset file type.
EXT
Specifies the extent has expired if printed in the far
right column.
Connectivity Systems, Inc.—Copyright © 2006
Use Pursuant to Company Instructions
A-17
TSIDLVT Report
Example
The following is an example of the TSIDLVT report.
*----------------------------------------------------------------------------------------------------------------------------*
*
*
REPORT FOR SERIAL NUMBER=CKD001
*
*
OPTIONS IN EFFECT - PRINT IN EXT SEQUENCE
*
LIST EXPIRED EXTENTS
*
IGNORE POOL LIMITS
*
LIST FREE SPACE
*
LIST IN RELATIVE TRACK/BLOCK FORMAT
*
USE CONVENTIONAL DATE FORMAT MM/DD/YYYY
*
LIST UNEXPIRED EXTENTS
*----------------------------------------------------------------------------------------------------------------------------*
DATE 12/11/1997
DISPLAY OF
E P I C
V T O C
R E P O R T
VOLSER CKD001 TSIDLVT 6.1
TIME 14 30 16
SER=CKD001
V O L S E R
I N
E X T E N T
S E Q U E N C E
CUU
160
PAGE
SERIAL EXT
---------- EXTENT ---------CREATE
EXPIRE
DISK FILE
FILE NAME
SEQ
START
END
NUMBER
DATE
DATE
TYPE TYPE
VSE.POWER.QUEUE.CKD.FILE
CKD001
0
1
4
4 09/18/1997 12/31/1999 3390 DA
******* FREE SPACE *******
CKD001
5
14
10
3390
BIMEDIT.CKD.BIFLIB
CKD001
0
15
674
660 06/24/1997 12/31/1999 3390 DA
Z9999994.VSAMDSPC.TAE74BEB.T03FDC09
CKD001
0
675
689
15 04/03/1997 12/32/1999 3390 VSAM
Z9999992.VSAMDSPC.TAE74BEB.T5C0E97E
CKD001
0
690
6689
6000 04/03/1997 12/32/1999 3390 VSAM
VSE.POWER.DATA.CKD.FILE
CKD001
0
6690
7139
450 09/18/1997 12/31/1999 3390 DA
VSE.BIM.COLUMBUS.LIB6
CKD001
0
7140
8264
1125 07/11/1997 12/31/2099 3390 SD
VSE.BIM.COLUMBUS.MON.PDS
CKD001
0
8265
8534
270 07/10/1997 12/31/2099 3390 SD
VSE.BIM.COLUMBUS.VIO.PDS
CKD001
0
8535
9134
600 07/10/1997 12/31/2099 3390 SD
VSE.BIM.COLUMBUS.EVT.PDS
CKD001
0
9135
9314
180 07/11/1997 12/31/2099 3390 SD
VSE.BIM.COLUMBUS.LOG.PDS
CKD001
0
9315
9374
60 07/10/1997 12/31/2099 3390 SD
VSE.BIM.COLUMBUS.CPR.PDS
CKD001
0
9375
9464
90 07/10/1997 12/31/2099 3390 SD
VSE.BIM.COLUMBUS.ARC.PDS
CKD001
0
9465
9509
45 07/10/1997 12/31/2099 3390 SD
EAK294.RECORDER.DATA
CKD001
1
9510
9521
12 12/04/1997 12/11/1997 3390 SD
******* FREE SPACE *******
CKD001
9522
9549
28
3390
I17007.RECORDER.FILE.BACKUP
CKD001
1
9550
9558
9 08/06/1997 12/31/2099 3390 SD
I17007.CATALOG.FASTBU
CKD001
1
9559
9709
151 08/06/1997 12/31/2099 3390 SD
F43.TSIDUTL.WORK.FILE
CKD001
1
9710
9711
2 12/04/1997 12/11/1997 3390 SD
******* FREE SPACE *******
CKD001
9712
10173
462
3390
HEWTEST1.Y2000.Y2000
G=0000002 CKD001
1
10174
10175
2 11/14/1997 12/31/2099 3390 SD
******* FREE SPACE *******
CKD001
10176
10214
39
3390
VSE.BIM.COLUMBUS.LIBRARY
CKD001
0
10215
12314
2100 09/10/1997 12/31/1999 3390 SD
******* FREE SPACE *******
CKD001
12315
13058
744
3390
HEW.RECORDER.FILE.BU.Y2000
CKD001
1
13059
13060
2 11/14/1997 12/14/1997 3390 SD
******* FREE SPACE *******
CKD001
13061
13107
47
3390
HEW.RECORDER.FILE.BU.Y2000.BIG
CKD001
1
13108
13119
12 11/18/1997 12/18/1997 3390 SD
******* FREE SPACE *******
CKD001
13120
13278
159
3390
JUANTEST
G=0000011 CKD001
1
13279
13287
9 11/25/1997 12/31/2099 3390 SD
JUANTEST
G=0000012 CKD001
1
13288
13296
9 11/25/1997 12/31/2099 3390 SD
JUANTEST
G=0000013 CKD001
1
13297
13306
10 11/25/1997 12/31/2099 3390 SD
JUANTEST
G=0000014 CKD001
1
13307
13315
9 11/25/1997 12/31/2099 3390 SD
JUANTEST
G=0000015 CKD001
1
13316
13324
9 11/25/1997 12/31/2099 3390 SD
JUANTEST
G=0000016 CKD001
1
13325
13333
9 11/25/1997 12/31/2099 3390 SD
JUANTEST
G=0000017 CKD001
1
13334
13342
9 11/25/1997 12/31/2099 3390 SD
JUANTEST
G=0000018 CKD001
1
13343
13351
9 11/25/1997 12/31/2099 3390 SD
JUANTEST
G=0000019 CKD001
1
13352
13360
9 11/25/1997 12/31/2099 3390 SD
******* FREE SPACE *******
CKD001
13361
16678
3318
3390
CKD001.QDAS.REL4.SHARE.FILE
CKD001
0
16679
16679
1 11/12/1997 12/31/2099 3390 SD
VTOC
CKD001
0
16680
16694
15
3390 UN
*----------------------------------------------------------------------------------------------------------------------------*
**
** VOLUME STATISTICS **
*
*
*
TOTAL SPACE THIS VOLUME
16695
*
TOTAL USED SPACE THIS VOLUME
11874
*
TOTAL FREE SPACE THIS VOLUME
4821
*
*----------------------------------------------------------------------------------------------------------------------------*
A-18
Connectivity Systems, Inc.—Copyright © 2006
Use Pursuant to Company Instructions
User Reference
*
*
*
*
*
*
*
*
*
1
EXP
EXP
*
*
*
*
*
TSIDMNT Report
TSIDMNT Report
Description
TSIDMNT can produce a summary report or a detail report. To receive a
summary report, request a display of all datasets or a group of datasets. To
receive a detail report, request a specific dataset name or a specific
volume serial number.
See Chapter 3, “TSIDMNT—DSN CATALOG MANAGEMENT
UTILITY,” for additional information on TSIDMNT report.
Definitions
The following describes the fields located on the TSIDMNT report.
Field
Definition
DATASET NAME
Specifies the name of the dataset.
SERIAL
Specifies the volume serial number(s) associated
with the version.
VN
Specifies the version number.
RL
Specifies the reel or extent sequence number.
ST
Specifies the version status. Valid status codes are:
(blank)—active version
C—conditional catalog status
L—active version in a locked status
M—MCAT version
O—open status
S—scratch status.
BLK
Specifies the block size of the version.
REC
Specifies the record size of the version.
TYPE
Specifies the storage medium. Valid storage
mediums are:
TAPE
DISK
EMPTY
Note: If EMPTY is displayed, there are no
versions of the requested dataset.
Detail Report
User Reference
The first three lines for each dataset report the defaults. Lower lines
present the version level data for the dataset.
Connectivity Systems, Inc.—Copyright © 2006
Use Pursuant to Company Instructions
A-19
TSIDMNT Report
The following describes the BIM-EPIC dataset definition (EDD).
A-20
Field
Definition
RET
Specifies the number of days each version is to be
retained.
CYC
Specifies the number of versions (cycles) to be
maintained.
VLT
Specifies the number of the vault method assigned
to the dataset.
WORK
Specifies a work dataset.
PASSWORD
Specifies the Unlock/Release password displayed at
the far right.
REBLK
Specifies the default block size.
POOL
Specifies the disk pool name.
EXT=n
Specifies the size of the primary and secondary
extent allocation. The first value is the size of the
primary extent. The second value is the size of all
secondary extents.
SEC
Specifies the maximum number of secondary
extents allowed for a version.
ALR
Specifies the number of records for allocation by
logical records.
SID
Specifies the system ID.
UID
Specifies the user ID.
(UN)LBL
Specifies whether this is a standard label tape
dataset.
MOD
Specifies the default tape density.
SYSnnn
Specifies the SYS number assigned to the dataset.
REC
Specifies the actual record size of the current
version.
BLK
Specifies the actual block size of the current
version.
REV
Specifies whether this is a revolving tape dataset.
COM
Specifies the user comment.
TPA=
Specifies whether or not versions are to be created
on TPA devices (YES|NO).
TPL
Specifies the tape pool ID.
Connectivity Systems, Inc.—Copyright © 2006
Use Pursuant to Company Instructions
User Reference
TSIDMNT Report
Version
Information
User Reference
The following describes the BIM-EPIC version information.
Field
Definition
SER-NO
Specifies the tape or disk volume serial number
associated with this version.
VN
Specifies the version number.
RL
Specifies the reel or extent sequence number.
CREDT
Specifies the creation date in Julian format.
EXPDT
Specifies the projected expiration date.
CREAT/JB
Specifies the name of the creating job.
CUU
Specifies the drive address where the version was
created.
ST
Specifies the status of the current version. Valid
codes are:
C—conditional catalog status
L—active version in a locked status
M—MCAT version
O—open status
S—scratch status
LAST/JOB
Specifies the last job that accessed this version.
LASTDT
Specifies the last date this version was accessed.
USE
Specifies the number of times the tape was opened
since the last clean date.
ERR
Specifies the number of read/write errors
encountered since the last clean date.
CLN-DAT
Specifies the last clean date for this tape.
VLT
Specifies the current vault location for this tape.
SL
Specifies the current slot location for this tape.
Connectivity Systems, Inc.—Copyright © 2006
Use Pursuant to Company Instructions
A-21
TSIDOFD Report
TSIDOFD Report
Description
TSIDOFD produces a report listing the datasets to be offloaded or backed
up. See Chapter 13, “Selecting Datasets To Be Offloaded (TSIDOFD),”
for additional information on TSIDOFD reports.
Definitions
The following describes the fields located on the TSIDOFD report.
Field
Definition
DATASET NAME Specifies the name of the dataset to offload or
backup.
A-22
VER
Specifies the version number of the dataset to
offload or backup.
ALL VER
Specifies all versions were selected.
UID
Specifies whether the dataset was selected by user
ID.
SID
Specifies whether the dataset was selected by
system ID.
VOLUME
Specifies whether the dataset was selected by
volume.
POOL ID
Specifies whether the dataset was selected by pool
name.
S/DLA
Specifies whether the dataset was selected by SLA
or DLA.
NEW
Specifies that only new datasets were selected.
Connectivity Systems, Inc.—Copyright © 2006
Use Pursuant to Company Instructions
User Reference
TSIDOFD Report
Example
The following is an example of the TSIDOFD Data Selection report.
TSIDOFD= 6.1
TIME:
15.32.06
INCLUDE PARAMETERS
D A T A S E T
S E L E C T I O N
R E P
64,466=SELECTED ENTRY TABLE SIZE USED FOR THIS
DATASET NAME
/ VER
ALLVER
0001
DATASET NAME
/ VER
ALLVER
OMIT PARAMETERS
DATASET NAME
ABSENTEE.TEMP
ACCTS.PAYABLE.TWO
BATCH CONVERT OUT
BILL.REPRINT.FILE
BLS.REC
COLLECT JOURNAL
CONSTR.JOURNAL.FILE
DAILY.BDTRNMT.BKUP
DAILY.BILLING
DB.MONTHLY.TRANS2
DCDCASTO.SORT
DCDRATXT.OUTPUT
DFR.BILLNG.BKP.TAPE
DITTO.DISK
ELMET.INVENTORY.FILE
EREP.HISTORY
EXPANDED.NOTICE2
FINAL ENTREX
FINLODE.562
FSOHOST.BKUP
F8.CICS170.MSGUSR
GROUP1.DISKOR
HEWTEST1.Y2000.Y2000
HPL.WORK.FILE
INVENTORY.CARD.FILE
JOB.HIST.ACCUM
JUANTEST
M & S.FILE
MD.DUMMY.FILE.G30026
MD.EXTRACT.CHECK.FILE
MD.HRM.ADJUST.FILE
MD.HRM.PAY070.PUNCH1
MD.HRM.PAY070.PUNCH2
MD.HRM.PAY070.PUNCH4
MD.HRM.PAY070.PUNCH6
MD.HRM.PAY070.PUNCH8
MD.HRM.QEHCNTL
MD.HRM.SAM.CHGFILE
MD.HRM.SAM.CHKOUT
MD.HRM.SAM.CNTLFIL
User Reference
DATASETS HAVE BEEN SELECTED
VER
1
1
1
1
1
1
1
1
1
1
1
1
1
1
1
1
1
1
1
1
1
1
1
1
1
1
1
1
1
1
1
1
1
1
1
1
1
1
1
1
O R T
PROCESSING
UID
SID
UID
VU
SID
DATASET NAME
ACCOUNTS.PAYABLE.FILE
AR CONDENSE FILE
BILL BACKUP
BILLING.PAN.ORDER
COLL.TAPE
CONST.FILE.OUT
DAILY.ARFILE.BKUP
DAILY.BD2CES.BKUP
DAILY.OVERPAYMENTS
DBLABOR.DISTRIBUTION
DCDMAINT INPUT
DEFER.BILL.BKUP
DISTRIBUTION.FILE
DR-CR.OUT
EPIC.TSIDOFL.INPUT
EREP.HISTORY.OUT
FA.CICS170.MSGUSR
FINLODE.BKUP
FSILOAD.BKUP
FUELLOAD.FILE
GROUP1.DISKOC
G7.BILLS
HP TRAN HIST
IND.AUDIT.FILE
JOB.ACCT.WORK
JOB.HIST.DAILY
LTD.CONSTR.MASTER
MAINT REPORTT
MD.DUMMY.FILE.G30027
MD.GL.RECON.WRAP.FILE
MD.HRM.DISTR.INTRF
MD.HRM.PAY070.PUNCH10
MD.HRM.PAY070.PUNCH3
MD.HRM.PAY070.PUNCH5
MD.HRM.PAY070.PUNCH7
MD.HRM.PAY070.PUNCH9
MD.HRM.SAM.BONDTAP
MD.HRM.SAM.CHKNBRS
MD.HRM.SAM.CHKREV
MD.HRM.SAM.CURLAB
Connectivity Systems, Inc.—Copyright © 2006
Use Pursuant to Company Instructions
VOLUME
PAGE
1
DATE 12/11/1997
POOLID
S/DLA
MISC
VOLUME
POOLID
VER
1
1
1
1
1
1
1
1
1
1
1
1
1
1
1
1
1
1
1
1
1
1
1
1
1
1
1
1
1
1
1
1
1
1
1
1
1
1
1
1
A-23
TSIDOFL Report
TSIDOFL Report
Description
TSIDOFL creates a report listing the datasets offloaded or backed up. See
Chapter 13, “Offloading and Backing Up Datasets (TSIDOFL),” for
additional information on TSIDOFL reports.
Definitions
The following describes the fields located on the TSIDOFL report.
Field
Definition
DATASET NAME Specifies the name of the dataset offloaded or
backed up.
VER
Specifies the dataset's version number.
SERIAL
Specifies the volume serial number the dataset came
from.
CUU
Specifies the drive address where the version was
created.
EXTENTS
START
Specifies the former extent starting address.
EXTENTS END
Specifies the former extent ending address.
EXTENTS SIZE Specifies the size of the extent.
A-24
CREATE DATE
Specifies the date the dataset was created.
EXPIRE DATE
Specifies the date the dataset is scheduled to expire.
NUMBER
RECORDS
Specifies the number of records in the dataset.
BLOCK SIZE
Specifies the block size of the dataset.
RECORD SIZE
Specifies the record size.
TYPE
Specifies the file type.
FILE SEQ
Specifies the dataset file sequence on the offload
tape.
Connectivity Systems, Inc.—Copyright © 2006
Use Pursuant to Company Instructions
User Reference
TSIDOFL Report
Example
The following is an example of the TSIDOFL Dataset Offload report.
TSIDOFL= 6.1
TIME:
9.15.09
DATASET NAME
VERIFY3.OFLONL01.FBA.RECFM.V
VERIFY3.OFLONL01.FBA.RECFM.U
VERIFY3.OFLONL01.FBA.RECFM.S
VERIFY3.OFLONL01.FBA.RECFM.F
VERIFY3.OFLONL01.CKD.RECFM.V
VERIFY3.OFLONL01.CKD.RECFM.U
VERIFY3.OFLONL01.CKD.RECFM.S
VERIFY3.OFLONL01.CKD.RECFM.F
TSIDOFL= 6.1
TIME:
9.15.09
DATASET NAME
User Reference
D A T A S E T
VER
G=0000002
1
G=0000002
1
G=0000002
1
G=0000002
1
G=0000002
1
G=0000002
1
G=0000002
1
G=0000002
1
D A T
O F F L O A D
R E P O R T
-------EXTENTS-------- CREATE
SERIAL CUU
START
END
SIZE
DATE
EPV400 400
9383
9458
76 1997346
EPV400 400
9318
9382
65 1997346
EPV400 400
9242
9317
76 1997346
EPV400 400
9090
9165
76 1997346
CKD001 160
9535
9537
3 1997346
CKD001 160
9528
9534
7 1997346
CKD001 160
9524
9527
4 1997346
CKD001 160
9522
9523
2 1997346
A S E T
O F F L O A D
R E P O R T
EXPIRE
DATE
1997346
1997346
1997346
1997346
1997346
1997346
1997346
1997346
-------EXTENTS-------- CREATE EXPIRE
VER SERIAL CUU
START
END
SIZE
DATE
DATE
VOLUME
TRACKS RELEASED
TOTAL EXTENTS
EPV400
293
4
CKD001
16
4
* GRAND TOTAL *
309
8
Connectivity Systems, Inc.—Copyright © 2006
Use Pursuant to Company Instructions
PAGE 1
DATE12/12/1997
BLOCK RECORD
SIZE
SIZE RECFM
1000
1000
VB
100
100
U
1000
1000
VBS
1000
100
FB
1234
1234
VB
100
100
U
1000
1000
VBS
1000
100
FB
PAGE
2
DATE 12/12/1997
BLOCK RECORD
SIZE
SIZE RECFM
A-25
TSIDONL Report
TSIDONL Report
Description
TSIDONL creates a report listing the datasets that were onloaded. See
“Onloading and Restoring Datasets (TSIDONL),” for additional
information on the TSIDONL report.
Definitions
The following describes the fields located on the TSIDONL report.
Field
Definition
DATASET NAME
Specifies the name of the dataset onloaded.
OLD VER
Specifies the version number of the dataset
before it was onloaded.
OLD GEN
Specifies the generation number of the
dataset before it was onloaded.
NEW VER
Specifies the version number of the dataset
after it was onloaded.
NEW GEN
Specifies the generation number of the
dataset after it was onloaded.
NUMBER RECORDS
Specifies the number of records in the
dataset.
BLOCK SIZE
Specifies the block size.
RECORD SIZE
Specifies the record size.
RECFM
Specifies the record format.
INPUT DATASET NAME Specifies the name of the offload dataset.
Example
TSIDONL= 6.1
TIME:
9.18.55
DATA SET NAME
VERIFY3.OFLONL01.FBA.RECFM.V
VERIFY3.OFLONL01.FBA.RECFM.U
VERIFY3.OFLONL01.FBA.RECFM.S
VERIFY3.OFLONL01.FBA.RECFM.F
VERIFY3.OFLONL01.CKD.RECFM.V
VERIFY3.OFLONL01.CKD.RECFM.U
VERIFY3.OFLONL01.CKD.RECFM.S
VERIFY3.OFLONL01.CKD.RECFM.F
A-26
INPUT SERIAL
Specifies the volume serial number of the
offload tape the dataset was copied from.
FILE SEQ
Specifies the dataset file sequence on the
offload tape.
The following is an example of a TSIDONL Dataset Onload report.
D A T A S E T
O N L O A D
----OLD---- ----NEW---GEN VER
GEN
2
1
3
2
1
3
2
1
3
2
1
3
2
1
3
2
1
3
2
1
3
2
1
3
R E P O R T
BLOCK
SIZE
1000
100
1000
1000
1234
100
1000
1000
RECORD
SIZE RECFM
1000
VB
100
U
1000
VBS
100
FB
1234
VB
100
U
1000
VBS
100
FB
Connectivity Systems, Inc.—Copyright © 2006
Use Pursuant to Company Instructions
PAGE
1
DATE 12/12/1997
-------INPUT-------- FILE
DATASET NAME
SERIAL SEQ
VERIFY3.O01.TAPE VRFY31
1
VERIFY3.O01.TAPE VRFY31
1
VERIFY3.O01.TAPE VRFY31
1
VERIFY3.O01.TAPE VRFY31
1
VERIFY3.O01.TAPE VRFY31
1
VERIFY3.O01.TAPE VRFY31
1
VERIFY3.O01.TAPE VRFY31
1
VERIFY3.O01.TAPE VRFY31
1
User Reference
TSIDPRV Report
TSIDPRV Report
Description
TSIDPRV produces the Vaulting Method report.
Definitions
The following describes the fields located on the TSIDPRV report.
Field
Definition
DATASET NAME Specifies the name of the dataset.
User Reference
NO. CYC
Specifies the number of cycles to be maintained for
the dataset.
DAYS RET
Specifies the number of days each version is to be
retained.
METH NO.
Specifies the vaulting method assigned to the
dataset.
VER NO.
VAULT NAME
Specify the heart of the vaulting method report.
These fields correlate each version number with its
designated vault location.
Connectivity Systems, Inc.—Copyright © 2006
Use Pursuant to Company Instructions
A-27
TSIDPRV Report
Example
TIME 14 09 28
The following is an example of the TSIDPRV report.
* *
V A U L T I N G
M E T H O D
DATE 12/04/1997
AR.PROD.NCL.ELME3BKP.GVEXPORT.OFFSITE
30
1
1
1
2
3
MAIN LIBRARY
VAULT 1
VAULT 2
AR.PROD.NCL.EREXTR.EL860.OFFSITE
30
1
1
1
2
3
MAIN LIBRARY
VAULT 1
VAULT 2
AR.PROD.NCL.ERPNDB.EL860.OFFSITE
30
1
1
1
2
3
MAIN LIBRARY
VAULT 1
VAULT 2
AR.PROD.NCL.ERPYAJ.EL860.OFFSITE
30
1
1
1
2
3
MAIN LIBRARY
VAULT 1
VAULT 2
1
1
2
3
MAIN LIBRARY
VAULT 1
VAULT 2
BUDGET.SQLBKUP
3
CL.PROD.LGX.ELEXTR.CLEXTBKP.CLDLY
7
7
2
1
2
3
4
VAULT 1
VAULT 2
VAULT 3
MAIN LIBRARY
CL.PROD.LGX.ELEXTR.CLEXTEOM.OFFSITE
30
1
1
1
2
3
MAIN LIBRARY
VAULT 1
VAULT 2
CL.PROD.LGX.ELHAF.CLHAFCPY.MONTHEND
2
45
3
1
2
3
4
5
MAIN LIBRARY
MAIN LIBRARY
VAULT 3
VAULT 1
MAIN LIBRARY
30
1
1
1
2
3
MAIN LIBRARY
VAULT 1
VAULT 2
CL.PROD.LGX.EL000BKP.CLEOMREN.OFFSITE
A-28
R E P O R T * *
NO. DAYS METH VER
CONSTR.BACKUP
3
1
1
2
3
MAIN LIBRARY
VAULT 1
VAULT 2
CONSTR.JOURNAL.BK
3
1
1
2
3
MAIN LIBRARY
VAULT 1
VAULT 2
CR.PROD.LGX.EL000BKP.ELME1REN.OFFSITE
30
1
1
1
2
3
MAIN LIBRARY
VAULT 1
VAULT 2
CR.PROD.LGX.EL000BKP.GVEXPORT.OFFSITE
30
1
1
1
2
3
MAIN LIBRARY
VAULT 1
VAULT 2
Connectivity Systems, Inc.—Copyright © 2006
Use Pursuant to Company Instructions
PAGE
1
User Reference
TSIDSDS Report
TSIDSDS Report
Description
TSIDSDS produces a summary report correlating dataset versions and
tape volume serial numbers. The summary report is listed in volume serial
number order. See Chapter 12, “Tape to Dataset Report (TSIDSDS),” for
additional information on the TSIDSDS report.
There is at least one entry for each version of a dataset. If a version spans
more than one volume, there is an entry for each volume.
Definitions
User Reference
The following describes the fields located on the TSIDSDS report.
Field
Definition
DATASET NAME
Specifies the volume serial number.
SER NO
Specifies the name of the dataset contained in the
referenced volume.
Connectivity Systems, Inc.—Copyright © 2006
Use Pursuant to Company Instructions
A-29
TSIDSDS Report
Example
TSIDSDS= 6.01.00
TIME 14 07 58
SER NO
B12017S
B12110S
B12183S
B12437S
B12500S
B12547S
B12862S
B12873S
HEW001
JA0001
T12994
T13014S
000001
000004
000004
000004
000004
000004
000004
000004
000004
000004
000004
000004
000004
000004
000004
000004
000004
000004
000004
000006
000007
000009
000009
000009
000009
000009
000009
000009
000009
000009
000009
000009
000009
000009
000009
000009
000009
000009
000009
A-30
--DATASET NAME-EPIC.DISK01.BKUP
EPIC.DISK01.BKUP
EPIC.DISK01.BKUP
EPIC.DISK01.BKUP
EPIC.DISK01.BKUP
EPIC.DISK01.BKUP
EPIC.DISK01.BKUP
EPIC.DISK01.BKUP
IDCAMS.BACKUP
IDCAMS.BACKUP
T.ZEKE.AUDIT.BKUP
T.ZEKE.AUDIT.BKUP
ELECTRIC.METER.BK
SQL.BKC.F01
SQL.BKC.F02
SQL.BKC.F03
SQL.BKC.F04
SQL.BKC.F05
SQL.BKC.F06
SQL.BKC.F07
SQL.BKC.F08
SQL.BKC.F09
SQL.BKC.F10
SQL.BKC.F11
SQL.BKC.F12
SQL.BKC.F13
SQL.BKC.F14
SQL.BKC.F15
SQL.BKC.F16
SQL.BKC.F17
SQL.BKC.F20
JOB.HIST.MONTH
PMTHIST.BKUP
SQL.BKC.F01
SQL.BKC.F02
SQL.BKC.F03
SQL.BKC.F04
SQL.BKC.F05
SQL.BKC.F06
SQL.BKC.F07
SQL.BKC.F08
SQL.BKC.F09
SQL.BKC.F10
SQL.BKC.F11
SQL.BKC.F12
SQL.BKC.F13
SQL.BKC.F14
SQL.BKC.F15
SQL.BKC.F16
SQL.BKC.F17
SQL.BKC.F20
The following is an example of the TSIDSDS Dataset Management
report.
D A T A
S E T
M A N A G E M E N T
S Y S T E M
PAGE
1
DATE 12/04/1997
SER NO --DATASET NAME-000011 SQL.BKW.F45
000011 SQL.BKW.F46
000011 SQL.BKW.F47
000011 SQL.BKW.F48
000011 SQL.BKW.F50
000015 SQL.BKW.F01
000015 SQL.BKW.F02
000015 SQL.BKW.F03
000015 SQL.BKW.F04
000015 SQL.BKW.F05
000015 SQL.BKW.F06
000015 SQL.BKW.F07
000015 SQL.BKW.F08
000015 SQL.BKW.F09
000015 SQL.BKW.F10
000015 SQL.BKW.F11
000015 SQL.BKW.F12
000015 SQL.BKW.F13
000015 SQL.BKW.F14
000015 SQL.BKW.F15
000015 SQL.BKW.F16
000015 SQL.BKW.F17
000015 SQL.BKW.F18
000015 SQL.BKW.F19
000015 SQL.BKW.F20
000015 SQL.BKW.F21
000015 SQL.BKW.F22
000015 SQL.BKW.F23
000015 SQL.BKW.F24
000015 SQL.BKW.F26
000015 SQL.BKW.F27
000015 SQL.BKW.F28
000015 SQL.BKW.F29
000015 SQL.BKW.F30
000015 SQL.BKW.F31
000015 SQL.BKW.F32
000015 SQL.BKW.F33
000015 SQL.BKW.F34
000015 SQL.BKW.F35
000015 SQL.BKW.F36
000015 SQL.BKW.F37
000015 SQL.BKW.F38
000015 SQL.BKW.F39
000015 SQL.BKW.F40
000015 SQL.BKW.F41
000015 SQL.BKW.F42
000015 SQL.BKW.F43
000015 SQL.BKW.F44
000015 SQL.BKW.F45
000015 SQL.BKW.F46
000015 SQL.BKW.F47
Connectivity Systems, Inc.—Copyright © 2006
Use Pursuant to Company Instructions
User Reference
TSIDTAC Report
TSIDTAC Report
Description
TSIDTAC produces the Date Time Activity report, which lists job
accounting information by CPU and by date and time. It is a cross
reference to the Job Time Activity report.
Definitions
The following describes the fields located on the TSIDTAC report.
Field
Definition
CPU NO.
Specifies the CPU being reported.
RUN DATE
Specifies the date the job ran.
JOB NAME
Specifies the name of the job initiating the
activity.
PHASE NAME
Specifies the name of the program being reported.
PART ID
Specifies the partition the job ran in.
START TIME
Specifies the time the phase started. Time is
displayed in hh.mm.ss format.
END TIME
Specifies the time the phase completed.
DURATION TIME
Specifies the length of time the phase ran.
IDLE TIME
Specifies the amount of time the CPU was idle
while the phase ran. Idle time uses standard IBM
definitions.
CPU TIME
Specifies the amount of CPU time used by the
program.
OVERHEAD
Specifies the program overhead, as defined by
IBM.
TOTAL I/O
Specifies the amount of I/O issued by the
program to that device.
In addition, grand totals for DURATION TIME, IDLE TIME, CPU
TIME, OVERHEAD, and TOTAL I/O are listed at the end of the report.
User Reference
Connectivity Systems, Inc.—Copyright © 2006
Use Pursuant to Company Instructions
A-31
TSIDTAC Report
Example
C.P.U. NO. 111111
RUN
JOB
DATE
NAME
The following is an example of the TSIDTAC Date Time Activity report.
RUN DATE 12/04/1997
PHASE
PART
NAME
ID
J O B
A C C O U N T I N G
S Y S T E M
* D A T E T I M E A C T I V I T Y *
START
END
DURATION
IDLE
TIME
TIME
TIME
TIME
12/02/1997
12/02/1997
12/02/1997
12/02/1997
12/02/1997
12/02/1997
12/02/1997
12/02/1997
12/02/1997
12/02/1997
12/02/1997
12/02/1997
12/02/1997
12/02/1997
BGINIT
DUMMY
VERIFYJ1
VERIFYJ1
VERIFYJ1
VERIFYJ1
VERIFYJ1
VERIFYJ1
VERIFYJ1
VERIFYJ1
VERIFYJ1
VERIFYJ1
VERIFYJ1
VERIFYJ1
IESWAIT
VERIFYJO
VERIFYJO
VERIFYJO
VERIFYJO
JCOPY
VERIFYJI
JCOPY
VERIFYJI
JCOPY
VERIFYJI
JCOPY
VERIFYJI
BG
BG
BG
BG
BG
BG
BG
BG
BG
BG
BG
BG
BG
BG
09.29.40
09.30.15
09.56.19
09.57.47
10.01.52
10.03.40
10.08.53
10.09.02
10.10.10
10.10.17
10.14.20
10.14.33
10.15.59
10.16.11
09.30.10
09.30.17
09.56.39
09.58.05
10.02.16
10.04.05
10.09.02
10.09.19
10.10.16
10.10.31
10.14.33
10.14.55
10.16.10
10.16.25
12/02/1997
12/02/1997
12/02/1997
12/02/1997
12/02/1997
12/02/1997
12/02/1997
12/02/1997
12/02/1997
12/02/1997
12/02/1997
12/02/1997
12/02/1997
12/02/1997
12/02/1997
12/02/1997
12/02/1997
12/02/1997
12/02/1997
12/02/1997
12/02/1997
12/02/1997
12/02/1997
12/02/1997
12/02/1997
12/02/1997
12/02/1997
12/02/1997
12/02/1997
12/02/1997
12/02/1997
12/02/1997
12/02/1997
12/02/1997
12/02/1997
12/02/1997
12/02/1997
12/02/1997
12/02/1997
12/02/1997
12/02/1997
12/02/1997
12/02/1997
12/02/1997
12/02/1997
12/02/1997
12/02/1997
12/02/1997
12/02/1997
12/02/1997
12/02/1997
12/02/1997
12/02/1997
12/02/1997
12/02/1997
12/02/1997
12/02/1997
12/02/1997
12/02/1997
12/02/1997
12/02/1997
12/02/1997
12/02/1997
12/02/1997
TSIDRFS
JAY
JAY
JAY
JAY
JAY
JAY
JAY
JAY
JAY
JAY
JAY
JAY
JAY
JAY
JAY
JAY
JAY
JAY
JAY
JAY
JAY
JAY
JAY
JAY
JAY
JAY
JAY
JAY
JAY
JAY
JAY
JAY
JAY
JAY
JAY
JAY
JAY
JAY
JAY
JAY
JAY
JAY
JAY
JAY
JAY
JAY
JAY
JAY
JAY
JAY
JAY
JAY
JAY
JAY
JAY
JAY
JAY
JAY
STEPSEQ
STEPSEQ
STEPSEQ
STEPSEQ
VERIFYK
TSIDRFS
JCOPY
VERIFYJI
JCOPY
TSIDLVT
JCOPY
JCOPY
JCOPY
VERIFYJI
JCOPY
TSIDLVT
JCOPY
JCOPY
JCOPY
VERIFYJI
TSIDLVT
JCOPY
JCOPY
JCOPY
VERIFYJI
TSIDLVT
JCOPY
JCOPY
JCOPY
JCOPY
TSIDLVT
JCOPY
JCOPY
JCOPY
JCOPY
TSIDLVT
JCOPY
JCOPY
JCOPY
TSIDLVT
JCOPY
JCOPY
JCOPY
TSIDLVT
JCOPY
JCOPY
JCOPY
JCOPY
TSIDLVT
JCOPY
JCOPY
JCOPY
JCOPY
TSIDLVT
JCOPY
JCOPY
JCOPY
TSIDLVT
JCOPY
JCOPY
JCOPY
TSIDLVT
JCOPY
JCOPY
LIBR
JCOPY
LIBR
JCOPY
JCOPY
F4
F4
F4
F4
F4
F4
F4
F4
F4
F4
F4
F4
F4
F4
F4
F4
F4
F4
F4
F4
F4
F4
F4
F4
F4
F4
F4
F4
F4
F4
F4
F4
F4
F4
F4
F4
F4
F4
F4
F4
F4
F4
F4
F4
F4
F4
F4
F4
F4
F4
F4
F4
F4
F4
F4
F4
F4
F4
F4
F4
F4
F4
F4
F4
09.28.33
09.44.59
09.45.22
09.45.39
09.45.46
09.46.15
09.46.32
09.46.38
09.46.54
09.47.07
09.47.14
09.47.33
09.47.48
09.50.11
09.50.32
09.50.45
09.51.03
09.51.08
09.51.11
09.51.17
09.51.32
09.51.54
09.52.07
09.56.03
09.56.46
09.56.53
09.57.16
09.57.35
09.57.44
09.58.10
09.58.16
09.58.35
09.58.48
10.01.37
10.02.24
10.02.58
10.03.24
10.03.34
10.04.11
10.04.30
10.04.42
10.08.41
10.09.23
10.09.28
10.09.45
10.09.58
10.10.06
10.10.35
10.10.38
10.10.48
10.10.56
10.14.05
10.15.01
10.15.24
10.15.38
10.15.52
10.16.30
10.16.58
10.17.16
10.21.52
10.23.16
10.26.12
10.26.19
11.09.31
09.30.03
09.45.22
09.45.39
09.45.45
09.46.15
09.46.31
09.46.38
09.46.53
09.47.07
09.47.14
09.47.33
09.47.47
09.47.56
09.50.31
09.50.44
09.51.02
09.51.07
09.51.11
09.51.17
09.51.31
09.51.54
09.52.06
09.52.15
09.56.46
09.56.52
09.57.16
09.57.35
09.57.43
09.58.10
09.58.15
09.58.34
09.58.48
09.58.55
10.02.23
10.02.58
10.03.23
10.03.34
10.04.11
10.04.29
10.04.42
10.04.50
10.09.22
10.09.27
10.09.45
10.09.57
10.10.06
10.10.35
10.10.37
10.10.48
10.10.56
10.11.09
10.15.01
10.15.23
10.15.38
10.15.51
10.16.30
10.16.58
10.17.15
10.17.24
10.23.15
10.26.12
10.26.18
10.26.25
11.09.40
A-32
00.00.30
00.00.02
00.00.20
00.00.18
00.00.24
00.00.25
00.00.09
00.00.17
00.00.06
00.00.14
00.00.13
00.00.22
00.00.11
00.00.14
00.03.45*
00.01.30
00.00.23
00.00.17
00.00.06
00.00.29
00.00.16
00.00.06
00.00.15
00.00.13
00.00.07
00.00.19
00.00.14
00.00.08
00.00.20
00.00.12
00.00.17
00.00.04
00.00.03
00.00.06
00.00.14
00.00.22
00.00.12
00.00.08
00.00.43
00.00.06
00.00.23
00.00.19
00.00.08
00.00.26
00.00.05
00.00.18
00.00.13
00.00.07
00.00.46
00.00.34
00.00.25
00.00.10
00.00.37
00.00.18
00.00.12
00.00.08
00.00.41
00.00.04
00.00.17
00.00.12
00.00.08
00.00.29
00.00.02
00.00.10
00.00.08
00.00.13
00.00.56
00.00.22
00.00.14
00.00.13
00.00.38
00.00.28
00.00.17
00.00.08
00.01.23
00.02.56
00.00.06
00.00.06
00.00.09
00.00.00
00.00.05
00.26.02
00.01.08
00.03.47
00.01.24
00.04.48
00.00.00
00.00.51
00.00.01
00.03.49
00.00.00
00.01.04
00.00.01
00.43.00*
00.00.00
00.14.56
00.00.00
00.00.00
00.00.01
00.00.00
00.00.01
00.00.00
00.00.01
00.00.00
00.00.00
00.00.00
00.00.01
00.02.15
00.00.01
00.00.01
00.00.01
00.00.01
00.00.00
00.00.00
00.00.01
00.00.00
00.00.01
00.03.48
00.00.00
00.00.01
00.00.00
00.00.00
00.00.01
00.00.00
00.00.01
00.00.01
00.00.00
00.02.42
00.00.01
00.00.00
00.00.01
00.00.00
00.00.00
00.00.01
00.00.00
00.03.51
00.00.01
00.00.01
00.00.00
00.00.01
00.00.00
00.00.00
00.00.01
00.00.00
00.00.00
00.02.56
00.00.00
00.00.01
00.00.00
00.00.01
00.00.00
00.00.00
00.00.01
00.04.28
00.00.01
00.00.00
00.00.01
00.43.06
Connectivity Systems, Inc.—Copyright © 2006
Use Pursuant to Company Instructions
TSIDTAC= 6.01.00
TIME 13.20.14
PAGE
1
CPU
OVER
TOTAL
TIME
HEAD
I/O
00.00.3
00.00.1
00.00.7
00.00.7
00.00.7
00.00.7
00.00.7
00.00.6
00.00.7
00.00.6
00.00.6
00.00.5
00.00.6
00.00.5
00.07.3*
00.00.5
00.01.1
00.00.5
00.00.8
00.01.7
00.01.1
00.00.6
00.00.6
00.00.5
00.00.7
00.01.7
00.01.1
00.00.6
00.01.0
00.00.5
00.01.7
00.01.0
00.00.5
00.00.6
00.00.5
00.01.7
00.01.1
00.00.6
00.00.8
00.00.7
00.01.7
00.01.1
00.00.6
00.00.4
00.00.7
00.01.7
00.01.1
00.00.6
00.00.9
00.01.7
00.01.1
00.00.5
00.00.4
00.01.7
00.01.1
00.00.6
00.00.9
00.00.7
00.01.7
00.01.1
00.00.5
00.00.4
00.00.7
00.01.7
00.01.1
00.00.6
00.00.9
00.01.7
00.01.1
00.00.5
00.00.4
00.01.9
00.01.1
00.00.6
00.10.6
00.34.0
00.00.8
00.00.4
00.00.9
00.00.2
00.00.1
00.00.5
00.00.5
00.00.5
00.00.5
00.00.3
00.00.5
00.00.3
00.00.5
00.00.3
00.00.4
00.00.3
00.00.5
00.04.7*
00.00.3
00.00.7
00.00.5
00.00.3
00.00.7
00.00.4
00.00.3
00.00.4
00.00.5
00.00.3
00.00.7
00.00.4
00.00.3
00.00.6
00.00.5
00.00.7
00.00.4
00.00.3
00.00.3
00.00.5
00.00.7
00.00.4
00.00.3
00.00.5
00.00.2
00.00.7
00.00.4
00.00.3
00.00.2
00.00.2
00.00.8
00.00.4
00.00.3
00.00.5
00.00.7
00.00.4
00.00.3
00.00.2
00.00.7
00.00.4
00.00.3
00.00.5
00.00.2
00.00.7
00.00.4
00.00.3
00.00.2
00.00.2
00.00.7
00.00.4
00.00.3
00.00.5
00.00.7
00.00.4
00.00.3
00.00.2
00.00.7
00.00.4
00.00.3
00.02.8
00.08.9
00.00.3
00.00.2
00.00.5
238
44
707
718
637
637
373
613
364
613
298
570
296
568
6676*
465
705
524
336
696
1448
245
357
521
336
684
1457
400
635
485
684
1446
248
284
487
695
1446
404
595
336
684
1457
244
251
336
686
1446
389
613
684
1457
242
269
684
1455
389
600
336
684
1446
244
256
336
693
1446
398
619
693
1446
251
275
693
1446
398
16714
17113
696
238
630
User Reference
TSIDUTL Report
TSIDUTL Report
Description
TSIDUTL enables you can obtain information using various report
formats. The following provides an overview of several report formats.
DSPLY ALL,
Dataset Name
Sequence
The TSIDUTL DSPLY ALL, SEQ=DSN report format gives you a
detailed listing of all datasets in dataset name sequence. Each dataset is
reported at two levels: BIM-EPIC dataset definition (EDD) and version
information.
The first two lines of each dataset, beginning with the name, provide the
dataset definition. The field titles are listed on these two lines.
Definitions
The following describes the fields located on the DSPLY ALL,
SEQ=DSN report format.
Field
Definition
SID
Specifies the system ID.
UID
Specifies the user ID.
RET
Specifies the number of days each version is to be
retained.
CYC
Specifies the number of versions (cycles) to be
maintained.
RBLK
Specifies the default block size.
REC
Specifies the actual record size of the last version.
BLK
Specifies the actual block size of the last version.
VLT
Specifies the number of the vault method assigned
to the dataset.
MODE
Specifies the default tape density.
REV
Specifies whether this is a revolving tape dataset.
UNLBL
Specifies whether this is a standard label tape
dataset.
ENCODE=NO
Specifies whether tape encryption is activated.
OWN
Specifies the owner ID.
TPOOL
Specifies the tape pool ID.In addition to these
fields, you may also see information in the body of
the report:
Any comment associated with the dataset appears at
the end of the first line.
WORK
User Reference
Specifies the dataset is a non-generation dataset.
This field is located between the RET and CYC
fields.
Connectivity Systems, Inc.—Copyright © 2006
Use Pursuant to Company Instructions
A-33
TSIDUTL Report
Version
Information
The field titles listed at the top of each page refer to data recorded at the
version level. The fields titles listed are:
Field
Definition
SERIAL NO
Specifies the tape or disk volume serial
number.
VER. NO
Specifies the relative version number of
the version. There may also be four status
codes listed in this column.
S—the version is scratched.
O—the version is in open status.
C—the version is conditionally
cataloged.
M—the version is the master dataset
of an MCAT group.
REEL/EXT
Specifies the reel or extent sequence
number.
CREATION JOB NAME
Specifies the name of the job that created
this version.
CREATION DATE
Specifies the date the version was created.
EXPIRE DATE
Specifies the projected expiration date of
the version.
TIME
Specifies the time the version was created.
Time is displayed in hh.mm format.
TP
Specifies the dataset tape pool.
PART
Specifies the partition in which the version
was created.
PHYS. UNIT
Specifies the address of the device
containing the new version.
BLOCK COUNT
Specifies the number of blocks read the
last time the version was accessed.
LAST ACCESS JB NAME Specifies the name of the last job that
accessed this version.
A-34
LAST ACCESS DATE
Specifies the date the version was last
accessed.
COUNT USE
Specifies the number of times the tape was
opened since the version was added.
CLEAN DATE
Specifies the last clean date of the tape. If
the dataset is a disk dataset, the display
appears in format: EXT=starting
address/allocation.actual usage.
TOTAL USE
Specifies the total number of times the tape
was opened since the last cleaning.
Connectivity Systems, Inc.—Copyright © 2006
Use Pursuant to Company Instructions
User Reference
TSIDUTL Report
User Reference
Field
Definition
VLT
Specifies the current vault location of the
tape.
SLT
Specifies the current slot location of the
tape.
TOTAL ACTIVE
Specifies the total number of active tapes
on the TSIDUTL report.
TOTAL SCRATCH
Specifies the total number of scratch tapes
on the TSIDUTL report.
Connectivity Systems, Inc.—Copyright © 2006
Use Pursuant to Company Instructions
A-35
TSIDUTL Report
Example
The following is an example of the TSIDUTL DSPLY ALL,DSN report
format.
TSIDUTL= 6.01.00
TIME 13.42.37
D A T A
S E T
M A N A G E M E N T
S Y S T E M
PAGE
2
DSPLY ALL,SEQ=DSN
DATE 12/04/1997
SERIAL VER. REEL ---CREATION----EXPIRE
BLOCK ---LAST ACCESS--USE CLEAN
USE
NO
NO /EXT JB NAME
DATE
DATE
TIME TP PT CUU COUNT JB NAME
DATE
COUNT DATE TOTAL VLT SLT
ABSENTEE.TEMP
SID=
UID=
RET=
0 CYC= 2 WORK REBLK=OPT
REC= 1700 BLK=22100 DLA=
0
POOL=DISK02
EXT=0000060.0000030
SEC=000
ALR=0000000
DUMMY0
1 1 ABMSETUP 07/08/1997 07/08/1997 11.25
C3 1B7
0 ABMBURA1 07/09/1997
X=0006036/00060.00041
ACCOUNTS.PAYABLE.FILE
SID=
UID=
RET=
0 CYC= 1
REBLK=
REC=
80 BLK= 4160 DLA=
0
POOL=DISK01
EXT=0000060.0000030
SEC=000
ALR=0000000
G=0000012 DUMMY0
1 1 GAMAPLST 07/16/1997 07/16/1997 18.17
F2 1B7
0 TSIBACK 08/02/1997
X=0005607/00060.00020
ACCTS.PAYABLE.TWO SID=
UID=
RET=
0 CYC= 1
REBLK=
REC=
80 BLK= 4160 DLA=
0
POOL=DISK01
EXT=0000060.0000030
SEC=000
ALR=0000000
G=0000012 DUMMY3
1 1 GAMAPLST 07/16/1997 07/16/1997 18.17
F2 1A9
0 TSIBACK 08/02/1997
X=0030740/00060.00020
ADFIL.BKUP
SID=
UID=
RET=
3 CYC= 0
REBLK=
REC=32767 BLK=32767 DLA=
0
VLT= 0 MODE=F8 REV=NO
UNLBL=NO
ENCODE=NO
OWN=00
TPOOL=B
SYS000
POOL=DISK02
EXT=0001000.0000500
SEC=000
ALR=0000000
001015 S
1 VSNADDFL 07/20/1997 07/23/1997 03.41
C1 610
1508 VSNADDFL 07/20/1997
2
2
0
0
ALERT.AUDIT.HIST SID=
UID=
RET=
0 CYC= 3
REBLK=
REC=32767 BLK=32767 DLA=
0
VLT= 0 MODE=F8 REV=NO
UNLBL=NO
ENCODE=NO
OWN=00
TPOOL=B
SYS000
000092
1 1 ALTAUDIT 08/04/1997 08/04/1997 06.48
C1 611
575 ALTAUDIT 08/04/1997
1
17
0
0
000057
2 1 ALTAUDIT 07/02/1997 07/02/1997 06.41
C1 611
570 ALTAUDIT 08/04/1997
2
14
0
0
000455
3 1 ALTAUDIT 06/03/1997 06/03/1997 08.11
F5 620
565 ALTAUDIT 07/02/1997
2
5
0
0
000298 S
1 ALTAUDIT 05/02/1997 05/02/1997 07.20
C1 620
558 ALTAUDIT 06/03/1997
2
8
0
0
ANY.FILEID.LONG.ENOUGH.SHOW.THIS.EXAMPLE
SID=
UID=AC RET=
0 CYC= 0 WORK REBLK=
REC=
BLK=
DLA=
0 **** AUTO CATALOGUE ****
POOL=
EXT=0000000.0000001
SEC=000
ALR=0000000
ANY.FILEID.LONG.ENOUGH.TO.SHOW.THIS.EXAMPLE
SID=
UID=AC RET=
0 CYC= 0 WORK REBLK=
80 REC=
BLK=
DLA=
0 **** AUTO CATALOGUE ****
VLT= 0 MODE=00 REV=NO
UNLBL=NO
ENCODE=NO
OWN=
TPOOL=A
SYS000
ANY.OLD.FILEID
SID=
UID=AC RET=
0 CYC= 0 WORK REBLK=
REC=
BLK=
DLA=
0 **** AUTO CATALOGUE ****
POOL=
EXT=0000001.0000001
SEC=000
ALR=0000000
ANY.OLD.FILEID.LONG.ENUFF.FOR.EXAMPL
SID=
UID=AC RET=
0 CYC= 0 WORK REBLK=
REC=
BLK=
DLA=
0 **** AUTO CATALOGUE ****
POOL=
EXT=0000001.0000001
SEC=000
ALR=0000000
AR CONDENSE FILE SID=
UID=
RET=
0 CYC= 1
REBLK=
REC=
5 BLK= 250 DLA=
0
POOL=DISK01
EXT=0000005.0000002
SEC=000
ALR=0000000
G=0000132 DUMMY3
1 1 DCDCREAR 08/01/1997 08/01/1997 19.13
C1 1A9
0 TSIBACK 08/02/1997
X=0010300/00005.00002
AR.PROD.LGX.AR192BKP.GVEXPORT.AR192RST
SID=TP UID=
RET=
2 CYC= 2
REBLK=
REC=
BLK=32767 DLA=
0 LOGIC IDCAMS BACKUP/RESTORE OF
VLT= 0 MODE=08 REV=NO
UNLBL=NO
ENCODE=NO
OWN=
TPOOL=
SYS000
011609
1 1 AR835
08/07/1997 08/11/1997 16.53
F3 180
0 TSIDYN
08/18/1997
0
0
0
0
011918
2 1 AR835
08/06/1997 08/10/1997 16.31
F3 180
0 TSIDYN
08/18/1997
0
0
0
0
012056
3 1 AR835
08/04/1997 08/08/1997 16.28
F3 180
0 TSIDYN
08/18/1997
0
0
0
0
AR.PROD.LGX.EL588BKP.GVEXPORT.EL588RST
SID=TP UID=
RET=
2 CYC= 2
REBLK=
REC=
BLK=32767 DLA=
0 LOGIC IDCAMS BACKUP/RESTORE OF
VLT= 0 MODE=08 REV=NO
UNLBL=NO
ENCODE=NO
OWN=
TPOOL=
SYS000
011615
1 1 EL588
08/07/1997 08/11/1997 17.31
F3 180
0 TSIDYN
08/18/1997
0
0
0
0
011932
2 1 EL588
08/06/1997 08/10/1997 17.41
F3 180
0 TSIDYN
08/18/1997
0
0
0
0
012087
3 1 EL588
08/04/1997 08/08/1997 17.25
F3 180
0 TSIDYN
08/18/1997
0
0
0
0
AR.PROD.NCL.CASHRCT.CASHRBKP.DAILY
SID=TP UID=
RET=
2 CYC= 3
REBLK=
REC=
80 BLK=
80 DLA=
0 CASH RECEIPTS DAILY BACKUP
VLT= 0 MODE=08 REV=NO
UNLBL=NO
ENCODE=NO
OWN=
TPOOL=
SYS000
011610
1 1 AR835
08/07/1997 08/11/1997 16.52
F3 180
0 TSIDYN
08/18/1997
0
0
0
0
011904
2 1 AR835
08/06/1997 08/10/1997 16.31
F3 180
0 TSIDYN
08/18/1997
0
0
0
0
012057
3 1 AR835
08/04/1997 08/08/1997 16.27
F3 180
0 TSIDYN
08/18/1997
0
0
0
0
----------------------------------------------------------------------------------------------------------------------------TSIDUTL= 6.01.00
D A T A
S E T
M A N A G E M E N T
S Y S T E M
PAGE
95
TIME 13.42.37
DSPLY ALL,SEQ=DSN
DATE 12/04/1997
SERIAL VER. REEL ---CREATION----EXPIRE
BLOCK ---LAST ACCESS--USE CLEAN
USE
NO
NO /EXT JB NAME
DATE
DATE
TIME TP PT CUU COUNT JB NAME
DATE
COUNT DATE TOTAL VLT SLT
VSAM.TEC.FILES
SID=
UID=
RET=
2 CYC= 0
REBLK=
REC=
80 BLK= 800 DLA=
0
POOL=DISK01
EXT=0000005.0000002
SEC=000
ALR=0000000
G=0000003 DUMMY0
1 1 VSAMTEC 08/03/1997 08/05/1997 03.43
C2 1B7
0 VSAMTEC 08/03/1997
X=0005799/00005.00002
VSAM.110A.FILES
SID=
UID=
RET=
2 CYC= 0
REBLK=
REC=
80 BLK= 800 DLA=
0
POOL=DISK01
EXT=0000005.0000002
SEC=000
ALR=0000000
G=0000005 DUMMY6
1 1 VSAM100A 08/03/1997 08/05/1997 03.05
C2 1B1
0 VSAM100A 08/03/1997
X=0028974/00005.00002
VSAM.111A.FILES
SID=
UID=
RET=
2 CYC= 0
REBLK=
REC=
80 BLK= 800 DLA=
0
POOL=DISK01
EXT=0000005.0000002
SEC=000
ALR=0000000
G=0000005 DUMMY1
1 1 VSAM101A 08/03/1997 08/05/1997 03.18
C2 1B9
0 VSAM101A 08/03/1997
X=0021911/00005.00002
VSAM.112A.FILES
SID=
UID=
RET=
2 CYC= 0
REBLK=
REC=
80 BLK= 800 DLA=
0
POOL=DISK01
EXT=0000005.0000002
SEC=000
ALR=0000000
G=0000005 DUMMY3
1 1 VSAM102A 08/03/1997 08/05/1997 03.33
C2 1A9
0 VSAM102A 08/03/1997
X=0010302/00005.00002
WATRMTR.BACKUP
SID=
UID=
RET=
0 CYC= 1
REBLK=OPT
REC= 181 BLK=16290 DLA=
0
VLT= 0 MODE=F8 REV=NO
UNLBL=NO
ENCODE=NO
OWN=00
TPOOL=B
SYS000
000034
1 1 MWMBAKUP 07/11/1997 07/11/1997 08.07
C1 610
849 MWMRSTOR 07/11/1997
2
22
0
0
WWSTATS.BKUP.TAPE SID=
UID=
RET= 30 CYC= 0
REBLK=MAX
REC=32767 BLK=32767 DLA=
0
VLT= 0 MODE=F8 REV=NO
UNLBL=NO
ENCODE=NO
OWN=00
TPOOL=B
SYS000
000067
1 1 WWMSTBKP 07/10/1997 08/09/1997 09.20
C2 610
12 WWMSTBKP 07/10/1997
1
9
0
0
000635 S
1 WWMSTBKP 06/09/1997 07/09/1997 11.02
C2 610
12 WWMSTBKP 06/09/1997
1
1
0
0
TOTAL ACTIVE TAPES
2106 TOTAL SCRATCH TAPES
284
A-36
Connectivity Systems, Inc.—Copyright © 2006
Use Pursuant to Company Instructions
User Reference
Tape Dataset Summary Report
Tape Dataset Summary Report
Description
The following report summarizes information about tape datasets. Each
tape volume serial number (volser) is listed along with data for that
version. Dataset definitions are not listed. The first field listed is the
version dataset name. Other fields contained in this report are described
later in this document.
Example
The following is an example of a Tape Dataset Summary report.
SIDUTL= 6.01.00
TIME 13.42.37
D A T A
S E T
M A N
DSPLY ALL,SEQ=SER
SERIAL VER. REEL ---CREATION----EXPIRE
NO
NO /EXT JB NAME
DATE
DATE
.MD.HRM.SAM.RPTREC
DUMMY8
1 1 PAYROL10 05/07/1996 05/07/1996
.NAME CI BACKUP DUMMY8
1 1 DCDMAINT 10/02/1996 10/02/1996
.HPL.WORK.FILE
DUMMY8
1 1 HPLVSAMP 10/11/1996 10/11/1996
.MD.HRM.SAM.SUP050T
DUMMY8
1 1 PAYROL10 02/21/1996 02/21/1996
.OLDNOVER.FILE
DUMMY8
1 1 OCWOPNBL 04/05/1995 04/05/1995
.PROG.WORK.FILE3 DUMMY8 O
1 HRBDESIG 08/04/1997 08/05/1997
.MD.HRM.SAM.PERWTRN
DUMMY8
1 1 PAYROL10 05/07/1996 05/07/1996
.PROG.WORK.FILE3 DUMMY8 O
1 HRBDESIG 08/04/1997 08/05/1997
.MD.HRM.SAM.PER171T
DUMMY8
1 1 PAYROL10 03/28/1996 03/28/1996
.MD.HRM.PAY070.PUNCH10
DUMMY8
1 1 PAMSRT11 07/09/1997 07/09/1997
.PROJECT.FL
DUMMY8
1 1 DCXHILOW 01/24/1996 01/24/1996
.MD.HRM.SAM.PERWORK
DUMMY8
1 1 PAYROL10 05/07/1996 05/07/1996
.ELMET.INVENTORY.FILE
DUMMY8
1 1 KLLEPIC1 06/02/1994 06/02/1994
.JOB.HIST.ACCUM DUMMY8
2 1 TSIJOBAT 07/31/1997 07/31/1997
.MD.HRM.SAM.PERTRAN
DUMMY8
1 1 PAYROL10 05/07/1996 05/07/1996
.JOB.HIST.ACCUM DUMMY8
2 3 TSIJOBAT 07/31/1997 07/31/1997
.TMON.DAILY.D
DUMMY8
1 7 CICDTMON 08/04/1997 08/04/1997
.TMON.DAILY.D
DUMMY8
1 6 CICDTMON 08/04/1997 08/04/1997
.MD.HRM.SAM.CHKNBRS
DUMMY8
1 1 PAYROL10 05/07/1996 05/07/1996
.TMON.DAILY.D
DUMMY8
1 3 CICDTMON 08/04/1997 08/04/1997
.MD.HRM.SAM.CNTLFIL
DUMMY8
1 1 PAYROL10 05/07/1996 05/07/1996
.FINLODE.562
DUMMY8
1 1 MFX22990 07/07/1997 07/07/1997
.MD.HRM.SAM.CHKOUT
DUMMY8
1 1 PAYROL10 05/07/1996 05/07/1996
.TMON.DAILY.D
DUMMY8
1 4 CICDTMON 08/04/1997 08/04/1997
.TMON.DAILY.D
DUMMY8
1 1 CICDTMON 08/04/1997 08/04/1997
.MD.HRM.SAM.DATACTL
DUMMY8
1 1 PAYROL10 05/07/1996 05/07/1996
.TMON.DAILY.C
DUMMY8 O
1 CICCTMON 08/04/1997 08/04/1997
.TMON.DAILY.B
DUMMY8 O
2 CICBTMON 08/04/1997 08/04/1997
.MD.HRM.SAM.ERROR10
DUMMY8
1 1 PAYROL10 05/07/1996 05/07/1996
.FINAL ENTREX
DUMMY8
1 1 DCDMAINT 10/02/1996 10/02/1996
.MD.HRM.SAM.ERROR20
DUMMY8
1 1 PAYROL10 05/07/1996 05/07/1996
.TAX.CODE.FILE
DUMMY8
1 1 DCXCSLST 06/20/1997 06/20/1997
.MD.HRM.SAM.ONLCHGS
DUMMY8
1 1 PAYROL10 05/07/1996 05/07/1996
.MD.HRM.SAM.MNTRPCH
DUMMY8
1 1 PAYROL10 05/07/1996 05/07/1996
.MD.HRM.SAM.CHGFILE
DUMMY8
1 1 PAYROL10 05/07/1996 05/07/1996
.TMON.DAILY.A
DUMMY8 O
1 CICATMON 08/04/1997 08/04/1997
.IND.AUDIT.FILE DUMMY8
1 1 DCXBILLS 07/18/1995 07/18/1995
.MD.HRM.SAM.MONITOR
DUMMY8
1 2 PAYROL10 05/07/1996 05/07/1996
.TEMP HP HISTORY DUMMY8
1 1 EPICONLD 10/18/1996 10/18/1996
.MD.HRM.SAM.MONITOR
DUMMY8
1 1 PAYROL10 05/07/1996 05/07/1996
.MD.HRM.SAM.INTRANS
DUMMY8
1 1 PAYROL10 05/07/1996 05/07/1996
.MD.HRM.PAY070.PUNCH6
DUMMY8
1 1 PSMCOPY 05/19/1997 05/19/1997
.JOB.HIST.ACCUM DUMMY8
1 1 TSIJOBAT 08/01/1997 08/01/1997
.MD.HRM.SAM.LABORT
DUMMY8
1 1 PAYROL10 03/11/1996 03/11/1996
User Reference
A G E M E N T
TIME TP PT CUU
S Y S T E M
BLOCK ---LAST ACCESS--COUNT JB NAME
DATE
PAGE
11
DATE 12/04/1997
USE CLEAN
USE
COUNT DATE TOTAL VLT SLT
10.46
11.59
15.58
BG 1AB
BG 1AB
BG 1AB
0 EPICONLD 10/18/1996 X=0019644/00200.00003
0 TSIBACK 08/01/1997 X=0019924/00024.00002
0 EPICONLD 10/18/1996 X=0019720/00100.00002
15.17
16.00
08.06
BG 1AB
BG 1AB
C1 1AB
0 EPICONLD 10/18/1996 X=0019609/00015.00002
0 EPICONLD 10/18/1996 X=0019605/00012.00002
0 HRBDESIG 08/04/1997 X=0020793/00050.00050
10.30
09.07
BG 1AB
C2 1AB
0 TSIDONL 11/07/1996 X=0019734/00050.00008
0 HRBDESIG 08/04/1997 X=0020457/00050.00050
11.22
BG 1AB
0 EPICONLD 10/18/1996 X=0019611/00015.00002
10.28
10.24
C2 1AB
BG 1AB
0 PAMSRT11 07/09/1997 X=0023535/00015.00002
0 EPICONLD 10/18/1996 X=0019642/00100.00002
10.31
BG 1AB
0 EPICONLD 10/18/1996 X=0019613/00015.00002
10.39
06.11
BG 1AB
F2 1AB
0 TSIBACK 08/01/1997 X=0020113/00020.00004
0 TSIJOBAT 08/01/1997 X=0025648/00100.00100
10.31
06.11
13.36
13.36
BG
F2
F2
F2
0
0
0
0
10.34
13.35
BG 1AB
F2 1AB
0 TSIDONL 11/07/1996 X=0019635/00005.00002
0 CICDTMON 08/04/1997 X=0020518/00015.00015
10.28
12.06
BG 1AB
C1 1AB
0 EPICONLD 10/18/1996 X=0019682/00005.00002
0 TSIBACK 08/01/1997 X=0023646/00012.00012
10.45
13.35
13.34
BG 1AB
F2 1AB
F2 1AB
0 EPICONLD 10/18/1996 X=0019684/00200.00003
0 CICDTMON 08/04/1997 X=0020762/00015.00015
0 CICDTMON 08/04/1997 X=0024565/00030.00030
10.28
11.17
11.08
BG 1AB
C2 1AB
F5 1AB
0 TSIDONL 11/07/1996 X=0019633/00005.00002
0 CICCTMON 08/04/1997 X=0023675/00030.00030
0 CICBTMON 08/04/1997 X=0020256/00015.00015
10.28
12.00
BG 1AB
BG 1AB
0 EPICONLD 10/18/1996 X=0019680/00050.00002
0 TSIBACK 08/01/1997 X=0020103/00006.00002
10.33
07.47
BG 1AB
C1 1AB
0 EPICONLD 10/18/1996 X=0019678/00005.00002
0 TSIBACK 08/01/1997 X=0020232/00006.00002
10.28
BG 1AB
0 EPICONLD 10/18/1996 X=0019622/00005.00003
10.33
BG 1AB
0 EPICONLD 10/18/1996 X=0019647/00015.00002
10.32
13.42
13.26
BG 1AB
F2 1AB
BG 1AB
0 EPICONLD 10/18/1996 X=0019687/00005.00003
0 CICATMON 08/04/1997 X=0023387/00030.00030
0 TSIBACK 08/01/1997 X=0019926/00005.00003
10.32
10.58
BG 1AB
BG 1AB
0 TSIDONL
0 TSIBACK
11/07/1996 X=0019627/00007.00006
08/01/1997 X=0019800/00006.00004
10.32
BG 1AB
0 TSIDONL
11/07/1996 X=0019704/00015.00015
10.29
BG 1AB
0 TSIDONL
11/07/1996 X=0020440/00150.00007
10.50
06.11
C1 1AB
F2 1AB
0 HRBEMPRF 05/22/1997 X=0020225/00015.00007
0 TSIBACK 08/01/1997 X=0025923/00100.00100
11.21
BG 1AB
0 EPICONLD 10/18/1996 X=0019649/00030.00029
1AB
1AB
1AB
1AB
EPICONLD
TSIJOBAT
CICDTMON
CICDTMON
Connectivity Systems, Inc.—Copyright © 2006
Use Pursuant to Company Instructions
10/18/1996
08/01/1997
08/04/1997
08/04/1997
X=0019615/00015.00002
X=0023537/00025.00017
X=0024304/00015.00015
X=0024289/00015.00015
A-37
Tape Dataset Summary Report
Expiration Date,
Creation Date,
and Creation
Job Sequences
A-38
Each version is listed with all version data. Dataset definitions are not
listed. The first field listed is the version dataset name. See “DSPLY
ALL, Dataset Name Sequence” for an explanation of the other fields
contained in the TSIDUTL report.
Connectivity Systems, Inc.—Copyright © 2006
Use Pursuant to Company Instructions
User Reference
Display Active Report
Display Active Report
Description
User Reference
The TSIDUTL Display Active report details the active versions of each
dataset. See “DSPLY ALL, Dataset Name Sequence” for an explanation
of the fields contained in the TSIDUTL report.
Connectivity Systems, Inc.—Copyright © 2006
Use Pursuant to Company Instructions
A-39
DSPLY NEW Report
DSPLY NEW Report
Description
The TSIDUTL DSPLY NEW report lists all datasets created since the last
time the report was created. See “DSPLY ALL, Dataset Name Sequence”
for an explanation of the fields contained in the TSIDUTL report.
Example
The following is an example of the TSIDUTL DSPLY NEW report.
IDUTL= 6.1
IME 6.45.36
D A T A
S E T
M A N A G E M E N T
S Y S T E M
DSPLY NEW,SEQ=DSN
SERIAL VER. REEL ---CREATION----EXPIRE
BLOCK ---LAST ACCESS--NO
NO /EXT JB NAME
DATE
DATE
TIME TP PT CUU COUNT JB NAME
DATE
SH.BUD1.BKUP
SID=
UID=
VLT= 0 MODE=F8
000149
1 1
000497 S
1
RET=
0
REV=NO
BUMCBKUP
BUMCBKUP
PAGE
1
DATE 12/30/1997
USE CLEAN
USE
COUNT DATE TOTAL VLT SLT
CYC= 1
REBLK=
REC= 8244 BLK= 8244 DLA=
0
UNLBL=NO
ENCODE=NO
OWN=00
TPOOL=B
SYS000
07/07/1997 07/07/1997 09.42
C4 611
1002 BUMCBKUP 07/07/1997
06/04/1997 06/04/1997 14.18
C2 610
994 BUMCBKUP 06/04/1997
1
1
14
4
0
0
0
0
SID=
UID=
RET=
0 CYC= 1
REBLK=
REC= 8244 BLK= 8244 DLA=
0 NSU FILE OF CASH.BUD1.BKUP
VLT= 0 MODE=F8 REV=NO
UNLBL=NO
ENCODE=NO
OWN=00
TPOOL=B
SYS000
F=0000002 000149
1 1 BUMCBKUP 07/07/1997 07/07/1997 09.50
C4 611
26 BUMCBKUP 07/07/1997
1
1
0
0
SH.BUD2.BKUP
.PROD.LGX.EL512BKP.GVEXPORT.EL512RST
SID=TP UID=
RET=
1
VLT= 0 MODE=08 REV=NO
011625
1 1 IN512DNH
011967
2 1 IN511MID
011953
3 1 IN511VNB
011938
4 1 IN512DNH
011850
5 1 IN512DNH
011851
6 1 IN511MID
012128
7 1 IN511HEL
012113
8 1 IN512DNH
012109
9 1 IN511FBS
012095
10 1 IN511MTH
012094
11 1 IN511VNB
CYC= 1
UNLBL=NO
08/07/1997
08/06/1997
08/06/1997
08/06/1997
08/05/1997
08/05/1997
08/04/1997
08/04/1997
08/04/1997
08/04/1997
08/04/1997
REBLK=
REC=
ENCODE=NO
OWN=
08/11/1997 17.37
08/10/1997 18.19
08/10/1997 18.14
08/10/1997 17.47
08/09/1997 17.30
08/09/1997 17.24
08/08/1997 17.58
08/08/1997 17.52
08/08/1997 17.46
08/08/1997 17.39
08/08/1997 17.33
F3
F3
F3
F3
F3
F3
F3
F3
F3
F3
F3
BLK=32767
TPOOL=
180
0
180
0
180
0
180
0
180
0
180
0
180
0
180
0
180
0
180
0
180
0
DLA=
TSIDYN
TSIDYN
TSIDYN
TSIDYN
TSIDYN
TSIDYN
TSIDYN
TSIDYN
TSIDYN
TSIDYN
TSIDYN
0
LOGIC IDCAMS BACKUP/RESTORE OF
SYS000
08/18/1997
0
0
0
08/18/1997
0
0
0
08/18/1997
0
0
0
08/18/1997
0
0
0
08/18/1997
0
0
0
08/18/1997
0
0
0
08/18/1997
0
0
0
08/18/1997
0
0
0
08/18/1997
0
0
0
08/18/1997
0
0
0
08/18/1997
0
0
0
0
0
0
0
0
0
0
0
0
0
.PROD.NCL.EL511WA.BKS511.ENTRY
SID=TP UID=
RET= 21 CYC= 1
REBLK=
REC=
VLT= 0 MODE=08 REV=NO
UNLBL=NO
ENCODE=NO
OWN=
012107
1 1 IN511FBS 08/04/1997 08/25/1997 17.49
80 BLK=32000 DLA=
0 LOGIC PROD INPUT DATA TO EL512
TPOOL=
SYS000
F3 180
0 TSIDYN
08/18/1997
0
0
0
.PROD.NCL.EL511WA.CI003CNV.ENTRY
SID=TP UID=
RET=
1 CYC= 1
REBLK=
REC=
VLT= 0 MODE=08 REV=NO
UNLBL=NO
ENCODE=NO
OWN=
011963
1 1 IN511MID 08/06/1997 08/10/1997 18.22
80 BLK=32000 DLA=
0 LOGIC JOURNAL FILE
TPOOL=
SYS000
F3 181
0 TSIDYN
08/18/1997
0
0
0
0
.PROD.NCL.EL511WA.CI005CNV.ENTRY
SID=TP UID=
RET= 21 CYC= 1
REBLK=
REC=
VLT= 0 MODE=08 REV=NO
UNLBL=NO
ENCODE=NO
OWN=
012127
1 1 IN511HEL 08/04/1997 08/25/1997 18.00
80 BLK=32000 DLA=
0 LOGIC JOURNAL PROD FILE
TPOOL=
SYS000
F3 180
0 TSIDYN
08/18/1997
0
0
0
0
A-40
Connectivity Systems, Inc.—Copyright © 2006
Use Pursuant to Company Instructions
User Reference
DSPLY PULL Report
DSPLY PULL Report
Description
The TSIDUTL DSPLY PULL report lists only the most current version
for each dataset. See “DSPLY ALL, Dataset Name Sequence” for an
explanation of the fields contained in the TSIDUTL report.
Example
The following is an example of the TSIDUTL DSPLY PULL report.
TSIDUTL= 6.01.00
TIME 13.42.37
D A T A
S E T
M A N A G E M E N T
S Y S T E M
PAGE
1
DSPLY PULL,SEQ=DSN
DATE 12/04/1997
SERIAL VER. REEL ---CREATION----EXPIRE
BLOCK ---LAST ACCESS--USE CLEAN
USE
NO
NO /EXT JB NAME
DATE
DATE
TIME TP PT CUU COUNT JB NAME
DATE
COUNT DATE TOTAL VLT SLT
A-R TAPE
SID=
UID=
RET=
0 CYC= 2
REBLK=MAX
REC=
25 BLK=32750 DLA=
0
VLT= 0 MODE=F8 REV=NO
UNLBL=NO
ENCODE=NO
OWN=00
TPOOL=B
SYS000
POOL=DISK01
EXT=0000250.0000050
SEC=000
ALR=0000000
001249
1 1 OCNARBAK 06/30/1997 06/30/1997 20.11
F5 620
342 OCYAUDAR 07/01/1997
2
2
0 0
ABSENTEE.TEMP
SID=
UID=
RET=
0 CYC= 2 WORK REBLK=OPT
REC= 1700 BLK=22100 DLA=
0
POOL=DISK02
EXT=0000060.0000030
SEC=000
ALR=0000000
DUMMY0
1 1 ABMSETUP 07/08/1997 07/08/1997 11.25
C3 1B7
0 ABMBURA1 07/09/1997 X=0006036/00060.00041
ACCOUNTS.PAYABLE.FILE
SID=
UID=
RET=
0 CYC= 1
REBLK=
REC=
80 BLK= 4160 DLA=
0
POOL=DISK01
EXT=0000060.0000030
SEC=000
ALR=0000000
G=0000012 DUMMY0
1 1 GAMAPLST 07/16/1997 07/16/1997 18.17
F2 1B7
0 TSIBACK 08/02/1997 X=0005607/00060.00020
ACCTS.PAYABLE.TWO SID=
UID=
RET=
0 CYC= 1
REBLK=
REC=
80 BLK= 4160 DLA=
0
POOL=DISK01
EXT=0000060.0000030
SEC=000
ALR=0000000
G=0000012 DUMMY3
1 1 GAMAPLST 07/16/1997 07/16/1997 18.17
F2 1A9
0 TSIBACK 08/02/1997 X=0030740/00060.00020
ALERT.AUDIT.HIST SID=
UID=
RET=
0 CYC= 3
REBLK=
REC=32767 BLK=32767 DLA=
0
VLT= 0 MODE=F8 REV=NO
UNLBL=NO
ENCODE=NO
OWN=00
TPOOL=B
SYS000
000092
1 1 ALTAUDIT 08/04/1997 08/04/1997 06.48
C1 611
575 ALTAUDIT 08/04/1997
1
17
0 0
AR CONDENSE FILE SID=
UID=
RET=
0 CYC= 1
REBLK=
REC=
5 BLK= 250 DLA=
0
POOL=DISK01
EXT=0000005.0000002
SEC=000
ALR=0000000
G=0000132 DUMMY3
1 1 DCDCREAR 08/01/1997 08/01/1997 19.13
C1 1A9
0 TSIBACK 08/02/1997 X=0010300/00005.00002
AR.PROD.LGX.AR192BKP.GVEXPORT.AR192RST
SID=TP UID=
RET=
2 CYC= 2
REBLK=
REC=
BLK=32767 DLA=
0 LOGIC IDCAMS BACKUP/RESTORE OF
VLT= 0 MODE=08 REV=NO
UNLBL=NO
ENCODE=NO
OWN=
TPOOL=
SYS000
011609
1 1 AR835
08/07/1997 08/11/1997 16.53
F3 180
0 TSIDYN
08/18/1997
0
0
0
0
AR.PROD.LGX.EL588BKP.GVEXPORT.EL588RST
SID=TP UID=
RET=
2 CYC= 2
REBLK=
REC=
BLK=32767 DLA=
0 LOGIC IDCAMS BACKUP/RESTORE OF
VLT= 0 MODE=08 REV=NO
UNLBL=NO
ENCODE=NO
OWN=
TPOOL=
SYS000
011615
1 1 EL588
08/07/1997 08/11/1997 17.31
F3 180
0 TSIDYN
08/18/1997
0
0
0
0
AR.PROD.NCL.CASHRCT.CASHRBKP.DAILY
SID=TP UID=
RET=
2 CYC= 3
REBLK=
REC=
80 BLK=
80 DLA=
0 CASH RECEIPTS DAILY BACKUP
VLT= 0 MODE=08 REV=NO
UNLBL=NO
ENCODE=NO
OWN=
TPOOL=
SYS000
011610
1 1 AR835
08/07/1997 08/11/1997 16.52
F3 180
0 TSIDYN
08/18/1997
0
0
0
0
AR.PROD.NCL.ELME3BKP.GVEXPORT.ELME3RST
SID=TP UID=
RET= 90 CYC= 3
REBLK=
REC=
BLK=32767 DLA=
0 LOGIC BACK-UP OFFLINE FILES UP
VLT= 0 MODE=08 REV=NO
UNLBL=NO
ENCODE=NO
OWN=
TPOOL=
SYS000
010523
1 1 ELME3AR 07/19/1997 10/17/1997 18.05
BG 180
0 TSIDYN
08/18/1997
0
0
0
0
AR.PROD.NCL.ELME3BKP.GVEXPORT.OFFSITE
SID=TP UID=
RET=PERM CYC= 30
REBLK=
REC=32763 BLK=32767 DLA=
0 LOGIC BACK-UP OFFLINE FILES CR
VLT= 1 MODE=
REV=NO
UNLBL=NO
ENCODE=NO
OWN=
TPOOL=
SYS000
090783
1 1 1996
01/26/1997 06/12/2024 06.52
F5 283
0 TSIDYN
08/18/1997
0
0
1
0
AR.PROD.NCL.ERBFWD.EL863.MONTHEND
SID=TP UID=
RET= 35 CYC= 1 WORK REBLK=
REC= 1000 BLK=23000 DLA=
0
VLT= 0 MODE=08 REV=NO
UNLBL=NO
ENCODE=NO
OWN=
TPOOL=
SYS000
010405
1 1 ELME3AR 07/19/1997 08/23/1997 16.58
BG 181
0 TSIDYN
08/18/1997
0
0
0
0
AR.PROD.NCL.EREXTR.EL860.MONTHEND
SID=TP UID=
RET= 90 CYC= 3
REBLK=
REC= 629 BLK=23273 DLA=
0 LOGIC EL860 ERRORS
VLT= 0 MODE=08 REV=NO
UNLBL=NO
ENCODE=NO
OWN=
TPOOL=
SYS000
012145
1 1 ELME1GET 07/18/1997 10/16/1997 18.20
F3 180
0 TSIDYN
08/18/1997
0
0
0
0
AR.PROD.NCL.EREXTR.EL860.OFFSITE
SID=TP UID=
RET=PERM CYC= 30
REBLK=
REC= 629 BLK=23273 DLA=
0 LOGIC EL860 ERRORS DECEMBER
VLT= 1 MODE=
REV=NO
UNLBL=NO
ENCODE=NO
OWN=
TPOOL=
SYS000
090785
1 1 1996
01/26/1997 06/12/2024 07.05
F5 283
0 TSIDYN
08/18/1997
0
0
1
0
AR.PROD.NCL.ERPNDB.EL860.MONTHEND
SID=TP UID=
RET= 90 CYC= 3
REBLK=
REC= 585 BLK=23400 DLA=
0 LOGIC EL860 PENDING BUSINESS
VLT= 0 MODE=08 REV=NO
UNLBL=NO
ENCODE=NO
OWN=
TPOOL=
SYS000
012149
1 1 ELME1GET 07/18/1997 10/16/1997 18.21
F3 280
0 TSIDYN
08/18/1997
0
0
0
0
AR.PROD.NCL.ERPNDB.EL860.OFFSITE
SID=TP UID=
RET=PERM CYC= 30
REBLK=
REC= 585 BLK=23400 DLA=
0 LOGIC PENDING BUSINESS DECEMBE
VLT= 1 MODE=
REV=NO
UNLBL=NO
ENCODE=NO
OWN=
TPOOL=
SYS000
090786
1 1 1996
01/26/1997 06/12/2024 07.21
F5 283
0 TSIDYN
08/18/1997
0
0
1
0
User Reference
Connectivity Systems, Inc.—Copyright © 2006
Use Pursuant to Company Instructions
A-41
DSPLY VAULT Report
DSPLY VAULT Report
Description
The TSIDUTL DSPLY VAULT report lists the vault and slot locations of
all tapes located in offsite vaults. See “DSPLY ALL, Dataset Name
Sequence” for an explanation of the fields contained in the TSIDUTL
report.
Example
The following is an example of the TSIDUTL DSPLY VAULT report.
TSIDUTL= 6.01.00
TIME 13.42.37
D A T A
S
DSPLY VAULT
SERIAL VER. REEL ---CREATION----NO
NO /EXT JB NAME
DATE
R.PROD.NCL.ELME3BKP.GVEXPORT.OFFSITE
090783
1 1 1996
01/26/1997
R.PROD.NCL.ELME3BKP.GVEXPORT.OFFSITE
090651
2 1 1995
01/20/1996
R.PROD.NCL.ELME3BKP.GVEXPORT.OFFSITE
090529
3 1 COPY1994 01/19/1995
R.PROD.NCL.ELME3BKP.GVEXPORT.OFFSITE
090424
4 1 COPY1993 01/29/1994
R.PROD.NCL.ELME3BKP.GVEXPORT.OFFSITE
090217
5 1 COPY1992 01/29/1993
R.PROD.NCL.ELME3BKP.GVEXPORT.OFFSITE
090218
5 2 COPY1992 01/29/1993
R.PROD.NCL.EREXTR.EL860.OFFSITE
090785
1 1 1996
01/26/1997
R.PROD.NCL.EREXTR.EL860.OFFSITE
090653
2 1 1995
01/20/1996
R.PROD.NCL.EREXTR.EL860.OFFSITE
090531
3 1 COPY1994 01/19/1995
R.PROD.NCL.EREXTR.EL860.OFFSITE
090425
4 1 COPY1993 01/29/1994
R.PROD.NCL.EREXTR.EL860.OFFSITE
090209
5 1 COPY1992 01/29/1993
R.PROD.NCL.ERPNDB.EL860.OFFSITE
090786
1 1 1996
01/26/1997
R.PROD.NCL.ERPNDB.EL860.OFFSITE
090654
2 1 1995
01/20/1996
R.PROD.NCL.ERPNDB.EL860.OFFSITE
090532
3 1 COPY1994 01/19/1995
R.PROD.NCL.ERPNDB.EL860.OFFSITE
090426
4 1 COPY1993 01/29/1994
R.PROD.NCL.ERPNDB.EL860.OFFSITE
090208
5 1 COPY1992 01/29/1993
R.PROD.NCL.ERPYAJ.EL860.OFFSITE
090880
1 1 1996
01/28/1997
R.PROD.NCL.ERPYAJ.EL860.OFFSITE
090784
2 1 1996
01/26/1997
R.PROD.NCL.ERPYAJ.EL860.OFFSITE
090652
3 1 1995
01/20/1996
R.PROD.NCL.ERPYAJ.EL860.OFFSITE
090530
4 1 COPY1994 01/19/1995
R.PROD.NCL.ERPYAJ.EL860.OFFSITE
090423
5 1 COPY1993 01/29/1994
UDGET.SQLBKUP
001056
1 1 BUMBAKUP 07/22/1997
UDGET.SQLBKUP
000252
2 1 BUMBAKUP 06/23/1997
UDGET.SQLBKUP
000432
3 1 BUMBAKUP 05/21/1997
L.PROD.LGX.ELEXTR.CLEXTBKP.CLDLY
011637
1 1 CLDLY
08/07/1997
L.PROD.LGX.ELEXTR.CLEXTBKP.CLDLY
011974
2 1 CLDLY
08/06/1997
L.PROD.LGX.ELEXTR.CLEXTBKP.CLDLY
012136
3 1 CLDLY
08/04/1997
L.PROD.LGX.ELEXTR.CLEXTBKP.CLDLY
010787
4 1 CLDLY
07/31/1997
L.PROD.LGX.ELEXTR.CLEXTBKP.CLDLY
011397
1 3 CLEOM
08/01/1997
L.PROD.LGX.ELHAF.CLHAFCPY.MONTHEND
011865
2 1 CLEOM
07/01/1997
L.PROD.LGX.ELHAF.CLHAFCPY.MONTHEND
090773
1 5 1996
01/03/1997
L.PROD.LGX.EL000BKP.CLEOMREN.OFFSITE
090774
1 6 1996
01/03/1997
A-42
E T
M A N A G E M E N T
EXPIRE
DATE
TIME TP PT CUU
S Y S T E M
BLOCK ---LAST ACCESS--COUNT JB NAME
DATE
PAGE
1
DATE 12/04/1997
USE CLEAN
USE
COUNT DATE TOTAL VLT SLT
06/12/2024 06.52
F5 283
0 TSIDYN
08/18/1997
0
0
1
0
06/06/2023 11.08
BG 283
0 TSIDYN
08/18/1997
0
0
2
0
06/06/2022 13.52
BG 282
0 TSIDYN
08/18/1997
0
0
3
0
06/16/2021 12.18
F3 781
0 TSIDYN
08/18/1997
0
0
4
0
06/16/2020 16.41
BG 783
0 TSIDYN
08/18/1997
0
0
5
0
06/16/2020 00.00
BG 783
0 TSIDYN
08/18/1997
0
0
5
0
06/12/2024 07.05
F5 283
0 TSIDYN
08/18/1997
0
0
1
0
06/06/2023 11.23
F5 283
0 TSIDYN
08/18/1997
0
0
2
0
06/06/2022 14.04
BG 282
0 TSIDYN
08/18/1997
0
0
3
0
06/16/2021 12.20
BG 783
0 TSIDYN
08/18/1997
0
0
4
0
06/16/2020 16.16
BG 783
0 TSIDYN
08/18/1997
0
0
5
0
06/12/2024 07.21
F5 283
0 TSIDYN
08/18/1997
0
0
1
0
06/06/2023 11.25
F5 283
0 TSIDYN
08/18/1997
0
0
2
0
06/06/2022 14.07
BG 282
0 TSIDYN
08/18/1997
0
0
3
0
06/16/2021 12.23
BG 783
0 TSIDYN
08/18/1997
0
0
4
0
06/16/2020 16.14
BG 783
0 TSIDYN
08/18/1997
0
0
5
0
06/14/2024 14.59
F5 283
0 TSIDYN
08/18/1997
0
0
1
0
06/12/2024 07.02
F5 283
0 TSIDYN
08/18/1997
0
0
2
0
06/06/2023 11.12
F5 283
0 TSIDYN
08/18/1997
0
0
3
0
06/06/2022 14.01
BG 282
0 TSIDYN
08/18/1997
0
0
4
0
06/16/2021
07/22/1997
06/23/1997
05/21/1997
BG
F6
C1
F5
08/18/1997
07/22/1997
06/23/1997
05/21/1997
0
1
1
1
0
1
10
3
5
1
2
3
0
1
0
0
12.07
11.48
14.32
13.27
783
610
610
610
0
169
169
169
TSIDYN
BUMBAKUP
BUMBAKUP
BUMBAKUP
08/14/1997 18.44
F3 180
0 TSIDYN
08/18/1997
0
0
5
0
08/13/1997 19.25
F3 181
0 TSIDYN
08/18/1997
0
0
4
0
08/11/1997 19.10
F3 180
0 TSIDYN
08/18/1997
0
0
3
0
08/07/1997 19.39
F3 180
0 TSIDYN
08/18/1997
0
0
2
0
09/15/1997 00.00
F3 180
0 TSIDYN
08/18/1997
0
0
1
0
08/15/1997 21.18
F3 180
0 TSIDYN
08/18/1997
0
0
2
0
05/20/2024 00.00
F5 283
0 TSIDYN
08/18/1997
0
0
1
0
05/20/2024 00.00
F5 283
0 TSIDYN
08/18/1997
0
0
1
0
Connectivity Systems, Inc.—Copyright © 2006
Use Pursuant to Company Instructions
User Reference
DSPLY SCRATCH Report
DSPLY SCRATCH Report
Description
The TSIDUTL DSPLY SCRATCH report lists scratch tapes along with
data specific to the version contained on the scratch tape. See “DSPLY
ALL, Dataset Name Sequence” for an explanation of the fields contained
in the TSIDUTL report.
Example
The following is an example of the TSIDUTL DSPLY SCRATCH report.
TSIDUTL= 6.01.00
TIME 13.42.37
ADFIL.BKUP
ALERT.AUDIT.HIST
BUD.ACASH.BKUP
BUDGET.SQLBKUP
CASH.BUD1.BKUP
CONHIST.BACKUP
CONSTR.BACKUP
CONSTR.JOURNAL.BK
ELECTRIC.METER.BK
EPIC.DBA.WORK1
EPIC.DISK01.BKUP
EPIC.DISK01.BKUP
EPIC.DISK01.BKUP
EPIC.DISK01.BKUP
EPIC.DISK01.BKUP
EPIC.DISK01.BKUP
EPIC.DISK01.BKUP
EPIC.DISK01.BKUP
EPIC.DISK01.BKUP
EPIC.DISK01.BKUP
EPIC.DISK01.BKUP
EPIC.DISK01.BKUP
EPIC.DISK01.BKUP
EPIC.DISK01.BKUP
EPIC.DISK01.BKUP
EPIC.DISK01.BKUP
EPIC.DISK01.BKUP
EPIC.DISK01.BKUP
EPIC.DISK01.BKUP
EPIC.DISK01.BKUP
EPIC.DISK01.BKUP
EPIC.DISK01.BKUP
EPIC.DISK01.BKUP
EPIC.DISK01.BKUP
GAS.METER.BKUP
KKL.TEST.TAPE
MBOOKFL.BACKUP
NOTEFL.BKUP
NOTEFL.BKUP
NOTEFL.BKUP
ODE.P.LIB.ARCHIVE
ODE.P.LIB.ARCHIVE
ODE.SAVE1
ODE.SAVE1
ODE.SAVE1
ODE.SAVE1
ODE.SAVE1
ODE.SAVE1
ODE.SAVE1
ODE.SAVE1
ODE.SAVE1
ODE.SAVE1
ODE.SAVE1
ODE.SAVE1
ODE.SAVE1
ODE.SAVE1
ODE.SAVE1
ODE.SAVE1
ODE.SAVE1
P.FC.PD.ESA110
P.FC.PD.ESA110
P.FC.PD.ESA110
P.FC.PD.ESA110
P.FC.PD.ESA111
P.FC.PD.ESA111
P.FC.PD.ESA111
P.FC.PD.ESA111
SERIAL
NO
001015
000298
000499
000360
000497
001014
001054
000352
000429
000724
000301
000258
000281
000240
000712
000661
000609
000566
000525
000480
000433
000454
000427
000415
000422
000683
B12873
B12110
B12862
B12183
B12017
B12500
B12547
B12437
000223
000584
000618
000221
000995
000599
000987
000592
001092
001063
001032
000986
000955
000921
000888
000852
000260
000440
000697
000646
000591
000551
000510
000389
000671
004990
004293
004274
004249
004217
004991
004294
004275
User Reference
D A T A
S
DSPLY SCRATCH
VER. REEL ---CREATION----NO /EXT JB NAME
DATE
S
1 VSNADDFL 07/20/1997
S
1 ALTAUDIT 05/02/1997
S
1 BUMCBADJ 06/04/1997
S
1 BUMBAKUP 04/30/1997
S
1 BUMCBKUP 06/04/1997
S
1 VSNCNHST 07/20/1997
S
1 CAMMASBK 07/22/1997
S
1 CONSTR
04/30/1997
S
1 MENEMBAK 06/03/1997
S
1 BKUPLIBR 06/17/1997
S
1 TSIBACK 07/02/1997
S
1 TSIBACK 06/28/1997
S
1 TSIBACK 06/24/1997
S
1 TSIBACK 06/21/1997
S
1 TSIBACK 06/17/1997
S
1 TSIBACK 06/10/1997
S
1 TSIBACK 06/07/1997
S
1 TSIBACK 06/06/1997
S
1 NO NAME 06/05/1997
S
1 NO NAME 06/04/1997
S
1 NO NAME 06/03/1997
S
1 NO NAME 05/22/1997
S
1 NO NAME 05/21/1997
S
1 NO NAME 05/15/1997
S
1 NO NAME 05/07/1997
S
1 TSIBACK 03/14/1997
S
1 TSIBACK 02/15/1997
S
1 TSIBACK 02/14/1997
S
1 TSIBACK 02/13/1997
S
1 TSIBACK 02/09/1997
S
1 TSIBACK 02/02/1997
S
1 DCMBATCH 01/25/1997
S
2 DCMBATCH 01/25/1997
S
3 DCMBATCH 01/25/1997
S
1 MGMBAKUP 07/01/1997
S
1 FAV22BK 06/06/1997
S
1 VSNMBOOK 06/08/1997
S
1 CSNNOTBK 08/02/1997
S
1 CSNNOTBK 07/19/1997
S
1 CSNNOTBK 06/07/1997
S
1 ODEBACKP 07/18/1997
S
1 ODEBACKP 06/06/1997
S
1 ODESAVE 07/23/1997
S
1 ODESAVE 07/22/1997
S
1 ODESAVE 07/21/1997
S
1 ODESAVE 07/18/1997
S
1 ODESAVE 07/17/1997
S
1 ODESAVE 07/16/1997
S
1 ODESAVE 07/15/1997
S
1 ODESAVE 07/14/1997
S
1 ODESAVE 07/07/1997
S
1 ODESAVE 07/02/1997
S
1 ODESAVE 06/16/1997
S
1 ODESAVE 06/09/1997
S
1 ODESAVE 06/06/1997
S
1 ODESAVE 06/05/1997
S
1 ODESAVE 06/04/1997
S
1 ODESAVE 06/02/1997
S
1 ODESAVE 03/13/1997
S
1 FCPYD110 07/17/1997
S
1 FCPYD110 07/16/1997
S
1 FCPYD110 07/15/1997
S
1 FCPYD110 07/07/1997
S
1 FCPYD111 07/23/1997
S
1 FCPYD111 07/17/1997
S
1 FCPYD111 07/16/1997
S
1 FCPYD111 07/15/1997
E T
M A N A G E M E N T
EXPIRE
DATE
07/23/1997
05/02/1997
06/04/1997
04/30/1997
06/04/1997
07/30/1997
07/22/1997
04/30/1997
06/13/1997
06/24/1997
07/02/1997
06/28/1997
06/24/1997
06/21/1997
06/17/1997
06/10/1997
06/07/1997
06/06/1997
06/05/1997
06/04/1997
06/03/1997
05/22/1997
05/21/1997
05/15/1997
05/07/1997
03/14/1997
02/15/1997
02/14/1997
02/13/1997
02/09/1997
02/02/1997
01/25/1997
01/25/1997
01/25/1997
07/01/1997
06/08/1997
06/13/1997
08/03/1997
07/20/1997
06/08/1997
07/18/1997
06/06/1997
07/23/1997
07/22/1997
07/21/1997
07/18/1997
07/17/1997
07/16/1997
07/15/1997
07/14/1997
07/07/1997
07/02/1997
06/16/1997
06/09/1997
06/06/1997
06/05/1997
06/04/1997
06/02/1997
03/13/1997
07/17/1997
07/16/1997
07/15/1997
07/07/1997
07/23/1997
07/17/1997
07/16/1997
07/15/1997
TIME TP PT CUU
03.41
C1 610
07.20
C1 620
15.08
C1 610
07.15
C1 620
14.18
C2 610
03.33
C2 610
11.42
C2 610
07.14
C4 611
06.47
C1 611
08.06
BG 611
02.36
F2 610
02.38
F2 611
02.36
F2 610
05.48
F2 610
04.43
F6 611
02.36
F2 610
02.37
F6 610
02.37
F2 610
04.31
F2 610
04.33
F2 610
06.49
F2 620
02.36
F2 610
08.08
F6 610
02.36
F2 610
02.38
F2 611
07.04
F2 611
15.19
F6 803
05.20
F2 802
05.21
F6 802
22.36
BG 801
00.37
BG 800
15.07
W3 000
15.07
W3 000
15.07
W3 000
07.04
C3 610
12.05
BG 610
08.06
C1 611
00.58
C2 611
01.16
F5 620
01.22
F5 620
19.16
C4 621
20.35
C2 611
19.40
C1 620
19.21
C1 620
20.47
C1 610
19.13
C3 621
18.59
C3 620
19.01
C2 620
19.58
C3 611
19.33
C3 611
20.05
C1 610
19.11
F2 620
21.27
C1 611
20.52
C1 610
20.31
C3 611
20.30
C1 620
20.17
F5 610
21.24
C1 610
19.49
C1 610
23.18
F2 610
22.44
F2 610
23.07
F2 610
22.47
F2 610
00.01
F5 611
23.22
F5 611
22.46
F5 611
23.09
F5 611
S Y S T E M
BLOCK
COUNT
1508
558
641
169
994
2077
0
214
11523
0
3549
5435
5990
3684
5127
5929
4939
4930
4910
4984
5066
4500
5746
5126
5800
4654
3483
3378
3389
3194
3177
0
0
0
168
2345
2080
2225
2209
2345
216
216
804
835
809
793
736
728
741
724
815
787
642
646
630
595
585
726
665
32347
32347
32347
32347
32347
32347
32347
32347
PAGE
1
DATE 12/04/1997
---LAST ACCESS--USE CLEAN
USE
JB NAME
DATE
COUNT DATE TOTAL VLT SLT
VSNADDFL 07/20/1997
2
2
0
0
ALTAUDIT 06/03/1997
2
8
0
0
BUMCBADJ 06/04/1997
1
3
0
0
BUMBAKUP 04/30/1997
1
3
0
0
BUMCBKUP 06/04/1997
1
4
0
0
VSNCNHST 07/20/1997
2
2
0
0
CAMMASBK 07/22/1997
1
1
0
0
CONSTR
04/30/1997
1
4
0
0
MENEMRST 06/03/1997
2
5
0
0
BKUPLIBR 06/17/1997
1
2
0
0
TSIBACK 07/02/1997
1
5
0
0
TSIBACK 06/28/1997
1
8
0
0
TSIBACK 06/24/1997
1
9
0
0
TSIBACK 06/21/1997
1
9
0
0
TSIBACK 06/17/1997
1
1
0
0
TSIBACK 06/10/1997
1
2
0
0
TSIBACK 06/07/1997
1
2
0
0
TSIBACK 06/06/1997
1
2
0
0
NO NAME 06/05/1997
1
4
0
0
NO NAME 06/04/1997
1
3
0
0
NO NAME 06/03/1997
1
4
0
0
NO NAME 05/22/1997
1
4
0
0
NO NAME 05/21/1997
1
4
0
0
NO NAME 05/15/1997
1
7
0
0
NO NAME 05/07/1997
1
3
0
0
TSIBACK 03/14/1997
1
1
0
0
TSIBACK 02/15/1997
1
1
0
0
TSIBACK 02/14/1997
1
1
0
0
TSIBACK 02/13/1997
1
1
0
0
TSIBACK 02/09/1997
1
1
0
0
TSIBACK 02/02/1997
1
1
0
0
EPICRSTR 01/25/1997
1
1
0
0
DCMBATCH 01/25/1997
0
0
0
0
DCMBATCH 01/25/1997
0
0
0
0
MGMBAKUP 07/01/1997
1
6
0
0
FAV22R
06/06/1997
2
3
0
0
VSNMBOOK 06/08/1997
2
2
0
0
CSNNOTRS 08/02/1997
2
8
0
0
CSNNOTRS 07/19/1997
2
2
0
0
CSNNOTRS 06/07/1997
2
3
0
0
ODEBACKP 07/18/1997
1
1
0
0
ODEBACKP 06/06/1997
1
2
0
0
ODESAVE 07/23/1997
1
1
0
0
ODESAVE 07/22/1997
1
1
0
0
ODESAVE 07/21/1997
1
1
0
0
ODESAVE 07/18/1997
1
1
0
0
ODESAVE 07/17/1997
1
1
0
0
ODESAVE 07/16/1997
1
1
0
0
ODESAVE 07/15/1997
1
1
0
0
ODESAVE 07/14/1997
1
1
0
0
ODESAVE 07/07/1997
1
12
0
0
ODESAVE 07/02/1997
1
3
0
0
ODESAVE 06/16/1997
1
1
0
0
ODESAVE 06/09/1997
1
2
0
0
ODESAVE 06/06/1997
1
2
0
0
ODESAVE 06/05/1997
1
1
0
0
ODESAVE 06/04/1997
1
3
0
0
ODESAVE 06/02/1997
1
5
0
0
ODESAVE 03/13/1997
1
1
0
0
FCPYD110 07/17/1997
1
5
0
0
FCPYD110 07/16/1997
1
6
0
0
FCPYD110 07/15/1997
1
7
0
0
FCPYD110 07/07/1997
1
13
0
0
FCPYD111 07/23/1997
1
11
0
0
FCPYD111 07/17/1997
1
4
0
0
FCPYD111 07/16/1997
1
9
0
0
FCPYD111 07/15/1997
1
8
0
0
Connectivity Systems, Inc.—Copyright © 2006
Use Pursuant to Company Instructions
A-43
PSCRATCH Report (Projected Scratch)
PSCRATCH Report (Projected Scratch)
Description
The PSCRATCH report lists all tapes that become scratch tapes by the
specified date. This report also lists current DSN Catalog usage statistics.
The requested projected date is shown next to the PSCRATCH report title
and is written in Julian format. For example, PSCRATCH 96001
indicates a projected scratch date of January 1, 1996.
At the end of this report, message EP119 is issued to report on DSN
Catalog usage.
Definitions
A-44
The following describes the fields located on the PSCRATCH report.
Field
Definition
SERIAL NO
Specifies the volume serial number of the tape.
FILE NAME
Specifies the dataset name of the version
written on this tape.
CREATION DATE
Specifies the date this version was created.
EXPIRATION DATE
Specifies date retention criteria may be
satisfied for this version.
TAPE ERRORS
Specifies the number of temporary read/write
errors encountered on this tape while the
version resided on the tape.
TOT-ERR
Specifies the total number of errors that
occurred since the tape was last cleaned.
TOT-USED
Specifies the total number of times the tape was
used since the last cleaning.
DT-CLEAN
Specifies the date the tape was last cleaned.
VLT
Specifies the current vault location of the tape.
SLOT
Specifies the current slot location of the tape.
Connectivity Systems, Inc.—Copyright © 2006
Use Pursuant to Company Instructions
User Reference
PSCRATCH Report (Projected Scratch)
Example
TSIDUTL= 6.01.00
TIME 13.42.37
SERIAL
NO
FILE NAME
HEW001 IDCAMS.BACKUP
JA0001 IDCAMS.BACKUP
000001 ELECTRIC.METER.BK
000007 PMTHIST.BKUP
000028 P.SQL.LOG.ARC
000062 UCAT110A.BKUP
000063 UCAT111A.BKUP
000065 UCAT112A.BKUP
000067 WWSTATS.BKUP.TAPE
000070 VSAM.BKUP.TEC
000079 MBOOKFL.BACKUP
000154 P.SQL.LOG.ARC
User Reference
The following is an example of the TSIDUTL PSCRATCH report.
D A T A
S E T
M A N A G E M E N T
S Y S T E M
PAGE
DATE 12/04/1997
PSCRATCH 99095
CREATION
DATE
11/14/1997
11/14/1997
08/02/1997
08/02/1997
08/02/1997
08/03/1997
08/03/1997
08/03/1997
07/10/1997
08/03/1997
08/03/1997
07/29/1997
EXPIRATION TAPE
DATE
ERRORS TOT-ERR TOT-USED
11/14/1997
0
0
1
11/14/1997
0
0
4
08/12/1997
0
0
41
08/09/1997
0
0
42
08/09/1997
0
0
28
08/06/1997
0
0
19
08/06/1997
0
0
12
08/06/1997
0
0
12
08/09/1997
0
0
9
08/05/1997
0
0
14
08/08/1997
0
0
12
08/05/1997
0
0
16
Connectivity Systems, Inc.—Copyright © 2006
Use Pursuant to Company Instructions
DT-CLEAN
POOL
VLT
0
0
0
0
1
0
0
0
0
0
0
2
A-45
SLOT
0
0
0
0
99
0
0
0
0
0
0
0
1
TSIDVLT Report
TSIDVLT Report
Description
TSIDVLT produces two reports listing tapes which should be moved.
One is a Picking List which is sorted by the current location of the tape.
The other is a Distribution List which is sorted by the new destination of
the tape. Both reports list the current location of tape reels and their new
location. They are designed to assist vault workers in the physical
movement of tapes from vault to vault. See Chapter 13, “VTOC Listings
(TSIDLVT),” for additional information on producing reports.
Definitions
The following describes the fields located on the TSIDVLT reports.
Field
Definition
VAULT INFORMATION & SLOT Specifies number and name of the
vault and the number of the slot
from which the tape should be
moved.
SER-NO
Specifies volume serial number of
the tape.
VER
Specifies the tape version number.
REEL
Specifies tape reel sequence
number which is important for
multi-volume versions.
DATASET NAME
Specifies dataset name of the
version on the tape.
VAULT INFORMATION & SLOT Specifies number and name of the
vault and the number of the slot
where the tape should be moved.
A-46
Connectivity Systems, Inc.—Copyright © 2006
Use Pursuant to Company Instructions
User Reference
TSIDVLT Report
Example
TSIDVLT
DATE 12/11/1997
----------F R O M--------VAULT INFORMATION
1 VAULT 1
1 VAULT 1
1 VAULT 1
1 VAULT 1
1 VAULT 1
TSIDVLT
DATE 12/11/1997
----------F R O M--------VAULT INFORMATION
2 VAULT 2
2 VAULT 2
2 VAULT 2
2 VAULT 2
2 VAULT 2
2 VAULT 2
2 VAULT 2
TSIDVLT
DATE 12/11/1997
------------T O----------VAULT INFORMATION
1 VAULT 1
1 VAULT 1
1 VAULT 1
1 VAULT 1
1 VAULT 1
TSIDVLT
DATE 12/11/1997
------------T O----------VAULT INFORMATION
2 VAULT 2
2 VAULT 2
2 VAULT 2
2 VAULT 2
2 VAULT 2
User Reference
The following is an example of the TSIDVLT Vault Movement report.
VAULT MOVEMENT REPORT
SLOT
112
113
119
120
121
SER-NO
004207
004208
000101
004013
004014
VER REEL
DATASET NAME
1
1
T.FCOPY.ESA212
1
1
T.FCOPY.ESA213
1
1
T.FCOPY.TST701
1
1
T.FCOPY.T21RES
1
1
T.FCOPY.T21WK1
VAULT MOVEMENT REPORT
SLOT
SER-NO
T12994
000118
000154
000220
000251
000252
000279
VER REEL
DATASET NAME
2
1
T.ZEKE.AUDIT.BKUP
2
1
T.KCOPY.TST701
2
1
P.SQL.LOG.ARC
2
1
EPIC.DISK01.BKUP
2
1
CONSTR.JOURNAL.BK
2
1
BUDGET.SQLBKUP
2
1
P.RPFICH.MONTHLY
VAULT MOVEMENT REPORT
SLOT
1
2
3
4
5
SER-NO
010185
090651
010005
090653
010072
VER REEL
DATASET NAME
1
1
PT.A011.CLM.CK.BK
2
1
AR.PROD.NCL.ELME3BKP.GVEXPORT.OFFSITE
1
1
PT.D089.NAMES
2
1
AR.PROD.NCL.EREXTR.EL860.OFFSITE
1
1
ST.ADABAS.FILE114.JR114UPD
VAULT MOVEMENT REPORT
SLOT
1
2
3
4
5
SER-NO
090529
090531
090532
090652
000432
VER REEL
DATASET NAME
3
1
AR.PROD.NCL.ELME3BKP.GVEXPORT.OFFSITE
3
1
AR.PROD.NCL.EREXTR.EL860.OFFSITE
3
1
AR.PROD.NCL.ERPNDB.EL860.OFFSITE
3
1
AR.PROD.NCL.ERPYAJ.EL860.OFFSITE
3
1
BUDGET.SQLBKUP
Connectivity Systems, Inc.—Copyright © 2006
Use Pursuant to Company Instructions
TIME 15 08 50
------------T O----------VAULT INFORMATION
SLOT
0 MAIN LIBRARY
0
0 MAIN LIBRARY
0
0 MAIN LIBRARY
0
0 MAIN LIBRARY
0
0 MAIN LIBRARY
0
TIME 15 08 50
------------T O----------VAULT INFORMATION
SLOT
1 VAULT 1
110
1 VAULT 1
98
1 VAULT 1
197
1 VAULT 1
106
1 VAULT 1
30
1 VAULT 1
8
1 VAULT 1
195
TIME 15 08 50
----------F R O M--------VAULT INFORMATION
SLOT
5 ________________________
0
2 VAULT 2
0
5 ________________________
0
2 VAULT 2
0
5 ________________________
0
TIME 15 08 50
----------F R O M--------VAULT INFORMATION
SLOT
3 VAULT 3
0
3 VAULT 3
0
3 VAULT 3
0
3 VAULT 3
0
3 VAULT 3
0
A-47
TSIDVLT Report
A-48
Connectivity Systems, Inc.—Copyright © 2006
Use Pursuant to Company Instructions
User Reference
Index
- - - suffix (UR), 15, 34
- - suffix (UR), 15, 34
Symbols
"** DSN DELETED ** (UR), 26
$$$ datasets (UR), 33
$DEFSEC security profile (UR), 7, 61 to 62
$EPIC security profile (UR), 61
&&dsname (UR), 28
&dsname (UR), 28
&n parameter (UR), 15
** DSN DELETED ** (UR), 38, 30, 52
**** AUTO CATALOGUE **** (UR), 21
***.VOLUME.DSN.** (UR), 11
*EPIC.EVENT.DSN* (UR), 2
=== datasets (UR), 31
Numerics
000000 volser (UR), 44
A
Abend processing
DD statements (UR), 22
Absolute generation
User Reference
accessing with DLBL option G (UR), 12
DD statements (UR), 26
Absolute track specification (UR), 38
ABSTR parameter (UR), 38
Accepted Tapes Report (UR), 5, 10, 12
Accessing
disk volume (UR), 37
Online Manager security (UR), 62
sequential and random (UR), 7
TOJA (UR), 14
VSE label area (UR), 26
Accessing records
TSIDAC2 (UR), 6
Accounting statistics (UR), 3
ACL support
ejecting after MOVE (UR), 35
no revolving tapes (UR), 14
scratching tapes (UR), 26
selecting tapes (UR), 46
Active records, number of (UR, 13
Active version (UR), 17
Activity Log Report
cross-reference (UR), 10
TSIDARP (UR), 3
Activity Log Report (UR), 7
Connectivity Systems, Inc.—Copyright © 2006
Use Pursuant to Company Instructions
IN-1
ADD command
JCL requirements (UR), 7
parameters (UR), 7
syntax examples (UR), 9
ADD command (UR), 33, 2, 6
Adding
EDDs (UR), 22
versions (UR), 37
ADDRESS EPIC, 13
decoding output from (UR), 14
return codes (UR), 13
ADDRESS EPIC (UR), 13
ADS command (UR), 10
After-hours support, xiv
AGP configuration option (UR), 28
AGP. See Automatic generation purge
Align on cylinder boundary (UR), 38
ALLMALL configuration option
overriding with DLBL option M (UR), 13
overriding with OPTION (UR), 33
ALLMSG configuration option
overriding with DLBL option M (UR), 13
overriding with OPTION (UR), 33
ALLMSGS subparameter (UR), 33
Allocating
LUBs (UR), 30
Allocation
by logical records (UR), 16
Allocation messages
DD statements (UR), 32
DLBL option M (UR), 13
Allocation size
by cylinders (UR), 38
by logical records (UR), 38
by tracks (UR), 38
DD statements (UR), 34
SPACE parameter (UR), 38
Alpha options on TLBLs (UR), 4
ALX parameter (UR), 38
AMP parameter (UR), 10
AND condition (UR), 10
AR facility (UR), 6
ASSGN statements
IGNORE (UR), 65
IN-2
TSIDASS (UR), 2
uncontrolled datasets (UR), 7
when required (UR), 7
ASSGN statements (UR), 7
Assigning
default pools (UR), 15
SYS number (UR), 30
Assigning vaulting method (UR), 27
Assignments
holding (UR), 29
releasing (UR), 29
Assignments (UR), 4
ATTACH (UR), 5
Attention Routine commands (UR), 6
AUTOATT configuration option (UR), 31
Autoattach (UR), 32, 5
AUTOCAT configuration option (UR), 5, 21
Autodetach restrictions (UR), 32
AUTOLOG configuration option (UR, 21
Automated Cartridge Library (ACL)
vaulting (UR), 19
Automatic cataloging
AUTOCAT (UR), 21
AUTOLOG (UR), 21
DD statements (UR), 22, 30
generation datasets (UR), 22, 26
SYSPARM (UR), 22
work datasets (UR), 22
Automatic cataloging (UR), 44
Automatic generation purge (UR), 28
Automatic Volume Recognition (UR), 4
Automatic volume recognition (UR), 31
AUTOSTP configuration option (UR), 31
Available drives (UR), 5
Available tapes (UR), 5
AVAULTS parameter (UR), 25
AVR (UR), 31
AVR. See Automatic volume recognition
B
Backed-up datasets
listing (UR), 24
BACKUP
Connectivity Systems, Inc.—Copyright © 2006
Use Pursuant to Company Instructions
User Reference
IDCAMS (UR), 45
LIBR (UR), 48
Backup/Offload (UR), 34
Batch catalog management (UR), 8
BIM-EPIC
dataset control (UR), 6
DLBL enhancements (UR), 10
JCL enhancements (UR), 41
job cancellation (UR), 39
restricting control (UR), 6
special options (UR), 24
TLBL enhancements (UR), 2
using JCL (UR), 39
BIM-EPIC Configuration options (UR)
BIM-EPIC dataset definitions
allocation by logical records (UR), 16
automatic purge (UR)
block size (UR), 11
CISIZE (UR), 15
creating (UR), 22
cycles retention (UR), 12
dataset name (UR), 10
days after last access (UR), 12
deleting (UR), 30, 43, 26
disk pool name (UR), 15
display format (UR), 8
displaying (UR), 16, 20
encryption password (UR), 10
generation dataset (UR), 11
managing (UR), 18
modifying (UR), 54
number of secondary allocations (UR), 15
owner ID (UR), 13
password (UR), 10
primary extend size (UR), 15
prime dataset name (UR), 13
releasing (UR), 26
removing (UR), 39
retention (UR), 55
retention days (UR), 12
revolving tapes (UR), 14
secondary extent size (UR), 15
standard label (UR), 13
SYS number (UR), 11
System ID (UR), 11
tape density (UR), 13
tape pool ID (UR), 13
tape size (UR), 14
User Reference
TSIDUTL report (UR), 33
unlocking (UR), 28
updating (UR), 24
User ID (UR), 11
vault method number (UR), 14
BIM-EPIC dataset definitions comment
(UR), 10
BIM-EPIC Documentation, xv
BIM-FAQS/ASO
accessing Online Manager (UR), 3
Online Manager security (UR), 61
Block size
BLKSIZE DD parameter (UR), 17
MAX (UR), 16
mutually exclusive with CISIZE (UR), 11
OPT (UR), 16
Block size (UR), 11
Bypass datasets DD statements (UR), 52
C
CA-EPIC for CMS
sharing BIM-EPIC catalog (UR), 27, 31
sharing DSN Catalog on VSE (UR), 2
Called subroutines (UR), 8
CAPACITY command
JCL requirements (UR), 13
syntax examples (UR), 13
CAPACITY command (UR), 13
Card input (UR), 61
Cartridge tapes (UR), 33
CA-SORT (UR), 39
CATALOG
TSIDOFD (UR), 21
CATALOG command
common parameters (UR), 14
disk parameters (UR), 19
JCL requirements (UR), 14
REV (UR), 4
syntax examples (UR), 21
tape parameters (UR), 17
VLT parameter (UR), 21
CATALOG command (UR), 14
Catalog management
ADD (UR), 6
ADS (UR), 10
Connectivity Systems, Inc.—Copyright © 2006
Use Pursuant to Company Instructions
IN-3
CAPACITY (UR), 13
CATALOG (UR), 14
CLEAN (ur), 22
CLOSE (UR), 23
CYCLE (UR), 24
DELETE (UR), 43, 26
DEQ (UR), 27
DISPLAY (UR), 28
ENQ (UR), 31
LOCK (UR), 32
MOVE (UR), 35, 25
OFFLINE (UR), 36
ONLINE (UR), 37
PASSWORD (UR), 38
PURGE (UR), 43, 39
QUIESCE (UR), 41
RELEASE (UR), 42
RENAME (UR), 44
RETAIN (UR), 45
SCRATCH (UR), 52, 48
TRANSFER (UR), 50
UNLOCK (UR), 52
UPDATE (UR), 54
vaulting (UR), 21
Catalog management (UR), 2, 2
Catalog overrides
DD statements (UR), 13
Cataloging datasets
DD statements (UR), 12, 22, 30
Cataloging management
MCATALOG (UR), 33
CATLG DD parameter (UR), 22
CATRT1 configuration option (UR), 5, 22
Changing
EDD information (UR), 24
vault and slot location (UR), 35
version expiration date (UR), 45
Changing from
disk to tape (UR), 61
tape to disk (UR), 61
Check CPU See Job management control
language
Check partition See JMCL
Checkpoint/restart
TSIDASS (UR), 4
Checkpoint/restart (UR), 59
Choosing offload datasets (UR), 18
IN-4
CICS
accessing Online Manager (UR), 3
label creation (UR), 17
CISIZE
DD parameter (UR), 32
mutually exclusive with block size (UR), 11
CISIZE (UR), 15
CISIZE subparameter (UR), 33
CLEAN command
JCL requirements (UR), 22
parameters (UR), 22
syntax examples (UR), 22
CLEAN command (UR), 48, 22
CLOSE command, 23
CLOSE command (UR), 23
CLOSE parameter (UR), 29
Close processing
disk files (UR), 45
CMDHELP command (UR), 14
CMS
accessing Online Manager (UR), 3
CNTRL configuration option (UR), 6
COBOL
example (UR), 8
COBOL copybook (UR), 9
Coding
DD statements (UR), 2
Command Forms (UR), 13
Command Syntax, x
Command syntax, x
Comment (UR), 10
Common work datasets
deleting (UR), 23
retention (UR), 23
Common Work Datasets (CWDS), 15
Common work datasets (UR), 33
Compiler work datasets (UR), 33, 35
Concatenating datasets (UR), 38 to 39
Concatenation
datasets example (UR), 66
DD statements (UR), 26
CONDCAT parameter (UR), 22, 69
Connectivity Systems, Inc.—Copyright © 2006
Use Pursuant to Company Instructions
User Reference
Condition checking and branching See Job
management control language
Conditional Cataloging (UR), 18
Conditional cataloging (UR), 69
Conditionally cataloged
CONDCAT parameter (UR), 22
Conditions and IF (UR), 10
Configuration options
AGP (UR), 28
AUTOATT (UR), 31
AUTOCAT (UR), 5, 21
AUTOLOG (UR), 21
AUTOSTP (UR), 31
CATRT1 (UR), 5, 22
CNTRL (UR), 6
CYCL (UR), 22
DDGEN (UR), 22, 26
DEFEXT (UR), 22
DEFPOL (UR), 15, 22
DSKRET (UR), 26
GDI (UR), 8, 12, 20
JCLLANG (UR), 1 to 2
JCLOVRDE (UR), 12, 22
JOBACCT (UR), 1
MINRET (UR), 5
MODE (UR), 33
NCATDSK (UR), 5, 22
PURBYP (UR), 28, 22
RECORD (UR), 1
Recorder File (UR), 29
RECSHR (UR), 29
RECWARN (UR), 29
RECWMSG (UR), 29
RETEN (UR), 22
RMNTPRT (UR), 17
SHARE (UR), 31
Start Track 1 datasets (UR), 5
STRTRK (UR), 5, 4
UNCDSK (UR), 6
UNCTAP (UR), 6, 31
UNCTL (UR), 6
VM (UR), 25
VSAM (UR), 6, 29
Configuration options (UR), 2
Configuration optoins
RECORD (UR), 29
Confirmation options (UR), 12
User Reference
CONTIG parameter (UR), 38
Continuing with a dependent task (UR), 5
Controlled datasets (UR), 3
Controlled tapes (UR), 44, 18
Converting
to BIM-EPIC See BIM-EPIC Conversion
Guide
uncontrolled to controlled (UR), 4
Copying and merging datasets (UR), 12
CP commands (UR), 25
CPU indenendence
disk pools (UR, 34
CPU independence
disk pools (UR), 15
CPU independence (UR), 31
CPU/partition-independent pools (UR), 34
Create Date/Time Activity Report (UR), 31, 33
Create Job/Time Activity Report (UR), 15
Creating
EDD (UR), 14
EDDs (UR), 22
Recorder History dataset (UR), 2
security profiles (UR), 62
tap, 33
Creation date
changing (UR), 45
report listing (UR), 38
Creation date (UR), 19
Creation job
changing (UR), 45
report listing (UR), 38
Creation job (UR), 19
Creation time (UR), 19
Cross-Reference Report (UR), 26
Cross-Reference Reports
input to TSIDBRP (UR), 3
Cross-Reference Reports (UR), 10
Cross-ReferenceReports
vaulting(UR), 20
Current condition code See Job management
control language
Current utilization, displaying (UR), 13
Customer support, xiii
Customizing
Connectivity Systems, Inc.—Copyright © 2006
Use Pursuant to Company Instructions
IN-5
BIM-EPIC Processing (UR)
confirmation options (UR), 12
EDD display format (UR), 8
version display format (UR), 10
CWDS. See Common work datasets
CYCL configuration option (UR), 22
CYCLE command
versions (UR), 57
CYCLE command (UR), 24
Cycles retention
overriding (UR), 24
Cycles retention (UR), 12
CYL parameter (UR), 38
D
DA datasets
secondary allocation unavailable (UR), 2
DA datasets (UR), 6
DATA parameter (UR), 50, 10
Database utilities (UR), 37
Dataset defaults
overriding (UR), 12
Dataset definitions. See BIM-EPIC dataset
definitions
Dataset drop (UR), 68
Dataset fragmentation (UR), 2
Dataset name
DSN DD parameter (UR), 26
specifying on DD statement (UR), 11
Dataset name (UR), 10
Dataset names
changing (UR), 44
Dataset to Tape Report (UR), 27, 13
DATASET.NAME (UR), 45
dataset-name control statement (UR), 35
Datasets
assigning vaulting methods (UR), 21
cataloging (UR), 3
changing retention (UR), 27
concatenating (UR), 5
control (UR), 6
copying and merging (UR), 12
defining (UR), 5
direct access (UR), 26
IN-6
expiration rules (UR), 24
generation or work (UR), 11
ISAM (UR), 27
naming (UR), 10
onloading (UR), 30
renaming (UR), 44
restoring (UR), 30
revolving (UR), 4
rules for naming (UR), 10
scratch (UR), 38
sequential (UR), 26
Start Track1 (UR), 4
Date time activity report
creating (UR), 31, 33
Days after last access (DLA) (UR), 12
DD statement syntax
continuation rules (UR), 4
JCL requirements (UR), 4
DD statement syntax (UR), 4
DD statements
ABSTR parameter (UR), 38
additional parameters (UR), 4
allocation by logical record (UR), 38
ALX parameter (UR), 38
AMP (UR), 10
BLKSIZE parameter (UR), 16
catalog override example (UR), 13
cataloging (UR), 19
CATLG parameter (UR), 22
CLOSE parameter (UR), 29
CONDCAT parameter (UR), 22, 69
CONTIG parameter (UR), 38
continuations (UR), 4
CYL parameter (UR), 38
DATA parameter (UR), 50
dataset drop (UR), 68
dataset fragmentation (UR), 2
DCB parameter (UR), 16
default version (UR), 4
DELETE parameter (UR), 22
DEN parameter (UR), 16
DISP (UR), 10
DISP parameter (UR), 19
DSN parameter (UR), 11, 26
DSORG parameter (UR), 17
dummy datasets (UR), 52
END parameter (UR), 29
fragmentation (UR), 38
Connectivity Systems, Inc.—Copyright © 2006
Use Pursuant to Company Instructions
User Reference
FREE parameter (UR), 29
ignoring datasets (UR), 52
JCL requirements (UR), 2
JOBCAT (UR), 7
KEEP parameter (UR), 22
LABEL parameter (UR), 30
LRECL parameter (UR), 17
MOD subparameter (UR), 19
multi-dataset coding (UR), 9
MXIG parameter (UR), 38
NEW subparameter (UR), 19
OLD subparameter (UR), 19
OPTION (UR), 32
OPTION parameter (UR), 48
parameters (UR), 10
PASS parameter (UR), 22
pool request (UR), 45
printer and punch datasets (UR), 48
PRIVATE parameter (UR), 45
REF (UR), 45
RETAIN parameter (UR), 45
RLSE parameter (UR), 38
ROUND parameter (UR), 38
secondary allocation (UR), 38
SER parameter (UR), 45
SHR subparameter (UR), 19
SPACE (UR), 11, 38
SPACE parameter (UR), 34, 3
special ddnames (UR), 7
specifying (UR), 2, 12
specifying for tape (UR), 12
Start Track 1 example (UR), 13
STEPCAT (UR), 7
SYSABEND (UR), 7, 9
SYSIN (UR), 7
SYSMDUMP (UR), 7, 9
SYSnnn parameter (UR), 34
SYSOUT parameter (UR), 48
SYSUDUMP (UR), 7, 9
TRK parameter (UR), 38
uncontrolled dataset example (UR), 13
uncontrolled datasets (UR), 13
uncontrolled disk (UR), 38
UNIT parameter (UR), 11, 48
unsupported ddnames (UR), 5, 7
VOL parameter (UR), 11
volser request (UR), 45
VOLUME (UR), 10
VOLUME parameter (UR), 45
VSAM example (UR), 13
User Reference
VSAM processing (UR), 13, 32
VSAM/SAM processing (UR), 13
DDGEN
EPS049 Configuration Option, 25
DDGEN configuration option (UR), 22, 26
DDGEN Override
PURBYP, 25
Deactivating
TPRT transaction (UR), 18
TSIDBPR (UR), 17
Default profiles
$DEFSEC (UR), 61
$EPIC (UR), 61
Defaults
density (UR), 13
disk pool (UR), 21
pools (UR), 15
security profiles (UR), 61
DEFEXT configuration option (UR), 22
Define an EDD Panel (UR), 22
Define an EDD panel (UR), 22, 53
Defining
datasets (UR), 5
EDDs (UR), 22
DEFPOL configuration option (UR), 15, 22
DELETE
DD parameter (UR), 22
DELETE command
JCL requirements (UR), 26
parameters (UR), 26
syntax examples (UR), 26
DELETE command (UR), 43, 26
Deleting
EDD (UR), 30, 26, 39
EDDs (UR), 38
versions (UR), 39
volsers (UR), 39
Deleting datasets
DD statements (UR), 22
DELETE DD parameter (UR), 22
Density
DEN DD parameter (UR), 16
DEQ command (UR), 27
DETACH (UR), 5
Detail records
Connectivity Systems, Inc.—Copyright © 2006
Use Pursuant to Company Instructions
IN-7
ADDRESS EPIC (UR), 14
Detail records (UR), 6
Detail report
TSIDMNT (UR), 19
Device address (UR), 19
Device down (UR), 36
Device type, choosing (UR), 61
DFSORT (UR), 39
DHLDOPEN (UR), 24, 39
Direct access datasets
DD statements (UR), 17
Direct access datasets (UR), 26
Disk datasets
close processing (UR), 45
converting to controlled (UR), 4
grouping (UR), 11
names (UR), 10
open processing (UR), 44
placing on specific volumes (UR), 6
scratching (UR), 38 to 39
Disk pool name (UR), 15
Disk pools
CPU independent (UR), 15
CPU-independent (UR), 34
default pool (UR), 21
leveling (UR), 34
locating (UR), 44
partition-independent (UR), 15, 34
Disk pools (UR), 30, 34
Disk space
freeing (UR, 26
Disk to tape (UR), 61
Disk volumes
dismounting (UR), 36
Dismounting a disk volume (UR), 36
DISP parameter (UR), 10, 19
DISP=(x,CATALG) (UR), 21
Display active report listing (UR), 38
DISPLAY command (UR), 28
Display NEW report listing (UR), 38
Display PULL report listing (UR), 38
Display PULL, DSN report listing (UR), 38
Display scratch report listing (UR), 43
Display vault report listing (UR), 38
IN-8
Displaying
DSN Catalog entries (UR), 28
EDDs (UR), 16, 20
online VTOC (UR), 11
tape information (UR), 47
version attributes (UR), 36
version information (UR), 32
VTOC entries (UR), 34, 17
DITTO (UR), 37, 49
DL/1 datasets (UR), 3
DLAUPD= (UR), 25
DLBL option codes
B=n reblocking (UR), 12
C conditional catalog (UR), 69
G=n access absolute generation (UR), 12
M issue allocation messages (UR), 13, 33
T dataset drop (UR), 68, 12
DLBL statements
automatic truncation (UR), 3
BIM-EPIC enhancements (UR), 10
default version (UR), 4
F option (UR), 2
inhibiting truncation (UR), 3
DLBL statements (UR), 10
Do not rewind (UR), 8
Documentation, xv
DOS cancel code See Job management control
language
Drive assignments (UR), 31
DSKLUB configuration option
assigning SYS number (UR), 30
DSKRET configuraiton optoin (UR), 26
DSN Catalog
capacity (UR), 13
controlled tapes (UR), 44
dataset name sequence (UR), 13
dequeuing (UR), 27
EDD information (UR), 7
entries (UR), 7
in volume sequence (UR), 29
maintenance (UR), 5
record structure (UR), 6
removing versions (UR), 38
resequencing (UR), 6
searching (UR), 16
sequential and random access (UR), 7
version information (UR), 7
Connectivity Systems, Inc.—Copyright © 2006
Use Pursuant to Company Instructions
User Reference
DSN catalog
enqueuing (UR), 31
DSN Catalog (UR), 3
DSN Catalog efficiency (UR), 4
DSN Catalog entries (UR), 3, 46
DSN DD parameter (UR), 26
DSN parameter (UR), 11
DSN/JOB Cross-Reference Report (UR), 5, 10
DSORG DD parameter (UR), 17
DSPLY command
VAULT (UR), 24
VLT (UR), 24
DSPLY command (UR)
DTF names
excluding from IBM-EPIC control (UR), 6
in TLBLs (UR), 2
TSIDDMP (UR), 20
TSIDDTD (UR), 12
unit record (UR), 3
DTFCD (UR), 3, 61
DTFCP (UR), 61
DTFDI (UR), 61
DTFPR (UR), 3, 61
DTFs
TYPEFLE=WORK (UR), 34
DUMMY parameter (UR), 52
DVCDN (UR), 36
E
e volume labels (UR), 33
Early Drive Release (UR), 32
EDD Information panel (UR), 20
EDD. See BIM-EPIC dataset definitions
Efficiency considerations
disk allocation (UR), 34
Start Track 1 datasets (UR), 4
Emergency support, xiv
Encryption password (UR), 10
END parameter (UR), 29
End-of-extent processing
disk (UR), 44
End-of-volume processing (UR), 43
ENQ command
User Reference
JCL requirements (UR), 31
ENQ command (UR), 31
EOF extent (UR), 19
EP009 message
ACCEPT response (UR), 5
EP038 message
FRAG response (UR), 2
EP930 message (UR), 6
EPICFLOW command (UR), 14
EPICREC.OAL (UR), 14
EPS022 special option (UR), 49
EPS043 special option (UR), 4
error count (UR), 22
Event posting
executing in batch (UR), 7
releasing TSIDREL AND TSIDCREL
(UR), 3
SYSPARM value (UR), 7
TSIDCHK and TSIDCCHK (UR), 5
TSIDLOC and TSIDCLOC (UR), 4
TSIDUNL and TSIDCUNL (UR), 6
Event posting (UR), 9, 13
Examples
SPACE parameter (UR), 38
EXCLUDE (UR), 3
Excluding TDF names (UR), 6
Executing
in batch (UR), 7
in CICS (UR), 9, 13
standard processing subroutines (UR), 8
Exiting
Online Manager (UR), 4
Expiration
LABEL parameter (UR), 30
Expiration date
changing (UR), 45
overriding (UR), 27
report listing (UR), 38
EXPORT (UR), 47
Extending a tape
MOD subparameter (UR), 19
Extent statement
reusing space (UR), 11
EXTENT statements
Connectivity Systems, Inc.—Copyright © 2006
Use Pursuant to Company Instructions
IN-9
controlled dataset (UR), 26
Start Track 1 dataset (UR), 26
Start Track 1 datasets (UR), 4
Extent statements
overriding (UR), 9
F
FAVER (UR), 45
FBA CISIZE (UR), 32
Field help (UR), 14
Forced initialization (UR), 12
FORTRAN (UR), 38
FRAG configuration option (UR), 2
Fragmentation
DD statements (UR), 38
FREE command (UR), 8
FREE parameter (UR), 29
Free records, number of (UR), 13
G
G option (UR), 12
GDI
example (UR), 64
GDI (UR), 61
GDI configuration option
TSIDDMP (UR), 20
TSIDDTD (UR), 12
GDI configuration option (UR), 8
GDI/GDIUR (UR), 61
GDIUR
DD statement reset (UR), 32
GDIUR (UR), 61
Generation datasets
autocatalog with DD statements (UR), 22,
26
DD statements (UR), 26
Generation datasets (UR), 11
Generation number (UR), 17
GET Request (UG), 21
GETVIS
releasing (UR), 11
Global constants See Job management control
language
IN-10
Global Subsystem (UR), 13
GOTO parameter (UR), 8, 10
H
HDR1 labels
expiration (UR), 2
retention (UR), 2
Help for help (UR), 14
Help, online (UR), 14
Highest condition code See Job management
control language
HOLD parameter (UR), 5
Holding assignment
FREE statement (UR), 29
I
IBM utilities
checkpoint/restart (UR), 59
DITTO (UR), 49
IBM utilities (UR), 37
IDCAMS
backup and restore (UR), 45
example (UR), 34
import and export (UR), 47
REPRO (UR), 46
IDCAMS (UR), 37
IDCAMS Backup Datasets, 45
IGNORE (UR), 65
Ignoring datasets
DD statements (UR), 52
IJSYS files (UR), 7
IJSYSNR (UR), 6
IJSYSPC (UR), 6
IJSYSxx datasets (UR), 35
ILIST parameter
excluding DTF names (UR), 6
IMODs (UR), 14
IMODTBP (UR), 45
IMPORT (UR), 47
INCLUDE
TSIDOFD (UR), 21
INDEX (UR), 6
Index, resequencing (UR), 6
Connectivity Systems, Inc.—Copyright © 2006
Use Pursuant to Company Instructions
User Reference
Indexed sequential
DD statements (UR), 17, 26, 38
Inhibiting LUB allocation
TLBL option 64 (UR), 9
with SYS number (UR), 11
Inhibiting LUB allocation (UR), 7
Initializing tapes (UR), 33, 44, 11
Input DTF names
TSIDDMP (UR), 20
TSIDDTD (UR), 12
IOMDTRT (UR), 45
ISAM datasets (UR), 6, 27
ISAM See Indexed sequential
J
JCL
DD statements (UR), 12
specifying DD statements (UR), 2
JCL BIM-EPIC enhancements(UR), 41
JCL enhancements (UR), 16
JCL requirements (UR), 23
JCLLANG configuration option (UR), 1 to 2
JCLOPT configuration option
TLBL alpha options (UR), 4
JCLOVRDE configuration option (UR), 12, 22
JMCL parameters
AND (UR), 10
DATA (UR), 10
GOTO (UR), 8, 10
HOLD (UR), 5
NAME (UR), 8
OR (UR), 10
RESET (UR), 17
SETC (UR), 13
SETG (UR), 13
TIME (UR), 5
TYPRUN (UR), 6
JMCL See Job management control language
Job accounting
by CPU (UR), 31, 33
by CPU and by job (UR), 15
by date and time (UR), 31, 33
POWER (UR), 51
TSIDJLD (UR), 9
Job accounting database (UR), 3
User Reference
Job cancellation (UR), 39
Job execution
TIME limit (UR), 5
Job management control language
&n (UR), 15
condition checking and branching (UR), 8
conditions and IF (UR), 10
CP commands (UR), 25
job cancel options and syntax checking
(UR), 5
parameters (UR), 2
preventing EOJ after cancel (UR), 5
symbolic replacements (UR), 15
Job management control language (UR), 1 to 2
Job Overview panel (UR), 12, 3
Job scheduling (UR), 3
Job Selection panel (UR), 12
Job Time Activity Report (UR), 15
JOBACCT configuration option (UR), 1
JOBCAT statements (UR), 7, 9
JOBLIB statements
unsupported (UR), 5, 7
Jobs
running (UR), 1
Jobs in the POWER queues (UR), 3
K
KEEP DD parameter (UR), 22
L
Label creation (UR), 17
LABEL parameter
retention days (UR), 30
LABEL parameter (UR), 30
Labels, disk (UR), 2
Labels, tape See Tape labels
Large tapes (UR), 3
Leveling a disk pool (UR), 34
LIBR (UR), 48
Listing tapes to be moved (UR), 46
Listing the datasets to be backed up (UR), 22
Listing the datasets to be offloaded (UR), 22
LOCK command
Connectivity Systems, Inc.—Copyright © 2006
Use Pursuant to Company Instructions
IN-11
JCL requirements (UR), 32
parameters (UR), 32
syntax examples (UR), 32
LOCK command (UR), 32
Locked status (UR), 18
Locking
version (UR), 39
Locking a dataset or version (UR), 32
Logging
VSAM datasets (UR), 29
Logical IOCS (UR), 19
LUB allocation
DTFPH (UR), 7
inhibiting with DD statements (UR), 34
inhibiting with SYS number (UR), 11
inhibiting with TLBL option 64 (UR), 9
physical IOCS (UR), 7
TSIDASS (UR), 7
TSIDMAP (UR), 7
warning (UR), 7
LUB allocation (UR), 30, 7
M
M option (UR), 13
Main vault (UR), 35
Manage EDDs panel (UR), 19, 26, 28, 30
Manage Tape Volumes panel (UR), 48, 51
Manage Version panel (UR), 39
Manage Versions panel (UR), 34
Management commands
executing (UR), 5
Managing
EDDs (UR), 18
tape information (UR), 48
vaults (UR), 19
versions (UR), 32
Manual cataloging
explanation (UR), 8
Manual cataloging (UR), 2
Manually controlled vaults (UR), 25
Master records
ADDRESS EPIC (UR), 13
Master records (UR), 6
MAX block size (UR), 16
IN-12
Maximum secondaries(UR), 15
MCAT alias (UR), 33
MCAT status (UR), 18
MCATALOG command
JCL requirements(UR), 33
parameters (UR), 33
syntax examples (UR), 34
MCATALOG command (UR), 33
Merging datasets, TSIDDTD (UR), 12
Messages
allocation (UR), 32
METHOD macro (UR), 19
MINRET configuration option (UR], 5
MOD subparameter (UR), 19
MODE configuration option
default density (UR), 13
MODE configuration option (UR), 33
Mode setting
DEN DD parameter (UR), 16
Modeling
security profiles (UR), 62
Modify EDD Display panel (UR), 8
Modify Profile Defaults panel (UR), 12
Modify Version Display panel (UR), 10
Modifying
confirmation options (UR), 12
EDD display format (UR), 8
EDD information (UR), 24
expiration date (UR), 45
security profiles (UR), 62
version display format (UR), 10
Modifying retention (UR), 54
Modifying VSE labels
TSIDGLB and TSIDPLB (UR), 26
Mounting tapes for output
uncontrolled (UR), 9
MOVE command
JCL requirements (UR), 35
parameters (UR), 35
syntax examples, 35
MOVE command (UR), 35
Move command (UR), 48
MOVESER control statement (UR), 22
MOVESLT control statement (UR), 22
Connectivity Systems, Inc.—Copyright © 2006
Use Pursuant to Company Instructions
User Reference
MTC (UR), 13
MULTCPU configuration option
CPU independence (UR), 28
MULTCPU configuration option (UR), 31
Multi-dataset groups
prime dataset name (UR), 13
Multi-dataset processing
autocatalog with DD statements (UR), 22
examples (UR), 19
FREE DD statement (UR), 29
refer-back with DD statements (UR), 45
scratching multi-dataset tapes (UR), 16
Multi-volume
DD statements (UR), 45
processing limits (UR), 14
MVS
compatibility (UR), 4, 42
MXIG parameter (UR), 38
N
NAME parameter (UR), 8
NCATDSK configuration option (UR), 5, 22
NEW subparameter (UR), 19
No automatic cataloging (UR), 22
No options in effect (UR), 7
Non-generation datasets. See Work datasets.
NOREW subparameter (UR), 33
NOREWIND
DD statements (UR), 45
O
OFFLINE command (UR), 36
Offload status (UR), 18
Offload system
consolidating versions (UR), 39
offloading datasets (UR), 24
onloading datasets (UR), 30
selecting offload datasets (UR), 18
OFFLOAD.DATA.SET (UR), 25
Offload/Backup (UR), 34
Offloaded datasets listing (UR), 24
Offloading datasets (UR), 24
OLD subparameter (UR), 19
One use only (UR), 42
User Reference
ONLINE command (UR), 37
Online Flow panel (UR), 14
Online help (UR), 3
Online Manager
accessing security (UR), 62
exiting (UR), 4
help (UR), 3, 14
scratch tapes (UR), 3
using (UR), 3
Online Manager (UR), 8
Online VTOC displays (UR), 11
Onloaded datasets
listing (UR), 26
Onloading datasets (UR), 30
OPEN command
TSIDASS (UR), 2
OPEN not issued (UR), 38
Open version (UR), 17
Operator console commands (UR), 6
OPT block size (UR), 16
OPTION parameter
ALLMSGS (UR), 33
CISIZE (UR), 33
NOREW (UR), 33
SPACE (UR), 35
SYSnnn (UR), 36
OPTION parameter (UR), 32, 48
OPTION SYSPARM (UR), 7
OR condition (UR), 10
Output
subdataset (UR), 46
Output DTF names
TSIDDMP (UR), 20
TSIDDTD (UR), 12
Overriding
cycles retention (UR), 24
dataset defaults (UR), 12
extent statements (UR), 9
tape density (UR), 13
Overriding normal cycles retention (UR), 27
Overriding the DSN Catalog
block size (UR), 2
extent size (UR), 2
retention criteria (UR), 2
tape density (UR), 2
Connectivity Systems, Inc.—Copyright © 2006
Use Pursuant to Company Instructions
IN-13
Owner ID (UR), 13, 3
Ownership (UR), 3
P
PACCT (UR), 51
Panel Descriptions Display (UR), 15
Panel help (UR), 14
Panel IDs Display (UR), 15
Panel navigation help (UR), 14
Parameter tables, xi
Parameter-expressions
defined (UR), 3
parameters (UR), 23
Partition independence
disk pools (UR), 15, 34
Partition independence (UR), 31
Partitions
starting/stopping (UR), 35
PASS parameter (UR), 22
PASSWD configuration option (UR), 38
PASSWORD command (UR), 38
Passwords
EDD and version use (UR), 10
PDISPLAY,POFFLOAD,Printer/Punch Tape
Spooling
POWER (UR), 52
Permanent retention (UR), 12
Physical IOCS
inhibiting LUB allocation (UR), 9
Physical IOCS (UR), 19, 39, 37
Placing datasets on specific volumes (UR), 6
Pool ID specification
DD statements (UR), 45
Pool names (UR), 15, 34, 36
Pools
default (UR), 15
Pools. See Disk pools and Tape pools
POOL-x (UR), 44
Posted events See Event posting
POWER
queued jobs (UR), 3
POWER job accounting (UR), 51
IN-14
POWER PDISPLAY,POFFLOAD,
Printer/Punch Tape Spooling (UR), 52
Pre-open assignment checking (UR), 39
Pre-open checking (UR), 34
Pre-open processing
TSIDASS (UR), 2
Prevent tape rewind
DD statements (UR), 45
Preventing rewind with TLBL option 3 (UR), 8
Primary extent size (UR), 15
Primary Option Menu (UR), 3
Prime datasets (UR, 13
Prime datasets (UR), 15
Printer datasets
DD statements (UR), 48
Printer output (UR), 61
Printing dataset labels (UR), 17
Printing datasets
TSIDDMP (UR), 20
Printing external volume labels (UR), 16
PRIVATE DD parameter (UR), 45
Processing multiple datasets
dataset drop (UR), 68
Processing options See Configuration options
Profiles
$DEFSEC (UR), 61
$EPIC (UR), 61
security (UR), 61
Program Audit panel (UR), 13, 5
Program Overview panel (UR), 13, 4
Projected Scratch (PSCRATCH) Report
(UR), 44
PROJSER control statement (UR), 22
PROJSLT control statement (UR), 22
PSCRATCH (UR), 23
Punch datasets
DD statements (UR), 48
PURBYP configuration option (UR), 28
PURGE command
JCL requirements, 39
parameters (UR), 39
syntax examples (UR), 40
PURGE command (UR), 39
Connectivity Systems, Inc.—Copyright © 2006
Use Pursuant to Company Instructions
User Reference
Purge command (UR), 48
Purging
EDD (UR), 39
tape volumes (UR), 50
versions (UR), 39
volsers (UR), 39
with DD statements (UR), 22
Purging (UR), 38
Purging datasets with JMCL (UR), 5
PUT Request (UG), 22
Q
QDAS
access during open/EOX (UR), 44
and space holder records (UR), 45
Quick allocation with QDAS (UR), 44
QUIESCE command
JCL requirements, 41
parameters (UR), 41
syntax examples (UR), 41
QUIESCE command (UR), 41
R
Random access
syntax examples, dataset (UR), 9
syntax examples, detailed record (UR), 10
syntax examples, master record (UR), 9
Random access (UR), 7, 9
Random initialization
example (UR), 14
Random initialization (UR), 11
Reading multiple datasets (UR), 66
Reading VSE labels
TSIDGLB and TSIDPLB (UR), 26
Reblocking
BLKSIZE DD parameter (UR), 17
datasets processed by PIOCS (UR), 38
EDD block size (UR), 11
Recatalog a deleted version (UR), 6, 10
RECORD configuration option (UR), 29, 1
Record length
LRECL DD parameter (UR), 17
Recorder File
comments (UR), 29
configuration options (UR), 29
User Reference
history dataset (UR), 2
job accounting reports (UR), 1
Recorder File (UR), 29
Recorder subsystem (UR), 29
RECSHR configuration option (UR), 29
RECWARN configuration option (UR), 29
RECWMSG configuration option (UR), 29
REF parameter (UR), 45
Refer-back
multi-dataset processing (UR), 45
space allocation (UR), 34
subdatasets (UR), 45
Re-initializing tapes (UR), 33
Relative version
DD statements (UR), 26
RELEASE command
JCL requirements (UR), 42
parameters (UR), 42
syntax examples (UR), 43
RELEASE command (UR), 42
Release unused disk space
DD statements (UR), 38
Releasing
EDD (UR), 26
GETVIS (UR), 11
jobs from POWER queue (UR), 3
Releasing assignment
FREE statement (UR), 29
Removing
EDD (UR), 39
version information (UR), 30
versions (UR), 39
volsers (UR), 39
RENAME command
JCL requirements (UR), 44
parameters (UR), 44
syntax examples (UR), 44
RENAME command (UR), 44
Renaming datasets (UR), 44
REPORT
TSIDOFD (UR), 21
Report listing
creation date (UR), 38, 43
creation job (UR), 38
creation job sequence (UR), 43
Connectivity Systems, Inc.—Copyright © 2006
Use Pursuant to Company Instructions
IN-15
display active (UR), 38, 43
display NEW (UR), 43
display NEW report (UR), 38
display PULL (UR), 43
display PULL report (UR), 38
display PULL, DSN report (UR), 38
display scratch report (UR), 43
display vault report (UR), 38
expiration date (UR), 38, 43
Report writers (UR), 37
Reports
Activity Log Report (UR), 7
Create Date/Time Activity (UR), 31, 33
Create Job/Time Activity (UR), 15
creating (UR), 36
customized (UR), 2
Dataset to Tape (UR), 13
Dataset to Tape Report (UR), 27
offload tape datasets (UR), 30
online VTOC (UR), 11
Projected Scratch (PSCRATCH) (UR), 44
Tape to Dataset (UR), 29
Tape to Dataset Report (UR), 28
TSIDBRP (UR), 10
TSIDDIS (UR), 13
TSIDJAC (UR), 15
TSIDLVT (UR), 17
TSIDMNT (UR), 19
TSIDOFD (UR), 22
TSIDOFL (UR), 24
TSIDONL (UR), 26
TSIDPRV (UR), 27
TSIDSDS (UR), 29
TSIDTAC (UR), 31, 33
TSIDUTL (UR), 2
TSIDVLT (UR), 46
Vaulting Cross-Reference (UR), 27
vaulting cross-reference (UR), 20
Vaulting Cross-Reference Report (UR), 26
VTOC (UR), 7
REPRO (UR), 46
Requirement for DTFDA datasets (UR), 11
Resequencing dataset extents (UR), 4
Resequencing index (UR), 6
RESET parameter (UR), 17
Restarting from a checkpoint (UR), 59
Restarting job
IN-16
TYPRUN=RESTART (UR), 6
RESTORE
IDCAMS (UR), 45
LIBR (UR), 48
Restoring datasets (UR), 30
Restricting BIM-EPIC control (UR), 6
Retain a Version panel (UR), 55
RETAIN command
JCL requirements (UR), 45
parameters (UR), 45
syntax examples (UR), 47
RETAIN command (UR), 45
RETAIN parameter (UR), 45
RETEN configuration option, 22
RETEN configuration option (UR), 22
Retention
concepts (UR), 52
cycles (UR), 12
days after last access (DLA) (UR), 12
HDR1 labels (UR), 2
LABEL parameter (UR), 30
overriding (UR), 27
PERM (UR), 12
rules for Start Track 1 datasets (UR), 26
Start Track 1 datasets (UR), 4
tape (UR), 2
types of (UR), 11
Retention criteria
modifying (UR), 27
Retention criteria (UR), 52
Retention days
LABEL parameter (UR), 30
Retention days (UR, 12
Return codes
ADDRESS EPIC (UR), 13
TSIDAC2 (UR), 8
Reusing same extent
MOD subparameter (UR), 19
Reusing the same space (UR), 11
REV parameter (UR), 4
Revolving tape datasets (UR), 4
Revolving tapes (UR), 14
Rewind options
overriding (UR), 33
Connectivity Systems, Inc.—Copyright © 2006
Use Pursuant to Company Instructions
User Reference
Rewind tape DD statements (UR), 45
RLSE parameter (UR), 38
RMNTPRT configuration option (UR), 17
ROUND parameter (UR), 38
RPG-II (UR), 61
RSTRT (UR), 59
Rules for dataset retention
work datasets (UR), 25
Rules for dataset retention (UR), 24
Running
TVTO (UR), 11
Running TSIDLVT (UR), 17
S
SAM datasets (UR), 6, 29
Scheduling dependent tasks (UR), 5
SCRATCH
TSIDUTL (*UR), 23
SCRATCH command
JCL requirements (UR), 48
parameters (UR), 48
syntax examples (UR), 49
SCRATCH command (UR), 48
Scratch procesisng (UR), 38
Scratch processing
work datasets (UR), 23
Scratch status (UR), 18, 46
Scratch tapes (UR), 3
Scratched tape version (UR), 28
Scratching
ACL cartridges (UR), 26
DD statements (UR), 22
old tape versions (UR), 11
versions (UR), 59
work datasets (UR), 24
Scratching (UR), 52
Scratching a version
DD statements (UR), 22
Scratching tapes (UR), 26
Scratchingopen version (UR), 39
Search Catalog panel (UR), 16, 33
Searching the catalog (UR), 16
Secondary allocations
User Reference
at close (UR), 45
DD statement (UR), 45
DD statements (UR), 38
Secondary allocations (UR), 2
Secondary exrtent size (UR), 15
Secondary extents
at close (UR), 45
fragmentation (UR), 2
Secondary pooling. See Owner ID (UR)
Secured Users panel (UR), 62
Security
accessing (UR), 62
Online Manager (UR), 61
Security profiles
$DEFSEC (UR), 61
$EPIC (UR), 61
creating (UR), 62
Security profiles (UR), 61, 64
Selecting
offload datasets (UR), 18
SYS number (UR), 30
tapes (UR), 46
versions (UR), 34
SEQ parameter
VAULT (UR), 24
Sequential access
syntax example, terminating (UR), 11
syntax examples, entire DSN catalog
(UR), 10
syntax examples, from starting point
(UR), 11
terminating (UR), 11
Sequential access (UR), 7, 10
Sequential datasets
DD statements (UR), 17
Sequential datasets (UR), 26
Sequential initialization (UR), 11
SER DD parameter (UR), 45
Serial numbers (UR), 2
Set condition code to zero See RESET
SETC parameter (UR), 13
SETG parameter (UR), 13
SHARE configuration option (UR), 31
Sharing a DSN Catalog (UR), 2
Connectivity Systems, Inc.—Copyright © 2006
Use Pursuant to Company Instructions
IN-17
SHR subparameter (UR), 19
Sign-On panel (UR), 66
Size See Tape size
Skip JCL See Job management control language
Slots
current (UR), 20
SM-2 (UR), 39
SM2 See Sort packages
Small tapes (UR), 3
Smalltapes(UR), 3
SOL/VSE
Tape Output Functions (UR), 54
SORT files (UR), 7
Sort programs
CA-SORT (UR), 42
DFSORT (UR), 42
SYNCSORT (UR), 42
Sort programs (UR), 37, 39
SORTWRK datasets (UR), 33
SPACE DD parameter (UR), 34
Space holder records (UR), 45
SPACE parameter
example (UR), 38
secondary extent size (UR), 2
SPACE parameter (UR), 11, 38
SPACE subparameter (UR), 35
Special DD names (UR), 7
Special options
EPS022 (UR), 49
EPS043 (UR), 4
Special Terms, x
Special terms, x
Specifying
DD statements (UR), 2
JMCL parameters (UR), 2
tape size (UR), 3
Standards
JCL (UR), 5
START control statement (UR), 35
Start Track 1 datasets
7-day default retention (UR), 4
configuration options (UR), 5
converting to controlled (UR), 4
DD statements (UR), 13
IN-18
extent sequence number (UR), 26
TYPEFLE=WORK
(UR), 34
VOLUME parameter (UR), 33
Start Track 1 datasets (UR), 4, 26, 19
Starting and stopping partitions (UR), 35
Start-up options. See Configuration options
Status
device down (UR), 36
STATUS command (UR), 8
STEPCAT statements (UR), 7, 9
STEPLIB statements
unsupported (UR), 5, 7
STOP
TSIDINIT (UR), 12
STRTRK configuration option (UR), 5, 4
Subdatasets
autocatalog with DD statements (UR), 22
FREE DD statement (UR), 29
limitations (UR), 16
refer-back with DD statements (UR), 45
retention criteria (UR), 17
Subdatasets (UR), 13, 16
Substatset status (UR), 18
Summary display (UR), 19
Summary report
TSIDMNT (UR), 19
Symbolic replacements (UR), 15
SYNCSORT (UR), 39
syntax examples (UR), 23
SYS number (UR), 11
SYS numbers
assigned by BIM-EPIC (UR), 30
SYS000 (UR), 7
SYS00n (UR), 35
SYSABEND statements (UR), 7, 9
SYSCHK statements
unsupported (UR), 5, 7
SYSCKEOV statements
unsupported (UR), 5, 7
SYSIN statements (UR), 7
SYSIPT (UR), 61, 64
SYSIPT data
Connectivity Systems, Inc.—Copyright © 2006
Use Pursuant to Company Instructions
User Reference
JMCL parameter (UR), 5
SYSLNK (UR), 35
SYSLST (UR), 61, 64
SYSMDUMP statements (UR), 7, 9
SYSnnn DD parameter (UR), 34
SYSnnn subparameter (UR), 36
SYSOUT parameter (UR), 9, 48
SYSOUT statements
unsupported (UR), 5, 7
SYSPCH (UR), 61, 64
SYSPRINT statements
unsupported (UR), 5, 7
System datasets
DD statements (UR), 32
example (UR), 34
open across job boundaries (UR), 13
VSE device independence (UR), 64
System ID
searching by (UR), 16
System ID (UR), 11
System logical units
ASSGN (UR), 2
System options. See Configuration options
SYSUDUMP statements (UR), 7, 9
T
Tape
ownership (UR), 3
positioning (UR), 13
Tape configuration options (UR), 31
Tape datasets
grouping (UR), 11
listing (UR), 37
names (UR), 10
scratching (UR), 38
updating from CMS (UR), 2
Tape density (UR), 13
Tape drives
availability (*UR)
availability (UR), 4
Tape drives (UR), 31
Tape error count (UR), 19
Tape labels
valid volume serial numbers (UR), 2
User Reference
Tape Output Functions
SQL/VSE (UR), 54
Tape pool ID
searching by (UR), 16
Tape pool ID (UR), 13
Tape pools (UR), 44, 3
Tape processing
labeled (UR), 12
multi-dataset tapes (UR), 16
unlabeled (UR), 12
Tape size (UR), 14, 3
Tape to Dataset Report (UR), 28, 29
Tape to disk (UR), 61
Tape use count (UR), 19
Tape vaulting. See Vaulting
Tape Volume Information panel (UR), 47
Tapes
, 22
by current location/destination (UR), 46
cartridge (UR), 33
cataloging (UR), 44
close processing (UR), 43
displaying information about (UR), 47
end of volume processing (UR), 43
initializing (UR), 33, 44, 11
managing catalog information (UR), 48
manually controlled vaulting (UR), 25
moving to next vault (UR), 22, 46
open processing (UR), 42
open status (UR), 24
printing dataset labels (UR), 17
purging (UR), 43, 50
recording cleaning (UR), 51
reporting vault locations (UR), 24
revolving (UR), 4
scratch (UR), 3
scratching (UR), 26
use count (UR), 22
using Online Manager (UR), 44
volume labels (UR), 33
Tapes, output
controlled and uncontrolled (UR), 9
TAPLUB configuration option
assigning SYS number (UR), 30
Technical Support, xiii
Technical support, xiii
Connectivity Systems, Inc.—Copyright © 2006
Use Pursuant to Company Instructions
IN-19
Terminating
sequential access (UR), 11
Termination options
DISP DD parameter (UR), 22
Test jobs (UR), 69
THLDOPEN (UR), 24, 39
TIME parameter (UR), 5
TLBL option
codes (UR), 7
TLBL option codes
0 no options in effect (UR), 7
16 or D dataset drop (UR), 68
3 do not rewind (UR), 8
32 conditional catalog (UR), 69
64 no LUB allocation (UR), 9
TLBL option codes (UR), 7
TLBL options (UR), 7
TLBL statement
format (UR), 2
parameters (UR), 2
syntax examples (UR), 6
TLBL statements
BIM-EPIC differences (UR), 2
default version (UR), 4
TLBL statements (UR), 2
TOJA
report examples (UR), 3
TOJA transaction (UR), 9
Total capacity (UR), 13
TPRE transaction (UR), 18
TPRT transaction
activating (UR), 17
deactivating (UR), 18
TRANSFER command
parameters (UR), 50
syntax examples (UR), 50
TRANSFER command (UR), 50
TRK parameter (UR), 38
Truncation
inhibiting with DLBL option N (UR), 3
requesting with DD statements (UR), 3
RLSE parameter (UR), 38
TSICMNT. See also Catalog Management
TSIDAC2
IN-20
GETVIS (UR), 11
return codes (UR), 8
search arguments and calls (UR), 9
syntax example, release storage (UR), 12
syntax examples (UR), 8
TSIDAC2 (UR), 6
TSIDAR (UR), 6
TSIDARP
report (UR), 7
TSIDARP (UR), 3
TSIDASS
DITTO (UR), 49
inhibiting LUB allocation (UR), 9
RSTRT (UR), 4
TSIDASS (UR), 38, 2
TSIDBPR
deactivating (UR), 17
TSIDBPR (UR), 17
TSIDBRP
reports (UR), 10
TSIDBRP (UR), 5
TSIDCCHK (UR), 5, 9, 13
TSIDCHK (UR), 5, 7 to 8
TSIDCLOC (UR), 4, 9, 13
TSIDCREL (UR), 3, 9, 13
TSIDCUNL (UR), 6, 9, 13
TSIDDIS (UR), 27, 13
TSIDDMP (UR), 49, 20
TSIDDTD (UR), 49, 12, 2
TSIDFAV (UR), 13
TSIDGLB (UR), 26
TSIDINIT
VOLSER statements (UR), 14
TSIDINIT (UR), 33, 11
TSIDINIT. See Tape initialization (UR)
TSIDJAC
report (UR), 15
TSIDJAC report examples (UR), 15
TSIDJLD (UR), 9
TSIDLBL
example (UR), 17
TSIDLBL (UR), 33, 16
TSIDLOC (UR), 4, 7 to 8
Connectivity Systems, Inc.—Copyright © 2006
Use Pursuant to Company Instructions
User Reference
TSIDLVT, 7
control statements (UR), 8
report (UR), 17
VTOC data in batch (UR), 17
TSIDLVT (UR), 34, 8
TSIDMAP macro
ILIST Parameter (UR), 6
TSIDMNT
QUIESCE (UR), 41
reports (UR), 19
TSIDMNT command
JCL requirements (UR), 4
parameters (UR), 4
syntax examples (UR), 5
TSIDMNT command (UR), 4
TSIDMNT. See also Catalog Management
TSIDMNTcommands (UR), 2
TSIDOFC
examples (UR), 43 to 44
TSIDOFC (UR), 39
TSIDOFD
CATALOG (UR), 21
REPORT (UR), 21
report (UR), 22
report examples (UR), 22
TSIDOFD (UR), 18, 35
TSIDOFL
examples (UR), 27
report (UR), 24
report examples (UR), 24
TSIDOFL (UR), 24
TSIDOJA.C (UR), 9
TSIDONL
examples (UR), 37
report (UR), 26
report examples (UR), 26
TSIDONL (UR), 30, 35
TSIDPEN (UR), 17 to 18
TSIDPLB (UR), 26
TSIDPRT (UR), 17
TSIDPRV, 26
report (UR), 27
report examples (UR), 27
TSIDPRV (UR), 20, 26
User Reference
TSIDREC.C (UR), 2
TSIDREL (UR), 3, 7 to 8
TSIDRFS
comments (UR), 29
TSIDSDS
report example (UR), 29
TSIDSDS (UR), 28
TSIDSRT (UR), 37
TSIDTAC, 31
report (UR), 31, 33
TSIDUNL (UR), 6 to 8
TSIDUTL
DSPLY (UR), 24, 26
DSPLY SCRATCH (UR), 3
DSPLY. See Reports
INDEX (UR), 6
PSCRATCH (UR), 23, 3
reporting locations of vaulted tapes (UR), 26
SCRATCH (UR), 3
SCRATCH(UR), 23
VAULT (UR), 26
VLT parameter (UR), 26
TSIDUTL DSPLY
JCL requirements (UR), 2
parameters (UR), 3
syntax examples (UR), 5
UPSI values (UR), 2
TSIDUTL DSPLY (UR), 2
TSIDVLT
excludes from Recorder (UR), 29
reports (UR), 46
TSIDVLT (UR), 19, 22
TSIDVUT, 7
RENUM (UR), 49
resequencing extents (UR), 4
TSIDVUT (UR), 27, 34
TSTJOB configuration option (UR), 69
TVTO, 7
TVTO (UR), 34, 11
TYPEFLE=WORK
control on disk only (UR), 6
secondary allocation unavailable (UR), 2
TYPEFLE=WORK (UR), 34
TYPRUN parameter (UR), 6
Connectivity Systems, Inc.—Copyright © 2006
Use Pursuant to Company Instructions
IN-21
U
UIN (UR), 7
UNCDSK configuration option
ISAM limitation (UR), 27
uncontrolled DA datasets (UR), 26
UNCDSK configuration option (UR), 6, 36
Uncontrolled datasets
DD statement example (UR), 13
DD statements (UR), 13, 38
SAM (UR), 29
VSAM (UR), 29
Uncontrolled datasets (UR), 36
Uncontrolled tapes
Early Drive Release (UR), 31
UNCTAP configuration option (UR), 6, 36, 9
UNCTAP configuration options
Early Drive Release (UR), 31
UNCTL configuration option (UR), 6, 36
UNIT DD parameter (UR), 11
UNIT parameter (UR), 48
Unit record
DD statements (UR), 32
DTF (UR), 3
Unlabeled status (UR), 18
Unload tape
DD statements (UR), 45
UNLOCK command
JCL requirements (UR), 52
parameters (UR), 52
syntax examples (UR), 52
UNLOCK command (UR), 52
Unlocking
datasets or versions (UR), 42
EDD (UR), 28
Unsupported ddnames (UR), 5, 7
Unsupported processing
DITTO (UR), 2
IJSYSNR (UR), 2
IJSYSPC (UR), 2
POWER LST (UR), 2
POWER offload (UR), 2
xxJSYSRS (UR), 2
UOUT (UR), 7
Update an EDD panel (UR), 24, 54
IN-22
UPDATE command
JCL requirements, 54
syntax examples (UR), 55
VLT parameter (UR), 21
UPDATE command (UR), 54
Updating
confirmation options (UR), 12
EDD display format (UR), 8
EDD information (UR), 24
version display format (UR), 10
VTOC entries (UR), 34
User ID
searching by (UR), 16
User ID (UR), 11
User Profiles
maintaining (UR), 6
User profiles
confirmation options (UR), 12
EDD display format (UR), 8
version display format (UR), 10
User Profiles panel (UR), 6 to 7
User Security panel (UR), 64
V
VATTACH (UR), 32
Vault locations (UR), 19
Vault method number (UR), 14
Vault Method Report (UR), 26
VAULT parameter (UR), 24
VAULT sequence (UR), 24
VAULTDEF macro
AVAULTS (UR), 25
VAULTDEF macro (UR), 19
Vaulting
assigning vaulting methods (UR), 21
Cross-Reference Report (UR), 26
cross-reference report (UR), 20
METHOD macro (UR), 19
MOVE (UR), 35
MOVESER (UR), 22
MOVESLT (UR), 22
PROJSER (UR), 22
PROJSLT (UR), 22
reporting tape location (UR), 24
reports (UR), 46
Connectivity Systems, Inc.—Copyright © 2006
Use Pursuant to Company Instructions
User Reference
TSIDVLT (UR), 22
VAULTDEF macro (UR), 19
Vaulting Cross-Reference Report (UR), 26, 27
Vaulting method assignment (UR), 27
Vaulting methods (UR), 19
Vaults
current (UR), 20
manually controlled (UR), 25
VDETACH (UR), 32
Version attributes
block count (UR), 19
block size (UR), 19
creating job and device (UR), 19
creation date and time (UR), 19
current vault and slot (UR), 20
expiration date (UR), 19
extent number and address (UR), 19
file sequence number (UR), 18
generation number (UR), 17
last access (UR), 19
record format (UR), 19
record length (UR), 19
reel number (UR), 18
status (UR), 17
tape error count (UR), 19
tape use count (UR), 19
version number (UR), 17
volume serial number (UR), 18
Version Information panel (UR), 36
Version specification
DD statements (UR), 26
Version srtatus
open (UR), 17
Version status
conditional cataloging (UR), 18
lock (UR), 18
MCAT (UR), 18
offload (UR), 18
scratch (UR), 18
subdataset, 18
unlabeled (UR), 18
work (UR), 18
Version-level data (UR), 17, 34
Versions
adding (UR), 37, 6, 10
changing dataset name (UR), 50
closing (UR), 41
User Reference
CYCLE (UR), 57
default (UR), 4
deleting (UR), 26
display format (UR), 10
displaying (UR), 32, 36
locking (UR), 39
moving (UR), 50
online management (UR), 32
removing (UR), 43, 39
removing from catalog (UR), 30
retention (UR), 55
scratching (UR), 59
selecting from a list (UR), 34
Verson status
active (UR), 17
Viewing
job accounting database (UR), 3
VLT parameter (UR), 24
VM configuration option
CP commands (UR), 25
VOL DD parameter (UR), 11
VOL parameter (UR), 45
VOL1 labels (UR), 2
Volser
TSIDLBL (UR), 17
VOLSER statements
TSIDINIT (UR), 14
VOLUME DD parameter (UR), 45
VOLUME parameter
number of secondary extents (UR), 2
Start Track 1 datasets (UR), 33
Volume serial number
vault sequences (UR), 37
Volume serial numbers
000000 (UR), 44
printing labels (UR), 16
ranges (UR), 44
Volume serial numbers (UR), 2
Volume serial request DD statements (UR), 45
Volumes
removing
(UR), 39
VSAM configuration option (UR), 6, 29
VSAM datasets
DD statements (UR), 13, 32
Connectivity Systems, Inc.—Copyright © 2006
Use Pursuant to Company Instructions
IN-23
extent information (UR), 6
VSAM datasets (UR), 29
VSAM/SAM datasets
DD statements (UR), 32
VSE
Attention Routine (UR), 6
Operator console commands (UR), 6
system utilities (UR), 37
VSE label area
accessing (UR), 26
TSIDGLB (UR), 26
TSIDPLB (UR), 26
VSE Label Area (UR), 42
VTAM
accessing Online Manager (UR), 3
VTOC
access during open/EOX (UR), 44
generation datasets (UR), 17
space holder records (UR), 45
updates during close (UR), 45
VTOC (UR), 44
VTOC entries
displaying (UR), 34, 17
VTOC utilities
batch reports (UR), 7
TVTO (UR), 11
No concatenation code on last label statement
(UR), 66
Tape reuse before scratch (UR), 24
TSIDPLB doesn't validate label data
(UR), 27
UPSI x1 restores oldest as version 1
(UR), 25
Without version specified, DSN concatenates
(UR), 27
Warnings
TIME overridden by SETIME (UR), 5
Work dataset status (UR), 18
Work datasets
autocatalog with DD statements (UR), 22
DD statements (UR), 26
temporary datasets (UR), 30
Work datasets (UR)
Work datasets (UR)TSIDUTL
SCRATCH (UR), 11
Work datasrets
scratching (UR), 24
X
xJSYSRS (UR), 6
Z
Zeroing use and error counts (UR), 22
W
WARNING
ADD does not recover a VTOC entry
(UR), 6
WARNINGS
ACCEPT=YES lets operator select tapes
(UR), 10
Do not delete encrypted versions (UR), 11,
26
Do not purge encrypted versions (UR), 39
Do not rename prime or offload datasets
(UR), 44
Do not scratch encrypted dataset versions
(UR), 48
Do not use PURGE for routine deletion
(UR), 39
Keep Recorder active (UR), 29
MOVEs not shown on TSIDVLT reports
(UR), 35
MOVEs nullified by auto vaulting (UR), 35
IN-24
Connectivity Systems, Inc.—Copyright © 2006
Use Pursuant to Company Instructions
User Reference