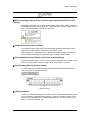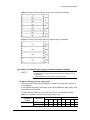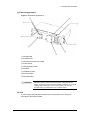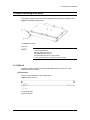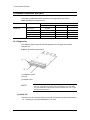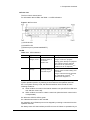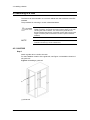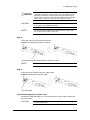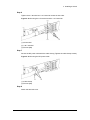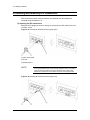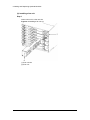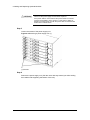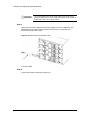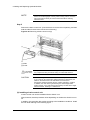
1
ALAXALA AX6700S Hardware Instruction Manual AX67S-H001-40X Reading and storing this manual: z Before you use the equipment, carefully read the manual and make sure that you understand all safety precautions. z After reading the manual, store it in a convenient place for easy reference. Relevant products This manual applies to the AX6708S model. Export Restrictions If you export this product, please check all restrictions, such as Japan's Foreign Exchange and Foreign Trade Law and USA export control laws and regulations, and carry out all required procedures. If you require more information, please contact your Alaxala sales representative. Trademarks - Ethernet is a product name of Xerox Corporation. - Windows is a registered trademark of Microsoft Corporation in the United States and other countries. - Other company and product names are trademarks or registered trademarks of their respective owners. Reading and storing this manual: Before you use the equipment, carefully read the manual and make sure that you understand all safety precautions. After reading the manual, store it in a convenient place for easy reference. Note Information in this document is subject to change without notice. Radio interference This is a Class A product that supports the Voluntary Control Council for Interference by Information Technology Equipment standard. In a home environment, this product might cause radio interference, in which case the user might be required to take appropriate measures. About harmonic regulations Products to which the harmonic current emissions standard JIS C 61000-3-2 applies Applicable products: AX6708S Edition history April 2009 (Edition 5), AX67S-H001-40X Copyright Copyright (C) 2009, ALAXALA Networks Corporation. All rights reserved. Preface About this manual This manual provides hardware instructions for the ALAXALA AX6700S series of multilayer switches. Before you operate the Switch, read this manual carefully and make sure that you understand all instructions and safety precautions. After reading the manual, store it in a convenient place for easy reference. Intended readers This document is intended for the technical personnel responsible for setting up and handling AX6700S series switches. Readers are therefore required to have a knowledge of electric circuits, wiring, and networks. Structure of this manual Safety Information This document includes important notes regarding safe use of AX6700S series switches. Be sure to read and understand this section prior to using the Switch. Chapter 1 Components Overview Provides an overview of the components of the Switch. Chapter 2 Preparation for Installation Describes all environmental conditions and required preparation for installation of the Switch. Chapter 3 Preparing Interface Cables and Terminals Describes the interface cables and the terminals used for the Switch. Chapter 4 Installing a Switch Describes how to install the Switch. Chapter 5 Adding and Replacing Options Describes how to add and replace the fan unit, power supply unit, basic control unit, basic switching unit, and the network interface unit. Appendix A. Cleaning Optical Connectors Explains how to clean the optical connectors of the transceivers and the fiber optic cable connectors. I Preface Reading sequence of AX6700S series manuals NOTE The Troubleshooting Guide is common to the AX2400S, AX3600S, AX6300S, AX6600S, and AX6700S series. Conventions: The terms "Switch" and "switch" The term Switch (upper-case "S") is an abbreviation for any or all of the following models: z II AX6700S series switch Preface The term switch (lower-case "s") might refer to a Switch, another type of switch from the current vendor, or a switch from another vendor. The context decides the meaning. How to obtain this manual The AX6700S series manuals are available on the ALAXALA website at the following address: http://www.alaxala.com/en/index.html Acronyms BCU Basic Control Unit BSU Basic Switching Unit DSF Dispersion Shifted Fiber EIA Electronic Industries Alliance JIS Japanese Industrial Standards LAN Local Area Network LED Light Emitting Diode MC Memory Card MDI Medium Dependent Interface MDI-X Medium Dependent Interface Crossover NIF Network Interface PS Power Supply RS-232C Recommended Standard 232C SD Secure Digital SFP Small Form factor Pluggable TCP/IP Transmission Control Protocol/Internet Protocol T/R Transmitter/Receiver URL Uniform Resource Locator UTP Unshielded Twisted Pair XFP 10 gigabit small Form factor Pluggable III Preface IV Contents 1. Components Overview ........................................................................................................... 1 1.1 Switch............................................................................................................................ 2 1.1.1 AX6708S .......................................................................................................... 2 1.1.2 Accessories...................................................................................................... 6 1.2 Fan unit (FAN)............................................................................................................... 8 1.2.1 FAN-11 ............................................................................................................. 8 1.3 Power supply unit (PS).................................................................................................. 9 1.3.1 PS-A11............................................................................................................. 9 1.3.2 PS-D11........................................................................................................... 10 1.4 Basic control unit (BCU).............................................................................................. 13 1.4.1 BCU-S1 and BCU-S11................................................................................... 13 1.5 Basic switching unit (BSU).......................................................................................... 17 1.5.1 BSU-LA .......................................................................................................... 17 1.5.2 BSU-LB .......................................................................................................... 18 1.6 Network interface unit (NIF) ........................................................................................ 20 1.6.1 Single-size ..................................................................................................... 20 1.7 Memory card (MC) ...................................................................................................... 29 1.8 Transceiver.................................................................................................................. 30 1.8.1 SFP ................................................................................................................ 30 1.8.2 XFP ................................................................................................................ 33 1.9 Blank panel ................................................................................................................. 36 1.10 Power cable .............................................................................................................. 38 1.10.1 CBL-A12 ...................................................................................................... 38 1.11 Rack fixture ............................................................................................................... 39 1.11.1 BRK-13......................................................................................................... 39 2. Preparation for Installation .................................................................................................. 40 2.1 Preparation workflow................................................................................................... 41 2.2 Installation conditions.................................................................................................. 42 2.3 Carrying a Switch ........................................................................................................ 43 2.4 Power supply facility.................................................................................................... 45 2.4.1 Power supply facility for 100 V AC................................................................. 45 2.4.2 Power supply facility for 200 V AC................................................................. 46 2.4.3 Power supply facility for −48 V DC ................................................................ 48 2.5 Notes on electric noise................................................................................................ 52 2.6 Leakage current .......................................................................................................... 53 2.7 Environment conditions............................................................................................... 54 2.8 Installation location...................................................................................................... 56 2.9 Maintenance area ....................................................................................................... 58 2.10 Cooling requirements ................................................................................................ 59 2.10.1 Airflow .......................................................................................................... 59 2.10.2 Cooling requirements for a desktop installation........................................... 59 2.10.3 Cooling requirements for a rack installation ................................................ 59 2.11 Device noise.............................................................................................................. 61 3. Preparation of Interface Cables and Terminals ................................................................. 62 3.1 List of interface cables ................................................................................................ 63 3.2 Details about interface cables..................................................................................... 65 3.2.1 UTP cables (10/100/1000BASE-T)................................................................ 65 3.2.2 Fiber optic cables (1000BASE-X) .................................................................. 66 3.2.3 Fiber optic cables (10GBASE-R) ................................................................... 68 3.3 Terminals and connection cables................................................................................ 70 3.3.1 When connecting an operation terminal to the CONSOLE port .................... 70 3.3.2 When connecting an operation terminal to the MANAGEMENT port............ 70 i Contents 3.3.3 Connecting a modem to the AUX port ........................................................... 72 4. Installing a Switch................................................................................................................. 74 4.1 Required tools ............................................................................................................. 75 4.2 Read prior to operation ............................................................................................... 76 4.3 Installing a Switch on a desktop.................................................................................. 77 4.4 Replacing the rack fixture ........................................................................................... 78 4.4.1 AX6708S ........................................................................................................ 78 4.5 Mounting in a rack....................................................................................................... 80 4.5.1 AX6708S ........................................................................................................ 80 4.6 Connecting and disconnecting the power cable ......................................................... 84 4.6.1 Replacing the bracket preventing disconnection of the power cable (when a 200 V AC power cable is used) .................................................................... 84 4.6.2 Connecting and disconnecting the AC power cable ...................................... 86 4.6.3 Connecting and disconnecting the DC power cable...................................... 88 4.7 Attaching a wrist strap ................................................................................................. 94 4.8 Inserting and removing memory cards........................................................................ 95 4.9 Inserting and removing SFP transceivers ................................................................... 98 4.10 Inserting and removing XFP transceivers ............................................................... 100 4.11 Connecting operation terminals .............................................................................. 101 4.12 Connecting interface cables.................................................................................... 103 4.13 Turning the Switch on and off ................................................................................. 105 4.13.1 AX6708S (AC power supply unit installed) ................................................ 105 4.13.2 AX6708S (DC power supply unit installed)................................................ 108 4.14 Other operations ..................................................................................................... 113 5. Adding and Replacing Optional Modules......................................................................... 114 5.1 Required tools ........................................................................................................... 115 5.2 Read prior to operation ............................................................................................. 116 5.3 Replacing a fan unit .................................................................................................. 117 5.4 Adding or replacing a power supply unit ................................................................... 122 5.4.1 Adding or replacing an AC power supply unit .............................................. 122 5.4.2 Adding or replacing a DC power supply unit................................................ 127 5.5 Adding or replacing a basic control unit .................................................................... 132 5.6 Adding or replacing a basic switching unit ................................................................ 142 5.7 Adding or replacing a network interface unit............................................................. 151 5.7.1 Single-size network interface unit ................................................................ 151 Appendix .................................................................................................................................. 160 A. Cleaning Optical Connectors ............................................................................................ 161 A.1 Cleaning the optical connectors of transceivers....................................................... 161 A.2 Cleaning fiber optic cables ....................................................................................... 163 ii Safety Information Using the AX6700S series switches correctly and safely z This guide provides important information for ensuring safe use of the AX6700S series switches. Please read this guide completely before using your Switch. z Keep this guide handy after reading it, so that it is available for later reference. z Operate the Switch according to the instructions and procedures provided in this manual. z Heed all warnings and cautions for the Switch in this guide. Failure to do so could result in injury or damage to the Switch. Before using the Switch Caution indications These indications are intended to ensure safe and correct use of the Switch and to prevent serious injury, and equipment and property damage. Caution information in this manual and on the Switch is preceded by the indications shown below. Make sure you fully understand the meaning of the indications before continuing with the main body of this manual. Ignoring instructions preceded by this indication and using the Switch incorrectly could result in death or serious injury to yourself and others. Ignoring instructions preceded by this indication and using the Switch incorrectly could result in serious injury to yourself and others. CAUTIO N Ignoring instructions preceded by this indication and using the Switch incorrectly could result in serious damage to the Switch or nearby property. NOTE Information preceded by this indication is supplementary information that, if ignored, will not result in physical injury or serious damage to the Switch. Unauthorized operations Do not attempt to perform any operations that are not described in this guide. In the event of a Switch problem, perform the operations below, and contact maintenance personnel. z For a Switch with an AC power supply unit installed, turn off the Switch power before unplugging the power cable from the outlet. z For a Switch with a DC power supply unit installed, turn off the Switch power, and then set the power supply circuit breaker of the power supply facility to OFF. Stay alert and pay careful attention The warnings and cautions provided on the Switch and in this guide have been selected after careful consideration. Nevertheless, there is always the possibility of the unexpected occurring. Therefore, while using a Switch, in addition to the following instructions, always stay alert and pay careful attention to what you are doing. Safety-1 Safety Information If anything seems wrong, immediately turn off the power. If smoke or an unusual smell is emanating from the Switch, or if liquid is spilled into the Switch or a foreign object falls into the Switch, immediately turn off power to the Switch as described below. Continuing operation could result in fire or electric shock. z For a Switch with an AC power supply unit installed, turn off the Switch power before unplugging the power cable from the outlet. z For a Switch with a DC power supply unit installed, turn off the Switch power, and then set the power supply circuit breaker of the power supply facility to OFF. Do not place the Switch in an unstable location. When installing the Switch on a table, position the Switch horizontally on a worktable strong enough to bear the weight of the Switch. Placing the Switch in an unstable location, such as on an unsteady or tilting surface, might cause the Switch to fall, resulting in injury. Do not remove the Switch cover. Do not remove the Switch cover. Doing so could result in electric shock. Do not allow any foreign objects to get into the Switch Do not insert or drop any foreign objects, such as anything metallic or flammable, through the Switch's ventilation slots. Doing so could result in fire or electric shock. Do not modify the Switch. Do not modify the Switch. Doing so could result in fire or electric shock. Do not subject the Switch to shocks In the event that the Switch is dropped or any of its components is damaged, turn off the power, unplug the power cable, and contact maintenance personnel. Discontinue using the cable to avoid the risk of fire or electric shock. Do not place any objects on the Switch. Do not place any metallic object such as a small pin or a paper clip or any container with a liquid, such as a vase or a flower pot, on the Switch. Liquid or metallic objects falling into the Switch could result in fire or electric shock. Use the Switch only with the indicated power supply. Do not use the Switch at any voltage other than the indicated voltage. Doing so could result in fire or electric shock. Safety-2 Safety Information Ensure that the capacity for incoming current to the distribution board is greater than the operating current of the circuit breaker. Ensure that the capacity for incoming current to the distribution board is greater than the operating current of the circuit breaker. If it is not, the circuit breaker might not operate properly in the event of a failure, which could result in fire. Ground the Switch. When connecting the Switch to a 100 V AC power supply, each Switch has at most 3.5 mA of leakage current. To connect a Switch to an AC power supply, always use a grounded power outlet for the Switch. Using the Switch without grounding could result in electric shock or failures due to electrical noise. When connecting the Switch to a 200 V AC power supply, each Switch has at most 5 mA of leakage current. To connect a Switch to an AC power supply, always use a grounded power outlet for the Switch, and make sure that the power outlet is grounded to the grounding board of the building. To do this, ask maintenance personnel or a professional electrician. Using the Switch without grounding could result in electric shock or failures due to electrical noise. The following label is attached to a Switch. If you use a DC power supply, always connect the ground terminals. Using the Switch without grounding could result in electric shock or failures due to electrical noise. Connecting and disconnecting a DC power cable must be performed by a trained technician or maintenance personnel. Connecting and disconnecting a DC power cable must be performed by a trained technician or maintenance personnel. Terminal connections are required for connection of the DC power cable. For this reason, incorrect handling of the DC power cable could result in fire or electric shock. Set the circuit breaker of the power supply facility to OFF before connecting or disconnecting the DC power cable. Make sure the circuit breaker of the power supply facility is set to OFF before connecting or disconnecting the DC power cable. Connecting or disconnecting the cable with the circuit breaker of the power supply facility set to ON could result in fire or electric shock. Safety-3 Safety Information Place an insulation cover over the 0 V and −48 V terminals of a DC power cable. Place an insulation cover over the 0 V and −48 V terminals of a DC power cable before using them. Using the terminals without an insulation cover could result in fire or electric shock. Do not use a DC power supply with the cover of the terminal board removed. After attaching a power cable, attach the cover to the terminal board when using a DC power supply. Using the power supply unit without the cover could result in electric shock. Do not touch the terminal used to measure voltage. A power supply unit has a terminal used to measure voltage. This terminal is used for inspection before the unit is shipped from the factory. Customers must not use this terminal. In addition, do not insert anything with a narrow tip, such as a pin or paper clip, into the terminal. Doing so could result in fire or electric shock. The Switch must be installed and carried by trained persons or a professional carrier. The maximum weight of the Switch is 82 kg. The Switch must be placed and carried by trained persons or a professional carrier. If a person other than the above does these operations, the Switch might fall, resulting in injury. When placing and carrying the Switch, use a handling device such as a hand lifter. If you carry the Switch without using a handling device, the Switch might fall, resulting in injury. The following label is attached to a Switch. Safety-4 Safety Information Handle power cables carefully. Do not place anything heavy on a power cable. Do not pull, bend, or modify a cable. Doing so could damage the cable, resulting in fire or electric shock. If the power cable is covered with a carpet or the like, it is easy to forget that the cable is there and to place something heavy on it. Use the supplied or a designated power cable. Using another cable could result in fire or electric shock. In addition, do not use the supplied cable with other devices. Doing so could result in fire or electric shock. If the power cable is damaged so that the wires underneath the covering are visible or cut, stop using it, and ask maintenance personnel to replace it. Discontinue using the cable to avoid the risk of fire or electric shock. Make sure the power plug is free of dust, and insert the plug completely up to the base of the prongs to prevent any looseness. Using a power plug with dust on it or one that is imperfectly connected could result in fire or electric shock. Do not overload the power outlet. Do not overload the power outlet by connecting multiple power plugs to the same outlet. Overloading the outlet could result in fire or the circuit breaker tripping due to excessive power used. This can affect other equipment. Before turning off the power, set all power switches or the circuit breaker for the Switch to OFF. A Switch has multiple input power supplies. When turning off the Switch power, set all power supply switches (with an AC power supply unit installed) or the circuit breaker (with a DC power supply unit installed) to OFF. The following label is attached to a Switch. Adding or replacing an option must be performed by a trained technician or maintenance personnel. Adding or replacing an optional module must be performed by a trained technician or maintenance personnel. Adding or replacing a power supply unit requires connecting or disconnecting the power cable. If an untrained person performs the operation and mishandles the power cable, fire or electric shock could result. Also, mishandling other optional modules could result in injury or damage. Safety-5 Safety Information When pressing the reset button, do not use anything with a fragile tip, or anything that might become caught in the Switch, such as a pin or paper clip. When pressing the reset button on the front panel, do not use anything with a fragile tip, or anything that might become caught in the Switch, such as a pin or paper clip. Doing so could result in fire or electric shock. When adding or replacing a power supply unit, disconnect the power supply cable. When adding or replacing a power supply unit, disconnect the power cable from the power supply unit that will be replaced. If the power cable is connected and the power switch is turned off, power is still supplied to some circuits. For this reason, adding or replacing a power supply unit with the power cable connected could result in fire or electric shock. Do not use an air duster near a flame. When cleaning the optical connectors, do not use an air duster that contains flammable gas near a flame. Doing so could result in fire. Safety-6 Safety Information Do not install the Switch in a dusty or humid location. Do not install the Switch in a dusty or humid location. Doing so could result in fire or electric shock. Condensation might form on the surfaces and the inside of the Switch if it is moved from a cold location to a warm location. Using the Switch in this condition could result in fire or electric shock. After moving the Switch between two locations with a large temperature variation, let the Switch stand a few hours before using it. Do not stack Switches. Do not stack Switches. Doing so might damage the Switch. Furthermore, the Switch might fall, or become unbalanced, resulting in injury. Do not step on the Switch, lean against it, or place anything on it. Do not step on the Switch, lean against it, or place anything on it. Doing so might damage the Switch. Furthermore, the Switch might fall, or become unbalanced, resulting in injury. When mounting a Switch into a rack, use the guide rails or shelves. It is not possible for the provided rack fixture alone to support the weight of a Switch. Its purpose is merely to hold a Switch in the rack. Use the guide rails or shelves. You must use the guide rails and shelves provided with the rack, and these must be able to support the weight of the Switch (with the maximum number of optional modules installed). Do not obstruct the ventilation slots. Do not obstruct the ventilation slots of the Switch. Doing so causes heat to accumulate inside the Switch, and could result in fire. Maintain a space of at least 70 mm around the ventilation slots. Safety-7 Safety Information Do not allow hair or objects near the ventilation slots. Because a Switch is equipped with internal cooling fan units, do not allow anything near ventilation slots. Doing so causes heat to accumulate inside the Switch and could cause a failure. Do not allow hair or other light material or objects near the ventilation slots because they might be sucked into the Switch, resulting in injury. When moving a Switch, do not hold the handles of optional modules. When moving a Switch, do not hold the handle of the fan unit or power supply unit. The handle might come off, resulting in the Switch falling and possibly causing injury. Also, the fan unit or power supply unit might become deformed, resulting in fire or electric shock. Unplug the cables before moving a Switch. Before moving a Switch, you must turn it off and unplug all cables. Failure to do so might cause the Switch or cable to become deformed, or might damage the Switch, resulting in fire or electric shock. Do not drop an optional module. Handle an optional module carefully so that you do not drop it. Dropping it could result in injury. The weight of a DC power supply unit is 5.6 kg and the front-to-back measurement is 163 mm. When removing a DC power supply unit from a Switch, support the DC power supply unit itself. If you pull the unit carelessly, it might fall, possibly resulting in injury. The following label is attached to a DC power supply unit. Do not touch the inside of the Switch with your hands. Do not carelessly put your hands inside the Switch. The frame and components might cause injury. When removing a basic control unit or a network interface unit, use care because it might be very hot. The components in a basic control unit and a network interface unit might be very hot. Do not touch any components with your hands. Doing so could result in burns. Safety-8 Safety Information When removing a fan unit, do not place your hands near the fan if it is rotating. Immediately after a fan unit is removed, the blades might still be rotating. While the fan blades are rotating, do no place your hands near them. Doing so might result in injury. The following label is attached to a fan unit. Handle the power cable carefully. Do not place a power cable near a heat-generating apparatus, because the heat could melt the cable coating, resulting in fire or electric shock. When plugging or unplugging a power cable from the outlet, always hold the plug, not the cable itself. Pulling the cable itself might cause the wires to break. Do not directly touch a Switch if you have a metal allergy. A Switch is plated with zinc, nickel, or gold. If you are allergic to these metals, do not directly touch the Switch. Doing so might cause a skin eruption or a rash. Avoid looking directly at laser beams. A network interface unit attached with the label below uses a laser beam. Never look directly into the optical transceiver. Lithium batteries A Switch uses a lithium battery for the real-time clock. Mishandling the battery might cause the battery to generate heat, explode, or catch fire, resulting in injury or fire. Do not remove the battery from a Switch, disassemble it, heat it to 100oC or more, burn it, or allow it to become wet. Safety-9 Safety Information Cleaning Remove dust on and around the Switch regularly. In addition to causing the switch to stop, accumulated dust could result in fire or electric shock. Safety-10 Safety Information Do not turn off the Switch power while software is being updated (when the ppupdate command is being executed). When the ppupdate command is executed, the Switch restarts automatically. Do not turn off the Switch until it is restarted (until the STATUS LED on the basic control unit changes from blinking green to constant green). Failure to do so could result in a Switch failure. If the ACC LED is lit, do not remove the memory card or turn off the power. When the ACC LED on the front panel of the Switch is lit, the memory card is being accessed. While a memory card is being accessed, do not remove the memory card or turn off the power. Doing so might damage the memory card. In addition, some commands require a certain amount of time after being entered to finish accessing the card. Make sure that the memory card is no longer being accessed before removing the card or turning off the power. Handle memory cards carefully. When inserting a memory card, do not push the card too strongly or flick it with your finger. When removing a memory card, do not forcibly pull out the card if it is locked. Doing so might damage the connector of the memory card slot. Remove the memory card before moving the Switch. If a card is subjected to excessive force when the Switch is moved, the connector of the memory card slot might be damaged. Do not attach any labels to a transceiver. A label attached to the transceiver indicates that the transceiver is a standard product from ALAXALA or another manufacturer. However, such labels are attached where they do not interfere with heat dissipation from the transceiver or the mechanism that prevents the transceiver from coming loose from the cage. Attaching a label to a location that interferes with these functions could cause a malfunction in the transceiver or damage to the Switch. For power supply facility, avoid a voltage drop caused by inrush current. When a Switch is turned on, inrush current flows. Consider measures for avoiding a voltage drop in the power supply facility caused by the inrush current. Voltage drops affect not only the Switch, but also the devices connected to the same power supply facility. Turn off the power before connecting or disconnecting the power supply cable. Before connecting or disconnecting a power cable, turn off the power to the device to be installed or removed. Safety-11 Safety Information When replacing a fan unit with the Switch turned on, observe the time limit. When replacing a fan unit with the Switch on, you must remove and replace the unit within one minute. If the operation takes longer than one minute, the temperature inside the Switch will rise and possibly cause a failure. When carrying or packing a Switch and an optional module, wear a wrist strap to protect against static electricity. Be sure to wear an antistatic wrist strap. If you handle the Switch without wearing an antistatic wrist strap, the Switch might be damaged by static electricity. If you remove an optional module, attach a blank panel. If you remove an optional module, attach a blank panel. If you continue using the Switch without attaching a blank panel, the airflow in the Switch cannot be maintained. As a result, the temperature inside the Switch will rise, possibly resulting in a failure. Safety-12 Safety Information Install an optional module carefully. Follow the procedure below when you install an optional module. Failure to do so could result in a failure or a malfunction of the Switch. 1. Open the levers as shown in the figure. 2. While holding the levers, push the optional module carefully until the levers touch the Switch. 3. Use the levers to push the optional module as far as it will go. When moving a lever, move it slowly (for one second or longer) without exerting strain. Before removing the optional module, loosen the screws. When removing a basic control unit, a basic switching unit, or a network interface unit, use the levers. If the screws are not loose enough, the optional module might be damaged when the levers are opened. When carrying and packing an optional module, handle it carefully. Do not touch any components or a soldered surface with your hands when carrying or packing an optional module, such as a basic control unit, basic switching unit, network interface unit, memory card, transceiver, or power supply unit. Also, when storing it, use an antistatic bag. Do not place a Switch in a high-temperature location. Do not place a Switch in direct sunlight or near a heater or other heat-generating apparatus. Doing so could adversely affect parts of the Switch. Safety-13 Safety Information Do not use a TV or a radio near a Switch. Placing a Switch near a TV or a radio could affect both devices. If you hear noise on the TV or radio, do the following: z Place the Switch as far away as possible from the TV or radio. z Adjust the orientation of the TV or radio antenna. z Use separate outlets. Do not place a Switch where it will be exposed to hydrogen sulfide or salt. Placing a Switch in an area where sulfides are present, such as a hot-springs area, or in an area with salty-air, such as along a coast could shorten the life of the Switch. Use care when handling an air duster. Use an air duster specially designed for cleaning optical connectors. Using another type of air duster could cause the ferrule tip to become dirty. Keep the nozzle or container of the air duster from coming into contact with the ferrule tip. Contact could result in a malfunction. Use care when handling an optical connector cleaner. Always use a dedicated optical connector cleaner. If you use another type of cleaner, the ferrule tip might become dirty. Before cleaning, make sure that the tip of the optical connector cleaner is clean and free of defects, such as lint, dirt, or other foreign substances. Using a cleaner with a defective tip might damage the ferrule tip. Do not apply excessive pressure when cleaning. Doing so might damage the ferrule tip. Rotate the optical connector cleaner (stick) clockwise only. Rotating the cleaner alternately clockwise and counterclockwise might damage the ferrule tip. Maintenance Clean any dirty areas on the exterior of the switch with a clean, dry cloth, or a cloth damp with (but not soaked with) water or a neutral detergent. Do not use volatile organic solutions (such as benzene or paint thinner), chemicals, chemically treated cloths, or pesticides because these substances might deform, discolor, or damage the switch. If the Switch will not be used for a long time For safety reasons, unplug the power cable from the outlet if the Switch will not be used for a long time. If you are using a DC power supply, set the circuit breaker of the power supply facility to OFF. Safety-14 Safety Information Disposing of a Switch When disposing of a Switch, you should either follow local ordinances or regulations or contact your local waste disposal and treatment facility. Safety-15 Safety Information Safety-16 1. Components Overview This chapter provides an overview of the various parts of the Switch. 1.1 Switch 1.2 Fan unit (FAN) 1.3 Power supply unit (PS) 1.4 Basic control unit (BCU) 1.5 Basic switching unit (BSU) 1.6 Network interface unit (NIF) 1.7 Memory card (MC) 1.8 Transceiver 1.9 Blank panel 1.10 Power cable 1.11 Rack fixture 1 1. Components Overview 1.1 Switch The AX6700S series switches are Layer 3 switches suitable for the backbone of a large-scale independent network, the core of a medium-scale network, or the edge of a service provider's Layer 3 network. The following are the features of AX6700S series switches: z High-density 10-Gigabit Ethernet z Excellent performance, reliability, availability, and security z Environment-friendly low power consumption 1.1.1 AX6708S The AX6708S has the following hardware specifications: z Basic control unit (BCU) slot: 2 slots z Basic switching unit (BSU) slot: 3 slots z Network interface unit (NIF) slot: 8 slots z Power supply unit (PS) slot: 8 slots z Fan unit (FAN) slot: 4 slots (1) External appearance Figure 1-1 Front view (1) Basic control unit (BCU) slot (2) Basic switching unit (BSU) slot 2 1. Components Overview (3) Network interface unit (NIF) slot (4) Rack fixture (5) Handles (6) Wrist strap terminal NOTE A rack fixture attached to a Switch is used to secure the rack pillars and the front of the Switch so that they are flat when the Switch is installed in a rack. If a 100 mm space cannot be maintained between the rack door and the front of the Switch, you can use another fixture (sold separately) that fixes the front of a Switch so that it is recessed 50 mm from a rack pillar. For information about this separately sold fixture, see 1.11 Rack fixture. Figure 1-2 Rear view (with an AC power supply unit installed) (1) Power supply unit (PS) slot (2) Fan unit (FAN) slot (3) Handles (4) Ground terminal NOTE The ground terminal is used if the Switch cannot be grounded through a power outlet when the Switch is used in a 200 V AC environment. Normally, the ground terminal is not used. 3 1. Components Overview Figure 1-3 Rear view (with a DC power supply unit installed) (1) Power supply unit (PS) slot (2) Fan unit (FAN) slot (3) Handles (4) Ground terminal NOTE The ground terminal is used if the Switch cannot be grounded through a power outlet when the Switch is used in a 200 V AC environment. Normally, the ground terminal is not used. (2) Slot number The following figures show the slot numbers of optional modules for the Switch. Figure 1-4 Front of the Switch 4 1. Components Overview Figure 1-5 Rear of the Switch (with an AC power supply unit installed) Figure 1-6 Rear of the Switch (with a DC power supply unit installed) (3) Number of installed power supply units and installation location NOTE Power supply units come in an AC model and a DC model. Do not install both an AC power supply unit and DC power supply unit on a single Switch. If you install both units, they will not operate properly. When installing AC power supply units When AC power supply units are installed on a Switch, the redundancy method is 4+4 redundancy. In this method, four basic power supply units and four additional power supply units for redundancy are required. For the installation locations of the power supply units, see the following table. Table 1-1 Installation locations of AC power supply units Power supply redundancy method 4+4 redundancy Power supply redundancy Basic Redundancy PS1 PS2 PS3 PS4 PS5 PS6 PS7 PS8 None Y Y Y Y N N N N Required Y Y Y Y Y Y Y Y 5 1. Components Overview If you install a power supply unit in a location other than those above, it will not operate properly. NOTE When installing a DC power supply unit When installing a DC power supply unit on a Switch, the power supply redundancy method is 2+2 redundancy. Two basic power supply units and two power supply units for redundancy are required. For the installation locations of the power supply units, see the following table. Table 1-2 Installation locations of DC power supply units Power supply redundancy method Power supply redundancy 2+2 redundancy Basic Redundancy PS1 PS2 PS3 PS4 None Y Y N N Required Y Y Y Y If you install a power supply unit in a location other than those above, it will not operate properly. NOTE (4) LEDs and switches LEDs and switches are located on each optional module. For information about the LEDs and switches on the front of the Switch, see 1.4 Basic control unit (BCU), 1.5 Basic switching unit (BSU), and 1.6 Network interface unit (NIF). For information about the LEDs on the rear of the Switch, see 1.2 Fan unit (FAN) and 1.3 Power supply unit (PS). 1.1.2 Accessories The items listed in Table 1-3 Switch accessories are shipped with the Switch when it is shipped from the factory. Table 1-3 Switch accessories Name Quan tity 1 Before using an AX6700S series switch 1 2 Using the Switch Safely 1 Num ber Remarks (1) Before using an AX6700S series switch This document lists the items supplied with a Switch when it is shipped from the factory. (2) Using the Switch Safely This document includes important notes regarding safe use of the Switch. 6 1. Components Overview Be sure to read this document before use. 7 1. Components Overview 1.2 Fan unit (FAN) 1.2.1 FAN-11 The FAN-11 fan unit is common to AX6700S series switches, and is included in each Switch. (1) External appearance Figure 1-7 External appearance (1) Handles (2) Installation screw (3) LEDs (2) LED Table 1-4 LED indications Type Status Description LED: Green, orange, or red Indicates the operating status of the fan unit. Green: Normal operation Orange: A lamp test is in progress. Red: A failure has been detected. 8 1. Components Overview 1.3 Power supply unit (PS) NOTE Power supply units come in an AC model and a DC model. Do not install both an AC power supply unit and DC power supply unit on a single Switch. If you install both units, they will not operate properly. 1.3.1 PS-A11 The PS-D11 power supply unit is common to AX6700S series switches. This power supply unit supports 100 V AC and 200 V AC. (1) External appearance Figure 1-8 External appearance (1) ALARM LED (2) POWER LED (3) Cable clamp (4) Installation screw (5) Terminal for measuring voltage (6) Bracket preventing disconnection of the power cable (7) Power supply connector (8) Power switch (9) Handles A power supply unit has a terminal for measuring voltage. This terminal is used for inspection before the unit is shipped from the factory. Customers must not use this terminal. In addition, do not insert anything with a narrow tip, such as a pin or paper clip, into the terminal. Doing so could result in fire or electric shock. 9 1. Components Overview (2) LED A power supply unit indicates its status with a combination of two LEDs, as described in the following table. Table 1-5 LED indications Name Description POWER (LED: Green) ALARM (LED: Red) ON OFF The power supply output voltage is normal. OFF ON A power supply output voltage error has occurred. OFF OFF The power is off or a power supply output voltage error has occurred.#1 #1: Depending on the kind of error, both the POWER LED and the ALARM LED might be off. (3) Accessories A 100 V AC, 2.5 m power cable is available as an accessory. A 100 V AC power cable is supplied with the PS-A11. Figure 1-9 Power cable When using a Switch at 100 V AC, use the supplied power cable. Using another cable could result in fire or electric shock. In addition, do not use the supplied power cable with another switch. Doing so could result in fire or electric shock. When using a Switch in a 200 V AC environment, use only the separately sold ALAXALA power cable, or a power cable that meets ALAXALA specifications. Using another cable could result in fire or electric shock. In addition, do not use the supplied power cable with another switch. Doing so could result in fire or electric shock. NOTE For the specifications defined by ALAXALA for power cables, see 2.4.2 Power supply facility for 200 V AC. 1.3.2 PS-D11 The PS-D11 power supply unit is common to AX6700S series switches. The power supply unit supports −48 V DC. 10 1. Components Overview (1) External appearance Figure 1-10 External appearance (1) ALARM LED (2) POWER LED (3) Terminal for measuring voltage (4) Cable clamp (5) Terminal board cover (6) Handles (7) Installation screw (8) Circuit breaker (9) Terminal board A power supply unit has a terminal for measuring voltage. This terminal is used for inspection before the unit is shipped from the factory. Customers must not use this terminal. In addition, do not insert anything with a narrow tip, such as a pin or paper clip, into the terminal. Doing so could result in fire or electric shock. (2) LED A power supply unit indicates its status with a combination of two LEDs, as described in the following table. 11 1. Components Overview Table 1-6 LED indications Name Description POWER (LED: Green) ALARM (LED: Red) ON OFF The power supply output voltage is normal. OFF ON A power supply output voltage error has occurred. OFF OFF The power is off or a power supply output voltage error has occurred.#1 #1: Depending on the kind of error, both the POWER LED and the ALARM LED might be off. (3) Accessories No accessories are available. The customer must provide a power cable. When using a Switch in a −48 V DC environment, use only a power cable that meets ALAXALA specifications. Using another cable could result in fire or electric shock. NOTE 12 For the specifications defined by ALAXALA for power cables, see 2.4.3 Power supply facility for −48 V DC. 1. Components Overview 1.4 Basic control unit (BCU) The following figures show the external appearance of the basic control units. Figure 1-11 External appearance (1) Memory (2) Installation screw (3) Lever NOTE Memory cannot be added or replaced. Do not remove, add, or replace memory. If you do so, operation is not guaranteed. NOTE In a basic control unit, a flash disk is used as a storage device for storing base software, configuration information, and log information. The number of times the flash disk can be written to is limited and should be noted during operation. For detailed notes about writing data to a flash disk, see 11 Switch Management in the Software Manual Configuration Guide Vol. 1. 1.4.1 BCU-S1 and BCU-S11 The BCU-S1 and BCU-S11 basic control units are common to the AX6700S series switches. The BCU-S1 and the BCU-S11 have the following hardware specifications: z Memory card slot: 1 slot z AUX port (RS-232C): 1 port z CONSOLE port (RS-232C): 1 port z MANAGEMENT port (10BASE-T/100BASE-TX): 1 port (1) Front view The front view of the BCU-S1 and BCU-S11 is shown below. 13 1. Components Overview Figure 1-12 Front view (1) System operation panel (2) Memory card slot (3) AUX port (RS-232C) (4) CONSOLE port (RS-232C) (5) MANAGEMENT port (10BASE-T/100BASE-TX) (6) LEDs (7) Switches (2) System operation panel The figure below shows the external appearance of the system operation panel. As shown in the figure, the system operation panel has an LCD and three operating buttons (back, enter, and forward). The LCD displays information about the Switch. Pressing the back, enter, or forward button allows you to switch among the menus that can be displayed on the LCD. Figure 1-13 External appearance of the system operation panel (1) LCD (2) Back button (3) Enter button (4) Forward button 14 1. Components Overview NOTE If you press the back and forward buttons at the same time, you can perform a lamp test. For details about operations in addition to the lamp test and the information that can be displayed on the LCD, see 11.1 System operation panel in the Software Manual Configuration Guide Vol. 1. NOTE If you perform a lamp test, LEDs light up for fan units, power units, basic switching units, and network interface units whose power is on. NOTE The LCD has a backlight. The backlight turns on in the following cases: z When the Switch is turned on z When a button is pressed If no buttons are pressed for 60 seconds, the backlight turns off automatically. If a Switch failure occurs, the failure information appears on the LCD, and the backlight blinks. (3) LEDs and switches Table 1-7 LED indications and switches Name Type Status Description STATUS LED: Green, orange, or red Indicates the operating status of the basic control unit. Green: Operation is possible. Orange: Self-diagnosis is in progress. Blinking green: Software is being loaded. Red: A failure has been detected. Off: Power is off. (The basic control unit can be replaced.)#1 ACC LED: Green Indicates the memory card status. Green: The memory card is being accessed. (Do not remove the memory card.) Off: The memory card is in idle mode. (A memory card can be plugged in or removed.) RESET Switch (non-locking) Used to reset the Switch manually.#2 Press one second: Use this method when a Switch failure has occurred.#3 Press five seconds: Use this method when you have forgotten the password.#4 ACH Switch (non-locking) Used to switch the system of the basic control unit.#2 #5 When the basic control unit is duplicated, use this switch to switch between the active system and the standby system. ACTIVE LED: Green Indicates whether the basic control unit is the active system or the standby system. Green: Indicates the active system. Off: Indicates the standby system. 15 1. Components Overview Name Type Status Description SYSTEM1 LED: Green, orange, or red Indicates the Switch status. Green: Operation is possible. Orange: A partial Switch failure was detected. Red: A Switch failure was detected. SYSTEM2 LED: Green, orange, or red Indicate the status of the power consumption mode#8#9 Green: Power saving mode. Orange: Not supported. Blinking green: The power consumption mode is changing. Red: Not supported. Off: Normal power consumption mode. LINK LED: Green or orange Indicates the operation status of the MANAGEMENT port. Green: A link is established. Orange: A failure has been detected. Off: A link failure occurred#6 or #7 operation has stopped. T/R LED: Green Green: A packet is being sent or received. Off: No packets are being sent or received. #1: A basic control unit can be turned off by the Inactivate operation from the system operation panel or by entering a command from the operation terminal. #2: The switch is recessed from the surface of the front panel. Use a screwdriver with a small head to press it. #3: If you press the switch for one second or less, the Switch might not be reset. #4: After a restart, a login password and an administrator password are no longer required. Be especially careful if you restart the unit with this method. #5: The system can be switched only if you press the ACH switch on the basic control unit of the active system. #6: Cable disconnection is also included. #7: You can stop operation by entering a command. #8: This is supported by the software Ver. 11.1 or later. The LED is always turned off because this is not supported by a version earlier than Ver. 11.1 of the software. #9: The status of the power consumption mode is displayed only for the basic control unit of the active system. When pressing a switch, do not use anything with a fragile tip, or anything that might become caught in the Switch, such as a pin or paper clip. Doing so could result in fire or electric shock. 16 1. Components Overview 1.5 Basic switching unit (BSU) The following figures show the external appearance of the basic switching units. Figure 1-14 External appearance (1) Installation screw (2) Lever NOTE The basic switching unit comes in two sizes: a standard table size and an extended table size. Standard table size: BSU-LA Extended table size: BSU-LB Do not install both types in a single Switch. If you install both types, they will not operate properly. 1.5.1 BSU-LA The BSU-LA basic switching units (standard table size) are common to the AX6700S series switches. (1) Front view The front view of the BSU-LA is shown below. Figure 1-15 Front view (1) STATUS LED (2) ACTIVE LED 17 1. Components Overview (2) LED Table 1-8 LED indications Name Type Status Description STATUS LED: Green, orange, or red Indicates the operating status of the basic switching unit. Green: Operation is possible. Orange: A reset is in progress. Blinking green: Startup is in progress. Red: A failure has been detected. Off: Power is off. (The basic switching unit can be replaced.)#1#2 ACTIVE LED: Green Indicates whether the basic switching unit is the active system or the standby system. Green: Indicates the active system. Off: Indicates the standby system. #1: A basic switching unit can be turned off by the Inactivate operation from the system operation panel or by entering a command from the operation terminal. Note that immediately after the Inactivate operation is performed for the basic switching unit in the active system, the ACTIVE LED might be lit even if the STATUS LED is turned off. While the ACTIVE LED is lit, the basic switching unit is running. Before removing the basic switching unit, you must wait until both the STATUS LED and the ACTIVE LED are turned off. #2: If no system recovery is set, the basic switching unit is also turned off in the following cases: z When a failure occurred in the basic switching unit. (The STATUS LED turns red, and then it turns off.) z When a failure occurred in a basic control unit (when the basic control unit is not duplicated) 1.5.2 BSU-LB The BSU-LB basic switching units (extended table size) are common to the AX6700S series switches. (1) Front view The front view of the BSU-LB is shown below. Figure 1-16 Front view (1) STATUS LED (2) ACTIVE LED 18 1. Components Overview (2) LED Table 1-9 LED indications Name Type Status Description STATUS LED: Green, orange, or red Indicates the operating status of the basic switching unit. Green: Operation is possible. Orange: A reset is in progress. Blinking green: Startup is in progress. Red: A failure has been detected. Off: Power is off. (The basic switching unit can be replaced.)#1#2 ACTIVE LED: Green Indicates whether the basic switching unit is the active system or the standby system. Green: Indicates the active system. Off: Indicates the standby system. #1: A basic switching unit can be turned off by the Inactivate operation from the system operation panel or by entering a command from the operation terminal. Note that immediately after the Inactivate operation is performed for the basic switching unit in the active system, the ACTIVE LED might be lit even if the STATUS LED is turned off. While the ACTIVE LED is lit, the basic switching unit is running. Before removing the basic switching unit, you must wait until both the STATUS LED and the ACTIVE LED are turned off. #2: If no system recovery is set, the basic switching unit is also turned off in the following cases: z When a failure occurred in the basic switching unit. (The STATUS LED turns red, and then it turns off.) z When a failure occurred in a basic control unit (when the basic control unit is not duplicated) 19 1. Components Overview 1.6 Network interface unit (NIF) The following table lists network interface units supported by the Switch. Table 1-10 Network interface units Size Name Interface 10/100/1000BASE-T Single-size 1000BASE-X 10GBASE-R NK1G-24T 24 ports -- -- NK1G-24S -- 24 ports -- NK1GS-8M 4 ports 8 ports -- NK10G-4RX -- -- 4 ports NK10G-8RX -- -- 8 ports 1.6.1 Single-size The following figure shows the external appearance of a single-size network interface unit. Figure 1-17 External appearance (1) Installation screw (2) Lever (3) Interface port NOTE The above figure shows an example of the NK1G-24T. Depending on the type of the network interface unit, the interface port or the LEDs vary. For details about single-size network interface units, see (1) and the following subsections. (1) NK1G-24T The NK1G-24T is a network interface unit with the following hardware specification: z 20 Ethernet port (10/100/1000BASE-T): 24 ports 1. Components Overview Front view The front view is shown below. For information about LEDs, see Table 1-13 LED indications. Figure 1-18 Front view (1) STATUS LED (2) LINK/TR LED (3) Ethernet port (10/100/1000BASE-T) LED Table 1-11 LED indications Name Type Status Description STATUS LED: Green, orange, or red Indicates the operating status of the network interface unit. Green: Operation is possible. Orange: A reset is in progress. Blinking green: Startup is in progress. Red: A failure has been detected. Off: Power is off. (The network interface unit can be replaced.)#1 #2 LINK/TR LED: Green or Orange Indicates the operating status of the Ethernet port.#6 Green: A link is established. Blinking green: A frame is being sent or received. Orange: A failure has been detected. Off: A link failure occurred#3 #4 or #3 #5 operation has stopped. #1: A network interface unit can be turned off by the Inactivate operation from the system operation panel or by entering a command from the operation terminal. #2: If no system recovery is set, the network interface unit is turned off in the following situations: z When a failure occurred in the network interface unit (the STATUS LED turns red, and then it turns off). z When a failure occurred in a basic control unit (when the basic control unit is not duplicated). #3: When the STATUS LED is green. #4: Cable disconnection is also included. #5: Operation of an Ethernet port can be stopped by entering a command from the operation terminal. #6: Always turns off if the interface port LED is set to off. When an operation key on 21 1. Components Overview the system operation panel is used, the LED lights up, and the operating status can be checked. If no keys are used for 60 seconds, the LED turns off again. If no system recovery is set and a failure occurs in a Switch, the Switch can stay stopped without recovering the failed part. NOTE (2) NK1G-24S The NK1G-24S is a network interface unit with the following hardware specification: z Ethernet port (1000BASE-X): 24 ports For information about the SFP transceivers supported by the Switch, see 1.8.1 SFP. NOTE Front view The front view is shown below. For information about LEDs, see Table 1-12 LED indications. Figure 1-19 Front view (1) STATUS LED (2) LINK/TR LED (3) Ethernet port (1000BASE-X) LED Table 1-12 LED indications 22 Name Type Status Description STATUS LED: Green, orange, or red Indicates the operating status of the network interface unit. Green: Operation is possible. Orange: A reset is in progress. Blinking green: Startup is in progress. Red: A failure has been detected. Off: Power is off. (The network interface unit can be replaced.)#1 #2 1. Components Overview Name Type Status Description LINK/TR LED: Green or Orange Indicates the operating status of the Ethernet port.#6 Green: A link is established. Blinking green: A frame is being sent or received. Orange: A failure has been detected. #3 #4 or Off: A link failure occurred #3 #5 operation has stopped. #1: A network interface unit can be turned off by the Inactivate operation from the system operation panel or by entering a command from the operation terminal. #2: If no system recovery is set, the network interface unit is turned off in the following situations: z When a failure occurred in the network interface unit (the STATUS LED turns red, and then it turns off). z When a failure occurred in a basic control unit (when the basic control unit is not duplicated). #3: When the STATUS LED is green. #4: Cable disconnection is also included. #5: Operation of an Ethernet port can be stopped by entering a command from the operation terminal. #6: Always turns off if the interface port LED is set to off. When an operation key on the system operation panel is used, the LED lights up, and the operating status can be checked. If no keys are used for 60 seconds, the LED turns off again. NOTE If no system recovery is set and a failure occurs in a Switch, the Switch can stay stopped without recovering the failed part. (3) NK1GS-8M The NK1GS-8M is a network interface unit with the following hardware specifications: z Ethernet port (10/100/1000BASE-T): 4 ports z Ethernet port (1000BASE-X): 8 ports NOTE You cannot use 10/100/1000BASE-T and 1000BASE-X at the same time because 10/100/1000BASE-T and 1000BASE-X share ports 1 to 4 of this network interface mechanism. Edit the configuration to set either 10/100/1000BASE-T or 1000BASE-X for each port. (By default, 1000BASE-X is set for ports 1 to 4.) For details about editing the configuration, see the software manual. NOTE For information about the SFP transceivers supported by the Switch, see 1.8.1 SFP. Front view The front view is shown below. For information about LEDs, see Table 1-13 LED indications. 23 1. Components Overview Figure 1-20 Front view (1) STATUS LED (2) LINK/TR LED (3) SEL LED (4) Ethernet port (10/100/1000BASE-T) (5) Ethernet port (1000BASE-X) LED Table 1-13 LED indications Name Type Status Description STATUS LED: Green, orange, or red Indicates the operating status of the network interface unit. Green: Operation is possible. Orange: A reset is in progress. Blinking green: Startup is in progress. Red: A failure has been detected. Off: Power is off. (The network interface unit can be replaced.)#1 #2 LINK/TR LED: Green or Orange Indicates the operating status of the Ethernet port.#6 Green: A link is established. Blinking green: A frame is being sent or received. Orange: A failure has been detected. Off: A link failure occurred#3 #4 #3 #5 or operation has stopped. SEL LED: Green Always green after the network interface unit is ready to operate.#6 Green: 10/100/1000BASE-T is selected. Off: 1000BASE-X is selected. #1: A network interface unit can be turned off by the Inactivate operation from the system operation panel or by entering a command from the operation terminal. #2: If no system recovery is set, the network interface unit is turned off in the following situations: 24 z When a failure occurred in the network interface unit (the STATUS LED turns red, and then it turns off). z When a failure occurred in a basic control unit (when the basic control unit is 1. Components Overview not duplicated). #3: When the STATUS LED is green. #4: Cable disconnection is also included. #5: Operation of an Ethernet port can be stopped by entering a command from the operation terminal. #6: Always turns off if the interface port LED is set to off. When an operation key on the system operation panel is used, the LED lights up, and the operating status can be checked. If no keys are used for 60 seconds, the LED turns off again. If no system recovery is set and a failure occurs in a Switch, the Switch can stay stopped without recovering the failed part. NOTE (4) NK10G-4RX The NK10G-4RX is a network interface unit with the following hardware specification: z Ethernet port (10GBASE-R): 4 ports For information about the XFP transceivers supported by the Switch, see 1.8.2 XFP. NOTE Front view The front view is shown below. For information about LEDs, see Table 1-14 LED indications. Figure 1-21 Front view (1) STATUS LED (2) LINK LED (3) T/R LED (4) Ethernet port (10GBASE-R) LED Table 1-14 LED indications Name STATUS Type LED: Green, orange, or red Status Description Indicates the operating status of the network interface unit. Green: Operation is possible. Orange: A reset is in progress. Blinking green: Startup is in progress. Red: A failure has been detected. Off: Power is off. (The network interface unit can be replaced.)#1 #2 25 1. Components Overview Name Type LINK LED: Green or Orange T/R LED: Green Status Description Indicates the operating status of the Ethernet #6 port. Green: A link is established. Orange: A failure has been detected. Off: A link failure occurred#3 #4 or #3 #5 operation has stopped. Blinking green: A frame is being sent or received. Off: No frames are being sent or received. #1: A network interface unit can be turned off by the Inactivate operation from the system operation panel or by entering a command from the operation terminal. #2: If no system recovery is set, the network interface unit is turned off in the following situations: z When a failure occurred in the network interface unit (the STATUS LED turns red, and then it turns off). z When a failure occurred in a basic control unit (when the basic control unit is not duplicated). #3: When the STATUS LED is green. #4: Cable disconnection is also included. #5: Operation of an Ethernet port can be stopped by entering a command from the operation terminal. #6: Always turns off if the interface port LED is set to off. When an operation key on the system operation panel is used, the LED lights up, and the operating status can be checked. If no keys are used for 60 seconds, the LED turns off again. NOTE If no system recovery is set and a failure occurs in a Switch, the Switch can stay stopped without recovering the failed part. (5) NK10G-8RX The NK10G-8RX is a network interface unit with the following hardware specification: z Ethernet port (10GBASE-R): 8 ports NOTE For information about the XFP transceivers supported by the Switch, see 1.8.2 XFP. Front view The front view is shown below. For information about LEDs, see Table 1-15 LED indications. 26 1. Components Overview Figure 1-22 Front view (1) STATUS LED (2) LINK LED (3) T/R LED (4) Ethernet port (10GBASE-R) LED Table 1-15 LED indications Name Type Status Description STATUS LED: Green, orange, or red Indicates the operating status of the network interface unit. Green: Operation is possible. Orange: A reset is in progress. Blinking green: Startup is in progress. Red: A failure has been detected. Off: Power is off. (The network interface unit can be replaced.)#1 #2 LINK LED: Green or Orange Indicates the operating status of the Ethernet #6 port. Green: A link is established. Orange: A failure has been detected. Off: A link failure occurred#3 #4 or operation has stopped.#3 #5 T/R LED: Green Blinking green: A frame is being sent or received. Off: No frames are being sent or received. #1: A network interface unit can be turned off by the Inactivate operation from the system operation panel or by entering a command from the operation terminal. #2: If no system recovery is set, the network interface unit is turned off in the following situations: z When a failure occurred in the network interface unit (the STATUS LED turns red, and then it turns off). z When a failure occurred in a basic control unit (when the basic control unit is not duplicated). #3: When the STATUS LED is green. #4: Cable disconnection is also included. #5: Operation of an Ethernet port can be stopped by entering a command from the operation terminal. #6: Always turns off if the interface port LED is set to off. When an operation key on the system operation panel is used, the LED lights up, and the operating status can be checked. If no keys are used for 60 seconds, the LED turns off again. 27 1. Components Overview NOTE 28 If no system recovery is set and a failure occurs in a Switch, the Switch can stay stopped without recovering the failed part. 1. Components Overview 1.7 Memory card (MC) To use a memory card, install it in a basic control unit. The memory card is used for the following: z Backing up operating information z Saving troubleshooting information in the event of a failure z Updating the Switch software (1) SD128 This memory card is an SD memory card with a capacity of 128 MB. Figure 1-23 External appearance Label: ALAXALA SD128 NOTE Make sure that you use standard ALAXALA memory cards labeled as shown in the figure. If non-standard products are used, correct operation is not guaranteed. NOTE The memory card can be written to approximately ten thousand times. 29 1. Components Overview 1.8 Transceiver 1.8.1 SFP To use an SFP transceiver, connect it to an Ethernet port on the network interface unit. The SFP transceivers supported by the Switch are listed in Table 1-16 List of SFP transceivers. Table 1-16 List of SFP transceivers Number Module name Interface 1 SFP-SX Gigabit Ethernet 1000BASE-SX 2 SFP-SX2 Gigabit Ethernet 1000BASE-SX2 3 SFP-LX Gigabit Ethernet 1000BASE-LX 4 SFP-LH 5 SFP-LHB Gigabit Ethernet 1000BASE-LH Gigabit Ethernet 1000BASE-LHB 6 SFP-BX1U Gigabit Ethernet 1000BASE-BX10-U#1 7 SFP-BX1D Gigabit Ethernet 10000BASE-BX10-D#1 8 SFP-BX4U Gigabit Ethernet 1000BASE-BX40-U#2 9 SFP-BX4D Gigabit Ethernet 1000BASE-BX40-D#2 #1: 1000BASE-BX10-U and 1000BASE-BX10-D are used in pairs. #2: 1000BASE-BX40-U and 1000BASE-BX40-D are used in pairs. The Switch uses laser beams that are colorless and transparent, and invisible to the eye. Never look directly into the optical transceiver. 30 CAUTION Do not attach any labels to a transceiver. A label attached to the transceiver indicates that the transceiver is a standard product from ALAXALA or another manufacturer. However, such labels are attached where they do not interfere with heat dissipation from the transceiver or the mechanism that prevents the transceiver from coming loose from the cage. Attaching a label to a location that interferes with these functions could cause a malfunction in the transceiver or damage to the Switch. NOTE Make sure that you use standard ALAXALA products labeled as shown in the figures. If non-standard products are used, correct operation is not guaranteed. 1. Components Overview (1) SFP-SX Figure 1-24 External appearance (1) Label: ALAXALA SFP-SX Label color: Black (2) Lever color: Black (2) SFP-SX2 Figure 1-25 External appearance (1) Label: ALAXALA SFP-SX2 Label color: White (2) Lever color: Silver (3) SFP-LX Figure 1-26 External appearance (1) Label: ALAXALA SFP-LX Label color: Blue (2) Lever color: Blue 31 1. Components Overview (4) SFP-LH Figure 1-27 External appearance (1) Label: ALAXALA SFP-LH Label color: Green (2) Lever color: Green (5) SFP-LHB Figure 1-28 External appearance (1) Label: ALAXALA SFP-LHB Label color: White (2) Lever color: Yellow-green (6) SFP-BX1U Figure 1-29 External appearance (1) Label at the back of the transceiver: ALAXALA SFP-BX1U Label color: White (2) Lever color: Blue 32 1. Components Overview (7) SFP-BX1D Figure 1-30 External appearance (1) Label at the back of the transceiver: ALAXALA SFP-BX1D Label color: White (2) Lever color: Magenta (8) SFP-BX4U Figure 1-31 External appearance (1) Label at the back of the transceiver: ALAXALA SFP-BX4U Label color: White (2) Lever color: Yellow (9) SFP-BX4D Figure 1-32 External appearance (1) Label at the back of the transceiver: ALAXALA SFP-BX4D Label color: White (2) Lever color: Green 1.8.2 XFP To use an XFP transceiver, connect it to an Ethernet port on the network interface 33 1. Components Overview unit. The XFP transceivers supported by the Switch are listed in Table 1-17 List of XFP transceivers. Table 1-17 List of XFP transceivers Number Module name Interface 1 XFP-SR 10 Gigabit Ethernet 10GBASE-SR 2 XFP-LR 10 Gigabit Ethernet 10GBASE-LR 3 XFP-ER 10 Gigabit Ethernet 10GBASE-ER 4 XFP-ZR 10 Gigabit Ethernet 10GBASE-ZR The Switch uses laser beams that are colorless and transparent, and invisible to the eye. Never look directly into the optical transceiver. CAUTION Do not attach any labels to a transceiver. A label attached to the transceiver indicates that the transceiver is a standard product from ALAXALA or another manufacturer. However, such labels are attached where they do not interfere with heat dissipation from the transceiver or the mechanism that prevents the transceiver from coming loose from the cage. Attaching a label to a location that interferes with these functions could cause a malfunction in the transceiver or damage to the Switch. NOTE Make sure that you use standard ALAXALA products labeled as shown in the figures. If non-standard products are used, correct operation is not guaranteed. (1) XFP-SR Figure 1-33 External appearance (1) Label: ALAXALA XFP-SR (2) Lever color: Ivory 34 1. Components Overview (2) XFP-LR Figure 1-34 External appearance (1) Label: ALAXALA XFP-LR (2) Lever color: Blue (3) XFP-ER Figure 1-35 External appearance (1) Label: ALAXALA XFP-ER (2) Lever color: Red (4) XFP-ZR Figure 1-36 External appearance (1) Label: ALAXALA XFP-ZR (2) Lever color: White 35 1. Components Overview 1.9 Blank panel When a slot does not contain an optional module, a blank panel is inserted in the slot. The blank panel serves the following purposes: z Ensures the flow of air inside the Switch. z Reduces radio interference from the Switch. z Protects the Switch from radio interference by another device. CAUTION Insert a blank panel in a slot in which there is no optional module. If you continue using the Switch without attaching a blank panel, the airflow inside the Switch cannot be maintained. As a result, the temperature inside the Switch will rise, possibly resulting in a failure. In addition, the radio waves generated by the Switch might affect another device, or the radio waves generated by another device might affect the Switch, resulting in a malfunction. (1) BPNL-PS11 The blank panel for a power supply unit. Figure 1-37 BPNL-PS11 (2) BPNL-SU11 The blank panel for a basic switching unit. Figure 1-38 BPNL-SU11 36 1. Components Overview (3) BPNL-NF11 The blank panel for a basic control unit or a network interface unit. Figure 1-39 BPNL-NF11 37 1. Components Overview 1.10 Power cable 1.10.1 CBL-A12 A 2.5 m 200 V AC power cable (sold separately). Use this cable when you use a Switch in a 200 V AC environment. (1) External appearance Figure 1-40 CBL-A12 When using a Switch in a 200 V AC environment, use only the separately sold ALAXALA power cable, or a power cable that meets ALAXALA specifications. Using another cable could result in fire or electric shock. In addition, do not use the supplied power cable with another switch. Doing so could result in fire or electric shock. NOTE If an optional ALAXALA power cable cannot be used with your power supply facility, use a power cable that meets ALAXALA specifications. For information about ALAXALA specified power cables, see 2.4.2 Power supply facility for 200 V AC. (2) Accessories Bracket that protects the power cable from being disconnected. This bracket can be used only for the CBL-A12. Figure 1-41 Bracket protecting disconnection of the power cable 38 1. Components Overview 1.11 Rack fixture A bracket (sold separately) used to attach the Switch to a 19-inch cabinet rack. With this bracket, you can fix a Switch so that it is recessed 50 mm from the rack pillar. 1.11.1 BRK-13 The BRK-13 is a rack fixture for the AX6708S. (1) External appearance Figure 1-42 BRK-13 (1) Left: L (2) Right: R (2) Accessories Installation screws for the BRK-13. Figure 1-43 Screws (M4 x 8, 10 screws) 39 2. Preparation for Installation This chapter describes the environment conditions and preparations required for installation of the Switch. Before preparing for the installation, read this chapter carefully and be sure that you understand all instructions and notes within. 2.1 Preparation workflow 2.2 Installation conditions 2.3 Carrying a Switch 2.4 Power supply facility 2.5 Notes on electric noise 2.6 Leakage current 2.7 Environment conditions 2.8 Installation location 2.9 Maintenance area 2.10 Cooling requirements 2.11 Device noise 40 2. Preparation for Installation 2.1 Preparation workflow The workflow to prepare for installation is shown in Figure 2-1 Flowchart of preparation for installation. Be sure to schedule enough time to complete the following work before installing the Switch: power supply work, communications equipment work, and laying down LAN cables. Figure 2-1 Flowchart of preparation for installation 41 2. Preparation for Installation 2.2 Installation conditions The general installation requirements for the Switch are described below. The installation environment must meet these requirements. Table 2-1 Switch installation conditions Item Dimensions (Width#1 x Depth#2 x Height) Specifications When an AC power supply unit is installed When a DC power supply unit is installed 443 x 544 x 395 mm 443 x 573 x 395 mm Weight (with maximum number installed) Input voltage#3 82 kg Rated breaker capacity Single phase 100 to 120 V AC Single phase 200 to 240 V AC −48 V DC Variation range 90 to 132 V AC 180 to 264 V AC −40.5 to -57V 50/60 ± 3Hz -- 40A @ 100 V AC, 20A @ 200 V AC 79A @ −48 V DC Frequency Maximum input current Maximum power consumption 3,750 W Maximum heat dissipation Noise#4 13,500k J/h Intake temperature 25oC 60 dB or less Intake temperature 40oC 65 dB or less 2.45 m/s2 or less Vibration Dust#5 Temperature Humidity#6 0.15 mg/m3 or less Operating o 0 to 40 C (23 to 28oC is recommended) Not operating −10 to 43oC During storage and transportation −25 to 65oC Operating 10 to 85% (45 to 55 % is recommended) Not operating 8 to 85 % During storage and transportation 5 to 85 % #1: Dimensions of the rack fixture are not included. #2: Dimensions for the handles of the Switch, fan unit, and power supply unit are included. #3: The power cable supplied with the Switch supports only 100 V AC. #4: The value is measured at 1 m from the side of the Switch. The number of rotations of the fan varies according to the intake temperature. Because of this, the value of the noise changes. #5: According to JIS Z 8813 Measuring Methods for Suspended Particulate Matter Concentration in Air. #6: No condensation 42 2. Preparation for Installation 2.3 Carrying a Switch The maximum weight of the Switch is 82 kg. The Switch must be placed and carried by trained persons or by a professional carrier. When lifting the Switch, carry it by holding the bottom of the Switch and the handles shown in the figure. When moving the Switch, use a handling device such as a hand lifter. Figure 2-2 Location of handles (front) (1) Handles Figure 2-3 Location of handles (rear) (1) Handles 43 2. Preparation for Installation The maximum weight of the AX6708S is 82 kg. The AX6708S must be placed and carried by trained persons or by a professional carrier. If a person other than the above does these operations, the AX6708S might fall, resulting in injury. When placing and carrying the AX6708S, use a handling device such as a hand lifter. If you carry the AX6708S without using a handling device, the AX6708S might fall, resulting in injury. 44 2. Preparation for Installation 2.4 Power supply facility 2.4.1 Power supply facility for 100 V AC (1) Outlet Use an outlet shown below, that conforms to the JIS and NEMA standards. This type of electrical outlet is available from electrical equipment suppliers. Table 2-2 Electrical outlet standards Standards Specifications JIS C-8303 NEMA 5-15R 15A 125V, two-pin grounded outlet Figure 2-4 Two-pin grounded outlet (125V 15A) When using the Switch at 100 V AC, always use a grounded power outlet. Using the Switch without grounding could result in electric shock or failures due to electrical noise. (2) Distribution board Use circuit breakers on the branch circuit supplying power to the Switch. See the following table for the rated breaker capacity, and the required number of circuit breakers and outlets. Table 2-3 Rated breaker capacity and required quantity Rated breaker capacity Power supply redundancy Number of required circuit breakers Number of required outlets 15 AT with single phase 100 V AC (for a 15 A circuit) None 4 4 Required 8 8 NOTE For easy operation, the distribution board should be installed in the same room as the Switch or in an adjacent room. NOTE For a redundant power supply, the power from different power supply systems can be supplied to each power supply unit. (3) Requirements for the incoming current to the distribution board The capacity of the incoming current to the distribution board must be greater than that of the breaker operating current described in the above (2) Distribution board. 45 2. Preparation for Installation Ensure that the capacity for incoming current to the distribution board is greater than the operating current of the circuit breaker. If it is not, the circuit breaker might not operate properly in the event of a failure, which could result in fire. Generally, the breaker operating current is greater than the rated current. Check the specifications of the circuit breaker. NOTE In addition, when a Switch is turned on, inrush current shown in the figure below flows. Consider measures for avoiding a voltage drop in the power supply facility caused by the inrush current. Table 2-4 Inrush current Current Time 30 A 150 ms CAUTION When a Switch is turned on, inrush current flows. Consider measures for avoiding a voltage drop in the power supply facility caused by the inrush current. Voltage drops affect not only the Switch, but also the devices connected to the same power supply facility. NOTE The inrush current described above is the value for a single power supply unit. 2.4.2 Power supply facility for 200 V AC (1) AC power cable An optional 200 V AC power cable is available that allows the Switch to be used in a 200 V AC environment. For information about the 200 V AC power cable, see 1.10 Power cable. NOTE If an optional ALAXALA power cable cannot be used with your power supply facility, use a power cable that meets the following ALAXALA specifications. Table 2-5 AC power cable specifications Item Rated breaker capacity Type Connector (Switch side) 250 V 10 A or higher PSE approved product Cable Plug (outlet side) 250 V 10 A or higher PSE approved product 250 V 10 A or higher PSE approved product Three cores Prepare a plug suitable for the outlet. When using a Switch in a 200 V AC environment, use only the separately sold ALAXALA power cable, or a power cable that meets ALAXALA specifications. Using another cable could result in fire or electric shock. In addition, do not use the supplied power cable with another switch. Doing so could result in fire or electric shock. 46 2. Preparation for Installation (2) Outlet Use an outlet shown below, that conforms to the JIS and NEMA standards. This type of electrical outlet is available from electrical equipment suppliers. Table 2-6 Electrical outlet standards Standards Specifications JIS C-8303 NEMA L6-20R 20 A 250 V, Two-pin grounded twist-lock outlet Figure 2-5 Two-pin grounded twist-lock outlet (250 V, 20 A) When using the Switch at 200 V AC, you must use a grounded power outlet, and make sure that the power outlet is grounded to the grounding board of the building. To do this, ask maintenance personnel or a professional electrician. Using the Switch without grounding could result in electric shock or failures due to electrical noise. NOTE The above outlet supports the ALAXALA 200 V AC optional power cable. If you do not want to use the ALAXALA optional power cable, use the outlet below. This type of electrical outlet is available from electrical equipment suppliers. z Two-pin grounded twist-lock outlet 250 V 10 A or higher (3) Distribution board Use circuit breakers on the branch circuit supplying power to the Switch. See the following table for the rated breaker capacity, and the required number of circuit breakers and outlets. Table 2-7 Rated breaker capacity and required quantity Rated breaker capacity 10 AT with single phase 200 V AC (for a 10 A circuit) NOTE Power supply redundancy Number of required circuit breakers Number of required outlets None 4 4 Required 8 8 For easy operation, the distribution board should be installed in the same room as the Switch or in an adjacent room. 47 2. Preparation for Installation For a redundant power supply, the power from different power supply systems can be supplied to each power supply unit. NOTE (4) Requirements for the incoming current to the distribution board The capacity of the incoming current to the distribution board must be greater than that of the breaker operating current described in the above (3) Distribution board. Ensure that the capacity for incoming current to the distribution board is greater than the operating current of the circuit breaker. If it is not, the circuit breaker might not operate properly in the event of a failure, which could result in fire. Generally, the breaker operating current is greater than the rated current. Check the specifications of the circuit breaker. NOTE In addition, when a Switch is turned on, inrush current shown in the figure below flows. Consider measures for avoiding a voltage drop in the power supply facility caused by the inrush current. Table 2-8 Inrush current Current Time 30 A 150 ms CAUTION When a Switch is turned on, inrush current flows. Consider measures for avoiding a voltage drop in the power supply facility caused by the inrush current. Voltage drops affect not only the Switch, but also the devices connected to the same power supply facility. NOTE The inrush current described above is the value for a single power supply unit. 2.4.3 Power supply facility for −48 V DC (1) DC power cable When using a Switch in a −48 V DC environment, use only the power cable described in Table 2-9 DC power cable specifications. Use the terminals described in Figure 2-6 0 V and −48 V terminals as the 0 V and −48 V terminals of a DC power cable, and use either terminal described in Figure 2-7 Ground terminal as the ground terminal. For information about the distances from the cable clamp to the 0 V terminal, the −48 V terminal, and the ground terminal, see Figure 2-8 Terminal board of the DC power supply unit. Table 2-9 DC power cable specifications Power supply unit PS-D11 48 Cable specifications Number of cores AWG No. External diameter of the cable Three cores 4 30 to 32 mm 2. Preparation for Installation Figure 2-6 0 V and −48 V terminals (1) 17.8 mm (max) (2) 17.5 mm (max) (3) 6.3 to 6.9 mm (4) Insulation cover Place an insulation cover over the 0 V and −48 V terminals. Using the terminals without an insulation cover could result in fire or electric shock. Place the insulation cover so that the distance from the hole of the terminal to the insulation cover is 17.5 mm or less (half of the width of the terminal board for the power supply unit). Be careful that the exposed core of the cable does not extend out of the terminal board. Figure 2-7 Ground terminal (1) 17.8 mm (max) (2) 6.3 to 6.9 mm (3) 19 mm (max) (4) 8 mm (max) (5) 16 mm 49 2. Preparation for Installation Figure 2-8 Terminal board of the DC power supply unit (1) Cable clamp (2) 0V terminal (screw: M6) (3) −48V terminal (screw: M6) (4) Ground terminal (screw: M6) (2) Distribution board Use circuit breakers on the branch circuit supplying power to the Switch. See the following table for the rated breaker capacity and the required quantity. Table 2-10 Rated breaker capacity and required quantity Rated breaker capacity Power supply redundancy Required number 60 A None 2 Required 4 NOTE For easy operation, the distribution board should be installed in the same room as the Switch or in an adjacent room. NOTE For a redundant power supply, the power from different power supply systems can be supplied to each power supply unit. (3) Requirements for the incoming current to the distribution board The capacity of the incoming current to the distribution board must be greater than that of the breaker operating current described in the above (2) Distribution board. Ensure that the capacity for incoming current to the distribution board is greater than the operating current of the circuit breaker. If it is not, the circuit breaker might not operate properly in the event of a failure, which could result in fire. 50 2. Preparation for Installation NOTE Generally, the breaker operating current is greater than the rated current. Check the specifications of the circuit breaker. In addition, if a Switch is turned on, the inrush current described in Table 2-11 Inrush current flows. Consider measures for avoiding a voltage drop in the power supply facility caused by the inrush current. Be especially careful, when using a UPS or CVCF. Table 2-11 Inrush current Current Time 80 A 40 ms CAUTION When a Switch is turned on, inrush current flows. Consider measures for avoiding a voltage drop in the power supply facility caused by the inrush current. Voltage drops affect not only the Switch, but also the devices connected to the same power supply facility. NOTE The inrush current described above is the value for a single power supply unit. 51 2. Preparation for Installation 2.5 Notes on electric noise Electric noise emitted by other devices can cause failures. Note the following points when designing a plan for the power supply facility: 52 z The branch circuit of the power supply to the Switch should not be connected to devices that use a relay, micro-switches, or other means to power them on and off repeatedly, such as air conditioners. z The service ground terminal of the Switch (Type D grounding) should be directly connected to the ground plate or, if possible, to a dedicated ground system for the Switch. z Embed a circuit to prevent noise generation into devices that emit electrical noise. z The cables connected to the Switch can be broadly categorized into power supply cables and signal cables, which have different electrical characteristics. Avoid bundling or twisting the two types of cables together when laying the cables. z Do not route communication lines along the power supply cables. 2. Preparation for Installation 2.6 Leakage current The Switch is equipped with a noise filter to prevent failure due to electric noise. As a result, at most 3.5 mA (at 100 V AC) or 5 mA (at 200 V AC) per device of leakage current flows through the protective ground line (Type D grounding). Be sure to consider whether the installation of a residual current circuit breaker is required for compliance with the Fire Service Act or other legislation. 53 2. Preparation for Installation 2.7 Environment conditions (1) Dust Because cooling fan units are mounted in a Switch, do not install them in a humid or dusty place. Dust requirements for the Switch are as follows: z Airborne dust concentration: 0.15 mg/m3 or less (according to JIS Z 8813 Measuring Methods for Suspended Particulate Matter Concentration in Air: General Requirements) NOTE Generally, areas around printers or with large numbers of people passing by contain high levels of toner or dust. Do not install the Switch in such places. (2) Corrosive and flammable gases Install the Switch in a place free of corrosive or flammable gases. If the Switch is installed where it is exposed to corrosive gases, the Switch will deteriorate and become unreliable. (3) Floor surface material The Switch can be installed in an ordinary office room. However, the floor surface should have the following properties: z Fireproof z Dust-resistant (4) Direct sunlight Do not expose the Switch to direct sunlight. (5) Water When cleaning the floor, do not allow the Switch to be exposed to water. (6) Electromagnetic interference Please note that when using high-frequency devices near the Switch, waves emitted by such devices might interfere with normal operation of the Switch. The Switch generates weak high-frequency radio waves that might affect indoor antennas for television, radio, and transceivers within 30 m of the Switch. (7) Cable protection Route the cables through ducts or cover them for protection. If cables are unprotected, mice or other animals might bite or chew them, leading to cable disconnection. Fiber-optic cables require special handling; lay the cables with a bend radius of 100 mm or more along the major axis and 50 mm or more along the minor axis, and protect them with metal covers. For fiber-optic cables with the required number of cores, ensure that they are protected against repeated mechanical stress due to bending, stretching, compression, and straightening when laying the cables, and ensure that they are protected against environmental stress after installation. 54 2. Preparation for Installation (8) Spraying When spraying pesticide or disinfectant in the room where the Switch is installed, cover the Switch beforehand to prevent direct exposure to chemicals. (9) Earthquake countermeasures Earthquakes can cause Switches to shift, fall over, or fall out of windows, possibly resulting in bodily injury or death. Take sufficient precautions to prevent the Switch from shifting or falling over. NOTE The actual vibration affecting a Switch is different from the vibrations at ground level and varies depending on the amplification factor determined by the structure of the building and the floor level of the room containing the Switch. Generally, the fifth floor and above of a nine-story, medium-rise building experiences two to three times the amount of shaking than that at ground level. Examples of effects observed in past earthquakes: z The position of a switch shifted from 10 to 30 cm. z Racks fell over. z Objects on higher furnishings in the room fell on a switch. 55 2. Preparation for Installation 2.8 Installation location The Switch can be installed on either a desktop or a 19-inch cabinet rack. (1) On a desktop When installing the Switch on a desktop, use a level, stable, and flat surface. When installing the Switch on a desktop, consider the requirements described in the following table. Table 2-12 Requirements for installing on a desktop Item Conditions Air intake and exhaust space Ensure at least 70 mm of space around all air vents of the Switch. (For details, see 2.10 Cooling requirements.) Cable space Ensure 100 mm of space in front of the Switch and 50 mm of space behind the Switch for the routing of cables.#1 Device noise For details about noise, see 2.11 Device noise. #1: When using the Switch in a 200 V AC environment, ensure 100 mm of space behind the Switch. When installing the Switch on a table, position the Switch horizontally on a worktable strong enough to bear the weight of the Switch. Placing the Switch in an unstable location, such as on an unsteady or tilting surface, might cause the Switch to fall, resulting in injury. (2) 19-inch cabinet rack When mounting the Switch on a rack, be sure to satisfy the rack requirements described in Table 2-13 Rack requirements. In addition, prepare a bracket described in Table 2-14 Required brackets and screws described in Table 2-15 Number of required screws. Table 2-13 Rack requirements Item Conditions Rack standard 19-inch cabinet rack conforming to the EIA standard#1 Air intake and exhaust space Ensure 70 mm or more of space between all air vents of the Switch and the rack pillars and side walls. (For details, see 2.10 Cooling requirements.) Cable space Ensure 100 mm of space in front of the Switch and 50 mm of space behind the Switch for the routing of cables.#2#3 #1: A rack fixture attached to a Switch supports a 19-inch cabinet rack conforming to the EIA standard. To use a 19-inch cabinet rack conforming to the JIS standard, contact an ALAXALA Networks Corporation sales representative. #2: When using the Switch in a 200 V AC environment, ensure 100 mm of space behind the Switch. #3: A rack fixture attached to a Switch is used to secure the rack pillars and the front of the Switch so that they are flat when the Switch is installed in a rack. If 100 mm of space cannot be maintained between the rack door and the front of the Switch, you 56 2. Preparation for Installation can use an optional fixture that secures the Switch so that it is recessed 50 mm from the rack pillar. For information about this separately sold fixture, see 1.11 Rack fixture. Table 2-14 Required brackets Bracket Specifications Guide rail Supplied with the rack. The width must be 56 mm or less.#1 #2 Shelf Supplied with the rack.#1 #1: Install the guide rail in the location described in 4.5 Mounting in a rack. #2: Rubber pads for the Switch are attached 56 mm inward from the side of the Switch. Use a guide rail with a width of 56 mm or less so that it does not touch the rubber pads (see Figure 2-9 Guide rail details). Figure 2-9 Guide rail details (1) Rubber pad (2) Guide rail (3) Rack pillar It is not possible for the provided rack fixture alone to support the weight of a Switch. Its purpose is merely to hold a Switch on the rack. Use the guide rails or shelves. Note that the guide rails or shelves must be supplied with the rack and must be able to bear the weight of the Switch (for which the maximum optional modules are mounted). Table 2-15 Number of required screws Purpose Number of screws For securing guide rails and shelves #1 For securing a Switch 8 Specifications Supplied with the rack. M5 or M6 screws. #1: For the number of screws used to secure a guide rail or a shelf, see the documentation supplied with your rack. 57 2. Preparation for Installation 2.9 Maintenance area Ensure a proper amount of space for Switch maintenance as described below. (1) Maintenance area for a desktop installation Figure 2-10 Maintenance area for a desktop installation (2) Maintenance area for a rack installation Figure 2-11 Maintenance area for a rack installation 58 2. Preparation for Installation 2.10 Cooling requirements 2.10.1 Airflow The following describes the airflow of the Switch. (1) AX6708S Figure 2-12 AX6708S 2.10.2 Cooling requirements for a desktop installation Ensure at least 70 mm of space for airflow on all sides of the Switch. Do not obstruct the ventilation slots of the Switch. Doing so causes heat to accumulate inside the Switch, and could result in fire. Maintain a space of at least 70 mm around the ventilation slots. NOTE When equipment with forced air cooling systems is installed near the Switch, interference due to the airflow from multiple devices can adversely affect the cooling of the Switch, which might result in a malfunction. z The exhaust airflow from nearby equipment might be drawn into the Switch, and the Switch air intake temperature might exceed the environment requirements. z When nearby equipment has too strong an intake or exhaust air system, reverse air pressure might affect the Switch airflow, decreasing the performance of internal cooling. Maintain enough space or place a partition between equipment to prevent airflow interference. Note that if a partition is installed, it must be at least 70 mm away from the side panel of the Switch. 2.10.3 Cooling requirements for a rack installation Ensure at least 70 mm of space between the Switch and all structural components of the rack, including the side walls, pillars, guide rails, and front and rear doors. 59 2. Preparation for Installation Do not obstruct the ventilation slots of the Switch. Doing so causes heat to accumulate inside the Switch, and could result in fire. Maintain a space of at least 70 mm around the ventilation slots. 60 NOTE Be sure that the temperature inside the rack is within the operating temperature specified for the Switch. Otherwise, the Switch might malfunction or fail. To bring the temperature inside the rack within the temperature requirements of the Switch, consider the following methods: z Install fans inside the rack for sufficient ventilation. z To allow good ventilation, replace the front and rear door panels with panels that have punched holes for cooling, or remove the doors. z If necessary, reduce the number of devices in the rack or mount the Switch under other equipment that emits heat. NOTE When equipment with forced air cooling systems is installed above or below the Switch, interference due to the airflow from nearby equipment can adversely affect the cooling of the Switch, which might result in a malfunction. z The exhaust airflow from nearby equipment might be drawn into the Switch, and the Switch air intake temperature might exceed the environment requirements. z Maintain enough space between equipment installed in the rack to prevent airflow interference. Maintain enough space between equipment installed in the rack to prevent airflow interference. 2. Preparation for Installation 2.11 Device noise Switches contain cooling fans that generate noise. Consider this noise when planning the layout for the installation of devices. For details about the noise emitted by the Switch, see 2.2 Installation conditions. NOTE Some examples of a layout that takes noise into account are given below. z Separate the area by using partitions or shelves to block the direct propagation of noise. z Do not install the Switch in frequently used areas (such as in offices, in meeting rooms, or on desks). z Install the Switch in a corner of the office area. z Install the Switch in a rack. z Avoid installation near windows or other objects that easily reflect sound. 61 3. Preparation of Interface Cables and Terminals This chapter describes the interface cables and the terminals used for the Switch. 3.1 List of interface cables 3.2 Details about interface cables 3.3 Terminals and connection cables 62 3. Preparation of Interface Cables and Terminals 3.1 List of interface cables This section describes the interface cables used for the Switch. The customer is responsible for obtaining these cables. Table 3-1 Interface cables Port 10/100/1000B ASE-T port 1000BASE-X port Transceiver Interface Cable -- 10BASE-T UTP cable (Category 3 or higher) -- 100BASE-TX UTP cable (Category 5 or higher) -- 1000BASE-T UTP cable (Enhanced category 5 or higher) SFP-SX 1000BASE-SX Multimode fiber optic cable (core/cladding diameter = 50 μm/125 μm) Connector RJ-45 connector LC duplex connector Multimode fiber optic cable (core/cladding diameter = 62.5 μm/125 μm) SFP-SX2 1000BASE-SX2 Multimode fiber optic cable (core/cladding diameter = 50 μm/125 μm) Multimode fiber optic cable (core/cladding diameter = 62.5 μm/125 μm) SFP-LX 1000BASE-LX Multimode fiber optic cable#1 (core/cladding diameter = 50 μm/125 μm) Multimode fiber optic cable#1 (core/cladding diameter = 62.5 μm/125 μm) Single-mode fiber optic cable (core/cladding diameter = 10 μm/125 μm) SFP-LH 1000BASE-LH Single-mode fiber optic cable (core/cladding diameter = 10 μm/125 μm) Single-mode (DSF) fiber optic cable (core/cladding diameter = 8 μm/125 μm) SFP-LHB 1000BASE-LHB Single-mode fiber optic cable (core/cladding diameter = 10 μm/125 μm) Single-mode (DSF) fiber optic cable (core/cladding diameter = 8 μm/125 μm) SFP-BX1U 1000BASE-BX1 0-U SFP-BX1D 1000BASE-BX1 0-D SFP-BX4U 1000BASE-BX4 0-U Single-mode fiber optic cable (core/cladding diameter = 10 μm/125 μm) LC simplex connector 63 3. Preparation of Interface Cables and Terminals Port Transceiver 10GBASE-R port Interface SFP-BX4D 1000BASE-BX4 0-D XFP-SR 10GBASE-SR Cable Multimode fiber optic cable (core/cladding diameter = 50 μm/125 μm) Connector LC duplex connector Multimode fiber optic cable (core/cladding diameter = 62.5 μm/125 μm) XFP-LR 10GBASE-LR XFP-ER 10GBASE-ER Single-mode fiber optic cable (core/cladding diameter = 10 μm/125 μm) XFP-ZR 10GBASE-ZR AUX port -- RS-232C RS-232C straight-through cable D-SUB 9-pin connector CONSOLE port -- RS-232C RS-232C crossover cable D-SUB 9-pin connector MANAGEMEN T port -- 10BASE-T UTP cable (Category 3 or higher) RJ-45 connector 100BASE-TX UTP cable (Category 5 or higher) #1: Some kinds of multimode fiber optic might increase the BER (bit error rate) when used with 1000BASE-LX. In this case, proper communication can be established by using the mode-conditioning patch code. 64 NOTE For details about the interface cables to be connected to the 10/100/1000BASE-T port, 1000BASE-X port, or 10GBASE-R port, see 3.2 Details about interface cables. NOTE For details about the terminals and interface cables to be connected to the AUX port, the CONSOLE port, and the MANAGEMENT port, see 3.3 Terminals and connection cables. 3. Preparation of Interface Cables and Terminals 3.2 Details about interface cables NOTE To allow for Switch maintenance, fiber optic cables should be the necessary length (3 m), and the excess cabling should be bundled near the Switch. When fiber optic cables and other interface cables are used together, be sure to avoid applying excessive stress on the fiber optic cables. NOTE Always have extra fiber optic cables ready in addition to the ones in use. 3.2.1 UTP cables (10/100/1000BASE-T) For information about UTP cables, see the following table. Table 3-2 Physical specifications for 10/100/1000BASE-T Item Category Physical specifications 10BASE-T 100BASE-TX 1000BASE-T Category 3 and higher Category 5 and higher Enhanced category 5 and higher 100 m 100 m 100 m Transmission distance (max.) NOTE The 10BASE-T, 100BASE-TX, or 1000BASE-T port on a Switch supports Auto MDI/MDI-X functionality. If the Auto MDI/MDI-X functionality is enabled, either a straight-through cable or a crossover cable can be connected, regardless of the connection target. NOTE The Auto MDI/MDI-X functionality is enabled only when auto-negotiation is specified for a 10/100/1000BASE-T port. The factory default setting is auto-negotiation. NOTE If the Auto MDI/MDI-X functionality is disabled, the 10/100/1000BASE-T port of the Switch is fixed to MDI-X. Use a straight-through cable if the port at the connection target is MDI, and use a crossover cable if the port is MDI-X. For information about the pin configuration of the 10/100/1000BASE-T port when the Auto MDI/MDI-X functionality is disabled, see the following table. Table 3-3 Pin configuration of the 10/100/1000BASE-T port RJ45 Pin number Physical specifications 10BASE-T 100BASE-TX 1000BASE-T 1 Receive (+) (A) Receive (+) (A) Send/receive A (+) (A) 2 Receive (-) (a) Receive (-) (a) Send/receive A (-) (a) 3 Send (+) (B) Send (+) (B) Send/receive (+) (B) 4 Not used#1 (C) Not used#1 (C) Send/receive C (+) (C) 65 3. Preparation of Interface Cables and Terminals RJ45 Pin number Physical specifications 10BASE-T #1 100BASE-TX #1 1000BASE-T 5 Not used (c) Not used (c) Send/receive C (-) 6 Send (-) (b) Send (-) (b) Send/receive (-) (b) 7 Not used#1 (D) Not used#1 (D) Send/receive D (+) (D) 8 #1 (d) #1 (d) Send/receive D (-) (d) Not used Not used (c) #1: Connect to the pin if you are using a 4-pair, 8-core cable. #2: Twisted pair line. Use (A) and (a), (B) and (b), (C) and (c), (D) and (d) in pairs for a 4-pair, 8-core cable. Use (A) and (a) and (B) and (b) in pairs for a 2-pair, 4-core cable. 3.2.2 Fiber optic cables (1000BASE-X) For details about the fiber optic cables used for 1000BASE-SX, 1000BASE-SX2, 1000BASE-LX, 1000BASE-LH, 1000BASE-LHB, and 1000BASE-BX, see the following tables. Table 3-4 Physical specifications for 1000BASE-SX Item Physical specifications Cable type Core/cladding diameter Transmission band Multi-mode 50 μm/125 μm 400 MHz x km 62.5 μm/125 μm 500 MHz x km 160 MHz x km 0.770 to 0.860 μm Center emission wavelength Optical transmission power (mean) -9.5 to 0 dBm Optical reception power (mean) -17.0 to 0 dBm Optical transmission loss (max) Transmission distance 200 MHz x km 7.5 dB 2 to 500 m 2 to 550 m 2 to 220 m 2 to 275 m Table 3-5 Physical specifications for 1000BASE-SX2 Item Physical specifications Cable type Multi-mode Core/cladding diameter 50 μm/125 μm 62.5 μm/125 μm Transmission band 500 MHz x km 500 MHz x km 1.270 to 1.355 μm Center emission wavelength Optical transmission power (mean) -9.0 to -3.0 dBm Optical reception power (mean) -19.0 to -3.0 dBm Optical transmission loss (max) Transmission distance 66 10.0 dB 2 m to 2 km 2 m to 1 km#1 3. Preparation of Interface Cables and Terminals #1: The transmission distance can be increased by using the mode conditioning patch code. However, the maximum distance for transmission is 2 km, and that distance depends on transmission loss. For 2 km transmission, the transmission loss must be no more than 10 dB. Table 3-6 Physical specifications for 1000BASE-LX Item Physical specifications Multi-mode#1 Cable type 50 μm/125 μm Core/cladding diameter Transmission band 400 MHz x km Center emission wavelength Optical transmission power (mean) Optical reception power (mean) Optical transmission loss (max) Transmission distance Single-mode 62.5 μm/125 μm 10 μm/125 μm 500 MHz x km -- 500 MHz x km 1.270 to 1.355 μm -11.5 to -3.0 dBm -11.0 to -3.0 dBm -19.0 to -3.0 dBm 7.5 dB 8.0 dB 2 to 550 m 2 m to 5 km #1: Some kinds of multimode fiber optic might increase the BER (bit error rate) when used with 1000BASE-LX. In this case, proper communication can be established by using the mode-conditioning patch code. Table 3-7 Physical specifications for 1000BASE-LH Item Cable type Core/cladding diameter Physical specifications Single-mode Single-mode (DSF) 10 μm/125 μm 8 μm/125 μm 1.540 to 1.570 μm Center emission wavelength Optical transmission power (mean) 0 to +5.0 dBm Optical reception power (mean) -22.0 to 0 dBm Optical transmission loss (max) 22.0 dB Transmission distance #1 2 m to 70 km #1: When optical transmission loss is 5.0 dB or less, use an optical attenuator to adjust the loss. Table 3-8 Physical specifications for 1000BASE-LHB Item Cable type Core/cladding diameter Physical specifications Single-mode Single-mode (DSF) 10 μm/125 μm 8 μm/125 μm Center emission wavelength 1.480 to 1.580 μm Optical transmission power (mean) +2.0 to +7.0 dBm Optical reception power (mean) -34.0 to -9.0 dBm 67 3. Preparation of Interface Cables and Terminals Item Physical specifications Optical transmission loss (max) 36.0 dB #1 2 m to 100 km#2 Transmission distance 2 m to 100 km #1: When optical transmission loss is 16.0 dB or less, use an optical attenuator to adjust the loss. #2: For transmission over a 100 km distance, use a fiber optic with dispersion of 20 ps/nm/km or less. Table 3-9 Physical specifications for 1000BASE-BX Item Physical specifications 1000BASE-BX10U#1 Interface 1000BASE-BX1 0-D#1 Cable type 1000BASE-BX40-U #2 1000BASE-BX40D#2 Single-mode 10 μm/125 μm Core/cladding diameter Center emission wavelength 1.260 to 1.360 μm 1.480 to 1.500 μm 1.260 to 1.360 μm 1.480 to 1.500 μm Receiving wavelength 1.480 to 1.500 μm 1.260 to 1.360 μm 1.480 to 1.500 μm 1.260 to 1.360 μm Optical transmission power (mean) -9.0 to -3.0 dBm -3.0 to 3.0 dBm Optical reception power (mean) -19.5 to -3.0 dBm -23.0 to -3.0 dBm 10.0 dB 20.0 dB#3 0.5 m to 10 km 0.5 m to 40 km Optical transmission loss (max) Transmission distance #1: 1000BASE-BX10-U and 1000BASE-BX10-D are used in pairs. #2: 1000BASE-BX40-U and 1000BASE-BX40-D are used in pairs. #3: When optical transmission loss is 6.0 dB or less, use an optical attenuator to adjust the loss. 3.2.3 Fiber optic cables (10GBASE-R) For details about the fiber optic cables used for 10GBASE-SR, 10GBASE-LR, 10GBASE-ER, and 10GBASE-ZR, see the following tables. Table 3-10 Physical specifications for 10GBASE-SR Item Physical specifications Cable type Multi-mode 50 μm/125 μm Core/cladding diameter Transmission band Center emission wavelength Optical transmission power (mean) 68 400 MHz x km 500 MHz x km 62.5 μm/125 μm 2,000 MHz x km 0.840 to 0.860 μm -7.3 to -1.0 dBm 160 MHz x km 200 MHz x km 3. Preparation of Interface Cables and Terminals Item Physical specifications Optical reception power (mean) -9.9 to -1.0 dBm Optical transmission loss (max) Transmission distance 2.6 dB 2 m to 66 m 2 m to 82 m 2 m to 300 m 2 m to 26 m 2 m to 33 m Table 3-11 Physical specifications for 10GBASE-LR Item Cable type Physical specifications Single-mode Core/cladding diameter Center emission wavelength 10 μm/125 μm 1.260 to 1.355 μm Optical transmission power (mean) -8.2 to +0.5 dBm Optical reception power (mean) -14.4 to +0.5 dBm Optical transmission loss (max) 6.2 dB Transmission distance 2 m to 10 km Table 3-12 Physical specifications for 10GBASE-ER Item Cable type Physical specifications Single-mode Core/cladding diameter Center emission wavelength 10 μm/125 μm 1.530 to 1.565 μm Optical transmission power (mean) -4.7 to +4.0 dBm Optical reception power (mean) -15.8 to -1.0 dBm Optical transmission loss (max) 11.1 dB#1 Transmission distance 2 m to 40 km #1: When optical transmission loss is 5 dB or less, use an optical attenuator to adjust the loss. Table 3-13 Physical specifications for 10GBASE-ZR Item Cable type Physical specifications Single-mode Core/cladding diameter 10 μm/125 μm Center emission wavelength 1.530 to 1.565 μm Optical transmission power (mean) +0.5 to +4.0 dBm Optical reception power (mean) -24.0 to -7.0 dBm Optical transmission loss (max) 24.5 dB#1 Transmission distance 2 m to 80 km #1: When optical transmission loss is 15 dB or less, use an optical attenuator to adjust the loss. 69 3. Preparation of Interface Cables and Terminals 3.3 Terminals and connection cables 3.3.1 When connecting an operation terminal to the CONSOLE port (1) Operation terminal To connect an operation terminal to the CONSOLE port of the Switch, prepare a personal computer or a workstation that meets the specifications in the following table. Table 3-14 Operation terminal (when connecting to the CONSOLE port) Item Specifications Communication port RS-232C port Communication software Tera Term Pro (Version 2.3) or communication software that meets the communication settings below. Communicatio n settings Communication parameters 8 bits, 1 stop bit, no parity Communication speed#1 19,200 bps, 9,600 bps, 4,800 bps, 2,400 bps, 1,200 bps #1: The communication speed of the Switch is set to 9,600 bps when shipped from the factory. (2) RS-232C crossover cable To connect an operation terminal to the CONSOLE port of the Switch, use a RS-232C cross over cable with a 9-pin (female) connector on both ends and use #4-40 inch-screws. The following figure shows the pin arrangement of an RS-232C cross over cable. Figure 3-1 Connection cable for the operation terminal 3.3.2 When connecting an operation terminal to the MANAGEMENT port (1) Operation terminal To connect an operation terminal to the MANAGEMENT port of the Switch, prepare a personal computer or a workstation that meets the specifications in the following table. 70 3. Preparation of Interface Cables and Terminals Table 3-15 Operation terminal (when connecting to the MANAGEMENT port) Item Specifications Communication port 10BASE-T/100BASE-TX port Communication software Tera Term Pro (Version 2.3) or another Telnet client Communication procedure Telnet, FTP FTP client#1 #1: Used for transferring software and dump files. (2) UTP cable (10BASE-T/100BASE-TX) To connect an operation terminal to the MANAGEMENT port of the Switch, prepare a UTP cable that supports the specifications in Table 3-16 Physical specifications of the MANAGEMENT port below. Table 3-16 Physical specifications of the MANAGEMENT port Item Physical specifications Category 10BASE-T 100BASE-TX Category 3 and higher Category 5 and higher 100 m 100 m Transmission distance (max.) NOTE The MANAGEMENT port of the Switch supports the Auto MDI/MDI-X functionality. If the Auto MDI/MDI-X functionality is enabled, either a straight-through cable or a crossover cable can be connected, regardless of the connection target. NOTE The Auto MDI/MDI-X functionality is enabled only when auto-negotiation is specified for the MANAGEMENT port. The factory default setting is auto-negotiation. NOTE When the Auto MDI/MDI-X functionality is disabled, the MANAGEMENT port of the Switch is fixed to MDI. Use a crossover cable if the port at the connection target is MDI, and use a straight-through cable if the port is MDI-X. For information about the pin configuration of the MANAGEMENT port when the Auto MDI/MDI-X functionality is disabled, see the following table. Table 3-17 Pin arrangement of the MANAGEMENT port RJ 45 pin number Physical specifications 10BASE-T 100BASE-TX 1 Send (+) (A) Send (+) (A) 2 Send (-) (a) Send (-) (a) 3 Receive (+) (B) Receive (+) #1 #1 (B) 4 Not used (C) Not used (C) 5 Not used#1 (c) Not used#1 (c) 6 Receive (-) (b) Receive (-) (b) 7 #1 (D) #1 (D) Not used Not used 71 3. Preparation of Interface Cables and Terminals RJ 45 pin number 8 Physical specifications 10BASE-T #1 Not used (d) 100BASE-TX #1 Not used (d) #1: Connect to the pin if you are using a 4-pair, 8-core cable. #2: Twisted pair line. Use (A) and (a), (B) and (b), (C) and (c), (D) and (d) in pairs for a 4-pair, 8-core cable. Use (A) and (a) and (B) and (b) in pairs for a 2-pair, 4-core cable. 3.3.3 Connecting a modem to the AUX port To connect a modem to the AUX port of the Switch, use an RS-232C straight-through cable with a 9-pin (female) D-SUB connector and a 25-pin (male) D-SUB connector, and use #4-40 inch screws. The following figure shows the pin arrangement of an RS-232C straight-through cable. Figure 3-2 Modem connection cable 72 3. Preparation of Interface Cables and Terminals 73 4. Installing a Switch This chapter describes the procedure for installing a Switch. 4.1 Required tools 4.2 Read prior to operation 4.3 Installing a Switch on a desktop 4.4 Replacing the rack fixture 4.5 Mounting in a rack 4.6 Connecting and disconnecting the power cable 4.7 Attaching a wrist strap 4.8 Inserting and removing memory cards 4.9 Inserting and removing SFP transceivers 4.10 Inserting and Removing XFP transceivers 4.11 Connecting operation terminals 4.12 Connecting interface cables 4.13 Turning the Switch on and off 4.14 Other operations 74 4. Installing a Switch 4.1 Required tools The following tools are necessary to install a Switch: No. 2 Phillips screwdriver Required when using M5 screws to replace a rack fixture or mount a Switch on a rack. This screwdriver is also required when connecting or disconnecting a DC power cable. No. 3 Phillips screwdriver Required when using M6 screws to mount a Switch on a rack. This screwdriver is also required when connecting or disconnecting a DC power cable. Antistatic wrist strap Used to protect the equipment from electrostatic discharge. Hand lifter: Used to install a Switch. 75 4. Installing a Switch 4.2 Read prior to operation When installing the Switch on a table, position the Switch horizontally on a worktable strong enough to bear the weight of the Switch. Placing the Switch in an unstable location, such as on an unsteady or tilting surface, might cause the Switch to fall, resulting in injury. Do not obstruct the ventilation slots of the Switch. Doing so causes heat to accumulate inside the Switch, and could result in fire. Maintain a space of at least 70 mm around the ventilation slots. Do not place any objects on the Switch. Doing so might damage the Switch. Furthermore, the Switch might fall, or become unbalanced, resulting in injury. 76 CAUTION Be sure to wear an antistatic wrist strap. If you handle the Switch without wearing an antistatic wrist strap, the Switch might be damaged by static electricity. NOTE Place the Switch where the LEDs can be easily seen. NOTE Route the cables through ducts or cover them for protection. Fiber optic cables require special handling; lay the cables with a bend radius of 100 mm or more along the major axis and 50 mm or more along the minor axis, and protect them with metal covers. NOTE To allow for Switch maintenance, fiber optic cables should be the necessary length (3 m), and the excess cabling should be bundled near the Switch. When fiber optic cables and other interface cables are used together, be sure to avoid applying excessive stress on the fiber optic cables. 4. Installing a Switch 4.3 Installing a Switch on a desktop A Switch can be placed on a stable, flat surface. Rubber pads are attached to the bottom of the Switch when it is shipped from the factory. When installing a Switch on a desktop, do so without removing the rubber pads. When installing the Switch, hold it by the bottom and the handles. Figure 4-1 Installing a Switch on a desktop (1) Handles When installing the Switch on a table, position the Switch horizontally on a worktable strong enough to bear the weight of the Switch. Placing the Switch in an unstable location, such as on an unsteady or tilting surface, might cause the Switch to fall, resulting in injury. The maximum weight of the AX6708S is 82 kg. The AX6708S must be placed and carried by trained persons or by a professional carrier. If a person other than the above does these operations, the AX6708S might fall, resulting in injury. When placing and carrying the AX6708S, use a handling device such as a hand lifter. If you carry the AX6708S without using a handling device, the AX6708S might fall, resulting in injury. When moving a Switch, do not hold the handle of the fan unit or power supply unit. The handle might come off, resulting in the Switch falling and possibly causing injury. Also, the fan unit or power supply unit might become deformed, resulting in fire or electric shock. 77 4. Installing a Switch 4.4 Replacing the rack fixture A rack fixture attached to a Switch is used to secure the rack pillars and the front of the Switch so that they are flat when the Switch is installed in a rack. If you purchased an optional fixture, which secures the Switch so that it is recessed 50 mm, use the following procedure to replace the rack fixture. 4.4.1 AX6708S Step 1 Remove the rack fixture that was attached to the Switch when it was shipped from the factory. Figure 4-2 Removing the rack fixture (1) Left: L (2) Right: R (3) Screws NOTE 78 Make sure you keep the rack fixture and screws you remove. 4. Installing a Switch Step 2 Attach the optional rack fixture. Figure 4-3 Attaching the rack fixture (1) Left: L (2) Right: R (3) Screws NOTE Use the screws supplied with the optional rack fixture to secure it to the Switch. 79 4. Installing a Switch 4.5 Mounting in a rack The Switch can be mounted in to a 19-inch cabinet rack that conforms to the EIA standard. The procedure for mounting in a rack is described below. It is not possible for the provided rack fixture alone to support the weight of a Switch. Its purpose is merely to hold a Switch on the rack. Use the guide rails or shelves. You must use the guide rails and shelves provided with the rack, and these must be able to support the weight of a Switch (with the maximum number of optional modules installed). NOTE Use a rack facility that satisfies the conditions described in 2.8 Installation location (2) 19-inch cabinet rack. 4.5.1 AX6708S Step 1 Attach a guide rail or a shelf to the rack. For the installation location of the guide rail, see Figure 4-5 Installation location of the guide rail. Figure 4-4 Installing a guide rail (1) Guide rail 80 4. Installing a Switch Figure 4-5 Installation location of the guide rail (1) Rubber pad (2) Guide rail (3) Rack pillar NOTE Dotted lines (- - -) in the Figure indicate the boundary between units (U). When attaching a guide rail, align the top of the guide rail with the boundary (U). NOTE Rubber pads are attached to the bottom of a Switch when it is shipped from the factory. The height of a rubber pad is 0.7 mm. When using a shelf, adjust it so that it is 0.7 mm below the boundary (U). 81 4. Installing a Switch Step 2 Mount the Switch on the guide rails or the shelf. Hold the bottom and the handles of the Switch when mounting the Switch. Figure 4-6 Mounting a Switch on the rack (1) Handles (2) Rack (3) Guide rail The maximum weight of the AX6708S is 82 kg. The AX6708S must be placed and carried by trained persons or by a professional carrier. If a person other than the above does these operations, the AX6708S might fall, resulting in injury. When placing and carrying the AX6708S, use a handling device such as a hand lifter. If you carry the AX6708S without using a handling device, the AX6708S might fall, resulting in injury. When moving a Switch, do not hold the handle of the fan unit or power supply unit. The handle might come off, resulting in the Switch falling and possibly causing injury. Also, the fan unit or power supply unit might become deformed, resulting in fire or electric shock. 82 4. Installing a Switch Step 3 Secure the Switch to the rack. Figure 4-7 Mounting a Switch on the rack (1) Screws (M5 or M6 x 4) NOTE To secure a Switch to the rack, use the M5 or M6 screws supplied with the rack. 83 4. Installing a Switch 4.6 Connecting and disconnecting the power cable 4.6.1 Replacing the bracket preventing disconnection of the power cable (when a 200 V AC power cable is used) The bracket attached when a Switch is shipped from the factory supports only the supplied power cable. To connect the optional 200 V AC power cable to a Switch, use the bracket supplied with the power cable. NOTE If you have obtained your own 200 V AC power cable, do not use the bracket. (1) Removing the bracket preventing disconnection of the power cable Pull the bracket outward from support B to remove it, and then pull the support A side. Figure 4-8 Removing the bracket (1) Bracket preventing disconnection of the power cable (2) Support A (3) Support B NOTE 84 Keep the removed bracket with the power cable. 4. Installing a Switch (2) Attaching the bracket Insert the bracket into support A, and then pull the bracket of the other side away from support B and insert it. Figure 4-9 Attaching the bracket (1) Bracket preventing disconnection of the power cable (2) Support A (3) Support B 85 4. Installing a Switch 4.6.2 Connecting and disconnecting the AC power cable (1) Connecting the AC power cable NOTE The figure below shows an example of connecting the 100 V AC power cable supplied with a Switch. Use the same procedure to connect a 200 V AC power cable. Step 1 Connect a power cable to the power connector. Figure 4-10 Connecting the power cable (1) Power cable When using a Switch at 100 V AC, always use a grounded power outlet. Using the Switch without grounding could result in electric shock or failures due to electrical noise. When using a Switch at 100 V AC, use the supplied power cable. Using another cable could result in fire or electric shock. In addition, do not use the supplied power cable with another switch. Doing so could result in fire or electric shock. When using the Switch at 200 V AC, you must use a grounded power outlet, and make sure that the power outlet is grounded to the grounding board of the building. To do this, ask maintenance personnel or a professional electrician. Using the Switch without grounding could result in electric shock or failure due to electrical noise. 86 4. Installing a Switch When using a Switch in a 200 V AC environment, use only the separately sold ALAXALA power cable, or a power cable that meets ALAXALA specifications. Using another cable could result in fire or electric shock. In addition, do not use the supplied power cable with another switch. Doing so could result in fire or electric shock. CAUTION Before connecting or disconnecting a power cable, turn off the power to the device to be installed or removed. NOTE For the specifications defined by ALAXALA for power cables, see 2.4.2 Power supply facility for 200 V AC. Step 2 Clamp the power connector with the bracket. Figure 4-11 Clamping the power connecter (1) Bracket preventing disconnection of the power cable NOTE If the bracket is removed, do not perform this step. Step 3 Clamp the power cable by using the cable clamp. Figure 4-12 Clamping the power cable (1) Cable clamp (2) Disconnecting the AC power cable Reverse the steps described in (1) Connecting the AC power cable to disconnect the power cable. CAUTION To disconnect the power cable, set the switch of the power supply unit to be removed to OFF. 87 4. Installing a Switch 4.6.3 Connecting and disconnecting the DC power cable (1) Connecting the DC power cable Use the specified DC power cable. Using another cable could result in fire or electric shock. Connecting and disconnecting a DC power cable must be performed by a trained technician or maintenance personnel. The DC power cable is connected to the terminal board. For this reason, incorrect handling of the DC power cable could result in fire or electric shock. Make sure the circuit breaker of the power supply facility is set to OFF before connecting or disconnecting the DC power cable. Connecting or disconnecting the cable with the circuit breaker of the power supply facility set to ON could result in fire or electric shock. NOTE For the specifications defined by ALAXALA for power cables, see 2.4.3 Power supply facility for −48 V DC. Step 1 Remove the terminal board cover. Figure 4-13 Removing the terminal board cover (1) Power supply unit (2) Terminal board cover (3) Screw (M3) 88 4. Installing a Switch Step 2 Remove the terminal board cover from the terminal board. Figure 4-14 Removing the terminal cover (1) Terminal cover Step 3 Remove the 0 V terminal, −48 V terminal, and ground terminal screws. Figure 4-15 Removing the screws (1) 0V terminal (2) −48 V terminal (3) Ground terminal (4) Screws (M6) NOTE If a two-hole type bracket (shown in the following figure) is used for the ground terminal, remove both screws of the ground terminal. Step 4 Loosen the cable clamp screws. 89 4. Installing a Switch Figure 4-16 Releasing the cable clamp (1) Cable clamp (2) Screws (M5) Step 5 Pass the DC power cable through the cable clamp, and then tighten the screws of the ground terminals. Figure 4-17 Securing the ground terminals (1) DC power cable (2) Cable clamp (3) Ground terminal (4) Screws (M6) If you use a DC power supply, always connect the ground terminals. Using the Switch without grounding could result in electric shock or failures due to electrical noise. NOTE 90 If a two-hole type bracket (shown in the figure below) is used for the ground terminal, use two screws to secure the ground terminal. 4. Installing a Switch Step 6 Tighten the 0 V terminal and −48 V terminal screws in that order. Figure 4-18 Securing the 0 V terminal and the −48 V terminal (1) 0V terminal (2) −48 V terminal (3) Screws (M6) Step 7 Secure the DC power cable with the cable clamp. (Tighten the cable clamp screws.) Figure 4-19 Securing the DC power cable (1) Cable clamp (2) Screws (M5) Step 8 Attach the terminal cover. 91 4. Installing a Switch Figure 4-20 Attaching the terminal cover (1) Terminal cover Step 9 Attach the terminal board cover. Figure 4-21 Attaching the terminal board cover (1) Terminal board cover (2) Screw (M3) 92 4. Installing a Switch After connecting the DC power cable, attach the terminal board cover. Using the power supply unit without the cover could result in electric shock. (2) Disconnecting the DC power cable Reverse the steps described in (1) Connecting the DC power cable to remove the power cable. Connecting and disconnecting a DC power cable must be performed by a trained technician or maintenance personnel. The DC power cable is connected to the terminal board. For this reason, incorrect handling of the DC power cable could result in fire or electric shock. Make sure the circuit breaker of the power supply facility is set to OFF before connecting or disconnecting the DC power cable. Connecting or disconnecting the cable with the circuit breaker of the power supply facility set to ON could result in fire or electric shock. 93 4. Installing a Switch 4.7 Attaching a wrist strap A Switch has a terminal for an antistatic wrist strap. The terminal supports 4 mm banana plugs. Use a 4 mm banana plug for the wrist strap terminal. Figure 4-22 Location of the wrist strap terminal (1) Wrist strap terminal 94 4. Installing a Switch 4.8 Inserting and removing memory cards To use a memory card, insert it in the basic control unit. CAUTION Remove the memory card before moving the Switch. If a card is subjected to excessive force when the Switch is moved, the connector of the memory card slot might be damaged. (1) Inserting a memory card Insert a memory card into the slot until you hear a click, and then remove your fingers slowly. (Hold the memory card with the cut-off corner to the right.) Figure 4-23 Inserting a memory card (1) Memory card (2) Memory card slot CAUTION When inserting a memory card, do not push the card too strongly or flick it with your finger. Doing so might damage the connector of the memory card slot. NOTE To prevent deleting or writing of data, slide the protection switch to the Lock position before inserting it. NOTE If the memory card slot is dusty, clean the slot with a dry cloth before inserting a memory card. (2) Removing a memory card Step 1 Make sure the ACC LED is off (the memory card is not being accessed). 95 4. Installing a Switch Figure 4-24 Checking the ACC LED CAUTION If the ACC LED is lit, the memory card is being accessed. While a memory card is being accessed, do not remove the memory card or turn off the power. Doing so might damage the memory card. In addition, some commands require a certain amount of time after being entered to finish accessing the card. Make sure that the memory card is no longer being accessed before removing the card or turning off the power. Step 2 Push the memory card in until you hear a click (the memory card is ejected slightly). Figure 4-25 Ejecting a memory card (1) Memory card Step 3 Remove the memory card. 96 4. Installing a Switch Figure 4-26 Removing a memory card CAUTION When removing a memory card, do not forcibly pull out the card if it is locked. Doing so might damage the connector of the memory card slot. 97 4. Installing a Switch 4.9 Inserting and removing SFP transceivers SFP transceivers with a network interface unit attached can be inserted and removed while the Switch is on. (1) Inserting an SFP transceiver Keep the lever upright as shown in the figure, and insert the SFP transceiver until you hear a click. Figure 4-27 Inserting an SFP transceiver (upper port) (1) SFP transceiver (2) Lever (3) Ethernet port NOTE The above figure shows an example for inserting an SFP transceiver in the upper Ethernet port of the network interface unit. If you want to insert an SFP transceiver in the lower Ethernet port, turn the SFP transceiver upside down and install it as shown in the figure below. Figure 4-28 Inserting an SFP transceiver (lower port) 98 4. Installing a Switch (1) Lever (2) SFP transceiver (3) Ethernet port (2) Removing an SFP transceiver Press the lever down in the direction of the arrow. While holding down the lever, pull out the SFP transceiver. Figure 4-29 Removing an SFP transceiver (1) Lever (2) SFP transceiver 99 4. Installing a Switch 4.10 Inserting and removing XFP transceivers XFP transceivers with a network interface unit attached can be inserted and removed while the Switch is on. NOTE The following procedures describe how to insert and remove a type-A module. The same procedures apply to a type-B module. (1) Installing an XFP transceiver Keep the lever upright as shown in the figure, and insert the XFP transceiver until you hear a click. Figure 4-30 XFP transceiver (1) XFP transceiver (2) Lever (3) Ethernet port (2) Removing an XFP transceiver Press the lever down in the direction of the arrow. While holding down the lever, pull out the XFP transceiver. Figure 4-31 Removing an XFP transceiver (1) Lever 100 4. Installing a Switch 4.11 Connecting operation terminals Connect an operation terminal to the CONSOLE port of the Switch. To do so, use an RS-232C crossover cable with 9-pin (female) D-sub connectors on both ends, and use #4-40 screws. Figure 4-32 Connecting the operation terminal (1) RS-232C cable (2) Operation terminal Step 1 Connect the RS-232C cable to the CONSOLE port of the Switch. Figure 4-33 Connecting the RS-232C cable 101 4. Installing a Switch (1) CONSOLE port (2) RS-232C cable NOTE After the cable is connected to the port, tighten the screws. Also make sure the cable is firmly connected. Step 2 In the same way, connect the RS-232C cable to the operation terminal. 102 4. Installing a Switch 4.12 Connecting interface cables (1) UTP cable Push the connector until you hear a click. Figure 4-34 Connecting a UTP cable (1) UTP cable (2) Tab (3) Ethernet port NOTE To detach the cable, hold the tab down and pull out the connector. (2) Fiber optic cable (LC duplex connector) Push the connector until you hear a click. Figure 4-35 Fiber optic cable (LC duplex connector) (1) Fiber optic cable (LC duplex connector) (2) Tab (3) Transceiver NOTE To detach the cable, hold the tab down and pull out the connector. 103 4. Installing a Switch NOTE For details about cleaning optical connectors, see A Cleaning Optical Connectors. (3) Fiber optic cable (LC simplex connector) Push the connector until you hear a click. Figure 4-36 Fiber optic cable (LC simplex connector) (1) Fiber optic cable (LC simplex connector) (2) Tab (3) Transceiver 104 NOTE To detach the cable, hold the tab down and pull out the connector. NOTE For details about cleaning optical connectors, see A Cleaning Optical Connectors. 4. Installing a Switch 4.13 Turning the Switch on and off 4.13.1 AX6708S (AC power supply unit installed) (1) Turning the Switch on Step 1 Make sure the power supply unit is installed correctly. Figure 4-37 Checking the installation location of the power supply unit (1) Slot number (2) Power supply unit NOTE If you do not want a redundant power supply, install power supply units in PS1 to PS4. For a redundant power supply, install power supply units in all slots from PS1 to PS8. NOTE The slot number of a power supply unit is located on the Switch. You can find the number at the bottom left of each power supply unit. Step 2 Set all the circuit breakers of the Switch to ON. 105 4. Installing a Switch Figure 4-38 Turning on the power (1) Power switch NOTE Set all power switches to ON within five seconds of turning the first switch on. If you take longer than five seconds, the basic control unit detects a power failure, and the failure information is displayed on the LCD. If this happens, take action as described in the following table. Display on the LCD Action E8 PS Msg=00000001 The Switch is ready. Set all power switches to ON. (When the power failure is resolved, the display on the LCD disappears.) [MD] FAULT 2200 220000aa00bb The Switch is unable to start operation because the power supply capacity is insufficient. Set all power switches to OFF, and then set them to ON again. The values for <aa> and <bb> above vary depending on the installation status of the power supply unit and the status of the power supply. NOTE 106 When you set the power switch to OFF and then ON again, wait at least two seconds between the OFF and ON operations. 4. Installing a Switch (2) Turning off the power Step 1 Make sure the software is not being updated (the ppupdate command is not being executed) and the memory card is not being accessed. Figure 4-39 Checking the LED (1) Basic control unit (2) STATUS LED (3) ACC LED CAUTION When the ppupdate command is executed, the Switch restarts automatically. Do not turn off the Switch until it is restarted (until the STATUS LED on the basic control unit changes from blinking green to constant green). Failure to do so could result in a Switch failure. CAUTION If the ACC LED is lit, the memory card is being accessed. While a memory card is being accessed, do not remove the memory card or turn off the power. Doing so might damage the memory card. In addition, some commands require a certain amount of time after being entered to finish accessing the card. Make sure that the memory card is no longer being accessed before removing the card or turning off the power. Step 2 Set all power switches on the Switch to OFF. 107 4. Installing a Switch Figure 4-40 Turning off the power (1) Power switch A Switch has multiple input power supplies. Before turning off the power, set all power switches of the Switch to OFF. 4.13.2 AX6708S (DC power supply unit installed) (1) Turning the Switch on Step 1 Make sure the power supply unit is installed correctly. 108 4. Installing a Switch Figure 4-41 Checking the installation location of the power supply unit (1) Power supply unit (2) Slot number NOTE If you do not want a redundant power supply, install the power supply unit in PS1 and PS2. For a redundant power supply, install power supply units in all slots from PS1 to PS4. NOTE The slot number of a power supply unit is located on the Switch. You can find the number at the bottom right of each power supply unit. Step 2 Set all the circuit breakers of the Switch to ON. 109 4. Installing a Switch Figure 4-42 Turning on the power (1) Circuit breaker NOTE Set all power switches to ON within five seconds of turning the first switch on. If you take longer than five seconds, the basic control unit detects a power failure, and the failure information is displayed on the LCD. If this happens, take action as described in the following table. Display on the LCD Action E8 PS Msg=00000001 The Switch is ready. Set all circuit breakers to ON. (When the power failure is resolved, the display on the LCD disappears.) [MD] FAULT 2200 220000aa00bb The Switch is unable to start operation because the power supply capacity is insufficient. Set all circuit breakers to OFF, and then set them to ON again. The values for <aa> and <bb> above vary depending on the installation status of the power supply unit and the status of the power supply. NOTE 110 When you set the circuit breaker to OFF and then ON again, wait at least two seconds between the OFF and ON operations. 4. Installing a Switch (2) Turning off the power Step 1 Make sure the software is not being updated (the ppupdate command is not being executed) and the memory card is not being accessed. Figure 4-43 Checking the LED (1) Basic control unit (2) STATUS LED (3) ACC LED CAUTION When the ppupdate command is executed, the Switch restarts automatically. Do not turn off the Switch until it is restarted (until the STATUS LED on the basic control unit changes from blinking green to constant green). Failure to do so could result in a Switch failure. CAUTION If the ACC LED is lit, the memory card is being accessed. While a memory card is being accessed, do not remove the memory card or turn off the power. Doing so might damage the memory card. In addition, some commands require a certain amount of time after being entered to finish accessing the card. Make sure that the memory card is no longer being accessed before removing the card or turning off the power. Step 2 Set all power switches of the Switch to ON. 111 4. Installing a Switch Figure 4-44 Turning off the power (1) Circuit breaker A Switch has multiple input power supplies. Before turning off the power, set all circuit breakers of the Switch to OFF. 112 4. Installing a Switch 4.14 Other operations (1) Operation management and configuration settings For details about the operation management and configuration settings, see the following manuals, as appropriate. (The number in the parentheses is the manual number.) z z z Manuals for operation management and configuration settings: Software Manual Configuration Guide Vol. 1 (AX63S-S001) Software Manual Configuration Guide Vol. 2 (AX63S-S002) Software Manual Configuration Guide Vol. 3 (AX63S-S003) Manuals for detailed configuration commands: Software Manual Configuration Command Reference Vol. 1 (AX63S-S004) Software Manual Configuration Command Reference Vol. 2 (AX63S-S005) Manuals for detailed operation commands: Software Manual Operation Command Reference Vol. 1 (AX63S-S006) Software Manual Operation Command Reference Vol. 2 (AX63S-S007) NOTE After setting a configuration, back up the operation information to simplify restoration if a failure occurs or if a basic control unit is replaced. For details about backup operations, see 11 Switch Management in the Software Manual Configuration Guide Vol. 1. (2) System interoperation test Before actual system operation, conduct a test to check the configuration settings. (3) Troubleshooting See the following manual for corrective actions to problems. (The number in the parentheses is the manual number. z Troubleshooting Guide (AX36S-T001) NOTE The Troubleshooting Guide is common to the AX2400S, AX3600S, AX6300S, AX6600S, and AX6700S series. 113 5. Adding and Replacing Optional Modules This chapter describes how to add and replace a fan unit, power supply unit, basic control unit, basic switching unit, and network interface unit. 5.1 Required tools 5.2 Read prior to operation 5.3 Replacing a fan unit 5.4 Adding or replacing a power supply unit 5.5 Adding or replacing a basic control unit 5.6 Adding or replacing a basic switching unit 5.7 Adding or replacing a network interface unit 114 5. Adding and Replacing Optional Modules 5.1 Required tools The following tools are necessary to add, replace, or remove devices: No. 1 Phillips screwdriver Used to install or remove an optional module. No. 2 Phillips screwdriver Used to connect or disconnect a DC power cable. No. 3 Phillips screwdriver Used to connect or disconnect a DC power cable. Antistatic wrist strap Used to protect the equipment from electrostatic discharge. 115 5. Adding and Replacing Optional Modules 5.2 Read prior to operation Adding or replacing optional modules must be performed by a trained technician or maintenance personnel. Adding or replacing a power supply unit requires connecting or disconnecting the power cable. If an untrained person performs the operation and mishandles the power cable, fire or electric shock could result. Also, mishandling other optional modules could result in injury or damage. Handle an optional module carefully so that you do not drop it. Dropping it could result in injury. Do not carelessly put your hands inside the Switch. The frame and components might cause injury. The components in a basic control unit and a network interface unit might be very hot. Do not touch any components with your hands. Doing so could result in burns. 116 CAUTION Be sure to wear an antistatic wrist strap. If you handle the Switch without wearing an antistatic wrist strap, the Switch might be damaged by static electricity. CAUTION Do not touch any components or soldered surfaces of an optional module with your hands. Also, when storing it, use an antistatic bag. 5. Adding and Replacing Optional Modules 5.3 Replacing a fan unit A fan unit can be replaced while the Switch is on. Replacing a fan unit must be performed by a trained technician or maintenance personnel. If another person performs the above and mishandles the fan unit, injury or damage could result. CAUTION When replacing a fan unit with the Switch on, you must remove and replace the unit within one minute. If the operation takes longer than one minute, the temperature inside the Switch will rise and possibly cause a failure. (1) Removing a fan unit Step 1 Loosen the screws of the fan unit. Figure 5-1 Removing a fan unit (1) (1) Screws (2) Fan unit 117 5. Adding and Replacing Optional Modules Step 2 Hold the handle of the fan unit and pull it a little way toward you, and then wait for the fan to stop. Figure 5-2 Removing a fan unit (2) (1) Handle (2) Fan Immediately after you have moved the fan unit, the fan might be still rotating. While the fan blades are rotating, do no place your hands near them. Doing so might result in injury. 118 5. Adding and Replacing Optional Modules Step 3 When the fan stops, remove the fan unit (remove it by holding the handle and supporting the bottom of the fan unit). Figure 5-3 Removing a fan unit (3) (1) Handle 119 5. Adding and Replacing Optional Modules (2) Installing a fan unit Step 1 Insert a fan unit in a fan unit slot. Figure 5-4 Installing a fan unit (1) (1) Fan unit slot (2) Fan unit 120 5. Adding and Replacing Optional Modules Step 2 Push the fan unit in as far as it will go, and then tighten the fan unit screw. Figure 5-5 Installing a fan unit (2) (1) Screws NOTE Use a screwdriver to tighten the screws. Make sure the screws are firmly tightened. 121 5. Adding and Replacing Optional Modules 5.4 Adding or replacing a power supply unit A power supply unit can be added while the Switch is on. If the power supply is redundant, a power supply unit can be replaced while the Switch is on. Replacing a power supply unit must be performed by a trained technician or maintenance personnel. Adding or replacing a power supply unit requires connecting or disconnecting the power cable. If another person performs the above and mishandles the power supply unit, fire or electric shock could result. NOTE Power supply units come in an AC model and a DC model. Do not install both an AC power supply unit and DC power supply unit on a single Switch. If you install both units, they will not operate properly. When replacing different types of power supply units, such as replacing an AC power supply unit with a DC power supply unit, turn off the Switch first. NOTE When adding a power supply unit, remove the blank panel. Make sure you keep the blank panel you remove. 5.4.1 Adding or replacing an AC power supply unit (1) Removing an AC power supply unit NOTE If the power supply is redundant, an AC power supply unit can be removed while the Switch is on. If the power supply is not redundant, turn off the Switch before removing the DC power supply unit. Step 1 Set the power switch of the power supply unit you are replacing to OFF. 122 5. Adding and Replacing Optional Modules Figure 5-6 Turning off the power (1) Power switch (2) Power supply unit Step 2 Disconnect the power cable from the power supply unit you are replacing. (For details about how to disconnect the power cable, see 4.6 Connecting and disconnecting the power cable.) Figure 5-7 Disconnecting the power cable (1) Power cable 123 5. Adding and Replacing Optional Modules When adding or replacing a power supply unit, disconnect the power cable from the power supply unit that will be replaced. If the power cable is connected and the power switch is turned off, power is still supplied to some circuits. For this reason, adding or replacing a power supply unit with the power cable connected could result in fire or electric shock. Step 3 Loosen the screws of the power supply unit. Figure 5-8 Removing a power supply unit (1) (1) Screws Step 4 Remove the power supply unit. (Pull the unit a little way toward you while holding the handles and supporting the bottom of the unit.) 124 5. Adding and Replacing Optional Modules Figure 5-9 Removing a power supply unit (2) (1) Handles CAUTION When removing a power supply unit, install a blank panel. If you continue using the Switch without attaching a blank panel, the airflow in the Switch cannot be maintained. As a result, the temperature inside the Switch will rise, possibly resulting in a failure. In addition, the radio waves generated by the Switch might affect another device, or the radio waves generated by another device might affect the Switch, resulting in a malfunction. (2) Installing a power supply unit Step 1 Install a power supply unit in a power supply unit slot. 125 5. Adding and Replacing Optional Modules Figure 5-10 Installing a power supply unit (1) (1) Power supply unit (2) Power supply unit slot Step 2 Push the power supply unit in as far as it will go, and then tighten the power supply unit screws. Figure 5-11 Installing a power supply unit (2) (1) Screws 126 5. Adding and Replacing Optional Modules NOTE Use a screwdriver to tighten the screws. Make sure the screws are firmly tightened. Step 3 Connect a power cable to the power supply unit. (For details about how to connect a power cable, see 4.6 Connecting and disconnecting the power cable.) 5.4.2 Adding or replacing a DC power supply unit (1) Removing a DC power supply unit NOTE If the power supply is redundant, a DC power supply unit can be removed while the Switch is on. If the power supply is not redundant, turn off the Switch before removing the DC power supply unit. Step 1 Set the circuit breaker of the power supply unit you are replacing to OFF. Figure 5-12 Turning off the power (1) Circuit breaker (2) Power supply unit Step 2 Set the circuit breaker of the power supply facility to OFF to turn off the power. 127 5. Adding and Replacing Optional Modules The circuit breaker of the power supply facility must be set to OFF. Adding or replacing a DC power supply unit with the circuit breaker set to ON could result in fire or electric shock. Step 3 Disconnect the power cable from the power supply unit you are replacing. (For details about how to disconnect the power cable, see 4.6 Connecting and disconnecting the power cable) Figure 5-13 Disconnecting the power cable (1) Power cable Step 4 Loosen the screws of the power supply unit. 128 5. Adding and Replacing Optional Modules Figure 5-14 Removing a power supply unit (1) (1) Screws Step 5 Remove the power supply unit. (Pull the unit a little way toward you while holding the handles and supporting the bottom of the unit.) Figure 5-15 Removing a power supply unit (2) (1) Handles 129 5. Adding and Replacing Optional Modules The weight of a DC power supply unit is 5.6 kg and the front-to-back measurement is 163 mm. When removing a DC power supply unit from a Switch, support the DC power supply unit itself. If you pull the unit carelessly, it might fall, possibly resulting in injury. CAUTION When removing a power supply unit, install a blank panel. If you continue using the Switch without attaching a blank panel, the airflow in the Switch cannot be maintained. As a result, the temperature inside the Switch will rise, possibly resulting in a failure. In addition, the radio waves generated by the Switch might affect another device, or the radio waves generated by another device might affect the Switch, resulting in a malfunction. NOTE Make sure you reattach the screws and cover you removed from the power supply unit to the power supply unit after you have replaced it. (2) Installing a power supply unit Step 1 Install a power supply unit in a power supply unit slot. Figure 5-16 Installing a power supply unit (1) (1) Power supply unit (2) Power supply unit slot Step 2 Push the power supply unit in as far as it will go, and then tighten the power supply unit screws. 130 5. Adding and Replacing Optional Modules Figure 5-17 Installing a power supply unit (2) (1) Screws NOTE Use a screwdriver to tighten the screws. Make sure the screws are firmly tightened. Step 3 Connect a power cable to the power supply unit. (For details about how to connect a power cable, see 4.6 Connecting and disconnecting the power cable.) Make sure the circuit breaker of the power supply facility is set to OFF before connecting or disconnecting the DC power cable. Connecting or disconnecting the cable with the circuit breaker of the power supply facility set to ON could result in fire or electric shock. After connecting the DC power cable, attach the terminal board cover. Using the power supply unit without the cover could result in electric shock. 131 5. Adding and Replacing Optional Modules 5.5 Adding or replacing a basic control unit Adding or replacing a basic control unit must be performed by a trained technician or maintenance personnel. If another person performs the above and mishandles the management and switching unit, injury or damage could result. NOTE When adding a network interface unit, remove the blank panel. Make sure you keep the blank panel you remove. (1) Removing a basic control unit A basic control unit can be removed while the Switch is on if the basic control unit is duplicated. Note, however, that the procedure varies depending on whether the Switch is on or off. Remove the unit while referring to the following figure. NOTE 132 For details about steps 1 to 5 in the figure, see the description of the steps that follow Figure 5-18 Overview of removing a network interface unit. 5. Adding and Replacing Optional Modules Figure 5-18 Overview of removing a basic control unit Step 1 Make sure the basic control unit you are removing has been turned off (when the STATUS LED is on, the unit is turned on; when it is off, the unit is off). 133 5. Adding and Replacing Optional Modules Figure 5-19 Checking the STATUS LED (1) Basic control unit (2) STATUS LED Step 2 Turn off the basic control unit if the power is being supplied (execute the Inactivate operation). NOTE For details about the Inactivate operation, see 11 Switch Management in the Software Manual Configuration Guide Vol. 1. Step 3 Loosen the screws of the basic control unit. 134 5. Adding and Replacing Optional Modules Figure 5-20 Removing a basic control unit (1) (1) Screws CAUTION Loosen the screws completely. If the screws are not loose enough, the basic control unit might be damaged when the levers are opened. Step 4 Open the right and left levers of the basic control unit at the same time (the unit comes out toward you about 15 mm). Figure 5-21 Removing a basic control unit (2) (1) Lever 135 5. Adding and Replacing Optional Modules NOTE Use the levers so that the connectors on the optional module and the Switch can be disengaged correctly. When moving a lever, move the right and left levers slowly and at the same time without exerting excessive force. Step 5 Remove the basic control unit. (Use the levers to remove the unit partway, and then hold the sides to remove the unit the rest of the way.) Figure 5-22 Removing a basic control unit (3) (1) Side (2) Lever Components in a basic control unit might be very hot. Do not touch any components with your hands. Doing so could result in burns. CAUTION When removing a basic control unit, install a blank panel. If you continue using the Switch without attaching a blank panel, the airflow in the Switch cannot be maintained. As a result, the temperature inside the Switch will rise, possibly resulting in a failure. In addition, the radio waves generated by the Switch might affect another device, or the radio waves generated by another device might affect the Switch, resulting in a malfunction. (2) Installing a basic control unit A basic control unit can be installed while the Switch is on. Note, however, that the procedure varies depending on whether the Switch is on or off. In addition, the procedure also varies according to the installation conditions. Install the unit while referring to the following figure. 136 5. Adding and Replacing Optional Modules NOTE For details about steps 1 to 6 in the figure, see the description of the steps that follow Figure 5-23 Installation overview. Figure 5-23 Installation overview Step 1 Insert a basic control unit halfway into the slot for it. (Do this while holding the sides of the unit.) 137 5. Adding and Replacing Optional Modules Figure 5-24 Installing a basic control unit (1) (1) Basic control unit slot (2) Basic control unit Step 2 While holding the levers, push the unit carefully until the levers touch the Switch. The levers must be opened parallel to the direction of insertion. Figure 5-25 Installing a basic control unit (2) (1) Contact point (2) Lever CAUTION 138 While holding the levers, push the basic control unit carefully until the levers touch the Switch. Failure to do this could result in a Switch malfunction or fault. 5. Adding and Replacing Optional Modules CAUTION When you install a basic control unit, open the levers as shown in the figure. If the levers are closed or opened too much, they might be damaged when you install the unit. Step 3 Close the levers of the basic control unit. (The unit is inserted completely.) Figure 5-26 Installing a basic control unit (3) (1) Lever CAUTION Use the levers so that the connectors on the optional module and the Switch will be engaged correctly. When moving the levers, move them slowly (one second or longer) without exerting any force. Failure to do this could result in a Switch malfunction or fault. Step 4 Tighten the screws of the basic control unit. 139 5. Adding and Replacing Optional Modules Figure 5-27 Installing a basic control unit (4) (1) Screws NOTE Use a screwdriver to tighten the screws. Make sure the screws are firmly tightened. Step 5 Turn on the basic control unit. (Execute the Activate operation.) NOTE For details about the Activate operation, see 11 Switch Management in the Software Manual Configuration Guide Vol. 1. NOTE Executing the Activate operation starts loading of the software. If the following conditions exist, the SYSTEM1 LED of the basic control unit lights in orange when the software has been loaded. z When the software is version 11.0 or later z When the license keys of the active system and the standby system do not match (when an optional license is set in a dual configuration) When the operation information is restored by the following step, the SYSTEM1 LED turns off. Step 6 Restore the operation information. The restoration procedure varies according to the case. Perform the appropriate procedure. 6-1 Synchronize the operation information of the basic control unit with the active system (when a unit has been added or when only one of the units in a dual configuration has been replaced). 140 5. Adding and Replacing Optional Modules 1. Match the software version with the version used in the active system (use the ppupdate command). 2. Synchronize the configuration, user account, password, license key, and other settings with the settings used in the active system (use the synchronize command). 3. When an optional license has been installed, restart the basic control unit of the standby system in order to reflect the license key information (use the reload command). 6-2 Restore the operation information of the basic control unit (when only one unit has been replaced in a non-dual configuration). 1. Restore the operation information from the file you have backed up (use the restore command). To do this, use the backup file stored on a memory card or an FTP server. 6-3 Restore the operation information of the basic control unit (when both units in a dual configuration have been replaced). 1. 2. Turn off the basic control unit in the standby system so that the system is not switched during restoration of the operation information (execute the Inactivate operation). Restore the operation information from the file you have backed up (use the restore command). To do this, use the backup file stored on a memory card or an FTP server. 3. Turn on the basic control unit in the standby system (execute the Activate operation). 4. Match the software version used in the standby system with the version used in the active system (use the ppupdate command). 5. Synchronize the configuration, user account, password, and license key settings of the standby system with the settings of the active system (use the synchronize command). 6. When an optional license has been installed, restart the basic control unit of the standby system in order to reflect the license key information (use the reload command). NOTE For details about the Activate and Inactivate operations, see 11 Switch Management in the Software Manual Configuration Guide Vol. 1. NOTE For details about the commands to use, see the following manuals: restore command: 9. Checking the Software Version and Switch Status in the Software Manual Operation Command Reference Vol. 1 ppupdate command: 13. Software Update in the Software Manual Operation Command Reference Vol. 1 synchronize command: 29. Making Devices Redundant in the Software Manual Operation Command Reference Vol. 1 reload command: 9. Checking the Software Version and Switch Status in the Software Manual Operation Command Reference Vol. 1 141 5. Adding and Replacing Optional Modules 5.6 Adding or replacing a basic switching unit Adding or replacing a basic switching unit must be performed by a trained technician or maintenance personnel. If another person performs the above and mishandles the network interface unit, injury or damage could result. NOTE When adding a network interface unit, remove the blank panel. Make sure you keep the blank panel you remove. (1) Removing a basic switching unit A basic switching unit can be removed while the Switch is on. Note, however, that the procedure varies depending on whether the Switch is on or off. Remove the unit while referring to the following figure. 142 NOTE Basic switching units of different table sizes, such as the BSU-LA and the BSU-LB, cannot be replaced while the Switch is on. You must turn off the Switch before replacing these units. NOTE For details about steps 1 to 5 in the figure, see the description of the steps that follow Figure 5-28 Overview of removing a network interface unit. 5. Adding and Replacing Optional Modules Figure 5-28 Overview of removing a basic switching unit Step 1 Make sure the basic switching unit you are removing has been turned off (when the STATUS LED is on, the unit is turned on; when it is off, the unit is off). 143 5. Adding and Replacing Optional Modules Figure 5-29 Checking the STATUS LED (1) Basic switching unit (2) STATUS LED (3) ACTIVE LED Step 2 Turn off the basic switching unit if the power is being supplied (execute the Inactivate operation). NOTE For details about the Inactivate operation, see 11 Switch Management in the Software Manual Configuration Guide Vol. 1. NOTE Note that immediately after the Inactivate operation is performed for the basic switching unit in the active system, the ACTIVE LED might be lit even if the STATUS LED is turned off. While the ACTIVE LED is lit, the basic switching unit is running. Before proceeding to step 3, you must wait until both the STATUS LED and the ACTIVE LED are turned off. Step 3 Loosen the screws of the basic switching unit. 144 5. Adding and Replacing Optional Modules Figure 5-30 Removing a basic switching unit (1) (1) Screws CAUTION Loosen the screws completely. If the screws are not loose enough, the basic switching unit might be damaged when the levers are opened. Step 4 Open the right and left levers of the basic switching unit at the same time (the unit comes out toward you about 15 mm). Figure 5-31 Removing a basic switching unit (2) (1) Lever 145 5. Adding and Replacing Optional Modules NOTE Use the levers so that the connectors on the optional module and the Switch can be disengaged correctly. When moving a lever, move the right and left levers slowly and at the same time without exerting excessive force. Step 5 Remove the basic switching unit. (Pull the unit a little way toward you while holding the levers and the sides.) Figure 5-32 Removing a basic switching unit (3) (1) Lever (2) Side CAUTION When removing a basic switching unit, install a blank panel. If you continue using the Switch without attaching a blank panel, the airflow in the Switch cannot be maintained. As a result, the temperature inside the Switch will rise, possibly resulting in a failure. In addition, the radio waves generated by the Switch might affect another device, or the radio waves generated by another device might affect the Switch, resulting in a malfunction. (2) Installing a basic switching unit A basic switching unit can be installed while the Switch is on. Note, however, that the procedure varies depending on whether the Switch is on or off. Remove the unit while referring to the following figure. 146 5. Adding and Replacing Optional Modules NOTE For details about steps 1 to 4 in the figure, see the description of the steps that follow Figure 5-33 Installation overview. Figure 5-33 Installation overview Step 1 Insert a basic switching unit halfway into the slot for it. (Do this while holding the sides of the unit.) 147 5. Adding and Replacing Optional Modules Figure 5-34 Installing a basic switching unit (1) (1) Basic switching unit (2) Basic switching unit slot Step 2 While holding the levers, push the unit carefully until the levers touch the Switch. The levers must be opened parallel to the direction of insertion. Figure 5-35 Installing a basic switching unit (2) (1) Contact point (2) Lever 148 5. Adding and Replacing Optional Modules CAUTION While holding the levers, push the basic switching unit carefully until the levers touch the Switch. Failure to do this could result in a Switch malfunction or fault. CAUTION When you install a basic switching unit, open the levers as shown in the figure. If the levers are closed or opened too much, they might be damaged when you install the unit. Step 3 Close the levers of the basic switching unit. (The unit is inserted completely.) Figure 5-36 Installing a basic switching unit (3) (1) Lever CAUTION Use the levers so that the connectors on the optional module and the Switch will be engaged correctly. When moving the levers, move them slowly (one second or longer) without exerting any force. Failure to do this could result in a Switch malfunction or fault. Step 4 Tighten the screws of the basic switching unit. 149 5. Adding and Replacing Optional Modules Figure 5-37 Installing a basic switching unit (4) (1) Screws 150 NOTE Use a screwdriver to tighten the screws. Make sure the screws are firmly tightened. NOTE If you install a basic switching unit (BSU) while the Switch is on, the BSU is turned on automatically when the BSU is installed. Note, however, that if no power enable is set in the configuration, the BSU is not turned on automatically. Set power enable, and then turn on the power. For details about the power enable command, see 12. Management of BSU/NIF in the Software Manual Configuration Guide Vol. 1. 5. Adding and Replacing Optional Modules 5.7 Adding or replacing a network interface unit Adding or replacing a network interface unit must be performed by a trained technician or maintenance personnel. If another person performs the above and mishandles the single-guide rail, injury or damage could result. NOTE When adding a network interface unit, remove the blank panel. Make sure you keep the blank panel you remove. 5.7.1 Single-size network interface unit (1) Removing a single-size network interface unit A network interface unit can be removed while the Switch is on. Note, however, that the procedure varies depending on whether the Switch is on or off. Install the unit while referring to the following figure. NOTE For details about steps 1 to 5 in the figure, see the description of the steps that follow Figure 5-38 Overview of removing a network interface unit. Figure 5-38 Overview of removing a network interface unit Step 1 Make sure the network interface unit you are removing has been turned off (when 151 5. Adding and Replacing Optional Modules the STATUS LED is on, the unit is on; when it is off, the unit is off). Figure 5-39 Checking the STATUS LED (1) Network interface unit (2) STATUS LED Step 2 Turn off the network interface unit if power is being supplied (execute the Inactivate operation). NOTE For details about the Inactivate operation, see 11 Switch Management in the Software Manual Configuration Guide Vol. 1. Step 3 Loosen the screws of the network interface unit. 152 5. Adding and Replacing Optional Modules Figure 5-40 Removing a network interface unit (1) (1) Screws CAUTION Loosen the screws completely. If the screws are not loose enough, the network interface unit might be damaged when the levers are opened. Step 4 Open the right and left levers of the network interface unit at the same time (the unit comes out toward you about 15 mm). Figure 5-41 Removing a network interface unit (2) (1) Lever 153 5. Adding and Replacing Optional Modules NOTE Use the levers so that the connectors on the optional module and the Switch can be disengaged correctly. When moving a lever, move the right and left levers slowly and at the same time without exerting excessive force. Step 5 Remove the network interface unit. (Pull the unit a little way toward you while holding the levers and supporting the sides.) Figure 5-42 Removing a network interface unit (3) (1) Side (2) Lever The components in a network interface unit might be very hot. Do not touch any components with your hands. Doing so could result in burns. CAUTION When removing a network interface unit, install a blank panel. If you continue using the Switch without attaching a blank panel, the airflow in the Switch cannot be maintained. As a result, the temperature inside the Switch will rise, possibly resulting in a failure. In addition, the radio waves generated by the Switch might affect another device, or the radio waves generated by another device might affect the Switch, resulting in a malfunction. (2) Installing a network interface unit A network interface unit can be installed while the Switch is on. Note, however, that the procedure varies depending on whether the Switch is on or off. Install the unit while referring to the following figure. 154 5. Adding and Replacing Optional Modules NOTE For details about steps 1 to 4 in the figure, see the description of the steps that follow Figure 5-43 Installation overview. Figure 5-43 Installation overview Step 1 Insert a network interface unit halfway into the slot for it. (Do this while holding the sides of the unit.) Figure 5-44 Installing a network interface unit (1) 155 5. Adding and Replacing Optional Modules (1) Network interface unit slot (2) Network interface unit Step 2 While holding the levers, push the unit carefully until the levers touch the Switch. The levers must be opened parallel to the direction of insertion. Figure 5-45 Installing a network interface unit (2) (1) Contact point (2) Lever CAUTION While holding the levers, push the network interface unit carefully until the levers touch the Switch. Failure to do this could result in a Switch malfunction or fault. CAUTION Open the levers as shown in the figure when you install a network interface unit. If the levers are closed or opened too much, they might be damaged when you install the unit. Step 3 Close the levers of the network interface unit. (The unit is inserted completely.) 156 5. Adding and Replacing Optional Modules Figure 5-46 Installing a network interface unit (3) (1) Lever CAUTION Use the levers so that the connectors on the optional module and the Switch will be engaged correctly. When moving the levers, move them slowly (one second or longer) without exerting any force. Failure to do this could result in a Switch malfunction or fault. Step 4 Tighten the screws of the network interface unit. Figure 5-47 Installing a network interface unit (4) 157 5. Adding and Replacing Optional Modules (1) Screws 158 NOTE Use a screwdriver to tighten the screws. Make sure the screws are firmly tightened. NOTE If you install a network interface unit (NIF) while the Switch is on, the NIF is turned on automatically when the NIF is installed. Note, however, that if no power enable is set in the configuration, the NIF is not turned on automatically. Set power enable, and then turn on the power. For details about the power enable command, see 12. Management of BSU/NIF in the Software Manual Configuration Guide Vol. 1. 5. Adding and Replacing Optional Modules 159 Appendix Appendix A. Cleaning Optical Connectors 160 A. Cleaning Optical Connectors A. Cleaning Optical Connectors A.1 Cleaning the optical connectors of transceivers To clean the optical connector for the transceiver, follow the procedure below. The fiber optic cable uses a laser beam that is colorless and transparent, and invisible to the eye. Never look directly into the optical transceiver. NOTE The following is an example of cleaning the optical connector of an SFP transceiver. Use the same procedure to clean the optical connector of an XFP transceiver. Step 1 Use an air duster to remove dirt and dust from the optical connector. Figure A-1 Optical connector and ferrule tip (1) Ferrule tip (at the back) (2) Connector for supplying standby power Do not use an air duster that contains flammable gas near a flame. Doing so could result in fire. CAUTION Use an air duster specially designed for cleaning optical connectors. Using another type of air duster could cause the ferrule tip to become dirty. CAUTION Keep the nozzle or container of the air duster from coming into contact with the ferrule tip. Contact could result in a malfunction. NOTE For instructions on how to use the air duster, see the documentation for the air duster. Step 2 Check the tip of the optical connector cleaner (stick-type) for irregularities, such as 161 A. Cleaning Optical Connectors lint, dirt, or other foreign matter. Figure A-2 Checking the optical connector cleaner (1) Optical connector cleaner (stick-type) (2) Part to check CAUTION Before cleaning, make sure that the tip of the optical connector cleaner is clean and free of defects, such as lint, dirt, or other foreign substances. Using a cleaner with a defective tip might damage the ferrule tip. CAUTION Always use a dedicated optical connector cleaner. If you use another type of cleaner, the ferrule tip might become dirty. Step 3 Use the optical connector cleaner (stick-type) to clean any dirt from the ferrule tip. Figure A-3 Cleaning the ferrule tip 162 CAUTION Do not apply excessive pressure when cleaning. Doing so might damage the ferrule tip. CAUTION Rotate the optical connector cleaner clockwise only. Rotating the cleaner alternately clockwise and counterclockwise might damage the ferrule tip. A. Cleaning Optical Connectors NOTE For instructions on how to use the optical connector cleaner, see the documentation for the optical connector cleaner. A.2 Cleaning fiber optic cables To clean fiber optic cables, follow the procedure below. The fiber optic cable uses a laser beam. (Laser beams are colorless and transparent, and invisible to the eye.) Never look directly into the optical transceiver. Step 1 Use an air duster to remove dirt and dust from the tip of the connector. Figure A-4 Optical connector and ferrule tip (1) Ferrule tip (2) Connector for supplying standby power Do not use an air duster that contains flammable gas near a flame. Doing so could result in fire. CAUTION Use an air duster specially designed for cleaning optical connectors. Using another type of air duster could cause the ferrule tip to become dirty. CAUTION Keep the nozzle or container of the air duster from coming into contact with the ferrule tip. Contact could result in a malfunction. NOTE For instructions on how to use the air duster, see the documentation for the air duster. Step 2 Use an optical connector cleaner (reel-type) to clean any dirt from the ferrule tip. 163 A. Cleaning Optical Connectors Figure A-5 Cleaning the ferrule tip 164 CAUTION Always use a dedicated optical connector cleaner. If you use another type of cleaner, the ferrule tip might be damaged. CAUTION Do not apply excessive pressure when cleaning. Doing so might damage the ferrule tip. NOTE For instructions on how to use the optical connector cleaner, see the documentation for the optical connector cleaner.