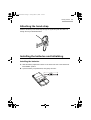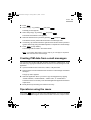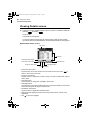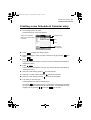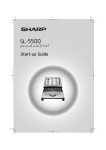
1
00.Introduction.book Page 1 Friday, March 15, 2002 3:17 PM
MODEL
OZ-800
ELECTRONIC ORGANIZER
OPERATION MANUAL
• Getting Started .................................. 9
• Basic Operation ............................... 17
• E-Mail ................................................ 33
• Attachment Viewer .......................... 49
• Schedule & Calendar ...................... 55
• Address Book .................................. 71
• To Do List ......................................... 79
• Memo ................................................ 87
• NotePad ............................................ 91
• Other Applications .......................... 97
• Exchanging Information with
Your PC (PC-Link).......................... 113
• Appendix ........................................ 115
00.Introduction.book Page 2 Friday, March 15, 2002 3:17 PM
Declaration of Conformity
Electronic Organizer: OZ-800
This device complies with Part 15 of the FCC Rules. Operation is subject to the following
two conditions: (1) This device may not cause harmful interference, and (2) this device must
accept any interference received, including interference that may cause undesired
operation.
Responsible Party:
SHARP ELECTRONICS CORPORATION
Sharp Plaza, Mahwah, New Jersey 07430-1163
TEL: 1-800-BE-SHARP
Tested To Comply With FCC Standards
FOR HOME OR OFFICE USE
WARNING - FCC Regulations state that any unauthorized changes or modifications to this
equipment not expressly approved by the manufacturer could void the user's authority to
operate this equipment.
Note: This equipment has been tested and found to comply with the limits for a Class B
digital device, pursuant to Part 15 of the FCC Rules.
These limits are designed to provide reasonable protection against harmful interference in
a residential installation. This equipment generates, uses, and can radiate radio frequency
energy and, if not installed and used in accordance with the instructions, may cause harmful
interference to radio communications.
However, there is no guarantee that interference will not occur in a particular installation. If
this equipment does cause harmful interference to radio or television reception, which can
be determined by turning the equipment off and on, the user is encouraged to try to correct
the interference by one or more of the following measures:
— Reorient or relocate the receiving antenna.
— Increase the separation between the equipment and receiver.
— Connect the equipment into an outlet on a circuit different from that to which the receiver
is connected.
— Consult the dealer or an experienced radio/TV technician for help.
Note:A shielded interface cable is required to ensure compliance with FCC regulations for
Class B certification.
FOR YOUR RECORDS...
For your assistance in reporting this product in case of loss or
theft, please record the model number and serial number
(located on the bottom of the unit) below.
Please retain this information.
Model Number
Serial Number
Date of Purchase
Place of Purchase
00.Introduction.book Page 1 Friday, March 15, 2002 3:17 PM
Introduction
Introduction
Congratulations and thank you for choosing the OZ-800!
Please read this operation manual thoroughly to familiarize yourself with all the
features of the unit and to ensure years of reliable operation. You may also find it
useful to keep this operation manual on hand for reference.
Some accessories described in this manual may not be available at the time of
purchasing this unit.
Check with your local SHARP dealer concerning availability.
NOTICE
• SHARP strongly recommends that you keep separate permanent written records
of all important data. Data may be lost or altered in virtually any electronic memory
product under certain circumstances. Therefore, SHARP assumes no
responsibility for data lost or otherwise rendered unusable, whether as a result of
improper use, repairs, defects, battery replacement, use after the specified
battery life has expired, or any other cause.
• SHARP assumes no responsibility, directly or indirectly, for financial losses or
claims from third parties resulting from the use of this product and any of its
functions, such as stolen credit card numbers, the loss or alteration of stored data,
etc.
• The information provided in this manual is subject to change without notice.
• Screen layouts illustrated in this manual may differ from the actual one.
The information described in this manual is subject to change without notice.
• Microsoft, Powerpoint, Outlook, and Windows are either registered trademarks or
trademarks of Microsoft Corporation in the United States and/or other countries.
• All company and/or product names are trademarks and/or registered trademarks
of their respective holders.
1
00.Introduction.book Page 2 Friday, March 15, 2002 3:17 PM
2
Introduction
About this manual
Operation procedure
This product can be operated by the following three ways.
• Press keys to operate.
• Tap keys on tablet keyboard with the attached stylus.
• Tap buttons, icons and entries on screens with stylus.
This manual explains the basic operation for using keys.
Buttons and keys
: Alphabetic Q key
: SHIFT key
: Escape key
: Scroll keys
: Scroll up key
: Scroll down key
: Scroll left key
: Scroll right key
: Enter key
: Power (ON/OFF) key
: Menu key
: Backlight key
Operation buttons on the screen
• These buttons, such as “OK button” for executing operation, are indicated as “OK”
etc.
• The application icons, such as [Address], are indicated as “Address” etc.
00.Introduction.book Page 3 Friday, March 15, 2002 3:17 PM
3
Table of Contents
Introduction............................................................ 1
About this manual.............................................................. 2
Caring for the unit.................................................. 7
Getting Started....................................................... 9
Part names and Functions................................................. 9
Using the stylus ............................................................... 10
Attaching the hand strap.................................................. 11
Installing the batteries and Initializing .............................. 11
Setting up the unit............................................................ 13
Basic Operation ................................................... 17
Common operations ........................................................ 17
Entering data ................................................................... 26
Operations using the menu ............................................. 26
Main menu screen ........................................................... 31
E-Mail .................................................................... 33
An overview of the E-Mail application.............................. 33
Inbox folder...................................................................... 35
Outbox folder ................................................................... 38
Mybox folder .................................................................... 40
Creating an e-mail message............................................ 42
Browsing an e-mail attachment ....................................... 44
Easy reply function .......................................................... 44
Creating PIM data from e-mail messages ....................... 45
Operations using the menu ............................................. 45
Attachment Viewer .............................................. 49
An overview of the Attachment Viewer application.......... 49
Viewing Index screen ...................................................... 51
Viewing Details screen .................................................... 52
Operations using the menu ............................................. 54
00.Introduction.book Page 4 Friday, March 15, 2002 3:17 PM
4
Schedule & Calendar ........................................... 55
An overview of the Schedule & Calendar application ...... 55
Creating a new Schedule & Calendar entry .................... 57
Viewing a Daily schedule................................................. 60
Viewing a Weekly schedule............................................. 62
Viewing a Monthly schedule ............................................ 63
Viewing the details of a Schedule & Calendar entry........ 65
Modifying a Schedule & Calendar entry .......................... 66
Operations using the menu ............................................. 68
Address Book ...................................................... 71
An overview of the Address Book application ................. 71
Creating a new Address Book entry ................................ 72
Viewing a list of Address Book entries ............................ 73
Viewing the details of an Address Book entry ................. 74
Modifying an Address Book entry.................................... 75
Changing the sorting order .............................................. 75
Creating an e-mail message from an Address Book
entry................................................................................. 77
Operations using the menu ............................................. 78
To Do List ............................................................. 79
An overview of the To Do List application ....................... 79
Creating a new To Do List entry ...................................... 81
Viewing a list of To Do List entries .................................. 82
Viewing the details of a To Do List entry ......................... 83
Modifying a To Do List entry ............................................ 83
Changing the sorting order .............................................. 84
Operations using the menu ............................................. 84
Memo .................................................................... 87
An overview of the Memo application .............................. 87
Creating a new Memo entry ............................................ 88
Viewing a list of Memo entries ......................................... 88
Viewing the details of a Memo entry................................ 89
Modifying a Memo entry .................................................. 89
Changing the sorting order .............................................. 89
00.Introduction.book Page 5 Friday, March 15, 2002 3:17 PM
5
Operations using the menu ............................................. 90
NotePad ................................................................ 91
An overview of the NotePad application.......................... 91
Creating a new NotePad entry ........................................ 92
Viewing a list of NotePad entries..................................... 93
Viewing the details of a NotePad entry............................ 94
Modifying a NotePad entry .............................................. 94
Changing the sorting order .............................................. 94
Operations using the menu ............................................. 95
Other Applications............................................... 97
Calculator ........................................................................ 97
Clock................................................................................ 99
Customizing the unit (Settings)...................................... 103
Checking memory information (Memory) ...................... 107
Setting a password (Secret) .......................................... 107
Entering owner information............................................ 111
About Add-on software .................................................. 112
Exchanging Information with Your PC
(PC-Link) ............................................................. 113
PC software set up ........................................................ 113
Appendix ............................................................ 115
Resetting the unit........................................................... 115
Battery replacement ...................................................... 116
Specifications ................................................................ 118
Index ................................................................... 121
Troubleshooting ................................................ 123
Product Support ................................................ 125
00.Introduction.book Page 6 Friday, March 15, 2002 3:17 PM
6
00.Introduction.book Page 7 Friday, March 15, 2002 3:17 PM
Caring for the unit
Caring for the unit
The unit contains sophisticated circuitry and a glass display panel, which can be
damaged if not handled with care. A few precautions should be taken regarding the
unit’s care to ensure it gives you many years of reliable use.
• Keep the unit away from extreme heat. Do not leave it on the dashboard of a car
or near any heat source. Do not leave it in any place that is extremely damp or
dusty.
• Do not drop the unit or subject it to severe impact or extreme force.
• Do not use force when pressing on the touch panel. Do not use any sharp or
pointed objects, or even your fingernails, to press on it.
• Sharp or hard objects can scratch or damage the unit. Make sure it is adequately
protected when carried with other objects. Do not carry it loose in a bag or
briefcase. Put it in a pocket or secure compartment within your bag.
• Clean the unit only with a soft, dry cloth. Do not use solvents.
• Do not carry the unit in your back pocket, as it may break when you sit down. The
display is made of glass and is very delicate.
• This product is not waterproof. Do not use it or store it near liquids or where it can
be subject to extreme moisture. Rain, juice, coffee, steam and perspiration can
also cause malfunctions.
• Replace the battery as soon as it becomes weak. Failing to replace a weak
battery may result in loss of data or damage from battery leakage.
• Do not throw or swing the unit around by its hand strap, as this may cause injury
or result in malfunction or damage to the unit.
7
00.Introduction.book Page 8 Friday, March 15, 2002 3:17 PM
8
Caring for the unit
00.Introduction.book Page 9 Friday, March 15, 2002 3:17 PM
Getting Started
Getting Started
Part names and Functions
1
2
8
7
6
3
4
5
1. Display:
Displays information, selects operations, data
entry, etc.
2. Tablet keyboard:
Used to input characters and execute quick
search.
3. Menu key:
Opens the application menu window.
4. Backlight key:
Turns the backlight on and off.
5. Scroll keys:
Scrolls up, down, left and right through items
(icons). Scrolls index, detailed text view, etc.
6. Enter key:
Selects item. Goes to next screen. (Starts
application or displays the Details screen from
the Index screen etc.)
7. Power (ON/OFF) key:
Turns the unit on and off.
8. Esc key:
Returns to the previous screen. Closes a
current menu window. Jumps to the Main
menu screen when pressed and held for 1
second.
9
00.Introduction.book Page 10 Friday, March 15, 2002 3:17 PM
10
Getting Started
14
9
13
12
10
11
9. Eyelet for the hand strap:
Attach the hand strap here.
10. Battery replacement switch:
Locks the battery compartment to prevent
access to the batteries.
11. Battery compartment lid:
Open it when installing/removing the batteries.
12. PC-Link port:
Connects PC-Link cable.
13. RESET button:
Resets the unit.
14. Stylus:
Use to tap buttons and input data.
Using the stylus
This unit comes equipped with a telescopic stylus. Remove and extend the stylus as
illustrated below. To replace it, insert it until the pointed end locks into place.
.
00.Introduction.book Page 11 Friday, March 15, 2002 3:17 PM
Getting Started
Attaching the hand strap
Pass the small loop of the hand strap through the eyelet and pass the other end
through the loop as illustrated below.
Installing the batteries and Initializing
Installing the batteries
1. Slide the battery replacement switch on the back of the unit to the “REPLACE
BATTERIES” position.
2. Open the battery compartment lid, then gently remove it.
11
00.Introduction.book Page 12 Friday, March 15, 2002 3:17 PM
12
Getting Started
3. Insert two AAA batteries, making sure to position them correctly according to the
plus (+) and minus (-) terminals, as illustrated below.
4. Replace the battery compartment lid.
5. Slide the battery replacement switch to the “NORMAL OPERATION” position.
Follow the setup procedures described in “Setting up the unit” on page 13.
Initializing
1. While pressing and holding
, press and release the RESET button on the
back of the unit using the stylus or similar object.
A message appears.
2. Release
.
3. Highlight “OK” by pressing
and press
(or tap “OK”).
Note: The following data will be lost when the batteries are replaced or
extremely low. It is recommended to copy important data to the
Mybox folder. (See page 34, 50)
• E-Mail messages in the Inbox folder (E-Mail application).
• Attachments in the Inbox folder (Attachment Viewer application).
00.Introduction.book Page 13 Friday, March 15, 2002 3:17 PM
Getting Started
Setting up the unit
After battery installation, the unit takes you through various steps needed to setup
the unit before use. It is recommended to complete the entire setup procedures
described below.
Adjusting the touch panel
The Calibration screen appears.
1. Tap the center of the target with the stylus.
The target moves to another position.
2. Repeat step 1 until you tap the target at the bottom right of the screen.
3. Tap “Q” followed by “P” on the tablet keyboard according to the instructions
displayed on the screen.
Adjusting the LCD contrast
After adjusting the touch panel, the Contrast screen appears.
1. Press
or tap icons on the screen to adjust the LCD contrast.
2. Tap “NEXT”.
Setting the CLOCK
After setting the LCD contrast, the Time/Date Setting screen appears.
City:
1. Highlight “City” by pressing
and press
2. Select the desired city by pressing
.
and press
.
13
00.Introduction.book Page 14 Friday, March 15, 2002 3:17 PM
14
Getting Started
Note: If you type the first letter of the desired city on the tablet keyboard, a list
of cities that begin with that letter appears.
Format:
1. Highlight “Format” by pressing
.
2. Select the desired format by pressing
3. Press
.
.
Date:
1. Highlight “Date” by pressing
and press
to display the pop-up
calendar.
2. Select the month by tapping “ ” “ ”.
3. Select the date by using
4. Press
.
.
Time:
1. Highlight “Time” by pressing
2. Press
3. Press
press
4. Press
press
5. Press
and press
.
, adjust the hour by pressing
, then press
, adjust the first digit of the minute by pressing
.
, then
.
, adjust the second digit of the minute by pressing
, then
, select AM or PM by pressing
.
.
, then press
(The AM/PM menu does not appear if you have selected “24hr” for format.)
6. Press
.
After setting the above, press
.
Turning the unit on and off
1. Press
to turn the unit on.
2. If you want to turn the unit off, press
.
Note:
• If you cannot turn the unit on, check that the battery replacement switch is set
to the “NORMAL OPERATION” position.
00.Introduction.book Page 15 Friday, March 15, 2002 3:17 PM
Getting Started
• If a message appears saying there is a problem, see page 123
“Troubleshooting” or page 116 “Battery replacement”.
• If you do not tap the screen or operate the buttons and keys for more than the
set number of minutes, the unit will automatically turn off to save the battery.
For details on setting the Auto-off function, see page 104 “Adjusting the Autooff function:”.
• Restarting the unit will restore the most recently used screen to the display
when the resume function is turned on.
• Restarting the unit while an entry is edited will restore that entry to the display
when the resume function is turned on.
15
00.Introduction.book Page 16 Friday, March 15, 2002 3:17 PM
16
Getting Started
00.Introduction.book Page 17 Friday, March 15, 2002 3:17 PM
Basic Operation
Basic Operation
Common operations
This section explains how to select applications, entries and items, how to enter
characters, and how to scroll through screens.
• Highlight the selected application, entry or item.
• Using the scroll keys moves the highlighted position.
• Pressing
• Pressing
executes the selected operation.
returns to the previous screen or closes a current menu window.
The Address Book application is used in the following examples. These techniques
can be applied to all of the applications.
Pressing keys and tapping buttons/icons and tablet keys
You can operate the unit by pressing keys on the unit and selecting commands from
menus.
The unit can be operated by pressing the keys or tapping on-screen with the stylus.
To open an application on the Main menu screen
The Main menu screen displays all major applications.
This outlines, how to display the Main menu screen, and how to select applications
are explained here.
Note: You can customize the Main menu screen. See page 31 “Main menu
screen” for further details.
17
00.Introduction.book Page 18 Friday, March 15, 2002 3:17 PM
18
Basic Operation
1. Press
to display the Main menu screen.
2. Move the highlight by using
to select the desired icon, and press
.
Or
Tap the desired application icon.
The selected application opens.
If you press
, the screen returns to the Main menu screen.
Note:
• If you press and hold
the Main menu screen.
for 1 second in any screen, the screen returns to
• Pressing
on the Main menu screen switches the screen in the following
order: Add-on menu screen → My Menu screen → Main menu screen
Entering characters
This section explains general data entry techniques used to edit an existing entry or
create a new one in each application.
The unit has two types of keyboards: tablet keyboard and on-screen keyboard.
The Tablet keyboard
You can input alphabet letters, commas and periods by tapping the tablet keyboard.
The keyboard corresponds to a QWERTY keyboard.
The On-screen keyboard
When you tap “New” or “Edit” in an application, the on-screen keyboard appears at
the bottom of the screen, allowing you to input certain types of characters and
symbols.
00.Introduction.book Page 19 Friday, March 15, 2002 3:17 PM
Basic Operation
1
2
3
4
On-screen
keyboard
Tablet
keyboard
5
6
7
1. SMBL: Enters symbols or foreign language characters.
2. Words & Phrases: Activates the Words & Phrases function.
3.
: Enters uppercase (capital) letters on the tablet keyboard.
To cancel the function, tap “
” again.
4.
SHIFT: Shifts to enter uppercase or lowercase letters when Caps lock is
turned on.
5.
6.
7.
(Back space): Deletes the character to the left of the cursor.
(Carriage return): Starts a new line.
: Inserts a space.
Symbols
Tap “SMBL” to display the symbol keyboard. Select the symbol display containing
the desired symbol by tapping “ ” or “ ”, then tap on it.
The unit automatically displays the 18 characters most recently selected.
Close box
(Tap here
to return
the
keyboard
to the
previous
mode.)
Scroll buttons
(Tap to scroll
the symbol
display.)
19
00.Introduction.book Page 20 Friday, March 15, 2002 3:17 PM
20
Basic Operation
Word completion feature
The word completion feature helps you enter characters by giving you four word
suggestions that begin with the letters you have entered on the keyboard. In addition
to easy character input, you can also store frequently used words and phrases in the
user dictionary. See page 103 “Customizing the unit (Settings)” for further details.
Words and phrase function
You can enter a word or phrase by selecting from the preset text.
1. Tap “Words & Phrases”.
The Words and Phrases screen appears.
2. Select the desired word or phrase by pressing
and press
.
Note: You can quickly find a word or phrase by typing it in the “Find” field.
Adding a new word or phrase:
1. Tap “Words & Phrases”.
The Words and Phrases screen appears.
2. Tap “New”.
The Enter Word/Phrase screen appears.
3. Enter the word or phrase you want to store.
4. Tap “SAVE”.
The field
Most applications divide the display into field boxes. The number and types of fields
varies in each application. The field types include text, date, time, and pop-up
menus.
You can enter any character in a text field.
The cursor
The cursor indicates the position where text will be entered or deleted.
00.Introduction.book Page 21 Friday, March 15, 2002 3:17 PM
Basic Operation
Text input
Text input is simple. Tapping a key enters the corresponding standard letter.
To enter a lowercase letter “h”, tap .
To enter an uppercase letter “H”, tap
SHIFT to turn the keyboard to shift mode,
then tap .
Note: While Caps lock is active,
functions in reverse.
Deleting text
If you make a mistake while entering text, you can erase as follows:
1. Move the cursor to the right of the character to be deleted.
2. Press
to delete a character to the left of the cursor.
Working with blocks of text
Working with a block of text is sometimes easier than working with individual
characters.
Selecting text:
1. Drag the stylus over the entire text you want to work with in the Edit screen of
an application. The selected text is highlighted.
2. You can now perform the following operations on the highlighted text.
Note: While the text is selected:
• Pressing
deletes the text.
• Entering a character deletes the text and inserts the character.
• Moving the cursor de-selects the text.
Screens and elements in applications
You can switch screens in any application.
For example, you can see the following screens in the Address Book application.
21
00.Introduction.book Page 22 Friday, March 15, 2002 3:17 PM
22
Basic Operation
• The Index screen shows a list of entries within the application.
This screen allows you to easily find a desired entry.
Name of the application
Category menu (See page 23)
Close
Scroll up/down
Operation buttons
• The Details screen allows you to see the details of the entry.
Scroll buttons
• The Edit screen allows you to modify an existing entry.
Save
(Saves the modified data.)
Close
(Tap this box to cancel
the modification.)
Data
Field name
Scroll buttons
00.Introduction.book Page 23 Friday, March 15, 2002 3:17 PM
Basic Operation
Operations in the Index screen
When you select the Address Book application from the Main menu screen, the
Address Book Index screen appears.
1. Highlight an entry by using
2. Press
.
to open the Details screen of the highlighted entry.
Or
Tapping an entry also opens the Details screen.
Category menu
(See below)
Address Book
Index screen
Press
Press
.
Press
.
Press
.
.
Tapping an entry directly opens the Details screen.
• Each time you press
, the highlight moves one line at a time up or down.
• Pressing
displays the commands of menus available in the present screen.
(See page 26)
• Tapping the operation button (ex. “New” ) executes the command (ex. creating a
new entry).
• Pressing
returns to the Main menu screen.
• Refer to the description of the respective application regarding the screen opened
by pressing
.
Selecting a Category
In the “All” category, all entries are displayed. You can limit the entries displayed by
selecting other categories.
23
00.Introduction.book Page 24 Friday, March 15, 2002 3:17 PM
24
Basic Operation
1. Select categories one by one by pressing
.
Or
Tap the category menu and then tap a category name.
The entries in the selected category appears.
Note:
• In the default setting, you can select the categories “All”, “UNFILED”,
“PERSONAL”, or “BUSINESS”.
• If you are using the E-Mail or Attachment Viewer application, you can select a
category only with Mybox folder. To set a category, press
and select
“Categorize...”.
• You can create or edit a category. (See page 30)
• If you do not set a category, the category becomes “UNFILED” by default.
• You can also set a category by pressing
and selecting “Categorize...”.
• You cannot categorize an entry into more than one category.
Operations for pop-up menu, radio buttons, and check
boxes
When you carry out a certain operation, screens that contain pop-up menu, radio
buttons and check boxes may appear for selecting settings. For example, the
operations in Settings screen are as follows.
Start-up/Auto-off screen
(example of pop-up menu)
E-Mail Index View Setting screen
(example of check box and radio
button)
00.Introduction.book Page 25 Friday, March 15, 2002 3:17 PM
Basic Operation
Pop-up menu
The operations for pop-up menu in the example on the previous page are as follows.
1. Highlight a pop-up menu by using
2. Press
.
.
Or
Tap the pop-up menu.
3. Select the desired item by pressing
and press
.
The new setting will be activated.
Or
Press
(or tap “Cancel”) to cancel the selected setting.
Radio buttons and Check boxes
The operations for radio buttons and check boxes in the example on the previous
page are as follows.
1. Highlight a check box
Press
or a radio button
by using
.
.
Or
Tap the box or the button.
The selected item is turned on
2. Highlight “OK” by using
or
.
and press
(or tap “OK”) to store the selected
setting.
The new setting will be activated.
Or
Press
(or tap “Cancel”) to cancel the selected setting.
The former setting will continue to be active.
• In selecting a radio button, you can select only one item out of many. When you
select an item , other items become unselectable .
• In selecting a check box, each time you press
and off .
it switches between on
25
00.Introduction.book Page 26 Friday, March 15, 2002 3:17 PM
26
Basic Operation
Entering data
Creating a new entry
1. On the Index or Details screen, tap “New”.
The New Entry screen appears.
The following steps vary depending on the applications.
E-Mail application: page 42
Schedule & Calendar application: page 57
Address Book application: page 72
To Do List application: page 81
Memo application: page 88
NotePad application: page 92
Modifying an entry
1. On the Index screen, highlight the entry you want to modify by using
.
Or
Open the Details screen of the entry you want to modify.
2. Tap “Edit”.
The Edit screen of the highlighted entry appears.
3. Modify the entry.
4. Press
(or tap “SAVE”) to store the modification.
If you press
(or tap the close box), a confirmation message appears asking
you if you really want to throw away all of the changes. To cancel the
modification, highlight “OK” by pressing
and press
(or tap “OK”).
Operations using the menu
Operations using the menu
The menu system is a quick way to issue commands and perform operations.
Pressing
displays the specific menu. Each menu contains various
commands.
The menus and commands differ by application or mode currently in use.
00.Introduction.book Page 27 Friday, March 15, 2002 3:17 PM
Basic Operation
1. Press
on the Address Book Index screen as an example.
The menu window appears.
2. Select a menu command (ex. “Data Deletion” command) by pressing
press
and
.
Or
Tap a menu command.
If a menu command line has “
” mark, the sub menu will be displayed.
If a menu command name has an ellipsis “...”, the related screen will be
displayed.
Note:
• Press
(or tap the close box or outside of the menu window) to return to
the previous screen.
• If the menu window consists of two pages, the 1/2 page is displayed when you
press
. To display the 2/2 page, press
again.
Copying and moving text
Select the text at first. Then press
pressing
. Then press
and select the following commands by
.
• Cut: Cuts the selected text.
• Copy: Copies the selected text.
• Paste: Pastes the text that you have copied or cut at a selected point in a field.
Duplicating an entry
You can duplicate an existing entry.
27
00.Introduction.book Page 28 Friday, March 15, 2002 3:17 PM
28
Basic Operation
This function is convenient to create a new entry using an existing entry.
1. On the Index screen, highlight the entry you want to duplicate by pressing
.
Or
Display the Details screen of the entry you want to duplicate.
2. Press
.
3. Select “Duplicate” by pressing
and press
.
The selected entry will be duplicated.
Deleting entries
You can delete unnecessary entries. For example, you can perform the following
deletion in the Address Book application for deleting a single entry.
1. On the Index screen, highlight the entry you want to delete by pressing
2. Press
.
.
3. Select “Data Deletion” by pressing
4. Select “Selected Entry” by pressing
and press
.
and press
.
The confirmation message appears before the entry is deleted.
5. Highlight ”OK” by pressing
and press
(or tap “OK”).
The selected entry will be deleted.
If you press
(or tap “Cancel”), the deletion is canceled.
Note: The sub menus of “Data Deletion” differ by application.
Finding entries
If you know a particular entry is in the unit, but cannot remember where, you can use
the Find function.
1. Press
on the Address Book Index screen as an example.
2. Select “Find...” by pressing
and press
.
00.Introduction.book Page 29 Friday, March 15, 2002 3:17 PM
Basic Operation
The Find screen appears.
3. Enter the keywords and press
to start searching.
The unit will display entries that contain the keywords you entered.
4. Select the entry by pressing
and press
.
The Details screen appears.
Changing the character size
The character size of the Index and Details screens can be changed between Large
and Small. The default character size is set to Small.
1. Press
on the Address Book Index screen as an example.
2. Select “View Setting...” by pressing
and press
.
The Index View Setting screen appears.
3. Highlight “Font” by using
, select the desired font size by pressing
4. Highlight “OK” by using
and press
then press
.
(or tap “OK”).
The Index View Setting screen returns to the previous screen.
, and
29
00.Introduction.book Page 30 Friday, March 15, 2002 3:17 PM
30
Basic Operation
Note:
• The font size setting is only active in the current application.
• Font size cannot be changed in some of the applications and screens.
Setting secret entries
You can mark entries as secret or non-secret.
Secret entries will be hidden from screens (“Lock”) in the Secret application. (See
page 107)
For example, you can perform the following steps in the Address Book application.
1. On the Index screen, select the entry you want to hide from the screen by
pressing
2. Press
.
.
3. Select “Secret...” by pressing
4. Select “ON” by pressing
5. Highlight “OK” by using
The secret status icon
and press
and press
.
.
and press
(or tap “OK”).
appears to the left of the close box.
Editing a Category
You can classify entries into a category for easy review.
You can also rename an existing category.
“PERSONAL” and “BUSINESS” are default categories and you can use up to 12
categories.
Note: Editing of categories in one application does not affect those in other
applications.
To rename an existing category
1. On the Index, Details screen, press
2. Select “Edit Categories...” and press
.
.
The Edit Categories screen appears.
3. Move the cursor to the category you want to rename by pressing
4. Rename the category using up to 20 characters.
5. Tap “SAVE” to store the name.
.
e03_zq800(basic)60.fm Page 31 Thursday, May 9, 2002 3:44 PM
Basic Operation
Main menu screen
The unit displays the Main menu screen when you turn on the unit.
Application menu
Application icons
Clock
Alarm icon
• Use
Scroll up/down
Secret icon
to move the highlight.
• Press
to scroll.
• Press
or tap the desired application icon to launch it.
• Battery indicator
appears only when the battery level becomes low. See
page 116 “Battery replacement” for further details.
• Alarm icon
appears only when a schedule alarm is set in the Schedule &
Calendar application.
• Secret icon
appears only when you lock the unit with a password.
Changing the Application menu
The unit has three Application menu screens. You can select the desired screen by
using the application menu at the top of the screen.
1. Press
to turn the unit on.
Main menu
Add-on software
menu (See page 112)
User defined menu
(See page 32)
2. Tap the desired application menu.
31
00.Introduction.book Page 32 Friday, March 15, 2002 3:17 PM
32
Basic Operation
Note:
• You can also select the menu by pressing
. Each time you press
the screen switches in the following order:
Add-on menu screen → My Menu screen → Main menu screen
• You can also select the menu by pressing
or “Go to My Menu”.
,
and selecting “Go to Add-on”
Customizing My Menu
You can copy application icons that you frequently use on the Main menu and Addon menu screens into the My Menu screen.
1. On the Main menu or Add-on menu screen, highlight the application icon you
want to copy by using
2. Press
.
, select “Copy to My Menu” by pressing
, then press
.
A confirmation message appears asking you if you really want to copy the
selected application icon to the My Menu screen. Press
(or tap “OK”).
The selected application icon is now copied into the My Menu screen. You can
confirm it by displaying the My Menu screen.
Moving application icons on the screen
You can move an application icon on the screen by performing the following steps.
1. Tap and hold the application icon you want to move.
2. Drag the selected icon to the desired position.
When the dragged icon comes to a position where you are able to drop it, a box
appears around it.
3. Release the stylus.
00.Introduction.book Page 33 Friday, March 15, 2002 3:17 PM
E-Mail
E-Mail
You can synchronize e-mail messages between the unit and your PC by installing
the PC software (OZ-800 Synchronization Software and WIZARD STATION) on the
supplied CD-ROM. (See page 113)
You can view e-mail messages or browse the attachments such as Microsoft® Word
documents on the unit’s display.
The E-Mail application provides you with the following functions:
• Viewing e-mail messages for the Inbox, Outbox, or Mybox folder: page 35, 38, 40
• Creating an e-mail message: page 42
• Browsing e-mail attachments: page 44
• Easy reply function: page 44
• Creating PIM data from e-mail messages: page 45
An overview of the E-Mail application
There are three main screens in the E-Mail application.
Index screen - you can check e-mail messages for the Inbox, Outbox, or Mybox
folder.
Details screen - you can read e-mail messages that are selected on the Index
screen.
Edit screen - you can create a new e-mail message or edit an existing one.
To use the E-Mail application
1. Highlight the “E-Mail” icon on the Main menu screen by using
2. Press
.
.
The Index screen appears.
If you press
menu screen.
(or tap the close box), the Index screen returns to the Main
About folders
The Index screen has three types of folder.
• Inbox folder: Stores incoming e-mail messages from your PC.
• Outbox folder: Stores outgoing e-mail messages.
33
00.Introduction.book Page 34 Friday, March 15, 2002 3:17 PM
34
E-Mail
• Mybox folder: Stores e-mail messages that are copied from Inbox or Outbox
folder as important e-mail messages.
Index screens are related with each other in the following way.
Inbox
Outbox
Press
Press
Mybox
Press
.
.
Press
Press
.
Press
.
.
.
Note: E-mail messages stored in the Inbox folder and any attachments that
accompany the e-mail message will be lost when the batteries are
replaced or the batteries are extremely low. It is recommended to copy
important messages from the Inbox folder to the Mybox folder.
00.Introduction.book Page 35 Friday, March 15, 2002 3:17 PM
E-Mail
Inbox folder
Screens associated with the Inbox folder are related to each other in the following
way.
Index screen
Details screen
Press
Tap “Reply”.
.
Tap “Del”.
Press
or
tap the
close box.
Tap
“New”.
Press
or
tap the
close box.
Edit screen for a new
e-mail message
Press
or
tap “
”.
Press
or
tap “
Reply to the sender of
the e-mail message.
Delete the current
e-mail message.
”.
Attachment screen
* Where an e-mail message has one
attachment.
The Inbox Index screen
Folder menu
Unread message
counter
Close
Message categories box
Message icons
Scroll up/down
New button
Reply button
Total message number
Delete button
35
00.Introduction.book Page 36 Friday, March 15, 2002 3:17 PM
36
E-Mail
• Every time you press
, the highlight moves up or down one line.
• Unread messages are displayed in bold font.
The message icons
The message icon at the left of each e-mail message indicates the respective
message status.
This icon
Indicates
Unread
Unread (with attachment)
Read
Read (with attachment)
Message has been replied
Message has been forwarded
The message categories box
You can limit the displayed e-mail messages by using the message categories box.
You can select a filter from “All”, “Unread”, and “Read”.
1. Open the Index screen.
2. Select the Inbox folder by pressing
.
3. Tap the message categories box.
The category list appears.
4. Tap the desired category command.
The e-mail messages are now limited according to the chosen category.
00.Introduction.book Page 37 Friday, March 15, 2002 3:17 PM
E-Mail
The Inbox Details screen
Close
Headers
Scroll bar
Contents
Reply button
Attachment icon
Delete button
• To read the entire contents of the e-mail message, use
or scroll bar.
The attachment icon
When the e-mail message has an attachment(s), the attachment icon appears at the
bottom of the Details screen.
This icon
Indicates
One attachment accompanies the email message.
Tap this icon to view the contents of the
attachment.
Several attachments accompany the email message.
Tap “
” or “
” to view the contents
of the respective attachments.
37
00.Introduction.book Page 38 Friday, March 15, 2002 3:17 PM
38
E-Mail
Outbox folder
Screens associated with the Outbox folder are related to each other in the following
way.
Index screen
Details screen
Press
.
Press
or tap the close
box.
Tap “New”.
Edit screen for a new
e-mail message
Tap “New”.
• Tapping “Edit” on the Index or Details screen displays the Edit screen for editing
an existing message.
00.Introduction.book Page 39 Friday, March 15, 2002 3:17 PM
E-Mail
The Outbox Index screen
Folder menu
Close
Message categories box
Unsent message counter
Message icons
Scroll up/down
New button
Total message number
Edit button
• Every time you press
Delete button
, the highlight moves up or down one line.
• Unsent messages are displayed in bold font.
The message icons
The message icon at the left of each e-mail message indicates the respective
message status.
This icon
Indicates
Unsent (will be sent in next PC-Link
connection)
Sent
Draft
The message categories box
You can limit the displayed e-mail messages by using the message categories box.
You can select a category from the following: “All”, “Unsent”, “Sent”, and “Draft”.
1. Open the Index screen.
2. Select the Outbox folder by pressing
.
3. Tap the message categories box.
The category list appears.
4. Tap the desired category command.
The e-mail messages are now limited according to the chosen category.
39
00.Introduction.book Page 40 Friday, March 15, 2002 3:17 PM
40
E-Mail
The Outbox Details screen
Close
Headers
Scroll bar
Contents
New button
Edit button
Delete button
• To read the entire contents of the e-mail message, use
or scroll bar.
Mybox folder
Screens associated with the Mybox folder are related to each other in the following
way.
Details screen
Index screen
Press
.
Press
or tap the close
box.
Tap “New”.
Edit screen for a new
e-mail message
00.Introduction.book Page 41 Friday, March 15, 2002 3:17 PM
E-Mail
The Mybox Index screen
Folder menu
Close
Message categories box
Message icons
Scroll up/down
Total message number
Delete button
New button
• Every time you press
, the highlight moves up or down one line.
• Unread messages are displayed in bold font.
• Draft message in the Outbox folder cannot be copied to the Mybox folder.
Setting a category
1. On the Index screen of the Mybox folder, highlight the e-mail message you want
to categorize and press
.
2. Select “Categorize...” by pressing
and press
.
The Select Category screen appears.
3. Select the desired category by pressing
and press
.
The highlighted e-mail message is now categorized.
The Mybox Details screen
The Details screen of the Mybox folder is common to the Details screen of the Inbox
or Outbox folder.
41
00.Introduction.book Page 42 Friday, March 15, 2002 3:17 PM
42
E-Mail
Creating an e-mail message
The E-Mail application allows you to create an e-mail message.
• To create a new e-mail message, open the Index or Details screen of the Outbox
folder and tap “New”, or open the Index screen of the Inbox or Mybox folder and
tap “New”.
• To reply to an e-mail message, open the Index or Details screen of the Inbox
folder and tap “Reply”.
• To forward an e-mail message, press
Inbox folder and select “Forward”.
on the Index or Details screen of the
Note: You can also reply to an e-mail message by selecting “Reply...” from the
menu window.
Creating a new e-mail message
See page 113 “Exchanging Information with Your PC (PC-Link)” and the supplied
Quick Start Guide and Software Guide for details on the PC-Link.
You can create new e-mail messages to be sent. To send the message, you must
transfer the message to your PC by using the PC software (OZ-800 Synchronization
Software and WIZARD STATION), and then send it from your PC. You can also
create draft messages.
1. Open the Index or Details screen of the Outbox folder or open the Index screen
of the Inbox or Mybox folder.
2. Tap “New”.
The New Message screen appears.
3. Enter the following items:
TO:
Recipient address (Main recipient)
CC:
(Carbon copy) Enter other recipient addresses (Sub recipients), if
needed.
BCC: (Blind carbon copy) Can be entered when you press
“Enable BCC”.
and tap
SUB: (Subject) Enter the mail title.
Message: Enter the mail message.
Note: When entering more than one recipient in each recipient field, enter a
semicolon (;) between each address.
00.Introduction.book Page 43 Friday, March 15, 2002 3:17 PM
E-Mail
4. Press
(or tap “SEND”).
The e-mail message will be stored in the Outbox folder.
Note: If you want to save the e-mail message as a draft, select “Save as Draft”
from the menu window.
To enter the e-mail address by using Address Book
Perform steps 1 and 2 in “Creating a new e-mail message” and then carry out the
following steps.
<Adding recipients from the Address Book>
1. Press
.
2. Select “Add Recipients...” and press
.
The Add Recipients screen appears.
3. Select the recipient by pressing
and press
.
The selected recipient will be entered in the “TO” field.
Note:
• The recipient selected in step 3 will be entered in the field where the cursor
has been placed. If you want to enter the recipient in the “CC” or “BCC” field,
move the cursor to the desired field before performing the above steps.
• Tapping the “TO” field in the New Message screen also opens the Add
Recipients screen.
• You can quickly find the recipient you are looking for by typing it in the “FIND:”
field.
• Tapping any part of the recipient’s entry brings the full-length e-mail address
into view.
<Smart Addressing>
1. Input a recipient name using the stylus.
The recipient name that begins with the input character will be found from the
Address Book and displayed in the field where the cursor has been placed.
2. Press
(or tap the return key).
Replying to a message
You can reply to a message that is stored in the Inbox folder. The reply message
you create will be stored in the Outbox folder.
43
00.Introduction.book Page 44 Friday, March 15, 2002 3:17 PM
44
E-Mail
1. Open the Details screen of the Inbox folder.
2. Tap “Reply”.
The New Message (Reply) screen appears with the “TO” field automatically
filled in.
3. Create a reply and press
.
Note:
• You can also create a reply by selecting “Reply...” from the menu window.
• If you want to reply to all persons who received the e-mail message, press
, select “Reply...”, and then select “Reply To All” on the Reply screen.
Forwarding a message
You can forward a message that is stored in the Inbox folder. The forwarded
message you create will be stored in the Outbox folder.
1. Open the Index or Details screen of the Inbox folder.
2. Press
.
3. Select “Forward” by pressing
and press
.
The Edit screen for forwarding appears.
4. Enter the “TO” and “Message” field.
5. Press
(or tap “SEND”).
Note: You cannot forward the attachments that accompany the forwarded
message.
Browsing an e-mail attachment
If a message in the Inbox folder has an attachment, you can view it using the
Attachment Viewer application. See the next chapter “Attachment Viewer”.
Easy reply function
In addition to the one-hand operation of the unit, the words and phrase function
provides you with an easy way to reply to messages.
1. Open the Index or Details screen of the Inbox folder.
00.Introduction.book Page 45 Friday, March 15, 2002 3:17 PM
E-Mail
2. Press
.
3. Select “Reply...” by pressing
and press
.
The Reply screen appears.
4. Select “Easy Reply” by pressing
and press
.
The Words and Phrases screen appears.
5. Select the desired word or phrase by pressing
and press
.
The selected word or phrase will be entered in the “Message” field.
6. If necessary, tap “Words & Phrases” again and enter another word or phrase or
type the sentence(s) using the tablet keyboard to complete the e-mail message.
7. Press
(or tap “SEND”).
The message will be stored in the Outbox folder.
Note: If you select “Easy Reply To All” in step 4, you can reply to all persons
who received the e-mail message.
Creating PIM data from e-mail messages
You can save time creating PIM data (Schedule & Calendar, Address Book, To Do
List, Memo) by copying the desired block of text from an e-mail message to a PIM
application.
1. Open the Details screen of the Inbox, Outbox, or Mybox folder.
2. Drag the stylus over the desired block of text of the e-mail message and release
the stylus.
The pop-up menu appears.
3. Select the application where you want to copy the dragged text by tapping
“Create Schedule”, “Create Address”, “Create ToDo”, or “Create Memo”.
The Edit screen for a new entry of the selected application appears with the text
copied into it.
4. Modify the text (if necessary) and create a new entry.
Operations using the menu
If you press
when you are using the E-Mail application, the menus available
for the E-Mail application appear in the menu window. The menus, unique to the E-
45
00.Introduction.book Page 46 Friday, March 15, 2002 3:17 PM
46
E-Mail
Mail application, are explained as follows. See page 26 for general operations using
the menu.
Data Deletion
Selected Message
Deletes the highlighted e-mail message.
All read in Inbox
Deletes all read messages in the Inbox folder.
All sent in Outbox
Deletes all sent messages in the Outbox folder.
All In this Category
Deletes all e-mail messages in the selected category.
All in Inbox
Deletes all e-mail messages in the Inbox folder.
All in Outbox
Deletes all e-mail messages in the Outbox folder.
All in Mybox
Deletes all e-mail messages in the Mybox folder.
All E-Mail Messages
Deletes all e-mail messages in the E-Mail application.
Reply...
Creates a reply.
Forward
Forwards message stored in the Inbox folder.
Add to Address Book
Sender of the selected e-mail message is added to the Address Book.
File to “Mybox”
Selected e-mail message in the Inbox or Outbox folder is copied to the Mybox folder.
Categorize...
Sets category to the e-mail message selected in the Mybox folder.
View Setting...
On the Index screen, selects a sorting order for the e-mail message according to
“From/To”, “Subject”, or “Date”, and changes the index item or font size. On the
Details screen, changes the header display or the font size.
Reply Setting...
Selects whether the original message is included or not.
Signature...
Creates a signature and selects whether the created signature is added to the e-mail
message or not.
00.Introduction.book Page 47 Friday, March 15, 2002 3:17 PM
E-Mail
Add Recipients...
The selected recipient in the Address Book is entered in the “TO”, “CC”, or “BCC”
field of the Edit screen for a new e-mail message.
Enable BCC
Enables you to enter the “BCC” field of the Edit screen for a new e-mail message.
Save as Draft
Saves the e-mail message as a draft.
47
00.Introduction.book Page 48 Friday, March 15, 2002 3:17 PM
48
E-Mail
00.Introduction.book Page 49 Friday, March 15, 2002 3:17 PM
Attachment Viewer
Attachment Viewer
The Attachment Viewer application allows you to view documents or spreadsheet
files attached to e-mail messages.
An overview of the Attachment Viewer
application
There are two main screens in the Attachment Viewer application.
Index screen - you can view a list of attachments.
Details screen - you can confirm the details of an attachment.
The following files can be viewed with the Attachment Viewer application.
Type of the file
Extension
Microsoft® Word file .doc
®
Microsoft Excel file .xls
®
Microsoft
PowerPoint® file
.ppt
Type in the
Attachment Viewer
Attachment icon
Document type
Spreadsheet type
Document type
PDF format file
.pdf
Document type
Text file
.txt
Document type
HTML format file
.html/.htm
Document type
Note:
• You cannot edit attachments of any type.
• If the attachment contains information on a format (leading, track, tab, font,
ruled line, etc.) or images that the Attachment Viewer application does not
support, the file may be laid out incorrectly.
• If an Excel file has more than one sheet, each sheet is handled as a separate
file. (Empty sheets are removed.)
Title (FileName) field has sheet order and number with original filename.
(Example, “1/3-OZ800 spec. xls”)
49
05.Attach.fm Page 50 Thursday, May 9, 2002 1:57 PM
50
Attachment Viewer
To use the Attachment Viewer application
1. Highlight the “Attach” icon on the Main menu screen by using
2. Press
.
.
The Index screen appears.
If you press
menu screen.
(or tap the close box), the Index screen returns to the Main
The two main screens are related to each other in the following way.
Details screen
(xls file as an example)
Index screen
Press
attachment.
or tap the
Press
twice or
tap the close box.
About folders
The Attachment Viewer Index screen has 2 types of folders.
• Inbox folder: All of the attachments in this folder are linked with the e-mail
messages in the E-Mail Inbox folder.
• Mybox folder: The attachments in this folder are linked with the e-mail messages
in the E-Mail Mybox folder, except when separated from messages and solely
copied.
Note: Attachments in the Inbox folder will be lost when the batteries are
replaced or the batteries are extremely low. It is recommended to copy
important attachments to the Mybox folder.
The Index screens are related to each other in the following way.
Inbox
Mybox
Press
Press
Category box
You can select a
category. (See
page 51)
.
.
00.Introduction.book Page 51 Friday, March 15, 2002 3:17 PM
Attachment Viewer
Viewing Index screen
1. Open the Index screen.
Attachments are displayed in date order.
Folder menu
Close
Attachment icons
Scroll up/down
Property button
• If you press
• If you press
(or tap the close box), the Main menu screen appears.
(or tap the file), the Details of the highlighted file appears.
• If you tap “Property”, the property of the highlighted file appears.
File name
E-mail subject
Sender’s name
Setting a category
1. On the Index screen of the Mybox folder, highlight the attachment you want to
categorize and press
.
2. Select “Categorize...” by pressing
and press
.
The Select Category screen appears.
3. Select the desired category by pressing
and press
The highlighted attachment is now categorized.
.
51
00.Introduction.book Page 52 Friday, March 15, 2002 3:17 PM
52
Attachment Viewer
Viewing Details screen
1. In the Index screen, highlight the file of which you want to confirm the details by
pressing
and press
.
Or tap the file.
The Details screen appears.
If you have selected a document file, the document details screen appears.
If you have selected a spreadsheet file, the spreadsheet details screen appears.
Spreadsheet details screen
File name
Scroll bar
Worksheet name button
E-Mail link icon
Full screen view button
Large font view button
Cell height button
Cell width button
• Full screen view button
Tap this button to turn the screen to the full screen view mode. Press
return to the normal view mode.
to
• Large font view button
Tap this button to change the font size to large. To return to original size, tap this
button again.
• Cell width button
Tap this button to change the cell width in three steps.
• Cell height button
Tap this button to change the cell height in four steps for the small font view mode
and in three steps for the large font view mode.
• Worksheet name button
Tap this button to display the worksheet name.
• Tapping the cell displays the Cell View screen that shows the content of the
tapped cell.
• Use
to move the highlight.
00.Introduction.book Page 53 Friday, March 15, 2002 3:17 PM
Attachment Viewer
• When the e-mail link icon is active (it appears with the box around it), pressing
brings you to the e-mail message or attachment that is linked to the current
file. If you want to scroll through the worksheet, press
to highlight the sheet
cell and use . To make the e-mail link icon active, press
.
Document details screen
File name
Scroll bar
Attachment icon
Full screen view button
Large font view button
E-mail link icon
• Full screen view button
Tap this button to turn the screen to the full screen view mode. Press
return to the normal view mode.
to
• Large font view button
Tap this button to change the font size to large. To return to original size, tap this
button again.
About the attachment and e-mail link icons
By tapping these icons, you can jump to the e-mail message (E-Mail Details screen)
that links to the current file, or, if that E-Mail Details screen links to another file, you
can jump directly to that file (Attachment Viewer Details screen) from the current file.
This icon
Indicates
Only the current file accompanies
the e-mail message.
Tap this icon to jump to the e-mail
message that links to the current file.
Another file other than the current file
accompanies the e-mail message.
Tap “
” to jump to the e-mail
message that links to the current file
or tap “
” to jump directly to
another file.
53
00.Introduction.book Page 54 Friday, March 15, 2002 3:17 PM
54
Attachment Viewer
Operations using the menu
If you press
when you are using the Attachment Viewer application, the
menus available for the Attachment Viewer application appear in the menu window.
The menus, unique to the Attachment Viewer application, are explained as follows.
See page 26 for general operations using the menu.
Data Deletion
Deletes the attachment stored in the unit. The following sub menus are available
only for the attachment stored in the Mybox folder. To delete an attachment stored
in the Inbox folder, delete the e-mail message that links to the attachment you want
to delete using the Data Deletion menu in the E-Mail application.
Selected Entry
Deletes selected attachment in the Mybox folder.
All in this category
Deletes all attachments in the selected category of the Mybox folder.
All in Mybox
Deletes all attachments in the Mybox folder.
Property...
Displays properties of the selected attachment.
File to “Mybox”
Selected attachment in the Inbox folder is copied to the Mybox folder.
Categorize...
Sets category to the file selected in the Mybox folder.
View Setting...
Selects a sorting order of the attachment according to “File name”, “From”, or “Date”,
and changes the font size on the Index screen.
00.Introduction.book Page 55 Friday, March 15, 2002 3:17 PM
Schedule & Calendar
Schedule & Calendar
The Schedule & Calendar application allows you to organize your schedule and
events.
You can view your schedule by day, week, and month. The built-in alarm reminds
you of important appointments and dates.
An overview of the Schedule & Calendar
application
There are five main screens in the Schedule & Calendar application.
Monthly Index screen (Calendar) - you can view the monthly calendar with various
icons indicating your schedule.
Daily Index screen - you can view a schedule list on a specified date.
Weekly Index screen - you can view weekly schedules.
Details screen - you can view the details of the schedule entry.
Edit screen - you can create a new entry or modify an existing entry.
To use the Schedule & Calendar application
1. Highlight the “Schedule” icon on the Main menu screen by using
2. Press
.
.
The Monthly Index screen appears.
If you press
(or tap the close box), the Monthly Index screen returns to the
Main menu screen.
55
00.Introduction.book Page 56 Friday, March 15, 2002 3:17 PM
56
Schedule & Calendar
The five major screens are related to each other in the following way.
Monthly Index screen
Weekly Index screen
View mode menu
Tap “MONTH” and select “WEEK”.
Tap “WEEK” and select “MONTH”.
Press
.
Press
.
Tap “WEEK” and
select “DAY”.
Daily Index screen
Tap “DAY” and
select “WEEK”.
Press
Press
Press
or
tap a Schedule &
Calendar entry.
Press
.
.
.
Details screen
Edit screen
Tap “Edit”.
• If you tap the view mode menu “MONTH”, “WEEK”, “DAY” in each Index screen,
the corresponding Index screen appears.
• If you press and hold
for 1 second in any Index screen, the screen returns
to the Main menu screen.
00.Introduction.book Page 57 Friday, March 15, 2002 3:17 PM
Schedule & Calendar
Creating a new Schedule & Calendar entry
1. On the Index screen, tap “New”.
The Edit screen for a new entry appears.
Category menu
Today or the specified
date on the Index screens
is entered.
Date
Time
Alarm button
(See page 66)
2. Press
to display the category menu.
3. Select the category in which you want to store the entry by pressing
press
4. Press
and
.
.
The pop-up calendar appears, and you may enter the date (see the following
“Entering the date“).
5. Press
.
The Set Time screen appears, and you may enter the time (see the following
“Entering the time“).
6. Select the “Title” field by pressing
and enter the title.
7. Select the “Location” field by pressing
8. Select the “Note” field by pressing
and enter the location.
and enter the description.
9. Tap “SAVE” to store the entry.
The Edit screen turns into the Details screen.
If you press
(or tap the close box), a confirmation message appears asking
you if you really want to throw away all of the changes. To cancel the new entry,
highlight “OK” by pressing
and press
(or tap “OK”).
57
00.Introduction.book Page 58 Friday, March 15, 2002 3:17 PM
58
Schedule & Calendar
Note:
• For an event entry, select “All Day” on the Set Time screen in step 5. (See
page 59)
Entering the date
Follow the steps below to enter the date.
Pop-up calendar
Close
Monthly calendar
button
Current day button
1. Select a month by tapping “ ” or “ ”.
• Tapping “ ” chooses the next month, and tapping “ ” chooses the previous
month.
2. Select a date by using
3. Press
.
.
Or
Tap the desired date.
If you press
, the setting is canceled and the pop-up calendar is closed.
00.Introduction.book Page 59 Friday, March 15, 2002 3:17 PM
Schedule & Calendar
Entering the time
Set Time screen
Time radio button
Start time menu
(hour : minute)
End time menu
(hour : minute)
1. Select the “Timed” or “All Day” radio button by pressing
and press
.
If you select the “All Day” radio button, the entry will be recognized as an event,
and you may skip to step 6. (See page 58)
If you select “Timed” radio button, you may proceed to step 2.
2. Press
3. Press
4. Press
5. Press
, select the start time (hour) by pressing
, then press
.
, select the start time (minute) by pressing
, then press
.
, select the end time (hour) by pressing
, then press
.
, select the end time (minute) by pressing
, then press
.
6. Press
(or tap “OK”) to store the setting.
The Set Time screen turns into the Edit screen for the time.
If you press
(or tap “Cancel”), the setting is canceled.
Creating an event entry
A schedule that will last all day and requires no specified time can be entered as an
event.
1. Perform steps 1 to 5 in “Creating a new Schedule & Calendar entry” on page 57.
2. In the Set Time screen, select the “All Day” radio button and tap “OK”.
3. Perform steps 6 to 9 in “Creating a new Schedule & Calendar entry” on page 57.
59
00.Introduction.book Page 60 Friday, March 15, 2002 3:17 PM
60
Schedule & Calendar
Note: If you select the “All Day” radio button in the Set Time screen, the “Alarm”
button on the Edit screen will be replaced with the “Reminder” button.
(See page 67)
Viewing a Daily schedule
1. Open the Daily Index screen after storing Schedule & Calendar entries.
Category menu
Daily calendar button
View mode menu
Schedule
New button
Current day button
Edit button
Note: You can also open the Daily Index screen in the following ways:
• In the Monthly Index screen, press
(or tap the desired date).
• In the Weekly Index screen, select “DAY” from the view mode menu.
• In the Details screen, press
.
About the Daily Index Screen
• Entries are listed in the order of event (entry without a specified time), and
schedule.
• Pressing
entry).
displays the Details screen for the highlighted entry (or tap an
• Tapping “New” opens the Edit screen for a new entry.
• Tapping “Edit” opens the Edit screen for the selected entry.
• Tapping “Today” opens the Daily Index screen for today.
Pressing
, selecting “Go to Specific Date...” by pressing
then tapping “Today” followed by “OK” also opens the today screen.
, and
00.Introduction.book Page 61 Friday, March 15, 2002 3:17 PM
Schedule & Calendar
Displaying a schedule for another date
To display the next or previous day’s schedules
1. Press
(or tap “ ”) to display the next day’s schedule.
Press
(or tap “ ”) to display the previous day’s schedule.
To display the schedules of a desired date
1. Press
, select “Go to Specific Date...” by pressing
, then press
.
The Go to Specific Date screen appears.
2. Specify the month by tapping “ ” “ ”.
3. Specify the date by using
4. Press
.
(or tap “OK”).
The Go to Specific Date screen turns to the Daily Index screen for the specified
date.
To display today’s schedule
1. Tap “Today”.
Or
Press
, select “Go to Specific Date...” by pressing
tap “Today” followed by “OK”.
, and then
Selecting a Category
In the “All” category, all entries are displayed. You can limit the entries displayed by
selecting other categories. (See page 23)
61
00.Introduction.book Page 62 Friday, March 15, 2002 3:17 PM
62
Schedule & Calendar
Viewing a Weekly schedule
1. Select “WEEK” from the view mode menu.
The Weekly Index screen appears.
Category menu
Weekly calendar
button
View mode menu
Date box
New button
Current day button
Edit button
About the Weekly Index Screen
• Selecting “DAY” from the view mode menu displays the Daily Index screen for the
highlighted entry.
• Selecting “MONTH” from the view mode menu displays the Monthly Index screen
including the highlighted entry.
• Tapping a Schedule & Calendar entry displays the Details screen for that entry.
• Tapping the date box displays the Daily Index screen for that date.
• Tapping “Today” opens the Weekly Index screen on which today’s date is
highlighted.
Pressing
, selecting “Go to Specific Date...” by pressing
, and
then tapping “Today” followed by “OK” also opens the today screen.
Displaying schedules for another week
To display the next or previous week’s schedule
1. Press
(or tap
) to display the next week’s schedule.
Press
(or tap
) to display the previous week’s schedule.
To display the schedule of a desired week
1. Press
, select “Go to Specific Date...” by pressing
.
, then press
00.Introduction.book Page 63 Friday, March 15, 2002 3:17 PM
Schedule & Calendar
The Go to Specific Date screen appears.
2. Specify the month by tapping “ ” “ ”.
3. Specify the date of the desired week by using
4. Press
.
(or tap “OK”).
The Go to Specific Date screen turns into the Weekly Index screen of the
specified week.
To display current schedule
1. Tap “Today”.
Or
Press
, select “Go to Specific Date...” by pressing
tap “Today” followed by “OK”.
, and then
Selecting a Category
In the “All” category, all entries are displayed. You can limit the entries displayed by
selecting other categories. (See page 23)
Viewing a Monthly schedule
1. On any Index screen, select “MONTH” from the view mode menu.
The Monthly Index screen appears.
Scheduled at AM
Scheduled at PM
Monthly calendar
button
All day event
New button
Current day
button
Number of
the week
Number of
the day
About the Monthly Index Screen
• Pressing
day).
displays the Daily Index screen for the highlighted day (or tap the
63
00.Introduction.book Page 64 Friday, March 15, 2002 3:17 PM
64
Schedule & Calendar
• Tapping “New” opens the Edit screen for a new entry.
• Tapping “Today” opens the Monthly Index screen on which today’s date is
highlighted.
• Pressing
, selecting “Go to Specific Date...” by pressing
, and
then tapping “Today” followed by “OK” also opens the Monthly Index screen for
this month.
Displaying a schedule of another month
To display the next or previous month’s schedules
1. Tap “ ” to display the next month’s schedule.
Tap “ ” to display the previous month’s schedule.
To display the schedule of a desired month
1. Press
, select “Go to Specific Date...” by pressing
, then press
.
The Go to Specific Date screen appears.
2. Select the desired month by tapping “ ” or “ ” and press
.
The Go to Specific Date screen turns into the Monthly Index screen of the
specified month.
To display schedule of this month
1. Tap “Today”.
Or
Press
, select “Go to Specific Date...” by pressing
“Today” followed by “OK”.
, then tap
Selecting a Category
In the “All” category, all entries are displayed. You can limit the entries displayed by
selecting other categories. (See page 23)
06.Schedule.fm Page 65 Thursday, May 9, 2002 1:58 PM
Schedule & Calendar
Viewing the details of a Schedule &
Calendar entry
1. In the Weekly or Daily Index screen, press
to display the Details screen
for the highlighted entry.
View mode menu
New button
Edit button
Current day button
Deletion button
About the Details Screen
• Pressing
or selecting “DAY” from the view mode menu displays the Daily
Index screen.
• Tapping “New” opens the Edit screen for a new entry.
• Tapping “Edit” opens the Edit screen for the current entry.
• Tapping “Today” opens the Daily Index screen for today.
Pressing
, selecting “Go to Specific Date...” by pressing
then tapping “Today” followed by “OK” also opens the today screen.
, and
Displaying a schedule of another date
To display the next or the previous day’s schedule
1. Press
to display the next entry.
Press
to display the previous entry.
To display the schedule of a desired date
1. Press
, select “Go to Specific Date...” by pressing
.
The Go to Specific Date screen appears.
2. Specify the month by tapping “ ” “ ”.
, then press
65
00.Introduction.book Page 66 Friday, March 15, 2002 3:17 PM
66
Schedule & Calendar
3. Specify the date by using
4. Press
.
(or tap “OK”).
The Go to Specific Date screen turns into the Daily Index screen for the
specified date.
To display the current schedules
1. Tap “Today”.
Or
Press
, select “Go to Specific Date...” by pressing
“Today” followed by “OK” .
, then tap
Modifying a Schedule & Calendar entry
See page 26 for the basic operations.
Setting a schedule alarm
You can set an alarm for each Schedule & Calendar entry.
1. Open the Edit screen.
2. Tap “Alarm”.
The Alarm screen appears.
Alarm check box
Alarm ON
Alarm OFF
Minutes box
Unit menu
3. Check the alarm check box by pressing
.
4. Press
and specify the reminder time in increments of ten by pressing
(or by tapping “ ” “ ”).
The figure counts up each time
down each time “ ” is tapped.
is pressed (or “
” is tapped) and counts
00.Introduction.book Page 67 Friday, March 15, 2002 3:17 PM
Schedule & Calendar
5. Press
and specify the reminder time in single digit increments by pressing
(or by tapping “ ” “ ”).
The figure counts up each time
down each time “ ” is tapped.
6. Press
is pressed (or “
” is tapped) and counts
.
7. Select the unit by pressing
8. Press
and press
.
(or tap “OK”) to complete the alarm setting.
• The Alarm will sound before the appointment according to your settings.
If you press
, the setting is canceled.
Note:
• When the specified time before the Schedule & Calendar entry is reached, the
alarm will sound and the Schedule Alarm screen will be displayed. Press
(or tap “OK”) to stop the alarm. The Daily Index screen including that
schedule will be displayed.
• The title, date, and time for the appointment will be displayed in the Schedule
Alarm screen. If the appointment has been designated as secret, only the date
and time will be displayed.
Setting a reminder
You can set a reminder for all day event entries instead of an alarm setting.
If you set a reminder, the following screens appear when the unit is turned on.
* Where the entry is not set
as secret.
1. Open the Edit screen for an all day event.
2. Tap “Reminder”.
* Where the entry is set as
secret.
67
00.Introduction.book Page 68 Friday, March 15, 2002 3:17 PM
68
Schedule & Calendar
The Reminder screen appears.
3. Select “ON” by pressing
4. Press
and press
and select the first digit for the number of day(s) before by pressing
.
The figure counts up each time
5. Press
.
is pressed.
and select the second digit for the number of day(s) before by pressing
.
The figure counts up each time
6. Press
is pressed.
(or tap “OK”).
The reminder is now set.
Operations using the menu
If you press
when you are using the Schedule & Calendar application, the
menus available for the Schedule & Calendar application appear in the menu
window. The menus, unique to the Schedule & Calendar application, are explained
as follows. See page 26 for general operations using the menu.
Data Deletion
Selected Day
Deletes all entries for the selected day.
All this Month
Deletes all entries for the selected month.
Delete to Last Month
Deletes all entries for the last month and before.
Go to Specific Date...
Brings you to the schedule for the specified date.
00.Introduction.book Page 69 Friday, March 15, 2002 3:17 PM
Schedule & Calendar
View Setting...
Changes the font size on the Weekly/Daily Index or Details screen.
Alarm Tone...
You can select a desired alarm type.
69
00.Introduction.book Page 70 Friday, March 15, 2002 3:17 PM
70
Schedule & Calendar
00.Introduction.book Page 71 Friday, March 15, 2002 3:17 PM
Address Book
Address Book
The Address Book application allows you to create, modify, and manage all contact
information, such as addresses, phone numbers, and E-mail addresses.
You can classify them into categories such as Personal or Business, or can
customize them to suit your needs.
An overview of the Address Book
application
There are three main screens in the Address Book application.
Index screen - you can view Address Book entries displayed in alphabetical order
by name.
Details screen - you can review the details of an entry.
Edit screen - you can create a new entry or modify an existing one.
To use the Address Book application
1. Highlight the “Address” icon on the Main menu screen by using
2. Press
.
.
The Index screen appears.
If you press
menu screen.
(or tap the close box), the Index screen returns to the Main
71
00.Introduction.book Page 72 Friday, March 15, 2002 3:17 PM
72
Address Book
The three main screens are related to each other in the following way.
Index screen
Details screen
Press
.
Press
Tap “Edit”.
Press
.
Edit screen
.
Tap “SAVE”.
Tap “Edit”.
• Tapping “New” on the Index or Details screen displays the Edit screen for creating
a new entry.
Creating a new Address Book entry
1. In the Index or Details screen, tap “New”.
The Edit screen for a new entry appears.
Save
Category menu
Field names
Scroll buttons
2. Press
to display the category menu.
00.Introduction.book Page 73 Friday, March 15, 2002 3:17 PM
Address Book
3. Select the category in which you want to store the entry by pressing
press
and
(ex. “Business”).
4. Move the cursor to each field where you want to enter data by pressing
.
5. Enter the data.
• You can enter data in the following fields:
Last name, First name, Company, Section, Title, Office #
(number), Fax #, Home #, Mobile #, Pager #, Other #, E-mail
1, E-mail 2, URL, Address (W (Work)), City (W), State (W), Zip
code (W), Country (W), Address (H (Home)), City (H), State
(H), Zip code (H), Country (H), Birthday (M/D/Y or D.M.Y can
be selected by changing the Date Format setting in the
Settings application), Custom 1, Custom 2, Note.
6. Tap “SAVE” to store the new entry.
The Edit screen turns into the Details screen.
If you tap the close box, the new entry is canceled.
Viewing a list of Address Book entries
1. Open the Index screen.
Address Book entries are displayed in alphabetical order according to the name
under a specified category and list item.
Category menu
You can change the
sorting order.
(See page 75)
Scroll up/down
New button
Mail button
Edit button
• Each time you press
the highlight moves one line up or down.
73
00.Introduction.book Page 74 Friday, March 15, 2002 3:17 PM
74
Address Book
Searching for an entry (Direct search)
In the Index screen, you can recall entries by the first character(s) of the last name
(or first name, or company).
1. Open the Index screen.
2. Tap the desired character(s) of the last name on the tablet keyboard.
• You can enter a maximum of 5 characters.
• If you tap the desired character(s) on the Index screen, the entries starting with
the characters will be displayed at the top of the entry list and the first entry will
be highlighted.
• If the desired entry is not found, the subsequent entry will be displayed.
• Entries can also be recalled directly by using the first name or company by setting
the 1st field using the menu command (“View Setting...” menu).
3. Press
when the desired listing or entry is recalled.
Note: On the Details screen, you can recall the entries only by the last name.
Selecting a Category
In the “All” category, all entries are displayed. You can limit the entries displayed by
selecting other categories. (See page 23)
Viewing the details of an Address Book
entry
1. On the Index screen, highlight the entry you want to review by pressing
2. Press
.
Or
Tap the desired entry.
.
00.Introduction.book Page 75 Friday, March 15, 2002 3:17 PM
Address Book
The Details screen of the entry appears.
Close
Only the fields containing
the data are displayed.
Address field icons
New button
Scroll buttons
Mail button
Edit button
Delete button
• On the Details screen, field names are represented by icons.
• Field data (Address, City, State, Zip code, Country) on the Index screen will be
displayed in one field on the Details screen.
Selecting the next or previous entry
1. Press
to select the next entry and press
alphabetical order under the same category.
to select the previous entry in
Modifying an Address Book entry
See page 26 for the basic operations.
Changing the sorting order
You can change view on the Index screen.
1. Press
and select “View Setting...”.
2. Press
.
75
00.Introduction.book Page 76 Friday, March 15, 2002 3:17 PM
76
Address Book
The Index View Setting screen appears.
1st field menu
2nd field menu
3. Press
to display the 1st field menu.
4. Select the desired item for the 1st field of the Index screen by pressing
and press
.
• If you select “Last Name, First Name”, the last and first name will be displayed in
the 1st field of the Index screen with a comma (,) inserted between them (default
setting).
• If you select “First Name Last Name”, the first and last name will be displayed in
the 1st field of the Index screen.
5. Press
to display the 2nd field menu.
6. Select the desired item for the 2nd field of the Index screen by pressing
and press
7. Press
.
twice and press
(or tap “OK”) to save the setting.
The screen returns to the Index screen.
If you press
(or tap “Cancel”), the setting is canceled.
00.Introduction.book Page 77 Friday, March 15, 2002 3:17 PM
Address Book
Creating an e-mail message from an
Address Book entry
1. On the Index or Details screen, tap “Mail”.
• If you tap “Mail” on the Index screen, the e-mail address from the highlighted entry
will be displayed.
• If you tap “Mail” on the Details screen, the e-mail address of the current entry will
be displayed.
* Where both the
“E-mail 1” and “E-mail 2”
fields for the Address
Book entry are filled.
2. <If either the “E-mail 1” or “E-mail 2” field for the Address Book entry is filled >
Press
.
<If both the “E-mail 1” and “E-mail 2” field for the Address Book entry are filled>
Select the e-mail address you want to send a message to from “MAIL 1” or
“MAIL 2” by pressing
and press
.
The New Message screen appears with the “TO” field filled with the selected
e-mail address.
3. Enter the “CC”, “SUB”, “Message” field, and then press
(or tap “SEND”).
77
00.Introduction.book Page 78 Friday, March 15, 2002 3:17 PM
78
Address Book
Operations using the menu
If you press
when you are using the Address Book application, the menus
available for the Address Book application appear in the menu window. The menu,
unique to the Address Book application, is explained as follows. See page 26 for
general operations using the menu.
View Setting...
Selects the 1st and 2nd field view for the Index screen and changes the font size of
the Index or Details screen.
00.Introduction.book Page 79 Friday, March 15, 2002 3:17 PM
To Do List
To Do List
The To Do List application allows you to manage tasks and reminds you to complete
them before the due date.
You can list them by due date or by priority.
An overview of the To Do List application
There are three main screens in the To Do List application.
Index screen - you can view a list of To Do List entries.
Details screen - you can confirm the details of an entry.
Edit screen - you can create a new entry or modify an existing one.
To use the To Do List application
1. Highlight the “ToDo” icon on the Main menu screen by using
2. Press
.
.
The Index screen appears.
If you press
menu screen.
(or tap the close box), the Index screen returns to the Main
79
00.Introduction.book Page 80 Friday, March 15, 2002 3:17 PM
80
To Do List
The three main screens are related to each other in the following way.
Edit screen
(To Be Done)
Index screen
Tap “Edit”.
Press
.
Press
or tap the entry.
Tap “SAVE”.
Details screen
(To Be Done)
Tap “Edit”.
Details screen
(Done)
You can check or
uncheck the status
check box by
pressing
.
• Tapping “New” on the Index or Details screen displays the Edit screen for creating
a new entry.
00.Introduction.book Page 81 Friday, March 15, 2002 3:17 PM
To Do List
Creating a new To Do List entry
1. On the Index or Details screen, tap “New”.
The Edit screen for a new entry appears.
Category menu
Due date pop-up calendar
Priority menu
2. Press
to display the category menu.
3. Select the category in which you want to store the entry by pressing
press
4. Press
5. Press
press
6. Press
pressing
7. Press
8. Press
and
.
and enter the title of the entry.
, select the due date on the pop-up calendar by using
, then
.
, select priority from 1 (most important) to 5 (least important) by
, then press
.
and enter the description.
(or tap “SAVE”) to store the new entry.
If you press
(or tap the close box), a confirmation message appears asking
you if you really want to throw away all of the changes. To cancel the new entry,
highlight “OK” by pressing
and press
(or tap “OK”).
81
00.Introduction.book Page 82 Friday, March 15, 2002 3:17 PM
82
To Do List
Viewing a list of To Do List entries
1. Open the Index screen.
To Do List entries are displayed by “Date” or by “Priority” under a specified
category. (See page 23)
.
Category menu
Index item
pop-up menu
Due date
Finish check box
Priority
New button
Scroll up/down
Edit button
If you press
, the Main menu screen appears.
Selecting an index item
You can limit the entries displayed to “All”, “Done”, or “To Be Done” by using the
index item pop-up menu.
1. Tap the index item pop-up menu.
2. Tap the desired index item.
The desired index screen will be displayed.
Selecting a Category
In the “All” category, all entries are displayed. You can limit the entries displayed by
selecting other categories. (See page 23)
00.Introduction.book Page 83 Friday, March 15, 2002 3:17 PM
To Do List
Viewing the details of a To Do List entry
1. On the Index screen, highlight the entry you want to confirm by pressing
2. Press
.
Or
Tap the desired entry.
The Details screen of the selected entry appears.
Done
To Be Done
To Do
field
icons
Status (To Be
Done)
Status
(Done)
Due date
Done date
Modifying a To Do List entry
See page 26 for the basic operations.
Note: If you change the index item from “To Be Done” to “Done”, the “DUE
DATE” field changes to “DONE DATE” field.
Checking a finished entry
When you finish a To Do List task, check the Finish check box. If you do not check
the box, the To Do List entry is recognized as unfinished.
To check on the Index or Details screen
1. On the Index screen, highlight the finished entry by pressing
Or
Open the Details screen.
2. Tap
(check box).
“DUE DATE” will change to “DONE DATE” that has today’s date.
• Repeating the above procedures removes the check.
.
.
83
00.Introduction.book Page 84 Friday, March 15, 2002 3:17 PM
84
To Do List
• On the Details screen, you can check or uncheck the check box by pressing
.
Changing the sorting order
You can sort To Do List entries by “Date” or by “Priority” and change the font size on
the Index screen.
1. On the Index screen, press
.
2. Select “View Setting...” by pressing
and press
.
3. Select the “Date” or “Priority” radio button and press
.
4. Select the “Small” or “Large” radio button and press
.
The Index View Setting screen appears.
5. Press
(or tap “OK”) to store the setting.
The screen returns to the Index screen.
If you press
(or tap “Cancel”), the setting is canceled.
Note: You can also change the font size on the Details screen by pressing
and selecting “View Setting...” on the Details screen.
Operations using the menu
If you press
when you are using the To Do List application, the menus
available for the To Do List application appear in the menu window. The menus,
unique to the To Do List application, are explained as follows. See page 26 for
general operations using the menu.
00.Introduction.book Page 85 Friday, March 15, 2002 3:17 PM
To Do List
Data Deletion
Selected Entry
Deletes the selected entry.
All in this Category
Deletes entries in the selected category.
All Done Entries
Deletes all Done entries in the To Do List application.
All To Do Entries
Deletes all entries in the To Do List application.
View Setting...
Selects a sorting order for the To Do List entries by “Date” or by “Priority” on the
Index screen and changes the font size on the Index or Details screen.
85
00.Introduction.book Page 86 Friday, March 15, 2002 3:17 PM
86
To Do List
00.Introduction.book Page 87 Friday, March 15, 2002 3:17 PM
Memo
Memo
The Memo application allows you to make brief notes.
An overview of the Memo application
There are three main screens in the Memo application.
Index screen - you can view a list of Memo entries.
Details screen - you can confirm the details of an entry.
Edit screen - you can create a new entry or modify an existing entry.
To use the Memo application
1. Highlight the “Memo” icon on the Main menu screen by using
2. Press
.
.
The Index screen appears.
If you press
menu screen.
(or tap the close box), the Index screen returns to the Main
The three main screens are related to each other in the following way.
Index screen
Details screen
Press
or tap the entry.
Press
.
Edit screen for a new entry
Tap “New”.
Tap “SAVE”.
Tap “New”.
• Tapping “Edit” on the Index or Details screen displays the Edit screen for editing
an existing entry.
87
00.Introduction.book Page 88 Friday, March 15, 2002 3:17 PM
88
Memo
Creating a new Memo entry
1. On the Index or Details screen, tap “New”.
The Edit screen for a new entry appears.
SAVE button
Close
Title line
2. Enter your memorandum with the stylus.
• The first line becomes a title in both the Index and Details screen.
3. Press
(or tap “SAVE”) to store the new entry.
If you press
, the new entry is canceled.
Viewing a list of Memo entries
1. Open the Index screen.
Memo entries are displayed by “Title” or by “Date” under in a specified category.
(See page 23)
Category menu
Close
New button
Scroll up/down
Edit button
00.Introduction.book Page 89 Friday, March 15, 2002 3:17 PM
Memo
• If you press
, the Main menu screen appears.
• If you press
, the Details screen of the highlighted entry appears.
Selecting a Category
In the “All” category, all entries are displayed. You can limit the entries displayed by
selecting other categories. (See page 23)
Viewing the details of a Memo entry
1. On the Index screen, highlight the entry you want to confirm by pressing
2. Press
.
Or
Tap the desired entry.
The Details screen of the selected entry appears.
Scroll buttons
• Press
to scroll line.
Modifying a Memo entry
See page 26 for the basic operations.
Changing the sorting order
You can sort Memo entries by “Title” or by “Date” and change the font size on the
Index screen.
1. On the Index screen, press
.
.
89
00.Introduction.book Page 90 Friday, March 15, 2002 3:17 PM
90
Memo
2. Select “View Setting...” by pressing
and press
.
The Index View Setting screen appears.
3. Select the “Title” or “Date” radio button and press
.
• If you choose the “Title” radio button, memo entries are listed in the order of
numbers, letters (uppercase, lowercase), or symbols.
• If you choose the “Date” radio button, Memo entries are listed by date. The oldest
entry will be displayed on the top of the list.
4. Select the “Small” or “Large” radio button and press
5. Press
.
(or tap “OK”) to store the setting.
The screen returns to the Index screen.
If you press
(or tap “Cancel”), the setting is canceled.
Note: You can also change the font size on the Details screen by pressing
and selecting “View Setting...” on the Details screen.
Operations using the menu
If you press
when you are using the Memo application, the menus available
for the Memo application appear in the menu window. The menus, unique to the
Memo application, are explained as follows. See page 26 for general operations
using the menu.
Data Deletion
All Memo Entries
Deletes all Memo entries in the Memo application.
View Setting...
Selects a sorting order for Memo entries by “Title” or by “Date” on the Index screen
and changes the font size on the Index or Details screen.
00.Introduction.book Page 91 Friday, March 15, 2002 3:17 PM
NotePad
NotePad
The NotePad application allows you to manually write notes using the stylus.
An overview of the NotePad application
There are three main screens in the NotePad application.
Index screen - you can view NotePad entries.
Details screen - you can review the details of an entry.
Edit screen - you can create a new entry or modify an existing one.
To use the NotePad application
1. Highlight the “NotePad” icon on the Main menu screen by using
2. Press
.
.
The Index screen appears.
If you press
menu screen.
(or tap the close box), the Index screen returns to the Main
The three main screens are related to each other in the following way.
Index screen
Details screen
Press
or tap the entry.
Press
.
Edit screen
Tap “Edit”.
Tap “SAVE”.
Tap “Edit”.
• Tapping “New” on the Index or Details screen displays the Edit screen for creating
a new entry.
91
00.Introduction.book Page 92 Friday, March 15, 2002 3:17 PM
92
NotePad
Creating a new NotePad entry
1. On the Index or Details screen, tap “New”.
The Edit screen for a new entry appears.
SAVE
Close
Tool box
: Draws a free-hand line. You can select three types of lines. Tap this icon to
display line options and then select the desired line by tapping it.
: Draws a straight line starting from the point where the stylus is in contact with the
screen to the point where the stylus is released.
: Erases graphics on the screen. The eraser is available in three sizes.
: Draws a box whose line starts from the point where the stylus is in contact with
the screen to the point where the stylus is released.
: Draws a circle whose line starts from the point where the stylus is in contact with
the screen to the point where the stylus is released.
: Clears the screen.
2. Draw a desired line with the stylus by using the tool box.
3. Press
(or tap “SAVE”) to store the new entry.
The entry will be saved as “Untitled”.
If you press
, the new entry is canceled.
• To specify a title for an entry, tap “Title” on the Details screen.
00.Introduction.book Page 93 Friday, March 15, 2002 3:17 PM
NotePad
Viewing a list of NotePad entries
1. Open the Index screen.
NotePad entries are displayed by “Title” or by “Date” under a specified category.
Category menu
Scroll up/down
New button
Edit button
Selecting a Category
In the “All” category, all entries are displayed. You can limit the entries displayed by
selecting other categories. (See page 23)
93
00.Introduction.book Page 94 Friday, March 15, 2002 3:17 PM
94
NotePad
Viewing the details of a NotePad entry
1. On the Index screen, highlight the entry you want to confirm by pressing
2. Press
.
.
Or
Tap the desired entry.
The Details screen of the selected entry appears.
Modifying a NotePad entry
See page 26 for the basic operation.
Changing the sorting order
You can sort NotePad entries by “Title” or by “Date” and change the font size on the
Index screen.
1. On the Index screen, press
.
2. Select “View Setting...” by pressing
and press
.
The View Setting screen appears.
3. Select the “Title” or “Date” radio button.
4. Select the “Small” or “Large” radio button.
• If you choose the “Title” radio button, NotePad entries are listed in the order of
numbers, letters (uppercase, lowercase), or symbols.
00.Introduction.book Page 95 Friday, March 15, 2002 3:17 PM
NotePad
• If you choose the “Date” radio button, NotePad entries are listed by date. The
oldest entry will be displayed on the top of the list.
5. Press
(or tap “OK”) to store the setting.
The screen returns to the Index screen.
If you press
(or tap “Cancel”), the setting is canceled.
Operations using the menu
If you press
when you are using the NotePad application, the menus
available for the NotePad application appear in the menu window. The menus,
unique to the NotePad application, are explained as follows. See page 26 for
general operations using the menu.
Data Deletion
All Notepad Entries
Deletes all entries in the NotePad application.
Title
Edits the title of the selected entry.
View Setting...
Selects a sorting order for NotePad entries by “Title” or by “Date” and changes the
font size on the Index screen.
95
00.Introduction.book Page 96 Friday, March 15, 2002 3:17 PM
96
NotePad
00.Introduction.book Page 97 Friday, March 15, 2002 3:17 PM
Other Applications
Other Applications
Calculator
The unit provides a 12-digit calculator which allows you to perform mathematical
operations, including percentage and square root calculations.
To use the Calculator application
1. Highlight the “Calc” icon on the Main menu screen by using
2. Press
.
.
The Calculator screen appears.
“+/-”:
Changes sign of
number.
“CM”:
Clears the memory.
“RM”:
Displays the memory’s
content.
“M-”:
Subtracts a number
from the memory.
“CE”:
Clears the number
entered last.
“C”:
Clears the current
calculation.
“M+”:
Adds a number to the
memory.
If you press
screen.
on the Calculator screen, the screen returns to the Main menu
3. Perform a calculation by tapping the numeric and mathematical symbol keys on
the screen.
97
00.Introduction.book Page 98 Friday, March 15, 2002 3:17 PM
98
Other Applications
Calculation examples
Note: Before starting calculation, tap
Calculation
Example
twice.
Tap operation
Arithmetic
(–24+2)÷4=
24
Constant
34+57=
34
45+57=
68×40=
45
(Subtraction and division are
performed in the same
manner.)
68
25
The
multiplicand
becomes a
constant.
40
200×10%=
200
9÷36=
9
Add-on
200+(200×10%)=
200
Discount
What is 500 after a
20% discount?
500
20
(or 500
20
68×25=
Percentage
Square
root
25 – 9 =
25
2
Display
57
4
–5.5
91.
The addend
becomes a
constant.
102.
1,700.
2,720.
10
20.
36
25.
10
220.
400.
)
9
4.
Power
(43)2=
4
4,096.
Reciprocal
1/8=
8
0.125
Memory
Summation
25×5=125
–)
84÷3=28
+) 68+17=85
25
84
68
(Clear the memory)
5
3
17
(Total)
Temporary memory
(14-3x2)x
(52-35)=
14
52
3
35
2
M
125.
28.
M
85.
M
182.
M
M
M
6.
136.
00.Introduction.book Page 99 Friday, March 15, 2002 3:17 PM
Other Applications
When “E” appears
• When any of the following situations occur, the error indicator “E” is displayed and
calculations are suspended. To clear the error, tap
.
• The integer part of a calculation result is within the range of 13 to 24 digits (a
rough calculation is obtained).
Example: 4567890123
456
2.08295789608 is displayed with E, which
indicates that the rough result is:
2.08295789608 × 10¹² (le. 2,082,957,896,080)
• The integer part of a calculation result exceeds 24 digits.
• The integer part of a numerical value in the memory exceeds 12 digits.
• A number is divided by “0”.
Clock
The Clock application allows you to check local and foreign city times and set daily
alarms.
To use the Clock application
1. Highlight “Clock” icon on the Main menu screen by using
2. Press
.
.
The Clock (Local Clock) screen appears.
Clock menu
Local Date
DST check box
Local city
Local time
Setting button
If you press
screen.
on the Clock screen, the Clock screen turns to the Main menu
99
00.Introduction.book Page 100 Friday, March 15, 2002 3:17 PM
100 Other Applications
The major screens are related to each other in the following way.
Local Clock screen
World Clock screen
Press
.
Press
Press
.
Press
.
.
Press
Timer Clock screen
.
Press
.
Alarm Clock screen
Press
Press
.
.
Setting your local city
1. On the Local Clock screen, highlight “Setting” by pressing
and press
(or tap “Setting”).
Time/Date Setting screen appears.
City:
1. Highlight “City” by pressing
and press
.
2. Type the first letter of the desired city on the tablet keyboard.
A list of cities that begin with that letter appears.
3. Select the desired city by pressing
and press
Format:
1. Highlight “Format” by pressing
.
2. Select the desired format by pressing
3. Press
.
.
.
00.Introduction.book Page 101 Friday, March 15, 2002 3:17 PM
Other Applications 101
Date:
1. Highlight “Date” by pressing
and press
to display the pop-up
calendar.
2. Select the month by tapping “ ” “ ”.
3. Select the date by using
4. Press
.
.
Time:
1. Highlight “Time” by pressing
2. Press
3. Press
press
4. Press
press
and press
, adjust the hour by pressing
.
, then press
.
, adjust the first digit of the minute by pressing
, then
.
, adjust the second digit of the minute by pressing
, then
, select AM or PM by pressing
.
.
5. Press
, then press
(The AM/PM menu does not appear if you have selected “24hr” for format.)
6. Press
.
After setting the above, press
.
• If necessary, tap the DST check box to adjust for daylight saving time.
Setting a world city time
1. Open the World Clock screen.
World Date
DST check box
World city box
World time
2. Tap the world city box.
00.Introduction.book Page 102 Friday, March 15, 2002 3:17 PM
102 Other Applications
3. Tap the desired city on the pop-up menu.
The World Time will adjust to that city’s time. If necessary, tap the DST check
box to adjust for daylight saving time.
Note: The setting of the date and time in the World city is based on the local
clock setting.
Setting an alarm
1. Open the Alarm Clock screen.
2. Highlight “Time” by pressing
and press
.
Time
Alarm check box
Daily check box
3. Press
4. Press
press
5. Press
press
6. Press
, adjust the hour by pressing
, and then press
, adjust the first digit of the minute by pressing
.
, then
.
, adjust the second digit of the minute by pressing
, then
, select AM or PM by pressing
.
.
, then press
(The AM/PM menu does not appear if you have selected “24hr” for format in
setting your local city.)
7. Press
.
8. Tap the Alarm on check box to turn on alarm.
• If you want an alarm to sound on a daily basis, tap the daily check box (“Daily”).
Alarm will sound same time every day at the set time.
After setting the above, tap “Done”.
00.Introduction.book Page 103 Friday, March 15, 2002 3:17 PM
Other Applications 103
Using timer
1. Open the Timer Clock screen.
Start button
Pause button
Reset button
2. Tap “Start” to start the timer, and tap “Pause” to stop it.
While the timer is running, it displays hour, minute, and second.
3. Tap “Reset” to set the time back to zero.
Customizing the unit (Settings)
The Settings application allows you to customize the various settings such as startup screen, opening screen, auto-off function, backlight function, sound, LCD
contrast, touch panel calibration, time format, and word completion feature.
To use the Settings application
1. Highlight the “Settings” icon on the Main menu screen by using
2. Press
.
The Settings screen appears.
.
00.Introduction.book Page 104 Friday, March 15, 2002 3:17 PM
104 Other Applications
• When you complete the settings, tap “OK” on the Settings screen. The screen
returns to the Main menu screen.
• The settings you made will not be stored unless you tap “OK” on the Settings
screen.
Setting the Start-up screen/Opening screen/Auto-off
function/Backlight function
Highlight “Start-up/Auto-off” by pressing
The Start-up/Auto-off screen appears.
and press
.
Selecting the Start-up screen:
You can select the start-up screen when the unit is turned on.
1. Highlight “Start-up” by pressing
and press
2. Select the desired start-up screen by pressing
.
and press
.
Setting the Opening screen:
You can select whether the opening screen is displayed or not when the unit is
turned on.
1. Highlight “Opening” by pressing
.
2. Select the “On” or “Off” radio button by pressing
and press
.
Adjusting the Auto-off function:
To conserve the battery power, the unit will turn itself off if it has not been used for
a set number of minutes.
1. Highlight “Auto-off” by pressing
and press
2. Select the desired auto-off time by pressing
.
and press
.
Note: In order to avoid accidentally interrupting data transfers, the Auto-off
function is automatically disabled while communicating with your PC.
Adjusting the Backlight function
1. Highlight “Backlight” by pressing
and press
2. Select the desired backlight time by pressing
.
and press
.
After setting the above, highlight “OK” by pressing
and press
(or tap
“OK”). The screen returns to the Settings screen. Tap “OK” to store the settings.
00.Introduction.book Page 105 Friday, March 15, 2002 3:17 PM
Other Applications 105
Adjusting the sound
1. Highlight “Sound” by pressing
and press
.
The Sound Settings screen appears.
2. Tap the Key Sound check box if you want to mute the sound when you press
the hardware keys.
3. Tap the Schedule Alarm check box if you want to mute the schedule alarm
sound.
4. Tap the Daily Alarm check box if you want to mute the daily alarm sound.
5. Highlight “OK” by pressing
and press
(or tap “OK”).
The screen returns to the Settings screen.
6. Tap “OK” to store the settings.
Adjusting the LCD contrast
1. Highlight “Contrast” by pressing
and press
.
The Contrast screen appears.
2. Press
to adjust the LCD contrast.
3. Highlight “OK” by pressing
and press
(or tap “OK”).
The screen returns to the Settings screen.
4. Tap “OK” to store the settings.
Adjusting the touch panel (Calibration)
1. Highlight “Calibration” by pressing
and press
.
2. Tap the center of the target with the stylus.
The target moves to another position.
3. Repeat step 2 until you tap the target at the bottom right of the screen.
4. Tap “Q” followed by “P” on the tablet keyboard according to the instructions
displayed on the screen.
The screen returns to the Settings screen.
5. Tap “OK” to store the settings.
00.Introduction.book Page 106 Friday, March 15, 2002 3:17 PM
106 Other Applications
Adjusting the time format (Formats)
1. Highlight “Formats” by pressing
and press
.
The Formats screen appears.
2. Highlight “Date Format” by pressing
button by pressing
, then press
, select the “M/D/Y” or “D.M.Y” radio
.
3. Highlight “Weekly Format” by pressing
, then press
, select the “SUN” or “MON” radio
.
4. Highlight “Time System” by pressing
, select “12” or “24” radio button by
button by pressing
pressing
, then press
5. Highlight “OK” by pressing
.
and press
(or tap “OK”).
The screen returns to the Settings screen.
6. Tap “OK” to store the settings.
Setting the word completion feature
1. Highlight “Word Completion” by pressing
and press
The Word Completion Settings screen appears.
2. Set each item according to your preference.
To store a new word into the user dictionary
1. Tap “Add Word to Dictionary”.
The User Dictionary screen appears.
2. Type the word or phrase you want to store and tap “Add”.
3. Press
.
The screen returns to the Word Completion Settings screen.
4. Press
.
The screen returns to the Settings screen.
5. Tap “OK” to store the settings.
.
00.Introduction.book Page 107 Friday, March 15, 2002 3:17 PM
Other Applications 107
Checking memory information (Memory)
The unit has two types of memory: flash memory and RAM (SDRAM) memory. The
flash memory holds the data in Mybox and Outbox folders for both the E-Mail and
Attachment Viewer applications as well as the data in another applications. The
RAM (SDRAM) memory holds the data in Inbox folder for the E-Mail application and
data in Inbox folder for the Attachment Viewer application.
The data stored on the RAM (SDRAM) memory will be lost when the batteries are
replaced or the batteries are extremely low. To avoid losing important data in the EMail or Attachment Viewer application, it is recommended to copy them to Mybox
folder for each application.
The Memory application allows you to check the memory usage of each memory.
Press
Press
.
.
Checking the memory usage
1. Highlight the “Memory” icon on the Main menu screen by using
2. Press
.
.
The Memory screen (FLASH memory) appears.
3. Press
to display the Memory screen (RAM memory).
If you press
menu screen.
(or tap the close box), the Memory screen returns to the Main
Setting a password (Secret)
The Secret application allows you to keep selected information in the unit secure by
locking it with a password that you specify. Entries that you have set as secret
cannot be accessed until the unit is unlocked using the password. Individual entries
can be set as secret, so that only someone who knows the password can access
them by unlocking the unit.
00.Introduction.book Page 108 Friday, March 15, 2002 3:17 PM
108 Other Applications
Note:
• If you forget the password, but you have not yet turned the unit off, you must
delete all secret entries and the password from the unit. As a safeguard, be
sure to make a written record of the password.
• If you forget the password and have already turned the unit off, you must do a
complete reset of the unit. When you do a complete reset of the unit, all data
in the unit will be deleted. See page 115 “All reset operation” for further details.
To use the Secret application
1. Highlight the “Secret” icon on the Main menu screen by using
2. Press
.
.
The Secret screen appears.
If you press
menu screen.
(or tap the close box), the Secret screen returns to the Main
Setting a password and locking the unit
1. On the Secret screen with “Lock” highlighted, press
(or tap “Lock”).
The Lock screen appears.
2. Enter a password within 20 characters.
Entered characters are displayed as “ ”.
Letters, numbers, and symbols can all be used. The text field is case-sensitive,
which means that upper and lower case letters are treated differently. The
password “SHARP”, for example, is different from the passwords “Sharp” or
“sharp”.
00.Introduction.book Page 109 Friday, March 15, 2002 3:17 PM
Other Applications 109
Note: Choose your password carefully. If you forget your password, there is no
way to bypass the Secret function or enter a new password without
losing all data set as secret. It is strongly recommended that you use a
password that you will always be able to remember, but which other
people will be unable to guess.
3. Press
.
The password confirmation screen appears.
4. Enter the password again and press
To cancel setting a password, press
5. Press
.
.
.
• If you enter an incorrect password in the password confirmation screen, a dialog
box appears showing it is incorrect.
Press
and re-enter the password by performing steps 2 to 5.
• When you enter the correct password, a dialog requesting you to memorize the
password appears.
Press
.
“Locked.” is displayed briefly and the screen returns to the Main menu screen with
displayed at the bottom of it.
Note: When you set a password and the security function works (locked
status), the following functions are carried out.
• Hides entries you set as secret.
• Prohibits finding secret entries.
• Prohibits synchronization with PC unless the password is
authenticated.
• Will not display Schedule & Calendar entries when marked as secret.
• Prohibits deleting entries in an application.
To set each entry secret, see “Setting secret entries” on page 30.
00.Introduction.book Page 110 Friday, March 15, 2002 3:17 PM
110 Other Applications
Unlocking the unit
Entries set as secret are not shown in the unit’s display when it is locked, and cannot
be accessed using the find function. To be able to recall and access secret entries,
the unit must first be unlocked.
1. On the Secret screen with “Unlock” highlighted, press
(or tap “Unlock”).
The Unlock screen appears.
2. Enter the password.
3. Press
.
• If you enter an incorrect password, a dialog box appears showing it is incorrect.
“Unlocked.” is displayed briefly and the screen returns to the Main menu screen.
Locking the unit again
On the Security screen with “Lock” highlighted, press
The unit is locked again.
(or tap “Lock”).
Note: The unit will automatically be locked again when the unit is turned off and
then turned on.
Deleting the password
1. On the Secret screen with “Lock” or “Unlock” highlighted, highlight “Delete
Password” by pressing
2. Press
.
.
The Delete Password screen appears.
00.Introduction.book Page 111 Friday, March 15, 2002 3:17 PM
Other Applications 111
3. Enter the password.
To cancel deleting the password, press
4. Press
.
to delete the password.
• If you enter an incorrect password, a dialog box appears showing it is incorrect.
The Delete Password screen returns to the Main menu screen. The unit returns
to the status with no password (Unlocked).
Note: To change the password, delete the password first, then set a new
password.
Deleting all secret entries and the password
If you forget the password, you have to delete all secret entries and the password in
the following way.
1. On the Secret screen with “Lock” or “Unlock” highlighted, highlight “Delete All
Secret Data” by pressing
2. Press
.
.
A confirmation dialog box appears.
To cancel deleting all secret entries and the password, press
3. Press
.
.
“Deleted.” is displayed briefly and the screen returns to the Main menu screen.
The unit returns to the status with no password (Unlocked).
Entering owner information
1. Highlight “Owner” icon on the Main menu screen by using
The Owner Information screen appears.
2. Enter each field and tap “SAVE”.
The entered information is saved.
and press
.
00.Introduction.book Page 112 Friday, March 15, 2002 3:17 PM
112 Other Applications
About Add-on software
Using PC software (WIZARD STATION), you can install Add-on software from your
PC to the unit.
Add-on software will be saved in the Add-on menu on the unit. For details on Addon software, refer to Software Guide.
12.PC Link.fm Page 113 Thursday, May 9, 2002 1:59 PM
Exchanging Information with Your PC (PC-Link) 113
Exchanging Information with
Your PC (PC-Link)
Using the included OZ-800 PC software (OZ-800 Synchronization Software and
WIZARD STATION) and cable, you can exchange data with a PC. This makes it
possible to transfer e-mail messages from your PC to the unit and read them while
outside your home. You can also install Add-on software from your PC to the unit.
PC software set up
1. Turn off your PC and unit before connecting them with the supplied cable.
2. Connect the standard 9-pin connector of the supplied cable to one of the Serial
Ports on your PC.
3. Connect the supplied cable to the PC-Link port of the unit.
4. Turn on the unit and your PC.
The connection between the unit and your PC is automatically established and
the unit is now ready to exchange data.
Note:
• Press
at any time to exit the PC-Link mode. If you leave the unit in PCLink mode, more power is consumed from the batteries than usual, and the
Auto-off function will not work.
To conserve battery power, always press
to leave the PC-Link mode as
soon as you have finished transferring data.
• For e-mail synchronization, only the e-mail message in the Inbox folder will be
synchronized between the unit and your PC.
• For details on exchanging information with your PC, refer to the separately
supplied Quick Start Guide and Software Guide.
00.Introduction.book Page 114 Friday, March 15, 2002 3:17 PM
114 Exchanging Information with Your PC (PC-Link)
00.Introduction.book Page 115 Friday, March 15, 2002 3:17 PM
Appendix 115
Appendix
Resetting the unit
A strong impact, exposure to an electrical field, or other unusual conditions may
render the unit inoperable, and pressing the keys and tapping the buttons will have
no effect. If this occurs, you will have to reset the unit by pressing the RESET button
on the back of the unit using the stylus or similar object.
Note:
• If the unit becomes inoperable, some or all of the data stored in the memory
may be lost.
• Do not use anything with a sharp tip or anything that might break to press the
RESET button.
• If the unit does not work properly after resetting it, remove the batteries and
wait for several seconds before replacing them. Then press the RESET
button.
All reset operation
If the unit still fails to function after it has been reset using the procedure above, or
you have forgotten the password to be entered in the start-up display, you will have
to reset it using a slightly more complicated method:
Caution: When you do a complete reset of the unit, all data created and all
Add-on software installed in the unit will be deleted.
1. While pressing and holding
A message appears.
, press and release the RESET button.
00.Introduction.book Page 116 Friday, March 15, 2002 3:17 PM
116 Appendix
2. Release
.
3. Highlight “OK” by pressing
and press
(or tap “OK”).
Battery replacement
General guidelines
The unit uses the following type of batteries:
Type
Size / Model
Qty.
Alkaline batteries
Size “AAA”/LR03
2
There are some important points to remember when installing new batteries:
• Replace both batteries at the same time. Use new batteries of the same type.
• The data stored in RAM memory, such as e-mail messages, will be lost when the
batteries are replaced or the batteries are extremely low.
Caution:
• If fluid from a leaking battery accidentally gets into your eyes, it may result in
serious injury. Should this occur, flush your eyes with clean water and consult
a physician immediately.
• Should fluid from a leaking battery come into contact with your skin or clothes,
immediately wash with clean water.
• If the unit will not be used for an extended period of time, to avoid damaging
the unit, remove batteries and store in a safe place.
• Do not leave exhausted batteries inside the unit.
• Do not mix different types of batteries or partially used batteries.
• Keep batteries out of the reach of children.
• Do not dispose of batteries by fire as they may explode.
Replacing the batteries
If the battery level becomes low when you are using the unit, a warning message
and the battery indicator appears on the unit’s display. You should replace batteries
immediately.
1. Turn off the unit.
00.Introduction.book Page 117 Friday, March 15, 2002 3:17 PM
Appendix 117
2. Slide the battery replacement switch on the back of the unit to the “REPLACE
BATTERIES” position.
3. Open the battery compartment lid and gently remove it.
4. Remove the old batteries.
5. Insert two new batteries, making sure to position them correctly according to the
plus (+) and minus (-) terminals, as illustrated below.
6. Replace the battery compartment lid.
7. Slide the battery replacement switch to the “NORMAL OPERATION” position.
8. Turn on the unit and follow the setup procedures displayed. (See page 13)
If nothing happens when you press
:
• Setting the battery replacement switch to “REPLACE BATTERIES” shuts off
power to the unit. Check that the battery replacement switch is set to “NORMAL
OPERATION”.
• Repeat the above battery replacement procedure step by step.
Note: The following data will be lost when the batteries are replaced.
• E-mail messages in the Inbox folder (E-Mail application)
• Attachments in the Inbox folder (Attachment Viewer application)
00.Introduction.book Page 118 Friday, March 15, 2002 3:17 PM
118 Appendix
Specifications
Model
OZ-800
Display
160 x 160 dot matrix liquid crystal display
Electronic unit
Applications
E-Mail, Attachment Viewer, Schedule & Calendar, Address
Book, To Do List, Memo, NotePad, Calculator, Clock, Add-on
Memory capacity
2MB Flash memory
User area approx. 1540KB
(Schedule & Calendar, Address Book, To Do List, Memo,
NotePad, Add-on software)
8MB SDRAM memory
User area approx. 7370KB
(E-Mail, Attachment Viewer)
Record capacity
Approx. 1650 E-Mails with 10% attachments.
(Average E-Mail message size: 2.5KB
Average attachment size: 30KB on PC)
User interfaces
Pen touch screen and Tablet keyboard
Other features
Secret, PC-Link, find function, word completion feature, words
and phrase function
Calculator
Digits
12
Functions
Addition, subtraction, multiplication, division, constant, memory
calculation
Clock
Crystal oscillation 32,768 Hz
frequency
Accuracy
Average variance per day, 2 seconds (at 25°C/77°F)
Display
information
Year, month, day, day of the week, hours, minutes, second,
AM/PM, city names.
Time system
12-hour or 24-hour
Other functions
Display of date and time for various cities around the world.
Enable/disable daylight saving time.
00.Introduction.book Page 119 Friday, March 15, 2002 3:17 PM
Appendix 119
Peripherals and Data transfer interface
Cable jack
4-pin connector
General
Power
Battery:
3V
DC, alkaline batteries
(LR03 (size “AAA”) x 2)
Power
consumption
0.36 W
Battery Life
Battery life may vary depending on usage.
* Approx. 80 hours. Continuous display at an ambient
temperature of 25°C (77°F).
* Approx. 50 hours. Searching data for 5 minutes and display on
for 55 minutes per hour, at an ambient temperature of
25°C(77°F).
* Approx. 45 hours. Using the Backlight for 2 minutes per hourly
use and searching for 5 minutes per hourly use at an ambient
temperature of 25°C(77°F).
* Replace batteries at least once every 2 months.
Backlight life
Backlight life may vary depending on usage.
If the backlight is on for 10 minutes per day (e.g. 1 minute 10
times a day), the brightness will be reduced by half after 10*
years (at an ambient temperature of 25°C and 65% humidity).
* This figure may vary depending on the surrounding
environment.
Operating
temperature
0°C to 40°C (32°F to 104°F)
Dimensions
67.5(W) x 108(D) x 12.4(H) mm
2-21/ 32"(W) x 4-1/ 4"(D) x 1/ 2"(H) inch
Weight
108 g (3.81 oz.) (including batteries)
Accessories
PC-Link cable
Carrying case
Hand strap
Stylus
CD-ROM Software
Quick Start Guide
Software Guide
Operation Manual
Alkaline batteries LR03 (size “AAA”) x 2
00.Introduction.book Page 120 Friday, March 15, 2002 3:17 PM
120 Appendix
00.Introduction.book Page 121 Friday, March 15, 2002 3:17 PM
Index 121
Index
A
Add-on software 112
Address Book application 71
Adjusting
Auto-off function 104
Backlight 104
Calibration 105
LCD contrast 105
Opening 104
Sound 105
Start-up 104
Touch panel 13, 105
Alarm 102
All reset 115
Attachment 49
Attachment Viewer application 49
Copy 27
Cursor 20
Cut 27
D
Daily schedule 60
Direct search 74
E
E-Mail application 33
Creating PIM data 45
Easy reply function 44
Forwarded message 44
Reply message 43
Smart Addressing 43
Exchanging information with your PC
113
B
F
Battery
Installing 11
Life 119
Replacement 116
Field 20
Finding entries 28
Formats 106
Forwarded message 44
C
I
Calculator application 97
Examples 98
Caring for the unit 7
Category
Editing a Category 30
Selecting a category 23, 61, 63,
Installing
Batteries 11
64, 74, 82, 89, 93
Setting a category 41, 51
Changing
Application menu 31
Character size 29
Sorting order 75, 84, 89, 94
Check box 25
Checking memory 107
Clock application 99
K
Keyboard
On-screen keyboard 18
Tablet keyboard 18
L
Local city 100
M
Main menu screen 31
Customizing 32
Moving application icon 32
Memo application 87
00.Introduction.book Page 122 Friday, March 15, 2002 3:17 PM
122 Index
Memory application 107
Message icon 36, 39
Monthly schedule 63
N
New entry
Creating 57, 72, 81, 88, 92
New message
Creating 42
NotePad application 91
O
Operations using the menu
(Application) 45, 54, 68, 78, 84,
90, 95
Operations using the menu (Basic
Operation) 26
Owner information 111
P
Part names and functions 9
Password
Deleting the password 110
Setting a password 108
Paste 27
PC-Link 113
Pop-up menu 25
Power
Auto-off function 104
Turning on and off 14
R
Radio button 25
Reminder 67
Reply message 43
Resetting 115
S
Schedule & Calendar application 55
Schedule alarm 66
Screens and elements in applications
21
Details screen 22
Edit screen 22
Index screen 22
Secret application 108
Deleting all secret entries and the
password 111
Deleting the password 110
Locking secret entries 108
Setting a password 108
Unlocking the secret entries 110
Setting a password 108
Setting up 13
Settings application 103
Stylus 10
T
Text
Copying and moving text 27
Deleting text 21
Input 21
Working with blocks of text 21
Time format 106
To Do List application 79
Checking a finished entry 83
Selecting an index item 82
Turning on and off 14
W
Weekly schedule 62
Word completion feature 20, 106
World city 101
00.Introduction.book Page 123 Friday, March 15, 2002 3:17 PM
Troubleshooting 123
Troubleshooting
If you have a problem with the unit, check the following points before you contact the
Customer Assistance Center. If the problem persists, contact the Customer
Assistance Center.
The device does not turn on.
Make sure the batteries are properly installed or the batteries are not becoming
weak.
Check the battery indicator status on the Main menu screen. If it appears on the
screen, change the batteries.
The keys do not function. Or, nothing appears on the display.
Reset the unit. (See page 115)
Check the battery indicator status on the Main menu screen. If it appears on the
screen, change the batteries.
A message notifying “Not enough memory” appears.
Delete unnecessary messages and entries. (See page 28)
The device turns itself off.
You have not operated the unit for a certain period and Auto-off function is activated.
(See page 104)
Check the battery indicator status on the Main menu screen. If it appears on the
screen, change the batteries.
Forgot the password and the Secret function is activated.
Delete all secret entries and the password. (See page 111)
00.Introduction.book Page 124 Friday, March 15, 2002 3:17 PM
124 Troubleshooting
00.Introduction.book Page 125 Friday, March 15, 2002 3:17 PM
Product Support 125
Product Support
Please register on our Web site, so that we can keep you up-to-date as new
products and services become available. If you have read the operation manual and
require further product support, you can contact us using the information below.
Prior to contacting us, please have the following information available:
• The serial number of your Organizer (indicated on the back of the unit).
Product Registration:
www.sharpusa.com/OZ800
Product Information & Customer Support:
USA:
URL:
www.sharpusa.com
Phone:
1-800 BE-SHARP
Online Shopping: – (purchase additional peripherals, etc.)
USA:
www.sharpplace.com
00.Introduction.book Page 126 Friday, March 15, 2002 3:17 PM
LIMITED WARRANTY
SHARP ELECTRONICS CORPORATION warrants to the first consumer purchaser that this
Sharp brand product (the “Product”), when shipped in its original container, will be free from
defective workmanship and materials, and agrees that it will, at its option, either repair the defect
or replace the defective Product or part thereof with a new or remanufactured equivalent at no
charge to the purchaser for parts or labor for the period(s) set forth below.
This warranty does not apply to any appearance items of the Product nor to the additional
excluded item(s) set forth below nor to any Product the exterior of which has been damaged or
defaced, which has been subjected to improper voltage or other misuse, abnormal service or
handling, or which has been altered or modified in design or construction.
In order to enforce the rights under this limited warranty, the purchaser should follow the steps
set forth below and provide proof of purchase to the servicer.
The limited warranty described herein is in addition to whatever implied warranties may be
granted to purchasers by law. ALL IMPLIED WARRANTIES INCLUDING THE WARRANTIES
OF MERCHANTABILITY AND FITNESS FOR USE ARE LIMITED TO THE PERIOD(S) FROM
THE DATE OF PURCHASE SET FORTH BELOW. Some states do not allow limitations on how
long an implied warranty lasts, so the above limitation may not apply to you.
Neither the sales personnel of the seller nor any other person is authorized to make any
warranties other than those described herein, or to extend the duration of any warranties beyond
the time period described herein on behalf of Sharp.
The warranties described herein shall be the sole and exclusive warranties granted by Sharp and
shall be the sole and exclusive remedy available to the purchaser. Correction of defects, in the
manner and for the period of time described herein, shall constitute complete fulfillment of all
liabilities and responsibilities of Sharp to the purchaser with respect to the Product, and shall
constitute full satisfaction of all claims, whether based on contract, negligence, strict liability or
otherwise. In no event shall Sharp be liable, or in any way responsible, for any damages or
defects in the Product which were caused by repairs or attempted repairs performed by anyone
other than an authorized servicer. Nor shall Sharp be liable or in any way responsible for any
incidental or consequential economic or property damage. Some states do not allow the
exclusion of incidental or consequential damages, so the above exclusion may not apply to you.
THIS WARRANTY GIVES YOU SPECIFIC LEGAL RIGHTS. YOU MAY ALSO HAVE OTHER
RIGHTS WHICH VARY FROM STATE TO STATE.
Your Product :
Electronic Organizer
One (1) year parts and labor from date of purchase.
Warranty Period for this
Product :
Additional Items Excluded from Warranty Coverage :
Any consumable items (such as paper or ink) and any
external hardware, software, firmware, or peripherals other
than the Product are excluded from warranty coverage.
Where to Obtain Service :
At a Sharp Authorized Servicer located in the United States.
To find out the location of the nearest Sharp Authorized
Servicer, call Sharp toll free at 1-800-BE-SHARP.
What to do to Obtain Service :
Ship (prepaid) or carry in your Product to a Sharp Authorized
Servicer. Be sure to have proof of purchase available. If you
ship or mail the Product, be sure it is packaged carefully.
TO OBTAIN SUPPLY, ACCESSORY OR PRODUCT INFORMATION, CALL 1-800-BE-SHARP.
00.Introduction.book Page 127 Friday, March 15, 2002 3:17 PM
00.Introduction.book Page 128 Friday, March 15, 2002 3:17 PM
00.Introduction.book Page 129 Friday, March 15, 2002 3:17 PM
17.h4.fm Page 130 Thursday, May 9, 2002 3:03 PM
SHARP ELECTRONICS CORPORATION
Sharp Plaza, Mahwah, New Jersey 07430-1163.
SHARP CORPORATION
PRINTED IN CHINA
02CTO(0LY85JS010022)
85-JS01-002207