1
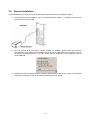
FusionHDTV
1. Before Getting Started
2. Software Installation
3. Hardware Installation
4. Using FusionHDTV
FusionHDTV USER License
DViCO Corporation (“DViCO”) is granting you (an individual or an entity, either of which is referred to herein
as “License”) a license to use DViCO’s FusionHDTV computer software, hardware, associated media and
printed materials only upon the condition that Licensee accepts all of the terms and conditions contained in
this User License Agreement (the “Agreement”). If Licensee does not agree to he terms of this Agreement,
Licensee should not install or use the Products rather, promptly return the Products to the place of purchase.
1. Grant of License. This Agreement grants Licensee a personal, limited, non-transferable, non-exclusive
right to install and use one copy of the Products on a single computer. No other uses and/or distribution of
the Products are permitted without DViCO’s prior written consent. DViCO reserves all rights not expressly
granted to Licensee.
2. Limitations or Restrictions. Licensee may not: (i) modify or translate the Products; (ii) reverse engineer
or disassemble the Products, except and only to the extent this restriction is expressly permitted by
applicable law; (iii) separate the Products component parts to transfer to a third party.
3. Intellectual Property Rights. Licensee acknowledges that no title to the intellectual property in the
Products and any components thereof is transferred to Licensee. All rights, titles and copyrights in and to the
products are owned by DViCO. The Products are protected by copyright laws and international copyright
conventions and treaties.
4. Disclaimer of Warranty. The Products are deemed accepted by Licensee. The PRODUCTS are provided
to Licensee “AS IS” and without warranty of any kind. To the maximum extent permitted by applicable law,
DViCO further disclaims all warranties including without limitation any implied warranties of merchantability,
fitness for a particular purpose, and non-infringement. Any and all risk arising out of the use or performance
of the PRODUCTS remains with Licensee. In no event shall DViCO or its suppliers be liable for any
consequential, incidental, direct, indirect, special, punitive, or other damages whatsoever (including, without
limitation, damages for loss of business profits, business interruption, loss of business information, or other
pecuniary loss) arising out of this Agreement or the use of or inability to use the Products, even if DViCO has
been advised of the possibility of such damages. Because some states/jurisdictions do not allow the
exclusion or limitation of liability for consequential or incidental damages, the above limitation applies only to
the extent permitted by applicable law.
5. Limitation of Liability. DViCO’s total liability and Licensee’s exclusive remedy under this Agreement shall
not exceed the replacement cost of a single copy of the Products.
6. Indemnification. Licensee shall hold harmless, indemnify and defend DViCO, its officers, directors and
employees, from and against any claim, suit or proceeding and any losses, damages, fines and expenses
2
(including attorneys’ fees and costs) arising out of or relating to any claims that Licensee’s use of the
Products in conjunction with any Licensee Application infringes the patent,
copyright, trademark, trade secret, or other proprietary rights of any third party, or resulting from any breach
of this Agreement by Licensee.
7. Termination. Without prejudice to any other rights, DViCO may terminate this Agreement if Licensee fails
to comply with any term or condition of this Agreement. Upon termination of this Agreement, Licensee shall
immediately discontinue the use of the Products and certify destruction of all full or partial copies of the
Products and related materials provided by DViCO. Licensee may also terminate this Agreement at any time
by destroying the Products and all copies thereof.
8. General. Licensee acknowledges that he or she has read this Agreement, understands it, and that by
using the Products Licensee agrees to be bound by the terms and conditions set forth in this Agreement.
Licensee further agrees that the Agreement is the complete and exclusive statement of the understanding
between DViCO and Licensee which supersedes any proposal or prior agreement, oral or written, and any
other communication between DViCO and Licensee relating to the subject matter of this Agreement. This
Agreement may not be modified except in a writing duly signed by an authorized representative of DViCO
and Licensee. If any provision of this Agreement is held to be unenforceable for any reason, such provision
shall be reformed only to the extent necessary to make it enforceable, and such decision shall not affect the
enforceability of such provision under other circumstances, or of the remaining provisions hereof under all
circumstances.
3
1
Before Getting Started ..................................................................................5
1.1
1.2
1.3
2
Software Installation ................................................................................... 11
2.1
2.2
2.3
2.4
3
Installing FusionHDTV Applications...................................................................... 11
Driver installation under Windows ME.................................................................. 21
Driver installation under Windows 2000 Professional .......................................... 32
Driver installation under Windows XP .................................................................. 55
Hardware Installation..................................................................................68
3.1
3.2
3.3
3.4
4
FusionHDTV Specification...................................................................................... 5
FusionHDTV System Requirements....................................................................... 7
Package contents ................................................................................................... 8
About the Board.................................................................................................... 68
Before Installation ................................................................................................. 74
Board Installation .................................................................................................. 74
Remote Installation ............................................................................................... 77
Using FusionHDTV.....................................................................................79
4.1
4.2
4.3
4.4
4.5
4.6
4.7
4.8
4.9
4.10
4.11
4.12
Starting and Quitting ............................................................................................. 79
Display setup ........................................................................................................ 79
Configuration ........................................................................................................ 83
Record .................................................................................................................. 93
Playing Files ......................................................................................................... 95
SnapShot Capturing ............................................................................................. 96
Using EPG ............................................................................................................ 97
Cut Editing ..........................................................................................................102
Using FusionRemote ..........................................................................................104
Using Signal Checker ......................................................................................... 116
Using FusionConverter....................................................................................... 117
FusionHDTV ShortKey ....................................................................................... 119
4
1 Before Getting Started
1.1
FusionHDTV Specification
A Highly cost effective ATSC/ NTSC TV reception card
You can enjoy HDTV at quite a low price due to Dvico’s innovative HDTV software decoding engine.
Unrivaled crystal-clear picture quality
FusionHDTV provides up to 5 times higher resolution when compared to analog TV, and provides
crisp and crystal-clear picture quality to a PC screen.
Good picture quality on LCD or low-resolution monitor
FusionHDTV shows excellent and super-clear on HDTV screens and even on LCD TV’s and low
resolution CRT due to Dvico’s proprietary decoding engine.
Great system compatibility
FusionHDTV is compatible with most video cards and motherboards. FusionHDTV works on any
recent VGA cards including Nvidia MX series or later chipsets, as well as ATI Radeon chipsets. It
works quite well on Intel, VIA, SIS, and other motherboard chipsets. Minimum system requirements
are Pentium 4 1.6G and DDR266 memory (or RDRAM memory), or AMD’s Athlon™ XP 1600+ or
faster processor, if you don’t have the ATI Radeon VGA card. Pentium 3 800Mhz or faster will be
enough if you have an ATI Radeon card.
Recording and playback of the HDTV stream
You can record live HDTV broadcasting streams to a PC and play them back anytime you want.
Using most recent VSB tuner – Best DTV reception rate
FusionHDTV uses the most recent VSB tuner to get the best reception rate, so you can get the uninterrupted and stable HDTV screen.
69 terrestrial digital(8VSB)/analog channels
FusionHDTV supports 69 terrestrial digital (8VSB) and all analog channels, so you will have the ability
to receive all the channels available to you at your location.
All 18 ATSC formats compliant
FusionHDTV supports all of the 18 formats of ATSC broadcasting, so you can experience the all of the
full ATSC format-rich content available.
AC3 audio output
FusionHDTV provides AC3 audio decoding, which is the standard audio format for ATSC. It can also
bypass the AC3 audio to digital output and connect directly to an AV amplifier.
High resolution still capture
FusionHDTV provides high resolution still screen capturing capability in live playback as well as file
playback mode.
Cut Edit feature – Cut the transport stream files
You can cut out the wanted scenes from the captured file and reconstruct the video clip.
Supports virtual channel
Virtual channel is set on the channel list independent of physical channel.
- OSD for virtual channel and broadcasting station name is shown whenever channel is changed.
5
Supports sub-channel
Sub channel is listed up in sub channel play list and can be selected with channel up/down button or
mouse selection in sub channel play list.
Second language
Supports the second language in digital broadcasting
Supports screen saver off.
Screen saver is off while FusionHDTV runs.
Supports AAC audio decoding
TS file clips and DVHS with AAC audio can be played directly in FusionHDTV.
Direct NATIVE .MPG recording
You can record DTV stream to .MPG format directly.
Add To Favorite List
You can add your favorite programs into favorite list before watching them.
HD-to-DVD or DivX format conversion
HD clips can be converted to MPEG2, DVD files or DivX format using FusionConverter tool.
Supports DVHS record and control ( Windows XP or above only )
Direct DVHS capture/ recording/ playback with OHCI card
Supports Titan EPG
Supports recording and live viewing according to TitanTV EPG.
Embeds the TitanTV EPG on the FusionHDTV application.
Time Shifting
FusionHDTV provides the various file playback functions just like live TV mode. That is, pause/ instant
replay/ time-shifting by scroll bar/ fast-forward/ fast-rewind.
Being interrupted while watching live TV programs (such as pick up phone calls & answer the door), all
you need to do is simply press the Pause button and freeze the picture for a period of time, and then
pick up right where you left off.
6
1.2
FusionHDTV System Requirements
System requirements for FusionHDTV are as follows
<Input/Output>
One TV antenna
One CABLE antenna
One inside stereo connection jack to sound card for analog TV
S-Video IN, Composite IN
External Sound card Connection cable
< DVB-T USB>
One TV antenna reception port
One Thru Pass Port
One USB Port ( USB 2.0 only )
<DxVA VGAs>
Pentium3 800MHz or faster with 128M memory
Celeron 900Mhz or faster with 128M memory
GeForce4 MX420,440,Fx5200,5600 Series, Ti Series
All ATI Radeon series VGAs
WinME/2000/XP or later
Ultra-DMA66 enabled main board and HDD for recording
<nonDxVA VGAs>
Pentium4 1.6GHz or faster with 128M memory
All Nvidia MX series VGAs and ATI Radeon series VGAs
DDR266 or faster memory
WinME/ 2000/ XP or later
Ultra-DMA66 enabled main board and HDD for recording
<DVHS>
Windows XP or above only.
OHCI compatible 1394 card
7
1.3
Package contents
The FusionHDTV package contains the following items:
[FusionHDTV I]
1
2
3
4
① FusionHDTV card
② Setup CD
③ Manual
④ Internal cable to sound card for Analog TV Audio
[FusionHDTV II]
① FusionHDTV card
② Setup CD
③ Manual
④ Internal cable to sound card for Analog TV Audio
⑤ External Sound card Connection cable
⑥ External source audio connection cable
[FusionHDTV III ]
1
2
3
4
① FusionHDTV card
② Setup CD
③ Manual
④ Internal cable to sound card for Analog TV Audio
8
5
⑤ External source audio connection cable
[FusionHDTV DVB-T ]
① FusionHDTV card
② Setup CD
③ Manual
④ Internal cable to sound card for External output Audio
⑤ External source audio connection cable
[ DVB-T PLUS]
1
2
3
4
① FusionHDTV card
② Setup CD
③ Manual
④ Internal cable to sound card for External output Audio
⑤ External connection cable
[ DVB-T Lite ]
① FusionHDTV card
② Setup CD
③ Manual
9
5
[ DVB-T USB ]
1
2
4
3
① FusionHDTV USB Board
② Setup CD
③ Manual
④ FusionHDTV transceiver
* Optional FusionHDTV remote transceiver
1
2
① FusionHDTV transceiver
② Receiver
<Important Notice>
First install the software before you plug the FusionHDTV card in your system. It will ease the installation
process. If you plugged the card in already, you can still proceed anyway.
10
2 Software Installation
Most likely there will be an updated version of the files on our web site.
Please check the site (Http://www.DVICO.com), before you install the software included in the CD.
2.1
Installing FusionHDTV Applications
Insert FusionHDTV Installation CD into the CD-ROM drive. The setup window will automatically pop up. if
you downloaded the recent version on DVICO’s website, please run install.exe or setup.exe.
2.1.1
Uninstall Drivers
1) When you select Uninstall Driver in the menu on the FusionHDTV INSTALLER program, it will
remove all the old drivers previously installed
2) When all the drives are removed, you will see following message:
11
2.1.2
Installing FusionHDTV Software
Important: Installation on Windows 2000 Professional or Windows XP
Before you install FusionHDTV software, be sure that you logged on as an account with
Administrator privileges.
1)
Select “Install FusionHDTV”.
2)
At the FusionHDTV Installation dialog opens, click on the “Next>” button.
3) The user Information window will show up. Type in the serial number, which is on the jacket of
FusionHDTV installation CD, then click on the “Next” button.
12
4) The “Choose Destination Location” window will appear. Click on “Next” if you want to install the
FusionHDTV in the default directory. Otherwise, you can choose a different directory by clicking on
“Browse”.
5) Press “Next” on the Destination Folder selection window.
6) The “Setup status” window will appear.
13
7) Choose your country, then click “OK”.
8) PC specification selection windows will appear. Please select the appropriate system. You can
change the mode after installation with configuration menu of the application program. You do not
need to reinstall the program with different options.
14
9) Select your FusionHDTV card, and Press ‘Next’ to install latest drivers.
10) You will see the progress window.
15
11) Press “Yes” for the digital signature message.
12) Following message indicates the completion of the setup.
13) By clicking the Finish button, the software installation is done.
14) When you reboot, the system will ask for the 5~6 drivers. Please click “Yes” when the digital
signature window appears.
<Notes>
In certain cases, Windows will ask for the .sys files. You can locate the sys files in the C:\Program
Files\DVico\FusionHDTV\driver folder.
16
2.1.3
Installing Microsoft DirectX 9
Important! Installing on Windows 2000 Professional or Windows XP
Before you install FusionHDTV software, be sure that you logged on as an account with
Administrator privileges.
You can check the version of DirectX by typing “dxdiag” on the command line which appears with
menu selection “start->run”
If you have DirectX 9 or later already, you do not need to install DirectX 9 again.
1) Run ‘Install.exe’ and then select “Install Direct 9”.
2) Read the License Agreement carefully and check “I accept the agreement” and then click on “Next”
if you agree.
3) To start installing of DirectX 9.0 Runtime, click on “Next”.
17
Tip
If there is a DirectX already installed in the system, a different window will show up instead of the
one above.
4) Click on “Finish” to restart system and complete installation of the DirectX.
18
2.1.4
Installing the FusionHDTV remote transceiver
Installation Caution
•
Remote transceiver is optional and can be purchased separately through FusionHDTV dealers.
•
First, install the FusionHDTV application then install the FusionHDTV remote transceiver program.
Important: Installation on Windows 2000 Professional or Windows XP
Before you install FusionRemote software, be sure that you logged on as an account with
Administrator privileges.
1) Select “FusionHDTV Remote transceiver Installation” at the Install.exe window.
2) Click “Next” to start the Remote transceiver installation.
3) The “Choose Destination Location” window will appear. Click on “Next” if you want to install the
FusionRemote in the default directory. Otherwise, you can choose a different directory by clicking on
“Browse”
19
4) Click on the “OK” to restart and finish installation.
20
2.2
Driver installation under Windows ME
2.2.1
Before Installation
Make sure to install the software in the following order.
1) Install the Application software (refer to 2.1 Installing FusionHDTV Applications)
2) Install Hardware(Board) (refer to 3.3 Board Installation)
3) Install Windows ME Driver (refer to 2.2.2 Installing Windows ME driver)
4) Check Windows ME device manger (refer to 2.2.3 Checking Windows ME Driver)
2.2.2
Installing the Windows ME driver
[ FusionHDTV I ]
1) Insert the FusionHDTV board into the PCI local bus slot. When Windows ME starts, the Add New
Hardware Wizard will pop up automatically.
2) Found New Hardware window will pop and FusionHDTV, WDM Video Capture driver will be installed
automatically.
3) The Add New Hardware Wizard will pop up automatically and “FusionHDTV, WDM MPEG-2 TS
Capture (Sony451/471)” driver will be installed automatically.
4) Files Needed Windows will appear and look for the ‘ZuluTcap.sys’ file, by clicking browser button
Select
driver
directory
under
the
installation
directory.(ex
:
C:\Program
Files\Dvico\FusionHDTV\driver)
21
5) If the version conflict message appears during installing, preserve the existing file by pressing ‘Keep’.
6) The Add New Hardware Wizard will pop up automatically and the “FusionHDTV, Sony451 WDM TV
Tuner” driver installation will be done automatically.
7) The Add New Hardware Wizard will pop up automatically and “FusionHDTV, WDM Crossbar” driver
installation will be done automatically.
[ FusionHDTV II ]
1) Insert the FusionHDTV board into the PCI local bus slot. When Windows ME starts, the Add New
Hardware Wizard will pop up automatically.
2) The Found New Hardware window will pop and FusionHDTV, WDM Video Capture driver will be
installed automatically.
3) The Add New Hardware Wizard will pop up automatically and “FusionHDTV, WDM MPEG-2 TS
Capture (ATSC-A)” driver will be installed automatically.
4) After the Files Needed Window appears, look for the ‘ZuluTcap.sys’ file by clicking the browse button.
Select the driver directory under the installation directory. (ex : C:\Program
Files\Dvico\FusionHDTV\driver)
22
5) If a version conflict message appears during installing, preserve existing file by pressing ‘Keep’.
6) The Add New Hardware Wizard will pop up automatically and “FusionHDTV, Philips1236D WDM TV
Tuner” driver installation will be done automatically.
7) The Add New Hardware Wizard will pop up automatically and “FusionHDTV, WDM Crossbar
(Tuner/SVHS/Video)” driver installation will be done automatically.
[ FusionHDTV III ]
1) Insert the FusionHDTV board into the PCI local bus slot. When Windows ME starts, the Add New
Hardware Wizard will pop up automatically.
2) The Found New Hardware window will pop and FusionHDTV 88x, WDM Video Capture driver will be
installed automatically.
3) The Add New Hardware Wizard will pop up automatically and “FusionHDTV 88x,Transport Stream
Capture(ATSC-A)” driver will be installed automatically.
23
4) After the Files Needed Window appears, look for the ‘zl88Tcap.sys’ file by clicking the browse button.
Select the driver directory under the installation directory. (ex : C:\Program
Files\Dvico\FusionHDTV\driver)
5) If a version conflict message appears during installing, preserve existing file by pressing ‘Keep’.
6) The Add New Hardware Wizard will pop up automatically and “FusionHDTV 88x, TEMIC+LG3302
WDM TV Tuner” driver installation will be done automatically.
7) The Add New Hardware Wizard will pop up automatically and “FusionHDTV 88x, Crossbar” driver
installation will be done automatically.
8) The Add New Hardware Wizard will pop up automatically and “FusionHDTV 881, Audio Capture”
driver installation will be done automatically.
[ FusionHDTV DVB-T]
24
1) Insert the FusionHDTV board into the PCI local bus slot. When Windows ME starts, the Add New
Hardware Wizard will pop up automatically.
2) The Found New Hardware window will pop and FusionHDTV 88x, WDM Video Capture driver will be
installed automatically.
3) The Add New Hardware Wizard will pop up automatically and “FusionHDTV 88x,Transport Stream
Capture(DVB-T)” driver will be installed automatically.
4) The Add New Hardware Wizard will pop up automatically and “FusionHDTV 88x, LGZ201 DVB-T
WDM TV Tuner” driver installation will be done automatically.
5) The Add New Hardware Wizard will pop up automatically and “FusionHDTV 88x, Crossbar” driver
installation will be done automatically.
[ DVB-T PLUS ]
In certain cases , Windows will ask for the Kstvtune.ax files. You can locate the ax files in the
C:\Windows\System folder.
1) Insert the FusionHDTV board into the PCI local bus slot. When Windows ME starts, the Add New
Hardware Wizard will pop up automatically.
2) The Found New Hardware window will pop and FusionHDTV 88x, WDM Video Capture driver will be
installed automatically.
25
3) The Add New Hardware Wizard will pop up automatically and “FusionHDTV 88x,Transport Stream
Capture(DVB-T)” driver will be installed automatically.
4) The Add New Hardware Wizard will pop up automatically and “FusionHDTV 88x, Thomson7579
DVB-T WDM TvTuner” driver installation will be done automatically.
5) The Add New Hardware Wizard will pop up automatically and “FusionHDTV 88x, Crossbar” driver
installation will be done automatically.
6) The Add New Hardware Wizard will pop up automatically and “FusionHDTV 88x, BDA DVB-T
Tuner/Demod (T7579+MT352)” driver installation will be done automatically.
[ DVB-T Lite ]
1) Insert the FusionHDTV board into the PCI local bus slot. When Windows ME starts, the Add New
Hardware Wizard will pop up automatically.
2) The Found New Hardware window will pop and FusionHDTV, WDM Video Capture driver will be
installed automatically.
3) The Add New Hardware Wizard will pop up automatically and “FusionHDTV,Transport Stream
Capture(DVB-T)” driver will be installed automatically.
26
4) The Add New Hardware Wizard will pop up automatically and “FusionHDTV, Thomson7579+MT352
WDM TV Tuner” driver installation will be done automatically.
5) The Add New Hardware Wizard will pop up automatically and “FusionHDTV, Crossbar(Tuner only)”
driver installation will be done automatically.
6) The Add New Hardware Wizard will pop up automatically and “FusionHDTV, BDA DVB-T
Tuner/Demod (T7579+MT352)” driver installation will be done automatically.
[ DVB-T USB ]
In certain cases , Windows will ask for the Kstvtune.ax files. You can locate the ax files in the
C:\Windows\System folder.
1) Insert the FusionHDTV board into the PCI local bus slot. When Windows ME starts, the Add New
Hardware Wizard will pop up automatically.
2) The Add New Hardware Wizard will pop up automatically and “FusionHDTV USB, BDA Receiver
Component (DVB-T2)” driver will be installed automatically.
3) The Add New Hardware Wizard will pop up automatically and “FusionHDTV USB, WDM TvTuner
DVB-T (Thomson7579)” driver installation will be done automatically.
27
4) The Add New Hardware Wizard will pop up automatically and “FusionHDTV USB, BDA DVB-T
Tuner/Demod (T7579+MT352)” driver installation will be done automatically.
2.2.3
Checking Windows ME driver
If all four drivers are found in the device manager, the Windows ME driver is installed properly. Otherwise,
you must reinstall the driver.
Right click the “My Computer” icon and select “properties” from the popup menu. Check whether you see
four new devices starting with “Fusion” under the “Sound video and game controllers”.
[FusionHDTV I]
[ FusionHDTV II ]
28
[ FusionHDTV III ]
[ FusionHDTV DVB-T ]
29
[ DVB-T PLUS ]
** In certain cases, Windows will ask for the .sys files. You can locate the sys files in the C:\Program
Files\DVICO\FusionHDTV\driver or C:\Windows\System32\Drivers folder. Or Windows will ask for the
Kstvtune.ax files. You can locate the ax files in the C:\Windows \System folder.
30
[ DVB-T Lite ]
[ DVB-T USB ]
31
2.3
Driver installation under Windows 2000 Professional
2.3.1
Before Installation
Make sure that you install the software in the following order.
1) Install the Application software(refer to 2.1 Installing FusionHDTV Applications)
2) Install hardware(board) (refer to 3.3 Board Installation)
3) Install the Windows 2000 Drivers (refer to 2.3.2 Installing Windows 2000 driver)
4) Check Windows 2000 device manager (refer to 2.3.3 Checking Windows Driver)
2.3.2
Installing Windows 2000 driver
[FusionHDTV I]
1) Insert the FusionHDTV board into the PCI local bus slot. When Windows 2000 starts, the Add New
Hardware Wizard will pop up automatically.
2) When the Digital Signature Not Found window appears, Click on “Yes”.
3) The ‘Found New Hardware’ Wizard window will pop up automatically.
32
4) When the Digital Signature Not Found window appears, Click on “Yes”.
5) ‘New Hardware Wizard window’ will pop up automatically.
6) When the Digital Signature Not Found window appears, Click on “Yes”.
.
7) ‘New Hardware Wizard window’ will pop up automatically.
33
8) When the Digital Signature Not Found window appears, Click on “Yes”.
34
[ FusionHDTV II ]
1) Insert the FusionHDTV board into the PCI local bus slot. When Windows 2000 starts, the Add New
Hardware Wizard will pop up automatically.
2) When the Digital Signature Not Found window appears, Click on “Yes”.
3) The “Found New Hardware” Wizard window will pop up automatically.
4) When the Digital Signature appears, Click on “Yes”.
35
5) The “New Hardware Wizard” window will pop up automatically.
6) When the “Digital Signature Not Found” window appears, Click on “Yes”.
.
7) The “New Hardware Wizard” window will pop up automatically.
36
8) When the “Digital Signature Not Found” window appears, Click on “Yes”.
[ FusionHDTV III ]
1) Insert the FusionHDTV board into the PCI local bus slot. When Windows 2000 starts, the Add New
Hardware Wizard will pop up automatically.
2) When the Digital Signature Not Found window appears, Click on “Yes”.
37
3) The “Found New Hardware” Wizard window will pop up automatically.
4) When the Digital Signature appears, Click on “Yes”.
5) When the “Completing…” window appears, Click on “Finish”.
38
6) The “New Hardware Wizard” window will pop up automatically.
7) When the “Digital Signature Not Found” window appears, Click on “Yes”.
.
8) The “New Hardware Wizard” window will pop up automatically.
39
9) When the “Digital Signature Not Found” window appears, Click on “Yes”.
10) The “New Hardware Wizard” window will pop up automatically.
11) When the “Digital Signature Not Found” window appears, Click on “Yes”.
40
12) If a driver file look for, click the browse button. Select the driver directory under the installation
directory (ex : C:\Program Files\Dvico\FusionHDTV\driver) or Driver folder of installation CD.
[ FusionHDTV DVB-T ]
1) Insert the FusionHDTV board into the PCI local bus slot. When Windows 2000 starts, the Add New
Hardware Wizard will pop up automatically.
2) When the Digital Signature Not Found window appears, Click on “Yes”.
3) The “New Hardware Wizard” window will pop up automatically.
4) When the “Digital Signature Not Found” window appears, Click on “Yes”.
41
.
5) The “New Hardware Wizard” window will pop up automatically.
6) When the “Digital Signature Not Found” window appears, Click on “Yes”.
7) The “New Hardware Wizard” window will pop up automatically.
42
8) When the “Digital Signature Not Found” window appears, Click on “Yes”.
9) If a driver file look for, click the browse button. Select the driver directory under the installation
directory (ex : C:\Program Files\Dvico\FusionHDTV\driver) or Driver folder of installation CD.
[ DVB-T PLUS ]
In certain cases, Windows will ask for the .sys files. You can locate the sys files in the C:\Program
Files\DVICO\FusionHDTV\driver or C:\Windows\System32\Drivers folder.
1) Insert the FusionHDTV board into the PCI local bus slot. When Windows 2000 starts, the Add New
Hardware Wizard will pop up automatically.
2) When the Digital Signature Not Found window appears, Click on “Yes”.
43
3) The “New Hardware Wizard” window will pop up automatically.
4) When the “Digital Signature Not Found” window appears, Click on “Yes”.
.
5) The “New Hardware Wizard” window will pop up automatically.
44
6) When the “Digital Signature Not Found” window appears, Click on “Yes”.
7) The “New Hardware Wizard” window will pop up automatically.
8) When the “Digital Signature Not Found” window appears, Click on “Yes”.
45
9) The “New Hardware Wizard” window will pop up automatically.
10) When the “Digital Signature Not Found” window appears, Click on “Yes”.
11) If a driver file look for, click the browse button. Select the driver directory under the installation
directory (ex : C:\Program Files\Dvico\FusionHDTV\driver) or Driver folder of installation CD.
[ DVB-T Lite ]
In certain cases, Windows will ask for the .sys files. You can locate the sys files in the C:\Program
Files\DVICO\FusionHDTV\driver or C:\Windows\System32\Drivers folder.
1) Insert the FusionHDTV board into the PCI local bus slot. When Windows 2000 starts, the Add New
Hardware Wizard will pop up automatically.
2) When the Digital Signature Not Found window appears, Click on “Yes”.
46
3) The “New Hardware Wizard” window will pop up automatically.
4) When the “Digital Signature Not Found” window appears, Click on “Yes”.
.
5) The “New Hardware Wizard” window will pop up automatically.
47
6) When the “Digital Signature Not Found” window appears, Click on “Yes”.
7) The “New Hardware Wizard” window will pop up automatically.
8) When the “Digital Signature Not Found” window appears, Click on “Yes”.
9) The “New Hardware Wizard” window will pop up automatically.
48
10) When the “Digital Signature Not Found” window appears, Click on “Yes”.
If a driver file look for, click the browse button. Select the driver directory under the installation directory (ex :
C:\Program Files\Dvico\FusionHDTV\driver) or Driver folder of installation CD.
[ DVB-T USB ]
In certain cases, Windows will ask for the .sys files. You can locate the sys files in the C:\Program
Files\DVICO\FusionHDTV USB \driver or C:\Windows\System32\Drivers folder.
1) Insert the FusionHDTV board into the PCI local bus slot. When Windows 2000 starts, the Add New
Hardware Wizard will pop up automatically.
2) When the Digital Signature Not Found window appears, Click on “Yes”.
49
3) After files are copied, Click “Finish” if the “FusionHDTV USB, BDA Receiver Component (DVB-T2)”
driver is properly installed.
Tip
Using this way, you may install “FusionHDTV USB, WDM TvTuner DVB-T (Thomson7579)“,
“FusionHDTV USB, HID IR Remote“, “HID Compliant device, FusionHDTV USB, BDA DVB-T
Tuner/Demod (T7579+MT352) “drivers.
If a driver file look for, click the browse button. Select the driver directory under the installation directory (ex :
C:\Program Files\Dvico\FusionHDTV USB\driver) or Driver folder of installation CD.
50
2.3.3
Checking the Windows 2000 driver
Right click the “My Computer” icon and select “properties” from the popup menu. Select Hardware-> Device
Manger
You must see four devices properly installed under “Sound video and game controllers”.
If you do not see all four drivers installed correctly, please re-install the drivers.
[FusionHDTV I]
51
[FusionHDTV II]
[ FusionHDTV III ]
52
[ FusionHDTV DVB-T]
[ DVB-T PLUS ]
53
[ DVB-T Lite ]
[ DVB-T USB ]
54
2.4
Driver installation under Windows XP
2.4.1
Before Installation
Make sure that you install the software in the following order:
1) Install the Application software (with reference to 2.1 Installing FusionHDTV Applications)
2) Install Hardware (refer to 3.3 Board Installation )
3) Install the Windows XP drivers (with reference to 2.4.2 Installing Windows XP driver)
4) Check Windows XP Device Manager (with reference to 2.4.3 Checking Windows XP Driver )
2.4.2
Installing Windows XP drivers
If you already installed the FusionHDTV software, insert the FusionHDTV board into the PCI local bus
slot.
[ FusionHDTV III ]
1) When the “Add New Hardware Wizard window” appears, select “Install the software automatically
(Recommended)” and then click “next”.
2) When the ”FusionHDTV 88x, TEMIC+LG3302 WDM TvTuner” window appears, Click “Continue
Anyway”.
55
3) After files are copied, Click “Finish” if the FusionHDTV 88x, TEMIC+LG3302 WDM TvTuner driver is
properly installed.
Tip
Using this way, you may install “FusionHDTV 881, Audio Capture “, “FusionHDTV 88x, Transport Stream
Capture(ATSC-A)“, “FusionHDTV 88x, Video Capture “, “FusionHDTV 88x, Crossbar “drivers.
56
[ FusionHDTV DVB-T]
1) When the “Add New Hardware Wizard window” appears, select “Install the software automatically
(Recommended)” and then click “next”.
2) When the ”FusionHDTV 88x, LGZ201 DVB-T WDM TvTuner” window appears, Click “Continue
Anyway”.
3) After files are copied, Click “Finish” if the FusionHDTV 88x, LGZ201 DVB-T WDM TvTuner driver is
properly installed.
57
Tip
Using this way, you may install “FusionHDTV 88x, Transport Stream Capture(DVB-T)“, “FusionHDTV
88x, Video Capture “, “FusionHDTV 88x, Crossbar “drivers.
[ DVB-T PLUS ]
In certain cases, Windows will ask for the .sys files. You can locate the sys files in the C:\Program
Files\DVICO\FusionHDTV\driver or C:\Windows\System32\Drivers folder.
4) When the “Add New Hardware Wizard window” appears, select “Install the software automatically
(Recommended)” and then click “next”.
58
5) When the ”FusionHDTV 88x, Thomson7579 DVB-T WDM TvTuner” window appears, Click
“Continue Anyway”.
6) After files are copied, Click “Finish” if the “FusionHDTV 88x, Thomson7579 DVB-T WDM TvTuner”
driver is properly installed.
59
Tip
Using this way, you may install “FusionHDTV 88x, Transport Stream Capture(DVB-T)“, “FusionHDTV
88x, Video Capture “, “FusionHDTV 88x, Crossbar, FusionHDTV 88x, BDA DVB-T Tuner/Demod
(T7579+MT352) “drivers.
[ DVB-T Lite ]
1) When the “Add New Hardware Wizard window” appears, select “Install the software automatically
(Recommended)” and then click “next”.
60
2) When the ”FusionHDTV, Thomson7579+MT352 WDM TvTuner” window appears, Click “Continue
Anyway”.
3) After files are copied, Click “Finish” if the FusionHDTV, Thomson7579+MT352 WDM TvTuner driver
is properly installed.
Tip
Using this way, you may install “FusionHDTV, Transport Stream Capture(DVB-T)“, “FusionHDTV, Video
Capture “, “FusionHDTV, Crossbar(Tuner only), FusionHDTV, BDA DVB-T Tuner/Demod (T7579+MT352)
“drivers.
[ DVB-T USB ]
In certain cases, Windows will ask for the .sys files. You can locate the sys files in the C:\Program
Files\DVICO\FusionHDTV USB\driver or C:\Windows\System32\Drivers folder.
61
1) When the “Add New Hardware Wizard window” appears, select “Install the software automatically
(Recommended)” and then click “next”.
2) When the ”FusionHDTV USB, BDA Receiver Component (DVB-T2)” window appears, Click
“Continue Anyway”.
3) After files are copied, Click “Finish” if the “FusionHDTV USB, BDA Receiver Component (DVB-T2)”
driver is properly installed.
62
Tip
Using this way, you may install “FusionHDTV USB, WDM TvTuner DVB-T (Thomson7579)“, “FusionHDTV
USB, HID IR Remote“, “HID Compliant device, FusionHDTV USB, BDA DVB-T Tuner/Demod
(T7579+MT352) “drivers.
63
2.4.3
Checking the Windows XP driver
Right click the “My Computer” icon and select “properties” from the popup menu. Select Hardware-> Device
Manger.
You must see four devices properly installed under the “Sound video and game controllers”.
If you do not see all four drivers installed correctly, please re-install drivers.
[FusionHDTV I]
64
[ FusionHDTV II ]
[ FusionHDTV III ]
65
[ FusionHDTV DVB-T]
[ DVB-T PLUS ]
[ DVB-T Lite ]
66
[ DVB-T USB ]
67
3 Hardware Installation
3.1
About the Board
[ FusionHDTV I ]
Analog Audio
output port
Antenna input port
Antenna input port: Connects to the antenna
Analog audio output port: Connects to the LINE_IN or equivalent (CD-IN, TV-IN). terminal of the
sound card. This for analog TV receiving.
68
[ FusionHDTV II ]
Analog Audio Output Port
AUDIO-OUT
Air Antenna
Cable Antenna
Composite-IN
SVideo-IN
AUDIO-IN
AUDIO-OUT: Can be connected to the Line-in port of the Sound card.
Air Antenna: Connects to the terrestrial signal
Cable Antenna: Connects to the Cable signal (This is used when the cable company sends the
HDTV signal using the 8VSB method)
Composite-IN: For external video sources.
SVideo-IN: For external video sources.
AUDIO-IN: For the audio of external video sources.
69
[ FusionHDTV III ]
Analog Audio Output Port
Air Antenna
Cable Antenna
Composite-IN
AUDIO-IN
AUDIO-OUT: Can be connected to the Line-in port of the Sound card.
Air Antenna: Connects to the terrestrial signal
Cable Antenna: Connects to the Cable signal (This is used when the cable company sends the
HDTV signal using the 8VSB method)
Composite-IN: For external video sources.
SVideo-IN: For external video sources.
AUDIO-IN: For the audio of external video sources.
70
[ FusionHDTV DVB-T]
Analog Audio Output Port
Air Antenna
Composite-IN
SVideo-IN
AUDIO-IN
Air Antenna: Connects to the terrestrial signal
Composite-IN: For external video sources.
SVideo-IN: For external video sources.
AUDIO-IN: For the audio of external video sources.
71
[ DVB-T PLUS ]
Analog Audio Output Port
Air Antenna
Thru Pass Port
Video -IN
Air Antenna: Connects to the terrestrial signal.
Thru Pass Port : The Thru Pass mean that you can plug your antenna into the card and then another
cable into the card to act as a repeater signal for another TV.
Video -IN: For external video sources.
Analog Audio Output Port : For the audio of analog sources.
[ DVB-T Lite ]
Air Antenna
Thru Pass Port
Air Antenna: Connects to the terrestrial signal.
Thru Pass Port : The Thru Pass mean that you can plug your antenna into the card and then another
cable into the card to act as a repeater signal for another TV.
72
[ DVB-T USB ]
Remote Receiver
USB Port
Air Antenna
Thru Pass Port
USB Port : Connects USB Port.
Air Antenna: Connects to the terrestrial signal.
Thru Pass Port : The Thru Pass mean that you can plug your antenna into the card and then another
cable into the card to act as a repeater signal for another TV.
FusionRemote Receiver
73
3.2
Before Installation
Warning:
1)
Before installing, first touch the grounded part of the PC to protect the components on the board
from static electricity.
2)
Before installing the board, the system’s power should be turned off. Installing the Board when the
system’s power is “ON,” will damage the system or the Board.
3)
Please remove the power cord from the PC.
3.3
Board Installation
1)
Connect the analog audio output port to the sound card (CD-IN or Aux) for Videro or composite
( Windows ME requires for analog TV audio.)
2)
Insert the board by holding the top part of the board and push it until it completely locks into the slot.
Fasten the screw on the bracket using a screw driver.
3)
Connect the Antenna input port to an antenna cable.
[FusionHDTV I]
74
[ FusionHDTV II ]
[ FusionHDTV III ]
[ FusionHDTV DVB-T ]
[ DVB-T PLUS ]
75
[ DVB-T Lite ]
Air Antenna
Thru Pass Port
[ DVB-T USB ]
Tip
After the board installation, when the power is on, the driver search message will appear. Please
refer to chapter 2 for driver Installation.
76
3.4
Remote Installation
* Remote transceiver is optional and can be purchased separately through FusionHDTV dealers.
1)
Connect the IR receiver module to the PC’s serial port(COM1, COM2…) or USB port.There are two
types receivers serial or USB
2)
After IR receiver and FusionHDTV remote software is installed, please reboot and start the
configuration by right cliking the FusionRemote icon at the low right bottom of the screen. If you do
not see the FusionRemote icon in the tray, please start the program by Start->Program->DViCO>FusionRemote.
3)
Please select the port that IR receiver module is attached and press the any button on the remote
transceiver. A Dialog box with the remote transceiver buttons will appear.
77
Tip
FusonRemote program will start automatically when the PC is booted. You can check the
FusionRemote program availability at the Task Bar of Windows like the picture below.
78
4 Using FusionHDTV
Please check www.dvico.com for any updated software or manuals.
4.1
Starting and Quitting
Click Start, point to Program->DVICO->FusionHDTV, or double click on the FusionHDTV icon in the program
folder to execute FusionHDTV.
When you first execute the program, it will ask for a channel scan. Please say “Yes” for the channel scan.
By clicking
4.2
(Exit Button) , the software is terminated.
Display setup
FusionHDTV Software composed with View panel and control panel.
4.2.1
Video Window
It shows the HDTV picture inside the window.
If you click right on the video window, a popup menu will appear.
79
Configuration: Refer to 4.3 : Configuration
Show Controller: Show/Hide FusionHDTV’s controller.
Recording Scheduler : Used to Reservation Record.
Input Source: Change input source.
Favorites Channel : Add your favorite programs into favorite list
before watching them.
Add to Favorite Channel.
Display Size: Resize display.
Aspect Ratio: Adjust display ratio.
Analog TV De-interlacing: removes interlace to progressive
conversion artifact.
CUT mode file playback: Change cut edit playback mode.
Always On Top: Shows FusionHDTV application always on top.
Second language : Second language can be heard with checking
"Audio > Second Language" option when it is available in digital
broadcasting.
Show WallPaper(ALT-W)
Time-Shifting On/Off : Change Time-Shifting mode.
File Playback: Play input signal(or file).
Stop : Change Stop.
Help: Shows Help information.
About..: Shows Program Information
Exit: Quit FusionHDTV.
80
4.2.2
Controller
This indicates Control Buttons.
1 2 3 4 5
6
7
8
30
14
33
9
16
27
31
11
10
17
28
15
12
13
29
32
25
19
20
22
18
21
23
26
24
1) Exit button
2) Minimize
3) Maximize button
4) Configuration button
5) Help button
6) Reserve REC button: is used to Reservation record.
7) LiveTV button: Changes to live TV mode.
8) Input button: is used to select input signal.
9) Time: Total elapsed time played.
10) Channel/Input button: This mode shows the channel number. If you click on the small channel
number, it will show the channel list and sub channel name.
11) Channel UP/DOWN button
12) Volume: Shows and controls the current volume level. Use the mouse or keyboard up/down button
to change the volume level.
13) Mute button: Mute ON/OFF.
14) Open file button: Is used to open recorded files.
15) Snapshot button: Is used for still image capture.
16) Video status
17) Audio status
18) Playback button: Is used to play an input signal (or file).
19) Pause button: Is used to pause playing or replay.
20) Start button: Is used to go to the first scene.
21) End button: Is used to go to the end of a scene.
22) Review button: Is used to search backward.
23) FF button: Is used to search forward.
24) Stop button
Tip
81
You can press stop when recording if you want to record the content without viewing.
25) Instant Replay button: goes 10 sec backward by default. You can configure the instant replay time in
the configuration menu.
26) Record button
27) Cut Edit button: Is used to edit a recorded file.
28) Mark in button: Mark in the start point where the cut starts.
29) Mark out button: Mark in the end point where the cut ends.
30) DVHS button: Connect / Disconnect with DVHS.
31) Time moving slider: Shows location currently playing. If you drag it with the mouse, you can move
anywhere in the white line.
32) Time moving Bar: Is used to drag the slider bar.
33) Favorites Channel : Add your favorite programs into favorite list before watching them.
82
4.3
Configuration
Configuration: (
4.3.1
), you can Configure many parameters.
Video
Video settings tab.
Input Source : Selects between multiple external video sources.
You can select antenna input between Tuner (OTA) or Cable
Cropping : flickering lines near the top or bottom of the picture can be removed with cropping function
Video tap is possible with adjust Brightness/contrast/Hue/Saturation/Sharpness.
Click on the " OK", and you can play adjusted display.
83
4.3.2
Display
Display settings tab.
Repeat playback: It will play the file endlessly if checked.
Show as hh:mm:ss: Shows time from 00:00:00.
CUT mode file playback : when you move to the position with scroll bar on the controller of the
FusionHDTV, it automatically pause when this option turned on.
FullScreen Refresh : it automatically sets the refresh rate of Screen to 60Hz to optimum display.
Aspect Ratio :
De-interlacing: Select BOB or WEAVE in DxVA video decoder.
-
Weave : Best for less moving picture
-
BOB
: Best for moving picture
Video Decoder: Is used to select video decoder.
< Dvico HDTV Video Decoder >
For Non DxVA compatible graphics cards. Usually the ones from Matrox.
84
Normal
- Intel Pentium 4 : CPU 1.6GHz, AGP 4X
- AMD Athlon XP : CPU 1600+, AGP 4X
High
- Intel Pentium 4 : CPU 2.4GHz, FSB 533, AGP 4X
- AMD Athlon XP : CPU 2400+, AGP 4X
Highest
- Intel Pentium 4 : CPU 2.4GHz, FSB 800, AGP 8X
- AMD Athlon XP : CPU 2400+, AGP 8X
< Dvico HDTV (DxVA) Video Decoder>
For DxVA compatible graphics cards. ATI Radeon,Geforce4 MX,Ti series cards.
Audio Decoder: Is used to select the audio decoder.
85
4.3.3
Record
This section indicates Record settings.
Capture Native Record : You can record Tp stream to mpeg format with maintaining Video, Resolution,
Audio information. (only with the sub-channels).
Recording Folder: Sets the folder of files being recorded.
Limitless Recording: If the record drive is formatted with NTSF, you are able to record a file continuously
on a hard drive.
REC SIZE per file: sets maximum file size to be recorded. The program will create a new file and start
recording if the current file exceeds this limit.
Deleting File Query: When the hard disk is full, this dialog box will appear.
Snapshot Folder: Sets the folder for files of snapshots.
Snapshot Format: Sets the format to JPG or BMP.
Record Target : Records FILE or DVHS or FILE+DVHS
86
4.3.4
Channel
This section indicates Channel settings: terrestrial digital analog channels and cable digital /analog channels.
TV : Select Cable or Air depending on your antenna connection.
Type : Scan wanted type. You can scan both.
Manual Tune : Check/uncheck wanted/unwanted channels. You can change the station name by clicking on
names.
Auto Scan : Scan starts for currently available channels.
Abort : Cancel channel scan and return to the original.
UP/Down Key As : UP/DOWN arrow key of keyboard/remote can be mapped to favorite channels/ RF
channels/ all sub-channels. default is the favorite channels. if 0 items in it, then RF channels.
87
4.3.5
Add To Favorite Channel List
Add your favorite programs into favorite list before watching them.
Hit the STAR(
) button above the Channel number.
Click Insert
button and add programs from Channel list to Favorite list.
Click Delete
button and delete the programs from Favorite list
Click Insert All button and add all of the programs from Channel list to Favorite list
Click Delete All button and delete all of the programs from Favorite list
Click OK and set up current favorite list.
88
4.3.6
Audio
This section indicates Audio settings.
TV Multi-Sound : is used to select the analog mono ,stereo or Multi-Language.
TV Audio Input: When you watch outer input(S-VHS,Video), you can set the input of sound card.
Analog Audio Attenuation : Analog audio level can be adjustable.
Digital Audio Output: is used to select the audio output: 2 CH SPEAKER, 5.1CH SPEAKERS or S/PDIF.
Supports the second language in digital broadcasting : Second language can be heard with checking
"Audio > Second Language" option when it is available in digital broadcasting.
89
4.3.7 Analog
This section indicates Analog settings.
Size(NTSC) : Initialize to VCD : 352*240 , S-VCD : 480*480 ,MPEG-1 : 320*240 MPEG2 : 640*480 ,DVD :
720*480
Size(PAL) : Initialize to VCD : 352*288 , S-VCD : 480*576 ,MPEG-1 : 320*288 MPEG2 : 720*576 ,DVD :
720*576
Quality : When MPEG-1,MPEG-2,DVD ,You can select Lowest,Low,Normal,High,Highest.
Record Audio Level : when recording the analog signals, The audio level can be adjustable.
Audio Bitrate : When MPEG-1,MPEG-2, you can select audio bitrate.
90
4.3.8 OSD
This section indicates OSD settings.
Show OSD: Is used to show channel and volume; on screen display.
Show Signal Strength : Is used to show Signal Check.( % or db)
Use BIG OSD : Is used to FusionRemote.
Advanced OSD : If you click
You can use
(MENU button) on remote controller, you can use advancedOSD Setting.
(File open) for playback to the file list.(only .tp files)
91
4.3.9 Time Shifting
This section indicates Time-Shifting settings.
Time Shift Folder : temporary recording folder. We recommend to 7200RPM or above hard disk.
Instant replay seconds will be applied when you press the
from 2 to 60 seconds.
(Instant replay button), and it’s adjustable
Time-shifting buffer size means that temporary buffer size of FusionHDTV for the time-shifting functionality
(like pause/ FF/ REW/ instant replay/ time-shift slider bar), and it’s adjustable from 1 to 120 minutes.
Time Shifting ON : You can watch the preview display with always recording to HDD.
92
4.4
4.4.1
Record
Manual Record
When you want record On-Air right away, click
(Record button) on FusionHDTV‘s controller.
If you want to terminate recording, click on the “Finish” button. The files recorded within that time will be
saved.If you want to cancel recording, click on the “Cancel” button.
When you click the cancel button while recording, you 'll get a message selecting Yes or No.
EXTEND : You can extend the recording time while manual/ reservation recording.
DVHS Recording : After Record target select, If you want record On-Air to DVHS, click
button) on FusionHDTV‘s controller.
When you want record to DVHS from File, open File and click
controller.
93
(Record
(Record button) on FusionHDTV‘s
4.4.2
Recording Scheduler
This mode is enabled by pressing popup menu(Recording Scheduler).
You can easily set the Channel/Date/ start time / Duration/Cycle of the TV program you want to record.
Click Insert(
) button and add Recording Schedule list.
Click Delete(
) button and delete Recording Schedule list.
94
4.5
Playing Files
If you click on the “open file” button on the controller, you can play a file.
You can also select multiple files for playback.
Tip
Difference between a *.tp and *.tpl file:
*.tp files are recorded files that are formatted for HDTV
*.tpl file is a file that represents multiple files when one program is recorded to multiple files.
You can conveniently play one program by selecting this .tpl file.
95
4.6
SnapShot Capturing
FusionHDTV provides high resolution still screen capture capability in live playback as well as in file playback
mode.
Click
the snapshot button for capturing a snapshot of LiveTV while in playback or file playback mode.
In the Record Tab, you can set the file name and file format.
96
4.7
4.7.1
Using EPG
Reserved program List
Reserved program list shows the program that you reserved. If you need to cancel reservation, select the
).
program and click Button(
Recording Scheduler list shows the program that you reserved.If you need to cancel reservation, select the
program and click button(
).
97
4.7.2
DVB-T EPG
DVB-T EPG(Electronic Program Guide) tells present/following Program for DVB-T.
Click EPG Button(
), or EPG(
) on the FusionRemote.
You can arrow Key with FusionRemote or keyboard. If you want to exit , Click
You can easily record the present/following Program you want to record.
98
4.7.3
TitanEPG
EPG(Electronic Program Guide) tells you exactly what you can see at your location. You can use EPG to
see quickly what's on for digital and analog broadcasts and data casting services
When you first visit TitanTV, Click TitanTV icon(
member before viewing your channel guides.
) and you must sign up(
) to become a
Most likely there will be an updated version of the TitanEPG Information on Titan web site
Please check the site (Http://www.titan.com).
4.7.4
EPG Program
The main feature on this page is the programming grid. This grid is divided lengthwise by station/channel
number and widthwise by time (in three-hour increments). You may have to scroll to see all
channels/programs available to you.
99
1
7
2
3
4
5
9
6
8
1) TitanTV logo in top left hand corner
2) Watch Now icon(
3) PVR icon(
) must be present
) must be present. Red “HD” must be present in one or more program cells
4) All channels must have program listings data
5) Variety of networks in channel lineup
6) Variety of genres (color codes) in program grid
7) My Favorites tab present
8) Legend of genres present
9) Sub-channel programming present
100
4.7.5
FusionHDTV Agent
This mode is enabled Shutdown the program or Turn the system off after the recording is finished.
1) Execute the FusionHDTV program and right click the “Tray” icon. If you do not see the FusionTray
icon in the tray, uncheck ‘Fusion Tray Auto Run’. Start the program by Start->Program->DViCO>FusionHDTV Agent. Press ‘Hide Menu(C)’, and you can hide popup menu.
2) Select FusionHDTV Agent.
If you want to silent mode recording,
select Minimize on Silent mode or .
Silent mode
Shutdown the program when
every scheduled recording is done.
Shutdown the program when specified time.
Turn the system off after the
recording is finished.
3) If you select Schedule View, you can found reservation list.
101
4.8
Cut Editing
You can cut the live recording/broadcast files as well as recorded .tp file with the cut-editing feature of the
FusionHDTV.
1) The cut-editing window will appear if you hit the ‘Cut’ button. (Mark-in/out button also brings the cutediting window)
2) You can set the prefix name on the ‘Prefix’ edit-box to generate the prefix of cut-edited file name
automatically.
3) You can set the output folder by pressing the right-side button of output folder edit-box. The
generated cut-edited files will be saved at that folder.
4) Hit the ‘Mark-In’ button to set the start point and ‘Mark-out’ button to set the end point of clip. You
can proceed with multiple clips with this manner.
102
5) To change the file name, just click the file name area. The edit-box will appear and you can type the
filename. To change the IN/OUT position, just click the spot you want to change. The edit-box and
up/down buttons will appear for you to change the position. To change the hour / minute/ second,
click each area you want. Then type the actual position, or hit the up/down arrow button to adjust.
6) You can delete unwanted clips by hitting the ‘Delete’ key on the keyboard.
7) After all mark-IN/OUT done, hit the ‘Cut’ button to start the cutting.
Cut files will be generated like this: ‘Prefix + _ + number + .tp’ sequence (For example, like
Dvico_00.tp, Dvico_01.tp, Dvico_02.tp) in the output folder
103
4.9
Using FusionRemote
* Optional FusionHDTV remote transceiver.
This indicates Remote Buttons.
4.9.1 Using For FusionHDTV
1) HDTV button: Start or Exit FusionHDTV program.
2) PC OFF button
3) ~ 12) number button
13) Snapshot button: is used for still image capture.
14) Record button
104
15) Channel UP button
16) Volume DOWN button.
17) Play/Pause button: is used to pause playing or replay.
18) Volume UP button
19) Channel DOWN button.
20) Review button: is used to search backward.
21) Stop button
22) FF button: Is used to search forward.
23) Playback button: Is used to play an input signal (or file).
24) ATV/DTV button: Changes to live TV mode.
25) DVHS button: Connect / Disconnect with DVHS.( Windows XP or above only.)
26) Configuration button: show FusionHDTV Configuration.
27) Aspect Ratio button: Change Aspect Ratio(16:9Å>4:3).
28) Fullscreen button: Show Fullscreen.
29) EPG button: Show Reservation/Recorded List.
30) Mute button
31) Windows button: Change Windows.
32) FOCUS button: move to FusionHDTV Controller.
33) Minimize button
34) Input button: repeat S-VHS – VIDEO – CABLE – Tuner
35) Back Channel button
36) Profile button: You can have different profile for each application programs you want to use with the
remote controller.
105
[ DVB-T USB Remote ]
1) HDTV button: Start or Exit FusionHDTV program.
1
2) ~ 11) numberic button
2
3
4
13
12) Back Channel button.
5
6
7
12
13) Mute button
8
9
10
11
14) Snapshot button: is used for still image capture.
15) Volume UP button
14
15
17
18
16
19
16) Record button.
17) Volume DOWN button
18) Play/Pause button: is used to pause playing or replay
20
21
22
23
24
25
19) Volume UP button.
20) Review button: is used to search backward
21) Channel DOWN button.
26
27
28
29
22) FF button: Is used to search forward.
30
31
32
33
23) Configuration button: show FusionHDTV Configuration.
34
35
36
24) Stop button
25) Playback button: Is used to play an input signal (or file).
26) EPG button: Show present/following EPG.
27) Aspect Ratio button: Change Aspect Ratio(16:9 >4:3).
28) Fullscreen button: Show Fullscreen.
29) Minimize button
30) Profile button: You can have different profile for each application programs you want to use with the
remote controller.
31) ATV/DTV button: Changes to live TV mode.
32) Input button: repeat S-VHS – VIDEO – Tuner
33) Instant Replay button: goes 10 sec backward by default. You can configure the instant replay time in
the configuration menu.
34) Windows button: Change Windows
35) FOCUS button: move to FusionHDTV Controller.
36) PC OFF button.
106
4.9.2 Using other Windows
1) UP button
2) LEFT button
3) Enter button
4) RIGHT button
5) DOWN button
6) TAB button
7) Shift + TAB button
8) ESC button
107
4.9.3 Using Remote profile program
You can use Fusion Remote as the simple replacement of the keyboard. press the blue button on the remote
transceiver for customizing the remote transceiver keys for the program you selected.
1. WinAMP
1)
2)
3)
13)
14)
15)
16)
17)
18)
19)
20)
21)
22)
23)
24)
25)
26)
27)
28)
29)
30)
31)
32)
33)
34)
35)
36)
Excute WinAMP
PC OFF
~ 12) : Numeric key
Pause
Exit WinAMP
Prew Track
Volume DOWN : DOWN arrow
Play/Restart/Unpause
Volume UP: UP arrow
Next Track
REW : Left arrow
STOP
FF : Right arrow
Open File
Open Location
Open Directory
Current file info
Toggle Repeat
Toggle Shuttle
Cycle through different WinAMP Windows
Empty
TAB Key
Enter Key
minimize
Change Window(ALT-Tab)
Empty Key
Change Profile
108
2. PowerDVD
1)
2)
3)
13)
14)
15)
16)
17)
18)
19)
20)
21)
22)
23)
24)
25)
26)
27)
28)
29)
30)
31)
32)
33)
34)
35)
36)
Excute PowerDVD
PC OFF
~ 12) Numeric key
Pause
Exit PowerDVD
Returns to previous chapter
Volume DOWN
Plays media
Volume UP
Jumps to next chapter
Step Backward
STOP
Step forward
Ejects Disk
Switches among available Subtitle
Switches among available Audio
Directly goes to bookmarked scenes
Repeats titles,chapters,songs,etc.
Fullscreen
Adds bookmarks for specific DVD scenes
Mute
TAB Key
Enter Key
minimize
Change Window(ALT-Tab)
Empty Key
Change Profile
109
3. Window Media Player 9
1)
2)
3)
13)
14)
15)
16)
17)
18)
19)
20)
21)
22)
23)
24)
25)
26)
27)
28)
29)
30)
31)
32)
33)
34)
35)
36)
Excute WMPlayer
PC OFF
~ 12) : Numeric key
Snapshot
Exit WMPlayer)
Previous File
Volume DOWN
Toggle Play/Pause
Volume UP
Next File
Step Backward
STOP
Step forward
Open File
Switches among available Subtitle
Toggle Shuttle
Switch to skin mode
Switch to full mode
Fullscreen
UP Key (UP arrow key)
Mute
TAB key
Enter key
Down key (DOWN arrow key)
Change Window(ALT-Tab)
Empty key
Change Profile
110
4. Window MCE 2005
1)
2)
3)
13)
14)
15)
16)
17)
18)
19)
20)
21)
22)
23)
24)
25)
26)
27)
28)
29)
30)
31)
32)
33)
34)
35)
36)
Excute Window MCE2005
PC OFF
~ 12) : Numeric key
Pause
Record
UP arrow key
LEFT arrow key
Select (Enter key)
RIGHT arrow key
DOWN arrow key
Rewind
PLAY
Fast Forward
Recorded TV
Move down one channel
Move up one channel
Go back to the previous screen or backspace a single
character in search
Volume Down
Volume Up
Guide
Mute
Fullscreen
STOP
Exit Window MCE2005
My TV
My music
Change Profile
111
4.9.4 Using Customize mode
When you are not using the FusionHDTV, you can use Fusion Remote as the simple replacement of the
keyboard. You can define the key-button mapping of any program you want to use with the FusionRemote.
Please refere to the instruction below.
1) Create the profile you want to define like the picture below.
2) After pressing the New button input the profile name and the execution path of the program. The
program will be started by pressing the red start button of the remote transceiver.
3) After adding the profile please press the <- button to select the profile for key define.
112
4) Please press the blue button on the remote transceiver for customizing the remote transceiver keys
for the program you selected.
5) If you press the Customize… button on the picture above you will see the remote transceiver pop up.
113
6) Please press button on the remote transceiver and input the keys or short cut keys you want to map
to the button.
Press SaveAll button when you are done
114
7) Clear button clears the button defined.
8) You can set the OSD setting in accordance to each profile like the picture below.
115
4.10 Using Signal Checker
You can check the strength of the TV signal using the Signal Checker program
Please do not execute Fusion Program and signal checker at the same time.
They only work one at a time.
1) Start – Program– Dvico – FusionHDTV – Signal Checker
2) Press Scan CHs (Scan Channels) button to search the channel.
80% or more signal strength is recommended
3) You can change the channel number of your preference to check the strength.
116
4.11 Using FusionConverter
You can Convert Tp files to MPEG2,DVD or DivX Files. FusionConverter works in 1080i, 576p, 576i
1.
Start->Program->DVICO->FusionConverter
2. Use file open button to select Tp file to convert. Use file save button to locate the converted file to be
saved. You can select the single sub-channel.
3. Press “Start” button to initiate the conversion. If you press stop button, conversion will stop and
converted file up to the point will be saved. If you want to cancel converting, click on the “Cancel”
button.
4.
Converting OK Dialog appears when done.
5.
Pressing
will pop up option windows. You can change size, aspect ratio, bit rate,
smoothness and interlace option.
PC OFF : Is used to turn the system off after the converting is finished.
Cature Native MPEG : You can convert Tp stream to mpeg format with maintaining Video,
Resolution, Audio information.
Use “progressive” option when you watch the converted motion file on PC monitor only.
Use “interlace” option if you watch converted motion file on a TV or on both TV and a PC.
117
Use “MP2” Audio format option if you burn the DVD authoring tool.(Ex. Ulead Videostudio 7 SE
DVD)
118
4.12 FusionHDTV ShortKey
Short Key
Explanation
F1
HELP
A+Numeric
Analog Channel
D+Numeric
Digital Channel
ALT+F4
Exit.
ALT+T
Time-Shifting On/Off
ALT+W
Show WallPaper
Page Up
Fast Foward (FF)
Page Down
Rewind (REW)
Backspace
Instant Replay.
ALT+Enter
Fullscreen.
CTRL+Space
Mute.
CTRL+B
Repeat all Aspect ratio
CTRL+C
16:9,4:3,4:3 Pan & Scan toggle
CTRL+D
DVHS Mode
CTRL+E
Recording Scheduler.
CTRL+F
File open.
CTRL+H
Edit favorite channel list .
CTRL+I,”I”
Snapshot .
CTRL+L
LIVE TV.
CTRL+M
Configuration.
CTRL+O
Go before Channel
CTRL+P
Input Source
CTRL+R ,”R”
Manual record.
CTRL+S
Stop.
CTRL+T
Always on TopTV.
CTRL+F6
Hide Controller..
UP
Channel UP.
DOWN
Channel DOWN.
RIGHT
Volume UP..
LEFT
Volume DOWN.
SPACE
File : Pause <-> Play / Live : Play
119