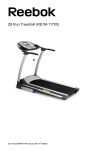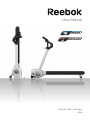
1
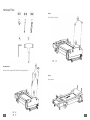
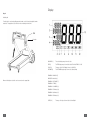
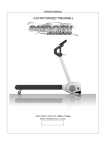
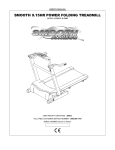
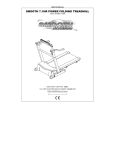
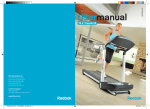
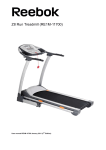
User Manual
I-Run RE-14301 UK Edition
0208
Contents:
PRECAUTIONS
1
2
3
4
5
6
7
8
9
10
11
12
13
14
15
16
17
18
19
20
21
22
23
24
25
26
27
28
Front Cover
Contents
Precautions
Parts list
Parts list
Exploded Diagrams
Exploded Diagrams
Exploded Diagrams
Exploded Diagrams
Hardware Pack / Assembly Instructions
Assembly Instructions
Assembly Instructions
Computer Operation
Computer Operation
Computer Operation
Computer Operation
Computer Operation
Computer Operation
Computer Operation
Computer Operation
Computer Operation
Heart Rate Calculation
Transportation
Maintenance
Incline Adjustment
Warranty/Customer Service
Contact
Rear Cover
WARNING: To reduce the risk of burns, fire, electric shock, or injury to persons, read the following
important precautions and information before operating the treadmill.
1. It is the responsibility of the owner to ensure that all users of this treadmill are adequately informed of all warnings and precautions.
2. Use the treadmill only as described in this manual.
3. Place on a level surface, with 2m of clearance behind it. To protect the floor or carpet from damage,
place a mat under the treadmill.
4. When choosing a location for the treadmill make sure that the location and position permit access to
a plug.
5. Keep the treadmill indoors, away from moisture or dust. Do not put the treadmill in a garage or
covered patio, or near water. Failure to do this will invalidate your warranty.
6. Do not operate the treadmill where aerosol products are used or where oxygen is
being administered.
7. Keep children under the age of 12 and pets away from the treadmill at all times.
8. The treadmill should not be used by persons weighing more than 100kg.
9. Never allow more than one person on the treadmill at a time.
10. Wear appropriate exercise clothing when using the treadmill. Do not wear loose clothing that could
become caught in the treadmill. Athletic support clothes are recommended for both men and
women. Always war athletic shoes. Never use the treadmill with bare feet, wearing only stockings,
or in sandals.
11. When connecting the power cord, plug the power cord into an earthed circuit. When replacing the
fuse, an ASTA approved BS 1362 type should be fitted to the fuse carrier. A 13 amp fuse should be
used. No other appliance should be on the same circuit.
12. If you need an extension cord, use only 14 gauge cord of 1.5m or less in length.
13. Keep the power cord away from heated surfaces.
14. Never move the walking belt while the power is turned off. Do not operate the treadmill if the power
cord or plug is damaged, or if the treadmill is not working properly
15. Never start the treadmill while you are standing on the walking belt. Always hold the handrails while
using the treadmill.
16. The treadmill is capable of high speeds. Adjust the speed in small increments to avoid sudden
jumps in speed.
17. The pulse sensor is not a medical device. Various factors, including the user’s movement, may affect
the accuracy of the heart rate readings. The pulse sensor is intended only as an exercise aid in
determining heart rate trends in general.
18. Never leave the treadmill unattended while it is running. Always remove the safety key when the
treadmill is not in use.
19. Do not attempt to raise, lower, or move the treadmill until it’s properly assembled. Do not change
the incline of the treadmill by placing objects under the treadmill.
20. Inspect and tighten all parts of the treadmill regularly.
21. Never drop or insert any object into any opening in/on the treadmill.
22. Only use an original power cord supplied with the machine. If a replacement is required contact
RFE international Ltd directly.
Parts List
Part no.
Part name
IR-101
IR-102
IR-103
IR-104
IR-105
IR-106
IR-107
IR-108
IR-109
IR-110
IR-111
IR-112
IR-113
IR-201
IR-202
IR-203
IR-204
IR-205
IR-206
IR-207
IR-208
IR-209
IR-210
IR-213
IR-214
IR-215
IR-216
IR-217
IR-218
IR-219
IR-220
IR-301
IR-302
IR-303
IR-304
IR-306
IR-307
IR-308
IR-309
IR-310
IR-311
IR-312
IR-401
IR-402
IR-403
IR-404
IR-405
IR-406
Console button plate
Console housing -upper
Console housing -lower
Safety Key base
Safety Key
Console housing holder-upper
Console housing holder-lower
Console fix lower cover
Computer main board
Button board
Safety key wire
Pulse sensor wire-upper
5 pin computer wire-upper
Fold up grip
Upright -left
Upright -right
Heart rate handle bar
Pulse sensor set
Console support tube bushing
Handlebar cover right -inner
Handlebar cover right -outside
Handlebar cover left -inner
Handlebar cover left -inner
Upright lower cover-left
Side cover
Fold up grip connect rod
Spring
Upright lock pin
Fold up grip connector
Safety key wire -lower
5 pin computer wire -lower
Fold up foot cover
Fold up foot
Front foot base
Main frame
Rear transport axle cap
Transportation wheel
Belt cover- bottom
Rear roller tube
Rear roller shaft
Front roller tube
Front roller shaft
Motor hood
DC driving Motor
Driving Belt
Motor holder
Motor holder bracket end cap -lower
Motor holder bracket end cap -lower
Quantity
1
1
1
1
1
1
1
1
1
1
1
2
1
1
1
1
1
2
2
1
1
1
1
2
2
2
2
2
2
1
1
2
2
2
1
1
4
4
1
1
1
1
1
1
1
1
2
2
IR-407
IR-408
IR-409
IR-410
IR-411
IR-412
IR-413
IR-414
IR-415
IR-416
IR-417
IR-418
IR-419
IR-420
IR-501
IR-502
IR-503
IR-504
IR-505
IR-506
IR-601
IR-602
IR-603
IR-604
IR-605
IR-606
IR-607
IR-608
IR-609
IR-610
IR-611
IR-612
IR-613
IR-614
IR-615
IR-616
IR-617
IR-618
IR-619
IR-620
IR-621
IR-622
IR-623
IR-624
IR-625
IR-626
IR-627
IR-628
IR-629
IR-630
IR-631
Front foot bracket
Motor holder bracket locate plate
Motor holder bracket base -left
Motor holder bracket base -right
Switch board Switch Switch board holder Electric outlet Electric outlet holder
Electric protector
PU cushion Motor cover -lower Transport wheel bracket Main frame foot cover
Side rail Rear end cap -left Rear end cap -right Running belt Running deck Side rail guider M4x14 mm Screw 3x10 mm Screw
M5X14 mm screw
M4X10 mm screw
M5 nut
M8×18 mm allen bolt
4×40 mm screw
M8×52 mm bolt
Ø10 washer
M8×130 screw
M6×45 mm screw
Ø10 washer
M12x25 mm cap allen head bolt M6×14 screw
M6 washer
M4X35 screw 26 washer M8 nut M8X85 bolt
M8X48 bolt
M10 nut M10X116 mm screw 8 plate washer Ø8 spring
M8×12 allen head bolt
M8 bump bolt 4×19 Screw
M8 special bolt Ø8 washer M10×25 allen head bolt
M8×30 allen head bolt
1
1
1
1
1
1
1
1
1
1
1
1
1
2
2
1
1
1
1
8
22
6
2
8
4
2
2
4
5
2
3
3
2
4
4
2
2
5
1
1
1
1
10
2
2
2
18
1
2
2
4
Hardware Pack
Step 2:
Push Feet 301 onto leg 302
Assembly Step 1:
Insert leg 302 into leg bracket 407 fix with bolt 610 using Allen Key A
Step 3:
Unit assembled
10
11
Display
Step 4:
Unfolding unit
To unfold, unlock cross bar by pulling upwards towards console. Now rotate uprights towards
motorhood. The uprights need to click twice when un-folding for the first time.
Crossbar
CALORIES (1)
The calories display range is from 0 to 999.
TIME (2)
The TIME display range is from 0:00 to 99:00. The initial TIME is “32:00”
PULSE (3)
The range of the PULSE display is from 0 to 199 BPM.
DISTANCE (4) The DISTANCE display range is from 0.0 to 99 km/h; Mph.
PROGRAM – MANUAL (5)
MEASURE in km/miles (6)
When un-folded please rotate the console around console support tube.
PROGRAM – DISTANCE (7)
PROGRAM – TIME (8)
PROGRAM – CALORIES (9)
PROGRAM – 15 Minutes (10)
PROGRAM – 30 Minutes (11)
PROGRAM – 45 Minutes (12)
SPEED (13) 12
The range of the Speed is from 0.0 to 99.9 km/h; Mph.
13
Button Functions
Start Button
Press the button to start the computer or start the program.
The initial speed of 0.8 km/h / 0.5 mph
STOP / ENTER button
Press to confirm a program and preset function values under setting mode.
Press to quit preset program and function values after completing a single program.
Setting procedure: returns to beginning of setting mode before pressing the START key.
Press to stop exercise during workout time.
SPEED Up button
Press the button to increase the speed or set the program.
SPEED Down button
Press the button to decrease the speed or set the program.
If you should encounter problems and need to stop the motor quickly, simply pull on the cord to
disengage the safety key from the console. To continue set the speed controller to stop and then reinsert
the safety key into the console, then press start.
SLEEP MODE
When the power is ON the computer will automatically enter POWER OFF MODE if it is left idle for 5
minutes, press any button to return to the power on status when the computer is in the POWER
OFF MODE.
COMPUTER OPERATION
Power on – “P1” (manual) will flash in the LCD display. Press SPEED UP / DOWN keys for desired
program. Please refer to the following instructions for different program options.
QUICK START
Press the START key directly to start exercise without a function value.
POWER ON
After connecting the power cord switch the power button on. The LCD screen will light up.
PROGRAM 1 – MANUAL
1.
Select the desired program by pressing the UP/DOWN button.
2.
Press STOP / ENTER to confirm the program.
3.
Press START to begin your exercise.
TIME:
DISTANCE: CALORIES:
SPEED:
Accumulates and displays workout time from start of exercise.
Accumulates and displays workout distance from start of exercise.
Accumulates and displays calories consumed during workout time.
Displays current speed.
To pause the program while exercising, press the STOP/ENTER button. To resume exercising,
press the “START” button. To stop the program press the STOP/ENTER button twice.
SAFETY KEY
The safety key must be inserted into the slot on the console in order to operate the treadmill. Always
insert the safety key and attach the clip to your clothing at your waist before beginning your workout.
14
15
PROGRAM 2 – DISTANCE
PROGRAM 3 – TIME
1.
2.
3.
4.
Select the desired program by pressing the UP/DOWN button.
Press STOP / ENTER to confirm the program.
Adjust your desired distance by pressing UP/DOWN and confirm with STOP/ENTER
Press START to begin your exercise.
1.
2.
3.
4.
Select the desired program by pressing the UP/DOWN button.
Press STOP / ENTER to confirm the program.
Adjust your desired time by pressing the UP/DOWN button, press STOP/ENTER
to confirm
Press START to begin your exercise.
DISTANCE:
Press SPEED UP/ DOWN to preset the distance target values and press START.
The distance will count down from preset target value. While distance counts down to 0
(zero), speed goes down to 0 (zero) by 0.5 km per second (when the preset target
is reached).
TIME:
Press SPEED UP / DOWN keys to preset time target value and press START.
The time will count down from preset target value when starting exercise. While time
counts down, the speed goes down to 0 (zero) by 0.5 km per second (when the preset
target is reached).
TIME:
Accumulates and displays workout time from start of exercise.
DISTANCE:
Accumulates and displays workout distance from start of exercise.
CALORIES:
Accumulates and displays calories consumed during workout time.
CALORIES:
Accumulates and displays calories consumed during workout time.
SPEED:
Displays current speed.
SPEED:
Displays current speed.
To pause the program while exercising, press the STOP/ENTER button. To resume exercising,
press the “START” button. To stop the program press the STOP/ENTER button twice.
16
To pause the program while exercising, press the STOP/ENTER button. To resume exercising,
press the “START” button. To stop the program press the STOP/ENTER button twice.
17
PROGRAM 4 – CALORIES Select the desired program by pressing the UP/DOWN button.
PROGRAM 5 – 15 MINUTES PRESET SPEED
1.
2.
3.
Press STOP / ENTER to confirm the program.
Adjust your desired calories by pressing the UP/DOWN button, press
STOP/ENTER to confirm
Press START to begin your exercise.
1.
2.
3.
4.
Select the desired program by pressing the UP/DOWN button.
Press STOP / ENTER to confirm the program.
You can choose between 5 level steps (L1 to L5) L1=easy, L5=hard. Select your desired
Level by pressing the UP/DOWN button and press STOP/ENTER to confirm.
Press START to begin your exercise.
CALORIES:
Press SPEED UP / DOWN keys to preset calories target value and press START.
Calories will count down from preset target value. While the distance counts down to 0
(zero), the speed goes down to 0 (zero) by 0.5 km per second (when the preset
target is reached).
TIME:
Accumulates and displays workout time from start of exercise.
DISTANCE:
Accumulates and displays workout distance from start of exercise.
TIME:
Accumulates and displays workout time from start of exercise.
PULSE:
Detects and displays current heart rate.
DISTANCE:
Accumulates and displays workout distance from start of exercise.
CALORIES:
Accumulates and displays calories consumed during workout time.
SPEED:
Displays current speed.
SPEED:
Displays current speed.
To pause the program while exercising, press the STOP/ENTER button. To resume exercising,
press the “START” button. To stop the program press the STOP/ENTER button twice.
18
To pause the program while exercising, press the STOP/ENTER button. To resume exercising,
press the “START” button. To stop the program press the STOP/ENTER button twice.
19
PROGRAM 6 – 30 MINUTES PRESET SPEED
PROGRAM 7 – 45 MINUTES PRESET SPEED
1.
2.
3.
4.
Select the desired program by pressing the UP/DOWN button.
Press STOP / ENTER to confirm the program.
You can choose between 5 level steps (L1 to L5) L1=easy, L5=hard. Select your desired
level by pressing the UP/DOWN button and press STOP/ENTER to confirm.
Press START to begin your exercise.
1.
2.
3.
4.
Select the desired program by pressing the UP/DOWN button.
Press STOP / ENTER to confirm the program.
You can choose between 5 level steps (L1 to L5) L1=easy, L5=hard. Select your desired
Level by pressing the UP/DOWN button and press STOP/ENTER to confirm.
Press START to begin your exercise.
TIME:
Accumulates and displays workout time from start of exercise.
TIME:
Accumulates and displays workout time from start of exercise.
DISTANCE:
Accumulates and displays workout distance from start of exercise.
DISTANCE: Accumulates and displays workout distance from start of exercise.
PULSE:
Detects and displays current heart rate.
CALORIES: Accumulates and displays calories consumed during workout time.
CALORIES:
Accumulates and displays calories consumed during workout time.
SPEED:
Displays current speed.
SPEED:
Displays current speed.
To pause the program while exercising, press the STOP/ENTER button. To resume exercising,
press the “START” button. To stop the program press the STOP/ENTER button twice.
To pause the program while exercising, press the STOP/ENTER button. To resume exercising,
press the “START” button. To stop the program press the STOP/ENTER button twice.
20
21
Heart Rate Training
Transportation
To maximize your results from training it is essential to monitor the intensity of your workout through your
heart rate.
It is imperative that you accurately determine the target pulse rate within which to train in order that you
may improve your fitness at a safe, comfortable and sustainable level.
The following table below is a rough guide to determine the level at which you should be exercising based
upon your maximum heart rate (MHR).
To move your I run. Fold the unit by dis-engaging the crossbar then fold the uprights to the deck.
Now grasp the grip bar at the back of the tread and tilt upright. Grasp the handles and tilt onto the
transport wheels.
Heart Rate diagram
You can calculate the target-heartrate for your training as follows:
Maximum heartrate = 220 minus age
For the different trainingtargets you should train with the following percentage of your maximum heartrate:
Health/Fat Burning:
Fitness/Bodyshaping: Performance: 50 – 70% of your max. heartrate
70 – 80% of your max. heartrate
80 - 90% of your max. heartrate
Example:
You are 25 years old and want to train for the target Fitness:
220 – 25 = 195
70% of 195 = 136,5
80% of 195 = 156
Your target-heartrate should be between 136,5 and 156 beats per minute.
This information is for your reference only. To determine your individual training intensity or in case you should have health
restrictions please consult your physician before starting exercising.
22
23
MAINTENANCE
ADJUSTING INCLINE WHEELS
Proper maintenance is very important to ensure your treadmill is always in top working condition. Improper maintenance
could cause damage or shorten the life of your treadmill and exceed the LIMITED WARRANTY coverage. Inspect and
tighten all parts of the treadmill regularly. Replace any worn parts immediately.
Your machine has 2 levels of incline – 1% or 4%
BELT ADJUSTMENT
Belt adjustment and tension performs two functions: adjustment for tension and centering. The running belt has been
adjusted properly at the factory. However transportation, uneven flooring or other predictable reasons could cause the
belt to shift off centre resulting in the belt rubbing with the plastic side rail or end caps and possibly causing damage. To
adjust the belt back to its proper position please follow the directions below. When the running belt is not centred and is
shifted to the right or to the left, it is possible to adjust its position. Remove the Safety Key and unplug the power cord.
Use the Allen wrench and turn both rear roller adjustment bolts clockwise, not more then 90 degrees. Remove the Allen
wrench, insert the Safety Key and plug in the power cord. Run the treadmill a few minutes and observe if WARNING: Do
not over tighten rollers! This will cause premature roller bearing failure!
To adjust the incline on your I-run simply move the bar that attaches the 2 rear wheels backwards of forwards. When the
wheels are pushed inwards towards the machine the running surface will be at a 4% incline. When the wheels are fully
extended the incline level will be 1 %.
*please note 1% incline level is the lowest point available for the I-run Machine.
CLEANING
Routine cleaning of your treadmill will extend the product’s life. WARNING: To prevent electrical shock, be sure the
power to the treadmill is OFF and the power cord is unplugged from the wall electrical outlet before attempting any
cleaning or maintenance.
•
•
•
Never use abrasive or solvents to clean the treadmill. To prevent damage to the computer, keep liquids away and keep it out of direct sunlight.
After each workout: Wipe off the console and other treadmill surfaces with a clean, water dampened soft cloth to remove excess perspiration.
Weekly: Use of a treadmill mat is recommended for ease of cleaning. Dirt from your shoes contacts the belt and eventually makes it to underneath the treadmill. Vacuum underneath treadmill once a week.
DECK LUBRICATION
The walking belt has been pre-lubricated at the factory. However, it is recommended that the walking board be checked
periodically for lubrication to ensure optimal treadmill performance. Your treadmill should not have to be lubricated
usually within the first year or 500 hours of use. Every 30 days or 30 hours of operation lift the sides of the walking belt
and feel the top surface of the walking board as far as you can reach. If you feel signs of silicone, no further lubrication is
required. If it feels dry to the touch, follow the instructions below. Please use a non-petroleum based silicone.
24
25
Warranty
Contact
RFE International Ltd. (RFE), warrants this product to be free from defects in workmanship and material, under normal
use and service conditions, for a period of (2) two years for parts and labour, (10) ten years for the motor (parts only) and
lifetime for the frame from the date of purchase. This warranty extends only to the original purchaser. RFE’s obligation
under this warranty is limited to replacing or repairing, at RFE’s option, the product through one of its authorized service
centres. All repairs for which warranty claims are made must be pre-authorized by RFE. This warranty does not extend
to any product or damage to the product caused by or attributed to freight damage, abuse, misuse, improper or
abnormal usage or repairs not provided by a RFE authorized service centre, products used for commercial or rental
purposes, or products used as store display models. No other warranty beyond that specifically set forth above is
authorized by RFE.
RFE INTERNATIONAL LTD
DSV HOUSE
MAIDSTONE RD
KINGSTON
MILTON KEYNES
MK10 0AJ
Excluded from warranty are wearing parts and damages caused by misuse of the product. In the case of claim please
contact your specialist dealer.
Head Office tel:
Head Office fax:
Technical Support
+44 (0) 1908 512244
+44 (0) 1908 512245
+44 (0) 0871 4742614
e-mail: [email protected]
web: www.rfeinternational.com
The warranty period starts at the date the product was purchased (please carefully retain your sales receipt).
Reebok quality products have been designed and tested to meet the needs and requirements of a committed
Fitness-Training of in-home use. This product is tested to the European Standard EN 957
Customer Service
To best possible support you in the case of problems with your product, we would ask you to please quote the product
Model Name and Serial Number.
These can be found on the sticker underside your product.
Model name:
Serial number:
Spare Part Order:
If you require any parts for your machine please contact Technical Support on 0871 4742614. Please have your machine serial number and production date to hand
Waste Disposal
26
27
RFE INTERNATIONAL LTD
DSV HOUSE
MAIDSTONE RD
KINGSTON
MILTON KEYNES
MK10 0AJ