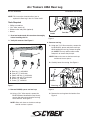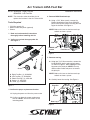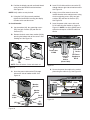
1
Cybex Arc Trainer® 425A
Service Manual
Cardiovascular Systems
Part Number 425A-901 A
www.cybexinternational.com
Cybex Arc Trainer® 425A
Service Manual
Cardiovascular Systems
Part Number 425A-901 A
Cybex®and the Cybex logo are registered trademarks of Cybex International, Inc.
Arc Trainer® and its mark are registered trademarks of Cybex International, Inc.
DISCLAIMER: Cybex International, Inc. makes no representations or warranties regarding the contents of this manual. We
reserve the right to revise this document at any time or to make changes to the product described within it without notice or
obligation to notify any person of such revisions or changes.
© 2008 Cybex International, Inc. All rights reserved. Printed in United States of America.
10 Trotter Drive Medway, MA 02053 • 888-426-9239 • 508-533-4300 • FAX 508-533-5183
www.cybexinternational.com • [email protected] • [email protected] • 425A-901 A • August 2008
Cybex Arc Trainer 425A Service Manual
About This Manual
To purchase additional copies of this manual or any other Cybex manual, please do one of
the following:
• contact Cybex Customer Service at 888-462-9239
• or contact Cybex Customer Service at 508-533-4300
To contact Cybex with comments about this manual send email to [email protected].
FCC Compliance Information
! WARNING: Changes or modifications to this unit not expressly approved by the party
responsible for compliance could void the user’s authority to operate the
equipment.
This equipment has been tested and found to comply with the limits for a Class B digital
device, pursuant to Part 15 of the FCC Rules. These limits are designed to provide reasonable
protection against harmful interference in a residential installation. This equipment generates,
uses and can radiate radio frequency energy and, if not installed and used in accordance with
the instructions, may cause harmful interference to radio communications. However, there is
no guarantee that interference will not occur in a particular installation. If this equipment does
cause harmful interference to radio or television reception (which can be determined by
turning the equipment off and on) the user is encouraged to try to correct the interference by
one or more of the following measures:
• Reorient or relocate the receiving antenna.
• Increase the separation between the equipment and receiver.
• Connect the equipment into an outlet on a circuit different from that to which the
receiver is connected.
• Consult the dealer or an experienced radio TV technician for help.
Page i
Cybex Arc Trainer 425A Service Manual
Table of Contents
Front Pages
About this Manual . . . . . . . . . . . . . . . . . . i
FCC Compliance Information . . . . . . . . . i
Table of Contents . . . . . . . . . . . . . . . . . . iii
1 Safety
Important Voltage Information . . . . . . . . .
Grounding Instructions . . . . . . . . . . . . . . .
Important Safety Instructions . . . . . . . . .
Warning Decals . . . . . . . . . . . . . . . . . . . .
1-1
1-1
1-2
1-4
2 Preventive Maintenance
Warnings . . . . . . . . . . . . . . . . . . . . . . . . .
Regular Maintenance Activities . . . . . . . .
Cleaning Your Arc Trainer 425A . . . . . . .
Drive Belt Maintenance . . . . . . . . . . . . . .
Lubrication . . . . . . . . . . . . . . . . . . . . . . . .
Environment . . . . . . . . . . . . . . . . . . . . . . .
Storage . . . . . . . . . . . . . . . . . . . . . . . . . . .
2-1
2-1
2-2
2-3
2-4
2-4
2-4
3 Customer Service
Contacting Service . . . . . . . . . . . . . . . . .
Serial Number and Voltage . . . . . . . . . . .
Return Material Authorization (RMA). . . .
Damaged Parts . . . . . . . . . . . . . . . . . . . .
Ordering Parts . . . . . . . . . . . . . . . . . . . . .
3-1
3-1
3-2
3-3
3-3
4 Service
Parts List - Main Assembly . . . . . . . . . . .
Exploded View - Main Assembly . . . . . .
Exploded View - Main Assembly . . . . . .
Exploded View - Main Assembly . . . . . .
Parts List - Console Assembly . . . . . .
Exploded View - Console Assembly . . . .
Parts List - Drive Frame Assembly . . . . .
Exploded View - Drive Frame Assembly
Schematic . . . . . . . . . . . . . . . . . . . . . . .
Arc Trainer 425A Kits . . . . . . . . . . . . . . .
4-2
4-3
4-4
4-5
4-6
4-7
4-8
4-9
4-11
4-13
Page v
1 - Safety
IMPORTANT: Read all instructions and warnings before using the unit.
Important Voltage Information
Before plugging the power cord into an electrical outlet, verify that the voltage requirements for your
area match the voltage of the unit that you have received. The power requirements for the unit include
_ 5%, 50/60 Hz and 15 amps; or 230 VAC
a grounded circuit, rated for one of the following: 115 VAC +
+
_10%, 50/60 HZ and 10 amps. See the voltage requirement decal for the exact voltage requirements of
your unit.
! WARNING: Do not attempt to use this unit with a voltage adapter. Do not attempt to use this
unit with an extension cord.
Grounding Instructions
This unit must be grounded. If it should malfunction or break down, grounding provides a path of least
resistance for electric current to reduce the risk of electric shock. This product is equipped with a cord
having an equipment-grounding conductor and a grounding plug. The plug must be plugged into an
appropriate outlet that is properly installed and grounded in accordance with all local codes and
ordinances.
! DANGER: Improper connection of the
equipment grounding conductor can
result in a risk of electric shock. Check
with a qualified electrician or service
provider if you are in doubt as to whether
the unit is properly grounded. Seek a
qualified electrician to perform any
modifications to the cord or plug. Cybex is
not responsible for injuries or damages as
a result of cord or plug modification.
AW-19624
115 VAC
AW-19627
100 VAC
AW-19625
230 VAC
AW-19626
230 VAC
This unit is for use on a nominal 115 VAC +
_
5%, 50/60 Hz and 15 amps; or 230 VAC +
_
10%, 50/60 Hz and 10 amps and a grounded
circuit. Make sure that the unit is connected
to an outlet having the same configuration as
the plug. Do not use a ground plug adapter
to adapt the power cord to a non-grounded
outlet.
Safety
Page 1-1
Important Safety Instructions
(Save These Instructions)
! DANGER: To reduce the risk of electric shock, always unplug this unit from the electrical outlet
immediately after using it and before cleaning it.
! WARNING: Serious injury could occur if these precautions are not observed. To reduce the risk
of burns, fires, electric shock, or injury:
User Safety Precautions
•
Keep children away. Teenagers and disabled must be supervised.Tenez les enfants éloignés. Les
adolescents et les handicapés doivent être surveilles.
•
Obtain instruction before using. Lisez les instructions avant l’utilisation.
•
Wait until foot plates come to a complete stop before dismounting. Attendre l’arret complet des
reposes pieds avant de descendre.
•
Obtain a medical exam before beginning any exercise program.
•
Stop exercising if you feel faint, dizzy, or experience pain.
•
Read and understand the Owner’s Manual and all warnings posted on the unit before using.
•
DO NOT wear loose or dangling clothing while using.
•
Keep all body parts, towels, and the like free and clear of moving parts.
•
Use the handles for support and to maintain balance.
•
DO NOT use the unit if you exceed 350 lbs. (160 kg). This is the rated maximum user weight.
•
Replace any warning labels if damaged, worn or illegible.
•
Report any malfunctions, damage or repairs to the facility.
Facility Safety Precautions
Safety
Page 1-2
•
Make sure all user and safety precautions are observed.
•
Read and understand the Owner’s Manual completely before using the unit.
•
Make sure all users are properly trained on how to use the equipment.
•
Make sure that each machine is set up and operated on a solid level surface. Do not install
equipment on an uneven surface.
•
Make sure there is enough room for safe access and operation of the equipment.
•
Perform regular maintenance checks on the equipment. Also pay close attention to all areas most
susceptible to wear, including (but not limited to) cables, pulleys, belts and grips.
•
Immediately replace worn or damaged components. If unable to immediately replace worn or
damaged components then remove from service until the repair is made.
•
Do not attempt repairs, electrical or mechanical. Seek qualified repair personnel when servicing. If
you live in the USA, contact Cybex Customer Service at 888-462-9239. If you live outside the USA,
contact Cybex Customer Service at 508-533-4300.
•
Disconnect all power before servicing the unit.
•
Keep a repair log of all maintenance activities.
•
Use only Cybex supplied components to maintain/repair the equipment.
•
Do not use attachments unless recommended for the unit by Cybex.
•
Do not operate the unit if: (1) the cord is damaged; (2) the unit is not working properly or (3) if the
unit has been dropped or damaged. Seek service from a qualified technician.
•
Do not operate electrically powered units in damp or wet locations.
•
Do not operate the unit around or where aerosol (spray) or where oxygen products are being used.
•
Do not use the unit outdoors.
NOTE: It is the sole responsibility of the user/owner or facility operator to ensure that regular
maintenance is performed.
Safety
Page 1-3
Warning Decals
Carefully read and understand the following before using the unit:
NOTE: To replace any worn or damaged decals, do one of the following: Fax your orders to
508-533-5183 or contact Cybex Customer Service at 888-462-9239. If you live outside of the USA, call
508-533-4300.
Warning decals indicate a potentially hazardous situation, which, if not avoided, could result in death or
serious injury. The warning decals are shown below.
Warning decal part number
425A-495-4
WARNING
Keep children away. Teenagers and
disabled must be supervised.Tenez
les enfants éloignés. Les
adolescents et les handicapés
doivent être surveilles.
Obtain instruction before using.
Lisez les instructions avant
l'utilisation.
SERIOUS INJURY
COULD OCCUR IF
THESE PRECAUTIONS
ARE NOT OBSERVED
Wait until foot plates come to a
complete stop before dismounting.
Attendre l'arret complet des
reposes pieds avant de descendre.
Obtain a medical exam before
beginning any exercise program.
Stop exercising if feeling faint,
dizzy, or experiencing pain.
Read and understand the Owner's
Manual and all warnings posted on
the unit before using.
DO NOT wear loose or dangling
clothing while using.
Keep all body parts, towels, and the
like free and clear of moving parts.
Use handles for support and to
maintain balance.
DO NOT use unit if user exceeds
350 lbs. (160 kg). This is the rated
maximum user weight.
Replace any warning labels if
damaged, worn or illegible.
Report any malfunctions, damage
Keep foot plate surface clean and dry. or repairs to the facility. 425A-495-4 A
Safety
Page 1-4
Warning decal part number
CM000240
ПРЕДУПРЕЖДЕНИЕ
ОТКЛЮЧИТЕ
ПИТАНИЕ,
ПРЕЖДЕ ЧЕМ
ПРИСТУПАТЬ
К ОБСЛУЖИВАНИЮ.
CM000240 E
Warning decal part number
DE-17219-4 (Both Sides)
CAUTION
Moving parts.
Keep hands away
when in use.
DE-17219-4 A
Safety
Page 1-5
Warning decal part number
425A-479
Safety
Page 1-6
Cybex Arc Trainer 425A Service Manual
2 - Preventive Maintenance
Warnings
All warnings and cautions listed in this chapter are as follows:
! WARNING: All maintenance activities shall be performed by qualified personnel. Failure to do
so could result in serious injury.
! WARNING: To prevent electrical shock, be sure the unit is unplugged from the electrical outlet
before performing any cleaning or maintenance procedures.
! WARNING: Keep wet items away from inside parts of the unit. Electrical shock could occur
even if the unit is unplugged. Do not touch components on the lower board. A
charge can remain after unplugging the power cord.
! WARNING: Disconnect the power cord before beginning this procedure. Keep wet items away
from inside parts of the unit. Electrical shock could occur even if the unit is
unplugged.
! WARNING: The flywheel may be hot. Wait until it cools before servicing.
Regular Maintenance Activities
! WARNING: All maintenance activities shall be performed by qualified personnel. Failure to do
so could result in serious injury.
Preventive maintenance activities must be performed to maintain normal operation of your unit. keeping
a log of all maintenance actions will assist you in staying current with all preventive maintenance
activities. See Service Schedule located at the end of this chapter.
NOTE: Worn or damaged components shall be replaced immediately or the unit removed from service
until the repair is made.
NOTE: Cybex is not responsible for performing regular inspection and maintenance actions for your
unit. Instruct all personnel in equipment inspection and maintenance actions and also in
accident reporting/recording.
Preventive
Maintenance
Page 2-1
Cybex Arc Trainer 425A Service Manual
Cleaning Your Arc Trainer 425A
! WARNING: To prevent electrical shock, be sure the unit is unplugged from the electrical outlet
before performing any cleaning or maintenance procedures.
When cleaning your unit spray a mild cleaning agent, such as a water and dish soap solution, on a
clean cloth first and then wipe the unit with the damp cloth.
NOTE: Do not spray cleaning solution directly on the unit. Direct spraying could cause damage to the
electronics and may void the warranty.
After Each Use - Wipe up any liquid spills immediately. After each workout, use a cloth to wipe up any
remaining perspiration from the handles and painted surfaces.
Be careful not to spill or get excessive moisture on the console and display overlays, as this might
create an electrical hazard or cause failure of the electronics.
As Needed - Vacuum any dust or dirt that might accumulate under or around the unit. Cleaning this
area should be done as often as indicated in the Service Schedule.
! WARNING: Keep wet items away from inside parts of the unit. Electrical shock could occur
even if the unit is unplugged. Do not touch components on the lower board. A
charge can remain after unplugging the power cord.
To clean inside the unit, remove the four Phillips head screws securing the access cover in place. Use
a vacuum attachment or hand vacuum to clean the exposed elevation assembly and remove dirt and
debris off of internal components.
Use a dry cloth to wipe all exposed areas. Replace the access cover and secure it with the screws
when finished.
Lift the rear of the unit and roll it back from its present position so as to vacuum the floor area
underneath the unit. When finished, return the unit to its normal position.
Contact Heart Rate Grips - Contaminants, such as hand lotions, oils or body powder, may come off
on the contact heart rate grips. These can reduce sensitivity and interfere with the heart rate signal. It is
recommended that the user have clean hands when using the contact heart rate. Clean the grips using
a cloth dampened with a cleaning solution containing alcohol. The grips are the only part of the unit
you should use a cleaning solution containing alcohol.
Preventive
Maintenance
Page 2-2
Cybex Arc Trainer 425A Service Manual
Drive Belt Maintenance
There are two drive belts that may become loose, worn or
cracked. See Figure 1.
Primary Belt - This is the wider of the two belts. It has
grooves that keep it aligned on the large upper pulley. It is
unlikely that the primary belt will become loose because it is
a stretch-fit belt.
Secondary Belt - This is the narrower of the two belts. It
has grooves that keep it aligned on the flywheel’s drive
pulley. It is unlikely that the secondary belt will become loose
because it is a stretch-fit belt.
Secondary
Drive Belt
Primary
Drive Belt
NOTE: If a belt has cracks or appears worn, it must be
replaced immediately by a qualified service technician.
Tools Required
• Phillips head screwdriver
Figure 1
! WARNING: Disconnect the power cord from the wall outlet before beginning this procedure.
Keep wet items away from inside parts of the unit. Electrical shock could occur
even if the unit is unplugged.
1. Read and understand this Drive Belt Maintenance section thoroughly before proceeding to
step 2.
2. Disconnect the external power source.
A. Unplug the power cord from the power outlet.
3. Remove the access cover.
A. Using a Philips screwdrivew, remove the four screws
securing the access cover.
Access
Cover
B. Remove the access cover.
! WARNING: the flywheel may be hot. Wait until it cools
before servicing.
4. Check the condition of each belt.
A. Roll each belt by to examine it condition. If a belt has
cracks or appears worn, it must be replaced
immediately by a qualified service technician.
Screw (4)
5. Attach the access cover.
A. Using a Philips head screwdriver, tighten the screws
first (removed in step 3A). NOTE: Do not over tighten
screws.
6. Test unit for proper operation.
Figure 2
Preventive
Maintenance
Page 2-3
Cybex Arc Trainer 425A Service Manual
Lubrication
The Arc Trainer 425A is designed with no-maintenance parts. Although there are grease fittings on the
pillow blocks, re-lubrication of the bearings is not required.
Elevation Motor Lubrication - In time the elevation motor pivot points may develop a squeak. If a
squeak is present, the unit will need to be serviced by a qualified service technician.
Environment
Static Electricity - Depending upon where you live, you may experience dry air, causing a common
experience of static electricity. This may be especially true in the winter time. You may notice a static
build-up just by walking across a carpet and then touching a metal object. The same can hold true
while working out on your unit. You may experience a shock due to the build-up of static electricity on
your body and the discharge path of the unit. If you experience this type of situation, you may want to
increase the humidity to a comfortable level through the use of a humidifier.
Humidity - The unit is designed to function normally in an environment with a relative humidity range
of 30% to 75%.
NOTE: Do not install or use the unit in an area of high humidity, such as in the vicinity of a steam room,
sauna, indoor pool or outdoors. Exposure to extensive water vapor, chlorine and/or bromine
could adversely affect the electronics as well as other parts of the machine.
Temperature - The unit is designed to function normally in an environment with an ambient
temperature range of 50o F (10o C) to 104o F (40o C) degrees.
Storage
Humidity - The unit can be shipped and stored in an environment with a relative humidity range of
10% to 90%.
NOTE: Do not store the unit in an area of high humidity, such as in the vicinity of a steam room, sauna,
indoor pool or outdoors. Exposure to extensive water vapor, chlorine and/or bromine could
adversely affect the electronics as well as other parts of the machine.
Temperature - The unit can be shipped and stored in an environment with an ambient temperature
range of 32o F (0o C) and 140o F (60o C) degrees.
Preventive
Maintenance
Page 2-4
Cybex Arc Trainer 425A Service Manual
3 - Customer Service
Contacting Service
Hours of phone service are Monday through Friday from 8:30 a.m. to 6:00 p.m. Eastern Standard Time.
For Cybex customers living in the USA, contact Cybex Customer Service at 888-462-9239.
For Cybex customers living outside the USA, contact Cybex Customer Service at 508-533-4300 or fax
508-533-5183.
Find information on the web at www.cybexinternational.com or by e-mail at [email protected].
Serial Number and Voltage
Your serial number and voltage can be found on the front of the unit. See Figure 1.
For your convenience record your serial number and voltage below so that you will have it ready if you
call Cybex Customer Service.
Serial Number
Voltage
Serial Number
Figure 1
Customer
Service
Page 3-1
Cybex Arc Trainer 425A Service Manual
Return Material Authorization (RMA)
The Return Material Authorization (RMA) system outlines the procedures to follow when returning
material for replacement, repair, or credit. The system assures that returned materials are properly
handled and analyzed. Follow the following procedures carefully.
Contact your authorized Cybex dealer on all warranty-related matters. Your local Cybex dealer will
request an RMA from Cybex, if applicable. Under no circumstances will defective parts or equipment
be accepted by Cybex without proper RMA and an Automated Return Service (ARS) label.
1. Call the Customer Service hotline listed on Page 6-1 for the return of any item that is defective.
2. Provide the technician with a detailed description of the problem you are having or the defect in the
item you wish to return.
3. Provide the model and serial number. The serial number is located on the front of the unit as shown
in Figure 1. The serial number begins with a letter, for example: R09-101331100.
4. At Cybex’s discretion, the technician may request that you return the problem part(s) to Cybex for
evaluation and repair or replacement. The technician will assign you an RMA number and will send
you an ARS label. The ARS label and RMA number must be clearly displayed on the outside of the
package that contains the item(s) to be returned. Include a description of the problem, the serial
number of the unit and the name and address of the owner in the package along with the part(s).
5. Forward the package through UPS to Cybex.
Attn: Customer Service Department
Cybex International, Inc.
1975 24th Ave SW
Owatonna MN 55060, USA
NOTE: Merchandise returned without an RMA number on the outside of the package or shipments sent
C.O.D. will not be accepted by the Cybex receiving department.
Customer
Service
Page 3-2
Cybex Arc Trainer 425A Service Manual
Damaged Parts
Materials damaged in shipment should not be returned for credit. Shipping damages are the
responsibility of the carrier (UPS, Federal Express, trucking companies, etc.).
Apparent Damage - Upon receipt of your shipment, check all boxes carefully. Any damage seen with
a visual check must be noted on the freight bill and signed by the carrier’s agent. Failure to do so will
result in the carrier’s refusal to honor your damage claim. The carrier will provide you with the required
forms for filing such claims.
Concealed Damage - Damage not seen with a visual check upon receipt of a shipment but noticed
later must be reported to the carrier as soon as possible. Upon discovery of the damage, a written or
phone request to the carrier asking them to perform an inspection of the materials must be made
within ten days of the date of delivery. Keep all shipping containers and packing materials: they will be
needed as part of the inspection process. The carrier will provide you with an inspection report and the
necessary forms for filing a concealed damage claim. Concealed damage is the carrier’s responsibility.
Ordering Parts
Fax orders to 508-533-5183. To speak with a customer service representative, call 888-462-9239
(for customers living within the USA) or 508-533-4300 (for customers outside the USA).
Cybex will void warranty if
non-Cybex
replacement parts are used.
Customer
Service
Page 3-3
Cybex Arc Trainer 425A Service Manual
This page intentionally left blank.
Customer
Service
Page 3-4
Cybex Arc Trainer 425A Service Manual
4 - Service
The first part of this chapter contains BOMs (Bills of Material) and corresponding exploded views.
The second part of this chapter contains kit instruction sheets currently available for service kits.
Service
Page 4-1
Cybex Arc Trainer 425A Service Manual
Main Assembly
ITEM
QTY
PART NO.
A1
A2
A3
A4
A5
A6
A7
A8
A9
A10
A11
A12
A13
A14
A15
A16
A17
A18
A19
A20
A21
A22
A23
A24
A25
A26
A27
A28
A29
A30
A31
A32
A33
A34
A35
A36
A37
A38
A39
A40
A41
A42
A43
A44
A45
A46
A47
A48
A49
2
2
1
1
1
1
2
1
1
2
1
1
2
2
2
2
2
2
2
2
2
2
6
1
1
1
1
1
4
1
1
1
1
1
1
1
1
4
2
1
2
2
2
1
1
2
1
4
1
425A-483
12090-322
425A-101
425A-200
425A-201
425A-202
425A-203
425A-204
425A-205
425A-207
425A-208
425A-209
425A-210
425A-212
425A-319
425A-359
425A-360
425A-378
425A-379
425A-487
425A-444
425A-484
425A-485
425A-216
425A-448
425A-449
425A-450
425A-451
425A-482
425A-457
425A-458
425A-459
425A-460
425A-461
425A-462
425A-463
425A-465
425A-468
425A-469
425A-470
425A-489
425A-488
425A-486
425A-479
610A-104
AW-19615
AW-19616
BR030225
CM000240
A50
A51
A52
2
1
4
CW-17231
EC-19978
FB030232
A53
4
FB030244
A54
8
FB030247
A55
A56
4
8
FB030248
FB030253
A57
A58
A59
A60
A61
A62
8
4
4
4
8
1
FC030003
FC030004
FC030005
FC030006
FC030007
FT-17242
Service
Page 4-2
DESCRIPTION
END CAP
FOOT PAD
DRIVE FRAME ASSEMBLY
MAIN FRAME
FRONT LEG RH
FRONT LEG LH
REAR LEG
FOOT BAR LH
FOOT BAR RH
S LINK
INPUT HANDLE RH
INPUT HANDLE LH
DRIVE LINK
REAR LEG
ASSY, CRANK ARM
FOOT PLATE
TOE CAP
GRIP, CHR, FRONT
GRIP, CHR, BACK
TUBE, SPACER
PIN, PIVOT
END CAP
END CAP
SHAFT, DRIVE PIVOT
PIN, PIVOT
PIVOT SHAFT
BLOCK, CLAMP
MAGNETIC SENSOR
END CAP
BRACKET COVER
COVER, TOP
COVER FRONT
COVER SIDE UPPER RIGHT
COVER SIDE LOWER RIGHT
COVER SIDE UPPER LEFT
COVER SIDE LOWER LEFT
INSERT, PLASTIC 1.75 OD
RETAINER
DECAL, CYBEX
COVER, LCB
SPACER
SPACER
SPACER
DECAL, LCB COVER
CABLE,CHR CHASSIS GND
CABLE, 425A, CHR GRIP
HARNESS, 425A CHR, FRAME
RETAINING RING 1.438 INTERNAL
DECAL, DISCONNECT POWER 7
LANGUAGES
WHEEL, TENSIONER
SENSOR, WHR AND CHR COMBO
BEARING, RADIAL 17 mm EXTENDED
RACE
BEARING, RADIAL BALL .50 ID X
1.688 OD
BEARING, RADIAL 25MM EXTENDED
RACE
BEARING, SPHERICAL 15MM
BEARING, RADIAL 30 MM EXTENDED
RACE
TOLERANCE RING
TOLERANCE RING 42 `(1.653) ID
TOLERANCE RING 1.378 ID
TOLERANCE RING 1.575 ID
TOLERANCE RING 2.047 ID
SLEEVE, ELEVATION MOUNTING, TOP
ITEM
QTY
A63
A64
A65
A66
A67
A68
A69
A70
A71
A72
A73
A74
A75
A76
A77
A78
A79
A80
A81
A82
A83
A84
1
4
FT-17243
HC620414
23
6
4
1
1
2
11
2
1
3
2
2
2
4
1
2
2
2
2
HC700415
HC700416
HC700426
HC701226
HC701230
HC702822
HF540200
HG700022
HN586300
HN624901
HN704000
HN704902
HN784901
HS008006
HS047300
HS307600
HS328300
HS347600
HT102214
A85
A86
A87
19
8
HT542514
HT552512
8
2
HT582510
HX-17143
2
2
2
2
2
1
1
1
1
1
1
1
1
1
4
4
1
1
1
1
1
1
1
4
1
1
1
1
1
1
1
1
10
4
4
1
1
JC620412
JC700412
JC780422
JD623324
PP130004
YD000027
AW-19624
AW-19625
AW-19626
AW-19627
HX-19841
HX-19842
HT552510
425A-206
HS307400
HX620420
MR-19609
MR-19610
425A-395
425A-396
5425A-4
425A-495-*
DE-17218-*
DE-17219-*
DE-17266
425A-494
CM000242
CM000241
HN625200
HS387700
JC780420
HC622815
425A-481
600A-311
HS307601
600A-362
630A-351
A88
A89
A90
A91
A92
A93
A94
A95
A96
A97
A97
A97
A97
A98
A98
A99
A100
A101
A102
A103
A103
A104
A105
A106
A107
A108
A109
A110
A111
A111
A112
A113
A114
A115
A116
A117
A118
A119
A120
A121
PART NO.
*Language Key
German -1 French-2 Spanish-3 English-4 Japanese-6 Swedish-7 Russian-8
DESCRIPTION
SLEEVE, ELEVATION MOUNTING, BOTTOM
BHSCS .250-20 X .625
REMOVED 3/07
BHSCS .375-16 X .75
BHSCS .375-16 X .875
BHSCS .375-16 X 2.00
BOLT, HHCS .375-16 x 2.0
SCREW, HHCS .375-16 x 2.50
SHCS .375-16 X 1.50
GROMMET, NYLON
LEVELING GLIDE, .375-16
NUT, K-LOCK 10-32 ZINC PLATED
LOCKNUT, .250-20 NYLON BLK ZN
HEX NUT .375-16
LOCKNUT, .375-16 NYLON
NYLON LOCKNUT .500-13 THIN
WASHER NYL .908 1.500 .050
LOCKWASHER, EXTERNAL NO. 10
WASHER SAE .250
LOCKWASHER SPLIT .312
WASHER, SAE .375
PHIL, HEX, WASHER HD, TYPE 23,
10-24
REMOVED 3/07
PN HD PHIL SC # 8 X .625 BLK
PAN HD PHIL HD SELF TAPPING,
8-16 x .50 TYPE WB
TAP SC NO 10 X .375 PN HD PHIL
RING RETAINING, INTERNAL, .500-168
REMOVED 3/07
BHSCS .250-20 X .50
BHSCS .375-16 X .50
BHSCS .500-13 X 1.50
BOLT, SHOULDER .312 x 1.75 .250-20 UNC
INSERT, DOMED PLASTIC
TAPE, DOUBLE BACK .75 X 2.00
POWER CORD 115V
POWER CORD 230V
POWER CORD 230V
POWER CORD 100V
CLAMP, STRAIN RELIEF .250 ID
CLAMP, STRAIN RELIEF .313 ID
SCREW
CONSOLE MOUNT
LOCKWASHER INT TOOTH .250 SS
BHSCS .250-20 X 1.250
MOTER EVEVATION 115V
MOTOR ELEVATION 230V
WARRANTY SHEET (NOT SHOWN)
INSTALLATION POSTER (NOT SHOWN)
OWNER’S MANUAL (NOT SHOWN)
WARNING DECAL
HEART RATE ZONE DECAL
CAUTION DECAL
UL DOMESTIC DECAL (NOT SHOWN)
ETL LABEL
CE DECAL
FCC DECAL
REMOVED 4/07
WASHER, SAE .500
BHSCS .250-20 X .75
BHSCS .500-13 X 1.25
SPACER
SPACER
WASHER, FLAT .281ID X .500OD X .062
BIOSIG PATENT LABEL
WEEE SYMBOL DECAL
Cybex Arc Trainer 425A Service Manual
Main Frame Assembly
A79
A58
A53
A93
A79
A78
A13
A91
A93
A89
A115
A81
SERIAL
NUMBER
DECAL
A53
A24
A94
A58
A75
A111
A15
A50
A71
A82
A75
A3
A114 A116
A76
A49
A73
A75
A79
A82
A53
A28
A99 A98
A58
A79
A97
A94
A71
A50
A76
A74
A62
A73
A15
A80
A45
A13
A69
A53
A84
A91
A58
A63
A44
A81
A77
A70
A103
A89
A40
Service
Page 4-3
Service
Page 4-4
A23
A56
A43
A7
A67
A57
A56
A56
A20
CABLE TIE DETAIL
5 SCREWS
INCLUDED
WITH A18
A4
CABLE TIE LOCATIONS
FOR SECURE WIRING
A57
A56
A57
A117
A22
A117
A67
A66
A8
A117
A1
A21
A57
A54
A12
A42
A61
A19
A54
A67
A23
A61
A54
A18
A61
A117
A6
A54
A83
A60
A92
A46
A46
A60
A52
A83
A60
A41
A26
SEE S LINK
ASSEMBLY
DETAIL
A37
A112
A117
A68
A27
A66
A41
A23
A117
A52
A12
A61
A25
A61
A52
A11
A92
A4
A9
A5
A54
A54
A61
A56
A23
A61
A57
A42
A21
A67
A59
A48
A23
A118
A119
A59
A117
A56
A29
A55
A7
A64
A12
A67
A22
A56 A117 A66
A48
A57
A118
A119
A55
A29
A64
A43
A67
A1
A57
S LINK ASSEMBLY DETAIL
A10
A6
A56
A54
A20
A117
A61
A57
A117
A54
Main Frame Assembly
Cybex Arc Trainer 425A Service Manual
A37
A47
ELECTRICAL INSTALLATION DETAIL
A46
A51
A86
A39
A86
A36
A35
A2
A72
A72
A14
A66
A95
A88
A38
A87
A107
A88
A38
A2
A16
A17
A72
A88
A66
A108
A31
SEE CONSOLE ASSEMBLY
A51
A66
A96
A120
A109
A95
A109
A100
A101
A86
A121
A86
A72
A102
A72
A34
A32
A86
A86
TOP COVER DETAIL
A33
A85
A86
A39
A31
Main Frame Assembly
A30
Cybex Arc Trainer 425A Service Manual
Service
Page 4-5
Service
Page 4-6
610A-396
AD-19618-Q
AW-19617
AW-19619
HJ582515
HT552509
HT552512
HT552515
PP080207
PP620003
PP620004
PP620005
PP620006
SW-19622-X*
SW-19623-X*
SW-19621-X*
B1
B2
B3
B4
B5
B6
B7
B8
B9
B10
B11
B12
B13
B14
B15
B15
1
1
1
1
1
7
4
4
1
1
1
1
2
1
1
1
PART NO.
ITEM QTY
PLATE, CONSOLE MOUNTING
PCA, 425A MAIN DISPLAY
HARNESS, 425A HR CONSOLE
CABLE, 425A CONSOLE RJ45
SCREW, SEMS, 10-32 X .75 PHIL PAN, BLK ZINC
SCREW, TAP 8-16 x .31 PLASTITE
PAN HD PHIL HD SELF TAPPING, 8-16 x .50 TYPE WB
PAN HD PHIL HD SELF TAPPING, 8-16 x .75, TYPE WB BLACK
INSERT, PLASTIC .437 DIA 11 GA
CONSOLE, FRONT PLASTIC
CONSOLE, REAR PLASTIC
COVER, CONSOLE BATTERY DOOR
TAB, BOOK HOLDER
MEMBRANE, 425A TOP
MEMBRANE, 425A BTM W/O AV
MEMBRANE, 425A BTM W AV
DESCRIPTION
Console Assembly
Cybex Arc Trainer 425A Service Manual
B15
B14
B13
#20
B10
B9
B6
B2
B7
B1
B6
B3
B4
B11
Console Assembly
B7
B7
B8
B5
B8
B12
Cybex Arc Trainer 425A Service Manual
Service
Page 4-7
Cybex Arc Trainer 425A Service Manual
Drive Frame Assembly
Service
Page 4-8
ITEM
QTY
PART NO.
DESCRIPTION
C1
C2
C3
C4
C5
C6
C7
C8
C9
C10
C11
C12
C13
C14
C15
C16
C17
C18
C19
C20
C21
C22
C23
C24
C25
C26
C27
C28
C29
1
1
1
1
1
2
2
1
1
2
1
2
2
2
2
4
4
4
4
1
4
4
2
4
4
2
2
1
1
425A-211
425A-313
425A-320
425A-322
425A-337
425A-364
425A-373
425A-455
425A-456
600A-340
AD-19612
BR030227
FB030254
FB130212
HC321258
HC622815
HC661217
HC701220
HJ582515
HN704901
HS307600
HS308300
HS347600
HS347700
HS760100
HX-17023
JS337400
MR-19541
CM000237
W BOX
SHAFT
PULLEY, SECONDARY DRIVE
SHAFT, SECONDARY DRIVE
PULLEY, PRIMARY DRIVE
MAGNET
ADJUSTER, BELT TENSION
BELT, PRIMARY DRIVE
BELT, SECONDARY DRIVE
BEARING, 1.00 INCH PILLOW BLOCK
PCA, 425A CONTROLLER
RETAINING RING, 20 MM EXTERNAL
RADIAL BEARING 20 MM
BUSHING, FLANGE .75 ID x .875 OD x .75 LG
SCREW, HEX HEAD CAP .312-18 x 6.000
SHCS .250-20 X .750
HX HD CAP SCREW .312-18 X 1.00
BOLT, HHCS .375-16 x 1.25
SCREW, SEMS 10-32 x .75 PHIL PAN, BLACK ZINC
LOCKNUT, .375-16 NYLON
WASHER SAE .250
SPLIT LOCKWASHER .250
WASHER, SAE .375
WASHER, USS .375
SPRING RETAINING WASHER
PIN, SPRING .1875 x .75 LG, TYPE 420
LOCKWASHER INT TOOTH .312
ASSEMBLY, ECB (SINGLE ROW BEARING)
LABEL, SAFETY GROUND
Cybex Arc Trainer 425A Service Manual
C15
Drive Frame Assembly
C27
C27
C7
C7
C28
C12
C3
C9
C13
C4
C20
C12
C23
C24
C21
C22
C16
C21
C22
C13
C19
C16
C21
C22
C16
C21
C22
C19
C19
C29
C11
C14
C26
C19
C1
C24
C18
C14
C10
C6
C24
C18
C2
C25
C17
C8
C5
C25
C6
C17
C24
C18
C10
C26
Service
Page 4-9
Cybex Arc Trainer 425A Service Manual
This page intentionally left blank
Service
Page 4-10
Cybex Arc Trainer 425A Service Manual
This page intentionally left blank
Service
Page 4-12
Cybex Arc Trainer 425A Service Manual
Arc Trainer 425A Kits
Description
Kit#
Drive Link
425AK002
Rear Leg
425AK003
Front Right Leg
425AK004
Front Left Leg
425AK005
Right Input Handle
425AK006
Left Input Handle
425AK007
Right Foot Bar
425AK008
Left Foot Bar
425AK009
Right Upper Side Cover
425AK010
Left Upper Side Cover
425AK011
Top Cover
425AK012
S-Link
425AK013
Side Handle
425AK015
AV Kit
425AK016
Plastic Insert
425AK017
AV Kit
425AK044
Shaft Replacement
425AK045
AV Kit
425AK046
Service
Page 4-13
Cybex Arc Trainer 425A Service Manual
This page intentionally left blank.
Service
Page 4-14
Arc Trainer® 425A Drive Link
Installation Instructions
Kit No. 425AK002
NOTE: This instruction sheet describes how to
replace the Drive Link in the Arc Trainer
425A.
5. Remove top cover.
A. Using a Phillips screwdriver, remove the
screw securing the top cover. See Figure 3.
Tools Required
• Phillips screwdriver
• 5/32” Allen wrench
• 3/4” Open end wrench
• 5/16” Allen wrench
Screw
1. Read and understand all instructions thoroughly
before installing this kit.
2. Verify kit contents. See Figure 1.
Figure 3
B. Remove top cover.
A
6. Remove upper side cover.
B
A. Drive Link, (1), 425AK002
B. Loctite, (1), YA000201
A. Using a Phillips screwdriver, remove the
screw securing the upper side cover.
See Figure 4.
Figure 1
3. Disconnect the external power source.
A. Unplug the power cord from the power outlet.
! WARNING: Disconnect the power cord before
continuing this procedure. Keep wet
items away from inside parts of the
unit. Electrical shock could occur
even if the unit is unplugged.
4. Remove the front cover.
A. Using a Phillips
screwdriver, remove
the four screws
securing the front
cover. See Figure 2.
Locking
Connectors
Upper Left
Side Cover
Front
Cover
Screw
Screws
(4)
B. Remove front cover.
Figure 4
Figure 2
B. Remove upper side cover.
7. Remove the proper drive link.
A. Using a 5/16” Allen wrench and 3/4” open end
wrench, remove the BHSCS securing drive link
to the front leg. Remove the drive link and two
nylon washers. See Figure 5.
Nylon
Washers
Locknut
NOTE: Do not let nylon washer slide down over
the bearing face while tighting. See
Figure 7.
Nylon
Washer
Bearing
Face
BHSCS
Drive
Link
Drive Link
Front Leg
Figure 7
Figure 5
E. Install the BHSCS and lock nut removed in
step 7A.
B. Using a 5/32” Allen wrench, remove the BHSCS
securing drive link to the crank arm. See
Figure 6.
F. Using a 5/16” Allen wrench and 3/4” open
end wrench, tighten the BHSCS and locknut
securely.
9. Attach the upper side cover.
Washer
Drive Link
A. Place the upper side cover in position. See
Figure 4.
Crank Arm
BHSCS/
Loctite
B. Using a Phillips screwdriver, tighten
the screw securing the upper side cover.
10. Attach the top cover.
Figure 6
8. Install the new drive link.
A. Attach the new drive link (A) to the crank arm.
See Figure 6.
B. Place a drop of loctite (B) on the BHSCS
and another drop inside the shaft where the
BHSCS will be tighten into.
C. Using a 5/32” Allen wrench, install the BHSCS/
loctite and washer as shown in Figure 6.
Tighten securely.
A. Place the top cover in position. See Figure 3.
B. Using a Phillips screwdriver, tighten the
screw securing the top cover.
11. Attach the front cover.
A. Place the front cover in position. See Figure 2.
B. Using a Phillips screwdriver, tighten the four
screws securing the front cover.
12. Test unit for proper operation.
D. Place a nylon washer removed in step 7A on
each side of the new drive link (A), then place
in position on the front leg. See Figure 5.
Cybex® and the Cybex logo are registered trademarks of Cybex International, Inc.
Arc Trainer® and its mark are registered trademarks of Cybex International, Inc.
10 Trotter Drive Medway, MA 02053 • 508-533-4300 • FAX 508-533-5183 • www.cybexinternational.com • [email protected]
[email protected] • Copyright © 2008, Cybex International, Inc. All rights reserved • 425A-500 A • March 2008
Arc Trainer® 425A Rear Leg
Installation Instructions
Kit No. 425AK003
NOTE: This instruction sheet describes how to
replace the Rear Leg in the Arc Trainer 425A.
A
Tools Required
E
•
•
•
•
C
Phillips screwdriver
7/32” Allen wrench (2)
Rubber mallet and punch (optional)
Grease
BHSCS/
Loctite
1. Read and understand all instructions thoroughly
before installing this kit.
Foot Bar
Figure 2
2. Verify kit contents. See Figure 1.
4. Remove rear leg.
B
A. Using two 7/32” Allen wrenches, remove the
inside BHSCS, spacer and plastic end cap.
While holding the rear leg, remove the pivot
pin. NOTE: You may need a rubber mallet
and punch to remove the pivot pin.
NOTE: Older units have an aluminum end cap
and do not have a spacer.
A
B. Carefully lower the rear leg. See Figure 3.
C
D
E
F
A. Rear leg, (1), 425AK003
B. Pivot pin, (1), 425A-444
C. Plastic end cap, (1), 425A-484
D. Plastic end cap, (2), 425A-485
E. Spacer, (3), 425A-481
F. Loctite, (1), YA000201
Figure 1
3. Remove BHSCS, spacer and end cap.
A. Using a 7/32” Allen wrench, remove the
BHSCS (Button Head Socket Cap Screw),
spacer and end cap securing the rear leg
to the foot bar. See Figure 2.
NOTE: Older units have an aluminum end cap
and do not have a spacer.
D
B
BHSCS/
Loctite
Loctite
Grease
Rear Leg
E
Pivot Hole
Figure 3
C. Remove the rear leg from the foot bar. See
Figure 4.
7. Install new rear leg on frame.
Foot Bar
A
A. Place grease on the new pivot pin assembled
in step 6B. See Figure 3.
B. Place the new rear leg (A) so that the pivot
hole aligns with the holes in the frame. See
Figure 3.
C. Insert new pivot pin assembly. See Figure 3.
Loctite
Grease
D. Install the other BHSCS/loctite, new spacer
(E) and new plastic end cap (D) to the pivot
pin (B) and tighten using two 7/32” Allen
wrenches as shown in Figure 3. NOTE:
Instead of installing these new parts, you
can install the old aluminum end cap.
Figure 4
5. Install new rear leg on the foot bar.
A. Place grease on the outside of the foot bar
shaft. See Figure 4.
B. Place the new rear leg (A) into position on the
foot bar.
6. Assemble pivot pin.
A. Place a drop of loctite (F) on the two BHSCS
removed in step 4A and another drop inside
the new pivot pin (B) shaft where the two
BHSCS will be tightened.
B. Install one BHSCS/loctite, a new spacer (E)
and new plastic end cap (D) to one side of the
new pivot pin (B). See Figure 5.
NOTE: Instead of installing the new end cap
and spacer, you can install the old aluminum
end cap to the new pivot pin.
B
E
8. Install the BHSCS/loctite, new spacer and
new end cap.
A. Place a drop of loctite (F) on the BHSCS
(removed in step 3A) and another drop
inside the shaft into where the BHSCS
will be tightened.
B. Using a 7/32” Allen wrench, reinstall the
BHSCS/loctite (removed in step 3A), new
spacer (E) and new end cap (C). See
Figure 2. NOTE: Instead of installing
these new parts, you can reinstall the
old aluminum end cap.
C. Tighten securely.
9. Test for proper operation.
D
BHSCS
Loctite
Figure 5
Cybex® and the Cybex logo are registered trademarks of Cybex International, Inc.
Arc Trainer® and its mark are registered trademarks of Cybex International, Inc.
10 Trotter Drive Medway, MA 02053 • 508-533-4300 • FAX 508-533-5183 • www.cybexinternational.com • [email protected]
[email protected] • Copyright © 2008, Cybex International, Inc. All rights reserved • 425A-501 B • March 2008
Arc Trainer® 425A Front Leg
Installation Instructions
Kit No. 425AK004 - Right Front Leg
425AK005 - Left Front Leg
NOTE: This instruction sheet describes how to
replace the front legs in the Arc Trainer 425A.
Tools Required
•
•
•
•
•
Phillips screwdriver
3/4” Open end wrench
5/32” Allen wrench
7/32” Allen wrench
Grease
4. Remove the front cover.
A. Using a Phillips screwdriver, remove the
four screws securing the front cover. See
Figure 2.
Front
Cover
Screws
(4)
1. Read and understand all instructions
thoroughly before installing this kit.
2. Verify you received the appropriate kit.
See Figure 1.
Figure 2
B. Remove front cover.
B
5. Remove top cover.
A
A. Using a Phillips screwdriver, remove the
screw securing the top cover. See Figure 3.
C
D
Screw
E
A. Right front leg, (1), 425AK004
B. Left front leg, (1), 425AK005
C. Pastic end cap, (1), 425A-485
D. Spacer, (1), 425A-481
E. Loctite, (3), YA000201
Figure 1
3. Disconnect the external power source.
A. Unplug the power cord from the power outlet.
! WARNING: Disconnect the power cord before
continuing this procedure. Keep wet
items away from inside parts of the
unit. Electrical shock could occur
even if the unit is unplugged.
Figure 3
B. Remove top cover.
6. Remove upper side covers.
A. Using a Phillips screwdriver, remove the
screw securing each upper side cover.
See Figure 4 .
Front
Leg
S-Link
End Cap
Washer
Loctite
Grease
Spacer
Locking
Connectors
BHSCS/
Loctite
Figure 6
Upper Left
Side Cover
9. Remove BHSCS and end cap.
Screw
A. Using a 7/32” Allen wrench, remove the
BHSCS, plastic end cap and spacer
securing the rear leg to the foot bar.
See Figure 7.
NOTE: Older units have an aluminum end cap
and do not have a spacer.
Figure 4
Rear Leg
B. Remove upper side covers.
Spacer
7. Disconnect drive link.
End Cap
A. Using a 5/16” Allen wrench and 3/4” open
end wrench, remove the Button Head
Socket Cap Screw (BHSCS), locknut and
two nylon washers and set aside. NOTE:
The BHSCS, locknut and washers will be
reused in step 17. See Figure 5.
Nylon
Washer
BHSCS/
Loctite
Foot Bar
Figure 7
10. Remove rear leg and foot bar.
BHSCS
A. Using two 7/32” Allen wrench, remove the
inside BHSCS, plastic end cap and spacer.
While holding the rear leg, remove the pivot
pin. NOTE: You may need a rubber mallet
and punch to remove the pivot pin.
Locknut
Drive Link
NOTE: Older units have an aluminum end cap
and do not have a spacer.
Figure 5
B. Carefully lower the rear leg. See Figure 8.
B. Tilt the drive link forward and lean on frame.
8. Disconnect S-link.
Pivot Pin
A. Using a 5/32” Allen wrench, remove the
BHSCS, washer, plastic end cap and spacer
securing both S-link of the handles to the
front legs. See Figure 6.
Spacer
Loctite
End Cap
BHSCS/
Loctite
Grease
NOTE: In older units remove the BHSCS,
aluminum end caps and nylon washers.
B. Tilt handles back and lean on frame.
Rear Leg
Figure 8
Pivot Hole
C. Using a 7/32” Allen wrench, remove the
BHSCS, pastic end cap and spacer securing
the foot bar to the front leg. See Figure 9.
D. Slide the appropriate front leg off of the
pivot pin and discard. See Figure 10.
12. Attach new front leg.
NOTE: Older units have an aluminum end cap
and do not have a spacer.
End
Cap
Front Leg
Loctite
Grease
Foot Bar
Figure 9
D. Remove the foot bar and rear leg.
A. Using a 7/32 Allen wrench, remove the
two BHSCS, two end plastic caps and
two spacers securing the front legs to
frame. See Figure 10.
NOTE: Older units have an aluminum end cap
and do not have a spacer.
B. While holding the front legs, use a 7/32”
Allen wrench to remove the four BHSCS
and clamp block securing the pivot pin to
frame. See Figure 10.
Spacer
A. Place grease on the outside of the front leg
shaft. See Figure 9.
B. Place the foot bar into position on the front
leg. See Figure 9.
C. Place a drop of loctite (E) on the BHSCS
removed in step 10C and another drop inside
the shaft into where the BHSCS will be
tightened. See Figure 9.
D. Using 7/32” Allen wrench, reinstall the
BHSCS/loctite, plastic end cap and spacer
(removed in step 10C). See Figure 9.
14. Install rear leg.
Pivot Pin
A. Place grease on the pivot pin (removed in
step 10A). See Figure 8.
End Cap
Loctite
Clamp Block
Front Leg
D. Using 7/32” Allen wrench, reattach the two
spacers, two plastic end cap and two
BHSCS/loctite (removed in step 11A). See
Figure 10.
13. Reattach foot bar.
11. Remove the front leg.
BHSCS/
Loctite
B. Place a drop of loctite (E) on the six BHSCS
(removed in steps 11A and 11B) and another
drop inside the shaft into where the BHSCS
will be tightened. See Figure 10.
C. Using 7/32” Allen wrench, reattach the
clamp block and four BHSCS/loctite
(removed in step 11B) securing the pivot
pin to the frame. See Figure 10.
Spacer
BHSCS/
Loctite
A. Slide the new front leg (A or B) on to the
pivot pin.
BHSCS/
Loctite
Figure 10
C. Pull the pivot pin and front legs away
from frame. See Figure 10.
B. Place the rear leg so that the pivot hole
aligns with the holes in the frame. See
Figure 8.
C. Insert pivot pin. See Figure 8.
D. Place a drop of loctite (E) on the BHSCS
removed in step 10A and another drop
inside the shaft of the pivot pin into where
the BHSCS will be tightened. See Figure 8.
E. Install the BHSCS/loctite, pastic end cap
and space to the pivot pin and tighten using
two 7/32” Allen wrenches. See Figure 8.
15. Reinstall the BHSCS/loctite and end cap.
A. Place a drop of loctite (E) on the BHSCS
removed in step 9A and another drop
inside the shaft into where the BHSCS will
be tightened.
B. Using a 7/32” Allen wrench reinstall the
BHSCS/ loctite, pastic end cap and spacer
(removed in step 9A), securing the foot bar
to the rear leg. See Figure 7.
B. Install the BHSCS and locknut removed in
step 7A.
C. Using a 5/16” Allen wrench and 3/4” open
end wrench, tighten the BHSCS and locknut
securely.
18. Attach the upper side covers.
A. Place the upper side covers in postiion. See
Figure 4.
B. Using a Phillips screwdriver, tighten the
screw securing each upper side cover.
C. Tighten securely.
16. Reattach the S-link.
19. Attach the top cover.
A. Place grease on the outside of shaft. See
Figure 6.
B. Place a drop of loctite (E) on the BHSCS
removed in step 8A and another drop inside
the shaft into where each BHSCS will be
tightened. See Figure 6
C. Install the BHSCS/loctite, washer, pastic
end cap and spacer (removed in 8A). See
Figure 6.
D. Using a 5/32” Allen wrench, tighten the
BHSCS securely.
A. Place the top cover in position. See Figure 3.
B. Using a Phillips screwdriver, tighten the
screw securing the top cover.
20. Attach the front cover.
A. Place the front cover in position. See Figure 2.
B. Using a Phillips screwdriver, tighten the four
screws securing the front cover.
21. Test unit for proper operation.
17. Reattach the drive link.
A. Place a nylon washer removed in step 7A
on each side of the drive link, then place in
position on the front leg. See Figure 5.
NOTE: Do not let nylon washer slide down over
the bearing face while tighting. See
Figure 11.
Nylon
Washer
Bearing
Face
Drive
Link
Figure 11
Cybex® and the Cybex logo are registered trademarks of Cybex International, Inc.
Arc Trainer® and its mark are registered trademarks of Cybex International, Inc.
10 Trotter Drive Medway, MA 02053 • 508-533-4300 • FAX 508-533-5183 • www.cybexinternational.com • [email protected]
[email protected] • Copyright © 2008, Cybex International, Inc. All rights reserved • 425A-502 B • March 2008
Arc Trainer® 425A Input Handle
Installation Instructions
Kit No. 425AK006 - Right Input Handle Kit
Kit No. 425AK007 - Left Input Handle Kit
C. Using a 5/32” Allen wrench, remove the
BHSCS (Button Head Socket Cap Screw),
end cap and nylon washer securing the
S-link to the input handle. See Figure 2.
NOTE: This instruction sheet describes how to
replace the input handle in the Arc
Trainer 425A.
Tools Required
• 5/32” Allen wrench
• 7/32” Allen wrench (2)
• Grease
Input
Handle
BHSCS/
Loctite
1. Read and understand all instructions
thoroughly before installing this kit.
Loctite
Grease
2. Verify kit contents. See Figure 1.
End Cap
Nylon
Washer
S-Link
Figure 2
D. Unplug the heart rate cable. See Figure 3.
A
B
C
E. Using two 7/32” Allen wrenches remove the
BHSCS and washer from the pivot shaft.
See Figure 3.
F. Slide the pivot shaft through main frame
opening to remove input handle. See
Figure 3.
G. Remove the proper input handle.
Left Input Handle
A. Right Hand Input Handle, (1), 425AK006
B. Left Hand Input Handle, (1), 425AK007
C. Loctite, (1), YA000201
Right Input Handle
Opening
Pivot Shaft
BHSCS/
Loctite
Washer
Figure 1
3. Remove the proper input handle.
A. Unplug the power cord from the power outlet.
Grease
Washer
Heart Rate
Cables
B. Confirm you have the proper replacement
handle. NOTE: The two handles are not
interchangeable.
Figure 3
Loctite
BHSCS/
Loctite
4. Install the proper new input handle.
A. Place grease on the outside of pivot shaft.
See Figure 3.
B. Position the new input handle vertically and
align with the main frame opening. See Figure 3.
C. Push pivot shaft through handle opening and
main frame opening. See Figure 3.
D. Place a drop of loctite (C) on the BHSCS and
another drop inside the pivot shaft where the
BHSCS will be tighten into.
E. Using both 7/32” Allen wrenches, install the
BHSCS/loctite and washer as shown in
Figure 3. NOTE: Handles will wobble if not
securely tightened.
5. Attach S-Link.
A. Place grease on outside of shaft. See Figure 2.
B. Attach the S-link to the new input handle. See
Figure 2.
C. Place a drop of loctite (C) on the BHSCS
(removed in step 3C) and another drop into
the shaft where it will be threaded into.
D. Using 5/32” Allen wrench, secure the S-Link to
the handle using the BHSCS/loctite, end cap
and nylon washer (removed in step 3C). See
Figure 2.
6. Test unit for proper operation.
Cybex® and the Cybex logo are registered trademarks of Cybex International, Inc.
Arc Trainer® and its mark are registered trademarks of Cybex International, Inc.
10 Trotter Drive Medway, MA 02053 • 508-533-4300 • FAX 508-533-5183 • www.cybexinternational.com • [email protected]
[email protected] • Copyright © 2008, Cybex International, Inc. All rights reserved • 425A-504 A • March 2008
Arc Trainer® 425A Foot Bar
Installation Instructions
Kit No. 425AK008 - Right Foot Bar
425AK009 - Left Foot Bar
NOTE: This instruction sheet describes how to
replace the foot bars in the Arc Trainer 425A.
4. Remove BHSCS and end cap.
A. Using a 7/32” Allen wrench, remove the
Button Head Socket Cap Screw (BHSCS),
plastic end cap and spacer securing the rear
leg to the foot bar. See Figure 2.
Tools Required
• 7/32 Allen wrench (2)
• Rubber mallet and punch (optional)
• Grease
NOTE: Older units have an aluminum end cap
and do not have a spacer.
1. Read and understand all instructions
thoroughly before installing this kit.
Rear Leg
2. Verify you received the appropriate kit.
See Figure 1.
Spacer
End Cap
B
A
BHSCS/
Loctite
Foot Bar
Figure 2
E
5. Remove rear leg.
D
C
A. Right Foot Bar, (1), 425AK008
B. Left Foot Bar, (1), 425AK009
C. Plastic End Cap, (1), 425A-483
D. Spacer, (1), 425A-481
E. Loctite, (1), YA000201
Figure 1
A. Using two 7/32” Allen wrenches, remove the
inside BHSCS, plastic end cap and spacer
as shown in Figure 3. While holding the rear
leg remove the pivot pin. NOTE: You may
need a rubber mallet and punch to remove
the pivot pin.
NOTE: Older units have an aluminum end cap
and do not have a spacer.
B. Carefully lower the rear leg. See Figure 3.
Pivot Pin
Spacer
End Cap
Loctite
3. Confirm the proper replacement foot bar.
BHSCS/
Loctite
A. Unplug the power cord from the power outlet.
Grease
B. Confirm you have the proper replacement
foot bar. NOTE: The two foot bars are not
interchangeable.
Rear Leg
Figure 3
Pivot Hole
C. Remove the rear leg from the foot bar. See
Figure 4.
Foot Bar
Rear Leg
D. Using a 7/32” Allen wrench, install the
BHSCS/loctite, new plastic end cap (C)
and new spacer (D) as shown in Figure 5.
NOTE: Instead of installing these new
parts, you can reinstall the old aluminum
end cap.
E. Tighten securely.
8. Install rear leg on the new foot bar.
A. Place grease on the outside of the new
foot bar shaft. See Figure 4.
Loctite
Grease
B. Place the rear leg into position on the
new foot bar.
Figure 4
9. Install rear leg.
6. Remove foot bar.
A. Using a 7/32” Allen wrench, remove the
BHSCS, plastic end cap and spacer securing
the foot bar to the front leg. See Figure 5.
NOTE: Older units have an aluminum end cap
and do not have a spacer.
Front Leg
Loctite
BHSCS/
Loctite
Grease
A. Place grease on the pivot pin that was
removed in step 5A. See Figure 3.
B. Place the rear leg so that the pivot hole
aligns with the holes in the frame. See
Figure 3.
C. Insert pivot pin. See Figure 3.
D. Place a drop of loctite (E) on the BHSCS
removed in step 5A and another drop
inside the shaft of the pivot pin to where
the BHSCS will be tightened. See Figure 3.
E. Install the BHSCS/loctite and retainer to
the pivot pin and tighten using two 7/32”
Allen wrenches. See Figure 3.
C
10. Reinstall the BHSCS/loctite and end cap.
D
B
Figure 5
B. Remove the foot bar.
7. Install new foot bar.
A. Place grease on the outside of the front leg
shaft. See Figure 5.
A. Place a drop of loctite (E) on the BHSCS
removed in step 4A and another drop
inside the shaft into where the BHSCS
will be tightened.
B. Using a 7/32” Allen wrench, reinstall the
BHSCS/loctite and end cap that was
removed in step 4A. See Figure 2.
C. Tighten securely.
11. Test for proper operation.
B. Place the new foot bar (A) or (B) into position
on the front leg.
C. Place a drop of loctite (E) on the BHSCS
and another drop inside the shaft into where
the BHSCS will be tightened.
Cybex® and the Cybex logo are registered trademarks of Cybex International, Inc.
Arc Trainer® and its mark are registered trademarks of Cybex International, Inc.
10 Trotter Drive Medway, MA 02053 • 508-533-4300 • FAX 508-533-5183 • www.cybexinternational.com • [email protected]
[email protected] • Copyright © 2008, Cybex International, Inc. All rights reserved • 425A-506 B • March 2008
Arc Trainer® 425A Upper Side Cover
Installation Instructions
Kit No. 425AK010 (Right Upper Side Cover)
425AK011 (Left Upper Side Cover)
NOTE: This instruction sheet describes how to replace
the upper side cover in the Arc Trainer 425A.
Tools Required
4. Remove the front cover.
A. Using a Phillips screwdriver, remove the
four screws securing the front cover. See
Figure 2.
• Phillips screwdriver
1. Read and understand all instructions
thoroughly before installing this kit.
2. Verify you received the appropriate kit.
See Figure 1.
Front
Cover
Screws
(4)
A. 425AK010 Right upper side cover
B. 425AK011 Left upper side cover
Figure 2
B. Remove front cover.
A
5. Remove top cover.
A. Using a Phillips screwdriver, remove the
screw securing the top cover. See Figure 3.
Screw
B
Figure 1
3. Disconnect the external power source.
A. Unplug the power cord from the power outlet.
! WARNING: Disconnect the power cord before
continuing this procedure. Keep wet
items away from inside parts of the
unit. Electrical shock could occur
even if the unit is unplugged.
Figure 3
B. Remove top cover.
6. Remove upper side cover.
A. Using a Phillips screwdriver, remove the
screw securing the upper side cover (A)
or (B). See Figure 4.
Locking
Connectors
Upper Left
Side Cover
Screw
Figure 4
B. Remove upper side cover.
7. Attach the new upper side cover.
A. Place the new upper side cover (A) or (B) in
position. See Figure 4.
B. Using a Phillips screwdriver, tighten the
screw securing the new upper side cover.
8. Attach the top cover.
A. Place the top cover in position. See Figure 3.
B. Using a Phillips screwdriver, tighten the
screw securing the top cover.
9. Attach the front cover.
A. Place the front cover in position. See Figure 2.
B. Using a Phillips screwdriver, tighten the
four screws securing the front cover.
10. Test unit for proper operation.
Cybex® and the Cybex logo are registered trademarks of Cybex International, Inc.
Arc Trainer® and its mark are registered trademarks of Cybex International, Inc.
10 Trotter Drive Medway, MA 02053 • 508-533-4300 • FAX 508-533-5183 • www.cybexinternational.com • [email protected]
[email protected] • Copyright © 2008, Cybex International, Inc. All rights reserved • 425A-508 A • March 2008
Arc Trainer® 425A Top Cover
Installation Instructions
Kit No. 425AK012
NOTE: This instruction sheet describes how to
replace the top cover in the Arc Trainer 425A.
Top Cover
Tools Required
• Phillips screwdriver
1. Read and understand all instructions
thoroughly before installing this kit.
2. Verify kit contents. See Figure 1.
Top Cover,
425AK012
Screws
(3)
Figure 2
B. Remove existing top cover.
4. Install new top cover.
A. Place the new top cover in position.
Figure 1
3. Remove the top cover.
A. Using a Phillips screwdriver, remove the
three screws securing the top cover.
See Figure 2.
B. Using a Phillips screwdriver, attach the cover
using the three screws removed in step 3A.
C. Tighten screws securely.
5. Test the unit to verify proper operation.
Cybex® and the Cybex logo are registered trademarks of Cybex International, Inc.
Arc Trainer® and its mark are registered trademarks of Cybex International, Inc.
10 Trotter Drive Medway, MA 02053 • 508-533-4300 • FAX 508-533-5183 • www.cybexinternational.com • [email protected]
[email protected] • Copyright © 2008, Cybex International, Inc. All rights reserved • 425A-510 A • March 2008
This page intentionally left blank.
Arc Trainer® 425A S-Link
Installation Instructions
Kit No. 425AK013
NOTE: This instruction sheet describes how to
replace the S-Link in the Arc Trainer 425A.
Tools Required
BHSCS/
Loctite
(2)
Handle
B
(2)
C
(2)
D
(2)
• 5/32” Allen wrench
• Grease
E
1. Read and understand all instructions thoroughly
before installing this kit.
Grease
2. Verify kit contents. See Figure 1.
A
Grease
E
Front Leg
Figure 2
A
B. Remove the S-link.
4. Installing the new S-link.
B
C
D
E
A. S-Link, (1), 425AK013
B. Washer, (2), HS307601
C. End Cap, (2), 425A-482
D. Spacer, (2), 600A-311
E. Loctite, (1), YA000201
Figure 1
3. Remove the S-link.
A. Using a 5/32” Allen wrench, remove each
Button Head Socket Cap Screw (BHSCS),
washer, end cap and spacer securing both
ends of the S-link. See Figure 2.
NOTE: In older units remove the BHSCS, aluminum
end cap and nylon washer. These parts can
be reinstalled rather than using the new
washer, plastic end cap and spacer.
A. Place grease on the outside of shaft. See
Figure 2.
B. Place the new S-link (A) in position. See
Figure 2.
C. Place a drop of loctite (E) to threads of each
BHSCS removed in step 3A and another drop
inside the shaft into where each BHSCS will
be tightened.
D. Install the two new spacers (D), two new end
caps (C), two new washers (B) and two
BHSCS/loctite as shown in Figure 2. NOTE:
Instead of installing these new parts you can
reinstall the old end cap and nylon washer.
E. Using a 5/32” Allen wrench, tighten both
BHSCS securely.
F. Test the unit to verify proper operation.
Cybex® and the Cybex logo are registered trademarks of Cybex International, Inc.
Arc Trainer® and its mark are registered trademarks of Cybex International, Inc.
10 Trotter Drive Medway, MA 02053 • 508-533-4300 • FAX 508-533-5183 • www.cybexinternational.com • [email protected]
[email protected] • Copyright © 2008, Cybex International, Inc. All rights reserved • 425A-511 B • March 2008
This page intentionally left blank.
Arc Trainer® 425A Side Handles
Installation Instructions
Kit No. 425AK015
NOTE:
This instruction sheet describes how to install
the side handles on the Arc Trainer 425A.
NOTE: The bend of the handle
is toward the front.
Tools Required
Loctite
• 7/32” Allen wrench
Left Side
Handle
BHSCS/
Loctite
(4)
1. Read and understand all instructions thoroughly
before installing this kit.
2. Verify kit contents. See Figure 1.
A. Left side handle (1), 425A-217
B. Right side handle (1), 425A-218
C. BHSCS .375-16 x .75 blk zinc (8), HS-60531
D. Loctite #242, YA000201
D
A
Figure 2
B. Place a drop of loctite (D) on the four new
BHSCS (C). Place another drop of loctite in
the threaded hole where each BHSCS will
be tightened into.
C. Install the left side handle using the four
BHSCS/loctite. Tighten the four BHSCS
securely. NOTE: Install the handle bracket
so that the bend of the handle is toward
the front. Figure 2.
B
C
D. Repeat steps 3A through 3C to install the
right side handle.
E. Test the unit to verify proper operation.
Figure 1
3. Install the handles.
A. Using a 7/32” Allen wrench, remove the
outside four Button Head Socket Cap
Screw (BHSCS) securing the left rear leg
to the frame. See Figure 2.
Cybex® and the Cybex logo are registered trademarks of Cybex International, Inc.
Arc Trainer® and its mark are registered trademarks of Cybex International, Inc.
10 Trotter Drive Medway, MA 02053 • 508-533-4300 • FAX 508-533-5183 • www.cybexinternational.com • [email protected]
[email protected] • Copyright © 2008, Cybex International, Inc. All rights reserved • 425A-493 A • March 2008
This page intentionally left blank.
Arc Trainer® 425A A/V
Kit No. 425AK016
Installation Instructions
NOTE: This instruction sheet describes how to
install the Audio/Visual mount on the Arc
Trainer 425A.
Tools Required
• 5/32” Allen wrench
• 7/32” Allen wrench (2)
• Phillips screwdriver
• Side cutter
• Cloth
NOTE: Monitor and controller is not included in kit.
3. Verify you have the monitor, controller with
cables and power supply (not included in
this kit).
4. Elevate the unit and disconnect the power
source.
A. Elevate the unit to level 10 incline.
1. Read and understand all instructions
thoroughly before installing this kit.
B. While the unit is elevated, unplug the power
cord from the power outlet.
2. Verify kit contents.
A. Console monitor mount (1), 425A-219
B. Coax and power cable (1), AW-18460
C. Controller mount bracket (1), 425A-516
D. BHSCS .250-20 X 1.250 SS (4), HX620420
E. Lockwasher .250 SS (4), HS307400
F. Cable Tie (3), EW000028
G. Poster (1), 425A-518 (not shown)
H. Loctite (1), YA000201
I. Strain relief bushing (1), PP740000
! WARNING: Disconnect the power cord before
continuing this procedure. Keep wet
items away from inside parts of the
unit. Electrical shock could occur
even if the unit is unplugged.
NOTE: To protect paint, place a cloth over upper
frame before removing handles.
5. Remove the input handles.
A. Using a 5/32” Allen wrench, remove the
Button Head Socket Cap Screw (BHSCS),
washer, end cap and spacer securing the
S-link to the input handles. See Figure 2.
B
A
Input
Handle
BHSCS/
Loctite
F
Loctite
Washer
End Cap
Grease
S-Link
Spacer
H
Figure 2
C
I
D
Figure 1
E
B. Unplug the heart rate cable. See Figure 3.
C. Using two 7/32” Allen wrenches, remove the
BHSCS and washer from the pivot shaft.
See Figure 3.
Right Input Handle
Left Input Handle
Opening
Pivot Shaft
BHSCS/
Loctite
Washer
8. Remove upper side covers.
A. Using a Phillips screwdriver, remove the
screw securing each of the upper side covers.
See Figure 6.
Grease
Washer
Heart Rate
Cables
B. Remove top cover.
Loctite
BHSCS/
Loctite
Figure 3
D. Slide the pivot shaft through main frame
opening to remove input handles. See
Figure 3.
E. Set input handles aside. They will be
reattached later.
Locking
Connectors
Upper Left
Side Cover
6. Remove the front cover.
Screw
A. Using a Phillips screwdriver, remove the four
screws securing the front cover. See Figure 4.
Figure 6
Front
Cover
B. Remove upper side covers.
9. Remove lower side covers.
A. Using a Phillips screwdriver, remove the four
screws securing each of the lower side covers.
See Figure 7.
Screws
(4)
Figure 4
Lower Left
Side Cover
B. Remove front cover.
7. Remove top cover.
A. Using a Phillips screwdriver, remove the
screw securing the top cover. See Figure 5.
Screws
(4)
Top Cover
Screw
Figure 7
B. Remove both lower side covers.
Figure 5
10. Remove the display console.
A. Using a 5/32” Allen wrench, remove the four
BHSCS with lock washers securing the display
console to the console mount. See Figure 8.
Display
Console
Lockwasher
(4)
NOTE: The Power Cable (B) has a male and female
connector at either end. Make sure the female
end goes to the Monitor and the male end
is at the base. See Figure 10.
Female
Connector
Male
Connector
Figure 10
BHSCS
(4)
B. Locate the coax and power cable (B).
Console
Mount
Console and
Heart Rate
Cables
BHSCS
(3)
C. Tape the ends of the coax and power cable
together (making it easier to guide the cables
down the frame).
D. Route the cable inside top of frame as shown
in Figure 9.
E. For monitors with center connectors, measure
out 44” of cable. For monitors with side
connectors, measure out 47” of cable.
Figure 8
B. Disconnect the console and heart rate cables
from the display console. See Figure 8.
C. Using a 7/32” Allen wrench, remove the three
BHSCS securing the console mount to the
frame. See Figure 8.
11. Route the coax and power cable.
A. Using a side cutter, cut the three cable ties.
See Figure 9.
Measure out 44” or 47” of cable
(see step 11E)
Cable Tie
Access
Hole
Coax Cable and
Power Cable with
male connector
Drive frame assembly not shown.
Figure 9
F. Pull the extra coax and power cables out of the
bottom of the main frame. See Figure 9.
G. Attach three cable ties (F) replacing the ones
removed in step 11A. See Figure 9.
NOTE: Leave cable ties loose for cable
adjustment. They will be tightened later.
12. Install cables in console mount.
A. Locate the console mount (A).
B. Locate the console, heart rate, coax and
power cables on the mainframe assembly.
C. Insert the cables into the bottom of the console
mount (A) until the cables exit the top of the
console mount opening. See Figure 11.
16. Attach strain relief bushing.
Coax and power cable
about 5” of cable with
female exposed for
monitors with center
connectors
Coax and power cable
about 8” of cable with
female exposed for
Monitor
monitors with side
Mount
connectors
A. Insert controller cable through the strain relief
bushing. See Figure 12.
Strain Relief
Bushing
Controller
Cable
Display
Console
Figure 12
Controller
Cable
Lockwasher
(4)
BHSCS
(4)
Console
Mount
BHSCS
(3)
Console Mount Hole
Console
Cable
Heart Rate
Cable
Controller
Mounting
Bracket
Console, Heart
Rate, Coax and
Power Cables
Figure 11
13. Attach the console mount.
A. Position the console mount (A) on the main
frame assembly and hand thread each of the
three BHSCS. See Figure 11.
B. Securely fasten the BHSCS with a 7/32” Allen
wrench.
14. Insert the coax and power cables.
A. Route the coax and power cable up through
the monitor mount until cable exits the top.
See Figure 11.
B. With 5” or 8” of coax and power cables exiting
the top of the monitor mount, pull the extra
coax and power cables out of the bottom of
the main frame. See Figure 11.
15. Insert the controller cable.
A. Route the controller cable down through the
monitor mount until the cable exits the hole in
the console mount. See Figure 12.
B. Insert the strain relief bushing into the console
mount hole.
17. Attach the display console and contoller.
A. Connect the console and heart rate cables
(exiting the top of the console mount) to the
display console. See Figure 11.
B. Using two screws and lock washers, secure the
top of the display console to the console mount.
See Figure 11.
C. Attach the controller mounting bracket to
the bottom of the console mount using the
remaining two screws and lock washers. See
Figure 11.
D. Secure controller to the controller mounting
bracket with nylon ties (not included in this kit)
as recommended by the controller manufacturer.
E. Plug the controller cable connector to the
back of the controller. NOTE: Ensure cable
connectors are securely fastened.
18. Installing the Monitor.
NOTE: An assistant is required when installing the
monitor.
A. Secure monitor on the monitor bracket using
the hardware supplied with the monitor. See
Figure 13. NOTE: For monitors with center
connectors, remove the back plate from the
monitor and secure back to the mounting
bracket.
Monitor
Back Plate
21. Attach the lower side covers.
A. Hold the lower covers in place. See Figure 7.
Monitor
Bracket
B. Using a Phillips screwdriver, tighten the four
screws securing each lower side cover.
22. Attach the upper side covers.
Mounting
Hardware
A. Place the upper side covers in position. See
Figure 6.
B. Using a Phillips screwdriver, tighten the
screw securing each upper side cover.
23. Attach the top cover.
NOTE: Refer to monitor manufacturer’s installation
instructions for cable connection locations
(supplied with the monitor).
Figure 13
B. Remove the tape holding the coax and power
cable ends together and install them in to their
connections on the monitor. NOTE: Refer to
monitor manufacturer’s installation instructions
for cable connection locations (supplied with
the monitor).
C. Reinstall the monitor to the monitor back plate
(if removed).
19. Tighten the three cable ties.
A. Pull the loose coax and power cables
through the access hole. See Figure 9.
B. Tighten the three cable ties securely.
See Figure 9.
20. Plug in AC/DC adapter and coax cables.
A. Locate the AC/DC adapter supplied with the
monitor and plug into the coax and power
cable exiting the base of the Arc.
B. Plug the power cord into the AC/DC adapter.
NOTE: You will need a power adapter and a
A/V adapter.
C. Thread the antenna/cable source cable
(supplied at the site location) into the coax
and power cable exiting the base of the Arc.
A. Place the top cover in position. See Figure 5.
B. Using a Phillips screwdriver, tighten the
screw securing the top cover.
24. Attach the front cover.
A. Place the front cover in position. See Figure 4.
B. Using a Phillips screwdriver, tighten the
four screws securing the front cover.
25. Attach the input handes.
A. Position right input handle vertically and align
handle opening with mainframe opening.
See Figure 3.
B. Insert pivot shaft into mainframe and handle
openings. See Figure 3.
C. Position left input handle vertically and align
handle opening with mainframe opening.
D. Push pivot shaft through opening.
E. Apply loctite (H) to the two BHSCS
(removed in step 5C) and into where
they will be threaded.
F. Using two 7/32” Allen wrenches, attach the
two BHSCS/Loctite and two washers to the
pivot shaft. See Figure 3. NOTE: Handle will
wobble if not securely tightened.
G. Attach the heart rate cables. See Figure 3.
26. Attach S-Links.
A. Place the S-links in position on the handles.
See Figure 2.
B. Place a drop of Loctite (H) to the threads of
each BHSCS removed in step 5A and another
drop inside the shaft into where each BHSCS
will be tightened.
C. Install the spacer, end cap, washer and
BHSCS/loctite as shown Figure 2.
D. Using a 5/32” Allen wrench, tighten BHSCS
securely.
27. Test the unit for proper operation.
A. Connect the power cord into the power outlet.
B. Operate the unit to verify proper operation.
Cybex® and the Cybex logo are registered trademarks of Cybex International, Inc.
Arc Trainer® and its mark are registered trademarks of Cybex International, Inc.
10 Trotter Drive Medway, MA 02053 • 508-533-4300 • FAX 508-533-5183 • www.cybexinternational.com • [email protected]
[email protected] • Copyright © 2008, Cybex International, Inc. All rights reserved • 425A-519 C • March 2008
Arc Trainer® 425A Plastic Insert
Kit No. 425AK017 - Plastic Insert
Installation Instructions
NOTE: This instruction sheet describes how to replace
the plastic insert on the Arc Trainer 425A.
Input
Handle
Tools Required
•
•
•
•
Phillips screwdriver
5/16” Nut driver or wrench
5/32” Allen wrench
7/32” Allen wrench (2)
• Utility knife
• Cloth
1. Read and understand all instructions thoroughly
before installing this kit.
BHSCS/
Loctite
Loctite
Grease
S-Link
Washer
End Cap
Spacer
2. Verify kit contents. See Figure 1.
Figure 2
B. Unplug the heart rate cables. See Figure 3.
A
B
C. Using two 7/32” Allen wrenches, remove the
BHSCS and washer from the pivot shaft.
See Figure 3.
Right Input Handle
Left Input Handle
A. Plastic Insert, (1), 425A-465
B. Loctite, (1), YA000201
Opening
Pivot Shaft
BHSCS/
Loctite
Washer
Figure 1
! WARNING: Disconnect the power cord before
beginning this procedure. Keep wet
items away from inside parts of the
unit. Electrical shock could occur
even if the unit is unplugged.
Grease
Washer
Heart Rate
Cables
Loctite
BHSCS/
Loctite
Figure 3
3. Disconnect the external power source.
A. Unplug the power cord from the power outlet.
NOTE: To protect paint, place a cloth over upper
frame before removing handles.
D. Slide the pivot shaft through main frame
opening to remove input handles. See
Figure 3.
E. Set input handles aside (these will be
reattached step 15).
4. Remove the input handles.
5. Remove the front cover.
A. Using a 5/32” Allen wrench, remove the
Button Head Socket Cap Screw (BHSCS),
washer, end cap and spacer securing the
S-link to the input handles. See Figure 2.
A. Using a Phillips screwdriver, remove the four
screws securing the front cover. See Figure 4.
B. Remove front cover.
B. Remove upper side covers.
Front
Cover
8. Remove both lower side covers.
A. Using a Phillips screwdriver, remove the four
screws securing each of the lower side covers.
See Figure 7.
Screws
(4)
Lower Left
Side Cover
Figure 4
6. Remove top cover.
A. Using a Phillips screwdriver, remove the
screw securing the top cover. See Figure 5.
Screws
(4)
Top Cover
Screw
Figure 7
B. Remove both lower side covers.
9. Remove plastic insert.
Figure 5
A. Using a utility knife pry up the plug insert
and pull out.
B. Remove top cover.
7. Remove both upper side covers.
A. Using a Phillips screwdriver, remove the
screw securing each of the upper side covers.
See Figure 6.
B. Using a 5/16” nut driver or wrench remove
the nut and washer from the two heart
rate jacks as shown in figure 8.
NOTE: Hold heart rate wires to prevent
them from twisting.
Heart
Rate
Jack
(2)
Plastic
Insert
Locking
Connectors
Nut
(2)
Upper Left
Side Cover
Washer
(2)
Figure 8
Screw
Figure 6
C. Remove the plastic insert from the heart
rate jacks.
10. Install new plastic insert.
A. Install new plastic insert (A) on the two heart
rate jacks as shown in Figure 8.
B. Using a 5/16” nut driver or wrench attach
the nut and washer (removed in step 9B)
to each of the two heart rate jacks as shown
in figure 8. NOTE: Hold heart rate wires to
prevent them from twisting.
C. Install by pushing on the plug insert until
it snaps in place in the hole.
D. Push pivot shaft through opening.
E. Apply Loctite (B) to the two BHSCS
(removed in step 4C) and into where
they will be threaded.
F. Using two 7/32” Allen wrenches, attach the
two BHSCS/Loctite and two washers to the
pivot shaft. See Figure 3. NOTE: Handle will
wobble if not securely tightened.
G. Attach the heart rate cables. See Figure 3.
16. Attach S-Links.
11. Attach the lower side covers.
A. Hold the lower covers in place. See Figure 7.
B. Using a Phillips head screwdriver, tighten the
four screws securing each lower side cover.
12. Attach the upper side covers.
A. Place the S-links in position on the handles.
See Figure 2.
B. Place a drop of Loctite (B) to the threads of
each BHSCS removed in step 4A and another
drop inside the shaft into where each BHSCS
will be tightened.
A. Place the upper covers in position. See
Figure 6.
C. Install the spacer, end cap, washer and
BHSCS/loctite as shown Figure 2.
B. Using a Phillips head screwdriver, tighten the
screw securing each upper side cover.
D. Using a 5/32” Allen wrench, tighten BHSCS
securely.
13. Attach the top cover.
A. Place the upper left cover in postiion. See
Figure 5.
17. Test the unit for proper operation.
A. Connect the power cord into the power outlet.
B. Operate the unit to verify proper operation.
B. Using a Phillips head screwdriver, tighten the
screw securing the top cover.
14. Attach the front cover.
A. Place the front cover in position. See Figure 4.
B. Using a Phillips head screwdriver, tighten the
four screws securing the front cover.
15. Attach input handles.
A. Position right handle vertically and align input
handle opening with mainframe opening. See
Figure 3.
B. Insert pivot shaft into mainframe and input
handle openings. See Figure 3.
C. Position left input handle vertically and align
input handle opening with mainframe opening.
See Figure 3.
Cybex® and the Cybex logo are registered trademarks of Cybex International, Inc.
Arc Trainer® and its mark are registered trademarks of Cybex International, Inc.
10 Trotter Drive Medway, MA 02053 • 508-533-4300 • FAX 508-533-5183 • www.cybexinternational.com • [email protected]
[email protected] • Copyright © 2008, Cybex International, Inc. All rights reserved • 425A-525 A • March 2008
This page intentionally left blank.
Arc Trainer® 425A A/V
Installation Instructions
Kit No. 425AK044
NOTE: This instruction sheet describes how to install
the Cybex Personal Entertainment Monitor on
the Arc Trainer 425A.
Tools Required
•
•
•
•
3 mm Allen wrench
5/32” Allen wrench
7/16” Open end wrench
Phillips screwdriver
•
•
•
•
7/32” Allen wrench (2)
Side cutter
Utility knife
Cloth
1. Read and understand all instructions
thoroughly before installing this kit.
3. Verify the monitor kit contents shown in Figure 2.
AA.
BB.
CC.
DD.
EE.
FF.
GG.
HH.
II.
Monitor (1), EE000005 or EE000007
Remote control (1), EM000000
Batteries, remote control, AAA size (2), N/A
Screws, mounting, M4 x 0.7 x 10 mm (4),
HC692860
Washers, external lock, (4), HS047300
Washers, flat, M4 (4), HS097600
AC/DC adapter (1), ET300038
Power cord, 115 VAC 60 Hz, (Country specific
cords supplied with product), (1), EW600000
Personal Entertainment Monitor Manual (1),
LT-20191
2. Verify kit contents shown in Figure 1.
AA
A. Console monitor mount (1), 425A-220
B. Audio cable 1/4” to 3.5 mm 18” (1), 630A-102
C. RJ-45 round cable (1), 630A-103
D. Headphone adapter clamp (1), 630A-330
E. Headphone jack mount bracket (1), 630A-331
F. Coax and power cable I/O W/2.1 mm (1),
630A-104
G. Allen wrench 3 mm (1), BK030210
H. Adapter, 1/4 plug to 1/8 stereo jack (1),
ES000001
I. Self tapping screw 8-16 x .31 (2), HT552509
J. Self tapping screw 8-16 x .75 (2), HT552515
K. Strain relief bushing (1), PP740000
L. A/V bottom membrane (1), SW-19621-4 (NOTE:
for English Console only)
M. Cybex monitor kit (1), EE000005 or EE000007
N. Poster (1), 425A-513 (not shown)
O. Warranty sheet (1), LT-20219 (not shown)
P. Cable Tie (5), EW000028
Q. Signal Isolator (1), 425A-490
R. Loctite (1), YA000201 (not shown)
M
B
K
L
F
C
D
A
E
I
P
Q
Figure 1
J
DD
EE
BB
GG
HH
FF
II
Figure 2
4. Elevate the unit and disconnect the power source.
A. Elevate the unit to level 10 incline.
B. While the unit is elevated, unplug the power cord
from the power outlet.
! WARNING: Disconnect the power cord before
continuing this procedure. Keep wet
items away from inside parts of the
unit. Electrical shock could occur
even if the unit is unplugged.
NOTE: To protect paint place a cloth over upper
frame before removing handles.
H
G
CC
5. Remove the input handles.
A. Using a 5/32” Allen wrench, remove the Button
Head Socket Cap Screw (BHSCS), washer,
end cap and spacer securing the S-link to the
input handles. See Figure 3.
7. Remove top cover.
Loctite
Input
Handle
Washer
A. Using a Phillips screwdriver, remove the
screw securing the top cover. See Figure 6.
Grease
BHSCS/
Loctite
Top Cover
Screw
End Cap
Spacer
S-Link
Figure 6
Figure 3
B. Unplug the heart rate cables. See Figure 4.
B. Remove top cover.
8. Remove upper side covers.
Right Input Handle
Left Input Handle
Opening
Pivot Shaft
BHSCS/
Loctite
Washer
Grease
Washer
Heart Rate
Cables
A. Using a Phillips screwdriver, remove the
screw securing each of the upper side covers.
See Figure 7.
Loctite
BHSCS/
Loctite
Locking
Connectors
Figure 4
C. Using two 7/32” Allen wrenches, remove the
BHSCS and washer from the pivot shaft.
See Figure 4.
Upper Left
Side Cover
D. Slide the pivot shaft through main frame
opening to remove input handles. See
Figure 4.
E. Set input handles aside (they will be
reattached later).
6. Remove the front cover.
A. Using a Phillips
screwdriver, remove
the four screws
securing the front
cover. See Figure 5.
B. Remove front cover.
Screw
Figure 7
B. Remove upper side covers.
Front
Cover
Screws
(4)
Figure 5
9. Remove both lower side covers.
A. Using a Phillips head screwdriver, remove the
four screws securing each of the lower side
covers. See Figure 8.
Lower Left
Side Cover
45”
Cable Tie
Access
Hole
Coax Cable and
Power Cable with
male connector
Screws
(4)
Figure 8
B. Remove both lower side covers.
10. Remove the display console.
Figure 10
A. Using a 5/32” Allen wrench, remove the four
BHSCS with lock washers securing the display
console to the console mount. See Figure 9.
Lockwasher
(4)
BHSCS
(3)
NOTE: The Power Cable (F) has a male and female
connector at either end. Make sure the female
end goes to the Monitor (AA) and the male end
is at the base. See Figure 11.
Display
Console
Female
Connector
BHSCS
(4)
Console
Mount
Drive frame assembly not shown.
Male
Connector
Figure 11
Console and
Heart Rate
Cables
B. Locate the coax and power cable (F).
C. Tape the ends of the coax and power cable
together (making it easier to guide the cables
down the frame).
D. Measure out 45” of cable from top of frame as
shown in Figure 10.
Figure 9
E. Route the cable inside top of frame as shown
in Figure 10.
B. Disconnect the console and heart rate cables
from the display console. See Figure 9.
F. Pull rest of cable through the access hole.
See Figure 10.
C. Using a 7/32” Allen wrench remove the three
BHSCS securing the console mount to the
frame. See Figure 9.
G. Attach three cable ties (P) replacing the ones
removed in step 11A. See Figure 10.
NOTE: Leave cable ties loose for cable
adjustment, they will be tightened later.
11. Route the coax and power cable.
A. Using a side cutter, cut the three cable ties.
See Figure 10.
12. Remove covers from console.
A. Using a Phillips screwdriver, remove the one
screw securing the console battery door
cover, then remove the four screws securing
the the rear console cover to the front
console cover. See Figure 12.
Console Battery
Door Cover
Bottom
Membrane
Cybex International, Inc. Medway, MA USA (508) 533-4300 www.CybexInternational.com
end
Wireless HR Receiver Inside
..
.
Screw
A/V
Membrane
Screws
(4)
..
.
..
.
Figure 15
Rear Console
Cover
D. Peel off backing from new A/V membrane
and place on the front console cover.
See Figure 15.
Figure 12
NOTE: Step 13 is for English units only, all other
languages skip to step 14.
E. Plug the A/V membrane ribbon cable into
the main display PC board. See Figure 14.
13. Replace bottom membrane with A/V membrane.
F. Using a Phillips screwdriver, reattach the
three screws securing the main display PC
board to the front console cover. See
Figure 13.
A. Using a Phillips screwdriver, remove the three
screws securing the main display PC board
to the front console cover. See Figure 13.
14. Install audio cable, bracket, clamp and
adapter to front cover.
A. Using a Phillips screwdriver, attach the two
screws (I) securing the headphone jack
mount bracket (E). See Figure 16.
Screw
B
Figure 13
I
B. Unplug the bottom membrane ribbon cable
from the the main display PC board. See
Figure 14.
D
J
E
H
PART OF B
Figure 16
Ribbon Cable
Figure 14
C. Using a utility knife, pry off bottom membrane
from the front console cover. See Figure 15.
B. Attach the audio cable (B) to the headphone
jack mount bracket (E) securing it with the
flat washer and nut (attached to cable). See
Figure 16.
C. Attach the adapter (H) securing it in place
with the headphone adapter clamp (D) and
two screws (J). See Figure 16.
15. Reattach the cover to the console.
A. Using a Phillips screwdriver, reattach the four
screws securing the rear console cover to the
front console cover. See Figure 12.
16. Attach the RJ-45 and audio cables to the
signal isolator.
A. Attach the RJ-45 (C) and audio cables (B)
to the signal isolator (Q). See Figure 17.
Mounting
Plate
(Q)
(C)
Power
Cable
Coax
Cable
RJ-45
Cable
8”
(20 cm)
Monitor
Mount
Lockwasher
(4)
BHSCS
(4)
(A)
BHSCS
(3)
(B)
Figure 17
B. Insert the RJ-45 (C) cable down through
the lower rear console cover opening.
See Figure 17.
17. Attach the signal isolator.
A. Attach signal isolator (Q) cable to the PC
board. See Figure 17.
B. Peel off backing from tape and attach the
signal isolator (Q) to the mounting plate.
See Figure 17.
18. Reattach the battery door cover to the
console.
A. Using a Phillips screwdriver, reattach the
one screw securing the console battery
door cover to the console cover. See
Figure 12.
19. Install cables in console mount.
A. Locate the console mount (A).
B. Locate the console, heart rate, coax and
power cables on the mainframe assembly.
C. Insert the cables into the bottom of the
console mount (A) until the cable exit the
top. See Figure 18.
Display
Console
Console
Cables
Heart Rate
Cable
Console, Heart
Rate, Coax and
Power Cables
Figure 18
20. Attach the console mount.
A. Position the console mount (A) on the main
frame assembly and hand thread each of the
three BHSCS. See Figure 18.
B. Securely fasten the BHSCS with the 7/32” Allen
wrench.
21. Insert the coax, power and RJ-45 cables.
A. Route the coax and power cables up through
the monitor mount until 8” (20 cm) of cable
exit the top. See Figure 18.
NOTE: Exactly 8” (20 cm) of cable must exit the top of
the monitor mount.
B. With 8” of coax and power cables exiting
the top of the console assembly, pull the
extra coax and power cables out of the
bottom of the main frame.
C. Insert the RJ-45 cable that is attached to the
display console up through the monitor mount.
See Figure 18.
22. Attach the display console.
A. Connect the console and heart rate cables
exiting the top of the console mount to the
console. See Figure 18.
B. Position the display console and hand thread
each of the four BHSCS and lockwashers.
See Figure 18.
NOTE: Verify cables are not pinched.
C. Using the 5/32” Allen wrench provided,
tighten the four BHSCS securing the display
console to the console mount.
23. Install monitor
A. Locate monitor (AA), four mounting screws
(DD), four lock washers (EE) and four flat
washers (FF).
D. Insert RJ-45 cable and the coax end of (F)
through hole on right side of monitor mount.
See Figure 20.
E. Using a 3 mm Allen wrench secure the
monitor bracket to the monitor mount using
the four mounting screws (DD), four lock
washers (EE) and four flat washers (FF).
See Figure 20.
F. Insert the power cable, coax cable and
RJ-45 cable into the monitor as shown in
Figure 21. NOTE: Use of the CSAFE port is
optional and requires a CSAFE cable and
device.
B. Remove the back cover from monitor (AA) by
pressing the bottom tabs of the cover in and
rotating out. See Figure 19.
(AA)
To CSAFE
Device
Tab
Antenna/
Cable
Source
(Coax Cable)
Back
Cover
D
D
Power Inlet
12 VDC
Tab
NOTE: Press in bottom of tabs and rotate out.
To Fitness
Equipment
RJ-45
Figure 21
Figure 19
C. Insert the power cable end of (F) through
hole on left side of monitor mount. See
Figure 20.
(AA)
G. Secure the power inlet cable to the monitor
plate using the cable tie (P). See Figure 22.
Power Inlet
Cable
Monitor
Bracket
Monitor
Mount
(F)
Power
Cable
RJ-45
Cable
Figure 22
(FF)
(EE)
Figure 20
Secure Cable
Tie Here
(DD)
(F)
Coax
Cable
Monitor
Plate
H. Install the back cover to the monitor (AA).
See Figure 23.
(AA)
Channel
Keys
Volume
Keys
Figure 24
27. Attach the lower side covers.
Back
Cover
A. Hold the lower covers in place. See Figure 8.
B. Using a Phillips screwdriver, tighten the four
screws securing each lower side cover.
Figure 23
24. Tighten the three cable ties.
A. Pull the loose coax and power cables
through the access hole. See Figure 10.
B. Tighten the three cable ties securely.
See Figure 10.
25. Plug in AC/DC Adapter and coax cables.
A. Locate the AC/DC adapter (GG) supplied
with the monitor and plug into the power
cable exiting the base of the Arc.
28. Attach the upper side covers.
A. Place the upper covers in position. See
Figure 7.
B. Using a Phillips screwdriver, tighten the
screw securing each upper side cover.
29. Attach the top cover.
A. Place the upper left cover in postiion. See
Figure 6.
B. Using a Phillips screwdriver, tighten the
screw securing the top cover.
30. Attach the front cover.
B. Plug the power cord (HH) into the AC/DC
adapter (GG). NOTE: Power cord (HH)
varies by country.
C. Thread the antenna/cable source cable
(supplied at the site location) into the coax
cable exiting the base of the Arc.
26. Set up monitor for first time use.
A. Locate the Personal Entertainment Monitor
Manual (LT-20191) and follow the set up
procedure in Chapter 5.
B. Plug the power cord (HH) into a wall outlet.
C. Plug headphones (not supplied) into
headphone jack located at base of console.
D. Refer to Chapter 3 of the Personal
Entertainment Monitor Manual (LT-20191)
regarding use of the channel and volume
keys located on the lower center of the
Arc console. See Figure 24.
A. Place the front cover in position. See Figure 5.
B. Using a Phillips screwdriver, tighten the four
screws securing the front cover.
31. Attach the handes.
A. Position right handle vertically and align
handle opening with mainframe opening.
See Figure 4.
B. Insert pivot shaft into mainframe and handle
openings. See Figure 4.
C. Position left handle vertically and align
handle opening with mainframe opening.
D. Push pivot shaft through opening.
E. Apply loctite (R) to the two BHSCS (removed
in step 5C) and into where they will be
threaded.
F. Using two 7/32” Allen wrenches, attach the
two BHSCS/Loctite and two washers to the
pivot shaft. See Figure 4. NOTE: Handle will
wobble if not securely tightened.
G. Attach the heart rate cables. See Figure 4.
32. Attach S-Links.
A. Place the S-links in position on the handles.
See Figure 3.
B. Place a drop of Loctite (R) to the threads of
each BHSCS removed in step 5A and another
drop inside the shaft into where each BHSCS
will tightened.
C. Install the two nylon washers, two end caps
and two BHSCS/loctite as shown Figure 3.
D. Using a 5/32” Allen wrench, tighten BHSCS
securely.
33. Test the unit for proper operation.
A. Connect the power cord into the power outlet.
B. Operate the unit to verify proper operation.
Cybex® and the Cybex logo are registered trademarks of Cybex International, Inc.
Arc Trainer® and its mark are registered trademarks of Cybex International, Inc.
10 Trotter Drive Medway, MA 02053 • 508-533-4300 ● FAX 508-533-5183 ● www.cybexinternational.com ● [email protected]
[email protected] ● Copyright © 2008, Cybex International, Inc. All rights reserved ● 425A-514 C ● March 2008
Arc Trainer® Shaft Replacement
Kit No. 425AK045
Installation Instructions
NOTE: This instruction sheet describes how to replace
the pivot shaft on the 425A Arc Trainer.
Tools Required
•
•
•
•
•
•
Phillips screwdriver
1/2” Open end wrench
5/32” Allen wrench
5/16” Allen wrench
Hammer & punch
Grease
4. Remove the front cover.
A. Using a Phillips screwdriver, remove the
four screws securing the front cover.
See Figure 2.
Front
Cover
1. Read and understand all instructions
thoroughly before installing this kit.
Screws
(4)
2. Verify kit contents. See Figure 1.
A. Shaft, (1), 425A-216
B. BHSCS .250-20 X .75, (1), JC620415
C. BHSCS .500-13 X 1.25, (1), JC780420
D. Washer SAE .500, (1), HS387700
E. Nylon locknut .250-20, (1),HN625200
F. Loctite, (1), YA000201
Figure 2
B. Remove front cover.
D
A
5. Remove top cover.
C
A. Using a Phillips screwdriver, remove the
screw securing the top cover. See Figure 3.
Top
Cover
B
Screw
E
F
Figure 1
3. Disconnect the external power source.
Figure 3
A. Unplug the power cord from the power outlet.
B. Remove top cover.
! WARNING: Disconnect the power cord before
continuing this procedure. Keep wet
items away from inside parts of the
unit. Electrical shock could occur
even if the unit is unplugged.
6. Remove upper side covers.
A. Using a Phillips screwdriver, remove the
screw securing each of the upper side
covers. See Figure 4.
C. Using a hammer an punch, tap out the
pivot shaft.
D. While supporting the drive frame assembly.
Remove pivot shaft. See Figure 6.
8. Install new pivot shaft (A).
Locking
Connectors
A. Put grease on both ends of new pivot
shaft (A).
B. Aline drive frame assemby with holes in
the main frame support and insert new
pivot shaft (A). See Figure 6.
Upper Left
Side Cover
Screw
C. Using a 5/32” Allen wrench and a 1/2”
open end wrench, attach the BHSCS (B)
and nylon locknut (E), tighten securely.
See Figure 6.
D. Place a drop of loctite (F) on BHSCS (C)
and another drop inside the pivot shaft
where the BHSCS will be tightened.
Figure 4
B. Remove upper side covers.
E. Using a 5/16” Allen wrench, attach the
BHSCS (C) and washer (D) to the pivot
shaft (A), tighten securely. See Figure 5.
7. Remove pivot shaft.
A. Using a 5/16” Allen wrench, remove the
BHSCS and washer. See Figure 5.
9. Attach the upper side covers.
A. Place the upper side covers in position.
See Figure 4.
B. Using a Phillips screwdriver, tighten the
screw securing each upper side cover.
Washer
10. Attach the top cover.
BHSCS
A. Place the top cover in position. See
Figure 3.
Figure 5
B. Using a 5/32” Allen wrench and a 1/2” open
end wrench, remove the BHSCS and nylon
locknut. See Figure 6.
Nylon
Nut
Drive Frame
Assembly
B. Using a Phillips screwdriver, tighten the
screw securing the top cover.
11. Attach the front cover.
A. Place the front cover in position. See
Figure 2.
B. Using a Phillips screwdriver, tighten the
four screws securing the front cover.
12. Connect power and test for proper operation.
BHSCS
Figure 6
Pivot Shaft
Main Frame
Support
A. Plug power cord to the power outlet.
B. Test unit for proper operation.
Cybex® and the Cybex logo are registered trademarks of Cybex International, Inc.
Arc Trainer® and its mark are registered trademarks of Cybex International, Inc.
10 Trotter Drive Medway, MA 02053 • 508-533-4300 • FAX 508-533-5183 • www.cybexinternational.com • [email protected]
[email protected] • Copyright © 2008, Cybex International, Inc. All rights reserved • 425A-387 A • March 2008
Cybex Arc Trainer 425A Service Manual
ADAPTER, SERVICE PROGRAMMING
CN-16924
GND
UP
ELV-MOTOR
ELEV NEUTRAL
ELEV DWN
THERMAL
ELEV UP
CHASSIS GROUND
CHASSIS
GND
N/C
B+
TXD
RXD
N/C
N/C
CSAFE CONNECTOR
7
6
GRAY
BROWN
YELLOW
GREEN
RED
BLACK
ORANGE
BLUE
8
J102
9
1 CD CARRIER DETECT
2 RD RECEIVE DATA
3 TD TRANSMIT DATA
4 DTR READY
5 GND
6 DSR DATA SET READY
7 RTS REQUEST TO SEND
8 CTS CLEAR TO SEND
9 RI RING DETECT
5
DWN
N/C > 0% POSITION
MR-19609 MOTOR, INCLINE 425A 115V 60Hz
MR-19610 MOTOR, INCLINE 425A 230V 50Hz
POWER CORDS
1
2
3
4
1
2
3
4
GND
EF-19822
F2 2.5A / 250VAC SLO-BLO
AC2
425A-451
SENSOR, 425A SPEED
AD-19612
PCA, 425A ECB CONTROLLER
HX-18537
MAGNET, ROLLER SHEAVE
J4 INCLINE
EF-19822
F2 2.5A / 250VAC SLO-BLO
J1 SPEED
N
AC1
S
POWER CORD, 115V/2.5A
POWER CORD, 2.5A/230V 50Hz
POWER CORD, 3A/230V UK
POWER CORD, 2.5A JAPAN
2
MAGNET
CRANK
PULLEY
+9V REG
ELEV. UP
+9v REG
GND
1
GND
2
LED4 AC POWER
PWM
LED6 BRAKE ON
LED7 9VDC DISPLAY PWR
ELEV. DOWN
SPEED SIGNAL
2
LED2 SPEED SIGNAL
LED3 INCLINE DWN
J5 ECB
2
c
28 Ohm @ 23° COILS
LED5 INCLINE UP
MAGNET
1
1
LED1 BRAKE PWM
N
AW-19624
AW-19625
AW-19626
AW-19627
COM
S
8
5
4
7
4
3
6
3
2
2
1
1
J2 CONSOLE
1
1
1
2
4
8
6
4
3
7
5
3
2
5
6
7
8
AW-19619
CABLE, CONSOLE 425A
SIG
WHITE, ORANGE OR RED
+9V REG
J1
5 X 5 UPPER MEMBRANE SWITCHES
SW-19622-X MEMBRANE, 425A TOP
3 x 4 LOWER MEMBRANE
SW-19621-X MEMBRANE, 425A BTM W/AV
8
J6
7
7
5
COM
LEFT
RIGHT
CHASSIS
GND
N/C
B+
TXD
RXD
N/C
N/C
6
5
GREEN
4
6
8
A/V MONITOR
EE000004
4
5
5
GND
3
4
4
STD CSAFE
EXTERNAL ACCESS
SW-19623-4 MEMBRANE, 425A BTM W/O AV
(ENGLISH ONLY)
AUDIO JACK
2
3
1
RED
630A-103 CABLE,
5E BONDED-PAIR RJ45
2
BLACK
AW-19617
HARNESS, 425A HR CONSOLE
1
GND
VCC
SCHEMATIC INTENDED TO BE AN ELECTRICAL
REPRESENTATION OF THE ARC SYSTEM.
MECHANICAL IMPLEMENTATION OR REPRESENTATION
MAY VARY.
THE ARC USES INTERNATIONAL POWER COLOR CODES.
BLUE=NEUTRAL, BROWN=HOT, GREEN/YLW=GND
2
3
3
VCC
REF RIGHT
SIGNAL
1
2
2
ELEC RIGHT
5
OUT
4
4
ELEC LEFT
SOURCE
WHITE
ORANGE
3
3
SRC
2
2
REF LEFT
PRESENCE DETECT
1
1
LEFT
FRONT
OUTSIDE
1
1
WHITE
Audio Adapter
425A-490
AC POWER ADAPTER
EW600005 (Ger. Sp. Swe.) CABLE, POWER CORD, 230V, 10A, CEE 7-7,2M
AW-19521 POWER CORD, JAPAN, 2.4M IEC-320
AW-19587 POWER CORD, 250VAC, 3A, 2.5M IEC-320, UK
630A-102
CABLE, AUDIO 1/4"
HA-20175
HEADPHONES
ES000001
ADAPTER, 1/4"-1/8"
1
3
630A-104
CABLE, A/V I/O W/2.1mm
3
AW-19616
CABLE, CHR FRAME
EC-19620 CODE, 425A DISPLAY
LEFT
REAR
INSIDE
HDS
RED
AD-19618 PCA, 425A DISPLAY
7
J3
L
BLACK
8
6
5
AW-19615
CABLE, CHR GRIP
LEFT
ARM
GREEN
3
PWM
RIGHT
FRONT
OUTSIDE
BLACK OR BROWN
GND
SPEED SIGNAL
RIGHT
REAR
INSIDE
WHITE, ORANGE OR RED
SIG
4
2
1
BLACK OR BROWN
GND
7
ELEV. UP
AW-19615
CABLE, CHR GRIP
8
6
5
+9v REG
3
ELEV. DOWN
RIGHT
ARM
4
2
1
GND
R
GND
MR-19541
EDDY CURRENT BRAKE W/FLYWHEEL
2
Service
Page 4-11
10 Trotter Drive Medway, MA 02053 • 508-533-4300 • FAX 508-533-5183
www.cybexinternational.com • [email protected]•[email protected]