1
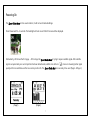
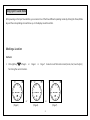
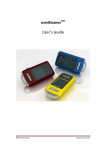
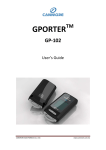
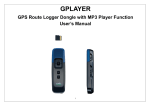
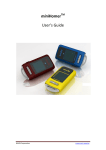
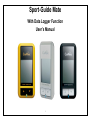
Sport-Guide Mate With Data Logger Function User’s Manual 1 CanMore Sport-Guide Mate is the world’s easiest to use personal GPS navigation device that helps you find your way back to previously marked locations. Never again worry about where you’ve parked your car at a shopping mall or stadium, finding way back to a hotel traveling in a foreign city, getting back to a camp site while hiking in the woods, or returning a favorite fishing spot... Sport-Guide Mate is a small-sized reverse navigation device that is accurate, easy to use, and gives peace of mind for outdoor activities. Never getting lost again outdoors! Finding your way back with 100% confidence! DISPLAY & KEY Power Key On/Off:Press 2~3s Satellite Icon, Position Fix Quality Indicator Battery Indicator Page-Up : click fast Page-Down : click fast Exit: Press for 2~3 seconds Exit: Press for 2~3 seconds USB Charging port Charging Status Indicator 2 Caution Read before you start to use: Global position system (GPS) is obtained by American Ministry of National Defense, and they got the full responsibility about the preciseness and the maintenance. Any changes may cause the capacity and preciseness of GPS differed. If you use this device inside of buildings, tunnels, or any huge objects beside you, the GPS signals might be cut-off or disturbed. Please do not consider that the receiver is malfunction. The receiver operating temperature is located between – 20°C and + 60°C. For safety and lifetime of Li-polymer battery usage, do not place this device over two hours with overheated environment... 1. Introduction The Sport-Guide Mate is a total solution of GPS receiver with Venus 6 serial ; 65 channels all-in-view tracking technology. This Sport-Guide Mate can communicate with other electronic devices by USB interface. The Sport-Guide Mate is designed as an ultra low power consumption device, and high position accuracy. It will update the satellite position every second. This Sport-Guide Mate auto-locating feature is capable of automatically determining a navigation solution without intervention. However, acquisition performance could be interfered and do cold start if the receiver were initialized with occurrence of the following events: 1) First in use 2) The GPS receiver is not in use for more than 3 months or transportation over distances further than 500 kilometers. 3) Charge Li-Polymer battery. 3 2. Features and Functions 1) Venus 6 serial simultaneous time-frequency search bins. Signal detection better than -160dBm 2) Cold start < 30 seconds at – 147dBm 3) Hot start < 1sec. under open sky. 4) 5m CEP accuracy. 5) Signal reacquisition 1 sec. 6) Acquire and track 65 satellites simultaneously 7) USB Version 1.1/2.0 8) High capacity Li-ion rechargeable battery. 9) Built-in E-compass 10)Back-track(way point) function Check the Package Content Before you start using, please check out if your package includes the following items. If any item is damaged or missed, please contact your reseller at once. • Sport-Guide Mate device • BL-4C 650mA Li-ion Battery • CD User’s manual/Software • Bike holder • AC adapter+ USB Cable • Holder Lanyard 4 Safety • Do not allow children to play with the GPS receiver, it contains small parts that could become detached and create a choking hazard. • Observe all signs that require an electrical device or RF radio product to be switched off in the designated areas. • This device contains a Li-ion battery. Please keep it away from fire anytime • (Including discarding the device) or the battery may explode. • The embedded battery must be properly disposed or may be recycled, contacts your local recycling centers for disposal methods. BASIC OPERATIONS Charging the battery For the first use, the battery should be charged for about 4 hour to assure a full charge. re-charge. Afterward, it takes about 2 hours to fully Plug the charging jack of AC adapter into power jack and connect the charger properly to cigar-lighter or a main power outlet. When is in charging, the blue LED will be lighted up. When the battery is fully charged, the blue LED will be turned off. Unplug car charger or AC adapter from power jack. 5 Icon Information Status Classification Icon & explaination Battery Status Battery is fully charged, Battery power is full Battery power with 75% full Battery power with 50% full Low power, please charge immediately GPS Status When the battery is charging No Signal 2D fix with poor signal 3D fix with poor signal 3D fix with good signal 3D fix with strong signal Logging status When 3D fix and device start logging at the same time, the icon flashing / 5sec Sport Mode Biking mode running mode walking mode Key Function Right key:(1)Click : To Next Page (2) Press and hold right key : Enter/enter Next Page Left Key: (1) Click : To Last page (2) Press and hold right key : Exit/return Forward Page 6 Powering On The Sport-Guide Mate is to be used outdoors; it will not work inside buildings. Press Power switch 1~2 seconds. The backlight will turn on and full LCD screen will be displayed. Momentarily, LCD shows the first page. At this stage the Sport-Guide Mate is trying to acquire satellite signal. After satellite signal is acquired and your current position has been determined, satellite icon with arcs ; more arcs meaning better signal quality with more satellites used for an accurate position fix. The Sport-Guide Mate is now ready to be used. (Page.1 & Page.3) (Page1) (Page2) 7 The time it takes to reach position fix from powering on, after several hours of unused period, may vary from 30 seconds to couple minutes, depending on the surrounding environment. Places with unobstructed sky view will result in faster position fix. If the Sport-Guide Mate had been previously used within the 2 hour period before powering on, the time to reach position fix will be very short. When satellite signal is acquired and your current position has been determined, the Sport-Guide Mate starts logging the data. The logging icon will flashing for every 5 second. (Page.1) PS: There is GPS Photo Tagger or GPS Sport tracker software in our package. Please install this software first. When you finish installing the software, please enter the product key for the first time. Then you can connect Sport-Guide Mate to your PC and download the logging data with USB cable. You can see the all logging & sporting information with this software. (Please see the software user manual) 8 Calibrating Digital Compass The internal digital compass requires calibration for first time use, or when the Sport-Guide Mate has been moved 100miles (160km) from the place of last calibration. 1. Lay the Sport-Guide Mate on a flat surface with LCD facing up and no metal object nearby. 2. Click right key to Page.4, to select the compass mode with compass icon An arrow will point to the direction of the magnetic north. 3. The displayed number indicates the clockwise angle from the magnetic north to the forward direction of the Sport-Guide Mate Note that you can calibrate the compass in this mode. 9 4. Press and hold right key for 2~3 seconds, the LCD will display a 20 second count down. 5. Within the 20 seconds, slowly rotate the Sport-Guide Mate 360degrees twice, either clockwise or counterclockwise. 6. After the countdown is finished, the LCD will display the direction triangle and heading number once again. 10 Speed When the position has been determined, Sport-Guide Mate will show the correct speed. (Page.2) (Page.4) Powering Off Press and hold power key for 2~3 seconds while the Sport-Guide Mate is on. 11 Using Sport-Guide Mate After powering on the Sport-Guide Mate, you can select one of the three different operating modes by clicking the Power/Mode key and the corresponding icons will show up on the display one after another. Marking a Location Method.1 1. Click right key to Page.5 or Page.6 or Page.7 to select one of the location icons (Home, Car, Favorite Spot,) for storing the current location. or (Page.5) or (Page.6) (Page.7) 12 2. Make sure satellite icon or 3. Press and hold right key for 2~3 seconds, wait until the circle of direction arrows shows up and then release Mark key. or with 3D fix. The LCD will display arrived countdown distance. or 4. or The current location coordinate is stored with the selected location icon. 13 Method.2: OR Press and hold left key enter 0~9 number ; and hold left key for 2~3 seconds, to enter the longitude information. Press and hold right key Click right key or left key to for 2~3 seconds to next step setting number. To return forward step is Press for 2~3 seconds The current location coordinate is stored with the selected location icon. 14 Getting Back to a Location 1 Click right key to Page.5 or Page.6 or Page.7 to select one of the location icons to return to a previously stored location. or or 2 Make sure satellite icon or 3 The displayed number shows distance to the return point, and the direction arrow shows the direction to follow. 4 After reaching the destination, within a 10 meter (or 40 feet) radius, the circle will warning and show up. or or with 3D fix. or Note that the internal digital compass for showing direction works best when the Sport-Guide Mate is held horizontally. 15 Sport Trip The Page.8 & Page 9 is customer page1 & 2. User can setting the information with preferences. Press and hold right key 2~3 seconds to start the sport trip, and it will display sport mode icon (biking) or (running) or Please see the General setting to set the customer apge. or Running Mode or Walking Mode Biking Mode 16 (walking). for Timer Setting 1 For Page.10, and Press and hold right key to for 2~3 seconds, to start / stop / zero the timer. General Setting & System setting For Page.11; General Setting Press and hold right key for 2~3 seconds, enter to set backlight/log interval/ calories/customer page1/customer page2 17 Set Backlight 1 Press and hold right key for 2~3 seconds “Enter” setting; click right key 5/10/30/60 s. When you check it, the LCD will show the confirmation icon 2 Press and hold right key for 2~3 seconds “Exit” setting 18 。 or left key to choose Log interval 1. Press and hold right key for 2~3 seconds “Enter” setting; click right key Seconds/By Distances. When you check it, the LCD will show the confirmation icon 2. Press and hold right key for 2~3 seconds “Exit” setting 19 . or left key to choose By Calories 1. Press and hold right key for 2~3 seconds “Enter” setting; click right key or left key to choose Sport Mode/Weight (1) Click Sport Mode and hold right key for 2~3 seconds “Enter” setting; click right key choose Biking/Running/Walking. When you check it, the LCD will show the confirmation icon (2)Click Weight and hold right key number ; Press and hold right key hold left key 2. for 2~3 seconds “Enter” setting; Click right key to . or left key to enter 0~9 for 2~3 seconds to next step setting number. To return forward step is Press and for 2~3 seconds Press and hold right key or left key for 2~3 seconds “Exit” setting 20 Customer Page1 & Customer Page2 1. Press and hold right key to for 2~3 seconds “Enter” setting; click right key or left key to choose Current Date/Current Time/Heading/Elevation/Current Speed/Calories/Odometer/Trip Avg Speed/Trip Max Speed/Trip Time/Trip Distance 2. Press and hold right key to for 2~3 seconds “Enter” setting; To return forward step is Press and hold left key 2~3 seconds 3. Press and hold right key to for 2~3 seconds “Exit” setting 21 for For Page.12; System Setting Press and hold right key to for 2~3 seconds, enter to set Delete All log/Time zone/ Unit/Odometer/Language 22 Delete All Log 1. Press and hold right key to for 2~3 seconds “Enter” setting; 2. Press and hold right key to for 2~3 seconds “Exit” setting click right key or left key to choose NO/YES or Time Zone 1. Press and hold right key to for 2~3 seconds “Enter” setting; click right key UCT+13~UCT+0~UCT+12. When you check it, the LCD will show the confirmation icon 2. Press and hold right key to for 2~3 seconds “Exit” setting 23 or left key to choose Unit 1. Press and hold right key to for 2~3 seconds “Enter” setting; click right key or left key to choose unit m/km/kg or yd/mi/lb. When you check it, the LCD will show the confirmation icon 2. Press and hold right key to for 2~3 seconds “Exit” setting Odometer 1. Press and hold right key to for 2~3 seconds “Enter” setting; click right key 24 or left key to choose Clear Odometer(NO/YES)/Set Odometer(enter number) (1) Click Clear Odometer and hold right key for 2~3 seconds “Enter” setting; click right key or left key to choose NO/YES (2)Click Set Odometer and hold right key enter 0~9 number ; Press and hold right key is Press and hold left key 2. Press and hold right key for 2~3 seconds “Enter” setting; Click right key to for 2~3 seconds “Exit” setting to for 2~3 seconds to next step setting number. To return forward step for 2~3 seconds or left key or 25 Language 1. Press and hold right key to for 2~3 seconds “Enter” setting; click right key or left key to choose unit m/km/kg or yd/mi/lb. When you check it, the LCD will show the confirmation icon 2. Press and hold right key to for 2~3 seconds “Exit” setting Reset Default 1. Press and hold right key to for 2~3 seconds “Enter” setting; 2. Press and hold right key to for 2~3 seconds “Exit” setting or Note reboot the Sport-Guide Mate, turn off the power and turn on again. 26 lick right key or left key to choose NO/YES Power Saving Features Smart Backlighting Clicking either the right key or the left key will turn on a bright backlight for 5/10/30/60 seconds. Afterwards, the backlight will be turned off automatically. The backlight can setting by user. Battery Warnibg If the following guidelines are not followed, the internal rechargeable battery may be damaged and may present risk of leak, fire, chemical burn, or injury. • Do not operate the device outside temperature range of -4°F ~ 140°F (-20°C ~ 60°C) for discharging, and 32°F ~ 113°F (0°C ~ 45°C) for charging. • Do not store the device outside temperature range of -4°F ~ 113°F (-20°C ~ 45°C) for an extended period of time. 27 Charging Requirements Use only the following power sources to charge the device: • Standard desk-top or laptop computer USB port • Car USB charger adapter: Input 12V, output 5.0V • Wall USB charger adapter: Input 110/220V, output 5.0V FAQ Q1: Why can’t my Sport-Guide Mate get a position fix? A1: Make sure the Sport-Guide Mate is operated outdoors with the LCD display facing upward and there is a good sky view with less obstruction. Q2: Why does the time to determine my location vary? A2: In an open sky environment, it will be very fast to get a position fix if the Sport-Guide Mate has recently been used (within 2 hours); 28 otherwise it will take about 30 to 40 seconds. Under tree foliage or beside tall buildings where satellite signal is attenuated, it may take up to several minutes before the location can be determined. Q3: Why can’t my Sport-Guide Mate accurately point to the north in the compass mode? A3: Make sure the Sport-Guide Mate has been calibrated and there is no large metal object in the vicinity. The digital compass inside a Sport-Guide Mate includes a magnetic sensor, whose accuracy will be affected by nearby metallic objects. Q4: Why doesn’t the direction arrow of my Sport-Guide Mate work properly when used inside a slow moving car? A4: At speed below 10km/hr, the Sport-Guide Mate uses the internal digital compass to calculate direction to the return point; if you are inside a car, the metallic structure of the car will affect the accuracy of the digital compass so the direction may be wrong. When the speed is over 10km/hr, the Sport-Guide Mate will automatically switch to GPS to calculate direction; as long as you hold the Sport-Guide Mate in normal forward direction, the direction triangle will correctly point to the return point. Q5: What do those arcs of the satellite icon represent? A5: The arcs of the satellite icon indicate the quality of position fix. More arcs mean more satellite signals and better position accuracy. In a weak signal environment, you can try to wait a while longer to see if more arcs will show up before marking the location so the accuracy of the marking can be increased Q6: Will my Sport-Guide Mate remember the stored locations after powering off? A6: You can turn off your Sport-Guide Mate to save power and all the settings will be saved. Next time when it’s turned on, you will be in the last operating mode with all marked locations restored. The memory won’t be lost even if the battery is fully drained. 29 Concerning of Poor GPS Signal It is possible unable to receive GPS signal or signal low in these places: Inside the tunnel, GPS signal is blocked. is low or disturbed. Covers above, GPS signal are blocked. Inside buildings, GPS signal is blocked. Beside some buildings, GPS signal Inside forests, or too many covers, GPS signal is low or disturbed. If you use the USB GPS Receiver inside the car, some anti-sunlight windscreen film will make the GPS signal degraded or signal blank. GPS satellite is owned by America military; sometimes they will tune-down the accuracy by some reason. In such cases, the GPS position may not fixed exactly. 30 Used equipment must be disposed of in compliance with current environmental protection regulations. You should return it to your reseller or dispose of it in an approved recycling centre. DECLARATION: We hereby declare that this product complies with essential requirements and other related requirements, of the 1999/5/EC R&TTE directive and particularly with article 3 sections 1a, 1b and 3. 31