1
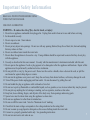
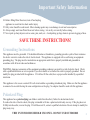
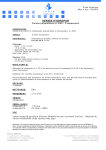
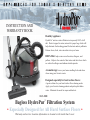
INSTRUCTION AND
WARRANTY BOOK
Healthy Appliance:
HydroPur™ unit uses water filtration to trap nearly 100% of all
dirt. Dust is trapped in water, instead of a paper bag, which will
help eliminate the breeding ground for bacteria and air pollutants.
Returns clean, fresh, water-rinsed air into your home.
HEPA filter helps remove most bacteria, allergens, and
pollens. Helps in the control of dust mites and their feces which
are related to allergies and asthma-related episodes.
Aromatherapy leaves your home smelling fresh and clean
when using your favorite scents.
Designed especially for hard surface floors:
A great solution for your hard surface floor cleaning needs.
Apply your favorite cleaning product and pick up dirt-laden
water. Eliminate the need for mops and buckets.
AVC-2001
Bagless HydroPur Filtration System
™
• Especially Designed for All Hard Surface Floors •
Warranty and service location information is located on the inside back cover.
Congratulations
Welcome to the growing number of families using Clean Air Technology for their vacuum filtration
method. We believe our innovative series of appliances for today's healthy home will provide truly
clean air, a fresh ambiance and improved comfort. Your new appliance is designed to enhance your
well-being with a Healthier Home Environment.
Table of Contents
Important Safety Information . . . . . . . . . . . . . . . . . . . . . . . . . . . . . . . . . . . . . . . . . . . . .1-2
Features and Benefits . . . . . . . . . . . . . . . . . . . . . . . . . . . . . . . . . . . . . . . . . . . . . . . . . . .3-4
Parts Identification . . . . . . . . . . . . . . . . . . . . . . . . . . . . . . . . . . . . . . . . . . . . . . . . . . . . . .5-6
Assembly and Operating Instructions . . . . . . . . . . . . . . . . . . . . . . . . . . . . . . . . . . . . . . .7-8
User Maintenance . . . . . . . . . . . . . . . . . . . . . . . . . . . . . . . . . . . . . . . . . . . . . . . . . . . . . . . .9
Troubleshooting . . . . . . . . . . . . . . . . . . . . . . . . . . . . . . . . . . . . . . . . . . . . . . . . . . . . . . . .10
Warranty Information . . . . . . . . . . . . . . . . . . . . . . . . . . . . . . . . . . . . . . . . . . . . . . . . . . . .12
Important Safety Information
READ ALL INSTRUCTIONS BEFORE USING
YOUR VACUUM CLEANER.
USE ONLY AS DIRECTED.
WARNING - To reduce the risk of fire, electric shock, or injury:
1. Do not leave appliance unattended when plugged in. Unplug from outlet when not in use and before servicing.
2. For household use only.
3. Do not expose to rain. Store indoors.
4. Do not use outdoors.
5. Do not put any object into openings. Do not use with any opening blocked; keep free of dust, lint, hair and anything
that may reduce air flow.
6. Do not use without water inside the water tank.
7. Do not allow the appliance to be used as a toy. Young children should be supervised to ensure that they do not play
with the appliance.
8. Use only as described in this users manual. Use only with the manufacturer’s attachments included with this unit.
9. Do not operate the appliance if cord or plug appears to be damaged or after the appliance malfunctions. Repair of this
appliance must be performed by authorized service technician.
10. Do not pull, lift or carry by the power cord. Do not use the cord as a handle, close a door on the cord, or pull the
cord around or against sharp edges or corners.
11. Do not run the appliance over power cord. Keep the cord away from heated surfaces, as this may damage the cord.
12. Turn off the power before unplugging unit from outlet. Do not disconnect by pulling the cord.
13. Do not handle the plug or appliance with wet hands or bare feet.
14. Do not use to pick up flammable or combustible liquids, such as gasoline, or use in areas where they may be present.
15. Do not pick up anything that is burning or smoking, such as cigarettes, matches or hot ashes.
16. Keep hair, loose clothing, fingers, and all parts of the body away from openings and moving parts.
17. Special care must be taken when using the appliance to clean stairs.
18. Do not use appliance for other than its intended use.
19. Do not overfill the water tank. Note the ‘Maximum Level’ marking.
20. Check that the main voltage corresponds to the voltage indicated on the rating label.
21. Do not vacuum up soapy liquid or detergents as this causes frothing inside the water tank.
22. Connect to a properly grounded outlet only. See grounding instructions.
1
23. Do not turn unit on its side when in use.
Important Safety Information
24. Before filling Water Reservoir, turn off and unplug
appliance to avoid electric shock and/or injury.
25. Only water should be used in unit. Other cleaning agents may cause damage to unit and cause injuries.
26. Always empty and clean Water Reservoir before storing. Let air dry or towel dry before storing.
27. Never pick up sharp objects such as coins, pins, nails, etc. Avoid picking up large items to prevent clogging of hose.
SAVE THESE INSTRUCTIONS!
Grounding Instructions
This appliance must be grounded. If it should malfunction or breakdown, grounding provides a path of least resistance
for electric current to reduce the risk of electric shock. This appliance is equipped with a cord having an equipmentgrounding plug. The plug must be inserted into an appropriate outlet that is properly installed and grounded in
accordance with all local codes and ordinances.
WARNING- Improper connection of the equipment-grounding conductor can result in a risk of electric shock. Check
with a qualified electrician or service person if you are in doubt as to whether the outlet is properly grounded. Do not
modify the plug provided with the appliance. If it will not fit the outlet, have a proper outlet installed by a qualified
electrician.
This appliance is for use on a normal 120-volt circuit and has a grounding attachment plug. Make sure that the appliance
is connected to an outlet having the same configuration as the plug. No adapter should be used with this appliance.
Polarized Plug
This appliance has a polarized plug (one blade is wider than the other); follow the instructions below:
To reduce the risk of electric shock, this plug is intended to fit into a polarized outlet only one way. If the plug does not
fit fully into the outlet, reverse the plug. If it still does not fit, contact a qualified electrician. Do not attempt to modify the
plug in any way.
THIS UNIT FOR HOUSEHOLD USE ONLY. DO NOT USE OUTDOORS
2
Features and Benefits
Floor Attachment
This unit is the ideal tool for hard surface floor areas as well as throw rugs. Used at the
end of the telescoping wand, it allows you to clean large areas as well as conveniently
reach under beds, furniture and hard-to-reach areas. Numerous adjustments to switch
between surfaces such as throw rugs and hardwood floors.
Power Brush
Efficiently deep clean carpets, mattresses and furniture. The rotating brush causes a gentle
vibration to help extract deeply embedded sand and grit from beneath the surface. By
using this unit regularly on your mattress it will help reduce dust and allergen causing
materials such as dust mites and their feces contained in your mattress.
Telescoping Wand
Enjoy the convenience of the adjustable extension wand, which will allow you to adjust to
many different lengths, for convenient cleaning of hard-to-reach areas such as walls and
ceilings. Simple release button allows you to easily adjust length and lock into place for
each type of use.
3
Features and Benefits
Upholstery Tool
Enjoy this versatile tool, which incorporates a built-in brush that will agitate the surface to
help remove hair, and tough dirt stains. This tool is most frequently used attached to the end
of the flexible hose for surface cleaning of upholstered furniture. Used on the end of the
telescoping wand it is ideal for cleaning draperies.
Crevice Tool with Detachable Brush
Ideally used for those hard-to-reach areas, the crevice tool will make your cleaning job easier.
Attached to the end of the flexible hose or the telescoping wand, this tool with the crevice
brush in place is used for cleaning radiators, registers and window and door tracks. Remove
the brush and use it to clean the crevices in upholstered furniture. The crevice tool is also
ideal for cleaning the difficult areas in your vehicle.
Universal Squeegee
A great partner when washing windows and cleaning spills on hard surface floors. The
universal squeegee allows you to pick up and retain water and spilled materials in the
reservoir, eliminating the need for mops and buckets.
Multi-Purpose Sprayer
This multi-purpose sprayer can be used for applying clean water to spills before removing
them. This will help to dilute sticky spills and make them easier to remove. Used with
caution you can mist your household plants with clean clear water.
4
Know Your HydroPur™ and It’s Parts
1
2
3
7
4
14
5
8
9
10
6
11
12
13
1. Cradle car locking handle
2. ON/OFF button
3. Suction power control
4. Intake outlet
5. Cord holder
6. Cradle car
7. Motor unit
8. Exhaust outlet
9. Cord
10. Tank handle
11. Removable water tank
12. Removable suction tube
13. Foam filter with safety float
14. HEPA filter
5
Know Your HydroPur™ and It’s Parts
15
19
17
16
20
21
18
23
24
15. Flexible hose
16. Inlet nozzle with accessory
holder
17. Inlet nozzle with suction
release valve
18. Telescoping wand
19. Crevice tool with
detachable brush
20. Upholstery tool
21. Floor attachment
22. Multi-purpose sprayer
23. Power brush
24. Universal squeegee
25. Blower adapter
25
22
6
Assembly and Operating Instructions
Easy To Assemble
Note: When assembling and preparing unit for use, make sure that the
appliance is NOT plugged into the wall outlet.
STEPS:
• Completely lower cradle car locking handle that locks in the motor unit. (fig. 1)
• Remove the motor unit by pulling upward on the motor handle. (fig. 2)
• Remove the water tank by lifting upward on its handle. (fig. 3)
• Fill the water tank with tap water until the water level is between the MIN> and MAX> marking printed on the tank.
Note: To use the vacuum for wet or dry vacuuming, a minimum of 1.8 liters of water should be poured into tank; do not
exceed the maximum level of 3.3 liters marked on the tank.
• The suction tube can be removed making it easier to fill the tank. (fig. 4) Be sure it is replaced before locking the motor unit in place.
• Replace the tank on the cradle car, position the motor unit in place and raise the handle that locks the motor unit in place until you
hear it click.
• To ready the vacuum for use, insert the inlet nozzle at the end of the flexible hose into the intake outlet and turn clockwise until it
snaps into place. (fig. 5) To remove hose, turn it counter clockwise and pull outward.
• Place telescoping wand at end of hose with suction release valve and push it fully into place.
• Finally, attach the desired accessory to be used in cleaning to the end of telescoping wand.
Operating Procedure:
STEPS:
• Plug appliance into electrical wall socket.
• Press the ON/OFF button to switch the unit on.
• Slide the variable speed control to the desired suction power.
• To adjust the amount of suction needed for each cleaning accessory, simply slide the suction release valve to the open or
closed position or anywhere in between. (fig. 6)
• Adjust the telescoping wand to desired length by pushing in on the locking button, pulling outward to lengthen or pushing
inward to shorten. When you hear it lock into place it is ready to use.
Multi-Purpose Sprayer:
STEPS:
• Remove plastic shield and HEPA filter from exhaust (fig. 7A) and replace with blower adapter. (fig. 7B)
• Remove hose from intake outlet. (fig. 5 )
• Insert the inlet nozzle at the end of the flexible hose into the adapter by pushing in and turning clockwise until it locks into place.
• Fill sprayer jar with water and connect to the other end of hose.
7
Assembly and Operating Instructions
Fig. 6
Fig. 1
Fig. 3
Fig. 7A
Fig. 2
Fig. 4
Fig. 5
Fig. 7B
8
User Maintenance Instructions
To replace HEPA filter:
STEP:
To replace the HEPA filter simply remove the grill by pressing the lever and pull out
on the plastic cover. Then grasp the HEPA filter and remove by pulling on the
tab at top. The HEPA filter must be replaced if dirty in order to maintain
maximum cleaning efficiency. Replace with new filter and reposition the
grill by pressing it lightly into place. The filter can be purchased at the
authorized service center listed on warranty page on back cover. (fig. 8)
To clean water tank
Caution: Always disconnect the cord from the electrical wall outlet before
performing any cleaning or maintenance operations.
Fig. 8
After the appliance has been used, take out the rubber plug first, then pour away the
dirty water and clean the water tank by rinsing. If you used the machine to clean
liquid waste other than water, there will be some liquid residue left in the flexible
hose and extension wands. To clean inside the hose and wands, empty the water tank
completely and then vacuum up about 1 litre of clean water. Repeat as necessary
until completely clean. It is recommended to rinse water tank once a month with
white vinegar.
After emptying and rinsing the water tank, remove the foam filter, wash it under
running water and let dry completely before re-positioning (the filter must be kept
dry to prolong its life). Periodically check that the float is free to move. (fig. 9)
Fig. 9
Aromatherapy
Add water-based essence to sponge filter to leave your house smelling
wonderfully fresh.
9
Troubleshooting
Problems
The unit will not start.
Unit turns on, but has
little or no suction.
Water leakage is noticed.
Possible Cause
Solution
The unit is not plugged in
Plug into electrical outlet
Household circuit breaker/
ground default has tripped
Reset the circuit breaker - If you
need assistance, contact a
qualified electrician
The hose, wand or one of
the accessories being used is
clogged
Carefully inspect each item and
remove blockage
The variable suction control
is set to low
Check suction control and set
to “High”
Suction release valve on hose
is open
Close valve completely
HEPA filter is clogged and
not allowing the air to flow
freely
Replace old filter with new one
The float could be blocked or
was not installed correctly
Release float, clean and dry
foam filter
10
Warranty Information
Limited Warranty
Aroma Housewares Company warrants this product free from defects in material
and workmanship for 90 days from provable date of purchase in continental United
States.
Within this warranty period, Aroma Housewares Company will repair or replace, at
its option, defective parts at no charge, provided the product is returned, freight
prepaid with proof of purchase and U.S. $8.00 for shipping and handling charges
payable to Aroma Housewares Company. Before returning an item, please call the
toll free number below for return authorization number. Allow 2-4 weeks for return
shipping.
This warranty does not cover improper installation, misuse, abuse or neglect on the
part of the owner. Warranty is also invalid in any case that the product is taken apart
or serviced by an unauthorized service station.
This warranty gives you specific legal rights and which may vary from state to state
and does not cover areas outside the United States.
AROMA HOUSEWARES COMPANY
6469 Flanders Drive
San Diego, California 92121
1-800-276-6286
M-F, 8:30 AM - 5:00 PM, Pacific Time
Website: www.aromaco.com
12
CLEANER
•
FRESHER
•
H E A LT H I E R