1
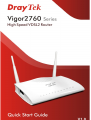
i Vigor2760 Series Quick Start Guide Vigor2760 Series Quick Start Guide ii Vigor2760 Series High Speed VDSL2 Router Quick Start Guide Guide Version: 1.0 For updates and support, visit www.draytek.co.uk May 2014 / Firmware V3.7.5.1 Note: Product specification is subject to continuous evolution which may not always be reflected in current documentation. For the formal specification of your product, please refer only to the web site at www.draytek.co.uk iii Vigor2760 Series Quick Start Guide Copyright Information Copyright Declarations Copyright© 2014 All rights reserved. This publication contains information that is protected by copyright. No part may be reproduced, transmitted, transcribed, stored in a retrieval system, or translated into any language without written permission from the copyright holders. Trademarks The following trademarks are used in this document: Microsoft & Windows are a registered trademarks of Microsoft Corp. Apple, iOS and Mac OS are registered trademarks of Apple Inc. Other products may be trademarks of their respective manufacturers. Safety Instructions, Warranty & Updates Safety Instructions Warranty Read the installation guide thoroughly before you set up the router. The router is a complicated electronic unit that may be repaired only be authorized personnel. Do not try to open or repair the router yourself. Do not place the router in a damp or humid place, e.g. a bathroom. Do not stack the router or obstruct its ventilation.. The router should be used within a temperature range of +5 to +40C and not exposed to heat sources or direct sunlight. Do not run any LAN cables outdoors or to external buildings. Keep the packaging out of reach of children. When you want to dispose of the router, please follow local regulations on conservation of the environment. We warrant to the original end user (purchaser) that the router will be free from any defects in workmanship or materials for a period of two (2) years from the date of purchase from the dealer. Please keep your purchase receipt safely as proof of purchase. During the warranty period, and upon proof of purchase, should the product have indications of failure due to faulty workmanship and/or materials, we will, at our discretion, repair or replace the defective products or components, without charge for either parts or labour, to whatever extent we deem necessary to re-store the product to proper operating condition. Any replacement will consist of a new or re-manufactured functionally equivalent product of equal value, and will be offered solely at our discretion. This warranty will not apply if the product is modified, misused, tampered with, damaged by an act of God, or subjected to abnormal/unapproved working conditions. The warranty does not cover the bundled or licensed software of other vendors. Defects which do not significantly affect the usability of the product will not be covered by the warranty. We reserve the right to revise the manual and online documentation and to make changes from time to time in the contents hereof without obligation to notify any person of such revision or changes. Warranty service is ‘RTB’ (return to base), not advance replacement or on-site and in all cases provided through the distribution chain through which the product was supplied and only to the intended locale. You can subscribe to VigorCare within 30 days of purchase – see www.draytek.co.uk/vigorcare Join the UK mailing list Users in the UK & Ireland can sign up to our mailing list which goes out 4-6 times per year with products news, updates, hints & tips and offers. For details, please visit www.draytek.co.uk/mailing-list Firmware & Tools Updates Due to the continuous evolution of DrayTek technology and emerging risks, router firmware updates may be issued. Please consult the DrayTek web site for more information on newest firmware, tools and documents. www.draytekco.uk (For users and products in the UK/Ireland) i Vigor2760 Series Quick Start Guide European Community Declarations Manufacturer: Address: Product: DrayTek Corp. No. 26, Fu Shing Road, HuKou, HsinChu Industrial Park, Hsin-Chu, Taiwan 303 Vigor2760 Series Router DrayTek Corp. declares that Vigor2760 Series complies with R&TTE Directive 1999/5/EEC, the requirements of Electro-Magnetic Compatibility (EMC) Directive 2004/108/EC, EN55022/Class B and EN55024/Class B and Low Voltage (LVD) Directive 2006/95/EC complying with EN60950-1. This product is designed for POTS, xDSL and 2.4GHz WLAN network for UK/Ireland. Please refer to the web site (www.draytek.co.uk) for latest specification and compatibility for your product. Regulatory Information Federal Communication Commission Interference Statement This equipment has been tested and found to comply with the limits for a Class B digital device, pursuant to Part 15 of the FCC Rules. These limits are designed to provide reasonable protection against harmful interference in a residential installation. This equipment generates, uses and can radiate radio frequency energy and, if not installed and used in accordance with the instructions, may cause harmful interference to radio communications. However, there is no guarantee that interference will not occur in a particular installation. If this equipment does cause harmful interference to radio or television reception, which can be determined by turning the equipment off and on, the user is encouraged to try to correct the interference by one of the following measures: Reorient or relocate the receiving antenna. Increase the separation between the equipment and receiver. Connect the equipment into an outlet on a different circuit to the the receiver. Consult the dealer or an experienced radio/TV technician for help. This device complies with Part 15 of the FCC Rules. Operation is subject to the following two conditions: (1) This device may not cause harmful interference, and (2) This device may accept any interference received, including interference that may cause undesired operation. RF Exposure Warning This equipment must be installed and operated in accordance with provided instructions and the antenna(s) used for this transmitter must be installed to provide a separation distance of at least 20 cm from all persons and must not be co-located or operating in conjunction with any other antenna or transmitter. End-users and installers must be provided with antenna installation instructions and transmitter operating conditions for satisfying RF exposure compliance. ` Caution Any changes or modifications not expressly approved by the grantee of this device could void the user's authority to operate the equipment including the usage on unauthorised accessories. Please visit http://www.draytek.com/user/SupportDLRTTECE.php# Vigor2760 Series Quick Start Guide ii Table of Contents 1. Introduction ........................................................................................1 1.1 Front Panel & Connectors .............................................................................. 2 1.2 Package Contents (Accessories).................................................................... 5 2. Installing Your Router ........................................................................6 2.1 Hardware Installation ...................................................................................... 6 3. Quick Setup ........................................................................................8 3.1 Accessing the Web User Interface (WUI) ....................................................... 8 3.2 Configuring WAN1 for Internet Access ........................................................... 9 3.3 Configuring WAN2 for Internet Access ......................................................... 12 3.4 Configuring WAN3 for Internet Access ......................................................... 14 4. Troubleshooting ...............................................................................15 4.1 Check the Hardware connection................................................................... 15 4.2 Check your computer’s Network Connection Settings.................................. 16 For Windows ............................................................................................ 16 For Mac OS.............................................................................................. 18 4.3 Pinging the router from your computer ......................................................... 19 For Windows ............................................................................................ 19 For Mac OS (Terminal) ............................................................................ 19 4.4 Check the ISP Settings on the router............................................................ 20 4.5 Problems with 3G/4G Network Connection .................................................. 20 Check if the router’s USB LED is on ........................................................ 20 USB LED lit but no network connection ................................................... 20 3G/4G Connection Speed........................................................................ 21 4.6 Restoring back to Factory Default Settings................................................... 21 4.7 Getting further help ....................................................................................... 23 5. Additional Feature Setup .................................................................23 6. Keep Up to Date with Our Mailing List ...........................................23 7. Firmware Updates ............................................................................23 iii Vigor2760 Series Quick Start Guide 1. Introduction The Vigor2760 series is a router/firewall supporting ADSL, VDSL or Ethernet-fed WAN technologies, ideal to allow later migration or standardization on a single model regardless of your Internet connectivity The Vigor 2760 series includes 802.11n Wireless LAN (n models) with multiple security methods to help protect your network. The Vigor 2760Vn also includes phone ports for connectivity of a phone to make use of Voice-over-IP (VoIP) services for low-cost calls over the Internet (compatible SIP/VoIP provider required). With the high throughput performance, Quality of Service assurance and web content filtering features provided by the Vigor2760 series, you can simultaneously use bandwidth-intensive applications, such as video streaming, online gaming, and Internet telephony / access. The Vigor2760 supports up to 2 outgoing (dial-out to HQ) VPN tunnels using advanced protocols such as IPSec with AES/3DES for encryption and MD5/SHA-1 for authentication allowing connectivity to your main office. In addition, the Vigor 2760 series supports two USB interfaces for connecting a shared USB printer, a USB memory device for sharing files or compatible 3G/4G cellular dongle for Internet backup. 1 Vigor2760 Series Quick Start Guide 1.1 Front Panel & Connectors LED ACT LINE Status Blinking Off Explanation The router is running normally. The router is powered off. On Off A PSTN phone call is active on a connected telephone handset. There is no active PSTN phone call. On Off Blinking The phone on this port is off-hook. The phone on this port is on-hook. A phone call is ringing. On (Green) Blinking (Green) Blinking (Orange) Off On Slow Blink Fast Blink On Blinking The wireless access point is ready. The data is transmitting via wireless connection. Blinks with one second cycle for two minutes. The WPS function is active. Wireless access is turned off. The xDSL port is connected. The router is ready to connect. The router is trying to connect to Internet or synchronize with the line. The port is connected. Data is transmitting. On A USB device is connected and active. (Vigor 2760Vn only) Phone1/Phone2 (Vigor 2760Vn only) Wireless LAN On/Off/WPS (Vigor 2760n and Vigor 2760Vn only) xDSL (Green) ~ LAN 1/2/3/4 ~ USB1/2 Vigor2760 Series Quick Start Guide 2 Interface PWR I/O Factory Reset WLAN ON/OFF/WPS (Vigor 2760n and Vigor 2760Vn only) VDSL/ADSL USB (1-2) LAN (1-4) (or WAN2) Description Connector for the power adapter. Power switch. Turns the unit on or off. Restore the default settings. Usage: Turn on the router (ACT LED is blinking). Press gently and hold for more than 5 seconds. When the ACT LED blinks rapidly, release the button and the router will restart with its factory default configuration. WLAN ON/OFF - Press button to enable/disable. WLAN WPS - Press this button for 2 seconds to allow for client devices to connect through WPS. RJ-11 connector for ADSL or VDSL line Connector for USB storage, printer or 3G/4G modem RJ-45 Gigabit Ethernet connectors for local network devices. If WAN2 (Ethernet) is enabled, LAN Port 4 becomes WAN2 (and WAN1 is disabled). 3 Vigor2760 Series Quick Start Guide Analogue Line / Phone Ports (Vigor 2760Vn only) On the Vigor 2760Vn, you can take advantage of VoIP using any provider compatible with the ‘SIP’ protocol (such as www.draytel.org). VoIP enables low cost or free calls and gives you additional call capacity (like having two extra phone lines). You can connect 2 phones to the router to make calls, each of which can work independently to make or receive calls. You can also connect the router to your analogue line so that calls can also be received from or made via your analogue line. Interface Line Phone1/Phone2 Description Connector for PSTN (analogue/POTS line) Connector for a regular analogue phone for VoIP communication. The socket is RJ-11 type; two adaptors to BT/UK type socket are included. Emergency Services: For the Vigor 2760Vn, check if your VoIP service provides emergency services access (999/112). You may need a separate analogue phone/line or mobile phone for use in emergency. In a power cut, Phone 1 will automatically connect to your analogue line, if the line is connected to your router’s Line port. Do not make test calls to the emergency service but do test a regular outgoing call using your analogue line (dial #0 to select). Vigor2760 Series Quick Start Guide 4 1.2 Package Contents (Accessories) Quick Start Guide CD (Contains manual) RJ-45 Cable (Ethernet) 2 x Antennae (n models) RJ-11 xDSL Line Cable UK Power Adapter (PSU) The Vigor 2760 router should only be used with the supplied PSU. Operation with any other PSU may cause product malfunction or damage the product and will invalidate your manufacturer’s warranty. If you lose your PSU, use a genuine replacement from your DrayTek dealer. For the Vigor 2760Vn model, you will additionally have two RJ11-BT adaptors (to plug in phones) and an RJ11-BT plug cable, for connecting to the analogue phone line for POTS (landline) voice calls. 5 Vigor2760 Series Quick Start Guide 2. Installing Your Router This section will guide you to install the router including hardware connection and configuring the router’s settings through your web browser. Firstly, be sure of what type of Internet connection you have: Connection ADSL VDSL Ethernet 3G/4G Modem Port WAN1 (RJ-11) WAN1 (RJ-11) WAN2 (RJ-45) WAN3 (USB) Description ADSL/ADSL2+ Service VDSL Service (FTTC/BT Infinity™). Some ISPs (incorrectly) call this ‘fibre broadband’ If your Internet comes in via another modem or other RJ-45 connection you can use WAN2 instead of xDSL. Using a compatible modem, you can use 3G/4G networks for backup (failover) to your primary Internet connection. Check for a list of compatible modems. Note: ‘xDSL’ means either ADSL or VDSL. Several ISPs refer to their VDSL service as ‘Fibre’ even though it’s delivered to you by copper wires to your regular phone socket. Actual Fibre To The Premises (FTTP) is relatively rare in the UK so most ISPs really mean copper/VDSL (Fibre To The street Cabinet). The Vigor2760 is not compatible with actual fibre. 2.1 Hardware Installation 1. Connect the xDSL interface to the external xDSL splitter (microfilter) with an xDSL line cable. With the Vigor2760Vn, also connect the Line interface to the phone port on the xDSL splitter. 2. Connect Port 1 of the 4-port LAN switch to your computer with the supplied RJ-45 cable. The router allows you to connect up to 4 PCs directly (or 3 if you are using WAN2). Vigor2760 Series Quick Start Guide 6 3. If required, connect the Phone ports to a regular analogue telephone (for Vn model only). Cordless DECT base stations are also compatible. 4. Connect the antennae to the router for Vigor2760 series (for n models only). Attach them firmly but do not over-tighten. 5. Connect the power cord to the power port. Plug the PSU into the mains wall outlet. 6. Turn on the router (the power switch is on the rear of the router). 7. Check the ACT and DSL, LAN LEDs to assure network connection. Wireless Connection: If you have a Vigor 2760n or Vigor 2760Vn then you can connect to it from any wireless-equipped device (PC, tablet etc.). The default SSID (network name) and encryption password is printed on the bottom of your router. 7 Vigor2760 Series Quick Start Guide 3. Quick Setup 3.1 Accessing the Web User Interface (WUI) 1. Make sure your PC connects to the router correctly. Normally, your computer will get its IP address dynamically from the router (using ‘DHCP’), otherwise you must set the PCs IP address to be in the same IP subnet as the router (e.g. 192.168.1.2). The default IP address of the Vigor 2760 router is 192.168.1.1. 2. Open a web browser on your PC and type http://192.168.1.1. 3. The following prompt will ask for the router’s username and password. The default is “admin/admin” for Username/Password. The click Login to open the web user interface (WUI). Note: The default password of ‘admin’ should be changed at your earliest opportunity (from the router’s system maintenance menu), but don’t forget what you change it to otherwise you will not be able to access the router’s configuration/WUI. Vigor2760 Series Quick Start Guide 8 The web interface that you see will vary depending on your exact model, specification and firmware version in use. The dashboard gives you a live snapshot of the current router and ports’ status. 3.2 Configuring WAN1 for Internet Access 1. Select WAN>>General Setup. The below menu will appear: 9 Vigor2760 Series Quick Start Guide 2. Click on the WAN1 link to open the following page: 3. Ensure that WAN1 interface is enabled (Enable:Yes). Set ‘Display Name’ to your ISP’s name (e.g. BT, Sky, TalkTalk etc.). For the UK, other default settings should be correct. Click OK to save/exit. 4. Open WAN>>Internet Access. Vigor2760 Series Quick Start Guide 10 5. Click the Details Page button for WAN1. Depending on your your ISP, click either the PPPoE/PPPoA, MPoA/Static or Dynamic tab: 6. The PPPoE/PPPoA tab and the default settings are appropriate for nearly all ISPs in the UK. 7. Users in Ireland may have different settings requirements. For VDSL/FTTC users may need a VLAN tag of 10 (see point 2 above) and for ADSL, use PPPoE/LLC with VPI/VCI settings of 8 and 35 (check with your ISP for the latest settings). 8. Sky Broadband is one ISP which does vary; it may use the DHCP method and require setting of the DHCP Option parameters; please refer to specific help guides if you are using Sky (or former O2/Be). 9. Enter the ISP’s name and username/password in the boxes shown at the top right of the above image. 10. Click OK to save. The router will restart to activate the settings and you should then be online to the Internet. 11 Vigor2760 Series Quick Start Guide 3.3 Configuring WAN2 for Internet Access The WAN2 port supports connections where there is Ethernet presentation from the ISP supplied modem or Internet connection instead of xDSL. WAN2 uses the physical port normally designated as LAN4. If WAN2 is used then WAN1 will be disabled and vice versa. To setup the Vigor 2760 to connect via WAN2 then please follow the steps below: 1. Open WAN >> General Setup. 2. Click the WAN2 link to open the following page: 3. Enable WAN2 (Enable:Yes), give the connection a display name (e.g. your ISP’s name) and click OK to save and exit. Vigor2760 Series Quick Start Guide 12 4. Open the menu WAN>>Internet Access. 5. Click the Details Page button for WAN2. Depending on the information supplied by your ISP, enable PPPoE, Static or Dynamic IP: 6. Fill in the information provided by your ISP. If you are using DHCP, you may not need to change any settings. For PPPoE, you will need to set your username and password. Click OK to save the settings and exit. 7. The router will restart to activate the settings and you should then be online to the Internet. 13 Vigor2760 Series Quick Start Guide 3.4 Configuring WAN3 for Internet Access WAN3 uses your USB port and supports an optional 3G/4G USB modem for backup (automatic failover) to your primary Internet connection. Check for the latest list of compatible USB modems. 1. In the router’s web interface, go to the WAN>Internet Access menu and set WAN3 to 34/4G modem, then click on the adjacent Details Page button as shown below: 2. In most cases, you only need to check the Enable button shown below and set the appropriate APN name (and press Apply) for your ISP. Some 3G/4G ISPs use a username and password (often a generic one) but others require that you leave the fields blank, or don’t care: Vigor2760 Series Quick Start Guide 14 4. Troubleshooting If you cannot access the Internet after installing and configuring the router, follow sections below to check your basic installation status stage by stage. Check the hardware status is OK. Check the network connection settings on your computer are OK. Pinging the router from your computer. Checking if the ISP settings are OK Reset back to factory default setting if necessary. If things are still not okay, it’s time to contact your dealer or DrayTek support for more advanced help and troubleshooting (see later). 4.1 Check the Hardware connection 1. If no LEDs are lit, ensure the router is connected to the power supply and turned on. Check that ACT LED blinks once per second. 2. If you are using ADSL/VDSL then check the xDSL LED on the front panel. It should be lit steadily. If it is flashing quickly, the router is still attempting synchonisation. If it is blinking slowly, it has not detected any xDSL line. Ensure that the RJ11 cable is connected to the DSL port and to the xDSL line (splitter/microfilter) correctly. Ensure that WAN1 is enabled (see earlier setup sections). 3. For initial configuration, we recommend using a wired (Ethernet/RJ-45) connection. The corresponding LAN port LED (1-4) should be lit. 4. For wireless connections, the default SSID (network name) and WPA2 encryption key is printed on the bottom of the router. 5. If you can access the router web interface’s ‘Dashboard’ it gives you a realtime indication of the router status and WAN status. 15 Vigor2760 Series Quick Start Guide 4.2 Check your computer’s Network Connection Settings Your computer may have the wrong network connection settings. For Windows The examples shown are based on Windows 7. For examples on other operating systems, please refer to support notes on our web site. 1. Go to Control Panel and then double-click on Network and Sharing Center. 2. Click on Local Area Connection and then select Properties (varies according to O/S): Vigor2760 Series Quick Start Guide 16 3. Select Internet Protocol (TCP/IP) and then click Properties. 4. Ensure that Obtain an IP address automatically and Obtain DNS server address automatically are selected. 17 Vigor2760 Series Quick Start Guide For Mac OS 1. Double click on the current used Mac OS on the desktop. 2. Open the Application folder and get into Network. 3. On the Network screen, select Using DHCP from the drop down list of Configure IPv4. Vigor2760 Series Quick Start Guide 18 4.3 Pinging the router from your computer The default gateway IP address of the router is 192.168.1.1. You can use “ping” to check if your PC can reach the router. Your PC should receive a ping reply from the router at 192.168.1.1. For Windows 1. For Windows 2000/XP/Vista/7/8, open the Command Prompt window (Press the Windows Key+R simultaneously) and type cmd (and press Enter). Press Enter. The ‘DOS’ command prompt window appears: 2. Type ping 192.168.1.1 and press Enter. If the link is OK, you’ll get a reply like “Reply from 192.168.1.1:bytes=32 time<1ms TTL=255”.. 3. If the reply line does not appear, please check the IP address setting of your computer. For Mac OS (Terminal) 1. Double click on the current used Mac OS on the desktop. 2. Open the Application folder and get into Utilities. 3. Double click Terminal. The Terminal window will appear. 4. Type ping 192.168.1.1 and press [Enter]. If the link is OK you will get a reply like “64 bytes from 192.168.1.1: icmp_seq=0 ttl=255 time=30 ms”. 19 Vigor2760 Series Quick Start Guide 4.4 Check the ISP Settings on the router Open WAN>>Internet and check that the ISP settings are set correctly. 4.5 Problems with 3G/4G Network Connection Check if the router’s USB LED is on You have to wait at least 15 seconds after inserting the 3G/4G USB modem into your Vigor 2760. Synchronization and connection to the network can take up to 1 minute. The router’s USB LED will light to indicate that the USB Modem is active. If the USB LED is not lit, remove and re-insert the modem. If it still fails, restart the Vigor 2760 (turn off then on again). USB LED lit but no network connection Check the PIN Code of SIM card is disabled or not. Please use the modem’s PC utility to disable PIN code. Ensure that you have used the correct APN name for your 3G/4G ISP. Check with the web site or support department that your modem type is supported. Vigor2760 Series Quick Start Guide 20 3G/4G Connection Speed Connect your 3G/4G USB Modem to a PC directly to test or compare the connection speed. In addition, please refer to the manual of 3G USB Modem for LED Status to check that it’s using the right connection mode (e.g. HSDPA mode and not a slower mode). Try different positions for the modem for best signal reception (you can use a USB extension lead, max 2M). Some 3G/4G USB modems may draw a lot of current so a powered USB hub may be necessary. 4.6 Restoring back to Factory Default Settings Sometimes, an incorrect configuration necessitates returning to the default settings (as it was when it came from the factory). Warning: After resetting to factory default settings, you will lose all existing router settings. Ensure beforehand that you have recorded all necessary settings to allow reconfiguration. Factory Reset from the Web Interface You can reset the router to factory default via the Web interface. Open System Maintenance>> Reboot System. The following screen will appear. Choose Using factory default configuration and click OK. The router will reboot and then be at default factory settings. 21 Vigor2760 Series Quick Start Guide Factory Reset Using the Hardware Reset Button Whilst the router is running (ACT LED blinking), press the Factory Reset button and hold it for more than 5 seconds. When you see the ACT LED blinking rapidly, release the button. Then, the router will restart with the default configuration. After restoring the factory default settings, you can re-configure the settings for the router again from scratch. After a factory reset, the router’s default IP address is 192.168.1.1 again and the admin username/password returns to admin/admin. Vigor2760 Series Quick Start Guide 22 4.7 Getting further help If the router still does not appear to be operating correctly or you cannot get online to the Internet, please visit our web sites for further troubleshooting advice or to contact our support technicians. Users in the UK/Ireland using qualifying products should visit http://www.draytek.co.uk/support for options including email support, telephone support, knowledgebase and UK user support forums. If you are outside of the UK/Ireland, please contact your own supplier, [email protected] or visit www.draytek.com/support For warranty service, in the first instance, please contact the appropriate support service as above. You should keep your proof of purchase safely in case warranty service is required. 5. Additional Feature Setup This is a quick setup guide to get you online with your new router. Your Vigor 2760 series router is capable of very much more and has a plethora of other features. These are covered in the main user manual (available on the CD or the web site) and also the online knowledgebase. 6. Keep Up to Date with Our Mailing List Now that your have your DrayTek product, you should keep up to date with product updates (firmware) and other product news, advice or offers for users. Users in the UK/Ireland can subscribe to our mailing list. For details please see www.draytek.co.uk/mailing-list. In other countries, please contact your local distributor/supplier for local options. 7. Firmware Updates Firmware updates for your product ensure that you have the latest set of features, security updates and improvements for your product. Users in the UK/Ireland can download these from www.draytek.co.uk/support Please note that if your Vigor 2760 product has firmware version 1.x.x or earlier then it can only update to later 1.x.x firmware. If your Vigor 2760 has firmware version 3.7.5 or later (‘Delight/DrayOS’ hardware) then you can upgrade to any compatible later firmware. You cannot use Delight/DrayOS firmware on original (classic) Vigor 2760 hardware or vice-versa. This quick setup guide applies only to DrayOS/Delight hardware/firmware. 23 Vigor2760 Series Quick Start Guide