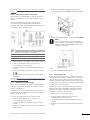
1
INDOOR CLIMATE
UPONOR CONTROL SYSTEM
WIRED
Installation and Operation Manual
01 | 2011
Contents
1
Copyright and Disclaimer ............................
4
5.2.2
2
Preface...........................................................
5
5.2.3
Connecting thermostat to controller ................
19
2.1
Safety instructions ...........................................
5
5.2.4
Connecting an optional external sensor ...........
19
2.2
Disposal ...........................................................
5
5.3
Installing Uponor Thermostat T-34 ..................
19
3
Description ....................................................
6
5.3.1
Opening the thermostats .................................
19
Mounting the thermostats ...............................
18
3.1
System overview ..............................................
6
5.3.2
Mounting the thermostats ...............................
19
3.2
Example of a system ........................................
6
5.3.3
Connecting thermostat to controller ................
19
3.3
Uponor Control System Wired components .....
7
5.4
3.3.1
Controllers .......................................................
7
Installing Uponor Thermostats T-35, T-33, and
T-37 .................................................................
20
3.3.2
Thermostats.....................................................
8
5.4.1
Opening the thermostats .................................
20
Mounting thermostats onto a wall ...................
20
3.3.3
Timer ...............................................................
8
5.4.2
3.3.4
Uponor Actuators ............................................
9
5.4.3
Connecting thermostats to controller...............
20
3.4
Function ..........................................................
9
5.4.4
Connecting optional floor sensor .....................
21
3.4.1
Comfort and economy modes ..........................
9
6
Installing Uponor Timer I-36 for C-35 .......
22
6.1
Opening Uponor Timer I-36 .............................
22
4
Installing the Uponor Control System
Wired ..............................................................
10
6.2
Mounting Uponor Timer I-36 ...........................
22
4.1
Preparing the installation.................................
10
6.3
Connecting Timer I-36 to controller .................
22
4.2
Installing Uponor Controller C-33 and Uponor
Controller C-35 ................................................
6.4
Connecting an optional dry contact .................
22
10
7
Finishing installation....................................
23
4.3
Connecting components to controller..............
10
8
Operating Uponor Control System Wired ..
24
4.3.1
General directions for connecting devices to the
controller .........................................................
10
8.1
Principle of operation.......................................
24
4.3.2
Auto linking .....................................................
11
4.3.3
Connecting thermostats and actuators to
Uponor Controller C-33 ...................................
12
Connecting thermostats and actuators to
Uponor Controller C-35 ...................................
12
4.3.5
Connecting a timer ..........................................
12
4.3.6
Connecting a heating–cooling switch ..............
13
4.3.7
Connecting a circulation pump ........................
4.3.8
Connecting a boiler..........................................
4.3.4
8.2
Normal operation without optional timer .........
24
8.3
Operation with optional timer ..........................
24
8.4
Setting analog thermostats ..............................
24
8.4.1
Changing the room temperature setpoint ........
24
8.4.2
Setting minimum and maximum temperature
limits ................................................................
24
9
Operating digital thermostats.....................
26
13
9.1
Screen layout ...................................................
26
13
9.2
Operating buttons............................................
27
Power-up .........................................................
27
4.4
Connection examples.......................................
14
9.3
4.4.1
Uponor Controller C-33 ...................................
14
9.4
Run mode ........................................................
27
4.4.2
Uponor Controller C-35 with three thermostats
and without timer ............................................
9.5
Parameter and mode settings menu.................
28
14
4.4.3
4.4.4
4.4.5
Uponor Controller C-35 with four thermostats
and without timer ............................................
15
Uponor Controller C-35 with four thermostats
and timer .........................................................
15
9.6
CLK – Clock settings (T-38 only) .....................
28
9.7
PRG – Programming (T-38 only)......................
28
9.8
HOL – Holiday mode (T-38 only).....................
29
9.9
MOD – Regulation choices...............................
29
9.10
BAL – Balancing mode .....................................
30
ECO – Economy mode (T-36 only)...................
30
T°C – Comfort and economy mode
temperatures (T-38 only) .................................
30
Uponor Controller C-35 with four thermostats,
timer and heating–cooling switch ....................
15
9.11
4.5
Connecting the controller to AC power............
17
9.12
5
Installing thermostats .................................
18
5.1
Selecting locations for thermostats..................
18
5.2
Installing Uponor Thermostats T-36 and T-38.
18
5.2.1
Opening the thermostats .................................
18
2
9.13
CAL – Calibration .............................................
30
9.14
OFF – Standby mode .......................................
30
9.15
Lock mode .......................................................
31
UPONOR CONTROL SYSTEM WIRED - INSTALLATION AND OPERATION MANUAL
9.16
Menu trees.......................................................
32
9.16.1
Uponor Thermostat T-36 .................................
32
9.16.2
Uponor Thermostat T-38 .................................
32
10
Operating Uponor Timer I-36......................
33
10.1
Screen layout ...................................................
33
10.2
Operating buttons............................................
34
10.3
Power-up .........................................................
34
10.4
Run mode ........................................................
34
10.5
Parameter and mode settings menu.................
34
10.6
CLK – Clock settings ........................................
34
10.7
PRG – Programming.........................................
35
10.8
HOL – Holiday mode........................................
36
10.9
OFF – Standby mode .......................................
36
10.10
Lock mode .......................................................
36
10.11
Menu tree ........................................................
37
11
Maintenance ..................................................
38
11.1
Manual preventive maintenance ......................
38
11.2
Automatic preventive maintenance ..................
38
11.3
Corrective maintenance....................................
38
11.3.1
Fallback mode ..................................................
38
11.3.2
Resetting the controller ...................................
38
11.4
Troubleshooting...............................................
38
12
Technical data ...............................................
41
UPONOR CONTROL SYSTEM WIRED - INSTALLATION AND OPERATION MANUAL
3
1
Copyright and Disclaimer
Uponor has prepared this Uponor Control System Installation and
Operation Manual and all the content included solely for
information purposes. The contents of the Manual (including
graphics, logos, icons, text, and images) are copyrighted and
protected by worldwide copyright laws and treaty provisions. You
agree to comply with all copyright laws worldwide in your use of
the Manual. Modification or use of any of the contents of the
Manual for any other purpose is a violation of Uponor's
copyright, trademark and other proprietary rights.
the Manual, even if Uponor has been advised of the
possibility of such damages.
This disclaimer and any provisions in the Manual do not
limit any statutory rights of consumers.
The presumption for the Manual is that the safety measures have
been fully complied with and, further, that the Uponor Control
System, including any components that are part of such system,
covered by the Manual:
•
is selected, planned and installed and put into operation by a
licensed and competent planner and installer in compliance
with current (at the time of installation) installation
instructions provided by Uponor as well as in compliance with
all applicable building and plumbing codes and other
requirements and guidelines;
•
has not been (temporarily or continuously) exposed to
temperatures, pressure and/or voltages that exceed the
limits printed on the products or stated in any instructions
supplied by Uponor;
•
remain in its originally installed location and is not repaired,
replaced or interfered with, without prior written consent of
Uponor;
•
is connected to potable water supplies or compatible
plumbing, heating and/or cooling products approved or
specified by Uponor;
•
is not connected to or used with non-Uponor products, parts
or components except for those approved or specified by
Uponor; and
•
does not show evidence of tampering, mishandling,
insufficient maintenance, improper storage, neglect or
accidental damage before installation and being put into
operation.
While Uponor has made efforts to ensure that the Manual is
accurate, Uponor does not guarantee or warrant the accuracy of
the information contained herein. Uponor reserves the right to
modify the specifications and features described herein, or
discontinue manufacture of the Uponor Control System
described at any time without prior notice or obligation. The
Manual is provided “as is” without warranties of any kind, either
expressed or implied. The information should be independently
verified before using it in any manner.
To the fullest extent permissible, Uponor disclaims all
warranties, expressed or implied, including, but not
limited to, the implied warranties of merchantability,
fitness for particular purpose and noninfringement.
This disclaimer applies to, but is not limited to, the accuracy,
reliability or correctness of the Manual.
Under no circumstances shall Uponor be liable for any
indirect, special, incidental or consequential damages or
loss that result from the use of or the inability to use the
materials or information in the Manual, or any claim
attributable to errors, omission or other inaccuracies in
4
UPONOR CONTROL SYSTEM WIRED - INSTALLATION AND OPERATION MANUAL
2
Preface
The Uponor Control System Wired installation manual describes
how to install and operate the components of the system.
Example applications and possible configurations of the system
are also included.
2.1
Safety instructions
Warnings used in this manual
The following symbols are used in the manual to indicate special
precautions when installing and operating any Uponor
equipment:
WARNING!
Risk of injury. Ignoring warnings can cause injury or
damage components.
CAUTION
Ignoring cautions can cause malfunctions.
Safety measures
Conform to the following measures when installing and operating
any Uponor equipment:
•
Read and follow the instructions in the installation and
operation manual.
•
Installation must be performed by a competent person in
accordance with local regulations.
•
It is prohibited to make changes or modifications not
specified in this manual.
•
All power supply must be switched off before starting any
wiring work.
•
•
Do not use water to clean Uponor components.
•
We cannot accept any responsibility for damage or
breakdown that can result from ignoring these instructions!
Do not expose the Uponor components to flammable
vapours or gases.
Power
WARNING!
The Uponor system uses 50 Hz, 230 V AC power. In
case of emergency, immediately disconnect the power.
Technical constraints
CAUTION
To avoid interference, keep installation/data cables
away from power cables of more than 50 V.
2.2
Disposal
The Uponor Control System consists of various recyclable
components. Uponor would be grateful if the components
(batteries, plastics, and electric or electronic parts) are sorted and
disposed of at a suitable recycling centre.
UPONOR CONTROL SYSTEM WIRED - INSTALLATION AND OPERATION MANUAL
5
3
Description
Uponor Control System Wired is a management system for
underfloor heating and cooling installations. Comfort, userfriendliness and temperature control for each individual room of
a home can be combined through the use of thermostats or floor
temperature sensors.
3.1
3.2
Example of a system
System overview
Uponor Control System Wired consists of a controller,
thermostats, actuators and an optional timer. The controller
manages the operation of the actuators when the thermostats
detect a demand for heating or cooling.
Uponor Control System Wired is controlled by different types of
thermostats. Designed for maximum comfort, the thermostats
communicate with the controller by non-polarized two wired
cables. It is possible to mix the different types of Uponor wired
thermostats in the same installation.
Pos.
Description
A
Uponor Thermostat T-36 wired with the option of
adding a floor sensor
B
Uponor Thermostat Public T-33 wired with the option
of adding a floor sensor
C
Uponor Thermostat T-37 wired with the option of
adding a floor sensor
D
Uponor Controller, 6 Channels C-33 Wired or
Uponor Controller, 12 Channels C-35 Wired
The floor sensor can be used for maximum or
minimum limitation of the floor temperature,
regardless of the room temperature. The floor sensor
can be used with Uponor thermostats T-33,T-36,
T-37 and T-38
For example, the maximum limitation can protect a
sensitive floor covering from exposure to too high
temperature when there is a high heating demand.
The minimum limitation can keep a tiled floor warm
even when there is a no general demand for heat
supply to the room.
NOTE:
Auto-balancing is now possible with Uponor Control
System Wired. If the auto-balancing function is used,
it is recommended to use it for the whole system.
Uponor Digital Thermostats T-36 and T-38 are
equipped with the auto-balancing function.
6
UPONOR CONTROL SYSTEM WIRED - INSTALLATION AND OPERATION MANUAL
3.3 Uponor Control System Wired
components
Pos. Uponor designation
Description
A1
Uponor Controller, 6
Channels C-33 Wired
6-channel controller
A2
Uponor Controller, 12
Channels C-35 Wired
12-channel controller
B
Mounting screws and plugs
C
Installation and Operation
Manual
Uponor Controller, 6 Channels C-33 Wired
The Uponor Controller, 6 Channels C-33 Wired controls up to 6
thermostats and 8 actuators connected to the hydraulic system of
the installation.
The controller drives the actuators according to the information
received from each thermostat and according to the system
parameter settings.
The controller is typically located near the hydraulic system
manifolds.
D
Uponor Thermostat T-35 Thermostat
E
Uponor Thermostat T-37 Thermostat for floor sensor
F
Uponor Thermostat T-33 Public thermostat
Uponor Controller, 12 Channels C-35 Wired
G
Uponor Floor sensor
Floor sensor for Thermostats
T-36,T-38, T-33 and T-37
(option)
The Uponor Controller, 12 Channels C-35 Wired controls up to 12
thermostats and 14 actuators connected to the hydraulic system
of the installation.
H
Uponor Relay
Optional heating-cooling
relay
I
Uponor Timer I-36
Optional timer
The controller drives the actuators according to the information
received from each thermostat and according to the system
parameters settings.
J
Uponor Thermostat T-38 Digital thermostat with timer
functions
The controller is typically located near the hydraulic system
manifolds.
K
Uponor Thermostat T-36 Digital thermostat
The window in the actuator shows when a valve is open or closed.
L
Uponor Thermostat T-34 Thermostat flush
Several extensions can be added on to the 12-channel controller:
3.3.1
Controllers
There are two alternative controllers in Uponor Control System
Wired. The figure below shows a controller with actuators and
thermostats.
UPONOR CONTROL SYSTEM WIRED - INSTALLATION AND OPERATION MANUAL
The window in the actuator shows when a valve is open or closed.
•
A timer can be used to add energy saving features in one or
two independent timer zones
•
If the installation is equipped with a cooling unit, Uponor
Control System Wired can be run through a heating–cooling
relay
•
If the installation is equipped with a cooling unit, a dew point
sensor can be connected to the control system
7
3.3.2
Thermostats
Uponor Thermostats T-35 and T-37 wired
The following thermostats can be used in the system:
Main characteristics:
•
•
•
•
•
•
•
•
Temperature setpoint is adjusted with a dial
•
The 21 °C position is marked with a longer
mark on the dial
•
Optional floor sensor can be connected to the thermostat (T37 only)
•
Minimum or maximum floor temperature is adjusted with a
potentiometer behind the cover (T-37 only)
Uponor Thermostat T-36 wired
Uponor Thermostat T-38 wired
Uponor Thermostat T-34 wired
Uponor Thermostat T-35 wired
Uponor Thermostat T-37 wired
Uponor Thermostat T-33 Public wired
Uponor Thermostats T-36 and T-38 wired
Main characteristics:
The dial is removed to set minimum and
maximum setpoints on the thermostat
•
•
Temperature setpoint is adjusted with buttons
Uponor Thermostat T-33 Public wired
Room temperature regulation with internal
sensor
Thermostat T-33 is intended for public locations.
Main characteristics:
•
Optional floor sensor can be connected to the
thermostat
•
Temperature setpoint is adjusted with an
internal potentiometer behind the cover
•
Minimum or maximum floor temperature is adjusted with
buttons
•
Optional floor sensor can be connected to the
thermostat
•
•
•
•
•
•
Programmable to switch between Comfort and ECO modes
•
Minimum or maximum floor temperature is adjusted with a
potentiometer behind the cover
•
The cover is removed to set minimum and maximum setpoints
on the thermostat
Can be set to auto-balancing mode
Customer programmable ECO–comfort mode (T-38 only)
Can be set to permanent override mode
Hidden reset
Powered by controller (no batteries)
3.3.3
Timer
Uponor Timer I-36 can be connected to control the system.
Display shows:
Setpoint temperature
Uponor Timer I-36 wired
Room temperature
Main characteristics:
Floor temperature
•
•
Two zones programming ECO–comfort mode
•
Date and time, with summer-winter change,
power failure proof
Lock mode, standby mode
Uponor Thermostat T-34 wired
•
•
•
•
•
•
Main characteristics:
Display shows:
•
•
Temperature setpoint is adjusted with a dial
•
The comfort zone is indicated by the non-filled
(outlined) mark on the dial
•
•
Powered by controller (no batteries)
•
•
•
•
•
•
•
•
•
•
•
•
•
•
•
•
•
8
Controller mode
Balancing mode
Comfort or ECO mode
Heating/Cooling demand
Holiday mode (T-38 only)
Time and Date (T-38 only)
Lock indication
Standby mode
The dial is removed to set minimum and
maximum setpoints on the thermostat
Pre-recorded modifiable programs for working
days/weekend/week
Can be set to permanent override mode
Programmable to switch between Comfort and ECO modes
Hidden reset
Dry contact input for forced ECO mode
Powered by controller (no batteries)
Room temperature in two zones
Comfort or ECO mode
Holiday mode
Time and Date
Lock indication
Standby mode
Flush mounted
UPONOR CONTROL SYSTEM WIRED - INSTALLATION AND OPERATION MANUAL
3.3.4
Uponor Actuators
Uponor actuators are mounted on top of the valves of the
manifolds
When the thermostat senses that the temperature has fallen
below the setpoint, the controller sends a signal to the actuator
to open the valve. The indicator window on the actuator turns
bright.
When the thermostat senses that the temperature has risen
above the setpoint, the controller sends a signal to the actuator
to close the valve. The indicator window on the actuator turns
dark.
A Actuator has closed the valve – dark indicator
B
Actuator has opened the valve – bright indicator
3.4
Function
Uponor Control System Wired is used to control an underfloor
heating system in a house. It can also control a combined heating
and cooling system.
The thermostats that are connected to the controller control the
actuators that are mounted on the manifolds.
For example in a heating system, if a thermostat senses that the
temperature in a room falls below the setpoint, then the
controller regulates the actuators to open more and increase the
heat flow in the floor pipes in the room.
If a thermostat senses that the temperature in a room rises above
the setpoint, then the controller regulates the actuators to close
more and decrease the heat flow in the floor pipes in the room.
3.4.1
Comfort and economy modes
If a timer is connected to the controller, it is possible to regulate
the temperature between two different temperatures, that is
comfort mode and economy mode. See example below.
The diagram shows that the system delivers heating in comfort
mode in the morning and afternoon, but the system enters
economy mode during night and in the middle of the day, when
the house normally is empty.
The controller can use two different timer patterns to regulate
the temperature in different ways in different rooms.
UPONOR CONTROL SYSTEM WIRED - INSTALLATION AND OPERATION MANUAL
9
4
Installing the Uponor Control System Wired
Installation procedure
2. Check that the connectors and switches are easily accessible.
Uponor recommends that you follow the steps described below
to achieve the best possible installation:
CAUTION
The Uponor Controllers C-33 and C-35 must be
mounted horizontally. There is a risk for overheating if
a controller is mounted vertically or on a horizontal
surface.
Section Description
4.1
Preparing the installation
4.2
Installing Uponor Controller C-33 and Uponor
Controller C-35
4.3
Connecting components to controller
4.4
Connection examples
4.5
Connecting the controller to AC power
5
Installing thermostats
6
Installing Uponor Timer I-36 for C-35
7
Finishing installation
4.1
Preparing the installation
Before starting the installation:
1. Verify the contents of the package with the packing list.
See also section 3.3, page 7 for identification of the
components.
2. Check whether a floor sensor has been mounted.
3. Study the wiring diagram in the foldout or inside the
controller cover.
Mounting Uponor Controller C-33 and Uponor Controller
C-35
Uponor Controller C-33 and Uponor Controller C-35 are delivered
in kits including screws and wall plugs. The figure below shows
unit dimensions and mounting hole positions.
4. Ensure that the controller can be installed close to the
manifold pair.
Note that each manifold pair must have its own controller.
5. Ensure that a power outlet is available for the connection of
the controller to the mains.
6. Ensure that the mounting locations for Uponor Control
System Wired components are protected from running and
dripping water.
7. Include one thermostat for every room fitted with a floor
heating (one thermostat can control several loops of the floor
heating).
4.2 Installing Uponor Controller C-33 and
Uponor Controller C-35
Selecting a mounting position
4.3
Connecting components to controller
This section describes how to connect Uponor Control System
Wired components to the controller.
4.3.1
General directions for connecting devices to the
controller
Connect thermostats, actuators and other components to the
controller as follows. Use the figure below for guidance to the
instructions.
1. Lead the cables from the devices through cable entries in the
controller frame and if applicable, then through the cable
clamps. See figure below.
1. Check that the cover of the controller can easily be removed.
10
UPONOR CONTROL SYSTEM WIRED - INSTALLATION AND OPERATION MANUAL
2. Press, without turning, with a thin screwdriver, on the white
button of the quick connector.
The controller senses automatically where the thermostats and
the actuators are connected, this is called auto linking.
3. Insert a wire in the quick connector.
Auto linking rules
4. Remove the screwdriver.
In order to make the auto linking of the controller to work
correctly, the following restrictions apply:
5. Lead the cables from the actuators through openings in the
upper row of cable entries in the controller and connect the
wires as described in steps 3. and 4.
6. Tighten the screws of the cable clamps to fix the thermostat
cable.
A Cable entries and cable clamps for thermostats
B Cable entries for actuators
•
•
•
Actuators must not be connected in parallel
•
There must never be any empty connector row between
groups of thermostats and actuators
•
Empty connector rows are only allowed after the last actuator
in the last group of thermostat and actuators, that is in the
end of the connector field
Actuators must not be linked with jumper cables
The first thermostat must always be connected to the
controller on connector row 01
NOTE!
Any disregard to follow the auto linking rules will
result in erroneous function of the controller.
C Cable entries and cable clamps for heating/cooling
relay, timer, and condense sensor
D Cable entries and cable clamps for 230 V AC
compartment
4.3.2
Auto linking
One thermostat can control of several actuators.
In the example below, the thermostat #01 is connected to the
controller on connector row 01. All actuators on rows 01 to 04 are
controlled from the same thermostat.
The next thermostat, #05, controls the actuators on rows 05 to
11 and thermostat #12 controls the actuator on row 12.
UPONOR CONTROL SYSTEM WIRED - INSTALLATION AND OPERATION MANUAL
11
4.3.3
Connecting thermostats and actuators to Uponor
Controller C-33
Uponor Controller C-33 can only be used for heating. One to six
thermostats and one to eight actuators can be connected to this
controller.
To connect the first thermostat with actuators to the controller,
do this:
Pos. Label
Heating
4
Timer control zone 2 No cooling for this room
Z2
Cooling
NOTE!
The two wires from the thermostat are non-polarized.
Explanations to the different controller functions
1. Follow the general instructions in section 4.3.1 for
connecting devices to the controller.
Common terminal. One wire from the thermostat must
always be connected to this position.
2. Ensure that the conditions for the auto-linking function are
met when connecting the thermostats and actuators. See
section 4.3.2 Auto linking, page 11.
Thermostats must always be connected to this position
with the second wire if the controller is not provided with
a timer.
3. See the wiring diagram on the foldout page for connector
positions.
4. For each thermostat, connect one wire of the thermostat to
position 1 and the other wire to position 2. See table below.
This position must also be used for thermostats if the
timer function is not to be used in the related room.
Z1
Thermostats can be connected to this position to use the
timer function in the related room. The timer is used to
switch the temperature between two temperature levels,
comfort and ECO (economy level). See section 10
Operating Uponor Timer I-36, page 33 for programming
details.
Z2
Heating mode
Use cables with 2×0.5 mm2 wires for the thermostats.
Pos. Label
Heating
1
Common terminal
2
No timer control
The Z2 position is an alternative position for connecting
thermostats to use the timer function. It is possible to
have two different timer schemes for different rooms in a
house. See section 10 Operating Uponor Timer I-36,
page 33 for programming details.
NOTE!
The two wires from the thermostat are non-polarized.
5. Connect actuators controlled by the same thermostat in
groups. See the wiring diagram on the foldout page for
connector positions.
Heating and cooling mode
NOTE!
The two wires from the actuator are non-polarized.
See section 4.4.1 Uponor Controller C-33 for a connection
example.
4.3.4
Connecting thermostats and actuators to Uponor
Controller C-35
Uponor Controller C-35 can be used for both heating and
cooling. One to twelve thermostats and one to fourteen actuators
can be connected to this controller.
To connect thermostats to the controller, do this:
1. Follow the general instructions in section 4.3.1 for
connecting devices to the controller.
2. Ensure that the conditions for the auto-linking function are
met when connecting the thermostats and actuators. See
section 4.3.2 Auto linking, page 11.
3. See the wiring diagram on the foldout page for connector
positions.
4. For each thermostat, connect one wire of the thermostat to
position 1 and the other wire to one of the positions 2, 3, or
4. See table below.
Use cables with 2×0.5 mm2 wires for the thermostats.
Pos. Label
Heating
Cooling
1
Common terminal
Common terminal
2
No timer control
No timer control
When the thermostat is connected to position Z2, the
cooling function is disabled in the related room. The
heating function is working as described in Heating
mode above.
See sections 4.4.2 Uponor Controller C-35 with three thermostats
and without timer, 4.4.4 Uponor Controller C-35 with four
thermostats and timer, and 4.4.5 Uponor Controller C-35 with
four thermostats, timer and heating–cooling switch for
connection examples.
4.3.5
Connecting a timer
Uponor Control System Wired can be equipped with a timer to
add energy-saving features and define independent zones. The
timer has two programming zones. Each zone offers four
programming options, including one that can be personalized,
thus enabling different programmes to be created for each day of
the week.
NOTE!
The timer is not available for Uponor Controller C-33.
To connect a timer to the controller, do this:
1. Follow the general instructions in section 4.3.1 for
connecting devices to the controller.
2. See the wiring diagram on the foldout page for connector
positions.
3. Connect the timer to positions 1 and 2,
3
12
Z1
.
4. Tighten the screws of the cable clamps to fix the timer cable.
Timer control zone 1 Timer control
UPONOR CONTROL SYSTEM WIRED - INSTALLATION AND OPERATION MANUAL
See section 4.4.4 Uponor Controller C-35 with four thermostats
and timer for a connection example.
4.3.6
4. Open the lower lid (A) of the 230V compartment in the
controller and fix it to the latch (B)on the upper part of the
lid.
Connecting a heating–cooling switch
If the installation is equipped with a cooling unit, the Uponor
Control System Wired can be run through a heating–cooling
switch.
The controller heating–cooling input operates with the
connection of a dry contact that can be realized with, for
example, a relay controlled by an additional regulation system or
a two-position switch. See figure below.
5. Connect the circulation pump to connectors labelled PUMP.
NOTE!
There is no power in the controller to supply the
pump. The pump connector in the controller provides
only a dry contact to switch off and on the power
connection to the pump.
Pos. Description
A
Connectors for the heating–cooling switch
B
Heating–cooling switch realized with a relay
C
Circuitry with timer controlling the relay C
D
Alternative heating–cooling switch using a manual
To connect a heating–cooling switch to the controller, do this:
1. Follow the general instructions in section 4.3.1 for
connecting devices to the controller.
2. See the wiring diagram on the foldout page for connector
positions.
6. Tighten the screws of the cable clamps to fix the pump cable.
3. Connect the heating–cooling switch to positions 11 and 12,
.
7. Close the lid and tighten the fixing screw.
4. Tighten the screws of the cable clamps to fix the heating–
cooling cable.
4.3.8
See section 4.4.5 Uponor Controller C-35 with four thermostats,
timer and heating–cooling switch for a connection example.
4.3.7
Connecting a circulation pump
Uponor Control System Wired can operate a circulation pump on
heating–cooling demand. The pump will stop when there is no
heat or cooling demand.
The controller controls the circulation pump via connection on
terminal block (dry contact). There is no power for the pump in
the box, only the dry contact.
To connect a circulation pump to the controller, do this:
1. Follow the general instructions in section 4.3.1 for
connecting devices to the controller.
2. See the wiring diagram on the foldout page for connector
positions.
3. Ensure the power is disconnected from the controller and the
circulation pump.
UPONOR CONTROL SYSTEM WIRED - INSTALLATION AND OPERATION MANUAL
Connecting a boiler
If the Uponor Controller C-33or C-35 includes a boiler relay, it
can be used to either directly fire the heat source or power open
a two port motorised zone valve positioned on the flow to the
underfloor heating manifold. If the relay is used to power open a
zone valve then the volt free auxiliary contacts on the zone valve
should be used to fire the heat source.
Alternatively, the boiler relay can be used to send a demand
signal to an electrically operated water temperature controller.
The additional contacts on the water temperature controller
should then be used to fire the heat source.
To connect a boiler to the controller, do this:
1. Follow the general instructions in section 4.3.1 for
connecting devices to the controller.
2. See the wiring diagram on the foldout page for connector
positions.
3. Ensure the power is disconnected from the controller and the
boiler.
13
4. Open the lower lid (A) of the 230V compartment in the
controller and fix it to the latch (B)on the upper part of the
lid.
•
Thermostat #06 controls the actuator on channel 06
NOTE!
The timer is not available for the 6-channel
controller.
NOTE!
The economy mode (ECO) is not available for the 6channel controller.
The installation will work in a standard way with the thermostats
regulating each room according to their set temperatures.
See also the wiring diagram on the foldout page.
5. Connect the boiler to connectors labelled BOILER.
NOTE!
There is no power in the controller to supply the
boiler. The boiler connector in the controller provides
only a dry contact to switch off and on the power
connection to the boiler.
NOTE!
When connecting thermostats and actuators to the
Uponor Controller, the auto-linking rules must always
be followed strictly. See section 4.3.2 Auto linking,
page 11
Any disregard to follow the auto linking rules will
result in erroneous function of the Uponor Controller.
6. Tighten the screws of the cable clamps to fix the boiler cable.
7. Close the lid and tighten the fixing screw.
4.4.2
Uponor Controller C-35 with three thermostats
and without timer
4.4
A connection example of Uponor Controller C-35 using three
thermostats is shown in the figure below.
Connection examples
•
Thermostat #01 controls the actuators on channels 01a, 01b,
02a, 02b, 03 and 04
4.4.2 Uponor Controller C-35 with three thermostats and
without timer, page 14
•
•
Thermostat #05 controls all actuators on channels 05 to 11
•
4.4.3 Uponor Controller C-35 with four thermostats and
without timer, page 15
The installation will work in a standard way with the thermostats
regulating each room according to their set temperatures.
•
4.4.4 Uponor Controller C-35 with four thermostats and
timer, page 15
See also the wiring diagram on the foldout page.
•
4.4.5 Uponor Controller C-35 with four thermostats, timer
and heating–cooling switch, page 15
The following sections describe a few connection examples:
•
•
4.4.1 Uponor Controller C-33, page 14
4.4.1
Thermostat #12 controls the actuator on channel 12
Uponor Controller C-33
A connection example of Uponor Controller C-33 is shown in the
figure below.
•
Thermostat #01 controls the actuators on channels 01a and
01b
•
Thermostat #02 controls the actuators on channels 02b, and
05
14
UPONOR CONTROL SYSTEM WIRED - INSTALLATION AND OPERATION MANUAL
4.4.4
Uponor Controller C-35 with four thermostats
and timer
A connection example of Uponor Controller C-35 using four
thermostats is shown in the figure below.
NOTE!
When connecting thermostats and actuators to the
Uponor Controller, the auto-linking rules must always
be followed strictly. See section 4.3.2 Auto linking,
page 11
Any disregard to follow the auto linking rules will
result in erroneous function of the Uponor Controller.
4.4.3
Uponor Controller C-35 with four thermostats
and without timer
A connection example of Uponor Controller C-35 using four
thermostats is shown in the figure below.
•
•
•
•
Thermostat #01 controls the actuators on channels 01a, 01b,
02a,and 02b
Thermostat #03 controls the actuators on channels 03 and 04
Thermostat #05 controls all actuators on channels 05 to 11
Thermostats and actuators
•
Thermostat #01 controls the actuators on channels 01a, 01b,
02a,and 02b
•
•
•
Thermostat #03 controls the actuators on channels 03 and 04
Thermostat #05 controls all actuators on channels 05 to 11
Thermostat #12 controls the actuator on channel 12
Timer
•
The timer controls the switching between comfort and
economy modes for Thermostat #01, see example diagram
below
Thermostat #12 controls the actuator on channel 12
The installation will work in a standard way with the thermostats
regulating each room according to their set temperatures.
See also the wiring diagram on the foldout page.
See also the wiring diagram on the foldout page.
NOTE!
When connecting thermostats and actuators to the
Uponor Controller, the auto-linking rules must always
be followed strictly. See section 4.3.2 Auto linking,
page 11
Any disregard to follow the auto linking rules will
result in erroneous function of the Uponor Controller.
4.4.5
Uponor Controller C-35 with four thermostats,
timer and heating–cooling switch
NOTE!
When connecting thermostats and actuators to the
Uponor Controller, the auto-linking rules must always
be followed strictly. See section 4.3.2 Auto linking,
page 11
A connection example of Uponor Controller C-35 using four
thermostats, a timer, and a heating–cooling switch is shown in
the figure below.
Any disregard to follow the auto linking rules will
result in erroneous function of the Uponor Controller.
UPONOR CONTROL SYSTEM WIRED - INSTALLATION AND OPERATION MANUAL
15
Cooling mode
•
Thermostat #01 is connected to the
(Common terminal)
and Z1 connectors. The cooling will switch between comfort
and economy mode according to timing pattern Z1.
•
Thermostat #03 is connected to the
(Common terminal)
and Z2 (cooling off) connectors. In cooling mode no cooling
will be applied in this room.
•
Thermostats #05 and #12 are connected to the
(Common
terminal) and
connectors (No timer control). Cooling is
generated in comfort mode constantly.
See also the wiring diagram on the foldout page.
Thermostats and actuators
•
Thermostat #01 controls the actuators on channels 01a, 01b,
02a,and 02b and is connected to timer zone 1 (Z1)
•
Thermostat #03 controls the actuators on channels 03 and 04
and is connected to timer zone 2
•
•
Thermostat #05 controls all actuators on channels 05 to 11
Thermostat #12 controls the actuator on channel 12
Heating–cooling switch
The heating–cooling switch is manually or automatically
controlled and is used to switch the operation of the controller
between heating and cooling modes.
Timer
The timer controls the switching between comfort and economy
modes in timer zone 1 (Z1), to which thermostat #01is
connected, and timer zone 2 (Z2), to which thermostat #03 is
connected.
Heating mode
•
Thermostat #01 is connected to the
(Common terminal)
and Z1 connectors. The heating will switch between comfort
and economy mode according to timing pattern Z1.
•
Thermostat #03 is connected to the
(Common terminal)
and Z2 (cool off) connectors. The heating will switch
between comfort and economy mode according to timing
pattern Z2.
•
Thermostats #05 and #12 are connected to the
(Common
terminal) and
connectors (No timer control). Heating is
generated in comfort mode constantly.
16
NOTE!
When connecting thermostats and actuators to the
Uponor Controller, the auto-linking rules must always
be followed strictly. See section 4.3.2 Auto linking,
page 11
Any disregard to follow the auto linking rules will
result in erroneous function of the Uponor Controller.
Cooling mode with Uponor Timer I-36
If a Uponor Timer I-36 is connected to the Uponor Controller C35 and the system is operating in cooling mode, then zone 1 and
zone 2 will automatically be combined to a single zone. The
combined zone thus covers both zone 1 and zone 2.
In this combined zone, the comfort mode always has priority over
the economy mode. Whenever either zone 1 or zone 2 is
programmed for comfort mode, the combined zone will operate
in comfort mode.
The combined zone will operate in economy mode only if both
zones 1 and 2 are programmed for economy mode. See diagram
below.
UPONOR CONTROL SYSTEM WIRED - INSTALLATION AND OPERATION MANUAL
4.5
Connecting the controller to AC power
To conclude the installation of the controller:
1. Check that all wiring is complete and correct:
•
•
•
•
•
Thermostats
Actuators
Timer
Heating–cooling switch
Circulation pump
2. Ensure that the 230 V AC compartment of the controller is
closed and the fixing screw is tightened.
3. Connect the power cable to a 230 V AC wall socket.
UPONOR CONTROL SYSTEM WIRED - INSTALLATION AND OPERATION MANUAL
17
5
Installing thermostats
The following thermostats can be connected to Uponor Control
System Wired:
•
•
•
•
•
•
Uponor Digital Thermostat T-36 Wired
Uponor Programmable Digital Thermostat T-38 Wired
Uponor Thermostat Flush T-34 Wired:
Uponor Thermostat T-35 Wired:
Uponor Thermostat T-37 Wired:
Uponor Thermostat Public T-33 Wired:
Analog thermostats
•
Uponor Thermostats T-34 and T-35:
The temperature is adjusted with the dial. The dial must be
removed to set the minimum and maximum setpoints on the
thermostat.
•
The two thermostats are identical in function but differ in
design.
5.2 Installing Uponor Thermostats T-36 and
T-38
Uponor Thermostat T-37:
Uponor Thermostats T-36 and T-38 are digital thermostats with
three buttons on the front to set the setpoint temperature.
The temperature is adjusted with the dial. The potentiometers used for the settings are protected with a cover. The
dial and the cover must be removed to set the minimum and
maximum setpoints on the thermostat.
The thermostat can also be used to connect an optional floor
sensor.
•
Uponor Thermostat T-33:
This thermostat is designed for public location. The
potentiometers used for the settings are protected with a
cover.
For instructions to operate the thermostats, see section 9
Operating digital thermostats, page 26.
5.2.1
Opening the thermostats
1. Gently press the tab at the bottom of the thermostat
housing.
2. Lift off the top part from the mounting frame.
The thermostat can also be used to connect an optional floor
sensor.
5.1
Selecting locations for thermostats
To select a good location for a thermostat:
1. Select an indoor wall and a position 1.5 m to 1.8 m above the
floor.
2. Ensure that the thermostat is away from direct solar
radiation.
5.2.2
3. Ensure that the thermostat will not be heated through the
wall from sunshine.
Uponor Thermostats T-36 and T-38 are delivered in kits including
screws and plugs.
4. Ensure that the thermostat is away from any source of heat,
for example television set, electronic equipment, fireplace,
spotlights, and so on.
The figure below shows required space for the thermostats and
mounting hole positions.
Mounting the thermostats
5. Ensure that the thermostat is away from any source of
humidity and water splashes. (IP20)
18
UPONOR CONTROL SYSTEM WIRED - INSTALLATION AND OPERATION MANUAL
5.2.3
Connecting thermostat to controller
To connect the thermostat to the controller:
1. Insert the two wires of the thermostat cable into the
connector terminals labelled 1 and 2.
2. Tighten the screws fixing the wires in the terminal block.
2. At the back of the thermostat, gently push the three guides
(two indicated in the figure below) to separate the
electronics part from the mounting frame.
Connecting the cable to the controller is described in section
4.3 Connecting components to controller, page 10.
5.2.4
Connecting an optional external sensor
It is possible to connect a floor sensor or a remote indoor sensor
to Uponor Thermostats T-36 and T-38.
5.3.2
1. Insert the two wires of the sensor cable into the connector
terminals labelled 3 and 4.
Uponor Thermostat T-34 is delivered in a kit including screws and
plugs.
2. Tighten the screws fixing the wires in the terminal block.
The figure below shows required space for the thermostat and
mounting hole positions.
The figure below shows how to connect a floor sensor.
5.3.3
Mounting the thermostats
Connecting thermostat to controller
To connect the thermostat to the controller:
5.3
Installing Uponor Thermostat T-34
Uponor Thermostat T-34 is a flush mounted, analog thermostat
with a dial on the front to set the setpoint temperature.
5.3.1
1. Insert the two wires of the thermostat cable into the
connector terminals.
2. Tighten the screws fixing the wires in the terminal block.
Opening the thermostats
1. Remove the dial and unscrew the fixing screw, see illustration
below.
UPONOR CONTROL SYSTEM WIRED - INSTALLATION AND OPERATION MANUAL
19
5.4.3
Connecting thermostats to controller
To connect the thermostat to the controller:
1. Insert the two wires of the thermostat cable into the
connector labelled POWER.
Connecting the cable to the controller is described in section
4.3 Connecting components to controller, page 10.
2. Tighten the screws fixing the wires in the connector.
5.4 Installing Uponor Thermostats T-35, T33, and T-37
The three thermostat types Thermostat T-35, T-33 Public, and T-37 are similar in design but have the following differentiatng
characteristics:
T-35
T-33
T-37
Setpoint adjusted with dial
Characteristic
Yes
No
Yes
Setpoint adjusted with internal
potentiometer
No
Yes
No
Optional connection of floor sensor
No
Yes
Yes
5.4.1
Opening the thermostats
To open the thermostats:
1. (T-33 only) Unscrew the screw fixing the cover to thermostat
box.
2. Insert a flat-bladed screwdriver from underneath and push it
gently to release the latch.
3. Pull off the thermostat cover.
Setting the room temperature potentiometer in Uponor
Thermostat T-33
In Uponor Thermostat T-33 the temperature setpoint is adjusted
with a potentiometer.
•
Minimum temperature range: +5 °C to +30 °C
NOTE!
The frost protection symbol,
minimum temperature, +5 °C.
, denotes the
To set the room sensor potentiometer:
1. Use a cross-headed screwdriver to set the potentiometer. See
figure below.
5.4.2
Mounting thermostats onto a wall
The Uponor thermostats are delivered in kits including screws and
wall plugs. The Uponor thermostats can be mounted either
directly onto a wall or using a 60 mm European wall box. See
figure below.
20
UPONOR CONTROL SYSTEM WIRED - INSTALLATION AND OPERATION MANUAL
When the maximum temperature setting is used, the frost
protection is also active. This means that the floor
temperature will never fall below +5 °C.
To set the floor sensor potentiometer:
1. Use a cross-headed screwdriver to set the potentiometer. See
figure below.
5.4.4
Connecting optional floor sensor
Uponor Thermostats T-33 and T-37 allow a floor sensor to be
fitted to the system. The temperatures thus measured ensure a
more efficient management of the system.
Wiring the floor sensor
1. Insert the two wires of the floor-sensor cable into the
connector labelled EXT.
2. Tighten the screws fixing the wires in the connector.
Setting the floor sensor potentiometer
When a floor sensor is connected to the thermostat to control the
temperature of the floor, the limitation of the floor temperature
can be adjusted with a potentiometer. The floor sensor setting
overrides the thermostat.
It is possible to set the floor sensor for either a maximum
temperature or a minimum temperature:
•
Minimum temperature range: +5 °C to +30 °C
NOTE!
The frost protection symbol,
, denotes the
minimum temperature, +5 °C.
•
Maximum temperature range: +25 °C to +35 °C
UPONOR CONTROL SYSTEM WIRED - INSTALLATION AND OPERATION MANUAL
21
6
Installing Uponor Timer I-36 for C-35
Uponor Timer I-36 for C-35 is a digital timer with three buttons
on the front to adjust various timing functions.
For instructions how to operate the thermostats, see section 9
Operating digital thermostats, page 26.
6.1
Opening Uponor Timer I-36
To open Uponor Timer I-36:
1. Gently press the tab at the bottom of the thermostat
housing.
2. Lift off the top part from the mounting frame.
Connecting the cable to the controller is described in section
4.3 Connecting components to controller, page 10.
6.4
Connecting an optional dry contact
It is possible to connect a dry contact input to Uponor Timer I-36,
for example a Uponor Remote Access Module R-56.
1. Insert the two wires of the dry contact cable into the
connector terminals labelled 3 and 4.
6.2
Mounting Uponor Timer I-36
2. Tighten the screws fixing the wires in the terminal block.
Uponor Timer I-36 is delivered in a kit including screws and plugs.
The figure below shows required space for the thermostats and
mounting hole positions.
6.3
Connecting Timer I-36 to controller
To connect Uponor Timer I-36 to the controller:
1. Insert the two wires of the timer cable into the connector
terminals labelled 1 and 2.
2. Tighten the screws fixing the wires in the terminal block.
22
UPONOR CONTROL SYSTEM WIRED - INSTALLATION AND OPERATION MANUAL
7
Finishing installation
Make a complete check up of the installation:
1. Check that the thermostats are working correctly.
Turn thermostat setpoints to maximum to obtain a heating
demand and make sure that the actuators are running.
2. Reset the thermostats to the defined operating settings.
3. Close the covers of the controller and the thermostats.
4.
Fill in the “Installation report” on the centre pages of
booklet.
5. Give the manual and all information about the system to the
user.
UPONOR CONTROL SYSTEM WIRED - INSTALLATION AND OPERATION MANUAL
23
8
Operating Uponor Control System Wired
The Uponor Control System Wired controls the floor heating/
cooling installation according to customer needs. Temperatures
are adjusted with thermostats located in each room.
8.1
Principle of operation
As soon as the temperature measured at a thermostat is lower
(heating mode) or higher (cooling mode) than the setpoint
temperature, it sends this information to the controller, which
opens the actuators for this room. Once the set temperature is
reached, this information is sent and the actuators are closed.
8.2
Normal operation without optional timer
When the system is running in normal mode:
In Heating mode, the actuators are open when room
temperatures are lower than the temperatures set on the
thermostat.
In Cooling mode, the actuators are open when room
temperatures are higher than the temperature set on the
thermostat.The actuator position can be seen in the small
windows of the actuators.
8.3
Operation with optional timer
The use of an optional timer optimizes the installation and
conserves energy.
For information about operating the timer, see section 10
Operating Uponor Timer I-36, page 33.
8.4
Setting analog thermostats
The room temperature set point can be adjusted with a dial on
Uponor Thermostats T-34, T-35, and T-37. See sub-sections
below.
The room temperature set point can be adjusted with a
potentiometer on Uponor Thermostat T-33. This requires that
the cover is removed, see section 5.2.3 Connecting thermostat to
controller, page 19.
The floor temperature set point can be adjusted with a
potentiometer on Uponor Thermostats T-33 and T-37. This
requires that the cover is removed. See section Thermostat
installation.
8.4.1
8.4.2
limits
Setting minimum and maximum temperature
It is possible to set the minimum and maximum limits of the
temperature adjustment. Inside the dial there are two plastic
devices that can be set to limit the turning of the dial. See
illustrations below.
•
•
The default temperature setpoint is 21 °C
•
The maximum temperature setpoint of the red stopper is
+30 °C (21 + 9 = 30)
•
If both stoppers are set to their extreme positions, then the
dial can be set between +6 °C and +30 °C
•
If both stoppers are set to the same position, then the dial is
fixed and the temperature setpoint cannot be changed
The minimum temperature setpoint of the blue stopper is
+6 °C (21 - 15 = 6)
Changing the room temperature setpoint
To change the thermostat setpoint:
1. Turn the dial clockwise to get a higher temperature setpoint.
2. Turn the dial counter-clockwise to get a lower temperature
setpoint.
24
UPONOR CONTROL SYSTEM WIRED - INSTALLATION AND OPERATION MANUAL
Pos. Description
A
Minimum temperature setpoint stopper
B
Maximum temperature setpoint stopper
C
Notch in the thermostat housing for setting the stoppers
in the selected stopping positions (T-35 and T-37 only)
1. Carefully remove the dial using a small, flat-bladed
screwdriver.
2. Set the minimum temperature limit with the blue stopper (A).
3. Set the maximum temperature limit with the red stopper (B).
UPONOR CONTROL SYSTEM WIRED - INSTALLATION AND OPERATION MANUAL
25
9
Operating digital thermostats
The digital thermostats T-36 and T-38 have a screen with a
number of symbols for displaying different messages.
Pos. Icon
Description
B
Manual override. For example forced
comfort or economy mode.
Below the screen there are three buttons for operating the
thermostats.
Also used as a warning when defining the
Min cooling temperaure in RFT mode.
Heating mode
Cooling mode
Standby mode
Holiday mode
Used with empty house icon, see pos. F
below.
Lock mode. The three navigation buttons
below the screen are locked.
C
T-38 only
Weekday selected indicators
1 = Monday
7 = Sunday
9.1
Screen layout
T-38 only
The figure below shows all possible symbols and characters that
can be displayed on the screen:
Weekday deselected indicators
D
T-38 only
Indicator showing AM or PM when the
thermostat is set to 12 h mode
No indication when the thermostat is set to
24 h mode
E
T-38 only
Digital clock
Software version
F
Pos. Icon
Description
A
Message field using three alphanumerical
characters
Comfort mode
Temperature reading using a + or - sign,
two digital characters, a decimal point and
a character showing either 0 or 5
Holiday mode
Used with suitcase icon, see pos. B above.
G
26
Economy mode
Temperature unit, shown when the
character group A shows a temperature
UPONOR CONTROL SYSTEM WIRED - INSTALLATION AND OPERATION MANUAL
Pos. Icon
Description
H
Heating/Cooling demand
•
I
0 waves are shown if manual balancing
is selected and the heating or cooling
demand is off
•
4 waves are shown if manual balancing
is selected and the heating or cooling
demand is on
•
0 to 3 waves alternating sequentially if
autobalancing is selected
OK indicator. Confirms an activated
function.
9.2
•
•
•
Heating/Cooling demand icon if a demand is present
•
•
Lock mode icon if the thermostat is set in lock mode
•
If a connected floor sensor is faulty, this is indicated by a
flashing star to the left of the displayed room temperature
•
(T-38 only) Weekday and time
Standby icon if the system is set in standby mode
Holiday mode icon and remaining days if system is set in
holiday mode
Manual override icon if the system is set in forced comfort or
ECO mode
Example:
Operating buttons
The following three buttons are used to operate the thermostats
Uponor Thermostat:
Button Description
The OK button is used to:
•
•
•
Enter and exit the settings menu
Confirm a setting
Enter and exit comfort or economy mode
The minus and plus sign buttons are used to:
•
•
•
•
9.3
Set the temperature setpoint
Toggle between comfort and economy modes
In the example above the following is displayed:
•
•
•
•
•
•
System works in heating mode
Room temperature is 22.3 °C
System works in comfort mode
System works in auto-balancing mode, heating demand is on
Today is Thursday
Time is 15:47
Modify settings in the settings menus
Enter and exit the lock mode (press and hold
simultaneous for 3 seconds)
Power-up
At power-up the thermostat designation, T-36 or T-38, and the
software version is shown for three seconds. Then the thermostat
enters into run mode..
Example:
Changing temperature setpoint
To adjust the temperature setpoint of the current mode from the
run mode screen:
1. Press the + or - button once.
The screen shows the current setpoint flashing.
2. Press the + or - button repeatedly to adjust the
setpointtemperature.
When the new sepolnt is set, the screen returns to run mode
after a few seconds, showing the room temperature.
Setting forced ECO or comfort mode
To set the system in forced ECO or comfort mode:
1. Press the OK button.
The house icon starts flashing.
9.4
Run mode
Run mode display description
In run mode the screen displays the following:
Note: The different modes given in the list below are explained
in sections 9.5 to 9.15 below.
•
•
•
Room temperature in degrees Celsius
Heating or cooling icon depending on system working mode
2. Press the + or - button to change from comfort to ECO mode
or the other way around.
3. Press the OK button.
The screen returns to run mode displaying the selected ECO
or comfort mode and the manual override icon .
To remove forced mode:
1. Press and hold the OK key for 3 seconds.
The manual override icon disappears and the system
returns to the mode, ECO or comfort, as defined by the
programming.
ECO or comfort mode icon depending on system working
mode
UPONOR CONTROL SYSTEM WIRED - INSTALLATION AND OPERATION MANUAL
27
9.5
Parameter and mode settings menu
To enter the parameter and mode settings menu:
1. Press and hold the OK button for three seconds to enter the
settings menu.
•
•
T-38: The first menu, CLK (clock), is displayed
T-36: The first menu, MOD (mode), is displayed
The screen displays TME (time) and four digits designating
the time are blinking.
11. Press the + and - buttons to change the setting:
•
Press once and the time setting increments with a 1
minute step.
•
Press continuously and the time setting increments with
1 minute steps, after a few seconds increments are made
with 10 minute steps and then 1 hour steps.
2. Press the + button repeatedly to reach the other menus.
The menus are presented in the following order:
Uponor Thermostat T-36
•
•
•
•
•
The screen displays S/W (summer-winter time).
MOD (regulation choices)
Two alternatives are selectable:
BAL (balancing mode)
•
S/W and OK displayed: Automatic change of summerwinter time activated
•
S/W only displayed: Automatic change of summerwinter time dis-activated
ECO (economy mode)
CAL (calibration)
OFF (standby mode)
Uponor Thermostat T-38
•
•
•
•
•
•
•
•
12. Press OK to confirm the setting.
Example: Automatic summer-winter time change selected.
CLK (clock)
PRG (programming)
HOL (holiday mode)
MOD (regulation choices)
BAL (balancing mode)
T °C (temperature setpoint)
CAL (calibration)
OFF (standby mode)
3. Press the -button to run the menu sequence in opposite
order.
4. Press and hold the OK button for three seconds to exit the
settings menu.
13. Press OK to confirm the setting and proceed to the next
menu, PRG.
9.7
PRG – Programming (T-38 only)
The programming menu is used to adjust the settings for comfort
and economy modes.
To change the programming:
9.6
CLK – Clock settings (T-38 only)
1. When PRG is displayed, press OK to enter the menu.
The clock menu is used to set date and time.
The next screen displays one of the following:
To set the clock parameters:
•
•
1. Press and hold the OK key for 3 seconds.
The next screen displays CLK (clock).
2. Press OK to enter the clock menu.
The screen displays YR (year) and four digits designating the
year are blinking.
3. Press the + and - buttons to change the setting.
5. Press the + and - buttons to change the setting.
OFF, programming is disabled
2. Press the + and - buttons to select the setting ON or OFF.
Then select one of the following alternatives to proceed:
a.
From setting ON, press OK to start the programming,
see step 3. below.
b.
From setting OFF, press OK to proceed to the next
menu, see section 9.8 HOL – Holiday mode (T-38 only),
page 29
4. Press OK to confirm the setting.
The screen displays MTH (month) and two digits designating
the month are blinking.
ON, programming is enabled (default setting)
3. When PRG is displayed, press OK to enter the menu.
The group of days flashes (day numbers with frames).
6. Press OK to confirm the setting.
The screen displays DAY (day) and two digits designating the
date are blinking.
7. Press the + and - buttons to change the setting.
8. Press OK to confirm the setting.
The screen displays TME (time) and either 24:H or AM/PM
12:H, designating the time format are blinking.
4. Press + or - successively to select the group of days.
9. Press the + and - buttons to change the setting.
There are three alternatives:
10. Press OK to confirm the setting.
•
•
28
Monday till Friday, default setting
Monday till Saturday
UPONOR CONTROL SYSTEM WIRED - INSTALLATION AND OPERATION MANUAL
•
Monday till Sunday
5. Press OK to confirm the setting.
The digital clock starts flashing.
6. Press and hold the OK key for 3 seconds to select the default
schedule.
The diagram below shows the default schedule for Monday
till Friday or Monday till Saturday programming groups.
12. Press the OK key to change between comfort and economy
mode at the desired time.
Continue to the next comfort/economy changeover with the
+ button. Up to 5 changes in 24 hours are permitted.
13. Continue stepping the clock until midnight is passed.
The screen displays the next menu, HOL.
9.8
HOL – Holiday mode (T-38 only)
The holiday mode menu is used to set a temperature setpoint
that is used for a defined period when the house is empty.
Entering holiday mode
The next diagram shows the default schedule for Monday till
Sunday prgramming group.
7. Press the + and - buttons to modify the default clock setting:
•
Press once and the time setting increments with a 1
minute step.
•
Press continuously and the time setting increments with
1 minute steps, after a few seconds increments are made
with 10 minute steps and then 1 hour steps.
•
Set the clock to the time for the first comfort/economy
changeover.
8. Press the OK key to change between comfort and economy
mode at the desired time.
Continue to the next comfort/economy changeover with the
+ button. Up to 5 changes in 24 hours are permitted.
9. Continue stepping the clock until midnight is passed.
Depending on the selection made in step 4. above, the screen
displays the following:
•
If the group Monday till Friday was selected, then
Saturday till Sunday is displayed.
•
If the group Monday till Saturday was selected, then
Sunday is displayed.
•
If the group Monday till Sunday was selected, then the
screen displays the next menu, HOL, see section 9.8 HOL
– Holiday mode (T-38 only).
10. Press and hold the OK key for 3 seconds to select the default
schedule.
1. When HOL is displayed, press OK to enter the menu.
The screen displays the following:
•
•
•
•
•
Heating
or cooling
Holiday suitcase
icon depending on mode
icon
Ambient temperature
Empty house
icon flashing
1 d flashing, designating the number of days the holiday
mode is active
2. Press the + and - buttons to set the number of days the hday
mode shall be active.
3. Press OK to confirm the setting.
The holiday mode temperature setpoint and the empty house
icon are flashing.
4. Press the + and - buttons to change the holiday mode
temperature setpoint.
Default setting: 18 °C
Setting range: 10 – 30 °C
5. Press OK to confirm the setting.
The screen enters run mode.
The thermostat starts to countdown the days when holiday
mode is active.
The holiday mode ends automatically at 00:00 the day 0.
Exiting holiday mode
1. Press and hold the OK button for three seconds.
The holiday mode is canceled and the run mode is entered.
9.9
MOD – Regulation choices
The regulation choices menu is used to set the regulation mode
of the thermostat.
1. When MOD is displayed, press OK to enter the menu.
The next screen displays one of the following:
11. Press the + and - buttons to modify the default clock setting:
•
•
•
Press once and the time setting increments with a 1
minute step.
Press continuously and the time setting increments with
1 minute steps, after a few seconds increments are made
with 10 minute steps and then 1 hour steps.
Set the clock to the time for the first comfort/economy
changeover.
UPONOR CONTROL SYSTEM WIRED - INSTALLATION AND OPERATION MANUAL
•
•
•
RT – room sensor regulation
RFT – room sensor regulation with floor sensor limitation
RS – remote sensor regulation
2. Press the + or - button to change the setting.
3. Press OK to confirm the setting.
If RT or RS regulation mode is selected, the next menu is
displayed, see section 9.10 BAL – Balancing mode.
If RFT regulation mode is selected, the next regulation
setting, is displayed.
29
4. (Heating mode only)
The symbol (heating mode) and MAX is displayed
(maximum floor temperature limitation).
4.1. Press OK to display the limitation temperature.
4.2. Press the + and - buttons to change the setting.
Default setting: 26 °C
Setting range: 20 – 45 °C
4.3. Press OK to confirm the setting.
5. (Heating and cooling modes)
The heating or cooling icon and MIN is displayed (low
floor temperature limitation).
5.1. Press OK to display the limitation temperature.
5.2. Press the + and - buttons to change the setting.
Default setting: 20 °C
Setting range: 10 – 30 °C
NOTE!
In cooling mode, if the MIN value is set below 14 °C,
the hand and cooling icons will flash to indicate
a warning for condensation.
5.3. Press OK to confirm the setting and proceed to the next
menu, BAL.
3. Press OK to confirm the setting and proceed to the next
menu.
9.12 T°C – Comfort and economy mode
temperatures (T-38 only)
The menu for comfort and economy mode temperatures is used
to set the setpoint temperature in comfort mode and the setback
temperature in economy mode.
The settings will apply to the mode the system is set to work in,
heating or cooling.
The default comfort and economy settings are used unless the
user changes a setpoint from the run mode screen. In that case
the latest setpoint setting will be applied.
Adjusted settings are saved in the thermostat.
1. When T °C is displayed, press OK to enter the menu.
The screen displays the setpoint temperature and the
comfort icon.
2. Press the + or -button to change the setting.
Default setting, heating mode: 21 °C
Default setting, cooling mode: 26 °C
Setting range: 5 -30 °C
Setting accuracy: 0.5 °C
9.10 BAL – Balancing mode
The balancing mode menu is used to select between manual and
auto-balancing.
The auto-balance function removes the need for manual
balancing of the manifold at installation. The principle for
automatic balancing is that the energy required by each loop is
distributed in pulses. The length of the pulses in each loop is
calculated from the actual heat demand of the room.
1. When BAL is displayed, press OK to enter the menu.
The screen displays one of the following:
•
•
3. Press OK to confirm the setting.
The screen displays the economy setpoint temperature and
the ECO icon.
4. Press the + or - button to change the setting.
Default setting, heating mode: 17 °C
Default setting, cooling mode: 30 °C
Setting range: 5 - 30 °C
Setting accuracy: 0.5 °C
5. Press OK to confirm the setting and proceed to the next
menu, CAL
MAN – manual balancing
AB – automatic balancing
2. Press the + or - button to change the setting.
3. Press OK to confirm the setting and proceed to the next
menu.
9.11 ECO – Economy mode (T-36 only)
The economy mode menu is used to set the setback temperature
for economy mode.
9.13 CAL – Calibration
The calibration menu is used to adjust the temperature sensor in
the thermostat.
1. When CAL is displayed, press OK to enter the menu.
The room temperature is displayed.
2. Press the + and - buttons to change the setting in 0.1 °C
steps.
Setting range: -3 °C to +3 °C
In heating mode, the setback temperature is negative, in cooling
mode it is positive.
3. Press OK to confirm the setting and proceed to the next
menu.
Activation and deactivation of the economy is done from the run
mode screen, see section 9.4 Run mode, page 27.
9.14 OFF – Standby mode
1. When ECO is displayed, press OK to enter the menu.
The screen displays the setback temperature.
2. Press the + or - button to change the setting.
Default setting: 4 °C
Entering standby mode
Setting range: 0 – 11 °C
1. Press OK to confirm the standby mode.
Setting accuracy: 0.5 °C
30
In standby mode, the regulation of the room temperature is
disabled, but thermostat still displays the current room
temperature.
The standby icon
and the room temperature is displayed.
UPONOR CONTROL SYSTEM WIRED - INSTALLATION AND OPERATION MANUAL
Exiting standby mode
1. Press and hold OK for three seconds.
The thermostat name and software version are displayed for
two seconds. Then the thermostat enters run mode.
9.15 Lock mode
The three operating buttons can be locked to prevent
unintentional use.
Entering lock mode
1. Press and hold the + and - buttons simultaneuously for three
seconds.
The lock icon appears. Other displayed information
remains and the thermostat operates as set-up.
Exiting lock mode
1. Press and hold the + and - buttons simultaneuously for three
seconds.
The lock icon
disappears.
UPONOR CONTROL SYSTEM WIRED - INSTALLATION AND OPERATION MANUAL
31
9.16 Menu trees
The following sections show the menu trees for Uponor Thermostats T-36 and T-38
9.16.1
Uponor Thermostat T-36
Run mode, see section 9.4, page 27
Regulation choices, see section, see section 9.9, page 29
Room sensor regulation, see section 9.9, page 29
Room sensor regulation with floor sensor limitation, see section 9.9, page 29
Maximum floor temperature limitation, see section 9.9, page 29
Minimum floor temperature limitation, see section 9.9, page 29
Remote sensor regulation, see section 9.9, page 29
Balancing mode, see section 9.10, page 30
Manual balancing, see section 9.10, page 30
Automatic balancing, see section 9.10, page 30
Economy mode, see section 9.11, page 30
Calibration, see section 9.13, page 30
Standby mode, see section 9.14, page 30
Run mode, see section 9.4, page 27
9.16.2
Uponor Thermostat T-38
Run mode, see section 9.4, page 27
Clock settings, see section, see section 9.6, page 28
Year, see section, see section 9.6, page 28
Month, see section, see section 9.6, page 28
Day, see section, see section 9.6, page 28
Time, see section, see section 9.6, page 28
Summer-winter time, see section, see section 9.6, page 28
Programming mode, see section 9.7, page 28
Programming enable/disable, see section 9.7, page 28
Day group selection, see section 9.7, page 28
Holiday mode, see section 9.8, page 29
Regulation choices, see section, see section 9.9, page 29
Room sensor regulation, see section 9.9, page 29
Room sensor regulation with floor sensor limitation, see section 9.9, page 29
Maximum floor temperature limitation, see section 9.9, page 29
Minimum floor temperature limitation, see section 9.9, page 29
Remote sensor regulation, see section 9.9, page 29
Balancing mode, see section 9.10, page 30
Manual balancing, see section 9.10, page 30
Automatic balancing, see section 9.10, page 30
Comfort and economy mode temperatures, see section 9.12, page 30
Calibration, see section 9.13, page 30
Standby mode, see section 9.14, page 30
Run mode, see section 9.4, page 27
32
UPONOR CONTROL SYSTEM WIRED - INSTALLATION AND OPERATION MANUAL
10
Operating Uponor Timer I-36
Uponor Timer I-36 has a screen with a number of icons and
symbols for displaying messages.
Pos. Icon
Description
B
Manual override. For example forced
comfort or economy mode.
Below the screen there are three buttons for operating Uponor
Timer I-36.
Standby mode
Holiday mode
Used with empty house icon, see pos. F
below.
Lock mode. The three navigation buttons
below the screen are locked.
C
Weekday selected indicators
1 = Monday
7 = Sunday
Weekday deselected indicators
D
Indicator showing AM or PM when the
thermostat is set to 12 h mode
No indication when the thermostat is set to
24 h mode
E
Digital clock
10.1 Screen layout
The figure below shows all possible symbols and characters that
can be displayed on the screen:
Software version
F
Economy mode
Comfort mode
Holiday mode
Used with suitcase icon, see pos. B above.
Pos. Icon
Description
A
Message field using three alphanumerical
characters
G
Temperature unit, shown when the
character group A shows a temperature
H
OK indicator. Confirms an activated
function.
Temperature reading using a + or - sign,
two digital characters, a decimal point and
a character showing either 0 or 5
UPONOR CONTROL SYSTEM WIRED - INSTALLATION AND OPERATION MANUAL
33
10.2 Operating buttons
The following three buttons are used to operate the Uponor
Timer I-36:
Button Description
The OK button is used to:
•
•
•
Enter and exit the settings menu
Confirm a setting
Select comfort or economy mode
•
•
•
Zone Z1 is in economy mode
Today is Tuesday
Time is 13:20
Changing zone to be displayed
To change the zone to be displayed:
1. Press the + or - button.
The screen changes to display the other zone, that is, from
zone Z1 to Z2 or the other way around.
The minus and plus sign buttons are used to:
•
•
•
Toggle between comfort and economy modes
Modify settings in the settings menus
Enter and exit the lock mode (press and hold
simultaneous for 3 seconds)
10.3 Power-up
At power-up the timer designation I-36 and the software version
is shown for three seconds. Then the timer enters into run mode.
Example:
Setting forced ECO or comfort mode
To set the system in forced ECO or comfort mode:
1. Press the OK button.
The house icon starts flashing.
2. Press the + or - button to change from comfort to ECO mode
or the other way around.
3. Press the OK button.
The screen returns to run mode displaying the selected ECO
or comfort mode and the manual override icon .
To remove forced mode:
1. Press the OK button.
The manual override icon disappears and the system
returns to the mode, ECO or comfort, as defined by the
programming.
Remote system controlled forced economy mode
10.4 Run mode
Run mode display description
Forced economy mode ina zone can be set from a remote external
system such as the Uponor R-56 SMS module. Then the empty
house and hand icon are flashing. In this case it is not possible to
cancel the forced mode from the timer.
In run mode the screen displays the following:
10.5 Parameter and mode settings menu
Note: The different modes given in the list below are explained
in sections 10.5 to 10.10 below.
To enter the parameter and mode settings menu:
•
•
Zone, Z1 or Z2
1. Press and hold the OK button for three seconds to enter the
settings menu.
ECO or comfort mode icon depending on system working
mode
2. Press the + button repeatedly to reach the other menus.
The first menu, CLK (clock), is displayed
•
•
Standby icon if the system is set in standby mode
The menus are presented in the following order:
Holiday mode icon and remaining days if system is set in
holiday mode
•
•
Lock mode icon if the timer is set in lock mode
•
Weekday and time
•
•
•
•
•
Manual override icon if the zone is set in forced comfort or
ECO mode
Example:
CLK (clock)
PRG (programming)
HOL (holiday mode)
CAL (calibration)
OFF (standby mode)
3. Press the -button to run the menu sequence in opposite
order.
4. Press and hold the OK button for three seconds to exit the
settings menu.
10.6 CLK – Clock settings
The clock menu is used to set date and time.
To set the clock parameters:
In the example above the following is displayed:
34
1. Press and hold the OK key for 3 seconds.
UPONOR CONTROL SYSTEM WIRED - INSTALLATION AND OPERATION MANUAL
The screen displays CLK (clock).
The group of days flashes (day numbers with frames).
2. Press OK to enter the clock menu.
The screen displays YR (year) and four digits designating the
year are blinking.
3. Press the + and - buttons to change the setting.
4. Press OK to confirm the setting.
The screen displays MTH (month) and two digits designating
the month are blinking.
5. Press the + and - buttons to change the setting.
6. Press OK to confirm the setting.
The screen displays DAY (day) and two digits designating the
date are blinking.
7. Press the + and - buttons to change the setting.
8. Press OK to confirm the setting.
The screen displays TME (time) and either 24:H or AM/PM
12:H, designating the time format are blinking.
9. Press the + and - buttons to change the setting.
10. Press OK to confirm the setting.
The screen displays TME (time) and four digits designating
the time are blinking.
4. Press + or - successively to change the group of days.
There are three choices:
•
•
•
Monday till Friday, default setting
Monday till Saturday
Monday till Sunday
5. Press OK to confirm the setting.
The digital clock starts flashing.
6. Press and hold the OK key for 3 seconds to select the default
schedule.
The diagram below shows the default schedule for Monday
till Friday or Monday till Saturday programming groups.
11. Press the + and - buttons to change the setting:
•
Press once and the time setting increments with a 1
minute step.
•
Press continuously and the time setting increments with
1 minute steps, after a few seconds increments are made
with 10 minute steps and then 1 hour steps.
The next diagram shows the default schedule for Monday till
Sunday prgramming group.
12. Press OK to confirm the setting.
The screen displays S/W (summer-winter time).
Two alternatives are selectable:
•
S/W and OK displayed: Automatic change of summerwinter time activated
•
S/W only displayed: Automatic change of summerwinter time dis-activated
Example: Automatic summer-winter time change selected.
7. Press the + and - buttons to modify the default clock setting:
•
Press once and the time setting increments with a 1
minute step.
•
Press continuously and the time setting increments with
1 minute steps, after a few seconds increments are made
with 10 minute steps and then 1 hour steps.
•
Set the clock to the time for the first comfort/economy
changeover.
8. Press the OK key to change between comfort and economy
mode at the desired time.
Continue to the next comfort/economy changeover with the
+ button. Up to 5 changes in 24 hours are permitted.
13. Press OK to confirm the setting and proceed to the next
menu, PRG.
10.7 PRG – Programming
The programming menu is used to adjust the settings for comfort
and economy modes.
9. Continue stepping the clock until midnight is passed.
Depending on the selection made in step 4. above, the screen
displays the following:
•
If the group Monday till Friday was selected, then
Saturday till Sunday is displayed.
•
If the group Monday till Saturday was selected, then
Sunday is displayed.
•
If the group Monday till Sunday was selected, then the
screen displays the next menu, HOL, see section 10.8
HOL – Holiday mode.
To change the programming:
1. When PRG is displayed, press OK to enter the menu.
The screen displays the same zone, Z1 or Z2, that was
displayed in run mode.
2. If required, press the + or - button to change zone.
3. Press OK to start the programming.
UPONOR CONTROL SYSTEM WIRED - INSTALLATION AND OPERATION MANUAL
10. Press and hold the OK key for 3 seconds to select the default
schedule.
35
3. Press OK to confirm the setting.
The screen enters run mode.
The timer starts to countdown the days when holiday mode
is active.
11. Press the + and - buttons to modify the default clock setting:
•
Press once and the time setting increments with a 1
minute step.
•
Press continuously and the time setting increments with
1 minute steps, after a few seconds increments are made
with 10 minute steps and then 1 hour steps.
•
Set the clock to the time for the first comfort/economy
changeover.
12. Press the OK key to change between comfort and economy
mode at the desired time.
Continue to the next comfort/economy changeover with the
+ button. Up to 5 changes in 24 hours are permitted.
13. Continue stepping the clock until midnight is passed.
The screen displays the next menu, HOL.
14. Press the - key to get back to the PRG screen.
15. Press OK to enter the menu.
The holiday mode ends automatically at 00:00 the day 0.
Exiting holiday mode
1. Press and hold the OK button for three seconds.
The holiday mode is canceled and the run mode is entered.
10.9 OFF – Standby mode
Entering standby mode
1. Press OK to confirm the standby mode.
The standby icon
is displayed.
Exiting standby mode
1. Press and hold OK for three seconds.
The timer name and software version are displayed for two
seconds. Then the timer enters run mode.
16. Press the + or - button to change zone.
10.10 Lock mode
17. Repeat steps 1. to 13. above for the other zone.
The three operating buttons can be locked to prevent
unintentional use.
18. Continue stepping the clock until midnight is passed.
The screen displays the next menu, HOL.
Entering lock mode
10.8 HOL – Holiday mode
Entering holiday mode
1. When HOL is displayed, press OK to enter the menu.
The screen displays the following:
•
•
•
Holiday suitcase
Empty house
icon
icon flashing
1 d flashing, designating the number of days the holiday
mode is active
1. Press and hold the + and - buttons simultaneuously for three
seconds.
The lock icon appears. Other displayed information
remains and the timer operates as set-up.
Exiting lock mode
1. Press and hold the + and - buttons simultaneuously for three
seconds.
The lock icon
disappears.
2. Press the + and - buttons to set the number of days the
holiday mode shall be active.
36
UPONOR CONTROL SYSTEM WIRED - INSTALLATION AND OPERATION MANUAL
10.11 Menu tree
The structure below illustrates the menu tree of Uponor Timer I-36.
Run mode, see section 10.4, page 34
Clock settings, see section, see section 10.6, page 34
Year, see section, see section 10.6, page 34
Month, see section, see section 10.6, page 34
Day, see section, see section 10.6, page 34
Time, see section, see section 10.6, page 34
Summer-winter time, see section, 10.6, page 34
Programming mode, see section 10.7, page 35
Zone 1, see section 10.7, page 35
Day group selection, see section 10.7, page 35
Zone 2, see section, see section 10.7, page 35
Day group selection, see section 10.7, page 35
Holiday mode, see section 10.8, page 36
Standby mode, see section 10.9, page 36
Run mode, see section 10.4, page 34
UPONOR CONTROL SYSTEM WIRED - INSTALLATION AND OPERATION MANUAL
37
11
Maintenance
The maintenance of the Uponor Control System Wired includes
the following:
•
•
•
Manual preventive maintenance
Automatic preventive maintenance
Corrective maintenance
11.1 Manual preventive maintenance
The Uponor Control System Wired requires no preventive
maintenance except cleaning:
1. Use a dry soft cloth to clean the Control System and all its
components.
Stop!
Do not use any detergents to clean the Uponor
System components.
11.2 Automatic preventive maintenance
Uponor Control System Wired is fitted with an automatic exercise
function. This function consists of a test run designed to prevent
the pump and actuators from seizing up due to inactivity.
This exercise is run every 6 days ±24 hours at random:
•
The pump exercise operates only if the pump has not been
activated since the last exercise. The pump is activated 3
minutes during the exercise.
•
The actuators exercise operates only if the actuators have not
been activated since the last exercise. The exercise consists of
opening and completely closing the actuators:
•
•
5 minutes to open an actuator
9 minutes to close an actuator
11.3 Corrective maintenance
11.3.1
Fallback mode
If a thermostat is short-circuited or not detected, the controller
executes the fallback mode to maintain the temperature in the
room (heating or cooling) until the problem is resolved.In fallback
mode the actuators will be controlled as follows:
•
•
7 min open
14 min closed
If the wire is broken, the preceding thermostat in order control
the actuators. If this is not possible, the fallback mode will be
activated.
11.3.2
Resetting the controller
If the controller does not work as expected, for example due to a
hang-up, it can be reset to solve the problem:
1. Disconnect and reconnect the controller to AC power.
11.4 Troubleshooting
The table below shows problems and alarms that can occur with
the Uponor Control System and describes solutions.
38
UPONOR CONTROL SYSTEM WIRED - INSTALLATION AND OPERATION MANUAL
Problem
Indication
Probable cause
Room too cold in heating The thermostat does not switch on The thermostat is connected on a
mode
or off with heating or cooling
bad channel
demand
or
The indicator window on the
The actuator does not open
Room too warm in
actuator does not turn white
cooling mode
Check the thermostat setpoint
Thermostat setting too low
Solution
1. Check Installation report.
2. Check the wiring.
1. Replace the actuator.
2. Check that the controller
output is +24 V DC during
heating demand.
1. Change temperature set point.
2. Use maximum and minimum
settings to protect system
from consequences of
unreasonable temperature
settings.
Temperature displayed on
thermostat drops after thermostat
is moved
Thermostat may be infl uenced by 1. Change location of
external heat source
thermostat.
Check thermostat wiring
Thermostats of individual rooms
are incorrectly connected to the
controller
Check thermostat and actuator
connections in the controller
Autolinking in controller is violated 1. Correct thermostat and
by incorrect thermostat and/or
actuator connections in the
actuator wiring
controller
ECO mode is displayed on
thermostat
1. Correct thermostat
connections in the controller
The thermostat is out of order
1. Replace the thermostat.
ECO mode
1. Change ECO profile or assign
another profile to room
2. Cancel rest of ECO period by
pressing a thermostat key
Floor is cold
Holiday mod is displayed on
thermostat
Holiday mode
1. Cancel Holiday mode
No heat demand from underfloor
heating system
Room is heated by another heat
source
1. Change thermostat position
Room temperature OK but fl oor is
cold
All rooms are cold in
heating mode
Holiday mod is displayed on timer
Holiday mode
1. Cancel Holiday mode
ECO mode is displayed on timer
ECO mode
1. Change ECO profile or assign
another profile to room
or
2. Cancel rest of ECO period by
pressing a thermostat key
All rooms are warm in
cooling mode
Uneven heating in the
house
The heat appears to shift from zone Zones assigned to loops, actuators 1. Check that loops are assigned
to zone in the house.
and thermostats do not
to correct zones.
correspond.
2. Check that the actuators are
connected to the same zone in
the controller as on the
manifold.
3. Check that thermostatsare
connected to the correct zone
in the controller.
UPONOR CONTROL SYSTEM WIRED - INSTALLATION AND OPERATION MANUAL
39
Problem
Indication
The system does not start The power indicator in the
controller is off
Probable cause
Solution
There is no AC power in the
controller
1. Check that the controller is
connected to AC power.
2. Check the wiring in the 230 V
compartment.
3. Check that there is 230 V AC
power in the wall socket.
There is 230 V AC power in the wall Faulty power cable
socket but not in 230 V
compartment
1. Replace power cable and plug.
Uneven fl oor
temperature
Floor temperature is changing
Supply water temperature too high 1. Check boiler or shunt
abnormally between hot and cold in
heating mode
The thermostat is not
supplied with
+6–12 V DC
The thermostat does not switch on There is a problem with a terminal 1. Check the terminal block.
or off with heating or cooling
block
demand
The thermostat does not switch on The thermostat cable is faulty
or off with heating or cooling
The thermostat is out of order
demand
Thermostat T-36 or T-38 An asterisk
is set in RFT for using a
screen
floor sensor or RS mode
for using a remote sensor,
but the sensor is not
sensed
is blinking on the
The Uponor Digital
Nothing displayed on Uponor
thermostat or Timer is
Digital thermostat or Uponor Timer
blank after installation
screen
and powering up of the
Uponor Controller C-33/
C-35
40
1. Replace the thermostat.
There is a short circuit in the sensor 1. Replace the thermostat cable.
connection or the sensor is missing
The sensor is missing
1. Reconnect the sensor or
connect a missing sensor.
The Uponor Digital Thermostat
1. Loosen the screws on the
back plate has been deformed or
wallplate so that thermostat’s
bent during installation. No power
back part is not deformed.
reaching the thermostat.
2. Reinstall front part and
confirm power-up after a few
seconds.
Uponor thermostat T-38 Uponor thermostat T-38 will not
The Uponor thermostat T-38 is
will not follow the Z1 or follow the Z1 or Z2 timing schedule following the local time schedule
Z2 timing schedule
as specified.
defined on Uponor Timer
I-36
The Uponor Timer I-36
Flashing house and hand symbol
will not follow the
specified time scheduling
1. Replace the thermostat cable.
1. For the Uponor Thermostat T38 to follow the Timer I-36
time schedule, the
programming must be turned
OFF as described in section
9.7, page 28.
Uponor Timer I-36 has been forced 1. To return to nomal scheduling
into econony mode by a remote
mode the dry contact input
system
must be opened again by the
remote system.
UPONOR CONTROL SYSTEM WIRED - INSTALLATION AND OPERATION MANUAL
12
Technical data
Controller
Thermostats and Timer
•
•
CE marking:
•
•
•
•
•
•
•
•
Power supply: 230 V AC +10/-15 %, 50 Hz
Operating temperature: 0 °C to +55 °C
•
< 2 W without any charge
230 V AC +10 %/-15 %
•
< 250 VA
Heating–cooling and dew-point inputs: Only dry contact
•
Actuator outputs:
24 V DC ±5 %, 436 mA maximum per output 1 and 2
Dew-point sensor module output:
24 V DC ±5 %, 40 mA maximum
•
•
•
T-33, T-35, T-37: 0 °C to 50 °C
T-34, T-36, T-38, I-36: 0 °C to 40 °C
T-33, T-35, T-37: -20 °C to +70 °C
T-34, T-36, T-38, I-36: -10 °C to +60 °C
Ambient relative humidity (RH):
T-33, T-35, T-37: < 95 % at 20 °C
T-34, T-36, T-38, I-36: < 85 %
Consumption: < 5 mA
•
•
24 V DC ±5 %, 218 mA maximum per output 3 to 12
T-34, T-36, T-38, I-36: IP31
Storage temperature:
•
•
Only dry contact
T-33, T-35, T-37: IP20
Operating temperature:
•
•
Pump and boiler relay outputs:
•
•
•
< 90 W in full charge
EMC tests: EN 60730-1 and EN 301-489-3
Isolation:
•
•
Power consumption:
•
•
•
•
Ambient relative humidity (RH): < 95 % at 20 °C
Low voltage tests: EN 60730-1* and EN 60730-2-9***
Power supply: +6 to +12 V DC through wires from controller
•
•
Storage temperature: -20 °C to +70 °C
•
•
•
•
•
•
•
Isolation: IP20
•
•
•
•
•
Low voltage tests: EN 60730-1* and EN 60730-2-1**
Electromagnetic compatibility (EMC) tests: EN 60730-1
and EN 301-489-3
CE marking:
All thermostats: < 5 mA
Timer I-36: < 15 mA
Backup time, T-38 and I-36 only: 2 h
Wire thermostat to controller: 2×0.5 mm2, < 50 m
Wire thermostat to floor sensor: < 4 m
Supply connection: wires 1.5 mm² maximum
Pump and boiler connection: wires 1.5 mm² maximum
*) EN 60730-1 Automatic electrical controls for household and
similar use, Part 1: General requirements
**) EN 60730-2-1 Automatic electrical controls for household
and similar use, Part 2-1: Particular requirements for electrical
controls for electrical household appliances
***) EN 60730-2-9 Automatic electrical controls for household
and similar use, Part 2-9: Particular requirements for temperature
sensing controls
Cables
The following table specifies cables to be used guaranteed without EMC problems:
Cable
Standard cable length
Maximum cable length
Wire gauge
C-33/C-35 to actuator
0.75 m
2m
0.2 – 1.5 mm2
C-33/C-35 to thermostat
—
50 m
2×0.5 mm2
Thermostat to external sensor
5m
5m
0.6 mm2
Thermostat to floor sensor
4m
4m
0.75 mm2
C-33/C-35 to heating/cooling relay
—
20 m
0.2 – 1.5 mm2
C-33/C-35 to timer
—
5m
0.2 – 1.5 mm2
C-33/C-35 to dew-point sensor module
—
20 m
0.2 – 1.5 mm2
UPONOR CONTROL SYSTEM WIRED - INSTALLATION AND OPERATION MANUAL
41
Uponor Controller C-35 layout
Pos. Description
Pos. Description
1
Connectors for heating–cooling relay
7
Push-button for Heating or Heating / Cooling mode
2
Connectors for timer
8
Bicoloured power indicator
3
Connectors for dew-point sensor unit
• Red = Heating mode
4
Connectors for 1–14 actuators
• Green = Heating–cooling mode
5
Connectors for 1–12 thermostats
6
230 V AC compartment
• Off = Power off
C-35 wiring diagram
42
UPONOR CONTROL SYSTEM WIRED - INSTALLATION AND OPERATION MANUAL
Uponor Controller C-33 layout
Pos. Description
Pos. Description
1
Connectors for 1–8 actuators
4
2
Connectors for 1–6 thermostats
• Red = Power on (heating mode)
3
230 V AC compartment
• Off = Power off
Power indicator
C-33 wiring diagram
UPONOR CONTROL SYSTEM WIRED - INSTALLATION AND OPERATION MANUAL
43
Installation report
Controller No.
Channels
Rooms
#1
Floor sensor
Relay
Pump
Yes
+24 V DC
No
230 V AC
Yes
No
Timer
Yes
No
44
UPONOR CONTROL SYSTEM WIRED - INSTALLATION AND OPERATION MANUAL
UPONOR CONTROL SYSTEM WIRED - INSTALLATION AND OPERATION MANUAL
45
Uponor Housing Solutions Ltd.
Snapethorpe House Rugby Road,
Lutterworth Leicestershire LE17 4HN
Tel. +44 1455 550 355
Fax +44 1455 550 366
www.uponorhousingsolutions.co.uk
Uponor reserves the right to change specifications without prior notice, in keeping with our
policy of continuous improvement and development.