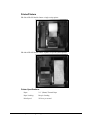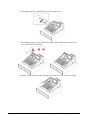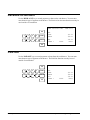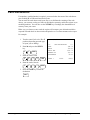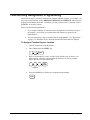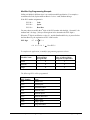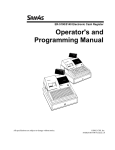
1
SAM4s ER-900 Series Electronic Cash Register Operator’s and Programming Manual ER-920 Shown Above with Optional Card Reader All specifications are subject to change without notice ©2012 CRS, Inc ER-900 Manual Version 1.7 CRS, Inc. Limited Warranty and Disclaimers of Warranty This manual has been developed by CRS, Inc. It is intended for the use of its customers and service personnel and should be read in its entirety before attempting to install, use or program the product(s). Nothing contained in this manual shall be deemed to be, and this manual does not constitute, a warranty of, or representation with respect to, the product or any of the products to which this manual applies. This manual is subject to change without notice and CRS, Inc. has no obligation to provide any updates or corrections to this manual. Further, CRS, Inc. also reserves the right, without prior notice, to make changes in equipment design or components as it deems appropriate. No representation is made that this manual is complete or accurate in all respects and CRS, Inc. shall not be liable for any errors or omissions contained in this manual. In no event shall CRS, Inc. be liable for any incidental or consequential damages relating to or arising out of the use of this manual. This document contains proprietary information that is protected by copyright. All rights are reserved. No part of this document may be photocopied or reproduced without prior written consent of CRS, Inc. NOTICE IF ANY WARRANTY IS EXTENDED TO YOU WITH REGARD TO THE PRODUCT(S) TO WHICH THIS MANUAL APPLIES, IT IS A WARRANTY FROM THE ENTITY OR INDIVIDUAL FROM WHOM YOU DIRECTLY PURCHASED THE PRODUCT(S). SUBJECT TO THE FOREGOING, UNLESS YOU ARE A DIRECT END USER CUSTOMER OF CRS, INC., CRS, INC. DOES NOT EXTEND TO YOU ANY EXPRESS WARRANTY OR ANY IMPLIED WARRANTY AND EXPRESSLY DISCLAIMS ANY IMPLIED WARRANTY OF MERCHANTABILITY, FITNESS FOR USE, OR FITNESS FOR ANY PARTICULAR PURPOSE, OR ANY WARRANTY OF NON-INFRINGEMENT OF INTELLECTUAL PROPERTY RIGHTS IN CONNECTION WITH THE PRODUCT(S) OR ANY SOFTWARE, DRIVERS, OR PROGRAMMING PRODUCT, WHETHER EMBEDDED IN PRODUCT(S) OR PROVIDED AS A SEPARATE PROGRAM, OR USED IN CONJUNCTION WITH THIS/THESE PRODUCT(S). CRS, INC. SPECIFICALLY DOES NOT WARRANT THAT THE OPERATION OF ANY DRIVERS, SOFTWARE, OR PROGRAMMING PRODUCTS LICENSED HEREUNDER, WHETHER EMBEDDED IN PRODUCTS OR PROVIDED AS SEPARATE PROGRAMS, SHALL BE UNINTERRUPTED OR ERROR FREE OR THAT FUNCTIONS CONTAINED IN SUCH DRIVERS, SOFTWARE OR PROGRAMMING PRODUCTS SHALL OPERATE IN COMBINATION(S) WHICH MAY BE SELECTED FOR USE BY YOU OR OTHERWISE MEET YOUR REQUIREMENTS. CRS, Inc. is not responsible for any damages or loss, either direct, indirect, special, incidental or consequential, which you may experience as a result of your purchase or use of the product(s). Your sole remedy in the event that you encounter any difficulties with the product(s) is against the entity or individual from whom you purchased the product(s). Revision 2.0 - April 1, 2005 WARNING - U.S. THIS EQUIPMENT GENERATES, USES AND CAN RADIATE RADIO FREQUENCY ENERGY, AND IF NOT INSTALLED AND USED IN ACCORDANCE WITH THE INSTRUCTIONS MANUAL, MAY CAUSE INTERFERENCE TO RADIO COMMUNICATIONS. IT HAS BEEN TESTED AND FOUND TO COMPLY WITH THE LIMITS FOR A CLASS A COMPUTING DEVICE PURSUANT TO SUBPART J OF PART 15 OF FCC RULES WHICH ARE DESIGNED TO PROVIDE REASONABLE PROTECTION AGAINST SUCH INTERFERENCE WHEN OPERATED IN A COMMERCIAL ENVIRONMENT. OPERATIONS OF THE EQUIPMENT IN A RESIDENTIAL AREA IS LIKELY TO CAUSE INTERFERENCE IN WHICH CASE THE USER, AT HIS OWN EXPENSE, WILL BE REQUIRED TO TAKE WHATEVER MEASURES MAY BE REQUIRED TO CORRECT THE INTERFERENCE. NOTICE - CANADA THIS APPARATUS COMPLIES WITH THE CLASS “A” LIMITS FOR RADIO INTERFERENCE AS SPECIFIED IN THE CANADIAN DEPARTMENT OF COMMUNICATIONS RADIO INTERFERENCE REGULATIONS. CET APPAREIL EST CONFORME AUX NORMES CLASS “A” D’INTERFERENCE RADIO TEL QUE SPECIFIER PAR MINISTRE CANADIEN DES COMMUNICATIONS DANS LES REGLEMENTS D’INTERFERENCE RADIO. ATTENTION The product that you have purchased may contain a battery that may be recyclable. At the end of its useful life, under various state and local laws, it may be illegal to dispose of the battery into the municipal waste system. Check with your local solid waste officials for details concerning recycling options or proper disposal. Precaution Statements Follow these safety, servicing and ESD precautions to prevent damage and to protect against potential hazards such as electrical shock. 1-1 1. 2. 3. 4. 5. 6. Safety Precautions Be sure that all built-in protective devices are replaced. Restore any missing protective shields. When reinstalling the chassis and its assemblies, be sure to restore all protective devices, including nonmetallic control knobs and compartment covers. Make sure there are no cabinet openings through which people - particularly children - might insert fingers and contact dangerous voltages. Such openings include excessively wide cabinet ventilation slots and improperly fitted covers and drawers. Design Alteration Warning: Never alter or add to the mechanical or electrical design of the SECR. Unauthorized alterations might create a safety hazard. Also, any design changes or additions will void the manufacturer’s warranty. Components, parts and wiring that appear to have overheated or that are otherwise damaged should be replaced with parts that meet the original specifications. Always determine the cause of damage or over- heating, and correct any potential hazards. Observe the original lead dress, especially near the following areas: sharp edges, and especially the AC and high voltage supplies. Always inspect for pinched, out-of-place, or frayed wiring. Do not change the spacing between components and the printed circuit board. Check the AC power cord for damage. Make sure that leads and components do not touch thermally hot parts. 7. Product Safety Notice: Some electrical and mechanical parts have special safety-related characteristics that might not be obvious from visual inspection. These safety features and the protection they give might be lost if the replacement component differs from the original - even if the replacement is rated for higher voltage, wattage, etc. Components that are critical for safety are indicated in the circuit diagram by shading, () or (). Use replacement components that have the same ratings, especially for flame resistance and dielectric strength specifications. A replacement part that does not have the same safety characteristics as the original might create shock, fire or other hazards. CAUTION Danger of explosion if battery is incorrectly replaced. Replace only with the same or equivalent type recommended by the manufacturer. Dispose used batteries according to the manufacturer’s instructions. ATTENTION ll y a danger d’explosion s’il y a remplacement incorrect de la batterie. Remplacer uniquement avec une batterie du même type ou d’un type équivalent recommandé par le constructeur. Mettre au rebut les batteries usagées conformément aux instructions du fabricant. SAM4s ER-900 Series Operator's & Programming Manual v.1.7 3 1-2 Servicing Precautions WARNING: First read the-Safety Precautions-section of this manual. If some unforeseen circumstance creates a conflict between the servicing and safety precautions, always follow the safety precautions. WARNING: 1. 2. 3. 4. An electrolytic capacitor installed with the wrong polarity might explode. Servicing precautions are printed on the cabinet. Follow them. Always unplug the units AC power cord from the AC power source before attempting to: (a) Remove or reinstall any component or assembly (b) Disconnect an electrical plug or connector (c) Connect a test component in parallel with an electrolytic capacitor Some components are raised above the printed circuit board for safety. An insulation tube or tape is sometimes used. The internal wiring is sometimes clamped to prevent contact with thermally hot components. Reinstall all such elements to their original position. After servicing, always check that the screws, components and wiring have been correctly reinstalled. Make sure that the portion around the serviced part has not been damaged. 5. 6. 7. 8. Check the insulation between the blades of the AC plug and accessible conductive parts (examples : metal panels and input terminals). Insulation Checking Procedure: Disconnect the power cord from the AC source and turn the power switch ON. Connect an insulation resistance meter (500V) to the blades of AC plug. The insulation resistance between each blade of the AC plug and accessible conductive parts (see above) should be greater than 1 megohm. Never defeat any of the B+ voltage interlocks. Do not apply AC power to the unit (or any of its assemblies) unless all solid-state heat sinks are correctly installed. Always connect an instrument’s ground lead to the instrument chassis ground before connecting the positive lead ; always remove the instrument’s ground lead last. 1-3 Precautions for Electrostatically Sensitive Devices (ESDs) 1. 2. 3. 4. 5. 4 Some semiconductor (solid state) devices are easily damaged by static electricity. Such components are called Electrostatically Sensitive Devices (ESDs); examples include integrated circuits and some field-effect transistors. The following techniques will reduce the occurrence of component damage caused by static electricity. Immediately before handling any semiconductor components or assemblies, drain the electrostatic charge from your body by touching a known earth ground. Alternatively, wear a discharging wriststrap device. (Be sure to remove it prior to applying power - this is an electric shock precaution.) After removing an ESD-equipped assembly, place it on a conductive surface such as aluminum foil to prevent accumulation of electrostatic charge. Do not use freon-propelled chemicals. These can generate electrical charges that damage ESDs. Use only a grounded-tip soldering iron when soldering or unsoldering ESDs. 6. 7. 8. 9. Use only an anti-static solder removal device. Many solder removal devices are not rated as antistatic; these can accumulate sufficient electrical charge to damage ESDs. Do not remove a replacement ESD from its protective package until you are ready to install it. Most replacement ESDs are packaged with leads that are electrically shorted together by conductive foam, aluminum foil or other conductive materials. Immediately before removing the protective material from the leads of a replacement ESD, touch the protective material to the chassis or circuit assembly into which the device will be installed. Minimize body motions when handling unpackaged replacement ESDs. Motions such as brushing clothes together, or lifting a foot from a carpeted floor can generate enough static electricity to damage an ESD. SAM4s ER-900 Series Operator's & Programming Manual v.1.7 Contents Introduction 11 About the ER-900 Series ......................................................................................................... 11 Using This Manual .................................................................................................................. 12 Using Flowcharts....................................................................................................... 12 Basic Features and Functions .................................................................................................. 13 Display ...................................................................................................................... 14 Printer/Printers .......................................................................................................... 15 Control Lock ............................................................................................................. 16 Keyboards.................................................................................................................. 17 Initial Clear................................................................................................................ 19 Getting Started 21 Quick Start Steps ..................................................................................................................... 21 Unpacking................................................................................................................................ 22 Installing the Paper.................................................................................................... 22 Models with Two Printer Stations............................................................................. 23 Clearing Memory..................................................................................................................... 26 ER-920/ER-940 Memory All Clear........................................................................... 26 ER-925/ER-945 Memory All Clear........................................................................... 27 Straight Percentage Tax Rate Programming............................................................................ 29 Programming Tax & Preset Status for Keyboard PLUs .......................................................... 30 Programming a Price for a Preset Keyboard PLU ................................................................... 31 Programming a Descriptor for Keyboard PLUs ...................................................................... 32 Operations 35 Function Key Descriptions ...................................................................................................... 35 Clerk Sign-On/Sign-Off .......................................................................................................... 41 Direct Sign-On .......................................................................................................... 41 Coded Sign-On.......................................................................................................... 42 Receipt On and Off.................................................................................................................. 42 PLU Registrations.................................................................................................................... 43 Keyboard PLU Entries .............................................................................................. 43 Numeric PLU Entries ................................................................................................ 46 Modifier Entries ........................................................................................................ 48 Percentage Key (%) Registrations ........................................................................................... 49 Void and Correction Operations.............................................................................................. 52 Error Correct ............................................................................................................. 52 Previous Item Void.................................................................................................... 53 Merchandise Return .................................................................................................. 54 VOID Control Lock Position (Transaction Void) ..................................................... 55 Cancel........................................................................................................................ 56 Subtotal Operations ................................................................................................................. 57 Subtotal...................................................................................................................... 57 SAM4s ER-900 Series Operator's & Programming Manual v.1.7 Introduction • 5 Add Check (Tray Subtotal) .......................................................................................57 Eat-In/Take-Out/Drive Thru Operations ...................................................................58 Tax Shift Operations................................................................................................................59 Tendering Operations ..............................................................................................................61 Cash ...........................................................................................................................61 Check.........................................................................................................................61 Charge .......................................................................................................................62 Split Tender ...............................................................................................................63 Post Tendering...........................................................................................................63 Receipt on Request ..................................................................................................................64 Training Mode .........................................................................................................................64 Clerk Interrupt .........................................................................................................................64 Non-Add Number ....................................................................................................................65 No Sale.....................................................................................................................................65 Received on Account ...............................................................................................................66 Paid Out ...................................................................................................................................66 Table Service Restaurant Operations.......................................................................................67 Overview ...................................................................................................................67 Posting Guest Checks Manually with the Previous Balance Key .............................69 Soft Check .................................................................................................................70 Hard Check................................................................................................................73 Fast Food Drive Thru ................................................................................................76 Promo Function .........................................................................................................77 Waste Function..........................................................................................................77 Charge Posting Operations ......................................................................................................78 Currency Conversion ...............................................................................................................81 Food Stamp Operations ...........................................................................................................82 Scale Operations ......................................................................................................................83 Direct Scale Entry......................................................................................................83 Manual Weight Entry ................................................................................................83 Scale with Automatic Tare Entry ..............................................................................84 Scale with Manual Tare Entry ...................................................................................84 Validation ................................................................................................................................85 Integrated Payment Operations................................................................................................85 Not Found PLU........................................................................................................................86 Not Found PLU: Quick Entry...................................................................................86 Not Found PLU: Detail Entry...................................................................................86 Not Found PLU Report .............................................................................................86 Management Functions 87 Introduction..............................................................................................................................87 Cash Declaration......................................................................................................................88 System Reports ........................................................................................................................90 Running a Report – General Instructions ..................................................................90 Report Table ..............................................................................................................91 S-Mode Programming 93 Overview..................................................................................................................................93 Clearing Memory.....................................................................................................................94 Memory All Clear......................................................................................................94 Clear All Totals and Counters ...................................................................................94 Clear Grand Total ......................................................................................................94 Clear PLU File...........................................................................................................94 6 • Introduction SAM4s ER-900 Series Operator's & Programming Manual v.1.7 Self Tests ................................................................................................................................. 95 Memory Allocation.................................................................................................................. 96 Memory Capacity ...................................................................................................... 96 Memory Allocation Program..................................................................................... 97 Memory Allocation Program Scan ............................................................................ 98 Function Key Assignment Programming ................................................................................ 99 Function Key Codes ................................................................................................ 100 RS-232 Communication Option Programs ............................................................................ 101 RS-232 Option Chart............................................................................................... 102 SD Card Utilities ................................................................................................................... 104 Program Backup and Restore .................................................................................. 104 Saving Reports to an SD Card................................................................................. 105 Load/Save Receipt Images .................................................................................................... 106 1. Preparing a Graphic Logo Bitmap for an ER-900 Series ................................... 106 2. Use the PC Utility to Convert the Image............................................................ 107 3. Copy the Images to an SD Card ......................................................................... 107 4. Load the Images by SD Card ............................................................................. 108 5. Saving Images from an ER-900 to an SD Card.................................................. 108 Flash ROM Updates .............................................................................................................. 109 Flash ROM Update by SD....................................................................................... 109 Flash ROM Update by PC....................................................................................... 110 Flash ROM Information ........................................................................................................ 113 P-Mode Programming 115 Default Program .................................................................................................................... 115 Tax Programming .................................................................................................................. 116 Straight Percentage Tax Rate Programming ........................................................... 117 Tax Table Programming.......................................................................................... 118 PLU Programming................................................................................................................. 120 Program 100 - PLU Status Programming................................................................ 121 Program 110 - PLU Auto Tare Programming ......................................................... 125 Program 150 - PLU Group Assignment .................................................................. 126 Program 200 - PLU Price/HALO Programming ..................................................... 127 Program 250 - PLU Stock Amount Programming .................................................. 128 Program 300 - PLU Descriptor Programming......................................................... 129 Program 350 - PLU Link Programming.................................................................. 132 Program 400 – PLU Delete Programming .............................................................. 133 Program 450 – PLU Mix and Match Programming ................................................ 134 System Option Programming................................................................................................. 135 System Option Table ............................................................................................... 136 System Options - Reference Information ................................................................ 140 Print Option Programming .................................................................................................... 143 Print Option Table ................................................................................................... 144 Function Key Programming .................................................................................................. 150 Program 70 - Function Key Options ....................................................................... 150 Program 80 - Function Key Descriptor ................................................................... 151 Program 90 - Function Key HALO ......................................................................... 152 Instructions for Currency Conversion Rate - Program 90....................................... 153 ADD CHECK - Function Key Options ................................................................... 154 CANCEL - Function Key Options .......................................................................... 155 CASH - Function Key Options ............................................................................... 155 CHARGE 1-8 - Function Key Options ................................................................... 156 CHECK - Function Key Options............................................................................. 157 CHECK CASHING - Function Key Options.......................................................... 158 SAM4s ER-900 Series Operator's & Programming Manual v.1.7 Introduction • 7 CHECK ENDORSEMENT - Function Key Options ..............................................158 CHECK # - Function Key Options..........................................................................159 DRIVE THRU / EAT IN / TAKE OUT - Function Key Options ...........................160 ERROR CORRECT - Function Key Options..........................................................161 F/S Subtotal - Function Key Options ......................................................................161 F/S TEND - Function Key Options .........................................................................162 GUEST - Function Key Options .............................................................................163 #/NS - Function Key Options ..................................................................................164 MDSE RETURN - Function Key Options ..............................................................165 MODIFIER 1-5 - Function Key Options.................................................................166 PBAL - Function Key Options ................................................................................168 PROMO - Function Key Options ............................................................................168 PAID OUT 1-3 - Function Key Options .................................................................169 PRINT CHECK - Function Key Options ................................................................169 RECD ON ACCT 1-3 - Function Key Options .......................................................170 SCALE - Function Key Options..............................................................................170 SERVICE - Function Key Options..........................................................................171 SUBTOTAL - Function Key Options .....................................................................171 TABLE - Function Key Options .............................................................................172 TARE - Function Key Options................................................................................172 TAX EXEMPT - Function Key Options .................................................................173 TIP - Function Key Options ....................................................................................174 VALIDATE - Function Key Options ......................................................................175 VOID - Function Key Options ................................................................................175 WASTE - Function Key Options ............................................................................176 %1-%5 Function Key Options.................................................................................177 Mix and Match Discount Programming ................................................................................178 Program 600 – Trip Level Programming.................................................................179 Program 601 – Price Programming .........................................................................179 Program 610 – Mix & Match Descriptor Programming..........................................180 Clerk Programming................................................................................................................181 Program 800 - Secret Code Programming...............................................................181 Program 801 - Drawer Assignment .........................................................................182 Program 810 - Clerk Descriptor Programming .......................................................183 Group Programming ..............................................................................................................184 Miscellaneous Programming .................................................................................................186 Program 1500 - Macro Key Sequence Programming..............................................186 Program 700 – Logo/Endorsement Message Programming ....................................187 Program 701 - Financial Report Descriptor Programming......................................188 Program 710 - Clerk Report Descriptor Programming............................................190 Program 711 - Macro Name Programming .............................................................192 Program 720 – Datatran Message Program .............................................................193 Program 1000 - NLU Code Number Programming ................................................194 Program 1100 - Cash-In-Drawer Limit Programming ............................................195 Program 1200 - Check Change Limit Programming ...............................................196 Program 1300 - Date and Time Programming ........................................................197 Program 1400 - Scale Tare Weight Programming ..................................................198 Program 1600 - Machine Number Programming ....................................................199 Program 1900 – Starting Kitchen Printer Order Number........................................199 Program Scans .......................................................................................................................200 Sample Reports 201 Financial ................................................................................................................................201 Time.......................................................................................................................................205 8 • Introduction SAM4s ER-900 Series Operator's & Programming Manual v.1.7 PLU........................................................................................................................................ 206 Clerk ...................................................................................................................................... 207 Individual Clerk..................................................................................................................... 208 Groups ................................................................................................................................... 209 Stock ...................................................................................................................................... 210 Open Check ........................................................................................................................... 211 Balancing Formulas ............................................................................................................... 212 Integrated Payment Appendix 213 One Day Example of Credit Authorization ........................................................................... 213 Open Batch.............................................................................................................. 213 Sample Credit Transaction ...................................................................................... 214 Sample Debit Transaction ....................................................................................... 215 Gift Card Operations ............................................................................................... 216 Manual Card Entry (Credit/Gift Only) .................................................................... 218 Merchandise Return ................................................................................................ 219 Void Transaction ..................................................................................................... 220 Local Total Report................................................................................................... 220 Tip (Gratuity) Entry................................................................................................. 220 Close Batch ............................................................................................................. 221 Reset Mode Procedures ......................................................................................................... 222 Datatran Function Table.......................................................................................... 222 Initialize EFT........................................................................................................... 223 Clear Curr Batch...................................................................................................... 223 Chg Batch Number.................................................................................................. 223 Issue Local Total ..................................................................................................... 223 Issue Transaction..................................................................................................... 224 Issue Batch Status.................................................................................................... 224 Dial In Load/Dial Out Load .................................................................................... 225 Pin Pad Initialize ..................................................................................................... 226 DataTran Diagnostics .............................................................................................. 226 Log File Report ....................................................................................................... 227 Required ECR Programs........................................................................................................ 228 Local Transaction Report Key............................................................................................... 228 Glossary 231 Manual Revision Record 239 SAM4s ER-900 Series Operator's & Programming Manual v.1.7 Introduction • 9 10 • Introduction SAM4s ER-900 Series Operator's & Programming Manual v.1.7 Introduction About the ER-900 Series The ER-900 Series is offered in four different configurations. There are two flat keyboard models that work well for restaurants, food service shops, or convenience stores and two raised-key models for retail shops. This manual includes instructions for all models. The keyboard and printer configuration defines the model. All other features are the same, unless otherwise noted. SAM4s ER-920 Flat 150-position Keyboard Receipt Printer. SAM4s ER-940 Flat 150-position Keyboard Receipt and Journal Printers. SAM4s ER-925 Raised-key Keyboard Receipt Printer. SAM4s ER-945 Raised-key keyboard Receipt and Journal Printers. SAM4s ER-900 Series Operator's & Programming Manual v.1.7 Introduction • 11 Using This Manual This manual provides you with a means to use your SAM4s cash register to its fullest potential. It is divided into six sections: "Getting Started" on page 21, provides quick start steps to help you get up and running for basic applications. "Operations" on page 35, guides you through the basic operation sequences. "Management Functions" on page 87, explains manager controlled functions, along with reports and balancing information. "S-Mode Programming" on page 93 provides instructions for secure programming – usually done by the installing dealer prior to installation. “P-Mode Programming” on page 115 provides complete programming instructions, including PLU, function key programs, and system options. This section is recommended for use by storeowners and managers. Call your SAM4s dealer if you find you need programming assistance. “Sample Reports” on page 201 provides a sample of each register report. The SAM4s ER-900 allows many different user applications. This manual was written with this in mind. Although we have tried to touch on all available options, your specific application may differ. If you have questions concerning the configuration of your ER-900, contact your authorized SAM4s dealer. Using Flowcharts Flowcharts are used to supplement step-by-step instructions throughout this manual. For example, the following flowchart describes how to register $1.00 into the PLU1 key: 1 0 0 PLU #1 This flowchart means: 1. Press numeric key 1. 2. Press numeric key 0. 3. Press numeric key 0. 4. Press PLU #1. Follow the flowchart from left to right, pressing the keys in the order they are shown. Numeric keypad entries are shown as square keys. PLU and function keys are shown as rectangular keys. 12 • Introduction SAM4s ER-900 Series Operator's & Programming Manual v.1.7 Basic Features and Functions SAM4s ER-900 series electronic cash registers are designed to fit into many different retail and restaurant environments. Standard features include: Easy drop-and-print paper loading. Cash drawer with 5 bill and 5 coin compartments and media storage. A two-line 16-character backlit LCD display and a 9-character rotating rear display. 7-position control lock. 24-hour real-time clock with automatic day and date change. Four tax rates with value added tax (VAT) capability. Each tax rate is programmable for tax table look-ups and/or straight percentage tax programming. Tax rate 4 may be programmed to accommodate Canadian goods and services tax (GST). Memory allocation system supports the following system features. (Note: maximums are theoretical and may be available when other memory options are minimized.) o Up to approximately 4000 PLUs that can be accessed directly through individual keyboard PLU keys or indirectly through the PLU look-up key. o Operation for up to 99 clerks or cashiers with separate report totals. o Up to a maximum of 99 group totals are available to accumulate totals of individual PLUs that are assigned to each group. Each PLU can be assigned to up to three different groups. o Hard or soft check tracking for up to 200 guest checks, with soft checks containing up to 100 lines of items. o 20, up to a maximum of 100 Mix and Match PLU discount tables. o Up to 5 PLU modifier keys (i.e. small, medium, and large). A programmable keyboard allowing customized placement of functions, as they are needed. (See "Function Key Descriptions" on page 35 for a list of available functions). Function keys for posting charges and payments to accounts or guest checks. You can choose manual previous balance posting or automatic balance tracking. Food stamp sorting and tendering for stores that accept food stamp payments. Check, Cash, and up to eight Charge keys. Management X and Z reports. Two standard RS-232C (DB9) communication ports for connection to optional POS peripherals. Two additional RS232C ports (RJ-45) are optional. The ER-900 series can connect to a scale, kitchen printer, remote printer, scanner, coin dispenser, pole display, liquor interface, video surveillance system, modem, Datatran integrated payment appliance, or a PC for polling and/or programming. SAM4s ER-900 Series Operator's & Programming Manual v.1.7 Introduction • 13 Display The ER-900 comes with a two-line 16-character backlit LCD display. As items are registers, the item description will display on the first line; price and quantity information will display on the second line. Additional information and error messages will display as appropriate, and may be accompanied by an error tone. Messages and Error Conditions SEQUENCE ERROR PLU NO DATA ERR CLERK ERROR AMOUNT CNT ERR LANTRAN ERR COMM ERROR TIME ERROR OVER LIMIT ERR INACTIVE ERROR X MODE ONLY NON ADD ERROR ADD CHECK ERR CONDIMENT ERROR REQ. EATIN FUNC STOCK ERROR DRAWER ERROR REQ. GUEST # SCALE ERROR CLERK NO MATCH COMPULSORY TARE REQ. DECLARATION OFF LINE ERROR REQ. ENDORSEMENT CONSOL OVER 14 • Introduction REQ. SUBTOTAL PROMO ERROR CHECK OPEN ERR REQ. PASSWORD NO VOID PLU REQ. PORT SETUP REQ PRESET VALUE REQ. OPEN VALUE REQ. AMOUNT REQ. PAYMENT INVALID FUNC. REQ. TABLE # REQ. PBAL REQ. CHECK # ONLY ONE TABLE REQ. VALID RECPT PAPER END RECPT NEAR END COVER OPEN ERR CUTTER JAM ERR J PAPER END J NEAR END POWER FAIL ERR CHARGE POST ERR SAM4s ER-900 Series Operator's & Programming Manual v.1.7 Printer/Printers ER-920 & ER-925 Models feature a single receipt printer. ER-940 & ER-945 Models feature separate receipt and journal printers. Printer Specifications Paper: 2 ¼” (58mm) Thermal Paper Paper Loading: Drop-in Loading Print Speed: 22 Lines per second SAM4s ER-900 Series Operator's & Programming Manual v.1.7 Introduction • 15 Control Lock The control lock has 7 positions, accessed with 5 keys. Each ECR is shipped with two full sets of keys. VOID Use to void (correct) items outside of a sale. OFF REG VOID X OFF The register is inoperable. REG Use for normal registrations. X Use to read register reports. Z Use to read register reports and reset totals to zero. P Use to program the register. S The S position is a hidden position reserved for dealer access. Z P S Before performing any operations in Register Mode a clerk must be signed on. See “Direct Sign-On” or “Coded Sign-On” on page 42 for a description of clerk operations. Control Keys The ER-900 includes two sets of keys that may be used to access the following control lock positions. Positions Accessible Key REG OFF, REG VD VOID, OFF, REG, X Z VOID, OFF, REG, X, Z P VOID, OFF, REG, X, Z, P C ALL POSITIONS Note: Keys may be removed from the control lock in the OFF or REG positions. 16 • Introduction SAM4s ER-900 Series Operator's & Programming Manual v.1.7 Keyboards ER-920/ER-940 Flat Keyboard Versions The ER-920/ER-940 keyboards include 150 key positions with the default legends and key assignments as shown below. The keyboard legend sheet can be replaced by lifting the protective rubber cover. Shaded key locations are fixed and cannot be changed with the exception of the Journal Feed key which can be reprogrammed on the ER-900 & ER-925. FEED JOURNAL FEED ERROR CORR VOID CLERK %1 RA PO #/NS RETUR N %2 TAKE OUT EAT IN DRIVE THRU CANCE L %3 CHECK # SERVIC E TABLE # PRINT CHECK %4 ADD CHECK TAX 1 CONV 1 CHARGE 3 96 MACRO 1 CLEAR PLU X/TIME CHARGE 2 87 97 MACRO 2 7 8 9 CHARGE 1 78 88 98 MACRO 3 4 5 6 CHECK 69 79 89 99 MACRO 4 1 2 3 SUBTL 70 80 90 100 MACRO 5 0 00 . CASH 1 11 21 31 41 51 61 71 81 91 2 12 22 32 42 52 62 72 82 92 3 13 23 33 43 53 63 73 83 93 4 14 24 34 44 54 64 74 84 94 5 15 25 35 45 55 65 75 85 95 6 16 26 36 46 56 66 76 86 7 17 27 37 47 57 67 77 8 18 28 38 48 58 68 9 19 29 39 49 59 10 20 30 40 50 60 ER-925/ER-945 Raised Keyboard Versions The ER-925/ER-945 keyboards include keyboard PLU locations and functions with the default legends and key assignments as shown below. The keyboard can be expanded to 63 PLU key locations. Shaded key locations are fixed and cannot be changed. 1 8 15 2 9 16 3 10 17 4 11 18 5 12 19 6 13 20 7 14 21 SAM4s ER-900 Series Operator's & Programming Manual v.1.7 FEED JOURNAL FEED #/NS TAX 1 CLERK RETUR N CANCEL VOID ERROR CORR RA CLEAR PLU X/TIME %1 PO 7 8 9 CHECK CHARGE 1 4 5 6 1 2 3 0 00 . SUBTOTAL CASH TEND Introduction • 17 ER-925/ER-945 Raised Keyboard Version-Expanded Your authorized dealer can expand the keyboard to 63 PLU key locations as shown below. Shaded key locations are fixed and cannot be changed. 18 • Introduction 1 8 15 22 29 36 43 50 57 2 9 16 23 30 37 44 51 58 3 10 17 24 31 38 45 52 59 4 11 18 25 32 39 46 53 60 5 12 19 26 33 40 47 54 61 6 13 20 27 34 41 48 55 62 7 14 21 28 35 42 49 56 63 FEED JOURNAL FEED #/NS TAX 1 CLERK RETUR N CANCE L VOID ERROR CORR RA CLEAR PLU X/TIME %1 PO 7 8 9 CHECK CHARGE 1 4 5 6 1 2 3 0 00 . SUBTOTAL CASH TEND SAM4s ER-900 Series Operator's & Programming Manual v.1.7 Initial Clear CAUTION: Do not share this information with unauthorized users. Distribute the PGM Mode key only to those you may want to perform this function. The initial clear function allows you to exit any register activity and return to a beginning or cleared state. Any transaction that is in progress will be exited and totals for that transaction will not be updated. Here are some reasons you may want to perform an initial clear: The register is in an unknown state, and you wish to exit the current program or transaction without following normal procedures. You have performed a function that includes a compulsory activity and you wish to bypass the compulsion. An initial clear may be necessary as part of servicing, or troubleshooting. Perform this procedure only as necessary. Contact your SAM4s dealer first if you have questions about operating or programming your SAM4s ER-900. To Perform an Initial Clear: 1. Turn the power switch located on the right side of the register to the OFF position. 2. Turn the control lock to the PGM position. 3. For All Models (ER-920/ER-940/ER-925/ER-945): Press and hold the key position where the SUBTL key is located on the default keyboard layout. 4. While continuing to hold the appropriate key, turn the power switch to the ON position. 5. The message "INITIAL CLEAR OK!” prints when the initial clear is complete. SAM4s ER-900 Series Operator's & Programming Manual v.1.7 Introduction • 19 20 • Introduction SAM4s ER-900 Series Operator's & Programming Manual v.1.7 Getting Started Quick Start Steps Using Quick Start Instructions provided here you can configure your register for use in your retail store. Basic setup instructions include: programming prices, descriptors, and loading a tax percentage. Your ER-900 series ECR is now fully functional for many basic-use applications. Detailed programming steps are found in the full Program section of this manual. A qualified dealer will survey your needs and deliver a more sophisticated program. Complex taxes can be programmed, security options set as needed. Coupons, receipt messages/logos and other commonly used features can be deployed. Dealers will normally charge a program/installation fee for this service. Steps In this chapter: 1. Unpacking 2. Installing the Paper 3. Clearing All Memory 4. Setting a Straight Percentage Tax for Tax Rate 1 5. Programming Tax Status for Keyboard PLUs 6. Programming a Descriptor for Keyboard PLUs SAM4s ER-900 Series Operator's & Programming Manual v.1.7 Getting Started • 21 Unpacking 1. Unpack and unwrap the cash register. 2. Locate in the packing the following items: 1 roll of paper 1 rewind spindle (ER-940/ER-945 only) 2 sets of control keys 3. Remove the cardboard protectors from the cash drawer. 4. Plug the register into a grounded outlet (three-prong), turn the power switch on, insert a control key and turn the key to the REG control lock position. Installing the Paper 1. Remove the printer cover. 2. Push the blue cap lever and then lift up to open the paper cover. 22 • Getting Started SAM4s ER-900 Series Operator's & Programming Manual v.1.7 3. Ensure that the paper is being fed from the bottom of the roll and then close the paper cover slowly until it locks firmly. 4. Pass the leading edge of the paper through the tear-bar slot. Tear off the excess paper. Replace the printer cover. Models with Two Printer Stations The ER-940 and ER-945 models are equipped with separate printers for receipt and journal. Paper loading for these models is shown below: 1. Remove the printer cover. SAM4s ER-900 Series Operator's & Programming Manual v.1.7 Getting Started • 23 2. Push the blue cap lever and then lift up to open the paper cover. 3. Ensure that the paper is being fed from the bottom of the roll and then close the paper cover slowly until it locks firmly 4. Pass the leading edge of the paper through the tear-bar slot. Tear off the excess paper. 24 • Getting Started SAM4s ER-900 Series Operator's & Programming Manual v.1.7 5. Push the blue cap lever and then lift up to open the journal paper cover. 6. Ensure that the paper is being fed from the bottom of the roll and then close the paper cover slowly until it locks firmly. 7. If you wish to use the printer to print a sales journal, insert the paper into the paper takeup spool. Wind the paper two or three turns around the spool shaft and install the spool in the mount and insure that the paper is being fed from the bottom of the roll. SAM4s ER-900 Series Operator's & Programming Manual v.1.7 Getting Started • 25 Clearing Memory Before you use your ER-900 for the first time, you must perform a memory all clear to insure that all totals and counters are cleared and that the default program is installed. CAUTION: The procedures described in this area are security sensitive. Clearing the ER-900 memory after the register is put into service will erase all programming as well as totals and counters. Do not share this information with unauthorized users and distribute the special SERVICE-Mode key only to those you may want to perform these functions. ER-920/ER-940 Memory All Clear 1. Turn the power switch located on the right side of the register to the OFF position. 2. Turn the control lock to the S position. 3. Press and hold the key position where the CHECK key is located on the default keyboard layout: ER-920 and ER-940 Press and hold the CHECK key position during power-up in S mode. 4. Continue to hold the CHECK key while turning the power switch to the ON position. The message “RAM ALL CLEAR" displays. 5. Press the upper left key of the keyboard, then the lower left key, then the upper right key, and finally press the lower right key. 1 3 ER-920 ER-940 2 4 6. After a short delay, the printer will print the message: "Please Wait…" displays. Memory is cleared, the default program is installed and the RAM CLEAR receipt is printed. The display now reads: “PRINTER 2STATION; Y=CASH N=CLEAR”. 7. If you have an ER-920 (one printer station), press CLEAR. If you have an ER-940 (two printer stations), press CASH. 8. The display now reads: “AUTO CUT ?; Y=CASH N=CLEAR”. Press CLEAR. 9. The display now reads: “SERVICE MODE; CLOSED”. The RAM Clear procedure is complete. 26 • Getting Started SAM4s ER-900 Series Operator's & Programming Manual v.1.7 ER-925/ER-945 Memory All Clear 1. Turn the power switch located on the right side of the register to the OFF position. 2. Turn the control lock to the S position. 3. Press and hold the key position where the CHECK key is located on the default keyboard layout: ER-925 and ER-945 Press and hold the SUBTOTAL key position during power-up in S mode. 4. Continue to hold the SUBTOTAL key while turning the power switch to the ON position. The message “RAM ALL CLEAR" displays. 5. Press the upper left key of the keyboard, then the lower left key, then the upper right key, and finally press the lower right key. 1 3 ER-925/ER-945 Default Configuration (21 PLU Keys) 2 1 4 3 ER-925/ER-945 Expanded (63 PLU keys) 2 4 Note: In the default configuration, there are 21 double-width PLU keys. Under each key, the left-most key is inactive and the right-most key is active. The four-key sequence shown with the default configuration will set the keyboard in the default 21-PLU key configuration. When the keyboard is expanded, the four-key sequence shown will set the keyboard in the expanded configuration. If you wish to build a custom configuration, you will want to perform a memory clear for the expanded configuration, and then assign each key position individually. 6. After a short delay, the printer will print the message: "Please Wait…" displays. Memory is cleared, the default program is installed and the RAM CLEAR receipt is printed. The display now reads: “PRINTER 2STATION; Y=CASH N=CLEAR”. 7. If you have an ER-925 (one printer station), press CLEAR. If you have an ER-945 (two printer stations), press CASH. SAM4s ER-900 Series Operator's & Programming Manual v.1.7 Getting Started • 27 8. The display now reads: “AUTO CUT ?; Y=CASH N=CLEAR”. Press CLEAR. 9. The display now reads: “SERVICE MODE; CLOSED”. The RAM Clear procedure is complete. RAM Clear Receipt Example DATE 07/01/2011 FRI TIME 08:37 ================================ RAM ALL CLEAR OK ! ================================ RAM (4M) OK EPROM INFO. VERSION : USA 01.002 CHECKSUM : OBEA BOOT/APP : 4C02/BFE8 JUNE. 29 2011 CLERK 0 28 • Getting Started 000001 00000 SAM4s ER-900 Series Operator's & Programming Manual v.1.7 Straight Percentage Tax Rate Programming When tax requirements may be met using a straight percentage rate, use the following method to program a tax as a straight percentage. Programming Straight Percentage Tax Rates and Status 1. Turn the control lock to the PGM position. 2. If the tax is a percentage rate, enter the tax rate with a decimal. (0.000-99.999). It is not necessary to enter preceding zeros, but you must enter the decimal. For example, for 6%, enter 06.000 or 6.000. 3. Enter 00. (Entries here set tax options for value added tax and or Canadian GST. See “Straight Percentage Tax Rate Programming” on page 117 for details.) 4. Press the appropriate Tax Shift key for the tax you are programming. 5. Press the CASH key to end programming. Tax Rate Programming Flowchart . 0 0 TAXSHIFT 1 CASH Tax Rate You must enter decimal SAM4s ER-900 Series Operator's & Programming Manual v.1.7 Getting Started • 29 Programming Tax & Preset Status for Keyboard PLUs Tax status and preset status for PLUs is set as part of the PLU Status Program, where many other PLU options are set as well. For many basic users, tax and preset status are the only necessary settings, so a short cut program sequence is shown here. If you need to review other PLU status options, go to “Program 100 - PLU Status Programming” on page 121 for detailed instructions. 1. Turn the control lock to the P position. 2. To begin the program, enter 1 0 0, press the SUBTL key. 3. Press a PLU key on the keyboard. 4. For an open-entry PLU taxable by tax rate 1, enter the nine digits as shown and press the X/TIME key: 5 0 0 0 0 0 0 0 0 X/TIME 0 0 X/TIME 0 0 X/TIME For a preset PLU taxable by tax rate 1, enter: 4 0 0 0 0 0 0 For an open-entry, non-taxable PLU, enter: 1 0 0 0 0 0 0 To return the PLU to the default, non-taxable, preset, status, enter: 0 X/TIME 5. To program additional PLUs, repeat from step 3, or press the CASH key to finalize the program. CASH 30 • Getting Started SAM4s ER-900 Series Operator's & Programming Manual v.1.7 Programming a Price for a Preset Keyboard PLU If a PLU is open, set the HALO (high amount lock out) here. If a PLU is preset set the preset price here. 1. Turn the control lock to the PGM position. 2. To begin the program, enter 2 0 0, press the SUBTL key. 2 0 0 SUBTL 3. Press a PLU key on the keyboard. 4. If the PLU is open, enter a HALO of up to 7 digits. If the PLU is preset, enter a preset price. (Note: Do not enter the decimal. The maximum preset price you can enter is $50,000.00.) Press the X/TIME key. X/TIME Price/HALO 5. To program additional PLUs, repeat from step 3, or press the CASH key to finalize the program. CASH SAM4s ER-900 Series Operator's & Programming Manual v.1.7 Getting Started • 31 Programming a Descriptor for Keyboard PLUs The default method of programming a descriptor will differ depending upon the specific ER-900 Series model you are programming. ER-920 & ER-940 models feature a flat keyboard. The default descriptor program method is by the Alpha Keyboard Overlay. ER-925 & ER-945 models feature a raised-key keyboard. The default descriptor program method is by descriptor codes. Note that if you have purchased the expanded keyboard version of one of theses models, descriptor entry by overlay method is optional. Consult with your dealer to determine the correct method of descriptor entry for your model. Descriptor Programming by Overlay Method for Flat Keyboard Models Locate the Alpha Keyboard overlay included in your register’s accessory package. Install the overlay under the protective rubber overlay. The overlay will look like the example below: 1 11 21 31 41 51 61 71 81 91 2 12 22 32 42 52 62 72 82 92 FEED JOURNAL FEED ' " < > - + = : ? ! @ # $ % ^ & * ( ) q w e r t y u i o p a s d f g h j k l ; CLEAR PLU X/TIME z x c v b n m , . / 7 8 9 CAP DOUBLE SPACE SPACE SPACE SPACE SPACE CAP DOUBLE BACK 4 5 6 9 19 29 39 49 59 69 79 89 99 1 2 3 SUBTL 10 20 30 40 50 60 70 80 90 100 0 00 . CASH Note: You can program descriptors up to 18 characters, however only the first 16 will appear on the display. 1. Turn the control lock to the PGM position 2. To begin the program, enter 3 0 0, press the SUBTL key. 3 0 0 SBTL 3. Press a PLU key on the keyboard you wish to program. 4. Type up to 18 descriptors on the overlay and press the X/TIME key. 5. To program additional PLUs, repeat from step 3, or press the CASH key to finalize the program. CASH 32 • Getting Started SAM4s ER-900 Series Operator's & Programming Manual v.1.7 Descriptor Programming by Overlay Method for Raised Key Models Descriptor programming by overlay is available on raised-key models if you have installed the keyboard expansion kit. FEED JOURNAL FEED CAP CLEAR PLU X/TIME / DOUBL E 7 8 8 ; < BACK 4 5 5 * : > 1 2 2 ( ' ? 0 00 . A H O V # ) " SPACE B I P W $ - , SPACE C J Q X % + . D K R Y ^ = E L S Z & F M T ! G N U @ SUBTOTAL CASH TEND 1. Turn the control lock to the PGM position 2. To begin the program, enter 3 0 0, press the SUBTL key. 3 0 0 SBTL 3. Press a PLU key on the keyboard you wish to program 4. Type up to 18 descriptors on the overlay and press the X/TIME key. 5. To program additional PLUs, repeat from step 3, or press the CASH key to finalize the program. CASH SAM4s ER-900 Series Operator's & Programming Manual v.1.7 Getting Started • 33 Descriptor Programming by Code Method for Raised Key Models 1. Turn the control lock to the PGM position 2. To begin the program, enter 3 0 0, press the SUBTL key. 3 0 0 SBTL 3. Press a PLU key on the keyboard you wish to program 4. Enter codes from the Descriptor Code Chart below. Enter up to 18 descriptors on the overlay and press the X/TIME key. 5. To program additional PLUs, repeat from step 3, or press the CASH key to finalize the program. CASH Descriptor Code Chart CHAR CODE CHAR CODE CHAR CODE CHAR CODE CHAR CODE CHAR CODE CHAR CODE CHAR CODE CHAR CODE CHAR CODE CHAR CODE CHAR CODE CHAR CODE 34 • Getting Started Ç 001 è 011 ö 021 € 031 ) 041 3 051 = 061 G 071 Q 081 ü 002 ï 012 ò 022 SPACE 032 * 042 4 052 > 062 H 072 R 082 091 e 101 o 111 y 121 092 f 102 p 112 z 122 é 003 î 013 û 023 ! 033 + 043 5 053 ? 063 I 073 S 083 â 004 ì 014 ù 024 " 034 , 044 6 054 @ 064 J 074 T 084 ä 005 Ä 015 ÿ 025 # 035 045 7 055 A 065 K 075 U 085 à 006 Å 016 ö 026 $ 036 . 046 8 056 B 066 L 076 V 086 093 094 095 g h i 103 104 105 q r s 113 114 115 BACK SPACE 123 096 j 106 t 116 å 007 É 017 Ü 027 % 037 / 047 9 057 C 067 M 077 W 087 a 097 k 107 u 117 ç 008 æ 018 ¢ 028 & 038 0 048 : 058 D 068 N 078 X 088 b 098 l 108 v 118 Double 999 ê 009 Ǽ 019 £ 029 ' 039 1 049 ; 059 E 069 O 079 Y 089 c 099 m 109 w 119 ë 010 ô 020 ¥ 030 ( 040 2 050 < 060 F 070 P 080 Z 090 d 100 n 110 x 120 SAM4s ER-900 Series Operator's & Programming Manual v.1.7 Operations Function Key Descriptions Keys are listed in alphabetical order. Many of the keys described below are not included on the default keyboard. See “Function Key Assignment Programming” on page 99 to add or change programmable keys. Keyboard Legend Description #/NS Use as a non-add key to print a numeric entry (up to 9-digits) on the receipt and journal. This entry will not add to any sales totals. The #/NS key is also used to open the cash drawer without making a sale. X/TIME Use to multiply a quantity of items or calculate split pricing on PLU entries. 00, 0-9, Decimal Use to make numeric entries in REG, X, Z, VOID, or PGM positions. The decimal key is used for decimal or scale multiplication, when setting or entering fractional percentage discounts, or when programming fractional tax rates. Do not use the decimal key when making amount entries into PLUs. ADD CHECK Use to combine individual trays (such as in a cafeteria situation). Each tray subtotal can advance the consecutive number, depending on programming. CANCEL Cancels a transaction without updating PLU, or function key totals. The Cancel function may only be used prior to tendering. Once tendering begins, the Cancel function may no longer be used. The CANCEL key corrects the appropriate totals and counters and the Financial report records total of transactions canceled. SAM4s ER-900 Series Operator's & Programming Manual v.1.7 Operations • 35 Keyboard Legend Description CASH Use to finalize cash sales. Calculates the sale total including tax and opens the cash drawer. Change computation is allowed by entering an amount before pressing the CASH key. The cash drawer will open only if the amount tendered is equal to or greater than the total amount of the sale. Post tendering is also available should a second change calculation be necessary. Reenter the tendered amount and press the CASH key to show the new change computation. Press the CASH key a second time to issue a buffered receipt when the receipt on/off function is OFF. CHECK Use to finalize check sales. Calculates the sale total including tax, finalizes the sale, and opens the cash drawer. Change computation is allowed by entering an amount before pressing the CHECK key. The cash drawer will open only if the amount tendered is equal to or greater than the total amount of the sale. Change issued will be subtracted from the cash-in-drawer total. CHECK CASHING Use to exchange a check for cash. Cash-in-drawer and check-indrawer totals are adjusted. CHECK ENDORSEMENT Use to print a check endorsement message on an optional slip printer after a check has been tendered. See “Programming the Receipt/Check Endorsement Message” on page 187 to program an endorsement message. CHARGE (1-8) Use to finalize charge sales. Calculates the sale total including tax, finalizes the sale, and opens the cash drawer. Change computation is allowed by entering an amount before pressing the CHARGE key. The cash drawer will open only if the amount tendered is equal to or greater than the total amount of the sale. Change issued will be subtracted from the cash-indrawer total. CHECK # The CHECK # key is used to begin a new, or access an existing balance (hard check) or itemized bill (soft check). Check track numbers that are entered manually may be set at a fixed length of one to nine digits. Check track numbers assigned automatically will begin with #1. Existing checks are accessed by entering the check track number and pressing the CHECK # key. CLEAR 36 • Operations Use to clear entries made into the 10 key numeric pad or X/TIME key before they are printed. Also used to clear error conditions. SAM4s ER-900 Series Operator's & Programming Manual v.1.7 Keyboard Legend Description CLERK The register will not operate in register mode unless a clerk has been signed on. Direct or secret code sign on procedures accomplishes clerk sign-on. All entries made on the register will report to one of the 10 clerk totals. When a clerk is signed on, all entries following will add to that clerk’s total until another clerk is signed on. To sign a clerk off, enter 0 (zero) and then press the CLERK key. The “CLOSED” message displays. The register cannot be operated until another clerk is signed on. The current clerk must first be signed off before another clerk may be signed on. CONV (1-4) The currency conversion function, allowed after subtotal, converts and displays the new subtotal at a preprogrammed exchange rate. Tendering is allowed after using the currency conversion function. Change is calculated and issued in home currency. The amount of foreign currency tendered is stored in a separate total on the Financial report, but not added to the drawer total. EAT-IN TAKE OUT DRIVE THRU Eat-In, Take Out and Drive Thru are subtotal functions. In areas that have different tax rules for eat-in and take out sales, the EAT-IN, TAKE OUT and DRIVE THRU keys can be programmed to automatically charge or exempt taxes. Sales may not be split between Eat-In, Take Out and Drive Thru. The EAT-IN, TAKE OUT and DRIVE THRU keys maintain separate totals on the Financial report. ERROR CORR Use to correct the last entry. The ERROR CORR key corrects the appropriate totals and counters. F/S SHIFT When pressed before a PLU entry, the F/S SHIFT key reverses the preprogrammed food stamp status of the PLU. For example, an item not food stamp eligible can be made food stamp eligible. F/S SUB Displays the amount of the sale that is food stamp eligible. F/S TEND Use to tender food stamps for eligible sales. FINALIZE Pressing before closing a check will close the account and the account number will no longer be reported on the open check report. The system option for charge posting must be set to “Y” in order to use this function. GUEST # Use to enter the count of guests served. JOURNAL FEED Advances the journal paper one line, or continuously until the key is released. MACRO (1-10) Macro keys may be programmed to record, and then later perform, up to 50 keystrokes. For example, a macro key could be set to tender (preset tender) a common currency, such as $5 into the cash key. MDSE RETURN Used to return or refund merchandise. Returning an item will also return any tax that may have been applied. SAM4s ER-900 Series Operator's & Programming Manual v.1.7 Operations • 37 Keyboard Legend Description MODIFIER (1-5) A modifier key alters the next PLU registered, either by changing the code number of the PLU so that a different item is registered, or by adding the modifier descriptor (and not changing the code of the subsequent PLU.) P/BAL Use to enter the amount of an outstanding balance. PAID OUT (1-3) Use to record money taken from the register to pay invoices, etc. The paid out amount subtracts from the cash-in-drawer total. Paid outs are allowed outside of a sale only. %1-%5 Up to five % keys may be placed on the keyboard. Each % key is set with a specific function, such as item discount or surcharge, or sale discount or surcharge. The percent rate may be entered or preprogrammed, or the percent keys can be programmed with a negative open or preset price, thus acting as coupon keys. PLU The PLU key is used to register price lookups by number entry. PLUs can be programmed open or preset, and positive or negative. PAYMENT Press to make a payment, partial payment, or pre-payment while posting to a check (account). If the payment amount exceeds the check balance, a credit balance will be maintained. The system option for charge posting must be set to “Y” in order to use this function. PAY TENDER Functions like the Payment key, except if the payment amount exceeds the check balance, the overpayment will be issued as change and the account balance will be zeroed. The system option for charge posting must be set to “Y” in order to use this function. PRINT CHECK Use to print a guest check. The check can be printed on an optional (RS-232C) printer, or can be printed on the receipt printer. The PRINT CHECK key can be set to automatically service the check. PROMO The PROMO key allows you to account for promotional items, as in "buy two, get one free". Pressing this key will remove an item's cost from the sale, but will include the sale of the item in the item's sales counter. RECT FEED Advances the receipt paper one line, or continuously until the key is released. RCPT ON/OFF When 'OFF' no receipt will print during a sale. (If the receipt is off, a buffered receipt is available by pressing the CASH key a second time.) RECD ACCT (1-3) The RA (received on account) key is used to record media loaned to the cash drawer, or payments received outside of a sale. The cash drawer will open. The amount received adds to the cash-indrawer total. 38 • Operations SAM4s ER-900 Series Operator's & Programming Manual v.1.7 Keyboard Legend Description SCALE Use to make weight entries. When a scale is attached, press the scale key to show the weight in the display, then press (or enter) a PLU to multiply the weight times the price. When a scale is not attached, you can enter the weight (using the decimal key for fractions). PLUs may be programmed to require an entry through the scale key. SERVICE Use to store Previous Balance or Check/Table tracking transactions. SUBTL Displays subtotal of sale including tax. Must be pressed prior to a sale discount or sale surcharge. TABLE # Tracks the current balance for a guest check or table. TARE Tares are container weights. If you are using the scale function, you can preset up to 5 different tare weights. The tare can be subtracted automatically when a specific PLU is registered, or manually inputting the tare number and pressing the TARE key can subtract the tare. Tare #5 can be programmed for entering tare weights manually. TAX EXEMPT Press the TAX EXEMPT key to exempt tax 1, tax 2, tax 3, and/or tax 4 from the entire sale. TAX (1-4) SHIFT When pressed before a PLU entry, the tax shift keys reverse the tax status of the PLU, i.e., a PLU with non-tax status would become taxable or a PLU with tax status would become nontaxable. TIP The TIP key allows a gratuity to be added to a guest check before payment. The tip amount is deducted from the Cash-inDrawer amount for the Clerk/Cashier closing the guest check. The TIP key may be programmed as either a percentage or amount. If programmed as a percentage, tax programming defines whether the percentage is calculated on the net amount, or the amount after taxes. VOID Use to correct an item entered earlier within a sale. The VOID key corrects the appropriate totals and counters. To correct the last item, use the ERROR CORR key. For void operations outside of a sale (Transaction Void), use the VOID position on the control lock. The Financial report records totals for each type of void separately. VALIDATION If you are using an optional slip printer, you can press the VALIDATION key to print a three-line validation on a separate form or piece of paper. Any item registration, discount or payment may be validated SAM4s ER-900 Series Operator's & Programming Manual v.1.7 Operations • 39 Keyboard Legend Description WASTE Allows control of inventory by accounting for items that must be removed from stock due to spoilage, breakage or mistakes. Press the WASTE key before entering wasted items, and then press the WASTE key again to finalize. The WASTE key may be under manager control, requiring the control lock to be in the X position. The WASTE key is not allowed within a sale. 40 • Operations SAM4s ER-900 Series Operator's & Programming Manual v.1.7 Clerk Sign-On/Sign-Off See "System Option Programming” to review your clerk options: (System option #2 allows you to select direct or code entry sign on, option #3 allows you to select stay-down or pop-up operation, and option #26 allows you select clerk interrupt operations.) Depending on how your register has been programmed, sign-on will take place only at the beginning of a shift (stay-down), or may have to be repeated for each transaction (pop-up). Normally, if your register has been programmed for stay-down clerks, the clerk currently signed on must be signed off before another clerk may be signed on. If you have selected the clerk interrupt option, a new clerk can be signed on in the middle of a transaction. In this circumstance, the initial transaction is suspended. When the interrupt transaction is completed, the suspended transaction can be continued. Check with your store manager to see which options have been selected for your register. Before any transaction may take place, a clerk must be signed on. Clerk sign-on is accomplished in one of two ways: Direct Sign-On If the direct sign-on method is selected, enter the clerk number and press the clerk key. CLERK Clerk # (1-10) To sign the clerk off, enter 0 (Zero) and press the clerk key. 0 DATE 06/14/2011 SUN TIME 08:37 ================================ CLERK LOG IN ================================ CLERK 1 01 CLERK LOG IN TIME 09:06 CLERK 1 000001 00001 CLERK DATE 06/14/2011 SUN TIME 08:37 ================================ CLERK LOG OUT ================================ CLERK 1 01 CLERK LOG OUT 09:06 CLERK 1 000001 00001 SAM4s ER-900 Series Operator's & Programming Manual v.1.7 Operations • 41 Coded Sign-On If the code entry sign-on method is selected, press the clerk key, enter the clerk code, and then press the clerk key again. CLERK CLERK Clerk Code (up to 6 digits) To sign the clerk off, enter 0 (Zero) and press the clerk key. 0 CLERK Receipt On and Off The RECEIPT ON/OFF function key may or may not be located on your keyboard. (The RECEIPT ON/OFF key is not located on the default keyboard.) If the RECEIPT ON/OFF Key is Not Located on the Keyboard 1. Turn the control lock to the X position. 2. To turn the receipt off, enter 9 9, press the SUBTL key. Enter 1, press CASH. 9 9 SUBTL 1 CASH 3. To turn the receipt on, enter 9 9, press the SUBTL key. Enter 0, press CASH. 9 9 SUBTL 0 CASH If the RECEIPT ON/OFF Key is Located on the Keyboard 1. Press the RECEIPT ON/OFF key once to turn the receipt off. 2. Press the RECEIPT ON/OFF key again to turn the receipt on. 42 • Operations SAM4s ER-900 Series Operator's & Programming Manual v.1.7 PLU Registrations All sales registrations on ER-900 are made into open or preset PLUs. In place of traditional department keys, keyboard PLU keys are located directly on the keyboard. Keyboard PLU keys can be programmed to access a specific PLU. In the default configuration Keyboard PLU key #1 will access PLU #1. See “Program 1000 NLU Code Number Programming” on page 194 if you wish to change the PLU assigned to a Keyboard PLU key. For example, you could have keyboard PLU key #1 access PLU #2345. When more items or categories are needed than the number of PLUs available on the keyboard, registrations can be into PLUs by entering the PLU code number and pressing the PLU key on the keyboard, or if an optional scanner is used, items can be registered by scanning the item. This system simplifies reporting by listing all items (regardless of how they are entered) on the PLU report, while reporting for groups of items or categories is available from the Group report. Keyboard PLU Entries As you make PLU registrations, you can follow your entries by viewing the display. In the following examples: PLU1 is programmed for open entries, and is taxable by Tax 1. PLU2 is programmed for open entries, and is taxable by Tax 2. PLU3 is programmed with a preset price of $3.00, and is taxable by Tax 1 and Tax 2. Tax 1 is programmed at 5%; Tax 2 is programmed at 10%. SAM4s ER-900 Series Operator's & Programming Manual v.1.7 Operations • 43 DATE 06/14/2011 SUN 1 0 0 PLU 1 CASH PLU1 T1 TAX1 TOTAL CASH CLERK 1 000001 DATE 06/14/2011 SUN PLU 3 1 0 0 PLU 1 PLU 1 CASH PLU3 T12 PLU1 T1 PLU1 T1 TAX1 TAX2 TOTAL CASH CLERK 1 5 0 X/TIME 0 PLU 2 CASH 44 • Operations 2X PLU2 T2 TAX2 TOTAL CASH CLERK 1 $1.00 $0.05 $1.05 $1.05 00001 TIME 03:15 000001 DATE 06/14/2011 SUN 2 TIME 08:37 $3.00 $1.00 $1.00 $0.25 $0.30 $5.55 $5.55 00001 Open Keyboard PLU Entry Single Preset PLU Single Open PLU Repeat PLU Item TIME 03:15 @5.00 $10.00 $1.00 $11.00 $11.00 000001 00001 Multiple Quantity of a PLU Entry SAM4s ER-900 Series Operator's & Programming Manual v.1.7 Note: PLU program setting must be made to allow this override. Turn Key Lock to the X position if set for manager control. 2 5 0 0 PLU 1 3 5 0 PLU 3 DATE 06/14/2011 SUN PLU1 T1 PLU3 T12 TAX1 TAX2 TOTAL CASH CLERK 1 TIME 03:15 $25.00 $3.50 $1.43 $0.35 $30.28 $30.28 000001 00001 HALO Override on PLU Entry Preset Override of a Keyboard PLU CASH DATE 06/14/2011 SUN 1 0 2 X/TIME 3 X/TIME 0 PLU 1 CASH 2@3FOR PLU1 T1 TAX1 TOTAL CASH CLERK 1 SAM4s ER-900 Series Operator's & Programming Manual v.1.7 TIME 03:15 @1.00 000001 $0.67 $0.03 $0.70 $0.70 00001 Split Pricing PLU Entry Operations • 45 Numeric PLU Entries In the following examples: PLU510 is programmed open, and is taxable by Tax 1. PLU520 is programmed open, and is taxable by Tax 2. PLU530 is programmed with a preset price of $1.50, and is taxable by Tax 1 and Tax 2. PLU540 is programmed with a preset price of $2.50, and is non-taxable. DATE 06/14/2011 SUN 5 4 0 PLU CASH #540 TOTAL CASH CLERK 1 000001 DATE 06/14/2011 SUN 5 1 0 PLU 1 0 0 PLU CASH #510 T1 TAX1 TOTAL CASH CLERK 1 4 0 PLU PLU CASH 46 • Operations PLU540 PLU540 TOTAL CASH CLERK 1 $2.50 $2.50 $2.50 00001 Preset PLU Entry TIME 03:15 000001 DATE 06/14/2011 SUN 5 TIME 03:15 $1.00 $0.05 $1.05 $1.05 00001 Single Open PLU Entry TIME 03:15 000001 $2.50 $2.50 $5.00 $5.00 00001 Single Preset PLU Entry Repeat Entry SAM4s ER-900 Series Operator's & Programming Manual v.1.7 DATE 06/14/2011 SUN 2 X/TIME 5 1 0 PLU 1 0 0 PLU CASH Note: PLU program setting must be made to allow this override. Turn Key Lock to the X position if set for manager control. 2 5 1 0 PLU 5 0 0 PLU 2X #510 T1 TAX1 TOTAL CASH CLERK 1 @1.00 000001 DATE 06/14/2011 SUN PLU510 T1 TAX1 TOTAL CASH CLERK 1 TIME 03:15 00001 $2.00 $0.10 $2.10 $2.10 00001 Multiple Quantity of a Open PLU Entry TIME 03:15 $25.00 $1.25 $26.25 $26.25 00000 HALO Override on PLU Entry CASH 2 X/TIME 3 X/TIME 5 1 0 PLU 1 0 0 PLU DATE 06/14/2011 SUN 2@3FOR PLU510 T1 TAX1 TOTAL CLERK 1 TIME 03:15 @1.00 00001 $0.67 $0.03 $0.70 00000 Split Pricing PLU Entry CASH SAM4s ER-900 Series Operator's & Programming Manual v.1.7 Operations • 47 Modifier Entries Pressing a modifier key alters the next PLU registered, either by changing the code number of the PLU so that a different item is registered, or by just adding the modifier descriptor and registering the same PLU. See "Modifier 1-5" in the "Program Mode Programming" chapter in order to determine how the modifier key will affect the PLU entry. Modifiers can be: stay down so that registrations will be modified by the same modifier until another modifier is selected, pop-up after each item to register, for example large, medium or small soft drink, pop-up after each transaction to register, for example, toppings of various pizza sizes. See "System Options" in the "Program Mode Programming" chapter to select stay down/popup status. Pop-Up Modifier Key Affecting PLU Code 1. Press a preset PLU key. For example, press PLU 1 with a price of $1.00. PLU 1 2. Press the MOD 1 key. MOD 1 3. Press the same PLU key. In this example the modifier 1 will add the digit 1 to the third PLU # position, resulting in the registration of PLU #101. DATE 06/14/2011 SUN PLU1 #101 PLU2 TOTAL CASH CLERK 1 TIME 03:15 000001 $1.00 $2.00 $1.50 $4.50 $4.50 00001 PLU 1 4. Press another PLU key. In this example press PLU 2 with a price of $1.50. 48 • Operations SAM4s ER-900 Series Operator's & Programming Manual v.1.7 Percentage Key (%) Registrations There is one percentage key on the default ER-925/945 keyboard; there are four percentage keys on the default ER-920/940 keyboard. Through "Function Key Assignment Programming" (see page 99) up to five percentage keys may be placed on the keyboard. Each key is individually programmable to add or subtract, from an individual item or from a sale total, amounts (coupons) or percentages. You can also program the percentage key taxable or non-taxable, so that sales taxes are calculated on the net, or gross amount of the item or sale. The operation examples in this section show the percentage key in a variety of configurations. See "%1-%5 Function Key Options” on page 177 to assign a specific function to each percentage key. 1 0 0 PLU 1 %1 CASH DATE 06/14/2011 SUN TIME 03:15 PLU1 T1 $1.00 %1 10.000% AMOUNT T1 $0.10 TAX1 $0.06 TOTAL $1.16 CASH $1.16 CLERK 1 000001 00001 DATE 06/14/2011 SUN 1 0 0 PLU 1 SUBTL %1 CASH PLU1 T1 %1 AMOUNT T1 TAX1 TOTAL CASH CLERK 1 SAM4s ER-900 Series Operator's & Programming Manual v.1.7 Preset 10% Surcharge on an Item TIME 03:15 $1.00 -10.000% -0.10 $0.05 $0.95 $0.95 000001 00001 Preset 10% Discount on a Sale Operations • 49 DATE 06/14/2011 SUN 1 0 0 0 PLU #1 1 0 0 0 PLU #4 SUBTL %1 CASH PLU1 T1 PLU4 %1 AMOUNT T1 TAX1 TOTAL CASH CLERK 1 $10.00 $10.00 10.00% $2.00 $0.55 $22.55 $22.55 000001 00001 DATE 06/14/2011 SUN 1 0 0 PLU #1 2 5 %1 PLU #1 CASH PLU1 T1 PLU1 CT1 TAX1 TOTAL CASH CLERK 1 0 1 0 PLU #1 2 X/TIME 0 %1 PLU #1 PLU1 T1 2X PLU1 CT1 TAX1 TOTAL CASH CLERK 1 Preset 10% Surcharge on a Sale TIME 03:15 000001 DATE 06/14/2011 SUN 2 TIME 03:15 $1.00 -0.25 $0.04 $0.79 $0.79 00001 Store Coupon Entry (Open Amount Discount on an Item) TIME 03:15 $2.00 @0.10 000001 -0.20 $0.09 $1.89 $1.89 00001 Multiple Store Coupon Entry (Open Amount Discount on an Item) CASH 50 • Operations SAM4s ER-900 Series Operator's & Programming Manual v.1.7 DATE 06/14/2011 SUN 1 0 0 %2 PLU #1 CASH PLU1 T1 PLU1 CT1 TAX1 TOTAL CASH CLERK 1 000001 DATE 06/14/2011 SUN 1 0 0 5 %1 CASH PLU1 T1 %1 T1 TAX1 TOTAL CASH CLERK 1 0 0 $1.00 -0.25 $0.04 $0.79 $0.79 00001 Vendor Coupon Entry (Open Amount Discount on a Sale) TIME 03:15 PLU #1 SUBTL 1 Preset Store Coupon (Preset Amount Discount on an Item) TIME 03:15 000001 DATE 06/14/2011 SUN 1 $1.00 -0.50 $0.03 $0.53 $0.53 00001 PLU #1 SUBTL 2 TIME 03:15 PLU #1 2 X/TIME 0 %1 PLU1 T1 2X %1 T1 TAX1 TOTAL CASH CLERK 1 $1.00 @0.10 000001 -0.20 $0.04 $0.84 $0.84 00001 Multiple Vendor Coupon Entry (Open Amount Discount on a Sale) CASH SAM4s ER-900 Series Operator's & Programming Manual v.1.7 Operations • 51 DATE 06/14/2011 SUN 1 0 0 TIME 03:15 PLU #1 SUBTL %2 CASH PLU1 T1 %1 T1 TAX1 TOTAL CASH CLERK 1 000001 $1.00 -0.50 $0.03 $0.53 $0.53 00001 Preset Vendor Coupon Entry (Preset Amount Discount on a Sale) Void and Correction Operations Error Correct The error correct function voids the last item entered, provided no other key has been pressed. 1 0 0 PLU #1 1 0 0 PLU #4 ERROR CORR PLU #3 ERROR CORR CASH 52 • Operations DATE 06/14/2011 SUN TIME 03:15 PLU1 T1 $1.00 PLU4 $2.00 ERRCORR------------------------PLU4 -2.00 PLU3 T12 $3.00 ERRCORR------------------------PLU3 T12 -3.00 TAX1 $0.05 TOTAL $1.05 CASH $1.05 CLERK 1 000001 00001 Error Correction SAM4s ER-900 Series Operator's & Programming Manual v.1.7 Previous Item Void The void function allows the correction of any item previously entered in the current transaction. 5 0 PLU #2 DATE 06/14/2011 SUN 1 0 0 PLU #1 2 0 0 PLU #4 PLU2 T2 $0.50 PLU1 T1 $1.00 PLU4 $2.00 VOID---------------------------PLU1 T1 -1.00 VOID---------------------------PLU2 T2 -0.50 TOTAL $2.00 CASH $2.00 CLERK 1 000001 00001 VOID 1 0 0 PLU #1 VOID 5 0 PLU #2 TIME 03:15 Previous Item Void CASH SAM4s ER-900 Series Operator's & Programming Manual v.1.7 Operations • 53 Merchandise Return Merchandise returns may be registered as part of a separate transaction, or as part of a transaction where other merchandise is sold. Press the RETURN key before entering the related PLU. Tax is credited if the item being returned is taxable. RETURN 5 0 0 PLU #1 RETURN 2 0 3 X/TIME 0 PLU #4 CASH RETURN 1 0 0 PLU #4 %1 CASH 54 • Operations DATE 06/14/2011 SUN TIME 03:15 RETURN************************** PLU1 T1 -5.00 RETURN************************** 3X @2.00 PLU4 -6.00 TAX1 -0.25 TOTAL -11.25 CASH -11.25 CLERK 1 000001 00001 DATE 06/14/2011 SUN Merchandise Return Multiple Item Merchandise Return TIME 03:15 RETURN************************** PLU4 -1.00 %1 -10.000% AMOUNT $0.10 TOTAL -0.90 CASH -0.90 CLERK 1 000001 00001 Merchandise Return of Discounted Merchandise SAM4s ER-900 Series Operator's & Programming Manual v.1.7 VOID Control Lock Position (Transaction Void) Most operations that can be performed with the control lock in the REG position, can also be done with the control lock in the VOID position. VOID position operations will adjust all sale totals, and the VOID (Transaction Void) position carries its own total on the Financial report. DATE 06/14/2011 SUN 1 2 0 0 0 0 PLU #1 PLU #4 CASH PLU1 T1 PLU4 TAX1 TOTAL CASH CLERK 1 000001 DATE 06/14/2011 SUN 1 2 0 0 0 0 TIME 03:15 $1.00 $2.00 $0.05 $3.05 $3.05 00001 Original Transaction TIME 03:15 PLU #1 PLU #4 CASH VOID MODE*********************** PLU1 T1 -1.00 PLU4 -2.00 TAX1 -0.05 TOTAL -3.05 CASH -3.05 CLERK 1 000001 00001 SAM4s ER-900 Series Operator's & Programming Manual v.1.7 Transaction Void of Original Transaction Operations • 55 Cancel Press the CANCEL key anytime during a transaction to cancel that transaction. (This is not a tender key.) Transactions of up to a maximum of 49 items may be canceled. The only total affected is the Cancel total, to which the total of all positive entries is added. DATE 06/14/2011 SUN 2 1 0 PLU #1 3 1 0 PLU #1 1 0 0 PLU #4 TIME 03:15 PLU1 T1 $2.00 PLU1 T1 $3.00 PLU4 $1.00 CANCEL************************** CLERK 1 000001 00001 Canceled Transaction CANCEL 56 • Operations SAM4s ER-900 Series Operator's & Programming Manual v.1.7 Subtotal Operations Subtotal Press the SUBTL key at anytime during a transaction to view the total due, including tax and after adjustments. The display will indicate Sub for subtotal. Add Check (Tray Subtotal) In a cafeteria, use the ADD CHECK key to add multiple trays that are paid by a single individual (i.e. Dad pays all the trays for the family.) Press the ADD CHECK key after each order, and SUBTL for the total of all orders. Finalize with any tender key as you would a normal sale. DATE 06/14/2011 SUN 4 0 0 PLU #1 ADD CHECK PLU1 T1 TAX1 TOTAL ADDCHK CLERK 1 000001 DATE 06/14/2011 SUN 5 0 0 PLU #1 ADD CHECK PLU1 T1 TAX1 TOTAL ADDCHK CLERK 1 TOTAL CASH CLERK 1 SAM4s ER-900 Series Operator's & Programming Manual v.1.7 $4.00 $0.20 $4.20 $4.20 00001 TIME 03:15 000002 DATE 06/14/2011 SUN CASH TIME 03:15 $5.00 $0.25 $5.25 $5.25 00001 First Check Added Second Check Added Payment for Both Checks TIME 03:15 000003 $9.45 $9.45 00001 Operations • 57 Eat-In/Take-Out/Drive Thru Operations In a restaurant, EAT-IN, TAKE-OUT and DRIVE THRU keys can be set up to provide totals for each type of sale. The EAT-IN, TAKE-OUT and DRIVE THRU keys may also be set up to remove taxes. For example, if your state charges sales tax for food consumed on the premises, while not charging sales tax for food taken home, sales tax can be exempted with the TAKE-OUT key. See "DRIVE THRU / EAT IN / TAKE OUT - Function Key Options" on page 160 to set up tax status for these keys. After registering all items, press EAT-IN, TAKE-OUT or DRIVE THRU (as you would use the Subtotal key), and then finalize the sale as you normally would. DATE 06/14/2011 SUN 1 0 0 TIME 03:15 PLU #1 PLU #3 PLU1 T1 PLU3 T12 $1.00 $3.00 ==== EATIN ==== EAT IN CASH 1 0 0 PLU #1 PLU #3 TAX1 TAX2 TOTAL CASH CLERK 1 000001 DATE 06/14/2011 SUN $0.20 $0.30 $4.50 $4.50 00001 TIME 03:15 PLU1 T1 PLU3 T12 $1.00 $3.00 ==== TKOUT ==== TAKE OUT CASH TOTAL CASH CLERK 1 000001 DATE 06/14/2011 SUN PLU #3 DRIVE THRU CASH 58 • Operations $4.00 $4.00 00001 TAKE OUT Transaction (Tax is Removed from Taxable Items) TIME 03:15 PLU3 T12 $3.00 ==== DVTHR ==== TOTAL CASH CLERK 1 EAT IN Transaction (Tax is Charged) 000001 $3.00 $3.00 00001 DRIVE THRU Transaction (Tax is Removed from Taxable Items) SAM4s ER-900 Series Operator's & Programming Manual v.1.7 Tax Shift Operations When tax shift operations are performed, the appropriate tax will display before the entry. To charge a tax or taxes on a non-taxable item press the appropriate tax shift key or keys prior to making the non-taxable PLU entry. To except a tax or taxes on a taxable item press the appropriate tax shift key or keys prior to making the taxable PLU entry. To except a tax or taxes from an entire sale, press the appropriate tax shift key or keys prior to finalizing the transaction. DATE 06/14/2011 SUN TIME 03:15 TAX 1 SHIFT 2 0 0 PLU #4 CASH TAX 1 SHIFT 2 0 0 PLU #1 CASH PLU4 T1 TAX1 TOTAL CASH CLERK 1 000001 DATE 06/14/2011 SUN PLU1 TOTAL CASH CLERK 1 SAM4s ER-900 Series Operator's & Programming Manual v.1.7 $2.00 $0.10 $2.10 $2.10 00001 To Charge Tax On A Non-Taxable PLU TIME 03:15 000001 $2.00 $2.00 $2.00 00001 To Except Tax On A Taxable PLU Operations • 59 1 0 0 PLU #1 2 0 0 PLU #3 SUBTL TAX 1 SHIFT DATE 06/14/2011 SUN PLU1 T1 PLU3 T12 TOTAL CASH CLERK 1 TIME 03:15 000001 $1.00 $2.00 $3.00 $3.00 00001 To Except Specific Taxes On Entire Sale TAX 2 SHIFT SUBTL CASH 1 0 0 PLU #1 2 0 0 PLU #3 SUBTL TAX EXEMPT DATE 06/14/2011 SUN PLU1 T1 PLU3 T12 TOTAL CASH CLERK 1 TIME 03:15 000001 $1.00 $2.00 $3.00 $3.00 00001 To Except Tax On Entire Sale with PreProgrammed Tax Exempt Key SUBTL CASH 60 • Operations SAM4s ER-900 Series Operator's & Programming Manual v.1.7 Tendering Operations Cash DATE 06/14/2011 SUN 1 2 0 0 0 0 PLU #1 PLU #4 CASH PLU1 T1 PLU4 TAX1 TOTAL CASH CLERK 1 000001 DATE 06/14/2011 SUN 1 0 0 PLU #1 2 0 0 PLU #4 SUBTL 4 0 0 TIME 03:15 CASH PLU1 T1 PLU4 TAX1 TOTAL CASH CHANGE CLERK 1 $1.00 $2.00 $0.05 $3.05 $3.05 00001 Cash Tender (exact amount of purchase) TIME 03:15 000001 $1.00 $2.00 $0.05 $3.05 $4.00 $0.95 00001 Cash Tender with Change Check DATE 06/14/2011 SUN 1 0 0 PLU #1 2 0 0 PLU #4 CHECK PLU1 T1 PLU4 TAX1 TOTAL CHECK CLERK 1 SAM4s ER-900 Series Operator's & Programming Manual v.1.7 TIME 03:15 000001 $1.00 $2.00 $0.05 $3.05 $3.05 00001 Check Tender (exact amount of purchase) Operations • 61 DATE 06/14/2011 SUN 1 2 0 0 0 0 PLU #1 PLU #4 SUBTL 4 0 0 TIME 03:15 CHECK PLU1 T1 PLU4 TAX1 TOTAL CHECK CHANGE CLERK 1 000001 DATE 06/14/2011 SUN $1.00 $2.00 $0.05 $3.05 $4.00 $0.95 00001 TIME 03:15 *** CHKCASH *** 1 0 0 0 CHECK CASH CHECK CASH CLERK 1 Check Tender with Change Check Cashing $10.00 -10.00 000001 00001 Charge Tendering and over tendering into charge keys is allowed. DATE 06/14/2011 SUN 1 0 0 PLU #1 2 0 0 PLU #4 CHARGE 1 62 • Operations PLU1 T1 PLU4 TAX1 TOTAL CHARGE1 CLERK 1 TIME 03:15 000001 $1.00 $2.00 $0.05 $3.05 $3.05 00001 Charge Total SAM4s ER-900 Series Operator's & Programming Manual v.1.7 Split Tender The drawer will not open until the final balance has been paid. 2 0 0 PLU #1 3 0 0 PLU #1 1 0 0 PLU #4 SUBTL 2 0 0 CASH 1 0 0 CHECK CHARGE 1 DATE 06/14/2011 SUN PLU1 T1 PLU1 T1 PLU4 TAX1 TOTAL CASH TOTAL CHECK TOTAL CHARGE1 CLERK 1 TIME 03:15 000001 $2.00 $3.00 $1.00 $0.25 $6.25 $2.00 $4.25 $2.00 $2.25 $2.25 00001 Cash, Check & Charge Payments on the Same Transaction Post Tendering Post tendering is available for computing change after a sale has been finalized. (See option #6 in "System Option Programming" on page 135 to enable post tendering.) The second cash entry is compared to the sale total and the difference is displayed. (The CLEAR key must first be pressed for registers programmed with pop-up clerks.) DATE 06/14/2011 SUN 6 0 0 SUBTL CASH 1 1 5 0 TIME 03:15 PLU #1 PLU1 T1 TAX1 TOTAL CASH CLERK 1 000001 $6.00 $0.30 $6.30 $6.30 00001 Post Tender CASH SAM4s ER-900 Series Operator's & Programming Manual v.1.7 Operations • 63 Receipt on Request If a customer requests a receipt after a sale has been finalized, a second depression of the CASH key will issue a complete buffered receipt. (See option #6 in “System Option Programming” on page 135 and option #24 in “Print Option Programming” on page 143.) Note: A maximum of approximately 224 items may be registered in one sale. Training Mode A training mode is available so that you can operate the cash register without updating totals and counters. Note the following conditions: The receipt and journal print the message "TRAINING MODE BEGIN" when training mode is activated. (See option #13 in “Print Option Programming” on page 143.) The receipt and journal print the message "TRAINING MODE END" when training mode is exited. The message "TRAINING MODE" prints on each receipt printed while training mode is active. The total and counter on the financial report labeled "TRAIN TTL" is updated with the net amount of each training transaction. To Enter Training Mode Set system option #23 to a value of 1. See "System Option Programming". To Exit Training Mode Set system option #23 to a value of 0. See "System Option Programming". Clerk Interrupt Clerk interrupt allows you to temporarily suspend a transaction in progress by allowing a new clerk to sign on and register a new transaction. After the new transaction is complete, the original clerk can sign on, the suspended transaction is recalled and may be completed. You must select either check (table) tracking or clerk interrupt. You cannot use clerk interrupt with a check tracking system. To Enable Clerk Interrupt 1. Program Clerk Secret Code 2. Set system option #2 to a value of 1. See "System Option Programming". 3. Set system option #26 to a value of 1. See "System Option Programming". 64 • Operations SAM4s ER-900 Series Operator's & Programming Manual v.1.7 Non-Add Number With the #/NS key, you can enter a memo number at any time and print the number on the receipt, journal, or validation. The non-adding number is not added to the sale, nor is it added to any register total, except the # key total itself. You can enter a number up of up to 9 digits. For example: 1 Enter a number prior to a PLU entry to print a record of the item's SKU number. Enter a number prior to a Check tender to print a record of the check number. Enter a number prior to a Charge to print a record of the charge account number. 2 3 1 4 5 6 #/NS 2 0 0 PLU #4 3 5 7 #/NS CHECK DATE 06/14/2011 SUN NON-ADD# PLU4 T1 TAX1 TOTAL NON-ADD# CHECK CLERK 1 TIME 03:15 123456 $2.00 $0.10 $2.10 1357 $2.10 000001 00001 No Sale Outside of a transaction you can press the #/NS key to open the cash drawer. The number of no sales are counted and reported on the financial report. The no sale function can also be placed under management control, requiring the control key to be in the X position. DATE 06/14/2011 SUN /NS SAM4s ER-900 Series Operator's & Programming Manual v.1.7 TIME 03:15 NOSALE ------------------------CLERK 1 000001 00001 Operations • 65 Received on Account Use the RECD ACCT key to record payments or loans to the cash drawer. You can enter more than one type of payment to the drawer. The Received on Account function can only be used outside of a transaction. DATE 06/14/2011 SUN TIME 03:15 RA 1 2 5 0 CASH 2 0 0 0 CHECK RA1 CASH CHECK RA1 CLERK 1 00001 $12.50 $20.00 $32.50 00000 RA Paid Out Use the PAID OUT key to record payments or loans from the cash drawer. You can enter more than one type of payment to the drawer. The Paid Out function can only be used outside of a transaction. PO 1 2 2 0 5 0 0 0 CASH CHECK PO 66 • Operations DATE 06/14/2011 SUN PO1 CASH CHECK P/O CLERK 1 00001 TIME 03:15 $12.50 $20.00 $32.50 00000 SAM4s ER-900 Series Operator's & Programming Manual v.1.7 Table Service Restaurant Operations Overview The SAM4s ER-900 can be used to add items or receive payments on guest checks using a manual previous balance, hard check, or soft check system. (Note that you must select hard or soft check posting in memory allocation programming. The default selection is soft.) If manual previous balance is selected, the check balance is not saved in memory and is input manually by the operator (use the PBAL key). If a hard check system is selected, only the previous balance is maintained in memory. If a soft check system is selected, the check detail is kept in memory until the check is paid. (The maximum size of the soft check is set in memory allocation programming.) When a soft check system is used, the receipt can be used to print the final check that is presented to the customer for payment. Consolidation of like items can be selected for guest check printing. For example, if three rounds of drinks are served, the check will print: "3 TAP BEER" rather than "1 TAP BEER" three times. (See “Print Option Programming” on page 143.) Note: If you wish to print guest check transactions on a slip or a pre-printed guest check, an optional printer must be installed. See your SAM4s dealer for more information. SAM4s ER-900 Series Operator's & Programming Manual v.1.7 Operations • 67 Function Keys and Options Functions necessary for restaurant operations may not appear on the default keyboard. Any or all of the following functions can be located on the keyboard. See "Function Key Assignment Programming” on page 99 if it is necessary to locate these keys on your keyboard. The CHECK # key is used to begin a new, or access an existing CHECK # balance (hard check) or itemized bill (soft check.) Existing checks are accessed by entering the check track number and pressing the CHECK# key. The Check # key may be set with the following options: A check must be started before items may be entered. The clerk that opens the check has exclusive access. Only one check may be allowed per table. The check # may be automatically assigned by the register. Check track numbers that are entered manually may be set at a fixed length of one to nine digits. Check track numbers assigned automatically will begin with #1. In a drive thru system, simply pressing the PBAL key will recall the oldest open balance (lowest check track #). GUEST Use to enter the count of guests served as part of a guest check. The entry of a guest count can be enforced when opening a guest check, or for all transactions. P/BAL Use to enter the amount of an outstanding balance. The P/BAL key will take the recall function if the drive thru feature is enabled in CHECK # key programming. SERVICE Use to temporarily finalize Previous Balance or check tracking transactions. (If you are using a hard check system, you must program the SERVICE key for the port where the slip printer is connected.) TABLE You can enforce the entry of a table number for guest check transactions, or for all transactions. If you are tracking guest check balances, the balance can be recalled either by entering the check number or the table number. PRINT CHECK Use to print a soft check. The check can be printed on an optional (RS232C) printer, or can be printed on the receipt printer. The PRINT CHECK key can be set to automatically service the check. TIP The TIP key allows a gratuity to be added to a guest check before payment. (The TIP key is only used in guest check operations.) The tip amount is deducted from the Cash-in-Drawer amount for the Clerk/Cashier closing the guest check. The TIP key may be programmed as either a percentage or amount. If programmed as a percentage, tax programming defines whether the percentage is calculated on the net (taxable = no) amount, or the amount after taxes. 68 • Operations SAM4s ER-900 Series Operator's & Programming Manual v.1.7 Posting Guest Checks Manually with the Previous Balance Key The previous balance key is used to enter the amount of the previous balance before adding new items or making payments. DATE 06/14/2011 SUN 1 0 0 0 P/BAL 0 PLU #1 SERVICE PBAL PLU4 SERVICE BFWD CLERK 1 $0.00 $10.00 $10.00 $10.00 000001 00001 DATE 06/14/2011 SUN 1 0 0 0 P/BAL 1 0 0 PLU #1 SERVICE PBAL PLU1 T1 TAX1 SERVICE BFWD CLERK 1 1 0 5 P/BAL 2 0 0 0 CASH PBAL CHECKS PAID TOTAL CASH CHANGE CLERK 1 SAM4s ER-900 Series Operator's & Programming Manual v.1.7 Starting a Check TIME 03:15 $10.00 $1.00 $0.05 $1.05 $11.05 000001 00001 DATE 06/14/2011 SUN 1 TIME 03:15 Adding to an Existing Check TIME 03:15 $11.05 $11.05 $11.05 $20.00 $8.95 000001 00001 Paying a Check Operations • 69 Soft Check Opening a Soft Check 1. Enter the number of the guest check, press the CHECK # key: Receipt Example: DATE 08/15/2011 SUN 1 2 3 or, press the CHECK # key to automatically assign a check #: CHECK# 2. If required, enter the table number and press the TABLE key: 3 TABLE 3. If required, enter the number of guests and press the GUEST key: 2 TIME 08:33 CHECK# CHECK # PBAL TABLE GUEST LIQUOR T1 STEAK T2 TAX1 TAX2 SERVICE BFWD CLERK 1 #123 $0.00 #3 #2 $7.00 $10.00 $0.35 $1.00 $18.35 $18.35 000011 00001 GUEST 4. Register the items you wish to sell. 5. To total the posting, press SERVICE: SERVICE Note: If a table number entry is required for all guest checks, and checks are assigned by register, the check will be assigned by the register when the table # is entered. 70 • Operations SAM4s ER-900 Series Operator's & Programming Manual v.1.7 Adding to a Soft Check 1. Enter the number of the guest check, press the CHECK # key: Receipt Example: DATE 08/15/2011 SUN 1 2 3 or, if you entered a table number, enter the table number and press the TABLE key: 3 TIME 08:33 CHECK# TABLE 2. Register the next items you wish to sell. 3. To total the posting, press SERVICE: CHECK # PBAL TABLE GARLIC BREAD T2 TAX1 TAX2 SERVICE BFWD CLERK 1 #123 $18.19 #3 $2.00 $0.35 $1.20 $2.20 $20.55 000012 00001 SERVICE NOTE: Tax are recalculated and printed to reflect total taxes for all items posted on the check. Printing a Soft Check 1. Enter the number of the guest check, press the CHECK # key: Sample of soft check printed on the receipt: DATE 08/15/2011 SUN 1 2 3 CHECK# or, if you entered a table number, enter the table number and press the TABLE key: 3 TABLE 2. Press PRINT CHECK to print the complete check. If programmed to do so, the PRINT CHECK key will automatically service the check: PRINT CHECK TIME 08:33 #123 CHECK # LIQUOR T1 STEAK T2 GARLIC BREAD T2 TAX1 TAX2 SERVICE BFWD $20.33 CLERK 1 CHK # : 1 000012 00001 $7.00 $10.00 $2.00 $0.46 $0.87 $0.00 The number of times each check has been printed is counted and printed on the check SAM4s ER-900 Series Operator's & Programming Manual v.1.7 Operations • 71 Paying a Soft Check 1. Enter the number of the guest check, press the CHECK # key: Sample of soft check printed on the receipt: DATE 08/15/2011 SUN 1 2 3 or, if you entered a table number, enter the table number and press the TABLE key: 3 TABLE 2. If necessary, add additional items. If you wish to add a tip, press SUBTL, then enter the tip amount and press the TIP key: SUBTL 3 0 0 TIME 08:33 CHECK# CHECK # LIQUOR T1 STEAK T2 GARLIC BREAD T2 TIP TAX1 TAX2 CHECKS PAID TOTAL CASH CHANGE CLERK 1 TIP #123 $7.00 $10.00 $2.00 $3.00 $0.46 $0.87 $23.33 $23.33 $25.00 $1.67 CHK # : 2 000013 00001 3. Pay the balance, as you would normally tender a transaction, with CASH, CHECK, or one of the CHARGE functions. If the tender is greater than the balance due, change is displayed. 2 72 • Operations 5 0 0 CASH SAM4s ER-900 Series Operator's & Programming Manual v.1.7 Hard Check Opening a Hard Check 1. Enter the number of the guest check, press the CHECK # key: 1 2 3 CHECK# 2. If required, enter the table number and press the TABLE key: TABLE 3. If required, enter the number of guests and press the GUEST key: 2 THANK-YOU CALL AGAIN CHECK# or, press the CHECK # key to automatically assign a check: 3 Receipt Example: GUEST DATE 08/15/2011 SUN CHECK # PBAL TABLE GUEST LIQUOR T1 STEAK T2 TAX1 TAX2 SERVICE BFWD CLERK 1 TIME 08:33 #123 $0.00 #3 #2 $7.00 $10.00 $0.46 $0.73 $18.19 $18.19 000011 00001 4. Register the items you wish to sell. 5. Place a slip in an optional slip printer, the check will print automatically when you press SERVICE: SERVICE SAM4s ER-900 Series Operator's & Programming Manual v.1.7 Operations • 73 Adding to a Hard Check 1. Enter the number of the guest check, press the CHECK # key: Receipt Example: DATE 08/15/2011 SUN 1 2 3 CHECK# or, if you entered a table number, enter the table number and press the TABLE key: 3 TIME 08:33 TABLE 2. Register the next items you wish to sell. 3. Place a slip in an optional slip printer, the check will print automatically when you press SERVICE: CHECK # PBAL TABLE GARLIC BREAD T2 TAX1 TAX2 SERVICE BFWD CLERK 1 #123 $18.19 #3 $2.00 $0.46 $0.87 $2.15 $20.33 000012 00001 SERVICE 74 • Operations SAM4s ER-900 Series Operator's & Programming Manual v.1.7 Paying a Hard Check 1. Enter the number of the guest check, press the CHECK # key: Sample of Hard Check postings printed on an optional printer: DATE 1 2 3 CHECK# or, if you entered a table number, enter the table number and press the TABLE key: 3 12/01/2011 #123 PBAL $0.00 LIQUOR T1 STEAK T2 TAX1 TAX2 SERVICE TABLE BFWD 2. If necessary, add additional items. If you wish to add a tip, press SUBTL, then enter the tip amount and press the TIP key: No.000017 REG 01 KELLY PBAL 0 TIP 2 5 0 0 CASH SAM4s ER-900 Series Operator's & Programming Manual v.1.7 18.19 TIME 09:15 $18.19 $0.46 TAX2 $0.87 PBAL 3. Pay the balance, as you would normally tender a transaction, with CASH, CHECK, or one of the CHARGE functions. If the tender is greater than the balance due, change is displayed. $0.73 $18.19 $2.00 BFWD 0 $0.46 TAX1 No.000019 REG 01 KELLY 3 $7.00 $10.00 GARLIC BREAD T2 SERVICE SUBTL WED CHECK # $2.15 20.33 TIME 09:47 $20.33 TIP $3.00 TAX1 $0.46 TAX2 $0.87 CHECKS PAID $23.33 CASH $25.00 CHANGE No.000021 REG 01 KELLY $1.67 TIME 10:16 Operations • 75 Fast Food Drive Thru For fast food drive thru windows, the ER-900 has the capability of storing orders when they are taken, and then recalling the next order automatically at the payment window. The PBAL function becomes a recall function when the drive thru feature is enabled in the CHECK # function key program. Press the PBAL key to recall the lowest tracking number balance. Orders are stored by first pressing the CHECK # key to automatically assign the next tracking number, then pressing SERVICE. (A macro sequence key could be created to execute both functions sequentially.) See "Function Key Programming" on page 150. Taking a Drive Thru Order 1. Register the items you wish to sell. 2. Press the CHECK # key to begin an automatically assigned check: CHECK# 3. To store the posting, press SERVICE: SERVICE Receipt Example: DATE 08/15/2011 SUN HAMBURGER FRIES CHECK # PBAL SERVICE BFWD CLERK 1 TIME 08:33 $2.00 $1.00 #3 $0.00 $3.00 $3.00 000011 00001 Paying a Drive Thru Order Receipt Example: 1. Press the PBAL key: PBAL DATE 08/15/2011 SUN 2. If necessary, add additional items, register discounts or coupons. 3. Pay the balance, as you would normally tender a transaction, with CASH, CHECK, or one of the CHARGE functions. If the tender is greater than the balance due, change is displayed. 5 76 • Operations 0 0 CHECK # PBAL CHECKS PAID TOTAL CASH CHANGE CLERK 1 TIME 08:33 #3 000012 $3.00 $3.00 $3.00 $5.00 $2.00 00001 CASH SAM4s ER-900 Series Operator's & Programming Manual v.1.7 Promo Function The PROMO key allows the operator to account for promotional items (i.e. buy two, get one free). By design, this key will remove the items cost from the sale, but not the count. In the example of buy two, get one free, the reported count remains three items, but the customer is only charged for two. 3 X/TIME PROMO TACO DATE 06/14/2011 SUN COKE 3X TACO T1 COKE T1 TACO TIME 03:15 Promo Entry @0.89 $2.67 $0.69 *** PROMO *** CASH TACO T1 TAX1 TOTAL CASH CLERK 1 000001 $0.89 $0.16 $2.63 $2.63 00001 Waste Function The WASTE key allows control of inventory by accounting for items that must be removed from stock due to spoilage, breakage, or mistakes. With manager control, the WASTE key requires the control lock to be in the X position. The WASTE key is not allowed within a sale. Waste operations begin and end with by pressing the WASTE key. WASTE DATE 06/14/2011 SUN TIME 03:15 Waste Entry 3 X/TIME TACO COKE *** WASTE *** 3X TACO T1 COKE T1 WASTE @0.89 $2.67 $0.69 *** WASTE *** TOTAL CLERK 1 SAM4s ER-900 Series Operator's & Programming Manual v.1.7 000001 $3.36 00001 Operations • 77 Charge Posting Operations The ER-900 check tracking system can be used to post charges and payments to house accounts. This posting system is ideal for small resorts, campgrounds, motels/hotels or retail stores that accept house charges. Charge posting features include: Manual balance posting, soft check posting, or hard check posting. For house account posting, the hard check posting method with an optional slip printer is recommended. (Because house accounts are usually maintained over a period of time, the soft check system may not have the memory capacity to track the ongoing account activity.) Payments can be posted before charges are posted and credit balances can be carried forward. Overpayments can be issued as change or carried forward. Managers can control access to new account numbers or closing accounts. Zero balance accounts can remain active. The total of outstanding accounts prints at the end of the open check report and also on the Financial report. (The total is not reset when the financial report is cleared.) The total of house account charges (Service Total) and payments are reported to facilitate accounts receivable balancing. In order to implement this system, you must enable the charge posting features (see “System Option Programming” on page 135”.) You must also assign the necessary function keys for your application. 78 • Operations SAM4s ER-900 Series Operator's & Programming Manual v.1.7 Charge Posting Function Keys CHECK # (ACCT #) The CHECK # key is used to begin a new, or access an existing balance (hard check) or itemized bill (soft check.) Existing checks are accessed by entering the check track number and pressing the CHECK# key. You may wish to reprogram the descriptor of the CHECK # key to ACCT#. P/BAL Use to manually enter the amount of an outstanding balance. The P/BAL key is not used when hard or soft check posting is used. SERVICE (HOUSE CHRG) Use to temporarily finalize Previous Balance or house account transactions. (If you are using a hard check system, you must program the SERVICE key for the port where the slip printer is connected.) You may wish to reprogram the descriptor of the SERVICE key to HOUSE CHRG. PAYMENT Press to make a payment, partial payment, or pre-payment while posting to a check (account). If the payment amount exceeds the check balance, a credit balance will be maintained. PAY TEND The PAY TEND key functions like the PAYMENT key, except if the payment amount exceeds the check balance, the overpayment will be issued as change and the account balance will be zeroed. PRINT CHECK Use to print a soft check. The check can be printed on an optional (RS232C) printer, or can be printed on the receipt printer. The PRINT CHECK key can be set to automatically service the check. FINALIZE Pressing the FINALIZE key before closing a check will close the account and the account number will no longer be reported on the open check report. SAM4s ER-900 Series Operator's & Programming Manual v.1.7 Operations • 79 Sample of Hard Check postings printed on an optional printer: Opening an Account 1. Enter the number of the account and press the CHECK # key. You may be required to turn the key lock to the MGR position. DATE 12/01/2011 PBAL 1 2 3 CHECK# Accepting an Advance Payment $50.00 CHECK $50.00 SERVICE PAYMENT 3. Enter the amount of the payment and press the appropriate tender key; cash, check or charge. 0 0 CHECK 4. Press the SERVICE key to finalize and store the balance. WED PBAL $50.00 ROOM $75.00 SERVICE $75.00 25.00 BFWD No.000019 REG 01 KELLY TIME 09:47 12/01/2011 PBAL WED $25.00 CHANGE $5.00 TENDER $30.00 CASH $25.00 SERVICE BFWD SERVICE TIME 09:15 12/01/2011 DATE 0 $0.00 -50.00 No.000017 REG 01 KELLY DATE 5 $0.00 PAYMENT BFWD 2. Press the PAYMENT key. WED #123 CHECK # No.000021 REG 01 KELLY $0.00 $0.00 TIME 10:16 Posting New Charges 5. Enter the number of the account and press the CHECK # key. 6. Enter items purchased. 7. Press the SERVICE key to finalize and store the balance. Accepting an Overpayment and Issuing Change 8. Enter the number of the account and press the CHECK # key. 9. Press the PAY TEND key. PAY TEND 10. Enter the amount of the payment and press the appropriate tender key; cash, check or charge. 3 0 0 0 CASH 11. Press the SERVICE key to finalize and store the balance. 80 • Operations SAM4s ER-900 Series Operator's & Programming Manual v.1.7 Currency Conversion If you normally accept currency from a neighboring nation, you can program the SAM4s ER900 to convert the subtotal of a sale to the equivalent cost in the foreign currency. Four foreign currency conversion keys are available. See "Function Key Assignment Programming" on page 99 to place currency conversion keys on the keyboard. You also need to program the conversion factor. For example, if the US dollar (home currency) is worth 1.3720 Canadian dollars (foreign currency), the conversion factor is 1.3720. See "Instructions for Currency Conversion Rate - Program 90" on page 153 to set a conversion rate. Note: The change due is computed in home currency! 1 0 0 PLU #4 2 0 0 PLU #4 C/CONV 5 0 0 CASH DATE 06/14/2011 SUN PLU1 PLU4 TOTAL CONV1 CHANGE RATE HOME AMT CHANGE CLERK 1 SAM4s ER-900 Series Operator's & Programming Manual v.1.7 TIME 03:15 $1.00 $2.00 $3.00 @5.00 #1.3720 $3.64 $0.64 000001 00001 Currency Conversion Transaction Operations • 81 Food Stamp Operations Note: All food stamp payments are now made through EBT payments. The ER-900 does not have the capability to integrated EBT transactions. Where food stamps are used, the payment must be processed through a standalone POS payment terminal. At the ER-900, the payment would be entered into the F/S TEND function key. The SAM4s ER-900 can be set up to sort food stamp eligible merchandise and accept food stamp payments. See "Function Key Assignment Programming" on page 99 to place the necessary function keys (F/S SHIFT, F/S SUB, F/S TEND) on the keyboard. You will also need to set food stamp eligibility status for each open or preset PLU (see "Program 100 PLU Status Programming" on page 121.) If necessary, you can use the F/S SHIFT key to shift the pre-programmed eligibility status for any item as it is entered. For example, while produce is normally food stamp eligible, certain produce department items, such as birdseed, cannot be paid for with food stamps. In this case, program the produce PLU as food stamp eligible, then press F/S SHIFT before registering a non-eligible produce item. If a customer chooses to pay with food stamps (EBT), press the F/S SUB key to display a total of food stamp eligible merchandise. Tender food stamp payments into the F/S TEND key. Since all food stamp payments are now made by EBT, always tender the exact amount. DATE 06/14/2011 SUN 1 2 9 PLU #4 1 0 0 PLU #4 F/STAMP SUBTL 82 • Operations 5 0 0 F/STAMP TEND 1 0 0 CASH PLU1 F PLU4 TOTAL F/S TOTAL F/D TEND F/S CRT AMT TOTAL CASH CHANGE FD/S CHANGE CLERK 1 TIME 03:15 000001 $1.29 $1.00 $2.29 $1.29 5.00 $0.71 $0.29 $1.00 $0.71 $3.00 00001 Food Stamp Payment Transaction SAM4s ER-900 Series Operator's & Programming Manual v.1.7 Scale Operations The SAM4s ER-900 can be interfaced to an optional load-cell scale, allowing direct entry of an item's weight by using the SCALE key. If you attempt an entry into a PLU that has been programmed to require scale entry (see "Program 100 - PLU Status Programming" on page 121.) an error tone will sound and you will be prompted to make a scale entry. Direct Scale Entry Place a product on the scale and press the SCALE key to display the weight on the cash register. Then make the appropriate PLU entry. DATE 06/14/2011 SUN SCALE TIME 03:15 PLU #3 SCALE 1 0 0 PLU #4 SCALE 5 4 0 PLU CASH 1.50 lb PLU3 T12 1.75 lb PLU 4 1.25 lb PLU540 TAX1 TAX2 TOTAL CASH CLERK 1 @ 3.00 $4.50 Preset Keyboard PLU @ 1.00 $1.75 @ 2.50 $3.13 $0.23 $0.45 $10.06 $10.06 000001 00001 Open Keyboard PLU Preset PLU Manual Weight Entry NOTE: Manual weight entry can be used only when a scale is not interfaced. Operators can make manual weight entries if the item has been programmed to accept them (see "Program 100 - PLU Status Programming" on page 121). You must use the decimal key to enter fractional manual weights. DATE 06/14/2011 SUN 1 . 5 1 0 0 0 0 TIME 03:15 SCALE PLU #4 CASH 1.50 lb PLU4 TOTAL CASH CLERK 1 SAM4s ER-900 Series Operator's & Programming Manual v.1.7 @ 1.00 000001 $1.50 $1.50 $1.50 00001 Manual Scale Entry Operations • 83 Scale with Automatic Tare Entry Place a product on the scale, enter the preprogrammed tare number and press the TARE key and then the SCALE key. The weight, less the tare, will appear on the cash register display. Then make the appropriate PLU entry. DATE 06/14/2011 SUN 1 SCALE 1 0 0 TIME 03:15 TARE PLU #4 1.50 lb PLU4 TOTAL CASH CLERK 1 @ 1.00 000001 $1.50 $1.50 $1.50 00001 Automatic Tare Entry CASH Scale with Manual Tare Entry Tare #5 can be used to manually enter tare weights. Place a product on the scale, enter 5 and press the TARE key. Enter the tare weight (using the decimal key), press the TARE key and then the SCALE key. The tare weight will display. Press the SCALE key again, and the weight, less the tare will display. Then make the appropriate PLU entry. DATE 06/14/2011 SUN . 5 5 TARE 2 TARE SCALE 1 0 0 1.50 lb PLU4 TOTAL CASH CLERK 1 TIME 03:15 @ 1.00 000001 $1.50 $1.50 $1.50 00001 Manual Tare Entry PLU #4 CASH 84 • Operations SAM4s ER-900 Series Operator's & Programming Manual v.1.7 Validation Validation is possible if an optional slip printer is connected to one of the available RS-232C ports. Use VALIDATION key (keycode #441) to print a three-line validation on a separate form or piece of paper. Any item registration, discount or payment may be validated. Validation can be done after virtually any operation, and validation can be set to be compulsory after selected functions, including: Add Check Cash Charge Check Check cash Drive Thru/Eat In/Take Out Error Correct Food Stamp Tender Merchandise Return Paid Out Received on Account Service Tax Exempt Waste % Key Functions Validation Notes: 1. See Function Key Programming to set compulsory validation. 2. When validating a payment, system option #20 determines whether the sale amount or tender amount is validated. 3. When validating a void or correction, the validation prints an abbreviation to identify the type of void. The key below defines the type of correction: a. VD = Error Correct b. VD2 = Void Key c. VD3 = Void Mode d. VD4 = Cancel Integrated Payment Operations See Integrated Payment Appendix on page 213 for credit card payment operation information. SAM4s ER-900 Series Operator's & Programming Manual v.1.7 Operations • 85 Not Found PLU The “Not Found PLU” feature is available for use when an optional scanner is used to input PLUs. If an item is scanned that is not programmed in the PLU file, the operator has the option to input the price of the item and assign it the same descriptor and properties of another PLU, or enter the descriptor and tax status independently. This provides a simple mechanism for building an item file for a low-cost scanning installation. Not Found PLU: Quick Entry Action 1. Scan or input PLU 2. Press 1 3. Enter the item price; press X/TIME 4. Touch a PLU on Keyboard (or enter PLU # and press the PLU key) Display Notes NOT FOUND PLU STOP:0 SAVE:1 INPUT PRICE PRESS X/TIME key SELECT COPY PLU The item is registered and displayed The item is added to the PLU file with the price as entered and the descriptor and options of the PLU that was entered as the COPY PLU. Not Found PLU: Detail Entry Action 1. Scan or input PLU 2. Press 1 3. Enter the item price; press X/TIME 4. Enter 0; press PLU 5. Enter the item descriptor: press X/TIME. 6. Enter the tax status (from digits N1 & N2 of the PLU Status Program) press X/TIME. Display Notes NOT FOUND PLU STOP:0 SAVE:1 INPUT PRICE PRESS X/TIME key SELECT COPY PLU DESC TAXABLE The item is registered and displayed You must enter descriptor by descriptor code. (If using Quick Entry, you can enter descriptors later using the PC Utility.) For example, enter 40 for taxable by tax rate 1. Note that the item is assigned by default to PLU Group 1. Not Found PLU Report Turn the key lock to X or Z: enter 15 and press SUBTOTAL. Note: Up to 50 not found PLU items can be retained. When capacity is reached, you must clear (Z) the Not Found PLU report. 86 • Operations SAM4s ER-900 Series Operator's & Programming Manual v.1.7 Management Functions Introduction All Management Functions take place with the control lock in the X position. In this way only those with the correct key will have access to these functions. Some register operations may be programmed to require the control lock in the X position in order to operate. All reports require a key that will access the X or Z position. SAM4s ER-900 Series Operator's & Programming Manual v.1.7 Management Functions • 87 Cash Declaration If compulsory cash declaration is required, you must declare the count of the cash drawer prior to taking X or Z financial and clerk reports. You can enter the cash drawer total in one step, or to facilitate the counting of the cash drawer, you can enter each type of bill/coin and checks separately and let the register act as an adding machine. You can also use the X/TIME key to multiply the denomination of currency times your count. Either way you choose to enter cash, the register will compare your declaration with the expected cash and check in drawer totals and print the over or short amounts on the report. For example: 1. Turn the control lock to the X or Z position (depending upon the type of report you are taking.) 2. Enter 90 and press the SUBTL key. 9 0 SUBTL 3. Enter the total of cash. 9 8 7 6 CASH DATE 06/14/2011 SUN TIME 03:15 *** CASH DECLARATION *** CASH $98.76 CHECK $20.00 INPUT AMT $118.76 DRAWER TTL $23.53 DIFFERENCE -95.23 CLERK 1 00001 00000 4. Enter the total of checks. 2 0 0 0 CHECK 5. Press the CASH key to total the declaration. CASH 88 • Management Functions SAM4s ER-900 Series Operator's & Programming Manual v.1.7 Or, enter each denomination separately: 1. Turn the control lock to the X or Z position (depending upon the type of report you are taking.) 2. Enter 90 and press the SUBTL key. 9 0 SUBTL 3. Enter the total of pennies: 7 6 CASH 4. If you wish you can multiply the count times the denomination. Enter, for example: 3 0 5 CASH DATE 06/14/2011 SUN TIME 03:15 *** CASH DECLARATION *** CASH $0.76 CASH $1.50 CHECK $12.00 CHECK $8.00 INPUT AMT $22.26 DRAWER TTL $23.53 DIFFERENCE -1.27 CLERK 1 00001 00000 X/TIME 5. Enter the remaining cash separately by denomination. 6. Enter each check: 1 2 0 8 0 0 0 CHECK CHECK 7. Press the CASH key to total the declaration. CASH SAM4s ER-900 Series Operator's & Programming Manual v.1.7 Management Functions • 89 System Reports System reports are divided into two basic categories: X reports, which read totals without resetting Z reports, which read totals and reset them to zero Most reports are available in both categories. Some reports, such as the Cash-in-Drawer report and the From-To PLU report are available only as X reports. Some reports also provide identical but separate period to date reports. These reports maintain a separate set of totals which may be allowed to accumulate over a period of days, weeks, months, or even years. X2 reports read period to date totals without resetting, and Z2 reports read period to date totals and reset them to zero. Period to date totals are updated each time a Z1 report is completed. A complete list of available reports is presented in a chart on the following page. See “Sample Reports” on page 201 for an example of each report. Registers programmed with pop-up clerks must be signed on in the REG control lock position prior to taking reports. Running a Report – General Instructions 1. Refer to the “Report Table” on the following page. 2. Select a report type and the report mode. 3. Turn the control lock to the position indicated. 4. Enter the key sequence for the report you have selected. 90 • Management Functions SAM4s ER-900 Series Operator's & Programming Manual v.1.7 Report Table Report Mode Control Lock Position Key Sequence Report Type Report Number Financial 1 X X 1 – SUBTL Time All PLU All Clerk Group All STOCK Daily Sales 2 3 4 5 6 8 Individual Clerk Report 9 Open Table/Check 11 From/To PLU 13 Z Z 1 – SUBTL X2 X 201 – SUBTL Z2 Z 201 – SUBTL X X 2 – SUBTL Z Z 2 – SUBTL X2 X 202 – SUBTL Z2 Z 202 – SUBTL X X 3 – SUBTL Z Z 3 – SUBTL X2 X 203 – SUBTL Z2 Z 203 – SUBTL X X 4 – SUBTL Z Z 4 – SUBTL X2 X 204 – SUBTL Z2 Z 204 – SUBTL X X 5 – SUBTL Z Z 5 – SUBTL X2 X 205 – SUBTL Z2 Z 205 – SUBTL X X 6 – SUBTL Z Z 6 – SUBTL X2 X 208 – SUBTL Z2 Z 208 – SUBTL X X 9 – SUBTL- # - CLERK - # - CLERK X2 X 209 – SUBTL- # - CLERK - # - CLERK X X 11 – SUBTL Z Z 11 – SUBTL X X 13-SUBTL XXXX – PLU – XXXX – PLU X2 X 213-SUBTL XXXX – PLU – XXXX – PLU From/To STOCK 14 X X 14-SUBTL XXXX –PLU – XXXX – PLU DRAWER TOTAL 111 X X 111-SUBTL SAM4s ER-900 Series Operator's & Programming Manual v.1.7 Management Functions • 91 Electronic Journal Reports PRINT ALL EJ 300 X X 300 -SUBTL PRINT EJ CASH 301 X X 301 -SUBTL PRINT EJ CHECK PRINT EJ CHARGE PRINT EJ % 302 X X 302 -SUBTL 303 X X 303 -SUBTL 304 X X 304 -SUBTL PRINT EJ RA/PO PRINT EJ RETURN PRINT EJ EC/VOID PRINT EJ NO SALE PRINT EJ CANCEL 305 X X 305 -SUBTL 306 X X 306 -SUBTL 307 X X 307 -SUBTL 308 X X 308 -SUBTL 309 X X 309 –SUBTL PRINT EJ BY CLERK 401 – 15 X X/Z 401-415 SUBTL (depends on Max Clerk)-SUBTL EJ RESET 399 Z Z 399- SUBTL Note: Quick Journal Review is available if set in Print Option Programming (see option #37). In the REG key lock position (outside of a transaction) enter 1 0 and press the SUBTL key. Recent journal entries are printed (option #37 sets the number of lines to printed). This allows the operator, or manager to quickly check the details of the previous transaction or transactions without running a report. 92 • Management Functions SAM4s ER-900 Series Operator's & Programming Manual v.1.7 S-Mode Programming Overview A separate key, marked “C” will access the hidden S key lock position one position clockwise from the PGM key lock position. Caution: For information security, distribute the “C” key only to owners or managers who will need to use these procedures. The following secure procedures are performed in the S-Mode. Self Tests Clearing Memory EPROM Information Memory Allocation Function Key Assignment Programming Updating Firmware Program SD Card Utilities Load/Save Receipt Images SAM4s ER-900 Series Operator's & Programming Manual v.1.7 S-Mode Programming • 93 Clearing Memory Memory All Clear Before you use your ER-900 for the first time, you must perform a memory all clear to insure that all totals and counters are cleared and that the default program is installed. Go to “Clearing Memory” on page 26 to complete the procedure. Clear All Totals and Counters 1. Turn the control lock to the S position. 2. Enter 20 and press the SUBTL key. 2 0 SUBTL Clear Grand Total 1. Turn the control lock to the S position. 2. Enter 30 and press the SUBTL key. 3 0 SUBTL Clear PLU File 1. Turn the control lock to the S position. 2. Enter 40 and press the SUBTL key. A confirmation dialog will ask “ARE YOU SURE”. Press CASH to continue or CLEAR to abort the process. 4 94 • S-Mode Programming 0 SUBTL SAM4s ER-900 Series Operator's & Programming Manual v.1.7 Self Tests Self-tests can be performed to check the functions of the register. 1. Turn the control lock to the S position. 2. Enter the test number from the chart below and press the SUBTL key. SUBTL Test Key Sequence Results/Instructions Printer 10 SUBTL The receipt printer generates a printer test pattern and the drawer will open at the end of the test. Display 11 SUBTL Displays illuminate a test pattern. Keyboard 12 SUBTL Press any key. The key’s current function is displayed. Turn key lock to end the test. Mode Lock 13 SUBTL Turn the mode lock to display the lock position. Return the key to S to end the test. RS232C Port 1 RS232C Port 2 RS232C Port 3 RS232C Port 4 14 SUBTL 24 SUBTL 34 SUBTL 44 SUBTL Loop back connector must be connected. Displays “232 Port Good” if successful; displays “232 Port No Good” and sounds an error if unsuccessful (or if loop back is not connected). Endless Printing 16 SUBTL The receipt prints a sample ticket and opens the cash drawer. The print is repeated until the key lock is turned. MCR Test 17 SUBTL Swipe a card. The printer prints card track data. SD Card 19 SUBTL Insert a SD card. Checks SD card operation. SAM4s ER-900 Series Operator's & Programming Manual v.1.7 S-Mode Programming • 95 Memory Allocation The memory allocation program determines how memory is divided to support the following features: 1. PLUs - you must allocate a minimum of 300 PLUs, a maximum of approximately 4000 is determined by available memory. 2. Clerks – you must allocate at least 1 clerk, with a maximum of 99. (Note you also must allocate at least one guest check for each clerk.) 3. Groups – you must allocate at least 1 group, with a maximum of 99. 4. Guest Checks – you can allocate a maximum of approximately 200 hard or soft checks 5. Soft Check Lines – you can allocate a maximum of 100 lines per check 6. Check Type – select hard or soft checks 7. Levels – allocate one or two price levels. 8. Mix & Match Discount Tables – default is 10 you can allocate a maximum of 100. 9. Electronic Journal – Default is 1000 lines; maximum is 1000 lines. Important Memory Allocation Notes 1. Memory variable maximums are theoretical. For example, if all other variables are at or near zero, then 4000 PLUs are possible. Note check memory, especially soft check memory, and clerk memory consume considerable memory. 2. Using the clerk interrupt feature requires allocation of at least one guest check for each clerk and sufficient soft check lines to support the interrupted transaction (i.e. if 20 soft check lines are allocated, a transaction with up to 20 lines can be interrupted.) See system option flag # 26 to select clerk interrupt operations instead of table management (check tracking) operations. 3. All models default to 1000 lines of electronic journal. For models with journal printers, you may wish to set electronic journal to “0” so that memory may be used for other options. Memory Capacity Maximum memory of 4 mb is standard. No additional expansion is available. 96 • S-Mode Programming SAM4s ER-900 Series Operator's & Programming Manual v.1.7 Memory Allocation Program Once you have determined the memory variables you wish to set, you can set them in the memory allocation program. If you attempt to allocate more options than memory, the message “MEMORY ALLOCATION SIZE OVER” will print on the receipt and journal. Setting memory allocation will require some trial and error; the register will not allow overallocation. 1. Turn the control lock to the S position. 2. To Allocate Memory, enter 6 0 and press the SUBTL key. 6 0 SUBTL 3. Refer to the chart below and enter a digit to represent allocated area and press the X/TIME key. X X/TIME 4. Enter the desired allocation. Note for the CHECK TYPE entry: enter 0 for soft check or enter 1 for hard check. X Allocated Area 1 2 3 4 5 6 7 8 9 PLU CLERK GROUP CHECK# SOFT CHECK LINES CHECK TYPE : Hard(1), Soft(0) # of PRICE LEVELS MIX & MATCH ELECTRONIC JOURNAL LINES CASH 5. Repeat from step 3 to allocate another area, or press the CASH key to finalize the program. If the allocation is accepted, the printer will print the new allocation. If the allocation is not accepted, the message “ALLOCATION OVER” will display. CASH SAM4s ER-900 Series Operator's & Programming Manual v.1.7 S-Mode Programming • 97 Memory Allocation Program Scan You can read the current memory allocation with the following sequence: 1. Turn the control lock to the S position. 2. Enter 6 0, press the SUBTL key and then press the CASH key. 6 0 SUBTL DATE 04/02/2011 FRI CASH TIME 08:37 ================================ TTL AVAIL : 327680 TTL USED : 269050 -------------------------------1.ALLOCATED PLU IS :2000 2.ALLOCATED CLERK IS :10 3.ALLOCATED GROUP IS :20 4.ALLOCATED CHECK IS :10 5.ALLOCATED CHK LINE IS :50 6.ALLOCATED HARD(N),SOFT(Y):Y 7.ALLOCATED LEVEL IS : 1 8.ALLOCATED M&M IS :20 9.ALLOCATED EJ LINE IS : 1000 ================================ CLERK 1 000001 00001 98 • S-Mode Programming SAM4s ER-900 Series Operator's & Programming Manual v.1.7 Function Key Assignment Programming Function keys may be relocated, inactivated or changed with this program. For example, you may wish to add functions, such as PREVIOUS BALANCE and SERVICE, which may not be placed on the default keyboard. Or perhaps, you may wish to remove a function, such as CANCEL, for security reasons. Please note the following limitations: If you assign a duplicate of a function code, the duplicate will function exactly as the original - you will not get separate totals and counters on reports for the duplicated key. You can reassign keys only in locations that are programmable. See "Keyboards" on page 17 to determine the key locations that are fixed and cannot be changed. To Assign a Function Key to a Location 1. Turn the control lock to the S position. 2. Enter 7 0 and press the SUBTL key. 7 0 SUBTL 3. Refer to “Function Key Codes” on page 100 to find the code for the key you wish to assign. Enter the code and press the location you wish to program. Repeat this step to assign another key. Key Location Key Code 4. Press the CASH key to finalize key assignment programming. CASH SAM4s ER-900 Series Operator's & Programming Manual v.1.7 S-Mode Programming • 99 Function Key Codes Code Function Code Function Code Function Code Function 1 NLU 1 327 CHARGE 5 355 NOT USED 383 REC ON ACCT 2 300 NLU 300 328 CHARGE 6 356 MACRO 1 384 REC ON ACCT 3 301 Numeric 1 329 CHARGE 7 357 MACRO 2 385 SUBTL 302 Numeric 2 330 CHARGE 8 358 MACRO 3 386 SCALE 303 Numeric 3 331 CHECK CASHING 359 MACRO 4 387 SERVICE 304 Numeric 4 332 ENDORSE 360 MACRO 5 388 TABLE # 305 Numeric 5 333 CHECK TEND 361 MACRO 6 389 TARE 306 Numeric 6 334 CHECK # 362 MACRO 7 390 TAKE OUT 307 Numeric 7 335 CLEAR (ESC) 363 MACRO 8 391 TAX EXEMPT 308 Numeric 8 336 CLERK # 364 MACRO 9 392 TAX SHIFT 1 309 Numeric 9 337 CURR. CONV. 1 365 MACRO 10 393 TAX SHIFT 2 310 Numeric 0 338 CURR. . CONV. 2 366 RETURN 394 TAX SHIFT 3 311 Numeric 00 339 CURR. CONV. 3 367 MOD 1 395 TAX SHIFT 4 312 DECIMAL 340 CURR. CONV. 4 368 MOD 2 396 NOT USED 313 #/NS 341 DRIVE THRU 369 MOD 3 397 TIP 314 %1 342 EAT-IN 370 MOD 4 398 VOID 315 %2 343 ERR CORRECT 371 MOD 5 399 WASTE 316 %3 344 F/S SHIFT 372 P/BAL 400 NOT USED 317 %4 345 F/S SUB 373 NOT USED 401 VALIDATION 318 %5 346 F/S TEND 374 NOT USED 402-441 NOT USED 319 XTIME 347 NOT USED 375 PAID OUT 1 442 FINALIZE 320 ADD CHECK 348 NOT USED 376 PAID OUT 2 443 PAYMENT 321 CANCEL 349 GUEST 377 PAID OUT 3 444 PAY TENDER 322 CASH 350 PLU 378 RECEIPT FEED 445 PRICE INQ 323 CHARGE 1 351 PRICE LEVEL 1 379 NOT USED 446 RECEIPT ON/OFF 324 CHARGE 2 352 PRICE LEVEL 2 380 PRINT CHECK 447 INACTIVE 325 CHARGE 3 353 NOT USED 381 PROMO 448 NON ADD 326 CHARGE 4 354 NOT USED 382 REC ON ACCT 1 449 JOURNAL FEED (2-Station Models) 100 • S-Mode Programming SAM4s ER-900 Series Operator's & Programming Manual v.1.7 RS-232 Communication Option Programs You must define the device(s) attached to the RS-232C communications ports, and the options for the device(s). 1. Turn the control lock to the S position. 2. Enter 8 0 (enter 8 1 to program the second port; 8 2 for the optional third port; and 8 3 for the optional fourth port) and press the SUBTL key. 3. Refer to the chart RS-232C option chart that follows and enter the address number of the option you wish to program and press the X/TIME key. (For example enter 5 to select the device that will be connected.) 4. Enter the value that represents your selection and press the CASH key. (for example, if you are programming the device (address 5) enter 6 if the device is a scanner.) 5. Repeat from step 2 for additional options you wish to program. 6. Press CASH to exit the program. Port 1 (standard) 8 0 SUBTL OPTION XTIME VALUE CASH CASH Port 2 (standard) 8 1 SUBTL OPTION XTIME VALUE CASH CASH Port 3 (option) 8 2 SUBTL OPTION XTIME VALUE CASH CASH Port 4 (option) 8 3 SUBTL OPTION XTIME VALUE CASH CASH SAM4s ER-900 Series Operator's & Programming Manual v.1.7 S-Mode Programming • 101 RS-232 Option Chart Address 1 2 3 4 5 Option Baud Rate Parity Data Bits Stop Bits Value Selection 0 9600 BPS 1 1200 BPS 2 2400 BPS 3 4800 BPS 4 19200 BPS 5 38,200 BPS 6 57,600 BPS 7 115,200 BPS 0 NONE 1 ODD 2 EVEN 0 8 BITS 1 7 ITS 0 1 BIT 1 2 BIT NONE PC SCALE Remote Journal (TVS Interface) Remote Printer Liquor Dispenser Scanner COIN EFT Device Pole Display PDC 0 1 2 3 Device Function 4 5 6 7 8 9 10 6 Initial Feeding Line KP 0 - 20 7 End Feeding Line KP 0 - 20 8 Initial Feeding Line Slip 0 - 20 9 Print Line On Guest Check 0 - 50 10 Scale Type 0 1 2 102 • S-Mode Programming NCI CAS CAS Ounce SAM4s ER-900 Series Operator's & Programming Manual v.1.7 Address 11 12 Option Printer Type Display Type SAM4s ER-900 Series Operator's & Programming Manual v.1.7 Value Selection 0 1 2 3 4 NONE SAM4s ELLIX10 SAM4s ELLIX20 SRP-270/270, SNBC M280 SRP-350, SNBC R580/2002NP/880NP CITIZEN 3550 CITIZEN 810 CITIZEN 230 EPSON TM T88-2 EPSON U200 EPSON U295 EPSON U300 EPSON U325 EPSON U375 STAR SP-200 STAR SP-298 STAR SP-300 STAR TSP-200 EPSON ICD 5 6 7 8 9 10 11 12 13 14 15 16 17 0 1 S-Mode Programming • 103 SD Card Utilities Program Backup and Restore You can use an SD flash memory card to backup and restore the full program. The program data is saved in a separate folder named with the store name be programmed in system option #30. The SD card can also be used to save reports, which can then be viewed on a PC using the ER-900 PC Utility. The report data is saved in a separate folder named with current date and time. NOTE: SD cards must be formatted as FAT 32. Note: If you are Using an SD Card for the First Time . . . Caution: Formatting the SD card will clear all data on the SD card and prepare it for use. 1. Start Windows Explorer. 2. Select the SD card drive, right click and select Format. (Win XP screen shown; slightly different procedures are used with different operating systems.) Select “Format…” 3. From the Format dialog you must select the File System: FAT32. 104 • S-Mode Programming SAM4s ER-900 Series Operator's & Programming Manual v.1.7 Backing Up the Program to an SD Card CAUTION: When backing up and restoring data, the store name must be programmed in system option #30. 1. Turn the control lock to the S position. 2. To backup the program to SD, enter 1 0 0, press the SUBTOTAL key. 1 0 0 SUB TOTAL Restore Program from the SD Card CAUTION: Memory allocation must be set the same as the saved program. Be sure to print out the memory allocation so that it can be re-entered before restoring the program. 1. Turn the control lock to the S position. 2. To load the program to the register from the SD card, enter 1 1 0, press the SUBTOTAL key. 1 1 0 SUB TOTAL Saving Reports to an SD Card Reports saved are the current X1 readings. 1. Turn the control lock to the S position. 2. To backup Reports to SD, enter 1 0 1, press the SUBTOTAL key. 1 0 1 SUB TOTAL SAM4s ER-900 Series Operator's & Programming Manual v.1.7 S-Mode Programming • 105 Load/Save Receipt Images You can load a preamble and postamble image for your ER-900 receipt. Before loading, the images must be converted by the PC Utility to .img format. After conversion, they can be loaded directly by connecting a PC to the ER-900 or by copying the images to a SD card and loading (or saving the image) using the SD utility program described here. Note that after loading the images, you must set Print Options #21 and #22 to activate the image printing. 1. Preparing a Graphic Logo Bitmap for an ER-900 Series The image must be black/white, 384 x 192 pixels, and 10 Kbytes or less in size. 1. Open MS Paint. 2. Open the image file you wish to use. 3. Choose Attributes from the Image menu. The Attributes dialog box displays. 4. The image dimensions must be no larger than 384 pixels wide by 192 pixels high. If the image size in pixels is greater than the maximum, you must resize your image. a. Click OK to exit the Attributes dialog. b. Select your image. (Choose Select All from the Edit menu.) c. Using the handles of the selected image, resize the image. Keep the image in the upper left corner of the screen. d. Choose Attributes from the Image menu. The Attributes dialog box displays again. Enter 384 in the Width field; enter 192 in the Height field; select Pixels as the unit. Click OK to exit the dialog box. e. Your image will be cropped to the 384 x 192 pixel size. If you cropped part of the image you wish to keep, you can undo (Ctrl + Z) and try again. You may have to experiment a bit to resize the image inside the 384 x 192 pixel limit. 5. After the image is sized, select Black and white in the Attributes dialog. 6. Save your image as type “Monochrome Bitmap (*.bmp,*.dib)” and confirm that the size is 10k or less. If you resized your original image, you may wish to rename when you save, so that you preserve a copy of the original image. 106 • S-Mode Programming SAM4s ER-900 Series Operator's & Programming Manual v.1.7 2. Use the PC Utility to Convert the Image 1. Install the ER-900 PC Utility on your PC. 2. At your PC, start the ER-900 PC Utility. (Select Start, Programs, SHC PC UTILITY, ER-900 PC UTILITY.) The Store Setting dialog box displays. 3. If you are starting the ER-900 PC Utility for the first time, you must define a store name, or if a store is already defined, you can select the store from the drop down list. After the store is defined or selected, click Close. The PC Utility program starts. 4. Move the .bmp logos you wish to use into the store directory (i.e. C:\ER-900PC\storename.) 5. At the PC Utility, choose Convert Logo Image from the Utility menu. The Bmp dialog box displays. 6. Click FILE OPEN. Select the bitmap image you wish to use from the Open dialog and click the Open command button. 7. Click the SAVE AS PRE IMG or SAVE AS POST IMG button. 8. When the image is selected, click OK. Verify that the message “Save As UserPre.Img” or “Save As UserPost.Img” displays. If the file is too large, and cannot be loaded, the message “File Size Error” displays. 3. Copy the Images to an SD Card The PC Utility will create two image files: USERPRE.IMG USERPOST.IMG They will be located in your PC at: C:\ER-900PC\Store Name Copy the mages to the following path on your SD card: SD\\ER900\PgmBack\Store Name Important: In the path: C:\ER-900PC\Store Name, the store name is the name you have defined as the store in the PC Utility. Note: You must use the same store name in the ER-900 Series ECR at System Option #30. SAM4s ER-900 Series Operator's & Programming Manual v.1.7 S-Mode Programming • 107 4. Load the Images by SD Card 1. Insert the SD card in the register’s SD slot. Note: The SD slot is located in the printer compartment of the ER-900. Remove the security screw to access the slot. 2. Turn the control lock to the S position. 3. To load the Preamble Image to the register from the SD card, enter 1 2 0, press the SUBTOTAL key. 1 2 0 SUBTL 4. To load the Postamble Image to the register from the SD card, enter 1 3 0, press the SUBTOTAL key. 1 3 0 SUBTL 5. Saving Images from an ER-900 to an SD Card 1. Insert the SD card in the register’s SD slot. Note: The SD slot is located in the printer compartment of the ER-900. Remove the security screw to access the slot. 2. Turn the control lock to the S position. 3. To save the Preamble Image from the register to the SD card, enter 1 2 1, press the SUBTOTAL key. 1 2 1 SUBTL 4. To save the Postamble Image from the register to the SD card, enter 1 3 1, press the SUBTOTAL key. 1 108 • S-Mode Programming 3 1 SUBTL SAM4s ER-900 Series Operator's & Programming Manual v.1.7 Flash ROM Updates The ER-900 register software is loaded in Flash ROM. This program may occasionally be updated by the manufacturer. Your SAM4s dealer can update the software if necessary. The Flash ROM can be loaded through by SD card or by using a PC Update Program (NEWNET_DOWN.exe.) CAUTION: Flash ROM update by either method must be done by a qualified, trained technician. DO NOT POWER OFF OR ABORT any program loading once it has started. Failure to follow the procedures exactly may cause the program to load incompletely and for the register to fail completely. Flash ROM Update by SD The ER-900 Flash ROM program is contained in a file named NEWNET.bin. This file will be provided to the authorized dealer by CRS, Inc. and contains both the Boot program area and the Application program area. 1. At your PC, format the SD Card for FAT32. (See the “Note: If you are Using an SD Card for the First Time . . . " on page 104.) 2. Create a folder named update in the root of the SD card. 3. Copy NEWNET.bin to: SD:/update/. 4. Insert the SD card into the register. (The SD slot is located inside the printer compartment. Remove the security screw and open the flap securing the SD slot. Insert the SD card until you hear a click and the SD card is locked in.) Boot Area Update Update instructions included with the .bin file will tell whether both Boot Area and Application Area updates are required. In most cases you may be instructed only to update the Application Area. For application only updates go to step 7 below. For boot area updates begin at step 1. 1. At the ER-900, turn the control lock to the S position. 2. Power off the ER-900. 3. Press and hold the Numeral 1 key on the keyboard. While continuing to hold the Numeral 1 key, turn on the power switch. 4. Release the Numeral 1 Key. 5. The display will flash, slowly at first. After a few seconds a rapid beep-beepbeep will be heard, and the display will flash rapidly. The boot update is now complete 6. Turn the ECR power switch OFF and proceed directly to the next step: Application Update. Application Area Update 7. Set the control lock to the S position. SAM4s ER-900 Series Operator's & Programming Manual v.1.7 S-Mode Programming • 109 8. Press and hold the Numeral 2 key on the keyboard. While continuing to hold the Numeral 2 key, turn on the power switch. 9. Release the Numeral 2 Key. 10. The display will flash (Current program is being erased), after a few seconds, the display will continue to flash, but at a slower rate. This continues for about 1minute while the new program is being loaded. When the load is complete, a rapid beep-beep-beep will be heard, and the display will flash rapidly. 11. Power the register OFF. The Flash ROM update is complete. 12. Remove the SD card from the register. 13. Perform a memory all clear on the ECR. The ECR is now ready to program or to load a previously saved end-user program. Flash ROM Update by PC Update Files To complete the firmware update, you will be supplied with the following files: NEWNET_DOWN.exe (The update utility program) NEWNET.bin PC Connection Cable YOU MUST USE Port #1. Use the following cable: CRS Part # 522120 (Register DB-9MF COM 1 to PC DB-9F) Update Boot Area Update instructions included with the .bin file will tell whether both Boot Area and Application Area updates are required. In most cases you may be instructed only to update the Application Area. 1. Connect the Serial Cable From ECR to PC. 2. At the register, turn the control lock to the S position. 3. Turn the power switch to the OFF position. 4. Press and hold the CASH and CLERK keys. (Use the keys in their default locations, the upper-right and lower-right keys on the keyboard.) 5. While continuing to hold the CASH and CLERK keys, turn the power switch to the ON position. (The display will illuminate and the error tone will sound beep-beep-beep in quick succession.) Release the keys. 110 • S-Mode Programming SAM4s ER-900 Series Operator's & Programming Manual v.1.7 6. At the PC, execute the program “NEWNET_DOWN.exe”. The Download dialog box displays. 7. Select the appropriate com port connection at your PC at the PORT# option buttons. 8. Click SEL. find the folder where the update files are located and select NEWNET.bin. 9. Select Boot Area Only in the Select One option buttons. 10. Press OK Button. The download takes about 30 seconds; the scroll bar will track the progress of the download. At the ECR, the display will flash slowly while the update is taking place. 11. At the PC, the message Completed displays. Click OK and the Download program will close. At the ECR, the display will flash rapidly. 12. At the ECR, the display will flash rapidly, indicating the update is complete, Turn the power switch to the OFF. Update Program Area 1. Connect the Serial Cable From ECR to PC. 2. At the register, turn the control lock to the S position. 3. Turn the power switch to the OFF position. 4. Press and hold the CASH and CLERK keys. (Use the keys in their default locations, the upper-right and lower-right keys on the keyboard.) SAM4s ER-900 Series Operator's & Programming Manual v.1.7 S-Mode Programming • 111 5. While continuing to hold the CASH and CLERK keys, turn the power switch to the ON position. (The display will illuminate and the error tone will sound beep-beep-beep in quick succession.) Release the keys. 6. At the PC, execute the program “Download.exe”. The Download dialog box displays. 7. Select the appropriate com port connection at your PC at the PORT# option buttons. 8. Click SEL. find the folder where the update files are located and select NEWNET.bin. 9. Select Program code + font in the Select One option buttons. 10. Press OK Button. The download takes about minutes; the scroll bar will track the progress of the download. 11. The message Completed displays. Click OK and the Download program will close. 12. The display will flash (Current program is being erased), after a few seconds, the display will continue to flash, but at a slower rate. This continues for about 3 minutes while the new program is being loaded. When the load is complete, a rapid beep-beep-beep will be heard, and the display will flash rapidly. Turn the power switch to OFF, the program update is complete. 13. Disconnect the PC cable. 14. Perform a memory all clear on the ECR. The ECR is now ready to program or to load a previously saved end-user program. 112 • S-Mode Programming SAM4s ER-900 Series Operator's & Programming Manual v.1.7 Flash ROM Information The ER-900 register software is loaded in an Flash ROM. This procedure will provide a receipt with the current version, date and checksum for the Flash ROM. 1. Turn the control lock to the S position. 2. Enter 50 and press the SUBTL key. 5 0 SUBTL 3. After a short delay, the register will print a receipt as in the example below: DATE 07/01/2011 FRI VERSION CHECKSUM BOOT/APP JUNE. 29 CLERK 1 TIME 08:37 EPROM INFO. : USA 01.002 : OBEA : 4C02/BFE8 2011 000001 00001 SAM4s ER-900 Series Operator's & Programming Manual v.1.7 S-Mode Programming • 113 114 • S-Mode Programming SAM4s ER-900 Series Operator's & Programming Manual v.1.7 P-Mode Programming Default Program The ER-900 arrives with a default or generic program already installed. Program options are set to 0 (Zero), unless otherwise noted, which means the machine can be operated immediately after a RAM clear procedure is performed. For example: All keyboard PLUs are nontaxable and open, without entry limits by default status programming of "000000000". All system options are set to 0 in default programming, unless otherwise noted. Change only the options that will deviate from default programming. There is no need to re-enter an option status of 0, since 0 is its original setting. All programming (unless otherwise noted) is done with the control lock in the PGM position. Each section details a specific area of register programming. SAM4s ER-900 Series Operator's & Programming Manual v.1.7 P-Mode Programming • 115 Tax Programming The ER-900 has the capability to support four separate taxes. Taxes can be calculated as either a straight percentage rate of between .001% and 99.999%, or a 60 break point tax table. Each tax may be either an add-on tax (added to the cost of a taxable item), or a value added tax (VAT) that is included in the price of the item. Tax rate 4 may be set to function as the Canadian Goods & Services Tax (GST). If Tax 4 is designated as GST, table programming for the rate is not allowed. Definitions for tax rates 1, 2, 3 & 4 are made as part of tax programming. If you are entering a tax rate (add-on or VAT), see "Straight Percentage Tax Rate Programming" to enter the percentage rate. If you are entering a tax table, see “Tax Table Programming” to enter the tax break points. If you are entering a Canadian Goods and Services Tax (GST), use tax rate 4 for the GST tax, and use tax rates 1, 2 and/or 3 for any other provincial tax or taxes. See "Straight Percentage Tax Rate Programming" to enter the GST status and percentage rate. Important Note: After you have entered your tax program(s), test for accuracy by entering several transactions of different dollar amounts. Carefully check to make sure the tax charged by the cash register matches the tax on the printed tax chart for your area. As a merchant, you are responsible for accurate tax collection. If the cash register is not calculating tax accurately, contact your dealer for assistance. 116 • P-Mode Programming SAM4s ER-900 Series Operator's & Programming Manual v.1.7 Straight Percentage Tax Rate Programming Often, tax requirements may be met using a straight percentage rate. Use the following method to program a tax as a straight percentage. Programming Straight Percentage Tax Rates and Status 1. Turn the control lock to the PGM position. 2. If the tax is a percentage rate, with a decimal. (0.000-99.999). It is not necessary to enter preceding zeros. For example, for 6%, enter 06.000 or 6.000. 3. For the type of tax: If the tax is a percentage added to the sale (normal add on tax), enter: 0 If the tax is a percentage value added tax (VAT; calculated as part of the sale), enter: 2 4. Enter 0 here for all taxes, unless if you are programming tax 4 as a Canadian GST. If tax 4 is a Canadian GST, enter the sum of the options below: OPTION VALUE GST (tax 4) is taxable by rate 1? Yes = 1 No = 0 GST (tax 4) is taxable by rate 2? Yes = 2 No = 0 GST (tax 4) is taxable by rate 3? Yes = 4 No = 0 = SUM 5. Press the Tax Shift key for the tax you are programming. 6. Press the CASH key to end programming. Tax Rate Programming Flowchart TAXSHIFT (1/2/3/4) . Tax Rate You must enter decimal Tax type SAM4s ER-900 Series Operator's & Programming Manual v.1.7 CASH GST tax Info P-Mode Programming • 117 Tax Table Programming In some cases, a tax that is entered as a percentage does not follow exactly the tax charts that apply in your area (even if the tax chart is based on a percentage). In these cases, we recommend that you enter your tax using tax table programming. This method will match tax collection exactly to the break points of your tax table. Before programming, obtain a copy of the tax table you wish to program. You will need the printed tax table if you wish to determine the break point entries yourself. Note: You can enter up to 60 break points. Determining Break Point Entries 1. Examine the printed tax table for the tax you are programming. 2. Refer to the “Tax Table Programming Example - Illinois 6% Tax Table” to help with this exercise. 3. Calculate the break point differences by subtracting the high side of the previous range from the high side of the dollar range. 4. Examine the pattern of break point differences to determine when the break points begin to repeat. Mark the beginning break points that do not fit a pattern as “non-repeat breaks.” Mark the break points that are repeating in a pattern as “repeat breaks.” Programming a Tax Table 1. Turn the control lock to the PGM position. 2. Enter 10; press the TAX SHIFT key for the tax you are programming, i.e. TAX SHIFT 1, TAX SHIFT 2, TAX SHIFT 3 or TAX SHIFT 4. 3. Enter the maximum amount that is not taxed and press the appropriate TAX SHIFT key. 4. Enter the first tax amount charged and press the appropriate TAX SHIFT key. 5. For each non-repeat break point, up to the last non-repeat break point, enter the high side from the sale dollar range and press the appropriate TAX SHIFT key. 6. For the last non-repeat break point, enter the high side from the sale dollar range and press the X/TIME key. 7. For each repeat break point, enter the high side from the sale dollar range and press the appropriate TAX SHIFT key. 8. Press the CASH key to end the tax table program. 118 • P-Mode Programming SAM4s ER-900 Series Operator's & Programming Manual v.1.7 Tax Table Programming Example - Illinois 6% Tax Table Tax Charged Sale Dollar Range $0.00 $0.00 - $0.10 Break point Differences $0.01 $0.11 - $0.21 11 $0.02 $0.22 - $0.38 17 $0.03 $0.39 - $0.56 18 $0.04 $0.57 - $0.73 17 $0.05 $0.74 - $0.91 18 $0.06 $0.92 - $1.08 17 $0.07 $1.09 - $1.24 16 $0.08 $1.25 - $1.41 17 $0.09 $1.42 - $1.58 17 $0.10 $1.59 - $1.74 16 $0.11 $1.75 - $1.91 17 $0.12 $1.92 - $2.08 17 $0.13 $2.09 - $2.24 16 $0.14 $2.25 - $2.41 17 Non-Repeat Repeat To enter the sample program for the Illinois 6% tax table in tax 1: 1. Enter 1 0 press the TAX SHIFT 1 key. 2. Enter 1 0 (the maximum amount that is not taxed), press the TAX SHIFT 1 key. 3. Enter 1 (the first tax amount charged), press the TAX SHIFT 1 key. 4. Enter 2 1 (non-repeat break point), press the TAX SHIFT 1 key. 5. Enter 3 8 (non-repeat break point), press the TAX SHIFT 1 key 6. Enter 5 6 (non-repeat break point), press the TAX SHIFT 1 key. 7. Enter 7 3 (non-repeat break point), press the TAX SHIFT 1 key. 8. Enter 9 1 (non-repeat break point), press the X/TIME key. 9. Enter 1 0 8 (repeat break point), press the TAX SHIFT 1 key. 10. Enter 1 2 4 (repeat break point), press the TAX SHIFT 1 key. 11. Enter 1 4 1 (repeat break point), press the TAX SHIFT 1 key. 12. Press the CASH key to complete the tax program. SAM4s ER-900 Series Operator's & Programming Manual v.1.7 P-Mode Programming • 119 PLU Programming All PLUs, whether they are registered by pressing a PLU key on the keyboard, or by entering the PLU number and pressing the PLU key, have the same programming options. These options are set through separate programs: “Program 100 - PLU Status Programming” determines whether the PLU is open, preset or inactive. Also selected here are tax, food stamp, scale, negative, single item, hash, gallonage, compulsory number entry, compulsory condiment and print options. “Program 110 - PLU Auto Tare Programming” allows you to automatically subtract a pre-programmed tare weight when registering a scale PLU. “Program 150 - PLU Group Assignment” allows you to select up to three groups where each PLUs sales will accumulate. “Program 200 - PLU Price/HALO Programming” determines the PLU price if the PLU is preset, or the high amount lock out (HALO) if the PLU is open. “Program 250 - PLU Stock Amount Programming” allows you to add stock to the PLU sales counters for PLUs you have designated as stock keeping PLUs. “Program 300 - PLU Descriptor Programming” allows you to set a unique descriptor, up to 18 characters, for each PLU. “Program 350 - PLU Link Programming” allows you to link a PLU to another PLU, so that registration of the first PLU will automatically trigger registration of the linked PLU. “Program 400 – PLU Delete Programming” allows you to delete a PLU. “Program 450 – PLU Mix and Match Programming” allows you to designate items eligible for mix and match discounts. 120 • P-Mode Programming SAM4s ER-900 Series Operator's & Programming Manual v.1.7 Program 100 - PLU Status Programming 1. Turn the control lock to the PGM position. 2. To begin the program, enter 1 0 0, press the SUBTL key. 1 0 0 SUBTL 3. Select the PLU or PLUs you wish to program in one of the following ways: Press a PLU key on the keyboard or scan the item. PLU If sequential PLUs are to receive the same status, press the first PLU key and then press the last PLU key. PLU PLU Enter the number of the PLU (up to 15 digits) and press the PLU key. PLU Enter the number of the first PLU in a range of PLUs that are to receive the same setting; press the PLU key. Enter the last number in the range; press the PLU key. PLU PLU 4. Refer to the "PLU Status Chart" to determine the values for N1 through N9. (If an address offers more than one option, add the values for each option and enter the sum. For example, if you wish the PLU to be taxable by rates 2 and 4, add the values for your choices, 1 + 4, and enter the sum "5" for address N2.) Enter the values you have selected, press the X/TIME key. (You do not need to enter preceding zeros. For example, if you are only selecting a value for N9, just enter that value.) N1 N2 N3 N4 N5 N6 N7 N8 N9 X/TIME 5. To program additional PLUs, repeat from step 3, or press the CASH key to finalize the program. CASH SAM4s ER-900 Series Operator's & Programming Manual v.1.7 P-Mode Programming • 121 PLU Status Chart Address N1 Program Option Value PLU is preset? PLU is override preset ? PLU is taxable by rate 1? N2 PLU is taxable by rate 2? PLU is taxable by rate 3? PLU is taxable by rate 4? N3 PLU is food stamp eligible? PLU is negative item? PLU is hash? N4 PLU is single item? Compulsory non-add number? PLU is gallonage? N5 PLU is stock? PLU is inactive? PLU is scalable? N6 PLU is auto-scale entry? PLU is a condiment? Compulsory condiment entry? N7 Print PLU on receipt? Not Used Print PLU on check? N8 Print item’s price on receipt? Print item’s price on check? PLU is disabled PROMO function? N9 PLU counter is not reset when a PLU Z report is done? PLU is preset override in MGR control? Disable Void & Return 122 • P-Mode Programming = Sum Yes = 0 No = 1 Yes = 0 No = 2 Yes = 4 No = 0 Yes = 1 No = 0 Yes = 2 No = 0 Yes = 4 No = 0 Yes = 1 No = 0 Yes = 2 No = 0 Yes = 4 No = 0 Yes = 1 No = 0 Yes = 2 No = 0 Yes = 4 No = 0 Yes = 1 No = 0 Yes = 2 No = 0 Yes = 4 No = 0 Yes = 1 No = 0 Yes = 2 No = 0 Yes = 4 No = 0 Yes = 0 No = 1 0 Yes = 0 No = 4 Yes = 0 No = 1 Yes = 0 No = 2 Yes = 4 No = 0 Yes = 1 No = 0 Yes = 2 No = 0 Yes = 4 No = 0 SAM4s ER-900 Series Operator's & Programming Manual v.1.7 PLU Options - Reference Information Option Description PRESET OVERRIDE If Yes, you can enter a price to override the preset price. FOOD STAMP ELIGIBLE Select Yes to accumulate a total of food stamp eligible items in the current sale. The total can be viewed by pressing the F/S SUB key and food stamps can be tendered with the F/S TEND key. HASH Items designated with HASH status add to the current sale, but do not add to the registers grand total. HASH items may or may not add to the net sales total - see system option programming. Use hash for lottery sales or bottle deposits. SINGLE ITEM Select Yes for a single item PLU. Single item PLUs automatically total as a cash sale immediately after the PLU entry. Single item PLUs are used to speed up one item sales. NON-ADD # COMP Select Yes to enforce the entry of a non-add number before a registration can be made. GALLONAGE ITEM Select Yes to compute gallons sold. The gallons sold will print along with the price entry on the receipt. The total gallons sold will accumulate in the PLU counter. You must program the price per gallon (in tenths of a cent, i.e. $1.299 for $1.29 and 9/10) in the PRICE/HALO field. STOCK ITEM Select Yes if you wish to track the number of items remaining in stock using the Stock report. SCALEABLE If Yes, the PLU will work only when you are multiplying a weight from an optional scale or when multiplying a manually entered weight. (For example, enter weight, press SCALE, then register PLU.) AUTO SCALE Select Yes if you wish entries into this PLU to be automatically multiplied by the weight on the optional scale. CONDIMENT Select Yes if you wish the item to act like a condiment on the kitchen printer. Items with this status will satisfy the requirements of items with compulsory condiment status. COMPULSORY CONDMNT Select Yes if you wish to force the entry of a condiment after this item is entered. PRINT ON RECEIPT PRINT ON CHECK Select No if you wish to suppress printing of the item at the designated location. PRT PRICE ON RCPT Select No if you wish to suppress printing of the item's price on the receipt. PRT PRICE ON CHK Select No if you wish to suppress printing of the item's price on the check. DISABLE PROMO Select Yes to block the PROMO function on this PLU. SAM4s ER-900 Series Operator's & Programming Manual v.1.7 P-Mode Programming • 123 Option Description COUNTER NOT RESET Select Yes if you do not wish to reset the PLU item counter on the Z PLU report. PRESET OVERRIDE IN MGR CONTROL If preset override is Yes, then you can force manager control for preset override. 124 • P-Mode Programming SAM4s ER-900 Series Operator's & Programming Manual v.1.7 Program 110 - PLU Auto Tare Programming Note: Tare #5 can be used for open tare entries. 1. Turn the control lock to the PGM position. 2. To begin the program, enter 1 1 0, press the SUBTL key. 1 1 0 SUBTL 3. Select the PLU or PLUs you wish to program in one of the following ways: Press a PLU key on the keyboard or scan the item. PLU If sequential PLUs are to receive the same status, press the first PLU key and then press the last PLU key. PLU PLU Enter the number of the PLU (up to 15 digits) and press the PLU key. PLU Enter the number of the first PLU in a range of PLUs that are to receive the same setting; press the PLU key. Enter the last number in the range; press the PLU key. PLU PLU 4. Enter a value (1-5) to indicate the number of the preprogrammed tare weight you want to automatically subtract when the PLU is used for scale entry (using an optional scale), and then press the X/TIME key. Enter 0 to disable automatic tare subtraction. X/TIME 5. To program additional PLUs, repeat from step 3, or press the CASH key to finalize the program. CASH SAM4s ER-900 Series Operator's & Programming Manual v.1.7 P-Mode Programming • 125 Program 150 - PLU Group Assignment Each PLU may report to any three of 99 groups. Group totals appear on reports, so that you can track sales of different types of items. A group can also be used to designate items that are to print on an optional kitchen printer. The first of the three groups to which a PLU can be assigned determines kitchen printer routing. Note: The PLU will report to group "1", if not programmed to report to another group. 1. Turn the control lock to the PGM position. 2. To begin the program, enter 1 5 0, press the SUBTL key. 1 5 0 SUBTL 3. Select the PLU or PLUs you wish to program in one of the following ways: Press a PLU key on the keyboard or scan the item. PLU If sequential PLUs are to receive the same status, press the first PLU key and then press the last PLU key. PLU PLU Enter the number of the PLU (up to 15 digits) and press the PLU key. PLU Enter the number of the first PLU in a range of PLUs that are to receive the same setting; press the PLU key. Enter the last number in the range; press the PLU key. PLU PLU 4. Enter up to three 2-digit numbers representing the groups where you wish to add the PLUs sales, i.e. enter 1 0 for group 10 or enter 0 4 for group four. Press the X/TIME key. X/TIME 1st Group 2nd Group 3rd Group 5. To program additional PLUs, repeat from step 3, or press the CASH key to finalize the program. CASH 126 • P-Mode Programming SAM4s ER-900 Series Operator's & Programming Manual v.1.7 Program 200 - PLU Price/HALO Programming If a PLU is open, set the HALO (high amount lock out) here. If a PLU is preset set the preset price here. If a PLU is set with gallonage status, enter the price per gallon here. (Enter price per gallon in tenths of a penny, i.e. 1299 for $1.29 9/10 per gallon.) 1. Turn the control lock to the PGM position. 2. To begin the program, enter 2 0 0, press the SUBTL key. 2 0 0 SUBTL 3. Select the PLU or PLUs you wish to program in one of the following ways: Press a PLU key on the keyboard or scan the item. PLU If sequential PLUs are to receive the same price, press the first PLU key and then press the last PLU key. PLU PLU Enter the number of the PLU (up to 15 digits) and press the PLU key. PLU Enter the number of the first PLU in a range of PLUs that are to receive the same setting; press the PLU key. Enter the last number in the range; press the PLU key. PLU PLU 4. If the PLU is open, enter a HALO of up to 7 digits. If the PLU is preset, enter a preset price. (The maximum preset price you can enter is $50,000.00.) X/TIME Price/HALO 5. If you have allocated a second price level for PLUs, you must enter the second price for the item a immediately after you have entered the first price. X/TIME nd 2 Lvl Price/HALO 6. To program additional PLUs, repeat from step 3, or press the CASH key to finalize the program. CASH SAM4s ER-900 Series Operator's & Programming Manual v.1.7 P-Mode Programming • 127 Program 250 - PLU Stock Amount Programming With this program, you can you can add stock to the PLU sales counters for PLUs you have designated as stock PLUs. See "Program 100 - PLU Status Programming" to set option N5 to set stock status. The stock number set here can be the amount of stock that is being added to the current level, or optionally, it can be the new total stock level. See option #18 in "System Option Programming" to set this option. 1. Turn the control lock to the PGM position. 2. To begin the program, enter 2 5 0, press the SUBTL key. 2 5 0 SUBTL 3. Select the PLU or PLUs you wish to program in one of the following ways: Press a PLU key on the keyboard or scan the item. PLU If sequential PLUs are to receive the same status, press the first PLU key and then press the last PLU key. PLU PLU Enter the number of the PLU (up to 15 digits) and press the PLU key. PLU Enter the number of the first PLU in a range of PLUs that are to receive the same setting; press the PLU key. Enter the last number in the range; press the PLU key. PLU PLU 4. Enter the stock amount you wish to add (up to six digits), press the X/TIME key. X/TIME Stock Amount 5. To program additional PLUs, repeat from step 3, or press the CASH key to finalize the program. CASH 128 • P-Mode Programming SAM4s ER-900 Series Operator's & Programming Manual v.1.7 Program 300 - PLU Descriptor Programming Program descriptors by typing descriptors on the alpha keyboard overlay or by entering three digit alpha character codes. To enter descriptors by three digit alpha character codes you must set system option #25 (See “System Option Programming” on page 135). Note: You can program descriptors up to 18 characters, however only the first 16 will appear on the display. 1. Turn the control lock to the PGM position 2. To begin the program, enter 3 0 0, press the SUBTL key. 3 0 0 SUBTL 3. Select the PLU you wish to program in one of the following ways: Press a PLU key on the keyboard or scan the item. PLU Enter the number of the PLU (up to 15 digits) and press the PLU key. PLU 4. If you are programming using an alpha keyboard overlay, type up to 18 descriptors on the overlay and press the X/TIME key. Type up to 18 descriptor keys X/TIME If you are programming using descriptor codes, enter up to 18 three-character codes and press the X/TIME key. (See “Descriptor Code Chart” on page 131.) Enter up to 18 threecharacter codes X/TIME 5. To program additional PLUs, repeat from step 3, or press the CASH key to finalize the program. CASH SAM4s ER-900 Series Operator's & Programming Manual v.1.7 P-Mode Programming • 129 ER-925/ER-945 Alpha Keyboard Overlay Note: There is no alpha overlay option for the default 21-PLU Location version of the ER-900 Series. You must use the descriptor code entry method for the 21-key configuration. FEED JOURNAL FEED CAP CLEAR PLU X/TIME / DOUBL E 7 8 8 ; < BACK 4 5 5 * : > 1 2 2 ( ' ? 0 00 . FEED JOURNAL FEED A H O V # ) " SPACE B I P W $ - , SPACE C J Q X % + . D K R Y ^ = E L S Z & F M T ! G N U @ SUBTOTAL CASH TEND ER-920/ER-940 Alpha Keyboard Overlay 1 11 21 31 41 51 61 71 81 91 2 12 22 32 42 52 62 72 82 92 ' " < > - + = : ? ! @ # $ % ^ & * ( ) q w e r t y u i o p a s d f g h j k l ; CLEAR PLU X/TIME z x c v b n m , . / 7 8 9 CAP DOUBL E SPACE SPACE SPACE SPACE SPACE CAP DOUBL E BACK 4 5 6 9 19 29 39 49 59 69 79 89 99 1 2 3 SUBTL 10 20 30 40 50 60 70 80 90 100 0 00 . CASH 130 • P-Mode Programming SAM4s ER-900 Series Operator's & Programming Manual v.1.7 Descriptor Code Chart CHAR Ç ü é â ä à å ç ê ë CODE 001 002 003 004 005 006 007 008 009 010 CHAR è ï î ì Ä Å É æ Ǽ ô CODE 011 012 013 014 015 016 017 018 019 020 CHAR ö ò û ù ÿ ö Ü ¢ £ ¥ CODE 021 022 023 024 025 026 027 028 029 030 CHAR € SPACE ! " # $ % & ' ( CODE 031 032 033 034 035 036 037 038 039 040 CHAR ) * + , - . / 0 1 2 CODE 041 042 043 044 045 046 047 048 049 050 CHAR 3 4 5 6 7 8 9 : ; < CODE 051 052 053 054 055 056 057 058 059 060 CHAR = > ? @ A B C D E F CODE 061 062 063 064 065 066 067 068 069 070 CHAR G H I J K L M N O P CODE 071 072 073 074 075 076 077 078 079 080 CHAR Q R S T U V W X Y Z CODE 081 082 083 084 085 086 087 088 089 090 a b c d CHAR CODE 091 092 093 094 095 096 097 098 099 100 CHAR e f g h i j k l m n CODE 101 102 103 104 105 106 107 108 109 110 CHAR o p q r s t u v w x CODE 111 112 113 114 115 116 117 118 119 120 CHAR y z BACK SPACE Double CODE 121 122 123 999 SAM4s ER-900 Series Operator's & Programming Manual v.1.7 P-Mode Programming • 131 Program 350 - PLU Link Programming PLU link programming allows you to link a PLU to another PLU, so that registration of the first PLU will automatically trigger registration of the linked PLU. For example, you may wish to link a bottle deposit with the sale of beverages, or you may wish to register a group of items normally sold together. 1. Turn the control lock to the PGM position. 2. To begin the program, enter 3 5 0, press the SUBTL key. 3 5 0 SUBTL 3. Select the PLU you wish to program in one of the following ways: Press a PLU key on the keyboard or scan the item. PLU Enter the number of the PLU (up to 15 digits) and press the PLU key. PLU 4. Enter the number of the PLU you wish the PLU linked to; press the PLU key. Or press the PLU key on the keyboard you wish the PLU linked to. PLU Or, PLU If you want to unlink 0 PLU 5. To program additional PLUs, repeat from step 3, or press the CASH key to finalize the program. CASH 132 • P-Mode Programming SAM4s ER-900 Series Operator's & Programming Manual v.1.7 Program 400 – PLU Delete Programming NOTE: To delete a PLU, all totals for the PLU must be cleared from both Z1 and Z2 reports and Stock reports.) 1. Turn the control lock to the PGM position. 2. To begin the program, enter 4 0 0, press the SUBTL key. 4 0 0 SUBTL 3. Select the PLU or PLUs you wish to program in one of the following ways: Press a PLU key on the keyboard or scan the item. PLU Press the first PLU key that is to be deleted and press the last PLU key. PLU PLU Enter the number of the PLU you wish to delete and press the PLU key. PLU Enter the number of the first PLU in a range you wish to delete and press the PLU key. Enter the last number in the range; press the PLU key. PLU PLU 4. Press X/TIME key. X/TIME 5. To program additional PLUs, repeat from step 3, or press the CASH key to finalize the program. CASH SAM4s ER-900 Series Operator's & Programming Manual v.1.7 P-Mode Programming • 133 Program 450 – PLU Mix and Match Programming If a PLU is eligible for a mix and match discount, enter the mix and match table for the PLU here. See “Mix and Match Discount Programming” on page 178 for more information. 1. Turn the control lock to the PGM position. 2. To begin the program, enter 4 5 0, press the SUBTL key. 4 5 0 SUBTL 3. Select the PLU or PLUs you wish to program in one of the following ways: Press a PLU key on the keyboard or scan the item. PLU Enter the number of the PLU (up to 15 digits) you wish to program and press the PLU key. PLU 4. Enter the number of the Mix & Match Table (1-99) and press the X/TIME key. X/TIME 5. To program additional PLUs repeat from step 3, or press the CASH key to finalize the program. CASH 134 • P-Mode Programming SAM4s ER-900 Series Operator's & Programming Manual v.1.7 System Option Programming Refer to the “System Option Table” to review the system options. Read each option carefully to determine if you wish to make any changes. NOTE: Typical selections are set as default. After clearing memory all options settings are automatically set to the default setting, therefore there is no need to program unless you are setting an option other than the default. Programming a System Option 1. Turn the control lock to the PGM position. 2. Enter 3 0, press the SUBTL key. 3. Enter a system option address and press the X/TIME key. 4. Enter the number representing the status you have selected, or if there is more than one decision to be made in an address, add the values representing your choices for each decision and enter the sum. Press the SUBTL key. 5. Repeat from step 3 for each system option you wish to change. 6. Press the CASH key to end system option programming. System Option Flowchart Repeat for each System Option 3 0 SUBTL X/TIME Option # SAM4s ER-900 Series Operator's & Programming Manual v.1.7 SUBTL CASH Status P-Mode Programming • 135 System Option Table Note: Default Values are shown in bold type. Address 1 SYSTEM OPTION VALUE Beeper is active? Yes = 0 No = 1 Reserved % Function does not affect Net Sales 2 3 4 Clerk sign on method is: Yes = 4 No = 0 0 Code entry = 1 Pop-up = 1 Stay down = 0 Enforce closed drawer for register operation? Yes = 0 No = 1 Open drawer alarm is active? Yes = 2 No = 0 5 The number of seconds before the open drawer warning tone sounds (default is 30 seconds). 6 Allow the post tender function? Yes = 1 No = 0 Drawer is opened on post tender? Yes = 0 No = 2 Allow multiple receipts? Yes = 4 No = 0 Cash declaration is compulsory before reports may be taken? Yes = 1 No = 0 Allow negative balance sales in the X control lock position only? Yes = 2 No = 0 Allow zero balance sales in the X control lock position only? Yes = 1 No = 0 Consecutive number is reset after a financial report? Yes = 2 No = 0 Grand total is reset after a Z Financial report? Yes = 1 No = 0 Cash drawer will open when reports are run? Yes = 0 No = 2 Open drawer during training mode? Yes = 0 No = 4 Decimal place: (0,1,2,3) default=2 0-3 7 8 9 10 136 • P-Mode Programming SUM 0 Direct entry = Clerks are: = 1-99 SAM4s ER-900 Series Operator's & Programming Manual v.1.7 Address 11 12 13 14 SYSTEM OPTION VALUE Date format is: Percentage and Tax calculations will: Split price calculations will: MMDDYY = 0 DDMMYY = 1 YYMMDD = 2 Round up at 0.005 = 0 Always round up = 1 Always round down = 2 Round up at 0.005 = 0 Always round up = 1 Always round down = 2 Eat-in/Take-out/Drive Thru procedure compulsory before tendering is allowed? Hash is 15 16 17 18 19 Normal = 0 Non-add = 2 Yes = 1 No = 0 Reset the Time report Z counter after a Z1 Time report? Yes = 2 No = 0 Reset the PLU report Z counter after a Z1 PLU report? Yes = 4 No = 0 Reset the Clerk report Z counter after a Z1 Clerk report? Yes = 1 No = 0 Reset the Group report Z counter after a Z1 Group report? Yes = 2 No = 0 Reset the Daily sales report Z counter after a Z2 Daily sales report? Yes = 1 No = 0 Paper sensor is enabled? Yes = 0 No = 2 Split pricing is deactivated? Yes = 4 No = 0 Enable direct multiplication? Yes = 1 No = 0 Adds to current level = 2 Replaces current level = 0 Global Entry Limit: 0 (default) is no limit SAM4s ER-900 Series Operator's & Programming Manual v.1.7 SUM Yes = 1 No = 0 Reset the Financial report Z counter after a Z1 Financial report? Stock counter programming: = 0-14 P-Mode Programming • 137 Address 20 SYSTEM OPTION VALUE Allow multiplication by more than one digit? Yes = 1 No = 0 Amount tendered = 2 Amount of sale = Display “add” price of linked item? 0 Tender Validation amount is: 21 Level 1 = Level 2 = Pop-up after item = Pop-up after sale = Stay-down = Yes = 1 No = 0 Yes = 0 No = 2 Yes = 4 No = 0 Yes = 1 No = 0 Yes = 0 No = 2 1 0 Yes = 1 No = 0 Yes = 0 No = 2 Yes = 4 No = 0 Yes = 1 No = 0 Yes = 2 No = 0 Yes = 4 No = 0 0 1 Yes = 2 No = 0 1 2 0 1 2 Pop-up after item = Pop-up after sale = Stay-down = 0 1 2 Allow sale when stock reaches “0”? Allow Swedish round on subtotal? 22 Allow Swedish round on cash? Allow Z stock report? Enter = Exit = 23 Training mode 24 Enable Electronic Journal? 25 Prompt Operator when Electronic Journal is full? Stop Operations when Electronic Journal is full? Send only Negative Entries to Electronic Journal? Send Reset Report to Electronic Journal? Disable Cash Declaration? Table Management = 26 Clerk Interrupt = VAT Shift affects the whole receipt? 27 Disable Level Keys? 28 Price level is: 29 Modifier is: 30 Store Name (8-characters) 138 • P-Mode Programming = SUM SAM4s ER-900 Series Operator's & Programming Manual v.1.7 Address 31 SYSTEM OPTION VALUE Program descriptors with overlay? Yes = 1 No = 0 Yes = 2 No = 0 Yes = 4 No = 0 0 1 0 Yes = 2 No = 0 Yes = 4 No = 0 Use Journal Take-up Spool? (ER-920/925 only) Use MCR 32 MSR Track Use: 33 Not Used Track 1 & 2 = Track 3 & 4 = Use Auto cutter? Mix & Match is taxable? 34 36 SUM Price embedded barcode type: Disabled Type 1 Type 2 Type 4 Type 7 35 = = = = = = 0 1 3 4 7 Language? English = Spanish = French = Require manager to open/close checks? Enable charge posting functions? Send Reports to Remote Printer? (sends to printer with lowest port#) 37 MSR Connected to: 38 Datatran = PDC = Register = Pin pad connected to device on port #: 39 Pin Pad Type: DUKPT = ROTATE = EFT Draft is fine dining (prints tip line)? 40 Disable Not-Found PLU feature? 41 For Puerto Rico Only SAM4s ER-900 Series Operator's & Programming Manual v.1.7 0 1 2 Yes = 1 No = 0 Yes = 2 No = 0 Yes = 4 No = 0 0 1 2 0-4 0 1 Yes = 2 No = 0 Yes = 1 No = 0 Yes = 1 No = 0 P-Mode Programming • 139 System Options - Reference Information # Option Description 2 Clerk sign on method is Direct Entry or Code Entry For direct entry, enter the numeric clerk code and press the CLERK key. For code entry, press the CLERK key, enter the clerk code and press the CLERK key. 6 Allow the post tender function Select Y to allow re-tendering should a second change calculation become necessary. Re-enter the tendered amount and press the CASH key to show the new change computation. 14 Hash is NORMAL or NON-ADD Normal Hash adds to all totals except the gross and net sales totals on the financial report. Non-add Hash does not add to any totals, except the HASH total on the financial report. 17 Split Pricing is deactivated? If N, both multiplication and split pricing calculations can be done with the X/TIME key. If Y, only multiplication can be done with the X/TIME key. 18 Enable Direct Multiplication If Y, you can multiply preset items by simply entering the quantity, then pressing the preset PLU key. 21 Display add price of linked item? When Y, the customer display shows a total of the item and linked item. For example, if PLU is $1.00 and is linked to PLU2, which is $0.25, the display will show $1.25. 21 Allow Swedish round on subtotal? 22 Allow Swedish round on cash? Swedish rounding rounds as below: .00 - .02 = .00 .03 - .07 = .05 .08 - .09 = .10 140 • P-Mode Programming SAM4s ER-900 Series Operator's & Programming Manual v.1.7 # Option Description 26 Table Management, or Clerk Interrupt allows you to temporarily suspend an incomplete transaction by signing on a new clerk. The new clerk can begin a new transaction with the first transaction temporarily suspended. The original transaction can be recalled for completion by signing on the original clerk. You cannot use check/table tracking or charge posting when the clerk interrupt system is implemented. Clerk Interrupt Using the clerk interrupt feature requires allocation of at least 2 guest checks and sufficient soft check lines to support the interrupted transaction (i.e. if 20 soft check lines are allocated, a transaction with up to 20 lines can be interrupted.) 29 Modifier is: Pop-up after item? Pop-up after sale? Stay-down? A MODIFIER key alters the next PLU registered, either by changing the code number of the PLU so that a different item is registered, or by adding the modifier descriptor and not changing the code of the subsequent PLU. If you press a modifier key, you have the option of the modifier applying only to the next item (0), having the same modifier apply to any subsequent item registered in the same transaction (1), or having the same modifier apply to any subsequent item on any subsequent transaction (2). 30 Store Name This is an 8-character alpha/numeric field. Entry is made by alpha overlay or descriptor code, depending upon the method selected. You must set a store name when using an SD card to save/load programs or reports. The name set here must match the name of the folder on the SD card, for example: SD:/ER900/PGMBACK/NAME for program files or SD:/ER900/RPTBACK/NAME for report files. Report files can be viewed using the optional PC Utility. Consult with your SAM4s dealer for details. 31 Program descriptors with overlay/ Defaults to Yes for flat keyboard models; No for raised key models. SAM4s ER-900 Series Operator's & Programming Manual v.1.7 P-Mode Programming • 141 # Option Description 34 Price Embedded barcode type If price embedded barcodes are scanned, choose, type 1, 2, 4, or 7. Definition of types is shown in the chart below. 36 Require manager to open/close checks? When Y, you must turn the key lock to the MGR position if you wish to open a new check or close a check. This option will usually be Y when a charge posting system is implemented and you do not wish a clerk to inadvertently open a new account. Enable charge posting functions? When charge posting is enabled, the FINALIZE, PAYMENT, and PAY TENDER keys are enabled. 142 • P-Mode Programming SAM4s ER-900 Series Operator's & Programming Manual v.1.7 Print Option Programming Refer to the “Print Option Table” to review the print options. Read each option carefully to determine if you wish to make any changes. NOTE: Typical selections are set as default. After clearing memory all options settings are automatically set to the default setting, therefore there is no need to program unless you are setting an option other than the default. Programming a Print Option 1. Turn the control lock to the PGM position. 2. Enter 4 0, press the SUBTL key. 3. Enter a print option address and press the X/TIME key. 4. Enter the number representing the status you have selected, or if there is more than one decision to be made in an address, add the values representing your choices for each decision and enter the sum. Press the SUBTL key. 5. Repeat from step 3 for each print option you wish to change. 6. Press the CASH key to end print option programming. Print Option Flowchart Repeat for each Print Option 4 0 SUBTL X/TIME Option # SAM4s ER-900 Series Operator's & Programming Manual v.1.7 SUBTL CASH Status P-Mode Programming • 143 Print Option Table Note: Default Values are shown in bold type. Address 1 PRINT OPTION VALUE Print media total on clerk report? Yes = 1 No = 0 Yes = 0 No = 2 Print tax symbol? 2 3 4 5 Void Mode/Return totals will print on the Financial report? Yes = 0 No = 1 Audaction total will print on the Financial report? Yes = 2 No = 0 Skip media totals with zero activity on the Financial report? Yes = 0 No = 1 Skip media totals with zero activity on the Clerk report? Yes = 0 No = 2 Print Clerk report at the end of the Financial report? Yes = 4 No = 0 Print PLU sale item number? Yes = 1 No = 0 Print PLU with zero totals on report? Yes = 2 No = 0 Subtotal is printed when the SUBTL key is pressed? Yes = 4 No = 0 Print percentage of sales on the PLU report? Yes = 1 No = 0 Yes = 0 No = 2 Yes = 0 No = 1 Yes = 0 No = 2 Yes = 0 No = 4 Print consecutive number counter on receipt? 6 Print date on receipt? Print time on receipt? Print machine number on receipt? Print clerk name on receipt? Yes = 0 No = 1 Print Z counter on reports? Yes = 0 No = 2 8 Home Currency symbol $ (Default) 9 Print receipt when sign on/off? Yes = 0 No = 1 Yes = 0 No = 2 Yes = 0 No = 4 7 Print Grand total on the X Financial report? Print Grand total on the Z Financial report? 144 • P-Mode Programming = SUM SAM4s ER-900 Series Operator's & Programming Manual v.1.7 Address 10 PRINT OPTION VALUE Print Gross total on the X Financial report? Yes = 0 No = 1 Yes = 0 No = 2 Yes = 1 No = 0 Print Gross total on the Z Financial report? 11 Print the subtotal without tax on the receipt? Tax amount to print on receipt is: 12 13 Combine = 2 Itemize = 0 Print the tax amount on receipt? Yes = 0 No = 1 Print taxable totals? Yes = 2 No = 0 Print the tax rate? Yes = 4 No = 0 Print a breakdown of the VAT eligible sale? Yes = 1 No = 0 Print training mode message on the receipt during training mode operations? Yes = 2 No = 0 14 Currency CONV. #1 = . 15 Symbol: CONV. #2 = . 16 CONV. #3 = . 17 CONV. #4 = . 18 19 20 Print the KP order number on the register receipt? Yes = 0 No = 1 Print the item’s price on the kitchen printer requisition? Yes = 2 No = 0 Print registrations in void mode on the kitchen printer requisition? Yes = 0 No = 1 Print registrations in training mode on the kitchen printer requisition? Yes = 2 No = 0 Combine like items on the kitchen printer? Yes = 0 No = 1 Consolidation of like items on check track? Yes = 0 No = 2 Chooses volume unit when the PLU is gallonage. SAM4s ER-900 Series Operator's & Programming Manual v.1.7 Gallons = 0 Liters = 4 = SUM P-Mode Programming • 145 21 22 23 24 25 Print preamble message on receipt? Yes = 0 No = 1 Print postamble message on receipt? Yes = 0 No = 2 Print preamble message on the guest check? Yes = 1 No = 0 Print postamble message on the guest check? Yes = 2 No = 0 Print average items per customer on the Financial report? Yes = 0 No = 1 Print average sales per customer on the Financial report? Yes = 0 No = 2 Allow a second receipt for the same transaction? Yes = 1 No = 0 Priority print by group on the kitchen printer? Yes = 2 No = 0 Print the PLU number and descriptor on the receipt? Yes = 4 No = 0 Print when polling reports? Yes = 0 No = 1 Print PLU# on PLU report? Yes = 2 No = 0 Grand total is: Net sale = 4 Gross sale = 0 26 Adjustable Cut Position (Default 40) (0-70) 27 Send order to the kitchen printer when the SUBTL key is pressed? Yes = 1 No = 0 Print date on hard check? Yes = 2 No = 0 Print pre graphic logo on receipt? Yes = 1 No = 0 Print post graphic logo on receipt? Yes = 2 No = 0 Print pre graphic logo on guest check? Yes = 1 No = 0 Print post-graphic logo on guest check? Yes = 2 No = 0 28 29 146 • P-Mode Programming SAM4s ER-900 Series Operator's & Programming Manual v.1.7 30 Not Used 0 31 Number of pre-feeding lines on receipt. 0-5 32 Number of post-feeding lines on receipt. 0-5 33 Print in high density? Yes = 1 No = 0 Journal is off? Yes = 2 No = 0 Yes = 4 No = 0 Journal is small? 34 Print EJ from: Oldest 1 Newest 0 Mask credit card number on all EFT drafts? Yes = 0 No = 2 35 Number of Datatran Receipt Copies (default=1) 36 No signature required if EFT transaction is under xxxx (i.e. if 2000 is set here, no signature is required on transactions under $20.00.) 0000 37 Quick journal review (R-Mode/10 Subtotal) prints last xx (0-99) lines of electronic journal. 0-99 SAM4s ER-900 Series Operator's & Programming Manual v.1.7 0-99 P-Mode Programming • 147 Print Options - Reference Information # Option Description 1 Print media totals on clerk report Select Yes to print media totals for each clerk, thus allowing clerk cash drawer accountability. Select No to remove the tax symbol (i.e."T1") from the print and display. If Yes, each receipt will print the total number of PLU items sold in the transaction. The register can calculate the percentage of sales represented by each PLU. Select Yes if you wish to print this percentage on the PLU report. Users outside of the USA can designate a different currency symbol. To select a different symbol, type descriptors on the alpha keyboard overlay or enter three digit alpha character codes. To enter a descriptor by three digit alpha character codes you must select No in system option #31 (See “System Option Programming” on page 135). Print tax symbol 4 Print PLU sale item number? 5 Print % of sales on PLU report? 8 Home currency symbol 9 Print receipt when sign on/off? Select No if you do not wish to print a receipt when signing on or off a clerk. 11 Print subtotal without tax on the receipt? If you hand-write invoices or credit card slips, you may find it useful to print the merchandise subtotal. Select Yes if you wish to print the subtotal without tax on the receipt. Tax amount on receipt is: Combine or Itemize Select “2” if you are calculating and reporting more than one sales tax rate separately and you wish to print just the total of multiple taxes rather than itemize each tax on the receipt. Print a breakdown of the VAT eligible sale? If Yes, a breakdown of the VAT eligible sale will print the net amount and the VAT amount. 13 148 • P-Mode Programming SAM4s ER-900 Series Operator's & Programming Manual v.1.7 # Option Description 15 Currency symbol: conv.#1 conv.#2 conv.#3 conv.#4 If you are using the currency conversion feature, you can select the appropriate symbol for each foreign currency you are accepting. To select a different symbol, type descriptors on the alpha keyboard overlay or enter three digit alpha character codes. To enter a descriptor by three digit alpha character codes you must select No in system option #31 (See “System Option Programming” on page 135). Combine like items on the kitchen printer? If two of the same items are registered in the same transaction, you can choose the format on the kitchen requisition. For example, if Yes, "2 HAMBURGERS; if N, "1 HAMBURGER" and "1 HAMBURGER". Combine like items on check track? Consolidation of like items can be selected for soft guest check printing. For example, if three rounds of drinks are served, the check will print "3 TAP BEER" rather than "1 TAP BEER" three times. Print average items per customer on the Financial report? Choose whether to print the average items per customer (PLU sales counter/Net sales counter) or the average sales per customer (Net Sales/Net Sales counter). 16 17 18 20 23 Print average sales per customer on the Financial report? 24 Priority print by group on the kitchen printer? SAM4s ER-900 Series Operator's & Programming Manual v.1.7 If Yes, the order in which items appear on a kitchen requisition is determined by the group to which the item is assigned, i.e. items reported to group 1 will print before items reported to group 2. P-Mode Programming • 149 Function Key Programming Three programs are used to program function keys: Program 70 - is used to set individual options for each function key Program 80 - is used to program an 18-character alphanumeric descriptor. In the case of the #/No Sale key, provision is made to program a separate descriptor for the # and No Sale functions. Program 90 - is used to set a high amount limit (HALO). In the case of percentage keys (%1-%5) the percentage rate or amount is programmed; In the case of currency conversion keys, the conversion rate is programmed. In this chapter you will find: General instructions for programs 70, 80 and 90. Specific Program 70 option programming instructions for each function key. Program 70 - Function Key Options Use Program 70 to set options for function keys. Because of the differences inherent in function keys, individual options will be different. See the specific instructions for each key in this chapter to find the options for each key. 1. Turn the control lock to the PGM position. 2. To begin the program, enter 7 0, press the SUBTL key. 7 0 SUBTL 3. Enter the values for the option digit or digits. Depending on the function key you are programming, you may enter up to six digits N1 through N6. Determine the values for N1 through N6 by referring to the specific function key information that follows. (You do not need to enter preceding zeros. For example, if the function key offers six digits, N1 through N6 and you are only selecting a value for N6, just enter the value for N6.) Press the function key you wish to program. N1 N2 N3 N4 N5 N6 FUNCTION KEY 4. To program additional function keys, repeat from step 3, or press the CASH key to finalize the program. CASH 150 • P-Mode Programming SAM4s ER-900 Series Operator's & Programming Manual v.1.7 Program 80 - Function Key Descriptor Program descriptors by typing descriptors on the alpha keyboard overlay or by entering three digit alpha character codes. To enter descriptors by three digit alpha character codes you must set system option #31 (See “System Option Programming” on page 135). Note: You can program descriptors up to 18 characters, however only the first 10 will appear on the display. 1. Turn the control lock to the PGM position. 2. To begin the program, enter 8 0, press the SUBTL key. 8 0 SUBTL 3. If you are programming using an alpha keyboard overlay, type up to 18 descriptors on the overlay, press the X/TIME key and then press the function key you are programming. (Note: As you are entering descriptors only the last 16 descriptors will display.) Type up to 18 descriptor keys X/TIME FUNCTION KEY If you are programming using descriptor codes, enter up to 18 three-character codes and press the function key you are programming key. (See “Descriptor Code Chart” on page 131.) Enter up to 18 threecharacter codes FUNCTION KEY 4. To program additional function keys, repeat from step 3, or press the CASH key to finalize the program. CASH Descriptor Programs for the #/No Sale Key - Programs 80 & 81 Since two distinct functions, # entry and no sale, reside on the same key, different programs are used to program each descriptor. To program the no sale descriptor: 8 0 SUBTL Enter up to 18 descriptor codes, or type 18 alpha overlay descriptors To program the # descriptor: 8 1 SUBTL Repeat for another function key FUNCTION KEY CASH Repeat for another function key Enter up to 18 descriptor codes, or type 18 alpha overlay descriptors SAM4s ER-900 Series Operator's & Programming Manual v.1.7 FUNCTION KEY CASH P-Mode Programming • 151 Program 90 - Function Key HALO Use Program 90 to program a high amount lock out (HALO) for a function key. Only specific keys require this program. For example, you can set a HALO for the CASH, CHECK or CHARGE keys. Refer to the specific function key programming information in this chapter to determine when the HALO option is available. Note: An 8 digit HALO has a maximum entry of $500,000.00. 1. Turn the control lock to the PGM position. 2. To begin the program, enter 9 0, press the SUBTL key. 9 0 SUBTL 3. Enter a HALO of up to eight digits, (or "0" for no HALO). Press the function key on the keyboard you wish to program. FUNCTION KEY Enter 1-8 digit HALO 4. To program additional function keys, repeat from step 2, or press the CASH key to finalize the program. CASH Program 90 Instructions for %1-%5 Keys Repeat for another function key 9 0 SUBTL Enter 5 digit rate or amount (see note below) % CASH Note: If key is amount, enter 5 digit HALO, or 0 for no HALO. If key is percentage enter the percentage in a five-digit format, without the decimal (XX.XXX). For example: for 10%, enter 10000; for 5.55%, enter 05550; for 99.999%, enter 99999. 152 • P-Mode Programming SAM4s ER-900 Series Operator's & Programming Manual v.1.7 Instructions for Currency Conversion Rate - Program 90 1. Turn the control lock to the PGM position. 2. To begin the program, enter 9 0, press the SUBTL key. 9 0 SUBTL 3. Enter the exchange rate of up to 7 digits (do not enter the decimal point), and then enter a number from 0 to 7 to indicate the decimal position. See "Currency Exchange Rate Programming Examples" below. Exchange Rate Decimal Position 4. Press the function key on the keyboard you wish to program. FUNCTION KEY 5. To program additional function keys, repeat from step 2, or press the CASH key to finalize the program. CASH Currency Exchange Rate Programming Examples Note: Foreign currency exchange rates may be stated as “foreign currency in dollars”, or “dollars in foreign currency”. Use the rate stated in “dollars in foreign currency” when you are programming this section. The US dollar (home currency) is worth 1.3720 Canadian dollars (foreign currency). 1 3 7 2 0 Exchange Rate 4 Decimal Position The US dollar (home currency) is worth 110.24 Japanese Yen (foreign currency). 1 1 0 2 Exchange Rate 4 2 Decimal Position SAM4s ER-900 Series Operator's & Programming Manual v.1.7 P-Mode Programming • 153 ADD CHECK - Function Key Options Options - Program 70 (P-Mode) Repeat for another function 7 0 Address N1 N2 N3 154 • P-Mode Programming SUBTL N1 N2 N3 ADD CEHCK CASH OPTION VALUE Key is inactive? Yes = 1 No = 0 Compulsory before tendering? Yes = 2 No = 0 Advance the consecutive # when this function is used? Yes = 0 No = 4 Delete the pre/postamble when this function is used? Yes = 0 No = 1 Exempt tax 1? Yes = 2 No = 0 Exempt tax 2? Yes = 4 No = 0 Exempt tax 3? Yes = 1 No = 0 Exempt tax 4? Yes = 2 No = 0 Validation is compulsory? Yes = 4 No = 0 = SUM SAM4s ER-900 Series Operator's & Programming Manual v.1.7 CANCEL - Function Key Options Options - Program 70 (P-Mode) Repeat for another function 7 0 Address N1 SUBTL N1 CANCEL CASH OPTION VALUE Key is inactive? Yes = 1 No = 0 Key is active in X control lock position only? Yes = 2 No = 0 = SUM = SUM CASH - Function Key Options Options - Program 70 (P-Mode) Repeat for another function 7 0 Address N1 N2 N3 SUBTL N1 N2 N3 CASH CASH OPTION VALUE Amount tender is compulsory? Yes = 1 No = 0 Allow over tendering and under tendering in X control lock position only? Yes = 2 No = 0 Disable under tendering? Yes = 4 No = 0 Open cash drawer? Yes = 0 No = 1 Exempt tax 1? Yes = 2 No = 0 Exempt tax 2? Yes = 4 No = 0 Exempt tax 3? Yes = 1 No = 0 Exempt tax 4? Yes = 2 No = 0 Validation is compulsory? Yes = 4 No = 0 SAM4s ER-900 Series Operator's & Programming Manual v.1.7 P-Mode Programming • 155 CHARGE 1-8 - Function Key Options Repeat for another function 7 0 Address N1 N2 N3 N4 N5 156 • P-Mode Programming SUBTL N1 N2 N3 N4 N5 CHARGE 1-8 OPTION VALUE Amount tender is compulsory? Yes = 1 No = 0 Allow over tendering and under tendering in X control lock position only? Yes = 2 No = 0 Disable under tendering? Yes = 4 No = 0 Open cash drawer? Yes = 0 No = 1 Allow over tendering? Yes = 2 No = 0 Non-add # entry compulsory? Yes = 4 No = 0 Exempt tax 1? Yes = 1 No = 0 Exempt tax 2? Yes = 2 No = 0 Exempt tax 3? Yes = 4 No = 0 Exempt tax 4? Yes = 1 No = 0 Validation compulsory? Yes = 2 No = 0 Connect Datatran? Yes = 4 No = 0 Select Transaction Type: (for Datatran Operations) CASH = SUM Credit = 1 Debit = 2 Gift = 3 Gift NSF = 4 SAM4s ER-900 Series Operator's & Programming Manual v.1.7 CHECK - Function Key Options Options - Program 70 (P-Mode) Repeat for another function 7 0 Address N1 N2 N3 N4 SUBTL N1 N2 N3 N4 CHECK CASH OPTION VALUE Amount tender is compulsory? Yes = 1 No = 0 Allow over tendering and under tendering in X control lock position only? Yes = 2 No = 0 Disable under tendering? Yes = 4 No = 0 Open cash drawer? Yes = 0 No = 1 Exempt tax 1? Yes = 2 No = 0 Exempt tax 2? Yes = 4 No = 0 Exempt tax 3? Yes = 1 No = 0 Exempt tax 4? Yes = 2 No = 0 Check endorsement compulsory? Yes = 1 No = 0 Validation is compulsory? Yes = 2 No = 0 SAM4s ER-900 Series Operator's & Programming Manual v.1.7 = SUM P-Mode Programming • 157 CHECK CASHING - Function Key Options Options - Program 70 (P-Mode) Repeat for another function 7 0 Address N1 N2 SUBTL N1 N2 CHECK CASH CASH OPTION VALUE Key is inactive? Yes = 1 No = 0 Key is active in X control lock position only? Yes = 2 No = 0 Validation is compulsory? Yes = 4 No = 0 Check Endorsement is compulsory? Yes = 1 No = 0 = SUM = SUM CHECK ENDORSEMENT - Function Key Options Options - Program 70 (P-Mode) Repeat for another function 7 0 Address N1 N2 158 • P-Mode Programming SUBTL N1 N2 CHECK ENDORSE CASH OPTION VALUE Key is inactive? Yes = 1 No = 0 Print the amount of the check and endorsement message? Yes = 2 No = 0 Print date? Yes = 4 No = 0 Print time? Yes = 1 No = 0 Print clerk? Yes = 2 No = 0 Print consecutive number? Yes = 4 No = 0 SAM4s ER-900 Series Operator's & Programming Manual v.1.7 CHECK # - Function Key Options Options - Program 70 (P-Mode) Repeat for another function 7 0 Address N1 N2 N3 N4 SUBTL N1 N2 N3 N4 CHECK# CASH OPTION VALUE Key is inactive? Yes = 1 No = 0 Before registering, begin a tracking number? Yes = 2 No = 0 Opening clerk has exclusive access? Yes = 4 No = 0 Check track # and balance will print on receipt? Yes = 0 No = 1 Check track # and balance will print on remote? Yes = 0 No = 2 Allow only one check per table? Yes = 4 No = 0 Check# is automatically assigned by register? Yes = 1 No = 0 PBAL key is used Drive thru recall key? Yes = 2 No = 0 Length of Check (0-9) SAM4s ER-900 Series Operator's & Programming Manual v.1.7 = SUM 0-9 P-Mode Programming • 159 DRIVE THRU / EAT IN / TAKE OUT - Function Key Options Options - Program 70 (P-Mode) Repeat for another function 7 0 SUBTL N1 N2 DRIVE THRU CASH Repeat for another function 7 0 SUBTL N1 N2 EAT IN CASH Repeat for another function 7 0 Address N1 N2 160 • P-Mode Programming SUBTL N1 N2 TAKE OUT CASH OPTION VALUE Exempt tax 1? Yes = 1 No = 0 Exempt tax 2? Yes = 2 No = 0 Exempt tax 3? Yes = 4 No = 0 Exempt tax 4? Yes = 1 No = 0 Validation is compulsory? Yes = 2 No = 0 = SUM SAM4s ER-900 Series Operator's & Programming Manual v.1.7 ERROR CORRECT - Function Key Options Options - Program 70 (P-Mode) Repeat for another function 7 0 Address N1 SUBTL N1 ERROR CORRECT CASH OPTION VALUE Key is inactive? Yes = 1 No = 0 Key is active in X control lock position only? Yes = 2 No = 0 Validation is compulsory? Yes = 4 No = 0 = SUM = SUM F/S Subtotal - Function Key Options Options - Program 70 (P-Mode) Repeat for another function 7 0 Address N1 SUBTL N1 F/S SUBTL CASH OPTION VALUE Key is inactive? Yes = 1 No = 0 SAM4s ER-900 Series Operator's & Programming Manual v.1.7 P-Mode Programming • 161 F/S TEND - Function Key Options Options - Program 70 (P-Mode) Repeat for another function 7 0 Address N1 N2 N3 SUBTL N1 N2 N3 F/S TEND CASH OPTION VALUE Exempt tax 1? Yes = 1 No = 0 Exempt tax 2? Yes = 2 No = 0 Exempt tax 3? Yes = 4 No = 0 Exempt tax 4? Yes = 1 No = 0 The tender is allowed in any amount? Yes = 2 No = 0 Open cash drawer? Yes = 0 No = 1 Validation is compulsory? Yes = 2 No = 0 Allow over-tender?** Yes = 4 No = 0 = SUM ** The recommended setting for this flag is “No”. Since all food stamp payment are made by EBT, there is no situation where an over-tender would be allowed. 162 • P-Mode Programming SAM4s ER-900 Series Operator's & Programming Manual v.1.7 GUEST - Function Key Options Options - Program 70 (P-Mode) Repeat for another function 7 0 Address N1 SUBTL N1 GUEST CASH OPTION VALUE Guest count entry compulsory when you use guest check operation? Yes = 1 No = 0 Before registering any transaction, enter a guest count? Yes = 2 No = 0 Print Guest # at the kitchen printer? Yes = 4 No = 0 SAM4s ER-900 Series Operator's & Programming Manual v.1.7 = SUM P-Mode Programming • 163 #/NS - Function Key Options Options - Program 70 (P-Mode) Repeat for another function 7 0 Address N1 N2 N3 N4 164 • P-Mode Programming SUBTL N1 N2 N3 N4 #/NS CASH OPTION VALUE No Sale is inactive? Yes = 1 No = 0 No Sale active in X control lock position only? Yes = 2 No = 0 No Sale inactive after non-add # entry? Yes = 4 No = 0 Enforce non-add # entry at start of sale? Yes = 1 No = 0 Print when a NO SALE is performed? Yes = 0 No = 2 Non-add # entries are prohibited? Yes = 4 No = 0 Compulsory non-add entry must match number of digits set in the MAX DIGIT flag below? Yes = 1 No = 0 Print non-add on guest check? Yes = 2 No = 0 Enter maximum number of digits for nonadd number entry. Zero (0) means no limit. = SUM 0-8 SAM4s ER-900 Series Operator's & Programming Manual v.1.7 MDSE RETURN - Function Key Options Options - Program 70 (P-Mode) Repeat for another function 7 0 Address N1 SUBTL N1 RETURN CASH OPTION VALUE Key is inactive? Yes = 1 No = 0 Key is active in X control lock position only? Yes = 2 No = 0 Validation is compulsory? Yes = 4 No = 0 SAM4s ER-900 Series Operator's & Programming Manual v.1.7 = SUM P-Mode Programming • 165 MODIFIER 1-5 - Function Key Options Note: See example on the following page. Options - Program 70 (P-Mode) Repeat for another function 7 0 Address N1 N2 SUBTL N1 N2 N3 MODIFIER OPTION VALUE Key is active in X control lock position only? Yes = 1 No = 0 Affect PLU number? (If No, only modifier descriptor is added.) Yes = 2 No = 0 Print modifier descriptor on the guest check? Yes = 1 No = 0 Print modifier descriptor on the receipt? Yes = 2 No = 0 Value of affected digit (0-9) N3 CASH = SUM 0-9 To set Affected Digit (1-15) of PLU#: Repeat for another function 9 0 166 • P-Mode Programming SUBTL 1-15 MODIFIER CASH SAM4s ER-900 Series Operator's & Programming Manual v.1.7 Modifier Key Programming Example Selling soft drinks in different sizes is an excellent modifier application. For example, a restaurant sells Coke, Sprite and Root Beer in 3-sizes: small, medium & large. If the PLU number assignment is: PLU #1 = Coke PLU #2 = Sprite PLU #3 = Root Beer You may choose to modify the 4th digit of the PLU number with the digit 1 for small, 2 for medium and 3 for large. (Always count right-to-left to determine the PLU digit#.) When the 4th digit is modified to a value of 1, and the Small modifier key is pressed before the Root Beer key, the registration of PLU #1003 results. PLU digit 8 7 6 5 4 3 2 1 0 0 0 0 1 0 0 3 New PLU # To complete the application, set modifier programming options as shown: Modifier Name Affected Digit (Program 90) Value of Affected Digit (Program 70, option N3) Small 4 1 Medium 4 2 Large 4 3 The following PLUs will be programmed: PLU Number Item 1001 Small Coke 1002 Small Sprite 1003 Small Root Beer 2001 Medium Coke 2002 Medium Sprite 2003 Medium Root Beer 3001 Large Coke 3002 Large Sprite 3003 Large Root Beer SAM4s ER-900 Series Operator's & Programming Manual v.1.7 P-Mode Programming • 167 PBAL - Function Key Options Options - Program 70 (P-Mode) 7 0 Address 1 SUBTL N1 PREVIOUS BALANCE CASH OPTION VALUE Previous balance may be entered at any time? Yes = 1 No = 0 Previous balance required at the start of the sale? Yes = 2 No = 0 = SUM = SUM PROMO - Function Key Options Options - Program 70 (P-Mode) Repeat for another function 7 0 Address N1 N2 168 • P-Mode Programming SUBTL N1 N2 PROMO CASH OPTION VALUE Key is inactive? Yes = 1 No = 0 Key is active in X control lock position only? Yes = 2 No = 0 Exempt tax 1? Yes = 4 No = 0 Exempt tax 2? Yes = 1 No = 0 Exempt tax 3? Yes = 2 No = 0 Exempt tax 4? Yes = 4 No = 0 SAM4s ER-900 Series Operator's & Programming Manual v.1.7 PAID OUT 1-3 - Function Key Options Options - Program 70 (P-Mode) Repeat for another function 7 0 Address N1 SUBTL N1 P/O CASH OPTION VALUE Key is inactive? Yes = 1 No = 0 Key is active in X control lock position only? Yes = 2 No = 0 Validation is compulsory? Yes = 4 No = 0 = SUM = SUM PRINT CHECK - Function Key Options Options - Program 70 (P-Mode) Repeat for another function 7 0 Address SUBTL N1 N2 PRINT CHECK CASH OPTION VALUE N1 Enter port. (Zero if the check will print on the receipt printer) N2 Automatically service the check? Yes = 1 No = 0 Print the number of times the check has been printed on the on the guest check Yes = 0 No = 2 SAM4s ER-900 Series Operator's & Programming Manual v.1.7 0-4 P-Mode Programming • 169 RECD ON ACCT 1-3 - Function Key Options Options - Program 70 (P-Mode) Repeat for another function 7 0 Address N1 SUBTL N1 R/A CASH OPTION VALUE Key is inactive? Yes = 1 No = 0 Key is active in X control lock position only? Yes = 2 No = 0 Validation is compulsory? Yes = 4 No = 0 = SUM = SUM SCALE - Function Key Options Options - Program 70 (P-Mode) Repeat for another function 7 0 Address N1 N2 SUBTL N1 N2 N3 SCALE OPTION VALUE Key is inactive? Yes = 1 No = 0 Key is active in X control lock position only? Yes = 2 No = 0 Allow manual entry of weight? Yes = 4 No = 0 Subtract tare weight on the scale entry? Yes = 1 No = 0 Not Used N3 170 • P-Mode Programming CASH 0 Scaleable items can be open price or scaleable entry. Yes = 4 No = 0 Weight symbol for manual entry is: Lb = 0 Kg = 1 Oz = 2 SAM4s ER-900 Series Operator's & Programming Manual v.1.7 SERVICE - Function Key Options Options - Program 70 (P-Mode) Repeat for another function 7 0 Address N1 N2 N3 SUBTL N1 N2 N3 N4 CASH OPTION VALUE Compulsory non-add number before this key is used? Yes = 1 No = 0 Print on receipt? Yes = 0 No = 2 Allow negative balance in X control lock position only? Yes = 4 No = 0 Calculate tax 1? Yes = 0 No = 1 Calculate tax 2? Yes = 0 No = 2 Calculate tax 3? Yes = 0 No = 4 Calculate tax 4? Yes = 0 No = 1 Validation is compulsory? Yes = 2 No = 0 Enter the port number if you are using a hard check system. N4 SERVICE = SUM = SUM 0-4 SUBTOTAL - Function Key Options Options - Program 70 (P-Mode) Repeat for another function 7 0 Address N1 SUBTL N1 SUBTL CASH OPTION VALUE Key is inactive? Yes = 1 No = 0 SAM4s ER-900 Series Operator's & Programming Manual v.1.7 P-Mode Programming • 171 TABLE - Function Key Options Options - Program 70 (P-Mode) Repeat for another function 7 0 Address N1 SUBTL N1 TABLE CASH OPTION VALUE Table number entry compulsory before opening a new check? Yes = 1 No = 0 Table number entry compulsory for all sales? Yes = 2 No = 0 Print table# at the remote printer? Yes = 4 No = 0 = SUM = SUM TARE - Function Key Options Options - Program 70 (P-Mode) Repeat for another function 7 0 Address N1 172 • P-Mode Programming SUBTL N1 TARE CASH OPTION VALUE Key is inactive? Yes = 1 No = 0 Key is active in X control lock position only? Yes = 2 No = 0 Using number 5 to manually enter a tare weight? Yes = 4 No = 0 SAM4s ER-900 Series Operator's & Programming Manual v.1.7 TAX EXEMPT - Function Key Options Options - Program 70 (P-Mode) Repeat for another function 7 0 Address N1 N2 SUBTL N1 N2 TAX EXEMPT CASH OPTION VALUE Exempt tax 1? Yes = 1 No = 0 Exempt tax 2? Yes = 2 No = 0 Exempt tax 3? Yes = 4 No = 0 Exempt tax 4? Yes = 1 No = 0 Compulsory non-add number before this key is used? Yes = 2 No = 0 Validation is compulsory? Yes = 4 No = 0 SAM4s ER-900 Series Operator's & Programming Manual v.1.7 = SUM P-Mode Programming • 173 TIP - Function Key Options Options - Program 70 (P-Mode) Repeat for another function 7 0 Address N1 N2 N3 N4 174 • P-Mode Programming SUBTL N1 N2 N3 N4 TIP OPTION Tip is: CASH VALUE Percentage = 1 Amount = 0 Key is inactive? Yes = 1 No = 0 Key is active in X control lock position only? Yes = 2 No = 0 Add tax rate 1? Yes = 4 No = 0 Add tax rate 2? Yes = 1 No = 0 Add tax rate 3? Yes = 2 No = 0 Add tax rate 4? Yes = 4 No = 0 Add the tip total to the NET and GROSS sales total? Yes = 1 No = 0 = SUM SAM4s ER-900 Series Operator's & Programming Manual v.1.7 VALIDATE - Function Key Options Options - Program 70 (P-Mode) Repeat for another function 7 0 Address SUBTL N1 N2 VALID OPTION CASH VALUE N1 Enter output communication port. Enter Zero if validation is not used. N2 This function is disabled? Yes = 1 No = 0 Allow multiple validations? Yes = 2 No = 0 = SUM = SUM 0-4 VOID - Function Key Options Options - Program 70 (P-Mode) Repeat for another function 7 Address N1 0 SUBTL N1 VOID CASH OPTION VALUE Key is inactive? Yes = 1 No = 0 Key is active in X control lock position only? Yes = 2 No = 0 SAM4s ER-900 Series Operator's & Programming Manual v.1.7 P-Mode Programming • 175 WASTE - Function Key Options Options - Program 70 (P-Mode) Repeat for another function 7 0 Address N1 176 • P-Mode Programming SUBTL N1 WASTE CASH OPTION VALUE Key is inactive? Yes = 1 No = 0 Key is active in X control lock position only? Yes = 2 No = 0 Validation is compulsory? Yes = 4 No = 0 = SUM SAM4s ER-900 Series Operator's & Programming Manual v.1.7 Note: See “Program 90 Instructions for %1-%5 Keys” on page 151 to set the value for the percentage or amount. %1-%5 Function Key Options Options - Program 70 (P-Mode) Repeat for another function 7 0 SUBTL Address OPTION N1 Apply an: N1 N2 N3 N4 N5 N3 Amount = Percentage = % Key is active in X control lock position only? % Key is: Open = Preset = % Key is: Sale = Item = Allow % key override preset? % Key is: Positive = Negative = %/Amount taxable tax 1? N4 %/Amount taxable tax 2? %/Amount taxable tax 3? %/Amount taxable tax 4? N5 N6 Reduce (or increase) the food stamp subtotal by % entry? Allow only one time subtotal entry? Allow multiple amount discounts (coupons) without pressing subtotal? Allow % key preset override active in X control lock position only? Validation is compulsory? SAM4s ER-900 Series Operator's & Programming Manual v.1.7 % VALUE Key is inactive? N2 N6 CASH = SUM 1 0 Yes = 2 No = 0 Yes = 4 No = 0 1 0 2 0 Yes = 4 No = 0 1 0 Yes = 2 No = 0 Yes = 1 No = 0 Yes = 2 No = 0 Yes = 4 No = 0 Yes = 1 No = 0 Yes = 2 No = 0 Yes = 4 No = 0 Yes = 1 No = 0 Yes = 2 No = 0 P-Mode Programming • 177 Mix and Match Discount Programming Retailers often offer discounts when multiples of different items are purchased. For example, the offer: “save $5 on any three bottles of wine” can be handled by a mix and match discount. The ER-900 can accommodate up to 99 different mix and match discounts. Tables have the following programming options that are set through separate programs: Program 600 – Trip Level Programming – This program sets the number of items that must be purchased to receive the discount Program 601 – Price Programming – This program sets the amount of the discount. Program 610 – Mix & Match Descriptor – This program allows you to set a unique, up to 18-character, descriptor for each Mix & Match discount. You also must link eligible items to the appropriate table. See “Program 450 – PLU Mix and Match Programming” on page 134 to identify the mix and match table for the eligible PLU. 178 • P-Mode Programming SAM4s ER-900 Series Operator's & Programming Manual v.1.7 Program 600 – Trip Level Programming 1. Turn the control lock to the PGM position. 2. To begin the program, enter 6 0 0, press the SUBTL key. 6 0 0 SUBTL 3. Enter the number (1-99) of the mix and match table you wish to program; press the X/TIME key. X/TIME 4. Enter a level of up to 5 digits (the Maximum Level you can enter is 50000) and press the SUBTL key. Enter the trip level, up to 5 digits SUBTL 5. Repeat from step 3 for each table you wish to program. Press the CASH key to finalize the program. CASH Program 601 – Price Programming 1. Turn the control lock to the PGM position. 2. To begin the program, enter 6 0 1, press the SUBTL key. 6 0 1 SUBTL 3. Enter the number (1-99) of the mix and match table you wish to program; press the X/TIME key. X/TIME 4. Enter a price (up to 7 digits) and press the SUBTL key. SUBTL Price/HALO 5. Repeat from step 3 for each table you wish to program. Press the CASH key to finalize the program. CASH SAM4s ER-900 Series Operator's & Programming Manual v.1.7 P-Mode Programming • 179 Program 610 – Mix & Match Descriptor Programming Program descriptors by typing descriptors on the alpha keyboard overlay or by entering three digit alpha character codes. To enter descriptors by three digit alpha character codes you must set system option #31 (See “System Option Programming” on page 135). 1. Turn the control lock to the PGM position. 2. To begin the program, enter 6 1 0, press the SUBTL key. 6 1 0 SUBTL 3. Enter the number (1-99) of the M&M table you wish to program; press the X/TIME key. X/TIME 4. If you are programming using an alpha keyboard overlay, type up to 18 descriptors on the overlay and press the SUBTL key. (Note: As you are entering descriptors only the last 16 descriptors will display.) Type up to 18 descriptor keys SUBTL If you are programming using descriptor codes, enter up to 18 three-character codes and press the SUBTL key. Enter up to 18 threecharacter codes SUBTL 5. Press the CASH key to finalize the program. CASH 180 • P-Mode Programming SAM4s ER-900 Series Operator's & Programming Manual v.1.7 Clerk Programming Clerks (which may be used as cashiers), have the following programming options. These options are set through separate programs: Program 800 - Secret Code programming determines the code that is used for clerk sign on if a code entry sign on method is selected in system option #2 (See "System Option Programming" on page 135.) Program 801 - If a second cash drawer is installed, Drawer Assignment determines which cash drawer will be opened for each. Program 810 - Clerk Descriptor Programming allows you to set a unique, up to 18 character, descriptor for each clerk Before attempting any programming, all clerks must first be signed off in REG mode. Program 800 - Secret Code Programming 1. Turn the control lock to the PGM position. 2. To begin the program, enter 8 0 0, press the SUBTL key. 8 0 0 SUBTL 3. Enter the number (1-99) of the clerk you wish to program; press the X/TIME key. X/TIME 4. Enter a secret code (up to 6 digits); press the SUBTL key. Enter the secret code, up to 6 digits SUBTL 5. Repeat from step 3 for each clerk you wish to program. Press the CASH key to finalize the program. CASH SAM4s ER-900 Series Operator's & Programming Manual v.1.7 P-Mode Programming • 181 Program 801 - Drawer Assignment 1. Turn the control lock to the PGM position. 2. To begin the program, enter 8 0 1, press the SUBTL key. 8 0 1 SUBTL 3. Enter the number (1-99) of the clerk you wish to program; press the X/TIME key. X/TIME 4. Refer to the table below and enter a 2-digit option code. Press the SUBTL key. Address OPTION N1 N2 N1 N2 Train Clerk VALUE Assign to drawer 1: 1 Assign to drawer 2: 2 No Drawer: 0 = Yes = 1 No = 0 SBTL 5. Repeat from step 3 for each clerk you wish to program. Press the CASH key to finalize the program. CASH 182 • P-Mode Programming SAM4s ER-900 Series Operator's & Programming Manual v.1.7 Program 810 - Clerk Descriptor Programming Program descriptors by typing descriptors on the alpha keyboard overlay or by entering three digit alpha character codes. To enter descriptors by three digit alpha character codes you must set system option #31 (See “System Option Programming” on page 135). 1. Turn the control lock to the PGM position. 2. To begin the program, enter 8 1 0, press the SUBTL key. 8 1 0 SUBTL 3. Enter the number (1-99) of the clerk you wish to program; press the X/TIME key. X/TIME 4. If you are programming using an alpha keyboard overlay, type up to 18 descriptors on the overlay and press the SUBTL key. (Note: As you are entering descriptors only the last 16 descriptors will display.) Type up to 18 descriptor keys SUBTL If you are programming using descriptor codes, enter up to 18 three-character codes and press the SUBTL key. Enter up to 18 threecharacter codes SUBTL 5. Press the CASH key to finalize the program. CASH SAM4s ER-900 Series Operator's & Programming Manual v.1.7 P-Mode Programming • 183 Group Programming 99 Group totals are available to accumulate totals of individual PLUs that are assigned to each group. Each PLU can be assigned to one, two or three different groups. (See "Program 150 - PLU Group Assignment" on page 126 to program PLU groups for each PLU.) Use program 900 to assign a group status, i.e. a group can be set to not add to the total of all groups, or a group can be used to designate like items for kitchen printer assignment. Use program 910 to assign a unique descriptor for each group, so that the group may be easily understood on the group report. Program descriptors by typing descriptors on the alpha keyboard overlay or by entering three digit alpha character codes. Programming Group Status - Program 900 1. Turn the control lock to the PGM position. 2. To begin the program, enter 9 0 0, press the SUBTL key. 9 0 0 SUBTL 3. Enter the number (1-99) of the group you wish to program; press the X/TIME key. X/TIME 4. Enter an option digit from the table below, press the SUBTL key. Address N1 OPTION VALUE Group total is added to the total of all groups on the Group report? Yes = 0 No = 1 Send to kitchen printer? No Choice KP PORT# : R (receipt requisition) KP PORT#: 1 KP PORT#: 2 KP PORT#: 3 KP PORT#: 4 N2 N3 N4 Print RED on KP? N5 Gift Card: N1 N2 N3 N4 N5 = SUM Yes = 2 No = 0 0 1 2 4 1 2 Yes = 1 No = 0 None = 0 Activate = 1 Add = 2 SUBTL 5. To program additional groups, repeat from step 3, or press the CASH key to finalize the program. CASH 184 • P-Mode Programming SAM4s ER-900 Series Operator's & Programming Manual v.1.7 Programming Group Descriptors 1. Turn the control lock to the PGM position. 2. To begin the program, enter 9 1 0, press the SUBTL key. 9 1 0 SUBTL 3. Enter the number (1-99) of the group you wish to program; press the X/TIME key. X/TIME 4. If you are programming using an alpha keyboard overlay, type up to 18 descriptors on the overlay and press the SUBTL key. (Note: As you are entering descriptors only the last 16 descriptors will display.) Type up to 18 descriptor keys SUBTL If you are programming using descriptor codes, enter up to 18 three-character codes and press the SUBTL key. Enter up to 18 threecharacter codes SUBTL 5. To program additional groups, repeat from step 3, or press the CASH key to finalize the program. CASH SAM4s ER-900 Series Operator's & Programming Manual v.1.7 P-Mode Programming • 185 Miscellaneous Programming Program 1500 - Macro Key Sequence Programming Macros are special function keys that are used to execute a sequence of key depressions. For example, a macro might be used to execute a string of reports or to automatically tender a preset amount. Up to ten different macros may be placed on the keyboard. (See "Function Key Assignment Programming” on page 99 to place macros on the keyboard.) To Program a Macro 1. Turn the control lock to the PGM position. 2. To begin the program, enter 1 5 0 0, press the SUBTL key. 1 5 0 0 SUBTL 3. Press the Macro key that you wish to program. MACRO 4. You must set the key lock to the position where you wish the macro to set the register (REG, X or Z.) For example, if you wish the macro to set the key lock to X to run a report, turn the key lock to X. When used in the REG position, the macro will set the register to X and run the report. 5. Press up to 50 keystrokes that you wish the macro to execute. Type up to 50 keystrokes 6. Return the key lock to the PGM position and press the macro key to finalize. MACRO 7. Repeat from step 3 to program additional macros. Press the CASH key to finalize the program. CASH To Remove a Macro If you wish to change a macro sequence change the function key assignment of the key to ‘Inactive’, and then reassign the macro function and reprogram the keystrokes as shown above. (See “Function Key Assignment Programming” on page 99.) 186 • P-Mode Programming SAM4s ER-900 Series Operator's & Programming Manual v.1.7 Program 700 – Logo/Endorsement Message Programming Programming the Receipt/Check Endorsement Message A preamble message of up to six lines can be printed at the top of each receipt; a postamble message of up to six lines can be printed at the bottom of each receipt, and an endorsement message of up to ten lines can be printed when a check is endorsed on an optional slip printer. Each line can consist of up to 32 characters. 1. Turn the control lock to the PGM position. 2. To begin the program, enter 7 0 0, press the SUBTL key. 7 0 0 SUBTL 3. Refer to the chart below and enter the number that represents the line you wish to program; press the X/TIME key. X X 1 2 3 4 5 6 7 8 9 10 11 X/TIME X Message Line st 1 line of Preamble 2nd line of Preamble 3rd line of Preamble 4th line of Preamble 5th line of Preamble 6th line of Preamble 1st line of Postamble 2nd line of Postamble 3rd line of Postamble 4th line of Postamble 5th line of Postamble X Message Line 12 13 14 15 16 17 18 19 20 21 22 6th line of Postamble 1st line of Endorsement 2nd line of Endorsement 3rd line of Endorsement 4th line of Endorsement 5th line of Endorsement 6th line of Endorsement 7th line of Endorsement 8th line of Endorsement 9th line of Endorsement 10th line of Endorsement 4. If you are programming using an alpha keyboard overlay, type up to 32 descriptors on the overlay and press the SUBTL key. (Note: As you are entering descriptors only the last 16 descriptors will display.) Type up to 32 descriptor keys SUBTL If you are programming using descriptor codes, enter up to 32 three-character codes and press the SUBTL key. Enter up to 32 threecharacter codes SUBTL 5. Press the CASH key to finalize the program. CASH SAM4s ER-900 Series Operator's & Programming Manual v.1.7 P-Mode Programming • 187 Program 701 - Financial Report Descriptor Programming The Financial Report selection allows you to reprogram the descriptors that appear with the Financial Report totals and counters. For example, the first total on the financial report "+PLU TTL" represents the total of all positive PLU entries. You might wish to re-label this total to say "FOOD SALES". You can reprogram any of the Financial Report totals listed here with any 18-character descriptor. 1. Turn the control lock to the PGM position. 2. To begin the program, enter 7 0 1, press the SUBTL key. 7 0 1 SUBTL 3. Refer to the chart on the next page and enter the number that represents the line you wish to program; press the X/TIME key. X X X/TIME 4. If you are programming using an alpha keyboard overlay, type up to 18 descriptors on the overlay and press the SUBTL key. (Note: As you are entering descriptors only the last 16 descriptors will display.) Type up to 18 descriptor keys SUBTL If you are programming using descriptor codes, enter up to 18 three-character codes and press the SUBTL key. Enter up to 18 threecharacter codes SUBTL 5. Press the CASH key to finalize the program. CASH 188 • P-Mode Programming SAM4s ER-900 Series Operator's & Programming Manual v.1.7 X Message Line X Message Line X Message Line 1 2 3 4 5 6 7 8 9 10 11 12 13 14 15 16 17 18 19 20 21 22 23 24 25 26 27 28 29 +PLU TTL -PLU TTL ADJST TTL NONTAX TAX1 SALES TAX2 SALES TAX3 SALES TAX4 SALES TAX1 TAX2 TAX3 TAX4 XMPT1 SALES XMPT2 SALES XMPT3 SALES XMPT4 SALES EATIN TTL TAKEOUT TTL DRTHRU TTL %1 %2 %3 %4 %5 NET SALE CREDIT TAX1 CREDIT TAX2 CREDIT TAX3 CREDIT TAX4 30 31 32 33 34 35 36 37 38 39 40 41 42 43 44 45 46 47 48 49 50 51 52 53 54 55 56 57 58 FD/S CREDIT RETURN ERROR CORR PREVIOUS VD VOID MODE CANCEL GROSS SALES CASH SALES CHECK SALES R/A 1 R/A 2 R/A 3 P/O 1 P/O 2 P/O 3 HASH TTL AUDACTION NOSALE CASH-IN-D CHECK-IN-D FD/S-IN-D CHG1-IN-D CHG2-IN-D CHG3-IN-D CHG4-IN-D CHG5-IN-D CHG6-IN-D CHG7-IN-D CHG8-IN-D 59 60 61 62 63 64 65 66 67 68 69 70 71 72 73 74 75 76 77 78 79 80 81 82 CHG1 SALES CHG2 SALES CHG3 SALES CHG4 SALES CHG5 SALES CHG6 SALES CHG7 SALES CHG8 SALES FOREIGN 1 FOREIGN 2 FOREIGN 3 FOREIGN 4 DRWR TTL PROMO WASTE TIP TRAIN TTL BAL FORWARD GUESTS P/BAL CHECKS PAID SERVICE MIX&MATCH PAYMENT TTL SAM4s ER-900 Series Operator's & Programming Manual v.1.7 P-Mode Programming • 189 Program 710 - Clerk Report Descriptor Programming The Clerk Report selection allows you to reprogram the descriptors that appear with the Clerk Report totals and counters. For example, the first total on the clerk report "NET SALES" might be re-labeled to say "GROSS SALES". You can reprogram any of the Clerk Report totals listed here with any 18-character descriptor. 1. Turn the control lock to the PGM position. 2. To begin the program, enter 7 1 0, press the SUBTL key. 7 1 0 SUBTL 3. Refer to the chart on the next page and enter the number that represents the line you wish to program; press the X/TIME key. X X X/TIME 4. If you are programming using an alpha keyboard overlay, type up to 18 descriptors on the overlay and press the SUBTL key. (Note: As you are entering descriptors only the last 16 descriptors will display.) Type up to 18 descriptor keys SUBTL If you are programming using descriptor codes, enter up to 18 three-character codes and press the SUBTL key. Enter up to 18 threecharacter codes SUBTL 5. Press the CASH key to finalize the program. CASH 190 • P-Mode Programming SAM4s ER-900 Series Operator's & Programming Manual v.1.7 X Message Line X Message Line X Message Line 1 2 3 4 5 6 7 8 9 10 11 12 13 14 15 16 17 18 19 20 21 22 23 24 25 NET SALE NONTAX TAX1 SALES TAX2 SALES TAX3 SALES TAX4 SALES TAX1 TAX2 TAX3 TAX4 XMPT1 SALES XMPT2 SALES XMPT3 SALES XMPT4 SALES EATIN TTL TAKEOUT TTL DRTHRU TTL %1 %2 %3 %4 %5 CREDIT TAX1 CREDIT TAX2 CREDIT TAX3 26 27 28 29 30 31 32 33 34 35 36 37 38 39 40 41 42 43 44 45 46 47 48 49 50 CREDIT TAX4 FD/S CREDIT RETURN ERROR CORR PREVIOUS VD VOID MODE CANCEL GROSS SALES CASH SALES CHECK SALES R/A 1 R/A 2 R/A 3 P/O 1 P/O 2 P/O 3 HASH TTL CASH-IN-D CHECK-IN-D FD/S-IN-D CHG1 SALES CHG2 SALES CHG3 SALES CHG4 SALES CHG5 SALES 51 52 53 54 55 56 57 58 59 60 61 62 63 64 65 66 67 68 69 70 CHG6 SALES CHG7 SALES CHG8 SALES FOREIGN 1 FOREIGN 2 FOREIGN 3 FOREIGN 4 DRWR TTL PROMO WASTE TIP TRAIN TTL BAL FORWARD GUESTS P/BAL CHECKS PAID SERVICE NOSALE MIX&MATCH PAYMENT SAM4s ER-900 Series Operator's & Programming Manual v.1.7 P-Mode Programming • 191 Program 711 - Macro Name Programming Up to ten function locations may be designated as Macro keys. You may wish to program a name for a macro. For example if a macro executes a series of commands to produce daily reports, you can program the descriptor “DAILY”, so the macro can easily be identified. Macro names can also be helpful when looking at keyboard layout information with the PC communication utility. 1. Turn the control lock to the PGM position. 2. To begin the program, enter 7 1 1, press the SUBTL key. 7 1 1 SUBTL 3. Enter the number of the Macro you wish to program (1-10); press the X/TIME key. X/TIME 4. If you are programming using an alpha keyboard overlay, type up to 18 descriptors on the overlay and press the SUBTL key. (Note: As you are entering descriptors only the last 16 descriptors will display.) Type up to 18 descriptor keys SUBTL If you are programming using descriptor codes, enter up to 18 three-character codes and press the X/TIME key. (See “Descriptor Code Chart” on page 131.) Enter up to 18 threecharacter codes SUBTL 5. Press the CASH key to finalize the program. CASH 192 • P-Mode Programming SAM4s ER-900 Series Operator's & Programming Manual v.1.7 Program 720 – Datatran Message Program When a Datatran integrated payment appliance is connected, you can print a message of up to four lines on the electronic payment draft receipt. 1. Turn the control lock to the PGM position. 2. To begin the program, enter 7 2 0, press the SUBTL key. 7 2 0 SUBTL 3. Enter the number of the message line (1-4) you wish to program; press the X/TIME key. X/TIME 4. If you are programming using an alpha keyboard overlay, type up to 32 descriptors on the overlay and press the SUBTL key. (Note: As you are entering descriptors only the last 16 descriptors will display.) Type up to 32 descriptor keys SUBTL If you are programming using descriptor codes, enter up to 32 three-character codes and press the X/TIME key. (See “Descriptor Code Chart” on page 131.) Enter up to 32 threecharacter codes SUBTL 5. Press the CASH key to finalize the program. CASH SAM4s ER-900 Series Operator's & Programming Manual v.1.7 P-Mode Programming • 193 Program 1000 - NLU Code Number Programming Keyboard PLUs are fixed keys on the keyboard (like traditional department keys) that access specific PLUs. In the default program each Keyboard PLU will look up the appropriate numeric PLU, beginning with PLU #1 for Keyboard PLU key #1 and continuing sequentially through the keyboard. However, this numbering sequence may be impractical for some applications. For example, Keyboard PLU #1 may represent a can of Diet Pepsi. The merchant may wish to have the Keyboard PLU look up the UPC code number for Diet Pepsi, which is “120500”. Using this program you can change the Number Look-Up (NLU) for the keyboard PLU to any 15-digit number you choose. On the ER-920 and ER-940 default keyboard, there are 100 keyboard PLU keys. The ER925 and ER-945 come equipped with 21 Keyboard PLUs and may be expanded to up to 63 Keyboard PLUs. Programming the NLU Code Number 1. Turn the control lock to the PGM position. 2. To begin the program, enter 1 0 0 0, press the SUBTL key. 1 0 0 0 SUBTL 3. Enter the new PLU code number you wish to use (up to 15 digits), and press the keyboard PLU on the keyboard you wish to program. Press the same key again. PLUKEY SAME KEY PLU Code 4. Repeat step #3 to program additional Keyboard PLU locations, or press CASH to finalize the program CASH 194 • P-Mode Programming SAM4s ER-900 Series Operator's & Programming Manual v.1.7 Program 1100 - Cash-In-Drawer Limit Programming You can set a cash-in-drawer limit. When cash in drawer exceeds the limit a warning will display on the screen. You must press CLEAR to remove the warning and continue operations. The warning will continue to appear at the completion of every transaction with the limit exceeded, until you use the PAID OUT function to remove cash from the drawer. Programming the Drawer Limit 1. Turn the control lock to the PGM position. 2. To begin the program, enter 1 1 0 0, press the SUBTL key. 1 1 0 0 SUBTL 3. Enter a cash-in-drawer limit (up to 8 digits or 0 for no limit); press the X/TIME key. Enter the cash limit, up to 8 digits X/TIME 4. Press the CASH key to finalize the program. CASH SAM4s ER-900 Series Operator's & Programming Manual v.1.7 P-Mode Programming • 195 Program 1200 - Check Change Limit Programming Use this program to set the maximum amount of cash that can be returned when a check is tendered for an amount greater than the amount of the sale. For example, if the check change limit is $10.00 the maximum amount that can be tendered into the check key on a $5.00 sale is $15.00. Programming the Check Change Limit 1. Turn the control lock to the PGM position. 2. To begin the program, enter 1 2 0 0, press the SUBTL key. 1 2 0 0 SUBTL 3. Enter a cash-in-drawer limit (up to 8 digits or 0 for no limit); press the X/TIME key. Enter the cash limit, up to 8 digits X/TIME 4. Press the CASH key to finalize the program. CASH 196 • P-Mode Programming SAM4s ER-900 Series Operator's & Programming Manual v.1.7 Program 1300 - Date and Time Programming Use this program to set the clock and calendar on your ER-900 Series register. The date changes automatically. After initial setting, time changing will probably be required only for beginning and ending daylight savings time. Programming the Date and Time 1. Turn the control lock to the PGM position. 2. To begin the program, enter 1 3 0 0, press the SUBTL key. 1 3 0 0 SUBTL 3. Enter time in military standard time (based on 24 hours), must be four digits (i.e. 1300 hours = 1:00 PM); press the X/TIME key. H H M M X/TIME 4. Enter the date in MM(month) DD(day) and YY(year) format. Press the X/TIME key: M M D D Y Y X/TIME 5. Press the CASH key to finalize the program. CASH SAM4s ER-900 Series Operator's & Programming Manual v.1.7 P-Mode Programming • 197 Program 1400 - Scale Tare Weight Programming A tare is the amount of weight representing the container, or package when items are sold by weight. You can pre-program five tare weights, representing the weight of different containers. When you place an item and a container on optional scale, you can enter the tare number to automatically subtract the pre-programmed tare weight. If you choose to use tare #5 for manual tare weight entry, do not enter a weight for tare #5. (See Scale Operations on page 83.) 1. Turn the control lock to the PGM position. 2. To begin the program, enter 1 4 0 0, press the SUBTL key. 1 4 0 0 SUBTL 3. Enter the number (1-5) of the tare you wish to program; press the X/TIME key. X/TIME 4. Enter the weight of the tare (one digit preceding the decimal key, the decimal key, and then three digits after the decimal key). Press the SUBTL key. . SUBTL 5. To program additional tare weights, repeat from step 3, or press the CASH key to finalize the program. CASH 198 • P-Mode Programming SAM4s ER-900 Series Operator's & Programming Manual v.1.7 Program 1600 - Machine Number Programming The machine number is printed on the register receipt. Program a machine number so that any receipt or journal can be identified with the store or register where the transaction took place. Programming the Machine Number 1. Turn the control lock to the PGM position. 2. To begin the program, enter 1 6 0 0, press the SUBTL key. 1 6 0 0 SUBTL 3. Enter a machine number (up to 5 digits); press the X/TIME key. X/TIME 4. Press the CASH key to finalize the program. CASH Program 1900 – Starting Kitchen Printer Order Number When using a kitchen printer or requisition receipt, you can program the starting order number that will appear on the requisition. When a Z1 financial report is taken, the requisition number will reset and begin again at the number set here. Programming the Starting KP Order Number 1. Turn the control lock to the PGM position. 2. To begin the program, enter 1 9 0 0, press the SUBTL key. 1 9 0 0 SUBTL 3. Enter the starting number (up to 4 digits); press the X/TIME key. X/TIME 4. Press the CASH key to finalize the program. CASH SAM4s ER-900 Series Operator's & Programming Manual v.1.7 P-Mode Programming • 199 Program Scans Since much time and energy has been invested in the planning and programming of your ER900, it is advisable to print a hard copy of the final program for future reference. This copy should be kept in a safe place. (You can also save your program electronically, on a SD card. Go to “Program Backup and Restore” on page 104 to use this method.) 1. Turn the control lock to the PGM position. 2. To print a program scan, enter 1 5, press the SUBTL key. 1 5 SUBTL 3. Refer to the chart below and enter a digit to represent the segment of the program you wish to print; press the X/TIME key. X X/TIME X Program X Program 0 1 2 3 4 5 6 7 8 Group Tax System option Print option Function keys Clerk Preamble message Postamble message Endorsement message 9 10 11 12 13 14 15 16 17 Financial Report message Clerk Report message Macro Name Drawer Limit Check Change Limit Time & Date Tare Weight Machine Number Mix & Match 4. To read PLU program information, enter the number of the first PLU in a range of PLUs (up to 15 digits) that are to be scanned; press the PLU key. Enter the last number in the range (up to 15 digits); press the PLU key, or PLU PLU Pres the first PLU keys that are to scanned and Press the last PLU keys, PLU PLU 5. To read MACRO information, press the MACRO key to be scanned, MACRO 6. To read additional parts of the program, repeat from step 3, or press the CASH key to finalize the program. CASH 200 • P-Mode Programming SAM4s ER-900 Series Operator's & Programming Manual v.1.7 Sample Reports Financial Total and count of all positive PLUs Total and count of all Negative PLUs Total of +PLU and –PLU sales Total of Nontaxable sales Total of tax eligible sales for each sale tax Total of tax collected for each tax Total exempted sales for each tax Total sales for each type of destination Total and count for each % function key (i.e. discounts & coupons) DATE 11/10/2011 WED TIME 13:32 X 1 REPORT 00001 -------------------------------FINANCIAL +PLU TTL 179.56 $288.60 -PLU TTL 10 -20.00 ADJST TTL 189.56 $268.60 -------------------------------NONTAX $30.47 TAX1 SALES $153.60 TAX2 SALES $11.92 TAX3 SALES $16.77 TAX4 SALES $31.89 TAX1 $10.00 TAX2 $1.21 TAX3 $1.18 TAX4 $2.18 XMPT1 SALES $7.00 XMPT2 SALES $1.50 XMPT3 SALES $7.95 XMPT4 SALES $7.50 EATIN TTL 1 $10.12 TAKEOUT TTL 2 $40.77 DRTHRU TTL 1 $3.04 ITEM DISC. 3 -0.48 continued . . . SAM4s ER-900 Series Operator's & Programming Manual v.1.7 Sample Reports • 201 continued from previous page Total and count for each % function key (i.e. discounts & coupons) SALE DISC. SALE SURCH. % 4 % 5 Net Sales Credited tax for each tax. (Tax is credited for negative taxable sales, i.e. mdse return transactions.) NET SALE CREDIT TAX1 CREDIT TAX2 CREDIT TAX3 CREDIT TAX4 Food stamp change credited to sales FD/S CREDIT RETURN Total and count for each type of transaction correction. ERROR CORR PREVIOUS VD VOID MODE CANCEL Gross Sales Totals and counters for CASH and CHECK sales GROSS SALES CASH SALES CHECK SALES R/A 1 R/A 2 R/A 3 Total and count for each type R/A (received on account) and P/O (paid out) key. P/O 1 P/O 2 P/O 3 2 -5.22 3 $3.23 0 $0.00 0 $0.00 26 $281.18 4 -1.11 1 -0.23 2 -0.89 1 -0.39 0 $0.23 33 -59.73 2 -4.00 1 -1.50 -2 -6.40 2 $16.00 $375.63 13 $133.49 1 $23.05 1 $145.00 0 $0.00 0 $0.00 1 -140.00 0 $0.00 0 $0.00 continued . . . 202 • Sample Reports SAM4s ER-900 Series Operator's & Programming Manual v.1.7 Total and count of items sold with HASH status. Count of No Sales. Total of numbers entered into the nonadd key Total and count of expected CASH, CHECK in drawer continued from previous page HASH TTL NOSALE NON ADD # CASH-IN-D CHECK-IN-D FD/S-IN-D CHG1-IN-D CHG2-IN-D Total and count for each CHARGE in drawer. CHG3-IN-D CHG4-IN-D CHG5-IN-D CHG6-IN-D CHG7-IN-D CHG8-IN-D CHG1 SALES CHG2 SALES Total and count for each CHARGE key. CHG3 SALES CHG4 SALES CHG5 SALES CHG6 SALES CHG7 SALES Total for each Foreign currency in drawer. CHG8 SALES FOREIGN FOREIGN FOREIGN FOREIGN 1 2 3 4 0 $0.00 4 547 14 $269.99 3 -108.45 2 $21.00 0 $0.00 1 $8.43 1 $8.52 2 -1.60 1 $2.67 2 $13.09 0 $0.00 1 $0.00 0 $0.00 1 $8.43 1 $8.52 2 -1.60 1 $2.67 2 $13.09 0 $0.00 1 $3.04 0.00 0.00 0.00 0.00 continued . . . SAM4s ER-900 Series Operator's & Programming Manual v.1.7 Sample Reports • 203 Total of CASH, CHECKS and CHARGES in drawer. Total and count for PROMO,WASTE and TIPS. Number of transactions and total activity in Training Mode Total and count of all balances serviced Total number of guests served Total and count of balances entered into PBAL key Total and count of balances paid Total and count of mix & match disc. Total and count of payments to house accounts continued from previous page DRWR TTL PROMO $216.69 1 $1.50 WASTE 8 $12.50 TIPS 0 $0.00 TRAIN TTL 5 $62.59 BAL FORWARD 4 $88.13 GUESTS 5 P/BAL 4 $0.00 CHECKS PAID 2 $18.64 SERVICE 4 $88.13 MIX&MATCH 0 $0.00 PAYMENT 0 $0.00 AVG ITEM/CUST 7.29 AVG $/CUST $10.81 ******************************** GRAND $375.63 KELLY 000209 00000 Average number if items per customer, and average dollar sales per customer Grand total 204 • Sample Reports SAM4s ER-900 Series Operator's & Programming Manual v.1.7 Time Time Period Number of Transactions Net sales in this period. Percentage of total sales Number of Transactions all periods Net sales in all periods. DATE 11/10/2011 WED TIME 15:48 X 1 REPORT 00001 -------------------------------TIME 13:00-13:59 CNT 17 SALES AMT $183.85 SALES RATE 65.39% 14:00-14:59 CNT 9 SALES AMT $97.33 SALES RATE 34.61% ******************************** TOTAL CNT 26 TOTAL AMT $281.18 KELLY 000236 00000 SAM4s ER-900 Series Operator's & Programming Manual v.1.7 Sample Reports • 205 PLU PLU number PLU Descriptor Count and sales total. Percentage of total sales (optional) Total activity for all PLUs Total sales for all PLUs. 206 • Sample Reports DATE 11/10/2011 WED TIME 15:33 X 1 REPORT 00001 -------------------------------ALL PLU PLU#1 HAMBURGER CNT 28 $42.00 SALES RATE 15.64% PLU#2 DBL BURGER CNT 40 $99.75 SALES RATE 37.14% PLU#4 COKE CNT 26 $38.85 SALES RATE 14.46% PLU#5 SPRITE CNT 18 $13.42 SALES RATE 5.00% PLU#7 ROAST CNT 19.16 $30.47 SALES RATE 11.34% PLU#28 UNLEADED CNT 32.85 $39.39 SALES RATE 14.66% PLU#29 RETURNS CNT 10 -20.00 SALES RATE -7.44% PLU#33 NAILS CNT 15.55 $24.72 SALES RATE 9.20% ******************************** TOTAL CNT 189.56 TOTAL AMT $268.60 KELLY 000213 00000 SAM4s ER-900 Series Operator's & Programming Manual v.1.7 Clerk Note: Media totals can be printed for each clerk, if selected in Print Option Programming. Clerk Name Number of Transactions Net sales for this clerk Drawer total for this clerk DATE 11/10/2011 WED TIME 15:36 X 1 REPORT 00001 -------------------------------ALL CLERK KELLY NET SALE 10 $155.23 DRWR TTL $109.81 -------------------------------ZACH NET SALE 5 $45.14 DRWR TTL $43.22 -------------------------------ANNA NET SALE 4 $78.75 DRWR TTL $67.03 -------------------------------LAURA NET SALE 2 $0.00 DRWR TTL $18.64 -------------------------------PEGGY -------------------------------MOLLY NET SALE 5 $2.06 DRWR TTL -22.01 -------------------------------KELLY 000218 00000 SAM4s ER-900 Series Operator's & Programming Manual v.1.7 Sample Reports • 207 Individual Clerk Clerk Name Number of Transactions Net sales for this clerk Drawer total for this clerk 208 • Sample Reports DATE 11/10/2011 WED TIME 15:36 X 1 REPORT 00001 -------------------------------INDIVIDUAL CLERK KELLY NET SALE 10 $155.23 DRWR TTL $109.81 -------------------------------KELLY 000218 00000 SAM4s ER-900 Series Operator's & Programming Manual v.1.7 Groups Group Descriptor Number of items sold in this group Net sales for this group Number of items sold in all groups. Net sales for all groups. DATE 11/10/2011 WED TIME 15:34 X 1 REPORT 00001 -------------------------------GROUP GROUP : 1 FOOD CNT 68 SALES AMT $141.75 GROUP : 2 DRINK CNT 44 SALES AMT $52.27 GROUP : 3 REST. CNT 112 SALES AMT $194.02 GROUP : 5 STORE CNT 19.16 SALES AMT $30.47 GROUP : 8 MDSE CNT 58.40 SALES AMT $44.11 GROUP : 9 STORE MDSE CNT 77.56 SALES AMT $74.58 ******************************** TOTAL CNT 189.56 TOTAL AMT $268.60 KELLY 000237 00000 SAM4s ER-900 Series Operator's & Programming Manual v.1.7 Sample Reports • 209 Stock PLU number PLU Descriptor Current Stock count 210 • Sample Reports DATE 11/10/2011 WED TIME 15:47 X 1 REPORT 00001 -------------------------------ALL PLU STOCK PLU#1 HAMBURGER CNT 26 PLU#2 DBL BURGER CNT 15 PLU#7 ROAST CNT 25.96 PLU#28 UNLEADED CNT 1488.47 PLU#33 NAILS CNT 161.25 KELLY 000228 00000 DATE 11/10/2011 WED TIME 15:47 SAM4s ER-900 Series Operator's & Programming Manual v.1.7 Open Check Open check number and balance. Clerk responsible for the check. Total of all open checks. DATE 11/10/2011 WED TIME 15:59 X 1 REPORT 00001 -------------------------------OPEN CHECK CHECK : 3 $24.07 MOLLY CHECK : 4 $45.42 KELLY CHECK : 5 $24.50 KELLY CHECK : 6 $28.33 KELLY ******************************** OPEN CHK TOTAL 122.32 KELLY 000243 00000 SAM4s ER-900 Series Operator's & Programming Manual v.1.7 Sample Reports • 211 Balancing Formulas 212 • Sample Reports +/- Net Sales $ Example = PLU Sales Total $ + Tax 1 $ + Tax 2 $ + Tax 3 $ + Tax 4 $ + Sale Coupon Amounts $ + Sale Percent Discounts $ + Sale Surcharge Amounts $ = Net Sales $ +/- Gross Sales $ Example = Net Sales $ + Negative PLU Total $ + Item Coupon Total $ + Item Percent Discount $ + Sale Coupon Amounts $ + Sale Percent Discounts $ + Credit Tax 1 $ + Credit Tax 2 $ + Credit Tax 3 $ + Credit Tax 4 $ + Merchandise Return $ + Void Position Total $ = Gross Sales $ SAM4s ER-900 Series Operator's & Programming Manual v.1.7 Integrated Payment Appendix One Day Example of Credit Authorization Open Batch NOTE: To present things in a logical order, OPEN BATCH is shown at the beginning of the day, but in practical day-to-day operation it is recommended to open a new batch right after closing today’s batch, so it is ready to go for the next day. 1. Turn the control lock to the Z position. 2. Enter 501, press SUBTL 3. The message “WAITING RESP.” displays momentarily, then the message “REPORT MODE” returns. The message “BATCH WAS OPENED SUCCESSFULLY” is printed. SAM4s ER-900 Series Operator's & Programming Manual v.1.7 Integrated Payment Appendix • 213 Sample Credit Transaction 1. Register a normal transaction. Press the appropriate CHARGE key. The message ‘SLIDE CARD” displays: 2. Slide the card. The message “WAITING RESP.” displays until the card verification is complete. 3. When verification is complete, the draft is printed. Note: If multiple documents are to be printed, the message “PRESS CASH KEY” displays. Tear off the printer paper, and press CASH to resume printing. Sample Draft 5/26/11 10:10 SALE ************6301 APP: VITAL8 REF: 41415013334 REC NO : 1 00001 $2.00 X___________________________ I AGREE TO PAY ABOVE TOTAL AMOUNT ACCORDING TO CARD ISSUER AGREEMENT Sample Draft – With Gratuity To print the tip entry line, see “System Option Programming” on page 135 and set address #39 to the appropriate value. 5/26/11 10:10 SALE ************6301 APP: VITAL8 REF: 41415013334 REC NO : 1 00001 $2.00 TIP_____________________________ TOTAL___________________________ X___________________________ I AGREE TO PAY ABOVE TOTAL AMOUNT ACCORDING TO CARD ISSUER AGREEMENT 214 • Integrated Payment Appendix SAM4s ER-900 Series Operator's & Programming Manual v.1.7 Sample Debit Transaction 1. Register a normal transaction. Press the appropriate CHARGE key (with debit function.) The message ‘SLIDE CARD” displays: 2. Slide the card. The message “GETTING PIN” displays. (At the PIN pad, the ENTER PIN message displays.) 3. At the PIN pad, enter the PIN and press the (ENTER) key. The register displays “PIN INPUT OK” momentarily and then displays “WAITING RESP.” until the card verification is completed 4. When verification is complete, the draft is printed. Note: If multiple documents are to be printed, the message “PRESS CASH KEY” displays. Tear off the printer paper, and press CASH to resume printing. Sample Receipt DATE 03/21/2011 WED TIME 11:15 PLU1 $1.00 TAX1 $0.07 CHARGE $1.07 TOTAL $1.07 -------------------------------SALE $1.07 ************6781 APP : TAS217 REF : 708016502304 REC NO : -------------------------------CLERK 1 NO.000118 00001 Sample Draft 03/21/11 11:16 00002 SALE ************6781 APP : TAS217 REF : 708016502304 REC NO : $1.07 SAM4s ER-900 Series Operator's & Programming Manual v.1.7 Integrated Payment Appendix • 215 Gift Card Operations Sale of Gift Card 1. Register the gift card amount into a PLU linked to a unique PLU Group with the gift card activate function. (See “Group Programming” on page 184 to set group options.) 2. Immediately after the PLU is registered, the message “SLIDE GIFT CARD” displays. 3. Slide the gift card. The terminal displays “WAITING RESP.” until the card is activated with the proper amount. The activation draft is not printed until the sale is completed. 4. If necessary, continue to register additional items of gift cards in the same transaction. Up to five gift cards may be sold in the same transaction. 5. When activation is complete, the receipt and the draft(s) are printed. Sample Draft 07/20/11 10:10 GIFT ISSUE ***************6540 APP: 423265 REF: 423265 BAL: 50.00 * 1 $50.00 Addition to Gift Card The procedure is identical to sale of gift card, except enter the amount of the addition into a distinct PLU programmed linked to a separate PLU Group set with the gift card add function. (See “Group Programming” on page 184 to set group options.) 216 • Integrated Payment Appendix SAM4s ER-900 Series Operator's & Programming Manual v.1.7 Payment with Gift Card 1. Register a normal transaction. 2. Press the appropriate MISC TEND key (with gift function). The message “SLIDE GIFT CARD” displays. 3. Slide the gift card. The terminal displays “WAITING RESP.” until the card verification is complete. 4. When verification is complete, the receipt and the draft are printed. Sample Draft 07/20/11 Note: Gift Balance is printed 10:10 GIFT CARD REDEMPTION ***************6537 APP: 423331 REF: 423331 BAL: 28.84 * 1 $8.50 Sample Receipt DATE 07/20/2011 WED TIME 10:10 HAMBURGER FT1234 $1.99 CHEESEBURGER FT1234 $5.99 TAX 1 $0.52 TOTAL $8.50 CHARGE3 $8.50 -------------------------------SALE 8.50 ***************6537 APP: 423331 REF: 423331 BAL: 28.84 -------------------------------* ORDER# 0166 * EMPLOYEE1 NO.000066 REG 01 SAM4s ER-900 Series Operator's & Programming Manual v.1.7 Integrated Payment Appendix • 217 Manual Card Entry (Credit/Gift Only) 1. Register a normal transaction. Press the appropriate CHARGE key. The message ‘SLIDE CARD” displays. 2. If card will not read, press CLEAR once, the message “ENTER ACCT NO” displays. 3. Enter the account number and press CASH (or press CLEAR twice to abort the tender.) 4. The message “ENTER EXP DATE” displays (if credit transaction.) Enter the 4digit expiration date and press CASH (not required for gift card manual entry). 5. When verification is complete, the draft is printed. Note: If multiple documents are to be printed, the message “PRESS CASH KEY” displays. Tear off the printer paper, and press CASH to resume printing. 218 • Integrated Payment Appendix SAM4s ER-900 Series Operator's & Programming Manual v.1.7 Merchandise Return The Merchandise Return function allows item to be refunded. The Merchandise Return transaction will appear as a separate transaction on the card holder statement. Complete the merchandise return transaction as you would a normal transaction. Press MDSE RTRN prior to entering each returned item. 1. Register a normal transaction. Press the appropriate CHARGE key. The message “SLIDE CARD” displays. 2. Slide the card. The message “SLIDE CARD” continues to display until the card verification is complete. 3. When verification is complete, the draft is printed. Note: If multiple documents are to be printed, the message “PRESS CASH KEY” displays. Tear off the printer paper, and press CASH to resume printing. Sample Draft 5/26/11 10:42 SALE ************6301 APP: * REF: 00004 REC NO : 3 TIP 00004 -2.00 _______________________ TOTAL _______________________ X___________________________ I AGREE TO PAY ABOVE TOTAL AMOUNT ACCORDING TO CARD ISSUER AGREEMENT SAM4s ER-900 Series Operator's & Programming Manual v.1.7 Integrated Payment Appendix • 219 Void Transaction Transaction Void allows a transaction to be removed from the batch and not reported to the cardholder statement. 1. Turn the key lock to the VOID position. 2. Register a normal transaction. 3. Press the appropriate CHARGE key. The message “SLIDE CARD” displays 4. Slide the card. The message “ENTER APP CODE” displays. 5. Enter the authorization code printed for the transaction to be voided, press CASH. The message “ENTER REF NO” displays. NOTE: The approval code is an alphanumeric entry. If your ER-900 series ECR is using an alpha keyboard overlay, you can type the descriptors. If the alpha keyboard is not available, you must use the alpha code chart to determine the numeric entries. For example the approval code “VITAL8” would be entered as “086 073 084 065 076 056”. See “ER-925/ER-945 Alpha Keyboard Overlay”, “ER-920/ER-940 Alpha Keyboard Overlay” on page 130, or “Descriptor Code Chart” on page 131 to make the appropriate entries. NOTE: If the approval code is numeric, you may have to enter leading zeros. 6. Enter the Reference number from the transaction to be voided; press CASH. The transaction is found and the original record removed. Local Total Report Run an Issue Local Total report to confirm that credit totals match the financial report before closing the batch. See “Issue Local Total” on page 223. Tip (Gratuity) Entry Gratuities (tips) indicated by the customer on the payment draft must be entered into the ECR before the batch is closed. Note: If tips are corrected, corresponding corrections must be made manually to the Financial and Clerk reports. 1. Turn the key lock to the Z position, enter 510 and press SUBTOTAL. 2. At the message “ENTER REC NO.”, enter the record number of the transaction and press CASH. 3. At the message “ORIG TRAN AMOUNT”, enter the original transaction amount and press CASH. 4. At the message “TIP AMOUNT”, enter the tip amount and press CASH. 5. If the record number and transaction number are valid, the tip amount is entered in the batch and a tip entry chit prints as shown below. 220 • Integrated Payment Appendix SAM4s ER-900 Series Operator's & Programming Manual v.1.7 Sample Tip Chit DATE 09/27/2011 MON TIME 10:41 SALE AMOUNT: TIP AMOUNT: REF : 00007 REC NO : 5 EMPLOYEE1 NO.000023 $2.12 $1.00 REG 01 Close Batch NOTE: To present things in a logical order, OPEN BATCH is shown at the beginning of the day, but in practical day-to-day operation it is recommended to open a new batch right after closing today’s batch, so it is ready to go for the next day. 1. Turn the control lock to the Z position. 2. For non-debit applications: Enter 502, press SUBTL. For debit applications: Enter 512, press SUBTL 3. The message “WAITING RESP.” displays momentarily. When communication is complete, the Local Batch Status prints and the batch is closed. The message “BATCH WAS CLOSED SUCCESSFULLY” prints. Close Batch See Explanations DATE 5/24/2011 WED TIME 10:34 **** LOCAL BATCH STATUS **** 0 11 5 4 12.72 0 .00 CLERK 1 000065 00000 Local Batch Status Explanations: (From Left to Right) o Batch Status C=Closed/O=Open/X=Incomplete 4 Batch Number 3 Batch Transaction Count 3 Batch Item Count 2.00 Batch Balance 0 Batch Forwarded Transaction Count .00 Batch Forwarded Balance SAM4s ER-900 Series Operator's & Programming Manual v.1.7 Integrated Payment Appendix • 221 Reset Mode Procedures Datatran Function Table Function Procedure Initialize EFT Z-Mode: Enter 500, press SUBTL Open Batch Z-Mode: Enter 501, press SUBTL Close Batch Z-Mode: Enter 502, press SUBTL Clear Current Batch S-Mode: Enter 503, press SUBTL Change Batch Number Z-Mode: Enter 504, press SUBTL Issue Local Total Z-Mode: Enter 505, press SUBTL Issue Transaction Z-Mode: Enter 506, press SUBTL Issue Batch Status Z-Mode: Enter 507, press SUBTL Dial In Load Z-Mode: Enter 508, press SUBTL Dial Out Load Z-Mode: Enter 509, press SUBTL Tip Entry Z-Mode: Enter 510, press SUBTL Pin Pad Initialize Z-Mode: Enter 511, press SUBTL Close Batch with Debit Z-Mode: Enter 512, press SUBTL DataTran Diagnostics Z-Mode: Enter 513, press SBTL Log File Report* Z-Mode: Enter 514, press SBTL *The “Log File Report” records each time the “Issue Transaction” (report 506) is generated. When the “Log File Report” reaches 20 entries, the error message “Log File Full” is displayed when a “Issue Transaction” (report 506) is attempted. The “Log File Report” entries clear when the “Log File Report” (report 514) is taken. 222 • Integrated Payment Appendix SAM4s ER-900 Series Operator's & Programming Manual v.1.7 Initialize EFT Z-Mode: Enter 500, press SUBTL Select Initialize EFT to verify communications, software versions and installed networks. List of Installed Networks DATE 5/24/2011 THU TIME 16:15 ** LIST INSTALLED NETWORKS ** VS2 CHK GFT --- VER:6.31 ON ON OFF OFF CLERK1 000066 00000 Software Version Status of Installed Clear Curr Batch Z-Mode: Enter 503, press SUBTL The clear batch command erases all the current batch transactions from the Datatran memory even if they have not been settled. After changing the card masking option (Print Option #34) A LOCAL TRANSACTION INQUIRY should be printed prior to clearing the batch. This will ensure that the operator has the transaction detail to re-enter if required. This operation should only be done under the direction of DATACAP. Chg Batch Number Z-Mode: Enter 504, press SUBTL (At the ENTER BATCH NO message, enter the new number, press CASH.) The change batch number command is used to assign a new batch number to an existing batch. It is used with certain credit card processors to rectify settlement problems. It is used infrequently. (Attempt to change batch number will be denied if bank does not allow the feature.) Issue Local Total Z-Mode: Enter 505, press SUBTL This report is added for ease of customer balancing actual totals in the Datatran to the system wide reports. A summary of each kind of credit card and a batch total should match the totals within the ER-900 report before the Settle Batch is attempted. DATE 5/24/2011 WED TIME 10:55 ****LOCAL TOTAL REPORT **** AMEX .00 0 VISA 120.32 5 MASTER .00 0 DISCOVER .00 0 PRIVATE LABEL .00 0 DINERS .00 0 JCB .00 0 DEBIT .00 0 TOTAL 120.32 5 CLERK 1 000069 00000 SAM4s ER-900 Series Operator's & Programming Manual v.1.7 Integrated Payment Appendix • 223 Issue Transaction Note: If card masking is set to No (Print Option #34) you will be prompted to enter a password. Contact CRS Technical Support if you have questions about password access. To run the Issue Transaction report, turn the key lock to Z, enter 506, press SUBTL. The Local Transaction Report contains details of each transaction in the current batch. Example (See Appendix for report key.) DATE 5/24/2011 WED TIME 10:59 *** LOCAL TRANSACTION REPORT *** 1 A 54 ************6301 0501 1 V ITAL6 * 100.00 * * * * * 4 * 052 604 113803 5 @ NY * * 00 * * D 1 00 00 * * * 00001 * * * * * 0524 04 113803 * * * * 00 * CLERK 1 000070 00000 Issue Batch Status Z-Mode: Enter 507, press SUBTL The Local Batch Status Report also prints when a batch is closed. See Explanations DATE 5/24/2011 WED TIME 10:34 **** LOCAL BATCH STATUS **** 0 4 3 3 2.00 0 .00 CLERK 1 000065 00000 Local Batch Status Explanations: (From Left to Right) O Batch Status C=Closed/O=Open/X=Incomplete 4 Batch Number 3 Batch Transaction Count 3 Batch Item Count 2.00 Batch Balance 0 Batch Forwarded Transaction Count .00 Batch Forwarded Balance 224 • Integrated Payment Appendix SAM4s ER-900 Series Operator's & Programming Manual v.1.7 Dial In Load/Dial Out Load These functions apply only to legacy DataTran equipment. Perform if instructed by Datacap support. You will be required to enter the phone number and terminal I.D. Z-Mode: Enter 508, press SBTL (Dial In Load) Z-Mode: Enter 509, press SBTL (Dial Out Load) DataTran NoLoad/AutoLoad Notes/TwinTran NoLoad Parameters managed at the processor host, not in the DataTran. For installation, changes, exchanges, call the processor, tell them the unique “mac” id, run tests and begin operations. AutoLoad Parameters managed on PSCS, Datacap’s web-based load system. Parameters are downloaded to the DataTran upon first use and for reloads on demand. TwinTran When a TwinTran is first installed, the dealer must do a Dial Out Load through the IP connection. If, for any reason, the internet is not available, the device cannot be loaded. If it is being installed at a location where the Internet is not currently operational and the customer wants to use the dial out method for approvals, the procedure below must be done at a location where the internet is working. To load a TwinTran using a Sam4s register; With the TwinTran connected to the register and an active Ethernet line, enter into the Dial Out mode. At the Phone number field enter the number “1”. If the register uses the code entry method for alpha characters enter the 3 digit code (049). At the Enter ID prompt, enter the serial number of the TwinTran. Select Tone phone connection. The TwinTran will call DataCaps host PC and load itself. This takes approximately 20 seconds. After the TwinTran is loaded, one successful credit transaction must be done. After that the unit can be connected as the customer wishes. SAM4s ER-900 Series Operator's & Programming Manual v.1.7 Integrated Payment Appendix • 225 Pin Pad Initialize Z-Mode: Enter 511, press SBTL Initializes the pin pad. Perform at the time of installation or as part of pin pad troubleshooting procedures. DataTran Diagnostics This feature is available with newer datacap “Tran” devices. Note: Use these commands with the assistance of a Datacap support representative. Datatran diagnostic commands are functions built into each Tran series model that assist an installer or operator troubleshoot problems related to communications, networking or merchant parameters. To Receive a List of Available Tests for the Connected Tran 1. From Z-Mode: Enter 513, press SBTL. 2. Enter “0” then press CASH. Test Number “0” returns a listing of tests that are available in the connected Tran application. The list of available diagnostic commands will vary by Tran model; for example, DialTran devices will not support networking tests that pertain to IPTran and TwinTran. Tran device diagnostics include payment gateway connection tests, transaction tests, phone number settings and merchant parameter summaries that are appropriate to the particular Tran device. A sample list of functions is as follows: 5/26/04 10:10 00001 *** DATATRAN SELF TESTS *** 1 - DTRAN/IPTRAN VERSIONS 2 - DIAL TONE TEST 3 - CARD SETTINGS 4 - CREDIT MID SETTINGS 5 - GFT/CHK MID SETTINGS 6 - AUTH ACCESS SETTINGS 7 - SETTLE ACCESS SETTINGS 8 - GFT ACCESS SETTINGS 9 - CHK ACCESS SETTINGS 10- IPTRAN-IP ADDRESS 11- IPTRAN-DNS TEST 12- IPTRAN-CREDIT GATEWAY 13- IPTRAN-GFT GATEWAY 14- IPTRAN-CHK GATEWAY 20/30- DIAL/IP VISA AUTH 21/31- DIAL/IP M/C AUTH 22/32- DIAL/IP AMEX AUTH 23/33- DIAL/IP DCVR AUTH 24/34- DIAL/IP GIFT AUTH 25/35- DIAL/IP CHECK CLERK 1 226 • Integrated Payment Appendix NO.000118 00001 SAM4s ER-900 Series Operator's & Programming Manual v.1.7 To Execute a Diagnostic Test The responses to the diagnostic commands are variable in content and not intended to be interpreted by software. The printing of the diagnostic output is intended to have a human operator read the results that will be readily interpreted with the assistance of a Datacap support representative. 1. From Z-Mode: Enter 513, press SBTL. 2. Enter the diagnostic report number and then press CASH. Log File Report Z-Mode: Enter 514, press SBTL The “Log File Report” is available beginning a software version 1.014. This report records each time the “Issue Transaction” (report 506) is generated. When the “Log File Report” reaches 20 entries, the error message “Log File Full” is displayed when a “Issue Transaction” (report 506) is attempted. The “Log File Report” entries clear when the “Log File Report” (report 514) is taken. DAE 04/15/2007 WED TIME 08:27 Z 1 REPORT 00007 LAST REPORT 03/15/2007 ------------------------------EFT TRANSACTION 1 04.15.07 08:27 GABRIEL STATUS ON 1 04.15.07 GABRIEL 15:14 STATUS ON 1 04.15.07 GABRIEL 20:27 STATUS ON CLERK 1 NO.000118 SAM4s ER-900 Series Operator's & Programming Manual v.1.7 00001 Integrated Payment Appendix • 227 Required ECR Programs 1. You must set EFT status for the port you are using. See “RS-232 Communication Option Programs” on page 101. Set device function to “EFT Device” and set BAUD to “2400”. 2. See System Option Programming on page 135. Set address #39 to 0 for Normal Draft with Normal Buffer Use. Add the value of 2 to your current value for a draft with a tip line. 3. See Print Option Programming on page 143. Set address #35 for the number of Datatran receipt copies you wish to print (0-99). 4. See CHARGE 1-8 - Function Key Options on page 156. Set option N5 to reflect the type of payment: Credit, Debit or Gift (check with your representative for availability of gift card processing). Local Transaction Report Key A B C D E F G H I J K H I J K L M N O P Q R S T [U V WX Y Z AA BB] Field Description Min Max Type A Transaction Sequence Number 1 5 Numeric B Transaction Status 1 1 Alphanumeric C Network Transaction Code 1 3 Alphanumeric D Credit Card Account Number 1 38 Alphanumeric E Expiration Date 4 4 Numeric F Card Reader Flag 1 1 Numeric G Approval Code 1 16 Alphanumeric H Reference Number 1 16 Alphanumeric I Transaction Amount 3 11 Numeric J Operator ID 1 10 Alphanumeric K AMEX Category or Product Code 1 10 Alphanumeric L Arrival Date 3 6 Numeric M Departure Date 3 6 Numeric N Gratuity Amount 3 11 Numeric O Media Type 1 2 Numeric P Special Program Code 1 1 Numeric Q Transaction Date 3 6 Numeric R Transaction Time 4 4 Numeric S Authorization Source Code 1 1 Numeric T Card Holder ID 1 1 Numeric U PS2000 or MIC Payment Service Indicator 1 1 Alphanumeric V PS2000 Transaction ID or 15 15 Alphanumeric MIC Banknet Reference Number 9 9 Alphanumeric MIC Banknet Authorization Date 4 4 Numeric MIC POS Entry Mode 1 1 Alphanumeric MIC Mag Stipe Error Code 1 1 Alphanumeric W PS2000 Validation Code 4 4 Alphanumeric X Authorization Response Code 2 2 Alphanumeric Y PS2000 Authorization Currency Code or 3 3 Alphanumeric MIC Entry Mode Change Indicator 1 1 Alphanumeric MIC Track Data - CVC Error 1 1 Alphanumeric MIC Track Data - Error Code 1 1 Alphanumeric 228 • Integrated Payment Appendix SAM4s ER-900 Series Operator's & Programming Manual v.1.7 ZMerchant Category Code AAEntry Mode BBOriginal Authorized Amount 3 2 2 11 2 Alphanumeric 2 Alphanumeric Numeric Local Transaction Report Field Definitions A. Transaction Sequence Number: The Datatran will use this field to return the internal sequence number assigned to each accessed transaction. B. Transaction Status: The Datatran will use this field to return the current status of each accessed transaction. Allowed values: “A” = Authorized but not captured, “C” = Captured, “F” = Forced Entry, or “V” = Void. C. Network Transaction Code: When available, the Datatran will use this field to return the service provider’s code assigned to each accessed transaction. D. Credit Card Account Number: The Datatran will use this field to return the card account number used in each accessed transaction . E. Expiration Date: The Datatran will use this field to return the expiration date of the credit card used in each accessed transaction. Format: “YYMM” or “MMYY” (“YY” = year and “MM” = month). F. Card Reader Flag: The Datatran will use this field to return the type of account number entry used in each accessed transaction. Allowed values: 0 = Hand entered account number, or 1 = Entered by card reader. G. Approval Code: The Datatran will use this field to return the approval code of each accessed transaction. H. Reference Number: When available, the Datatran will use this field to return the reference number of each accessed transaction. I. Transaction Amount: The Datatran will use this field to return the sales amount of each accessed transaction. Format: -9999999.99 (decimal point required). J. Operator ID: When available, the Datatran will use this field to return the cashier or operator ID number entered in each accessed transaction. K. AMEX Category or Product Code: When available, the Datatran will use this field to return the American Express product or category code of each accessed transaction. L. Arrival Date: When available, the Datatran will use this field to return the customer’s arrival date entered in each accessed transaction. Formats: “MMDDYY” (“MM” = month, “DD” = day, and “YY” = year). M. Departure Date: When available, the Datatran will use this field to return the customer’s departure date entered in each accessed transaction. Formats: “MMDDYY” (“MM” = month, “DD” = day, and “YY” = year). N. Gratuity Amount: When available, the Datatran will use this field to return the gratuity amount entered in each accessed transaction. Format: -9999999.99 (decimal point required). O. Media Type: The Datatran will use this field to return the media type used in each accessed transaction: 2 = American Express 6 = Private Label 3 = Visa 7 = Diner’s Club or Carte Blanche 4 = MasterCard 8 = JCB 5 = Discover 9 = Debit P. Special Program Code: When available, the Datatran will use this field to return the special program code entered for each accessed transaction. Q. Transaction Date: The Datatran will use this field to return the date of each accessed transaction. SAM4s ER-900 Series Operator's & Programming Manual v.1.7 Integrated Payment Appendix • 229 Formats: “MMDDYY” (“MM” = month, “DD” = day, and “YY” = year). R. Transaction Time: The Datatran will use this field to return the time of each accessed transaction. Format: “HHMM” (“HH” = military hours and “MM” minutes). S. Authorization Source Code: When available, the Datatran will use this field to return the Authorization Source Code of each accessed transaction. T. Card Holder ID: When available, the Datatran will use this field to return the Card Holder ID type of each accessed transaction. U. Payment Service Indicator: When available, the Datatran will use this field to return the Payment Service Indicator (also referred to as the ACI field) of each accessed transaction. V. Transaction ID: When available, the Datatran will use this field to return either the PS2000 Transaction ID number or MIC data of each accessed transaction. W. Validation Code: When available, the Datatran will use this field (also known as the ACI field) to return the validation code of each accessed transaction. X. Authorization Response Code: When available, the Datatran will use this field to return the authorization response code of each accessed transaction. Y. Authorization Currency Code: When available, the Datatran will use this field to return the authorization currency code of each accessed transaction. Z. Merchant Category Code: When available, the Datatran will use this field to return the merchant category code of each accessed transaction. AA. Entry Mode: When available, the Datatran will use this field to return the entry mode of each accessed transaction. BB. Original Authorization Amount: When available, the Datatran will use this field to return the original authorization amount of each accessed transaction. Format: -9999999.99 (decimal point required). 230 • Integrated Payment Appendix SAM4s ER-900 Series Operator's & Programming Manual v.1.7 Glossary Activity Count The activity counter increments each time an entry is made on a particular PLU, or function key. The counter prints on the appropriate reports. Cancel Press the CANCEL function to abort a transaction in progress. All current items are removed (voided). Cash Declaration This option forces the operator to count the cash drawer and input the results before the financial report can be taken. Absentee owners may want clerks or managers to declare the drawer counts to insure that all cash is deposited, regardless of overages, or shortages. As an added benefit, the overage or shortage amount is calculated and printed on the financial report. Clerk Sales clerks are individuals who are responsible for selling the merchandise to the customer. Typically, management wants to know merchandise sales levels for each clerk, in order to monitor productivity, account for cash and other media, and/or pay commissions. The default program provides operation for 15 clerks, however up to 99 different clerks can used by changing the default memory allocation. Compulsory When an operation is programmed compulsory, the appropriate entry must be performed in order to complete the operation. Compulsory Amount Tendering This forces the operator to input the tender, rather than pressing a payment key directly. The change will always be computed by the register when a customer tenders an amount greater than the total due. Compulsory tendering will reduce cashier change errors. Compulsory Condiment When a kitchen printer, or requisition system is used, the merchant may wish to force the entry of a condiment or instruction for specific items. If compulsory condiment status is set for a specific PLU, then a condiment PLU must follow the entry of the item. SAM4s ER-900 Series Operator's & Programming Manual v.1.7 Glossary • 231 Compulsory Drawer With compulsory drawer enabled, the clerk cannot begin a new transaction until the drawer is closed. This simple feature was designed to teach cashiers the habit of closing the cash drawer after each transaction. You’ll reduce potential errors, theft and fraud that can take place when your cashier works out of an open drawer. Compulsory Number Entry This option forces the operator to enter a reference number (using the #/NS key) before a PLU entry can be made or a transaction finalized with a Charge key. The number could represent an SKU number that would be tracked manually, or other data such as a customer count. Consecutive Number A sequential number is printed on each receipt issued. This is not a “customer count” as this number is incremented for non-sales activity such as no-sales and reports. A count of revenue generating transactions (true customer count) is printed with the Net Sales total on the financial report. Currency Conversion Use the currency conversion function to convert and display the value of the transaction in foreign currency. Only cash tender is allowed after pressing the currency conversion function. Change is calculated and issued in home currency. Decimal Multiplication If you sell weighed goods, yard goods, or any merchandise sold in fractions of a unit, the decimal multiplication feature calculates each transaction quickly and accurately. For example, if your customer selects 4.75 pounds of an item sold at $1.59 per pound, you enter 4.75 on the numeric keypad, press the X/TIME (multiplication) key, then enter the price per pound and press the appropriate PLU key. Default Program The original program installed in the ER-900 Series. The register has a default program which makes it operational after a memory clear. Nearly all option, rate, and status programs are set to zero as the default condition. Department Note: The ER-900 Series uses price look-ups (PLUs) to perform the function of traditional cash register departments. PLUs may be registered directly on the keyboard (like traditional departments) or indirectly by entering the item or PLU number and then pressing the PLU key. Electronic Journal The ER-920 and ER-925 do not provide a journal printer; the ER-940 and ER-945 provide a traditional journal printer. Today many systems, even expensive PC-based systems do not print a traditional sales journal. For business records, a copy of daily financial summaries is usually all that is needed. Like some of the more expensive POS systems, the SAM4s ER900 Series has the capability of storing a sales journal in memory. The electronic journal can be reviewed and discarded, saved to an SD card or polled by a PC for archival. When ECR memory reserved for electronic journal is full, current records are saved and old data is 232 • Glossary SAM4s ER-900 Series Operator's & Programming Manual v.1.7 discarded. Error Condition An error condition signals that mis-operation has occurred. It is identified by an audible tone and an error descriptor appearing on the display. Error Correct An error correct operation voids the last item entered, it must be used within a sale. Flash ROM Flash ROM is used by the manufacturer to contain the program that runs the register. Flash ROMs maintain memory when power is off, allowing the register to be especially stable and reliable. In the case that the register’s program is improved, or updated, the Flash ROM can be updated by a qualified service technician through a utility in the register. Food Stamp Note: Many areas now administer food stamp payments through EBT cards, rather than traditional food stamp coupons. The ER-900 Series is not capable of accepting EBT electronic payments at this time. Merchants who accept food stamp payments have the responsibility of accepting food stamps only for food stamp eligible merchandise. The SAM4s ER-900 Series offers a sophisticated routine to separate food stamp eligible items and accept the appropriate payments. First, each PLU is pre-programmed with food stamp eligibility status. If the customer is paying by food stamps, the operator can then recall and display the food stamp eligible total. Depending upon local rules, sales tax can be forgiven on any taxable food stamp eligible item. Change less than one dollar from food stamp tender is applied to non-food stamp eligible items, or issued in cash change. If both cash and food stamp change is due, the register displays both types of change due. Using this system, all food stamp items are automatically sorted, with change and tax calculated by the register. Thus, a potentially confusing transaction can be handled quickly with little risk for errors. Gallonage To simplify gasoline transactions, PLUs can be designated to calculate gallons sold on fuel purchases. The price of the fuel sold is entered as it would be in a normal “open” PLU. However the price per gallon of fuel is entered where the PLU preset price is normally maintained. When fuel is sold, the register will refer to the programmed price per gallon and calculate the number of gallons sold. Both the gallons pumped and dollar amount of the gas purchase are conveniently printed on the customer receipt and sales journal. This provides all the necessary information for a customer that needs a receipt for gas purchases. The total of gallons sold is also maintained on the appropriate PLU report, in the place of the PLU item counter. Several gallonage PLUs could be placed on the keyboard to maintain records for different pumps, or types of fuel. Thus, the dollar and gallon totals can provide a useful security check against separate pump totals. Groups (PLU Groups) Groups are used to organize sets of items. For example, in a restaurant Grill Items, Drinks, SAM4s ER-900 Series Operator's & Programming Manual v.1.7 Glossary • 233 and Ice Cream items might be separated into different groups. Up to 99 group totals are available. Group reporting is available on the group report. HALO The high amount lock-out (HALO) limits the amount allowed to be entered in a PLU, or function key. HASH Merchants often sell non-merchandise items, such as lottery tickets, or bottle deposits, that they do not wish to account for as reportable revenue. HASH PLUs are useful to account for non-revenue income. They will add to the appropriate totals on the PLU report, they will add to the transaction totals, and they will be accountable for in drawer totals, but they will not affect the merchants, NET SALES, GROSS SALES or NON-RESETTABLE GRAND TOTAL. As a system option, HASH can be defined to not add to the transaction (NONADD). Link (PLU Link) Use linked PLUs if you wish the registration a PLU to automatically cause the registration of another PLU (for example to automatically add a bottle deposit.) Linked PLUs are set with Program 350, PLU Link programming. Macro Macro keys may be programmed to record, and then later perform, up to 50 keystrokes. For example, a macro key could be set to tender (preset tender) a common currency, such as $5 into the cash key. Memory Allocation Memory allocation is a program that determines how the system memory is divided to provide the correct features for your application. For example, you may require more or less clerk memory, PLUs, or electronic journal memory. Memory allocation allows you to maximize the features you need while minimizing the features you do not need. Mix & Match Retailers often offer discounts when multiples of different items are purchased. For example, the offer: “save $5 on any three bottles of wine” can be handled by a mix and match discount. The default ER-900 Series can accommodate up to 10 different mix and match discounts, the total can be increased to a maximum of 100 through memory allocation. Multiple Receipts In some cases, for example where a mail-in rebate is offered, an extra copy of a receipt is needed. If allowed, the receipt must be re-printed immediately, before another transaction is started. Negative PLUs As you program PLUs, you will find a setting to make them negative (normally they are positive). Positive PLUs are used for items that add to the sale. Negative PLUs are used for items that subtract from a sale, like individual store coupons or bottle deposit credits. 234 • Glossary SAM4s ER-900 Series Operator's & Programming Manual v.1.7 NLU Number Look-Up (NLU) refers to PLU code that is accessed when a Keyboard PLU is used. In the default program each Keyboard PLU will look up the appropriate numeric PLU, beginning with PLU #1 for Keyboard PLU key #1 and continuing sequentially through the keyboard. However, this numbering sequence may be impractical for some applications. For example, Keyboard PLU #1 may represent a can of Diet Pepsi. The merchant may wish to have the Keyboard PLU look up the UPC code number for Diet Pepsi, which is “120500”. Using this program you can change the Number Look-Up (NLU) for the keyboard PLU to any 15-digit number you choose. No Sale No sale is an operation to simply open the cash drawer. No sales are counted and reported on the financial report. Not Found PLU For small merchants, the ER-900 Series can build a PLU file “on the fly”. Each time an item is scanned (or entered by PLU number) that is not in the PLU file, the operator is prompted to enter the price and other options for the item. At the end of the day, the “Not Found PLU Report” will allow the manager to verify the prices and update the PLU file as needed. T Open (PLU) Open PLUs accept price entries, rather than register a preset price. To prevent errors, you may set a high limit (HALO) for open entries. Override Override is an operation used to bypass a programmed price or entry limit (HALO). Over-Tendering/Under-Tendering When a payment is made less than the amount due, it is called an under-tender. After an under-tender, the register calculates and displays the remaining balance for the sale. Additional payments must be made until the total due is satisfied. When the sale is fully paid, the cash drawer will then open and the receipt is completed. When a payment is made more than the amount due, it is called an over-tender. The register will compute and display the change due and the receipt will be completed. Note that register options can be set to allow or disallow over-tendering for check and charge payments. Paid Out The Paid Out key is used to track cash paid out of the cash drawer or to record pick ups from the cash drawer. PLUs Price look-ups (PLUs) are accessed by indexing a code number and pressing the PLU key, or by pressing a keyboard PLU key. PLUs can be programmed with a preset or open price. PLUs record an activity count and dollar total on the PLU report. PLU sales may also report to a group. SAM4s ER-900 Series Operator's & Programming Manual v.1.7 Glossary • 235 Post Tender Post tendering is available to help prevent cashier confusion when a customer decides to change the tender amount. When Post Tendering is allowed, the operator can re-enter a cash tender and the register will re-calculate the change. To post tender after finalizing the sale, enter the cash amount presented by the customer and then press CASH. The amount of change due to the customer is then displayed. This is a calculation function only, and no totals or counters are updated by the use of this feature. Preamble/Postamble Message Programmable messages allow each merchant to customize his receipt with the store name, address, phone number, website or other critical identification information or advertising messages. The SAM4s ER-900 Series allows a preamble message of up to six lines, each with up to 24-characters, to be printed at the top of each receipt. A postamble of up to 6-lines of 24-characters can also be printed at the bottom of the receipt. Preset (PLU) When a PLU is pre-programmed or pre-set with a fixed amount, the preset amount will automatically register when the PLU is pressed or entered. Preset Override When a PLU is preset, it is possible to override the preset price with a different price. If the override function is set to be allowed in the PLU program, you can simply enter a new price and press the PLU key. Receipt A receipt is a printed tape given to a customer as a record of the sale transaction. Received on Account The Received on Account key is used to track cash received into the cash drawer or to record loans to the cash drawer. Register Number The number of the register can be set and printed on each receipt. If the merchant uses more than one register, or has more than one location, the register where a transaction took place or report was taken is easily identified. Single Item The transaction is finalized automatically when a single item PLU is registered as the first item in a sale. Single item status is used to speed transaction entry when an item is normally sold in a one-item sale, for example, a pack of cigarettes, a newspaper or an admission ticket. Split Pricing Often merchants price items in multiples, for example 3 for $1. The register will compute the price of items when the exact quantity is not purchased. If the customer chooses to buy 2 items at 3 for $1, enter 2, press the X/TIME key, enter 3, press the X/TIME key and then enter the price and the PLU. The register will compute the price for the items purchased. 236 • Glossary SAM4s ER-900 Series Operator's & Programming Manual v.1.7 Stock (PLU Stock) Each PLU reports an activity counter. Normally the activity counter increments (adds) and is reset when a PLU Z-report is taken. You can choose to use the PLU activity counter as a stock counter. If used as a stock counter, each PLU activity will reduce the count. A separate program allows you to add to the stock count or enter a new stock count. Stock counts are not reset when PLU Z-reports are taken. Surcharge (Item) An item percent surcharge adds a percentage to the price of an item. This addition nets the PLU total. Surcharge (Sale) A sale percent surcharge adds a percentage to the entire sale. Tare Tares are container weights. If you are using the scale function, you can preset up to 5 different tare weights. The tare can be subtracted automatically when a specific PLU is registered, or manually inputting the tare number and pressing the TARE key can subtract the tare. Tare #5 can be programmed for entering tare weights manually. Tax Computation by Rate/Tax Computation by Table In the simplest method of tax calculation, the register is set with a tax rate (or rates) and the taxes are computed by a percentage calculation. In some cases, a tax that is entered as a percentage does not follow exactly the tax charts that apply in your area (even if the tax chart is based on a percentage). In these cases, we recommend that you enter your tax using tax table programming. This method will match tax collection exactly to the break points of your tax table. Tax Exempt Tax exempt is used to exclude the tax from an entire sale. Tax Shift Tax shift keys are used to reverse the tax status of a PLU entry. Tender A tender is the register operation in which the amount of the payment is entered. If the tender exceeds the amount due, the sale is finalized and change due is displayed. Training Operation Training operations do not add to PLU or function key totals. This allows an operator to practice making entries without updating sales totals. If you wish to perform training operations, designate one of the clerks for training. You must clear (Z) the register before the training clerk can be used. When that clerk is signed on, the register is in “training mode”. Transaction Number See consecutive number. SAM4s ER-900 Series Operator's & Programming Manual v.1.7 Glossary • 237 VAT Value-Added Tax (VAT) is a tax collection system where a portion of the item’s sale price is tax. VAT is different than most sales taxes where tax amounts are calculated and added-on to the sale. Value added taxes are included in the item price. Most locales in the USA do not use a VAT system, which is used in Canada and other nations. Void A void operation will erase a previous item entry. It must be used inside of a sale only. X & Z Reports X (eXamine) reads reports without resetting and Z (Zero) reads and resets your sales totals. 238 • Glossary SAM4s ER-900 Series Operator's & Programming Manual v.1.7 Manual Revision Record Edition Date published Revision Contents 1.0 9-09-2011 Initial Printing 1.1 9-19-2011 Corrected Function Key Descriptor Programming 1.2 10-07-2011 Clarified bitmap copy from register to SD procedure. Updated model photos on page 11. 1.3 10/11/2011 Corrected: arrow on pg. 71; scale options pg.172; Dwr assignment options pg 184; Financial report descriptor table pg. 191; sample report pg. 206 1.4 11/15/2011 Initialize on all models can be done by powerup with SUBTL key pressed. Updates now refer to Flash ROM rather than EPROM. Memory All Clear function clarified for raised-key models. 1.5 12/6/2011 Price/HALO programming instructions updated for second price level. Default values for system and print options identified. System option #39 value corrected. 1.6 12/28/2011 Programmability of Feed & Journal Feed keys clarified. See Pages 17-18. Clarified Flash ROM Update by PC Instructions. 1.7 1/11/2012 Foreign Language descriptor system option #35 corrected: A value of 2=French descriptors. SAM4s ER-900 Series Operator's & Programming Manual v.1.7 Manual Revision Record • 239 240 • Manual Revision Record SAM4s ER-900 Series Operator's & Programming Manual v.1.7