1
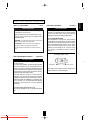
Downloaded From Disc-Player.com Sherwood Manuals
Introduction
ENGLISH
UNPACKING
AND
Congratulations on Your Purchase!
Your new high fidelity Compact Disc Player is designed to
deliver maximum enjoyment and years of trouble free service.
Please take a few moments to read this manual thoroughly. It will
explain the features and operation of your unit and help ensure a
trouble free installation.
Please unpack your unit carefully. We recommend that you save
the carton and packing material. They will be helpful if you ever
need to move your unit and may be required if you ever need to
return it for service. Your unit is designed to be placed in a
horizontal position and it is important to allow at least two inches
of space behind your unit for adequate ventilation and cabling
convenience.
To avoid damage, never place the unit near radiators, in front of
heating vents, in direct sunlight, in excessively humid, dusty
locations or near sources of strong magnetic fields. Connect your
complementary components as illustrated in the following
section.
CAUTION
RISK OF ELECTRIC SHOCK
DO NOT OPEN
CAUTION : TO REDUCE THE RISK OF
ELECTRIC SHOCK, DO NOT
REMOVE COVER (OR BACK).
NO USER-SERVICEABLE PARTS INSIDE.
REFER SERVICING TO QUALIFIED
SERVICE PERSONNEL.
This symbol is intended to alert the user to the
presence of uninsulated "dangerous voltage"
within the product's enclosure that may be of
sufficient magnitude to constitute a risk of
electric shock to persons.
This symbol is intended to alert the user to the
presence of important operating and
maintenance (servicing) instructions in the
literature accompanying the appliance.
WARNING
To reduce the risk of fire or electric shock, do not expose
this appliance to rain or moisture.
2
Downloaded From Disc-Player.com Sherwood Manuals
CLASS1
LASER PRODUCT
CAUTION
Invisible laser radiation when the unit is open. Do not stare
into beam.
CAUTION : USE OF ANY CONTROLS, ADJUSTMENTS, OR
PROCEDURES OTHER THAN THOSE SPECIFIED HEREIN
MAY RESULT IN HAZARDOUS RADIATION EXPOSURE.
FOR U.S.A.
FCC INFORMATION
This equipment has been tested and found to
comply with the limits for a Class B digital device,
pursuant to Part 15 of the FCC Rules. These limits
are designed to provide reasonable protection
against harmful interference in a residential
installation. This equipment generates, uses and can
radiate radio frequency energy and, if not installed
and used in accordance with the instructions, may
cause harmful interference to radio communications.
However, there is no guarantee that interference will
not occur in a particular installation. If this equipment
does cause harmful interference to radio or
television reception, which can be determined by
turning the equipment off and on, the user is
encouraged to try to correct the interference by one
or more of the following measures:
• Reorient or relocate the receiving antenna.
• Increase the separation between the equipment and
receiver.
• Connect the equipment into an outlet on a circuit
different from that to which the receiver is connected.
• Consult the dealer or an experienced radio/TV
technician for help.
CAUTION : Any changes or modifications in
construction of this device which are not expressly
approved by the party responsible for compliance
could void the user's authority to operate the
equipment.
FOR U.S.A. AND CANADA ......................................120 V
FOR OTHER COUNTRIES ........................... 115 V/230 V
FOR YOUR SAFETY
FOR YOUR SAFETY
Units shipped to the U.S.A. and Canada are designed
for operation on 120 V AC only.
Units shipped to countries other than the above
countries are equipped with an AC voltage selector
switch on the rear panel. Refer to the following
paragraph for the proper setting of this switch.
Safety precaution with use of a polarized AC plug.
However, some products may be supplied with a
nonpolarized plug.
AC VOLTAGE SELECTION
This unit operates on 115-230 V AC. The AC voltage
selector switch on the rear panel is set to the voltage
that prevails in the area to which the unit is shipped.
Before connecting the power cord to your AC outlet,
make sure that the setting position of this switch
matches your line voltage. If not, it must be set to
your voltage in accordance with the following
direction.
CAUTION : To prevent electric shock, match wide
blade of plug to wide slot, fully insert.
ATTENTION : Pour eviter les choc electriques,
introduire la lame la plug large de la borne
correspondante de la prise et poussre jusqu'au
fond.
AC voltage selector switch
FOR EUROPE AND AUSTRALIA ..........230 V/240 V
FOR YOUR SAFETY
Units shipped to Australia are designed for operation
on 240 V AC only.
To ensure safe operation, the three-pin plug supplied
must be inserted only into a standard three-pin
power point which is effectively earthed through the
normal household wiring. Extension cords used with
the equipment must be three-core and be correctly
wired to provide connection to earth.
Improper extension cords are a major cause of
fatalities. The fact that the equipment operates
satisfactorily does not imply that the power point is
earthed and that the installation is completely safe.
For your safety, if in any doubt about the effective
earthing of the power point, consult a qualified
electrician.
Move switch lever to match your line voltage with a
small screwdriver or other pointed tool.
PAN-EUROPEAN UNIFIED VOLTAGE
All units are suitable for use on supplies 230-240 V
AC.
3
Downloaded From Disc-Player.com Sherwood Manuals
ENGLISH
READ THIS BEFORE OPERATING
ENGLISH
CONTENTS
Introduction
UNPACKING AND INSTALLATION ....................................................................................................... 2
READ THIS BEFORE OPERATING YOUR UNIT.................................................................................. 3
Rear Panel Connections ................................................................................................................................ 5
Front Panel & Remote Controls .................................................................................................................. 6
Before Operation ........................................................................................................................................... 10
Operations
PLAYING CDs........................................................................................................................................... 11
CHANGING DISCS DURING PLAY....................................................................................................... 12
SKIP AND SEARCH PLAY...................................................................................................................... 12
PLAYING TRACKS IN RANDOM SEQUENCE (RANDOM PLAY) ................................................... 13
PLAYING THE FIRST 10 SECONDS OF EACH TRACK (INTROSCAN PLAY)
(ONLY FOR CDC-5090R)......................................................................................................................... 13
REPEAT PLAY.......................................................................................................................................... 14
PLAYING TRACKS IN ANY SEQUENCE (PROGRAMMED PLAY) ................................................. 15
EDITING FOR RECORDING ................................................................................................................... 18
SELECTING A BRIGHTNESS OF THE DISPLAY (ONLY FOR CDC-5090R) ................................... 20
DELETED PLAY....................................................................................................................................... 21
SELECTING A TIME DISPLAY .............................................................................................................. 23
USING THE HEADPHONES.................................................................................................................... 23
Troubleshooting Guide ................................................................................................................................ 24
Specifications .................................................................................................................................................. 25
4
Downloaded From Disc-Player.com Sherwood Manuals
• Do not plug the AC input cord into the AC outlet when plugging and unplugging connection cords.
• Be sure to connect the white plugs to the L(Left) and the red plugs to the R(Right) jacks when making
connections with the supplied cords.
• Refer to the connecting diagram in the operating instructions of AMPLIFIER/RECEIVER.
OUTPUT JACKS
Connect these jacks to the CD(or AUX) input jacks of your amplifier or receiver.
DIGI LINK JACKS
Connect this jack to the DIGI LINK jack of Sherwood amplifier or receiver bearing the DIGI LINK III or II
mark to control this unit remotely by DIGI LINK system.
AC INPUT CORD
Plug this cord into a wall AC outlet or the switched AC outlet of amplifier or receiver.
OPTICAL DIGITAL OUTPUT
• Connect this jack to the OPTICAL DIGITAL INPUT jack of amplifier or receiver to enjoy live digital sound.
• You can record digital sound by connecting the OPTICAL DIGITAL INPUT jack of MD recorder to this jack.
• All of the commercially-available optical fiber cords cannot be used for audio equipment.
If there is an optical fiber cord which cannot be connected to your audio equipments, consult your dealer or
nearest service organization.
5
Downloaded From Disc-Player.com Sherwood Manuals
ENGLISH
Rear Panel Connections
ENGLISH
Front Panel & Remote Controls
FRONT PANEL CONTROLS
REMOTE CONTROLS (ONLY FOR CDC-5090R)
6
Downloaded From Disc-Player.com Sherwood Manuals
DISC SKIP BUTTON
For loading or unloading discs, press this button to
rotate clockwise to the next disc position.
DISC TRAY
Press this button to display the elapsed or remaining
playing time of the current track or remaining playing
time of the disc.
DISC SELECTOR BUTTONS
Use these buttons to select the disc to be played.
TIME BUTTON
Load a compact disc on the disc tray.
OPEN/CLOSE BUTTON(
)
Press this button to open or close the disc tray.
PLAY/PAUSE BUTTON (
PROGRAM/REVIEW BUTTON
Press this button to program your favorite tracks, disc
or review the programmed selections.
/ )
Press this button to start play in the stop or pause mode.
Press this button to interrupt play temporarily and
press again to restart play.
STOP/CLEAR BUTTON (
EDIT BUTTON
Press this button to edit the tracks to be recorded onto
the tape.
)
Press this button to stop play, clear the programmed
selections or recover the deleted selections.
BACKWARD SKIP/SEARCH BUTTON(
TAPE SIZE BUTTON
Use this button to select the tape length.
)
DELETE/REVIEW BUTTON
Press this button to replay from the beginning of the
current track or return to a previous track.
Press and hold down this button search for a
specific passage in fast backward.
FORWARD SKIP/SEARCH BUTTON(
Press this button to delete the undesired tracks, discs or
review the deleted selections.
INTROSCAN BUTTON
Press this button to play the first 10 seconds of each
track on CDs.
)
Press this button to play from the beginning of a
next track.
Press and hold down this button to search for a
specific passage in fast forward.
HEADPHONE JACK
Stereo headphones can be plugged into this jack for
private listening.
RANDOM PLAY BUTTON
REMOTE SENSOR (ONLY FOR CDC-5090R)
Press this button to play tracks on CDs in random
sequence.
This receives the signals from the remote control.
REPEAT 1/ALL BUTTON
When selecting a disc with this button, press this first
and then the desired disc number(1~5) on the numeric
buttons within 2 seconds.
DISC BUTTON
Press this button to play a track, a disc or all discs
repeatedly.
REPEAT A<->B BUTTON
DISPLAY BUTTON
Press this button to play a specific passage repeatedly.
Press this button to change the brightness of the display.
NUMERIC BUTTONS
FLUORESCENT DISPLAY
Press the corresponding button when selecting tracks or
discs for play, programming or deleting, then the
selected is played, programmed or deleted directly
without the use of the PLAY, PROGRAM/REVIEW or
DELETE/REVIEW button.
• When selecting a two digit number, the second digit
should be pressed within 2 seconds after the first digit
has been pressed.
For details, refer to the next page.
7
Downloaded From Disc-Player.com Sherwood Manuals
ENGLISH
POWER SWITCH
Press this switch to turn the power on and press again
to turn the power off.
For system operation, plug the AC input cord into the
switched AC outlet on amplifier or receiver, keep the
POWER switch ON and control power ON/OFF with
the power operation on the amplifier or receiver.
ENGLISH
FLUORESCENT DISPLAY
TRACK No. and TIME DISPLAY
DISC No. DISPLAY
MUSIC CALENDAR DISPLAY
PLAY INDICATOR
PAUSE INDICATOR
REPEAT INDICATOR
REPEAT A< >B INDICATOR
INTROSCAN INDICATOR
RANDOM PLAY INDICATOR
PROGRAM INDICATOR
DELETE INDICATOR
EDIT DISPLAY
INDICATORS FOR REPEAT, INTRO
SCAN AND RANDOM PLAY MODE
DIGI LINK SYSTEM REMOTE CONTROL
This unit can be remotely controlled with Sherwood DIGI LINK III amplifier or receiver.
• For available functions, refer to the operating instructions of the Sherwood compatible amplifier or receiver.
• To listen to CDs by DIGI LINK system, first make DIGI LINK connection between this unit and the Sherwood
compatible amplifier or receiver.
8
Downloaded From Disc-Player.com Sherwood Manuals
ENGLISH
REMOTE CONTROL OPERATION RANGE (ONLY FOR CDC-5090R)
• Use the remote control unit within a range of about
7 meters (23 feet) and angles of up to 30 degrees
aiming at the remote sensor.
LOADING BATTERIES (ONLY FOR CDC-5090R)
1
Remove the cover.
2
Load two batteries(“AAA” size) matching
the polarity.
• Remove the batteries when they are not used for a
long time.
• Do not use the rechargeable batteries(Ni-Cd type).
9
Downloaded From Disc-Player.com Sherwood Manuals
Before Operation
Notes
• Do not expose discs to direct sunlight, high humidity or
high temperature for a long time.
• When loading or unloading a disc in the disc tray, always
place it with the printed side up.
ENGLISH
• Only compact discs bearing this mark can be reproduced.
• In handling a disc, hold it carefully with the edges.
• Do not stick paper or write anything on the printed
surface.
• The DTS logo on the front means that the CD encoded
with the DTS signal can be heard in DTS mode when this
digital out is connected to the digital input of the amplifier
with the DTS decoder, etc..
• Fingermarks and dust on the recorded surface should be
carefully wiped off with soft cloth.
Wipe straight from the inside to the outside of the disc.
• “DTS” and “DTS Digital Surround” are trademarks of
Digital Theater Systems, Inc.
• Always keep the discs in their cases after use to protect
them from dust and scratches.
10
Downloaded From Disc-Player.com Sherwood Manuals
Operations
Load the disc(s) and close the disc tray.
Turn the power on.
1
2
" " indicator lights up when the number of tracks is
more than 14.
For loading discs on other trays each, press the DISC
SKIP button.
8cm(3 inches) CDs can be loaded on the inside circle
of the tray, too.
Note
Do not open or close the tray by force.
Doing so may damage it.
Each time the POWER switch is pressed, this unit is
turned on or off.
Start play.
To interrupt play temporarily.
3
4
“ ” indicator lights up.
The unit plays from the first track on the 1st disc to
the last track on the 5th disc.
“ ” indicator lights up.
Press this button again to restart play.
To stop play.
5
11
Downloaded From Disc-Player.com Sherwood Manuals
ENGLISH
PLAYING CDs
ENGLISH
CHANGING DISCS DURING
Change the desired discs.
Open the disc tray.
1
2
During playing the disc , the discs
and can
be changed.
After changing the discs, press the OPEN/CLOSE
button to close the disc tray.
When changing the disc or , press the “DISC
SKIP” button and rotate the disc tray.
SKIP AND SEARCH PLAY
Selecting a disc
Searching for a passage during play
Press the corresponding button to start play from the
desired disc.
Example) When selecting the disc 4.
Press and hold down these buttons until the desired
passage is reached.
The first track of selected disc will be played.
Selecting a track during play
Press the button momentarily and repeatedly until
the desired track is selected.
When using the NUMERIC buttons on the remote
control.
Example) When selecting “9” :
When selecting “22” :
12
Downloaded From Disc-Player.com Sherwood Manuals
1 disc random play
ENGLISH
PLAYING TRACKS IN RANDOM SEQUENCE
All discs random play
In the 1 disc random play mode, press “RANDOM”
button again.
The unit automatically selects a disc among five
discs and a track on that disc in random sequence
and plays it.
After that track has been played, the unit continues
to select another disc and a track on that disc in
random sequence and plays it.
Press again to cancel the random play.
“RANDOM” indicator lights up.
The unit automatically selects and plays tracks on
the current disc in random sequence.
Each time this button is pressed, the random play
mode changes as follows:
RANDOM 1 DISC
RANDOM ALL DISCS
OFF
PLAYING THE FIRST 10 SECONDS OF EACH TRACK (INTROSCAN PLAY)
1 disc introscan play
“INTRO” indicator lights up.
The unit plays the first 10 seconds of each track from the
current disc to the 5th disc.
Each time this button is pressed, the introscan play mode
changes as follows:
INTRO 1 DISC
INTRO ALL DISCS
All discs introscan play
In the 1 disc introscan play mode, press “INTRO” button again.
The unit plays the first 10 seconds of each first track from the current disc to the last disc.
Press again to cancel the introscan play.
13
Downloaded From Disc-Player.com Sherwood Manuals
OFF
ENGLISH
REPEAT PLAY
Repeating a single track during play
Press this button after selecting the desired track.
Each time this button is pressed, the repeat mode changes as
follows:
REPEAT 1
REPEAT 1 DISC
REPEAT ALL DISCS
Repeating a disc during play
Repeating all discs during play
After selecting the desired disc, press again in the 1
track repeat mode.
Press again in the 1disc repeat mode.
OFF
Press again to cancel the repeat play.
Repeating a specific passage during
2
play(Only for CDC-5090R)
1
At the end of the desired passage, press
this button again, then “B” indicator lights
up and the desired passage is played
repeatedly.
At the beginning of the desired passage,
press this button.
“REPEAT” indicator lights up and “A< >” indicator
is flickering.
Press again to cancel the repeat play.
14
Downloaded From Disc-Player.com Sherwood Manuals
ENGLISH
PLAYING TRACKS IN ANY SEQUENCE
Up to 32 selections can be programmed to play in any desired sequence.
The track number greater than 99 can not be memorized.
Programming the tracks on the CDs
2
In the stop mode, enter the program mode.
Select the desired disc.
Example) When selecting the disc 1.
1
If the PROGRAM/REVIEW button is pressed
without selecting a track, the selected disc is
programmed as a selection.
3
Select the desired track.
Example) When selecting the track 4.
Store the selected track in the memory.
4
Because it is impossible to know the playing time of
each selection from five discs, “--:--” can appear on
the time display.
When selecting a track with the NUMERIC buttons,
the selected track is stored automatically without
pressing the PROGRAM/REVIEW button.
15
Downloaded From Disc-Player.com Sherwood Manuals
ENGLISH
Repeat the above steps 2, 3 and 4 until the desired program is completed.
5
Start the programmed play.
6
During the programmed play, when you want normal
play without clearing your programmed selections,
select the desired disc with the DISC SELECTOR or
DISC SKIP button or the desired track on the current
disc with the NUMERIC buttons, then normal play
will start from that disc or that track.
To return to the program mode(meaning “PROG”
lights up in the stop mode), press the
PROGRAM/REVIEW button in the stop mode.
Checking the programmed selections
Each time the PROGRAM/REVIEW button is
pressed in the program mode (meaning “PROG”
lights up in the sop mode), the programmed
selections will appear in the programmed sequence.
Select the disc 3.
Rectifying any wrong programmed
selection
2
Example) When the track 3, 5 and 7 of the disc 1
are programmed and you want to store
the track 7 of the disc 3 instead of the
track 5 of the disc 1.
Find the track 5 of the disc 1.
1
16
Downloaded From Disc-Player.com Sherwood Manuals
Select the track 7.
ENGLISH
3
Store the selected track in the memory.
4
When selecting a track with the NUMERIC buttons,
the selected track is stored automatically without the
PROGRAM/REVIEW button.
Clearing the programmed selections
To clear one by one
Each time this button is pressed in the program
mode, the programmed selections are cleared one by
one in the opposite sequence.
To clear all programmed selections
Press this button for more than 4 seconds in the
program mode.
To clear a specific selection
Find the desired selection and clear it in the program mode.
17
Downloaded From Disc-Player.com Sherwood Manuals
Opening the disc tray clears all programmed
selections, too.
ENGLISH
EDITING FOR RECORDING
Up to 30 tracks for auto edit or 32 tracks for manual edit can be edited according to the tape length.
It is possible only on the current disc.
Making auto edit
1
In the stop mode, select the auto edit
mode.
Each time this button is pressed, the edit mode changes
as follows:
AUTO EDIT
(MANUAL) EDIT
OFF
In the edit mode, the auto space function, leaving a 4
second blank space between the tracks, is automatically
activated for the automatic music search function on the
Sherwood DIGI-LINK III cassette deck.
2
Select the desired tape length.
Example) When the tape length is 46
minutes.
DISPLAY
T.SIZE
DISC
1
2
3
4
5
6
7
8
9
0
SKIP
SEARCH
or
EDIT T.SIZE
T.SIZE
TIME
PROG/REV. DEL/REV.
REPEAT
1/ALL A<->B RANDOM INTRO
You can select the tape length at your option with the
NUMERIC buttons on the remote control.
Example) When the tape length of each side is 23
minutes.
REMOTE CONTROL UNIT RM-CDC80
Each time this button is pressed, the tape length
changes as follows:
C-46
3
C-54
C-60
C-74
C-90
C120
Press the EDIT button to automatically edit the
tracks to be recorded.
18
Downloaded From Disc-Player.com Sherwood Manuals
1
3
2
In the stop mode, select the manual edit
mode.
Press the PROGRAM/REVIEW button to
manually edit the tracks to be recorded.
4
Select the tape length as you do in
“Making auto edit” procedure.
Edit the tracks for the side A repeating
steps 3 and 4 in “PLAYING TRACKS IN
ANY SEQUENCE (PROGRAMMED
PLAY)” procedure on page 15.
Notes
During manual edit, if the "-" indicator in the time
display disappears and “ ” flickers, it means that
the total time of the edited tracks exceeds the tape
length. So you should edit again.
When a track with a number greater than 30 is
edited, the time display may show "- -- : --".
5
Press the EDIT button to start editing for
the side B.
6
Do the above step 4 to edit the tracks for
the side B.
If the PLAY button is pressed after editing the
tracks, play starts from the first track of the side A
for recording.
If all tracks of the side A have been played, press the
PLAY button to start play from the first track of the
side B for recording.
When this unit is connected to Sherwood compatible
cassette deck controlled remotely by DIGI-LINK III
system, if using the CD synchro record function on
the cassette deck, recording a CD is easier. (Refer to
the operating instructions of the cassette deck).
19
Downloaded From Disc-Player.com Sherwood Manuals
ENGLISH
Making manual edit
ENGLISH
Checking the edited tracks
In the edit mode, check as you do the programmed tracks.
(refer to “Checking the programmed selections” on page 16)
Clearing all edited tracks
In the edit mode, press the STOP/CLEAR button for more than 4 seconds or open the tray.
In the manual edit mode only, you can clear or rectify the edited tracks as you do in “Rectifying any wrong
programmed selection” or “Cleaning the programmed selections” on page 16 and 17.
SELECTING A BRIGHTNESS OF THE DISPLAY (ONLY
Each time this button is pressed, the brightness of the
display changes as follows;
ON
DIM
OFF
In the display OFF mode, pressing any button will
restore the display ON mode.
20
Downloaded From Disc-Player.com Sherwood Manuals
When there are the undesired discs or tracks, you can delete up to 32 selections.
Deleting the undesired discs or tracks
2
In the stop mode, enter the delete mode.
Select the desired disc.
Example) When selecting the disc 1.
1
If the DELETE/REVIEW button is pressed without
selecting a track, the selected disc is deleted as a
selection.
3
Select the desired track.
Example) When selecting the track 4.
Delete the selected track.
4
When selecting a track with the NUMERIC buttons,
the selected track is deleted automatically without
the DELETE/REVIEW button.
5
When deleting other tracks on that disc
within 8 seconds after the above step 4,
repeat the above steps 3 and 4 and when
deleting the tracks on other discs, repeat
the above steps 2, 3 and 4.
Start the deleted play.
6
21
Downloaded From Disc-Player.com Sherwood Manuals
ENGLISH
DELETED PLAY
ENGLISH
Checking the deleted selections
Each time the DELETE/REVIEW button is pressed
in the delete mode (meaning “DELETE” lights up in
the stop mode), the deleted selections will appear in
the deleted sequence.
Recovering the deleted selections
To recover one by one
Each time this button is pressed in the delete mode,
the deleted selections are recovered one by one in the
opposite sequence.
To recover all deleted selections
Press this button for more than 4 seconds in the
delete mode.
Opening the disc tray recovers all deleted selections,
too.
To recover a specific selection
Find the desired track and recover it in the delete
mode.
22
Downloaded From Disc-Player.com Sherwood Manuals
Each time this button is pressed during play, time display changes as follows:
During random or programmed play, etc., the remaining playing time of the disc may show "- -- : --".
When a track of which number is greater than 30 is programmed, edited or being played, the time display
may show "- -- : --".
USING THE HEADPHONES
For private listening, insert a plug of the headphone into “PHONES” jack.
23
Downloaded From Disc-Player.com Sherwood Manuals
ENGLISH
SELECTING A TIME DISPLAY
ENGLISH
Troubleshooting Guide
If your unit should not perform as expected, consult the table below to see if the problem can be corrected before seeking
help from your dealer or our service organization.
PROBLEM
No power
REMEDY
POSSIBLE CAUSE
The AC input cord is disconnected.
Connect the cord securely.
The POWER switch is not pressed
Press the POWER button to ON.
correctly.
No play
The disc is loaded upside down.
Reload the disc with the printed
Dirty disc.
Clean the disc.
Defective or deeply scratched disc.
Load another disc.
Incorrect connections.
Make connections correctly.
Incorrect operation of the amplifier.
Operate the amplifier correctly.
The " " indicator lights up.
Press the PLAY or PAUSE button
side up.
No sound
to cancel the pause mode.
Poor or distorted sound
The unit is connected to the
Make connections correctly.
PHONO input jacks of the
amplifier.
Check the connections and connect
Poor connections.
all cords securely.
Sound skips
Defective or deeply scratched disc.
Play another disc.
This unit is placed on a surface that
Place this unit on a stable surface.
is subject to vibration or physical
shock.
Programming or deleting
The disc is dirty or badly scratched.
Try again with a scratch-free disc.
does not perform.
The programming or deleting
Try again.
procedure is not correct.
“Error” is displayed.
The number of the programmed
Check the number of the
selections is 32.
programmed selections.
Incorrect operation.
Press the OPEN/CLOSE button to
open and close the disc tray or press
the POWER switch to turn the
power off and on.
24
Downloaded From Disc-Player.com Sherwood Manuals
Specifications
TYPICAL AUDIO PERFORMANCES
Number of channels ................................................................................................................................................................ 2
Frequency response, 20~20,000 Hz ........................................................................................................................... 0.5 dB
Signal to noise ratio, A Wtd. ......................................................................................................................................... 110 dB
Dynamic range ................................................................................................................................................................ 95 dB
Total harmonic distortion, 1 kHz ................................................................................................................................. 0.005 %
Wow and flutter .................................................................................................................................. Quartz crystal precision
Audio output level ..................................................................................................................................................... 2 V RMS
Digital output
Optical, wavelength 660 nm ............................................................................................................................... -15~-20 dBm
OPTICAL READOUT SYSTEM
Laser ................................................................................................................................................... Semiconductor AlGaAs
Wavelength ........................................................................................................................................................... 760~800 nm
Numerical aperture ............................................................................................................................................................ 0.45
SIGNAL FORMAT
Sampling Frequency ................................................................................................................................................... 44.1 kHz
D/A Conversion ......................................................................................................................... 1 bit P.L.M. D/A Conversion
Oversampling ................................................................................................................................................................ 8 times
GENERAL
Power supply ...................................................................................................................................................... 230 V, 50 Hz
Power consumption .......................................................................................................................................................... 15 W
Dimensions (W H D) .................................................................... 440 112 388 mm(17-5/16 4-3/8 15-1/4 inches)
Weight (NET) ................................................................................................................................................ 5.7 kg(12.57 lbs)
Note: Design and specifications are subject to change without notice for improvements.
25
Downloaded From Disc-Player.com Sherwood Manuals
ENGLISH
SYSTEM ................................................................................................................................ Compact Disc Digital Audio
Downloaded From Disc-Player.com Sherwood Manuals