1
MODEL: MX-C250
MX-C300W
DIGITAL FULL COLOR
MULTIFUNCTIONAL SYSTEM
OPERATION GUIDE
INTRODUCTION
This manual describes MX-C250/MX-C300W Digital full color multifunctional system.
Note
• Where "MX-XXXX" appears in this manual, please substitute the name of your model for "XXXX". For the
name of your model, see p.8.
• The screen images and procedures that appear in this manual are mainly for Windows 7. With other versions
of Windows, some screen images may be different from those in this manual.
• For information on using your operating system, refer to your operating system's manual or online Help.
The display screens, messages, and key names shown in the manual may differ from those on the actual machine
due to product improvements and modifications.
2
CONTENTS
INTRODUCTION ................................................ 2
USING THE MANUAL ....................................... 7
● ABOUT THE MANUALS ...................................7
● CONVENTIONS USED IN THIS MANUAL .......7
DIFFERENCES BETWEEN MODELS............... 8
1
2
BEFORE USING THE MACHINE
PART NAMES AND FUNCTIONS ..................... 9
NORMAL COPYING ........................................ 26
● OPERATION PANEL ......................................11
●
●
●
●
●
●
PLACING THE ORIGINAL ............................. 27
MAKING A COPY DARKER OR LIGHTER ... 28
SELECTING THE TRAY ................................ 28
SETTING THE NUMBER OF COPIES .......... 28
SELECTING THE ORIGINAL SIZE ............... 29
USING THE BYPASS TRAY TO COPY A
SPECIAL SIZE ORIGINAL............................. 29
● REDUCING OR ENLARGING A COPY......... 29
● AUTOMATIC DUPLEX COPYING ................. 30
DISPLAY .......................................................... 13
● LEFT MENU AND RIGHT MENU ...................13
● HOW TO USE THE DISPLAY ........................14
POWER ON AND OFF..................................... 15
●
●
●
●
POWER ON ....................................................15
POWER OFF ..................................................15
POWER SAVE MODES..................................15
DEFAULT SETTINGS.....................................15
CONVENIENT COPY FUNCTIONS................. 31
LOADING PAPER............................................ 16
●
●
●
●
COPY FUNCTIONS
● SORT COPY .................................................. 31
● ID CARD COPY ............................................. 32
● RESOLUTION SETTINGS............................. 33
PAPER............................................................16
PRINT SIDE FACE UP OR FACE DOWN ......17
LOADING PAPER...........................................19
TRAY SETTINGS ...........................................22
SPECIAL MODES............................................ 34
● COPYING MULTIPLE ORIGINALS ONTO A
SINGLE SHEET OF PAPER (2 IN 1 / 4 IN 1
COPY)............................................................ 34
● CARD SHOT .................................................. 35
● ADJUSTING RED/GREEN/BLUE IN COPIES
(RGB Adjust) .................................................. 35
● ADJUSTING THE SHARPNESS OF AN IMAGE
(Sharpness) ................................................... 36
● WHITENING FAINT COLORS IN COPIES
(Suppress Background) ................................. 36
USER AUTHENTICATION MODE................... 23
● USING USER AUTHENTICATION MODE .....23
ENTERING CHARACTERS............................. 24
● CHARACTERS THAT CAN BE ENTERED ....24
FREQUENTLY USED SETTINGS (PROGRAMS) .. 37
3
3
4
PRINTER
● PRINTER FUNCTION OF THE MACHINE .....39
TO USE THIS PRODUCT CORRECTLY AS A
FACSIMILE ...................................................... 79
POINTS TO CHECK AND PROGRAM AFTER
INSTALLATION ............................................... 80
PRINTING FROM WINDOWS.......................... 40
● PRINTER DRIVER PROPERTIES WINDOW ....40
● BASIC PRINTING PROCEDURE......................41
● PRINTING WHEN THE USER AUTHENTICATION
FUNCTION IS ENABLED .................................43
● VIEWING PRINTER DRIVER HELP..................44
● SAVING FREQUENTLY USED PRINT SETTINGS........45
● CHANGING THE PRINTER DRIVER DEFAULT
SETTINGS .......................................................47
● FAX MODE (BASE SCREEN) ....................... 81
ORIGINALS ..................................................... 82
● ORIGINALS THAT CAN BE FAXED.............. 82
CONVENIENT DIALING METHODS (AUTODIALING) ......................................................... 83
FAX TRANSMISSION METHODS................... 84
PRINTING FROM A MACINTOSH .................. 48
● ADDRESS REVIEW FUNCTION ................... 84
● BASIC PRINTING PROCEDURE......................48
● PRINTING WHEN THE USER AUTHENTICATION
FUNCTION IS ENABLED .................................51
SENDING A FAX ............................................. 85
● BASIC PROCEDURE FOR SENDING FAXES............85
● TRANSMISSION BY AUTO-DIALING (SPEED
DIALING AND GROUP DIALING) ................. 87
● SEARCHING FOR A PROGRAMMED
DESTINATION (USING THE [ADDRESS]
KEY)............................................................... 87
● FAXING A TWO-SIDED ORIGINAL............... 88
● HOW TO SELECT THE RESOLUTION......... 92
● CHANGING THE EXPOSURE....................... 92
● CANCELING A FAX TRANSMISSION .......... 93
FREQUENTLY USED FUNCTION................... 52
●
●
●
●
●
SELECTING THE COLOR MODE.....................52
SELECTING A PRINT MODE SETTING ...........54
TWO-SIDED PRINTING ...................................55
FITTING THE PRINT IMAGE TO THE PAPER.........56
PRINTING MULTIPLE PAGES ON ONE PAGE ....57
CONVENIENT PRINTING FUNCTIONS.......... 59
● CONVENIENT FUNCTIONS FOR CREATING
PAMPHLETS AND POSTERS ..........................59
● FUNCTIONS TO ADJUST THE SIZE AND
ORIENTATION OF THE IMAGE .......................62
● COLOR MODE ADJUSTMENT FUNCTION ......64
● FUNCTIONS THAT COMBINE TEXT AND
IMAGES.............................................................. 68
● PRINT FUNCTIONS FOR SPECIAL PURPOSES.......71
● CONVENIENT PRINTER FUNCTIONS.............72
RECEIVING FAXES......................................... 95
● RECEIVING A FAX ........................................ 95
● MANUAL FAX RECEPTION .......................... 96
FUNCTION KEY .............................................. 97
● FAX PRINT HOLD FUNCTION...................... 97
● AUTOMATIC TRANSMISSION AT A
SPECIFIED TIME .......................................... 98
● SENDING THE SAME DOCUMENT TO
MULTIPLE DESTINATIONS IN A SINGLE
OPERATION .................................................. 99
● SENDING OPTIONS ................................... 100
● POLLING MEMORY .................................... 101
● STORING, EDITING, AND DELETING AUTODIAL NUMBERS (SPEED DIAL NUMBERS,
AND GROUP DIALS)................................... 103
● STORING, EDITING AND DELETING
PROGRAMS ................................................ 107
PRINTING WITHOUT THE PRINTER DRIVER... 74
●
●
●
●
FAX FUNCTIONS
DIRECTLY PRINTING A FILE IN USB MEMORY .......75
DIRECTLY PRINTING FROM A COMPUTER.............76
CANCELING A PRINT JOB FROM THE MACHINE ......... 76
CHANGE THE MACHINE TO OFFLINE MODE......76
APPENDIX ....................................................... 77
● PRINTER DRIVER SPECIFICATION LIST..............77
PRINTING LISTS OF PROGRAMMED
INFORMATION AND SETTINGS .................. 109
● INCLUDING SENDER INFORMATION ON
FAXES (OWN NUMBER SENDING) ........... 109
● FORWARDING FUNCTION......................... 110
● USING THE FORWARDING FUNCTION .... 111
USING SETTINGS STORED AS A PROGRAM 112
● USING A PROGRAM................................... 112
4
FORWARDING RECEIVED DATA TO A NETWORK
ADDRESS (INBOUND ROUTING SETTINGS) ..... 113
6
● CONFIGURING THE BASIC SETTINGS .....113
● SETTINGS THE DESTINATION...................115
TROUBLESHOOTING................................... 141
SENDING A FAX DIRECTLY FROM A
COMPUTER (PC-Fax) ....................................... 116
CONNECTING AN EXTENSION PHONE ............. 117
●
●
●
●
● CONNECTING AN EXTENSION PHONE ....117
● USING AN EXTENSION PHONE .................118
● INFORMATION APPEARING IN THE TYPE/
NOTE COLUMN ...........................................120
●
●
●
●
●
REPORT AT REGULAR INTERVALS
(COMMUNICATION ACTIVITY REPORT)..............121
WHEN AN ALARM SOUNDS AND A WARNING
MESSAGE IS DISPLAYED .....................................121
● SELF-DIAGNOSTIC FUNCTION..................122
● MESSAGES DURING NORMAL OPERATION ...122
SCANNER FUNCTIONS
7
● THE BASE SCREEN OF SCANNER MODE ... 125
● BASIC TRANSMISSION PROCEDURE.......126
● SELECTING A DESTINATION (USING THE
[ADDRESS] KEY) .........................................128
● TRANSMITTING A TWO-SIDED ORIGINAL ..... 129
● CLEANING THE DOCUMENT GLASS AND
DOCUMENT FEEDER................................. 163
● CLEANING THE ORIGINAL SCANNING
GLASS (ONLY WHEN AN DOCUMENT
FEEDER IS INSTALLED) ............................ 164
● CLEANING THE BYPASS TRAY PAPER FEED
ROLLER....................................................... 164
● CLEANING THE AUTOMATIC DOCUMENT
FEEDER ROLLERS..................................... 164
● CLEANING THE MAIN CHARGER OF THE
PHOTOCONDUCTIVE DRUM..................... 165
● CLEANING THE LASER UNIT .................... 166
STORING SCANNING SETTINGS ................ 130
●
●
●
●
●
●
ROUTINE MAINTENANCE
CHECKING THE TOTAL OUTPUT COUNT AND
TONER REMAINING ...................................... 163
ROUTINE MAINTENANCE............................ 163
SENDING AN IMAGE .................................... 126
●
●
MISFEED IN THE DOCUMENT FEEDER ... 153
MISFEED IN THE BYPASS TRAY .............. 155
MISFEED IN THE MACHINE....................... 156
MISFEED IN THE PAPER TRAY 1.............. 159
MISFEED IN THE PAPER TRAY 2.............. 159
REPLACING THE TONER CARTRIDGE ...... 160
REPLACING THE TONER COLLECTION
CONTAINER .................................................. 161
ABOUT THE SCANNER FUNCTIONS.......... 123
●
●
●
●
NETWORK PROBLEMS.............................. 143
MACHINE/COPYING PROBLEMS .............. 143
PRINTING AND SCANNING PROBLEMS .. 146
FAX PROBLEMS ......................................... 149
INDICATORS AND DISPLAY MESSAGES.... 151
IF YOUR E-MAIL IS RETURNED .................. 152
MISFEED REMOVAL.......................................... 153
WHEN A TRANSACTION REPORT IS PRINTED ..120
5
TROUBLESHOOTING
SETTING THE SCANNING SIZE .................130
SELECTING THE RESOLUTION .................130
SELECTING THE FILE FORMAT.................131
ADJUSTING THE GRAYSCALE OF BLACK &
WHITE MODE...............................................131
ADJUSTING THE SCANNING EXPOSURE .... 132
ENABLING SCANNING MARGINS (VOID
AREA) ...........................................................132
WHITENING FAINT COLORS IN COPIES
(SUPPRESS BACKGROUND) .....................132
ADJUSTING THE SHARPNESS OF AN IMAGE
(SHARPNESS) .............................................132
SCANNING BUSINESS CARDS (BUSINESS
CARD SCAN)................................................133
IMAGE ORIENTATION AND STANDARD
ORIGINAL PLACEMENT ORIENTATION ....133
STORING AND EDITING/DELETING A
PROGRAM ...................................................134
USING STORED SETTINGS (PROGRAM)..134
ADJUSTING THE DISPLAY CONTRAST ........ 167
SCANNING FROM YOUR COMPUTER (PC
SCAN) ............................................................ 135
● SCANNING FROM A TWAIN-COMPLIANT
APPLICATION ..............................................135
USB MEMORY SCAN.................................... 139
● USING THE USB MEMORY SCAN FUNCTION .. 139
5
8
9
SYSTEM SETTINGS
WEB FUNCTIONS IN THE MACHINE
PURPOSE OF THE SYSTEM SETTINGS ...... 168
ABOUT THE WEB PAGES ............................ 190
● PROGRAMS RELATED TO ALL FUNCTIONS
OF THE MACHINE .......................................168
● PROGRAMMING AN ADMINISTRATOR
PASSWORD .................................................168
● HOW TO ACCESS THE WEB PAGE .......... 190
ABOUT THE WEB PAGES (FOR USERS) .... 191
CONFIGURING THE PRINTER CONDITION
SETTINGS...................................................... 192
PROGRAMMING AN ADMINISTRATOR
PASSWORD................................................... 169
SYSTEM SETTINGS LIST .............................. 170
USING THE SYSTEM SETTINGS .................. 175
●
●
●
●
●
●
●
●
●
●
●
●
●
●
● HOW TO CONFIGURE THE SETTINGS..... 192
● PRINTER CONDITION SETTING MENU .... 193
● PRINTER CONDITION SETTINGS ............. 193
CONFIGURING THE SCANNER CONDITION
SETTINGS...................................................... 195
Change Admin Pw ........................................176
Default Settings.............................................176
Network.........................................................176
User Control..................................................178
Device Control ..............................................179
Operation Setting ..........................................179
Energy Save .................................................180
List Print ........................................................181
AutoColorCalib..............................................181
Security Settings ...........................................182
Copier ...........................................................182
Printer ...........................................................183
Fax ................................................................183
Scanner.........................................................189
● STORING DESTINATIONS ......................... 195
● BASIC SETTINGS FOR NETWORK SCAN
(FOR THE ADMINISTRATOR) .................... 201
ABOUT THE WEB PAGES (FOR THE
ADMINISTRATOR)......................................... 202
CONFIGURING SMTP, DNS AND LDAP
SERVER SETTINGS ...................................... 203
PROTECTING INFORMATION PROGRAMMED
IN THE WEB PAGE ([Passwords]) ............... 204
ADMINISTRATOR SETTINGS ....................... 205
● CONFIGURING A SETTING IN THE
ADMINISTRATOR SETTINGS .................... 205
● ADMINISTRATOR SETTINGS .................... 205
E-MAIL STATUS AND E-MAIL ALERT
SETTINGS...................................................... 206
●
●
●
●
INFORMATION SETUP ............................... 206
SMTP SETUP .............................................. 206
STATUS MESSAGE SETUP ....................... 207
ALERTS MESSAGE SETUP ....................... 207
TRADEMARK ACKNOWLEDGMENTS ......... 209
6
USING THE MANUAL
This machine has been designed to provide convenient copying features in a minimum amount of office space and
with maximum operational ease. To get full use of all machine features, be sure to familiarise yourself with this
manual and the machine. For quick reference during machine use, SHARP recommends printing out this manual
and keep it in a handy location.
ABOUT THE MANUALS
The manuals for the machine are as follows:
Start Guide
This manual explains:
• Specifications
• Cautions for using the machine in safety
Operation Guide (on the accessory CD-ROM)
This manual explains:
How to use the machine and what to do if trouble occurs.
Software Setup Guide (on the accessory CD-ROM)
This manual explains:
How to install software to operate the machine from your computer.
CONVENTIONS USED IN THIS MANUAL
The icons in the manuals indicate the following types of information:
Warning
Warns the user that injury may result if the contents of the warning are not properly followed.
Caution
Cautions the user that damage to the machine or one of its components may result if the contents
of the caution are not properly followed.
Note
Notes provide information relevant to the machine regarding specifications, functions,
performance, operation and such, that may be useful to the user.
7
DIFFERENCES BETWEEN MODELS
This manual covers the following models.
Model
Copy Speed
MX-C300W
30CPM
MX-C250
25CPM
Wireless LAN
Yes
No
FAX Function
Yes
No
Document Feeder
2-sided
1-sided
AB series (metric) and inch series references
Both specifications are quoted where applicable.
For example:
Page 4:
8-1/2" x 11" and 5-1/2" x 8-1/2" (A4 and B5)
Start Guide: 50%, 64%, 77%, 95%, 100%, 121%, 129%, 141%, 200% (50%, 70%, 81%, 86%, 100%, 115%, 122%,
141%, 200%)
Although inch series size indications are shown on the operation panel of this manual, AB series indications are
displayed on the AB series machines.
8
1
BEFORE USING THE MACHINE
This chapter contains basic information that should be read before using the machine.
PART NAMES AND FUNCTIONS
(17)
(15)
(16)
(1)
(2)
(3)
(4)
(18)
(8)
(9)
(10)
(11)
(12)
(13)
(5)
(4)
(14)
(19)
(4)
(6)
(7)
(1)
(2)
(3)
(4)
Note
(5)
(6)
(7)
(8)
(9)
(10) Front cover
Open to replace the toner cartridge etc.
(11) Side cover handle
Pull to open the side cover.
(12) Side cover
Open to remove misfed paper.
(13) Bypass tray guides
Adjust to the width of the paper when using the
bypass tray.
(14) Bypass tray
Special paper (heavy paper or transparency film)
can be fed from the bypass tray.
(15) Extension phone socket
The line from an extension phone can be
connected to this socket to use the telephone
function.
(16) Telephone line socket
When the fax function of the machine is used,
the telephone line is connected to this socket.
(17) USB 2.0 port (Type B)
Connect to your computer to this port to use the
printer function.
(18) LAN connector
Connect the LAN cable to this connector when
the machine is used on a network.
(19) Bypass tray extension
Open this tray when loading paper in the bypass
tray.
Document glass
Place an original that you wish to scan face down
here. (p.27)
Power switch
Press to turn the machine power on and off.
Center tray extensions
When you eject the paper of 8-1/2" x 11" size or
more, you can use open to the outside.
Handles
Use to move the machine. When attaching tray
2, use the handle at the bottom.
The main unit is extremely heavy, and thus two
people are required to do the work. When lifting
the main unit, grasp the handles on each side firm
Center tray
Copies and printed pages are output to this tray.
Tray 1
Tray 1 can hold approximately 250 sheets of copy
paper (21 lbs. (80 g/m2)). For restrictions on paper
types, sizes, and weights, refer to "PAPER" (p.16).
Tray 2 (Option)
Tray 2 can hold approximately 500 sheets of copy
paper (21 lbs. (80 g/m2)). For restrictions on paper
types, sizes, and weights, refer to "PAPER" (p.16).
Operation panel
Contains operation keys and indicator lights.
USB 2.0 port (Type A)
This is used to connect a USB device such as
USB memory to the machine.
9
BEFORE USING THE MACHINE
(23)
(24)
(25)
(26)
(27)
(28)
(21)
(30)
(29)
(32)
(20)
(33)
(22)
(31)
(20) Toner cartridge (Y/M/C/Bk)
Contains toner. When the toner runs out in a
cartridge, the cartridge of the color that ran out
must be replaced.
(21) Document feeder tray
Place the original(s) that you wish to scan face
up here.
(22) Toner collection container
This collects excess toner that remains after
printing.
(23) Feeding roller cover
Open to remove misfed originals.
(24) Original guides
Adjust to the size of the originals.
(25) Feeding roller tray
Open to place the originals.
(26) Extension tray
Open this when you scan a long original.
(27) Exit area
Originals exit the machine here after
copying/scanning when the document feeder is
used.
(28) Fusing unit paper guide
Open to remove misfed paper.
(29) Peep Hole
Use the peep hole (see the illustration at right) to
check the position of the original.
(Models with the one-sided scanning function only)
Note
(30) Fusing unit release levers
Push down these levers to release the pressure
when removing misfed paper from inside the
fusing area or when feeding an envelope from
the bypass tray.
Warning
• The fusing unit is hot. Do not touch
the fusing unit when removing
misfed paper. Doing so may cause
a burn or injury.
• When pushing down the levers,
pinch the levers with your thumb
and index finger while pushing
down slowly. If you push the levers
strongly, the levers may hit your
fingers.
(31) Roller rotating knob
Rotate to remove misfed paper.
(32) Paper tray right side cover
Open this to remove a paper misfeed in trays.
(33) Duplex conveyor cover
Open this cover to remove a misfeed.
Do not to block the exhaust slots of the machine by placing something in front of them or setting the machine closely
attached to the wall.
10
BEFORE USING THE MACHINE
OPERATION PANEL
(1) (2)
(3)
(4) (5)
(14)
(1)
(2)
(3)
(4)
(5)
(6)
(7)
(8)
(9)
(6)(7) (8)
(9) (10) (11) (12) (13)
(15)(16)
(10) [EXPOSURE] key
Use to select the exposure mode. (p.28)
(11) [ENERGY SAVE] key / indicator
Press to enter the energy save mode.
(12) [BACK] key
Press to return the display to the previous
screen.
(13) [SPECIAL FUNCTION] key
Press to select special functions.
(14) [C] key
Press to clear the set number of copies or stop a
copy run.
(15) [ADDRESS] key
Used to search for address, numbers and other
contact information stored for auto dialing. (p.87)
(16) [DUPLEX] key
Select the duplex copy/fax/scan mode.
Display
Shows various messages. (p.13, 81, 125)
[FAX] key / indicator
Press to select fax mode.
[PROGRAM 1 / PROGRAM 2] key
Press to use the scanner settings already stored.
(p.134)
[SCAN] key / indicator
Press to select scan mode.
[ZOOM] key
Press to select a reduction or enlargement copy
ratio. (p.29)
[COPY] key / indicator
Press to select copy mode.
[ID CARD COPY] key
Enable ID Card Copy.
Arrow keys
Press to move the highlighting (which indicates
that an item is selected) in the display.
[OK] key
Press to enter the selected setting.
11
BEFORE USING THE MACHINE
(17) (18) (19)
(24)
(20)
(21)
(25)
(22)
(26) (27) (28) (29)
(23)
(30)
(25) Numeric keys
Enter characters/numbers.
(26) [READ-END] key
When copying in sort mode from the document
glass, press this key when you have finished
scanning the original pages and are ready to
start copying.
(27) [CA] key
Clears all selected settings and returns the
machine to the default settings. (p.15)
(28) [STOP] key
Press this key to stop a copy job or scanning of
an original.
(29) FAX mode indicators
• LINE indicator
Lights up when a fax is being sent or received.
• DATA indicator
Blinks when a fax cannot be printed because
there is no paper or otherwise. Lights steadily
when there is an unsent fax.
(30) Printer mode indicators
• ONLINE indicator
Print data can be received when this lamp is lit.
• DATA indicator
Blinks when print data is being received. Lights
steadily during printing.
(17) [COMM. SETTING] key
This is used to switch between memory
transmission and direct transmission, and to
switch between automatic reception and manual
reception. (p.89)
(18) [SPEED] key
This is used to dial by Speed dialing. (p.83)
(19) [FAX STATUS] key
This is used to cancel a fax transmission or a
stored fax transmission. (p.93)
(20) [SPEAKER] key
This is used to dial without lifting an extension
phone connected to the machine. (p.83)
(21) [REDIAL/PAUSE] key
This is used to redial the last number dialed, and
enter a pause when entering a fax number.
(p.83, p.85)
(22) [COLOR START] key / indicator
Press this key to copy or scan an original in color.
This key cannot be used for fax.
(23) [BLACK & WHITE START] key / indicator
Press this key to copy or scan an original in black and
white. This key is also used to send a fax in fax mode.
(24) [LOGOUT] key
Press this key to log out after you have logged in
and used the machine. When using the fax
function, this key can also be pressed to send
tone signals on a pulse dial line.
Note
12
The content of the operation panel varies by
model.
BEFORE USING THE MACHINE
DISPLAY
This section explains how to use the display.
LEFT MENU AND RIGHT MENU
The display on the machine has a right menu containing frequently used settings and a left menu for display of the
settings and setting screens of each function.
Left Menu
Right Menu
Left Menu (Example: Copy mode)
(1)
(2)
(3)
(6)
(4)
(5)
(1)
(2)
(3)
Message display
Messages are displayed regarding machine
status and operation.
Special function icon display
Icons of enabled special functions will appear.
(4)
(5)
1-sided to 2-sided copy
2-sided to 2-sided copy
(Models with the two-sided scanning function only)
(6)
2-sided to 1-sided copy
(Models with the two-sided scanning function only)
Sort function
\
RGB Adjust
Suppress BG
2 in 1 copy
4 in 1 copy
Card shot
ID card copy
Sharpness
13
Paper size display
Displays the selected paper size.
Exposure display
Indicates the selected exposure mode.
Copy ratio display
Displays the copy ratio for reduction or
enlargement.
Original size display
When the original size is specified in "Original
Size" in the right menu, this shows the specified
size.
The following icons appear when the original is
placed.
None: Document Glass
:
Automatic document feeder (one-sided
scanning).
:
Automatic document feeder (two-sided
scanning)
(Models with the two-sided scanning
function)
BEFORE USING THE MACHINE
Right Menu
(7)
(7)
Connection status display
(Models with the wireless LAN function only)
Displayed when wireless LAN is on.
(8)
Wireless infrastructure mode:
Connecting
Wireless infrastructure mode:
Not connected
Wired + wireless access point mode:
With handset connected
Wired + wireless access point mode:
Without handset connected
(9)
Connection failure of wireless LAN
device inside machine
(8)
Number of copies display
Shows the number of copies set.
Function display
Shows the basic functions of each mode.
(9)
HOW TO USE THE DISPLAY
Selecting an item with the direction keys (up/down)
Use the up/down direction keys (indicated in this manual by [ ] [ ]) to move to and select (highlight) a setting item
in the selection screen. Press the [OK] key to display the screen of the selected setting item. Press [OK] in the
setting screen to save your settings.
The [ ] [ ] icons appear in the selection screen of settings that use the
up/down direction keys.
Selecting an item with the direction keys (left/right)
The left/right direction keys (indicated in this manual by [ ] [
setting screens. Press the [OK] key to save your settings.
The [
][
]) are used to set the exposure and numbers in
] icons appear in setting screens that use the left/right direction keys.
Use the [BACK] key to return to the previous setting screen.
14
BEFORE USING THE MACHINE
POWER ON AND OFF
The power switch is located on the left side of the machine.
POWER ON
POWER OFF
Turn the power switch to the "ON"
position.
Make sure that the machine is not in
operation and then turn the power switch
to the "OFF" position.
While the machine is warming
up, the message "Warming
Up" will appear in the
message display.
Note
If the power switch is turned off while the machine is in
operation, a misfeed may occur and the job that was in
progress will be canceled.
• The machine reverts to the initial settings when it is first turned on, when the [CA] key is pressed, or when no
keys are pressed for the preset "Auto clear" time following the end of a copy job. When the machine reverts to
the initial settings, all settings and functions selected to that point are canceled. The "Auto clear" time can be
changed in the system settings. (p.179)
• The machine is initially set to automatically enter power save mode if not used for copying or printing, for a
preset period of time. This setting can be changed in the system settings. (p.180)
• Before using fax mode, read the following sections and then turn on the power.
"TO USE THIS PRODUCT CORRECTLY AS A FACSIMILE" (p.79)
"POINTS TO CHECK AND PROGRAM AFTER INSTALLATION" (p.80)
POWER SAVE MODES
The machine has two power save modes to reduce overall power consumption thereby reducing the cost of
operation. In addition, these modes conserve natural resources and help reduce environmental pollution. The two
power save modes are "Preheat mode" and "Auto power shut-off mode".
Preheat mode
This function automatically switches the machine to a low power consumption state if the duration of time set in the
system settings elapses without the machine being used when the power is on. In preheat mode the display turns
off. Normal operation automatically resumes when a key on the operation panel is pressed, an original is placed, or
a print job or fax is received.
Auto power shut-off mode
This function automatically switches the machine to a state that consumes even less power than preheat mode if the
duration of time set in the system settings elapses without the machine being used when the power is on. During auto
power shut-off, only the [ENERGY SAVE] indicator blinks. To restore the machine to normal operation, press the
[ENERGY SAVE] key. Normal operation also resumes automatically when a print job or fax is received or scanning is
begun from a computer. While auto power shut-off is in effect, pressing a key other than the [ENERGY SAVE] key will
have no effect.
Note
The preheat activation time and the "Auto power shut-off timer" can be changed using system settings.
DEFAULT SETTINGS
The machine is set at the factory to return all settings to the default
settings one minute after a copy job is finished (auto clear function) or
when the [CA] key is pressed. When the settings return to the default
settings, any functions that were selected are canceled.
The auto clear time can be changed in the system settings. (p.179)
In the default state the display shown below appears. The default state of
the display may vary depending on settings in the system settings.
15
BEFORE USING THE MACHINE
LOADING PAPER
The message "TRAY< >:Add paper." will be displayed when there is no copy paper in the selected paper tray.
(< > is the tray number.) Load paper in the indicated paper tray.
PAPER
For best results, use only SHARP recommended paper.
Paper tray type
Tray 1
Tray 2 (Option)
Bypass tray
Paper type
Size
Weight
Capacity*1
Plain paper
Recycled paper
Color
Letter head
Pre-printed
Pre-punched
8-1/2" x 11",
5-1/2" x 8-1/2",
7-1/4" x 10-1/2",
A4, B5, A5, 16K
16 lbs. to 28 lbs.
250 sheets
(60 g/m2 to 105 g/m2)
500 sheets
Plain paper
Recycled paper
Color
Letter head
Pre-printed
Pre-punched
8-1/2" x 11",
5-1/2" x 8-1/2",
7-1/4" x 10-1/2",
8-1/2" x 14",
8-1/2" x 13-1/2",
8-1/2" x 13-2/5",
8-1/2" x 13",
A4, B5, A5, A6, 16K
13 lbs. to 28 lbs.
50 sheets
(55 g/m2 to 105 g/m2)
Labels
Transparency film
1 sheet
28 lbs. to 80 lbs.
(106 g/m2 to 220 g/m2)
10 sheets
Heavy paper
20 sheets
Glossy Paper
1 sheet
Envelopes*2
International DL
(110 mm x 220 mm)
International C5
(162 mm x 229 mm)
Monarch
(98 mm x 191 mm)
Commercial 10
(105 mm x 241 mm)
Custom
Horizontal: 5-1/2" to 14"
(140 to 356 mm)
Vertical:
3-5/8" to 8-1/2"
(90 to 216 mm)
10 sheets
*1 The number of sheets of the paper which can be set changes with the weight of a paper. The paper must not be
higher than the indicator line.
*2 When feeding an envelope, push down the fusing unit release levers to release the pressure. "Loading the
bypass tray" (p.20)
PLAIN PAPER, SPECIAL MEDIA
Plain paper that can be used
• SHARP standard plain paper (21 lbs. (80 g/m2)). For paper specifications, see the specifications in the Start
Guide.
• Plain paper other than SHARP standard paper (16 lbs. to 28 lbs. (60 g/m2 to 105 g/m2))
Recycled paper, colored paper and pre-punched paper must meet the same specifications as plain paper. Contact
your dealer or nearest SHARP Service Department for advice on using these types of paper.
* The "lbs." (g/m2) units used in these explanations indicate the weight of the paper.
16
BEFORE USING THE MACHINE
PRINT SIDE FACE UP OR FACE DOWN
Paper is loaded with the print side face up or face down depending on the paper type and tray.
The loading orientation of punched paper, letterhead paper, and pre-printed paper differs from that of other paper.
For details, see "Example: Placement orientations of punched paper, letter head paper, and pre-printed paper" (p.17).
Trays 1 to 2
Load the paper with the print side face up.
However, if the paper type is "Pre-Punched", "Letter Head" or "Pre-Printed", load the paper with the print side face down.
Bypass tray
Load the paper with the print side face down.
However, if the paper type is "Pre-Punched", "Letter Head" or "Pre-Printed", load the paper with the print side face up.
Example: Placement orientations of punched paper, letter head paper, and pre-printed paper
Original glass
A
A
Document feeder tray
Pre-punched (Left binding)
Letter head
Pre-printed
ABC
Tray 1 to 2
A
-1-
CBA
A
A
-1-
Load the paper print side
down with the punch holes to
the front and the top edge to
the right.
Load the paper print side
down with the letter head (top
edge) to the right.
Load the paper print side
(pre-printed side) down with
the top edge to the right.
Bypass tray
A
-1-
A
ABC
ABC
A
-1-
Load the paper print side up
with the punch holes to the
front and the top edge to the
left.
Load the paper print side up
Load the paper print side
with the letter head (top edge) (pre-printed side) up with the
to the left.
top edge to the left.
17
BEFORE USING THE MACHINE
Paper that cannot be used
•
•
•
•
•
Irregularly shaped paper
Stapled paper
Damp paper
Curled paper
Paper on which either the print side or the reverse
side has been printed on by another printer or
multifunction device.
• Paper with a wave-like pattern due to moisture
absorption
• Special media for inkjet printers (fine paper, glossy
paper, glossy film, etc.)
• Carbon paper or thermal paper
• Pasted paper
• Paper with clips
• Paper with fold marks
• Torn paper
• Oil-feed transparency film
• Thin paper less than 13 lbs. (55 g/m2)
• Paper that is 80 lbs. index (220 g/m2) or heavier
Non-recommended paper
• Iron-on transfer paper
• Japanese paper
Note
• Perforated paper
• Various types of plain paper and special media are sold. Some types cannot be used with the machine. Contact
your dealer or nearest SHARP Service Department for advice on using these types of paper.
• The image quality and toner fusibility of paper may change due to ambient conditions, operating conditions, and
paper characteristics, resulting in image quality inferior to that of SHARP standard paper. Contact your dealer or
nearest SHARP Service Department for advice on using these types of paper.
• The use of non-recommended or prohibited paper may result in skewed feeding, misfeeds, poor toner fusing
(the toner does not adhere to the paper well and can be rubbed off), or machine failure.
• The use of non-recommended paper may result in misfeeds or poor image quality. Before using
non-recommended paper, check if printing can be performed properly.
Paper that can be used for automatic 2-sided printing
Paper used for automatic duplex printing must meet the following conditions.
Paper type:
Plain paper (special paper cannot be used.)
Paper size:
Standard sizes (8-1/2" x 14", 8-1/2" x 13", 8-1/2" x 11", A4, B5, A5, 16K)
Paper weight: 16 lbs. to 28 lbs. (60 g/m2 to 105 g/m2)
Special papers
Follow these guidelines when using special papers.
• Use SHARP recommended transparency film and label sheets. Using other than SHARP recommended paper
may result in misfeeds or smudges on the output. If other than SHARP recommended media must be used, feed
each sheet one at a time using the bypass tray (do not attempt continuous copying or printing).
• There are many varieties of special paper available on the market, and some cannot be used with this machine.
Before using special paper, contact your SHARP Service Department.
• Before using other than SHARP recommended paper, make a test copy to see if the paper is suitable.
18
BEFORE USING THE MACHINE
LOADING PAPER
Make sure that the machine is not copying or printing, and then follow these steps to load paper.
Loading the paper tray
1
Gently lift and pull out the paper tray until it stops.
2
Push the pressure plate down, and adjust the plates in the tray to the length and width
of the paper.
(2)
(2)
(2)
Plate B
3
(1) Push the center of the pressure plate down until it locks into place.
(2) The plate A and B are slide-type guides. Grasp the locking knob on the
guide and slide the guides until the width that the paper can be loaded
properly.
(1)
Plate A
Load paper into the tray.
Line on
the guide
Roller
Protrusion
4
• Open the package of the paper and load it without fanning the paper.
• Make sure the stack of paper is straight before loading it.
• After loading the paper, close the guides to the paper width not to leave the
gap from the guides.
Note
• Do not load paper higher than the line on the guide (up to 250 sheets).
• Do not add paper to the loaded paper. It may cause multiple feed of
paper.
• The loaded paper should not go higher than the protrusion of the plate A.
Gently push the paper tray into the machine.
Push the tray in completely.
Note
• If you loaded a different size of paper than was loaded previously in
the tray, go to "CHANGING THE PAPER SIZE SETTING OF A TRAY"
(p.22).
• When misfeed occurs, rotate the paper 180 degrees and reload it.
• Straighten curled paper before using it.
19
BEFORE USING THE MACHINE
Loading the bypass tray
To feed an envelope, first press down the fixing unit
release levers (2 places) to release the pressure,
and then follow the steps below.
1
Unfold the bypass tray.
Open out the bypass tray extension.
2
Push the center of the pressure plate down until it locks into place.
3
Set the paper guides to the copy paper width.
4
Insert the paper (print face down) all the way into the bypass tray.
To prevent a misfeed, verify once more that the paper guides are adjusted to
the width of the paper.
Warning
Note
After feeding an envelope, be sure to press up and return the fixing unit release levers
(2 places) to their original positions.
If you loaded paper in the bypass tray, press the [SPECIAL FUNCTION] key and select "Paper Select" to select
the bypass tray.
20
BEFORE USING THE MACHINE
Important points when inserting paper in the bypass tray
• Up to 50 sheets of standard copy paper can be set in the bypass tray.
• Be sure to place 5-1/2" x 8-1/2" or A6, B6 size paper or envelopes horizontally as shown in the following diagram.
(When using the printer: Same as the direction for the 8-1/2" x 11" size paper, etc)
Available
Not
available
• When loading envelopes, make sure that they are straight and flat and do not have loosely glued construction flaps
(not the closure flap).
• Special papers except SHARP recommended transparency film, labels, and envelopes must be fed one sheet at a
time through the bypass tray.
• When adding paper, first remove any paper remaining in the tray, combine it with the paper to be added and then
reload as a single stack. The paper to be added must be the same size and type as the paper already in the tray.
• Use SHARP-recommended transparency film.
• Do not use paper that is smaller than the original. This may cause smudges or unclean images.
• Do not use paper that has already been printed on by a laser printer or plain paper fax machine. This may cause
smudges or unclean images.
Important points when using envelopes
Envelopes that cannot be used
Do not use the following envelopes. Envelopes misfeed, and smudges may result.
• Envelopes with an incorrectly aligned corner gluing
• Envelopes with metal clasps, plastic hooks, or ribbon
position on the back cannot be used as creasing
hooks
may result.
• Envelopes closed with string
• Envelopes with windows or backing
• Envelopes with an uneven front surface due to
embossing
• Double-layer envelopes
• Envelopes with an adhesive for sealing
Can be used
• Hand-made envelopes
• Envelopes with air inside
• Envelopes with creases, fold marks, torn or
Cannot be
damaged envelopes
used
Print quality on envelopes
• Print quality is not guaranteed in the area 13/32" (10 mm) around the edges of the envelope.
• Print quality is not guaranteed on parts of envelopes where there is a large step-like change of thickness, such as
on four-layer parts or parts less than three layers.
• Print quality is not guaranteed on envelopes with adhesive for sealing.
21
BEFORE USING THE MACHINE
Inserting transparency film
• Use SHARP-recommended transparency film.
• Do not touch the print side of transparency film.
• When loading multiple sheets of transparency film in the bypass tray, be sure to fan the sheets several times before
loading.
• When printing on transparency film, be sure to remove each sheet as it exits the machine. Allowing sheets to stack
in the output tray may result in curling.
TRAY SETTINGS
These programs are used to change the paper size setting of a tray, and auto tray switching.
CHANGING THE PAPER SIZE SETTING OF A TRAY
If the size of the loaded paper is different from the size shown in the display, follow the steps below to change the
paper size setting of the tray.
The paper size setting cannot be changed during copying, printing, fax printing (when the fax option is installed),
or when a misfeed has occurred. However, if the machine is out of paper or out of toner, the paper size setting can
be changed during copying, printing, and fax printing.
See "PAPER" (p.16) for information on the specifications for the types and sizes of paper that can be loaded in the
paper trays.
Press the [SPECIAL FUNCTION] key, and press the [ ] or [ ] key to select "Paper Size Set".
Press the [ ] or [ ] key to select the paper tray for which the paper size is
being changed. Press the [ ] key to select the paper size.
Press the [OK] key.
Note
: Shows tray "1".
: Shows tray "2".
: Shows Bypass tray.
For the paper trays and tray numbers, see "PAPER" (p.16).
DISABLING (ENABLING) AUTO TRAY SWITCHING
When auto tray switching is enabled and paper runs out during copying or printing, the job will continue using paper
from a different tray if that tray has the same size of paper in the same type. (This function does not operate when
using the bypass tray or when a fax is being printed.)
This function has been enabled at the factory. If you prefer to disable the function, follow the steps below.
Press the [SPECIAL FUNCTION] key, select "Paper Size", and press the [ ] key repeatedly until "Auto Tray
Switching" appears.
To re-enable auto tray switching, press the [OK] key that a checkmark
appears.
22
BEFORE USING THE MACHINE
CHANGING THE PAPER TYPE OF A TRAY
To change the paper type setting for a tray, follow the steps below.
Press the [SPECIAL FUNCTION] key, select "Paper Type", select the tray with the [
[OK] key. Select the desired paper type and press the [OK] key.
] or [
] key, and press the
See "PAPER" (p.16) for information on the specifications for the types and sizes of paper that can be loaded in the
paper trays.
USER AUTHENTICATION MODE
When user authentication mode is enabled, a count is kept of the pages printed by each account. The page counts
can be viewed in the display. Users that can transmit faxes (up to 30) can be established and transmission time and
other information can be tracked for each account. The Acc. Usage List (p.181) can be printed out which shows the
time used for transmission and pages transmitted by each account.
This function is enabled in the system settings. ("User Registration" (p.178))
Up to 30 can be stored.
USING USER AUTHENTICATION MODE
When user authentication mode is turned on, the account number entry screen is displayed. Enter your account
number (five-digit identification number) as explained below before performing a copy, fax, or scan operation.
1
Enter your account number (five digits) with the numeric keys.
As the account number is entered, the hyphens (-) change to asterisks ( ). If you enter an incorrect digit, press
[C] key and re-enter the correct digit.
2
When the copy job is finished, press the [LOGOUT] key (
Note
).
• When a valid account number is entered, the current count of
the account will appear in the message display of the base
screen. After 6 seconds
(factory default setting), the base screen appears. (p.15)
* In copy mode, the number of sheets remaining until the limit is
reached is also shown if "Function Limit Setting" (p.178) is
enabled in the system settings.
• If you enter an user number for copy mode has also been programmed for fax mode, you can change to fax
mode after completing the copy operation and continue with the fax operation without re-entering your user
number. If you enter an user number for copy mode that has not been programmed for fax mode, enter your
user number for fax mode after you press the [FAX] key to change to fax mode.
• If an invalid account number is entered in step 1, the account number entry screen reappears.
• When "A Warning when Login Fails" (p.178) in the system settings is enabled, a warning message will appear
and operation will not be permitted for 1 minute if an invalid account number is entered 3 times in a row.
23
BEFORE USING THE MACHINE
ENTERING CHARACTERS
This section explains how to enter and edit characters for names of rapid dial numbers, Speed Dial numbers, and
group keys, as well as account names, program names, and search characters for the address list.
CHARACTERS THAT CAN BE ENTERED
Characters that can be entered for names
The following characters can be entered:
• Up to 36 characters can be entered for a name.
However, up to 18 characters can be entered for a account name or sender's name.
• Upper case alphabet, lower case alphabet, numbers, special characters, symbols.
Characters that can be used for search characters
The following characters can be used:
• Up to 10 characters can be entered for search characters.
• Upper case alphabet, lower case alphabet, numbers, special characters.
Note
•
•
•
•
Search characters are normally the first 10 characters of the name entered for a destination.
Search characters are used when storing and using auto dial keys and numbers.
When a destination name includes a symbol, the symbol cannot be stored as a search character.
Search characters can be edited.
24
BEFORE USING THE MACHINE
Characters are entered by pressing the numeric keys on the operation panel. The letters entered with each numeric
key are shown below.
Characters that can be entered
Characters that can be entered for
Key
names
Characters that can be used for
search characters
1
1 Space -
1 Space -
2
ABC2abc
ABC2abc
3
DEF3def
DEF3def
4
GHI4ghi
GHI4ghi
5
JKL5jkl
JKL5jkl
6
MNO6mno
MNO6mno
7
PQRS7pqrs
PQRS7pqrs
8
TUV8tuv
TUV8tuv
9
WXYZ9wxyz
WXYZ9wxyz
*}{][?>=;:,+)('&%$"!/_-.@#
0
Note
0
0
Use to enter special characters.
Use to enter special characters.
To enter two characters in succession that require the same key, press the [ ] key to move the cursor after
entering the first character.
Example: Entering "ab" (when directly entering an e-mail address)
Press the [2] key once, press the [ ] key once to move the cursor, and then press the [2] key twice.
25
2
COPY FUNCTIONS
This chapter explains how to use the copy functions.
NORMAL COPYING
This section explains how to make a regular copy.
If "User authentication" has been enabled (p.178), enter your 5-digit account number.
1
Make sure that the operation panel shows the copy screen.
If the machine is not in copy mode, press the [COPY] key.
2
Place the original on the document glass or in the automatic document feeder.
To place the original, see "Place the original on the document glass." (p.27)" or "Place the original in the
automatic document feeder." (p.27).
To specify the original size, see "SELECTING THE ORIGINAL SIZE" (p.29).
3
Set copy settings for each function as needed.
For the functions and settings, see "MAKING A COPY DARKER OR LIGHTER" (p.28) to page "WHITENING
FAINT COLORS IN COPIES (Suppress Background)" (p.36).
4
5
Enter the number of copies with the numeric keys.
To make a color copy, press the [COLOR START] key. To make a black & white copy,
press the [BLACK & WHITE START] key.
Note
• About one minute after copying ends, "Auto Clear" (p.179) activates and restores the copy settings to the
default settings. The setting for "Auto clear" can be changed in the system settings.
• When selecting settings for copying, press the [CA] key if you need to cancel the settings.
• To stop copying in the middle of a run, press the [STOP] key. If you find it difficult to remove the original from
the document feeder tray, open the feeding roller cover before removing the original. If you pull out the original
without opening the feeding roller cover, the original may become dirty.
26
COPY FUNCTIONS
PLACING THE ORIGINAL
Place the original on the document glass.
Models with the one-sided scanning function
Set the originals face up in the document feeder tray.
Use the peep hole (see
Peep hole
the illustration at right) to
check the position of the
original.
There is an original top
edge mark in the peep
hole. Align the top edge of
the original with this mark.
Open the document feeder
and place the original face
down on the document glass.
5-1/2" x 8-1/2" (A5)
8-1/2" x 11" (A4)
Originals that can be used in the document feeder
Originals that are 5-1/2" x 8-1/2" to 8-1/2" x 14" (A5
to A4) and 15 lbs. to 24 lbs. (50 g/m2 to 105 g/m2)
can be used. A maximum of 50 pages can be
placed at once.
• Models with the two-sided scanning function
A maximum of 50 page can be placed at once
• Models with the one-sided scanning function
A maximum of 35 page can be placed at once
Align the upper left-hand corner of the original with
the tip of the mark.
* An original up to 8-1/2" x 11" (A4) can be placed
on the document glass.
Copying books or originals with folds or
creases
Press down on the document feeder while copying
as shown. If the document feeder is not completely
closed, shadows may appear on the copy or it may
be fuzzy. Straighten originals with folds or creases
well before placing.
Note
Note
• Close the automatic document feeder
slowly. Abruptly closing the automatic
document feeder may damage it.
• Take care that your fingers are not
pinched when closing the automatic
document feeder.
• Do not press hard on the automatic
document feeder. This may cause failure.
Originals that cannot be used in the
document feeder
The following originals cannot be used. These may
cause misfeeds or smudging and unclear images.
• Transparencies, tracing paper, other transparent or
translucent paper, and photographs.
• Carbon paper, thermal paper.
• Originals that are creased, folded, or torn.
• Glued originals, cut-out originals.
• Original with filing holes other than 2 holes, 3 holes,
4 holes, or 4-hole wide.
• Originals printed using an ink ribbon (thermal
transfer printing), originals on thermal transfer paper.
Place the original in the automatic document feeder.
Open the extension tray in
the original exit, and open
the original feeder tray.
Original Guides
• Make sure that there are no paper clips or
staples on the original.
• Straighten curled originals before placing
them in the document feeder tray. Curled
original may cause misfeeds.
• When you set multiple sheets of thick
original, if the original is not fed, reduce
the number of the set originals.
Adjust the original guides
to the size of the
original(s).
Set the original(s) face up
in the feeding roller tray.
27
COPY FUNCTIONS
Note
• Specify the original size after placing the original. (p.29)
• Do not place originals of different sizes together in the document feeder tray. This may cause misfeeds.
• The following icons appear when the original is placed.
None: Document Glass
: Automatic document feeder (one-sided scanning).
: Automatic document feeder (two-sided scanning) (Models with the two-sided scanning function)
MAKING A COPY DARKER OR LIGHTER
Press the [EXPOSURE] key on the operation panel to display the copy exposure screen.
The copy exposure can be adjusted as needed to the original.
Three exposure modes are available: "Text", "Text/Print Photo" and "Photo".
Depending on the settings, set "Auto" or one of five levels for the exposure.
Select the original type with the [ ][ ]keys, adjust the exposure if needed with the [
[OK] key.
][
] keys, and press the
SELECTING THE TRAY
When you want to use the paper in the bypass tray, or tray 2 is installed and you want to change the tray that is
used, select "Paper" in the right menu of the base screen of copy mode and press the [OK] key.
The tray changes each time you press the [OK] key.
SETTING THE NUMBER OF COPIES
Press the numeric keys to set the number of copies.
The set number of copies appears in the display. A maximum of 999 copies (factory default setting) can be set.
Note
• If you enter the wrong number, press the [C] key and enter the correct number.
• The limit for the number of copies can be changed in the system settings. (p.183)
28
COPY FUNCTIONS
SELECTING THE ORIGINAL SIZE
When you want to change the original size, select "Original Size" on the right menu and press the [OK] key.
Select Inch or AB with the [ ][ ] keys, and select the size with the [
Press the [OK] key. You will return to the base copy screen.
][
] keys.
USING THE BYPASS TRAY TO COPY A SPECIAL SIZE
ORIGINAL
Select "Original Size" in the right menu of the base screen of copy mode and press the [OK] key.
Select "Size Input" in the original size selection screen and press the [OK] key to display the size entry (inch)
screen.
Select "X" (width) with the [ ] or [ ] key and enter the width with the [
length (Y), and press the [OK] key.
] or [
] key, then do the same for the
REDUCING OR ENLARGING A COPY
Place the original, and press the [ZOOM] key on the operation panel to change to the ratio selection screen.
Specifying a ratio from 25% to 400%: Preset ratios/zoom.
(When the document feeder is being used, the zoom copy ratio range is 25% to 200%.)
Select the ratio with the [ ][ ] keys. You can fine adjust with the [ ][ ] keys (increments of 1%).
Press the [OK] key to enter the ratio.
29
COPY FUNCTIONS
AUTOMATIC DUPLEX COPYING
Two originals placed on the document glass can be copied onto each side of a single sheet of paper. In addition, a
document feeder (Models with the two-sided scanning function) can be used to copy two originals onto one sheet of
paper, or one duplex original onto two sheets of paper, or one duplex original onto each side of one sheet of paper.
This function is convenient for making copies for identification purposes and helps save paper.
Original → Paper
Usable paper
One-sided original → Two sides
Document
glass
8-1/2" x 11", 5-1/2" x 8-1/2"
(A4, B5, A5)
One-sided original → Two sides
Document
feeder
(Models with
the one-sided
scanning
function)
Document
feeder
(Models with
the two-sided
scanning
function)
One-sided original
→ Two sides
Duplex original
→ Two sides
Duplex original
→ One side
8-1/2" x 14", 8-1/2" x 13-1/2",
8-1/2" x 13-2/5", 8-1/2" x 13",
8-1/2" x 11", 5-1/2" x 8-1/2"
(A4, B5, A5)
To change to the 2-sided copy screen, press the [DUPLEX] key on the operation panel with the base screen of copy
mode displayed.
Note
There are restrictions on the paper that can be used for automatic duplex copying. See "Paper that can be used
for automatic 2-sided printing" (p.18).
Select "1 to 2", "2 to 2", or "2 to 1" with the [ ][ ] keys and press the [OK] key.
When scanning the original on the document glass, press the [START] key after scanning the front side, turn the original
over on the glass, and press the [COLOR START] key or [BLACK & WHITE START] key. Duplex copying starts.
To change the orientation of the copy image on the front and back sides of the paper, set "Binding Change" to "On"
with the [ ][ ] keys.
Normal automatic
duplex copying
If the orientation of
duplex copying is
changed
1
portrait original
2
1
2
Orientation of the
placed original
The top and bottom of The top and bottom of
the images on the front the images on the front
and back are reversed. and back are the same.
30
COPY FUNCTIONS
CONVENIENT COPY FUNCTIONS
This section explains major convenient copy functions.
SORT COPY
● Copies of multiple original pages can be sorted into sets. (Sort)
● Copies of multiple original pages can be grouped by page. (No Sort)
Sort
No Sort
When the document glass is used, "No Sort" is automatically selected. When the automatic document feeder is
used, "Sort" is automatically selected.
To change the sort setting manually, select "Sort" in the right menu of the base screen of copy mode and press the
[OK] key.
Select "No Sort" or "Sort" with the [ ] [ ] keys and press the [OK] key.
Note
• If the memory becomes full while the originals are being scanned, "Memory is full." will appear in the display.
To start copying the originals that have been scanned to that point, press the [COLOR START] key or [BLACK &
WHITE START]. To cancel the copy job, press the [CA] key.
• The auto select setting for the sort function of the automatic document feeder can be changed in "Sort Auto
Select" in the system settings (p.183).
31
COPY FUNCTIONS
ID CARD COPY
You can copy the front and back sides of ID card onto a page through this function.
The layout of the ID card copy, set the "ID Card Setting" of SYSTEM SETTINGS (p.182).
Original
Copies
Front
Back
Set Horizontally
• Set Horizontally
• Set Vertically
Set Vertically
Copies in the horizontal orientation (fixed position), regardless of the paper size.
Copies in the vertical orientation (fixed position), regardless of the paper size.
Press the [ID CARD COPY] key on the operation panel.
Place the ID card at the ID card mark on the document glass, and press the [COLOR START] key or [BLACK &
WHITE START] key.
Turn the ID card over and press the [COLOR START] key or [BLACK & WHITE START] key.
Note
• The ID card copy function cannot be used at the same time as the 2-sided copy, 2in1/4in1 copy, sort copy,
and card shot functions.
• Paper sizes that can be used with ID Card Copy are standard sizes.
• In ID card copy mode, scan area and scan number (1 page) cannot be changed. Scan area is:
X: 86 + 5 mm (1/4") (margin), Y: 54 + 5mm (1/4") (margin).
• Auto tray switch is invalid in ID card copy mode.
Please select paper and tray manually.
32
COPY FUNCTIONS
RESOLUTION SETTINGS
You can adjust the resolution for scanning an original on the document glass or in the auto document feeder, and
select high image quality or high speed as appropriate for your needs.
With the base screen of copy mode displayed, press the [SPECIAL FUNCTION] key, select "Resolution" with the
[ ][ ] keys, and press the [OK] key to display the resolution screen.
1
Select "Document glass" or "Document Feeder" with the [ ] [ ] keys and press the
[OK] key.
2
Select "B/W" or "COLOR" with the [ ][ ] keys, select "600 x 400dpi", "600 x 600dpi"
(Document glass) or "600 x 300dpi", "600 x 600dpi" (Document Feeder) with the
[ ][ ] keys, and press the [OK] key.
33
COPY FUNCTIONS
SPECIAL MODES
To display the special functions menu, press the [SPECIAL FUNCTION] key with the base copy screen displayed,
and press the [ ][ ] keys to select "SPECIAL FUNCTIONS".
COPYING MULTIPLE ORIGINALS ONTO A SINGLE
SHEET OF PAPER (2 IN 1 / 4 IN 1 COPY)
Multiple originals can be copied onto a single sheet of paper in a selected layout pattern.
This function is convenient for compiling multi-page reference materials into a compact format, or for providing an
overview of all pages of a document on a single page.
4 IN 1 COPY
2 IN 1 COPY
Pattern 2
Pattern 1
Pattern 1
Pattern 2
Pattern 3
Pattern 4
Select "2in1/4in1" with the [ ][ ] keys and press the [OK] key. In the 2in1 / 4in1 screen, select "2in1" or "4in1" with
the [ ][ ] keys and press the [OK] key.
Select the layout with the [
][
] keys and press the [OK] key. See above for the layouts that can be selected.
• 2 in 1 / 4 in 1 copy cannot be used in combination with the following functions. The function selected
Note
first will take precedence.
Card shot, ID card copy
• A special paper size cannot be used for 2 in 1 / 4 in 1 copy.
• An appropriate ratio setting will be automatically selected based on the original size, the paper size, and the
selected number of images. When using the document glass, reduction is possible to 25%.
Certain combinations of original size, paper size, and number of images may result in images being cut off.
34
COPY FUNCTIONS
CARD SHOT
When copying a card, this function allows you to print the front and back sides of the card next to each other on a
single sheet of paper.
This function creates 2 in 1 images of the front and back side of the card and centers them on the paper.
Original
Copy
Original
CARD
CARD
CARD
Front of
card
Front of
card
Back of
card
Select Card Shot with the [
•
•
•
•
CARD
Back of
card
][
] keys and press the [OK] key.
Specify the card size in the Card Shot screen.
Select horizontal (X) or vertical (Y) with the [ ][
[OK] key. Repeat for the other dimension.
Note
Copy
] keys, specify the dimension with the [
][
] keys, and press the
The horizontal and vertical dimensions can each be set to value from 1 to 8-1/2".
Paper cannot be fed from the bypass tray.
The card shot function cannot be used in combination with 2 in 1 / 4 in 1 copy, and ID card copy.
The default settings for the horizontal and vertical dimensions in this screen can be set in "Card Shot
Default" (p.182) in the system settings.
ADJUSTING RED/GREEN/BLUE IN COPIES (RGB Adjust)
The feature is used to strengthen or weaken any one of the three color components R (red), G (green), B (blue).
Select "RGB Adjust" with the [ ][ ] keys and press the [OK] key.
Select "R (Red)", "G (Green)", or "B (Blue)" with the [
keys, and press the [OK] key.
][
] keys, adjust the shade of the color with the [
35
][
]
COPY FUNCTIONS
ADJUSTING THE SHARPNESS OF AN IMAGE (Sharpness)
This is used to sharpen an image or make it softer.
Select "Sharpness" with the [ ][ ] keys and press the [OK] key.
Select "Off", "Soft", or "Sharp" with the [
][
] keys and press the [OK] key.
WHITENING FAINT COLORS IN COPIES
(Suppress Background)
This feature is used to suppress light background areas.
Select "Suppress BG" with the [ ][ ] keys and press the [OK] key.
: Only light backgrounds are suppressed.
: Light to dark backgrounds are suppressed.
To select, change the level (3 levels are available) with the [
Note
][
] keys and press the [OK] key.
When Suppress Background is selected, the copy exposure setting is not applied.
"MAKING A COPY DARKER OR LIGHTER" (p.28)
36
COPY FUNCTIONS
FREQUENTLY USED SETTINGS
(PROGRAMS)
A group of copy settings can be stored together as a program. A stored program can be easily invoked.
STORING A PROGRAM
The following copy settings can be stored:
Duplex, Zoom, Exposure, Resolution, Orig. Size Enter, Paper Size, Sort, 2in1/4in1, Card Shot, RGB Adjust,
Sharpness, Suppress BG
With the copy base screen displayed, press the [SPECIAL FUNCTION] key, select "Register Program" with the
[ ][ ] keys, and press the [OK] key. The Register Program screen appears.
To store a new program, select "Enter". To change a stored program, select "Change". To delete a stored program,
select "Delete". Press the [OK] key.
STORING/CHANGING A PROGRAM
1
Select the number of the program you want to store or change with the [ ][ ] keys
and press the [OK] key.
"No Store" appears in locations where a program has not been stored.
"Program 1 - 3" appears in locations where a program is already stored.
2
Use the [ ][ ] keys to select a setting that you want to store in the program from the
list of storable settings, and press the [OK] key.
3
Refer to "RESOLUTION SETTINGS" (p.33) to "WHITENING FAINT COLORS IN COPIES
(Suppress Background)" (p.36) for information on the settings.
A checkmark appears in front of each setting that you have selected. When you have finished selecting
settings, press the [COLOR START] key or [BLACK & WHITE START] key.
Note
• Up to three programs can be stored.
• Some setting combinations are not possible.
(For example, 2in1/4in1 and Card Shot)
37
COPY FUNCTIONS
DELETING A PROGRAM
1
Select the number of the program that you want to delete with the [ ][ ] keys and
press the [OK] key.
2
Select "Delete" with the [ ][ ] keys and press the [OK] key.
The selected program location changes to "No Store".
USING A PROGRAM
Select "Program" in the right menu of the base screen of copy mode and press the [OK] key.
Select the number of the program you want to use with the [ ][ ] keys and press the [OK] key.
The settings in the selected program are applied to the copy job.
38
3
PRINTER
PRINTER FUNCTION OF THE
MACHINE
The machine is equipped standard with a full color printing function. To enable printing from your computer, a printer
driver must be installed.
See the table below to determine which printer driver to use in your environment.
Environment
Printer driver type
Windows
PCL6
The machine supports the Hewlett-Packard PCL6 printer control languages.
Windows /
Macintosh
PS
This printer driver supports the PostScript 3 page description language developed by Adobe
Systems Incorporated, and enables the machine to be used as a PostScript 3 compatible printer.
(A PPD file is available if it is desired to use the Windows standard PS printer driver.)
Installing the printer driver in a Windows environment
To install the printer driver and configure settings in a Windows environment, see in the Software Setup Guide.
Note
The explanations in this manual of printing in a Windows environment generally use the screens of the PCL6
printer driver. The printer driver screens may differ slightly depending on the printer driver that you are using.
Installing the printer driver in a Macintosh environment
To install the printer driver and configure settings in a Macintosh environment, see in the Software Setup Guide.
39
PRINTER
PRINTING FROM WINDOWS
PRINTER DRIVER PROPERTIES WINDOW
(1)
(2)
(1) Select the printer driver of the machine.
• If the printer drivers appear as icons, click the icon of the printer driver to be used.
• If the printer drivers appear as a list, select the name of the printer driver to be used from the list.
(2) Click the [Preferences] button.
Note
The button that is used to open the printer driver properties window (usually [Properties] or [Printing
Preferences]) may vary depending on the software application.
40
PRINTER
BASIC PRINTING PROCEDURE
The following example explains how to print a document from "WordPad", which is a standard accessory program in
Windows.
1
Select [Print] from the [File] menu of
WordPad.
(1) Click the [Paper] tab.
(2) Select the paper size.
2
Open the printer driver properties
window.
(3) Click the [OK] button.
3
Select print settings.
(1)
To select settings on other tabs, click the desired tab
and then select the settings.
Note
(2)
• Make sure the paper size is the same as
the paper size set in the software
application.
• Up to nine custom paper sizes can be
stored. Storing a custom paper size
makes it easy to specify that size each
time you need to use it.
To store a paper size, select [Custom
Paper], one of [User1] to [User7] or [Long
Paper] from the pull-down menu and click
the [Custom] button.
4
Click the [Print] button.
Printing begins.
(3)
SELECTING THE PAPER
This section explains how to configure the "Paper Selection" setting on the [Paper] tab
of the printer driver properties window.
Before printing, check the paper sizes, paper types, and paper remaining in the
machine's trays. To view the most recent tray information, click the [Tray Status] button.
• When [Auto Select] is selected in "Paper Source"
The tray that has the size and type of paper selected in "Paper Size" and "Paper
Type" on the [Paper] tab is automatically selected.
• When other than [Auto Select] is selected in "Paper Source"
The specified tray is used for printing regardless of the "Paper Size" setting.
• When [Bypass Tray] is selected
The "Paper Type" must also be selected. Check the bypass tray and make sure that the desired type of paper is
loaded, and then select the appropriate "Paper Type" setting.
Note
Special media such as envelopes can also be placed in the bypass tray. For the procedure for loading paper and
other media in the bypass tray, see "Loading the bypass tray" (P.20) .
• When [Auto Select] is selected in "Paper Type"
A tray with plain paper of the size specified in "Paper Size" is automatically selected.
• When other than [Auto Select] is selected in "Paper Type"
A tray with the specified type of paper and the size specified in "Paper Size" is used for printing.
41
PRINTER
PRINTING ON ENVELOPES
The bypass tray can be used to print on special media such as envelopes. The procedure for printing on an
envelope from the printer driver properties screen is described below.
For the types of paper that can be used in the bypass tray, see "PAPER" (P.16) in "BEFORE USING THE
MACHINE". For the procedure for loading paper in the bypass tray, see "Loading the bypass tray" (P.20) in
"BEFORE USING THE MACHINE".
Select the envelope size in the appropriate settings of the application ("Page Settings" in many applications) and
then perform the following steps.
(1)
(1) Click the [Paper] tab.
(2) Select the envelope size from the "Paper Size"
menu.
(2)
The paper tray and paper type are automatically
selected.
Note
• It is recommended that you do a test print to check the print result before using an envelope.
• In the case of media that can only be loaded in a certain orientation such as an envelope, you can rotate the
image 180 degrees if needed. For more information, see "ROTATING THE PRINT IMAGE 180 DEGREES
(Rotate 180 degrees)".
• When feeding an envelope, push down the fusing unit release levers (see p.10) to release the pressure.
42
PRINTER
PRINTING WHEN THE USER AUTHENTICATION
FUNCTION IS ENABLED
When the user authentication function is enabled in the machine's system settings (administrator), your user
information (login name, password, etc.) must be entered in the printer driver properties window before you can
print. The information that must be entered varies depending on the authentication method being used, so check
with the administrator of the machine before printing.
1
Open the printer driver properties
window from the print window of the
software application.
2
Enter your user number.
(1)
(3) Enter the user name and job name as
necessary.
• User Name
Click the [User Name] checkbox
and enter
your user name (maximum of 32 characters).
Your entered user name will appear at the top of
the operation panel. If you do not enter a user
name, your computer login name will appear.
• Job Name
Click the [Job Name] checkbox
and enter a
job name (maximum of 80 characters). The
entered job name will appear at the top of the
operation panel as a file name.
If you do not enter a job name, the file name set
in the software application will appear.
(4) Click the [OK] button.
(2)
Note
3
(4)
To have a confirmation window appear
before printing starts, select the [Auto Job
Control Review] checkbox so that a
checkmark
appears.
Start printing.
(3)
(1) Click the [Job Handling] tab.
(2) Enter your user number.
When authentication is by user number. Click the [User
Number] checkbox
and enter a user number
(5 digits).
Note
Note
When [User Authentication] has been
checked on [Printing Policy] in the
[Configuration] tab, you cannot enter the
user number.
Enter the user information in the dialog box
whenever you print.
43
• The machine's user authentication
function cannot be used when the PPD
file* is installed and the Windows standard
PS printer driver is used. For this reason,
printing will not be possible if printing by
invalid users is prohibited in the system
settings (administrator).
• The PPD file enables the machine to print
using the standard PS printer driver of the
operating system.
System Setting(Administrator):Disable
Print by Inv. User
“Disable Print by Inv. User” can be
enabled in the machine’s system settings
(Administrator) to prohibit print jobs of
users whose user information is not
stored in the machine. When this function
is enabled, printing is not allowed when
user information is not entered or
incorrect information is entered.
PRINTER
VIEWING PRINTER DRIVER HELP
When selecting settings in the printer driver, you can display Help to view explanations of the settings.
1
Open the printer driver properties window from the print window of the software
application.
2
Click the [Help] button.
The Help window will open to let you view explanations of the settings on the tab.
To view Help for settings in a dialog box, click the underlined text at the top of the Help window.
Pop-up help
Help can be displayed for a setting by clicking the setting and pressing the [F1] key.
* To view Help for a setting in Windows XP/Server 2003, click the
button in the upper right-hand corner of the
printer driver properties window and then click the setting.
Information icon
Some restrictions exist on the combinations of settings that can be selected in the printer driver properties window.
When a restriction exists on a selected setting, an information icon (
) will appear next to the setting.
Click the icon to view an explanation of the restriction.
44
PRINTER
SAVING FREQUENTLY USED PRINT SETTINGS
Settings configured on each of the tabs at the time of printing can be saved as user settings. Saving frequently used
settings or complex color settings under an assigned name makes it easy to select those settings the next time you
need to use them.
SAVING SETTINGS AT THE TIME OF PRINTING
Settings can be saved from any tab of the printer driver properties window. Settings configured on each tab are
listed at the time of saving, allowing you to check the settings as you save them.
1
2
3
Open the printer driver properties
window from the print window of the
software application.
Check and save the settings.
(1)
(2)
Save the print settings.
(1)
(2)
(1) Configure print settings on each tab.
(2) Click the [Save] button.
(3)
(1) Check the displayed settings.
(2) Enter a name for the settings (maximum
of 20 characters).
(3) Click the [OK] button.
4
5
Note
Click the [OK] button.
Start printing.
• Up to 30 sets of user settings can be saved.
• The following items cannot be saved in user settings.
• A watermark that you created
• Paper insertion settings
• Overlay file
• The user number, user name, and job name entered in the [Job Handling] tab
45
PRINTER
USING SAVED SETTINGS
1
Open the printer driver properties window from the print window of the software
application.
2
Select the print settings.
(1) Select the user settings that you wish to use.
(2) Click the [OK] button.
(1)
3
(2)
Start printing.
Deleting saved settings
Select the user settings that you want to delete in (1) of step 2 above, and click the [Delete] button.
46
PRINTER
CHANGING THE PRINTER DRIVER DEFAULT
SETTINGS
The default settings of the printer driver can be changed using the procedure below. The settings selected using this
procedure are saved and become the default settings when printing from a software application. (Settings selected
in the printer driver properties window when printing from an application remain in effect only while the application is
in use.)
1
Click the [Start] button ( ) and select
[Control Panel] and then [View
devices and printers].
3
Click the [Printing Preferences] button
on the [General] tab.
4
Configure the settings and click the
[OK] button.
• In Windows XP/Server 2003, click the [start]
button and then click [Printers and Faxes].
• In Windows 8/Server 2012, right-click the start
screen (or swipe up from the bottom edge of
the screen), and click [All apps] - [Control
Panel] - [View devices and printers] - [Printer]
on the taskbar.
Note
2
In Windows XP, if [Printers and Faxes] does
not appear in the [start] menu, select
[Control Panel], select [Printers and Other
Hardware], and then select [Printers and
Faxes].
Open the printer properties window.
(1)
(2)
For explanations of the settings, see printer driver
Help.
(1) Click the icon of the printer driver of the
machine.
(2) Select [Printer properties].
Note
In Windows XP/Server 2003, click the [File]
menu.
47
PRINTER
PRINTING FROM A MACINTOSH
BASIC PRINTING PROCEDURE
The following example explains how to print a document from the standard accessory program "TextEdit" in Mac OS X.
Note
To use the machine as a printer for the Macintosh, the machine must be connected to a network.
To install the PPD file and configure printer driver settings, see Software Setup Guide.
SELECTING PAPER SETTINGS
Select paper settings in the printer driver before selecting the print command.
1
2
Select [Page Setup] from the [File]
menu of TextEdit.
Select paper settings.
(1)
(2)
(3)
(1) Make sure that the correct printer is selected.
(2) Select paper settings.
The paper size, paper orientation, and enlarge/reduce
can be selected.
(3) Click the [OK] button.
PRINTING
1
2
Select [Print] from the [File] menu of
TextEdit.
Make sure that the correct printer is
selected.
Note
Note
The menu used to execute printing may vary
depending on the software application.
48
Depending on the OS, the machine name
that appears in the "Printer" menu is
[MX-xxxx]. ("xxxx" is a sequence of
characters that varies depending on the
machine model.)
PRINTER
3
4
Select print settings.
Click
next to [Copies & Pages] and select the
settings that you wish to configure from the
pull-down menu. The corresponding setting
screen will appear.
If the settings do not appear in Mac OS X v10.5,
10.6 and 10.7, click " " next to the printer name.
Click the [Print] button.
Printing begins.
SELECTING THE PAPER
This section explains the [Paper Feed] settings in the print settings window.
• When [Auto Select] is selected
A tray with plain paper or recycled paper (the factory default setting is plain paper only) of the size specified in
"Paper Size" in the page settings window is automatically selected.
• When a paper tray is selected
The specified tray is used for printing regardless of the "Paper Size" setting in the page settings window.
For the bypass tray, a paper type can also be specified. Make sure that the paper type setting for the bypass tray
is correct and that the set type of paper is actually loaded in the bypass tray, and then select the appropriate
bypass tray (paper type).
Note
• Special media such as envelopes can also be placed in the bypass tray. For the procedure for loading paper
and other media in the bypass tray, see "Loading the bypass tray" (P.20) in "BEFORE USING THE MACHINE".
• When "Enable Detected Paper Size in Bypass Tray" (disabled by factory default) or "Enable Selected Paper
Type in Bypass Tray" (enabled by factory default) is enabled in the system settings (administrator), printing will
not take place if the paper size or paper type specified in the printer driver is different from the paper size or
paper type specified in the settings of the bypass tray.
• When a paper type is selected
A tray with the specified type of paper and the size specified in "Paper Size" in the page settings window is used
for printing.
49
PRINTER
PRINTING ON ENVELOPES
The bypass tray can be used to print on special media such as envelopes. The procedure for printing on an
envelope from the printer driver properties screen is described below.
For the types of paper that can be used in the bypass tray, see "PAPER" (P.16). For the procedure for loading paper
in the bypass tray, see "Loading the bypass tray" (P.20).
Select the envelope size in the appropriate settings of the application ("Page Settings" in many applications) and
then perform the following steps.
1
Select the paper size.
Select the envelope size from the "Paper Size" menu on the page setup screen.
Note
2
In the case of media that can only be loaded in a certain orientation such as an envelope, you can rotate the
image 180 degrees if needed. For more information, see "ROTATING THE PRINT IMAGE 180 DEGREES
(Rotate 180 degrees)" (P.62)".
Select the bypass tray.
(1)
(2)
(1) Select [Paper Feed] on the print screen.
(2) Select [Bypass Tray(Envelope)] from the "All pages from" menu.
Set the bypass tray paper type to [Envelope] in the machine’s “Paper Type Setup”, and make sure that an envelope is
loaded in the bypass tray.
Note
It is recommended that you do a test print to check the print result before using an envelope.
50
PRINTER
PRINTING WHEN THE USER AUTHENTICATION
FUNCTION IS ENABLED
When the user authentication function is enabled in the machine's system settings (administrator), you must enter
your user number in order to print.
1
3
Select [Print] from the application's
[File] menu.
Start printing.
(1)
(2)
(3)
(1) Enter your user information.
Note
2
When authentication is by user number
Enter your user number (5 digits) in "User
Number".
The menu used to execute printing may vary
depending on the software application.
(2) Enter the user name and job name as
necessary.
Display the job handling screen.
• User Name
Enter your user name (maximum of 32
characters). Your entered user name will
appear at the top of the operation panel. If you
do not enter a user name, your computer login
name will appear.
• Job Name
Enter a job name (maximum of 30 characters).
The entered job name will appear at the top of
the operation panel as a file name. If you do not
enter a job name, the file name set in the
software application will appear.
(1)
(3) Click the [Print] button.
(2)
(1) Make sure that the machine's printer
name is selected.
(2) Select [Job Handling] and then click the
[Authentication] tab in the screen that
appears.
Note
You can click the
(lock) button after
entering your login name and password, or
user number, to simplify operation the next
time you wish to print based on the same
user authentication.
In Mac OS X v10.4, select [Job Handling].
Note
Note
Depending on the OS, the machine name
that appears in the "Printer" menu is
[MX-xxxx]. ("xxxx" is a sequence of
characters that varies depending on the
machine model.)
"Disable Print by Inv. User" can be enabled in the machine's system settings (Administrator) to prohibit print jobs of
users whose user information is not stored in the machine.
51
PRINTER
FREQUENTLY USED FUNCTION
This section explains frequently used functions.
• "SELECTING THE COLOR MODE" (P.52)
• "TWO-SIDED PRINTING" (P.55)
• "FITTING THE PRINT IMAGE TO THE PAPER"
(P.56)
• "PRINTING MULTIPLE PAGES ON ONE PAGE"
(P.57)
The explanations assume that the paper size and other basic settings have already been selected. For the basic
procedure for printing and the steps for opening the printer driver properties window, see the following section:
• Windows : "BASIC PRINTING PROCEDURE" (P.41)
• Macintosh : "BASIC PRINTING PROCEDURE" (P.48)
In Windows, view printer driver Help for details on printer driver settings for each printing function.
SELECTING THE COLOR MODE
This section explains how to select the color mode in the printer driver properties window. The following three
selections are available for the color mode:
Automatic:
The machine automatically determines whether each page is color or black and white and prints
the page accordingly. Pages with colors other than black and white are printed using
Y (Yellow), M (Magenta), C (Cyan) and Bk (Black) toner. Pages that are only black and white are
printed using Bk (Black) toner only. This is convenient when printing a document that has both
color and black and white pages, however, the printing speed is slower.
Color:
All pages are printed in color. Both color data and black and white data are printed using
Y (Yellow), M (Magenta), C (Cyan) and Bk (Black) toner.
Black and White: All pages are printed in black and white. Color data such as images or materials for a
presentation are printed using black toner only. This mode helps conserve color toner when you
do not need to print in color, such as when proofreading or checking the layout of a document.
When "Color Mode" is set to [Automatic]
Even if the print result is black and white, the following types of print jobs will be counted as 4-color (Y (Yellow),
M (Magenta), C (Cyan), and Bk (Black)) print jobs. To be always counted as a black and white job, select [Black and
White].
• When the data is created as color data.
• When the application treats the data as color data even though the data is black and white.
• When an image is hidden under a black and white image.
.
Windows
(1) Click the [Color] tab.
(2) Select the "Color Mode" that you wish to use.
(1) (2)
52
PRINTER
BLACK AND WHITE PRINTING
[Black and White] can be selected on the [Main] tab as well as on the [Color] tab. Click the [Black and White Print]
checkbox on the [Main] tab so that a checkmark
appears.
The [Black and White Print] checkbox on the [Main] tab and the "Color Mode" setting on the [Color] tab are linked.
When the [Black and White Print] checkbox is selected
on the [Main] tab, [Black and White] is also selected on
the [Color] tab.
Macintosh
(2)
(1) Select [Color].
(2) Select the "Color Mode" that you wish to use.
(1)
53
PRINTER
SELECTING A PRINT MODE SETTING
This section explains the procedure for selecting a print mode setting. The "Print Mode Settings" consist of the
following two items:
Normal:
High Quality:
This mode is suitable for printing data such as regular text or a table.
The print quality of color photos and text is high.
Windows
(1)
(2)
(1) Click the [Advanced] tab.
(2) Select the "Print Mode".
(1)
(1) Select [Color].
(2) Select the "Print Mode".
Macintosh
(2)
54
PRINTER
TWO-SIDED PRINTING
The machine can print on both sides of the paper. This function is useful for many purposes, and is particularly
convenient when you want to create a simple pamphlet. Two-sided printing also helps conserve paper.
Paper
orientation
Print results
Windows
Macintosh
Windows
Macintosh
2-Sided(Book)
Long-edged binding
(Flip on long edge)
2-Sided(Tablet)
Short-edged binding
(Flip on short edge)
Windows
Macintosh
Windows
Macintosh
2-Sided(Book)
Short-edged binding
(Flip on short edge)
2-Sided(Tablet)
Long-edged binding
(Flip on long edge)
Vertical
Horizontal
The pages are printed so that they can be
bound at the side.
Windows
(1)
The pages are printed so that they can be
bound at the top.
Macintosh
(2)
(1)
(1) Configure the settings on the [Main] tab.
(2) Select [2-Sided(Book)] or [2-Sided(Tablet)].
(2)
(1) Select [Layout].
(2) Select [Long-edged binding] or [Short-edged
binding].
55
PRINTER
FITTING THE PRINT IMAGE TO THE PAPER
This function is used to automatically enlarge or reduce the printed image to match the size of the paper loaded in
the machine.
This is convenient for such purposes as enlarging an Invoice or letter size document to Letter or ledger size to make
it easier to view, and to print when the same size of paper as the document image is not loaded in the machine.
Invoice
Letter
The following example explains how to print an Invoice size document on Letter size paper.
Windows
(1)
(3)
(2)
(4)
(1) Click the [Paper] tab.
(2) Select the size of the print image (for example:
Invoice).
(3) Select [Fit To Paper Size].
(4) Select the actual paper size to be used for
printing (for example: Letter).
(2)
(1) Select [Paper Handling].
(2) Check the size of the print image (for example:
Invoice).
Macintosh
(1)
To change the print image size, use the "Paper Size"
menu that appears when [Page Setup] is selected.
(3) Select [Scale to fit paper size].
(4) Select the actual paper size to be used for
printing (for example: Letter).
(3)
(4)
56
PRINTER
PRINTING MULTIPLE PAGES ON ONE PAGE
This function can be used to reduce the print image and print multiple pages on a single sheet of paper.
This is convenient when you want to print multiple images such as photos on a single sheet of paper, and when you
want to conserve paper. This function can also be used in combination with two-sided printing for maximum
conservation of paper.
Using the PCL6 printer driver, you can print only the first page in the original size and print multiple reduced pages
on the subsequent sheets.
For example, when [2-Up] (2 pages per sheet) and [4-Up] (4 pages per sheet) are selected, the following print
results will be obtained, depending on the order selected.
Print results
N-Up
(Pages per
sheet)
Left To Right
Right To Left
Top To Bottom
(When the print
orientation is landscape)
2-Up
(2 pages per
sheet)
N-Up
(Pages per
sheet)
Right, and Down
Down, and Right
Left, and Down
Down, and Left
4-Up
(4 pages per
sheet)
• The page orders for 6-Up, 8-Up, 9-Up, and 16-Up are the same as for 4-Up.
• In a Windows environment, the page order can be viewed in the print image in the printer driver properties window.
In a Macintosh environment, the page orders are displayed as selections.
• In a Macintosh environment, the number of pages that can be printed on a single sheet is 2, 4, 6, 9, or 16.
57
PRINTER
Windows
(1) Configure the settings on the [Main] tab.
(2) Select the number of pages per sheet.
(3) If you wish to print borderlines, click the
[Border] checkbox so that a checkmark
appears.
(4) Select the order of the pages.
(1)
(2) (3)
(4)
Macintosh
(1)
(1)
(2)
(3)
(4)
(2)
(4)
(3)
58
Select [Layout].
Select the number of pages per sheet.
Select the order of the pages.
If you wish to print borderlines, select the
desired type of borderline.
PRINTER
CONVENIENT PRINTING FUNCTIONS
This section explains convenient functions for specific printing objectives.
• "FUNCTIONS THAT COMBINE TEXT AND
IMAGES" (P.68)
• "PRINT FUNCTIONS FOR SPECIAL PURPOSES"
(P.71)
• "CONVENIENT PRINTER FUNCTIONS" (P.72)
• "CONVENIENT FUNCTIONS FOR CREATING
PAMPHLETS AND POSTERS" (P.59)
• "FUNCTIONS TO ADJUST THE SIZE AND
ORIENTATION OF THE IMAGE" (P.62)
• "COLOR MODE ADJUSTMENT FUNCTION" (P.64)
The explanations assume that the paper size and other basic settings have already been selected. For the basic
procedure for printing and the steps for opening the printer driver properties window, see the following section:
• Windows : "BASIC PRINTING PROCEDURE" (P.41)
• Macintosh : "BASIC PRINTING PROCEDURE" (P.48)
In Windows, view printer driver Help for details on printer driver settings for each printing function.
CONVENIENT FUNCTIONS FOR CREATING
PAMPHLETS AND POSTERS
CREATING A PAMPHLET (Pamphlet)
The pamphlet function prints on the front and back of
each sheet of paper so that the sheets can be folded
and bound to create a pamphlet. This is convenient
when you wish to compile printed output into a
pamphlet.
Windows
(1)
(2)
(1) Configure the settings on the [Main] tab.
(2) Select [Pamphlet Style]
(3) Select the "Binding Edge".
(3)
59
PRINTER
Macintosh
(1)
(1) Select [Printer Features].
(2) Select the "Binding Edge".
(3) Select [Tiled Pamphlet] or [2-Up Pamphlet].
(2)
(3)
INCREASING THE MARGIN (Margin Shift)
This function is used to shift the print image to
increase the margin at the left, right, or top of the
paper. This is convenient when you wish to staple or
punch the output but the binding area overlaps the
text.
Windows
(1)
(1) Configure the settings on the [Main] tab.
(2) Select the "Binding Edge".
(3) Select the "Margin Shift".
(2)
Select from the "Margin Shift" menu. If you wish to
configure another numeric setting, select the setting
from the pull-down menu and click the [Settings] button.
Click the
button or directly enter the number.
(3)
Macintosh
(1)
(1) Select the "Printer Features".
(2) Select the "Binding Edge".
(3) Select the "Margin Shift".
(2)
(3)
60
PRINTER
CREATING A LARGE POSTER (Poster Printing)
(This function is only available in Windows.)
One page of print data can be enlarged and printed
using multiple sheets of paper (4 sheets (2 x 2),
9 sheets (3 x 3) or 16 sheets (4 x 4)). The sheets can
then be attached together to create a large poster.
To enable precise alignment of the edges of the sheets
during attachment, borderlines can be printed and
overlapping edges can be created (overlap function).
Windows
(1) Click the [Paper] tab.
(2) Select the [Poster Printing] checkbox
click the [Poster Settings] button.
(3) Select poster settings.
(1)
and
Select the number of sheets of paper to be used from
the pull-down menu. If you wish to print borderlines
and/or use the overlap function, select the
corresponding checkboxes
.
(2)
(3)
61
PRINTER
FUNCTIONS TO ADJUST THE SIZE AND
ORIENTATION OF THE IMAGE
ROTATING THE PRINT IMAGE 180 DEGREES (Rotate 180 degrees)
This feature rotates the image 180 degrees so that it
can be printed correctly on paper that can only be
loaded in one orientation (such as envelopes or paper
with punch holes). (In Mac OS X, a portrait image
cannot be rotated 180 degrees.)
ABCD
ABCD
Windows
(1)
(1) Select the setting on the [Main] tab.
(2) Select the [Rotate 180 degrees] checkbox
(2)
Macintosh
(1) Select [Page Setup] from the [File] menu and
click the
button.
(2) Click the [OK] button.
(1)
(2)
62
.
PRINTER
ENLARGING/REDUCING THE PRINT IMAGE (Zoom/XY-Zoom)
This function is used to enlarge or reduce the image to a selected
percentage.
This allows you to enlarge a small image or add margins to the paper
by slightly reducing an image.
When using the PS printer driver (Windows), you can set the width
and length percentages separately to change the proportions of the
image. (XY-Zoom)
Windows
(1) Click the [Paper] tab.
(2) Select [Zoom] and click the [Settings] button.
(1)
The actual paper size to be used for printing can be
selected from the pull-down menu.
(3) Select the zoom ratio.
Directly enter a number (%) or click the
button to
change the ratio in increments of 1%. You can also
select [Upper Left] or [Center] for the base point on the
paper.
(2)
(3)
REVERSING THE IMAGE (Mirror Image)
(This function is only available in Windows.)
The image can be reversed to create a mirror image.
This function can be used to conveniently print a
design for a woodblock print or other printing medium.
B
B
Windows
(This function can be used when the PS printer driver is used.)
(1)
If you wish to reverse the image horizontally, select
[Horizontal]. If you wish to reverse the image vertically,
select [Vertical].
(2)
(1) Click the [Advanced] tab.
(2) Select a mirror image setting.
63
PRINTER
COLOR MODE ADJUSTMENT FUNCTION
ADJUSTING THE BRIGHTNESS AND CONTRAST OF THE IMAGE (Color
Adjustment)
The brightness and contrast can be adjusted in the print settings when printing a photo or other image. These
settings can be used for simple corrections when you do not have image editing software installed on your
computer.
Windows
Macintosh
(This function can only be used in Mac OS X v10.4.)
(1)
(1)
(2)
(2)
(3)
(3)
(1) Click the [Color] tab.
(2) Click the [Color Adjustment] button.
(3) Adjust the color settings.
To adjust a setting, drag the slide bar
or
button.
or click the
(1) Select [Color].
(2) Click the [Color Adjustment] button.
(3) Select the [Color Adjustment] checkbox
and adjust the color.
Adjust the settings by dragging the slide bars
64
.
PRINTER
PRINTING FAINT TEXT AND LINES IN BLACK
(Text To Black/Vector To Black)
(This function is only available in Windows.)
•
When printing a color image in grayscale, color text
and lines that are faint can be printed in black. (Raster
data such as bitmap images cannot be adjusted.) This
allows you to bring out color text and lines that are faint
and difficult to see when printed in grayscale.
• [Text To Black] can be selected to print all text other
than white text in black.
• [Vector To Black] can be selected to print all vector
graphics other than white lines and areas in black.
ABCD
ABCD
Windows
(1) Click the [Color] tab.
(2) Select the [Text To Black] checkbox
the [Vector To Black] checkbox
.
(1)
(2)
65
and/or
PRINTER
SELECTING COLOR SETTINGS TO MATCH THE IMAGE TYPE (Advanced
Color)
Preset color settings are available in the machine's printer driver for various uses. These enable printing using the
most suitable color settings for the color image type.
Advanced color settings can also be configured to match the objective of the color image, such as color
management settings and the screening setting for adjustment of color tone expression.
Windows
(1)
(1) Click the [Color] tab.
(2) Select the "Image Type".
(2)
A document type to match the data to be printed can be
selected from the pull-down menu.
• Standard (for data that includes text, photos, graphs,
etc.)
• Graphics (for data with many drawings or illustrations)
• Photo (for photo data or data that uses photos)
• CAD (for engineering drawing data)
• Scan (for data scanned by a scanner)
• Colorimetric (Data which needs to be printed in
almost the same colors as those on the screen)
• Custom (for data to be printed with special settings)
(3) Select advanced color settings.
If you wish to select advanced settings, click the
[Advanced Color] button.
If you wish to perform color management using
Windows ICM* in your operating system, select
[Custom] for the image type at step (2) and then select
the [Windows ICM] checkbox
. To configure
advanced color management settings such as "Source
Profile", select the desired settings from the menus.
* Cannot be selected when using the PS printer driver
on Windows 7/Vista/Server 2008/8/Server 2012.
(3)
66
PRINTER
Macintosh
(1)
(4)
(2)
(3)
(1) Select [Color].
(2) Select color print settings.
(4) Select advanced color settings.
If you wish to select detailed settings, click the
[Advanced] tab.
To configure color management settings, select the
desired settings from the menus. To use "CMYK
Simulation", select the [CMYK Simulation] checkbox
and then select the desired setting.
To use the Mac OS Color Management function, select
the [ColorSync] checkbox
. When this is done,
"Image Type" cannot be selected.
(3) Select the Image Type.
An image type to match the data to be printed can be
selected from the pull-down menu.
• Standard (for data that includes text, photos, graphs,
etc.)
• Graphics (for data with many drawings or illustrations)
• Photo (for photo data or data that uses photos)
• CAD (for engineering drawing data)
• Scan (for data scanned by a scanner)
• Colorimetric (Data which needs to be printed in
almost the same colors as those on the screen)
• Custom (for data to be printed with special settings)
[Neutral Gray] can be used when [Custom] is selected.
The following color management settings are available.
(There may be certain settings that cannot be configured depending on your OS and type of printer driver.)
•
•
•
•
Windows ICM checkbox*1:
ColorSync checkbox:
Source Profile:
Rendering Intent:
• Output Profile:
• CMYK Correction*2:
• Screening:
• Neutral Gray:
• Pure Black Print:
• Black Overprint:
• CMYK Simulation:
• Simulation Profile:
Color management method in a Windows environment
Color management method in a Macintosh environment
Selection of the input color profile used for the printed image
Standard value used when converting the color balance of the image displayed on
the computer screen to a color balance that can be printed by the machine.
Selection of the output color profile used for the printed image
When printing a CMYK image, you can correct the image to obtain the optimum
result.
Select the most suitable image processing method for the image being printed.
Select whether gray halftones are printed with single-color black toner or 4-color
CMYK toners.
Select whether black areas are printed with single-color black toner or 4-color
CMYK toners.
Prevents whitening of the outline of black text.
The color can be adjusted to simulate printing using the process colors used by
printing presses.
Selecting a process color.
*1 Cannot be enabled when using a PS printer driver in Windows 7/Vista/Server 2008/8/Server 2012.
*2 Only the SPDL2-c printer driver can be used.
SPDL is an acronym for Sharp Printer Description Language.
67
PRINTER
FUNCTIONS THAT COMBINE TEXT AND IMAGES
ADDING A WATERMARK TO PRINTED PAGES (Watermark)
CO
NF
ID
EN
TI
A
L
Faint shadow-like text can be added to the background
of the printed image as a watermark. The size, color,
density, and angle of the watermark text can be
adjusted. The text can be selected from a pre-stored
list, or entered to create an original watermark.
Windows
(1)
(1) Click the [Watermarks] tab.
(2) Select the watermark settings.
(2)
Select a stored water mark from the pull-down menu.
You can click the [Edit] button to edit the font color and
select other detailed settings.
If you wish to create a new watermark...
Enter the text of the watermark in the "Text" box
and click the [Add] button.
Macintosh
(2)
(1) Select [Watermarks].
(2) Click the [Watermark] checkbox and configure
watermark settings.
(1)
Detailed watermark settings can be configured such as
selection of the text and editing of the font and color.
Adjust the size and angle of the text by dragging the
slide bar
.
68
PRINTER
PRINTING AN IMAGE OVER THE PRINT DATA(Image Stamp)
(This function is only available in Windows.)
A bitmap or JPEG image stored on your computer can
be printed over the print data. The size, position, and
angle of the image can be adjusted. This feature can
be used to "stamp" the print data with a frequently
used image or an icon of your own creation.
MEMO
MEMO
Windows
(1)
(1) Click the [Watermarks] tab.
(2) Select the image stamp setting.
(2)
If an image stamp has already been stored, it can be
selected from the pull-down menu.
If you have not stored an image stamp, click the [Image
File], select the file you wish to use for the image stamp,
and click the [Add] button.
69
PRINTER
CREATING OVERLAYS FOR PRINT DATA (Overlays)
(This function is only available in Windows.)
The print data can be printed in a previously created
overlay. By creating table rulings or a decorative frame
in an application different from that of the text file and
registering the data as an overlay file, an attractive
print result can be easily obtained without the need for
complex manipulations.
XXXX
XXX
XXXX
XXX
XXXX
XXXX
1
10
0
10
100
150
120
250
XXX
XXXX
XXX
XXXX
1
10
0
10
100
150
120
250
Overlay file
Windows
Create an overlay file.
(1)
(1) Click the [Advanced] tab.
(2)
Configure the printer driver settings from the software
application that you wish to use to create the overlay
file.
(2) Click the [Edit] button.
(3) Create an overlay file.
Click the [Create Overlay] button and specify the name
and folder to be used for the overlay file that you wish to
create. The file will be created when the settings are
completed and printing is started.
• When printing is started, a confirmation message
will appear. The overlay file will not be created
until the [Yes] button is clicked.
• To register a previously existing overlay file, click
the [Load Overlay] button.
(3)
Printing with an overlay file
(1)
(1) Click the [Advanced] tab.
(2)
Configure the printer driver settings from the application
from which you wish to print using the overlay file.
(2) Select the overlay file.
A previously created or stored overlay file can be
selected from the pull-down menu.
70
PRINTER
PRINT FUNCTIONS FOR SPECIAL PURPOSES
PRINTING SPECIFIED PAGES ON DIFFERENT PAPER (Different Paper)
• Using this function in a Windows environment
The front cover can be printed on paper that is
different from the other pages. Use this function
when you wish to print the front cover on heavy
paper, or different paper such as colored paper.
• Using this function in a Macintosh environment
The front cover and last page can be printed using
paper that is different from the other pages. This
function can be used, for example, when you want
to print only the front cover and last page on heavy
paper.
1
2
3
4
5
Windows
Macintosh
(1)
(1)
(2) (3)
(2)
(3)
(1) Select [Printer Features].
(2) Select [Different Paper].
(3) Select cover insertion settings.
Select the print setting, paper tray, and paper type for
the cover page and last page.
(1) Click the [Special Modes] tab.
(2) Select [Different Paper] and click the [Settings]
button.
(3) Select paper insertion settings.
Click the [Insert Cover] checkbox (
), and select the
feeding method and printing method for the insert paper
from the respective menus. Select the insertion
position, paper source, and printing method from the
corresponding menus.
When [Bypass Tray] is selected in "Paper Source",
be sure to select the "Paper Type" and load that
type of paper in the bypass tray.
71
PRINTER
CONVENIENT PRINTER FUNCTIONS
SAVING AND USING PRINT FILES (Retention)
This function is used to store a print job as a file on the
machine, allowing the job to be printed from the
operation panel. The location for storing a file can be
selected to prevent the file from being mixed together
with files of other users.
When printing from a computer, a password
(5 to 8 digits) can be set to maintain the secrecy of
information in a stored file.
When a password is set, the password must be
entered to print a stored file from the machine.
• Print data is erased when the power is turned off.
• Print data that exceeds 5 MB cannot be saved.
• A maximum of 5 files can be saved.
Windows
Macintosh
(1)
(2)
(1)
(2)
(1) Click the [Job Handling] tab.
(2) Select the retention setting.
(1) Select [Job Handling].
(2) Select the retention setting.
Click the [Retention] checkbox
. Select the retention
method in "Retention Settings". To enter a password (5
to 8 digit number), click the [Password] checkbox
.
Click the [Retention] checkbox
. To simplify
operation the next time the same password is set, click
the
(lock) button after entering the password (5 to 8
digit number).
72
PRINTER
Printing a job stored by retention
When retention is performed, the display appears as follows:
1
2
Press the [
3
Press the [OK] key.
4
Print or delete the print job with the [
] key to display the list of print hold jobs.
Select the print job with the [
][
] keys.
][
] keys.
Select "Print" to print the job.
Select "Delete" to delete the job without printing it.
Selecting "No Print" returns you to step 1.
5
Press the [OK] key.
The print job is printed or deleted. If a password is set, the job will be printed or deleted after you enter the
password with the numeric keys and press the [OK] key.
73
PRINTER
PRINTING WITHOUT THE PRINTER
DRIVER
When you do not have the printer driver installed on your computer, or when the software application used to open a
file that you wish to print is not available, you can print directly to the machine without using the printer driver.
The file types (and corresponding extensions) that can be printed directly are shown below.
File Type
TIFF
JPEG
PCL
PDF,
Encrypted PDF
PS
Extension
tiff, tif
jpeg, jpg,
jpe, jfif
pcl,prn,txt
pdf
ps
• Even if the print result is black and white, the following types of print jobs will be counted as 4-color (Y (Yellow),
M (Magenta), C (Cyan), and Bk (Black)) print jobs. To be always counted as a black and white job, select black and
white printing.
• When the data is created as color data.
• When the application treats the data as color data even though the data is black and white.
• When an image is hidden under a black and white image.
• The file format of some files may not be printable even if the file is listed in the above table.
• A password-protected PDF file cannot be printed.
74
PRINTER
DIRECTLY PRINTING A FILE IN USB MEMORY
A file in a USB memory device connected to the machine can be printed from the operation panel of the machine
without using the printer driver. When the printer driver of the machine is not installed on your computer, you can
copy a file into a commercially available USB memory device and connect the device to the machine to print the file
directly.
1
Connect the USB memory device to the machine.
When a USB memory device is inserted and the
machine recognizes the device, the display appears as
follows.
Use a FAT32 USB memory with a capacity of no
more than 32 GB.
2
Select "Print from the memory device" with [
file that you wish to print.
] or [
] key, and select the key of the
A name with "/" to its left is the name of a folder in the USB device. To display the files and folders in a folder,
select the folder and press the [OK] key.
• A total of 100 keys of files and folders can be displayed.
• Press the [READ-END] key ( ) to move up one folder level.
3
4
Press the [OK] key.
Select "Print" with the [
] or [
] key and then press the [OK] key.
When forwarding of the selected file is completed, printing starts.
Print settings can be selected in the machine’s Web page. However, if a file that includes print settings (PCL,
PS) is selected, the file’s print settings will be applied.
75
PRINTER
DIRECTLY PRINTING FROM A COMPUTER
Settings can be configured in the Web pages of the machine to enable direct printing from a computer without using
the printer driver. For the procedure for accessing the Web pages, see "ABOUT THE WEB PAGES" (P.190).
FTP PRINT
You can print a file from your computer by simply dragging and dropping the file onto the FTP server of the machine.
• Configuring settings
To enable FTP Print, click [Application Settings] and then [Setting for Print from the PC] in the Web page menu,
and configure the port number. (Administrator rights are required.)
• Performing FTP Print
Type "ftp://" and then the IP address of the machine in the address bar of your computer's Explorer as shown
below.
(Example)
ftp://192.168.1.28
Drag and drop the file that you wish to print onto the "lp" folder that appears in your Web browser. The file will
automatically begin printing.
• If you printed a file (PCL, PS) that includes print settings, the settings will be applied.
• When user authentication is enabled in the system settings (administrator) of the machine, the print function may be
restricted. For more information, ask your administrator.
CANCELING A PRINT JOB FROM THE MACHINE
Press the [STOP] key on the operation panel.
CHANGE THE MACHINE TO OFFLINE MODE
To change the machine to offline mode, follow the steps below.
1
Press the [SPECIAL FUNCTION] key and select "Online/Offline" with the [
keys.
2
Select "Offline" with the [
][
][
]
] keys and press the [OK] key.
Printing stops and the mode changes to offline mode. To cancel
printing, press the clear key. To resume printing, select "Online"
and press the [OK] key.
76
PRINTER
APPENDIX
PRINTER DRIVER SPECIFICATION LIST
Available functions and output results may vary depending on the type of printer driver being used.
PCL6
PS
Windows
PPD*1
Macintosh
PPD*1
Copies
1-999
1-999
1-999
1-999
Orientation
Yes
Yes
Yes
Yes
Number
of pages
2,4,6,8,9,16
2,4,6,8,9,16
2,4,6,9,16
2,4,6,9,16
Order
Yes
Yes
Yes
Yes
Border
Yes
Yes
Yes
Yes
2-Sided Print
Yes
Yes
Yes
Yes
Fit To Page
Yes
Yes
No
Yes
Binding Edge
Yes
Yes
No
Yes
Black and White Print
Yes
Yes
Yes
Yes
Paper Size
Yes
Yes
Yes
Yes
Custom Paper
8 size
8 size
Yes
Yes
Paper Selection
Yes
Yes
Yes
Yes
Pamphlet
Yes
Yes
Yes
Yes
Margin Shift
0 inch to
1.2 inch
0 inch to
1.2 inch
Yes
Yes
Poster Printing
Yes
Yes
No
No
Rotate 180 degrees
Yes
Yes
Yes
Yes*4
Zoom/XY-Zoom
Yes*2
Yes
Yes*2
Yes*2
Mirror Image
No
Yes
Yes*5
No
Different Paper
Yes
Yes
No
Yes
Page Interleave
Yes
No
No
No
Retention
Yes
Yes
No
Yes
Color Adjustment
Yes
Yes
No
Yes*3
Text To Black/
Vector To Black
Yes
Yes
No
No
Advanced Color
Yes
Yes
Yes
Yes
Watermark
Yes
Yes
Yes
Yes
Image Stamp
Yes
Yes
No
No
Overlay
Yes
Yes
No
No
Function
Frequently
used
functions
N-Up
Paper
Convenient
printer
functions
Special
functions
Color mode
adjusting
function
Functions to
combine
text and
images
77
PRINTER
PCL6
PS
Windows
PPD*1
Macintosh
PPD*1
Print Mode
Normal/
High Quality
Normal/
High Quality
Normal/
High Quality
Normal/
High Quality
Graphics Mode
Selection
Yes
No
No
No
Toner Save
Yes
Yes
Yes
Yes
Resident font
80 fonts
136 fonts
136 fonts
136 fonts
Selectable download
font
bitmap,
TrueType,
Graphics
bitmap,
TrueType,
Type1
bitmap,
TrueType,
Type1
No
Auto Configuration
Yes
Yes
No
Yes
User Authentication
Yes
Yes
No
Yes
Function
Image
Quality
Font
Other
functions
*1 The specifications of each function in Windows PPD and Macintosh PPD vary depending on the operating
system version and the software application.
*2 The horizontal and vertical proportion cannot be set separately.
*3 Only Mac OS X v10.4 can be used.
*4 Only landscape documents are supported.
*5 Horizontal mode only.
78
4
FAX FUNCTIONS
TO USE THIS PRODUCT
CORRECTLY AS A FACSIMILE
Several points must be kept in mind when using this product as a facsimile.
Please note the following.
Line connection
Be sure to use the provided telephone line cord to connect
the machine to a telephone line jack. Insert one end of the
telephone line cord into the LINE jack on the left side of the
machine as shown. Insert the other end of the telephone
line cord into a telephone line jack.
Insert the plug firmly until you hear a "click".
LINE jack
Setting the date and time and programming your sender's name and number
Before using the fax function, you must set the date and time and program your sender's name and number in the
machine. This procedure is explained in "POINTS TO CHECK AND PROGRAM AFTER INSTALLATION" (p.80) of
this manual.
Lithium battery
The date and time are protected by a lithium battery in the machine.
• When the battery dies, please contact your local Sharp dealer or SHARP Service Department for assistance in
disposing of this battery. The machine will not operate once the battery dies.
Please note
In the event of a thunderstorm, remove the power cord from the power outlet to ensure safety. Information will be
retained in memory even if the power cord is unplugged.
79
FAX FUNCTIONS
POINTS TO CHECK AND PROGRAM
AFTER INSTALLATION
After installing the machine and before using it as a fax machine, check the following points and program the
required information.
Set the date and time
The machine has an internal clock. It is important to set the correct date and time because they are used for such
features as Timer Transmission (p.98).
The date and time are set in the system settings. (p.176)
The date and time appear in the display. Make sure the correct date and time appear. If the date and time are wrong,
please correct them.
Program the sender's name and sender's number
The name and fax number of the user of the machine is programmed in "Own Passcode Set" (p.184) in the system
settings. (Only one name and number can be programmed.)
The programmed name and number are printed at the top of each transmitted fax page. The sender's number is also
used as an identification number when you use the Polling function to request transmission from another fax
machine (see "SENDING OPTIONS" (p.100)).
Note
You can check your programmed name and number by printing out the "Administrator Settings List" in the system
settings. (See "List Setting" (p.183).)
Paper sizes that can be used for fax mode
The machine can use 8-1/2" x 14", 8-1/2" x 13", 5-1/2"x 8-1/2", A4, B5 and A5 size paper; (If your machine uses
AB-based paper sizes, 8-1/2" x 14", 8-1/2" x 13" and 5-1/2" x 8-1/2" size paper cannot be used in fax mode.
(Among INCH sizes, only 8-1/2" x 11" and 5-1/2"x 8-1/2" can be used.))
For this reason, if only paper sizes that can be used in other modes but not in fax mode are loaded in the machine,
received faxes cannot be printed.
(For other points regarding fax reception, see "RECEIVING FAXES" (p.95).)
Note
For the procedures for loading paper in the trays, "LOADING PAPER" (p.19).
80
FAX FUNCTIONS
FAX MODE (BASE SCREEN)
The base screen of fax mode is displayed by pressing the [FAX] key when the copy mode, or scan mode screen
appears.
The base screen of fax mode
(6)
(1)
(9)
(2)
(3)
(7)
(10)
(4)
(8)
(11)
(12)
(5)
Left Menu
(1)
(2)
(3)
(4)
(5)
(6)
Right Menu
(7)
Reception mode display (p.96)
There are two modes for receiving faxes:
automatic reception and manual reception.
This shows the currently selected reception
mode.
(8) Original display (p.27)
This displays an icon to indicate the original
scanning mode when an original has been
placed.
:
One-sided original scanning in the
document feeder.
:
Two-sided original scanning in the
document feeder (Models with the
two-sided scanning function).
None: Document glass
This also shows the currently selected original
scanning size.
(9) Original Size (p.85)
This is used to set the original scanning size.
(10) Resolution (p.92)
This menu is used to select resolution settings.
(11) Broadcast (p.99)
This is used to perform a broadcast
transmission.
(12) Program (p.107)
Select this menu to use a program.
Message display
Messages appear here to indicate the current
status of the machine.
Date and time display
This shows the date and time.
Transmission mode display (p.89)
There are three transmission modes: memory
transmission, direct transmission, and manual
transmission. This shows the currently selected
transmission mode.
Exposure display
This shows the exposure for scanning the
original.
Resolution display
This shows the resolution for scanning the
original.
Free memory display
This shows the percentage of fax memory that is
free.
Note
The following functions also operate when a mode other than fax mode is selected:
• Automatic reception
• Manual reception
• Timer Transmission
• Transmission of stored memory transmission jobs
• Voice calls (when the extension phone is installed)
• Remote reception
81
FAX FUNCTIONS
ORIGINALS
ORIGINALS THAT CAN BE FAXED
Original sizes
Using the document Scanning width is fixed to A4 width (210mm) or 8-1/2" (216mm). Scanning length is
automatically adjusted from 148mm to 500mm.
feeder
Using the document All are scanned at 8-1/2" x 11" or A4.
glass
Note
• There are restrictions on originals that can be scanned using the document feeder. For more information, see
"NORMAL COPYING" (p.26).
• When sending a fax, originals of different length can be scanned together from the document feeder, as long
as the widths are the same. (one-sided scanning)
*Long originals
Depending on the resolution setting and the width of the original, there may not be sufficient space in memory to
hold a long original. When a long original cannot be entirely scanned, use direct transmission or manual
transmission (on-hook dialing).
82
FAX FUNCTIONS
CONVENIENT DIALING METHODS
(AUTO-DIALING)
The fax function includes a convenient auto dial feature (Speed dialing and group dialing). By programming
frequently dialed numbers, you can call and send faxes to these locations by means of a simple dialing operation
(p.87). There are two types of auto-dialing: Speed dialing, and group dialing. To program auto-dial numbers, see
p.103.
• Speed dialing (300 stations)
A stored destination can be dialed by pressing the
[SPEED] key, entering a 3-digit number (000 to 299),
and pressing the [BLACK & WHITE START] key. A
name (maximum 36 characters) can be stored for
each destination.
• Group dialing
Multiple numbers can be stored in a Speed Dial
number. This is convenient for communicating with a
group of other fax machines.
• REDIALING
The machine retains the last fax or phone number
dialed. This number can be redialed by simply
pressing the [REDIAL] key and then the [BLACK &
WHITE START] key.
• If you pressed a numeric key during the previous
call, the [REDIAL] key may not dial the correct
number.
• Redialing is not possible to broadcast transmission
(p.99), serial polling (p.100), timer transmission
(p.98) or group dialing (p.87) destinations.
• ON-HOOK DIALING
This feature allows you to dial without lifting an
extension phone connected to the machine.
Press the [SPEAKER] key, listen for the dial tone
through the speaker, and then dial.
• Faxes must be sent manually when using on-hook
dialing. (p.90)
Note
• Up to 100 destinations can be stored in each group dial number, and a combined total of 300 Speed Dial and
group dial numbers can be stored.
• Stored Group dialing and Speed dial destinations can be called up using a search name entered when the key
or destination was stored. (p.87)
• To prevent dialing a wrong number and sending a fax to an incorrect destination, check the message display
carefully when you store the number. You can also check stored numbers by printing out the programmed
information after storing the number. (p.109)
83
FAX FUNCTIONS
FAX TRANSMISSION METHODS
There are three basic methods for fax transmission: memory transmission, direct transmission, and manual
transmission. When memory transmission is used, the document is temporarily stored in memory before being
transmitted. When direct transmission or manual transmission is used, the document is transmitted without being
stored in memory.
The default transmission setting can be set to "Memory TX" or "Direct TX" using "Send Mode" (p.186) in the system
settings.
To manually switch between "Memory TX" and "Direct TX", use the [COMM. SETTING] key. (See "Faxing by direct
transmission" (p.89).)
The following explanations generally assume that memory transmission is being used.
ADDRESS REVIEW FUNCTION
The Address Review function allows you to check fax destinations to prevent transmission to an incorrect
destination.
When a fax number is entered with the numeric keys or selected with the [REDIAL] key, a screen appears after you
enter the number prompting you to reenter the number for confirmation.
• When a Speed Dial number (p.87) is used for transmission, a screen appears for confirmation of the stored name
and number.
• When a group dial number (p.87) is used for transmission, a screen appears for confirmation of all numbers
stored in the group.
This function can be set in "Address Review" in the system settings (p.186).
Note
• When the Address Review function is turned on, the [SPEAKER] key can only be used for manual reception
(p.90). If you press the [SPEAKER] key when the machine rings to signal an incoming call,
a screen appears to confirm whether you want to start reception. The speaker key on a connected extension
phone can be used.
• If the "Only apply to direct entry" checkbox is selected when the Address Review function is turned on, the
Address Review screen only appears when a number is entered with the numeric keys or the [REDIAL] key.
84
FAX FUNCTIONS
SENDING A FAX
BASIC PROCEDURE FOR SENDING FAXES
1 Make sure that the machine is in fax mode.
The FAX indicator is lit when the machine is in fax mode. If the indicator is not lit, press the [FAX] key.
If user authentication has been enabled for the fax function in the system settings, a message will appear
prompting you to enter your user number when you switch to fax mode. Enter your account number (5 digits)
with the numeric keys. (p.178)
Using the document feeder
2
Using the document glass
2
Place the original(s).
Using the document feeder: p.27
Place the original(s) in the document
feeder tray or on the document glass.
Using the document glass: p.27
If you are using the document glass to send
multiple pages, place the first page first.
Note
3
This is a single transmission operation, and therefore originals cannot be scanned in succession from both the
document feeder and the document glass.
3
Specify the original size.
One-side scanning
When the original is placed in the document
feeder, the icon changes to [AUTO]. The original
size cannot be changed by selecting "Orig. Size"
in the right menu.
Note
Specify the original size.
Select the "Original Size" on the right menu.
The paper size that can be selected is
8-1/2" x 11" or A4.
Originals up to 500 mm long can be sent
automatically.
Two-side scanning
For the procedure for specifying the original size
see "FAXING A TWO-SIDED ORIGINAL" (p.88).
AUTO:
One-sided scanning in the
document feeder.
8-1/2" x 11: Two-sided scanning in the
document feeder (Models with the
two-sided scanning function).
8-1/2" x 11:
Document glass
4
5
If needed, adjust the resolution and exposure settings.
Dial the fax number.
• The entered number appears in the message display. Up to 50 digits can be entered. If you make a mistake,
press the [C] key and then enter the correct number.
• Redialing and automatic dialing can also be used (p.83, p.87).
85
FAX FUNCTIONS
Entering a pause
If a pause is necessary when dialing an international number, press the [REDIAL] key. (This key functions as a
pause key when entering a number.)
If you press the [PAUSE] key once, a hyphen ("-") appears and a 2-second pause* is inserted.
After entering a number, you can also press the [PAUSE] key to enter a hyphen and then enter another number using
the numeric keys. (This connects the numbers together, and is called Chain dialing.)
* The duration of each pause can be changed in the system settings. (See "Pause Time" (p.184).)
Note
6
7
Group dials cannot be used for chain dialing.
Press the [OK] key.
When the reenter screen appears, reenter the fax number.
• "Address Review" (p.186)
8
Press the [OK] key.
Using the document feeder
9
Using the document glass
9
Press the [BLACK & WHITE START]
key.
• Scanning begins
• If the line is free, the machine will dial the
receiving machine and begin transmission as
soon as the first page is scanned. ("Quick
On-line" (p.91))
• If there is a previously stored job or a job is in
progress, or if the line is being used, all pages
of the original are scanned into memory and
stored as a transmission job. (This is called
memory transmission: the destination is
automatically called and the document
transmitted after previously stored jobs are
completed.)
Scanning begins.
10 If you have another page to scan,
change pages and then press the
[BLACK & WHITE START] key.
• Repeat this sequence until all pages have been
scanned.
• You can change the resolution and exposure
settings as needed for each.
11 After the last page is scanned, press
the [READ-END] key (
If scanning is completed normally, the following
screen is appears briefly and then the display
returns to the base screen.
Note
Press the [BLACK & WHITE START]
key.
).
Open the document feeder and remove the
original. When the original is removed or any key
operation is performed, the display returns to the
base screen.
The destination is automatically called and the
document transmitted after any previously stored
jobs are completed.
• To cancel transmission
To cancel transmission while "Reading" appears or before the [READ-END] key ( ) is pressed, press the [C]
or [CA] key. To cancel a transmission job that is already stored, press the [FAX STATUS] key and cancel the job
as explained on p.93.
• A job number (3 digits) appears in the display with "Read End" when memory transmission is performed.
If you make a note of this number after performing a broadcast transmission, you can use the number to check
the results of the transmission in the transaction report or activity report.
• If the power is turned off or a power failure occurs while an original is being scanned in the document feeder,
the machine will stop and an original misfeed will occur. After power is restored, remove the original as
explained in "MISFEED IN THE DOCUMENT FEEDER" (p.153).
86
FAX FUNCTIONS
TRANSMISSION BY AUTO-DIALING
(SPEED DIALING AND GROUP DIALING)
Instead of entering a full fax number with the numeric keys, you can send a fax by pressing the [SPEED] key and
entering a 3-digit number. To use an automatic dialing, the 3-digit number and name and fax number of the
destination must first be stored. See p.83 for information on auto-dialing and p.103 for information on programming
auto-dial destinations.
1
Enter the 3-digit number with numeric keys.
• Enter the 3-digit number entered when the Speed Dial number or Group Dial was programmed.
• If you make a mistake, press the [C] key and then enter the correct number. If you enter a 3-digit number that
is not programmed in the machine, press the [C] key and then enter the correct number. If you do not know
the Speed Dial number, print out the "Speed # List" or "Group List". (See "PRINTING LISTS OF
PROGRAMMED INFORMATION AND SETTINGS" (p.109).)
2
Press the [OK] key.
Check the destination. If correct, press the [OK] key again.
Note
• To cancel transmission
To cancel transmission while "Reading" appears or before the [READ-END] key ( ) is pressed, press the [C]
or [CA] key. To cancel a transmission job that is already stored, press the [FAX STATUS] key and cancel the job
as explained on p.93.
• A job number (3 digits) appears in the display with "Read End" when transmission is performed. If you make a
note of this number after performing a broadcast transmission, you can use the number to check the results of
the transmission in the transaction report or activity report.
SEARCHING FOR A PROGRAMMED DESTINATION
(USING THE [ADDRESS] KEY)
At the time of dialing, you can enter letters to search for a destination stored in a Speed Dial number, or Group dial.
1
Press the [ADDRESS] key and enter the search letters (you can also skip entry of
search letters and go directly to the next step to display the first destination in the
address list).
Up to 10 of the following types of characters can be entered.
Upper case letters, lower case letters, numbers, special characters
(See "ENTERING CHARACTERS" (p.24).)
2
Press the [OK] key and select the desired destination with the [ ] or [ ] key.
• The search results appear in the following order: upper case letters, lower case letters, special characters,
and numbers.
• If not all letters of the destination name appear, press the [READ END] key to display the full name. Press the
[READ END] key once again to return to the original screen.
Note
• To cancel transmission
To cancel transmission while "Reading" appears or before the [READ-END] key ( ) is pressed, press the [C]
or [CA] key. To cancel a transmission job that is already stored, press the [FAX STATUS] key and cancel the job
as explained on p.93.
• A job number (3 digits) appears in the display with "Read End" when transmission is performed. If you make a
note of this number after performing a broadcast transmission, you can use the number to check the results of
the transmission in the transaction report or activity report.
87
FAX FUNCTIONS
FAXING A TWO-SIDED ORIGINAL
Follow the steps below to automatically transmit both sides of a two-sided original. (Only on models with the
two-sided scanning function.)
1
2
Press the [DUPLEX] key on the operation panel and select "2-Sided".
Select "Portrait-Booklet", "Portrait-Tablet", "Landscape-Booklet", and
"Landscape-Tablet" with the [ ] or [ ] key.
Note
3
• Booklets and tablets Two-sided originals that are bound at the side are
BOOKLET
TABLET
booklets, and two-sided originals that are bound at the top are tablets.
• Duplex scanning is canceled when the transmission is completed, or when the
[CA] key is pressed.
• Duplex scanning of two-sided originals is only possible when a Document
feeder (Models with the two-sided scanning function) is used. Automatic
scanning of both sides of an original is not possible when the document glass is
used.
• The image of the back side of the original is rotated 180 degrees if needed at
the time of transmission, and thus there is no need to change the orientation at the receiving machine.
• To cancel duplex scanning, select "1-Sided" in step 1 and then press the [OK] key.
• Only the following two-sided document sizes can be used:
8-1/2 "x 14", 8-1/2 "x 13-1/2", 8-1/2 "x 13-2/5", 8-1/2 "x 13", 8-1/2" x 11", A4
Press [OK] key.
88
FAX FUNCTIONS
Transmission settings (memory transmission mode and direct transmission
mode)
Transmission modes include memory transmission, where the original is temporarily scanned into memory before
transmission, and direct transmission, where the original is transmitted directly without being scanned into memory.
There are two types of memory transmission: "Storing transmission jobs (memory transmission)" (p.90), where all
pages of the original are scanned into memory before transmission begins, and "Quick On-line" (p.91), where the
destination is dialed after the first page is scanned and the remaining pages are transmitted as they are scanned.
During a memory transmission, it may happen that the memory becomes full while the originals are being scanned.
See "If the memory becomes full during transmission of a stored transmission job" (p.90), and see "If the memory
becomes full during a quick online transmission" (p.91)
If there are too many pages and memory transmission is not possible, you can press the [COMM. SETTING] key to
switch from memory transmission to direct transmission. When direct transmission is used, transmission begins
after the current job is completed, allowing you to give priority to a transmission job. As such, direct transmission is a
convenient means of performing an interrupt transmission when there are a large number of stored transmission
jobs.
To switch between memory transmission and direct transmission, see the following "Faxing by direct transmission".
Note
When transmission is performed manually using an extension phone connected to the machine or using on-hook
dialing, direct transmission is automatically selected. (Memory transmission is not possible.)
Faxing by direct transmission
1
Press the [COMM.SETTING] key.
The communication settings screen appears.
2
Select "TX" with the [ ] or [ ] key.
Note
The communication settings screen can also be displayed from the function selection screen.
Press the [SPECIAL FUNCTION] key to display the special function selection screen, select "Comm. Setting"
with the [ ] or [ ] key, and press the [OK] key.
3
Select "Memory TX" with the [ ] or [ ] key and press the [OK] key.
4
Dial the fax number and press the [BLACK & WHITE START] key.
When using the document glass, multiple original pages cannot be transmitted in a single transmission.
Note
• To change from "Direct Transmission" back to "Memory Transmission", select "Memory TX" in step 3.
• To cancel a direct transmission, press the [C] key.
89
FAX FUNCTIONS
Faxing by manual transmission (using the [SPEAKER] key)
1
Press the [SPEAKER] key.
When this key is pressed, a message regarding volume adjustment will appear briefly followed by the dial entry
screen. You can adjust the speaker volume (high, middle, or low) by pressing the [ ] or [ ] key.
Note that this will not change the volume setting in the system settings. Ringing will be heard from the speaker
on the rear side of the machine when the [SPEAKER] key is used for dialing.
2
Dial the fax number and press the [BLACK & WHITE START] key.
Note
3
• When the Address Review function is turned on (p.186), the [SPEAKER] key cannot be used for transmission.
• To cancel dialing using the [SPEAKER] key when you need to redial the number or because transmission was
interrupted, press the [SPEAKER] key once again.
• As the original is not stored in memory when direct transmission and manual transmission are used, the
following functions cannot be used. Broadcast transmission "SENDING THE SAME DOCUMENT TO
MULTIPLE DESTINATIONS IN A SINGLE OPERATION" (p.99), "AUTOMATIC TRANSMISSION AT A
SPECIFIED TIME" (p.98), "Recall Setting (Busy)" (p.186), duplex scanning, Address Review, and others.
• When a fax is sent by direct transmission or manual transmission, the fax is sent after the connection with the
receiving machine is established.
Select "Send" and press the [OK] key.
Storing transmission jobs (memory transmission)
When the line is in use, the transmission job is temporarily stored in memory. When the current job and any previously
stored jobs are completed, transmission begins automatically. (This is called memory transmission.)
This means that transmission jobs can be stored in memory by performing a transmission operation while the machine
is occupied with another transmission/reception operation. A combined total of 50 memory transmission and timer
transmission jobs (p.98) can be stored at once. After transmission, the scanned document data is cleared from memory.
You can check transmission jobs stored in memory in the fax job status screen. (p.93)
Note that depending on the number of pages stored in memory and the transmission settings, it may not be possible to
store 50 jobs in memory.
• The procedure for storing a transmission job is the same as the procedure in "BASIC PROCEDURE FOR
SENDING FAXES" (p.85).
• If you have not yet pressed the [BLACK & WHITE START] key, you can cancel a transmission job by pressing the
[C] key.
• If you have already pressed the [BLACK & WHITE START] key, see "Canceling a stored transmission job" (p.93).
If the original is still being scanned after the [BLACK & WHITE START] key is pressed, you can press the [C] key to
cancel the transmission.
• If you store a transmission job in direct transmission mode, you will not be able to store any further transmission jobs.
After transmission, the scanned document data is cleared from memory. You can check transmission jobs stored in
memory in the fax job status screen. (p.93)
If the memory becomes full during transmission of a stored transmission job
If the memory becomes full while scanning the first page of a document, the transmission job is automatically
canceled.
If the memory becomes full while scanning the second page or a following page, scanning stops. In this case, you
can either press the [C] key to cancel the transmission, or press the [OK] key to transmit only those pages which
were completely scanned.
90
FAX FUNCTIONS
Quick On-line
When you use the document feeder to send a multi-page document and there are no previously stored jobs waiting
or in progress (and the line is not being used), the machine dials the destination after the first page is scanned and
begins transmitting scanned pages while the remaining pages are being scanned. This transmission method is
called Quick On-line. When a quick online transmission is being performed, the message display shows "Reading" "Dialing" - "Comm." - "Sending" in that order until scanning of the remaining pages is completed. When all pages
have been scanned, "Read End" appears before the above messages appear.
If the receiving party is busy, the quick online transmission will change into a stored transmission job (memory
transmission). (See "Storing transmission jobs (memory transmission)" (p.90).)
If the memory becomes full during a quick online transmission
If the memory becomes full while scanning the first page of a document, the transmission job is automatically
canceled. If the memory becomes full while scanning the second page or a following page, those pages which were
completely scanned will be transmitted.
Note
The machine is initially set (factory setting) to perform Quick On-line transmission. If desired, you can disable this
function in the system settings. (See "Quick On Line TX" (p.186).) When an original is transmitted using the
following methods, the job will be stored in memory. (Quick On-line transmission will not be performed.)
• Sending a fax from the document glass.
• "SENDING THE SAME DOCUMENT TO MULTIPLE DESTINATIONS IN A SINGLE OPERATION" (p.99)
• "AUTOMATIC TRANSMISSION AT A SPECIFIED TIME" (p.98)
If the receiving party is busy
If the receiving party is busy, the transmission is temporarily canceled and then automatically re-attempted after a
brief interval. (Two attempts are made at an interval of 3 minutes.*1)
If you do not want the machine to re-attempt the transmission, press the [FAX STATUS] key and cancel the job.
(p.93)
*1 The settings can be changed in the system settings. (See "Recall Setting (Busy)" (p.186))
If an error occurs that prevents transmission
If an error occurs that prevents transmission or the receiving machine does not answer the call within 45 seconds*2,
the transmission is stopped and then automatically re-attempted later. One attempt is made at an interval of
1 minute.*2) If you do not want the machine to re-attempt the transmission, press the [FAX STATUS] key and cancel
the job. (p.93) This machine also supports error correction mode (ECM) and is set to automatically resend any part
of a fax that is distorted due to noise on the line.*3
*2 The settings can be changed in the system settings. (See "Ring Timeout In Auto TX" (p.186) and "Recall Set
(Err)" (p.186).)
*3 If the other fax machine does not support ECM or ECM is not operating, error correction will not take place.
91
FAX FUNCTIONS
HOW TO SELECT THE RESOLUTION
The resolution can be changed to match the text size of the original, and the original type, such as a photo. Select
"Resolution" in the right menu of the base screen of fax mode and press the [OK] key.
Standard
Select for an original with normal size text.
Fine
Select for an original with small text or detailed diagrams. The original will be scanned at twice
the density of "Standard".
Super Fine
Select for an original with intricate pictures or diagrams. A higher-quality image will be produced
than with the "Fine" setting
Fine / Halftone
Super Fine /
Halftone
Use for photo or shaded color originals (color documents, etc.). Transmits a clearer image than
with "Fine" or "Super Fine" alone.
The transmission time is slightly longer when halftone is selected.
Note
• The factory default settings for the resolution and contrast are "Standard" and "Auto", respectively.
The default settings for the resolution and contrast can be changed in the system settings "Set Res. Con."
(p.186). When using the document glass to scan multiple original pages, you can change the resolution and
contrast each time you change pages. When using the auto document feeder, you cannot change the
resolution and contrast after scanning has started.
• Even if you send a fax at "Fine" or "Super Fine", the receiving fax may not be capable of receiving and printing
the fax at that resolution.
• To cancel a resolution setting, press the "Reset" key.
CHANGING THE EXPOSURE
The exposure can be changed to match the darkness of the original.
1
2
Select the [Exposure] key.
Adjust the exposure.
(1) Select the item.
(2) Adjust the exposure.
To dark the exposure , select the [
[
] key.
(3) Select the [OK] key.
92
] key, and to lighten the exposure, select the
FAX FUNCTIONS
CANCELING A FAX TRANSMISSION
To cancel a transmission that is in progress or a stored transmission job, follow the steps below. A transmission in
progress or a stored transmission job is canceled from the fax status screen. (Printing of a received fax cannot be
canceled.)
Note
To cancel a transmission while the original is being scanned ("Reading" appears in the message display) or
before the key is pressed ([READ-END] key ( ) when scanning the original from the document glass), the [C] or
[CA] key can be pressed.
Canceling a fax transmission
1
Press the [FAX STATUS] key.
• When a transmission is in progress, the job being transmitted is displayed.
• If the displayed job is not the job that you wish to cancel, it is likely that the job to be canceled is a stored job
waiting for transmission. Press the [BACK] key to display the fax status selection screen and then follow the
procedure in "Canceling a stored transmission job" on "Canceling a stored transmission job" (p.94) to cancel
the job.
Note
2
3
When a transmission is not in progress, the following fax status selection screen appears.
Press the [C] key.
Press the [OK] key.
The transmission is canceled.
Note
• If you do not wish to cancel the transmission, press the [ ] key in the screen of step 2, select "No", and press
the [OK] key.
• You can check canceled operations in the Activity Report. "Cancel" will appear in the "Type/Note" column of the
report. Additional information on the display during transmission
(A)
(B)
(C)
(D)
(A) Destination name
The name of the destination appears if programmed.
(B) Transmission method name
In the case of a timer transmission, the timer icon " " appears at the beginning of the transmission method
name.
(C) Number of pages currently transmitted
Appears during sending.
(D) Document number
The document number assigned at the time of scanning in memory transmission mode appears.
93
FAX FUNCTIONS
Canceling a stored transmission job
If you do not wish to cancel a stored transmission job and only wish to check its status, press the [BACK] key instead
of the [C] key in step 4 to exit.
1
Press the [FAX STATUS] key.
The fax job status screen is displayed.
Note
2
3
When a transmission is in progress, the job being transmitted is displayed. Press the [BACK] key to display the
fax status selection screen.
Select "TX/RX Reserve" with the [ ] or [ ] key.
Press the [OK] key.
The first stored transmission job appears.
Press the [ ] or [ ] key until the transmission job that you wish to cancel appears.
4
Press the [C] key.
The transmission cancel confirmation screen appears.
5
6
Select "Yes" with the [ ] or [ ] key.
Press the [OK] key.
The selected transmission job is canceled.
If you wish to cancel another transmission job, repeat steps 1 through 6.
Note
You can check canceled recall mode jobs in the Activity Report. "Cancel" will appear in the "Type/Note" column of
the report.
Contents of the stored job screen (screen of step 3)
(A)
(B)
(C)
(D)
(F)
(E)
(A) Current status
"Waiting" will appear next to stored transmission jobs and timer transmission jobs. "Recall" will appear next
to recall mode jobs.
(B) Destination
The name of the destination appears if programmed.
(C) Transmission method name
In the case of a timer transmission, the timer icon " " appears at the beginning of the transmission method
name.
(D) Number of pages stored
In the case of a stored transmission job, the document number assigned at the time of scanning appears.
(E) In the case of a timer transmission, the timer job number appears.
(F) In the case of a timer transmission, the specified reservation time appears. "Prepared" will appear for a
stored transmission job.
Status of completed jobs
To check the status of completed jobs, select "TX/RX Completed" in step 2 and press the [OK] key in step 3.
94
FAX FUNCTIONS
RECEIVING FAXES
When another fax machine sends a fax to your machine, your machine will ring*, automatically receive the fax, and
begin printing. (This is called automatic reception.)
If you do not wish to have received faxes printed immediately, use the print hold function to hold received faxes in
memory for printing at your convenience (all received faxes will be printed at once). To enable this function and print
received faxes, see "FAX PRINT HOLD FUNCTION" (p.97).
Note
• You can store a transmission job while fax reception is in progress. (See "Storing transmission jobs (memory
transmission)" (p.90)
• To print received fax pages on both sides of the paper, enable "Duplex Reception" (p.187) in the system
settings.
• If a extension phone is not connected to the machine, use automatic reception.
• If the Address Review function (p.186) is on, you can press the [SPEAKER] key when the machine rings to
select whether the fax will be received. Select "Yes" to receive the fax or "No" to reject the fax with [ ] [ ] ,
and press the [OK] key.
• In order to receive faxes, paper must be loaded in the paper tray. See "LOADING PAPER" (p.19) to load
appropriate paper.
RECEIVING A FAX
1 The machine will ring* and reception
2
will automatically begin.
• When reception ends, the machine sounds
a beep.
• When the optional job separator tray kit is
installed, received faxes are output to the job
separator.
The LINE indicator lights up.
Note
Reception ends.
If an extension phone is connected and the
other party is sending a fax by manual
transmission (p.119), you can lift the
handset before fax reception starts and
speak to the other party.
Note
*Number of rings
The machine has been set to ring twice before
beginning automatic reception. You can change the
number of rings to any number from 0 to 15 in the
system settings.
(See "#Of Rings At. RX" (p.187).)
If the number of rings is set to 0, the machine will
receive faxes without ringing.
95
The job separator has a sensor that detects
when a tray is full. When approximately
100 sheets accumulate in a tray, a message
appears in the display and fax printing stops.
If this happens, remove the sheets. Printing
will resume momentarily.
FAX FUNCTIONS
If received data cannot be printed
If the machine runs out of paper or toner, or a paper misfeed occurs, or if the machine is printing a print or copy job,
received faxes will be held in memory until printing becomes possible. The received faxes are automatically printed
when printing is possible. When received faxes are held in memory, the FAX [DATA] light blinks. You can also use
the forwarding function to have another fax machine print the received faxes. (See "FORWARDING FUNCTION"
(p.110).)
Note
In order to receive faxes, paper must be loaded in the paper tray. Load appropriate paper as explained in
"LOADING PAPER" (p.19).
• If you receive a fax that is larger than the loaded paper, the system setting uses "Received Data Print
Condition" (p.187) to print it out in the following manner:
If "Reduction" is set up, the image is automatically reduced before printing.*1
If "Division" is set up, the image is split onto multiple sheets of paper and printed on them at actual size.*1
If "Actual Size" is set up, the image is printed at actual size without being split.*2
*1 If the loaded paper is of the B5 size or less, the received image may not be printed depending upon the
width and length of the image data.
*2 The received image won't be printed until you load the paper larger than the actual size.
• In fax mode, printing is not possible on B5 and A5 sizes. (Among AB sizes, only A4 can be used for printing.)
(If your machine uses AB-based paper sizes, 8-1/2" x 14" size paper cannot be used in fax mode. (Among AB
sizes, only 8-1/2" x 11" and 8-1/2" x 11" can be used for printing.))
• If the paper runs out while a fax is being printed, printing will automatically continue using the closest size of
paper in another tray.
• If you change the size of paper loaded in a tray, change the tray's paper size setting.
• Faxes cannot be printed correctly if the actual paper size is different from the paper size setting. Be sure to set
the tray's paper size setting to the same paper size as the paper loaded in the tray. For example, if you receive
an 11" x 17" (B4) size fax when 8-1/2" x 14" (A4) paper is loaded in the tray and the tray's paper size setting is
11" x 17" (B4), the fax will be printed on 8-1/2" x 14" (A4) paper and part of the image may be cut off If the
paper loaded in the tray is larger than the paper size setting, paper larger than the recognized fax size will be
used. (A message prompting you to check the tray's paper size setting will appear.)
• Received faxes cannot be printed on paper inserted in the bypass tray.
MANUAL FAX RECEPTION
When the Address Review function (p.186) is turned on, you can decide whether to receive a fax (this is called
"manual reception" in this manual).
SETTING THE RECEPTION MODE
1
Press the [COMM. SETTING] key in the initial state of Fax mode.
Note
2
The communication setting screen can also be displayed from the function selection screen.
Press the [SPECIAL FUNCTION] key to display the function selection screen, select "Comm. Setting" with the
[ ] [ ] keys, and press the [OK] key.
Select "Manual" and press the [OK] key.
Note
To return to auto reception, select "Auto" in step 1 above.
Manually receiving a fax
When the machine rings, press the [SPEAKER] key. To receive the fax, select "Yes".
If you do not want to receive the fax, select "No".
96
FAX FUNCTIONS
FUNCTION KEY
This is the initial setting that appears when the [SPECIAL FUNCTION] key is pressed in fax mode.
FAX PRINT HOLD FUNCTION
Faxes are normally printed as soon as they are received.
This function is used to hold received faxes in memory rather than printing them as they are received.
Faxes held in memory are printed manually all at once.
Settings required for fax print hold
If a fax is received when auto power shut-off mode has activated ("POWER ON AND OFF" (p.15)), the machine
returns to normal operation in order to print the fax. For this reason, if faxes are received at regular intervals, auto
power shut-off will repeatedly activate and deactivate and less power will be conserved.
If you wish to maximize the benefit of auto power shut-off at night and other times when printing of received faxes is
not immediately necessary, enable fax print hold. When fax print hold is enabled, receiving faxes when auto power
shut-off has activated will not cause auto power shut-off to deactivate.
It is recommended that you enable and disable fax print hold as needed for your conditions of use; for example, enable fax print
hold during the night and disable it during the day.
Note
• When fax print hold is enabled and received faxes are held in memory, the DATA indicator above the [FAX] key
on the operation panel blinks and a message appears in the display. (When the received faxes are printed, the
indicator stops blinking and the message no longer appears.)
• If the remaining free memory reaches 0%, fax reception will no longer be possible. For this reason, it is
important to constantly make sure that sufficient free memory remains and frequently print received faxes.
The percentage of free memory remaining appears in the base screen of fax mode. (p.81)
Select the "Fax Print Hold" function.
Enabling fax print hold
Note
Printing received faxes held in
memory
If fax print hold is prohibited using "Disable
Fax Print Hold" (p.185) in the system
settings, it will not be possible to enable it.
Select "Fax print hold", and then select
"Print".
Select "Setting ", and then select "On".
To disable fax print hold, select "Off".
97
FAX FUNCTIONS
AUTOMATIC TRANSMISSION AT A SPECIFIED TIME
This feature enables you to set up a transmission or polling operation to be performed automatically at a specified
time up to a week in advance. This is convenient when you will be out of the office or for transmission at off-peak
nighttime rates. A combined total of 50 timer transmission and memory transmission jobs can be stored.
Note
1
• After a timer transmission is performed, the information (image, destination, etc.) is automatically cleared from
memory.
• To perform a timer transmission, the original must be scanned into memory. It is not possible to leave the
original in the document feeder or on the document glass and have it scanned at the specified time of
transmission.
• The date and time is set in the machine using the system settings.
(See "Daylight Saving Time" (p.176).)
• Only one polling timer operation can be set up at a time. If you wish to set up multiple timer polling operations,
combine the machines to be polled into one serial polling operation with a timer setting (see "Serial polling
mode" (p.101)).
Select "Timer Mode" and press the [OK] key.
If a time has been specified, a checkmark appears in front of "Timer Mode". To cancel a specified time, press
the [LOGOUT] key ( ) in the above display with "Timer Mode" highlighted.
The current time appears in the screen. If the current time is not correct, press the [CA] key to cancel the
operation and see "Daylight Saving Time" (p.176) to correct the time setting.
2
Select the day of the week with the [ ] or [ ] key.
The selected day is highlighted. If you select "No Select Days", the transmission will be performed
as soon as the specified time arrives. To return to the "Time Setting" display, press the [BACK] key.
Note
• To cancel a timer operation after the above procedure has been completed, follow the procedure in
"CANCELING A FAX TRANSMISSION" (p.93).
• A timer job number is automatically assigned to the operation. This number can be used to cancel a stored job.
(See the note Canceling a stored transmission job screen (screen of step 3)" on p.94.)
• Other operations can be performed after a timer operation is set up. If another operation is in progress when
the specified time arrives, the timer transmission will begin when the job in progress is completed.
98
FAX FUNCTIONS
SENDING THE SAME DOCUMENT TO MULTIPLE
DESTINATIONS IN A SINGLE OPERATION
This feature is used to send a fax to multiple destinations in a single operation. The original to be transmitted is
scanned into memory and then successively transmitted to the selected destinations. This feature is convenient for
such purposes as distributing a report to company branches. Up to 100 destinations can be selected.
When transmission to all destinations has been completed, the document is automatically cleared from memory.
Note
• If you frequently use broadcasting to send faxes to the same group of destinations, it is convenient to program
those destinations into a group dial. The procedure for programming group dials is explained on p.103.
• When a group dial is used to send a fax, the fax is broadcast (transmitted) to the destinations programmed in
the group dial. For example, if five destinations are programmed in a group dial and the key is pressed for a
broadcast transmission, the broadcast transmission will have five destinations.
Beep
Destination A
(recipient)
Sender
Reception
Successive
transmission
Beep
Destination B
(recipient)
Select the broadcast
transmission function.
The document is scanned
into memory
Reception
Beep
Destination C
(recipient)
Reception
1
Enter a full fax number with the numeric keys or press an auto-dial key (Rapid key,
Speed Dial number, or group key) to select the first destination. (p.87)
The destination selection screen appears. To clear a mistake when entering a full number with the numeric
keys, press the [C] key to clear one digit at a time. A destination selected with a Speed Dial number, or group
dial is indicated by an icon and a number. To clear an entry, press the [C] key.
2
Press the [OK] key and then select the next destination by entering a full fax number
or pressing an auto-dial key.
After entering a full number with the numeric keys, press the [OK] key to complete the entry. If you pressed an
auto-dial key in step 1, it is not necessary to press the [OK] key. You can immediately press another auto-dial
key for the next destination. Repeat steps 1 and 2 to select the remaining destinations.
Note
3
• If you need to delete a number for which entry has already been completed by pressing the [OK] key, use the
[ ] or [ ] key to select the number and then press the [C] key.
• If the selected destinations exceed the display range of the message screen, press the [ ] or [ ] key to scroll
through and check the destinations.
• Destinations can also be selected using the address directory and the [REDIAL] key.
Note, however, that the [REDIAL] key can only be used to select the first destination (it must be used before
any other destinations are selected).
• If you use two group dials that have 50 stations each, the total number of destinations entered will be 100.
Continue from step 7 of "BASIC PROCEDURE FOR SENDING FAXES" (p.85).
To cancel a broadcast transmission
Note
To cancel a broadcast transmission when selecting destinations, press the [CA] key. To cancel transmission after
the transmission procedure has been completed, follow the procedure in "CANCELING A FAX TRANSMISSION"
(p.93).
99
FAX FUNCTIONS
SENDING OPTIONS
This function allows your machine to call another fax machine and initiate reception of a document in that machine.
A timer setting can also be specified to have the operation take place at night or at another specified time.
(See "AUTOMATIC TRANSMISSION AT A SPECIFIED TIME" (p.98).)
Your machine
The other machine
(2) Permits polling
(1) Polling (ask other machine
to send document)
(4) Document data is automatically
sent to your machine
(3) Document data previously
scanned into memory
Group dials and the "SENDING THE SAME DOCUMENT TO MULTIPLE DESTINATIONS IN A SINGLE
OPERATION" (p.99) can be used to successively poll multiple fax machines in a single operation (this is called
"serial polling"). Up to 100 machines can be polled.
In this case, the sequence of operations in the above diagram is successively repeated for each sending machine
selected.
When using the Public Box function, do not set the fax reception mode to "Manual". (See "MANUAL FAX
RECEPTION" (p.96).)
Note
1
If the other machine is using polling security (see "Restricting polling access (polling security)" (p.103)), your fax
number (sender's number) must be programmed in the system settings (see "Own Passcode Set" (p.184)) and
your number must also be programmed in the other machine.
Select "Sending Options".
POLLING
2
3
4
Select "Polling".
Press the [OK] key and enter the fax number of the other machine with the numeric
keys specify a Speed Dial number (a group dial cannot be used).
Press the [OK] key. Press the [BLACK & WHITE START] key. "Polling reservation has
been set." appears in the screen. After communicating with the other machine, your
machine prints the received fax.
Note
To cancel the operation
During communication: Cancel as explained in "Canceling a fax transmission" (p.93).
While the job is stored: Cancel as explained in "Canceling a stored transmission job" (p.94).
100
FAX FUNCTIONS
Serial polling mode
Setting for polling reception from multiple fax machines.
Select "Serial polling" steps 1 to 2 of the polling procedure "POLLING" (p.100).
Before pressing the [BLACK & WHITE START] key in step 3, repeat steps 1 and 2 for each machine that you wish to poll.
Note
The receiving machine bears the expense (phone charges) of polling transmission.
POLLING MEMORY
This feature allows your machine to automatically send a document previously scanned into memory when another
machine calls and polls your machine.
Your machine
The other machine
(2) Permits polling
(1) Polling
(request transmission)
(3) Document data
previously scanned into
memory
Note
(4) Document data is
automatically sent to
other machine
The machine that requests transmission bears the expense (phone charges) of the call.
When using the Public Box function, do not set the fax reception mode to "Manual". (See "MANUAL FAX
RECEPTION" (p.96).)
101
FAX FUNCTIONS
Scanning a document into polling memory
This section explains how to scan a document into the polling memory. If other documents have already been stored
in the polling memory, the new document will be appended to those documents. If the previous documents are no
longer needed, they can be replaced.
1
Select "Memory Polling"
2
Press the [OK] key and select "1 Time" or "Repeat"
If you select "1 Time", the document data is automatically cleared from
memory after your machine is polled once. If you select "Repeat", the
document data in memory can be used repeatedly.
• If there are no previously stored documents in the polling memory, the above
screen appears.
• If there are previously stored documents in the polling memory, a screen will
appear to let you select what action to take.
(1) If you wish to append the new document, select "Add" with the [ ]
or [ ] key, press the [OK] key, and then go to step 2.
(2) If you wish to replace the previous document with the new
document, select "Change" with the [ ] or [ ] key, press the [OK]
key, and then go to step 2.
3
Press the [OK] key and press the [BLACK & WHITE START] key
• Scanning begins.
• If you are scanning from the document glass and have another page to scan, change pages and press the
[BLACK & WHITE START] key. Repeat until all pages have been scanned and then press the [READ END]
key.
4
Make sure that the reception mode is set to auto reception. ("SETTING THE
RECEPTION MODE" (p.96))
Transmission begins when the other machine calls and polls your machine.
Note
To cancel scanning
To cancel scanning of a document while scanning is in progress, press the [C] key. To erase the documents in the
Public Box, follow the procedure in "Deleting documents from the polling memory" (p.103).
Printing documents in the polling memory
To check the document that is stored in the public box, follow these steps to print it out.
1
Follow steps 1 of "Scanning a document into polling memory" (p.102) and then follow
the steps below.
2
Select "Print" with the [ ] or [ ] key and press the [OK] key.
Printing begins automatically.
102
FAX FUNCTIONS
Deleting documents from the polling memory
This procedure is used to delete documents from the polling memory when they are no longer needed.
1
2
Select "Delete".
Press the [OK] key.
A screen appears asking you to confirm the deletion.
3
Select "Yes" with the [ ] or [ ] key and press the [OK] key.
The documents are deleted from the polling memory.
Note
Deletion is not possible while the polling memory is being used.
Restricting polling access (polling security)
If you wish to prevent unauthorized fax machines from polling your machine, enable the polling security function.
When this function is enabled, polling permission will only be granted if the fax number of the polling machine
(programmed in that machine as the sender's number) matches one of the fax numbers you have programmed in
your machine as passcode numbers. Up to 10 fax numbers can be programmed as passcode numbers.
To enable the polling security function and program passcode numbers, see "Polling Passcode # Mode" (p.189) in
the system settings.
Note
• If you do not use the polling security function, the document will be sent to any fax machine that polls you.
• To use polling memory with polling security enabled, the sender's number of the polling machine must be
programmed in that machine and in your machine.
STORING, EDITING, AND DELETING AUTO-DIAL NUMBERS
(SPEED DIAL NUMBERS, AND GROUP DIALS)
Auto dial numbers are stored in the auto dial storing screen. Follow the steps below to display the auto dial storing
screen, and then store an auto dial number.
1
2
Select "Entry" and press the [OK] key.
3
4
Select "Speed", "Group", or "Change/Delete" with the [ ] or [ ] key.
Select "Dial" with the [ ] or [ ] key.
Press the [SPEED] key and enter the fax number of the destination with the numeric
keys.
• Enter the desired Speed Dial number (000 to 299) with the numeric keys.
• Up to 50 digits can be entered for the fax number. If you need to insert a pause between any of the digits,
press the [REDIAL/PAUSE] key. The pause appears as a hyphen (-). To set the duration of the pause, see
"Pause Time" (p.184).
5
Enter search characters (see "ENTERING CHARACTERS" (p.24)).
103
FAX FUNCTIONS
6
To finish the storing procedure, press the [BLACK & WHITE START] key. If you wish
to program an option such as chain dialing, transmission speed, or international
transmission mode, press the [OK] key.
• If you pressed the [BLACK & WHITE START] key, you will return to step 3. If you wish to store another or
Speed Dial number, repeat steps 3 to 6. If you have finished storing auto-dial numbers, press the [BACK]
key.
• If you pressed the [OK] key, go to the appropriate page for the option that you wish to program.
• To select "CHAIN DIAL", go to "Chain Dialing" (p.104).
• To set the "TRANSMISSION SPEED", go to "Transmission speed setting" (p.104).
• To set the "INTERNATIONAL TRANSMISSION MODE", go to "International transmission mode setting"
(p.105).
Note
About the setting options
When storing and editing and Speed Dial numbers, you can also select the setting options below. Chain dialing
cannot be combined with any of the other setting options.
When you select a setting option, a checkmark appears in the setting option screen.
• Chain Dialing
You can enable or disable Chain Dialing for a Rapid key or Speed Dial
number. (p.104)
• Transmission speed
You can set the transmission speed to 33,600 bps (maximum speed),
14,400 bps (high speed), 9600 bps (middle speed), or 4800 bps (low
speed). The initial setting is 33,600 bps (maximum speed). (p.104)
• International transmission mode
The international transmission mode can be set to "Off" or one of
modes 1 to 3. The initial setting is "Off". (p.105)
● Chain Dialing
To set an auto-dial number as a Chain Dial number, complete "Editing and deleting auto-dial numbers" (p.106).
Note
1
When a number is set as a Chain Dial number, the destination fax number can be up to 48 digits long.
Select "Chain Dial" with the [ ] or [ ] key and press the [OK] key.
• If checkmark appears to the left of "Chain Dial", it is already selected.
• To exit, press the [BLACK & WHITE START] key.
2
Select "On" or "Off" with the [ ] or [ ] key.
● Transmission speed setting
To set the transmission speed, complete "Editing and deleting auto-dial numbers" (p.106).
Note
1
2
Set the transmission speed only when you know what speed is most suitable, such as when you are sending a
fax to a foreign country and telephone line conditions are bad. If you do not know the line conditions, do not
change this setting.
Select "TX Speed" with the [ ] or [ ] key and press the [OK] key.
Select the desired transmission speed with the [ ] or [ ] key.
Note
If you select a speed other than 33,600 bps (maximum speed), a checkmark will appear next to "TX Speed"
when you return to the option setting screen. This setting is not effective for polling transmission.
To remove the checkmark and return the transmission speed setting to "33,600 bps (maximum speed)", press
the [LOGOUT] key ( ).
104
FAX FUNCTIONS
● International transmission mode setting
To set the international transmission mode, complete "Editing and deleting auto-dial numbers" (p.106).
Note
1
2
• When sending a fax to a foreign country, telephone line conditions can sometimes distort the fax or interrupt
the transmission. Selecting the right international transmission mode can help alleviate these problems.
• If errors frequently occur when sending a fax to a foreign country, try each of modes 1 to 3 and select the mode
that enables the best transmission.
Select "Chain Dial" with the [ ] or [ ] key press the [OK] key.
Select the desired mode with the [ ] or [ ] key.
Note
If you select a setting other than "Off", a checkmark will appear next to "International TX" when you return to the
option setting screen.
To remove the checkmark and return the international transmission mode to "Off", press the [LOGOUT] key ( ).
● Storing a group dial
To store a group dial number, perform the steps below in the auto dial storing screen.
1
Press the [SPEED] key.
Enter the desired Group Dial number (000 to 299) with the numeric keys.
If you press a number that has already been stored, a warning message will appear.
Note
2
3
Group key dialing is an automatic dialing function where by multiple destinations are programmed into a Rapid
key. If you frequently send faxes to the same group of destinations using broadcast transmission, which is used
to send the same document to multiple destinations in a single operation (p.99), it is convenient to program those
destinations into a group key.
Enter a group name (see "ENTERING CHARACTERS" (p.24)).
Store the destinations using Rapid keys, Speed Dial numbers, and the numeric keys.
• To store a Speed Dial number, press the [SPEED] key and then enter the desired Speed Dial number (000 to
299) with the numeric keys. If you press an incorrect key, press the [C] key and then press the correct key.
• Chain dialing, transmission speed, and international transmission mode options cannot be selected. If you
need to select an option for the destination, store the destination in Speed Dial number and then store the
destination in the group dial. Up to 50 digits can be entered for the fax number. If you need to insert a pause
between any of the digits, press the [REDIAL/PAUSE] key to enter a pause. The pause appears as a hyphen
(-). To set the duration of the pause, see "Pause Time" (p.184). When you have finished entering the fax
number, press the [OK] key.
4
Repeat step 3 for all of the destinations that you wish to store in the group dial.
Up to 100 destinations can be stored in a group dial.
105
FAX FUNCTIONS
● Editing and deleting auto-dial numbers
To edit or delete an auto-dial number, follow steps 1 through 6 on p.103 and then follow the steps below.
Note
The Speed Dial number is being used in a transmission in progress or in a stored transmission, a Speed Dial
number cannot be edited or cleared.
● Editing a Rapid key or Speed Dial number
1
2
Select "Speed" and Select "Change" with the [ ] or [ ] key.
Press or the [SPEED] key and edit the destination fax number with the numeric
keys.
• Press the [SPEED] key and then enter the Speed Dial number (000 to 299) that you wish to edit with the
numeric keys.
• Move the cursor to the digit(s) that you wish to edit with the [ ] or [ ] key, and then enter the correct
digit(s) with the numeric keys.
• To delete a digit, move the cursor to the digit that you wish to delete with the [ ] or [ ] key and then
press the [C] key.
3
To finish the storing procedure, press the [BLACK & WHITE START] key. If you
wish to program an option such as F-code, chain dialing, transmission speed, or
international transmission mode, press the [OK] key.
● Deleting a Speed Dial number
1
Select "Delete" and press the [SPEED] key.
Press the [SPEED] key and then enter the Speed Dial number (000 to 299) that you wish to delete with
the numeric keys.
2
Select "Delete" with the [ ] or [ ] key.
Note
If you select "No Delete", you can press the key to check the destination name. If you are deleting the
destination, check the destination name and then delete the destination.
● Editing and deleting group dials
To edit or delete a group dial, follow steps 1 through 3 on pages "STORING, EDITING, AND DELETING
AUTO-DIAL NUMBERS (SPEED DIAL NUMBERS, AND GROUP DIALS)" (p.103) and then follow the steps below.
Note
A group dial cannot be edited or deleted in the following cases.
• The group dial is stored in a program
● Editing a group dial
1
2
Select "Group" and press the [OK] key.
3
When you have finished editing the destinations, press the [BLACK & WHITE
START] key.
Press the group dial number (one of Rapid keys [01] to [50]) that you wish to edit,
and edit the group name, the search characters
● Deleting a group dial
1
2
Select "Delete" with the [ ] or [ ] key and press the group that you wish to edit.
Select "Delete" with the [ ] or [ ] key.
Note
If you select "No Delete", you can press the key to check the destination name. If you are deleting the
destination, check the destination name and then delete the destination.
106
FAX FUNCTIONS
STORING, EDITING AND DELETING PROGRAMS
You can store a address setting, transmission method, original size enter, duplex scanning, resolution and
exposure, own number sending, transmission settings.
This will allow you to use the settings for a transmission by means of a simple operation (see "USING SETTINGS
STORED AS A PROGRAM" (p.112)).
* Transmission methods: normal transmission, broadcast transmission, polling, serial polling.
Note
A screen setting and timer transmission setting cannot be stored in a program.
To store a program, follow steps 1 through 3 on pages "STORING, EDITING, AND DELETING AUTO-DIAL
NUMBERS (SPEED DIAL NUMBERS, AND GROUP DIALS)" (p.103) and then follow the steps below.
1
2
Select "Entry" and Select "Register Program" with the [ ] or [ ] key.
Select "Enter", "Change", or "Delete" with the [ ] or [ ] key.
• To store a program, select "Enter" and press the [OK] key.
Continue from step 3 of .
• To edit a program, select "Change" and press the [OK] key.
Next, follow the steps in "EDITING PROGRAMS" (p.108).
• To delete a program, select "Delete" and press the [OK] key.
Next, follow the steps in "DELETING PROGRAMS" (p.108).
● STORING A PROGRAM
3
Select the program that you wish to store with the [ ] or [ ] key.
If you select a program that has already been stored, a message appears. Select a program that has not been
stored, or clear the program (p.108) and then select it.
4
Select the program that you wish to store with the [ ] or [ ] key.
• A transmission method, original size enter, cover sheet/message,
resolution/exposure settings, dual pages, sender's name, and transmission
settings can be stored.
• A transmission method must be stored. The storing procedure cannot be
completed unless a transmission method is stored.
• For the procedures for selecting each of the settings, refer to the
explanations of the settings.
• To cancel a setting selection, select the setting that you wish to cancel and
then press the
key.
• Some settings cannot be used in combination with others. If you select a
prohibited combination of settings, a message will appear in the display.
107
FAX FUNCTIONS
● EDITING PROGRAMS
If you need to edit a previously stored program, follow these steps.
3
4
Select the program that you wish to edit with the [ ] or [ ] key.
Edit the program name (see "ENTERING CHARACTERS" (p.24)).
• See step 3 of .
• If you do not wish to edit the program name, go to the next step.
5
Select the stored setting that you wish to edit with the [ ] or [ ] key.
• See steps 4 of .
• If you do not wish to edit the stored settings, press the [BLACK & WHITE START] key and then press the
[BACK] key to exit.
● DELETING PROGRAMS
Before deleting a program, print the "Program List" to check the contents. (p.109)
To delete a previously stored program, follow these steps.
3
4
Select the program that you wish to delete with the [ ] or [ ] key.
Select "Delete" with the [ ] or [ ] key.
108
FAX FUNCTIONS
PRINTING LISTS OF PROGRAMMED
INFORMATION AND SETTINGS
You can print lists showing programmed information and settings.
The following lists can be printed.
• Destination Lists: Shows the destinations stored in auto dial numbers in the order of their search characters.
• Group List:
Shows the destinations stored in each group dial number.
• Program List:
Shows the operations stored in each program.
• Timer List:
Shows timer transmissions and recall transmissions.
• Mem. Polling List: Shows the documents stored for memory polling.
For other lists that can be printed, refer to "List Print" (p.181).
1
2
3
Press the [SPECIAL FUNCTION] key.
Select "Data List Print" and select "Fax" with the [ ] or [ ] key.
Select the list that you wish to print with the [ ] or [ ] key.
See the explanation of the lists that can be printed above.
INCLUDING SENDER INFORMATION ON FAXES (OWN
NUMBER SENDING)
This function prints the date, time, your programmed name, your programmed fax number, and the transmitted page
number at the top center of each page that you fax. All pages that you fax include this information.
Example of fax page printed out by the receiving machine
AP-1-2015-WED 03:00 PM
(1)
(1)
(2)
(3)
(4)
Date and time:
Sender's name:
Sender' number:
Transmitted page number:
SHARP PLANNING DIV.
FAX No. 0666211221
P. 001/001
(2)
(3)
(4)
programmed in the system settings (see "Daylight Saving Time" (p.176)).
programmed in the system settings (see "Own Passcode Set" (p.184)).
programmed in the system settings (see "Own Passcode Set" (p.184)).
3-digit number appearing in the format, "page number/total pages".
(Only the page number appears if you use manual transmission, direct
transmission, or quick on-line transmission.)
Position of sender information
You can select whether the sender information is added outside the document data or inside the document data in
the system settings (see "Print Station # In Rcvd Data" (p.186)). The factory default setting is outside the document
data.
Direction of
transmission
Inside the scanned data
(document data)
The top edge of the
scanned image will be cut
off by the sender's
information; however,
when both the sender and
the receiver use the same
size of paper, the printed fax will neither be reduced
nor split up and printed on two pages.
109
Length of
transmitted data
Length of
transmitted data
Length of
scanned data
Outside the scanned
data (document data)
None of the transmitted
image is cut off; however,
the transmitted image is
longer than the scanned
image, and thus when
both the sender and the
receiver use the same
size of paper, the printed fax may either be reduced or
split up and printed on two pages.
Length of
scanned data
Direction of
transmission
FAX FUNCTIONS
FORWARDING FUNCTION
When printing is not possible because of a paper, toner, or other problem, you can forward received faxes to another
fax machine if that machine has been appropriately programmed in your machine. This function can be conveniently
used in an office or other workplace where there is another fax machine connected to a different phone line. When a
fax has been received to memory, the FAX [DATA] light blinks (see "If received data cannot be printed" (p.96)).
(1) Fax transmission
to your machine
Transfer destination
(3) "Transfer" instruction
(4) Automatic dialing and
transmission to programmed
transfer destination
(5) Printing
Note
• All received faxes are forwarded; a particular fax cannot be selected for forwarding.
• Faxes that have been received to memory by the fax print hold function (p.97) are also forwarded.
• The result of forwarding is indicated in the activity report (see "REPORT AT REGULAR INTERVALS
(COMMUNICATION ACTIVITY REPORT)" (p.121)).
110
Other machine
Your machine
(2) Printing not possible because of
paper or toner problem
FAX FUNCTIONS
USING THE FORWARDING FUNCTION
Programming the fax number of the forwarding destination
The number of the forwarding destination is programmed in the system settings (see "Received Data FW. Station
Set" (p.188)). Only one fax number can be programmed. The forwarding function cannot be used unless a number is
programmed.
Forwarding received faxes
1
Select "FW. RX Data" with the [ ] or [ ] key and press the [OK] key.
2
Select "Transfer" with the [ ] or [ ] key and press the [OK] key.
The machine automatically dials the forwarding number programmed in the system settings and begins
forwarding the fax or faxes.
Note
• To cancel a forwarding operation
Press the [FAX STATUS] key, and then cancel forwarding in the same way as a regular fax transmission.
(See "CANCELING A FAX TRANSMISSION" (p.93).)
The fax(es) that was going to be forwarded will return to print standby status in your machine.
• If forwarding is not possible because the other machine is busy or a transmission error occurs, recall attempts
will be made according to the recall times setting. If forwarding is still not successful after the set number of
recall attempts are made, the fax(es) will return to print standby status in your machine.
• When forwarding is performed, all faxes that have been received in memory to that point are forwarded.
The page that was being printed when the problem occurred and all following pages will be forwarded.
• After a fax is forwarded, the fax data is automatically cleared from memory.
111
FAX FUNCTIONS
USING SETTINGS STORED AS A
PROGRAM
This function allows you to store the steps of an operation, including the destination and scanning settings, into a
program. This function is convenient when you frequently send documents, such as a daily report, to the same
destination. Up to 9 programs for fax transmission can be stored.
When storing a program, a name (maximum 36 letters) can be assigned to the program.
For information on storing, editing, and deleting programs, see "STORING, EDITING, AND DELETING
AUTO-DIAL NUMBERS (SPEED DIAL NUMBERS, AND GROUP DIALS)" (p.103).
The following settings can be stored in a program:
(1) Address setting
(2) Transmission method
Normal transmission (p.85), broadcast
transmission (p.99), polling (p.100), serial polling
(p.101)
(3) Original Size Enter
(4) Duplex Scanning
(5) Resolution and exposure
(6) Own number sendings (p.109)
(7) Transmission settings (p.89)
When storing a broadcast transmission or serial polling operation in a program, up to 200 destination fax numbers
can be stored.
Note
• A program differs from a timer transmission (p.98) in that it is not cleared from memory after transmission takes
place. A program thus allows you to repeatedly perform the same type of transmission. Note, however, that
programs do not allow you to establish a timer setting for transmission.
• A setting that can be stored in a program cannot be changed at the time that a program is used for a
transmission even if the setting is not stored in the program.
• The only settings that can be selected when using a program are the original size enter, duplex scanning, and
a timer setting.
USING A PROGRAM
1 In fax mode, place the original and select "Program" with the [
2 Select the program that you wish to use.
] or [ ] key.
If not all letters of the program name appear, press the [READ-END] key ( ) to
display all letters. Press the [READ-END] key ( ) once again to return to the
original screen.
3
If needed, select the original size and other settings, and then press the [BLACK &
WHITE START] key .
• Transmission takes place according to the program.
• If you selected a program that does not include a transmission method, set the transmission method and the
destinations to be dialed before pressing the [BLACK & WHITE START] key.
Note
Select settings that cannot be stored in a program before you press the [BLACK & WHITE START] key in step 3.
These settings include the original size (see "SELECTING THE ORIGINAL SIZE" (p.29)), duplex scanning (see
"FAXING A TWO-SIDED ORIGINAL" (p.88)), and a timer setting (see "AUTOMATIC TRANSMISSION AT A
SPECIFIED TIME" (p.98)).
112
FAX FUNCTIONS
FORWARDING RECEIVED DATA TO
A NETWORK ADDRESS (INBOUND
ROUTING SETTINGS)
You can have received faxes automatically forwarded to a specified shared folder. As an example, this function can
be used to route received faxes to a specified folder without printing the faxes.
All Inbound Routing settings are configured in the Web page.
The following explanation assumes that the Web page has been accessed with administrator rights.
For the procedure for accessing the Web pages, see "ABOUT THE WEB PAGES" (p.190).
To activate Inbound Routing, configure the basic settings before specifying the destination.
In the menu frame, click [Inbound Routing Settings]. Click the [Submit] button after
settings
CONFIGURING THE BASIC SETTINGS
Configure the basic settings of Inbound Routing.
Enabling the Inbound Routing function
Select [Enable] in [Inbound Routing].
Changing the print style of received data
Select a print style in [Print Style Setting].
Item
Settings
Description
Inbound Routing
Enable, Disable
Enable or disable the Inbound Routing function.
Print Style Setting
Always Print, Print at Error
Select a print style of received data.
113
FAX FUNCTIONS
Set a file name for forwarding received data
Select from the pull-down menu of items used for the file name.
To add a desired text string, select the "Characters" and enter the string in "Preset of Character" using up to 64
characters.
Select the item to be used as the file name in "File Name Setting".
Item
Description
Serial Number
Selecting Serial Number adds the unit serial number to the file name.
Sender Name
Selecting Sender Name adds the sender name to the file name.
Date & Time
Selecting Date & Time adds the date and time to the file name.
Session Page Counter
Selecting Session Page Counter adds the counter to the file name.
Unique Identifier
Selecting Unique Identifier adds the unique identifier to the file name.
Characters
To add a character string to the file name, select this checkbox and enter the text
string in "Preset of Character" using up to 64 characters.
Preset of Character
Enter a text string to be used in "Characters" using up to 64 characters.
Setting whether to print the transaction report
Select whether to print the transaction report when forwarding received data.
Specify the print condition in "Transaction Report Print Select Setting".
Item
Transaction Report Print
Select Setting
Settings
Description
Always Print, Print at Error,
Select a print style of the transaction report.
Do not Print
114
FAX FUNCTIONS
SETTINGS THE DESTINATION
Specify a sending source of received data and forwarding destination network folder to configure a forwarding table.
Up to 10 forwarding tables can be configured.
For each forwarding table, set the following items:
● Forward Condition (enabling/disabling forwarding, and the conditions to determine forwarding)
● Sender number (fax number)
● Forwarding destinations (network folder)
Note
• The names of the destination number (Forward destination 1 to 10) cannot be changed.
• Only the network folder can be specified for a forwarding destination. E-mail address, Scan to FTP, Scan to
Desktop, and fax number cannot be specified.
Viewing the destination list
1
Click [Destination].
The destination list appears.
Item
Description
Inbound Routing
Displays whether Inbound Routing function is enabled.
Number
Displays the forwarding destination number (Forward Destination 1 to 10).
Each of setup menu is displayed by clicking each number.
Forward Condition
Displays the forward condition of the destination (enabling/disabling and determining the
destination setting).
[Delete] button
To delete the forwarding condition stored in a destination number, select the "Number"
checkbox of the destination number and click the [Delete] button.
[Clear Checked] button
Clicking this clears all "Number" checkboxes.
Settings the destination
1
2
Click [Destination] and click the destination number to be set.
Select [Enable] in "Forward Condition" and select the determining condition for
forwarding.
Select [Forward (All)] or [Forward (Sender)].
3
If you wish to forward received data from a specific sender, enter the sender's fax
number in "Sender Number".
Enter the fax number using up to 20 digits. To enter the fax number from the fax addresses stored in the
machine, click the [Select from Address Book] button. The "Fax Destination" screen appears, and you can
select the sender's number from the fax address list.
4
Enter the destination network folder in "Forward Destination (Max.5)".
Up to five network folder can be specified as the destination.
Two types of methods are available for entering the destination. The set network folder are displayed in
"Forwarding Destination Settings".
• Entering an network folder directly
Click the [Direct Entry] button. When the "Forwarding Destination Settings (Direct Entry)" appears, enter a
network folder information ("Hostname or IP Address", "User Name", "Password"), and click the [Submit]
button.
• Selecting an network folder from the address book
Click the [Select From Address Book] button. The "Destination List" screen appears, and you can select an
network folder from the network folder list.
Note
To delete a set network folder, select the checkbox at the left of the network folder you wish to delete, and then
click the [Delete] button.
115
FAX FUNCTIONS
Forward Condition
Item
Settings
Forward
Condition
Description
Enable, Disable
Enable or disable the destination to be set in this screen.
Forward (All), Forward
(Sender)
Select the determination condition for forwarding the received FAX data.
Sender Number
Item
Description
Fax No.
Enter the sender's fax number if you have selected "Forward (Sender)" in "Forward
Conditions" setting. Up to 20 digits can be entered.
[Select From Address Book]
button
Click this button to select the fax number from the fax addresses stored in this machine.
Forward Destination (Max. 5)
Item
Description
Forwarding Destination Settings Displays the stored destinations. If no destination is stored, "Not Set" appears.
[Delete] button
Deletes the selected destination.
[Direct Entry] button
Click this button to enter an network folder directly.
[Select From Address Book]
button
Click this button to select an network folder from the network folder address list stored in the
machine.
SENDING A FAX DIRECTLY FROM A
COMPUTER (PC-Fax)
A document in a computer can be transmitted via the machine as a fax. Faxes are sent using the PC-Fax function in
the same way as documents are printed. Select the PC-Fax driver as the printer driver on your computer and then
select the Print command in the software application. Image data for transmission will be created and sent as a fax.
Fax transmission
Note
• To use the PC-Fax function, the PC-Fax driver must be installed. For more information, see the Software Setup
Guide
• This function can only be used on a Windows computer.
• This function can only be used for transmission. Faxes cannot be received to your computer.
116
FAX FUNCTIONS
CONNECTING AN EXTENSION PHONE
You can connect a telephone to the machine and use it as an extension phone to place and receive calls like any
normal phone. Fax reception can also be activated from an extension phone connected to the machine. (remote
operation)
CONNECTING AN EXTENSION PHONE
Insert the end of the extension phone cord into the extension phone jack on the left
side of the machine.
Extension phone jack
Note
Make sure you hear a "click" sound indicating that the cord is
securely connected.
Only use an extension telephone that can be connected to a modular jack.
If the shape of the cord plug is not compatible with the jack, consult your dealer or nearest Sharp customer
service center.
117
FAX FUNCTIONS
USING AN EXTENSION PHONE
Using an extension phone for voice calls
An extension phone connected to the machine can be used to place and receive voice calls just like a normal phone.
A extension phone can be used while another mode is being used (copying, etc.).
Note
• It may not be possible to make a call on your line during a power outage. This depends on the type of line
(optical line, etc.).
• If the fax reception mode is set to auto reception, you must lift the phone to answer a call before the machine
automatically begins reception. The machine is initially set to answer calls on two rings. The number of rings
can be changed to any number from 0 to 15 in the system settings. (See "#Of Rings At. RX" (p.187).)
• A call cannot be placed on hold.
Activating fax reception from an extension phone (remote reception)
After receiving a call on the extension phone, you can activate fax reception from the extension phone. This is called
"remote reception". After speaking, or when you hear a fax tone through the extension phone, perform the following
procedure with the extension phone still lifted. (If you made the call, remote reception will not be possible.)
Note
1
The following procedure is not possible if you are on a pulse dial line and your extension phone cannot produce
tone signals. To find out whether your extension phone can produce tone signals, refer to the manual for your
extension phone.
If you are on a pulse dial line, set your phone to issue tone signals.
Refer to your phone's manual to set the phone to issue tone signals.
If your phone is already set to issue tone signals, proceed to the next step.
2
Press the
key once and the
key twice on the extension phone.
Fax reception is activated.
3
Replace the extension phone.
Note
The one-digit number that is used to activate fax reception from an extension phone (initially set to "5") is called
the "remote reception number". You can change this number to any number from 0 to 9 in the system settings.
(See "Remote Reception" (p.185).)
118
FAX FUNCTIONS
Sending a fax after talking on the phone (Manual transmission)
If the other fax machine is set to manual reception, you can talk to the other party and then send a fax without
breaking the connection.
Note
Automatic redialing (p.91) will not take place if the line is busy.
1
Follow steps 1 to 4 of "BASIC PROCEDURE FOR SENDING FAXES" (p.85) and then
follow the steps below.
2
3
4
5
Lift the extension phone.
Dial the number of the other party.
Speak to the other party when they answer.
After the other party switches to fax reception, press your [BLACK & WHITE START]
key.
Transmission begins.
• If you have loaded the original on the document glass, you can only send one page by manual transmission.
Note
6
Canceling a fax transmission...
Press the [C] key. A screen appears asking you to cancel a fax transmission. Select "Yes" with the [
[ ] keys, and press the [OK] key.
]
Replace the extension phone.
Receiving a fax after talking (Manual reception)
When an extension phone is connected to the machine and you have set the reception mode to Manual (p.96), you
can talk to a person sending a fax manually and then begin fax reception without breaking the connection.
119
FAX FUNCTIONS
WHEN A TRANSACTION REPORT
IS PRINTED
The machine has been set to automatically print a transaction report to notify you of the result when a transmission
is not successful or when the Broadcast transmission function is used.
When transmission is not successful and a transaction report similar to the following is printed,
"FOLLOWING DATA CANNOT BE SENT. PLEASE HAND THIS REPORT TO XXX.", read the report and take
appropriate action.
The transaction report is set at the factory to print at the times indicated in gray
below, however, the times at
which the report is printed can be changed in the system settings. (See "List Setting" (p.183))
• Normal transmission:
ALWAYS PRINTS / ERROR ONLY /NEVER PRINTS
ALWAYS PRINTS /ERROR ONLY/NEVER PRINTS
• Broadcast transmission:
• Original image print setting*: ALWAYS PRINTS / ERROR ONLY /NEVER PRINTS
• Reception:
ALWAYS PRINTS /ERROR ONLY/ NEVER PRINTS
The Transaction Report shows the date of transmission, the time transmission began, the other party's name, the
duration of the operation, the number of pages, the type of transmission, the result, the department, and other
information.
* You can select whether or not part of the transmitted original is printed with transaction reports that are printed for
normal transmissions and broadcast transmissions.
Note
The list count appears in the "#" column of the Transaction Report and a serial number appears in the FILE
column. (These numbers are not related to the transaction.)
INFORMATION APPEARING IN THE TYPE/NOTE
COLUMN
Information such as the type of transmission and type of error appears in the TYPE/NOTE column of the "REPORT
AT REGULAR INTERVALS (COMMUNICATION ACTIVITY REPORT)" (p.121).
The following notes may appear.
Sending result
Explanation
OK
Transmission was completed successfully.
BUSY
Transmission was not successful because the line was busy.
CANCEL
A transmission was canceled while in progress or a stored transmission job was canceled.
P. FAIL
The power was turned off or a power failure occurred.
NO RX POLL
A polling request was denied because the polling machine did not have its own fax number
programmed.
PASS CODE # ERR
A polling request was denied because the other machine's fax number had not been stored as
a polling passcode in your machine.
ORIG ERROR
When you attempted to send a fax from the document feeder in direct transmission mode,
a misfeed occurred.
ERRORXXXXXX
Line conditions prevented the transmission from taking place normally.
A code used by service technicians appears.
First two digits
Last four digits
XX-XX OK
When group dialing or broadcast transmission was performed,
xxx- :
Indicates total number of transmissions.
xxx OK: Indicates completed transmissions.
120
FAX FUNCTIONS
Reception result
Explanation
OK
Reception was completed successfully
P. FAIL
The power was turned off or a power failure occurred.
MEMORY FULL
The image memory became full during substitute reception to memory.
LENGTH OVER
The transmitted document was over 800 mm long and therefore could not be received.
NO RX ROLL
When polling was attempted,
(1) Your fax number (sender's number) was not programmed in your machine.
(2) Your fax number was not programmed as a polling passcode number in the other machine.
RX NO POLL
When polling was attempted,
(1) The other machine did not have a polling function.
(2) The other machine did not have a document stored in polling memory.
ERRORXXXXXX
Line conditions prevented the reception from taking place normally.
A code used by service technicians appears.
First two digits
Last four digits
XX-XX OK
When serial polling ended normally,
xxx- :
Indicates total number of transmissions.
xxx OK: Indicates completed transmissions.
JUNK FAX ERR
Fax reception was denied by the reception denial function.
REPORT AT REGULAR INTERVALS
(COMMUNICATION ACTIVITY REPORT)
Your machine keeps a record of the most recent 50 transactions (both transmissions and receptions) that were
performed. The record includes the date of the transaction, the other party's name, the duration, and result.
You can have the report automatically printed when the number of transactions exceeds 50, or at a specified time.
This allows you to check the machine's activity at regular intervals.
The machine is initially set (factory default setting) to not print the report. To have the report printed, change the
setting in the system settings. (See "List Setting" (p.183).)
Note
• Refer to the table on "WHEN A TRANSACTION REPORT IS PRINTED" (p.120) for the notes that appear in the
TYPE/NOTE column.
• The activity report can also be printed out on demand. (See "PRINTING LISTS OF PROGRAMMED
INFORMATION AND SETTINGS" (p.109).)
121
FAX FUNCTIONS
WHEN AN ALARM SOUNDS AND A
WARNING MESSAGE IS DISPLAYED
When an error occurs during a transaction, an alarm will sound and a message will appear in the display.
If one of the following messages appears, follow the instructions in the table.
If another messages appears, see "INDICATORS AND DISPLAY MESSAGES" (p.151).
Message
(alarm sounds)
XXXXXX
Line error.
Meaning of message
Solution
An error prevented completion of the Try the transaction again.
transaction.
Page
–
SELF-DIAGNOSTIC FUNCTION
The machine has a self-diagnostic function that automatically stops operation if a problem occurs in the machine. If
a problem occurs in fax mode, the following display appears.
Message display
Call for service.
code:xx xx.
Main code
Action
Turn off the power and then turn it back on. If the error is not cleared, note the 2-digit main code
and the 2-digit sub-code and then contact your dealer.
Sub code
MESSAGES DURING NORMAL OPERATION
Message
SENT
No.001
Meaning of message
xx% This appears when a direct transmission ends ("xx" indicates the number of pages).
P-xxx
READING
No.001
xx%
P-xxx
The original is being scanned into memory (during memory transmission).
Stand-by.
22 AUG FRI 10:25
100%
The machine is in the standby state.
ENTER DIAL #
This appears when the [SPEAKER] key has been pressed.
122
5
SCANNER FUNCTIONS
ABOUT THE SCANNER FUNCTIONS
With this machine a document or photo can be scanned into an image file.
Installing the network expansion kit on the machine enables you to scan documents, photos, or other originals to
create a data file. You can then send the data file to the file server or your computer using the inter-corporate
network (Intranet) or the Internet. To send originals using the scanner function, specify the stored destination
(delivery address information name) from the operation panel (display) of the machine.
1. Scanning from a TWAIN-compliant application
4. Sending the scanned data
to a computer connected to
the same network
2. Sending the scanned image
to a USB memory
3. Sending the scanned data to FTP
5. Sending the scanned
data by E-mail
123
SCANNER FUNCTIONS
1
Scanning from a TWAIN-compliant application
A TWAIN-compliant application on a computer connected to the same network as the machine is used to scan
a document or image.
To use PC Scan, the scanner driver must be installed from the "Software CD-ROM" that accompanies the
machine.
For more information on scanning from a TWAIN-compliant application, see "SCANNING FROM YOUR
COMPUTER (PC SCAN)" (p.135)
2
Sending the scanned image to a USB memory
The scanned image can be sent to a USB memory installed on the machine. This is called "USB Memory Scan"
in this manual. For more information on USB Memory Scan, see "USB MEMORY SCAN" (p.139).
3
Sending the scanned data to FTP
The scanned image can be sent to a memory storage device on a network (a designated directory on an FTP
server). (This is called "Scan to FTP" in this manual.)
4
Sending the scanned data to a computer connected to the same network
The scanned file is sent to a shared folder on a Windows computer on the same network as the machine.
The scanned file is sent to a specified folder on your computer.
To use Scan to Desktop, software must be installed from the "Sharpdesk/Network Scanner Utilities" CD-ROM
that accompanies the machine. For the system requirements of the software, see the manual (PDF format) or
the Readme file on the CD-ROM. For the procedures for installing the software, see the "Sharpdesk Installation
Guide".
5
Sending the scanned data by E-mail
The scanned image can be sent to an e-mail recipient. (This is called "Scan to E-mail" in this manual.)
124
SCANNER FUNCTIONS
THE BASE SCREEN OF SCANNER MODE
The base screen of scan mode is displayed by pressing the [SCAN] key from the base screen of copy mode or fax
mode.
hz
Note
If a screen appears asking you what type of connection you are using after you press the [SCAN] key, select
"Network" with the [ ] or [ ] key and press the [OK] key.
Base screen of scan mode
(1)
(2)
(6)
(7)
(8)
(9)
(3)
(4)
(5)
(1) Message display
Messages appear here to indicate the current
status of the machine.
(2) Destination display
This shows the selected destination.
There are scanner transmission modes:
Scan to E-mail, Scan to Network Folder, Scan to
FTP, Scan to Desktop, and USB Memory Scan.
This shows the currently selected destination and
transmission mode.
(3) Original scanning mode / Original size display
Shows the currently selected original scanning
mode and scanning size.
:
One-sided scanning in the document
feeder.
:
Two-sided scanning in the document
feeder (Models with the two-sided
scanning function).
None: Document glass
(4) File format display
This shows the image data file type and file
method to be created.
(5) Resolution display
The shows the scanning resolution.
(6) Original size (p.130)
This is used to set the size of the original to be
transmitted.
(7) Resolution (p.130)
This is used to select the scanning resolution.
(8) Format (p.130)
This is used to select the image data file type and
file method to be created.
(9) Mono/Gray (p.131)
Set whether an original is scanned in Mono2 or
grayscale when the [BLACK & WHITE START] key
is pressed.
125
SCANNER FUNCTIONS
SENDING AN IMAGE
BASIC TRANSMISSION PROCEDURE
1 Make sure the machine is in scan mode.
When the SCAN indicator is lit, the machine is in scan mode. If the indicator is not lit, press the [SCAN] key.
If auditing mode has been enabled for the scan function in the system settings, a message will appear
prompting you to enter your account number when you switch to scan mode. Enter your account number (five
digits) with the numeric keys. (p.178)
2
Place the original(s) in the document feeder tray or on the document glass.
• To use the document feeder, see p.27.
• To use the document glass, see p.27.
If you are using the document glass to send multiple pages, place the first page first.
Note
3
You cannot place originals in both the document feeder tray and on the document glass and send them in a
single transmission.
Check the original size.
To change the original size, change as explained in "SETTING THE SCANNING SIZE" (p.130).
4
If needed, select the resolution setting (p.130).
The initial factory setting is [200dpi].
5
If needed, select the format (p.131).
The initial factory setting
Color / Grayscale :
PDF M
B/W :
PDF G4
6
If you select "B/W", adjust the exposure in B/W mode if needed. (p.131)
The initial factory setting is [B/W].
7
8
Press the [ADDRESS] key.
Select the destination selection method (p.128).
Select from the following three destination selection methods:
• "ADDRESS BOOK" (p.128)
Select one of the stored destinations directly from the operation panel.
• "ADDRESS ENTRY" (p.128)
Directly enter the e-mail address. (Only for Scan to E-mail.)
• "ADDRESS SEARCH" (p.128)
Access a directory data base on the Internet or your intranet and search for a destination e-mail address.
During a global address search, multiple addresses can be entered to perform a broadcast transmission.
Note
• Information on the destination can be stored in the Web page.
• The sender name is normally set to the name stored in "Reply E-mail Address" in "SMTP Setup" in the
Web page.
When you have finished searching for the destination, you will return to the following base screen.
126
SCANNER FUNCTIONS
Using the document feeder
9
Press the [COLOR START] key or
[BLACK & WHITE START] key.
Scanning begins.
If scanning is completed normally, the following
screen is appears briefly and then the display
returns to the base screen.
Using the document glass
9
Press the [COLOR START] key or
[BLACK & WHITE START] key.
Scanning begins.
10 If you have another page to scan,
change pages and then press [COLOR
START] key or [BLACK & WHITE
START] key.
• Repeat this sequence until all pages have been
scanned.
• If no action is taken for one minute (the
[COLOR START] key or [BLACK & WHITE
START] key is not pressed), scanning
automatically ends and transmission begins.
11 When the final original page has been
scanned, press the [READ-END] key
( ).
Open the document feeder and remove the
document. When the original is removed or any
key operation is performed, the display returns to
the base screen.
Note
Canceling transmission
• To cancel the transmission while "Reading" appears or before the [READ-END] key ( ) is pressed, press the
[C] or [CA] key.
• If the power is turned off or a power failure occurs while a document is being scanned in the document feeder,
the machine will stop and a document misfeed will occur. After the power is restored, remove the misfed
original as explained in "MISFEED REMOVAL" (p.153)".
• When performing a Scan to E-mail transmission, note the following points:
Be careful not to send image data files that are too large. Your mail server's system administrator may have
placed a limit on the amount of data that can be sent in one e-mail transmission. If this limit is exceeded, the
e-mail will not be delivered to the recipient. Even if there is no limit and your e-mail is successfully delivered,
a large data file may take a long time to be received and place a heavy burden on the recipient's network,
depending on the recipient's network (Internet) environment. If large image data files are repeatedly sent, the
resulting burden on the network may slow down the speed of other, unrelated data transmissions and in some
cases, may even cause the mail server or network to go down. In cases where you need to send a large file or
multiple images, try lowering the resolution or reducing the scanned original size.
127
SCANNER FUNCTIONS
SELECTING A DESTINATION (USING THE [ADDRESS]
KEY)
A destination can be selected using one of three methods: Selecting from "ADDRESS BOOK", using "ADDRESS
ENTRY", or "ADDRESS SEARCH".
Note
• Multiple destination scan be selected for a Scan to E-mail transmission. (Maximum of 20.)
• Only one destination can be selected for a Scan to Network, Scan to FTP or Scan to Desktop transmission.
ADDRESS BOOK
1
2
Press the [ADDRESS] key, and select the "Address Book".
Change tabs as needed with the [ ] or [ ] key and select the desired destination with
the [ ] or [ ] key.
You can switch between information on the selected destination and the destination
list by pressing the [READ-END] key ( ).
3
Press the [READ-END] key ( ).
A checkmark appears by the selected destination. To cancel the selection, press the [READ-END] key (
once again to remove the checkmark. To select multiple destinations, repeat steps.
)
ADDRESS ENTRY
1
Press the [ADDRESS] key, and select "Address Entry" with the [ ] key, and press the
[OK] key.
2
3
Enter the destination address.
Press the [OK] key.
ADDRESS SEARCH
1
Press the [ADDRESS] key, and select "Global Address Search" with the [ ] key, and
press the [OK] key.
2
3
4
Enter the search characters.
Select the desired destination with the [ ] or [ ] key.
Press the [OK] key.
128
SCANNER FUNCTIONS
TRANSMITTING A TWO-SIDED ORIGINAL
The original field of the display shows the original scanning size.
The current original scan mode setting is indicated by an icon.
:
:
One-sided scanning in the document feeder.
Two-sided scanning in the document feeder (Models with the
two-sided scanning function).
None: Document glass
Follow these steps to automatically transmit a two-sided original. (Only models with the two-sided scanning
function.)
Note
Only the following two-sided document sizes can be used:
Standard sizes
8-1/2" x 14", 8-1/2" x 13-1/2", 8-1/2" x 13-2/5", 8-1/2" x 13", 8-1/2" x 11", 5-1/2" x 8-1/2", A4, B5, A5
Non-standard sizes
Inch sizes
AB sizes
1
X: 6-3/4 to 14 inches, Y: 5-1/2 to 8-1/2 inches
X: 170 to 356 mm, Y: 140 to 216 mm
Place the original(s) in the document feeder tray, and check the original size.
For information on placing an original, see "4. COPY FUNCTIONS" of the "Operation manual (for general
information and copier)".
2
Press the [DUPLEX] key, and Select "2-Sided" with the [ ] or [ ] key, and press the
[OK] key.
3
Select "Portrait-Booklet", "Portrait-tablet", "Landscape-Booklet", "Landscape-tablet"
with the [ ] or [ ] key, and press the [OK] key.
4
Press the [OK] key.
Note
• Booklets and tablets Two-sided originals that are bound at the side are
booklets, and two-sided originals that are bound at the top are tablets.
• Two-sided scanning mode turns off after the transmission is finished.
Two-sided scanning mode can also be canceled by pressing the [CA] key.
• Two-sided scanning is only possible when a document feeder (Models with the
two-sided scanning function) is used. Automatic scanning of both sides of an
original is not possible when the document glass is used.
• Two-sided scanning of originals longer than 8-1/2" x 11" (A4) is not possible.
• To cancel two-sided scanning, select "1-Sided" in step 2 and then press the
[OK] key.
129
BOOKLET
TABLET
SCANNER FUNCTIONS
STORING SCANNING SETTINGS
Sets of scanning settings (scan size, resolution, file type, etc.) can be changed for use in various scanning
applications.
SETTING THE SCANNING SIZE
The default scanning size is 8-1/2" x 11". (If "SCANNING BUSINESS CARDS (BUSINESS CARD SCAN)" (p.133)
has been selected, the scanning size is set to business card size.)
If you change the original size, follow the steps below to change the setting after you have placed the original in the
document feeder or on the document glass (p.27).
1
Select "Original Size" with the [ ] or [ ] key, and then select the original size.
Note
To select an inch size, press the [
] key.
The original scanning size can be set manually.
In the Inch original size selection screen, select [Size Input] and press the [OK] key to display the screen below.
Select the width (X) or the length (Y) with [ ] or [
increments of 1/8" or 1 mm with [ ] or [ ] key.
] key, and adjust in
Input range
X: 5-1/2" to 14" / 140 to 356 mm*
Y: 5-1/2" to 8-1/2" / 140 to 216 mm
* 5-1/2" x 11-5/8" / 140 to 297 mm when the document glass is used
Note
To cancel a manual original size setting, press the [CA] key.
If it is not possible to select the actual original size, select a size that is larger than the actual original size.
If a smaller size is selected, part of the original will not be transmitted.
SELECTING THE RESOLUTION
The scanning resolution can be selected. After selecting scan mode and placing the original (steps 1 to 3 on p.126),
perform the procedure below.
The factory default setting for the resolution is "200dpi".
If you need to change the resolution, follow these steps.
1
2
Select "Resolution" with the [ ] or [ ] key, and then select the resolution.
Press the [OK] key.
Note
Resolution
• The default resolution setting is 200 dpi. For typical text documents, a resolution of 200 dpi or 300 dpi produces
sufficiently legible image data. (A resolution of 200 dpi corresponds to the generally used "Fine" in fax mode.
For this reason, the 600 dpi setting should only be used in cases where high-clarity image reproduction is
required, such as an original that includes photographs or illustrations.
• The default setting can be changed in the system settings. (p.189)
130
SCANNER FUNCTIONS
SELECTING THE FILE FORMAT
After selecting scan mode and placing the original (steps 1 to 3 on p.126), perform the procedure below.
The factory default settings are "PDF" for the file type and "Multi" for the file creation method (multiple scanned
images are combined into one file).
If you need to change the file format, follow these steps.
1
Select "Format" with the [ ] or [ ] key, and select "Color / Grayscale" or "B/W", and
press the [OK] key.
2
Select the file type with the [ ] or [ ] key, and select the file creation method.
When "Single" is selected, a one-page file is created for the scanned image.
When "Multi" is selected, all scanned images can be combined into a single file.
3
Press the [OK] key.
Note
• When the file type is set to "TIFF", the file creation method can only be select.
• To open the scanned image without using the software program in the accompanied CD-ROM, the recipient
must have a viewer program that can open the image format (file type) that was selected as explained above.
If the recipient cannot open the image, try sending the image in a different format.
ADJUSTING THE GRAYSCALE OF BLACK & WHITE
MODE
Set whether a black & white original is scanned in Mono2 or grayscale when the [BLACK & WHITE START] key is
pressed. Select scan mode, place the original (steps 1 to 3 on p.126), and then follow the procedure below.
B/W (BLACK & WHITE)
Colors in the original are scanned as black or white.
Grayscale
The colors in the original are scanned in black and white as shades of gray (grayscale).
1
2
Select "Mono/Grayscale" with the [ ] or [ ] key.
Select "B/W" or "Grayscale" with the [ ] or [ ] key.
L
3
Press the [OK] key.
131
SCANNER FUNCTIONS
ADJUSTING THE SCANNING EXPOSURE
The exposure for an image can be adjusted. The larger the value, the darker the image.
Select scan mode, place the original (steps 1 to 3 on p.126), and then follow the procedure below.
The scanning exposure is set to "Txt/Prt Photo Auto" by factory default.
1
Press [EXPOSURE] key with the [ ] or [ ] key, and select "Text", "Txt/Prt Photo", or
"Photo" for the original type.
2
To select, change the level (5 levels are available) with the [ ] [ ] keys and press the
[OK] key.
3
Press the [OK] key.
ENABLING SCANNING MARGINS (VOID AREA)
When this function is enabled, margins (void areas that are not scanned) are created around the edges of the
machine's maximum scanning area.
Select scan mode, place the original (steps 1 to 3 on p.126), and then follow the procedure below.
The factory default setting for the void area is "Off" (disabled).
If you need to change the void area setting, follow these steps.
Void area: 7/64" (2.5 mm) from the top and bottom edges
1/8" (3.0 mm) from the left and right edges
1 Press the [SPECIAL FUNCTION] key to select "Void Area" with the [
2 Select "On" or "Off" with the [ ] or [ ] key.
3 Press the [OK] key.
WHITENING FAINT COLORS IN COPIES
(SUPPRESS BACKGROUND)
] or [ ] key.
For more information on WHITENING FAINT COLORS IN COPIES (Suppress Background), see "WHITENING
FAINT COLORS IN COPIES (Suppress Background)" (p.36).
ADJUSTING THE SHARPNESS OF AN IMAGE
(SHARPNESS)
For more information on ADJUSTING THE SHARPNESS OF AN IMAGE (Sharpness), see "ADJUSTING THE
SHARPNESS OF AN IMAGE (Sharpness)" (p.36).
132
SCANNER FUNCTIONS
SCANNING BUSINESS CARDS (BUSINESS CARD SCAN)
(Models with the two-sided scanning function)
Business cards can be scanned.
Only when using this feature, it is possible to read the business card from the automatic document feeder.
Original glass
1
Document feeder tray
Press the [SPECIAL FUNCTION] key, and press the [ ] or [ ] key to select "Bus. Card
Scan".
The original size is set to business card size (custom).
2
Press the [OK] key.
Note
• When business card scan mode is selected, the original size cannot be changed.
• When business card scan mode is selected, duplex scanning cannot be used.
• When using the automatic document feeder, it may not be possible to feed or read the card correctly
depending on its condition/material/shape/processing method.
IMAGE ORIENTATION AND STANDARD ORIGINAL
PLACEMENT ORIENTATION
When using the document glass, the original should be placed face down in the far left corner of the glass with the
top edge of the original at the left edge of the glass.
When using the document feeder, the original should be placed face up in the middle of the document feeder tray,
with the top of the original to the right.
Document glass
Document feeder
133
Scanning result
SCANNER FUNCTIONS
STORING AND EDITING/DELETING A PROGRAM
This function lets you store a transmission address and scanning settings. The address and settings can be called
up when you scan a document, saving you the trouble of selecting the address and settings. Up to two programs can
be stored for scanning.
• Address Setting • Original Size • Resolution • Format • Exposure • Original scanning mode can be stored in a
program.
1
Press the [SPECIAL FUNCTION] key and select "Register Program" with the [ ] or [ ]
key, and press the [OK] key.
2
Select "Enter", "Change", "Delete", and press the [OK] key.
● Register program
1 Select "No Store", and press the [OK] key.
2 Select the program you want to store with the [ ] or [ ] key, and press the [OK] key.
Setting each screen will be displayed.
3 Press the [OK] key to perform the required settings.
Return to step 2.
4 Press the [START] key.
Programs are stored.
● Change program
Select the program you want to change, and press the [OK] key.
Change the settings same operation as for registration.
● Delete program
1 Select the program you want to delete, and press the [OK] key.
2 Select "Delete", and press the [OK] key.
USING STORED SETTINGS (PROGRAM)
Press the [Program 1] or [Program 2] key. See "BASIC TRANSMISSION PROCEDURE" (p.126).
134
SCANNER FUNCTIONS
SCANNING FROM YOUR COMPUTER
(PC SCAN)
The machine supports the TWAIN standard, making it possible to scan from TWAIN-compliant applications.
SCANNING FROM A TWAIN-COMPLIANT APPLICATION
Scanning in PC scan mode is only possible when the scanner driver has been installed from the "Software
CD-ROM" using the integrated installer. For the procedures for installing the scanner driver and configuring settings,
see the Software Setup Guide.
1
Place the original(s) that you wish to scan on the document glass/document feeder.
Press the [SPECIAL FUNCTION] key, and select "PC SCAN".
2
After starting TWAIN-compliant application, click the "File" menu and select a menu
to scan.
Note
3
Select "SHARP MFP TWAIN V", and click the "Select" button.
Note
4
The method for accessing the menu to select the scanner depends upon the application.
For more information, refer to the manual or the help file of your application.
Depending on your system, "SHARP MFP TWAIN V 1.0 (32-32)" may appear in the above "Select Source" screen.
Select the menu to acquire an image from the application’s "File" menu.
The scanner driver setup screen will appear.
"Scanner driver settings" (p.137)
5
In the "Scanning Source" menu, select the location where you placed the original in
Step 2.
If you placed a one-sided original in the document feeder, select
"SPF (Simplex)".
Only when using the document feeder (Models with the
two-sided scanning function):
If you placed a two-sided original in the document feeder (Models
with the two-sided scanning function), select "SPF (Duplex-Book)"
or "SPF (Duplex-Tablet)" according to the binding position of the
original.
Note
If you selected "SPF (Duplex-Book)" or "SPF (Duplex-Tablet)" in the "Scanning Source" menu, select whether the
orientation of the placed original is "Right edge is fed first" or "Top edge is fed first".
135
SCANNER FUNCTIONS
6
Click the "Preview" button.
The preview image will appear.
Note
7
• If the angle of the image is not correct, reset the original, and click the "Preview" button again.
• If the preview image is not oriented correctly, click the "Rotate" button in the preview screen. This rotates
the preview image 90 degrees clockwise, allowing you to correct the orientation without resetting the
original. "Preview screen" (p.138)
• If you set multiple pages in the document feeder, the machine previews only the top page of the originals,
and then sends it to the original exit area. Return the previewed original to the document feeder before
starting the scanning job.
Specify the scanning area and set the scan preferences.
For information on specifying the scan area and setting the scan preferences, see scanner driver Help.
"Scanner driver settings" (p.137)
Scanning a large area at high resolution results in a large quantity of data and a prolonged scanning time.
Caution It is recommended that you set appropriate scanning preferences for the type of original being scanned, i.e.,
Web page (monitor), Photo, FAX, or OCR.
8
When you are ready to begin scanning, click the "Scan" button.
Scanning begins and the image is acquired into the application that you are using.
In the application, assign a file name and save the file.
Note
9
To cancel a scanning job after the "Scan" button has been clicked, press the [Esc] key on your keyboard or
the [C] key or [CA] key on the operation panel.
Press the [BACK] key on the operation panel.
136
SCANNER FUNCTIONS
Scanner driver settings
The scanner driver setup screen consists of the "Set-up screen", which lets you select scan settings, and the
"Preview screen", which shows the scanned image. For details on the scan settings, click the "Help" button in the
preview screen to display Help.
Set-up screen
(1)
(2)
(3)
(4)
(5)
(6)
(7)
(1) "Scanning Position" menu
("Scanning Source" in some regions)
Select the location where the original is placed.
Selections are "Platen" (document glass), "SPF
(Simplex)", "SPF (Duplex-Book)" or "SPF
(Duplex-Tablet)".
"SCANNING FROM A TWAIN-COMPLIANT
APPLICATION" (p.135)
Note
On machines without an document feeder,
this setting is fixed at "Platen".
(2) "Scanning Mode" menu
Select "Preset" or "Custom Settings" ("Standard"
or "Professional" in some regions) for the scanning
mode.
The "Preset (or Standard)" screen lets you select
the original type as well as monitor, photo, fax, or
OCR according to the purpose of scanning.
If you wish to change the default settings for these
four buttons, or select custom settings such as the
image type and resolution before scanning, switch
to the "Custom Settings (or Professional)" screen.
For details on the settings, click the "Help" button
in the preview screen to display Help.
(3) "Image Area" menu
Set the scanning area. To scan the original size
detected by the machine, select "Auto".
The scanning area can also be specified as
desired in the preview window.
(4) "Zoom Preview" checkbox
When this is selected, the selected part of the
preview image will be enlarged when the "Preview"
button is clicked.
To return to the regular view, remove the
checkmark.
Note
[Zoom Preview] cannot be used when [SPF]
is selected in the "Scanning Position" menu.
(5) "Preview" button
Previews the document.
Note
If [Preview] is canceled by immediately
pressing the [Esc] key on your keyboard,
nothing will appear in the preview screen.
(6) "Scan" button
("Scanning" in some regions)
Click to scan an original using the selected
settings. Before clicking the "Scan" button, make
sure the settings are correct.
Note
To cancel a scanning job after the "Scan"
button is clicked, press the [Esc] key on your
keyboard.
(7) "Close" button
Click to close the scanner driver setup screen.
137
SCANNER FUNCTIONS
Preview screen
(1)
(2)
(3)
(4)
(5)
(1) Preview screen
Click the "Preview" button in the Set-up screen to
display the scanned image. You can specify the
scanning area by dragging the mouse inside the
window. The inside of the frame that is created
when you drag the mouse will be the scanning
area. To cancel a specified scanning area and
clear the frame, click anywhere outside the frame.
(2) "Rotate" button
Click to rotate the preview image 90 degrees
clockwise. This allows the orientation to be
corrected without resetting the original. Upon
scanning, the image file is created in the
orientation shown in the preview screen.
(3) "Image Size" button
Click to open a dialog box that allows you to
specify the scanning area by entering numbers.
Pixels, mm, or inches can be selected for the units
of the numbers. By initially specifying a scanning
area, numbers can be entered to change that area
relative to the top left corner as a fixed origin.
(4) "Auto Scan Area Judgement" button
Click when the preview screen is displayed to
automatically set the scanning area to the entire
preview image.
Click the "Auto Scan Area
Judgement" button to
automatically set the
scanning area to the entire
preview image.
Preview image
Preview screen
(5) "Help" button
Click to display the help file for the scanner driver.
138
SCANNER FUNCTIONS
USB MEMORY SCAN
USING THE USB MEMORY SCAN FUNCTION
A scanned image can be sent (save) to a commercially available USB memory device that has been connected to
the machine.
1
Make sure the machine is in scan mode.
When the SCAN indicator is lit, the machine is in scan mode. If the indicator is not lit, press the [SCAN] key.
If auditing mode has been enabled for the scan function in the system settings, a message will appear
prompting you to enter your account number when you switch to scan mode. Enter your account number (five
digits) with the numeric keys. (p.178)
2
Place the original(s) in the document feeder tray or on the document glass.
For detailed information on placing an original, see "PLACING THE ORIGINAL" (p.27).
If you are using the document glass to send multiple pages, place the first page first.
Note
3
4
You cannot place originals in both the document feeder tray and on the document glass and send them in a
single transmission.
Press the [ADDRESS] key.
Select "USB Memory Scan" using the [ ] key, press the [OK] key.
139
SCANNER FUNCTIONS
5
Connect the USB memory device to the machine.
Note
If a USB memory device is inserted into the machine prior to step 4, the following screen will appear.
Instead of performing steps 3 and 4, you can select "Scan to the memory device" with the [
above screen and press the [OK] key to select the USB memory device as the destination.
Using the document feeder
6
Press the [COLOR START] key or
[BLACK & WHITE START] key.
Scanning begins.
If scanning is completed normally, "Complete." is
appears briefly and then the display returns to the
base screen.
] or [
] key in the
Using the document glass
6
Press the [COLOR START] key or
[BLACK & WHITE START] key.
Scanning begins.
7
If you have another page to scan,
change pages and then press [COLOR
START] key or [BLACK & WHITE
START] key.
• Repeat this sequence until all pages have been
scanned.
• If no action is taken for one minute (the
[START] key is not pressed), scanning
automatically ends and transmission begins.
8
When the final original page has been
scanned, press the [READ-END] key
( ).
Open the document feeder and remove the
document. When the original is removed or any
key operation is performed, the display returns to
the base screen.
140
6
TROUBLESHOOTING
This chapter describes troubleshooting and misfeed removal.
If you encounter a problem when using the machine, check the following troubleshooting guide before calling for
service. If you cannot resolve the problem using the troubleshooting guide, turn off the main switch, disconnect the
power cord from the power outlet, and contact your dealer.
If you experience difficulty using the machine, check the following troubleshooting guide before calling for service.
Many problems can be easily resolved by the user. If you are unable to solve the problem using the troubleshooting
guide, turn off the power switch and unplug the machine, and contact your SHARP Service Department.
"**-**" represents a code consisting of numbers and letters. When contacting your dealer, inform your dealer of the
code that is displayed.
TROUBLESHOOTING
NETWORK PROBLEMS
The machine does not connect to the network. ....................................................................................... 143
MACHINE/COPYING PROBLEMS
The machine does not operate. ............................................................................................................... 143
The power is on, but copying does not take place. .................................................................................. 143
Copies are too dark or too light................................................................................................................ 143
The text is blurred when I make a copy. ................................................................................................... 144
Blank copies............................................................................................................................................. 144
Part of the image is cut off or there is too much blank space. ................................................................. 144
Wrinkles appear in the paper or the image disappears in places. ........................................................... 144
Paper misfeed.......................................................................................................................................... 144
Copies are smudged or dirty.................................................................................................................... 145
White or black lines appear on copies. .................................................................................................... 145
Paper size for a paper tray cannot be set. ............................................................................................... 145
A copy job stops before it is finished........................................................................................................ 145
The display turns off................................................................................................................................. 145
Lighting fixture flickers. ............................................................................................................................ 145
PRINTING AND SCANNING PROBLEMS
The machine does not print. (ONLINE indicator does not blink.)............................................................. 146
The machine does not print. (ONLINE indicator was blinking.) ............................................................... 146
Printing is slow. ........................................................................................................................................ 146
The printed image is light and uneven. .................................................................................................... 147
The printed image is dirty......................................................................................................................... 147
The printed image is skewed or it runs off the paper. .............................................................................. 147
Poor scanning quality............................................................................................................................... 148
Unable to scan the image. ....................................................................................................................... 148
The recipient does not receive a transmitted data. .................................................................................. 148
The recipient does not receive data sent by e-mail (Scan to E-mail)....................................................... 149
Transmission takes a long time. .............................................................................................................. 149
The [COLOR START] or [BLACK & WHITE START] indicator is not lit in the USB Memory Scan mode................ 149
"Check the USB memory." appears in the display during USB Memory Scan. ....................................... 149
"Memory is full. Job is canceled." appears in the display during USB Memory Scan. ............................. 149
141
TROUBLESHOOTING
FAX PROBLEMS
The machine does not operate. ............................................................................................................... 149
Dialing is not possible. ............................................................................................................................. 149
Cannot send a fax.................................................................................................................................... 150
The transmitted image prints out blank at the receiving side................................................................... 150
The transmitted image is distorted........................................................................................................... 150
White or black lines appear in the transmitted image. ............................................................................. 150
Transmission does not take place at the specified time. ......................................................................... 150
Printing does not take place after reception............................................................................................. 150
A received fax prints out blank................................................................................................................. 150
The received image is faint. ..................................................................................................................... 150
The received image is distorted. .............................................................................................................. 150
A dial tone is not heard through the speaker. .......................................................................................... 151
The machine does not ring. ..................................................................................................................... 151
Dialing is not possible. ............................................................................................................................. 151
INDICATORS AND DISPLAY MESSAGES.................................................. 151
IF YOUR E-MAIL IS RETURNED.................................................................. 152
MISFEED REMOVAL .................................................................................... 153
MISFEED IN THE DOCUMENT FEEDER ............................................................................................... 153
MISFEED IN THE BYPASS TRAY .......................................................................................................... 155
MISFEED IN THE MACHINE................................................................................................................... 156
MISFEED IN THE PAPER TRAY 1 ......................................................................................................... 159
MISFEED IN THE PAPER TRAY 2 ......................................................................................................... 159
REPLACING THE TONER CARTRIDGE...................................................... 160
REPLACING THE TONER COLLECTION CONTAINER ............................. 161
142
TROUBLESHOOTING
TROUBLESHOOTING
NETWORK PROBLEMS
Problem
Cause and solution
Page
The LAN cable is disconnected.
→ Make sure that he LAN cable is firmly inserted in the connectors
on the machine and your computer. To connect the cable, see the
"Software setup guide".
The machine does not connect to
the network.
9
Is the machine configured for se on he same network as
the computer?
→ The machine cannot be used if it is not connected to the same
network as the computer, or if it is not configured for use on the
network.
For more information, consult your network administrator.
–
MACHINE/COPYING PROBLEMS
The following problems are related to the general operation of the machine and copying.
Problem
Cause and solution
The machine is not plugged into a power outlet.
→ Plug the machine into a grounded outlet.
Power switch OFF.
→ Turn the power switch ON.
Page
–
15
The machine is warming up.
→ The machine requires some time to warm up after the power
switch is turned on. While the machine is warming up, copy
settings can be selected but copying is not possible. Wait until
"Ready to copy." appears.
The front cover or the side cover is not completely closed.
The machine does not operate.
→ Close the front cover or the side cover.
15
–
The machine is in auto power shut-off mode.
→ When auto power shut-off mode has activated, only the
[ENERGY SAVE] indicator blinks; all other indicators and the
display are off. The machine returns to normal operation when
the [ENERGY SAVE] key is pressed, when a print job or fax is
received, or when scanning from a computer is started.
* Except when print hold for the fax function is enabled.
Misfeed occurs.
→ To remove the misfeed, see "MISFEED REMOVAL".
The tray is out of paper.
→ Load paper.
The power is on, but copying does
not take place.
→ Press the [COPY] key to select copy mode.
15
153
19
–
An appropriate exposure for the original has not been
selected.
Copies are too dark or too light.
→ Select a suitable exposure mode with the [EXPOSURE] key and
set an appropriate exposure level with the [ ] or [ ] key.
→ If the copy is too light or too dark even though "AUTO" was
selected with the [EXPOSURE] key, adjust the automatic
exposure level.
143
28
TROUBLESHOOTING
Problem
The text is blurred when I make a
copy.
Blank copies.
Cause and solution
Select a suitable exposure for the original in the copy
exposure screen.
28
→ Change the exposure to "Text" with the [EXPOSURE] key.
The original is not placed face up in the document feeder
or face down on the document glass.
→ Place the original face up in the document feeder or face down on
the document glass.
The original was not placed in the correct position.
→ Place the original correctly.
Part of the image is cut off or there
is too much blank space.
Page
The size of paper loaded in the tray was changed without
changing the tray's paper size setting.
→ Be sure to change the tray's paper size setting whenever you
change the size of paper loaded in the tray.
The paper is outside of the specified size and weight range.
→ Use copy paper within the specified range.
27
27
22
19
Paper curled or damp.
Wrinkles appear in the paper or
the image disappears in places.
→ Do not use curled or crimped paper. Replace with dry copy paper.
During periods when the machine is not used for a long time,
remove the paper from the tray and store it in a dark place in a
bag to prevent moisture absorption.
–
The fixing unit release levers were not returned to their
original positions
→ If the fixing unit release levers are not returned, poor toner
adhesion, smudging, and lines may occur. Be sure to press both
levers up to return to their original positions.
The paper is outside of the specified size and weight
range.
157
16
→ Use copy paper within the specified range.
Paper curled or damp.
→ Do not use curled or crimped paper. Replace with dry copy paper.
During periods when the machine is not used for a long time,
remove the paper from the tray and store it in a dark place in a
bag to prevent moisture absorption.
Paper is not loaded properly.
→ Make sure the paper is properly installed.
Pieces of paper inside machine.
→ Remove all pieces of misfed paper.
Several sheets of paper stick together.
Paper misfeed.
→ Fan the paper well before loading it.
A paper misfeed has occurred in the tray.
→ Turn the paper over and/or turn it around, and reload.
–
19
153
19
19
Too much paper is loaded in the tray.
→ If the stack of paper is higher than the indicator line on the tray,
remove some of the paper and reload so that the stack does not
exceed the line.
19
The guides on the bypass tray do not match the width of
the paper.
→ Adjust the guides to match the width of the paper.
If the paper guide presses too hard against the paper, a misfeed
may occur. Adjust the guide so that it lightly contacts the paper.
The bypass tray extension is not pulled out.
→ When loading paper, open the extension.
144
20
20
TROUBLESHOOTING
Problem
Paper misfeed.
Cause and solution
The bypass paper feed roller is dirty.
→ Clean the roller.
The document glass or the underside of the document
feeder is dirty.
Copies are smudged or dirty.
Original smudged or blotchy.
The scanner glass for the document feeder is dirty.
→ Clean the long, narrow scanning glass.
Press the [COPY] key to select copy mode.
Copying or printing is performed.
Paper size for a paper tray cannot
be set.
164
163
→ Clean regularly.
→ Use a clean original.
White or black lines appear on
copies.
Page
→ Set the paper size after copying or printing is complete.
The machine has stopped temporarily due to running out
of paper or a misfeed.
–
164
–
11
19, 153
→ Load paper or remove the misfeed, and then set the paper size.
The paper output tray is full.
A copy job stops before it is
finished.
→ Remove the copies in the paper output tray and press the
[COLOR START] key or [BLACK & WHITE START] key to resume
copying.
The tray is out of paper.
→ Load paper.
9
19
Any other indicators turned off.
The display turns off.
→ If other indicators are lit, the machine is in "Preheat mode". Press
any key on the operation panel to resume normal operation.
[ENERGY SAVE] indicator blinks.
→ The machine is in auto power shut-off mode. Press the [ENERGY
SAVE] key to resume normal operation.
Lighting fixture flickers.
15
The same power outlet being used is for the lighting
fixture and the machine.
→ Connect the machine to a power outlet which is not used for other
electric appliances.
145
15
–
TROUBLESHOOTING
PRINTING AND SCANNING PROBLEMS
In addition to this section, troubleshooting information can also be found in the README files for each of the
software programs. To view a README file, see "SOFTWARE SETUP GUIDE".
Problem
Cause and solution
Page
The machine is set to off-line mode.
→ If the ONLINE indicator is not on, press the [SPECIAL
FUNCTION] key to switch to printer mode and then use the [
key to select "Online/Offline".
]
76
The machine is not correctly connected with your
computer.
→ Check both ends of the printer cable and make sure you have a
solid connection. Try a known good cable. For information on
cables, see "SPECIFICATIONS (START GUIDE)".
Copy job is performed.
→ Wait until the copy job is complete.
9
–
Your machine is not selected correctly in the current
application for the print job.
The machine does not print.
(ONLINE indicator does not blink.)
→ When choosing "Print" from the "File" menu located in
applications, be sure you have selected "SHARP MX-XXXX"
(where XXXX is the model name of your machine) printer
displayed in the "Print" dialog box.
–
The printer driver has not been installed properly.
→ Follow these steps to check and see if the printer driver is installed.
1 Click the "Start" button, and then click "Devices and Printers".
In Windows Vista, click the "Start" button, click "Control
Panel", and then click "Printer".
In Windows XP, click the "start" button, and then click
"Printers and Faxes".
In Windows 2000, click the "Start" button, select "Settings"
and then click "Printers".
2 If the "SHARP MX-XXXX" printer driver icon is shown but you
still cannot print, the printer driver may not have been installed
correctly. In this case, delete the software and then reinstall it.
–
The port setting is not correct.
→ Printing is not possible if the printer driver port setting is not
correct. Set the port correctly. For more information, see the
Software Setup Guide.
9
Printing is disabled.
→ If "CANCEL JOBS OF INVALID ACCOUNTS" is enabled in the
system settings, printing will not be possible. Consult the
administrator.
178
The tray size settings are not the same on the machine
and in the printer driver.
The machine does not print.
(ONLINE indicator was blinking.)
→ Make sure that the same tray paper size is set on the machine
and in the printer driver. To change the tray's paper size setting
on the machine, see "CHANGING THE PAPER SIZE SETTING
OF A TRAY" (p.22) or see Software Setup Guide to change it in
the printer driver.
The specified size of paper has not been loaded.
→ Load the specified size of paper in the paper tray.
Printing is slow.
Simultaneous use of two or more application software
programs.
→ Start printing after quitting all unused application software programs.
146
22
19
–
TROUBLESHOOTING
Problem
The printed image is light and
uneven.
Cause and solution
Page
The paper is loaded so that printing takes place on the
back side of the paper.
→ Some paper types have a front and back side. If the paper is
loaded so that printing takes place on the back side, toner will not
adhere well to the paper and a good image will not be obtained.
You are using paper that is outside the specified size and
weight range.
19
16
→ Use copy paper within the specified range.
Paper curled or damp.
→ Do not use curled or crimped paper. Replace with dry copy paper.
During periods when the machine is not used for a long time,
remove the paper from the tray and store it in a dark place in a
bag to prevent moisture absorption.
The printed image is dirty.
–
You did not set sufficient margins in the paper settings of
your application.
→ The top and bottom of the paper may be dirty if the margins are
set outside of the specified print quality area.
→ Set the margins in the software application within the specified
print quality area.
–
Black dots or smudges appear on the printed output.
→ Run fixing cleaning mode. The letter "V" is printed on a sheet of
paper and the fixing unit is cleaned.
179
The paper loaded in the tray is not the same size as that
specified in the printer driver.
→ Check if the "Paper Size" options suit the size of the paper loaded
in the tray.
If the "Fit To Paper Size" setting is activated, make sure that the
paper size selected from the drop-down list is the same as the
size of the loaded paper.
The printed image is skewed or it
runs off the paper.
–
The orientation of document setting is not correct.
→ Click the "Main" tab in the printer driver setup screen, and verify if
the "Image Orientation" option is set to your requirements.
Paper is not loaded properly.
→ Make sure the paper is properly loaded.
–
19
You did not correctly specify the margins for the
application in use.
→ Check the layout of the document margins and the paper size
settings for the application you are using. Also check if the print
settings are specified correctly to suit the paper size.
147
–
TROUBLESHOOTING
Problem
Cause and solution
The document glass or the underside of the document
feeder is dirty.
Page
163
→ Clean regularly.
Original smudged or blotchy.
→ Use a clean original.
–
You have not specified a suitable resolution.
→ Make sure that the resolution setting in the scanner driver is
appropriate for the original.
–
You have not specified a suitable value for the "B/W
Threshold" setting.
Poor scanning quality.
→ If you are scanning with a TWAIN-compliant application, make
sure that a suitable value is specified for the "B/W Threshold"
setting. A larger threshold value makes your output darker, while
a small threshold value makes it lighter. To adjust the threshold
automatically, click the "Auto Threshold" button on the "Image"
tab of the "Professional" screen.
–
The brightness and contrast settings are not suitable.
→ If you are scanning with a TWAIN-compliant application and the
resulting image has unsuitable brightness or contrast (for
example it is too bright), click the "Auto Brightness/Contrast
Adjustment" button on the "Color" tab of the "Professional"
screen. Click the "Brightness/Contrast" button to adjust the
brightness and the contrast while viewing the scanned output
image on the screen.
The original is not placed face up in the document feeder
or face down on the document glass.
→ Place the original face up in the document feeder or face down on
the document glass.
The original was not placed in the correct position.
→ Place the original correctly.
–
27
27
Your application is not TWAIN compliant.
→ If your application is not TWAIN compliant, scanning will not be
possible. Make sure your application is TWAIN compliant.
You have not selected the scanner driver of the machine
in your application.
Unable to scan the image.
→ Make sure that the machine’s scanner driver is selected in your
TWAIN-compliant application.
–
–
You have not specified all scanning preferences
appropriately.
→ Scanning a large area at high resolution results in a large amount
of data and extended scanning times. The scanning preferences
should be set appropriately for type of original to be scanned, i.e.,
Text, Text/Graphics, Photograph.
–
There is a mistake in the stored destination information
or the wrong destination was selected.
The recipient does not receive a
transmitted data.
→ Make sure that the correct destination information is stored.
If there is a mistake, correct it.
* If delivery by e-mail (Scan to E-mail) is unsuccessful, an error
message such as "Undelivered Message" may be sent to the
designated administrator's e-mail address. This information may
help you determine the cause of the problem.
148
195
TROUBLESHOOTING
Problem
Cause and solution
Check the Web page to see if a limit has been set for the size of
image files sent using Scan to E-mail (the factory default setting is
"Unlimited"). A limit can be set from 1 MB to 10 MB. Consult the
administrator of the Web page to select a suitable limit.
The recipient does not receive
data sent by e-mail (Scan to
E-mail).
Transmission takes a long time.
The [COLOR START] or [BLACK &
WHITE START] indicator is not lit
in the USB Memory Scan mode.
"Check the USB memory." appears
in the display during USB Memory
Scan.
"Memory is full. Job is canceled."
appears in the display during USB
Memory Scan.
Page
195
The amount of data that can be sent in one e-mail transmission is
sometimes limited by the administrator of the mail server. Even if the
file size is within the limit explained above, if it exceeds the limit set
by the administrator of the mail server, the file will not be delivered to
the recipient.
Decrease the amount of data sent in the e-mail transmission (reduce
the number of pages scanned). (Ask your mail server administrator
what the data limit is for one e-mail transmission.)
–
When there is a large amount of image information, the data file is
also large and transmission takes a long time.
–
The USB memory is not recognized or not inserted, or
any device other than USB memory is inserted in the USB
port.
–
→ Check the USB port.
Any device other than USB memory is inserted in the USB
port, the USB memory is write-protected, or it was taken
off during USB Memory Scan.
–
→ Check your USB memory device and use it properly.
The memory of the USB device became full.
–
→ Use the USB device with sufficient memory.
FAX PROBLEMS
If you experience a problem with the fax function, first check the following table.
This section describes problems related to the fax function. For problems related to general operation of the
machine, see "TROUBLESHOOTING" in the Operation Guide for the machine.
Problem
Cause and solution
Is the machine power switch turned on?
The machine does not operate.
→ Turn the power switch ON.
Does the display show an error message?
→ Clear the error as instructed by the message.
Is the correct dial mode set for your line?
→ Check your line and set the correct dial mode.
Is the telephone line properly connected?
Dialing is not possible.
→ Check the connections.
Is the machine power switch turned on?
→ Turn the power switch ON.
Is the machine in fax mode?
→ Press the [FAX] key to set the machine to fax mode.
149
Page
15
120
184
79
15
85
TROUBLESHOOTING
Problem
Cause and solution
Does the receiving fax machine have paper?
→ Check with the operator of the receiving machine.
Is the receiving machine ready to receive?
→ Check with the operator of the receiving machine.
Are you using a transmittable original size?
→ Check the transmittable sizes.
Cannot send a fax.
Was the original size detected correctly?
→ Check size of the original.
Page
–
–
82
82
The message "Reading canceled. Please retry sending
operation." appears.
→ If you attempt transmission while the message "Warming-up."
appears, the transmission may not take place correctly. Repeat
the transmission.
Was the original placed so that the correct side is
scanned?
The transmitted image prints out
blank at the receiving side.
→ Make sure the original is placed so that the correct side is
scanned.
If the receiving machine is using thermal paper, was the
thermal paper loaded with the wrong side out?
–
27
–
→ Check with the operator of the receiving machine.
Were line conditions poor due to thunder or another
reason?
–
The transmitted image is distorted. → Try the transmission again.
Were the resolution and exposure settings suitable?
→ Check the resolution and exposure settings.
White or black lines appear in the
transmitted image.
Transmission does not take place
at the specified time.
Is the document glass or the scanning glass for the
document feeder (the long, narrow glass) dirty?
→ Clean the document glass or the scanning glass for the document
feeder.
Is the machine's clock set to the correct time?
→ Set the clock to the correct time.
Does an error message appear regarding adding paper,
replenishing toner, or a misfeed? (This means that
printing is not possible.)
–
163
176
122
→ Restore printing capability as instructed by the display message.
Printing will begin.
Printing does not take place after
reception.
Is forwarding (Inbound Routing function) selected in the
Web page for a received fax?
→ If you need to print a received fax, ask your administrator.
When the Inbound Routing function is enabled in the Web pages,
received faxes are automatically forwarded to a specified
address. If "Print at Error" is selected when Inbound Routing is
enabled, received faxes will only be printed when an error occurs.
A received fax prints out blank.
Was the wrong side of the original scanned in the
transmitting machine?
–
–
→ Check with the operator of the transmitting machine.
Is the original faint?
The received image is faint.
The received image is distorted.
→ Ask the other party to re-send the fax using a suitable exposure
setting.
Were line conditions poor due to thunder or another
reason?
→ Ask the other party to send the fax again.
150
–
–
TROUBLESHOOTING
Telephone
Problem
Cause and solution
A dial tone is not heard through
the speaker.
Is the volume set to "low"?
The machine does not ring.
→ Set the ringer volume to "low", "middle", or "high".
Dialing is not possible.
→ Check the connections.
Page
→ Set the speaker volume to "middle" or "high".
Has the ringer volume been turned off?
Is the telephone line properly connected?
184
184
79
INDICATORS AND DISPLAY
MESSAGES
If one of the following messages appears in the display, take prompt action as instructed by the message.
Message
Action
Maintenance
It is time for regular maintenance. Contact your SHARP Service
Department.
Maintenance required. Call for
service.
Maintenance required soon. Contact your SHARP Service Department.
Call for service.
–
Obtain replacement toner.
Check the toner cartridge.
Turn off the power and then turn it back on. If this does not clear the
message, write down the 2-digit main code and 2-digit sub-code
("
"), turn off the power, and promptly contact your SHARP Service
Department.
The toner cartridge must be replaced soon.
Check to see if the toner cartridge has been installed properly.
Take out toner cartridge and shake it
up and down.
Reinstall it and close the front cover.
Remove the toner cartridge as explained in "REPLACING THE TONER
CARTRIDGE" (p.160), shake it, and then reinstall.
Replace waste box.
Replace the toner collection container as explained in "REPLACING THE
TONER COLLECTION CONTAINER" (p.161).
Change the toner cartridge.
Replace the toner cartridge as explained in "REPLACING THE TONER
CARTRIDGE" (p.160).
Remove paper from the center
tray.
The number of sheets in the output tray has reached the limit. Remove the
paper.
Load <
> paper into tray < >.
The paper size specified for the tray is different from the actual size.
(p.22)
< >: Tray number
<
>: Size of paper that should be loaded
151
TROUBLESHOOTING
And if one of the following error codes appears in the display at communication error when sending the scanned
image, take corresponding solution as mentioned below.
Error
Code
Solution
Page
CE-00
CE01
Turn off the power and then turn it back on. Consult with your network administrator to make sure
that no problems exist on the network or in the server. If the error is not cleared after turning the
power off and on, turn off the power and contact your dealer.
–
CE-02
CE-04
The scanned image was not sent because a connection to the server could not be established.
Make sure that the SMTP server settings or Scan to FTP destination settings in the Web page are
correct.
The procedure for configuring the SMTP server is explained in "Configuring SMTP, DNS and
LDAP server settings", and the procedure for editing Scan to FTP destination information is
explained in "Editing and deleting programmed transmission destinations".
200, 203
CE-03
The scanned image was not sent because the server was busy or there was too much traffic on
line. Wait briefly and then try again.
CE-05
The scanned image was not sent because the directory of the destination FTP server was not correct. Make sure that the correct FTP server information is configured in the Web page.
200
CE-06
Scan data cannot be sent as E-mail address that is stored in the Destination List is not adequate.
Check if the stored destination information is correct.
200
CE-09
The size of the scanned image file exceeds the limit set in "Maximum Size of E-mail attachments"
in the Web page. Reduce the number of original pages scanned into the file, or change the limit set
in "Maximum Size of E-mail attachments". Or it may exceed the limit of the file size at the mail
server. Reduce the volume of the original, otherwise change the resolution or the color mode to
make the scanned file size smaller.
201
CE-11
The memory became full during scanning. Scan less pages, lower the resolution, or change the
color mode so that the file size is smaller, and try scanning again.
CE-12
The maximum number of destinations of a global address search has been exceeded.
Increase the number of search characters to narrow the range of the global address search.
CE-14
Check if the USB memory is not set to write-protect.
–
CE-15
Check that the USB memory has enough free space to accept the data size to be scanned.
–
CE-16
Check that the USB memory has no problem.
–
CE-17
Check that the file names in the USB memory do not exceed 256 characters per file, or check that
the USB memory has no problem.
–
–
130, 131
128
IF YOUR E-MAIL IS RETURNED
If a Scan to E-mail transmission is not successful, an e-mail informing you of this fact is sent to the return address
configured in the SMTP server. If this happens, read the e-mail and determine the cause of the error, and then
repeat the transmission.
152
TROUBLESHOOTING
MISFEED REMOVAL
When a misfeed occurs during copying, the message "
Check the location and remove the misfeed.
Note
Clear paper path." and the location of the misfeed will appear.
The paper may tear when you remove a misfeed. In this event, be sure to remove all torn pieces of paper from the
machine.
(See below)
(p.156)
(p.159)
(p.155)
(p.159)
(p.159)
(p.159)
MISFEED IN THE DOCUMENT FEEDER
1 Remove the misfed original.
Remove the original from the document feeder.
Check sections A, B, and C in the left shows the
illustration (see the next page), and remove the misfed
original.
Section A
Push the release lever up, and remove the misfed original from the document feeder tray. Pull down the
release lever.
153
TROUBLESHOOTING
Section B
Open the document feeder and rotate the release roller in the direction of the arrow to feed the original out.
Close the document feeder and then remove the original.
Roller
If you are unable to remove the original, remove from part C.
Section C
Remove the misfed original from the exit area.
If the original misfed in the reversing unit, open the document out unit and gently remove the misfed original.
2
Press the [OK] key to make the misfeed location indicator stop blinking.
3
Return the originals indicated by the number in the display to the document feeder
tray and press the [COLOR START] key or [BLACK & WHITE START] key.
Copying will resume from the originals that still remained when the misfeed occurred.
154
TROUBLESHOOTING
MISFEED IN THE BYPASS TRAY
1 Remove any paper remaining in the bypass tray.
2
Gently remove the misfed paper from the bypass tray.
If you were able to remove the misfed paper
3
Close the auxiliary tray and then the
bypass tray, grasp the side cover
open/close handle, and gently open
and close the side cover.
If you are unable to remove the misfed paper
3
Grasp the side cover open/close
handle and gently open the side
cover.
4
Turn the paper feed knob and feed out
the paper that is inside. ("Misfeed in
the paper feed area A" (p.156))
5
Close the side cover.
(1)
(2)
The message "
Clear paper path." will be
cleared and copying will be possible.
The message "
Clear paper path." will be
cleared and copying will be possible.
155
TROUBLESHOOTING
MISFEED IN THE MACHINE
To remove a misfeed from inside the machine, open the side cover, check whether the misfeed occurred in "A", "B",
or "C" below, and follow the misfeed removal procedure.
1
Open the bypass tray and the side cover.
Note
2
If paper remains in the bypass tray, remove the paper.
Check the misfeed location. Remove the misfed paper following the instructions for
each location in the illustration below.
Area C
If paper is misfed here, go to
"Misfeed in the transport area C"
(p.158).
Area B
If the misfed paper is visible
here, go to "Misfeed in the
fusing area B" (p.157).
Area A
If paper is misfed here, go to
"Misfeed in the paper feed
area A" (p.156).
Misfeed in the paper feed area A
1
Carefully remove the misfed paper. Turn the roller rotating knob in the direction of the
arrow to assist in removing it.
Roller rotating knob
Fusing unit
Be careful not to tear the misfed paper during removal.
The fusing unit is hot. Do not touch the fusing
Warning unit when removing misfed paper. Doing so may
cause a burn or injury.
When removing misfed paper, do not touch or damage
Caution the transfer belt.
2
Close the side cover.
The message "
Note
Clear paper path." will be cleared and copying will be possible.
• When closing the side cover, press on around the handle.
• If the message does not clear, check again to make sure that no pieces of paper remain.
156
TROUBLESHOOTING
Misfeed in the fusing area B
1
Lower the fusing unit release levers to allow easier removal.
Fusing unit release levers
2
Lower the part with the green label that protrudes from the fixing unit paper guide,
and open the fixing unit paper guide.
3
Remove the misfed paper.
Be careful not to tear the misfed paper during removal.
Warning The fusing unit is hot. Do not touch the fusing unit when
removing misfed paper. Doing so may cause a burn or injury.
Caution
4
• When removing misfed paper, do not touch or damage the transfer
belt.
• Be careful about unfixed toner on the misfed paper not to soil your
hands or clothes.
If the misfed paper cannot be removed, remove the paper by pulling it into the paper
output area.
Be careful not to tear the misfed paper during removal.
5
Lift the part with the green label that protrudes from the fixing unit paper guide, and
close the fixing unit paper guide.
6
Lift the fusing unit release levers, to return them to their operating positions.
157
TROUBLESHOOTING
7
Close the side cover.
The message "
possible.
Note
Clear paper path." will be cleared and copying will be
• When closing the side cover, press on the handle.
• If the paper was torn, make sure that no torn pieces remain in the
machine.
• If the message does not clear, check again to make sure that no
pieces of paper remain.
Misfeed in the transport area C
1
Lift up the duplex conveyor lever and open the reversing unit.
2
Remove the misfed paper.
3
Return the duplex conveyor lever to its original position and close the side cover.
The message "
Note
Clear paper path." will be cleared and copying will be possible.
• When closing the side cover, press on around the handle.
• If the paper was torn, make sure that no torn pieces remain in the machine.
• If the message does not clear, check again to make sure that no pieces of paper remain.
158
TROUBLESHOOTING
MISFEED IN THE PAPER
TRAY 1
Note
Make sure that there is no misfed paper in the
tray before pulling it out. (p.156)
1
Open the side cover and remove the
misfed paper. (p.156)
2
Lift and pull out the upper paper tray
and remove the misfed paper.
Be careful not to tear the misfed paper during
removal.
MISFEED IN THE PAPER
TRAY 2
1 Open the lower side cover.
Grasp the handle to open the lower side cover.
2
Remove the misfed paper.
Be careful not to tear the misfed paper during
removal.
3
Push the upper paper tray in
completely.
Push the tray in completely.
4
3
The message "
Clear paper path." will be
cleared and copying will be possible.
Open and close the side cover.
The message "
Clear paper path." will be
cleared and copying will be possible.
4
(1)
• When closing the side cover, press on the
handle.
• If the message does not clear, check again
to make sure that no pieces of paper
remain.
If the misfed paper is not seen in step
2, lift and pull out the lower paper tray
and remove the misfed paper.
Be careful not to tear the misfed paper during
removal.
(2)
Note
Close the lower side cover.
5
Close the lower paper tray.
Push the tray in completely.
Note
159
If the message does not clear, check again to
make sure that no pieces of paper remain.
TROUBLESHOOTING
REPLACING THE TONER CARTRIDGE
When the "Prepare a new toner." appears, little toner remains.
Be sure to replace the toner cartridge when the message "Change the toner cartridge." appears.
Note
If you continue to use the machine without replacing the cartridge,
the following message will appear when the toner runs out.
Warning
Colors that are running low or have run out of toner are indicated in
(
).
: Yellow toner
: Magenta toner
: Cyan toner
: Black toner
Replace the toner cartridges of the indicated colors.
1
• If any one of the toner
colors runs out (including
black toner), color printing
will not be possible.
If Y, M, or C toner runs out
but Bk toner remains, black
and white printing will still
be possible.
• Be sure to install 4 toner
cartridges (Y/M/C/Bk).
• Do not throw the toner
cartridge into a fire.
Toner may splatter and
cause burns.
• Store toner cartridges out
of the reach of small
children.
Open the front cover.
Push on both ends of the front cover and open it.
Locations of color toner cartridges
(A) (B) (C) (D)
2
(A): Yellow
(B): Magenta
(C): Cyan
(D): Black
Grasp the handle of the top and bottom of the toner cartridge, pull the toner cartridge
out.
After removing the toner cartridge, do not shake it or tap on it. Doing so
Caution may cause toner to leak from the cartridge. Put the old cartridge
immediately in the box of the new cartridge.
Note
3
Keep used toner cartridges (do not discard them).
Your service technician will collect used toner cartridges.
Take out the new toner cartridge. Shake it vertically five or six times.
When holding the toner cartridge, do not grasp the shutter. This may
Caution cause toner to leak.
160
TROUBLESHOOTING
4
Insert the toner cartridge along the guides until it locks in place.
If there is any dirt or dust on the toner cartridge, remove it before installing the
cartridge.
Note
A toner cartridge of a different color cannot be installed. Be sure to
install a toner cartridge of the same color.
5
Press the center of the toner cartridge until the cartridge locks into place.
6
Close the front cover.
The toner cartridge replacement required indicator (
Note
) will go out.
• Even after a new toner cartridge is installed, the toner cartridge replacement required indicator (
) may still
light up, indicating that copying cannot be resumed (toner is not fed sufficiently). In this case, open and close the
front cover. The machine will feed toner again for about two minutes and then copying can be resumed.
• Before closing the front cover, make sure that the toner cartridge is correctly installed.
• When closing the front cover, gently hold both ends.
REPLACING THE TONER
COLLECTION CONTAINER
This section explains the procedure for replacing the toner collection container.
The toner collection container collects any excess toner that occurs during printing. When the toner collection
container becomes full, the message "Replace waste box" will appear.
• Do not throw the toner collection container into fire. Toner may fly out and cause burns.
Caution • Store the toner collection container out of the reach of children.
1
Pull out the paper tray 1.
Hold the tray with both hands and slowly pull out and up at a slight angle.
The toner collection container cannot be removed unless tray 1 is removed.
161
TROUBLESHOOTING
2
Open the front cover.
3
Pull out the toner collection container.
Hold the toner collection container with both hands and slowly pull it out.
Note
4
When removing the toner collection container, it is easier to draw one side at a time.
Place the toner collection container on a flat surface.
Spread newspaper on the surface before placing the toner collection container.
Note
5
• Do not tilt the part with the hole down, as waste toner will spill out.
• Do not discard the toner collection container. Place it in a plastic bag and store.
Your service technician will collect the toner collection container the next time he comes for maintenance.
Install a new toner collection container.
Push the toner collection container in completely.
6
Close the front cover.
Note
7
You cannot close the front cover when the toner collection container is not attached.
Replace tray 1.
162
7
ROUTINE MAINTENANCE
This chapter explains how to keep the machine operating smoothly, including viewing copy count, and cleaning the
machine.
CHECKING THE TOTAL OUTPUT
COUNT AND TONER REMAINING
To check the total number of pages output in copy, print, and fax modes hold down the
[COPY] key when the machine is in
the standby state. The counts will appear while the key is held down. The total output
count can be used as a guideline for cleaning. When the total output count exceed
"99,999,999", the counts return to "0".
The toner level is shown at the bottom of the screen.
Note
• You can also check by pressing the [SPECIAL FUNCTIONS] key and selecting "Total Count" in the function
menu screen.
• Each two-sided sheet that is output is counted as two pages.
• Blank copies and blank prints are included in the count.
• If the last page of a two-sided printing job is blank, it is not included in the count.
ROUTINE MAINTENANCE
Do not spray flammable cleaner gas. Gas from the spray may come in contact with the internal
Warning electrical components or high-temperature parts of the fusing unit, creating a risk of fire or
electrical shock.
CLEANING THE DOCUMENT GLASS AND
DOCUMENT FEEDER
If the document glass, underside of the document feeder, or the scanner for originals coming from the document
feeder (the long narrow glass surface on the left side of the document glass) become dirty, the dirt may appear on
copies. Always keep these parts clean.
Original
scanning
glass
Stains or dirt on the document glass/document feeder will also be copied. Wipe the document glass, underside of
the document feeder and the scanning window on the document glass with a soft, clean cloth.
If necessary, dampen the cloth with water. Do not use thinner, benzene, or similar volatile cleaning agents.
163
ROUTINE MAINTENANCE
CLEANING THE ORIGINAL SCANNING GLASS
(ONLY WHEN AN DOCUMENT FEEDER IS INSTALLED)
If white or black lines appear in copies made with using the document
feeder, use a soft clean cloth to clean the original scanning glass.
(If white or black lines appear in copies or printed pages when the
document feeder is not used, see "CLEANING THE LASER UNIT" ).
Example of dirty print image
Black lines
White lines
CLEANING THE BYPASS TRAY PAPER FEED ROLLER
If misfeeds occur frequently when feeding envelopes, heavy paper, etc.
through the bypass tray. Before starting, remove the paper from the
bypass tray. Turn the power switch off, remove the roller cover from the
bypass tray and wipe the paper feed roller at the feed slot of the bypass
tray with a soft, clean cloth dampened with alcohol or water.
After cleaning the paper feed roller, attach the roller cover on the bypass
tray, and then turn on the machine's power.
Paper feed
roller
Warning When cleaning the rollers, be careful not to injure your hands.
Note
Do not touch the surface of the roller if your hands are dirty.
CLEANING THE AUTOMATIC DOCUMENT FEEDER
ROLLERS
If you find that originals fed through the automatic document feeder misfeed or are soiled by the rollers, remove the
rollers and clean them. If misfeeds or soiling continue to occur, replace the rollers.
Before starting, remove any originals from the automatic document feeder.
1
2
Turn the power switch off.
Open the document conveyor cover on the automatic document feeder.
164
ROUTINE MAINTENANCE
3
To clean the removed rollers, wipe each roller with a clean cloth.
When cleaning the rollers, be careful not to injure your
Warning hands.
Note
4
Close the document conveyor cover on the automatic document feeder.
Note
5
Do not touch the surface of the roller if your hands are dirty.
Take care that your fingers are not pinched when closing the cover.
Turn on the power.
CLEANING THE MAIN CHARGER OF THE
PHOTOCONDUCTIVE DRUM
If black lines or colored lines appear even after you have cleaned the document glass and automatic document
feeder, use the charger cleaner to clean the main charger.
1
Procedure of "REPLACING THE TONER COLLECTION CONTAINER" (p.161), release
the toner collection container.
2
Grasp the green knob to release the lock and gently remove the charger cleaner.
3
4
Gently push the charger cleaner all the way in.
5
Procedure of "REPLACING THE TONER COLLECTION CONTAINER" (p.161), push the
toner collection container into the machine.
Repeat step 2 and 3 with each of the other main chargers.
Note
• If this does not solve the problem, pull the knob out and push it back in 2 more times.
• When pulling and pushing the knob to clean the charger, pull and push the knob slowly from one end to the
other.
• Touching the waste toner outlet or the toner collection container may soil your hands and clothes. Exercise
caution when cleaning the charger.
165
ROUTINE MAINTENANCE
CLEANING THE LASER UNIT
When the laser unit inside the machine becomes dirty, line patterns (colored lines) may form in the printed image.
Identifying lines (colored lines) caused by a dirty laser unit.
If the above problems occur, follow the steps below to clean the laser unit.
1
2
3
Turn the power switch off.
Procedure of "REPLACING THE TONER COLLECTION CONTAINER" (p.161).
Take out the cleaning tool for the laser unit.
The cleaning tool is attached to the front cover.
Pull the right side of the cleaning instrument and unfasten it from the claw.
(2)
(1)
boss
4
Clean the laser unit.
(1) Push up and open the laser unit cover (gray color).
(2) Point the cleaner down and gently push the charger cleaner all the
way in.
(3) Gently pull the charger cleaner out.
(4) Push down and close the laser unit cover.
166
ROUTINE MAINTENANCE
5
Repeat step 4 to clean all holes in the laser unit (4 holes).
There are a total of 4 places to be cleaned in the laser unit, including the hole cleaned in step 4. Clean all holes.
Cover
6
Replace the cleaning tool.
(1) Rotate the charger cleaner after putting it on the boss and hook its
edge (the side that does not have a handle) to the claw on the left
side. Hook the charger cleaner with the clean side face up.
(2) Place the right-hand side of the charger cleaner on the inner side,
spread across the top of the claw.
(3) Hook the charger cleaner to the claw.
7
Procedure of "REPLACING THE TONER COLLECTION CONTAINER" (p.161), push the
toner collection container into the machine.
ADJUSTING THE DISPLAY CONTRAST
The contrast of the display can be adjusted as explained below.
1
2
3
Press the [SPECIAL FUNCTION] key.
4
Adjust the contrast with the [ ] or [ ] key.
Select "Display Contrast" with the [ ] or [ ] key.
Press the [OK] key.
To reset the contrast to the default setting, press the [C] key.
5
Press the [SPECIAL FUNCTION] key.
You will return to the base screen.
167
8
SYSTEM SETTINGS
PURPOSE OF THE SYSTEM SETTINGS
The system settings are used by the administrator of the machine to enable or disable functions to suit the needs of
your workplace.
This manual explains only the system settings that are common to all the functions of the machine, (copy and printer
functions), as well as system settings that are specifically for the copy function.
PROGRAMS RELATED TO ALL FUNCTIONS OF THE
MACHINE
These programs are used to enable user authentication mode, adjust power consumption, and manage peripheral
devices.
User Authentication mode can be enabled separately for the copy. When user authentication mode is enabled for a
function, a valid account number must be entered in order to use the function. (If a valid account number is not
entered, the function cannot be used.)
When user authentication mode is enabled for the printer function, an account number must be entered at the user's
computer when the print command is selected. (Depending on the system settings, a job may be printed even if an
incorrect account number is entered, and thus care must be taken when managing printer page counts.) If "Disable
Print by Inv. User" is enabled in the system settings, printing will be prohibited if an invalid account number is
entered.)
PROGRAMMING AN ADMINISTRATOR PASSWORD
The administrator password is a 5-digit number that must be entered in order to access the system settings. The
administrator (administrator of the machine) should change the default administrator password that was set at the
factory to a new 5-digit number. Be sure to remember the new administrator password, as it must be entered each
time the system settings are subsequently used. (Only one administrator password can be programmed.)
Refer to the Start Guide for the factory default administrator password.
To change the administrator password, see "PROGRAMMING AN ADMINISTRATOR PASSWORD" (p.169).
168
SYSTEM SETTINGS
PROGRAMMING AN
ADMINISTRATOR PASSWORD
1
Press the [SPECIAL FUNCTION] key.
The special function screen will appear.
2
3
Select "System Settings" with the [ ] or [ ] key.
Press the [OK] key.
The administrator password entry screen appears.
4
Use the numeric keys to enter the five-digit administrator password.
• If this is the first time you are programming the administrator password, enter the factory default code. (Refer
to the Start Guide)
• " " appears for each digit that you enter.
• The special modes screen will appear with "Change Admin PW" selected.
5
Press the [OK] key.
The administrator password change screen appears.
6
Enter the new 5-digit administrator password with the numeric keys.
The administrator password change screen appears.
7
Press the [OK] key.
• The previously programmed administrator password is replaced by the new administrator password.
• Press the [CA] key to return to the base screen.
169
SYSTEM SETTINGS
SYSTEM SETTINGS LIST
This is a list of the machine's system settings.
Programs for general use of the machine
Program name
Change Admin Pw
Change Admin Pw
Default Settings
Date & Time Set
Daylight Saving Time
Network
Confirmation of Network
Connection Type
Wired settings
Wireless (Infrastructure)
Wireless (Access Point)
User Control
User Authentication
User Registration
Function Limit Setting
Account Limit Setting
User Count Display
User Count Reset
A Warning when Login Fails
Disable Print by Inv. User
Device Control
Fusing Control
Fusing Cleaning
Registration Adjustment
Operation Setting
Auto Clear
Disable Display Timeout
Language Setting
Message Time
Key Touch Sound
Keys Touch Sound At Initial Point
Key Press Time
Disable Auto Key Repeat
Disable Paper Size Set
Energy Save
Auto Power Shut-Off
Auto Power Shut-Off Timer
Preheat Mode
Enter Auto Power Shut-Off after the
Remote Job
Toner Save Mode (Copy)
Toner Save Mode (Print)
Program name
List Print
Fax Settings
User Usage List
Activity Report
Inbound Routing
Junk Fax # List
User Info. Print
AutoColorCalib.
AutoColorCalib.
Security Settings
IPsec Settings
Initialize Private Data and Data in
Machine
Page
176
176
176
176
176
176
177
177
178
Page
181
181
181
181
181
181
181
182
182
178
178
Programs for Copy Mode
178
Program name
Copier
ID Card Setting
Card Shot Default
Default Tray Set
Default Exposure
Sort Auto Select
Limit Of Copies
178
178
178
178
179
179
179
179
179
Page
182
182
182
182
183
183
Programs for Printer Mode
179
Program name
Printer
Notice Page
179
180
180
180
180
180
180
180
180
181
181
181
170
Page
183
SYSTEM SETTINGS
Programs for Fax Mode
Program name
Programs for Scanner Mode
Page
Program name
List Setting
Print Selection
183
Auto Listing
184
Initial Setting
Dial Mode
184
Pause Time
184
Own Passcode Set
184
Set Volume
184
TX/RX End Sound
185
End Sound Length
185
Distinctive Ring
185
Remote Reception
185
Disable Fax Print Hold
185
Sending Function
Original Size Enter
186
Set Res. Con.
186
Send Mode
186
Quick On Line TX
186
Print Station # In Rcvd Data
186
Address Review
186
Recall Setting (Busy)
186
Recall Set (Err)
186
Ring Timeout In Auto TX
186
Rcv. Function
#Of Rings At. RX
187
#Of Rings Man.RX
187
Tray Selection
187
Received Data Print Condition
187
Auto Rcv Reduce To Regular Size
187
Duplex Reception
187
FW. RX Data
188
Received Data FW. Station Set
188
Anti Junk Fax
188
Enter Junk Fax #
188
Polling Security
Polling Security
188
Polling Passcode # Mode
189
171
Page
Disable USB Scan
189
New Default
189
SYSTEM SETTINGS
ADMINISTRATOR SETTINGS MENU
The system settings are accessed via the following menu structure.
Refer to this menu when enabling or disabling the settings that are explained beginning on p.176.
Some settings contain an additional level of settings (a settings screen).
Administrator Password
Level 1
Level 2
Level 3
Change Admin Pw
Default Settings
Date & Time Set
Daylight Saving Time
Copier
ID Card Setting
Card Shot Default
Default Tray Set
Default Exposure
Sort Auto Select
Limit Of Copies
Printer
Notice Page
Scanner
Disable USB Scan
New Default
Fax
List Setting
Print Selection
Auto Listing
Initial Setting
Dial Mode
Pause Time
Own Passcode Set
Set Volume
TX/RX End Sound
End Sound Length
Distinctive Ring
Remote Reception
Disable Fax Print Hold
Sending Function
Original Size Enter
Set Res. Con.
Send Mode
Quick On Line TX
Print Station # In Rcvd Data
Address Review
Recall Setting (Busy)
Recall Set (Err)
Ring Timeout In Auto TX
172
SYSTEM SETTINGS
Level 1
Level 2
Rcv. Function
Level 3
#Of Rings At. RX
#Of Rings Man.RX
Tray Selection
Received Data Print Condition
Auto Rcv Reduce To Regular Size
Duplex Reception
FW. RX Data
Received Data FW. Station Set
Anti Junk Fax
Enter Junk Fax #
Polling Security
Polling Security
Polling Passcode # Mode
Network
User Control
Confirmation of Network
Connection Type
Wired
Wireless Infrastructure
Wired + Wireless AP
Wired settings
IPv4 Settings
IPv6 Settings
Wireless (Infrastructure)
Manual Input of SSID
Wireless (Access Point)
Setting of SSID
Security Settings
Device IP Address Settings
Channel Settings
Sending Output Settings
Bandwidth Settings
IP Addr. Distribution Range
User Authentication
User Registration
Function Limit Setting
Account Limit Setting
User Count Display
User Count Reset
A Warning when Login Fails
Disable Print by Inv. User
Device Control
Fusing Control
Fusing Cleaning
Registration Adjustment
173
SYSTEM SETTINGS
Level 1
Operation Setting
Level 2
Auto Clear
Disable Display Timeout
Language Setting
Message Time
Key Touch Sound
Keys Touch Sound At Initial Point
Key Press Time
Disable Auto Key Repeat
Disable Paper Size Set
Energy Save
Auto Power Shut-Off
Auto Power Shut-Off Timer
Preheat Mode
Enter Auto Power Shut-Off after
the Remote Job
Toner Save Mode (Copy)
Toner Save Mode (Print)
List Print
Fax Settings
Inbound Routing
User Usage List
Activity Report
Junk Fax # List
User Info. Print
AutoColorCalib.
Security Settings
IPsec Settings
Initialize Private Data and Data in
Machine
174
Level 3
SYSTEM SETTINGS
USING THE SYSTEM SETTINGS
1
2
3
Press the [SPECIAL FUNCTION] key.
Select "System Settings" with the [ ] or [ ] key and press the [OK] key.
Enter the administrator password with the numeric keys.
• " " appears for each digit that you enter.
• The mode selection screen appears.
4
Select the desired mode with the [ ] or [ ] key.
5
6
7
Press the [OK] key.
Select the desired setting with the [ ] or [ ] key.
Press the [OK] key and follow the instructions in the setting screen.
Several settings will have checkboxes in front of them. To enable a function (make a checkmark appear), press
the [OK] key. To disable the setting, press the [OK] once again to remove the checkmark. To configure a
setting that has a checkbox, go to step 8.
8
To use another setting for the same mode, select the desired setting with the [ ] or
[ ] key.
To use a setting for a different mode, press the [BACK] key and select the desired mode. To exit the system
settings, press the [CA] key.
175
SYSTEM SETTINGS
Change Admin Pw
Wired settings
Use this function to change administrator password.
To change the administrator password, see
"PROGRAMMING AN ADMINISTRATOR
PASSWORD" (p.169).
IPv4 Settings
When using the machine on a TCP/IP (IPv4) network,
use this setting to configure the IP address of the
machine. The settings are shown below.
Enable DHCP
Use this setting to have the IP address obtained
automatically using DHCP (Dynamic Host
Configuration Protocol). When this setting is enabled,
it is not necessary to manually enter an IP address.
Default Settings
The default settings for operation of the machine can
be configured. Select the [Default Settings] to
configure the settings.
IPv4 Address
Enter the IP address of the machine.
Subnetmask
Entry the Subnetmask
Default Gateway
Enter the Default Gateway.
Date & Time Set
IPv6 Settings
Use this to set the date and time in the machine's
built-in clock.
When using the machine on a TCP/IP (IPv6) network,
use this setting to configure the IP address of the
machine.
The settings are shown below.
Daylight Saving Time
Enable daylight saving time.
Enable IPv6 Protocol
Enable this setting.
Network
Enable DHCPv6
Use this setting to have the IP address obtained
automatically using DHCP (Dynamic Host
Configuration Protocol). When this setting is enabled,
it is not necessary to manually enter an IP address.
Network settings are described below.
Select the [Network] key to configure the settings.
Manual Address
Enter the IP address of the machine.
Prefix Length
Enter the prefix length (0 to 128).
Default Gateway
Enter the IP Gateway address.
Note
Confirmation of Network
Confirm network settings.
Connection Type
You can change the machine's network connection
type.
176
• If DHCP is used, the IP address assigned
to the machine may change automatically.
If the IP address changes, printing will not
be possible.
• In an IPv6 environment, the machine can
use LPD protocol.
SYSTEM SETTINGS
Wireless (Infrastructure)
Wireless (Access Point)
(Only on models with wireless LAN)
(Only on models with wireless LAN)
This sets connection using wireless infrastructure
mode.
This sets connection using wireless access point
mode.
Manual Input of SSID
Enter up to 32 half-width characters for the SSID.
Setting of SSID
Enter up to 32 half-width characters for the SSID.
Security Type
Select the security type.
(none/WEP/WPA Personal/WPA2 Personal)
Security Settings
• Security Type
Select the security type.
(none/WEP/WPA Personal/WPA2 Personal)
Setting of Encrypt
Select the encryption method based on the "Setting of
Security Type" setting.
(none/WEP/TKIP/AES)
• Setting of Encrypt
Select the encryption method based on the
"Setting of Security Type" setting.
(none/WEP/TKIP/AES)
Security Key Settings
Set the security key used for wireless connection.
WEP
WPA
Personal
• Security Key Settings
Set the security key used for wireless connection.
5 half-width numeric digits,
10 hexadecimal (64 bit) digits,
13 half-width numeric digits,
or 26 hexadecimal (128 bit) digits
8 to 63 half-width numeric digits or
64 hexadecimal digits
WPA2
Personal
WEP
5 half-width numeric digits,
10 hexadecimal (64 bit) digits,
13 half-width numeric digits,
or 26 hexadecimal (128 bit) digits
WPA
Personal
8 to 63 half-width numeric digits or
64 hexadecimal digits
WPA2
Personal
Device IP Address Settings
Set the IP address of the access point.
Channel Settings
Set the channel used for the access point.
Sending Output Settings
Set the transmission output of the access point.
Bandwidth Settings
Set the frequency band of the access point.
IP Addr. Distribution Range
Set the lease range and lease period of the IP address
used for the access point.
177
SYSTEM SETTINGS
User Control
User Control is used to configure settings for user
authentication. Select the [User Control] to configure
the settings.
User Authentication
These settings enable or disable user authentication
and specify the authentication method.
When user authentication is enabled, each user of the
machine is registered. When a user logs in, settings for
that user are applied.
User Registration
Users can be added, deleted, and changed.
Note
• When entering a user number, the [OK]
key is not enabled until 5 digits have been
entered.
• If the [Clear] key is pressed during entry of
a user number, the displayed user
number changes to "-----".
Function Limit Setting
Set functions that all users or a specific user can use.
• Copies (Color)/Copies (B/W)
• Printer (Color)/Printer (B/W)/USB Memory Direct
Print
• Scanner
• Fax
Set the paper limits for copying (color, black & white)
and printing (color, black & white).
User Count Display
This setting is used to display the page counts of each
account in copy, print, and scan modes, and the usage
limits for copy and print modes. Misfed pages are not
included in the page counts.
For the network scanner function, the number of
transmitted pages is displayed.
Select "User Count Display" and press the [OK] key.
Switch to the page counts in other modes for the same
account, as well as the page limits, with the [ ] or [ ]
key.
To change to a different account number, press the
[ ] or [ ] key.
User Count Reset
This setting is used to reset the copy, print, and scan
page counts of an individual account, or all accounts,
to zero.
A Warning when Login Fails
When this setting is enabled, the machine will not
allow operation for one minute if an incorrect account
number is entered three times in a row. During this
time, "This operation is disabled. Please contact your
administrator." will appear in the display.
Disable Print by Inv. User
When enabled, this setting cancels a print job if no
account number is entered or an invalid account
number is entered. This setting is only effective when
"User Authentication" has been enabled for print
mode.
The function is initially disabled (factory default
setting).
abled
Note
Account Limit Setting
Copying and printing paper limits can be set for all
users or specific users.
178
Pages printed by invalid account numbers
are added to the page count of "Others"
(account number).
SYSTEM SETTINGS
Device Control
Operation Setting
These settings are used to configure settings for
hardware functions of the machine. To access one of
these settings, select "Device Control" in the mode
selection screen, select the desired setting in the
device control screen, and press the [OK] key.
These settings are used to configure various settings
related to the operation panel. To access one of these
programs, select "Operation Setting" in the mode
selection screen, select the desired setting in the
operation setting screen, and press the [OK] key.
Fusing Control
The temperature of toner fusing is controlled according
to the weight of the paper that is used.
Note
• Be sure to use only paper that is in the
same weight range as the weight range
set here. Do not mix in other standard
paper that differs from the set range.
• When settings are changed, the changes
will take effect after the machine is
restarted. To restart the machine, see
"POWER ON AND OFF" (p.15).
Auto Clear
This function returns the copy settings to the default
settings if the operation panel is not used for the
duration of time set with this setting following the end
of a copy job. Time selections are "0 sec.", "10 sec.",
"20 sec.", "60 sec.", "90 sec." and "120 sec.".
The factory default setting is 60 seconds.
Select "Auto Clear" and press the [OK] key. The
following screen will appear.
Select the desired time with the [ ] or [ ] key.
If you do not want auto clear to operate, select "0".
Fusing Cleaning
Note
Use this function to clean the machine's fusing unit
when dots or other dirt appear on the printed side of
the paper. When this function is executed, "V" printed
paper is output and the fusing unit is cleaned.
Note
If improvement is not noticed after the first
time you use the function, try executing the
function again.
The Auto Clear function is disabled when
scanned data is stored under the following
status: When the last page has not been
scanned during the 2 IN 1 or 4 IN 1 copy
process (one page has been scanned for a
two-page set or three pages have been
scanned in a four-page set), or only one
side has been scanned in the ID card copy
process.
Registration Adjustment
Disable Display Timeout
If the colors are out of place on the printed surface
when color printing is performed, the print positions of
the colors can be adjusted.
Select "Registration Adj." and press [OK] key to start
automatic registration. When appearing the complete
message, the adjustment is completed.
This setting is used to select whether or not the display
will automatically return to the base screen if no keys
are pressed on the operation panel for one minute in
scan or fax mode.
The factory default setting is automatic return to the
base screen.
Note
Depending on the machine's condition,
adjustment error message may appear.
In that case, execute the registration
adjustment again.
Language Setting
This setting is used to select the display language.
Select "Language Setting", press the [OK] key, and
follow the steps below.
Message Time
This setting is used to set the length of time that
messages appear in the display (this applies to
messages that appear for a certain length of time and
then automatically disappear.)
Select from "Short (3 sec.)", "Normal (6 sec.)", or
"Long (9 sec.)".
The factory default setting is "Normal (6 sec.)".
179
SYSTEM SETTINGS
Key Touch Sound
This setting is used to set the length of the key touch
sound that is heard each time a key is pressed.
The initial factory setting is "Short".
Select the desired length with the [ ] or [ ] key.
To turn the key touch sound off, select "Off".
Energy Save
These settings are used to configure energy saving
settings. To access one of these settings, select
"Energy Save" in the mode selection screen, and
select the desired setting in the energy save screen,
and then press the [OK] key.
Keys Touch Sound At Initial Point
This setting is used to select whether or not a beep will
sound at preset base settings as you press a key to
select a setting.
The factory default setting is no beep.
Key Press Time
This setting is used to set the duration of time that a
key must be pressed to take effect.
A longer setting can be selected to prevent keys
pressed accidentally from taking effect. Keep in mind,
however, that when a longer setting is selected more
care is required when pressing keys to ensure that the
key input is registered.
The initial factory setting is "Minimum".
Auto Power Shut-Off
This setting is used to enable auto power shut-off
mode, which automatically turns off the power to the
fusing unit if the operation panel is not used for a
certain duration of time.
Enabling auto power shut-off mode helps conserve
energy, preserve natural resources, and reduce
environmental pollution.
The function is initially enabled.
Disable Auto Key Repeat
This setting is used to stop a setting from changing
continuously when the [ ] or [ ] key is held down,
such as when setting the zoom ratio or the original size
(auto key repeat will not operate). When this setting is
enabled, a key must be pressed repeatedly instead of
holding it down.
Auto key repeat is initially set to operate (factory
default setting).
Disable Paper Size Set
This setting is used to disable "Paper Size Set" in the
special functions menu. When disabled, "Paper Size
Set" cannot be used when the [Special Function] key
is pressed, which prevents users other than the
administrator from easily changing the paper size
setting.
"Disable Paper Size Set" is initially disabled (factory
default setting).
Note
Rather than disabling the auto power
shut-off feature, it is recommended that you
first try lengthening the time set in "Auto
Power Shut-Off Timer" (see below). In most
cases a suitable timer setting will allow work
to proceed with minimal delay and still
enable you to enjoy the benefits of power
conservation.
Auto Power Shut-Off Timer
This setting is used to set the duration of time until
auto power shut-off mode activates when the
operation panel is not used. Using this function helps
conserve energy, preserve natural resources, and
reduce environmental pollution.
"1 min.", "3 min.", "5 min.", "10 min.", "15 min.",
"30 min.", "45 min." or "60 min." can be selected for the
duration of time. Select a setting that suits your work
conditions.
Preheat Mode
This setting is used to set the duration of time until
preheat mode, which automatically lowers the fusing
unit temperature, activates when the operation panel is
not used. Using this function helps conserve energy,
preserve natural resources, and reduce environmental
pollution. "1 min.", "3 min.", "5 min.", "10 min.",
"15 min.", "30 min.", "45 min." or "60 min." can be
selected for the duration of time. Select a setting that
suits your work conditions.
180
SYSTEM SETTINGS
Enter Auto Power Shut-Off after the
Remote Job
This function works in Auto Power Shut-Off mode.
When the machine completes a print job received from
the PC or outputs received fax data, the machine
immediately returns to the Auto Power Shut-Off mode.
Toner Save Mode (Copy)
Toner Save Mode (Print)
You can reduce the amount of toner used for
copying/printing.
Note
AutoColorCalib.
This is used to perform automatic color correction
when the color in color copies is off. The machine
prints a test patch, the test patch is scanned, and the
color is automatically corrected.
After the [OK] is selected and a test patch is printed, a
message appears prompting you to begin automatic
calibration. Place the test patch on the document glass
as shown below (so that the light patch at the edge of
the page is to the left).
Toner Save Mode (Print) is only effective
when the machine's printer driver is not
used. When the printer driver is used, the
printer driver setting takes precedence.
This function may not operate in some
applications and operating systems.
Align the upper left corner of the original
with the
mark.
Align the upper left corner of the original with the mark.
List Print
This is used to print lists and reports that are only for
use by the administrator of the machine.
Select the [List Print] to configure the settings.
Fax Settings
Shows the current state of the
system settings, as well as the
sender name, sender number,
polling passcode numbers, and
forwarding numbers.
Inbound
Routing
Shows the inbound routing settings
for routing received faxes on your
network.
Lay copy paper (about five sheets) that is the same
size as the test patch on top of the placed test patch,
gently close the automatic document feeder, and
select the [OK].
Note
User Usage List Shows the communication time and
number of pages transmitted by each
user.
Activity Report
Shows a log of past communication
performed on the machine (date of
communication, name of other party,
time required, result, etc.).
Junk Fax # List
Shows the stored fax numbers from
which reception in "Anti Junk Fax"
(p.188) is blocked.
User Info. Print
The user name, user number, paper
used, paper limits, and function
permission settings can be printed
for each user.
*Cannot be printed if no users are
registered.
181
• Before executing Auto Color Calibration,
check to see if the registration adjustment
is correct. If the registration adjustment is
not correct, perform "Registration
Adjustment" (p.179).
• If the color is still off after performing Auto
Color Calibration, repeating Auto Color
Calibration once again may improve the
color.
SYSTEM SETTINGS
Security Settings
Copier
The following settings are related to security.
Select the [Security Settings] to configure the settings.
These settings are used to enable various copy
functions. To access one of these programs, select
"Copier" in the mode selection screen, select the
desired setting in the copy settings screen, and press
the [OK] key.
IPsec Settings
IPsec can be used for data transmission/reception on
a network.
IKEv1 Settings
Configure the IKEv1 settings.
Initialize Private Data and Data in
Machine
The system-set values can be restored to the factory
default state after eliminating the data stored in the
machine.
•
•
•
•
•
•
•
•
•
•
•
•
•
•
•
•
•
•
•
All information displayed in the fax status
Image data in memory boxes
Unsent fax data
Current values set for system settings
Current values set for network settings
User information > User registration information
User information > Paper limits
User information > Function usage restrictions
User information > User counts
(Excluding default users)
Fax / scanner addresses
Groups
User index (scanner)
Programs
Auto forwarding of received faxes
Public box data
Sender information
Reception rejection numbers
Forwarding information
Product key
ID Card Setting
The layout pattern for copying of the ID card can be
changed during the ID card copy process.
Refer to the illustration in "ID CARD COPY" (p.32) for
the available layout patterns.
Card Shot Default
This setting is used to set the default dimensions that
appear when the card shot size entry screen is
displayed.
The factory default settings are 3-3/8" (86 mm) for the
width (X) and 2-1/8" (54 mm) for the length (Y).
Select X or Y and adjust the corresponding default
value with the [ ] or [ ] key.
Default Tray Set
This setting is used to set which tray is selected by
default.
Trays that appear for selection will vary depending on
the optional trays that have been installed.
The factory default setting is "Tray 1".
Default Exposure
This setting is used to select the original type and
exposure mode that is initially selected when the
[EXPOSURE] key is pressed.
Three exposure modes are available: "Text",
"Text/Print Photo" and "Photo".
Depending on the settings, set "Auto" or one of five
levels for the exposure.
Select the original type with the [ ][ ] keys, adjust
the exposure if needed with the [ ][ ] keys, and
press the [OK] key.
182
SYSTEM SETTINGS
Sort Auto Select
This setting is used to select the default output mode
when the document feeder is used for copying.
The initial factory setting is "Sort".
Fax
System settings for the fax function are explained
below.
Limit Of Copies
List Setting
This setting is used to set the limit for the number of
copies that can be set (and that can appear in the
display) for one copy job.
The factory default setting is "999 copies".
This setting is used to print lists showing current
system settings and other programmed information.
Select the [List Setting] to configure the settings.
Print Selection
Printer
This setting is used to select the conditions for printing
out transaction reports for normal transmission,
broadcast transmission, original print and reception.
Settings related to the printer function can be
configured.
Select the [Printer] to configure the settings.
Transmission
Broadcast
Always Prints
Always Prints
Original Image
Print Setting
Always Prints
Error Only
Error Only
Error Only
Never Prints
Never Prints
Never Prints
Reception
Always Prints
Error Only
Notice Page
Set whether a notice page is printed when printing
does not take place due to an error such as memory
full.
Never Prints
Normally the settings indicated by shading
above are selected.
"Transmission", "Broadcast", "Original Image Print
Setting", or "Reception" can be selected.
• If you selected "Transmission", select "Always
Prints", "Error Only", or "Never Prints".
• If you selected "Broadcast", select "Always Prints",
"Error Only", or "Never Prints".
• If you selected "Original Image Print Setting", select
"Always Prints", "Error Only", or "Never Prints".
• If you selected "Reception", select "Always Prints",
"Error Only", or "Never Prints".
Note
183
"Original Image Print Setting" is used to
have part of the first page of the transmitted
document printed on the transaction report.
This setting is not effective when the
transaction report is set to not print out.
SYSTEM SETTINGS
Auto Listing
Initial Setting
This setting is used to have the activity report that is
stored in the machine's memory printed out at regular
intervals.
You can choose to have the report automatically
printed each time the number of stored transactions
exceeds 50, or have the report printed at a specified
time every day (only once per day). You can also
enable both print methods.
The report is normally set to not print out. To have the
report automatically printed when the number of stored
transactions (the combined total of transmissions and
receptions) exceeds 50, select "Auto Print Rept At
Limit(50)".
To have the report printed at a specified time, enable
"Print Time Set" and enter the desired time.
• The setting is enabled and a checkmark appears in
the checkbox.
• If this procedure is performed when the setting is
enabled, the checkmark will be cleared and the
setting disabled.
These settings are used to change the default settings
(initially set at the factory) for the various fax functions
to settings that better meet your needs.
Select the [Initial Setting] to configure the settings.
Note
• To cancel a "Print Time Set" setting,
select "Cancel":
• Select "Cancel" with the [ ] or [ ] key
and then press the [OK] key.
• If "Auto Print Rept At Limit(50)" is not
enabled and the number of recorded
transactions exceeds 50, each new
transaction will delete the oldest
transaction.
• The activity report can also be printed out
on demand. (See "PRINTING LISTS OF
PROGRAMMED INFORMATION AND
SETTINGS" (p.109).)
Dial Mode
This setting is used to set the appropriate dial mode for
the line connected to the machine. Select tone for a
tone dial line or pulse for a pulse dial line.
Pause Time
This setting is used to select the duration of pauses
that are inserted in destination fax numbers.
Normally the setting is 2 seconds, which means that
each time the [PAUSE] key is pressed when dialing or
storing a fax number, a pause of 2 seconds is inserted.
The pause time can be set to any number of seconds
from 1 to 15.
Own Passcode Set
Use this setting to setting the fax number of the
machine and the name of the user. The programmed
name and number are printed at the top of each fax
page you send. The number is also used as a
passcode when performing polling reception
"SENDING OPTIONS" (p.100)".
You can check your programmed name and number
by printing out the "List Print" (p.181)
A maximum of 20 digits can be stored for the fax
number.
• A maximum of 18 letters can be stored for the
name.
Note
To clear the programmed fax number and
name, follow these steps:
(1) Select "Delete" and then press the [OK]
key.
(2) Select "Delete" with the ] or [ ] key
and then press the [OK] key.
Set Volume
This setting is used to adjust the on-hook volume, the
ringing volume, the line monitor volume, the TX/RX
end sound volume, the original scanning end sound
volume, and the tone output volume. All volume
settings are initially set to "Middle".
• "High", "Middle" or "Low" can be selected for the on
hook volume.
• "High", "Middle", "Low" or "Off" can be selected for
volumes other than the on hook volume.
184
SYSTEM SETTINGS
TX/RX End Sound
Remote Reception
(Only when an extension phone is connected)
This setting is used to select the beep pattern that
signals the end of transmission or reception.
"Pattern 1", "Pattern 2" or "Pattern 3" can be selected.
Before pressing the [OK] key to store your selection, you
can press the
key to listen to the selected pattern.
End Sound Length
This setting is used to select the length of the end sound
in seconds. Selections are "2.0 sec", "2.5 sec", "3.0 sec",
"3.5 sec", and "4.0 sec". "3.0 sec" is normally selected.
When a call is received on an extension phone
connected to the machine, fax reception can be
activated by entering a 1-digit number and pressing
twice on the phone's keypad. This 1-digit number is
called the remote reception number, and you can set it
to any number from "0" to "9". Normally the remote
reception number is set to "5".
Note
Distinctive Ring
(Varies depending on country and region)
If multiple telephone numbers have been assigned to
your telephone line, the number called can be
identified by its ringing pattern. By using one number
for voice calls and another number for faxes, you can
tell which type of call you are receiving by the ringing
pattern. You can set your machine to automatically
receive faxes when your fax number is called by
setting the pattern that corresponds to your fax
number. Normally "Off" is selected.
If a remote number has been previously
stored, the newly entered remote number
overwrites the old number.
Disable Fax Print Hold
This setting is used to disable the fax print hold
function,
which holds received faxes in memory instead of
printing them as they are received. (p.97)
Normally the fax print hold function is disabled.
• The setting (which disables fax print hold) is
enabled and a checkmark appears in the checkbox.
• If this procedure is performed when the setting is
enabled, the checkmark will be cleared and the
setting disabled (fax print hold is enabled).
185
SYSTEM SETTINGS
Sending Function
Address Review
These settings are used to change the default settings
(initially set at the factory) for the various fax
transmission functions to settings that better meet your
needs.
Select the [Sending Function] to configure the settings.
You can specify whether a screen appears for
confirmation of the destination when sending a fax.
Note
Original Size Enter
Set the size of originals scanned on the document
glass. Normally 8-1/2" x 11" is set.
Set Res. Con.
This setting is used to adjust the exposure level when
scanning an original to be faxed. The initial setting is
standard resolution and auto exposure mode.
Send Mode
This setting is used to select whether the default mode
for sending faxes is memory transmission or direct
transmission.
The initial setting is "Memory TX".
Quick On Line TX
This setting is used to select whether or not quick
on-line transmission (transmission while original pages
are being scanned into memory) takes place when a
memory transmission is performed.
If quick on-line transmission is disabled, transmission
will not begin until all original pages have been
scanned into memory.
Normally quick on-line transmission is enabled.
When this function is disabled, transmission will not
begin until all pages of the document have been
scanned. Note that this setting does not apply to
manual transmission. (See "Storing transmission jobs
(memory transmission)" (p.90).)
• Quick on-line is enabled and a checkmark appears
in the checkbox.
• If this procedure is performed when quick on-line is
enabled, the checkmark will be cleared and quick
on-line disabled.
Print Station # In Rcvd Data
This setting lets you select the position (inside or
outside the original image) of the date and sender's
information that are printed at the top of each fax page
you send. Normally outside the original image is
selected. To have your name and number printed
inside the original image, select "In Data".
For more detailed information on the position of each
setting, see "INCLUDING SENDER INFORMATION
ON FAXES (OWN NUMBER SENDING)" (p.109).
When the "Only apply to direct entry"
checkbox is selected, the Address Review
screen only appears when the fax number is
entered with the numeric keys or the
[REDIAL] key.
Recall Setting (Busy)
This setting is used to set the number of recall
attempts and the interval between recall attempts
when a transmission is not successful due to the line
being busy or other reason.
Normally the machine is set to make 2 recall attempts
at intervals of 3 minutes.
If you do not wish to have recalling take place, set the
number of attempts to "0".
Note
Even if this setting is enabled, the machine
will not re-attempt the call when a fax is sent
by manual transmission.
Recall Set (Err)
When sending a fax, this setting is used to select
whether or not the machine will automatically
re-attempt the call if the transmission fails due to a line
error. Normally the machine is set to make 1 recall
attempt at intervals of 1 minute.
If you do not wish to have recalling take place, set the
number of attempts to "0".
Note
• If the recall interval is set to "0", the
machine will immediately call again after
the connection is broken due to the line
error.
• Even if this setting is enabled, the
machine will not re-attempt the call when
a fax is sent by manual transmission.
Ring Timeout In Auto TX
When sending a fax by automatic transmission (see
"Storing transmission jobs (memory transmission)"
(p.90)), this setting lets you select the amount of time
that the machine waits before breaking the connection
when the other machine does not answer your
machine's call. If the other machine does not respond
within this set time, your machine will automatically
break the connection.
Time selections are "30 sec." and "45 sec.".
Normally "45 sec." is selected.
186
SYSTEM SETTINGS
Rcv. Function
Received Data Print Condition
These settings are used to change the default settings
(initially set at the factory) for the various fax reception
functions to settings that better meet your needs.
Select the [Rcv. Function] to configure the settings.
This setting determines the selection condition for
paper when printing received documents. Select one
of the three conditions below. "Reduction" is normally
selected.
• Reduction
Each received image is printed at actual size when
possible. When not possible, the image is
automatically reduced before printing.
• Division
Each received image is printed at actual size.
If necessary, the image is split onto multiple sheets
of paper.
• Actual Size
The received fax image is printed at its actual size
(without dividing it onto multiple sheets of paper).
If the same size of paper or larger paper is not
loaded, the fax will be received in memory and will
not be printed until a suitable size of paper is
loaded.
#Of Rings At. RX
When the reception mode is set to auto, this setting is
used to select the number of rings on which the
machine automatically receives a call and begins fax
reception. (See "RECEIVING A FAX" (p.95).)
• Any number of rings from 0 to 15 can be selected.*
Normally "2" is selected.
• If you make a mistake, move the cursor to the
mistake with the [ ] [ ] keys and reenter.
Note
• If the number of rings is set to 0, the
machine will receive faxes without ringing.
• When the number of rings is set to 14 or
15, reception may not be possible
depending on the functions and settings
of the other machine.
#Of Rings Man.RX
(This function may not be available in some regions)
You can set the number of rings on which the machine
changes to auto reception when there is an incoming
fax call in manual reception mode.
Tray Selection
Auto Rcv Reduce To Regular Size
When you receive a fax that includes the sender's
name and number, the received image is slightly larger
than the standard size*. This setting lets you select
whether or not the received image is automatically
reduced before printing to fit the standard size.
Normally this setting is enabled.
* Standard sizes are sizes such as 8-1/2" x 11" and
5-1/2" x 8-1/2".
This setting is used to select which output trays can be
used for received faxes. All output trays are initially
enabled.
• The selected tray is enabled and a checkmark
appears in the checkbox.
• If this procedure is performed when the tray is
enabled, the checkmark will be cleared and the tray
disabled.
Note
• The trays that can be enabled will vary
depending on the options that are
installed.
• The trays cannot all be disabled
Note
• If this setting is disabled (no reduction)
and the received data print condition is set
to division, the image may be clipped.
• If auto receive reduce is disabled, an
image larger than the standard size will be
cut off. However, the image will be clearer
because it will be printed at the same size
as the original.
Duplex Reception
This setting is used to select whether or not received
faxes are printed on both sides of the paper. When
two-sided printing is enabled and a fax that is two
pages or longer is received (the pages must be the
same size), the fax will be printed on both sides of the
paper.
Even if the pages are in different orientations, the
pages are rotated appropriately to enable printing on
both sides of the paper.
• The setting is enabled (two-sided printing will take
place) and a checkmark appears in the checkbox.
• If the procedure is performed when the setting is
enabled, the checkmark will be cleared and the
setting disabled.
187
SYSTEM SETTINGS
FW. RX Data
Enter Junk Fax #
This setting is used to select whether or not received
faxes are forwarded to a fax machine programmed as
explained in "Received Data FW. Station Set" (p.188)
in the event that the machine cannot print the faxes.
The setting is initially disabled.
• The setting is enabled and a checkmark appears in
the checkbox.
• If the procedure is performed when the setting is
enabled, the checkmark will be cleared and the
setting disabled.
This setting is used to program fax numbers from
which you wish to block reception. Up to 50 fax
numbers can be stored (maximum of 20 digits each).
To block reception from the programmed fax numbers,
the "Anti Junk Fax" setting must be enabled.
Note
Note
This setting only operates when the fax
number of the machine that is to receive the
forwarded faxes is programmed.
Received Data FW. Station Set
When a problem prevents the machine from printing a
received fax, the fax forwarding function (p.111) can
be used to forward the received fax to another fax
machine. Use this setting to setting the fax number of
the destination fax machine. Only one fax number can
be programmed (maximum of 50 digits).
Note
To delete the number, follow these steps:
(1) Select "Delete" and then press the [OK]
key.
(2) Select "Delete" with the [ ] or [ ] key
and then press the [OK] key.
Anti Junk Fax
When this setting is enabled, reception from fax
numbers programmed using the "Enter Junk Fax #"
setting will be blocked.
This setting is normally disabled.
• The setting is enabled and a checkmark appears in
the checkbox.
• If this procedure is performed when the setting is
enabled, the checkmark will be cleared and the
setting disabled.
To delete a number, follow these steps:
Before deleting a number, use the "List
Setting" (p.183) to check the control number
that identifies the fax number (01 to 50) that
you wish to delete. The control number must
be entered to delete the fax number. (The
fax number will not appear in the display. If
the wrong control number is accidentally
entered, a fax number other than the fax
number that you wish to delete will be
deleted.)
(1) Select "Delete" and then press the [OK]
key.
(2) Select the 2-digit control number (01 to
50) that identifies the fax number that
you wish to delete with the [ ] or [ ]
key and then press the [OK] key.
(3) Select "Delete" with the [ ] or [ ] key
and then press the [OK] key.
Polling Security
These settings are used for the public box.
Select the [Polling Security] to configure the settings.
Polling Security
When performing polling memory (see "Restricting
polling access (polling security)" (p.103)), this setting
is used to select whether any machine will be allowed
to poll your machine, or only machines that have been
programmed in your machine. Normally this setting is
enabled.
• The setting is enabled and a checkmark appears in
the checkbox.
• If this procedure is performed when the setting is
enabled, the checkmark will be cleared and the
setting disabled.
188
SYSTEM SETTINGS
Polling Passcode # Mode
When "Polling Security" is enabled, use this setting to
program (or delete) the fax numbers of the machines
that are allowed to poll your machine. Programmed fax
numbers are called passcodes. Up to 10 fax numbers
can be programmed. To check the programmed
numbers, print the "List Print" (p.181).
If you make a mistake, move the cursor to the mistake
with the [ ] or [ ] keys and enter the correct number.
Note
To clear a passcode number, follow these
steps:
(1) Select "Delete" and then press the [OK]
key.
(2) Enter the control number that identifies
the number you wish to clear, and then
press the [OK] key.
(3) Select "Delete" with the [ ] or [ ] key
and then press the [OK] key.
Scanner
System settings for the scanner function are explained
below.
Select the [Scanner] to configure the settings.
Disable USB Scan
Select whether or not scanning from a computer and
scanning from the machine are disabled when a USB
connection is used.
Default setting is "No" (disabled).
New Default
This is used to change the default settings for the
original size, resolution, format, and scanning
exposure in B/W mode. (For details, see "STORING
SCANNING SETTINGS" (p.130).)
• For details on each setting, see the pages below.
"Original Size Enter" (p.130)
"Resolution"
(p.130)
"Format"
(p.131)
"Mono2/Grayscale" (p.131)
189
9
WEB FUNCTIONS IN THE
MACHINE
ABOUT THE WEB PAGES
The machine includes a built-in Web server. The Web server is accessed using a Web browser on your computer.
The Web pages include both pages for users and pages for the administrator. In the user Web pages, users can
monitor the machine, and select printer configuration settings. In the administrator Web pages, the administrator can
configure the machine's e-mail settings, settings for print by e-mail, and passwords. Only the administrator is
allowed to configure these settings.
HOW TO ACCESS THE WEB PAGE
Use the following procedure to access the Web pages. [Help] can be clicked at the bottom of the menu frame to view
information on the various function settings that can be configured remotely over the network from the machine's
Web pages. For the settings of each function, see the explanations in Help.
1
Open the Web browser on your computer.
Supported browsers:
Internet Explorer:
Netscape Navigator:
Firefox:
2
6.0 or higher (Windows®)
9 (Windows®)
2.0 or higher (Windows®)
In the "Address" field of your Web browser, enter the IP address that has been
configured in the machine.
When the connection is completed, the Web page will appear in your Web browser.
"ABOUT THE WEB PAGES (FOR USERS)" (p.191)
3
When finished, close the Web pages.
When you have finished using the Web pages, click the
190
(close) button in the top right corner of the page.
WEB FUNCTIONS IN THE MACHINE
ABOUT THE WEB PAGES
(FOR USERS)
When you access the user Web pages in the machine, the following page will appear in your browser.
A menu frame appears on the left side of the page. When you click an item in the menu, a screen appears in the
right frame that allows you to configure settings for that item.
(1)
(2)
(3)
(4)
(5)
(6)
(1) Menu frame
Click a setting in the menu to configure it.
(2) System Information
Shows the current status of the machine and
model name.
• Device Status
Shows the current status of the machine, paper
trays, output trays, toner and other supplies, and
page counts.
Out of paper and other warnings appear in red.
• Device Configuration
Shows what options are installed.
• Network Status
Shows the network status. Information on
"General" and "TCP/IP" is shown on the
respective pages.
(3) Data List Print
You can print out the various settings that you have
selected.
(4) Condition Settings
Configure basic printer settings and printer
language settings.
"CONFIGURING THE PRINTER CONDITION
SETTINGS" (p.192)
(5) Admin Mode
To open the Web pages for the administrator, click
here and then enter the administrator's user name
and password.
"ABOUT THE WEB PAGES (FOR THE
ADMINISTRATOR)" (p.202)
"PROTECTING INFORMATION PROGRAMMED
IN THE WEB PAGE ([Passwords])" (p.204)
(6) Display Language Setting
Select the desired language setting from the
pull-down menu.
191
WEB FUNCTIONS IN THE MACHINE
CONFIGURING THE PRINTER
CONDITION SETTINGS
The printer condition settings allow basic printer settings to be configured. The following items can be set:
● "Default Settings" (p.193): Basic settings that are mainly used when the printer driver is not used.
● "PCL Settings" (p.194):
PCL symbol set, font, line feed code, and other settings.
Note
When the printer driver is used and the same settings are configured both in the printer driver and in the above
screens, the settings configured in the printer driver override the settings in the above screens. If a setting is
available in the printer driver, use the printer driver to configure the setting.
HOW TO CONFIGURE THE SETTINGS
To display the Condition Settings screen, click [Condition Settings] in the menu frame.
(2)
(3)
(1)
(4)
(1) Condition Settings
This displays the page for configuring the printer
condition settings.
(2) Default Settings/ PCL/PS
Select the type of condition settings that you wish
to configure.
(3) Settings
The factory default settings are displayed.
Change the settings as desired by selecting from
drop-down lists and by directly entering settings.
For information on the settings, see "PRINTER
CONDITION SETTINGS" (p.193).
(4) Submit
Click to store the Web page settings in the
machine.
192
WEB FUNCTIONS IN THE MACHINE
PRINTER CONDITION SETTING MENU
Condition Settings
Default Settings
Condition Settings
Factory default settings
PCL Settings
Factory default settings
Orientation
Portrait
Symbol Set
PC-8
Default Paper Size
8-1/2" x 11"
Font
0: Courier (internal font)
Default Paper Type
Standard
Line Feed Code
CR=CR; LF=LF; FF=FF
Default Resolution
600dpi (High Quality)
Disable Blank Page
OFF
Print
PS Settings
Print PS Errors
2-Sided Print
1-Sided
Color Mode
Auto
Fit To Page
ON
Factory default settings
Disable
PRINTER CONDITION SETTINGS
Factory default settings are indicated in bold.
Default Settings
Item
Selections
Description
Orientation
Portrait, Landscape
This sets the orientation of the printed page. Select [Portrait]
when the image is longer in the vertical direction, or
[Landscape] when the image is longer in the horizontal
direction.
Default Paper Size
Letter, Invoice,
Executive, A4, B5, A5,
This sets the default paper size used for printing.
Default Paper Type
Standard, Letter head,
Pre-printed,
Pre-punched,
Recycled, Color
Set the type of paper used for printing.
Default Resolution
600dpi,
600dpi (High Quality)
Set the printing resolution.
Disable Blank Page
Print
ON, OFF
When this is specified, blank pages with no print data will not
be printed.
2-Sided Print
1-Sided,
2-Sided (Book),
2-Sided (Tablet)
When [2-Sided (Book)] is selected, two-sided printing takes
place so as to allow binding at the left side. When [2-Sided
(Tablet)] is selected, two-sided printing takes place so as to
allow binding at the top. (Only for models that support
two-sided printing.)
Color Mode
Auto, Black & White
Set the color mode used for printing.
Fit To Page
ON, OFF
Set whether the printed image is fit to the size of the paper.
193
WEB FUNCTIONS IN THE MACHINE
PCL Settings
Item
Selections
Description
Symbol Set
Select one of 35 sets.
This specifies which country's characters (PCL symbol set)
are assigned to certain of the symbols in the character code
list.
The factory default setting is [PC-8].
Font
Select one internal
font.
This specifies which PCL font to use for printing. One font can
be specified from among the internal fonts. The factory default
setting is [0: Courier].
Line Feed Code
CR=CR; LF=LF;
FF=FF,
CR=CR+LF; LF=LF;
FF=FF,
CR=CR; LF=CR+LF;
FF=CR+FF,
CR=CR+LF;
LF=CR+LF;
FF=CR+FF
This specifies the line break code by means of a combination
of the "CR" (return) code, "LF" (line break) code, and "FF"
(page break) code. The factory default setting is printing
based on the transmitted code. The setting can be changed by
selecting one of four combinations.
PostScript settings
Item
Settings
Description
Print PS Errors
Enable, Disable
When this setting is enabled, an error description is printed
each time a PostScript error occurs.
194
WEB FUNCTIONS IN THE MACHINE
CONFIGURING THE SCANNER
CONDITION SETTINGS
STORING DESTINATIONS
To store scanning destinations, click [Destination] in the Web page menu frame. This screen can also be used to
edit or delete stored destinations. (p.200)
A total of 200 destinations* can be stored, including E-mail, Network folder FTP, Desktop, and Group destinations.*
* Multiple e-mail addresses can be stored as a group (up to 100). Note that this may reduce the maximum number
of destinations (normally 200) that can be stored.
Click here to store
destinations.
Storing destinations for Scan to E-mail
Click [E-mail], and enter the destination information.
For each setting, see the following table.
Note
To perform Scan to E-mail, the SMTP server settings must first be established. (p.203)
E-mail destination information
Item
Description
Name (Required)
Enter the name of the destination (up to 36 characters).
Initial (Optional)
Enter initial text for the destination (maximum of 10 characters). When the destination
list is displayed in the destination control screen, the initial text is used to group the
destinations.
Custom Index
Names can be assigned to the custom indexes as desired (p.191), allowing
convenient grouping of destinations.
Drop down list:
Select a custom index for the destination to be stored.
User checkbox:
When this is selected, the destination is stored in the user tab of
the address book. (p.128)
E-mail Address
(Required)
Enter the e-mail address of the destination (up to 64 characters). If an LDAP server is
being used, you can click the [Global Address Search] button to search for an
address on the LDAP server.
195
WEB FUNCTIONS IN THE MACHINE
Storing destinations for Scan to FTP
Click [FTP], and enter the destination information.
For the settings, see the following table.
FTP destination information
Item
Description
Name (Required)
Enter the name of the destination (up to 36 characters).
Initial (Optional)
Enter initial text for the destination (maximum of 10 characters). When the destination
list is displayed in the destination control screen, the initial text is used to group the
destinations.
Custom Index
Names can be assigned to the custom indexes as desired (p.191), allowing
convenient grouping of destinations.
Drop down list:
Select a custom index for the destination to be stored.
User checkbox:
When this is selected, the destination is stored in the user tab of
the address book. (p.128)
Hostname or IP Address
(required)*
Enter the IP address or host name of the FTP server (maximum of 127 characters).
User Name (Optional)
Enter the login user name for the FTP server (maximum of 32 characters).
Password (Optional)
Enter the login password for the FTP server (maximum of 32 characters).
Directory (Optional)
If you wish to specify a destination directory on the FTP server, enter the directory
(maximum of 200 characters).
* If you entered a host name in "Hostname or IP Address", you will need to enter the DNS server settings. (p.203)
196
WEB FUNCTIONS IN THE MACHINE
Storing destinations for Network folder
Click [Network folder], and enter the destination information.
For the settings, see the following table.
Network folder destination information
Item
Description
Name (Required)
Enter the name of the destination (up to 36 characters).
Initial (Optional)
Enter initial text for the destination (maximum of 10 characters). When the destination
list is displayed in the destination control screen, the initial text is used to group the
destinations.
Custom Index
Names can be assigned to the custom indexes as desired (p.191), allowing
convenient grouping of destinations.
Drop down list:
Select a custom index for the destination to be stored.
User checkbox:
When this is selected, the destination is stored in the user tab of
the address book. (p.128)
Hostname or IP Address
(required)*
Enter the IP address or host name of the network folder (maximum of 127
characters).
User Name (Optional)
Enter the login user name for the network folder (maximum of 32 characters).
Password (Optional)
Enter the login password for the network folder (maximum of 32 characters).
* If you entered a host name in "Hostname or IP Address", you will need to enter the DNS server settings. (p.203)
197
WEB FUNCTIONS IN THE MACHINE
Storing destinations for Scan to Desktop
The destination for Scan to Desktop is stored by the Sharp Network Scanner Tool Setup Wizard when "Network
Scanner Tool" is installed in your computer. For this reason, there is no need to store the Scan to Desktop
destination in the Web page. (The Network Scanner Tool is on the "Sharpdesk" CD-ROM.)
For information on Scan to Desktop system requirements, installing the Network Scanner Tool, and storing
the destination, see the "Sharpdesk installation guide".
Normally your computer is stored as the destination by the method indicated above.
The following page for storing Scan to Desktop destination information appears when [Destination] is selected in the
menu frame, followed by [Desktop]. This page is used mainly by the system administrator in the following circumstance.
• When another machine that also has the network expansion kit is added to your network and you wish to send an
image scanned on the new machine to a destination stored on the existing machine
See "Editing and deleting programmed transmission destinations" (p.200) to select the Scan to Desktop destination
information that you wish to use on the new machine and enter the displayed information in this screen in the new
machine. (When you have completed all entries, click [Submit].)
If there are several destinations that you wish to use on the new machine, repeat this procedure as needed.
If the information entered here differs from the
information entered on the host computer,
transmission/reception will not be possible.
For the settings, see the following table.
Scan to Desktop destination information
Item
Description
Name (Required)
Enter the name of the destination (up to 36 characters).
Initial (Optional)
Enter initial text for the destination (maximum of 10 characters). When the destination
list is displayed in the destination control screen, the initial text is used to group the
destinations.
Custom Index
Names can be assigned to the custom indexes as desired (p.191), allowing
convenient grouping of destinations.
Drop down list:
Select a custom index for the destination to be stored.
User checkbox:
When this is selected, the destination is stored in the user tab of
the address book. (p.128)
Hostname or IP Address
(Required)*
Enter the IP address or host name of the FTP server (maximum of 127 characters).
Port Number (Required)
Enter a port number from 0 to 65535 for the desktop network scanner tool.
Process Directory
(Optional)
Enter the destination directory name for the file (maximum of 200 characters). The file
will be processed in this directory after it is received.
User Name (Optional)
Enter the login user name for the network scanner tool (maximum of 32 characters).
Password (Optional)
Enter the login password for the network scanner tool (maximum of 32 characters).
* If you entered a host name in "Hostname or IP Address", you will need to enter the DNS server settings. (p.203)
198
WEB FUNCTIONS IN THE MACHINE
Storing Groups (Scan to E-mail)
You can send a scanned image to multiple e-mail destinations in a single Scan to E-mail operation. If you frequently
transmit to a fixed group of destinations, you can store the destinations as a group.
Note
Up to 100 destinations can be stored in one group.
Click [Group(E-mail)], and enter the destination information.
For the settings, see the following table.
Storing a group of destinations
Item
Description
Name (Required)
Enter a name for the group (up to 36 characters).
Initial (Optional)
Enter initial text for the destinations (maximum of 10 characters). When the
destination list is displayed in the destination control screen, the initial text is used to
group the destinations.
Custom Index
Names can be assigned to the custom indexes as desired (p.191), allowing
convenient grouping of destinations.
Drop down list:
Select a custom index for the destination to be stored.
User checkbox:
When this is selected, the destination is stored in the user tab of
the address book. (p.128)
Address(es) (Required)
Select the address of each destination from the "E-mail" list box. Programmed e-mail
destinations appear in each of the destination lists. To select multiple destinations,
click each address while holding down the [Ctrl] key on the keyboard. If you need to
cancel an address that has been selected, click the address again while holding down
the [Ctrl] key.
If an LDAP server is being used, you can click the [Global Address Search] button to
search for an address on the LDAP server. Multiple e-mail addresses can be entered.
Separate the e-mail addresses with a comma (,), semi-colon (;), space ( ), or colon (:).
199
WEB FUNCTIONS IN THE MACHINE
Editing and deleting programmed transmission destinations
To edit or delete programmed destinations, click [Destination] in the menu frame of the Web page.
To edit the selected destination, click [Edit] at the bottom of the Destinations List.
The programming screen of the destination selected appears. Edit the information
in the same way as you initially stored it.
To delete the selected destination, click [Delete] at the bottom of the Destinations List.
Note
If you attempt to delete a programmed destination in the following situations, a warning message will appear and
deletion will not be possible.
• The destination is included in a group.
If the destination is being used for a current transmission, cancel the transmission or wait until it is completed
and then delete the destination. If the destination is included in a group, delete the destination from the group
and then delete the destination.
Printing lists of programmed destinations
You can print lists showing the destinations that have been programmed.
The following lists can be printed.
● Destination List:
Shows the information programmed in e-mail, FTP, desktop, and group destinations.
● Print group list:
Shows only the information programmed in group (e-mail) destinations.
To print the individual list, click [Print Individual List] at the bottom of the destinations list.
To print the group list, click [Print Group List] at the bottom of the destinations list.
200
WEB FUNCTIONS IN THE MACHINE
BASIC SETTINGS FOR NETWORK SCAN
(FOR THE ADMINISTRATOR)
To use the Network Scan function, setting from the Web page is required.
Click the menu frame and configure the required settings. A password is required to access this screen.
These settings should only be configured by the network administrator.
1
Click [Network Scanning] in the menu frame.
The Network Scanning setup page appears.
2
Select the scanner mode.
In the "Enable Scanner Delivery to:" field, click the checkbox so that a
checkmark appears in the checkbox.
3
Select the method for assigning a file name to a scanned image.
Select the method for assigning a file name to a scanned image. In "File Naming", click the items that you wish
to use in the file name. "Date & Time" is initially selected.
4
Click [Submit].
After entering the settings, be sure to click [Submit] to store them.
201
WEB FUNCTIONS IN THE MACHINE
ABOUT THE WEB PAGES
(FOR THE ADMINISTRATOR)
In addition to the menus that appear for users, other menus that can only be used by the administrator appear in the
administrator Web pages.
A menu frame appears on the left side of the page. When you click an item in the menu, a screen appears in the
right frame that allows you to configure settings for that item. Settings that can only be configured by the
administrator are explained here.
(1)
(2)
(3)
(4)
(5)
(6)
(7)
(8)
(9)
202
(1)Information
Configure machine identification information for
the status & alert E-mail function.
"INFORMATION SETUP" (p.206)
(2)Passwords
To protect the Web site, the system administrator
can establish passwords. Enter a password that
you would like to establish and click the [Submit]
button.
One password can be established for the
administrator and one password can be
established for users.
"PROTECTING INFORMATION PROGRAMMED
IN THE WEB PAGE ([Passwords])" (p.204)
(3)Administrator Settings
Setting changes can be prohibited and interface
settings can be configured.
"ADMINISTRATOR SETTINGS" (p.205)
(4)Status Message
Configure parameters required for sending status
messages, such as destination addresses and
time schedules.
"STATUS MESSAGE SETUP" (p.207)
(5)Alerts Message
Store destination addresses for alert messages.
"ALERTS MESSAGE SETUP" (p.207)
(6)Security
Unused ports can be disabled for greater security
and port numbers can be changed.
(7)Services
Configure information concerning the e-mail
system.
"SMTP SETUP" (p.206)
(8)Print Port
Configure settings for LPD and Raw print.
(9)LDAP
Configure settings for LDAP.
WEB FUNCTIONS IN THE MACHINE
CONFIGURING SMTP, DNS AND
LDAP SERVER SETTINGS
The procedures for using [Quick Setup] are explained here. [Quick Setup] is used to quickly configure only the
required settings for "SMTP", "DNS", and "LDAP" servers. These settings are normally configured first.
SMTP server:
DNS server:
LDAP server:
SMTP is used to transmit e-mail that is sent using Scan to E-mail.
To use these transmission methods, your SMTP server settings must be configured.
If you entered a host name in "Primary SMTP Server" or "Secondary SMTP Server" of "SMTP",
you must also configure your DNS server settings.
You will also need to configure your DNS server settings if host names will be entered in
"Hostname or IP Address" when storing destinations for Scan to Desktop.
If mail addresses are managed on your network by an LDAP server, the e-mail addresses stored
in the LDAP server can be used for Scan to E-mail.
To allow the machine to use the e-mail addresses in the LDAP server, the LDAP server settings
must be configured in the Web page.
5
Click [Quick Setup] in the menu frame.
6
7
Enter the required information in "SMTP", "DNS" and "LDAP".
When you have completed all of the entries, click [Submit].
The entries will be stored.
Note
If you need to configure advanced settings for the SMTP, DNS, and LDAP servers, follow the procedures below.
• Configuring SMTP and DNS server settings
Click [Services] in the menu frame to display the services setup screen. Select the desired server and then
configure the required parameters for that server.
• Configuring LDAP server settings
Click [LDAP] in the menu frame to display the LDAP setup screen. Configure the required parameters.
203
WEB FUNCTIONS IN THE MACHINE
PROTECTING INFORMATION
PROGRAMMED IN THE WEB PAGE
([Passwords])
Passwords can be set (click [Passwords] in the menu frame) to restrict Web page access and protect settings.
The administrator must change the password from the factory default setting. The administrator must also take care
to remember the new password. The next time the Web pages are accessed, the new password must be entered.
A password can be set for the administrator and a password can be set for users.
1
2
Click [Passwords] in the menu frame.
Enter the current password in "Admin Password".
When establishing a password for the first time, enter "admin" in "Admin Password".
Caution
3
Be sure to enter "admin" in lower case (passwords are case sensitive).
Enter passwords in "User Password" and "Admin Password".
• A maximum of 7 characters and/or numbers can be entered for each password (passwords are case
sensitive).
• Be sure to enter the same password in "Confirm Password" as you did in "New Password".
4
When you have finished entering all items, click [Submit].
The entered password is stored.
After setting the password, turn the machine power off and then back on.
Note
When prompted to enter a user name, a user should enter "users" and an administrator should enter "admin" in
"User Name". In "Password", the respective password for the entered user name should be entered.
204
WEB FUNCTIONS IN THE MACHINE
ADMINISTRATOR SETTINGS
The administrator settings are used to prohibit changes to the [Condition Settings] and to configure interface
settings.
● "Default settings":
Select the setting for which you wish to prohibit changes.
● "Fusing Control" :
The temperature of toner fusing is controlled according to the weight of the paper
that is used.
● "Interface settings":
Enable monitoring of data sent to the network port and set restrictions.
CONFIGURING A SETTING IN THE ADMINISTRATOR
SETTINGS
1 Click [Administrator Settings] in the menu frame.
The "Default Settings" screen of the [Administrator Settings] will appear. If you wish to select a setting in the
"Default Settings" screen, go to step 3.
2
Click the desired setting, and make a selection for the setting in the screen that appears.
See "ADMINISTRATOR SETTINGS" for descriptions of the settings.
3
Click [Submit] to store the entered information.
ADMINISTRATOR SETTINGS
When "YES, NO" appears in the "Settings" column, "YES" is selected when a checkmark appears in the checkbox of
the item, and "NO" is selected when checkmark does not appear.
Default settings
Item
Settings
Description
Prohibit Test Page Printing
YES, NO
This setting is used to prohibit printing of a printer test page.
Disable Default Setting
Changes
YES, NO
This setting is used to prohibit changes to the default condition
settings.
Disabling of Clock
Adjustment
YES, NO
This setting is used to prohibit changes to the date and time
settings.
Item
Settings
Description
Fusing Control
16 to 23lb.
23+ to 28lb.
The temperature of toner fusing is controlled according to the
weight of the paper that is used.
Fusing Control
205
WEB FUNCTIONS IN THE MACHINE
Interface settings
Item
Settings
Description
I/O Timeout
1- 60 - 999 (sec)
During reception of a print job, if remaining data is not received
after the time set here elapses, the port connection is broken and
the next print job is begun.
Port Switching Method
Switch at End
of Job, Switch
after I/O Timeout
Select the method for switching network ports.
Emulation Switching
Auto*,
PostScript, PCL
Select the printer language. When [Auto] is selected, the
language is automatically selected from the data sent to the
printer. Unless errors occur frequently, do not change the setting
from [Auto] to another setting.
E-MAIL STATUS AND E-MAIL
ALERT SETTINGS
These functions send information on machine use (print count, copy count, etc.) and error conditions (paper
misfeed, out of paper, out of toner, etc.) via e-mail to the administrator of the machine or the dealer.
INFORMATION SETUP
Machine identification information for the status and alert e-mail functions is configured in the "Information Setup"
screen. The entered information will be included in status and alert e-mail messages.
1
Click [Information] in the menu frame.
The "Information Setup" screen will appear.
2
3
Enter the machine information.
Click [Submit] to store the entered information.
SMTP SETUP
The Status and alert e-mail functions use SMTP (Simple Mail Transport Protocol) to send e-mail. The following
procedure is used to set up the e-mail environment. This must be done by the system administrator or other person
familiar with the network.
1
Click [Services] in the menu frame.
The "Services Setup" screen will appear.
2
3
4
Click [SMTP].
Enter the information required to set up the e-mail environment.
Click [Submit] to store the entered information.
206
WEB FUNCTIONS IN THE MACHINE
STATUS MESSAGE SETUP
Use the status message function to send the current counter information, including the copy count, print count, and
total output count, based on the specified schedule. The destinations can be set for administrators and dealers
respectively.
To set up the status message, follow these steps.
1
Click [Status Message] in the menu frame.
The "Status Message Setup" screen will appear.
2
Enter the required information, including the destination addresses and time
schedule.
3
Click [Submit] to store the entered information.
When the E-mail Status settings are completed, printer count information will be sent periodically by e-mail to
the specified e-mail addresses.
Note
If you quit the browser before clicking [Submit], the settings will be canceled. To send printer information
immediately to the specified e-mail addresses, click [Send Now].
ALERTS MESSAGE SETUP
Use the alert message function to send alert information, such as empty toner and paper and trouble including paper
misfeeds, to specified destinations when such problems occur. The destinations can be set for administrators and
dealers respectively.
To set up the alert message, follow the procedure below.
1
Click [Alerts Message] in the menu frame.
The "Alerts Message Setup" screen will appear.
2
3
Enter the destination addresses.
Click [Submit] to store the entered information.
If these parameters are set, event information for the printer will be transmitted to the specified addresses via
E-mail each time a specified event occurs. The meaning of each event item is shown below.
(Example)
Paper Jam:
Toner Low:
Toner Empty:
Paper Empty:
Note
A paper misfeed has occurred.
Toner is low.
Toner must be added.
Paper must be loaded.
If you quit the browser before clicking [Submit], the settings will be canceled.
207
Information on the Software License for This Product
Software composition
The software included in this product is comprised of various software components whose individual copyrights are
held by SHARP or by third parties.
Software developed by SHARP and open source software
The copyrights for the software components and various relevant documents included with this product that were
developed or written by SHARP are owned by SHARP and are protected by the Copyright Act, international treaties,
and other relevant laws. This product also makes use of freely distributed software and software components whose
copyrights are held by third parties. These include software components covered by a GNU General Public License
(hereafter GPL), a GNU Lesser General Public License (hereafter LGPL) or other license agreement.
Obtaining source code
Some of the open source software licensors require the distributor to provide the source code with the executable
software components. GPL and LGPL include similar requirements.
For information on obtaining the source code for the open source software and for obtaining the GPL, LGPL, and
other license agreement information, visit the following website:
http://sharp-world.com/products/copier/source/download/index.html
We are unable to answer any questions about the source code for the open source software. The source code for
the software components whose copyrights are held by SHARP is not distributed
208
TRADEMARK ACKNOWLEDGMENTS
The following trademarks and registered trademarks are used in conjunction with the machine and its peripheral
devices and accessories.
• Microsoft®, Windows®, Windows® XP, Windows Server® 2003, Windows Vista®, Windows Server®
2008, Windows® 7, Windows® 8, Windows Server® 2012 and Internet Explorer® are either registered
trademarks or trademarks of Microsoft Corporation in the United States and/or other countries.
• Intel® is a trademark of Intel Corporation in the U.S. and/or other countries.
• Adobe, the Adobe logo, PostScript, Acrobat, the Adobe PDF logo, Reader, and Flash are either
registered trademarks or trademarks of Adobe Systems Incorporated in the United States and/or other
countries.
• Apple, Macintosh, Mac OS, AppleTalk, EtherTalk and LaserWriter are registered trademarks of Apple
Inc.
• Netscape Navigator is a trademark of Netscape Communications Corporation.
• PCL is a registered trademark of the Hewlett-Packard Company.
• IBM, PC/AT, and PowerPC are trademarks of International Business Machines Corporation.
• Sharpdesk is a trademark of Sharp Corporation.
• All other trademarks and copyrights are the property of their respective owners.
Candid and Taffy are trademarks of Monotype Imaging, Inc. registered in the United States Patent and Trademark
Office and may be registered in certain jurisdictions. CG Omega, CG Times, Garamond Antiqua, Garamond
Halbfett, Garamond Kursiv, Garamond and Halbfett Kursiv are trademarks of Monotype Imaging, Inc. and may be
registered in certain jurisdictions. Albertus, Arial, Coronet, Gill Sans, Joanna and Times New Roman are trademarks
of The Monotype Corporation registered in the United States Patent and Trademark Office and may be registered in
certain jurisdictions. Avant Garde, ITC Bookman, Lubalin Graph, Mona Lisa, Zapf Chancery and Zapf Dingbats are
trademarks of International Typeface Corporation registered in the United States Patent and Trademark Office and
may be registered in certain jurisdictions. Clarendon, Eurostile, Helvetica, Optima, Palatino, Stempel Garamond,
Times and Univers are trademarks of Heidelberger Druckmaschinen AG, which may be registered in certain
jurisdictions, exclusively licenced through Linotype Library GmbH, a wholly owned subsidiary of Heidelberger
Druckmaschinen AG. Apple Chancery, Chicago, Geneva, Monaco and New York are trademarks of Apple Inc. and
may be registered in certain jurisdictions. HGGothicB, HGMinchoL, HGPGothicB and HGPMinchoL are trademarks
of Ricoh Company, Ltd. and may be registered in some jurisdictions. Wingdings is a registered trademark of
Microsoft Corporation in the United States and other countries. Marigold and Oxford are trademarks of Arthur Baker
and may be registered in some jurisdictions. Antique Olive is a trademark of Marcel Olive and may be registered in
certain jurisdictions. Hoefler Text is a trademark of Johnathan Hoefler and may be registered in some jurisdictions.
ITC is a trademark of International Typeface Corporation registered in the United States Patent and Trademark
Office and may be registered in certain jurisdictions. Agfa is a trademark of the Agfa-Gevaert Group and may be
registered in certain jurisdictions. Intellifont, MicroType and UFST are trademarks of Monotype Imaging, Inc.
registered in the United States Patent and Trademark Office and may be registered in certain jurisdictions.
Macintosh and TrueType are trademarks of Apple Inc. registered in the United States Patent and Trademark Office
and other countries. PostScript is a trademark of Adobe Systems Incorporated and may be registered in some
jurisdictions. HP, PCL, FontSmart and LaserJet are trademarks of Hewlett- Packard Company and may be
registered in some jurisdictions. The Type 1 processor resident in Monotype ImagingÅfs UFST product is under
licence from Electronics For Imaging, Inc. All other trademarks are the property of their respective owners.
209
OPERATION GUIDE
MXC300W-US1
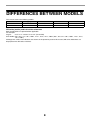
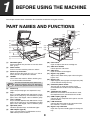
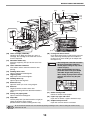
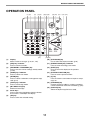
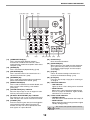
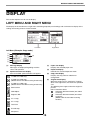
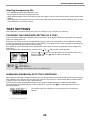
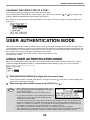
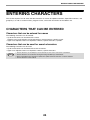

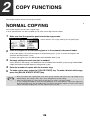

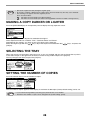

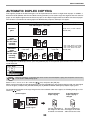
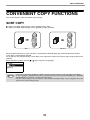
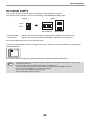

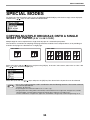

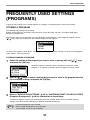
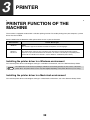
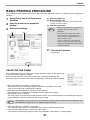
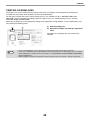
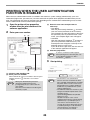
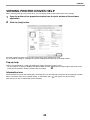
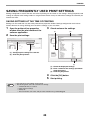


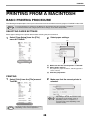
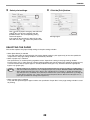
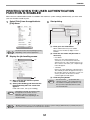
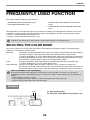

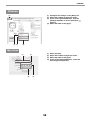

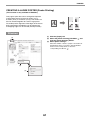
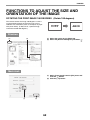

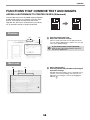
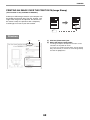
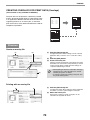


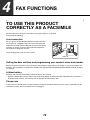
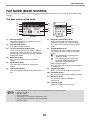
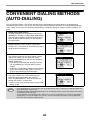
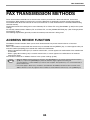
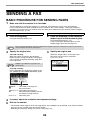
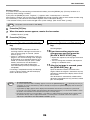
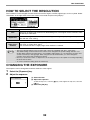
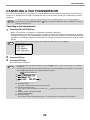
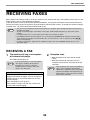

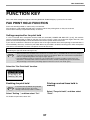
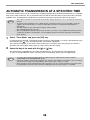
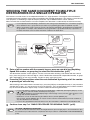
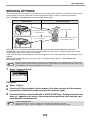


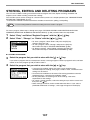
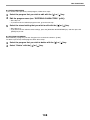
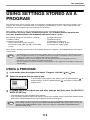
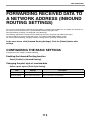

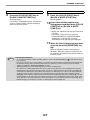
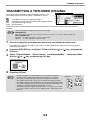
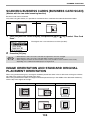
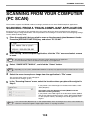
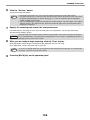
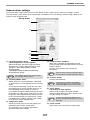
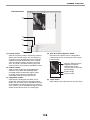
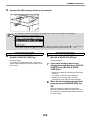
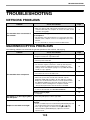
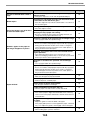

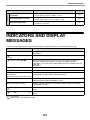

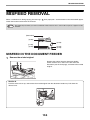
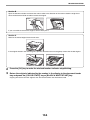
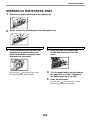
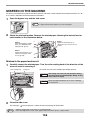
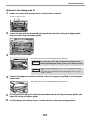
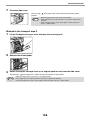
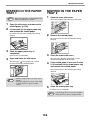
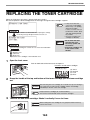

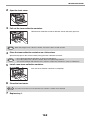
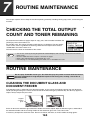
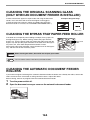
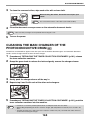
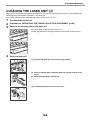
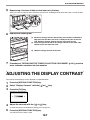


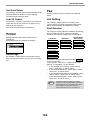


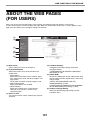
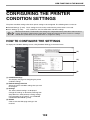


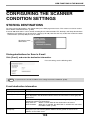
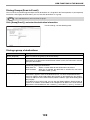
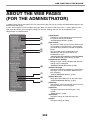


![3 Pulse la tecla [OK].](http://vs1.manualzilla.com/store/data/006242630_1-7a1c03e0b02b6620550bbf18f6c5e232-150x150.png)