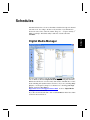
1
& User’s Guide Alcorn McBride Inc. Document Revision 2.3 September 2005 Copyright 1996-2005 Alcorn McBride Inc. All rights reserved. Information Station and the other product line names are trademarks of Alcorn McBride Inc. Windows is a trademark of the Microsoft Corporation. Sony and Pioneer are trademarks of their respective owners. Every effort has been made to assure the accuracy of the information contained in this manual, and the reliability of the hardware and software. Errors sometimes can go undetected, however. If you find one, please bring it to our attention so that we can correct it for others. Alcorn McBride Inc. reserves the right to make changes to these products, without notice, in order to improve their design or performance. Applications described herein are for illustrative purposes only. Alcorn McBride Inc. assumes no responsibility or liability for the use of any of these products, and makes no representation or warranty that the use of these products for specific applications will be suitable without further testing or modification. Our equipment is not intended for use in applications where a malfunction can reasonably be expected to result in personal injury or damage to equipment. Customers using or selling Alcorn McBride Inc. products for use in such applications do so at their own risk, and agree to fully indemnify Alcorn McBride Inc. for any damages resulting from such improper use or sale. Product Design: Chris Harden, Jim Carstensen, Jeremy Scheinberg, Scott Harkless, Martin Chaney, and Steve Alcorn. Document Number 110-100974.00 Rev 2.2 Alcorn McBride Inc. 3300 S. Hiawassee, Suite 105 Orlando, Florida 32835 TEL: (407) 296-5800 FAX: (407) 296-5801 http://www.alcorn.com [email protected] Contents Welcome! ................................................................................ 1 Features ....................................................................................................................... 2 Technical Support......................................................................................................... 3 Getting Started ....................................................................... 5 Check the POWER Setting .......................................................................................... 5 Digital Media Manager.................................................................................................. 5 Live Control - AMITerm ................................................................................................ 6 Play a Factory File ........................................................................................................ 6 Make an MPEG File ..................................................................................................... 7 Make a WMVHD File.................................................................................................... 7 Load Videos.................................................................................................................. 7 Use FTP ....................................................................................................................... 8 Option 1: AMITerm .......................................................................................... 8 Option 2: DOS FTP ......................................................................................... 9 Duplicate IP Addresses ................................................................................. 12 Read the Manual! ....................................................................................................... 12 Front Panel ........................................................................... 13 IS ................................................................................................................................ 13 ISHD ........................................................................................................................... 13 Rear Panel............................................................................. 15 Power Connector ........................................................................................................ 15 Composite Video Connector(IS only) ......................................................................... 15 S-Video (Y-C) Connector (IS only) ............................................................................. 15 RGB (VGA) Connector ............................................................................................... 15 DVI Connector (ISHD only)........................................................................................ 15 Audio Output............................................................................................................... 16 Ethernet Connector .................................................................................................... 16 RS-232 Connector...................................................................................................... 16 Networking............................................................................ 17 Connecting via Ethernet ............................................................................................. 17 Direct PC Connection .................................................................................... 17 LAN or the Internet Connection ..................................................................... 19 Transferring Files........................................................................................................ 20 Transferring Files using FTP ......................................................................... 20 Update Operating System .......................................................................................... 21 File Names.............................................................................23 Test Files.....................................................................................................................24 Making Videos.......................................................................27 Making an WMVHD File..............................................................................................27 What Is An MPG File? ................................................................................................27 How Do I Make an MPG File?.....................................................................................27 The MPEG-2 Program Stream ......................................................................29 What is a Variable Bitrate? ............................................................................29 Audio Files ............................................................................31 Types .............................................................................................................31 Images ...................................................................................33 Size ................................................................................................................33 Transparency .................................................................................................34 Banners .................................................................................35 File Format / Tutorial...................................................................................................35 Browser Files – URLs and Flash .........................................37 Special Considerations: ..............................................................................................37 Time-Sensitivity in Playlists ............................................................................37 Control Limitations .........................................................................................37 Flexibility of the Browser Commands.............................................................38 How Files are Displayed ................................................................................38 Screen Layouts in Manual Mode (ISHD Only) .....................39 Command Summary .............................................................40 Error Codes.................................................................................................................45 Serial Control – RS-232 ........................................................47 Ethernet Control....................................................................49 Hardware and Software Requirements .......................................................................49 AMINet Protocol ..........................................................................................................49 Control Message Format ............................................................................................50 Control Message Checksum.......................................................................................50 UDP Message Layer ...................................................................................................51 Control Message Response........................................................................................51 Playlists................................................................................. 53 Digital Media Manager................................................................................................ 53 Playlist Engines .......................................................................................................... 56 Auto Execution ........................................................................................................... 56 Extra Commands........................................................................................................ 56 Example Playlist ......................................................................................................... 57 Logging ....................................................................................................................... 57 Schedules ............................................................................. 59 Digital Media Manager................................................................................................ 59 File Format / Tutorial .................................................................................................. 64 Basic Command Structure ............................................................................ 64 Fields in Detail ............................................................................................... 67 Restrictions.................................................................................................... 71 Comments & Whitespace.............................................................................. 71 Order of Operations....................................................................................... 72 Coincident Events.......................................................................................... 72 Uploading New Schedules ............................................................................ 74 Logging ....................................................................................................................... 75 INI File – is.ini ....................................................................... 77 Completion Acks .................................................................. 79 FTP Client ............................................................................. 80 Updates from CD, DVD, USB Drives ................................... 81 Drive Configuration and Update ................................................................................. 81 Specifications ....................................................................... 83 Index...................................................................................... 85 Welcome Welcome! Thank you for purchasing The Alcorn McBride Information Station. We have tried to think of everything you need in a multi-media playback system that can be used as anything from a simple video player to an advertising display complete with dynamic update of video, watermarks, and text. Note this manual refers to Information Station but also applies to the Information Station HD, except where noted. We hope you enjoy using it as much as we enjoyed designing it. Welcome! 1 Features The Information Station offers a wide range of features including: • Video type: • The IS plays high resolution MPEG-2 Video. On S-video or Composite or RGBHV • The ISHD plays high resolution WMVHD on DVI or RGBHV • Overlays images and text banners on video • FTP Server • Web Server • UDP Control • Serial (RS232) Control • Scheduler Control • Playlist Control • Soft Reboot • Browser Control – Flash playback and URL browsing • CD, USB, Compact Flash, file updates on bootup If you have an earlier version of the OS, you may need to upgrade your unit before you can use new features. To get the latest Information Station operating system, go to http://alcorn.com/products/informationstation/osupdate.html or to http://alcorn.com/products/informationstationhd/osupdate.html. 2 Welcome! Welcome Technical Support You can obtain information about specifying, installing, configuring, updating and programming your Alcorn McBride Information Station from several sources in the table below. For… Welcome! Contact… When?… Telephone Support (407) 296-5800 M-F 9am–6pm (EST) Fax Support (407) 296-5801 M-F 9am-6pm (EST) Knowledge Base http://www.alcorn.com/kb Any Time e-mail Support [email protected] Any Time Software/Firmware Updates http://www.alcorn.com/support Any Time 3 4 Welcome! Getting Started Check the POWER Setting Front Panel Don’t plug in your unit until you have verified it is set for your region of the world’s standard power setting. US and Canada – 120V, Europe and Australia 240V. There’s a red slide switch on the rear of the unit that determines this setting. Digital Media Manager We have made available for the IS and ISHD a powerful GUI application that runs on Windows XP called Digital Media Manager. It integrates AMITerm described below as well as many other features, like FTP, Status Checking, File Synchronization, and more. If you are controlling many players, or would prefer a simple to use interface for controlling your single player, download a free demo at http://www.alcorn.com/support/software.html. Look for “Digital Media Manager” in the software list. If you have downloaded the demo, click on “Live!” in the left column to send instant commands as shown with AMITerm below. Getting Started 5 Live Control - AMITerm AMITerm is a standalone GUI for controlling the IS and ISHD serially and over Ethernet. You can even browse to the Information Station’ s web server and download a copy of the version shipped with the unit, or download the latest version online at http://www.alcorn.com/support/software.html Look for AMI Terminal Play a Factory File The Information Station boots up and plays a video, banner, and image via an autoexec playlist. If you want to play your own file, the Information Station is controllable via Ethernet and serial interfaces. Refer to the section labeled Networking for details on setup for Ethernet control. Once you have verified your connection, which you can do by pinging the default IP address, you now have access to controlling the Information Station via commands in the Command Summary section. Use AMITerm or DMM’s Live! interface to try other functions of the Information Station as well. If you want to write your own application instead of using AMITerm, we have an application called UDP Tester to get you started. It is located on our FTP site at ftp://ftp.alcorn.com/pub/software/udpsdk.zip The zip file contains the command line program and example batch files that implement the commands listed in the UDP control section discussed below. Once you have unzipped the file, use a DOS command prompt to type the name of the batch file you want to run. For 6 Getting Started Make an MPEG File MPEG2 video is pretty complicated. If you’ ve never encoded it before, we recommend hiring an encoding house to do it. You can buy your own encoding system, but don’ t be cheap. The last thing you want is to find out the encoding system you purchased has a bug that causes the video to glitch, audio to drift, pixelation, etc… The encoding house uses their equipment to optimize the parameters and filtering of your video to achieve the best possible result. If you want to make your own, our customers have had positive results with the LSX MPEG Encoder by Ligos and Optibase’ s hardware-based encoder. Darim’ s DVMPEG is a good encoding solution along with PixelTools’ Multiplexer. There is a section below this introduction describing production in more detail. Make a WMVHD File There are a variety of tools available to create WMVHD video. You can learn more about it at http://www.wmvhd.com/ Load Videos You can also use File Transfer Protocol (FTP). FTP is a way of copying files over an Ethernet Cable (like the special red one that came with your Information Station). Use AMITerm to launch an Internet Explorer browser in FTP mode. ( Or Digital Media Manager to handle FTP transfers seamlessly for you. See its tutorials for details). Set the Target IP address to the Information Station’ s IP address (192.168.0.254 unless you changed it), and press the FTP button. Then select and copy your files while in Windows Explorer and paste them into the VIDEOS folder of your FTP connection. If you configured your computer for the web interface as listed in the Networking section of this manual, you’ re already able to use the Information Station’ s FTP interface. You can use any FTP program you like to talk to the Information Station’ s FTP interface. We frequently use WS FTP (shareware), Cute FTP (shareware), and even the DOS FTP (which comes on most PC’ s). Getting Started 7 Front Panel example, to get the current firmware version, type “ version” and press “ Enter.” The UDP Tester program sends a request to your Information Station and returns the version string. Next, type “ 1se” and press “ Enter.” Then type “ pl” and press “ Enter.” The Information Station arrives from the factory with a “ video #1” on it for your use. You have just searched and played it. If you connected your NTSC or PAL monitor and speakers to the Information Station, you should be seeing and hearing the video now. See the Ethernet Control section for a list of commands. If you don’ t know how to use FTP programs to put the files on your Information Station, there are plenty of tutorials on the web. Just visit your favorite search engine and type in “ FTP tutorial” . Also see the Transferring Files section in the manual. A basic guide to using DOS FTP follows. Use FTP First, connect an Ethernet cable from the IS to your network or a NULL Ethernet cable directly from your IS to your PC. If you’ re not familiar with FTP, begin by searching the Internet for an FTP (File Transfer Protocol) Tutorial. (Digital Media Manager handles FTP transfers seamlessly for you. See its tutorials for details). You’ ll need to configure your Information Station and the TCP/IP settings on your computer to use this guide. Please refer to the Networking section of this manual. It’s a good rule of thumb to keep the demo clips on your Information Station. You can rename them and then, if ever necessary, use them later to debug potential problems in the field. Option 1: AMITerm First, configure the Ethernet settings on AMITerm. Select “ Ethernet” and press “ Configure.” Then type in Destination IP address. Press OK If you press the “ FTP” button, AMITerm launches Internet Explorer with the Destination IP address as the URL. You’ ll be asked to login. The default username and password are admin and password. The same operation goes for browsing to the Information Station. Just press the “ HTTP” button instead. 8 Getting Started Front Panel Option 2: DOS FTP DOS FTP usually comes on your PC, which is why we provide this guide. If using the DOS FTP program doesn’ t work out for you, download from the Internet an FTP program (like WS_FTP or Cute FTP). They handle all the commands for you and provide an interface with more of a Windows feel to it. Select Start\Run Type command in Win98/ME or cmd in WinXP/NT/2000. Press Enter. A DOS prompt will appear. Getting Started 9 Change directories by typing cd <directory where your videos are>. Press Enter. Type ftp 192.168.0.254. Press Enter. (assuming your IP address is still at the default value) (The following steps assume the factory set username and password.) Type admin. Press Enter. If it doesn’ t ask you for the username for longer than 30 seconds, something’ s probably wrong. Recheck your TCP/IP settings with in the Networking Your Information Station section. Type password.. (It won’ t show the password you’ re typing). Press Enter. It will say you’ re not logged in for some reason, or it will say you’ re accepted. Type help to see a menu of commands. 10 Getting Started Return to the VIDEOS directory. To get a status update during a file transfer, type ha. Press Enter. With this “ hash marks” option turned on, FTP prints an update character (the # symbol) to show you the transfer is still in progress. Type bin to make the FTP connection a binary one. The Information Station provides a “ type set to binary” response. To copy file 2 from the Information Station to your hard drive, type get vid00002.mpg. Press Enter. (It starts printing hash marks.) When the FTP> prompt is shown again, you know the transfer is complete. Now type !dir. Press Enter. The file is now shown in your PC’ s local directory. Notice the file gets put in the directory that you are currently in. Getting Started 11 Front Panel To see what’ s on the Information Station’ s drive, type cd VIDEOS and press Enter. Type ls. Press Enter. Here you’ ll see the video files that come with the unit from the factory. Type cd .. and press Enter. Repeat this step to see what files are in the BANNERS, IMAGES, PLAYLISTS, and SCHEDULES directories. To copy playlist 0 to the Information Station from your hard drive, first change directories to the PLAYLISTS directory, then type put ply00000.lst. Press Enter. When the FTP> prompt is shown again, you know the transfer is complete. Type ls. Press Enter. Playlist 0 is now shown on the Information Station’ s hard drive (not shown—see above). To exit DOS FTP, type quit. Press Enter. To exit DOS, type exit and press Enter. Take it from here. Be careful, and understand the commands that you’ re using before doing anything crazy. Duplicate IP Addresses If you use the same computer to talk to several Information Station’ s straight from the factory, you’ ll need to do the following: Each time you communicate over Ethernet with a different Information Station, open a DOS window. Type arp -d 192.168.0.254 Press Enter. (This is assuming the Information Station is set up to the default IP address). It clears away old IP address relationships that can cause problems like delays while connecting when using FTP, web browsers, etc… Once you change your IP Addresses for the Information Station’ s, you won’ t have to do this anymore. Read the Manual! Read the rest of this manual. Information like how to name your files, the power of playlists, serial control, etc… are all right at your fingertips. The few minutes you invest will save you hours of time. Enjoy! 12 Getting Started IS The Information Station provides a power switch in the bottom right. To manually reboot the machine, hold in the oval-shaped power button until the unit turns off. It should take several seconds at longest. ISHD The Information Station HD provides two LED’ s on the front to let you know when power is on and when the hard drive is being accessed. Front Panel 13 Front Panel Front Panel 14 Front Panel Rear Panel The Information Station rear panel provides connections for video and audio outputs as well as an Ethernet jack and power cable connection. Power Connector Composite Video Connector(IS only) One RCA-type jack is provided. Connect your RCA cable here. This outputs an interlaced signal. It is for use with NTSC/PAL monitors, RF modulators that have termination, plasmas... S-Video (Y-C) Connector (IS only) One S-Video jack is provided. Connect your S-video (Y-C) cable here. This outputs an interlaced signal. It is for use with NTSC/PAL monitors, RF modulators that have termination, plasmas... RGB (VGA) Connector One 15pin female high-density jack is provided. Connect your RGB video cable here. This outputs a progressive scan signal. It is for use with plasmas, PC monitors, etc... DVI Connector (ISHD only) One Digital Video Interface (DVI) is provided. Some users connect this to their plasmas via a DVI cable. This outputs a DVI video signal at a maximum resolution of 1200x1600. It is for use with monitors that support unencrypted DVI video signals. Rear Panel 15 Networking Next to your power connector is a red switch. This supply needs to be manually configured for 120/240V depending on your power requirements. Do not plug this unit in until verifying the setting, or you could damage the product. Audio Output IS: One 8th inch stereo phono jack is provided. Connect your audio cable here. ISHD: Three 8th inch stereo phono jacks are provided. Connect your three 8th inch phono-to-RCA-jack adapter cables (included) to these. The audio jacks come configured as being able to output up to 6 channel surround sound through the three stereo pairs. They dynamically determine how many jacks you have plugged in and output 2 or more channels accordingly. Please see the diagram below. Ethernet Connector This RJ-45 connector provides connection for a standard 10/100 Base-T Ethernet cable. This cable would normally be connected to a hub, but may also be connected directly to a PC’ s Ethernet card using a null Ethernet, or “ crossconnect” cable, or use a straight Ethernet cable to your router. Ethernet is the primary mechanism for transfer of video data into the Information Station, and may also be used for control and monitoring. The Information Station is shipped with a factory default IP address of 192.168.0.254, which is useful for transferring video across an Ethernet LAN, but must be changed if the Information Station is to be connected to a router on the Internet. Refer to the Networking section of this document for more information. RS-232 Connector This is a 9pin D-Sub connector. It follows standard RS-232 communications (9600 8N1). Note this is an upstream device, so you may need a Null serial cable to communicate with it from another upstream device like a PC or show controller. 16 Rear Panel Networking Connecting via Ethernet The Information Station is shipped with a factory default IP address of 192.168.0.254, which is useful for transferring video across an Ethernet LAN, but must be changed if the Information Station is to be connected to a router on the Internet. This IP address represents the official test IP address. The Information Station is configured with default TCP/IP settings. These setting are the IP address, the login name, and the login password. These settings need to be changed only if the unit is to be used on an Intranet or the Internet. If you intend to use Ethernet only to transfer video files into the unit, then the default settings will work just fine. If you are connecting the Information Station to an existing Ethernet LAN Intranet, then the Network System Administrator will need to provide you with a unique IP address for the Information Station. If you are connecting the Information Station to the Internet, then your Internet Service Provider (ISP) will provide you with a unique IP address. The default login username is admin, and the default login password is password. The password should be changed if the Information Station is going to remain on the Network. Direct PC Connection If you are not connecting to the Information Station from your Local Area Network (LAN), the Internet, or an Ethernet hub, you should follow these instructions: Networking 17 Networking The Ethernet connection is a useful tool for transferring video and other files to and from the unit. It is also useful for transferring feature updates and controlling and monitoring the Information Station. Ethernet is a physical medium for transferring data. TCP/IP is used to transmit the data over the Ethernet. TCP/IP is a common “ protocol” for transmitting data on local Ethernet connections (Intranet) and also global connections (Internet). The Information Station allows both. We will refer to the use of either an Intranet or the Internet as the Network. 18 1. Plug one end of a “ Null-Ethernet” cable into the Ethernet port on the rear of the Information Station. 2. Plug the other end of the “ Null-Ethernet” cable into the Ethernet port on your computer. 3. Using Windows 95, 98, NT, or XP, right-click on the Network Neighborhood icon and select Properties. If you are not using Windows or you do not have TCP/IP Networking installed on your computer, please consult your computer’ s documentation for further instructions on Network Configuration. 4. Double-click on the TCP/IP option. The “ TCP/IP Properties” window should be displayed. Select the “ IP Address” tab. 5. Write down your current IP address and Subnet Mask settings and keep them in a safe location. 6. Change your IP Address (In XP you can add an extra IP address by clicking the advanced button.) to the value shown above (192.168.0.2). Change your Subnet Mask to the value shown above (255.255.255.0). 7. Click the OK button twice to exit and save the changes to the Network setup. 8. Your computer will require you to reboot to change the settings (not XP). Click the Yes button to do so. Networking 9. Once your computer has finished rebooting, launch a Web Browser (Netscape, Internet Explorer, etc.). 10. In the address box, type “ http://” followed by the IP address of your Information Station. If this is your first time connecting to your Information Station, or you have not changed the IP address, the correct entry should be: http://192.168.0.254 11. Upon hitting the Enter key on your keyboard, you should be presented with the introductory web page from your Information Station. Note: If you are unable to connect to the Information Station over Ethernet after following the above procedure, the problem may be a result of internal conflicts in Windows TCP/IP settings. To avoid this Windows problem, right-click on the Network Neighborhood icon and select Properties. Select each reference to TCP/IP and click Properties. Write down the old settings and then delete all references to TCP/IP by highlighting them individually and selecting Remove. Then click Add, select Protocol and click Add. Select Microsoft on the left side of the Select Network Protocol dialog. Now select TCP/IP from the right side of the Select Network Protocol dialog and press OK. Windows will ask you to insert the Windows installation disk(s) to complete the process. This procedure will eliminate any conflicts with other TCP/IP entries in Windows. You will need to perform the above procedure again to connect to the Information Station. Also, some laptops with both modem cards and Ethernet adapters may have conflicts, resulting in an assignment of the IP address to the modem instead of the Ethernet card. You can try temporarily disabling the modem card, but copy your settings and do this at your own risk. LAN or the Internet Connection Note: This process can only be accomplished once you have already connected to the Information Station directly and have changed the default IP address to an address approved by your Network Administrator. To connect to the Information Station over a LAN or the Internet: Networking 19 Networking 12. When you are finished configuring your Information Station, follow steps 38 to restore your computer’ s TCP/IP settings. 1. Connect one end of a 10/100 Base-T Ethernet cable to the Ethernet connector on the Information Station. 2. Connect the other end of the Ethernet cable to your network hub. 3. On your computer, launch a Web Browser (Netscape, Internet Explorer, etc.). 4. In the address box, type “ http://” followed by the IP address of your Information Station. Upon hitting the Enter key on your keyboard, you will be presented with the introductory web page from your Information Station. Transferring Files Transferring files onto your Information Station involves connecting to the Information Station from your PC or Local Area Network using a network card and the Ethernet port on the back of the Information Station. Transferring Files using FTP File Transfers to the Information Station can be accomplished by using a common Internet/Unix file transfer utility called FTP (which stands for File Transfer Protocol), such as WS_FTP. This program is freely available on most computer platforms, just like a web browser. To transfer a file to or from the Information Station, run FTP, selecting the proper IP address, login name, and password. You should then be able to connect to the Information Station, and transfer video files across the Network to the Information Station. For help with FTP, please refer to the Getting Started section at the beginning of this manual. Other helpful information can be found in the section entitled Networking. You will also be able to update the Information Station’ s Operating System by transferring the file OS.NEW to the Information Station via FTP, and then power-cycling the unit, as discussed in the section entitled Update Operating System. 20 Networking Update Operating System Alcorn McBride periodically adds enhancements to its products. The Operating System (OS) updates can be downloaded to your Information Station to add new features if you wish. The Information Station retains two copies of its Operating System: the Current version and the Previous version. This allows you to switch between the versions if you wish to. NOTE: There is no need to upgrade your operating system if your show is already programmed, but installing the new operating system brings your unit up to date with current production, and allows you to take advantage of the latest features. Networking Networking To Upgrade the Information Station Operating System: 1. Use a web browser to connect to the Alcorn McBride Information Station support page and follow the links to the OS Update Page (http://www.alcorn.com/support/Information Station). 2. Compare the Operating System version on the Alcorn McBride WebPages to the version on the Information Station’ s internal WebPages. 3. If the version on the Alcorn McBride page is the same, there is no need to download. If the version on the Alcorn McBride page is newer, click the Download Now button. Save the file to a known location on your local computer. DO NOT MAKE ANY CHANGES TO THE FILE NAME. 4. Once the file download has completed, use a File Transfer Protocol (FTP) program (such as WS_FTP) to place the file (OS.NEW) in the root directory of the Information Station. Do this in binary mode! 5. Once the file transfer has completed, quit the FTP program and power-cycle the Information Station. 6. On power-up the Information Station will detect the new OS version and perform a check to verify that it is valid. 7. If the new Operating System is determined to be valid, the Information Station will then update use the new OS. Verify this through the UDP or web interface. 21 22 Networking File Names Prefix Extension Format VID .MPG, WMV Video files SND .MP3, WAV, .MID, .WMF Audio files BAN .BAN, .TXT Text Banners IMG .BMP Bitmap Images PLY .LST Playlists SCH .SCL, .TXT Schedules BRO .SWF, .HTM, .HTML Browser files FTP .CMD FTP Client scripts File Names All media file types can be searched by their file name, using the double quotes notation discussed in the control section(s). You search banners and images in the same way you search videos and playlists. If you want to search them by number, use the following convention. File names are represented in simple DOS 8.3 format – in other words, an eight-character name, a period, and then a three-character extension. The name is typically made up of eight characters specifying the type (VID for audio/video file, PLY for Playlist), and the number of the file (5 digits from 00000 to 99999). The three-character extension is used to tell the Information Station the data format of the file. Supported formats are shown in the table below. Note all files except playlists can be autoexectued with all zeroes 00000 in the number positions. Auto exec playlists are explained in the Playlist section. Some example file names: File Name File Names Description VID00001.MPG Clip number one. MPEG-2 Video with stereo Audio. SND00002.MP3 Audio File Number 2 BAN00000.TXT Banner 0 IMG99999.BMP Bitmap 99999 23 Any type of file may be stored in the Information Station, but only those listed in the table may be played. Although any file may be copied from or to the internal drive in the Information Station, only the above-described file formats and file names may be played back. This allows archiving of ANY information on the drive: CAD drawings, spreadsheets, documentation, etc. To avoid confusion, don’t duplicate file numbers. If you want to search files by the number convention discussed above, remember the following. File numbers contained on a drive should be unique, regardless of the file type. In other words, you shouldn’ t have PLY00002.LST and VID00002.MPG on the same drive. You can, but there is an order of precedence assigned: 1. Videos and Audios 2. Playlists 3. Images 4. Banners So if you search file #2, the video will be used, not the playlist. Test Files When shipped the Information Station contains the following test files. We recommend leaving these for troubleshooting in the field. Feel free to rename them to get them out of the way. VIDEOS Directory on the IS: vid00001.mpg – NTSC 30 second National Geographic commercial (10Mbits/s) vid00002.mpg – NTSC red, 2kHz tone vid00003.mpg – NTSC green, 4kHz tone vid00004.mpg – NTSC blue, 8kHz tone vid00005.mpg – NTSC SMPTE color bars with 1 kHz tone vid00006.mpg – NTSC Projector Registration Pattern VIDEOS Directory on the ISHD: vid00001.wmv – WMVHD video 1080p factory1080.wmv – WMVHD video 1080p magicflight1080.wmv – WMVHD video 1080p Pachinko1080.wmv – WMVHD video 1080p 24 File Names speed1080.wmv – WMVHD video 1080p surroundTest.wmv – WMVHD video 1080p – good for testing Surround Sound Wiring AUDIO Directory: snd00001.wav snd00002.mp3 snd00003.wma snd00004.mid BANNERS Directory: Text files you can search to practice using a banner on the Information Station. Ban00001.txt (or .ban for later units) Ban00002.txt (or .ban for later units) Ban00003.txt (or .ban for later units) File Names Ban00004.txt (or .ban for later units) IMAGES Directory: Bitmap images you can search to practice using a watermark or slide show on the Information Station. img00001.bmp img00002.bmp img00003.bmp img00004.bmp img00005.bmp img00006.bmp (There are more images on the ISHD with various file names, please look in the ISHD’ s IMAGES directory for details) PLAYLISTS Directory: Playlist file listing example commands for the playlist engine These are the autoexec files for playlist engine 1 and 2. To get playlist engine 2 to operate, rename ply00002.sav to ply00002.lst ply00001.lst ply00002.sav SCHEDULES Directory: File Names 25 Schedule file listing example commands for the scheduler in the Information Station. sch00001.txt (or .scl for later units) WEB Directory: Flash and HTML files demonstrating how the IS treats flash files. bro00001.swf bro00002.htm 26 File Names Making Videos Making an WMVHD File Only the ISHD can play WMVHD files. WMVHD is a compressed video format. There are a variety of tools and formats for encoding WMVHD. You can learn more about it at http://www.wmvhd.com/ What Is An MPG File? The Information Station plays MPG files that contain digital video encoded in high-resolution by an algorithm known as “ MPEG-2” . Many encoding systems produce MPG files, but not all MPG files may be played on the Information Station. Many MPG files are designed for playback in a small window on a PC, or for transfer over the internet. These MPG files are generally of very low resolution at slow frame rates. The Information Station is designed to accept MPG files encoded at a resolution of 704 or 720 x 480 (NTSC) and 704 or720 x 576 (PAL). Making Videos MPG is short for MPEG, which stands for Motion Picture Experts Group, the organization that codified the audio/video compression scheme used in the Information Station. The Information Station can play MPG files encoded at bit rates up to 15.0 Megabits per second. Since higher bit rates equate to better picture quality, we encourage you to encode your video at the highest bit rate supported. How Do I Make an MPG File? The most important step in creating video for your application is to perform the highest quality MPEG encoding of your source material. Encoding professional-quality MPEG material is more of an art than a science. The person encoding the material must be experienced and the hardware wellchosen, so users deciding whether or not to encode their material themselves should put a lot of thought into what would best suit their needs. Making Videos 27 The quality of encoded video depends upon the quality of the source video, the encoding system used, and the skill of the operator. 28 Although encoding your own video is very cost effective and surprisingly straightforward, only an experienced individual can create the highest-quality MPEG. Video material encoded without regard to bleeding colors and motion artifacts will include them, so it is important for the user to decide whether these elements are acceptable. A good alternative to hiring an on-staff MPEG expert (or becoming one yourself) is to hire an experienced post-production house to encode and format your video for you. All you have to do is to provide a Digital Betacam or D-1 master and they do the rest! Making Videos The MPEG-2 Program Stream The Information Station plays MPEG-2 Program Streams. This stream is a Variable or Constant bitrate stream containing both audio and video. In order to achieve playback of video only, you must encode an elementary stream of silent audio that will be combined with your elementary video stream to create a program stream. A program stream is not the same as a DVD VOB file. The Information Station does not play VOB files. What is a Variable Bitrate? Unlike MPEG-1, which uses a constant bitrate, MPEG-2 also supports variable bitrate program streams. This means that the encoding process scales the bitrate up and down depending on quality needs. A scene with a tremendous amount of movement requires more bits than a still scene. Program Stream: Mux Bit Rate: 15.0 Mbits/s max The stream should be authored according to ISO 13818-1 Format MPEG-2 Video: SIF-NTSC: 240 lines by 352 pixels Making Videos Picture Format SIF-PAL: 288 lines by 352 pixels HalfD1-NTSC: 480 lines by 352 pixels HalfD1-PAL: 576 lines by 352 pixels CCIR-NTSC: 480 lines by 704(or 720) pixels CCIR-PAL: 576 lines by 704(or 720) pixels Chroma Format 4:2:0 MPEG-1 Audio (Layer II): Making Videos Sample Rate: 44.1 KHz or 48KHz Emphasis: Off Mode: Stereo 29 Audio Files Types Audio Files Information Station can play MP3’ s, WAV’ s, MIDI files and WMA’ s (Windows proprietary audio compression format). Choose which type(s) you like, record them and copy them into the AUDIO folder. There is a separate audio channel that can play simultaneously while video is playing. Its channel number is 2. Search and play files according to the Ethernet Control section in order to use this channel. Audio Files 31 32 Audio Files Images There is a separate image channel that you can use to search images while video is playing. Its channel number is 3. Search and play files according to the Ethernet Control section in order to use this channel. Size The supported image format is .BMP. Later versions of the firmware support .JPG and .GIF. Create RGB 24bit bitmaps for best results. Be aware of this when you are creating your images. Copy your images into the IMAGES folder. ¾For the IS: Images To determine how big your images will appear on the screen, remember they are sized 1 to 1 over an 800x600pixel window then scaled down to match the window size of your video. So if the video is 720x480, and you create an 80 pixels tall x 60 pixels wide bitmap, it will cover one-tenth of the screen 800x600 screen. Then it gets scaled according to the diagram below, so you end up with a 72x48pixel image on the video screen. Use the formula to know how big your image will be. If you are using PAL , substitute 720x480 with 720x576. ¾For the ISHD: To determine how big your images will appear on the screen, remember they are sized 1 to 1 over whatever resolution you have the monitor’ s output set at. If it is 1920x1080 (default) you’ ll see the resolution relationship below. There is no squeezing down on the ISHD, since it has a high enough resolution output. If the image is larger than the window size, and the image is in CENTER mode, it will be squeezed proportionally to fit on the screen. Images 33 Transparency You can make your whole image 50% transparent, allowing some of the video to shine through and creating an overlay effect. See the Command Summary section for turning on and off this feature. (Note: at the time of the writing of this version of the manual, this functionality varies in some versions of the firmware. It either shows translucency as described above, transparent alpha channel (255,255,255) or neither. Be sure to get the latest version for the most current mode. Once this functionality has been solidified, new manuals will reflect the determined functionality) 34 Images Banners There is a separate image channel that you can use to search banners while video is playing. Its channel number is 4. Search and play files according to the Ethernet Control section in order to use this channel. Information Station has a special format for the banner files, much like INI files you’ ll find on your PC. They have fields you use to control how the banner looks, what it says, how fast it scrolls, etc… File Format / Tutorial The Scheduler uses a text file loaded in the BANNERS folder of the Information Station. The text file can be edited in a text editor, like notepad. The default filename is ban00000.ban or ban00000.txt. A banner is composed of a list of banner fields. Here is a table of the fields for your reference: Banners Value [BANN ER] Must be at the top of the file to work!!!! BT Banner Text – What the message will say. You don’ t need quotes, but you can use them. If you currently have no message on the screen and you don’ t have this field, the banner will be blank. If you just want to change the format of the banner, leave this field out. BC Banner Color – can either be one of the standard color names defined in the UDP section like red, or orange (no quotes necessary) or can be a hexadecimal value like 8982a7 BF See the Command List for values BD Banner direction – see the Command Summary section for values BL Banner Location - see the Command Summary section for values BV Banner Velocity - see the Command Summary section for values BM Banner Mute - see the Command Summary section for values BB Banner Background - see the Command Summary section for values BS Banner Size - see the Command Summary for section values Banners Fields 35 All the fields above besides [BANNER] are not required. You change only the ones you want to and the rest will stay the same as they were previously. Example 1: [BANNER] BT=Use our easy examples to get started. BC=8982a7 BF=Times New Roman BD=RL BL=B BV=0 BM=0 BB=0 BS=24 Example 2: [BANNER] BT=Let’ s only change a couple of things here. BC=RED BF=Arial BV=1 BB=1 BS=36 36 Banners Browser Files – URLs and Flash There is built-in browser support in the Information Station. You can direct the video output to Flash files and HTML files that are resident on the Information Station in the WEB folder. Or you can direct the browser to a URL, such as www.alcorn.com, which can be useful when the URL is continually getting updated with the latest and greatest information while the Information Station is running canned video presentations. Additionally, if you wish to send a Flash update to the unit rather than encoding a video, you can use a .swf file instead. Remember to set your IP Address, Gateway, Subnet Mask, DNS1, and DNS2, if you plan to use the browser over the Internet. See the master command list for these. Special Considerations: Time-Sensitivity in Playlists Unlike the video channel and the separate audio channel, the browser channel does not know when flash files have completed playback. So you will need to add an offset in any playlists you create that makes the playlist wait until a timeout has occurred before continuing forward. For example here’ s a playlist between a video and a flash file: 11PL, “ flashfile.swf” PL, AFTER[00:00:01:14] ,< So, above the sequence of events is: Play video 1 to completion Play flashfile.swf for 1minute and 14 seconds Start over Control Limitations Also, the browser does not have control over stopping, stilling, pausing, volume control, etc… over the flash playback. The browser really is for use to play or browse to URL’ s and then switch to other browser files or back to videos. Browser Files – URLs and Flash 37 Browser Files So, you have to be aware of the length of the flash movie in seconds to cause a playlist to wait on it to finish. Flexibility of the Browser Commands Since URL’ s can lead to .html, .htm, .asp, .com, .org, etc… they can be anyone of way too many extensions for the Information Station to keep up with. If you search any URL not on the Information Station, you must use the channel number in the command. This tells the Information Station it is OK to pass the URL along to the browser. Example: This is correct: “ http://www.alcorn.com” 5PL This is wrong: “ http://www.alcorn.com” PL If you are searching .swf, .htm, and .html files located on the Information Station in the WEB folder, then you can use the standard numbering convention or full names in quotes as usual. There is an order of precedence here too: Example: 15PL ; causes the Information Station to look for a bro00001.swf, then bro00001.htm, then bro00001.html in that order. How Files are Displayed The current resolution is 800x600 for the IS and 1920x1080 for the ISHD, so you can set your layouts to this size if preferred. This size is subject to change without notice. Flash files are expanded to full screen. HTML files and web URL’ s are shown full screen, as it operates like Internet Explorer in Kiosk mode. You will need to implement a hide mouse command. In your HTML page’ s JavaScript you can minimize interference with a crosshair mouse: <style type="text/css"> <!-p {cursor: crosshair;} --> </style> Or hide in your flash application’ s Action Script: Mouse.hide(). 38 Browser Files – URLs and Flash Command Summary Screen Layouts in Manual Mode (ISHD Only) In Version 1.05 01/30/05 we added manual screen layout commands to allow you to map your video in one location, your banner somewhere, your browser somewhere, and your image somewhere. Imagine creating your own layout tailored to fit your message of the hour, and then changing the layout again at the next moment to keep the presentation visually appealing. Here are a few example layouts, but the limit of choices is up to your imagination. This is a coordinate-based layout, so you can place and size the display window for each type of screen element anyway you like. Just like all other commands, you can use these commands in playlists, schedules, serially, or over Ethernet control. Most users will create a playlist of these commands to layout their screen. Here’s the format for setting the video window location: xxx*yyyXYVL Here’s the format for setting the video window width and height: www*hhhWHVL Notice XY is for location and WH is for the window’ s width and height. VL is for video location, IL is for image location, BL is for banner location, and OL is for the browser location Screen Layouts in Manual Mode (ISHD Only) 39 Examples: 3*5XYVL locates the video window’s top, left corner shifted three pixels to the right and 5 pixels down. 300*400WHVL sets the width to 300 & height to 400. When all four values X,Y,W,H are zero, the unit is back in the default, automatic mode, where the video window is full screen, the image is rotating around the four corners of the screen, the banner is located along the top or bottom, and the browser takes over the full screen when used. You can also do Percentages. Here’s the format for setting the video window location by percent: xxx%yyyXYVL Here’s the format for setting the video window width and height by percent: www%hhhWHVL For example: 10%10XYOL 25%100WHOL Note the asterisk has changed to a percentage. In the above example, if your desktop screen width and height was 800x600, your browser window would be located 8pixels to the left of the edge and 6 pixels down from the top. It would be 200 pixels wide by 600 pixels tall. Command Summary The following table shows the complete Information Station control protocol. Using these commands, an external controller or PC can accomplish extremely complex tasks. Throughout the following table, <CR> means carriage return, a byte with the hexadecimal value of 0D. (The serial interface uses carriage returns, but the other interfaces do not need them.) Brackets, like [ ], denote optional message bytes. If you try a command that responds with an error, you may need to upgrade your firmware form our website at www.alcorn.com. In the Table below, some commands are channel specific. Use the following list for the specific channels: Number Channel 1 Video/Audio & Playlist Engine 1 2 Independent Audio only & Playlist Engine 2 3 Image 4 Banner 5 Browser 6 FTP Client 9 Scheduler Below, [<ID>@] refers to the optional ID byte (zero by default) that can be placed in front of each command. This is usually left off. Description Firmware Version 40 Command Bytes [<ID>@]?V<CR> Response Version Comments Firmware Version Request Command Summary [<ID>@]c?C<CR> [<ID>@]?P<CR> [<ID>@]cPL<CR> string<CR> n<CR> n<CR> R<CR> upon receipt Pause [<ID>@]cPA<CR> R<CR> Still [<ID>@]cST<CR> R<CR> Stop [<ID>@]cRJ<CR> R<CR> Search by file number [<ID>@]ncSE<CR> [<ID>@]nncSE<CR> [<ID>@]nnncSE<CR> [<ID>@]nnnncSE<CR> [<ID>@]nnnnncSE<CR> [<ID>@]”<filename>” SE <CR> R<CR> [<ID>@]cLP<CR> R<CR> PlayNext [<ID>@]ncPN<CR> R<CR> upon receipt LoopNext [<ID>@]ncLN<CR> R<CR> System Command Access All [<ID>@]mSC<CR> [<ID>@]AA<CR> R<CR> R<CR> [<ID>@]nnn.nnn.nnn.nnnIP<CR > [<ID>@]nnn.nnn.nnn.nnnGW<R > [<ID>@]nnn.nnn.nnn.nnnSM<R> R<CR> n=IP address entries n=Gateway address entries [<ID>@]nnn.nnn.nnn.nnnD1<R> nnn.nnn.nnn.nn n<CR> nnn.nnn.nnn.nn n<CR> R<CR> [<ID>@]nnn.nnn.nnn.nnnD2<R> R<CR> [<ID>@]mPW<CR> R<CR> [<ID>@]nID<CR> [<ID>@]nnID<CR> [<ID>@]nnnID<CR> [<ID>@]nID<CR> R<CR> Search by file name Also supported: PL, LP, PN, LN Loop Configuration Set IP Address Set Gateway Address Set Subnet Mask Set DomainNameServer1 Set DomainNameServer2 Set Password Set Device ID Set Time Zone Command Summary R<CR> R<CR> Command Summary Current File Current Status Play c= channel n=file name c= channel n=file name Automatically stops at end of clip. c= channel Picture remains on screen. c= channel Picture remains on screen c= channel Picture remains on screen c= channel Only file number 0-99999 addressing is supported. (not frames or time). ‘n’ is the file number . c= channel Searches by file name instead of number (no channel required) Play and loop at end of file c= channel Automatically plays this file at the end of current clip. c= channel * not supported. Automatically loops this file at the end of current clip. c= channel * not supported. m= DOS command to execute Makes log files readable via FTP. n= Subnet Mask entries n= DNS entries primary address n= DNS entries secondary address m= new password n=ASCII Device ID (‘0’‘126’) n= number of hours behind UTC (ex. Orlando is 5TZ) 41 42 Set Longitude [<ID>@]nLG<CR> R<CR> Set Latitude [<ID>@]nLA<CR> R<CR> Set Time [<ID>@]mTI<CR> R<CR> Set Date [<ID>@]mDA<CR> R<CR> Set Daylight Saving Time Support On/Off Set Daylight Saving Time Type [<ID>@]nSD<CR> R<CR> [<ID>@]nnnDT<CR> R<CR> Set Scheduler Bootup Delay [<ID>@]nDB<CR> R<CR> Set Scheduler Activity Logging [<ID>@]nSL<CR> R<CR> Get IP Address Get Gateway Address Get Subnet Mask Request Get Username [<ID>@]IP<CR> [<ID>@]GW<CR> Get Device ID Get Time Zone Get Longitude Get Latitude Get Time Get Date Get DST support [<ID>@]ID<CR> [<ID>@]TZ<CR> [<ID>@]LG<CR> [<ID>@]LA<CR> [<ID>@]TI<CR> [<ID>@]DA<CR> [<ID>@]SD<CR> IP String<CR> DefaultGateway <CR> Subnet Mask <CR> Username <CR> ID String<CR> Timezone<CR> Longitude <CR> Latitude <CR> Time<CR> Date<CR> n<CR> Get DST Type [<ID>@]DT<CR> DST Type<CR> Get Scheduler Bootup Delay [<ID>@]DB<CR> n<CR> [<ID>@]SM<CR> [<ID>@]US<CR> n= longitude ex. 26LG, n26LG, -15LG, s15LG n= latitude ex. 26LA, w26LA, -15LA, e15LA m=hh:mm:ssTI (ex. 01:02:56TI) - military time m=mm/dd/yyyy (ex.12/12/2003DA) use slashes, dashes or periods. 2-digit years are accepted also. n= 1 use DST n= 0 don’t use DST nnn = USA, UTC, or AUS for now. Other DST' s can be added on request. n= number of seconds before scheduler starts after reboot n= 1 update schedulerlog.txt n= 0 don’t write log n= 1 using DST n= 0 not using DST USA, UTC, or ASU currently. Other DST' s can be added on request. n= number of seconds before scheduler starts after a reboot Command Summary [<ID>@]SL<CR> n<CR> n= 1 updating schedulerlog.txt n= 0 not using log Set Audio Mode [<ID>@]mcAD<CR> R<CR> n=1 unmute n= 0 mute c= 1, 2 Decrease Volume [<ID>@]-cAD<CR> R<CR> Increase Volume [<ID>@]+cAD<CR> R<CR> [<ID>@]n%cAD<CR> R<CR> Left/Right Balance [<ID>@] nnnnnBcAD<CR> R<CR> Shift Balance Left [<ID>@]<cAD<CR> R<CR> Shift Balance Right [<ID>@>cAD<CR> R<CR> Decrease volume by one step c=1,2 Increase volume by one step c=1,2 Set volume 0 to 100% c=1,2 nnnnn is millidecibels 10000=all audio on right, 0=Left and Right are equal, -10000=all audio on left c=1,2 Shift balance to left by one increment c=1,2 Shift balance to right by one increment c=1,2 Menu Mode Full Screen Mode NTSC Video Mode PAL Video Mode MONITOR Video Mode [<ID>@]SHOW_MENU<CR> [<ID>@]HIDE_MENU<CR> [<ID>@]NTSC<CR> [<ID>@]PAL<CR> [<ID>@]MONITOR<CR> R<CR> R<CR> R<CR> R<CR> R<CR> MONITOR PAL Video Mode Video Modes VD Commands [<ID>@]MONITOR_PAL<CR> R<CR> [<ID>@]nVD<CR> R<CR> Surround Sound On/Off [<ID>@]nSU<CR> R<CR> Soft Reboot Shutdown Banner Specific [<ID>@]REBOOT<CR> [<ID>@]SHUTDOWN<CR> Command Summary Command Summary Get Scheduler Activity Logging Display debug menu Hide debug menu Output NTSC (IS only) Output PAL (IS only) Output to the RGBHV 800x600 for NTSC videos (IS only) Output to the RGBHV 800x600 for PAL videos (IS only) n=0 Mute Video n=1 NTSC (IS only) n=2 PAL (IS only) n=3 MONITOR (IS only) n=4 MONITOR_PAL (IS only) n=7 SHOW MENU n=8 HIDE MENU (IS only) n=0 Off n=1 On n=? Status This feature exists ONLY on units purchased with optional S/P DIF output card Reboot the unit Shutdown the unit (IS only) 43 Banner Text [<ID>@]mBT<CR> R<CR> Banner Direction Left Banner Direct. Right Banner Position Top [<ID>@]LBD<CR> [<ID>@]RBD<CR> [<ID>@]TBL<CR> R<CR> R<CR> R<CR> Banner Position Bottom [<ID>@]BBL<CR> R<CR> Banner Velocity [<ID>@]nBV<CR> R<CR> Banner Mute [<ID>@]nBM<CR> R<CR> Banner Color [<ID>@]nBC<CR> R<CR> Banner Background On/Off Banner Font [<ID>@]nBB<CR> R<CR> [<ID>@]nBF<CR> R<CR> Banner Size [<ID>@]nBS<CR> R<CR> [<ID>@]TLIL<CR> [<ID>@]TRIL<CR> R<CR> R<CR> [<ID>@]BLIL<CR> R<CR> [<ID>@]BRIL<CR> R<CR> [<ID>@]CEIL<CR> R<CR> Image Transparency [<ID>@]nIT<CR> R<CR> Image Mute [<ID>@]nIM<CR> R<CR> Manual Screen Layout Video Window XY Position [<ID>@]xxx*yyyXYVL<CR> R<CR> [<ID>@]xxx*yyyXYIL<CR> R<CR> [<ID>@]xxx*yyyXYBL<CR> R<CR> [<ID>@]xxx*yyyXYOL<CR> R<CR> Image Specific Image Position Top Left Image Position Top Right Image Position Bottom Left Image Position Bottom Right Image Position Center Image Window XY Position Banner Window XY Position Browser Window XYPosition 44 Set Banner Text. m=string to send m= string to display Set Banner Direction to left Set Banner Direct. to right Set Banner Position to top of screen Set Banner Position to bottom of screen Set Banner scrolling velocity. n = 0,1,2,3 n=0 Display Banner n=1 Don’t Display Banner n=RRGGBB hex string like ffff00 n= “Red” - quotes for predefined colors n=0 Background Off n=1 Background On n= “Font Name” - quotes for predefined fonts like “Arial” Set Banner font size n = 5 to 150 aka. Watermarks, Overlays Place Image in top left corner Place Image in top right corner Place Image in bottom left corner Place Image in bottom right corner Place Image in center of screen. Oversized images resize to fit in screen for this mode n=0 Transparency Off n=1 Transparency On n=0 Display Image n=1 Don’t Display Image xxx= X coordinate of video window from left of screen yyy = Y coordinate of video window from top of screen. (see above) for Image window (see above) for Banner window (see above) for Browser window Command Summary [<ID>@]www*hhhXYVL<CR> R<CR> [<ID>@]www*hhhXYIL<CR> R<CR> [<ID>@]www*hhhXYBL<CR> R<CR> [<ID>@]www*hhhXYOL<CR> R<CR> Layouts by Screen Percentage [<ID>@]www%hhhXYVL<CR> R<CR> For all above Manual Screen Commands, replace asterisk in string with percentage to layout screen in terms of 0 to 100 percent. xxx, yyy, www, and hhh are put in terms of percentage. [<ID>@]nSL<CR> R<CR> [<ID>@]n1L<CR> R<CR> [<ID>@]n2L<CR> R<CR> n=0 Logging Off n=1 Logging On n=0 Logging Off n=1 Logging On n=0 Logging Off n=1 Logging On Logging Schedule Logging On/Off Playlist 1 Logging On/Off Playlist 2Logging On/Off Command Summary Video Window Width/Height Image Window Wdth/Hght Banner Window Wdth/Hght Browser Window Wdth/Hght www= width of video window hhh = height of video window (see above) for Image window (see above) for Banner window (see above) for Browser window Error Codes The Information Station returns the following error codes: Command Summary Error Code Description E00 Communication Error E04 Feature Not Supported E12 Search Error E13 Internal Error 45 46 Command Serial Control Summary Serial Control – RS-232 The unit may be controlled using serial RS-232 (9600 baud rate, 8 data bits, No Parity, and 1 Stop bit -- 9600 8N1) messages via the 9-pin serial port located on the back panel of the machine. The protocol is ASCII-based, and many commands are similar on structure to Pioneer Disc protocol. Upper or lower case characters can be used interchangeably in most cases. Please see the Command Summary section for a table of commands. Note this section DOES require the <CR> carriage return listed in the protocol summary. Note this is an upstream device, so you may need a NULL serial cable to communicate with it from another upstream device like a PC or show controller. If you are using to control a downstream device, like a projector, you need a straight cable Serial Control – RS-232 47 Control up to 127 Information Stations at once over a standard Ethernet network! Ethernet Control Ethernet Control Please see the Command Summary section for a table of commands. Note this section does NOT require the <CR> carriage return listed in the protocol summary. Now you can use a powerful subset of commands from the Pioneer/AMI serial protocol to control multiple Information Stations at once that are connected to a standard Ethernet network. By sending UDP (User Datagram Protocol) packets across a network, you can communicate with and control up to 127 Information Stations simultaneously or independently. A Software Developer’s Kit with C Source Code implementing this protocol is available on our website at ftp://ftp.alcorn.com/pub/software/udpsdk.zip Hardware and Software Requirements Any Ethernet capable show controller or PC with a network interface card can send messages to Information Stations located on the same network. To use Ethernet control, your control source must have a way to broadcast UDP packets containing arbitrary message bytes to a specific UDP port number (2638). Each Information Station must be connected to the physical network via the RJ-45 Ethernet connector on the rear of the unit. All Information Stations must have different IP Addresses to reside on the same Ethernet network. Each one must also have a unique Unit ID, if you are using the broadcast IP address for UDP control (255.255.255.255). AMINet Protocol The user data sent in the UDP packet follows our AMINet Ethernet protocol. AMINet was originally developed for use with our Ethernet Machine, which provides an Ethernet backbone for communication between Alcorn McBride Show Controllers and controlling our DVM2 family of video players. Now the same, easy to use protocol, can be used to control the Information Station. AMINet is a very flexible and robust Ethernet protocol that allows for many different uses; however, only one of AMINet’ s command op-codes is necessary to transmit commands to the Information Station making the usage very simple. Ethernet Control 49 Control Message Format The control source will send a UDP packet that contains an Information Station Control Message as the User Data in the packet. A UDP Control Message is comprised of a few bytes needed specifically for AMINet and some Command bytes. The Command simply needs to contain an Addressed Pioneer / AMI protocol command. For example, An Information Station Control Message containing the Command bytes 7@?V<CR> would cause the Information Station on the network with Unit ID 7 to send back a UDP packet containing its version information. Please see the Serial Command Summary section for detailed information about the rest of the command set. The basic format of an Information Station Control Message is as follows: 0xF1 0x01 0x04 <Pioneer / AMI Command> <Checksum> 0xF2 The only bytes that change from message to message are the Command bytes and the Checksum. The command corresponds exactly to an Addressed Pioneer / AMI serial command. Control Message Checksum The Checksum is the summation of the hexadecimal value of all of the bytes in the Control Message except the first byte (0xF1), the last byte (0xF2) and of course the Checksum itself. The value of the checksum may easily increase to a value that cannot be represented by one byte. This situation calls for what we call number expansion. If the value of the Checksum is between 0x00 and 0xF9 (0-249), the value is represented in only 8 bits (1 byte). If the value is between 0xFA and 0xFFFF (250-65535), the value is represented in 16 bits (2 bytes) and is preceded by 0xFF to signify the number has been expanded to 16 bits. If the value is between 0x10000 and 0xFFFFFF (65536-16777215), the value is represented in 24 bits (3 bytes) and is preceded by 0xFE to signify the number has been expanded to 24 bits. The following example shows a Control Message with an expanded Checksum. 0xF1 0x01 0x04 5 5 @ R J <CR> 0xFF 0x01 0x58 0xF2 The value of the checksum is calculated by adding the hexadecimal values of each byte preceding it except the first byte (0xF1) as follows: 50 Ethernet Control The Checksum in this example is 0x158, but because it is greater than 0xF9, the two byte Checksum is preceded by 0xFF. UDP Message Layer The control source sends UDP Packets to the Information Station. A UDP Packet contains information about the packet source (IP Address, Port number) as well as definable user data. The user data contains the entire UDP Control Message including all AMINet specific bytes. These packets should be sent to the broadcast IP Address (255.255.255.255) or the unit’ s IP address (if you need to control one particular unit a network of many) with UDP port number 2639. Control Message Response The Information Station will normally send back a response to each Control Message it receives. The user data in these responses exactly match those in the Pioneer / AMI Serial control command descriptions but will have the added AMINet wrapper like a Control Message. For example, you’ ll receive an “ R” contained in the AMINet wrapper when you send a “ PL” contained in the AMINet wrapper. The responses are sent to the IP Address and UDP Port number found in the UDP packet that contained the original Control Message. As with the Addressable serial protocol, any Control Message sent to the wildcard unit ID (127) will not receive any response. This practice avoids any potential confusion at the source of the Control Message due to many responses to the same message. Ethernet Control 51 Ethernet Control 0x01 + 0x04 + 0x35 + 0x35 + 0x40 + 0x52 + 0x4A + 0x0D = 0x158. Playlists provide a mechanism for the Information Station to automatically play a collection of clips in a predefined sequence. Playlists often allow the unit to be used to perform complex functions that would normally require an external controller. Playlists can perform functions as simple as looping a single clip, or as complex as user prompted pacing of the playback. Please see the Serial Command Summary section for a table of commands. Note this section does NOT require the <CR> carriage return listed in the protocol summary. Digital Media Manager We have made available for the IS and ISHD a powerful GUI application that runs on Windows XP called Digital Media Manager. It integrates Playlist Builder described below as well as many other features, like FTP, Live control, Status Checking, File Synchronization, and more. If you are controlling many players, or would prefer a simple to use interface for controlling your single player, download a free demo at http://www.alcorn.com/support/software.html. Look for “ Digital Media Manager” in the software list. If you have downloaded the demo, click on PlaylistBuilder in the left column and follow the tutorial below. Playlists 53 Playlists Playlists ¾Playlist Builder Playlist Builder is a friendly GUI you can use to create your Playlists. Go to http://www.alcorn.com/support/software.html to download a copy today! You should also read the section below for a tutorial on how the engine works. Here’ s how to operate the interface: Select a Product Type: On the main menu select: Insert, Command Choose your command to insert in the Event Section. Note the drop down box is tailored to your unit’ s commands 54 Playlists Playlists The Parameters section tailors itself to the specific command’ s needs, instructing you on what to enter in the available parameter fields. For this example, we chose play by filename, so we entered a file name. Note we entered it in quotes, as that is the way the command is normally used. Press OK, and you then see your entry in the playlist. Add more, and save. Then FTP the file to your unit, and play it! There is a discussion on FTP in the first part of this manual. Playlists 55 Playlist Engines Information Station has two built-in playlist engines. You search playlists like you search media files. When you use an engine, you assign it to a media channel. In particular, you can assign one playlist engine to the video channel and one to the audio channel. Commands in the playlists can control all aspects of the Information Station, though. For example, you could have one playlist control audio, video, banners, and images. Or, if you are using the unit as both a video server and an audio server, you could have one playlist control video, images, and banners, while the other controls the independent audio channel. Commands may be entered into the Playlist in either upper or lower case. All text following a semicolon (;) is interpreted as comments, until the next carriage return. You may put anything you want in comments, including the special command characters normally used in the Playlist. Playlist files are stored in the PLAYLISTS directory. Auto Execution To make the unit play a playlist on bootup, name your playlist one of the two following names: ply00001.lst The unit will assign this playlist to channel 1 on bootup ply00002.lst The unit will assign this playlist to channel 2 on bootup Extra Commands Please see the Command Summary section for a table of commands. Note this section does not require the <CR> carriage return listed in the protocol summary. Below are additional commands available to the Playlist interface, since it has some special functionality the other interfaces don’ t have. 56 Playlists Meaning AND All commands AND’ ed together will be implemented in one group. The playlist will go no further until all commands in this group have been completed AFTER[dd:hh:mm:ss] Make the command immediately after this command wait the time defined in the brackets before executing. WAIT Insert this to make the playlist wait on the current group until it has received another play command. < Repeat entire Playlist. The only way to stop the Playlist from looping is to use the Stop command, or to start another file. Anything in the Playlist after the ‘<’ character is ignored. LOOPPOINT When you want to make a playlist loop using the ‘<’ command, but you don’ t want the playlist to start all the way from the beginning of the file, insert this command where you want the playlist to start from. Can be useful when setting up some one time initialization in the playlist. ; Comment - everything after the semicolon on that line is ignored Delimiters Commands (,), white space (spaces and tabs), carriage returns (and line feeds) separate commands. Example Playlist 12pl,22pl,32pl,42pl,< ;loop through audio clips The Playlist is a list of numbers representing the file numbers of video or audio clips. The list can also contain special control codes or symbols to govern playback. The list can be arranged all on the same line, as shown above, or vertically as shown below. ;play multiple videos "ban00001.ban"4PL AND "ban00002.ban"4PL AND "ban00003.txt"4PL AND "ban00004.txt"4PL AND "ban00005.txt"4PL AND < and update image and banner with each new video "img00001.bmp"3PL AND "vid00001.mpg"1PL ;scene 1 "img00002.bmp "3PL AND "vid00002.mpg"1PL ;scene 2 "img00003.bmp "3PL AND "vid00003.mpg"1PL ;scene 3 "img00004.bmp "3PL AND "vid00004.mpg"1PL ;scene 4 "img00005.bmp "3PL AND "vid00005.mpg"1PL ;scene 5 Logging The logging engine creates a new log file each hour with the date and hour stamped on the filename. Each entry inside has the minute and second stamp. This approach allows all the time logging of every event in a playlist without Playlists 57 Playlists Char creating a bulky file which burdens the CPU time and causing a disturbance in playback. Example of the filename: playlistlog1_August_09_2004_03PM.txt PlaylistLog1.txt and PlaylistLog2.txt will be kept in PLAYLISTS\LOGS directory, if the INI file has the correct entries. They log the time and date of events and once they reach a maximum file size (.25MB as of OS version .33) it will trim off the first chunk of the playlist file that is larger than the maximum to accommodate the last time being added. ¾Inside the log: When commands are launched, the time stamp and the command are listed When commands have a lifetime, like a video can last 2 minutes, but not an image, which is instant, they also register a completion stamp. When commands are completed, a ’C’ is placed after the time stamp and the command is listed. Every night, the UNIT (not the engine) deletes the log files that are older than 28 days (4 weeks), so customers can wait up to 4 weeks before having to upload their files. See the INI File – is.ini section to turn this on. 58 Playlists Schedules Scheduler Information Station has a down-to-the-minute scheduler based upon its internal real time clock. According to the time of day and date of year, Information Station can start a video, audio file, banner, image, etc… at 3pm on January 1st 2002, for example. This functionality is built into a feature called the Scheduler. Digital Media Manager We have made available for the IS and ISHD a powerful GUI application that runs on Windows XP called Digital Media Manager. It integrates Schedule Builder described below as well as many other features, like FTP, Live control, Status Checking, File Synchronization, and more. If you are controlling many players, or would prefer a simple to use interface for controlling your single player, download a free demo at http://www.alcorn.com/support/software.html. Look for “ Digital Media Manager” in the software list. If you have downloaded the demo, click on ScheduleBuilder in the left column and follow the tutorial below. Schedules 59 ¾Schedule Builder Note as of January 2004, we have Schedule Builder, a friendly GUI you can use to create your Schedules. Go to http://www.alcorn.com/support/software.html to download a copy today! You should also read the section below for a tutorial on how the engine works. Here’ s how to operate the interface: Select File: New, and choose your product from the pop-up dialog box: Create a New Event: In the new event dialog box, set a start date and time by clicking the down arrows on those controls: 60 Schedules Scheduler If you have an end date and time, do the same for those fields. Choose the Event (the command) from the drop down menu. Here we have selected PlayFilename: Schedules 61 Type in 1 for the channel, and a filename in quotes, like “ vid00001.mpg” for this example: Type in 2 and select Minutes, so the unit will repeat this command every 2 minutes. Add a comment, if desired: 62 Schedules Scheduler Press OK, and here is the resulting event: You can also select Edit:Edit Event to edit this entry with the dialog box or manually edit the events yourself. You can then save the schedule and test it with the built in tester. Select File:Test Schedule. Press the Options button to set your simulation time. With this dialog box, you can set simulation time, start date and time, what to do on errors, etc… . Then press OK and press Run. Schedules 63 File Format / Tutorial The Scheduler uses a text files loaded from the SCHEDULES folder of the Information Station. The text file can be edited in a text editor, like notepad. The autoexec filename is sch00000.txt or sch00000.scl. You can search schedules just like media files. Ex. 39pl searches sch00003.txt to the scheduler channel. A schedule is composed of a list of events. An event is some sort of action that must happen at a given time, whether it is changing to a new video or changing the font. All of the events you can use are listed in a table in the “ Events” section below. Basic Command Structure Please see the Command Summary section for a table of commands. Note this section does not require the <CR> carriage return listed in the protocol summary. Simply include a command after the 1: field in your schedule file. 64 Schedules E:COMMAND 1:<command here> An event has a variety of parameters that can be applied to it, in order to customize the Information Station’ s control to your show. In order to understand how you define an event in Information Station, let’ s take this simplest example and build it to the most feature-rich example. An event exists on one line. It is made up of several fields. Example 1 shows the minimum number of fields you need to define an event, which are an Event, a Start Time, and the required data field, and a Start Date. Each field begins with a delimiter. Here is a table of delimiters for your reference: Delimite r Schedules Field T: Starting time (hh:mm) (military time) D: Starting date (mm/dd/yy or mm/dd/yyyy . You can use periods, slashes, or dashes to separate dates) I: Ending time (hh:mm) (military time) A: Ending date (mm/dd/yy or mm/dd/yyyy . You can use periods, slashes, or dashes to separate dates) E: Event – always set to COMMAND 1: The actual command you would use on any IS interface 2: (not used for Information Station) 3: (not used for Information Station) 4: (not used for Information Station) R: Repeat Number: repeat after this number of periods has expired P: Repeat Period: Time to wait between executions, used with Repeat Number and Set when necessary S: Repeat Set: special case usage described below ; Although not a field, this marks a comment 65 Scheduler Example 1: T:13:46 D:01/1/2000 E:COMMAND 1:"Hello, world!" BT Now that we have seen a table of the scheduler fields, let’ s look at the event in Example 1. Here are its fields: Start Time: 1:46pm in the afternoon (13:46 military) Start Date: January 1st 2000. Event: COMMAND event, this is ALWAYS set to COMMAND Field 1, the string, defined as Hello, world!BT , which is the Banner Text command, telling the unit to set its banner’ s text to the string Hello World!. Now let’ s finish up with the remaining fields Example 2: (New fields are in bold. kept on one line for clarity.) T:14:46 D:01/1/2000 R:30 P:minute A:1.3.00 I:3:00 E:COMMAND 1:"Hello, world!"BT ;Repeats a while We’ ve now added: Repeat Number: 30 Repeat Period: minute Ending Time: 3am in the morning (3:00 military) Ending Date: January 3rd 2000 The Repeat Number acts as a multiplier of the Repeat Period. They should be read in conjunction like this: “Repeat this event every 30 minutes”. You may have noticed a slight change in the times and strings used in the examples above. The events used in Example1 and the final one in Example3 are used in an example file on Information Station that you can run with Schedule Builder (discussed below) to see how these actually operate. The only field not discussed yet is a set. Example 3: T:1:00 D:11-28-02 R:4 P:Thursday S:November 66 E:COMMAND 1:"Happy Thanksgiving!"BT Schedules A set defines a certain range of valid repeat periods. In this example, only the Thursdays in November are eligible for this event. When a set is used in an event, the Repeat Number takes on a different meaning. Instead of being a multiplier of the Repeat Period, it and the Repeat Period become an index of the set. These three fields should be read in conjunction like this: “Repeat this event every 4th Thursday in November.” There is a summarized table in the File Format/Tutorial section that lists all the fields for your reference. Since the Event, and event Parameter fields (E:, 1:, 2:, 3:, and 4: ) have been discussed in detail in the Events in Detail section, we’ ll discuss the rest of the fields here. ¾T: Start Time The Start Time is the hour and minute your event becomes active. For most cases being active simply means, “ gets executed” . You specify it in military time 00:00 is midnight, 23:59, 11:59pm, is last minute of the day something can be scheduled. You can specify the word BOOT as the field’ s value. This used to make an event get executed upon every reboot after the start time and start day have been reached. You can also specify sunrise or sunset. In order to take advantage of sunrise/sunset calculations in the Information Station, you need to determine you longitude, latitude, and time zone. These can be determined from many websites by typing your zip code into a form. Simply do a search for longitude latitude zip code in your favorite search engine like www.google.com to find them out. Then enter them into the Geographic Settings in Information Station’ s INI file is.ini. Information Station calculates the sunrise/sunset values and replaces the start time with them. Example: T:13:30 T:Boot T:Sunrise T:Sunset ¾D: Start Date The Start Date is the month, day, and year your event becomes active. For most cases being active simply means gets executed. You specify it in a variety of ways. You can use periods, slashes, or dashes to separate the fields of the dates. Dates from the year 2000 to the year 2099 are supported. Leap years are handled. Schedules 67 Scheduler Fields in Detail Examples: D:1.1.00 D:1/1/00 D:1-1-00 D:01.01.2001 D:01/01/2001 D:01-1-2001 ¾I: End Time The End Time is the hour and minute your event stops being active. See the T: Start Time section for syntax. Examples: I:1:30 I:sunset I: sunrise ¾A: End Date The End Date is the month, day, and year your event stops being active. See the D: Start Date section for syntax. Examples: D:1.1.00 D:1/1/00 D:1-1-00 D:01.01.2001 D:01/01/2001 D:01-1-2001 ¾R: Repeat Number The Repeat Number acts in one of two ways: • With no Repeat Set field present. • With a Repeat Set field present. With no Repeat Set field present: 68 Schedules This is the most common usage of the Repeat Number. It acts as a multiplier of the Repeat Period. They should be read in conjunction like this: “Repeat this event every <repeat number> <repeat period>”. Ex. “ Repeat this event every 30 minutes” . Example: R:1 R:117 Scheduler The repeat number can be anywhere from 1 to over 4billion. You can specify repeating a number of minutes, which is why this is so huge. Realistically though, you would specify repeating in years, if it got that large. Whatever combination you choose between Repeat Number and Repeat Period should not multiply out to be greater than a century. ;do it every period ;do it every 117 periods With a Repeat Set field present: The Repeat Number and the Repeat Period become an index of the set. These three fields should be read in conjunction like this: “Repeat this event every <repeat number> <repeat period> in <set>.” Ex. “ Repeat this event every 4th Thursday in November.” Although many customers may come up with other uses, we can use an example of holidays to explain what using a set can do for you. Over the period of a year, you may want to schedule events for some holidays. Unfortunately, not all holidays land on the same date every year. By defining a set, along with the repeat number and repeat period, you can choose the first Monday of the month, or whatever you like. Sets can be specific months or general and periods can be specific or general too. Example: R:2 P:Sunday S:May E:LP 1:"mothersday.mpg" ;Mother’s Day video R:1 P:Day R:1 P:Day R:2 P:Day R:3 P:Day …. S:LP E:2 1:1 S:LP E:2 1:2 S:LP E:2 1:3 S:LP E:2 1:4 ;Tell unit to do audio show for day #1 ;Tell unit to do audio show for day #1 ;Tell unit to do audio show for day #2 ;Tell unit to do audio show for day #3 ¾P: Repeat Period The Repeat Period defines how long to wait. It is multiplied or indexed according to the presence of a Repeat Set field. (See the Repeat Set and Repeat Number sections for details) Schedules 69 Periods can be one of the following: Sunrise, Sunset Sunday, Monday, Tuesday, Wednesday, Thursday, Friday, Saturday Minute Hour Day Year Boot Notes: Month is not a valid period. If you want to make a monthly schedule, use a combination of repeat number, period and set to do so. See the example in the Repeat Number section for details. You can also specify sunrise or sunset. In order to take advantage of sunrise/sunset calculations in the Information Station, you need to determine you longitude, latitude, and time zone. These can be determined online by typing your zip code into many websites. Simply do a search for longitude latitude zip code in your favorite search engine like www.google.com to find them out. Then enter them into the Geographic Settings in Information Station’ s INI file - is.ini. Information Station calculates the sunrise/sunset values and replaces the start time with them, after the first execution has taken place. Examples: R:sunday R:year R:sunset ¾I: Repeat Set Using the Repeat Set field changes the way Repeat Number and Repeat Period operate. Together they act as an index into the Repeat Set. Please read the Repeat Number section above, for a detailed explanation of the different behaviors they take on when the Repeat Set field is present. In order to create a monthly schedule, you can specify the Repeat Set as month. Sets can be one of the following: Month January, February, March, April, May, June, July, August, September, October, November, and December 70 Schedules Examples: R:5 P:day S:month ;repeat 5th day of every month R:2 P:monday S:month ;repeat 2nd Monday of every month th R:4 P:Thursday S:November ;repeat 4 Thursday in November Restrictions Since the Scheduler is very flexible, it is easier to explain what you cannot do, than to explain what you can. When using BOOT as the Repeat Period, the Repeat Number can only be one. The unit does not keep track of the number of times it has rebooted. You can put in other numbers, but it will ignore them. 2. Whatever combination you choose between Repeat Number and Repeat Period should not multiply out to be greater than a century. For example, don’ t repeat an event every 102 years. 3. One event executes per minute. If you want more and you haven’ t already purchased a small show controller, like the Alcorn McBride InterActivator, then get one of these. It can increase the amount of events you can generate from 1per minute to 30 per second * 60 seconds per minute = 1800 events per minute! Scheduler 1. Comments & Whitespace Comments are prefixed with a semicolon (;). Anything found after a semicolon is ignored by the scheduler. You can place a comment on its own line, if you like. You can use spaces or tabs to organize your schedule. They both are ignored. Examples: ;This is a comment on its own line T:1:00 D:1-1-01 E:SetVarEQ 1:2 2: 33 ;this is a comment too Schedules 71 Order of Operations Here is a listing of times when Information Station checks the schedule and the operations afterwards. 1. 1. 2. 3. 4. a. b. Information Station loads the schedule from sch00000.txt (default) at: Boot up Every night at midnight. Information Station gets today’ s date (or already knows it) from built in RTC. Information Station parses the schedule and loads all of today’ s active events. If it is a bootup that caused the schedule load, the Bootup event gets loaded. If there has been a bootup delay set via the INI file is.ini, then the unit will wait until that time has expired before starting. This allows Information Station to wait on products that boot slower than it does before starting a show. An example is a slow booting projector. Information Station has to wait until it has booted before playing video. Coincident Events If you plan on having a fairly complicated show, you may want to be sure you don’ t have events competing with each other for execution when their time and date come around. This discussion looks at what happens when two events end up on the same time and date. It explains the rules used to determine which event wins. ¾Definitions The following are previously undefined terms used in the Scheduler Rules discussion below 72 • Timestamp - time portion of the event' s starting point (T: and D: ) • Datestamp - date portion of the event' s start point (T: and D: ) • Slot - the event' s timestamp + datestamp • Startslot - slot when the event begins (required) • Endslot - slot when the event ends (not required) • Profile - an event’ s startslot, endslot, type (defined below) Schedules • Double Occupancy - two events in the same slot The following types of events exist in Information Station: One-shots -One time events with no repeat • Loops - Repeating events • Finites - loops that have an end time and end date • Infinites - loops with no end time or end date • Active Event - events with today’s datestamp that have been or will be loaded into the queue • Executable Event - events with the current timeslot • Start Time Bootups - events with start time listed as BOOT • Repeat Period Bootups- events with repeat period listed as BOOT Scheduler • ¾Scheduler Rules Precedence: If two events occupy the same slot, this is the precedence: Schedules 1. StartTime Bootups take ultimate precedence during the bootup minute, and are treated as normal events afterwards (if they repeat). 2. Repeating Bootups take second precedence during the bootup minute. 3. One-shots take precedence over Loops. 4. Finites take precedence over infinites during their period of execution. 73 5. Finites started on a later slot will take precedence over earlier finites. 6. Infinites started on a later slot will take precedence over earlier infinites. 7. If two or more events with the same profile are scheduled for the same start slot, the first one found in the file will be executed. This should only occur as a mistake. Ex. Two one-shots, finite loops, or infinite loops are programmed with the same startslot. When Double Occupancy is Legal: There are times that two events can legally occupy the same slot. These are expected to occur as: • Overlaps - When two or more loops (finites or infinites) unintentionally line up. Ex. A 3hour infinite and a weekly infinite will eventually overlap, if programmed on same timestamp of the day, but not necessarily the same datestamp. • One-shot Overrides - one-shots that are intended to supersede a standard finite or infinite show. Ex. A special holiday show at the regular show’s slot. • Finite Overrides - Finites that are intended to supersede another finite or infinite show. Ex. 1week finite that is placed in the middle of a 6month finite to override the standard show for 1week, then go back to normal. • Infinite Overrides (Replacements) - Infinite loops scheduled for the same timestamp at a later date. Ex. Daily infinite for three months, another daily infinite for the rest of the year. Although this probably should be programmed as finites, a customer may program it as replacements. Uploading New Schedules You can FTP sch00000.txt to the Information Station, replacing your current version. Information Station has the current schedule in memory. At midnight, or after a fresh reboot, the new sch00000.txt will get loaded into memory. If you want to cause an immediate update of your schedule, you can cause the Information Station to reboot with a software command over an interface like the 74 Schedules UDP interface, or by holding in the power button. You can also completely automate this process by using the built in FTP Client. See the FTP Client section for details. Logging Scheduler Scheduler logging works exactly like playlist logging for later versions of the os, except it logs its files in SCHEDULES\LOGS. See the playlist logging section for a complete description. Schedules 75 76 Schedules INI File – is.ini In the MEDIA folder (where you are located by default when you log in via FTP) is is.ini. It has INI settings that you can use to setup default behavior of the unit. Here are the entries and descriptions. Many of these are changed automatically when you send a command to change them via the interfaces. Or you can edit it manually and FTP it to the unit then reboot for the settings to take effect. set this if you want sunrise sunset calculations for scheduler to work set this if you want sunrise sunset calculations for scheduler to work set this when you set your time set this to support Daylight Savings Time set this to values like usa, aus, utc. Check the General Command table for values INI File [GEOGRAPHICAL] Longitude=0 Latitude=0 TimeZone=5 DSTEnable=1 DSTType=usa [GENERAL] UnitID=1 unit ID – useful when talking to multiple units over UDP and serial UpdateINI=1 Set to zero to turn off changes to your INI – rarely used. DontSendSerialResponses=1 Acks and Nacks are NOT sent out serial port. Used when unit is controlling another product that would get confused from those messages. [SCHEDULER] BootUpDelay=0 LogActivity=0 Verbose=1 Make the scheduler wait this many seconds before beginning. Set to 1 to Log scheduler activity Set to 1 to Log scheduler engine activity in heavy detail – good for debug [NETWORK] IPAddress=192.168.0.254 SubnetMask=255.255.255.0 GWAddress=192.168.0.1 Gateway Address DNS1=12.12.12.12 Domain Name Server Primary Address DNS2=12.12.12.12 Domain Name Server Secondary Address Password=password FTP login password [VIDEO] MuteAudio=0 Format=NTSC Volume=1000 Balance=0 Set to 1 to mute the video’ s audio track Set to PAL, NTSC, or MONITOR depending on your preference Set the volume. This is in milli decibels (later may change to percentage) Set Left/Right balance. 0=middle, -10000=all left , 10000 = all right side [AUDIO] Mute=0 Volume=1000 Set to 1 to mute the separate audio channel Set the volume. This is in milli decibels (later may change to percentage) INI File – is.ini 77 Balance=0 Set Left/Right balance. 0=middle, -10000=all left , 10000 = all right side [PLAYLIST1] LogActivity=1 Verbose=1 Set to 1 to Log playlist engine 1 activity Set to 1 to Log playlist engine 1 activity in heavy detail – good for debug [PLAYLIST2] LogActivity=1 Verbose=1 Set to 1 to Log playlist engine 2 activity Set to 1 to Log playlist engine 2 activity in heavy detail – good for debug 78 INI File – is.ini Completion Acks The InformationStation sends Completion Acks at the end of playback of video, audio, and playlist files. Completion Acks are the following format: n<CR> where n is the corresponding channel. The port (serial or UDP) that plays the playlist or media file gets the completion ack. Here are the rules: Video files selected directly return 1<carriage return>. • Audio files selected directly return 2<carriage return >. • Playlists that don’ t call any other playlists return the channel number to which the playlist was assigned. • When the current playlist selects another playlist, a completion ack will be sent at the transition point if the new playlist-play command is the LAST command in the current playlist. A completion ack will be sent at the end of the final playlist. • If the new playlist-play command is NOT the last command (like you typed a dummy command afterwards), no completion ack will be sent at the transition point. A completion ack will be sent at the end of the final playlist. Completion Acks Completion Acks • 79 FTP Client As of firmware version 0.39 the unit supports an FTP client that gets initiated by searching a command file to channel 6, as described below. It operates by reading in a text file, which has an FTP script inside of it. The filename convention is ftpxxxxx.cmd. Here’ s an example of one: ftp00003.cmd OPEN www.alcorn.com [email protected] password PUT C:\MEDIA\IMAGES\img00008.bmp img00008.bmp GET vid00150.mpg C:\MEDIA\VIDEOS\vid00105.mpg QUIT The commands available for the FTP client are: Command Data1 OPEN IP address Data2 Data 3 Description/Comment This must be the first line. It is used to log into the FTP server you are trying to reach. Note the IP address can be an IP address or a URL. Ex 192.168.0.200 is correct Notice in the example above that the username and password follow on separate lines. TYPE I, A Sets the mode to binary or ASCII. Binary mode is necessary for videos, ASCII mode is necessary for text files. GET Remote Filename Local Filename You have to have both. GET C:\MEDIA\README.TXT README.TXT for example PUT Local Filename Remote Filename You have to have both. PUT C:\MEDIA\README.TXT README.TXT for example CWD Directory Change to the directory DELETE Remote Filename Deletes that remote file QUIT Exit the FTP session DISCONN Same as QUIT, just whatever your preference is… !(DOS command) The exclamation point (!) lets you execute DOS commands from the ftp script. Example: !del c:\Media\readme.txt will delete the readme file on your IS. 80 FTP Client Updates from CD, DVD, USB Drives The Information Station has the ability to automatically detect media files located on devices connected to it. You can connect a media device that is natively supported under WinXPE, like a USB key, USB hard drive, Compact Flash adapter, or CD/DVD drive. If you have configured the device and its directories properly, when the unit boots up, it will scan the device, copy new media files to its directories, and continue on with normal operation. Note USB 2.0 has not been tested, and some Compact Flash adapters require a driver to be installed before they work. If this is true for your device, you cannot use it with the Iinformation Station. ScanDisk Compact Flash adapters, BusLink USB keys, and ViPower USB drives have been verified. For the CD/DVD option, you must order an Information Station from your Alcorn McBride distributor with the CD/DVD option specified. Drive Configuration and Update Updates CD & USB Here are the steps you need to take to ensure your drive image will be successfully copied to the unit’ s drive image: 1. Name your volume label NEW_MEDIA 2. Create a MEDIA directory on the image 3. Inside the MEDIA folder, create a VIDEOS, folder if you want to update videos. 4. Copy your videos into the VIDEOS folder on your device. 5. In the MEDIA folder, the unit has several subfolders: VIDEOS, AUDIO, IMAGES, BANNERS, PLAYLISTS, SCHEDULES, AND WEB. As in steps 3 & 4, create the appropriate folder inside the MEDIA folder on your device for whatever files you want copied to the IS, then copy your files to the appropriate directories. You can also update your unit’ s firmware by putting os.new in the MEDIA folder itself. 6. Attach the device (or insert your CD) and reboot the Information Station. Updates from CD, DVD, USB Drives 81 7. 82 The Information Station will copy any files to its MEDIA directories that do not match files already located in its MEDIA directories. If it finds a match, it compares the date & time stamp and file size. If any of these are different, it overwrites the one on its hard drive with the one from the device. Updates from CD, DVD, USB Drives Specifications Video IS: MPEG-2 (ISO 13818 MP@ML) 704x480, 720x480 NTSC, 30 fps Interlaced 704x576, 720x576 PAL, 25 fps Interlaced 15 Mbps maximum Supports 4:3 and 16:9 Aspect Ratios S-Video DIN connector Composite RCA phono connector ISHD: Please see WMVHD Specifications on encoding at www.WMVHD.com Supports 1080i, 720p, 24fps (please see specs for more detail) DVI output supports up to 1200x1600 output RGBHV output supports up to 1920x1080 output Audio Unbalanced stereo on 1/8th inch phono jack +4 volts max. into 20K Less than 10 ohms impedance 16-bit linear quantization 96 dB Digital Dynamic Range 0-48 KHz Sample Rate 20-20,000 Hz +/- 0.5 dB Frequency Response 96 dB Signal-to-Noise Ratio 0.01% THD, Ethernet IEEE802.3u 100 BASE-TX and 10 BASE-T (RJ-45) FTP server FTP client Http web server UDP control Serial Serial RS-232 Control (DB-9M) Pioneer protocol with Alcorn McBride extensions Response Time Less than 33 msec, however video playback response depends upon encoding. Typical video playback in less than 0.5 seconds. Power +5V at 3 Amps max. +12V at 2 Amps max. -12V at 0.3 Amps max. Connector: 5-pin DIN Adapter for 115 or 230 volts provided. 115/230 volts, 50/60 Hz, 250 W max. Certificates: UL/CSA: CAN/CSA C22.2, No. 950-95 / UL 1950, 3rd edition TUV: EN 60 950:1992+A1+A2+A3+A4+A11 CB: IEC 60 950:1991, 1992, EMKO-TSE(74-SEC)207/94, UL 1950 Specifications 83 CE: EN 55022 : 1998, CISPR 22, CLASS B, EN 55024 : 1998 IEC 61000-4 FCC: FCC PART 15B, Section 15.107(a) and Section 15.109(a), CLASS B Physical IS (Shelf Unit): 13" W x 16.5" D x 3.6" H (330mm x 420mm x 90mm) 11 lbs 0º to 38º C (32º to 100º F) 0 to 90% relative humidity,s non-condensing ISHD (Rack Mount Chassis): 19" W x 16.1" D x 5.15" H (483mm x 409mm x 131mm) 21 lbs 0º to 38º C (32º to 100º F) 0 to 90% relative humidity, non-condensing Model Number: Information Station: IS Information Station HD: ISHD 84 Specifications Index A AMINet ...........................................................................................................................49 AMITerm ......................................................................................................................6, 7 Arp...................................................................................................................................12 Audio.........................................................................................................................16, 29 B Balanced Audio ...............................................................................................................15 Banners................................................................................................................23, 35, 36 Betacam...........................................................................................................................28 Bitrate..............................................................................................................................29 Boot .................................................................................................................................71 Browser Files...................................................................................................................37 C Carriage Return ...............................................................................................................40 CCIR-NTSC ....................................................................................................................29 CCIR-PAL.......................................................................................................................29 CD/DVD..........................................................................................................................81 Channels ..........................................................................................................................40 Chroma Format................................................................................................................29 Commands.......................................................................................................................40 Command Bytes ..............................................................................................................40 Comments........................................................................................................................71 Completion Acks .............................................................................................................79 Control Message..............................................................................................................50 Checksum ........................................................................................................................50 Format .............................................................................................................................50 Response..........................................................................................................................51 D D-1...................................................................................................................................28 Darim DVMPEG...............................................................................................................7 Delimiters ........................................................................................................................65 DOS.................................................................................................................................23 Index 85