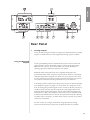
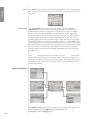
1
ENGLISH Owner’s Manual CDP-102 and CDP-202 Disc Players CDP-102 和 CDP-102 光盘播放机 用户手册 中文 ENGLISH WARNING: TO REDUCE THE RISK OF FIRE OR ELECTRIC SHOCK, DO NOT EXPOSE THIS APPLIANCE TO RAIN OR MOISTURE. CAUTION RISK OF ELECTRIC SHOCK DO NOT OPEN CAUTION: TO REDUCE THE RISK OF ELECTRICAL SHOCK, DO NOT REMOVE COVER. NO USER-SERVICEABLE PARTS INSIDE. REFER SERVICING TO QUALIFIED PERSONNEL. NOTICE All of us at Classé take extreme care to ensure that your purchase will remain a prized investment. We are proud to inform you that all Classé components have been of–cially approved for the European Community (CE) mark. This means that your Classé product was subjected to the most rigorous manufacturing and safety tests in the world. The CE mark certi–es that your purchase meets or exceeds all European Community requirements for unit-to-unit consistency and consumer safety. This equipment has been tested and found to comply with the limits for a Class B digital device, pursuant to Part 15 of the FCC Rules. These limits are designed to provide reasonable protection against harmful interference in a residential installation. This equipment generates, uses and can radiate radio frequency energy and, if not installed and used in accordance with the instructions, may cause harmful interference to radio communications. However, there is no guarantee that interference will not occur in a particular installation. If this equipment does cause interference to radio or television reception, which can be determined by turning the equipment on and off, the user is encouraged to try to correct the interference by one or more of the following measures: • • • • Reorient or relocate the receiving antenna; Increase the separation between the equipment and the receiver; Connect the equipment into an outlet on a circuit different from that to which the receiver is connected; Consult the dealer or an experienced radio/TV technician for help. CAUTION: Changes or modi–cations to this equipment not expressly approved by the manufacturer could void the user»s authority to operate the equipment. This product incorporates copyright protection technology that is protected by U.S. patents ad other intellectual property rights. Use of this copyright protection technology must be authorized by Macrovision, and is intended for home and other limited viewing uses otherwise authorized by Macrovision. Reverse engineering or disassembly is prohibited. The information contained in the manual is subject to change without notice. The most current version of this manual will be posted on our web site at http://www.classeaudio.com. Marking by the ≈CE∆ symbol (shown left) indicates compliance of this device with the EMC (Electromagnetic Compatibility) and LVD (Low Voltage Directive) standards of the European Community. Classé products are designed to comply with international directives on the Restriction of Hazardous Substances (RoHS) in electrical and electronic equipment and the disposal of Waste Electrical and Electronic Equipment (WEEE). The crossed wheelie bin symbol indicates compliance and that the products must be appropriately recycled or processed in accordance with these directives. Please record the serial number for your new Classé component here for future reference. Serial #: __________________ 2 1. Read these instructions. 2. Keep these instructions. 3. Heed all warnings. 4. Follow all instructions. 5. Do not use this apparatus near water. 6. Clean only with dry cloth. 7. Do not block any ventilation openings. Install in accordance with the manufacturer»s instructions. 8. Do not install near any heat sources such as radiators, heat registers, stoves, or other apparatus (including ampli–ers) that produce heat. 9. Do not defeat the safety purpose of the polarized or grounding-type plug. A polarized plug has two blades with one wider than the other. A grounding type plug has two blades and a third grounding prong. The wide blade or the third prong are provided for your safety. If the provided plug does not –t into your outlet, consult an electrician for replacement of the obsolete outlet. 10. Protect the power cord from being walked on or pinched particularly at plugs, convenience receptacles, andthe point where they exit from the apparatus. 11. Only use attachments/accessories speci–ed by the manufacturer. 12. ENGLISH Important Safety Instructions Use only with the cart, stand, tripod, bracket, or table speci–ed by the manufacturer, or sold with the apparatus. When a cart is used, use caution when moving the cart/apparatus combination to avoid injury from tip-over. 13. Unplug this apparatus during lightning storms or when unused for long periods of time. 14. Refer all servicing to quali–ed service personnel. Servicing is required when the apparatus has been damaged in any way, such as power-supply cord or plug is damaged, liquid has been spilled or objects have fallen into the apparatus, the apparatus has been exposed to rain or moisture, does not operate normally, or has been dropped. 15. Do not expose this apparatus to dripping or splashing and ensure that no objects –lled with liquids, such as vases, are placed on the apparatus. 16. To completely disconnect this apparatus from the AC Mains, disconnect the power supply cord plug from the AC receptacle. 17. The mains plug of the power supply cord shall remain readily operable. 18. Do not expose batteries to excessive heat such as sunshine, –re or the like. The lightning —ash with arrowhead symbol within an equilateral triangle is intended to alert the user to the presence of uninsulated ≈dangerous voltage∆ within the product»s enclosure that may be of suf–cient magnitude to constitute a risk of electric shock to persons. The exclamation point within an equilateral triangle is intended to alert the user to the presence of important operating and maintenance (servicing) instructions in the literature accompanying the product. WARNING : To reduce the risk of –re or electric shock, do not expose this apparatus to rain or moisture . . 3 ENGLISH Contents Welcome to the Classé family .......................................................................6 a word about installation ...................................................................... 6 Unpacking and Placement ............................................................................7 unpacking your player ........................................................................... 7 placement ............................................................................................... 7 ventilation .............................................................................................. 7 custom installations ............................................................................... 7 serial number ......................................................................................... 8 register your purchase! ......................................................................... 8 operating voltage .................................................................................. 8 warm up/break-in period ...................................................................... 9 please read this manual… ..................................................................... 9 Special Design Features...............................................................................10 flexible GUI ........................................................................................... 10 highly refined circuit design ............................................................... 10 extensive listening tests ....................................................................... 10 extraordinary longevity ....................................................................... 10 Front Panel...................................................................................................11 Rear Panel ....................................................................................................13 using the balanced outputs ................................................................ 13 using the single-ended(RCA) analog outputs .................................... 14 coaxial digital output .................................................................... 15 AES/EBU digital output ................................................................. 15 optical digital output .................................................................... 15 The Remote Control ....................................................................................18 Using the CDP-102 and CDP-202 ................................................................22 CD operational menu .......................................................................... 22 playlist ............................................................................................ 23 controls menu ................................................................................ 23 repeat mode .................................................................................. 23 shuffle ............................................................................................ 23 time display.................................................................................... 23 program ......................................................................................... 23 DVD operational menu ....................................................................... 24 the home screen ............................................................................ 24 controls .......................................................................................... 24 4 ENGLISH The Menu System ........................................................................................25 main menu system ............................................................................... 25 system setup .................................................................................. 25 teach IR .......................................................................................... 26 display setup .................................................................................. 26 triggers ........................................................................................... 26 remote Fkeys.................................................................................. 27 cautionary note on Fkey use......................................................... 27 status .............................................................................................. 28 version info .................................................................................... 28 sensors ............................................................................................ 28 display setup menu .............................................................................. 28 brightness ...................................................................................... 29 timeout .......................................................................................... 29 language ........................................................................................ 29 temporary display.......................................................................... 29 volume display ............................................................................... 30 System Setup................................................................................................31 the system setup menu system ........................................................... 31 audio setup .......................................................................................... 31 audio delay .................................................................................... 32 digital output ................................................................................ 32 volume setup ................................................................................. 32 distance .......................................................................................... 33 level trims....................................................................................... 33 video setup ........................................................................................... 33 video standard ............................................................................... 33 aspect ratio .................................................................................... 34 preference ............................................................................................ 34 audio format.................................................................................. 34 audio language ............................................................................. 35 subtitle language .......................................................................... 35 CD autoplay ................................................................................... 35 navigation ...................................................................................... 35 parental control ................................................................................... 35 Updating Your Unit .....................................................................................36 Troubleshooting ..........................................................................................37 Care & Maintenance....................................................................................38 Specifications – CDP-102 .............................................................................39 Technische Daten CDP-202..........................................................................39 Specifications – CDP-202 .............................................................................40 Dimensions...................................................................................................41 5 ENGLISH Welcome to the Classé family Congratulations on your purchase of a Classé product. It is the result of many years of continuous re–nement, and we are sure that you will enjoy it for many years to come. We value our relationship with our customers. Please allow us to stay in touch with you by returning your warranty card now, before you pack up the shipping carton of your new product and forget all about it. Doing so will enable us to let you know about any possible future upgrades or updates that might become available for your Classé component. Sending in your warranty card also registers your product with us so that warranty service can be obtained easily and quickly, even if you have mislaid your original sales slip. You will –nd the warranty registration card at the end of the separate warranty policy booklet, enclosed. Please, take a few minutes to fill out the warranty registration card, and drop it in the mail. a word about installation Every effort has been made to make this disc player simple and straightforward to install and use. Still, we have no way to evaluate other variables such as the size and shape of your room, its acoustics, and the associated equipment you have chosen to use with your player. All of these factors in—uence the ultimate performance of your system. For this reason, we strongly encourage you to have your system installed and calibrated by your dealer, whose experience, training, and specialized equipment can make a profound difference in the final performance of the system. 6 Unpacking and Placement ENGLISH unpacking your player Carefully unpack your disc player according to the supplied instructions, and remove all accessories from the carton. Important! Keep all packing materials for future transport of your Classé product. Shipping your new component in anything other than its purpose-designed packing material may result in damage that is not covered by the warranty. placement This disc player has been designed to operate optimally on any stable and level surface. Vibration damping in the feet and drive assemblies of the units provide a high level of isolation from external disturbances. As with any digital component, it is best to place the disc player somewhat apart from your most sensitive analog electronics, particularly turntables and preampli–ers. Generally, placing it on its own shelf should suf–ce. Note that adequate clearance for the AC cord and connecting cables must be left behind the disc player. We suggest leaving eight inches (20 cm) of free space behind the disc player to allow all cables suf–cient room to bend without crimping or undue strain. Classé recommends that the unit not be placed directly on the top surface of a power ampli–er (or any other heat source). ventilation Your Classé disc player generates a certain amount of heat in the course of normal operation. Be sure to allow three inches of clearance above it and three inches to each side to allow heat dissipation through air circulation. Avoid placement on soft surfaces that would restrict air—ow (such as plush carpeting). custom installations Drawings are included in this manual to facilitate special installations and custom cabinetry (see the section Dimensions). An optional, purpose-designed rack mount kit is available for this product. Contact your Classé dealer for more information. 7 ENGLISH serial number The serial number for your disc player is found on the rear of the unit. Please note and record this number on the page entitled Important Safety Instructions for your future reference. register your purchase! Having found the serial number, now would be a good time to register your purchase. Doing so will allow us to inform you of updates and other items of interest. To register your purchase, visit the Classé website (www.classeaudio.com) and follow the link marked WARRANTY REGISTRATION. Alternatively you can complete the enclosed Registration Card and post it to us. operating voltage This disc player is set at the factory (internally) for 100V, 120V, 230V, or 240V AC mains operation, as appropriate for the country in which it is to be sold. (230V only in European Union countries, in compliance with CE regulations.) The voltage setting may not be changed by the user. Make sure that the label on the rear panel of your disc player indicates the correct AC operating voltage for your location. Attempting to operate your disc player at an incorrect voltage may damage the unit. Warning: The voltage setting of your disc player may not be changed by the user. There are no user-serviceable parts within the unit. Please refer any problems to an authorized Classé service center. If the AC mains voltage indicated on your disc player is incorrect, please contact your local authorized Classé dealer or distributor. This disc player includes protection circuitry that prevents the player from operating at dangerously high or low voltages. • At startup: the AC mains voltage must be within a range of approximately -15% to +10% of its nominal value at startup, or the player will not turn on. For example, a 120V unit requires the AC mains to be between approximately 95V√135V in order to turn on. • Over-voltage during operation: if the AC mains voltage surges by roughly 10% or more during operation, the player will enter protection mode and shut down. The standby LED (Light-Emitting Diode) will —ash to indicate the protection mode has been engaged. An error message will be displayed on the LCD touchscreen. • Under-voltage during operation: if the AC mains voltage sags by 15% or more, the player will continue to play (since this does not present a particular danger to the player), but note that it may not be able to achieve its usual standard of performance under these compromised conditions. 8 The Standby LED will —ash to indicate the condition. ENGLISH warm up/break-in period Your new Classé disc player will deliver outstanding performance immediately. However, you should expect to hear it improve somewhat as it reaches its normal operating temperatures and its various components ≈break-in.∆ It has been our experience that the greatest changes occur within the –rst 300 hours, as the player reaches thermal equilibrium and the capacitors fully form. After this initial break-in period, the performance of your new product should remain quite consistent for years to come. The only exception to this rule is if the unit is placed in standby or unplugged for an extended period of time, allowing it to cool down. Depending on the degree of cooling involved, you should expect a brief warm-up period before the its sound quality is at its best. Unless your player was allowed to become quite chilled, subsequent thermal re-stabilization should not take long. Fortunately, you should never have to repeat the initial 300 hour break-in period. please read this manual… Please take a few minutes to review this manual, and to familiarize yourself with your new player. We understand that you are anxious to plug everything in and get started. However, reading this manual and following the advice it gives will ensure that you get all the bene–ts you deserve from having purchased such a –ne piece of equipment. 9 ENGLISH Special Design Features flexible GUI The LCD touchscreen on the front panel of your new component supports an extremely —exible and versatile graphical user interface (GUI) while maintaining a clean, uncluttered appearance. The touchscreen accesses a range of controls that might otherwise require dozens of buttons and knobs on the front panel. Despite this power and —exibility, it remains simple to operate in day-to-day use. highly refined Classé products are designed to deliver consistent, state-of-the-art performance circuit design over many years of use. With this in mind, our engineers have developed electronic circuitry that offers both exceptional performance and stability in equal measure. Starting with innovative circuit designs, we engineer them to optimum levels by applying meticulous attention to detail at all phases of the design and component selection process. By measuring, listening and viewing in an interactive manner we conclude whether our design goals have been met. Finally, our designs are subjected to extensive testing to ensure longevity, reliability, and stability. extensive listening tests Throughout the development phase, perhaps the most important testing of all is listening and viewing our work. Subjective listening is highly valued at Classé, as striking a balance between products that both measure exceptionally and sound fabulous is our aim. We take the same approach with video, wherein sophisticated video measuring equipment is used in conjunction with subjective viewing. extraordinary longevity Another bene–t of having worked with highly re–ned circuit designs so extensively over many years is that we have vast experience in what works well over the long term. By using only the highest quality parts to begin with, and then using them in an informed way as a result of both accelerated aging experiments and actual longterm experience, we are able to design and manufacture products which we are con–dent will stand the test of time. We are con–dent that your new Classé disc player will give you many years of trouble-free reliability and musical enjoyment, just as previous Classé products have given their owners. 10 ENGLISH LOAD MENU � CDP-202 Front Panel 1 Standby button & LED indicator The front panel Standby button will toggle the player between its fully operational status and a standby mode that leaves the player off, yet ready to respond to system commands via any of the supported control options (e.g. IR input, DC trigger, CAN Bus, or RS-232). The current state of the player is indicated by the LED on the Standby button on the front panel. When the unit is powered and switched on, this LED indicates the following: • • • • On Flashing (on power-up) Off Flashing (after power-up) = = = = standby initialization operate AC mains voltage out of range If you are not going to use the player for an extended period of time, e.g. vacation or other travel, we suggest you disconnect it from the AC mains. Please be certain that the player is in standby prior to disconnecting it from the AC mains. Also, it is a good practice to physically disconnect any and all valuable electronics from the AC mains during electrical storms, as a lightning strike anywhere near your home can put a tremendous surge on the AC mains that will easily jump across a simple power switch. The resulting surge (which may be many thousands of volts) can damage any piece of electronics, no matter how well designed and protected. The best protection in the case of severe electrical storms is simply to remove the electronics from any connection to the power grid. 11 ENGLISH 2 Menu button Pressing the front panel Menu button will call up the menu system, replacing the normal status display in the LCD touchscreen. 3 LCD touchscreen You may control the player by using the front panel LCD touchscreen. It will usually display the information you are accustomed to seeing on the front of most CD and disc players (track number, time, etc.), as well as the basic transport controls. In addition, the touchscreen can be used to preview videos you may be ≈cueing up∆ for friends or family, and to navigate DVD-Audio discs» menu systems without the distraction of having to turn on your main video display. By pressing the Menu button, you can also call up the menu system, which gives you control over many of the operational details of the disc player, including system setup options, various display options (including the language in which the menu system itself displays), and several custominstallation capabilities that allow superior integration into complex systems. For more information, see the section The Menu System later in this manual. 4 Eject button The front panel Eject button operates the slot-loading mechanism of the disc player. It will eject a loaded disc. There may be a short delay prior to ejection whilst a disc is playing, in order to give the disc time to come to a stop. A blue light illuminates the slot when there is no disc loaded. 5 IR window The infrared (IR) receiver and transmitter are located behind this window. Ordinarily, the disc player must be able to ≈see∆ the remote control from this window in order to respond to remote control commands. If your CD player will be located behind closed doors, or for any other reason will not be able to ≈see∆ the remote control during normal operation, you may use the rear panel IR input and output mini-jacks and an IR repeater system to solve the problem. For more information about using an infrared repeater system to route signals to and from the disc player, refer to the section Rear Panel later in this manual, or contact your local Classé dealer. 12 � � ENGLISH � �� � � � � Rear Panel 1 using the balanced outputs Analog Outputs The front left and right channels are supported with both balanced analog outputs on XLR connectors and single-ended analog outputs on RCA connectors. If your preampli–er/processor has balanced inputs for the front left and right channels, connect these XLR outputs to them using high quality balanced interconnects. Your Classé dealer can provide assistance in selecting appropriate balanced cables for your system. Balanced audio interconnections were originally developed in the professional audio world, for preserving the delicate nuances of extremely small microphone-level signals. For many years now, they have also been used by performance-oriented consumer companies like Classé to preserve every nuance of the –nest audio performances in your collection. Technically, balanced audio interconnections provide two distinct bene–ts: they double the signal»s strength as it travels from one component to the next, increasing the potential signal to noise ratio by 6 dB; they also do an excellent job of rejecting noise and interference that might otherwise be picked up between the components, due to either EMI (electromagnetic interference) or RFI (radio frequency interference). In our modern world of wireless telecommunications, there is more potential interference —oating around us than ever beforeƒit makes sense to keep it all out of our music and movie soundtracks. For this reason, we strongly recommend using the balanced analog interconnections between your Classé components wherever possible. 13 ENGLISH The pin assignments of these XLR-type female output connectors are: Pin 1: Signal ground Pin 2: Signal + (non-inverting) Pin 3: Signal √ (inverting) Connector ground lug: chassis ground These pin assignments are consistent with the standards adopted by the Audio Engineering Society. using the single-ended (RCA) analog outputs Outputs are also provided in a high quality single-ended form on RCA plugs. Single-ended cables using RCA connectors are the most common form of analog connection used in consumer electronics. When implemented carefully and used with high quality interconnect cables, this standard can provide excellent performance. Classé has gone to extraordinary effort to ensure that the single-ended (RCA) outputs of your disc player are as good as possible. However, this connection standard cannot offer the immunity from interference that balanced interconnection doesƒhence our recommendation to use the balanced outputs when possible. If you are not using balanced analog interconnection, then connect these single-ended outputs to your preampli–er/processor using high quality RCA-terminated cables. Your Classé dealer can advise you on the selection of cables suitable for your system. 2 Test/Monitor Video Outputs The disc player is equipped with both S-Video and Composite video outputs that can be used to display the information on the LCD touchscreen on a video monitor. This capability allows you to operate the disc player from a distance. The S-Video output employs the standard S-Video (mini-DIN) connector, while the Composite output employs a high quality RCA connector. Both analog video outputs are active simultaneously. Connect the appropriate video output(s) to the corresponding inputs on your A/V preampli–er/processor using high quality video cables. Your Classé dealer can assist you in making an appropriate cable selection. 3 14 Digital Outputs This disc player has three digital outputs, all of which carry the same information. You may use whichever connection you prefer, consistent with the available connections on your A/V preampli–er/processor. Only one of the three connections is needed. The coaxial digital output provides a digital audio signal via a 75Ω coaxial cable equipped with RCA-type connectors. Connect this output to a corresponding coaxial digital input on your preampli–er/processor. AES/EBU digital output The AES/EBU output provides a digital audio signal via a 110Ω balanced cable equipped with XLR-type connectors. Connect this output to a corresponding AES/EBU digital input on your preampli–er/processor. optical digital output The optical digital output provides a digital audio signal via a standard EIAJ (≈Toslink™∆) Toslink™∆) optical cable. Connect this output to a corresponding Toslink optical digital input on your preampli–er/processor. ENGLISH coaxial digital output Making any one of these connections allows you to feed the signal in its digital form directly to your A/V preampli–er for further digital processing. 4 IR Input and Output Your Classé player includes two 1/8th-inch mono mini-jacks in order to support the infrared (IR) remote controls that are ubiquitous today. Infrared commands exist (for example) for toggling the player between operate and standby standby, in addition to discrete command codes for either operate or standby. These codes may be used in ≈macros∆ for sophisticated remote control systems, facilitating the control of the player in the larger context of a complete system. The list of commands available is quite extensive, enabling even complex macros (chains of commands strung together) to operate —awlessly. If this capability is of interest to you, we strongly recommend discussing it with your authorized Classé dealer. Note that IR Input and Output is a bit of a misnomer: the input and output of these plugs is electrical in nature, not infrared. They are used with standard IR receivers, distribution ampli–ers, and emitters (available from your dealer) to translate the remote»s IR signal to an electrical signal and vice versa. The big advantages here include being able to easily route the signals anywhere they might need to go and the reliability of a solid electrical connection. Since an IR distribution system such as your dealer may design for you usually must control many products, your player includes both an IR input (for the control of this product) and an IR output (so as to pass along the same signal to the next product). This allows you to ≈daisy chain∆ your control wires from one product to the next. 15 ENGLISH Note: Many IR repeater systems do not yet support the strippedcarrier signal format required by your disc player. If yours does not, a Delta IR Interface may be required to ensure compatibility between your IR repeater system and your Delta-series Classé equipment. Your dealer can assist you in designing an effective IR repeater system. The player is designed to respond to IR commands of 5VDC, with the tip of the mono mini-jacks de–ned to be ≈positive∆ relative to the shank of the plug. 5 DC Trigger Input and Output Many audio/video components can supply a DC control voltage to associated equipment in order to induce desired behavior. Your Classé player can take advantage of these capabilities in order to be switched between operate and standby automatically, usually in concert with the A/V preamp itself. The 1/8th-inch mono mini-jack Trigger In provides for remote-controlled turn-on (that is, toggling between operate and standby standby) of the player. Two 1/8th-inch mono mini-jacks provide individually controllable DC trigger outputs which can be used for any of a number of purposes, as described in The Menu System. For example, your dealer can program Trigger Out to toggle your Classé power ampli–er between operate and standby with your disc player. The remote Trigger In will respond to the presence of 5√12VDC, with tip polarity as shown below: Similarly, the Trigger Outs will create a 12VDC signal that can support up to 100mA of current. 6 16 Classé CAN Bus Control Ports These RJ-45 connectors are reserved for future control and communication applications using Classé Audio»s implementation of the Controller Area Network (CAN) Bus speci–cation. 7 ENGLISH RS-232 Control Port This port has two purposes: • downloading new operating software into your player (should new features ever be added, for example) • external control of your preampli–er by systems such as i-Command™, AMX® and Crestron™ For more information, please contact your dealer and ask about home automation systems. 8 Danger! AC Mains Power Switch The main power switch is located at the right side of the rear panel. The player should be in standby mode before being switched off. Switching the unit on puts it in standby mode. Potentially dangerous voltages and current capabilities exist within your disc player, even when disconnected from AC mains. Do not attempt to open any portion of the player’s cabinet. There are no user-serviceable parts inside your disc player. All service of this product must be referred to a qualified authorized Classé dealer or distributor. 9 AC Mains Input An IEC standard power cord (supplied) is used with the disc player. Plug the cord into the IEC outlet provided, and the other end into a suitable wall outlet. The AC inlet assembly includes a built-in fuse for the protection of the unit in case of major AC mains problems and/or component failure. If your disc player ever behaves as though it were not connected to the AC mains (meaning, it seems completely ≈dead∆), remove the AC cord from the unit, and open the fuse holder immediately above the AC cord inlet. If the fuse is blown, replace it with the spare fuse contained in the fuse holder. If the spare fuse blows, take the unit to your quali–ed Classé dealer immediately. Caution: There are no user-serviceable parts inside the disc player. Do not attempt to diagnose the problem yourself. 17 ENGLISH The Remote Control ������� ���� ������� ���� ����� ����� � � � � � � �������� Your new disc player comes with a versatile remote control which can control both the disc player and several aspects of the rest of a Classé-based system. The keys are arranged in logical groups according to their functions. 1 ��� ���� � � � ���� � ���� Basic Functions This section along the top of the remote control includes two groups of four functions that control your basic interactions with the disc player. The general group is located in the topmost row, and includes: ��� ����� • Light switches the backlighting of the remote control on, for better visibility under low-light conditions. After a few moments of inactivity, the backlight switches off automatically. • Info takes you directly to the status screen in the LCD menu system, displaying several items of information about the disc player and its current operational status. • Disp (for Display Display) cycles through the three brightness settings of the screen display. • Standby toggles the disc player between standby and operate. operate ���� ����� ���� ���� ����� ������ ���� �� �� �� The DVD-speci–c group addresses secondary features of the DVD standard which you may have seen on other disc players, namely: �� • Zoom cycles through the available ≈zoomed in∆ or magni–ed views of the DVD. • Angle cycles through the available camera angles of the DVD being watched. (Relatively few discs take advantage of this optional feature of the DVD standard.) • Audio cycles through the various available soundtracks on the disc being played. (You can set your preference in the menu system, and it will become the default; this button cycles you through the other options, should you want to explore them.) • Subtitle cycles through the available subtitles in various languages. 2 Numeric Keypad, Programming & Volume The next section down on the remote control provides the numeric keypad for use in directly accessing particular tracks on the CD/DVD you are playing, as well as two keys that are frequently used in conjunction with the numeric keys. The Volume and Mute controls are also in this section. • The Numeric Keypad can be used to access speci–c tracks/ chapters directly from your remote control. Simply press the appropriate number key (or keys) followed by the Play key. The disc player will go directly to your selection and begin to play. For example, to play track 12, press the 1, 2, and Play keys in sequence. 18 3 ENGLISH • Time cycles through the four time display modes: time elapsed on track time elapsed on disc time remaining on track time remaining on disc • Prog (for Program) allows you to quickly and easily create a programmed sequence of tracks (or chapters) to be played on the current disc. Pressing Prog will take you directly to the program page of the menu system, regardless of where you might be. Once on the program page, you can change the highlighted track using the Up and Down buttons, and can use the Enter button to toggle whether it is included in the current program. Pressing Prog a second time returns you to wherever you had been. (Note that the program function is not available during play or pause, only when the disc player is in stop.) • Vol (for Volume) buttons raise and lower the output level, assuming you are using the analog outputs in their variable output mode. If you set the analog outputs to their –xed, line-level setting, or if you are using the digital output to your preampli–er/processor, these buttons will have no effect. • Mute will engage the mute function as you have de–ned it (either Classic, Speci–c, or Dampening; see The Menu System for more details). Navigation Keys The central section of the remote control contains the navigation keys. This array of keys is similar to what you may have seen on remote controls for disc players, and is used for navigation of the menu system. • Setup serves two functions: it calls up the menu system when you need it in order to adjust something to your preference; once within the menu system, pressing Setup returns you to the previous level of the menu system. If you press Setup when at the top level of the menu system, it will take you back out of the menu system to the normal display. • Home restores the normal display of chapter/track, time, and transport controls to the LCD touchscreen. This provides a quick way to get back to normal operation, regardless of how deep you might be in the menu system. a note about DVD menus: The DVD standard supports two levels of menus: 1) a menu of available “titles” on the disc (e.g., the main movie, plus extra “bonus” materials like documentaries, etc.); 2) each “title” then has a subordinate menu of chapters within the title. 19 ENGLISH • Disc Menu presents the menu of available chapters, within whatever title you are watching at the moment. (See explanation of DVD menus in this section.) • Title gives you a list of available ≈titles∆ on the disc you are watching. (See explanation of DVD menus in this section.) • Up/Down/Left/Right keys allow you to move within a particular menu screen, changing the highlighted item up/down/ left/right as you like, from the comfort of your chair. • The Enter key allows you to select the highlighted item, having the same effect as if you had pressed the button on the LCD touchscreen. 4 Transport Controls You will –nd the transport controls used to control the day-to-day playback of discs just below the navigation keys. • • • • • • • • • 20 (previous) will move backward through the chapters or tracks (or the playlist, if you have created one), one step at a time. As with most players, the single exception to this is the –rst time you press the key, which will take you to the beginning of the track currently playing. Pressing the key again within approximately one second will then take you to the previous track. / (play) will start the disc spinning (if necessary) and start playing the music, as expected. (next) will move forward through the tracks (or the playlist, if you have created one), one track at a time. , (pause) will stop the music but allow the disc to continue spinning; when you press Play, the music will start almost immediately, and it will pick up from where you left off. . (stop) applies to both the music and the spinning of the disc. When you press Play, the disc will need to take a few moments to get up to speed prior to playing, and it will play from the beginning of the disc or the playlist (if one has been created for the disc). Repeat will cycle the disc player through its repeat modes. [ (scan reverse) provides a ≈rewind∆ function, the nature of which is dictated by your navigation preference selection in the menu system. (See The Menu System for more information.) ] (scan forward) provides a ≈fast forward∆ function, the nature of which is dictated by your navigation preference selection in the menu system. (See The Menu System for more information.) ^ (eject) will cause the inserted disc to spin down and then eject. 5 ENGLISH System Controls The remote control can also be programmed to perform user de–ned functions through the Fkeys. • F1/F2/F3/F4 keys are available for controlling features not covered by the other buttons on the remote control. You are able to choose what the disc player does when it receives the infrared signal from a particular Fkey. The list of possible functions is quite extensive, and is found in the menu system (see The Menu System section, of this manual). For example, if you are using one of the DC triggers, you can toggle its state manually using one of the Fkeys. Note: The Fkeys on all Classé remote controls issue the same infrared commands. This saves you from having to be sure you have grabbed the proper remote, since all your Classé remotes will perform the same function for each Fkey. 21 ENGLISH Using the CDP-102 and CDP-202 Your disc player includes a versatile touchscreen LCD display which supports both an attractive information display and a —exible menu system. Because of this —exibility, the disc player can present different controls and capabilities when playing a CD, and when playing a DVD. We will present these separately. CD operational menu The operational menu consists of several screens that can be accessed directly from the normal display one sees when playing a CD. They are as follows: 22 ENGLISH playlist Pressing the playlist button on the display brings up the playlist for the current disc. If you have not created a custom program for the disc, the playlist will simply be a list of all the available tracks on the CD, in order. If you have created a custom program (see below), it will be presented to you here. Note that this display is mainly informational; you cannot edit the playlist from this screen. You may, however, jump to any track by touching it on the screen. controls menu The controls button on the operational display brings up a menu of controls, including repeat mode, shuf—e, time display, and program. repeat mode Pressing the repeat mode button on the controls menu displays a screen on which you may select any of the three repeat modes available: no repeat, repeat track, and repeat disc disc. (If you have created a program, repeat disc will repeat the program.) shuffle Pressing shuf—e on the controls menu will engage the shuf—e mode mode, which shuf—es the playback order of the tracks on the current CD. time display Pressing the time display button on the controls menu presents a screen with four possible selections for how the current time of the disc playing is displayed: elapsed on track, elapsed on disc, remaining on track, remaining on disc. program Pressing the program button on the controls menu takes you to the programming screen. When you –rst load a CD, the default program for the disc is to play all the tracks in their normal order (as you might expect). This is shown on the programming screen as a list consisting of track 1 followed by track 2, track 3, and so on. A sequence number appears to the left of each track, indicating its place in the playlist. You can store thousands of playlists. If there is a song on the disc that you prefer to skip over, simply scroll to the track in question by pressing the up or down arrows along the right side, and then press the large button with the track number you do not want to hear. It will no longer be highlighted, indicating that it has been removed from the playlist for that CD. You can repeat this process for as many tracks as you would like to delete. If you want to create a completely different order in which the songs are played, turn off the highlighting for all the tracks by touching each of their buttons in turn. Then highlight the tracks one at a time, in your desired order. A new playlist will be built based on your preferred sequence. To remove a playlist, simply deselect all tracks and press the save button. 23 ENGLISH DVD operational menu When a DVD is inserted, a different set of controls is displayed. the home screen The home screen for DVDs is presented at left in the graphic above, and contains basic information about where you are within the disc, as well as basic navigation buttons similar to those on your remote control. controls Pressing the controls button in the top right corner of the home screen takes you to the controls screen. It contains four buttons: • back will return you to the home screen • repeat mode takes you to another screen in which you can select any of the available repeat modes (no repeat, repeat chapter, repeat disc, and repeat title). • random will play chapters within the current title in random order. This can be used to good advantage when watching a concert DVD, or when listening to a DVD-Audio disc, in order to shuf—e the order in which songs are played. • time display changes the way in which time information for the disc is displayed. Your choices are: elapsed in chapter, remaining in chapter, elapsed in title, remaining in title. 24 The Menu System ENGLISH The disc player uses its versatile touchscreen display to make a wide variety of setup choices and system defaults readily available. Using these menus, you can easily customize the behavior of your disc player to suit your particular system»s con–guration, as well as your personal preferences. main menu system Pressing the Menu button to the left of the LCD touchscreen brings up a comprehensive menu system, the top two levels of which are shown below. This menu system provides access to many installation-speci–c features that let you customize how the disc player works within the context of your particular system. system setup The most extensive part of the menu system is under the system setup button. This section is both comprehensive and essential to taking full advantage of the remarkable capabilities of the disc player. As such, it is described more fully in its own, dedicated section of this manual. See System Setup for all the details. 25 ENGLISH teach IR The disc player has discrete infrared (IR) command codes for all its functions, a list that extends far beyond what is required by normal remote controls. However, many of these functions are critical if you plan to create a customized remote control with macros that take command of your entire system. Without these discrete codes, many of the macros you might want to create will simply not work reliably. The teach IR screen provides a scrolling list of all the available IR codes. By scrolling to the command your macro-capable remote needs to learn, and then pressing the send IR code button, the disc player will transmit the appropriate command code out its front panelƒwhere it can be learned by your third-party remote control. For more information on such control systems, we recommend you speak with your authorized Classé dealer. display setup This button brings up the display setup menu, which itself has subordinate menus. This menu system is detailed below, immediately after the corresponding menu illustration. (It allows you to con–gure the LCD touchscreen brightness, the display timeout, the language used in the touchscreen and menu system, the temporary display, and how volume settings are displayed if you use the variable volume capability of the disc player.) triggers Each of the DC Triggers may be programmed as to its ≈logic level,∆ which is to say, whether its voltage is low (essentially 0V), or high (approximately 12VDC) when the trigger is activated. The ability to change the level of a trigger»s on state can solve installation-speci–c problems that otherwise require external devices that add to both the cost and complexity of your system. If this seems an obscure point, that»s okay. It is a feature designed to solve problems you may not even have, but your installation professional appreciates being able to solve such problems when they occur. 26 remote Fkeys This button brings up the remote Fkeys menu. ENGLISH The remote control supplied with your Classé product includes four userprogrammable function keys, or ≈Fkeys.∆ They are labeled F1, F2, F3, and F4, and are located near the bottom of the remote control. The ≈remote Fkeys∆ menu allows you to de–ne how the disc player responds to these Fkey signals. You can use the Fkeys to give you instant access to speci–c system functions that might otherwise be buried in a menu somewhere. For example, if you use the shuf—e mode frequently, you may want to consider programming one of the Fkeys to toggle that function on and off. Doing so will save you having to access the control menu, followed by pressing the shuf—e button (which might be hard to see from across the room, even though you could do so from the remote control with an Fkey assignment). The remote Fkey menu has four buttons, one each for the four Fkeys on your remote control. Pressing any of these buttons on the LCD touchscreen takes you to a subordinate, scrolling list of possible functions for that particular Fkey. Selecting the one you want is as simple as scrolling through the list (by touching either the up or down arrows on the right), and then touching the speci–c function in the list that you want that Fkey to perform. cautionary note on Fkey use Note that all Classé remote controls provide these same four Fkeys, so that you need not worry about which remote you happen to pick up. Thus F1 on the preampli–er»s remote control sends the same infrared signal as F1 on the CD player»s remote control. While this is intended to minimize confusion amongst different remotes (since this aspect of them will all perform identically), you should take care when assigning different functions on different components to the same Fkey. Doing so would result in two components doing two different things at once, in response to a single press of a button on the remote control. This can sometimes be useful. As an example, F1 could set the preampli–er to the CD input, and also set the disc player to Play, both from the press of a single Fkey. 27 ENGLISH status The status screen provides several items of information on the currently playing disc, as well as access to information on the software and internal sensors of the disc player. version info The version info button on the status screen takes you to the version information screen. From time to time Classé develops new software that adds features or enhances the operation of the disc player. Each new software version has its own Version Number. The Version Info Screen displays the Version Number of the software that your unit is running. The latest software is always posted on the Classé website (www.classeaudio.com). If the version number displayed on the Version Info Screen is lower than the version posted on the Classé website, you may want to update your unit. Simple and detailed updating instructions are also provided on the website. If you ever have occasion to call our technical support people to ask a question not covered in this manual, they may want to know precisely what software version software your unit is running. Having this information available will help them to give you the best possible service. sensors The sensors button on the status screen takes you to the sensors screen, which displays information about several internal sensors within the disc player. It is unlikely you might ever need the sensor information, unless directed to do so by a customer service representative at Classé in order to help troubleshoot some unexpected problem. display setup menu 28 The display setup menu allows you to de–ne your preferences for three aspects of the Touchscreen: the brightness of the backlighting, the timeout of the backlighting, and the language used. ENGLISH brightness The brightness setting has three possible values: low, medium, and high. Select the appropriate setting based on the level of ambient light typically found in your listening room while using the system. A high brightness setting usually works best in brightly-lit rooms; you may –nd that a lower setting is less visually intrusive under more subdued lighting conditions. timeout If you prefer listening to music in a dimly-lit or darkened room, you may –nd even the low brightness setting of the display somewhat distracting. If so, you can vary the timeout of the backlighting so as to turn it off entirely after a period of inactivity you select. In this context, activity refers to any use of the user interface. This includes hard buttons, the LCD touchscreen, and the remote control. For example, if you reduce the timeout to its minimum setting, the backlighting will illuminate the display as soon as you interact with any of the disc player controls, and stay on for only three secondsƒjust long enough for you to check on something. If you continue to use any of the controls (at least once every three seconds), the display will remain lit. It will then extinguish itself after three seconds of inactivity on your part. If you prefer the display to remain on whenever not in standby standby, choose the never timeout setting. The lamp in the LCD display was designed for harsh automotive environments and will give you many years of reliable operation. If you plan to leave the unit on continuously, however, we recommend that you keep the timeout delay set to less than one minute. (Note that setting the brightness to a lower setting does not increase the life of the lamp.) language The language menu allows you to chose one of –ve languages for the touchscreen menu. Classé have provided our international distributors with a software tool that makes it possible for them to customize the translations to suit their local customs and terminology, in an effort to ensure that the operation of the disc player is as intuitive to use in every country as it is in our home country of Canada. temporary display When playing a DVD, the touchscreen displays the picture information in a ≈preview∆ mode. This can be helpful in cueing up material before sending the picture to the main display (saving your guests from the otherwise inevitable FBI warnings). It is also a wonderful way of navigating through DVD-Audio disc menu systems without having to turn on your main video display simply to enjoy some music. When you use any of the control functions of the disc player, the display will change from its normal preview mode to display the user interface screens. The temporary display setting determines how long this user interface remains displayed before the touchscreen reverts to its usual preview mode. 29 ENGLISH volume display If you elect to use the variable volume capability, you have two choices as to how the volume setting is displayed. • Absolute is how most volume controls work, namely that a setting of ≈0∆ indicates no sound, while larger numbers represent higher volumes. • Relative (THX) is the system preferred by the folks who bring you the Home standards, wherein ≈0∆ represents a calibrated reference volume, and deviations from that reference level are indicated as either positive or negative numbers (louder and quieter, respectively). 30 System Setup ENGLISH Pressing the menu button to the left of the LCD touchscreen, followed by pressing the on screen system setup button, will bring you to a menu system that gives you a wide range of control over how the disc player works both on its own and as a part of your overall system. the system setup menu system There are four submenus that can be accessed from the system setup menu. Each will be covered in turn. audio setup The audio setup button gives you access to six controls pertaining to how your disc player handles various audio details. 31 ENGLISH audio delay When a disc has been incorrectly authored, the audio can be out of sync from the video. Audio Delay allows you to compensate for this by inserting a delay that repositions the audio in relation to the video and brings them into sync. The delay is adjustable in 10ms steps and operates within a range of +/- 200 ms digital output The digital outputs can be con–gured in any of three ways, based on how you plan to use the player: • off ƒ for example, if you plan to use only the stereo analog outputs, and not send a digital signal along to a separate processor. • raw ƒ which passes along the native signal of whatever disc is playing, whether that is PCM, Dolby Digital, DTS, or anything else. This setting assumes that your external processor can handle anything you might send its way. • PCM stereo ƒ if the soundtrack you are playing contains multichannel information, it will be ≈downmixed∆ to a two-channel PCM signal that would be compatible with stereo playback, or further processing with Dolby Pro Logic II or DTS Neo:6 (as examples). volume setup The volume setup menu allows you to set up several volume-related parameters to suit your needs. If you elect not to use the variable volume capability, these settings will not be available. • max volume ƒ The maximum volume screen allows you to establish a maximum volume setting for your system. This scale runs from 0 to 100, with 100 indicating that you do not want any arti–cial limit placed on the maximum gain your surround processor can provide. This setting is interactive. You can set the value to something less than 100, and then adjust the volume to see whether it is appropriate. • startup volume ƒ Here you may select the level you prefer after the units wakes out of standby. This can be con–gured two different ways: last volume is the last level selected before the unit was powered down. Furthermore, the status of the mute will be remembered. The speci–c setting allows you to select a favorite level with the mute on or off. • mute setup ƒ Gives you three different types of muting function. • Classic muting literally mutes the output when you engage the mute button; no sound will be heard. • Speci–c muting allows you to select a speci–c volume setting that you want used when you engage mute, regardless of what setting you might have been using the moment before. • Dampening works as most mute buttons work, attenuating the current volume by the amount you specify. 32 distance The distance setting adjusts the speaker distance settings manually. ENGLISH Simply measure the distance with a tape measure or equivalent, and enter the distance into the menu. The disc player will automatically convert this distance to the appropriate delay, to ensure that you hear the sound from each speaker when you are supposed to hear it, despite the varying distances usually involved. level trims The level trims adjustments adjust the speakers» levels manually. A noise sequencer is available to provide a reference signal for adjustment purposes. Holding a dB SPL meter at the listening position, at arm»s length, and pointing straight up at the ceiling, adjust the level of each speaker in turn until it reads 75 dB SPL when the meter is set to ≈C∆ weighting and Slow response. Note that the level trims are applicable only to the analog outputs. As with your other source components, the digital outputs of the disc player are forwarded to the associated preampli–er/processor unchanged. This allows your preampli–er/ processor to be accurately calibrated once for all incoming source signals. The Dolby Late Night button engages and disengages the Late Night mode for Dolby Digital soundtracks, allowing you to enjoy movies with less chance of disturbing others. video setup Taking full advantage of the extensive video capabilities of the disc player is simple. Three menus will take care of everything. video standard These settings are usually preset for the geographic market in which you purchase the disc player. However, should you need to change the output to conform with a different standard, your choices are: • NTSC/PAL/native ƒ either choose the broadcast standard for your area, or set the unit to play the disc in its native format. This last option requires that you have a suitable multistandard display that can handle both NTSC and PAL. • IRE 7.5 or 0 ƒ the ≈video setup∆ in North America assumes that black is reproduced at a video level of 7.5 IRE units, while most of the rest of the world assumes that video black is represented by a video level of 0 IRE units. The disc player can operate either way; you should pick the standard common to your area for compatibility with the rest of your video sources. 33 ENGLISH aspect ratio You have three choices for the way widescreen movies will be displayed on your television. The choice should be determined by the capabilities of your television as well as your personal preference. • 4:3 ƒ If you have a 4:3 display and prefer to have it –lled at all times, the disc player will look for an available 4:3 version of the movie on any disc you insert, and play that version. • 16:9 ƒ If you have a modern, widescreen display that supports different aspect ratios (including an anamorphic mode), select the 16:9 option. Doing so passes the contents of the disc to your television without addressing the aspect ratio. In effect, you are telling the disc player that the television will be responsible for handling the aspect ratio duties. • letterbox ƒ If you have a 4:3 display, but prefer to see widescreen movies in their original form, the disc player can create a ≈letterbox∆ version of the movie for you within the 4:3 frame of your television. This will result in black bars above and below the picture, but will show you all of the picture as the director and cinematographer originally framed it. preference The DVD standard supports multiple soundtracks and languages, all on the same disc. This versatility can make playing a DVD more complicated than you might like. By establishing your preferences, the disc player will be able to select the right soundtrack and language without you having to search through menus. audio format Many DVDs have multiple soundtracks, in different formats. You can state your preference (assuming it is available) by pressing the audio format button. • automatic ƒ selects the ≈best∆ available soundtrack automatically. Preference is given to soundtracks with a greater number of discrete channels (e.g., 5.1 rather than 2.0). • PCM ƒ if you prefer uncompressed digital audio, even if it means fewer channels, select the PCM option. • Dolby 5.1 ƒ states a preference for 5.1 channel Dolby Digital soundtracks if they are available. • Dolby stereo ƒ indicates a preference for soundtracks intended to be reproduced via Dolby Pro Logic or Dolby Pro Logic II decoding matrix. • DTS ƒ when selected, the DTS (Digital Theater Systems) soundtrack is played automatically, provided one is available. 34 ENGLISH audio language You can also set a preference for the spoken language used in the soundtrack being played. Automatic defers to the default soundtrack on the disc itself. If you prefer, you can insist that the unit play an English, French, German, Spanish, or Italian soundtrack (assuming one is available). subtitle language Similarly, you can establish a preference for the language used in the subtitles. Your choices are English, French, German, Spanish, or Italian. CD autoplay When this button is highlighted, the player will automatically start playback when a CD is inserted. navigation Historically, navigating within a CD and a DVD has worked differently. Speci–cally, the ≈fast forward∆ and ≈rewind∆ functions on a CD required you to press and hold the button during the scanning process. By contrast, the same action on a DVD required only a button click ƒ in fact, additional button clicks would accelerate the rate at which the scanning would occur. If you want to have all discs operate as per the DVD way of doing things, select latching as your navigation preference. If you prefer the CD way of doing things, choose non-latching instead. If you want the disc player to behave like a CD player when playing a CD, and like a disc player when playing a DVD, choose adaptive. parental control The disc player is equipped with a set of parental controls, similar to those available on some cable or satellite TV services. • The set password button allows you to set a four-digit numeric password, which will be required to play any disc that exceeds the rating you select. • The set rating button gives you a list of eight ratings, with the corresponding movie ratings listed (e.g., level 6 is the same as an R-rated movie). The level you select here determines the maximum rating that can be played without the password being entered. (Note that this button is only enabled after you have set a password.) • The block unrated button prevents unrated movies from playing without the password. • The enable control button enables the parental control feature. 35 ENGLISH Updating Your Unit From time to time Classé designs new software that will enhance the performance of your component. Updating your unit with the latest software is a matter of downloading a –le from the Classé website (www.classeaudio.com) so it is worth ensuring that your component is fully updated. Details of the software your player is running can be found on the Version Information Screen. This screen is accessed by pressing the INFO button on the remote control, followed by VERSION INFO on the LCD touchscreen, or by pressing the MENU button beside the LCD touchscreen, then selecting STATUS from the touchscreen menu, followed by VERSION INFO. The Version Info Screen displays the Version Number of the software your unit is running. The latest software is always on the Classé website, so if the Software Version Number on your Version Info screen is lower than the Software Version Number posted on the Classé website, then you should consider updating your unit. Simple update instructions are posted on the Classé website, together with release notes and the software itself, so it is very easy to update your component and make it perform to its maximum potential. 36 Troubleshooting ENGLISH In general, refer any service problems to your Classé dealer. Before contacting your dealer, however, check to see if the problem is listed here. If it is, try the suggested solutions. If none of these solves the problem, contact your Classé dealer. 1 My disc is skipping. ✓ Gently clean the disc itself using a damp, soft cloth, wiping along the radius of the disc rather than around the circumference. (Cleaning discs in the manner minimizes the chance of damaging the disc.) ✓ The disc itself may already be damaged. Try several other discs, to see whether the problem is widespread or limited to a particular disc. 2 There is no sound and the Standby LED is not lit. ✓ Ensure the player is plugged into the AC mains, and that the AC mains are operating normally. ✓ Check that the main power switch on the rear of the unit is on. ✓ Your display may be set to timeout, and the disc player may simply be in Pause or Stop. Touch the screen to reactivate it so you can see the state of the unit, or simply press the Play key on the remote control. ✓ Unplug the unit for at least thirty seconds and then plug it in again; try powering it up. (Sometimes a brownout or short-term loss of power might require a restart.) ✓ Verify that the AC mains is not out of range. The unit will automatically attempt to protect itself from improper AC mains voltages by not powering up. ✓ Check the fuse by removing the AC cord from the back of the unit and detaching the fuse holder directly above the AC inlet. In the event that the fuse is blown, the fuse holder also contains a spare ✓ If none of these solutions work, please consult your Classé dealer for assistance. The are no user-serviceable parts inside your unit. 3. A disc was inserted, but the machine rejected it and asked for another disc to be inserted. ✓ Check that the disc is compatible with your disc player. It will play CD Audio, DVD-Video, DVD-Audio, DualDisc, MP3, WMA, AAC, Video-CD, and S-VCD discs. ✓ Ensure that the disc surface is clean, and try reinserting it. ✓ Check that the label side of the CD is facing up. 37 The disc is spinning but there is no sound in one or both channels. ✓ Check that both interconnect cables are properly connected between the outputs of the disc player and the inputs of your preampli–er. ✓ Ensure that the preampli–er/ampli–er units being used are properly con–gured. (You may need to consult those units» owner»s manuals for more information.) 5. The screen shows an error message and the Eject button does not eject the disc (or the player shows some other anomalous behavior). ✓ Press the Standby button so the screen dims and the blue light goes on. ✓ Using the rear panel power switch, turn off the unit for at least thirty seconds. Then turn the power back on and press Standby to restart the unit. 6. The IR remote control seems not to function. ✓ Ensure that there are no obstacles between the IR remote and the IR sensor (located to the right of the Mute button). ✓ If the batteries are weak, replace them with fresh ones. ENGLISH 4. Care & Maintenance To remove dust from the cabinet of your disc player, use a feather duster or a lint-free soft cloth. To remove dirt and –ngerprints, we recommend isopropyl alcohol and a soft cloth. Dampen the cloth with alcohol –rst and then lightly clean the surface of the player with the cloth. Do not use excessive amounts of alcohol that might drip off the cloth and into the player. Caution! 38 At no time should liquid cleaners be applied directly to the player, as direct application of liquids may result in damage to electronic components within the unit. Specifications – CDP-102 ENGLISH All speci–cations are accurate at the time of printing. Classé reserves the right to make improvements without notice. ■ Frequency response (Balanced) 8 Hz √ 20 kHz Ø0.1dB (single ended) 8 Hz √ 20 kHz +0/-0.7dB ■ Distortion (THD+noise) 0.001% ■ Output voltage (single-ended) 2Vrms ■ Output voltage (balanced) 4Vrms ■ Signal-to-noise ratio 110dB typical ■ Channel separation better than 115dB ■ D/A Converter 1 x Cirrus Logic CS4928 ■ Audio sample rate 192kHz ■ Formats supported CD, CD-R, CD-RW, DVD Audio, DVD Video, VCD, SVCD, MP3, AAC, WMA, DTS CD, DVD-R, DVD+R, DVD-RW, DVD+RW ■ Power consumption 55W ■ Mains voltage determined by the needs of country for which the unit was manufactured; cannot be reset by dealer or user ■ Overall dimensions Width: 17.5∆ (445mm) Depth: 16.5∆ (419mm) Height: 4.75∆ (121mm) ■ Net weight 27 lbs (12.3 kg) ■ Shipping weight 35 lbs (15.9 kg) For more information, see your Classé dealer Classé Audio 5070 François Cusson Lachine, Quebec Canada H8T 1B3 Telephone +1 (514) 636-6384 FAX +1 (514) 636-1428 Internet: http://www.classeaudio.com email: [email protected] Classé and the Classé logo are trademarks of Classé Audio Inc. of Lachine, Canada. All rights reserved. i-Command™ is a trademark of Equity International, Inc. All rights reserved. AMX® is a registered trademark of AMX Corporation of Richardson, TX. All rights reserved. Crestron™ is a trademark of Crestron Electronics, Inc. of Rockleigh, NJ. All rights reserved. 39 ENGLISH Specifications – CDP-202 All speci–cations are accurate at the time of printing. Classé reserves the right to make improvements without notice. ■ Frequency response (Balanced and single ended) 8 Hz √ 20 kHz +0/-0.4dB ■ Distortion (THD+noise) 0.001% ■ Output voltage (single-ended) 2Vrms ■ Output voltage (balanced) 4Vrms ■ Signal-to-noise ratio 110dB typical ■ Channel separation better than 115dB ■ D/A Converter 3 x Burr Brown PCM1792 ■ Audio sample rate 192kHz ■ Formats supported CD, CD-R, CD-RW, DVD Audio, DVD Video, VCD, SVCD, MP3, AAC, WMA, DTS CD, DVD-R, DVD+R, DVD-RW, DVD+RW ■ Power consumption 55W ■ Mains voltage determined by the needs of country for which the unit was manufactured; cannot be reset by dealer or user ■ Overall dimensions Width: 17.5∆ (445mm) Depth: 16.5∆ (419mm) Height: 4.75∆ (121mm) ■ Net weight 27 lbs (12.3 kg) ■ Shipping weight 35 lbs (15.9 kg) For more information, see your Classé dealer Classé Audio 5070 François Cusson Lachine, Quebec Canada H8T 1B3 Telephone +1 (514) 636-6384 FAX +1 (514) 636-1428 Internet: http://www.classeaudio.com email: [email protected] Classé and the Classé logo are trademarks of Classé Audio Inc. of Lachine, Canada. All rights reserved. i-Command™ is a trademark of Equity International, Inc. All rights reserved. AMX® is a registered trademark of AMX Corporation of Richardson, TX. All rights reserved. Crestron™ is a trademark of Crestron Electronics, Inc. of Rockleigh, NJ. All rights reserved. 40 Dimensions ENGLISH ������� ����� ������ ���� ������ ���� 41 警告:为了避免火灾或者电击危险, 请不要把该产品置于雨水或者潮湿的环境中。 注意! 电击危险 切勿打开 中文 注意:为了避免电击危险,切勿打开盖子。内部没有需要使用者 自己修理的零件。如遇到问题,请我们的专业修理人员联系。 注意 Classé 公司的所有工作人员全心全意地制作,确保为你提供极具价值的购买选择。我们很自豪的告诉您,所有 Classé 部件均 通过欧盟 (CE ) 标志的官方认可。 这也就是说,你所购买的 Classé 产品经过了世界上最为严格的生产和安全测试。CE 的标志证明你所购买的产品符合、甚至 超过欧洲共同体对产品的一致性和消费者安全的所有的要求。 本设备经测试和乎合 FCC 规则第 15 部份 B 类 数字式设备极限。这些极限设定了为住宅设施中有害的干扰提供合理的保 护。本产品能产生,使用或发启射频能量。如非按手册指示安装和使用有可能对电波通讯造成有害的扦扰。不过,这并不能 保证在某种安装中不会产生干扰。如果本产品对收音机或电视机接收造成干扰,可把器材开关机以确定,用户可赏试用下列 一或多个方法更正干扰: • • • • 更改接收天线方向或调迁位置 增加设备和接收器之间的分离距离 将设备连接到与接收器不同的交流电源线路 咨询经销商或有经验的收音机电视技术员帮助 小心:未经生产商批准而对这设备进行变动或更改可能使用户无法操作设备。 本产品包含受美国专利和其它知识产权保护的版权保护技术。使用该版权保护技术必须经过 Macrovision 的授权,且用于家 庭和其它 Macrovision 授权限制的情景。不得进行逆向工程或拆卸。 本手册如有更改,恕不另行通知。本手册的最新版本将会在我们的 http://www.classeaudio.com 上发布。 注有“CE”标志的产品表示该设备符合欧洲共同体制定的 EMC(电磁兼容性)和 LVD(低压指令)标准。 Classé 产品符合国际指令对电子电气设备的《有害物质限制(RoHS)》和《电子电气设备 废弃物(WEEE)》处理的要求。该标志表明本设备的符合这些指令以及产品必须按照这些 指令适当地回收或处理。 请在此处记录新 Classé 产品的序列号,以作参考。 序列号:__________________ 42 重要安全注意事项 阅读这些说明。 2. 保存这些说明。 3. 注意所有警告。 4. 遵守所有说明。 5. 请勿在近水处使用本设备。 6. 使用干布进行清洁。 7. 不得堵塞任何通风口。按照制造商的说明进行安装。 8. 请勿靠近热源,如散热器、热记录器、炉子或其它产生热量的设备(包括放大器)。 9. 请勿损坏用于安全目的的极化或接地插头。极化插头有两个插脚,其中一个较宽。接地插头有三个插脚, 其中一个为接地插脚。 较宽的插脚或接地插脚用于保护用户安全。如果提供的插头与插座不合,请向电工 咨询,更换原有插座 10. 避免踩踏或挤压电源线,特别是插头、插座和设备出线点。 11. 使用制造商指定的附件/配件。 12. 中文 1. 使用制造商指定的或随机出售的小车、支架、三脚架、托架或桌子。 如果使用小车,请小心移动小车/设备组合, 避免翻倒,造成伤害。 13. 雷雨或长时间不用时,请断开设备的电源。 14. 请专业维修人员进行维修。任何形式的设备损坏都需要维修,如电源线或插头损坏,液体溅入或物体掉入 设备内,设备被雨淋湿或暴露于潮湿环境,操作不当或设备掉落。 15. 请勿让液体进入设备,不要将盛满液体的物品如花瓶放在设备上。 16. 为完全断开设备与交流电源的连接,从交流插座上拔下电源线插头。 17. 电源线的主插座应保持随时可用。 18. 请勿将电池暴露于过热的环境中,如日光、火或类似热源。 等边三角形中带有箭头符号的电闪标记是用来提示用户,产品机壳中存在非绝缘“危险电压”,该 电压的大小足以对人造成电击危险。 等边三角形中的感叹号用于提醒用户产品手册中的重要操作和维护(维修)说明。 警告:为降低火灾或触电风险,请勿将本设备暴露于雨中或潮湿的环境中。 43 目录 中文 欢迎使用 Classé 公司的产品 .........................................................................46 安装简介 ................................................................................................ 46 打开包装并摆放好播放机 ..............................................................................47 打开播放机包装 ..................................................................................... 47 摆放 ....................................................................................................... 47 通风 ....................................................................................................... 47 定制安装 ................................................................................................ 47 序列号 ................................................................................................... 48 注册 ....................................................................................................... 48 操作电压 ................................................................................................ 48 预热/磨合期 ........................................................................................... 49 请阅读本手册 … .................................................................................... 49 特别的设计特性.............................................................................................50 灵活的 GUI ............................................................................................ 50 高度精制的电路设计 .............................................................................. 50 大量听音测试 ......................................................................................... 50 超长使用寿命 ......................................................................................... 50 前面板 ...........................................................................................................51 后面板 ...........................................................................................................53 使用平衡输出 ......................................................................................... 53 使用单端模拟输出 (RCA) ....................................................................... 54 同轴电缆数字输出 ........................................................................... 55 AES/EBU 数字输出 .......................................................................... 55 光纤数字输出 .................................................................................. 55 遥控器 ...........................................................................................................58 使用 CDP-102 和 CDP-202 ............................................................................62 CD 操作菜单 .......................................................................................... 62 播放列表 ......................................................................................... 63 控制菜单 ......................................................................................... 63 重复模式 ......................................................................................... 63 乱序播放 ......................................................................................... 63 时间显示 ......................................................................................... 63 编程................................................................................................. 63 DVD 操作菜单 ....................................................................................... 64 主屏幕 ............................................................................................. 64 控制................................................................................................. 64 44 中文 菜单系统 .......................................................................................................65 主菜单系统 ............................................................................................ 65 系统设置 ......................................................................................... 65 训练 IR ............................................................................................ 66 显示设置 ......................................................................................... 66 触发器 ............................................................................................. 66 遥控器功能键 .................................................................................. 67 关于功能键使用的注意事项............................................................. 67 状态................................................................................................. 68 版本信息 ......................................................................................... 68 传感器 ............................................................................................. 68 显示设置菜单 ......................................................................................... 68 亮度................................................................................................. 69 超时................................................................................................. 69 语言................................................................................................. 69 临时显示 ......................................................................................... 69 音量显示 ......................................................................................... 70 系统设置 .......................................................................................................71 系统设置的菜单系统 .............................................................................. 71 音频设置 ................................................................................................ 71 音频延迟 ......................................................................................... 72 数字输出 ......................................................................................... 72 音量设置 ......................................................................................... 72 距离................................................................................................. 73 电平修整 ......................................................................................... 73 视频设置 ................................................................................................ 73 视频标准 ......................................................................................... 73 宽高比 ............................................................................................. 74 首选项 ................................................................................................... 74 音频格式 ......................................................................................... 74 音频语言 ......................................................................................... 75 字幕语言 ......................................................................................... 75 CD 自动播放.................................................................................... 75 导航................................................................................................. 75 父母控制 ................................................................................................ 75 产品升级 .......................................................................................................76 疑难解答 .......................................................................................................77 保管和维护 ....................................................................................................78 CDP-102 技术规格 ........................................................................................79 CDP-202 技术规格 ........................................................................................80 尺寸...............................................................................................................81 45 欢迎使用 Classé 公司的产品 祝贺您购买 Classé 公司的产品,该产品是多年持续改进的结果。我们深 信,今后许多年您将享受该产品所带来的乐趣。 我们重视与客户的关系。趁现在还没有忘记,请在整理包装箱之前寄回 您的保修卡,以便让我们与您保持联系。这样做将使我们能够在将来您 的 Classé 产品可以升级或更新时及时通知您。 中文 寄回保修卡将使您购买的产品获得注册,从而能够容易并迅速地得到保 修服务,即使最初的销售发票已经遗失也无妨。 保修卡在单独的保修条款小册子最后。 请花上几分钟时间填写保修卡,并将其投入信箱。 安装简介 我们尽了最大努力,力图使本光盘播放机的安装和使用简单易懂。 但是,我们无法知道其他变数,比如您房间的尺寸和形状、音响装置以 及您选择的与该播放机一起使用的其他设备。所有这些因素都能影响该 系统的最终性能。 因此,我们强烈建议让经销商来安装并校准您的系统,他们 的经验、培训和专业设备可以使系统的最终性能完全不同。 46 打开包装并摆放好播放机 打开播放机包装 根据我们提供的说明,仔细打开光盘播放机的包装,并去除包装箱上所 有附属物。 重要提醒! 保留所有包装材料,以供将来运输该 Classé 产品时使用。使 用任何非专用的包装材料进行运输,可能导致不属于保修范 围的损坏。 中文 摆放 本光盘播放机的设计使其可以在任何稳定和水平的表面最优运行。本产 品底座和驱动装置中的减振设计使其能够与外部扰动高度隔离。 与任何数字设备一样,最好将该光盘播放机放在远离最敏感模拟电子设 备的某个地方,特别要远离唱机和前置放大器。通常,将其独自放在一 层隔板上就足够了。 注意,该光盘播放机后面必须为电源线和连接电缆留出足 够空间。我们建议留出 8 英寸(20 厘米)的自由空间,以 允许所有电缆能够在不受挤压或没有过度应变的情况下自 由弯曲。 我们建议,不要将本设备放在电源放大器(或任何其他热源)上面。 通风 本设备在正常工作过程中将产生一定热量,请确保其上方及周围留有 3 英寸的空间,以使热量通过空气循环消散。不要将本设备放在限制 空气流动的柔软表面(比如毛毯)上。 定制安装 本手册包括一些帮助特殊安装和定制家具的图纸(见“尺寸”部分)。 我们也有适合该产品的专用机架安装套件(可选)。请联系本公司经销 商了解详细信息。 47 序列号 序列号在播放机的背面,请在标题为“重要安全说明”的那一页记下该 号码,以备将来使用。 注册 找到序列号之后,就可以将您的产品注册。这样做将使我们能够将更新 情况及其他您感兴趣的信息及时通知您。 中文 要注册您购买的产品,请访问Classé公司的网站 (www.classeaudio.com), 然后点击链接 WARRANTY REGISTRATION(保修注册)。另外,您也 可以填写附带的保修卡,然后寄给本公司。 操作电压 本产品出厂时,已经在内部被设定为使用 100V、120V、230V 或 240V 交流电源工作,这适于所有可销售该产品的国家(遵照CE法规,只有 欧盟国家使用 230V 电压)。用户不能改变电压设定。 确保播放机后面板上的标签所标明的正确交流操作电压与您所在地区的 电压一致。试图以不正确电压操作本设备可能导致损坏。 警告: 用户不能改变本设备的电压设定,内部没有任何用户可维修 的部件。请将任何问题交给经过授权的 Classé 公司服务 中心。 如果本设备上标明的交流电压不正确,请联系当地经过授权的 Classé 公司经销商。 本产品包括保护电路,以避免在危险的高电压或低电压下工作。 • 启动时:交流电压必须在额定值 -15% 到 +10% 的误差范围之内, 否则该播放机不能启动。例如,额定值 120V 的播放机要求交流电 压在 95V√135V 之间才能启动。 • 工作时过电压:如果工作时交流电源升高约 10% 或更多,则播放 机将进入保护模式并关闭。应急 LED(发光二极管)将闪烁,表 明进入了保护模式。一条出错消息将显示在 LCD 触摸屏上。 • 工作时低电压:如果交流电源下降 15% 或更多,则播放机将继续 工作(因为这种情况不会给播放机带来什么危险),但这种条件下 可能达不到通常的性能标准。应急 LED 将闪烁,以指示低电压 状况。 48 预热和磨合期 这台新买的播放机将立即展现其突出的性能。但是,您应该期待该产品 在达到正常工作温度以及各种组件“磨合”之后能够表现出更好的性 能。根据我们的经验,最大的变化发生在最初 300 小时以内,这期间播 放机将达到热平衡,各种电容器将完全形成。在最初的磨合期过后,该 产品的性能将在以后数年间都保持完全一致。 这条规则的惟一例外是长期将本产品闲置不用,从而使之冷却的情况。 取决于冷却程度,其声音质量达到最好之前将有一段短暂的预热期。如 果该播放机没有闲置非常长的时间,则随后的热平衡重建过程应该不会 持续太长时间。幸运的是,您永远不必重复最初的 300 小时磨合期。 中文 请阅读本手册 请花上几分钟时间看一下本手册,并熟悉一下这台新的播放机。我们理 解您急于把一切插好然后开始播放的迫切心情。然而,阅读本手册并遵 照其给出的建议将确保获得所有因购买这样一台高级设备而应该得到的 好处。 49 特别的设计特性 灵活的 GUI 该播放机前面板上的 LCD 触摸屏支持相当灵活和强大的图形用户界面 (GUI),同时又保留着干净、整洁的外观。从触摸屏上可以实现大量控 制功能,这些功能如果在前面板上实现将可能需要数十个按钮和按键。 尽管如此强大和灵活,但该产品仍然保留着日常使用中的易操作性。 中文 高度精制的电路设计 Classé 公司设计的产品应该在许多年的使用过程中表现出一致的一流性 能。牢记着这一点,我们的工程师开发的电子电路在同等条件下可以提 供超常的性能和稳定性。 从创新的电路设计开始,本公司工程师通过仔细注意设计过程及元件 选择过程中所有阶段的细节,从而使电路达到最佳状态。通过交互式 测量、听音和观看,我们再得出设计目标是否达到的结论 最后,我们的设计经过了大量测试,以确保使用寿命、可靠性和 稳定性。 大量听音测试 在整个开发阶段,可能最重要的测试就是试听和观看我们的产品。主观 试听在 Classé 公司受到高度重视,因为我们的目的是既要使产品的测试 结果不同寻常,又要使产品听起来如天籁之音。我们对视频也采用了相 同的方法,既使用先进的视频测试设备,也进行主观的观看。 超长使用寿命 多年来大量设计高度精制的电路,使我们在哪些器件可以长期稳定工作 方面具备了大量经验。 作为加速老化实验和实际长期经验的结果,我们通过最初仅选择质量最 高的元件,然后以专业的方式使用这些元件,从而设计并制造出深信经 得起时间考验的产品。 我们深信,就像以前的 Classé 公司产品一样,这台新的播放机同样将带 给您许多年无故障的可靠运行和音乐享受。 50 LOAD MENU � CDP-202 中文 前面板 1 待机按钮和 LED 指示灯 前面板的 Standby(待机)按钮将使播放机在全力运行状态和待机 模式之间转换。待机模式使播放机停止工作,但仍然可以响应通过 支持的控制方式(例如红外线输入、DC 触发器、CAN 总线或 RS232 接口)到来的系统命令。 播放机的当前状态由前面板待机按钮上的 LED 指示。当播放机加 电启动之后,不同 LED 状态的含义如下: • • • • 亮 闪烁(加电时) 灭 闪烁(加电后) = = = = 待机 初始化 工作 交流电压超出允许范围 如果打算长期闲置本播放机——比如度假或进行其他旅行时,我们 建议将其从交流电源断开。在拔下交流电源插头之前,请确认播放 机处于待机模式。 另外,在雷雨天气中将各种有用的电子设备从交流电源断开是种很 好的做法,因为闪电击中您住宅附近的任何物体都可能在交流线路 上引起巨大的浪涌电压,这种电压将轻易穿过简单的电源开关。引 入的浪涌电压(可能高达数千伏)能够损坏任何电子设备,无论其 设计和保护得多么好。在恶劣的暴风雨天气中,最好的保护措施就 是简单地将电子设备与电力网的任何连接断开。 51 2 菜单按钮 按下前面板的 Menu(菜单)按钮将调出菜单系统,取代 LCD 触 摸屏上正常的状态显示。 3 LCD 触摸屏 我们可以使用前面板上的 LCD 触摸屏来控制播放机。触摸屏通常 将显示我们在大多数 CD 和光盘播放机前面常常看到的信息(音轨 号、时间等)和基本的播放控制按钮。另外,触摸屏可用来预览那 些为朋友或家人挑选的视频,并在不必打开主视频显示器的情况下 浏览 DVD 音频光盘的菜单系统。 中文 通过按下 Menu 按钮,用户还可以调出菜单系统,从而控制播放机 的许多工作细节,其中包括系统设置选项、各种显示选项(包括菜 单系统本身显示的语言)以及多种定制安装功能——将本产品集成 到复杂系统的高级功能。 欲知更多信息,请参见本手册后面的“菜单系统”部分。 4 弹出按钮 前面板上的 Eject(弹出)按钮控制着该播放机的进出盘机构。该 按钮将弹出托盘上的光盘。当光盘正在播放时,弹出动作可能有短 暂的延迟,以便使光盘有时间停下来。 当托盘上没有光盘时,将有一个蓝色的指示灯照亮托盘槽。 5 红外线窗口 红外线(IR)收发器位于本窗口后面。通常,光盘播放机必须能够 从本窗口“看到”遥控器,才可以响应遥控器命令。 如果本播放机位于关着的门后面,或者由于其他原因在正常工作时 不能“看到”遥控器,则用户可以使用后面板的红外线输入和输出 微型插孔和红外线转发系统来解决该问题。关于使用红外线转发系 统向或从播放机传输信号的更多信息,请参考本手册稍后的“后面 板”部分,或者联系当地的 Classé 公司经销商。 52 � � 中文 � �� � � � � 后面板 1 使用平衡输出 模拟输出 使用 XLR 连接口的平衡模拟输出和 RCA 连接口的单端模拟输出, 都可以支持前左、前右声道。 如果您的前置放大器/处理器有供前左、前右声道使用的平衡输入 插孔,则将 XLR 输出连接到这些输入孔,连接时使用高质量的平 衡互连电缆。我们的经销商在为您的系统选择合适的平衡电缆方面 可以提供帮助。 平衡音频互连电缆最初是在专业的音乐界发展起来的,目的是保留 特别小的话筒电平信号的细微差别。多年以后,这种电缆同样被像 Classé 公司这样追求性能的消费电子产品制造公司所使用,目的是 保留系统中最细微音频信号的各种差别。 从技术上讲,平衡音频互连电缆提供了两种截然不同的好处:它 们使信号从这台设备传输到下一台设备时强度加倍,从而可能使 信噪比增加 6 分贝;另外,它们可以非常好地抑制因 EMI(电磁 干扰)或RFI(射频干扰)引起的、本来将被设备吸收的噪声和干 扰。在现代的无线通信世界中,我们周围的潜在干扰源比以前多得 多,使它们全部离开我们的音乐和电影配音是有意义的。 因此,我们强烈建议只要可能,就应该在您的 Classé 产品之间使用 平衡的模拟互连电缆。 53 这些 XLR 型孔式输出连接器的引脚分配如下: 引脚 1:信号地 引脚 2:信号+(非反相) 引脚 3:信号-(反相) 连接器接地片:机壳接地 这些引脚分配与音频工程协会(Audio Engineering Society)采用的 标准一致。 中文 使用单端 模拟输出 (RCA) 我们还以 RCA 插头上高质量的单端形式提供了音频输出。使用 RCA 连接器的单端电缆是消费电子设备中最常用的模拟连接形 式。当仔细实现并配合高质量互连电缆一起使用时,该标准可以 提供极好的性能。 Classé 公司付出了非同寻常的努力,以确保本光盘播放机的单端 (RCA) 输出尽可能好。但是,该连接标准不能提供平衡互连方式 可以提供的抗干扰性,因此我们建议尽可能使用平衡输出。 如果不使用平衡模拟互连方式,那么请使用高质量 RCA 电缆将单 端输出连接到您的前置放大器/处理器。关于如何选择合适的 电缆,你的经销商可以提供建议。 2 测试/显示器视频输出 该光盘播放机带有 S 视频和复合视频输出,可用来在视频显示器 上显示 LCD 触摸屏上的信息。该功能使用户可以远距离操作播 放机。 S 视频输出使用标准的 S 视频(微型 DIN)连接器,而复合视频 输出使用高质量的 RCA 连接器。 这两种模拟视频输出是同时活动的。使用高质量的视频电缆,将 适当的的视频输出连接到 A/V 前置放大器/处理器上对应的输入插 孔。我们的经销商在正确选择电缆方面可以提供帮助。 3 54 数字输出 本光盘播放机有3种数字输出,它们都携带相同的信息。只要与 A/V 前置放大器/处理器上的可用连接方式一致,您就可以使用任 意一种喜欢的连接方式。您只需要一种连接方式。 同轴电缆数字输出t 同轴电缆数字输出通过带 RCA 型连接器的 75 欧姆同轴电缆,提供 数字音频信号。将该输出连接到前置放大器/处理器上对应的同轴 数字输入插孔。 AES/EBU 数字输出 AES/EBU 输出通过带 XLR 型连接器的 110 欧姆平衡电缆,提供 数字音频信号。将该输出连接到前置放大器/处理器上对应的 AES/EBU 数字输入插孔。 光纤数字输出 中文 光纤数字输出通过标准的 EIAJ 光纤电缆,提供数字音频信号。将 该输出连接到前置放大器/处理器上对应的光纤数字输入插孔。 使用其中任意一种连接都将把数字形式的信号直接馈送给 A/V 前 置放大器/处理器,以供进一步的数字处理使用。 4 红外线输入和输出 该播放机包括两个 1/8 英寸的单通道微型插孔,以支持在今天已经 到处存在的红外线(IR)遥控器。例如,使播放机在工作和待机模 式之间切换的红外线命令包含离散的对应工作或待机的命令代码。 这些代码可用在高级遥控系统中的“宏指令”上,以帮助在更大的 完整系统环境中对播放机进行控制。 可用的命令非常丰富,因此即使复杂的宏指令(串在一起的命令 链)也能完美地工作。如果您对该功能有兴趣,我们强烈建议您与 经过授权的本公司经销商进行讨论。 注意,红外线输入和输出有点用词不当:这些插头的输入输出本质 上是电信号,而不是红外线信号。它们要与标准的红外线接收器、 分配放大器和发射器(可从经销商处购买)一起使用,才能将遥控 器的红外线信号转换为电信号,反之亦然。该功能的优点是能够容 易地将信号传输到需要到达的任何地方,还有紧密的电气连接所带 来的高可靠性。 因为经销商为您设计的红外线分配系统通常必须控制许多产品,所 以该播放机既包括红外线输入(用于控制本产品),又包括红外线 输出(将相同的信号传递给下一个产品)。该特点允许用户以“菊 花链”形式链接不同产品之间的控制线。 55 注意: 许多红外线转发系统还不支持该播放器要求的剥离载波信号 格式。如果是这样,那么您可能需要使用 Delta 红外线接口, 以确保红外线转发系统与 Delta 系列 Classé 公司产品之间的 兼容性。 在设计有效的红外线转发系统方面,您的经销商可以提供 帮助。 中文 本播放机被设计为响应 5V 的直流红外线命令,单通道微型插头的 尖端被定义为相对于插头柄部的“正极”。 5 DC 触发器输入和输出 许多音频/视频设备都可以给相关设备提供某种直流控制电压,以 引发预期的行为。本播放机可以利用这些功能,以便在工作和待机 模式之间自动切换,这通常需要与 A/V 前置放大器进行配合。 / 英寸单通道微型触发器输入插孔可以提供远程启动(即在工作 和待机模式之间切换)播放机的功能。 1 8 两个 1/8 英寸单通道微型插孔各自提供了可控制的 DC 触发器输 出,这种输出可用于在“菜单系统”中所描述的各种目的。例如, 您的经销商可能将触发器输出设定为使该播放机的电源放大器在 工作和待机模式之间切换。 可遥控的触发器输入将响应 5√12V 直流电压,其尖端极性如下 所示: 同样,触发器输出将产生 12V 直流电压信号,可支持高达 100mA 的电流。 6 56 CAN 总线控制端口 这些 RJ-45 连接口是为将来的控制和通信应用而保留的,届时 将使用本公司实现的 CAN(控制器区域网络,Controller Area Network)总线规范。 7 RS-232 控制端口 该端口有两个用途: • 将新的操作软件下载到播放机中(比如增加了新功能时) • 通过 i-Command™、AMX AMX® 和 Crestron™ 这样的系统在外部 对前置大器进行控制 关于住宅自动化系统的更多信息,请向经销商咨询。 8 中文 危险! 交流电源开关 主电源开关位于后面板右边。在切断电源之前,本播放机应该处于 待机模式。接通电源开关将使本设备处于待机模式。 即使已经断开与交流电源的连接,本播放机内部也可能有危险 电压和电流。不要试图打开该播放机机壳的任何部分。本产品 的所有维修工作都必须交给经过授权的合格经销商或分销商。 9 交流电源输入 本播放机必须使用符合 IEC 标准的电源线(随机提供)。将电源线 插入提供的 IEC 插座,然后将另一端插入合适的墙壁电源插座。 交流电源入口处安装有内置的保险丝,可用于在多数交流电源故障 及/或播放机故障情况下起保护作用。 如果播放机好象没有与交流电源连接一样(即看起来完全没有任何 反应),请从设备上拔下电源线,立即打开电源线入口上方的保险 丝座。如果保险丝已经烧断,请用保险丝座内的备用保险丝将其更 换。如果备用保险丝也已经烧断,请将本产品立即拿到合格的经销 商处。 警告: 该播放机内部没有任何用户可维修的部件,不要试图自行诊断 发生的问题。 57 遥控器 ������� ���� ������� ���� ����� ����� � � � � � � �������� 本产品随机提供有多功能遥控器,既可以控制本播放机,也可以控制 本公司的某些其他系统。遥控器上的按键根据其功能在逻辑上被分为 几组: 1 ��� 基本功能 沿遥控器顶部排列的按键分为两组,各 4 个功能键,它们控制着同 播放机的基本交互。通用组位于最上边一行,包括: ���� � � � ���� � ���� • Light:打开遥控器的背光显示,可在光线较暗条件下提 供更好的可视性。如果在一定时间内不进行任何操作,则 背光将自动关闭。 • Info:直接进入 LCD 菜单系统的 status(状态)屏幕,显 示多项关于该播放机及其当前工作状态的信息。 • Disp:(表示显示)循环切换三种显示屏亮度设定。 • Standby:切换本播放机的工作和待机模式。 中文 ��� ����� ���� ����� ���� ���� ����� 专用于 DVD 播放的按键组处理 DVD 标准的次要功能——您可能 在其他播放机上看到过,它们是: ������ ���� �� �� �� • Zoom:循环显示 DVD 的可用放大图像。 • Angle:循环显示不同摄像角度的 DVD 图像(很少有光盘 利用 DVD 标准的这项可选功能)。 • Audio:循环切换正播放光盘上可用的不同配音。用户可 以在菜单系统中设定首选项,之后用户的设定将成为默认 配音。该按钮将循环切换其他您希望浏览的选项。 • Subtitle:循环显示可用的不同语言字幕。 �� 2 数字、编程和音量键 遥控器上再往下是数字键,用于直接进入 CD/DVD 上特定的音 轨。此外还有两个经常与数字键联合使用的按键。音量和静音键 也位于该区域。 • 数字键用于从遥控器直接进入特定的音轨或视频段。只需 按下适当的数字键,再按下 Play(播放)键即可。播放机 将直接转到您选择的位置,然后开始播放。例如,要播放 第 12 音轨,则顺序按下 1、2 和 Play 键。 58 3 中文 • Time:循环切换4种时间显示模式: 音轨播放时间、 光盘播放时间、 音轨剩余时间、 光盘剩余时间。 • Prog(表示编程):使用户迅速且容易地创建当前光盘上 要播放的音轨(或视频段)序列。无论目前位于何处, 按下 Prog 键都将直接进入菜单系统的编程页面。一旦来 到编程页面,用户就可以使用向上和向下按钮改变突出 显示的音轨,还可以使用 Enter 按钮来确定是否将其包括 在当前播放列表中。再次按下 Prog 将返回到之前所在的 位置(注意,播放或暂停期间编程功能不可用,仅当播放 机在停止状态时才能使用该功能)。 • Vol(表示音量):提高或降低输出电平,假定用户正在使 用模拟输出中的可变输出模式。如果将模拟输出设定为固 定的线路电平,或者馈送给前置放大器/处理器的是数字 输出,则这两个按钮将不起作用。 • Mute:进入所定义的静音功能(标准、特定和衰减, 见“菜单系统”了解详细信息)。 导航键 遥控器中心区域是导航键。这组按键与其他播放机遥控器的导航键 类似,可用于菜单系统的导航。 • Setup(设置)键有两个作用。当用户需要对首选项进行 某种调整时,按下该键将调出菜单系统;一旦来到菜单系 统,按下 Setup 键将返回到上级菜单系统。如果处于顶级 菜单系统时按下 Setup 键,则将退出菜单系统,返回到正 常显示状态。 • Home 键将在 LCD 触摸屏上恢复正常的段/音轨、时间和 传送控制显示。该按键提供了快速返回正常状态的方法, 而无论位于哪一级菜单系统。 关于 DVD 菜单的提示: DVD 标准支持两级菜单: 1) 由光盘上的“标题”构成的菜单(比如主电影加上其他 像记录片似的“赠送”片断等); 2) 各个标题内可以有下级视频段菜单。 59 • Disc Menu 按钮给出正观看的标题内所有段的菜单(见前 面关于 DVD 菜单的解释)。 • Title 按钮列出正观看的光盘上包括的“标题”(见前面关 于 DVD 菜单的解释)。 • 上下左右箭头键在特定的菜单屏幕上移动光标,按照舒服 地坐在椅子上的用户的意思上、下、左、右地改变突出显 示的项目。 • Enter 键允许用户选中突出显示的项目,与按下 LCD 触摸 屏上的 Enter 按钮具有相同效果。 中文 4 传送控制 就在导航键下面,您将发现用来控制日常光盘播放的传送控制键。 • • • • • • • • • 60 (上一个)键将一次一个音轨地移动到后面的视频段或 音轨(如果创建了播放列表,则转到后面的播放列表)。 与大多数播放机一样,这条原则的一个例外是首次按下该 键时将向后移动到当前正播放音轨的开始。在大约一秒钟 之内再次按下该键将转到上一个音轨。 / (播放)键将使光盘旋转(如果必要),并开始播放音 乐。 (下一个)键将一次一个音轨地移动到前面的视频段或 音轨(如果创建了播放列表,则转到前面的播放列表)。 , (暂停)键将停止音乐的播放,但允许光盘继续旋转; 当用户按下播放键时,音乐将几乎立即从暂停的位置重新 开始。 . (停止)键既作用于音乐,又作用于光盘的旋转。当用 户按下播放键时,光盘将需要一点儿时间来达到可以播放 的速度,而且将从光盘或播放列表(如果有的话)的开始 位置播放。 Repeat(重复)键将使播放机进入循环播放模式。 [ (向后扫描)键提供了“倒退”功能 ,其本质由菜单 系统中选择的导航首选项决定(参见“菜单系统”了解更 多信息)。 ] (向前扫描)键提供了“快进”功能 ,其本质由菜单 系统中选择的导航首选项决定(参见菜单系统了解更多信 息)。 ^ (弹出)键将使插入的光盘停止旋转,然后弹出。 5 系统控制 利用功能键,我们还可以将遥控器设定为执行用户定义的功能。 • F1/F2/F3/F4 键可用于遥控器上其他按钮不具有的控制功 能。用户可以选择使播放机收到从特定功能键发出的红外 线信号时执行何种操作。可能的功能列表非常丰富,该列 表位于菜单系统中(参见本手册的“菜单系统”)。例如, 如果用户正在使用 DC 触发器,则可以使用某个功能键来 手动翻转该触发器的状态。 注意: 中文 本公司所有遥控器上的功能键都发出相同的红外线命令。用户 不必确认是否拥有合适的遥控器,因为所有Ê >ÃÃjÊ 遥控器都将 为相同的功能键执行相同的功能。 61 使用 CDP-102 和 CDP-202 本播放机带有多功能的触摸屏 LCD 显示器,支持引人注目的信息显 示和灵活的菜单系统。由于这种灵活性,本播放机可以在播放 CD 和 DVD 时提供不同的控制和功能。我们将分别讨论这些。 中文 CD 操作菜单 该操作菜单由多个屏幕组成,可以从播放 CD 时正常的显示状态直接 进入。这些屏幕分述如下: 62 播放列表 按下显示屏上的 playlist(播放列表)按钮将显示当前光盘的播放列 表。如果还没有为光盘创建定制的播放列表,则该按键将只是顺序列出 CD 上所有可用的音轨。如果已经创建了定制的播放列表(参见下面的 内容),则定义的播放列表将显示出来。注意,本屏幕主要是提供信息 的;用户不能在这里编辑播放列表。 控制菜单 操作显示屏上的 controls(控制)按钮将引出控制菜单,其中包括重复 模式、乱序播放、时间显示和编程。 中文 重复模式 按下控制菜单上的 repeat mode(重复模式)按钮将显示出让用户选择 三种重复模式中一种的屏幕:不重复、重复音轨、重复光盘(如果已经 创建了播放列表,则重复光盘模式将重复该列表)。 乱序播放 在控制菜单上按下 shuf—e(乱序)按钮将进入乱序播放模式,即打乱当 前 CD 上音轨的播放顺序。 时间显示 在控制菜单上按下 time display(时间显示)按钮将出现让用户选择四 种时间显示方式的屏幕:音轨播放时间、光盘播放时间、音轨剩余时 间、光盘剩余时间。 编程 在控制菜单上按下 program(编程)按钮将显示编程屏幕。 当首次插入某张 CD 时,该光盘的默认列表是以正常顺序播放所有音轨 (这可能是您所期望的)。该播放列表将音轨编号顺序地显示在编程屏 幕上。各音轨左边的编号,指出了该音轨在播放列表中的位置。 您可以存储数以千计的播放列表。 如果用户希望跳过光盘上某首歌曲,只需按下右边的向上或向下箭头, 滚动到相应的音轨,然后按下那个显示着不希望听的音轨编号的大按钮 即可。该音轨将不再突出显示,表明该 CD 的播放列表已经不再包括这 首歌曲。我们可以重复该过程,以删除希望删除的任意多个音轨。 如果用户希望创建完全不同的歌曲播放顺序,那么请通过依次触摸各个 音轨的按钮来关闭所有音轨的突出显示,然后以所希望的顺序一次一个 地选中各个音轨。新的播放列表将基于您的选择顺序创建。 要删除某个播放列表,只需取消对所有音轨的选择,然后按下 save(保存)按钮即可。 63 中文 DVD 操作菜单 当插入 DVD 时,将显示一组不同的控制按钮。 主屏幕 上图左边是 DVD 的 home(主)屏幕,包括关于当前所在光盘位置的 基本信息,还有一些类似于遥控器按钮的基本导航按钮。 控制 按下主屏幕右上角的 controls(控制)按钮,将显示控制屏幕,其中包 括下面 4 个按钮: • back(后退):返回到主屏幕。 • repeat mode(重复模式):进入选择重复模式的屏幕,共有不重 复、重复段、重复光盘、重复标题四种选项。 • random(随机):以随机顺序播放当前标题内的段,用于观看音乐 会 DVD 或听 DVD 音频光盘时打乱歌曲播放顺序。 • time display(时间显示):改变显示光盘时间信息的方式,共有段 播放时间、段剩余时间、标题播放时间、标题剩余时间四种。 64 菜单系统 本播放机使用功能丰富的触摸屏显示,使用户可以轻松设定各种选项和 系统默认值。使用这些菜单,用户可以轻松定制该播放机的行为,以适 应具体的系统配置及个人偏好。 主菜单系统 按下 LCD 触摸屏左边的 Menu(菜单)按钮将显示出综合性的菜单系 统,顶部两级菜单如下所示: 中文 本菜单系统可访问许多专门针对安装过程设计的功能,使用户可以定制 本播放机在具体系统环境中的工作方式。 系统设置 菜单系统中规模最大的一部分是系统设置。这部分既是综合性的,又是 充分利用本播放机的非凡功能所必需的。因此,本手册将单独拿出一节 来充分描述这些设置。见“系统设置”了解所有细节。 65 中文 训练 IR 本播放机包括所有功能的红外线(IR)命令代码,其范围远远超出正常 遥控操作的需要。然而,如果用户打算制作定制的、包含宏指令(可指 挥整个系统)的遥控器,则其中许多功能都是至关紧要的。没有这些离 散的代码,则用户希望创建的许多宏指令将不能可靠工作。 训练 IR 屏幕提供了所有可用 IR 代码的列表。通过滚动到包含宏指令的 遥控器需要学习的命令,然后按下 send IR code(发送红外线代码)按 钮,播放机就会将适当的命令代码从前面板发出,这样第三方遥控器就 可以学习该命令。 关于这种控制系统的更多信息,我们建议您咨询经过授权的 Classé 公司 经销商。 显示设置 该按钮将引出 display setup(显示设置)菜单,该菜单还有下级菜单。 本菜单系统将在下面详细叙述——紧跟对应的菜单说明。用户在这里可 以设定 LCD 触摸屏的亮度、显示超时、触摸屏和菜单系统中使用的语 言、临时显示以及音量设置的显示方式(如果使用播放机可变音量功能 的话)。 触发器 用户可以设定各个 DC 触发器的“逻辑电平”,即激活触发器时其电压 是低(0V)还是高(约 12V)。改变触发器接通电平的能力可以解决某 些系统中所特有的问题,否则将需要添加使系统的成本和复杂性都增加 的外部设备。 如果觉得上述表述有点晦涩,这很正常。设计该功能的目的是解决那些 您可能还未曾遇到的问题,但专业的安装人员能够解决这样的问题。 66 遥控器功能键 该按钮将引出 remote Fkeys(遥控器功能键)菜单。 中文 随本产品提供的遥控器包括四个可编程的用户功能键,它们分别被标记 为 F1、F2、F3 和 F4,位于遥控器底部附近。“遥控器功能键”菜单允 许用户定义播放机对这些功能键信号的响应。您可以使用功能键立即进 入某个具体的系统功能,该功能本来可能藏在菜单中某个位置。 例如,如果您经常使用乱序播放模式,则可能希望将某个功能键设定 为打开和关闭该功能。这样将使我们不必再进入控制菜单,然后再按 shuf—e(乱序播放)按钮(虽然可以从遥控器上用功能键打开乱序播放 模式,但节省的时间可能难以感觉到)。 “遥控器功能键”菜单有四个按钮,各自对应遥控器上一个功能键。在 LCD 触摸屏上按下任意一个按钮将进入下级菜单,显示可以分配给该 功能键的功能列表。 只需滚动列表(触摸右边向上或向下的箭头),然后在列表中触摸希望 该功能键执行的具体功能,就可以完成功能分配。 关于功能键使用的注意事项 注意,本公司所有遥控器都提供了这四个功能键,因此用户不必担心拿 起的是哪个遥控器。也就是说,前置放大器遥控器上的 F1 键与 CD 播 放机遥控器上的 F1 键将发送相同的红外线信号。 虽然我们的用意是最大程度降低不同遥控器之间的混淆(这种设计可以 使它们执行相同的功能),但如果将不同设备上的不同功能分配给了相 同的功能键,那么我们就应该小心了。这样做将导致两台设备同时做两 件不同的事情,以响应遥控器上的一次按键操作。这种情况有时很有 用。例如,F1 可以将前置放大器设定为 CD 输入,同时使播放机开始 播放,这样按下一个功能键就可以完成两项任务。 67 状态 status(状态)屏幕提供关于当前正播放光盘的多项信息,还可以访问 关于本播放机的软件和内部传感器的信息。 中文 版本信息 按下状态屏幕上 version info(版本信息)按钮将进入版本信息屏幕。本 公司经常开发增加功能或增强播放机操作性的新软件,它们有各自的版 本号。版本信息屏幕将显示出该播放机所用软件的版本号。最新软件发 布在本公司的网站(www.classeaudio.com)上。如果版本信息屏幕显示 的版本号低于官方网站上发布的版本号,则可该设备能需要更新。官方 网站上同时提供有简单、详细的更新指导。如果用户给我们的技术支持 人员打电话询问某个本手册不包括的问题,他们可能需要知道您的设备 所使用的软件版本。该信息将有助于他们给您提供最好的服务。 传感器 按下状态屏幕上 sensors(传感器)按钮将进入传感器屏幕,显示关于播 放机内部多个传感器的信息。用户通常不需要知道这些信息,除非本公 司客户服务代表在帮助解决某个意外问题时要求您这样做。 显示设置菜单 display setup(显示设置)菜单允许用户定义触摸屏的三项首选项: 背光亮度、背光超时和使用的语言。 68 亮度 brightness(亮度)设置共有三项:低、中和高。基于使用本系统时听 音室内通常的环境光强度来选择合适的亮度。高亮度通常最适合光线较 强的房间;用户可能发现,较低的亮度设置在较弱光照条件下也显得不 够醒目。 超时 如果您喜欢在光线较弱或黑暗的房间内听音乐,则可能发现即使低亮度 设置也能分散注意力。如果是这样,您可以改变背光的超时设定,从而 在所选择的不活动时间过后将背光完全关闭。 中文 此处活动是指任何对用户界面的使用,包括使用硬按钮、LCD 触摸屏 和遥控器。 例如,如果将超时设定为最小值,则背光将在用户与播放机的任何控件 交互时照亮显示屏,然后仅仅保持三秒钟——刚够我们检查一下刚才的 操作。如果用户继续使用某种控件(至少每三秒钟一次),则显示屏将 保持点亮状态,然后将在不活动时间达到三秒钟之后熄灭。 如果希望显示屏当播放机不在待机模式时保持点亮状态,则选择超时 设置中的 never(从不)项。LCD 显示屏的背光灯可用于苛刻的汽车环 境,将给用户提供多年的可靠运行。但是,如果您可能经常离开播放 机,我们建议将超时设定为不到1分钟(注意,设定为较低亮度不会延 长背光灯使用寿命)。 语言 language(语言)菜单允许用户为触摸屏菜单选择五种语言中的一种。 本公司已经给我们的国际经销商提供了可自定义翻译过程的软件工具, 以适应当地的客户和术语;我们这样做的目的是确保本播放机的操作在 任何国家都像在加拿大一样直观。 临时显示 在播放 DVD 时,触摸屏可以在预览模式中显示图像信息。该功能使用 户可以在将图像发送到主显示器之前,对内容进行挑选(使客人不必 观看那些烦人的FBI警告)。它还是浏览 DVD 音频光盘菜单系统的好方 法,使我们不必打开主视频显示器,就能享受某段音乐。 当使用本播放机的任何控制功能时,触摸屏将从正常的预览模式改变为 显示用户界面。临时显示设置决定着在触摸屏返回通常的预览模式之 前,用户界面将停留多长时间。 69 音量显示 如果用户选择使用可变音量功能,则需要选择显示音量设置的方式: 中文 • Absolute(绝对):这是大多数音量控件的工作方式,即 0 表示没 有声音,而较大的数字表示更大的音量。 • Relative(相对):这是支持 Home 标准的人们所喜欢的方式,其中 0 表示校准的参考音量,与参考值的偏差用正数或负数(分别表示 更高和更低)来指示。 70 系统设置 按下 LCD 触摸屏左边的 menu(菜单)按钮,再按下屏幕上的 system setup(系统设置)按钮,将进入对播放机进行各种控制的菜单系统, 而播放机既可以是单独工作的,也可以是整个系统的组成部分。 系统设置的菜单系统 中文 从系统设置菜单可以进入四个子菜单,下面将一一讨论。 音频设置 按下 audio setup(音频设置)按钮将进入与播放机处理各种音频的方式 有关的六个控制屏幕。 71 音频延迟 如果光盘的编辑有错误,则音频可能与视频不同步。音频延迟设置通过 插入一段延迟时间,重新确定与视频相关的音频位置,使音视频同步, 从而达到纠错的目的。延迟时间可在 Ø200 毫秒的范围内以 10 毫秒为增 量进行调整。 数字输出 基于用户的具体情况,数字输出可以被配置为三种方式之一: 中文 • off(关闭)——如果用户打算仅使用立体声输出,而不向单独的处 理器发送数字信号,则可以选择这种方式。 • raw(原始)—— 传递播放的原始音频信号,无论是 PCM、杜比数 字、DTS,还是其他什么格式。这项设置假定外部处理器可以处理 收到的任何信号。 • PCM 立体声——如果播放的音轨包含多声道信息,则这些信息将 被混合成双声道 PCM 信号,以兼容立体声播放设备,或进一步用 Dolby Pro Logic II 或 DTS Neo:6 进行处理。 音量设置 音量设置菜单用于设定多项与音量有关的参数,以满足用户的需要。 如果选择不使用可变音量功能,则这些设置将不可用。 • 最大音量——该屏幕用于设定系统的最大音量,范围从 0 到 100。 100 表示不对声音处理器提供的最大增益设置任何人为限制。这项 设置是交互式的。用户可以设定某个小于 100 的值,然后通过调整 音量了解设定值是否合适。 • 初始音量——该屏幕用于选择播放机脱离待机状态之后的初始音 量,可将其配置为两种方式之一:最近音量指播放机断电之前最后 一次选定的音量。另外,系统能够记住静音状态。特定音量设置允 许用户选择一个喜爱的音量,以及是打开还是关闭静音功能。 • 静音设置——提供三种不同的静音功能。 • 标准静音:当静音按钮被按下时将屏蔽输出,之后将听不到任 何声音。 • 特定静音:允许用户选择希望在按下静音按钮时使用的特定音 量,无论之前设定的音量有多高。 • 衰减静音:与大多数静音按钮的工作情况相同,即将当前音量 衰减指定的数值。 72 距离 distance(距离)屏幕用于手动调整喇叭距离设定值。 只需用卷尺或其他尺子测量出距离,然后将其输入本菜单即可。播放机 将自动将输入的距离转换为适当的延迟,以确保用户在合适的时刻听到 各个喇叭的声音,从而消除经常变化的距离所带来的影响。 电平修整 level trims(电平修整)用于手动调整喇叭的电平。某种噪声发生器可 用来为调整目的提供参考信号。站在听音位置,手拿某个 dB SPL 测量 仪,将其设定为 C 加权和低速响应,然后伸直手臂,向上指向天花板, 这时依次调整各个喇叭的电平,直到测量仪读数为 75 dB SPL 为止。 中文 注意,电平修整只能用于模拟输出。与其他声源设备一样,本播放机的 数字输出不加改变地被送到相连的前置放大器/处理器。这样,我们精 确地校准一次前置放大器/处理器,就能处理所有输入的声源信号。 Dolby Late Night(杜比深夜)按钮用于进入和退出供杜比数字音轨 使用的深夜模式。这种模式允许用户在几乎不打扰他人的情况下欣赏 电影。 视频设置 充分利用本播放机丰富的视频功能非常简单。所有设置都包括在三个 菜单之中。 视频标准 这些设置通常已经针对销售地区作了正确调整。然而,如果您需要改变 输出以符合不同的标准,则两种选择如下所述: • NTSC/PAL/原始——或者选择当地的广播标准,或者使播放机以原 始格式播放光盘。后者要求用户拥有可处理 NTSC 和 PAL 两种格 式的多标准显示器。 • IRE 7.5 或 0 ——北美地区的视频设置认为 7.5 IRE 单位的视频强度 产生黑色,而世界上大多数地区认为 0 IRE 单位的视频强度表示黑 色。本播放机能够以任何一种方式工作;用户应该选择当地的标 准,以便与其他视频源兼容。 73 宽高比 对于将显示在电视机上的宽银幕电影来说,我们有三种选择。所作的选 择取决于电视机的功能和个人偏好。 中文 • 4:3——如果用户有宽高比为 4:3 的电视机,又希望始终将屏幕充 满,则本播放机将在任何插入的光盘上寻找 4:3 的电影版本,并播 放这种版本。 • 16:9——如果用户有支持不同宽高比(包括失真模式)的现代宽屏 电视机,则应该选择 16:9。这样做将把光盘的内容直接传递给电视 机,而不必处理宽高比。实际上,这是在告诉播放机电视机将承担 起处理宽高比的任务。 • letterbox——如果用户有宽高比为 4:3 的电视机,但喜欢以原始形 式观看宽银幕电影,则本播放机可以在电视机的 4:3 框架内产生像 信箱似的电影版本。这将在图像的上边和下边产生黑条,但显示的 是导演和摄影师制作的原始图像。 首选项 DVD 标准支持光盘上的多种配音和多种语言。这种多功能性可能使播 放 DVD 比预想的复杂。通过设置首选项,播放机将能够选择正确的配 音和语言,用户则不必再去搜索菜单。 音频格式 许多 DVD 都有格式不同的多种配音,用户可以按下 audio format(音 频格式)按钮,来设定自己的首选项。 • 自动——该选项使播放机自动选择最好的配音,即选择离散声道较 多的配音(比如选择 5.1 而不是 2.0)。 • PCM——如果喜欢不压缩的数字音频(这意味着较少的声道),则 选择 PCM。 • 杜比 5.1——如果光盘上有这种格式,则该选项将使播放机播放 5.1 声道的杜比数字配音。 • 杜比立体声——如果打算将交给 Dolby Pro Logic 或 Dolby Pro Logic II 解码矩阵处理,则选择该选项。 • DTS——如果选择这种格式,则播放机将自动播放 DTS(数字影院 系统,Digital Theater Systems)配音(如果有的话)。 74 音频语言 用户还可以设定配音中使用的语言。选择 Automatic(自动)将使用光 盘本身默认的配音。如果愿意,用户可以选择使播放机播放英语、法 语、德语、西班牙语或意大利语(假设至少有一种可用)。 字幕语言 同样,用户可以设定字幕中使用的语言。可选项有英语、法语、德语、 西班牙语和意大利语。 CD 自动播放 当选中本选项时,播放机将在插入 CD 时自动开始播放。 中文 导航 在历史上,CD 与 DVD 内的导航操作是不同的。具体地说,CD 上的快 进和倒退功能要求用户在扫描期间按住相应的按钮。相反,DVD 上的 相同动作只需要单击一次按钮。事实上,额外的按钮单击将加快扫描的 速度。 如果希望所有光盘都按照 DVD 的这种方式操作,则选择 latching(锁 定)作为导航首选项。 如果喜欢 CD 的导航方式,则选择 non-latching(非锁定)。 如果希望本播放机播放 CD 时像 CD 播放机,而播放 DVD 时像影碟播 放机,则选择 adaptive(自适应)。 父母控制 本播放机带有一组父母控制按钮,它们类似于某些有线或卫星电视服务 中提供的功能。 • set password(设定密码)按钮允许用户设定一个四位数密码;如 果播放的光盘超出了设定的等级,则要求输入该密码。 • set rating(设定等级)按钮将显示出等级列表(共 8 级),同时列 出对应的电影等级(例如,6 级与 R 级电影相同)。这里选择的等 级决定着不用输入密码就能播放的最高等级(注意,该按钮仅当设 定密码之后才可用)。 • block unrated(阻止未分级的电影)按钮使未分级的电影必须在输 入密码之后才能播放。 • enable control(激活控制)按钮用于启用父母控制功能。 75 产品升级 Classé 公司经常设计新的软件,以增强产品性能。用最新软件更新产品 只需要从官方网站(www.classeaudio.com)下载一个文件而已,因此确 保您的产品最新是值得的。 中文 播放机所用软件的详细信息可以在“版本信息”屏幕上找到。按下 遥控器上的 INFO(信息)按钮,再按下 LCD 触摸屏上的 VERSION INFO(版本信息)按钮,或者先按下触摸屏旁边的 MENU(菜单) 按钮,然后从触摸屏菜单上选择 STATUS(状态),再按下 VERSION INFO(版本信息)按钮,都可以进入“版本信息”屏幕。 “版本信息”屏幕显示出播放机所用软件的版本号。Classé 公司网站上 始终有最新的软件,因此如果“版本信息”屏幕上的软件版本号低于官 方网站上发布的版本号,则应该考虑将产品升级。 除版本说明和软件本身以外,Classé 公司网站上还有简单的升级指导, 因此更新产品并使其发挥出最大潜能是非常容易的。 76 疑难解答 一般来说,用户应该将任何需维修的问题交给经销商处理。不过,在联 系经销商之前,您可以看看遇到的问题是否已经在下面列出。如果是, 那么应该试试建议的解决方法。如果这些方法都不能解决您的问题,请 联系本公司的经销商。 不读盘 ✓ 用柔软的湿布清洁盘面,顺着光盘的半径而不是周长擦 拭。这种清洁方法可以使损坏光盘的可能性降至最低。 ✓ 光盘本身可能已经损坏。试试其他光盘,以确定该问题是 普遍存在的,还是仅限于特定的光盘。 2 没有声音,待机 LED 不能点亮 ✓ 确保播放机已经接入交流电源,且交流电压正常。 ✓ 检查后面板上的主电源开关是否接通。 ✓ 您可能设定了显示屏的超时,而播放机可能只是处于暂停 或停止状态。触摸显示屏以重新将其激活,以便能够看到 设备的状态;或者简单地按下遥控器上的播放键。 ✓ 将电源插头拔下,至少 30 秒钟以后再次将其插到插座 上;尝试给设备加电(有时可能因电压降低或短时间掉电 而需要重启设备)。 ✓ 验证交流电压没有超出范围。本产品将通过不加电的方式 自动保护自己不受不恰当交流电压的损害。 ✓ 拔掉播放机后面的电源线,然后取下位于电源线入口正上 方的保险丝座,检查保险丝。如果保险丝已经烧断,则保 险丝座内还有一根备用保险丝。 ✓ 如果这些方法都不能解决问题,请咨询经销商寻求帮助。 本产品内部没有任何用户可维修的部件。 3. 插入光盘后机器将其弹出,并要求插入另一张光盘 ✓ 检查该光盘是否与本播放机兼容,支持的格式包括 CD 音 频、DVD 视频、DVD 音频、DualDisc、MP3、WMA、 AAC、VCD 和 SVCD。 ✓ 确保光盘表面干净,然后试着重新将其插入到机器中。 ✓ 检查光盘的标签面是否朝上。 中文 1 77 中文 4. 光盘在旋转,但一个或两个声道内没有声音 ✓ 检查播放机输出与前置放大器之间的两根互连电缆是否连 接正确。 ✓ 确保使用的前置放大器单元配置正确(可能需要参考这些 产品的用户手册,以了解更多信息)。 5. 屏幕上显示出一条出错消息,弹出按钮不能将光盘弹出(或播放机 表现出某种异常行为) ✓ 按下待机按钮,以关闭屏幕显示,并点亮蓝色指示灯。 ✓ 使用后面板的电源开关,关闭播放机至少 30 秒钟。然后 再次接通电源,并按下待机键重启播放机。 6. 红外线遥控器不工作 ✓ 确保红外线遥控器与传感器(位于静音按钮的右边)之间 没有障碍物。 ✓ 如果电池电力耗尽,请用新电池更换。 保管和维护 使用鸡毛掸子或不起毛的软布清扫播放机机壳上的灰尘。如果要清除污 垢和指印,我们建议使用异丙醇和一块软布。首先用异丙醇浸湿软布, 然后用布轻轻地擦拭播放机的表面。不要使用过多的异丙醇,以免液体 从软布上滴落到播放机内。 警告! 78 任何时候都不应该直接使用液体清洁剂进行清洁,那样可能损坏播 放机内部的电子元件。 CDP-102 技术规格 所有规格在本手册印刷时都是准确的,本司保留在不通知客户的情况下 改进产品的权利。 ■ 尺寸 ■ 净重 ■ 运输重量 中文 ■ 频率响应 (平衡输出) 8 Hz √ 20 kHz Ø0.1dB 8 Hz √ 20 kHz +0/-0.7dB (单端输出) ■ 失真(THD+噪声) 0.001% ■ 输出电压(单端) 有效值 2V ■ 输出电压(平衡) 有效值 4V ■ 信噪比 典型值 110dB ■ 声道间隔 超过 115dB ■ D/A 转换器 1 x Cirrus Logic CS4928 ■ 音频采样速率 192kHz ■ 支持的格式 CD、CD-R、CD-RW、DVD 音频、DVD 视频、 VCD、SVCD、MP3、AAC、WMA、DTS CD、 DVD-R、DVD+R、DVD-RW、DVD+RW、 ■ 电能消耗 55W ■ 主电压 根据本产品销往的那些国家的需要确定 用户或经销商不能重新设定 宽:17.5∆ (445毫米) 深:16.5∆ (419毫米) 高:4.75∆ (121毫米) 27 磅 (12.3 公斤) 35 磅 (15.9 公斤) 关于更多信息,请咨询经销商。 Classé Audio 公司 5070 François Cusson 魁北克省拉欣市 加拿大 H8T 1B3 电话: +1 (514) 636-6384 传真: +1 (514) 636-1428 网址: http://www.classeaudio.com 电子信箱: [email protected] Classé 和 Classé 标志是加拿大拉欣市 Classé Audio 公司的商标,保留所有权利。 i-Command™ 是 Equity 国际公司的商标,保留所有权利。 AMX® 是美国得克萨斯州理查森市 AMX 公司的注册商标,保留所有权利。 Crestron™ 是美国新泽西州 Rockleigh 市 Crestron 电子公司的商标,保留所有权利。 79 CDP-202 技术规格 所有规格在本手册印刷时都是准确的,本司保留在不通知客户的情况下 改进产品的权利。 中文 ■ 频率响应 (平衡和单端输出) 8 Hz √ 20 kHz +0/-0.4dB ■ 失真(THD+噪声) 0.001% ■ 输出电压(单端) 有效值 2V ■ 输出电压(平衡) 有效值 4V ■ 信噪比 典型值 110dB ■ 声道间隔 超过 115dB ■ D/A 转换器 3 x Burr Brown PCM1792 ■ 音频采样速率 192kHz ■ 支持的格式 CD、CD-R、CD-RW、DVD 音频、DVD 视频、 VCD、SVCD、MP3、AAC、WMA、DTS CD、 DVD-R、DVD+R、DVD-RW、DVD+RW ■ 电能消耗 55W ■ 主电压 根据本产品销往的那些国家的需要确定 用户或经销商不能重新设定 ■ 尺寸 宽:17.5∆ (445毫米) 深:16.5∆ (419毫米) 高:4.75∆ (121毫米) ■ 净重 27 磅 (12.3 公斤) ■ 运输重量 35 磅 (15.9 公斤) 关于更多信息,请咨询经销商。 Classé Audio 公司 5070 François Cusson 魁北克省拉欣市 加拿大 H8T 1B3 电话: +1 (514) 636-6384 传真: +1 (514) 636-1428 网址: http://www.classeaudio.com 电子信箱: [email protected] Classé 和 Classé 标志是加拿大拉欣市 Classé Audio 公司的商标,保留所有权利。 i-Command™ 是 Equity 国际公司的商标,保留所有权利。 AMX® 是美国得克萨斯州理查森市 AMX 公司的注册商标,保留所有权利。 Crestron™ 是美国新泽西州 Rockleigh 市 Crestron 电子公司的商标,保留所有权利。 80 尺寸 中文 ������� ����� ������ ���� ������ ���� 81 Classé Audio 5070 François Cusson Lachine, Quebec Canada H8T 1B3 +1 (514) 636-6384 +1 (514) 636-1428 (fax)(传真) http://www.classeaudio.com email(电子信箱): [email protected] North America(北美地区): 1 800 370 3740 email(电子信箱): [email protected] Europe(欧洲): 44 (0) 1903 221 700 email(电子信箱): [email protected] Asia(亚洲): (852) 2790 8903 email(电子信箱): [email protected] All Others(其他地区): +1 514 636 6394 email(电子信箱): [email protected] Copyright © 2006 Classé Audio, Inc. Printed in Canada. 版权所有 ©:2006,Classé Audio 公司,印刷于加拿大。 V 2.2 030206