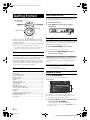
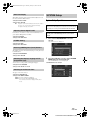
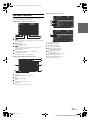
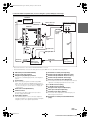
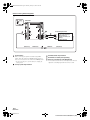
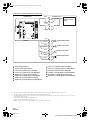
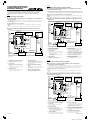
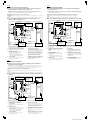
1
01GB00VPAB222R.book Page 1 Monday, January 23, 2006 4:24 AM
FOR CAR USE ONLY/NUR FÜR AUTOMOBIL GEBRAUCH/POUR APPLICATION AUTOMOBILE/PARA USO EN
AUTOMÓVILES/SOLO PER L’UTILIZZO IN AUTOMOBILE/ENDAST FÖR BILBRUK
R
EN
Vehiclehub Pro
VPA-B222R
DE
• OWNER'S MANUAL
Please read before using this equipment.
FR
• BEDIENUNGSANLEITUNG
Lesen Sie diese Bedienungsanleitung bitte vor
Gebrauch des Gerätes.
• MODE D'EMPLOI
Veuillez lire avant d’utiliser cet appareil.
• MANUAL DE OPERACIÓN
Léalo antes de utilizar este equipo.
ES
• ISTRUZIONI PER L’USO
Si prega di leggere prima di utilizzare l’attrezzatura.
• ANVÄNDARHANDLEDNING
Innan du använder utrustningen bör du läsa igenom
denna användarhandledning.
IT
ALPINE ELECTRONICS MARKETING, INC.
1-1-8 Nishi Gotanda,
Shinagawa-ku,
Tokyo 141-0031, Japan
Phone 03-5496-8231
ALPINE ELECTRONICS OF AMERICA, INC.
19145 Gramercy Place, Torrance,
California 90501, U.S.A.
Phone 1-800-ALPINE-1 (1-800-257-4631)
ALPINE ELECTRONICS OF CANADA, INC.
777 Supertest Road, Toronto,
Ontario M3J 2M9, Canada
Phone 1-800-ALPINE-1 (1-800-257-4631)
YAMAGATA Corporation
2-6-34, Takashima, Nishi-ku,
Yokohama, Kanagawa, Japan
ALPINE ELECTRONICS OF AUSTRALIA PTY. LTD.
161-165 Princes Highway, Hallam
Victoria 3803, Australia
Phone 03-8787-1200
ALPINE ITALIA S.p.A.
Viale C. Colombo 8, 20090 Trezzano
Sul Naviglio (MI), Italy
Phone 02-484781
ALPINE ELECTRONICS GmbH
Frankfurter Ring 117, 80807 München, Germany
Phone 089-32 42 640
ALPINE ELECTRONICS DE ESPAÑA, S.A.
Portal de Gamarra 36, Pabellón, 32
01013 Vitoria (Alava)-APDO 133, Spain
Phone 945-283588
ALPINE ELECTRONICS OF U.K. LTD.
Alpine House
Fletchamstead Highway, Coventry CV4 9TW, U.K.
Phone 0870-33 33 763
ALPINE ELECTRONICS (BENELUX) GmbH
Leuvensesteenweg 510-B6,
1930 Zaventem, Belgium
Phone 02-725-13 15
ALPINE ELECTRONICS FRANCE S.A.R.L.
(RCS PONTOISE B 338 101 280)
98, Rue de la Belle Etoile, Z.I. Paris Nord Il,
B.P. 50016, 95945 Roissy Charles de Gaulle
Cedex, France
Phone 01-48638989
Designed by ALPINE Japan
Printed in Japan (Y)
68-02065Z87-A
01GB01VPAB222R.fm
ALPINE VPA-B222R 68-02065Z87-A (EN)
SE
01GB00VPAB222R.book Page 1 Monday, January 23, 2006 4:24 AM
ENGLISH
Contents
Operating Instructions
WARNING
WARNING ................................................. 4
CAUTION .................................................. 4
PRECAUTIONS ........................................ 5
Getting Started
Feature .............................................................. 6
Accessory List .................................................. 6
Initial System Start-Up ..................................... 6
Turning Power On or Off ................................. 6
Displaying the Unit Source on the
Monitor ...................................................... 6
Switching a Source ........................................... 6
Adjusting the Volume ....................................... 7
Lowering Volume Quickly ............................... 7
Radio
Listening to Radio ............................................ 7
Manual Storing of Station Presets .................... 8
Automatic Memory of Station Presets ............. 8
Tuning to Preset Stations .................................. 8
RDS Operation
Turning AF (Alternative Frequencies)
On or Off ....................................................... 9
Other Useful Features
Adjusting the Audio ........................................11
Adjusting the Balance ..................................11
Adjusting the Fader .....................................11
Setting the Treble Control ...........................11
Setting the Bass Control ..............................11
Adjusting the Subwoofer Level ...................12
Turning Loudness ON or OFF .....................12
Turning Defeat ON or OFF .........................12
Adjusting Volume of GUIDE Voice ............12
Rear Entertainment Function ..........................12
Switching the function of the remote
sensor .......................................................13
Setup
GENERAL Setup
General Setup Operation .................................13
Demonstration Function ..............................14
Setting the Time Display .............................14
Setting the Time ...........................................14
Setting Daylight Saving Time .....................14
Sound (Beep) Guide Function .....................14
Turning the Commander Vibration
ON or OFF ...............................................14
Setting the Scroll .........................................14
RDS Time Display .......................................15
Adjusting Source Signal Levels ..................15
PI SEEK Setting ..........................................15
Receiving RDS Regional (Local)
Stations .....................................................15
Switching the Display Language of PTY
(Programme Type) ...................................15
Switching to the Russian Font .....................15
Receiving Traffic Information .......................... 9
PTY (Programme Type) Tuning ....................... 9
Programme Seek ............................................ 10
Receiving Traffic Information While Playing CD
or Radio ....................................................... 10
Priority News .................................................. 10
Displaying Radio Text .................................... 10
1-EN
01GB03VPAB222RTOC.fm
ALPINE VPA-B222R 68-02065Z87-A (EN)
01GB00VPAB222R.book Page 2 Monday, January 23, 2006 4:24 AM
SYSTEM Setup
System Setup Operation ................................. 15
Using the Speaker Input ................................. 16
Setting the Speaker Input Mode .................. 16
Displaying the Speaker Input
Volume Level ........................................... 16
Setting the Navigation/Speaker Input Voice
Interruption .............................................. 17
Adjusting the Speaker Input's Interruption
Detection Level ........................................ 17
Adjusting the Speaker Input Voice Interruption
Level ........................................................ 17
Setting the Interrupt Type of the Speaker Input
Voice ........................................................ 17
Setting the Channel of the Speaker Interruption
Detection .................................................. 17
Connecting the Navigation ............................. 18
Setting the Navigation Mode ....................... 18
Navigation Audio Interruption Volume
Adjustment ............................................... 18
Connecting an External Input Device
(AUX) .......................................................... 18
Setting the AUX Mode ................................ 18
Naming External Devices ............................ 18
Adjusting the External Input Audio
Level ........................................................ 18
Connecting the Rear Monitor ......................... 18
Setting of the External Monitor Output ...... 18
Setting the VISUALIZER Mode Display ... 18
Connecting a Subwoofer ................................ 19
Subwoofer On and Off ................................ 19
Setting the Commander .................................. 19
Setting the Colour of the Commander Button
illumination .............................................. 19
Turning the Commander Button illumination
on and off ................................................. 19
Adjusting the Brightness of the Commander
Button illumination .................................. 19
Setting the Others ........................................... 19
Setting the External Device Interrupt
Mode ........................................................ 19
Adjusting the display position ..................... 19
DVD/Video CD Operation (Optional)
Playing DVD/Video CD ................................. 22
To display the DVD mode screen ............... 22
If a menu screen appears ............................. 22
Playing Still Frames (Pausing) ....................... 22
Finding the Beginnings of
Chapters or Tracks ...................................... 23
Fast-forwarding/Fast-reversing ...................... 23
Displaying the Top Menu Screen
(DVD only) ................................................. 23
Changing Discs (only when DVD changer is
connected) ................................................... 23
Stopping Playback (PRE STOP) .................... 23
Stopping Playback .......................................... 23
Chapter/Track/Title Repeat Playback ............. 23
Switching the Audio Tracks ........................... 24
Switching the Subtitles (Subtitle Language)
(DVD only) ................................................. 24
Switching the Angle (DVD only) ................... 24
Switching from the disc menu .................... 24
iPod® (Optional)
Playback ......................................................... 25
Searching for a desired Song .......................... 25
Searching by Playlist .................................. 25
Searching by artist name ............................. 26
Searching by album name ........................... 26
Random Play Shuffle (M.I.X.) .................... 27
Repeat Play ..................................................... 27
Navigation System (Optional)
Displaying the Navigation Screen .................. 27
Changing the Navigation operation mode ...... 27
Map Screen Function ..................................... 28
Displaying the Current Position .................. 28
Scrolling the Map ........................................ 28
Changing the Map Scale ............................. 28
Menu Screen Function ................................... 28
CD/MP3/WMA Operation (Optional)
Playing CD/MP3/WMA ................................. 20
Folder/File Search ........................................... 20
M.I.X. (Random Play) .................................... 21
Repeat Play ..................................................... 21
2-EN
01GB03VPAB222RTOC.fm
ALPINE VPA-B222R 68-02065Z87-A (EN)
01GB00VPAB222R.book Page 3 Monday, January 23, 2006 4:24 AM
TV Operation (Optional)
Soft button operation
Operating TV Unit ......................................... 28
Basic operation ...............................................40
Automatic Memory of Channel Presets ......... 29
Radio Operation ..............................................40
Switching Audio ............................................. 29
RDS Operation ................................................41
Digital TV Operation (Optional)
Operating Digital TV Unit ............................. 29
EPG Screen Operation ................................... 30
Automatic Memory of Channel Presets ......... 30
Displaying the Menu Screen .......................... 30
Auxiliary Device (Optional)
Operating Auxiliary Devices (Optional) ........ 30
Factory System
Operating Factory System
(Speaker Input mode) .................................. 31
External Audio Processor (Optional)
Adjustment Procedure for Dolby Surround ... 32
Setup Operation ..............................................41
CD/MP3/WMA Operation ..............................42
DVD/Video CD Operation ..............................43
iPod® Operation ..............................................44
TV Operation ..................................................44
Digital TV Operation ......................................45
Information
In Case of Difficulty .......................................46
Specifications ..................................................47
Installation and
Connections
Setting the Speakers ....................................... 32
Warning .................................................. 48
Set MX Mode of the External Audio
Processor ..................................................... 33
Caution ................................................... 48
X-OVER Adjustment ..................................... 33
Installation ......................................................49
Performing Time Correction Manually
(TCR) .......................................................... 34
Connections (VPA-B222R Wiring
Diagram) ......................................................52
Phase Switching ............................................. 34
System Example .............................................54
Precautions ........................................... 48
Graphic Equalizer Adjustments ..................... 35
Parametric Equalizer Adjustments ................. 35
Setting Bass Sound Control ........................... 36
Setting Bass Compressor ............................ 36
Setting Bass Focus ...................................... 36
Speaker Setup ................................................. 36
Setting of Dolby Digital ................................. 37
Adjusting the acoustic image ...................... 37
Mixing bass sound to the rear channel ........ 37
Achieving powerful high volume sound ..... 38
Adjusting the speaker levels ....................... 38
Adjusting the DVD Level ............................... 38
Storing Settings in the Memory ..................... 38
Calling up the Preset Memory ........................ 39
Using the Pro Logic II Mode ......................... 39
Linear PCM Setting ........................................ 39
3-EN
01GB03VPAB222RTOC.fm
ALPINE VPA-B222R 68-02065Z87-A (EN)
01GB00VPAB222R.book Page 4 Monday, January 23, 2006 4:24 AM
Operating Instructions
WARNING
DO NOT DISASSEMBLE OR ALTER.
Doing so may result in an accident, fire or electric shock.
USE ONLY IN CARS WITH A 12 VOLT NEGATIVE GROUND.
WARNING
(Check with your dealer if you are not sure.) Failure to do so may
result in fire, etc.
This symbol means important instructions.
Failure to heed them can result in serious injury
or death.
KEEP SMALL OBJECTS SUCH AS BATTERIES OUT OF THE
REACH OF CHILDREN.
INSTALL THE PRODUCT CORRECTLY SO THAT THE DRIVER
CANNOT WATCH TV/VIDEO UNLESS THE VEHICLE IS
STOPPED AND THE EMERGENCY BRAKE IS APPLIED.
USE THE CORRECT AMPERE RATING WHEN REPLACING
FUSES.
It is dangerous for the driver to watch TV/Video while driving a
vehicle. Installing this product incorrectly enables the driver to
watch TV/Video while driving. This may cause a distraction,
preventing the driver from looking ahead, thus causing an accident.
The driver or other people could be severely injured.
DO NOT WATCH VIDEO WHILE DRIVING.
Watching the video may distract the driver from looking ahead of
the vehicle and cause an accident.
DO NOT OPERATE ANY FUNCTION THAT TAKES YOUR
ATTENTION AWAY FROM SAFELY DRIVING YOUR VEHICLE.
Any function that requires your prolonged attention should only be
performed after coming to a complete stop. Always stop the vehicle
in a safe location before performing these functions. Failure to do
so may result in an accident.
KEEP THE VOLUME AT A LEVEL WHERE YOU CAN STILL
HEAR OUTSIDE NOISE WHILE DRIVING.
Failure to do so may result in an accident.
Swallowing them may result in serious injury. If swallowed,
consult a physician immediately.
Failure to do so may result in fire or electric shock.
DO NOT BLOCK VENTS OR RADIATOR PANELS.
Doing so may cause heat to build up inside and may result in fire.
USE THIS PRODUCT FOR MOBILE 12V APPLICATIONS.
Use for other than its designed application may result in fire,
electric shock or other injury.
CAUTION
This symbol means important instructions.
Failure to heed them can result in injury or
material property damage.
HALT USE IMMEDIATELY IF A PROBLEM APPEARS.
Failure to do so may cause personal injury or damage to the
product. Return it to your authorized Alpine dealer or the nearest
Alpine Service Centre for repairing.
MINIMIZE DISPLAY VIEWING WHILE DRIVING.
Viewing the display may distract the driver from looking ahead of
the vehicle and cause an accident.
4-EN
01GB04VPAB222R.fm
ALPINE VPA-B222R 68-02065Z87-A (EN)
01GB00VPAB222R.book Page 5 Monday, January 23, 2006 4:24 AM
PRECAUTIONS
Product Cleaning
Use a soft dry cloth for periodic cleaning of the product. For more
severe stains, please dampen the cloth with water only. Anything
else has the chance of dissolving the paint or damaging the plastic.
Temperature
Be sure the temperature inside the vehicle is between +45 °C
(+113 °F) and 0 °C (+32 °F) before turning your unit on.
Moisture Condensation
You may notice the disc playback sound wavering due to
condensation. If this happens, remove the disc from the player and
wait about an hour for the moisture to evaporate.
Maintenance
If you have problems, do not attempt to repair the unit yourself.
Return it to your Alpine dealer or the nearest Alpine Service
Station for servicing.
Installation Location
Make sure the VPA-B222R will not be installed in a location
subjected to:
•
•
•
•
Direct sun and heat
High humidity and water
Excessive dust
Excessive vibrations
Alpine products equipped with the Ai-NET bus, connected to the
VPA-B222R, can be operated from the VPA-B222R. Depending on
the products connected, the functions and displays will vary. For
details, consult your Alpine dealer.
Operation of some of the functions of this unit is very complex.
Because of this, it was deemed necessary to place these functions
into a special screen. This will restrict operation of these functions
to times when the vehicle is parked. This ensures the focus of the
driver’s attention will be on the road and not on the VPA-B222R.
This has been done for the safety of the driver and passengers.
Audio Processor Adjustments cannot be made if the car is moving.
The car must be parked and the parking brake must be engaged for
the procedure described in the Owner’s Manual to be valid. The
warning “CAN’T OPERATE WHILE DRIVING,” will be
displayed if any attempts are made to perform these operations
while driving.
• Apple, the Apple logo and iPod are trademarks of Apple
Computer, Inc., registered in the U.S. and other countries.
5-EN
01GB04VPAB222R.fm
ALPINE VPA-B222R 68-02065Z87-A (EN)
01GB00VPAB222R.book Page 6 Monday, January 23, 2006 4:24 AM
Getting Started
Initial System Start-Up
Be sure to press the RESET button when using the unit for the first time,
after installing the CD changer, after changing the car battery, etc.
1
2
Turn off the unit power.
Press RESET with a ball-point pen or similar
pointed object.
Joystick
Flipper switch
RESET
Operation is carried out by the commander. If an Alpine touch panel
monitor is connected to this unit, the soft buttons appear in the display
to enable touch operation.
This manual explains operation using the commander. For details of the
touch operation, refer to “Soft button operation” on page 40.
• The commander vibrates when an operation is performed. Refer to
“Turning the Commander Vibration ON or OFF” (page 14).
Feature
If an Alpine Ai-NET compatible products (DVD player, DVD/CD
changer, Adapter for iPod, etc.) is connected to the VPA-B222R, it can
be controlled from the commander and displayed on the external
monitor. If an optional Alpine Navigation System is connected to the
VPA-B222R, the Navigation screen will be displayed on the external
monitor, and its operation can be performed. For details on the function
of connected devices, refer to the Owner’s Manual.
Turning Power On or Off
Some of this unit’s functions cannot be performed while the vehicle is in
motion. Be sure to stop your vehicle in a safe location and apply the
parking brake, before attempting these operations.
1
2
Press and hold SOURCE/POWER for at least 2
seconds to turn off the unit.
Displaying the Unit Source on the Monitor
By selecting the image source on the unit, it can be displayed on a
connected monitor. For operation, refer to the Owner’s Manual of the
monitor.
If an Alpine monitor is connected (RGB connection)
1 Recall the navigation mode by selecting the image
source on the monitor.
The source of the unit is displayed.
Accessory List
Main unit....................................................................................1
Power cable...............................................................................1
Parking brake sub-lead .............................................................1
Factory System Cable ...............................................................1
ISO power cable........................................................................1
Pinch connector ........................................................................6
Bracket ......................................................................................2
Tapping screw (M4 × 14)...........................................................4
Pan screw (M4 × 8) ...................................................................4
Velcro fastener ..........................................................................2
RGB cable (3M) ........................................................................1
RCA extension cable (6M) ........................................................1
Antenna extension cable (5.5M)................................................1
Commander ..............................................................................1
Holder........................................................................................1
Commander connection cable (5.5M) .......................................1
Double-sided adhesive tape......................................................1
Reinforcement screw.................................................................3
Cable clamp ..............................................................................3
Press SOURCE/POWER to turn on the unit.
• The unit can be turned on by pressing any button.
Switching a Source
1
Press SOURCE/POWER.
The source selection screen is displayed.
Screen example
Displays source modes that can be selected
(The kind of source modes that are displayed varies
depending on connection and setting)
2
Press the joystick up or down to select the desired
source, then press
/ /ENTER.
The selected main source screen is displayed.
• In the source selection screen mode, press TA/RTN/SETUP to return
to the previous screen.
6-EN
01GB05VPAB222R.fm
ALPINE VPA-B222R 68-02065Z87-A (EN)
01GB00VPAB222R.book Page 7 Monday, January 23, 2006 4:24 AM
Adjusting the Volume
Radio
Turn the flipper switch clockwise or counterclockwise
to adjust the volume.
Clockwise: Volume up
Counterclockwise: Volume down
Volume: 0 - 35
Joystick
Lowering Volume Quickly
Activating this function will instantly lower the volume level.
• This operation can be performed from either a monitor compatible
with touch panel or remote control (sold separately). For operation
from a remote control (sold separately), refer to the owner's manual
of the remote control.
Touch [MUTE] on the main source screen to activate the
MUTE mode.
The audio level decreases.
During mute, the volume level indicator will blink.
Screen example
Band display
Preset number display
Frequency display
MUTE
Touching [MUTE] again brings the audio back to its previous
level.
Listening to Radio
1
Press SOURCE/POWER.
The source selection screen is displayed.
2
3
Press the joystick up or down to select RADIO, then
press
/ /ENTER.
Press and hold
for at least 2 seconds repeatedly
until the desired radio band is displayed.
FM-1
4
Press
FM-2
/
FM-3
MW
LW
FM-1
/ENTER to select the tuning mode.
DX SEEK
SEEK
(OFF)
DX SEEK
• The initial mode is Distance mode.
DX SEEK (Distance mode):
Both strong and weak stations will be automatically tuned in
(Automatic Seek Tuning).
SEEK (Local mode):
Only strong stations will be automatically tuned in (Automatic
Seek Tuning).
OFF (Manual mode):
The frequency is manually tuned in steps (Manual tuning).
5
Press
or
Holding down
continuously.
to tune in the desired station.
or
will change the frequency
7-EN
01GB05VPAB222R.fm
ALPINE VPA-B222R 68-02065Z87-A (EN)
01GB00VPAB222R.book Page 8 Monday, January 23, 2006 4:24 AM
Manual Storing of Station Presets
Tuning to Preset Stations
1
1
2
Select the radio band and tune in a desired radio
station you wish to store in the preset memory.
Press and hold
seconds.
/MENU/FUNC. for at least 2
The FUNCTION screen is displayed.
3
4
2
Press
P06).
or
to select a preset number (P01 to
The selected station is received.
Recalling by the FUNCTION screen
Press the joystick up or down to select any one of
the preset numbers PRESET1 through PRESET6,
then press
/ /ENTER.
• A total of 30 stations can be stored in the preset memory (6 stations
for each band; FM-1, FM-2, FM-3, MW and LW).
• If you store a station in a preset memory which already has a station,
the current station will be cleared and replaced with the new station.
Automatic Memory of Station Presets
2
Changing Stations by the Commander
Press the joystick up or down to select PRESET
MEMORY, then press the joystick right.
The selected station is stored.
The display shows the band, preset number and station
frequency memorized.
1
Press and hold
for at least 2 seconds repeatedly
until the desired band is displayed.
2
Press and hold
seconds.
/MENU/FUNC. for at least 2
The FUNCTION screen is displayed.
3
4
Press the joystick up or down to select PRESET
CALL, then press the joystick right.
Press the joystick up or down to select any one of
the preset numbers PRESET1 through PRESET6,
then press
/ /ENTER.
The preset station is received.
The display shows the band, preset number and frequency
of the station selected.
Press and hold
for at least 2 seconds repeatedly
until the desired radio band is displayed.
Press and hold
/
/ENTER for at least 2 seconds.
The frequency on the display continues to change while the
automatic memory is in progress. The tuner will
automatically seek and store 6 strong stations in the
selected band. They will be stored into PRESET1 to
PRESET6 in order of signal strength.
When the automatic memory has been completed, the tuner
goes to the station stored in preset location No. 1.
• If no stations are stored, the tuner will return to the original station
you were listening to before the auto memory procedure began.
8-EN
01GB05VPAB222R.fm
ALPINE VPA-B222R 68-02065Z87-A (EN)
01GB00VPAB222R.book Page 9 Monday, January 23, 2006 4:24 AM
RDS Operation
Receiving Traffic Information
Press TA/RTN/SETUP to turn on the Traffic Information
mode.
When the traffic information station is tuned in, the TA indicator
lights up.
Joystick
Traffic information is heard only when it is being broadcast. If
traffic information is not being broadcast, the unit is set in the
standby mode.
When a traffic information broadcast begins, the unit
automatically receives it and the display shows “T. INFO”.
When the traffic information broadcast is over, the unit will
automatically set in the standby mode.
Turning AF (Alternative Frequencies) On
or Off
The RDS (Radio Data System) is a radio information system using the
57 kHz subcarrier of regular FM broadcasting. The RDS allows you to
receive a variety of information such as traffic information, station
names, and to automatically re-tune to a stronger transmitter that is
broadcasting the same programme.
1
Press and hold TA/RTN/SETUP for at least 2
seconds.
The SETUP screen is displayed.
2
Press the joystick up or down to select RDS, then
press the joystick right.
The display changes to the RDS setting screen.
3
Press and hold
seconds.
Press the joystick up or down to select the AF
(Alternative Frequency), then press
/ /ENTER.
• When the AF mode is selected, the unit automatically tunes to a
strong signal station in the AF list.
• Select AF again, then press
/ /ENTER to select OFF mode
when automatic re-tuning is not required.
5
PTY (Programme Type) Tuning
1
Press TA/RTN/SETUP to return to the previous
screen.
2
Press the joystick up or down to select RDS, then
press the joystick right.
The display changes to the RDS setting screen.
Changing PTY by the commander
3
Press and hold
or
for at least 2 seconds.
PTY is changed.
Changing by the FUNCTION screen
3
Press and hold
seconds.
/MENU/FUNC. for at least 2
The FUNCTION screen is displayed.
4
Tips
• When the unit receives the PTY31 (Emergency Broadcast) signal, the
unit will show “ALARM” in the display
• The RDS digital data includes the following:
PI
Programme Identification
PS
Programme Service Name
AF
List of Alternative Frequencies
TP
Traffic Programme
TA
Traffic Announcement
PTY
Programme Type
EON
Enhanced Other Networks
• Refer to GENERAL Setup section (Pages 13-15) about “RDS Time
Display”, “PI SEEK Setting”, “Receiving RDS Regional (Local)
Stations” and “Switching the Display Language of PTY (Programme
Type)”.
Press and hold TA/RTN/SETUP for at least 2
seconds.
The SETUP screen is displayed.
/MENU/FUNC. for at least 2
The FUNCTION screen is displayed.
4
• If the traffic information broadcast signal falls below a certain level,
the unit remains in the receiving mode for 1 minute. If the signal
remains below a certain level for over 70 seconds,
“TA” blink light up in the display.
• If you do not want to listen to the traffic information being received,
lightly press TA/RTN/SETUP to skip that traffic information
message. The T. INFO mode will remain in the ON position to receive
the next traffic information message.
• If the volume level is changed while receiving traffic information, the
changed volume level will be memorized. When traffic information is
received next time, the volume level will be automatically adjusted to
the level memorized.
5
6
Press the joystick up or down to select the PTY
and press the joystick right.
Press the joystick up or down to choose the
desired programme type.
Press
/ /ENTER after selecting the programme
type to start searching for a station of the selected
programme type.
If no station is found, “NO PTY” will be displayed.
9-EN
01GB05VPAB222R.fm
ALPINE VPA-B222R 68-02065Z87-A (EN)
01GB00VPAB222R.book Page 10 Monday, January 23, 2006 4:24 AM
Programme Seek
Priority News
A programme in the current PTY (Programme Type) is sought.
This function allows you to preset to give priority to the News
programme. You will never miss the News programme as the unit
automatically gives priority to the News programme whenever it begins
broadcasting, and interrupts the programme you are currently listening.
This feature is functional when your unit is set to a mode other than the
LW and MW modes.
1
Press and hold TA/RTN/SETUP for at least 2
seconds.
The SETUP screen is displayed.
2
Press the joystick up or down to select RDS, then
press the joystick right.
The display changes to the RDS setting screen.
3
Press
or
to seek a programme.
Receiving Traffic Information While
Playing CD or Radio
The example explained here is how to receive the traffic information
broadcast during CD playback.
1
In the CD mode, press TA/RTN/SETUP to turn on
the Traffic information mode.
The unit automatically starts to search for receivable traffic
broadcasts.
1
Press and hold TA/RTN/SETUP for at least 2
seconds.
The SETUP screen is displayed.
2
Press the joystick up or down to select RDS, then
press the joystick right.
The display changes to the RDS setting screen.
3
Press and hold
seconds.
/MENU/FUNC. for at least 2
The FUNCTION screen is displayed.
4
Press the joystick up or down to select the NEWS
mode, then press
/ /ENTER.
The “NEWS” indicator appears in the display.
• In the PRIORITY NEWS function, unlike in the TA function, the
volume does not increase automatically.
When the traffic information broadcast is searched out, the
CD mode is switched to the Radio mode and the unit
receives the traffic information broadcast.
5
• When the traffic information broadcast starts, the unit
automatically mutes the CD.
• When the traffic information broadcast finishes, the unit
automatically returns to the original source you were
playing before the traffic information broadcast began.
Displaying Radio Text
Text messages from a radio station can be displayed.
• The receiver is equipped with the EON (Enhanced Other Networks)
function so if the station being received does not broadcast the traffic
information, the receiver automatically tunes in the related station
that broadcasts the traffic information.
1
2
2
When the traffic information broadcast has finished,
the unit returns to the CD mode.
Press TA/RTN/SETUP to return to the previous
screen.
Press and hold /MENU/FUNC. for at least 2
seconds in the FM radio mode.
The FUNCTION screen is displayed.
Press the joystick up or down to select INFO., then
press
/ /ENTER.
The display shows “WAIT” for a few seconds.
3
To deactivate the Radio Text mode, repeat step 1
and 2.
• If there is no receivable text message or the unit cannot receive a text
message properly, the display shows “NO TEXT”.
10-EN
01GB05VPAB222R.fm
ALPINE VPA-B222R 68-02065Z87-A (EN)
01GB00VPAB222R.book Page 11 Monday, January 23, 2006 4:24 AM
Adjusting the Balance
Other Useful
Features
Adjust the sound volume of the left and right speakers.
Setting item: BALANCE
Setting range: L15 to R15
Adjusting the Fader
Adjust the volume of the front and rear speakers.
Setting item: FADER
Setting range: F15 to R15
Joystick
Setting the Treble Control
You can change the Treble Frequency emphasis to create your own tonal
preference.
1
2
Select TREBLE on the AUDIO MODE screen, then
press the joystick right.
Press the joystick up or down to select the desired
item, then press the joystick left or right to adjust
and set the desired item.
Adjusting the Audio
Setting the treble level
The following steps 1 to 5 are common operations of each audio
adjustment. Refer to each section for details.
You can boost or cut treble frequencies.
(The level of each audio source can be adjusted.)
Setting item: LEVEL
Setting level: -7 to +7
1
Press and hold TA/RTN/SETUP for at least 2
seconds.
The SETUP screen is displayed.
2
Setting the treble centre frequency
The displayed treble frequency is boosted.
(Common to each audio source.)
Press the joystick up or down to select AUDIO
MODE, then press the joystick right.
Setting item: FREQUENCY
Setting range: 7.5kHz
10kHz
12.5kHz
15kHz
The AUDIO MODE screen is displayed.
Display Example for AUDIO MODE Screen
• Adjustment cannot be performed when an external audio processor is
connected and DEFEAT is set to ON.
Setting the Bass Control
You can change the Bass Frequency emphasis to create your own tonal
preference.
1
2
3
Select BASS on the AUDIO MODE screen, then
press the joystick right.
Press the joystick up or down to select the desired
item, then press the joystick left or right to adjust
and set the desired item.
Press the joystick up or down to select the desired
item.
Setting items: BALANCE / FADER / TREBLE / BASS /
SUBW LEVEL / LOUDNESS / DEFEAT /
GUIDE MIX LV*
* Setting can be made only when an external audio processor is
connected.
4
5
Press the joystick left or right to adjust and set the
desired item.
Press TA/RTN/SETUP to return to the previous
screen. Press TA/RTN/SETUP repeatedly to return
to the main source screen displayed before starting
the setup operation.
11-EN
01GB05VPAB222R.fm
ALPINE VPA-B222R 68-02065Z87-A (EN)
01GB00VPAB222R.book Page 12 Monday, January 23, 2006 4:24 AM
Setting the bass level
Rear Entertainment Function
You can boost or cut bass frequencies.
(The audio source level can be adjusted.)
Setting item: LEVEL
Setting level: -7 to +10
Setting the slope
Select the frequency you want to set within the available range.
(Common to each audio source.)
Setting item: SLOPE
Setting range: 0.50
0.75
1.00
1.25
The rear entertainment function independently routes different sources
to the front and the rear inside a car. For example, while listening to the
radio or other audio source in the front, DVD can be enjoyed in the rear
with the optional rear monitor and headphones.
To connect the rear monitor, the optional expansion box VPE-S431 is
required.
1
Setting the bass centre frequency
The displayed bass frequency is boosted.
(Common to each audio source.)
Setting item: FREQUENCY
Setting range: 60Hz
80Hz
Press and hold TA/RTN/SETUP for at least 2
seconds.
The SETUP screen is displayed.
2
100Hz
120Hz
• Adjustment cannot be performed when an external audio processor is
connected and DEFEAT is set to ON.
Press the joystick up or down to select REAR
SELECT, then press the joystick right.
The REAR SELECT screen is displayed.
Display Example for REAR SELECT screen
Adjusting the Subwoofer Level
Adjust the subwoofer output.
Setting item: SUBW LEVEL
Setting range: 0 to 15
• The level adjustment becomes available when ON is set in
“Subwoofer On and Off” (page 19).
• This function cannot be used when MONITOR-1 or 2 is set to
OFF in SYSTEM SETUP.
Turning Loudness ON or OFF
Loudness introduces a special low- and high-frequency emphasis at low
listening levels. This compensates for the ear's decreased sensitivity to
bass and treble sound.
3
REAR-1: A rear external monitor can be connected to AUX
OUT 1 of the optional expansion box (VPE-S431).
REAR-2: A rear external monitor can be connected to AUX
OUT 2 of the optional expansion box (VPE-S431)
Setting item: LOUDNESS
Setting range: ON / OFF
• Adjustment cannot be performed when an external audio processor is
connected and DEFEAT is set to ON.
Turning Defeat ON or OFF
By setting Defeat ON, previously adjusted settings of BASS and
TREBLE will return to the factory defaults.
Setting item: DEFEAT
Setting range: ON / OFF
Adjusting Volume of GUIDE Voice
The volume level of the speaker input voice and the navigation interrupt
voice output from the external audio processor is adjusted.
Press the joystick up or down to select the desired
external monitor.
4
5
Press the joystick left or right to set the desired
video source (external input).
Press TA/RTN/SETUP to return to the previous
screen. Press TA/RTN/SETUP repeatedly to return
to the main source screen displayed before starting
the setup operation.
• To cancel the rear entertainment function, set to OFF.
• When the “Setting the AUX Mode” (page 18) is set to OFF, the
auxiliary source is not displayed.
• VISUALIZER (VISUAL.) is not displayed when the setting of “Setting
the VISUALIZER Mode Display” (page 18) is turned off.
Setting item: GUIDE MIX LV
* Setting range: 0 to 15
* Make sure to adjust this setting to 15. Otherwise operation may not
be correctly performed.
• Adjust the speaker input voice interruption level in “Adjusting the
Speaker Input Voice Interruption Level” (page 17)and “Navigation
Audio Interruption Volume Adjustment” (page 18).
12-EN
01GB05VPAB222R.fm
ALPINE VPA-B222R 68-02065Z87-A (EN)
01GB00VPAB222R.book Page 13 Monday, January 23, 2006 4:24 AM
Switching the function of the remote
sensor
Setup
For remote control operation, the remote sensor of the external device
(monitor, etc.) can be switched, as you prefer.
Switching the Remote Control Sensor
1
In the SETUP screen mode, press the joystick up or
down to select SYSTEM SETUP, then press the
joystick right.
Joystick
The SYSTEM SETUP screen is displayed.
2
3
Press the joystick up or down to select REMOTE
SEL.
Press the joystick left or right to select the monitor
to be controlled by the remote control.
FRONT:
REAR-1:
REAR-2:
4
Remote control operation can be performed
when the Alpine monitor is connected using an
RGB cable, and also when a monitor (other
than Alpine) connected to a remote control
sensor unit (optional) is connected.
The remote sensor of the external monitor
connected to AUX OUT1 of the tuner box of this
unit, or the optional expansion box (VPE-S431)
is effective, and the remote control can operate
only the source selected for the REAR SELECT
screen.
The remote sensor of the external monitor
connected to AUX OUT2 of the optional
expansion box (VPE-S431) is effective, and the
remote control can operate only the source
selected for the REAR SELECT screen.
Press TA/RTN/SETUP to return to the previous
screen. Press TA/RTN/SETUP repeatedly to return
to the main source screen displayed before starting
the setup operation.
GENERAL Setup
General Setup Operation
The Parking Brake must be engaged to access the SETUP
mode screen. Attempting to access this screen while driving
will display the warning-CAN’T OPERATE WHILE DRIVING.
The following steps 1 to 5 are common operations to each
“Setting item” of GENERAL Setup. Refer to each section for
details.
1
Press and hold TA/RTN/SETUP for at least 2
seconds.
The SETUP screen is displayed.
• Select SETUP on the FUNCTION screen to recall the SETUP screen
after pressing and holding /MENU/FUNC. for at least 2 seconds.
• The sensor of the touch panel rear monitor has priority over the
sensor of the remote control, if the rear monitor (connected to the
Alpine touch panel rear monitor via the Monitor control lead) is
touched, regardless of the remote control sensor switch setting. Note,
however, that the sensor of the remote control that has been set takes
priority if it has been 5 seconds since last touching the panel.
13-EN
01GB05VPAB222R.fm
ALPINE VPA-B222R 68-02065Z87-A (EN)
01GB00VPAB222R.book Page 14 Monday, January 23, 2006 4:24 AM
2
Press the joystick up or down to select GENERAL
SETUP, then press the joystick right.
The GENERAL SETUP screen is displayed.
Display Example for GENERAL SETUP Screen
Setting the Time
Setting item: CLOCK ADJ
Further setting items: HOUR / MINUTE
Setting content: 1-12 (0-23)* / 0-59
HOUR:
Adjust the hour.
MINUTE: Adjust the minute.
* The setting content differs depending on the selection in "Setting the
Time Display" (page 14).
• Pressing and holding the joystick left or right will change the setting
item continuously.
3
Setting Daylight Saving Time
Press the joystick up or down to select the desired
item.
Setting items:
DEMO / CLOCK TYPE / CLOCK ADJ / DAYLIGHT TIME / BEEP /
REACTOR / SCROLL AUTO / RDS CLK DISP / FM LEVEL /
PI SEEK / RDS REGIONAL / PTY LANGUAGE / LANGUAGE SEL
4
5
Press the joystick left or right to adjust and set the
desired item.
Press TA/RTN/SETUP to return to the previous
screen. Press TA/RTN/SETUP repeatedly to return
to the main source screen displayed before starting
the setup operation.
• Select SETUP on the FUNCTION screen to recall the SETUP screen
after pressing and holding /MENU/FUNC. for at least 2 seconds.
• Immediately after changing the settings of General Mode (While the
system is writing data automatically) do not turn the ignition key
(engine key) to OFF. Otherwise, the settings may not be changed.
Setting item: DAYLIGHT TIME
Setting content: OFF / ON
Place the Summer Time mode ON. The time advances by
one hour.
OFF: Return to the ordinary time.
ON:
Sound (Beep) Guide Function
Setting item: BEEP
Setting content: OFF / ON
ON: Activate the Sound Guide mode.
OFF: Deactivate the Sound Guide mode. The sound guide
beep will not be produced when a button on the
commander is pressed.
Turning the Commander Vibration ON or
OFF
You can turn the commander vibration ON or OFF during operation.
Demonstration Function
This unit is equipped with a demonstration function capable of showing
basic operations of respective sources on the monitor display.
Setting item: DEMO
Setting content: OFF / ON
Turns on the demonstration mode to show the basic
operations.
OFF: Turns off the demonstration mode.
ON:
• The demonstration operation is automatically repeated until the
function is turned off.
Setting the Time Display
The time display type can be set.
Setting item: CLOCK TYPE
Setting content: OFF / 12H / 24H
12H: Clock indication is displayed for 12 hours.
24H: Clock indication is displayed for 24 hours.
OFF: Clock indication is turned off.
Setting item: REACTOR
Setting content: OFF / ON
OFF: Turns off vibration during operation.
ON: Turns on vibration during operation.
Setting the Scroll
Scroll display is available if CD text, folder name, file name or tag
information is entered.
Setting item: SCROLL AUTO
Setting content: OFF / ON
Turns on the AUTO scroll mode. Scroll display is
repeated as long as the mode is turned on.
OFF: Turns off the AUTO scroll mode.
Scroll display is done once as a track is changed.
ON:
• Scroll display of the song, artist and album name is enabled when
iPod is connected.
14-EN
01GB05VPAB222R.fm
ALPINE VPA-B222R 68-02065Z87-A (EN)
01GB00VPAB222R.book Page 15 Monday, January 23, 2006 4:24 AM
RDS Time Display
SYSTEM Setup
When ON is selected, the clock is adjusted automatically based on the
time data sent from the RDS broadcast.
Setting item: RDS CLK DISP
Setting content: OFF / ON
ON:
Adjust the clock automatically based on the time data. In
this case, the clock cannot be adjusted manually.
To adjust it manually, select OFF.
System Setup Operation
The Parking Brake must be engaged to access the SETUP
mode screen. Attempting to access this screen while driving
will display the warning-CAN’T OPERATE WHILE DRIVING.
Adjusting Source Signal Levels
If the difference in volume level between the CD and FM radio is too
great, adjust the FM signal level as follows.
Setting item: FM LEVEL
Setting content: LOW / HIGH
The following steps 1 to 5 are common operations to each
“Setting item” of SYSTEM Setup. Refer to each section for
details.
1
PI SEEK Setting
Press and hold TA/RTN/SETUP for at least 2
seconds.
The SETUP screen is displayed.
Setting item: PI SEEK
Setting content: OFF / AUTO
Receiving RDS Regional (Local) Stations
When ON is selected, the unit automatically keeps receiving the related
local RDS station.
Setting item: RDS REGIONAL
Setting content: OFF / ON
Switching the Display Language of PTY
(Programme Type)
You can select one of the patterns of the display languages.
2
Press the joystick up or down to select SYSTEM
SETUP, then press the joystick right.
The SYSTEM SETUP screen is displayed.
SYSTEM SETUP Screen example
Setting item: PTY LANGUAGE
Setting content: GB / NL / F / D / I / E
Switching to the Russian Font
Two types of font can be selected.
Setting item: LANGUAGE SEL
Setting content: MODE1 / MODE2
MODE1: Normal Font Display (ISO8859-1)
MODE2: Russian Font Display (WINDOWS-1251)
You cannot use this font for display in RDS, Tuner
mode.
15-EN
01GB05VPAB222R.fm
ALPINE VPA-B222R 68-02065Z87-A (EN)
01GB00VPAB222R.book Page 16 Monday, January 23, 2006 4:24 AM
3
Press the joystick up or down to select the desired
item.
Setting items:
IN-INT MUTE / NAV. / GUIDE MIX / NAV. MIX LV / FACT SYS SET
/ FACT SYS LV / FACT SYS DET / FACT SYS MIX / F.SYS MIX TYP
/ F.SYS INT CH. / REMOTE SEL.*1 / AUX IN-1(2,3) / AUX IN1(2,3) NAME / AUX IN-1(2,3) LEVEL / MONITOR-1 / MONITOR-2
/ VISUALIZER / ILLUM COLOR / CMNDR LIGHT. / DIMMER /
SCREEN ADJ / SUBW*2
*1 Refer to "Rear Entertainment Function" on page 12.
*2 When an external audio processor is connected, the SUBW item is
not displayed.
4
5
Press the joystick left or right to adjust and set the
desired item.
Press TA/RTN/SETUP to return to the previous
screen. Press TA/RTN/SETUP repeatedly to return
to the main source screen displayed before starting
the setup operation.
• Select SETUP on the FUNCTION screen to recall the SETUP screen
after pressing and holding /MENU/FUNC. for at least 2 seconds.
• Immediately after changing the settings of System Mode (While the
system is writing data automatically) do not turn the ignition key
(engine key) to OFF. Otherwise, the settings may not be changed.
Using the Speaker Input
The unit can interrupt the system (navigation or telephone) of the car.
The audio can also be played back on the unit if the car system of the
audio (CD, etc.) is selected as the source.
The unit makes the sound interruption according to the sound output
level of the car system. If any of the following settings are not correctly
made, sound may not interrupt, or loud sound may suddenly interrupt.
Setting the Speaker Input Mode
The following explains how to install the system (navigation/telephone)
in your car. While listening to the radio, you can have navigation voice
guidance or a received telephone call interrupt automatically. You can
also select the speaker input mode (FACTRY SYS) on the source
selection screen.
Setting items: FACT SYS SET
Setting content: OFF / SOURCE / INT / BOTH
SOURCE: The system (CD, etc.) of the car can be selected as a
source.
Navigation/telephone voice of the car is not
interrupted.
INT:
Interrupts only the navigation/telephone voice of the
car.
BOTH:
The system (CD, etc.) of the car can be selected as
the source.
Navigation/telephone voice of the car is interrupted.
OFF:
Operation and setting of the speaker input mode is
not performed.
• If the car system (CD, etc.) is set to SOURCE and played back in a
car with multi-channel speakers, sound such as treble, etc., may not
be correctly output.
• Depending on the conditions of use, the INT or SOURCE setting is
recommended.
• If INT is set, do not output CD audio from the car system.
• With BOTH set, if the source is set to other than FACTORY SYS, do
not output CD audio, etc., from the car system.
• If OFF is to set, speaker input mode settings cannot be made.
Displaying the Speaker Input Volume Level
The volume level of the speaker input is displayed numerically.
Adjustment can be made only on the system in your car (standard car
audio, etc.), and cannot be made by this unit.
Setting items: FACT SYS LV
Setting content: 0 to 2 L / 3 to 15: OK / 16 to 18 H
L:
OK:
H:
Volume level is LOW
Volume level is optimally adjusted
Volume level is HIGH
Adjust the volume for optimum level.
• Set the volume as loud as possible, but before the onset of distortion
(The volume level should not exceed 15). Even if OK is displayed, if
any distortion is apparent, decrease the car audio's volume.
• Turn off the car audio's TREBLE, BASS settings.
• The volume level cannot be displayed when OFF is set in "Setting the
Speaker Input Mode" (page 16).
16-EN
01GB05VPAB222R.fm
ALPINE VPA-B222R 68-02065Z87-A (EN)
01GB00VPAB222R.book Page 17 Monday, January 23, 2006 4:24 AM
Setting the Navigation/Speaker Input Voice
Interruption
Setting the Interrupt Type of the Speaker
Input Voice
With an Alpine navigation system connected to the VPA-B222R, the
voice guidance of the navigation system will be mixed with the radio
play. Also, the setting of interruption of the speaker input voice can be
adjusted.
The following explanation is how to set the voice interrupt type of the
speaker input. When the navigation voice guidance is made to interrupt,
set to DEMAND, and the telephone voice is made to interrupt, set to
MUTE, these are recommended.
Setting item: GUIDE MIX
Setting content: OFF / ON
Setting items: F.SYS MIX TYP
Setting content: FULL / DEMAND / MUTE
OFF: The navigation/speaker input interruption mode is turned
off.
ON: The navigation/speaker input interruption mode is on.
Adjusting the Speaker Input's Interruption
Detection Level
You can set the level for voice interruption.
Setting items: FACT SYS DET
Setting level: 1 to 15
When the setting level is low, the voice interrupts even if a low
volume level is set on the system
• The setting can be made when INT or BOTH is set in "Setting the
Speaker Input Mode" (page 16).
• Warning beeps such as for seat belts may also output from the
speakers, depending to the car. Make sure that voice interruption
sounds correctly in such a car.
• We recommend initially setting the level to 8. Set the voice
interruption level to more than 8 if interruption is too frequent, or set
it to less than 8 if interruption is not frequent enough.
Adjusting the Speaker Input Voice
Interruption Level
The output level of the speaker input interruption can be adjusted.
Setting items: FACT SYS MIX
Setting level: 0 to 15
• The setting can be made when INT or BOTH is set in “Setting the
Speaker Input Mode” (page 16).
• Begin this setting after setting GUIDE MIX to ON and GUIDE MIX
LV to 15, when an external audio processor is connected. For details,
refer to “Setting the Navigation/Speaker Input Voice Interruption”
(page 17) and “Adjusting Volume of GUIDE Voice” (page 12).
Regardless of the speaker interruption detection
level, voice interruption and source sound are both
active. If voice interruption cannot be heard clearly,
adjust the source volume accordingly on the
commander.
DEMAND: When speaker input interruption occurs, voice
interruption may be too high or too low, adjust the
source volume so voice interruption can be heard. If
no speaker input interruption occurs for 5 seconds,
source volume returns to the level you initially set.
When speaker input interruption occurs again,
source volume level automatically returns to the last
one you set.
MUTE:
To avoid voice interruption not being heard clearly,
this setting mutes the current source sound
whenever speaker input interruption occurs. In this
setting, even when voice interruption cannot be
heard clearly, you can still set the volume by the
commander. When speaker input interruption occurs,
the commander buttons blink. Press SOURCE/
POWER to cancel voice interruption.
FULL:
• The setting can be made when INT or BOTH is set in "Setting the
Speaker Input Mode" (page 16).
Setting the Channel of the Speaker
Interruption Detection
The setting should be made according to the speaker output of the car
system (navigation/telephone).
Setting items: F.SYS INT CH.
Setting content: L / R / BOTH
L:
Outputs from the left speaker of the car system.
R:
Outputs from the right speaker of the car system.
BOTH: Outputs from both speakers of the car system.
• Usually set to BOTH.
• The setting can be made when INT or BOTH is set in "Setting the
Speaker Input Mode" (page 16).
• The speaker input interrupt voice is output from the right and left
front speaker regardless of this setting.
17-EN
01GB05VPAB222R.fm
ALPINE VPA-B222R 68-02065Z87-A (EN)
01GB00VPAB222R.book Page 18 Monday, January 23, 2006 4:24 AM
Connecting the Navigation
If an Alpine navigation system is connected, make the necessary
settings in “Setting the Navigation/Speaker Input Voice Interruption”
(page 17). Also make the following settings.
Setting the Navigation Mode
When you connect optional navigation equipment, set to ON.
Setting item: NAV.
Setting contents: OFF / ON
ON: Navigation source is displayed.
OFF: Navigation source is not displayed. The settings related
to the navigation cannot be changed from this unit.
Navigation Audio Interruption Volume
Adjustment
With an Alpine navigation system connected to the VPA-B222R, the
voice guidance of the navigation system will be mixed with the DVD or
CD playback sound.
You can adjust the volume level of the voice guidance.
Setting item: NAV. MIX LV
Setting contents: 0 to 15
• When NAV. is turned on, the setting can be made. Refer to "Setting
the Navigation Mode" (page 18).
Connecting an External Input Device
(AUX)
If an external input device is connected, make the following settings.
Setting the AUX Mode
Setting item: AUX IN-1, 2, 3
Setting content: OFF / ON
OFF: AUX source is not displayed.
ON: AUX source is displayed.
• When OFF is selected, the settings related to AUX cannot be changed
from this unit.
• AUX IN-3 is adjustable when the external expansion box (VPE-S431)
is connected.
• OFF is not displayed when a DVD player or DVD changer is
connected with the optional Ai-NET.
• When either a DVD player or DVD changer is connected to AUX IN
1, DVD is displayed on the screen. When both of them are connected,
DVD is displayed for AUX IN 1 and DVD CHANGER is displayed for
AUX IN 2.
Naming External Devices
• Only when an Alpine TV tuner is connected, can you operate the
displayed function guide from this unit.
• If an Ai-NET compatible DVD player/DVD changer is connected,
names are automatically set, however, they cannot be changed.
* “EXT.DVD” is displayed on the source selection screen when a DVD
player is connected, and “DVD-1-3” is displayed on the source
selection screen when the NAME setting is set to “EXTDVD” on
more than one AUX (included when an external Ai-NET compatible
DVD player is connected).
Adjusting the External Input Audio Level
Setting item: LEVEL
Setting content: LOW / HIGH
LOW: Decreases the external input audio level
HIGH: Increases the external input audio level
• The adjustment is available when ON is set in "Setting the AUX
Mode" (page 18).
Connecting the Rear Monitor
If the rear monitor is connected, make the following each setting
Setting of the External Monitor Output
Set it to ON when you use the rear entertainment function (page 12).
Setting items: MONITOR-1, 2
Setting contents: OFF / ON
By setting the connected external monitor to ON, the
remote control will be usable.
OFF: When either MONITOR-1 or 2 is set to OFF, only one
monitor can be set by the rear entertainment function.
When both MONITOR-1 and 2 are set to OFF, the rear
entertainment function cannot be used.
ON:
• This setting can be made if optional expansion box VPE-S431 is
connected.
Setting the VISUALIZER Mode Display
Note that this setting is enabled only when the optional expansion box
(VPE-S431) is connected.
Setting item: VISUALIZER
Setting contents: MODE-1-MODE-6 / SCAN / OFF
MODE-1 to
MODE-6 / OFF: Recalls the maker’s setting mode on the
expansion box (VPE-S431).
SCAN:
Displays the pattern of MODE-1 to MODE-6
repeatedly.
• VISUALIZER can be displayed in a rear monitor when mode is set to
other than OFF. Set the source of the rear monitor to VISUAL. to
display VISUALIZER in the rear monitor. For the rear monitor's
setting, refer to “Rear Entertainment Function” (page 12).
When more than one external device is connected, you can name each
(up to 3) as you like.
Setting items: NAME
Setting contents: AUX / VCR / GAME-1,2 / TV / EXTDVD* / DVB-T
• The setting can be made when ON is set in "Setting the AUX Mode"
(page 18).
• The selected source name is displayed instead of AUX source name.
If selecting TV/EXT.DVD/DVB-T as the source, the screen will
change to the function screen of that source.
18-EN
01GB05VPAB222R.fm
ALPINE VPA-B222R 68-02065Z87-A (EN)
01GB00VPAB222R.book Page 19 Monday, January 23, 2006 4:24 AM
Connecting a Subwoofer
Setting the Others
When a subwoofer is connected, set to ON.
Setting the External Device Interrupt Mode
Subwoofer On and Off
Setting item: SUBW
Setting contents: ON / OFF
ON: Subwoofer output is on.
OFF: Subwoofer output is off.
• When an external audio processor is connected, refer to “Setting the
Speakers” (page 32) for setting.
Setting the Commander
The colour/brightness, etc., of buttons lighting on the commander
supplied with the unit can be adjusted.
Setting the Colour of the Commander
Button illumination
You can set the illumination colour of the commander buttons.
Setting items: ILLUM COLOR
Setting content: BLUE / RED
BLUE: When a source other than navigation is activated,
illumination is blue. When the navigation is activated,
illumination is red.
RED: When a source other than navigation is activated,
illumination is red. When navigation is activated,
illumination is blue.
Turning the Commander Button
illumination on and off
You can select whether the commander button illumination remains lit
or blinks when no operation is performed for 5 minutes.
Setting items: CMNDR LIGHT.
Setting content: ON / OFF
ON: Commander button illumination blinks.
OFF: Commander button illumination stays lit (does not blink).
Adjusting the Brightness of the
Commander Button illumination
With AUTO set, when the headlights are turned on, the commander
button illumination dims. During the night, if the commander button
illumination is too bright, this setting is recommended.
Setting items: DIMMER
Setting content: OFF / ON / AUTO
If an Alpine Versatile Link Terminal (KCA-410C) is connected to the
VPA-B222R, an Auxiliary Source will be allowed to interrupt the
current audio source. For example, you can listen to a portable MP3
player through your car audio system even with a CD changer
connected and playing. The CD changer will automatically mute when
switched to the AUX Input. For further details on how to use the Alpine
KCA-410C, see your authorized Alpine dealer.
Setting item: IN-INT MUTE
Setting content: OFF / ON
OFF: Sound will be output in Interrupt mode.
ON: Sound will not be output in Interrupt mode.
• The auxiliary device being connected must have an interrupt wire
with a negative trigger for this function to operate automatically.
Otherwise, a separate switch needs to be added to switch it manually.
Adjusting the display position
Depending on the connected monitor, the display may move out of
position. During touch panel operation, if the position between the
display on the LCD and the display of the touch panel does not match,
adjust the display position.
Setting items: SCREEN ADJ
Setting content:
Adjustment if a monitor not compatible with touch panel
operation is connected.
The screen position within the display is adjustable. The position is
controlled from the commander.
1 In the SCREEN ADJ mode, press the joystick right.
The adjustment screen appears.
2 Press the joystick up, down, left or right to adjust the
display position.
3 Press
/ /ENTER.
The adjustment is complete, and the display returns to
the main source screen.
Adjustment if a touch panel compatible monitor is connected.
The screen and soft button positions are adjustable within the
display. The position is controlled from the soft buttons.
1 Touch [
] of SCREEN ADJ.
2 Touch [ ], [ ], [ ] or [ ] to adjust the display position,
and touch [ENT].
The TOUCH LOCATE screen is displayed.
3 Touch the centre of the
mark displayed in the lower left
of the screen.
The screen changes to the adjustment screen.
4 Touch the centre of the
mark displayed in the upper
right of the screen, then touch [ENT].
The adjustment is complete, and the display returns to
the main source screen.
Brightness of the commander button illumination is
maximum.
ON:
Brightness of the commander button illumination is
decreased.
AUTO: When the headlights are turned on, the commander
button illumination dims.
OFF:
19-EN
01GB05VPAB222R.fm
ALPINE VPA-B222R 68-02065Z87-A (EN)
01GB00VPAB222R.book Page 20 Monday, January 23, 2006 4:24 AM
6
CD/MP3/WMA
Operation
(Optional)
To pause playback, press
Pressing
/
/
/ENTER.
/ENTER again will resume playback.
• CD playback information (track no., text etc.) will be displayed on
the monitor during playback.
• MP3/WMA playback information (folder no., file no., tag
information, etc.) will be displayed on the monitor during playback.
• "NO SUPPORT" is displayed when text information is not
compatible with the VPA-B222R.
• The DVD changer (optional) is controllable as well as the CD
changer.
Multi-Changer Selection
With the KCA-410C (Versatile Link Terminal), you can connect two
changers.
1
Joystick
Press and hold
seconds.
/MENU/FUNC. for at least 2
The FUNCTION screen is displayed.
2
Press the joystick up or down to select CHG SEL.
Then press
/ /ENTER to select the next changer
(connected CD changers only).
Folder/File Search
Display example for MP3/WMA main screen
You can display the names of folders/files and search for a folder/file to
play.
1
Press
/MENU/FUNC. during playback.
The Folder Name list is displayed.
2
3
Disc number display
Folder number display
File number display
•
Press SOURCE/POWER.
The source selection screen is displayed.
2
3
4
5
Press
/ /ENTER to play back the first file in the
selected folder.
To search for a file in the selected folder
Playing CD/MP3/WMA
1
Press the joystick up or down to select the desired
folder.
Press the joystick up or down to select the CD/MP3/
WMA mode (CD CHANGER, etc.), then press
/ /
ENTER.
•
•
•
1 After selecting the folder in step 2, press the joystick right
to change to the file search mode of the selected folder.
If there is a file name list in the folder,
is displayed.
2 Press the joystick up or down to select a file, then press
/ /ENTER.
The selected file is played back.
Pressing TA/RTN/SETUP will return to the previous screen.
Folder/File Name search cannot be made during M.I.X. play.
“ROOT” is displayed for the root folder which does not have folder
name.
Press and hold
or
for at least 2 seconds to
select a disc (when a changer is connected).
While playing back MP3/WMA. Press
select the desired folder.
Press
or
or
to
to select the desired track.
Returning to the beginning of the current track:
Press
.
Fast reverse:
Press and hold
.
Advancing to the beginning of the next track:
Press
.
Fast forward:
Press and hold
.
20-EN
01GB05VPAB222R.fm
ALPINE VPA-B222R 68-02065Z87-A (EN)
01GB00VPAB222R.book Page 21 Monday, January 23, 2006 4:24 AM
M.I.X. (Random Play)
Repeat Play
1
1
Press and hold
seconds.
/MENU/FUNC. for at least 2
The FUNCTION screen is displayed.
2
Press the joystick up or down to select M.I.X..
When M.I.X.
3
4
is displayed (changer is connected)
Press the joystick right.
Press the joystick up or down to select the M.I.X.
mode, then press
/ /ENTER.
CD mode:
2
Press the joystick up or down to select REPEAT.
When REPEAT
3
4
is displayed (changer is connected)
Press the joystick right.
Press the joystick up or down to select the REPEAT
mode and press
/ /ENTER.
CD mode:
* When a CD changer equipped with the All M.I.X. function is
connected.
RPT:
Only a track is repeatedly played back.
RPT DISC: A disc is repeatedly played back.
OFF:
Repeat mode off.
MP3/WMA mode:
RPT:
RPT FLD:
RPT DISC:
OFF:
MP3/WMA mode:
M.I.X. FLD: Only files in a folder are played back in random
sequence.
M.I.X.:
All files in a disc are played back in random
sequence, and playback shifts to the next disc.
OFF:
M.I.X. mode off.
3
/MENU/FUNC. for at least 2
The FUNCTION screen is displayed.
M.I.X.:
Track are played back in random sequence.
M.I.X. ALL: The tracks on all the CDs in the current magazine
will be included in the random playback sequence.
OFF:
M.I.X. mode off.
When
Press and hold
seconds.
When
3
Only a file is repeatedly played back.
Only files in a folder are repeatedly played back.
A disc is repeatedly played back.
Repeat mode off.
REPEAT is displayed
Press
/
/ENTER.
The repeat mode is changed.
M.I.X. is displayed
CD mode:
/
Press
/ENTER.
RPT
M.I.X. mode is changed.
CD mode:
M.I.X.
RPT
OFF
OFF
RPT
MP3/WMA mode:
RPT FLD
OFF
RPT
M.I.X.
MP3/WMA mode:
M.I.X. FLD
M.I.X.
OFF
M.I.X. FLD
21-EN
01GB05VPAB222R.fm
ALPINE VPA-B222R 68-02065Z87-A (EN)
01GB00VPAB222R.book Page 22 Monday, January 23, 2006 4:24 AM
DVD/Video CD
Operation
(Optional)
To display the DVD mode screen
• If you try to activate the auxiliary device while driving, the display
will show the warning-PICTURE OFF FOR YOUR SAFETY.
Caution
• Not all functions will operate for every DVD. See the
individual DVD’s instructions for details on the
features supported.
• If you try to perform an invalid operation (based on
the type of disc being played), the following mark is
displayed on the monitor screen:
1
Press SOURCE/POWER.
The source selection screen is displayed.
Joystick
2
Press the joystick up or down to select the DVD
mode (EXT.DVD, DVD CHANGER or etc.), then press
/ /ENTER.
Playback starts.
If a menu screen appears
Display example for DVD main operation screen
On DVDs and Video CDs with playback control (PBC), menu screens
may appear automatically. The DVD menu can be controlled by the
commander supplied with the unit. If this happens, perform the
operation described below to start playback.
Press the joystick up, down, left or right to select an
item, then press and hold
/ /ENTER for at least
2 seconds.
Playing DVD/Video CD
Basic operations of an Alpine DVD player/Changer can be done from
the unit's supplied commander. Refer to the Owner's Manual of the
connected DVD player/Changer.
When using an Alpine DVD Player/Changer, some of the commander
functions may not be recognized. This varies from disc to disc. If the
supplied VPA-B222R commander is not controlling a particular
function of the DVD being played, please use the remote control that
came with the DVD player.
• Press TA/RTN/SETUP to return to the previous screen.
• The video CD menu screen cannot be controlled from the commander
supplied with the unit.
• Depending on the disc, the menu screen may be recalled from the
FUNCTION screen. Select MENU on the FUNCTION screen and
press
/ /ENTER to recall the menu, after displaying the
FUNCTION screen by pressing and holding /MENU/FUNC. for
at least 2 seconds.
Playing Still Frames (Pausing)
1
2
During playback, press
Press
/
/
/ENTER.
/ENTER to resume playback.
WARNING
It is dangerous for the driver to watch the DVD/TV/
Video while driving the vehicle. The driver may be
distracted from looking ahead and an accident could
occur.
Install the VPA-B222R correctly so that the driver
cannot watch DVD/TV/Video unless the vehicle is
stopped and the emergency brake is applied.
If the VPA-B222R is not installed correctly, the driver
will be able to watch the DVD/TV/Video while driving
the vehicle and may be distracted from looking ahead
and cause an accident. The driver or other people
could be severely injured.
22-EN
01GB05VPAB222R.fm
ALPINE VPA-B222R 68-02065Z87-A (EN)
01GB00VPAB222R.book Page 23 Monday, January 23, 2006 4:24 AM
Finding the Beginnings of Chapters or
Tracks
During playback, press
or
.
The chapter/track switches each time the button is pressed, and
playback of the selected chapter/track starts.
: Press this to start playback from the beginning of the
following chapter or track.
: Press this to start playback from the beginning of the
current chapter or track.
Fast-forwarding/Fast-reversing
Release
or
The FUNCTION screen is displayed.
2
(fast-reverse)
1
/
/ENTER.
/MENU/FUNC. on the DVD mode main screen.
The menu screen appears.
• To perform necessary operations, see “If a menu screen appears” on
page 22.
Changing Discs (only when DVD changer
is connected)
/
Press the joystick up or down to select STOP/PRE
STOP, then press
/ /ENTER.
“STOP” is displayed, and playback stops.
• Playback starts from the beginning when
/ /ENTER is pressed
while playback is stopped.
• When a DVD player/changer is connected with Ai-NET, STOP/PRE
STOP is not displayed on the FUNCTION screen in the video CD
mode.
Chapter/Track/Title Repeat Playback
Use this function to play the disc’s titles, chapters or tracks repeatedly.
1
Press and hold
seconds.
/MENU/FUNC. for at least 2
The FUNCTION screen is displayed.
for at least 2 seconds.
2
The selected disc is played back.
• Select DISC SELECT on the FUNCTION screen and press
/ /ENTER to change discs, after pressing and holding
MENU/FUNC. for at least 2 seconds.
During the PRE STOP mode, press and hold
MENU/FUNC. for at least 2 seconds.
The FUNCTION screen is displayed.
to return to normal playback.
With a DVD having two or more titles, a top menu screen will appear.
or
During PRE STOP mode, press
• For some discs, the position at which playback was stopped may not
be accurate.
• When a DVD player/changer is connected with Ai-NET, STOP/PRE
STOP is not displayed on the FUNCTION screen in the video CD
mode.
2
Press and hold
Press the joystick up or down to select STOP/PRE
STOP, then press
/ /ENTER.
Stopping Playback
Displaying the Top Menu Screen (DVD
only)
Press
/MENU/FUNC.
During playback, press and hold
for at least 2 seconds.
Playback starts from the position at which it was stopped.
“Chapters” are divisions of movies or musical selections on
DVDs.
“Tracks” are divisions of movies or musical selections on
video and music CDs.
2
1
3
Supplementary explanation
During playback, press and hold
or
(fast-forward).
Select the PRE STOP during playback to stop playback. That position is
stored in the memory.
"PRE STOP" is displayed.
• Some DVDs do not have chapters.
1
Stopping Playback (PRE STOP)
/
Press the joystick up or down to select REPEAT,
then press
/ /ENTER.
The screen changes to the repeat mode in the following
step.
DVD
The chapter is played repeatedly.
The title is played repeatedly.
The playback returns to normal mode.
23-EN
01GB05VPAB222R.fm
ALPINE VPA-B222R 68-02065Z87-A (EN)
01GB00VPAB222R.book Page 24 Monday, January 23, 2006 4:24 AM
Video CD
The track is played repeatedly.
The disc is played repeatedly.
Playback does not repeat.
Switching the Subtitles (Subtitle
Language) (DVD only)
With DVDs on which multiple subtitle languages are recorded, the
subtitle language can be switched during playback; moreover, subtitles
can be hidden.
1
• Display may vary depending on the connected devices.
• The track/disc repeat modes cannot be used on video CDs with
playback control (PBC). These modes can be carried out after
turning PBC off.
• For some discs it is not possible to switch the repeat mode.
• The repeat mode may not be switched, depending on the connected
product.
Switching the Audio Tracks
DVDs can have up to 8 different audio tracks. These alternate tracks can
be switched during playback.
1
Press and hold
seconds.
/MENU/FUNC. for at least 2
Press and hold
seconds.
/MENU/FUNC. for at least 2
The FUNCTION screen is displayed.
2
Press the joystick up or down to select SUB
TITLE, then press
/ /ENTER.
The subtitle language stored in the disc is changed, then
turns off.
• There may be a delay before the selected subtitle appears.
• Not all discs will allow changing the subtitles during playback. In
these cases, select subtitles from the DVDs menu.
• The subtitle language selected becomes the default setting every time
the power is turned on or the disc is replaced. If the disc does not
include that language, the disc’s default language is selected instead.
However, the subtitle language may differ depending on the disc.
• For some discs, the subtitles will be displayed even when this is set to
off. However, the subtitle language may differ depending on the disc.
The FUNCTION screen is displayed.
2
Press the joystick up or down to select AUDIO,
then press
/ /ENTER.
Switching the Angle (DVD only)
The sound switches between the alternate audio tracks
recorded on the disc.
On DVDs in which scenes have been filmed from multiple angles, the
angle can be switched during playback.
• The alternate track selected becomes the default setting every time
the power is turned on or the disc is replaced. If the disc does not
include that track, the disc’s default language is selected instead.
• Not all discs will allow changing the alternate audio tracks during
playback. In these cases, select audio tracks from the DVDs menu.
• There may be a delay before the selected alternate track begins to
play.
1
Press and hold
seconds.
2
/MENU/FUNC. for at least 2
Press the joystick up or down to select AUDIO,
then press
/ /ENTER.
The left and right channels will be output as shown in the
figure below.
<Monitor display>
AUDIO L/R
AUDIO L/L
AUDIO R/R
Press the joystick up or down to select ANGLE,
then press
/ /ENTER.
The angle switches between the angles recorded on the
disc.
The FUNCTION screen is displayed.
2
/MENU/FUNC. for at least 2
The FUNCTION screen is displayed.
Video CDs with multiplex audio
1
Press and hold
seconds.
AUDIO L/R
• If a DVD player/DVD changer with Ai-NET is connected, AUDIO is
not displayed on the video CD function screen.
• Some time may be required for the angle to change.
• Depending on the disc, the angle may switch in one of two ways.
- Seamless: The angle switches smoothly.
- Non-seamless: When the angle is switched, a still picture is
displayed first, after which the angle switches.
Switching from the disc menu
For some discs, the audio language, angle and subtitles can be switched
from the disc menu.
1
Press and hold
seconds.
/MENU/FUNC. for at least 2
The FUNCTION screen is displayed.
2
3
Press the joystick up or down to select MENU,
then press
/ /ENTER.
Select an item to confirm it.
See “If a menu screen appears” on page 22.
24-EN
01GB05VPAB222R.fm
ALPINE VPA-B222R 68-02065Z87-A (EN)
01GB00VPAB222R.book Page 25 Monday, January 23, 2006 4:24 AM
iPod®
(Optional)
3
Press
or
to select the desired song.
Return to the beginning of the current song:
Press
.
Fast reverse:
Press and hold
.
Advance to the beginning of the next song:
Press
.
Fast forward:
Press and hold
Joystick
An iPod® can be controlled from the VPA-B222R, when
connected to an optional Alpine Interface Adapter for iPod
(KCA-420i). While connected to the VPA-B222R, operation from
the iPod is no longer possible.
• For details, refer to the Owner’s Manual of the connected adapter
(KCA-420i).
• For each function, refer to the iPod’s documentation.
4
.
To pause playback, press
/ /ENTER. Pressing
/ /ENTER again will resume playback.
• If a song is playing on the iPod when it is connected to the
VPA-B222R, it will continue playing after the connection.
• If using the iPod with a changer, the Versatile Link Terminal (KCA410C) must be used. In this case, select “CHG SEL” and press
/
/ENTER on the FUNCTION screen or press and hold
for at
least 2 seconds to select the changer mode applicable to the iPod.
• If the artist, album or song name, created in iTunes, has too many
characters, songs may not be played back when connected to the
adapter. Therefore, a maximum of 250 characters is recommended.
The maximum number of characters for this unit is 64 (64 byte).
• Some characters may not be correctly displayed.
• “NO SUPPORT” is displayed when text information is not
compatible with the VPA-B222R.
About iPod usable with this unit
• The unit can be used with third generation and above iPod,
iPod photo, iPod minis or iPod nano. iPod Shuffle cannot be
used, however.
• Touch wheel or scroll wheel type iPods without the dock
connector cannot be connected to the unit.
• The unit can be used with the following iPod versions.
Correct function of earlier versions cannot be guaranteed.
Third generation iPod: Ver. 2.3
Fourth generation iPod: Ver. 3.0.2
iPod photo: Ver.1.1
iPod mini: Ver. 1.3
iPod nano: Ver.1.0
• The unit cannot be used with the software versions earlier
than 2005-02-22. For details about “iPod Software Update”,
refer to the iPod Instruction Manual.
Searching for a desired Song
An iPod can contain hundreds to thousands of songs. By keeping these
songs organized in smaller playlists, the VPA-B222R has the ability to
ease song searches.
• The maximum number of playlists, artists or albums that can be
searched is 511. The maximum number of searches for a song is 255.
Searching by Playlist
1
Press
/MENU/FUNC..
The search mode is activated, and the search list screen
appears.
2
Press the joystick up or down to select PLAYLIST
SEARCH, then press the joystick right.
Playback
3
1
To play back the playlist directly
Press SOURCE/POWER.
The source selection screen is displayed.
2
Press the joystick up or down to select iPod, then
press
/ /ENTER.
Press the joystick up or down to select the playlist.
1 Press
/ /ENTER.
The selected playlist is played back repeatedly.
To search for a song in the playlist
1 Press the joystick right to change to the song search
mode of the selected playlist.
2 Press the joystick up or down to select a song, then press
/ /ENTER.
The selected song is played back.
25-EN
01GB05VPAB222R.fm
ALPINE VPA-B222R 68-02065Z87-A (EN)
01GB00VPAB222R.book Page 26 Monday, January 23, 2006 4:24 AM
Searching by artist name
1
Press
/MENU/FUNC..
Searching by album name
1
The search mode is activated, and the search list screen
appears.
2
3
Press the joystick up or down to select ARTIST
SEARCH, then press the joystick right.
Press the joystick up or down to select the artist to
be played back.
To play back the artist directly
1 Press
/ /ENTER.
Songs by the selected artist are played back.
Press
/MENU/FUNC..
The search mode is activated, and the search list screen
appears.
2
3
Press the joystick up or down to select ALBUM
SEARCH, then press the joystick right.
Press the joystick up or down to select the album
to be played back.
To play back the album directly
1 Press
/ /ENTER.
Songs in the selected album are played back.
• Selecting ALL and pressing
/ /ENTER will return to the iPod
mode screen.
• Selecting ALL and pressing the joystick right will change to the
ALBUM search screen.
• Selecting ALL and pressing
/ /ENTER will return to the iPod
mode screen.
• Selecting ALL and pressing the joystick right will change to the
SONG search screen.
To search for the album of an artist
To search for a song in an album
1
Press the joystick right to change to the album search
mode of the selected artist.
2*1 Press the joystick up or down to select the album to be
played back.
3 Press
/ /ENTER to play back all songs of the
selected album.
Songs in the selected album are played back.
1 Press the joystick right to change to the song search
mode of the selected album.
2 Press the joystick up or down to select a song, then press
/ /ENTER.
The selected song is played back.
• Selecting ALL and pressing
/ /ENTER will play back the first
song of the selected artist.
• Selecting ALL and pressing the joystick right will change to the
SONG search screen of the selected artist
To search for a song in the album of an artist
1 After selecting the album in step 2*1, press the joystick
right to change to the song search mode of the selected
album.
2 Press the joystick up or down to select a song, then press
/ /ENTER.
The selected song is played back.
26-EN
01GB05VPAB222R.fm
ALPINE VPA-B222R 68-02065Z87-A (EN)
01GB00VPAB222R.book Page 27 Monday, January 23, 2006 4:24 AM
Random Play
Shuffle (M.I.X.)
Navigation System
(Optional)
The Shuffle function of the iPod is displayed as M.I.X. on the
VPA-B222R.
1
Press and hold
seconds.
/MENU/FUNC. for at least 2
The FUNCTION screen is displayed.
2
3
Press the joystick up or down to select M.I.X., then
press the joystick right.
Press the joystick up or down to select the M.I.X.
mode, then press
/ /ENTER.
Joystick
M.I.X. ALBUM:
Album shuffle playback plays back all songs in order, then randomly
selects the next album. All songs of that album are played back in order,
and so on. Any one album is played just once.
M.I.X. SONGS:
Song shuffle randomly plays back certain selected songs. Any one song
plays back just once until all songs have been played back.
OFF: M.I.X. mode off
Basic Alpine navigation control can be performed by the commander
supplied with the unit. Refer to the Owner's Manual of the navigator.
4
• If a navigation system that is not controlled by the remote control, but
touch-panel operation only is connected, operations cannot be
performed by the commander.
To cancel M.I.X. play, select OFF, and press
ENTER.
/
/
• For details of the search mode, refer to "Searching for a desired
Song" (page 25).
• If a song is selected in the album search mode before selecting
Shuffle (M.I.X.), the songs will not play back randomly even when
Shuffle album is selected.
• The M.I.X. mode is cancelled when iPod is removed or the ignition
key is turned off.
Displaying the Navigation Screen
When an Alpine navigation system is connected, the navigation screen
can easily be displayed.
1
Press DISP..
The Navigation screen is displayed.
Repeat Play
2
Only Repeat One is available for the iPod.
Repeat One: A single song is repeatedly played back.
Changing the Navigation operation mode
1
Press and hold
seconds.
/MENU/FUNC. for at least 2
The FUNCTION screen is displayed.
2
3
Press the joystick up or down to select REPEAT,
then press the joystick right.
Press the joystick up or down to select RPT, then
press
/ /ENTER.
The track is played back repeatedly.
4
To cancel repeat play, select OFF in step 3, and
press
/ /ENTER.
• During repeat playback, no other songs are selectable by pressing
or
.
• The repeat mode is cancelled when iPod is removed or the ignition
key is turned off.
To cancel the screen, press DISP. again.
When an Alpine navigation system is connected, the navigation screen
can easily be displayed, and some operations can be performed.
1
Press NAV./POS..
The navigation screen is displayed, and the navigation
mode becomes active.
2
Press DISP. to cancel the operation mode, and
return to the main source screen before the
operation was performed.
When DISP. is pressed and held for at least 2 seconds, the
operation mode is cancelled, the navigation screen display
remains, and the sound returns to the selected source
before the operation was performed.
• If the navigation mode is selected on the source selection screen, the
navigation mode is not cancelled even if DISP. is pressed.
• The colour of the commander buttons illumination changes in the
navigation mode. Refer to "Setting the Colour of the Commander
Button Illumination" (page 19).
27-EN
01GB05VPAB222R.fm
ALPINE VPA-B222R 68-02065Z87-A (EN)
01GB00VPAB222R.book Page 28 Monday, January 23, 2006 4:24 AM
Map Screen Function
Displaying the Current Position
1
TV Operation
(Optional)
Press NAV./POS. while displaying the map screen.
The current position screen is displayed.
Scrolling the Map
1
Press the joystick.
The map scrolls in the direction the joystick is pressed.
Joystick
Changing the Map Scale
1
Press
or
.
Each press of the button changes the map scale. Pressing
and holding changes the scale continuously.
Menu Screen Function
1
Press
/MENU/FUNC. in the Navigation mode.
The Navigation Menu screen is displayed.
2
3
Press the joystick up, down, left or right to select
the desired item.
Press
/
When connected to an Alpine TV unit (sold separately), you can use the
commander supplied with the VPA-B222R to operate the TV. Set the
AUX NAME to TV. Refer to "Naming External Devices" page 18.
• When the optional expansion box (VPE-S431) is connected, connect
TV to AUX IN-2, 3.
• Be sure to connect this unit or VPE-S431 remote control output lead
to the TV unit's remote control input lead.
• For details, refer to the owner's manual of the digital TV unit.
/ENTER.
• Press TA/RTN/SETUP to return to the previous screen.
Operating TV Unit
WARNING
It is dangerous for the driver to watch the TV while
driving the vehicle. The driver may be distracted from
looking ahead and an accident could occur.
Install the VPA-B222R correctly so that the driver
cannot watch TV unless the vehicle is stopped and
the emergency brake is applied.
If the VPA-B222R is not installed correctly, the driver
will be able to watch the TV while driving the vehicle
and may be distracted from looking ahead and cause
an accident. The driver or other people could be
severely injured.
• If you try to activate the TV unit while driving, the display will show
the warning-PICTURE OFF FOR YOUR SAFETY.
28-EN
01GB05VPAB222R.fm
ALPINE VPA-B222R 68-02065Z87-A (EN)
01GB00VPAB222R.book Page 29 Monday, January 23, 2006 4:24 AM
1
Press SOURCE/POWER.
The source selection screen is displayed.
2
3
4
Press the joystick up or down to select TV, then
press
/ /ENTER.
Press and hold
BAND.
Press
/
Manual tune
5
Digital TV Operation
(Optional)
for at least 2 seconds to select
/ENTER to switch the tuning mode.
Auto seek tune
Press
or
to seek for a channel downward
or upward respectively.
Joystick
Automatic Memory of Channel Presets
1
Press and hold
/
/ENTER for at least 2 seconds.
The auto preset operation starts.
After the completion, memorized channel number list
displays and the first memorized station is automatically
received.
2
To receive a memorized station, press
or
.
Switching Audio
1
Press and hold
seconds.
/MENU/FUNC. for at least 2
When connected to an Alpine Digital TV unit (sold separately), you can
use the commander supplied with the VPA-B222R to operate the Digital
TV. Set the AUX NAME to DVB-T. Refer to "Naming External
Devices" page 18.
• Be sure to connect this unit or VPE-S431 remote control output lead
to the Digital TV unit's remote control input lead.
• For details, refer to the owner’s manual of the digital TV unit.
Operating Digital TV Unit
The FUNCTION screen is displayed.
2
Press the joystick up or down to select AUDIO,
then press
/ /ENTER.
The audio mode is changed.
WARNING
It is dangerous for the driver to watch the TV while
driving the vehicle. The driver may be distracted from
looking ahead and an accident could occur.
Install the VPA-B222R correctly so that the driver
cannot watch TV unless the vehicle is stopped and
the emergency brake is applied.
If the VPA-B222R is not installed correctly, the driver
will be able to watch the TV while driving the vehicle
and may be distracted from looking ahead and cause
an accident. The driver or other people could be
severely injured.
• If you try to activate the Digital TV unit while driving, the display
will show the warning-PICTURE OFF FOR YOUR SAFETY.
29-EN
01GB05VPAB222R.fm
ALPINE VPA-B222R 68-02065Z87-A (EN)
01GB00VPAB222R.book Page 30 Monday, January 23, 2006 4:24 AM
1
Press SOURCE/POWER.
The source selection screen is displayed.
2
3
Press the joystick up or down to select DVB-T,
then press
/ /ENTER.
Press
/
/ENTER to switch the channel mode.
Channel up/down
4
5
Favorite Channel up/down
Press
or
to seek for a channel downward
or upward respectively.
Press and hold
for at least 2 seconds to switch a
source of digital TV unit.
EPG Screen Operation
1
Press
/MENU/FUNC..
The EPG screen is displayed.
2
3
Auxiliary Device
(Optional)
Press the joystick up or down to select the desired
item for adjusting.
Press the joystick left or right to adjust the selected
item, then press and hold / /ENTER for at least 2
seconds.
Operating Auxiliary Devices (Optional)
To operate devices connected to the AUX terminals of VPA-B222R,
follow the procedure described below.
WARNING
It is dangerous for the driver to watch the TV/Video
while driving the vehicle. The driver may be distracted
from looking ahead and an accident could occur.
Install the VPA-B222R correctly so that the driver
cannot watch TV/Video unless the vehicle is stopped
and the emergency brake is applied.
If the VPA-B222R is not installed correctly, the driver
will be able to watch the TV/Video while driving the
vehicle and may be distracted from looking ahead and
cause an accident. The driver or other people could
be severely injured.
Automatic Memory of Channel Presets
• If you try to activate an auxiliary device while driving, the display
will show the warning-PICTURE OFF FOR YOUR SAFETY.
1
1
Press and hold
seconds.
/MENU/FUNC. for at least 2
The source selection screen is displayed.
The FUNCTION screen is displayed.
2
Press the joystick up or down to select A. MEMO,
then press
/ /ENTER.
The auto preset operation starts.
Displaying the Menu Screen
The menu screen for a digital TV unit is displayed.
1
Press and hold
seconds.
/MENU/FUNC. for at least 2
The FUNCTION screen is displayed.
2
Press SOURCE/POWER.
2
Press the joystick up or down to select the AUX
mode, then press
/ /ENTER.
The external input screen is displayed.
• AUX-1 to AUX are displayed if AUX IN set to ON in “Setting the
AUX mode” (page 18), or the name which is given as the source
name in “Naming External Devices” on page 18 is displayed.
• AUX-3 is displayed when the optional expansion box (VPE-S431) is
connected.
• When the Versatile Link Terminal (KCA-410C) is connected, external
input to KCA-410C is unavailable. However, when IN-INT MUTE is
set to off, the sound of a device connected to the external input of
KCA-410C can be interrupted. (See "Setting the External Device
Interrupt Mode" page 19.)
Press the joystick up or down to select MENU,
then press and hold
/ /ENTER for at least 2
seconds.
30-EN
01GB05VPAB222R.fm
ALPINE VPA-B222R 68-02065Z87-A (EN)
01GB00VPAB222R.book Page 31 Monday, January 23, 2006 4:24 AM
Factory System
Operating Factory System (Speaker
Input mode)
External Audio
Processor
(Optional)
The car’s system (standard CD player, etc.) can be selected as a source.
1
Press SOURCE/POWER.
The source selection screen is displayed.
2
Press the joystick up or down to select the
FACTORY SYS mode, then press
/ /ENTER.
Joystick
The speaker input screen is displayed.
• FACTORY SYS mode is displayed when SOURCE or BOTH is set in
"Setting the Speaker Input Mode" (page 16).
• Make each setting correctly in “Using the Speaker Input” (page 16)
before use this function.
When an external audio processor is connected to this unit, you can
operate it from this unit. Some audio processors may not be operated.
Explanations below is the case when PXA-H700 or PXA-H701 is
connected for example.
Refer also to the operating instructions of the connected audio
processor.
• The adjustments or settings performed on the connected audio
processor cannot be operated properly from this unit.
• The setting "Setting the Speakers", "Setting Bass Sound Control",
and "Graphic Equalizer Adjustments" are not available if the MRDD550 is connected. Additionally, if the MRD-F350 is connected, the
following setting "Setting the MX mode" is not available. Also, the
setting content differs between the PXA-H700 and PXA-H701.
31-EN
01GB05VPAB222R.fm
ALPINE VPA-B222R 68-02065Z87-A (EN)
01GB00VPAB222R.book Page 32 Monday, January 23, 2006 4:24 AM
Adjustment Procedure for Dolby
Surround
Make the adjustments described below in order to reproduce Dolby
Digital and DTS sound with greater accuracy.
Setting the Speakers
1
2
Adjustment procedure
Speaker Setup (page 36)
(Turning the speakers to be used on and off and
setting their response)
Adjusting the speaker levels (page 38)
3
Mixing bass sound to the rear channel
(page 37)
4
4
Adjusting the acoustic image (page 37)
5
Achieving powerful high volume sound
(page 38)
Press the joystick up or down to select SPEAKER
SEL, then press the joystick right.
Press the joystick left or right to set the connected
speaker.
FRONT1:
FRONT2:
REAR:
CENTER:
SUBWOOFER:
(Adjusting the signal output level to the various
speakers)
(Achieving smooth sound in the rear seat by mixing
the front audio signals with the rear speaker signals)
Press the joystick up or down to select AP SETUP,
then press the joystick right.
The AP SETUP screen is displayed.
5
2
Press and hold TA/RTN/SETUP for at least 2
seconds.
The SETUP screen is displayed.
3
1
Check that Defeat mode is off (page 12).
6
7
OFF/FULL (Full Range)/TW (tweeter)
OFF/ON
OFF/ON
OFF/ON
OFF/MONO/STEREO
Repeat step 4 and 5 to set all other speakers.
Press TA/RTN/SETUP to return to the previous
screen.
• Set any unconnected speakers to OFF.
• Settings above can be carried out even when the speaker is set to
OFF in “Speaker Setup” (page 36).
• To use the subwoofer in MONO with PXA-H700 or PXA-H701
connected, connect the subwoofer to the subwoofer output terminal
of PXA-H700 or PXA-H701.
(Adjusting the acoustic image to achieve a sound as
if the centre speaker were directly in front of the
listener)
(Achieving energetic sound with even greater power,
like the sound in a movie theater)
6
7
Adjusting the DVD Level (page 38)
(Adjust the volume (signal level) in the Dolby Digital,
Pro Logic II, DTS and PCM modes)
Storing Settings in the Memory (page 38)
(Storing all the settings and adjustments made on the
VPA-B222R (not only the above settings/adjustments)
in the memory)
In case of combining the Automatic adjustments, etc.
We recommend to make the Automatic adjustments before the Dolby
Surround adjustments.
32-EN
01GB05VPAB222R.fm
ALPINE VPA-B222R 68-02065Z87-A (EN)
01GB00VPAB222R.book Page 33 Monday, January 23, 2006 4:24 AM
Set MX Mode of the External Audio
Processor
Before performing the operations below, set MX (Media Xpander)
mode of the PXA-H700 to “AUTO” when the PXA-H700 is connected.
1
2
X-OVER Adjustment
1
2
Check that Defeat mode is off (page 12).
Press and hold TA/RTN/SETUP for at least 2
seconds.
Press the joystick up or down to select AP SETUP,
then press the joystick right.
The AP SETUP screen is displayed.
4
5
6
3
4
5
6
Press the joystick up or down to select
MX SETUP, then press the joystick right.
7
Press the joystick up or down to select the media
that is being played back. Then press the joystick
left or right to set the desired MX mode.
8
MX CD (OFF, CD 1 to 3)
CD mode processes a large quantity of data. This data is used
to reproduce the sound cleanly by making use of the data
quantity.
MX AUX 1 to 3 (OFF, CMPM, MOVIE, MUSIC)
Choose the MX mode (CMPM, MUSIC, or MOVIE) that
corresponds to the media connected.
7
Press the joystick up or down to select
X-OVER.
Press the joystick left or right to select L/R or L+R.
Press the joystick up or down to select X-OVER
SETUP, then press the joystick right.
Press the joystick up or down to select the desired
speaker, then press the joystick right.
Press the joystick up or down to select the desired
item, then press the joystick left or right to adjust
the crossover.
FREQUENCY: Adjust the H.P.F. or L.P.F. cutoff frequency.
The adjustable bands differ according to the
channel (speaker).
LEVEL:
Adjust the H.P.F. or L.P.F. level.
Adjustable level: -13 to 0
SLOPE:
Adjust the H.P.F. or L.P.F. slope.
Adjustable slope: OFF/-6/-12/-18/-24/-30
MX COMPM (OFF, CMPM 1 to 3)
This corrects information that was omitted at the time of
compression. This reproduces a well-balanced sound close to
the original.
MX DVD (OFF, MOVIE 1 to 2)
The dialog portion of the video is reproduced more clearly.
(MUSIC)
This disk contains a large quantity of data, such as a music clip.
MX uses this data to reproduce the sound accurately.
Press the joystick up or down to select AP SETUP,
then press the joystick right.
The AP SETUP screen is displayed.
Press the joystick up or down to select MX, then
press joystick left or right to select ON.
MX FM (OFF, FM 1 to 3)
The medium to high frequencies become more clear, and
produces well balanced sound in all the bands.
Press and hold TA/RTN/SETUP for at least 2
seconds.
The SETUP screen is displayed.
The SETUP screen is displayed.
3
Check that Defeat mode is off (page 12).
To adjust other channels, repeat steps 7 and 8.
9
Press TA/RTN/SETUP to return to the previous
screen.
• When the speaker is set to the “OFF” mode, the X-OVER for that
speaker cannot be set. Refer to “Setting the Speakers” (page 32).
• Check the playback frequencies of the connected speakers before
adjusting.
• In order to protect the speakers, there is no OFF setting for the
subwoofer low pass filter (the slope remains the same).
• The H.P.F. filter cannot be set to OFF (slope OFF) if TW (tweeter) is
selected for FRONT1.
Press TA/RTN/SETUP to return to the previous
screen.
• The contents of MX set here is reflected in PXA-H700 or PXA-H701.
• When OFF is selected, MX effect of each MX mode will be OFF.
• Each music source, such as radio, CD, and MP3 can have its own
MX setting.
• MX mode does not function when MX is ON for MW, LW radio.
• MX COMPM is applied for MP3/WMA, MMD, iPod.
• MX mode can only be set for media currently playing back.
• AUX3 can be set only when the optional expansion box VPE-S431 is
connected.
33-EN
01GB05VPAB222R.fm
ALPINE VPA-B222R 68-02065Z87-A (EN)
01GB00VPAB222R.book Page 34 Monday, January 23, 2006 4:24 AM
Performing Time Correction Manually
(TCR)
Because of the particular conditions inside the vehicle, there can be
major differences in the distances between the various speakers and the
listening position. It is possible to calculate the optimum correction
values and eliminate the time error at the listening position yourself
using this function.
1
2
3
Check that Defeat mode is off (page 12).
Calculate the difference in distance between the
farthest speaker and the other speakers.
(distance of farthest speaker)
– (distance of other speakers)
Divide the distances calculated for the different
speakers by the speed of sound (343 m/s
temperature 20 °C).
6
Press the joystick up or down to select AP SETUP,
then press the joystick right.
The AP SETUP screen is displayed.
7
8
Press the joystick up or down to select TCR.
Press the joystick left or right to select L/R or L+R.
Different adjustment values can be set for the left and
right channels.
L+R: Sets the same adjustment values for the left and right
channels.
L/R:
9
Press the joystick up or down to select
TCR SETUP, then press the joystick right.
10 Press the joystick up or down to select the desired
speaker.
11 Press the joystick left or right to adjust the
calculated time correction value (0.00 to 20.00ms).
(1step=0.05ms)
This value is the time correction value for the various
speakers.
Concrete examples
Calculating the time correction value for the front left speaker on
the diagram below.
Press and hold TA/RTN/SETUP for at least 2
seconds.
The SETUP screen is displayed.
Sit in the listening position (the driver’s seat, for
example) and measure the distance (in meters)
between your head and the various speakers.
L=
4
5
Time correction value changes continuously by pressing
and holding the joystick.
12 Press TA/RTN/SETUP to return to the previous
screen.
Conditions:
Distance between farthest speaker and listening position:
2.25 m (88-3/4")
Distance between front left speaker and listening position:
0.5 m (20")
Calculation:
L = 2.25 m (88-3/4") – 0.5 m (20")= 1.75 m (68-3/4")
Compensation time = 1.75 ÷ 343 x 1000 = 5.1 (ms)
• When the speaker is set to the “OFF” mode, the TCR for that
speaker cannot be set. Refer to “Setting the Speakers” (page 32).
• The adjustment value for FRONT2 (Speakers) which is adjusted in
time correction, is also applied to the front speakers in “Setting Bass
Focus” (page 36).
• The adjustment (AUTO TCR) cannot be automatically set on this
unit.
In other words, setting the time correction value for the front left
speaker to 5.1 (ms) sets a virtual distance matching the
distance to the farthest speaker.
Phase Switching
1
2
5.1ms
0.5m
Check that Defeat mode is off (page 12).
Press and hold TA/RTN/SETUP for at least 2
seconds.
The SETUP screen is displayed.
3
2.25m
Press the joystick up or down to select AP SETUP,
then press the joystick right.
The AP SETUP screen is displayed.
4
5
The sound is uneven because
the distance between the
listening position and the
different speakers is different.
The difference in the distance
between the front left and rear
right speakers is 1.75 meters
(68-3/4").
Time correction eliminates
the difference between the
time required for the sound
from the different speakers to
reach the listening position.
Setting the time correction of
the front left speaker to 5.1
ms makes it possible to
coordinate the distance from
the listening position to the
speaker.
6
7
Press the joystick up or down to select PHASE
SETUP, then press the joystick right.
Press the joystick up or down to select the desired
speaker.
Press the joystick left or right to switch the phase
(0°or 180°).
Press TA/RTN/SETUP to return to the previous
screen.
34-EN
01GB05VPAB222R.fm
ALPINE VPA-B222R 68-02065Z87-A (EN)
01GB00VPAB222R.book Page 35 Monday, January 23, 2006 4:24 AM
Graphic Equalizer Adjustments
Parametric Equalizer Adjustments
The graphic equalizer allows you to modify the sound using 31 bands
each for the front (left and right), rear (left and right) and centre
speakers. An additional 10 bands are available for the subwoofer. This
allows you to customize the sound to suit your taste.
The frequency bands of the graphic equalizer are fixed. This makes it
very difficult to correct for undesired peaks and dips at specific
frequencies. The parametric equalizer’s centre frequency can be tuned
to these specific frequencies. Then, the bandwidth (Q) and level are
fine-tuned, independently, to make the necessary corrections. The
parametric equalizer function is an advanced tool for serious
audiophiles.
1
2
Check that the Defeat mode is off (page 12).
Press and hold TA/RTN/SETUP for at least 2
seconds.
The SETUP screen is displayed.
3
Press the joystick up or down to select AP SETUP,
then press the joystick right.
The AP SETUP screen is displayed.
4
5
Press the joystick up or down to select G-EQ.
Press the joystick left or right to select L/R or L+R.
Different adjustment values can be set for the left and
right channels.
L+R: Sets the same adjustment values for the left and right
channels.
L/R:
6
7
8
9
1
2
Check that Defeat mode is off (page 12).
Press and hold TA/RTN/SETUP for at least 2
seconds.
The SETUP screen is displayed.
3
Press the joystick up or down to select AP SETUP,
then press the joystick right.
The AP SETUP screen is displayed.
4
5
Press the joystick up or down to select P-EQ.
Press the joystick left or right to select L/R or L+R.
When parametric EQ is adjusted, this setting will be turned
off.
Different adjustment values can be set for the left and
right channels.
L+R: Sets the same adjustment values for the left and right
channels.
Press the joystick up or down to select G-EQ
SETUP, then press the joystick right.
When graphic EQ is adjusted, this setting will be turned off.
Press the joystick up or down to select the desired
channel, then press the joystick right.
Press the joystick up or down to select the desired
frequency.
Press the joystick left or right to adjust the level of
the desired frequency.
Adjustable level: -9 to +9
To adjust other frequencies, repeat steps 8 and 9.
To adjust other channels, repeat steps 7 and 9.
10 Press TA/RTN/SETUP to return to the previous
screen.
• When the speaker is set to the “OFF” mode, the graphic equalizer
for that speaker cannot be set. Refer to “Setting the Speakers”
(page 32).
• Check the playable frequency ranges of the connected speakers
before making the equalizer adjustments. If the speaker’s playable
frequency range is 55 Hz to 30 kHz, for example, adjusting the 40 Hz
or 20 Hz band has no effect. Additionally, you may overload and
damage the speakers.
• When graphic EQ is adjusted, the adjustment for parametric EQ
becomes ineffective.
L/R:
6
7
8
9
Press the joystick up or down to select P-EQ
SETUP, then press the joystick right.
Press the joystick up or down to select the desired
channel, then press the joystick right.
Press the joystick up or down to select the desired
band, then press the joystick right.
Press the joystick up or down to select the desired
item, then press the joystick left or right to adjust
the desired mode.
To adjust other bands, repeat steps 8 and 9.
To adjust other channels, repeat steps 7 and 9.
FREQUENCY: Selects the frequency.
LEVEL:
Q:
Adjusts the level.
Adjustable level: -9 to +9
Adjust the bandwidth.
Adjustable bandwidth: 0.5/1/2/3/4/5
10 Press TA/RTN/SETUP to return to the previous
screen.
• When the speaker is set to the “OFF” mode, the parametric
equalizer for that speaker cannot be set. Refer to “Setting the
Speakers” (page 32).
• It is not possible to adjust the frequencies of adjacent bands within 7
steps.
• Check the playable frequency ranges of the connected speakers
before making the equalizer adjustments. If the speaker’s playable
frequency range is 55 Hz to 30 kHz, for example, adjusting the 40 Hz
or 20 Hz band has no effect. Additionally, you may overload and
damage the speakers.
• When the parametric EQ is adjusted, the adjustment for graphic EQ
becomes ineffective.
35-EN
01GB05VPAB222R.fm
ALPINE VPA-B222R 68-02065Z87-A (EN)
01GB00VPAB222R.book Page 36 Monday, January 23, 2006 4:24 AM
Setting Bass Sound Control
Speaker Setup
1
2
The PXA-H700 or PXA-H701 can be set according to the playable
frequency range of your speakers.
Check the playable frequency range of the speakers (not including the
subwoofer) before performing this operation to verify whether the
speakers can play low frequencies (of about 80 Hz or less).
Check that Defeat mode is off (page 12).
Press and hold TA/RTN/SETUP for at least 2
seconds.
The SETUP screen is displayed.
3
Press the joystick up or down to select AP SETUP
and press the joystick right.
The AP SETUP screen is displayed.
4
Press the joystick up or down to select B.SOUND
CNTL, then press the joystick right.
Setting Bass Compressor
You can adjust the sound of low frequencies as desired.
5
6
Press the joystick up or down to select BASS
COMP.
Press the joystick left or right to select the desired
mode.
Bass sound is emphasized more as the mode is
sequentially switched as MODE1
2
3, offering you
vivid low frequencies.
Select OFF when the setting is not necessary.
Press TA/RTN/SETUP to return to the previous screen.
Setting Bass Focus
Using the previously specified delay number (time difference) allows
you to set a time difference between the front-rear/left-right speakers.
Namely, it enables a time correction based on your preference. With an
initial delay of 0.05 ms for each of the 0 to 400 steps, audible time
correction can be achieved.
5
6
7
• Avoid stopping, pausing, switching the disc, cueing, fast-forwarding
or switching the audio channel of this unit while making this
adjustment. The setting is cancelled if Decode mode is switched.
1
2
Check that Defeat mode is off (page 12).
Press and hold TA/RTN/SETUP for at least 2
seconds.
The SETUP screen is displayed.
3
Press the joystick up or down to select AP SETUP,
then press the joystick right.
The AP SETUP screen is displayed.
4
5
6
Press the joystick up or down to select SPEAKER
SETUP, then press the joystick right.
Press the joystick up or down to select the desired
speaker.
Press the joystick left or right to select the speaker
characteristic.
OFF*1:
SMALL:
When no speaker is connected.
When a speaker that cannot play low frequencies
(80 Hz or less) is connected.
LARGE*2: When a speaker that can play low frequencies (80
Hz or less) is connected.
*1 It is not possible to set the front speakers to “OFF”.
*2 If the front speakers are set to “SMALL”, the rear and
centre speakers cannot be set to “LARGE”.
Press the joystick up or down to select the desired
speaker.
Press the joystick left or right to adjust the front,
rear, left and right speakers.
Repeat step 5 and 6 to set other speakers.
• Any setting in Bass Focus is applied in time correction, too.
• Press TA/RTN/SETUP to return to the previous screen.
36-EN
01GB05VPAB222R.fm
ALPINE VPA-B222R 68-02065Z87-A (EN)
01GB00VPAB222R.book Page 37 Monday, January 23, 2006 4:24 AM
7
Repeat step 5 and 6 to set each speaker.
• If the centre speaker is turned “OFF,” the centre channel’s audio
signals are added to the audio signals output from the front speakers.
• If you set the speaker response to “OFF,” also set the speaker setting
to “OFF” (page 32).
• Perform the setup for all the speakers (“Front,” “Centre,” “Rear”
and “Subwoofer”). Otherwise, the sound may not be balanced.
• When the centre speaker is set to “OFF”, the setting is ineffective
even if centre is set with this function.
• Through changing the settings on each speaker, a change in the
output of the other speakers may occur due to the setting
requirements.
• When using PRO LOGIC II, if the rear speaker is set to “LARGE”,
there will be no output from the subwoofer.
Setting of Dolby Digital
1
2
Check that Defeat mode is off (page 12).
Press and hold TA/RTN/SETUP for at least 2
seconds.
The SETUP screen is displayed.
3
Press the joystick up or down to select AP SETUP,
then press the joystick right.
The AP SETUP screen is displayed.
4
Press the joystick up or down to select MULTI CH
SET, then press the joystick right.
The MULTI CH SET screen is displayed.
5
Press the joystick up or down to select the desired
item.
Set the items below as you desire.
Adjusting the acoustic image
In most installations, the centre speaker must be placed directly between
the front passenger and driver. Using this function, the centre channel
information is distributed to the left and right speakers. This creates an
acoustic image simulating a centre speaker directly in front of each
listener. Adjusting the centre width in PL II MUSIC (see “Using the Pro
Logic II Mode,” page 39), makes this function ineffective.
• Avoid stopping, pausing, switching the disc, cueing, fast-forwarding
or switching the audio channel of this unit while making this
adjustment. The setting is cancelled if the Decode mode is switched.
1 Press the joystick left or right to select ON of BIPHANTOM.
2 Press the joystick down to select BI-PHANTOM LV.
3 Press the joystick left or right to adjust the level.
The level can be adjusted within the range of -5 to +5. The
higher the level, the more the position of the centre speaker is
shifted to the sides.
The BI-PHANTOM function is turned off when setting to
OFF.
• This adjustment is effective when the setting of the centre speaker to
SMALL or LARGE in the speaker setup settings.
• This adjustment is ineffective when the speaker is set to CENTER
OFF in “Setting the Speakers” (page 32).
Mixing bass sound to the rear channel
This function mixes the front channel audio signals to the audio signals
output from the rear speakers, improving the sound in the vehicle’s rear
seat.
• Avoid stopping, pausing, switching the disc, cueing, fast-forwarding
or switching the audio channel of this unit while making this
adjustment. The setting is cancelled if the Decode mode is switched.
1 Press the joystick left or right to select ON of REAR MIX.
2 Press the joystick down to select MIX LEVEL.
3 Press the joystick left or right to adjust the level.
The level can adjusted in five steps: -6, -3, 0, +3 and +6. The
higher the level, the more bass is output from the rear speakers.
(The effect differs depending on the software (DVD, etc.)).
The REAR MIX function is turned off when set to OFF.
• This adjustment is ineffective when the rear speaker setup setting is
set to “OFF”.
• For linear PCM signals, the voice is output from the rear speaker
regardless of the REAR FILL and REAR MIX setting.
37-EN
01GB05VPAB222R.fm
ALPINE VPA-B222R 68-02065Z87-A (EN)
01GB00VPAB222R.book Page 38 Monday, January 23, 2006 4:24 AM
Achieving powerful high volume sound
With Dolby Digital, the dynamic range is compressed so that powerful
sound can be achieved at regular volume levels. This compression can
be cancelled to achieve an energetic sound with even greater power, like
the sound in a movie theater.
This function works only in the Dolby Digital mode.
Press the joystick left or right to select STD or MAX. of
LISTENING.
STD: For powerful sound at regular volume levels
MAX.: For powerful sound at high volumes
• Keep the volume to a level at which sounds outside the vehicle can
still be heard.
Adjusting the speaker levels
Adjusting the DVD Level
The volume (signal level) for Dolby Digital, Dolby PL II, DTS and
PCM modes can be set.
• Avoid stopping, pausing, switching the disc, cueing, fast-forwarding
or switching the audio channel of this unit while making this
adjustment. The setting is cancelled if the Decode mode is switched.
1
2
Check that Defeat mode is off (page 12).
Press and hold TA/RTN/SETUP for at least 2
seconds.
The SETUP screen is displayed.
3
Press the joystick up or down to select AP SETUP,
then press the joystick right.
The AP SETUP screen is displayed.
The test tones help to make the volume adjustments of the different
speakers. When levels are equal, a strong sense of presence can be heard
from the different speakers at the listening position.
• Avoid stopping, pausing, switching the disc, cueing, fast-forwarding
or switching the audio channel of this unit while making this
adjustment. The setting is cancelled if the decode mode is switched.
1 Press the joystick left or right to select ON of OUTPUT.
Test tone output is repeated for each of the different
speaker channels. They will be repeated in the order
shown below.
If no operation is performed for 2 seconds, the channel
switches to the next channel.
Left
Centre
Left surround
Right
Left
Right Surround
2 Press the joystick down to select OUTPUT LEVEL.
3 Press the joystick left or right to balance the output from
all the speakers.
• The adjustment range for the different speakers is
–10 dB - +10 dB.
• Adjust based on the front speakers.
4
Press the joystick up or down to select DVD
LEVEL, then press the joystick right.
The DVD LEVEL screen is displayed.
5
6
Press the joystick up or down to select the desired
mode.
Press the joystick left or right to adjust level.
The level can be adjusted in the range of –5 to +5.
7
Repeat step 5 and 6 to set each level.
Storing Settings in the Memory
Adjustment or setting contents can be stored.
Contents that can be stored vary depends on the audio processor used.
1
2
• If a speaker is set to off mode, that speaker’s level adjustment cannot
be made. Refer to “Speaker Setup” (page 36).
Check that Defeat mode is off (page 12).
Press and hold TA/RTN/SETUP for at least 2
seconds.
The SETUP screen is displayed.
3
Press the joystick up or down to select AP SETUP,
then press the joystick right.
The AP SETUP screen is displayed.
4
5
Press the joystick up or down to select PRESET
MEMORY, then press the joystick right.
Press the joystick up or down to select any one of
the preset numbers (1 through 6), then press
/ /
ENTER.
The setting contents are stored.
• The stored contents will not be deleted even when the battery power
cord is detached.
38-EN
01GB05VPAB222R.fm
ALPINE VPA-B222R 68-02065Z87-A (EN)
01GB00VPAB222R.book Page 39 Monday, January 23, 2006 4:24 AM
Calling up the Preset Memory
1
2
Check that Defeat mode is off (page 12).
If MUSIC is selected, the centre width can be adjusted with the
following operations.
This function offers the optimum vocal position by adjusting the
centre channel position between the centre speaker and the L/R
speaker (The adjustments established in “Adjusting the acoustic
image” (page 37) are ineffective while this function is activated).
Press and hold TA/RTN/SETUP for at least 2
seconds.
1 Press the joystick down to select CENTER WIDTH, then
press the joystick left or right to select ON.
2 Press the joystick left or right to adjust the level.
The level can be adjusted between 0 to 7. When the level
increases, the centre channel position moves from the
centre speaker position to both sides.
The centre width control is cancelled when set to OFF.
The SETUP screen is displayed.
3
Press the joystick up or down to select AP SETUP,
then press the joystick right.
The AP SETUP screen is displayed.
4
5
Press the joystick up or down to select PRESET
CALL, then press the joystick right.
Press the joystick up or down to select any one of
the preset numbers (1 through 6), then press
/ /
ENTER.
• It takes a few moments to call up the preset memory.
Using the Pro Logic II Mode
Pro Logic processing can be conducted on the music signals recorded
on two channels to achieve Dolby Pro Logic II surround sound. For
two-channel Dolby Digital and DTS signals, there is also a “REAR
FILL” function for outputting the signals of the front channel to the rear
channel.
1
2
Check that Defeat mode is off (page 12).
Press and hold TA/RTN/SETUP for at least 2
seconds.
The SETUP screen is displayed.
3
Press the joystick up or down to select AP SETUP,
then press the joystick right.
The AP SETUP screen is displayed.
4
5
Press the joystick up or down to select D PLII/
REAR, then press the joystick right.
Press the joystick left or right to select the desired
mode of D PLII/REAR.
MOVIE: Suits the stereo TV shows and all programs encoded in
Dolby Surround. It improves the sound field directivity to
near that of discrete 5.1-channel sound.
MUSIC: Can be used for all stereo music recordings, and
provides a wide, deep sound field.
R.FILL: Depending on the input signals, the sound may only be
output from the front speakers. In this case, the “REAR
FILL” function can be used to output signals from the
rear speakers as well.
OFF:
Turns D PLII/REAR FILL function to OFF.
• This adjustment is effective when the setting of the centre speaker is
SMALL or LARGE in the speaker setup settings.
• Avoid stopping, pausing, switching the disc, cueing, fast-forwarding
or switching the audio channel of this unit while making this
adjustment. The setting is canceled if the Decode mode is switched.
• This adjustment is ineffective when the speaker is set to CENTER
OFF in “Setting the Speakers” (page 32).
• This function only works with two-channel signals. This operation is
ineffective when 5.1-channel DTS or Dolby Digital signals are input.
• If the setting of REAR FILL is made when REAR MIX is ON, sound is
unchanged in the rear fill setting because REAR MIX is given priority
during 2 channel decoder other than linear PCM.
• For linear PCM signals, the voice is output from the rear speaker
regardless of the REAR FILL and REAR MIX setting.
• Pressing TA/RTN/SETUP will return to the previous screen.
Linear PCM Setting
The output when playing discs recorded in linear PCM can be set to 2 or
3 channels.
1
2
Check that Defeat mode is off (page 12).
Press and hold TA/RTN/SETUP for at least 2
seconds.
The SETUP screen is displayed.
3
Press the joystick up or down to select AP SETUP,
then press the joystick right.
The AP SETUP screen is displayed.
4
5
Press the joystick up or down to select PCM
MODE.
Press the joystick left or right to select 2CH or
3CH.
2CH: 2ch output (L/R)
3CH: 3ch output (L/R/CENTER)
• This adjustment is ineffective when the speaker is set to CENTER
OFF in “Setting the Speakers” (page 32).
39-EN
01GB05VPAB222R.fm
ALPINE VPA-B222R 68-02065Z87-A (EN)
01GB00VPAB222R.book Page 40 Monday, January 23, 2006 4:24 AM
Soft button
operation
If an Alpine touch panel compatible monitor is connected to this unit,
touch operation can be performed by directly touching the monitor.
Refer to each section for details.
• Operation may differ depending on the connected device. Refer to
owner’s manual of the connected device.
If there is a hierarchical list,
will change to the list screen.
is displayed, and touching
RTN
Basic operation
The following example for the radio screen and source selection screen
explains for basic operation.
Returns to the previous screen.
Radio Operation
Display example for the radio main screen
<RTN>
Returns to the main source screen.
/
Scrolls the list.
Selects the item.
(page 7)
Searches and receives a channel automatically (distance
mode or local mode).
(page 7)
Changes down through channels one by one (manual
mode).
(page 9)
PTY search (RDS operation).
TUNE (page 7)
Changes the tuning mode.
DX SEEK (
,
)
SEEK (
OFF (
,
)
PTY SEEK ( ,
,
)
)
DX SEEK
(page 7)
Searches and receives a channel automatically (distance
mode or local mode).
(page 7)
SOURCE (page 6)
The source selection screen is displayed.
Changes down through channels one by one (manual
mode).
(page 9)
NAV. (page 27)
PTY search (RDS operation).
The Navigation screen is displayed.
A.MEMO (page 8)
CONTROL
Memorizes automatically.
Displays the function screen on the connected touch panel
compatible with the monitor.
BAND (page 7)
VOL.
TA (page 9)
/
(page 7)
Adjusts the volume.
MUTE (page 7)
Changes the band.
Displayed when FM radio is received. Touch to change to
the Traffic Information mode.
Turns mute on and off.
FUNC.
Displays the FUNCTION screen of each source.
40-EN
01GB05VPAB222R.fm
ALPINE VPA-B222R 68-02065Z87-A (EN)
01GB00VPAB222R.book Page 41 Monday, January 23, 2006 4:24 AM
Display example for function screen
Display example for the function screen
(page 8)
When you store/recall a preset number, the display changes
to the preset number screen.
(INFO) (page 10)
Displays the radio text.
Setup Operation
“Adjusting the Audio" (page 11), “Rear Entertainment Function"
(page 12) and “External Audio Processor (Optional)” (page 31) are
operated in the same way.
Display example for the function screen
(page 8)
Enters the preset number.
RDS Operation
Display example for the RDS screen
(SETUP)
Displays SETUP screen.
Display example for setup screen
(pages 9, 10)
Seeks a programme in current PTY (Programme Type).
Touching and holding will change PTY.
(pages 9, 10)
Seeks a programme in current PTY (Programme Type).
Touching and holding will change PTY.
If there is a hierarchical list,
will change to the list screen.
is displayed, and touching
Display example for the RDS function screen.
/
(PTY)
Adjusts and sets by touching.
(page 9)
Displays the PTY selection screen. Touch
programme type in selection screen.
to confirm the
(NEWS) (page 10)
Changes the news mode.
(AF) (page 9)
Changes AF setting ON/OFF.
41-EN
01GB05VPAB222R.fm
ALPINE VPA-B222R 68-02065Z87-A (EN)
01GB00VPAB222R.book Page 42 Monday, January 23, 2006 4:24 AM
CD/MP3/WMA Operation
Display example for the function screen
Display example for MP3/WMA main screen
(REPEAT),
(M.I.X.) (page 21)
Each touch changes to repeat or M.I.X. mode.
Display example for when connecting a CD changer
(page 20)
Finds the beginning of the current track. Touch and hold to
play fast-reverse.
/
(page 20)
Pauses and plays back.
(page 20)
Finds the beginning of the next track. Touch and hold to
play fast-forward.
F. (page 20)
(page 21)
Selects previous folder.
F.
(DISC SELECT)
(page 20)
(page 20)
F.”, “F.
” and “
(page 20)
Displays disc selection screen.
Touch to confirm disc in the selection screen.
Enters folder/file search mode.
“
, (M.I.X.)
Changes to the selection screen of M.I.X. or repeat mode.
Touch to confirm mode in the selection screen.
Selects next folder.
•
(REPEAT)
” are not displayed during CD playback.
(CHG SEL) (page 20)
Displayed when two changers are connected.
Touch to change the changer.
Display example for search screen
(page 20)
Enters the selected folder/file.
(page 20)
If there is a file in the folder, folders are displayed, and
touching will change to the file list screen.
42-EN
01GB05VPAB222R.fm
ALPINE VPA-B222R 68-02065Z87-A (EN)
01GB00VPAB222R.book Page 43 Monday, January 23, 2006 4:24 AM
DVD/Video CD Operation
Display example for function screen
• The display item differs according to disc and connected device.
• Some soft buttons may not be operational.
Display example for DVD main operation screen
(page 23)
Finds the beginning of track/chapter. Touching and holding
plays fast- reverse.
/
(page 22)
Pauses and plays back.
(page 23)
Finds the beginning of a track/chapter. Touching and
holding plays fast- forward.
KEY (page 22)
The DVD menu operation screen is displayed.
TOP MENU (page 23)
The DVD top menu screen is displayed.
Display example for DVD menu operation screen
(MENU) (page 24)
Displays menu screen.
(AUDIO) (page 24)
Changes audio language.
(SUB TITLE) (page 24)
Changes subtitle language.
(ANGLE) (page 24)
Changes angle.
(STOP/PRE STOP) (page 23)
Stops/pauses playback.
(REPEAT) (pages 23, 24)
Changes repeat mode.
Moves an item displayed on the screen.
ENT
Enters the selected item.
RTN
Returns to the previous screen.
CONTROL
Displays the main operation screen.
43-EN
01GB05VPAB222R.fm
ALPINE VPA-B222R 68-02065Z87-A (EN)
01GB00VPAB222R.book Page 44 Monday, January 23, 2006 4:24 AM
iPod® Operation
TV Operation
Display example for iPod main screen
Display example for TV main screen
(page 29)
Decreases channels one by one (Manual mode).
(page 25)
Finds the beginning of a song. Touching and holding will go
fast-reverse.
/
(page 25)
(page 29)
Searches and receives a channel automatically (Auto seek
mode).
P.SET (page 29)
Pauses and plays back.
Decreases the preset numbers one by one.
(page 25)
Finds the beginning of a song. Touching and holding fastforwards a song.
(page 25)
The search mode screen is displayed.
Display example for search screen
TUNE (page 29)
Changes the tuning way (manual mode, auto seek mode
and preset number).
(page 29)
Increases channels one by one.
(page 29)
Searches and receives a channel automatically (Auto seek
mode).
P.SET
(page 29)
Increases the preset numbers one by one.
A.MEMO (page 29)
Memorizes automatically.
BAND (page 29)
Changes the band.
Display example for the function screen
(page 25)
Enters the selected playlist/artist/album/song.
(page 25)
If there is a hierarchy in playlist/artist/album, lists are
displayed, and the list screen will change by touching.
Display example for function screen
(AUDIO) (page 29)
Changes audio.
(REPEAT)
, (M.I.X.)
(page 27)
Changes to the selection screen of M.I.X. or repeat mode.
Touch
to confirm mode in selection screen.
44-EN
01GB05VPAB222R.fm
ALPINE VPA-B222R 68-02065Z87-A (EN)
01GB00VPAB222R.book Page 45 Monday, January 23, 2006 4:24 AM
Digital TV Operation
Display example for function screen
Display example for Digital TV main screen
MENU (page 30)
Displays the menu screen.
A.MEMO (page 30)
Memorizes automatically.
Display example for EPG screen
CH (page 30)
Decreases channels one by one. Touching and holding
changes continuously.
FAV (page 30)
Decreases favorite channels.
TUNE (page 30)
Changes the tuning way (channel and favorite channel).
CH
(page 30)
Increases channels one by one. Touching and holding
changes continuously.
FAV
(page 30)
Increases favorite channels.
KEY (page 30)
Displays soft button for EPG screen operation.
BAND (page 30)
Switches source of digital TV.
EPG (page 30)
Displays EPG screen.
(page 30)
Moves an item displayed on the screen.
ENT (page 30)
Enters the selected item.
RTN
Returns to the previous screen.
CONTROL
Displays the main operation screen.
45-EN
01GB05VPAB222R.fm
ALPINE VPA-B222R 68-02065Z87-A (EN)
01GB00VPAB222R.book Page 46 Monday, January 23, 2006 4:24 AM
Information
In Case of Difficulty
If you encounter a problem, please turn the power off, then on again.
If the unit is still not functioning normally, please review the items
in the following checklist. This guide will help you isolate the
problem if the unit is at fault. Otherwise, make sure the rest of your
system is properly connected, or then consult your authorized
Alpine dealer.
Basic
No function or display.
• Vehicle’s ignition is off.
- If connected according to the instructions, the unit will not
operate with the vehicle’s ignition off.
• Improper power lead connections.
- Check power lead connections.
• Blown fuse.
- Check the fuse on the battery lead of the unit; replace with the
proper value if necessary.
• Internal micro-computer malfunctioned due to interference
noise, etc.
- Press the RESET switch with a ballpoint pen or other pointed
article.
No sound or unnatural sound.
• Incorrect setting of volume/balance/fader controls.
- Readjust the controls.
• Connections are not properly or securely made.
- Check the connections and firmly connect.
Screen not displayed.
• Connections to the DVD, CD player, navigation system are not
securely made.
- Check the connections and firmly connect.
Navigation system inoperative.
• Connections to the navigation system are incorrect.
- Check the connections with the navigation system and connect
the cables correctly and firmly.
The remote control is inoperative.
• The remote control sensor setting of “Rear Entertainment
Function” is not set to this unit.
- Set for this unit.
Unable to tune stations in the seek mode.
• You are in a weak signal area.
- Make sure the tuner is in DX mode.
• If the area you are in is a primary signal area, the antenna may
not be grounded and connected properly.
- Check your antenna connections; make sure the antenna is
properly grounded at its mounting location.
• The antenna may not be the proper length.
- Make sure the antenna is fully extended; if broken, replace the
antenna with a new one.
Broadcast is noisy.
• The antenna is not the proper length.
- Extend the antenna fully; replace it if it is broken.
• The antenna is poorly grounded.
- Make sure the antenna is grounded properly at its mounting
location.
• The station signal is weak and noisy.
- If above solution does not work, tune in another station.
Indication for CD changer
• Protective circuit is activated due to high temperature.
- The indicator will disappear when the temperature returns to
within operation range.
• Malfunction in the CD Changer.
- Consult your Alpine dealer. Press the magazine eject button
and pull out the magazine.
Check the indication. Insert the magazine again.
If the magazine cannot be pulled out, consult your Alpine
dealer.
• Magazine ejection not possible.
- Press the magazine eject button. If the magazine does not eject,
consult your Alpine dealer.
• A disc is left inside the CD Changer.
- Press the Eject button to activate the eject function. When the
CD Changer finishes the eject function, insert an empty CD
magazine into the CD Changer to receive the disc left inside
the CD Changer.
Radio
Unable to receive stations.
• No antenna, or open connection in the antenna cable.
- Make sure the antenna is properly connected; replace the
antenna or cable if necessary.
• No magazine is loaded into the CD Changer.
- Insert a magazine.
• No indicated disc.
- Choose another disc.
46-EN
01GB06VPAB222R.fm
ALPINE VPA-B222R 68-02065Z87-A (EN)
01GB00VPAB222R.book Page 47 Monday, January 23, 2006 4:24 AM
Indication for iPod Mode
• The iPod is not connected.
- Make sure the iPod is correctly connected.
Make sure the cable is not bent excessively.
• The iPod’s battery remains low.
- Refer to the iPod’s documentation and charge the battery.
• There are no songs in the iPod.
- Download songs to the iPod and connect to the VPA-B222R.
Specifications
FM TUNER SECTION
Tuning Range
Mono Usable Sensitivity
50 dB Quieting Sensitivity
Alternate Channel Selectivity
Signal-to-Noise Ratio
Stereo Separation
Capture Ratio
MW TUNER SECTION
Tuning Range
Sensitivity (IEC Standard)
• Communication error
- Turn the ignition key off, and then set to ACC or ON again.
- Check the display by reconnecting between the iPod and the
adapter, using the iPod cable.
87.5 – 108.0 MHz
9.3 dBf (0.8 µV/75 ohms)
13.5 dBf (1.3 µV/75 ohms)
80 dB
65 dB
35 dB
2.0 dB
531 – 1,602 kHz
25.1 µV/28 dB
LW TUNER SECTION
Tuning Range
Sensitivity (IEC Standard)
153 – 281 kHz
31.6 µV/30 dB
GENERAL
Power Requirement
• Caused by the iPod Software Version not being compatible with
this unit.
- Update the iPod Software Version to be compatible with this
unit.
Operating temperature
Maximum Power Output
Output Voltage
Bass
Treble
Weight
Audio output level
Preout (Front, Rear):
Preout (Subwoofer):
Auxout:
Ai-NET:
14.4 V DC
(11–16 V allowable)
+32 °F to +113 °F
(0 °C to + 45 °C)
50 W × 4
2,000 mV/10k ohms
+20/–14 dB at 100 Hz
±14 dB at 10 kHz
1.2 kg
(2 lbs. 10 oz)
2V/10k ohms (max.)
2V/10k ohms (max.)
1.2V/10k ohms
850 mV
CHASSIS SIZE
Width
Height
Depth
275 mm (10-13/16")
40 mm (1-9/16")
170 mm (6-3/4")
Commander
Width
Height
Depth
Weight
53 mm (2-1/16")
29 mm (1-1/8")
87 mm (3-7/16")
50 g (1.8 oz) (holder excluded)
47-EN
01GB06VPAB222R.fm
ALPINE VPA-B222R 68-02065Z87-A (EN)
01GB00VPAB222R.book Page 48 Monday, January 23, 2006 4:24 AM
Installation and Connections
Before installing or connecting the unit, please read the
following and pages 4 to 5 of this manual thoroughly for
proper use.
Caution
HAVE THE WIRING AND INSTALLATION DONE BY EXPERTS.
Warning
MAKE THE CORRECT CONNECTIONS
The wiring and installation of this unit requires special technical
skill and experience. To ensure safety, always contact the dealer
where you purchased this product to have the work done.
Failure to make the proper connections may result in fire or product
damage.
USE SPECIFIED ACCESSORY PARTS AND INSTALL THEM
SECURELY.
USE ONLY IN CARS WITH A 12 VOLT NEGATIVE GROUND.
Be sure to use only the specified accessory parts. Use of other than
designated parts may damage this unit internally or may not
securely install the unit in place. This may cause parts to become
loose resulting in hazards or product failure.
(Check with your dealer if you are not sure.) Failure to do so may
result in fire, etc.
BEFORE WIRING, DISCONNECT THE CABLE FROM THE
NEGATIVE BATTERY TERMINAL.
Failure to do so may result in electric shock or injury due to
electrical shorts.
DO NOT ALLOW CABLES TO BECOME ENTANGLED IN
SURROUNDING OBJECTS.
Arrange wiring and cables in compliance with the manual to
prevent obstructions when driving. Cables or wiring that obstruct or
hang up on places such as the steering wheel, gear lever, brake
pedals, etc. can be extremely hazardous.
DO NOT SPLICE INTO ELECTRICAL CABLES.
Never cut away cable insulation to supply power to other
equipment. Doing so will exceed the current carrying capacity of
the wire and result in fire or electric shock.
DO NOT DAMAGE PIPE OR WIRING WHEN DRILLING
HOLES.
When drilling holes in the chassis for installation, take precautions
so as not to contact, damage or obstruct pipes, fuel lines, tanks or
electrical wiring. Failure to take such precautions may result in fire.
DO NOT USE BOLTS OR NUTS IN THE BRAKE OR STEERING
SYSTEMS TO MAKE GROUND CONNECTIONS.
Bolts or nuts used for the brake or steering systems (or any other
safety-related system), or tanks should NEVER be used for
installations or ground connections. Using such parts could disable
control of the vehicle and cause fire etc.
KEEP SMALL OBJECTS SUCH AS BOLTS OR SCREWS OUT
OF THE REACH OF CHILDREN.
Swallowing them may result in serious injury. If swallowed,
consult a physician immediately.
DO NOT INSTALL IN LOCATIONS WHICH MIGHT HINDER
VEHICLE OPERATION, SUCH AS THE STEERING WHEEL OR
GEARSHIFT.
Doing so may obstruct forward vision or hamper movement etc.
and results in serious accident.
IMPORTANT
Please record the serial number of your unit in the space provided
below and keep it as a permanent record. The serial number plate is
located on the bottom of the unit.
ARRANGE THE WIRING SO IT IS NOT CRIMPED OR
PINCHED BY A SHARP METAL EDGE.
Route the cables and wiring away from moving parts (like the seat
rails) or sharp or pointed edges. This will prevent crimping and
damage to the wiring. If wiring passes through a hole in metal, use
a rubber grommet to prevent the wires insulation from being cut by
the metal edge of the hole.
DO NOT INSTALL IN LOCATIONS WITH HIGH MOISTURE OR
DUST.
Avoid installing the unit in locations with high incidence of
moisture or dust. Moisture or dust that penetrates into this unit may
result in product failure.
Precautions
• Be sure to disconnect the cable from the (–) battery post before
installing your VPA-B222R. This will reduce any chance of
damage to the unit in case of a short-circuit.
• Be sure to connect the colour coded leads according to the
diagram. Incorrect connections may cause the unit to
malfunction or damage to the vehicle’s electrical system.
• When making connections to the vehicle’s electrical system, be
aware of the factory installed components (e.g. on-board
computer). Do not tap into these leads to provide power for this
unit. When connecting the VPA-B222R to the fuse box, make
sure the fuse for the intended circuit of the VPA-B222R has the
appropriate amperage. Failure to do so may result in damage to
the unit and/or the vehicle. When in doubt, consult your Alpine
dealer.
• The VPA-B222R uses female RCA-type jacks for connection to
other units (e.g. amplifier) having RCA connectors. You may
need an adaptor to connect other units. If so, please contact your
authorized Alpine dealer for assistance.
• Be sure to connect the speaker (–) leads to the speaker (–)
terminal. Never connect left and right channel speaker cables to
each other or to the vehicle body.
SERIAL NUMBER:
INSTALLATION DATE:
INSTALLATION TECHNICIAN:
PLACE OF PURCHASE:
48-EN
01GB07VPAB222R.fm
ALPINE VPA-B222R 68-02065Z87-A (EN)
01GB00VPAB222R.book Page 49 Monday, January 23, 2006 4:24 AM
When mounting with Screws
Installation
When mounting the tuner with the screws, be sure to choose a flat
location.
When making holes, be careful not to scratch any pipes or wires.
Installing the unit
1
Caution
• Do not block the unit’s fan or heat sink, thus preventing air
circulation. If blocked, heat will accumulate inside the unit and
may cause a fire.
• Do not touch the heat sink as it becomes hot, and may result in
injury.
Connect the bracket to both the flanks of the tuner
with the supplied pan screws (M4 × 8).
VPA-B222R
Air ventilation hole
Bracket (Included)
<Side of the tuner box>
2
When mounting with Velcro fasteners
When mounting the unit with the Velcro fasteners, be sure to choose a
flat location.
Do not hang the unit from the bottom of the dashboard or rear deck with
the Velcro fasteners.
1
Pan screws (M4 × 8) (Included)
Install the tuner on the floor with the supplied flangehead tapping screws (M4 × 14).
Flange-head tapping screws
(M4 × 14) (Included)
Remove the Protective paper and attach two pieces
of Velcro fastener to the bottom of the Tuner.
VPA-B222R
VPA-B222R
Protective paper
Protective paper
2
Velcro Fasteners
(Included)
Check the position, and then fix the Tuner to the
floor carpet.
49-EN
01GB07VPAB222R.fm
ALPINE VPA-B222R 68-02065Z87-A (EN)
01GB00VPAB222R.book Page 50 Monday, January 23, 2006 4:24 AM
Mounting the Commander
3
For safe use, make sure of the following:
• When the holder cannot be mounted securely with double-sided
adhesive tape, mount it by using screws.
• Location is stable and film.
• Driver's view or operations are not obstructed.
• Located where driving can easily be performed (centre console, etc.).
During operation, ensure that your driving posture does not change,
or that your attention is not taken away from safely driving your
vehicle.
1
Mount the Holder
Reinforcement screws
Commander
Confirm where the holder is to be placed, and
determine its direction.
Holder
Protective
Paper
The angle of the commander can be adjusted according to
the direction of the holder.
Pattern 1
Double-sided
adhesive
tape*
Console box, etc.
*Before attaching the tape, make sure the mounting location is free
from dust or dirt.
4
5
6
Connect the commander cable to the commander.
Take up any slack by pulling the cable, while holding
the holder.
Set the commander on the holder.
After aligning the 2 projections on the backside of the
commander with the groove of the holder, then turn the
commander clockwise until it clicks.
Pattern 2
Projections
2
Route the commander connection cable through the
holder.
Pattern 1
Route the cable through
the hole in the side.
Pattern 2
• When you remove the commander from the holder, turn the
commander counterclockwise by pressing
on the holder, then
remove the commander.
WARNING
Route the cable through the
hole in the underside.
DO NOT INSTALL THE COMMANDER NEAR THE
PASSENGER AIR BAG.
If the unit is not installed correctly, the air bag may not function
correctly, and if the air bag is triggered, parts may spring
upwards and cause accident or injury.
7
Fix the connection cable with the supplied cable
clamp.
50-EN
01GB07VPAB222R.fm
ALPINE VPA-B222R 68-02065Z87-A (EN)
01GB00VPAB222R.book Page 51 Monday, January 23, 2006 4:24 AM
Parking Brake Lead Connection
If necessary, use a pinch connector to connect the foot brake lead, parking brake lead, etc.
1
2
Vehicle Cable
Pliers
Pinch Connector
Monitor Cable
Stopper
Connection Diagram of SPST Switch (Sold Separately)
(If the ACC power supply is not available)
SPST SW (Optional)
IGNITION
(Red)
FUSE (5A)
(Optional)
BATTERY
(Yellow)
FUSE (20A)
(Optional)
VPA-B222R
Battery
• If your vehicle has no ACC power supply, add an SPST (Single-Pole, Single-Throw) switch (sold separately) and fuse (sold separately).
• The diagram and the fuse amperage shown above are in the case when VPA-B222R is used individually.
• If the switched power (ignition) lead of the VPA-B222R is connected directly to the positive (+) post of the vehicle’s battery, the VPA-B222R draws
some current (several hundred milliamperes) even when its switch is placed in the OFF position and the battery may be discharged.
Speaker Input Lead Connection
1
Cut the car audio's speaker leads.
2
Connect the leads together.
Connect the supplied pinch connector.
To prevent external noise from entering the audio system.
Locate the unit and route the leads at least 10 cm away from the car harness.
Keep the battery power leads as far away from other leads as possible.
Connect the ground lead securely to a bare metal spot (remove any paint, dirt or grease if necessary) of the car chassis.
If you add an optional noise suppressor, connect it as far away from the unit as possible. Your Alpine dealer carries various
noise suppressors, contact them for further information.
• Your Alpine dealer knows best about noise prevention measures so consult your dealer for further information.
•
•
•
•
51-EN
01GB07VPAB222R.fm
ALPINE VPA-B222R 68-02065Z87-A (EN)
01GB00VPAB222R.book Page 52 Monday, January 23, 2006 4:24 AM
Connections (VPA-B222R Wiring Diagram)
Antenna
SPEAKER INPUT (Grey)
RIGHT
FRONT
To speaker output lead of
the vehicle
(Grey/
Red)
To speaker output lead of
the vehicle
VPA-B222R
SPEAKER INPUT (White)
LEFT
FRONT
(White/
Red)
To speaker output lead of
the vehicle
To speaker output lead of
the vehicle
REMOTE OUT (AUX1)
To remote input lead
(White/Brown)
REMOTE OUT (AUX2)
To remote input lead
(White/Brown)
GUIDE CONT
To guide control lead of the
external audio processor
(White/Green)
ILLUMINATION
(Orange)
ILLM
(Orange)
To the instrument
cluster illumination
lead
REMOTE
TURN-ON
(Blue/White)
P.ANT
POWER ANT
(Blue)
AUDIO
INTERRUPT IN
(Blue)
(Pink/Black)
PARKING
BRAKE
(Yellow/Blue)
ACC
ACC
(Red)
(Red)
BATTERY
BATTERY
(Yellow)
(Yellow)
GND
(Black)
Note:
SPEAKER
LEFT
FRONT
(White)
F-Lch
SPEAKER
LEFT
REAR
(White/ (Green/
Black) Black)
R-Lch
SPEAKER
RIGHT
FRONT
SPEAKER
RIGHT
REAR
(Green) (Violet)
R-Rch
(Violet/
Black)
(Grey/
Black)
(Grey)
Be sure to connect the leads
correctly after identifying the
ISO connector terminals for
the Battery and lgnition
(ACC).
F-Rch
• Set the system switch to “NORM” when only a changer is connected (when the Ai-NET compatible equalizer is not used).
52-EN
01GB07VPAB222R.fm
ALPINE VPA-B222R 68-02065Z87-A (EN)
01GB00VPAB222R.book Page 53 Monday, January 23, 2006 4:24 AM
ISO Antenna Plug
AUX Input Terminals
ISO Antenna Converter Plug (sold separately)
If these terminals are connected to the optional expansion
box (VPE-S431), the AUX input terminals are not used on
this unit. Connect AUX IN 1, 2 and 3, and the AUX OUT 1
and 2 terminals of the expansion box (VPE-S431) to the
external device(s).
Antenna Extension Cable (Included)
Right Front (+) Speaker Input Lead (Grey)
Right Front (–) Speaker Input Lead (Grey/Red)
Left Front (+) Speaker Input Lead (White)
Left Front (–) Speaker Input Lead (White/Red)
Remote Control Output Lead (White/Brown)
Connect this lead to the remote control input lead. This lead
outputs the controlling signals from the remote control.
Remote Control Output Lead (White/Brown)
Connect this lead to the remote control input lead. This lead
outputs the controlling signals from the remote control.
Guide Control Lead (White/Green)
If an external audio processor is connected, connect this to
the guide control lead.
Illumination Lead (Orange)
This lead may be connected to the vehicle's instrument
cluster illumination lead. This will allow the backlighting of
the commander to dim whenever the vehicle's lights are
turned on.
Power Supply Connector
Steering Remote Control Interface Connector
To steering remote control interface box.
Antenna Receptacle
ISO Connector (Included)
Ground Lead (Black)
Connect this lead to a good chassis ground on the vehicle.
Make sure the connection is made to bare metal and is
securely fastened using the sheet metal screw provided.
Remote Turn-On Lead (Blue/White)
Connect this lead to the remote turn-on lead of your
amplifier or signal processor.
To amplifier or equalizer
Power Antenna Lead (Blue)
Connect this lead to the +B terminal of your power antenna,
if applicable.
Audio Interrupt In Lead (Pink/Black)
To vehicle phone
Parking Brake Lead (Yellow/Blue)
Connect this lead to the power supply side of the parking
brake switch to transmit the parking brake status signals to
the VPA-B222R.
Connect this to the remote control sensor unit.
Connect this lead to the parking brake lead powered
when parking brake is engaged.
Factory System Input Terminal
Switched Power Lead (Ignition) (Red)
Navigation Input (RGB Input) Terminal
Connect this lead to an open terminal on the vehicle’s fuse
box or another unused power source which provides (+)
12V only when the ignition is turned on or in the accessory
position.
Remote Control Eye Jack
Connect this to the RGB output terminal of the Navigation
System.
Display Output (RGB Output) Terminal
Connect a 13P RGB terminal equipped monitor using the
RGB cable supplied with the unit.
Video Output Terminal
Connect this to the external front monitor using the RCA
extension cable supplied with the unit.
Battery Lead (Yellow)
Connect this lead to the positive (+) post of the vehicle’s
battery.
Fuse Holder (10A)
Right Front (+) Speaker Output Lead (Grey)
Subwoofer output Terminal
Right Front (–) Speaker Output Lead (Grey/Black)
Connect the input lead of an amplifier for the subwoofer to
this terminal.
Right Rear (–) Speaker Output Lead (Violet/Black)
Rear output Terminal
Right Rear (+) Speaker Output Lead (Violet)
Use when connecting an amplifier or equalizer.
Left Rear (+) Speaker Output Lead (Green)
Front output Terminal
Left Rear (–) Speaker Output Lead (Green/Black)
Use when connecting an amplifier or equalizer.
Left Front (–) Speaker Output Lead (White/Black)
Ai-NET Connector
Left Front (+) Speaker Output Lead (White)
Connect this to the output or input connector of other
product (CD changer, Equalizer, iPod adapter*, etc.)
equipped with Ai-NET.
* If you connect to iPod, you need the optional adapter (KCA-420i).
For details on connection, refer to the Owner’s Manual of the KCA420i.
Guide Output Terminal
If an external audio processor is connected, outputs the
navigation interrupt voice signal that is input from the Alpine
navigation system, or the speaker input terminal.
Commander Terminal
AV Select Connector
When this connector is connected to the optional expansion
box (VPE-S431), connect this to the HEAD UNIT terminal of
VPE-S431.
System Switch
When connecting an equalizer or divider using Ai-NET
feature, place this switch in the EQ/DIV position. When no
device is connected, leave the switch in the NORM position.
• Be sure to turn the power off on the unit before changing the
switch position.
ALPINE/OTHER switching button
Set to “ALPINE” for normal use.
Set to “OTHER” when connecting optional display interface
box.
NTSC/PAL switching button
Switch if necessary. Effective only when the ALPINE/OTHER
switching button is set to OTHER.
Commander (Included)
53-EN
01GB07VPAB222R.fm
ALPINE VPA-B222R 68-02065Z87-A (EN)
01GB00VPAB222R.book Page 54 Monday, January 23, 2006 4:24 AM
System Example
Connect the ALPINE Monitor
Monitor
(Sold Separately)
RGB Input Terminal
Monitor B. Box
(Sold Separately)
RGB Cable
(Included)
Display Output (RGB Output) Terminal
Connect a 13P RGB terminal equipped monitor using the RGB cable supplied with the unit.
RGB Cable (Included)
Connect a Monitor of another manufacturer
Monitor
(Sold Separately)
Video Input Terminal
Monitor B. Box (Sold
Separately)
RCA Extension Cable (Included)
• Remote control sensor is required.
Video Output Terminal
Connect this to the external front monitor using the RCA extension cable supplied with the unit.
RCA Extension Cable (Included)
54-EN
01GB07VPAB222R.fm
ALPINE VPA-B222R 68-02065Z87-A (EN)
01GB00VPAB222R.book Page 55 Monday, January 23, 2006 4:24 AM
Connect the Ai-NET compatible audio processor, Navigation system, DVD player and changer.
NVE-N099P
Navigation system
(Sold Separately)
Guide Control lead*
(White/Green)
Guide Control lead
Audio Processor (Ai-NET)
(Fiber Digital compatible)
(Sold Separately)
(White/Green)
VPA-B222R
Fiber digital
Input terminal
(for DVD
Player)
RCA extension
cable
Ai-NET
cable
Ai-NET cable
Fiber optic cable
(Yellow)
(White/Brown)
(White/Brown)
REMOTE OUT
REMOTE IN
DVD Video Player
(Ai-NET)
(DVA-5210 etc.)
(Sold Separately)
CD Changer
(Ai-NET)
(Sold Separately)
Ai-NET cable
* Guide Control lead is not connected when PXA-H700/PXA-H701 is connected.
• When the NVA-N751AS is connected for the Navigation System, use the RGB conversion cable KWE-503N (sold separately).
RGB Cable (Included with NVE-N099P)
RCA Extension Cable (Sold Separately)
Factory System Input Terminal
Ai-NET Cable (Included with DVD video player)
Navigation Input (RGB Input) Terminal
Ai-NET Cable (Included with Audio Processor)
Connect this to the RGB output terminal of the Navigation
System.
Ai-NET Cable (Included with CD Changer)
System Switch
When connecting an equalizer or divider using Ai-NET
feature, place this switch in the EQ/DIV position. When no
device is connected, leave the switch in the NORM position.
• Be sure to turn the power off on the unit before changing the
switch position.
Guide Control Lead (White/Green)
Ai-NET Connector
Connect this to the output or input connector of other
products equipped with Ai-NET.
Guide Output Terminal
If an external audio processor is connected, outputs the
navigation interrupt voice signal that is input from the Alpine
navigation system, or the speaker input terminal.
Remote Control Output Lead (White/Brown)
Connect this lead to the remote control input lead. This lead
outputs the controlling signals from the remote control.
To Ai-NET Connector (Grey)
To Ai-NET Connector (Black)
Navigation Audio Input Jack (RCA Input)
Fiber optic Cable (Sold Separately)
AUX Video Input (AUX1) Terminal
Connect the video output lead of a DVD video player or
DVD changer to this terminal.
RCA Extension Cable (Included with DVD video
player)
55-EN
01GB07VPAB222R.fm
ALPINE VPA-B222R 68-02065Z87-A (EN)
01GB00VPAB222R.book Page 56 Monday, January 23, 2006 4:24 AM
When Connecting External Equipment
VPA-B222R
To Video Output terminal
TV Tuner, VCR or DVD Player
(DVE-5207) that is not
compatible with Ai-NET (Sold
Separately)
To Audio Output terminal
(White/Brown)
REMOTE OUT
REMOTE IN
(White/Brown)
System Switch
AUX Video/Audio Input Terminal
When connecting an equalizer or divider using Ai-NET
feature, place this switch in the EQ/DIV position. When no
device is connected, leave the switch in the NORM position.
• Be sure to turn the power off on the unit before changing the
switch position.
RCA Extension Cable (Sold separately)
Remote Control Output Lead (White/Brown)
Connect this lead to the remote control input lead. This lead
outputs the controlling signals from the remote control.
Factory System Input Terminal
56-EN
01GB07VPAB222R.fm
ALPINE VPA-B222R 68-02065Z87-A (EN)
01GB00VPAB222R.book Page 57 Monday, January 23, 2006 4:24 AM
Connect an expansion box (VPE-S431), DVD Player, DVD Changer or a Touch
Panel-compatible Monitor.
VPA-B222R
To AUX Input (AUX IN 1)
Terminals
DVD PLAYER
(DVA-5210, etc.)
(Sold separately)
EXPANSION BOX
(VPE-S431)
(Sold separately)
To AUX Input (AUX IN 2)
Terminals
DVD CHANGER
(Sold separately)
To AUX Output
Terminals
M.CONT
(White/Pink)
M.CONT
(White/Pink)
To Video Input
Terminals
To Audio Input
Terminals
REMOTE
IN
(White/Brown)
REMOTE OUT
(White/Brown)
TOUCH PANEL COMPATIBLE
REAR MONITOR
(Sold separately)
REMOTE OUT (AUX1)
REMOTE IN (AUX1)
(White/Brown)
(White/Brown)
(White/Brown)
REMOTE IN (AUX2)
REMOTE OUT
(AUX2)
(White/Brown)
• If the expansion box (VPE-S431) is connected to either a DVD video player or DVD changer, connect this to AUX IN 1. If this is
connected to AUX IN 2, remote control operation will not be possible. If both are to be connected, connect the DVD video player to
AUX IN 1, and the DVD changer to AUX IN 2.
System Switch
Remote Control Output Lead (White/Brown)
When connecting an equalizer or divider using Ai-NET
feature, place this switch in the EQ/DIV position. When no
device is connected, leave the switch in the NORM position.
Connect this lead to the remote control input lead. This lead
outputs the controlling signals from the remote control.
• Be sure to turn the power off on the unit before changing the
switch position.
Ai-NET Cable (Included with DVD changer)
To AV Selector Terminal
AV Selector Cable (Included with VPE-S431)
Ai-NET Cable (Included with DVD video player)
To Ai-NET Connector (Black)
To Ai-NET Connector (Grey)
RCA Extension Cable (Sold separately)
Monitor Control Lead (White/Pink)
Connect this to the Monitor Control Lead of the touch panelcompatible rear monitor.
57-EN
01GB07VPAB222R.fm
ALPINE VPA-B222R 68-02065Z87-A (EN)
01GB00VPAB222R.book Page 58 Monday, January 23, 2006 4:24 AM
Connect the car system (standard audio system, etc.).
(White)
SPEAKER INPUT
LEFT FRONT
SPEAKER OUTPUT
LEFT FRONT
Standard Car Audio
System
(White/Red)
(Grey)
RIGHT FRONT
RIGHT FRONT
(Grey/Red)
(Grey)
SPEAKER (RIGHT FRONT)
SPEAKER
(Grey/Black)
(White)
SPEAKER (LEFT FRONT)
(White/Black)
(Green)
SPEAKER (LEFT REAR)
(Green/Black)
(Violet)
SPEAKER (RIGHT REAR)
(Violet/Black)
Power Supply Connector
Left Front (+) Speaker Output Lead (White)
Factory System Input Terminal
Left Front (–) Speaker Output Lead (White/Black)
Left Front (+) Speaker Input Lead (White)
Left Rear (+) Speaker Output Lead (Green)
Left Front (–) Speaker Input Lead (White/Red)
Left Rear (–) Speaker Output Lead (Green/Black)
Right Front (+) Speaker Input Lead (Grey)
Right Rear (+) Speaker Output Lead (Violet)
Right Front (–) Speaker Input Lead (Grey/Red)
Right Rear (–) Speaker Output Lead (Violet/Black)
Right Front (+) Speaker Output Lead (Grey)
Right Front (–) Speaker Output Lead (Grey/Black)
• Be sure to connect the speaker input to the front speaker output lead. The rear speaker output lead cannot be connected.
• Be sure to disconnect all the speaker output lead of the standard speaker and system.
• If a multi-channel speaker system is connected, connect the speaker input to the mid range speaker (front). If a tweeter or woofer is connected,
sound will not output correctly.
• Set each item in“Using the Speaker Input” (page 16).
• Refer to "Speaker Input Lead Connection" (page 51).
• Failure to connect correctly may result in damage to your standard car audio system.
58-EN
01GB07VPAB222R.fm
ALPINE VPA-B222R 68-02065Z87-A (EN)
Deutsch
To customers/Hinweis an Kunden/A l’attention
de l’utilisateur/Información para los clientes/
Informazioni per i clienti/Till kunder
Anmerkungen zum Anschluss anderer Produkte
R
Please note following additional information of the Owner’s Manual./Bitte beachten Sie folgende zusätzliche
Informationen zur Bedienungsanleitung./ Veuillez noter les ajouts suivants au mode d’emploi./Tenga en
cuenta la información adicional contenida en el Manual de operación./ Tenere presente le seguenti
informazioni supplementari d’ istruzioni per l’uso./ Se följande tillägg till användarhandledning.
L Anschluss eines Ai-NET-kompatiblen Klangprozessors, Navigationssystems, DVDPlayers und -Wechslers (Seite 55).
• Wenn der PXA-H701/PXA-H700 bzw. DVD-Player/Wechsler über ein optisches Digitalkabel angeschlossen ist, kann beim Wechseln der Disc,
im Pausenzustand u. dgl. unter Umständen der Ton eines unterbrechenden Signals (Ansage) nicht ausgegeben werden. In diesem Fall schafft
ein externer Aktivlautsprecher Abhilfe, der für die Wiedergabe unterbrechender Tonsignale an die GUIDE OUT-Buchse angeschlossen wird.
Bitte beachten Sie folgende Korrekturen an der Bedienungsanleitung.
English
About connecting other products
L Connect the Ai-NET compatible audio processor, Navigation system, DVD player and
changer (page 55).
• If PXA-H701/PXA-H700 and DVD player/changer are connected via fiber digital, interruption audio may not be output when a
disc is changed, during pause, etc. In this case, connect an external speaker with built-in amplifier to the GUIDE OUT terminal to
output interruption audio.
<Falsch>
• Wenn das NVA-N751AS als Navigationssystem angeschlossen wird, verwenden Sie das RGB-Konversionskabel KWE-503N (separat erhältlich).
<Richtig>
• Wenn das NVE-N055PS als Navigationssystem angeschlossen wird, verwenden Sie das RGB-Konversionskabel KCE-030N (separat erhältlich).
L Anschluss eines Digital-Theater-Verstärkers, Navigationssystems, DVD-Players und
CD-Wechslers.
NVE-N099P
Navigationssystem
(separat erhältlich)
The Owner's Manual has errors as shown here.
<Incorrect>
• When the NVA-N751AS is connected for the Navigation System, use the RGB conversion cable KWE-503N (Sold separately).
<Correct>
• When the NVE-N055PS is connected for the Navigation System, use the RGB conversion cable KCE-030N (Sold separately).
L Connect the Digital theater amplifier, Navigation system, DVD changer and CD
changer.
RGBKabel
VPA-B222R
Optischer
Digitaleingang
(für DVDPlayer)
FactorySystemEingang
CinchAnschlusskabel
(separat
erhältlich)
NVE-N099P
Navigation System
(Sold Separately)
RGB
cable
External Speaker with
built-in amplifier (Sold
Separately)
Digital Theater
amplifier
(MRA-D550)
(im Lieferumfang
des DVDWechslers)
Cinch-Anschlusskabel
(im Lieferumfang des DVD-Wechslers)
Fiber Digital
Input terminal
(for DVD Player)
An Ai-NET-Anschluss
(Grau)
RCA Extension
cable (Sold
Separately)
RCA Extension cable
(Included with DVD changer)
(Gelb)
Ai-NET
cable
(Included
with CD
Changer)
Ai-NET cable
(Included with
DVD changer)
Ai-NET-Kabel
(im Lieferumfang des Versärkers)
(Weiß/Braun)
(Weiß/Braun)
FERNBEDIENUNGSAUSGANG
FERNBEDIENUNGSEINGANG
DVD-Wechsler
(Ai-NET) (DHA-S680P)
(separat erhältlich)
An Ai-NET-Anschluss (Schwarz)
1 Navigationseingang (RGB)
Ai-NET cable
(Included with amplifier)
REMOTE OUT
REMOTE IN
To Ai-NET connector (Black)
4 Führungs-Ausgang
Wird mit dem RGB-Ausgang am
Navigationssystem verbunden.
(Yellow)
DVD Changer
(Ai-NET) (DHA-S680P)
(Sold Separately)
Wenn ein externer Klangprozessor angeschlossen
wird, kann hier das vom Navigationssystem bzw.
den Lautsprechereingang eingegebene
Unterbrechungs-Sprachsignal abgegriffen werden.
2 System-Schalter
CD Changer (Ai-NET)
(Sold Separately)
• If a DVD player such as DVA-5210 or DVE-5207 is connected, a digital theater amplifier cannot be connected via fiber digital to
the DVD player.
Wenn ein Equalizer oder eine Frequenzweiche mit
Ai-NET-Funktion angeschlossen wird, stellen Sie
diesen Schalter auf EQ/DIV.
5 Fernbedienungs-Ausgangskabel (Weiß/Braun)
Wird mit dem Fernbedienungs-Eingangskabel
verbunden. Über dieses Kabel werden die
Steuersignale der Fernbedienung ausgegeben.
• Vor Ändern der Schalterstellung unbedingt das
Gerät ausschalten!
6 AUX-Videoeingang (AUX1)
3 Ai-NET-Anschluss
Hier wird das Video-Ausgangskabel eines DVDPlayers oder DVD-Wechslers angeschlossen.
Wird mit dem Aus- bzw. Eingangsanschluss des
anderen Ai-NET-Geräts verbunden.
1 Navigation Input (RGB Input) Terminal
Connect this to the RGB output terminal of the
Navigation System.
2 System Switch
When connecting an equalizer or divider using
Ai-NET feature, place this switch in the EQ/DIV
position.
• Be sure to turn the power off on the unit before
changing the switch position.
3 Ai-NET Connector
Connect this to the output or input connector of
other products equipped with Ai-NET.
CD-Wechsler (Ai-NET)
(separat erhältlich)
• Wenn ein DVD-Player wie der DVA-5210 oder DVE-5207 angeschlossen ist, kann ein Digital-Theater-Verstärker nicht über ein
optisches Digitalkabel an den DVD-Player angeschlossen werden.
To Ai-NET connector
(Grey)
(White/Brown)
Ai-NETKabel (im
Lieferumfang
des CDWechslers)
Ai-NET-Kabel
VPA-B222R
Factory
System Input
terminal
(White/Brown)
Digital-TheaterVerstärker
(MRA-D550)
Externer
Aktivlautsprecher
(separat erhältlich)
4 Guide Output Terminal
If an external audio processor is connected,
outputs the navigation interrupt voice signal that is
input from the Alpine navigation system, or the
speaker input terminal.
5 Remote Control Output Lead (White/
Brown)
Connect this lead to the remote control input lead.
This lead outputs the controlling signals from the
remote control.
6 AUX Video Input (AUX1) Terminal
Connect the video output lead of a DVD video
player or DVD changer to this terminal.
Français
À propos du raccordement d'autres appareils
L Raccordez le processeur audio compatible Ai-NET, le système de navigation, le
lecteur DVD et le changeur DVD (page 55).
• Si le PXA-H701/PXA-H700 et le lecteur ou le changeur DVD sont raccordés via la borne d’entrée en fibres numériques, il est possible
que l’interruption audio ne soit pas reproduite lorsque vous changez de disque, lorsque vous passez en mode pause, etc. Dans ce cas,
raccordez une enceinte externe munie d’un amplificateur intégré à la borne GUIDE OUT pour reproduire l’interruption audio.
Le mode d'emploi contient les erreurs indiquées ici.
<Incorrect>
• Si vous connectez le système de navigation NVA-N751AS, utilisez le câble de conversion RGB KWE-503N (vendu séparément).
<Correct>
• Si vous connectez le système de navigation NVE-N055PS, utilisez le câble de conversion RGB KCE-030N (vendu séparément).
L Raccordez l’amplificateur numérique de home cinéma, le système de navigation, le
changeur DVD et le changeur CD.
NVE-N099P
Système de navigation
(vendu séparément)
Câble
RGB
Enceinte externe avec
amplificateur intégré
(vendu séparément)
Amplificateur
numérique de home
cinéma (MRA-D550)
VPA-B222R
Borne
d’entrée du
système
usinier
Câble
d’extension
RCA (vendu
séparément)
Câble d'extension RCA
(inclus avec le changeur DVD)
Borne d’entrée
en fibres
numériques
(pour lecteur
DVD)
Câble Ai-NET
(fourni avec
le changeur
CD)
Câble Ai-NET
(inclus avec
le changeur
DVD)
Vers le connecteur Ai-NET
(gris)
(Jaune)
Câble Ai-NET
(inclus avec le amplificateur)
(Blanc/Brun)
SORTIE
TÉLÉCOMMANDE
(Blanc/Brun)
ENTRÉE
TÉLÉCOMMANDE
Changeur DVD
(Ai-NET) (DHA-S680P)
(vendu séparément)
Vers le connecteur Ai-NET (noir)
Changeur CD
(Ai-NET)
(vendu séparément)
• Si un lecteur DVD, tel que le DVA-5210 ou le DVE-5207 est raccordé, un amplificateur numérique de home cinéma ne peut pas
être raccordé via la borne en fibres numériques au lecteur DVD.
1 Borne d’entrée du système de navigation
(entrée RGB)
Raccordez-la à la borne de sortie RGB du
système de navigation.
2 Sélecteur de système
Quand vous raccordez un égaliseur ou un
répartiteur équipé de la fonction Ai-NET, placez
ce sélecteur sur la position EQ/DIV.
• N’oubliez pas de mettre l’appareil hors tension
avant de modifier la position du sélecteur.
3 Connecteur Ai-NET
VPA-B222R
Raccordez-le au connecteur d’entrée ou de sortie
d’un autre appareil équipé de la fonction Ai-NET.
4 Borne de sortie du guide
Si un processeur audio externe est raccordé, vous
pouvez reproduire le signal vocal d’interruption de
la navigation qui entre du système de navigation
ou de la borne d’entrée des enceintes.
5 Fil de sortie de la télécommande (blanc/brun)
Raccordez-le au fil d’entrée de la télécommande.
Ce fil produit les signaux de commande de la
télécommande.
6 Borne d'entrée vidéo AUX (AUX1)
Raccordez-lui le fil de sortie vidéo d'un lecteur
DVD vidéo ou d'un changeur DVD.
68-06194Z30-A (Y)
To customers/Hinweis an Kunden/
A l’attention de l’utilisateur/Información para
los clientes/Informazioni per i clienti/Till kunder
R
English
L Add to “In Case of Difficulty” in the Owner’s Manual (page 46) the following settings and operations for FACTORY
SYSTEM (Speaker Input).
Speaker input sound is distorted.
• The Factory system has already been adjusted.
- If the following settings of the car's Factory System: BASS, TREBLE, LOUDNESS, etc., are performed while in speaker input
mode, the Factory System sound is easily distorted. Therefore reset the above settings.
• The volume is not appropriately adjusted.
- Set the speaker input volume level (FACT SYS LV) to less than 15. Then, lower the car's Factory System volume, so that sound is
not distorted. Refer to “Displaying the Speaker Input Volume Level” (page 16).
Malfunction.
• A malfunction occurs caused by speaker input cable noise.
- Bundle and route the e and d speaker input cables. Routing the speaker input cables separately may cause noise.
The volume of the car audio system is too high/low.
• The volume is not appropriately adjusted.
- Select FACTORY SYS on the source selection screen, and adjust the volume using the commander.
Interruption does not function correctly.
• The speaker input is not correctly set to detect the Factory System.
- Make sure that the speaker cable of the car's Factory System properly connected. Confirm that the input is correctly selected
according to the detection channel setting (F.SYS INT CH.). Refer to “Setting the Channel of the Speaker Interruption Detection”
(page 17).
• Interruption volume of the car's Factory System is too low.
- 1) When an external audio processor is connected, set the GUIDE voice to 15. Refer to “Adjusting Volume of GUIDE Voice”
(page 12).
- 2) While the navigation voice guidance or the telephone audio of the car's Factory System is ON, set the speaker input volume level
(FACT SYS LV). The sound should be clearly audible, but the level should not exceed 15. Adjust the volume of the car's Factory
System if necessary. Refer to “Displaying the Speaker Input Volume Level” (page 16).
If the speaker input volume level is lower than the detection level (FACT SYS DET), interruption will not occur. Refer to
“Adjusting the Speaker Input’s Interruption Detection Level” (page 17).
• Interruption occurs too frequently because the detection level is set too low.
- Raise the interruption detection level (FACT SYS DET). Refer to “Adjusting the Speaker Input’s Interruption Detection Level”
(page 17).
• Interruption does not occur frequently enough if the detection level is set too high.
- Lower the interruption detection level (FACT SYS DET). Refer to “Adjusting the Speaker Input’s Interruption Detection Level”
(page 17).
• The source is set to FACTORY SYS.
- Change to another source. If the source is set to FACTORY SYS while listening to the Factory audio system, sound is output to all
speakers without interrupting the front speaker for the navigation voice guidance or telephone voice.
• Depending on the type of telephone ring tone, interruption may not be recognized.
- Lower the interruption detection level (FACT SYS DET), or change the telephone ring tone. Refer to “Adjusting the Speaker Input’s
Interruption Detection Level” (page 17).
• Depending on the car, the telephone volume is automatically lowered. Therefore, interruption is not recognized.
- Lower the interruption detection level (FACT SYS DET) based on the car's Factory System level. Refer to “Adjusting the Speaker
Input’s Interruption Detection Level” (page 17).
Interruption volume of the car navigation system is too high/low.
• The volume is not appropriately adjusted.
- Set the interruption volume (FACT SYS MIX) appropriately. Refer to “Adjusting the Speaker Input Voice Interruption Level”
(page 17).
ALPINE VPA-B222R 68-06194Z40-A (EN)
EN
The volume of the source is too high/low during the navigation interruption of the car system.
• The volume is not appropriately adjusted.
- During navigation voice interruption, adjust the volume of the current listening source using the commander. The next time the
navigation voice interrupts, the volume will match the adjusted source.
When the navigation voice of the car system interrupts, the volume of the source changes.
• The volume of the source was adjusted during a navigation voice interruption.
- During a navigation voice interruption, adjust the desired volume using the commander.
If the volume of the source is adjusted during a navigation voice interruption, its volume is stored, and the volume of the source is
adjusted at the next time navigation voice interruption.
Navigation interruption of the car system is not cancelled.
• Navigation voice is output.
- Navigation interruption cannot be cancelled on the unit. 5 seconds after you have operated the navigation and finished the guidance,
interruption is cancelled, and the volume of the source returns to its previously adjusted level.
The volume of the telephone interruption of the car system is too high/low.
• The volume is not appropriately adjusted.
- During the telephone interruption, adjust the volume appropriately using the commander. At the next telephone interruption, the
volume will be adjusted automatically to that level. (Concerning the volume display, though the volume of the source is displayed,
the volume of the telephone interruption is not displayed.)
Telephone interruption of the car system is not cancelled.
• Telephone voice is output.
- If the volume of the telephone is higher than the interruption detection level (FACT SYS DET), the telephone voice interrupts again
even when interruption is cancelled. Press SOURCE/POWER after hanging up, and cancel the telephone interruption.
Although the source screen is displayed, sound is not output.
• The telephone is interrupting.
- 1) Make sure that the commander blinks quickly, and hang up.
- 2) Press SOURCE/POWER, and cancel the telephone interruption.
Operation cannot be performed on the unit.
• The telephone is interrupting.
- When the speaker input mode (FACT SYS SET) is set to INT or BOTH, or the voice interruption type (F.SYS MIX TYP) is set to
MUTE, the telephone will interrupt if the audio of the car system is turned on in a source other than FACTORY SYS.
Press SOURCE/POWER after the audio of the car system is turned off, and cancel the telephone interruption. Refer to “Setting the
Speaker Input Mode” (page 16) and “Setting the Interrupt Type of the Speaker Input Voice” (page 17).
ALPINE VPA-B222R 68-06194Z40-A (EN)
Deutsch
L Ergänzung zu „Im Problemfall“ in der Bedienungsanleitung (Seite 46): Einstellungen und Bedienung für
FACTORY SYSTEM (Lautsprechereingang).
Der Klang des Lautsprechers ist verzerrt.
• Das Werksystem wurde bereits eingestellt.
- Wenn die Werksystem-Einstellfunktionen BASS, TREBLE, LOUDNESS usw. im Lautsprechereingangsmodus geändert werden,
verzerrt der Klang des Werksystems leicht. Setzen Sie die obigen Einstellungen daher wieder zurück.
• Die Lautstärke ist nicht gut eingestellt.
- Stellen Sie den Lautstärkepegel des Lautsprechereingangs (FACT SYS LV) auf einen kleineren Wert als 15 ein. Vermindern Sie
danach die Werksystem-Lautstärke des Fahrzeugs, so dass der Klang nicht mehr verzerrt ist. Siehe „Anzeigen des
Lautsprechereingangspegels“ (Seite 16).
Störung.
• Lautsprechereingangskabelrauschen kann eine Störung verursachen.
- Verlegen Sie die Lautsprechereingangskabel e und d gebündelt. Ein separates Verlegen der Lautsprechereingangskabel kann
Rauschen verursachen.
Die Lautstärke der Autostereoanlage ist zu hoch/niedrig.
• Die Lautstärke ist nicht gut eingestellt.
- Wählen Sie FACTORY SYS auf der Quellenauswahlanzeige, und stellen Sie die Lautstärke mit dem Commander passend ein.
Unterbrechung arbeitet nicht einwandfrei.
• Der Lautsprechereingang wurde nicht richtig auf die Erkennung des Werksystems eingestellt.
- Vergewissern Sie sich, dass das Lautsprecherkabel des Werksystems im Fahrzeug korrekt angeschlossen ist. Prüfen Sie, ob der zur
Einstellung des Erkennungskanals (F.SYS INT CH.) passende Eingang gewählt wurde. Siehe „Einstellen des Kanals für das
Sprachsignal-Unterbrechungssignal“ (Seite 17).
• Die Unterbrechungslautstärke des Werksystems im Fahrzeug ist zu niedrig.
- 1) Wenn ein externer Klangprozessor angeschlossen ist, stellen Sie das GUIDE-Sprachsigal auf 15 ein. Siehe „Einstellen der
Lautstärke des GUIDE-Sprachsignals“ (Seite 12).
- 2) Stellen Sie, während das Werksystem eine Navigationsansage oder Telefonsignal wiedergibt, den Lautstärkepegel des
Lautsprechereingangs (FACT SYS LV) ein. Der Ton sollte gut vernehmbar sein, aber der Pegel darf 15 nicht überschreiten.
Stellen Sie ggf. die Lautstärke des Fahrzeug-Werksystems ein. Siehe „Anzeigen des Lautsprechereingangspegels“ (Seite 16).
Wenn der Lautstärkepegel des Lautsprechereingangs niedriger ist als der Erkennungspegel (FACT SYS DET), erfolgt keine
Unterbrechung. Siehe „Einstellen des Unterbrechungspegels für das Sprachsignal am Lautsprechereingang“ (Seite 17).
• Zu häufige Unterbrechung wegen eines zu niedrig eingestellten Erkennungspegels.
- Stellen Sie für den Erkennungspegel (FACT SYS DET) einen höheren Wert ein. Siehe „Einstellen des Unterbrechungspegels für das
Sprachsignal am Lautsprechereingang“ (Seite 17).
• Unterbrechung erfolgt wegen eines zu hoch eingestellten Erkennungspegels nicht jedes Mal.
- Stellen Sie für den Erkennungspegel (FACT SYS DET) einen niedrigeren Wert ein. Siehe „Einstellen des Unterbrechungspegels für
das Sprachsignal am Lautsprechereingang“ (Seite 17).
• Die Quelle ist auf FACTORY SYS eingestellt.
- Wechseln Sie die Quelle. Wenn beim Hören über das Fahrzeug-Werksystem die Quelle auf FACTORY SYS eingestellt ist, wird der
Ton über alle Lautsprecher wiedergegeben, ohne dass eine Unterbrechung der Frontlautsprecher-Tonwiedergabe durch Navigationsoder Telefon-Sprachsignale erfolgt.
• Das Unterbrechungssignal wird wegen des Telefon-Klingeltons unter Umständen nicht erkannt.
- Stellen Sie für den Erkennungspegel (FACT SYS DET) einen niedrigeren Wert ein, oder ändern Sie den Telefon-Klingelton. Siehe
„Einstellen des Unterbrechungspegels für das Sprachsignal am Lautsprechereingang“ (Seite 17).
• Bei gewissen Fahrzeugen wird die Telefonlautstärke automatisch gesenkt, in welchem Fall die Unterbrechung nicht erkannt wird.
- Stellen Sie für den Erkennungspegel (FACT SYS DET) einen niedrigeren Wert ein, der zum Signalpegel des Fahrzeug-Werksystems
passt. Siehe „Einstellen des Unterbrechungspegels für das Sprachsignal am Lautsprechereingang“ (Seite 17).
Die Unterbrechungslautstärke des Fahrzeugnavigationssystems ist zu hoch/niedrig.
• Die Lautstärke ist nicht gut eingestellt.
- Stellen Sie die Unterbrechungslautstärke (FACT SYS MIX) passend ein. Siehe „Einstellen des Unterbrechungspegels für das
Sprachsignal am Lautsprechereingang“ (Seite 17).
ALPINE VPA-B222R 68-06194Z40-A (DE)
DE
Die Lautstärke der Quelle ist bei Navigationsunterbrechung des Fahrzeugsystems zu hoch/niedrig.
• Die Lautstärke ist nicht gut eingestellt.
- Stellen Sie bei einer Unterbrechung durch das Navigationssystem die Lautstärke der gegenwärtig gehörten Quelle mit dem
Commander ein. Bei der nächsten Unterbrechung durch die Sprachführung des Navigationssystems passt die Lautstärke dann zu der
für die Quelle eingestellten.
Bei Unterbrechung durch die Sprachführung des Navigationssystems ändert sich die Lautstärke der Quelle.
• Die Lautstärke wurde während einer Navigationsansage an der Quelle geändert.
- Stellen Sie bei einer Unterbrechung durch das Navigationssystem die Lautstärke mit dem Commander ein.
Wenn die Lautstärke bei einer Unterbrechung durch die Sprachführung am Quellengerät eingestellt wird, bleibt die Einstellung
gespeichert und wird bei der nächsten Unterbrechung wieder abgerufen.
Navigationsunterbrechung des Fahrzeugsystems wird nicht aufgehoben.
• Navigationsansage wird wiedergegeben.
- Die Navigationsunterbrechung kann nicht am Gerät aufgehoben werden. Wenn die Ansage der Sprachführung nach einer Bedienung
des Navigationssystems beendet ist, wird die Unterbrechung 5 Sekunden später aufgehoben, wonach die frühere Tonquelle wieder
mit der eingestellten Lautstärke wiedergegeben wird.
Die Lautstärke des Fahrzeugsystems ist bei Unterbrechung durch ein Telefongespräch zu hoch/niedrig.
• Die Lautstärke ist nicht gut eingestellt.
- Stellen Sie während einer Unterbrechung durch ein Telefongespräch die Lautstärke mit dem Commander passend ein. Bei der
nächsten Unterbrechung durch ein Telefongespräch wird die Lautstärke automatisch auf diesen Pegel eingestellt. (Auf der
Lautstärkeanzeige ist lediglich die Lautstärke der Quelle zu sehen, aber nicht die Lautstärke der Telefonunterbrechung.)
Telefonunterbrechung des Fahrzeugsystems wird nicht aufgehoben.
• Telefonsignal wird ausgegeben.
- Wenn die Lautstärke des Telefons höher ist als der Erkennungspegel (FACT SYS DET), unterbricht das Telefonsignal nach Aufheben
der Unterbrechung erneut. Drücken Sie nach dem Auflegen SOURCE/POWER, um die Telefonunterbrechung aufzuheben.
Es wird kein Ton wiedergegeben, obwohl der Quellenbildschirm angezeigt wird.
• Unterbrechung durch das Telefon.
- 1) Prüfen Sie, ob der Commander schnell blinkt, und legen Sie auf.
- 2) Drücken Sie SOURCE/POWER, um die Telefonunterbrechung aufzuheben.
Gerät lässt sich nicht bedienen.
• Unterbrechung durch das Telefon.
- Wenn als Lautsprechereingangsmodus (FACT SYS SET) INT oder BOTH eingestellt oder die Sprachsignal-Unterbrechungsart
(F.SYS MIX TYP) auf MUTE eingestellt ist, unterbricht das Telefon, wenn das Fahrzeugsystem bei einer anderen Quelle als
FACTORY SYS eingeschaltet wird.
Drücken Sie nach Ausschalten des Fahrzeugsystems SOURCE/POWER, um die Telefonunterbrechung aufzuheben. Siehe
„Einstellen des Lautsprechereingangsmodus“ (Seite 16) und „Einstellen der Unterbrechungsart für LautsprechereingangSprachsignale“ (Seite 17).
ALPINE VPA-B222R 68-06194Z40-A (DE)
Deutsch
Français
L Ajouter à la section « En cas de problème » du Mode d’emploi (page 46) les réglages et opérations suivants pour
FACTORY SYSTEM (entrée des enceintes).
Le son d’entrée des enceintes est déformé.
• Le système d’usine est déjà configuré.
- Si vous spécifiez les réglages BASS, TREBLE, LOUDNESS, etc. du système d’usine du véhicule en mode d’entrée des enceintes, le
son du système d’usine risque d’être déformé. Par conséquent, réinitialisez les réglages ci-dessus.
• Le volume n’est pas correctement réglé.
- Réglez le niveau de volume de l’entrée des enceintes (FACT SYS LV) sur une valeur inférieure à 15. Ensuite, réduisez le volume du
système d’usine du véhicule afin que le son ne soit pas déformé. Consultez la section « Affichage du niveau sonore d’entrée des
enceintes » (page 16).
Dysfonctionnement.
• Un dysfonctionnement peut se produire en raison de bruits au niveau des câbles d’entrée des enceintes.
- Regroupez et acheminez les câbles d’entrée des enceintes e et d. Si vous acheminez les câbles d’entrée des enceintes séparément,
vous risquez de provoquer du bruit.
Le volume du système audio du véhicule est trop élevé/faible.
• Le volume n’est pas correctement réglé.
- Sélectionnez FACTORY SYS sur l’écran de sélection de la source, puis réglez le volume à l’aide de l’appareil de commande.
L’interruption ne fonctionne pas correctement.
• L’entrée des enceintes n’est pas correctement configurée pour détecter le système d’usine.
- Vérifiez que le câble des enceintes du système d’usine du véhicule est correctement raccordé. Assurez-vous que l’entrée est
correctement sélectionnée en fonction du réglage du canal de détection (F.SYS INT CH.). Consultez la section « Réglage du canal
de la détection de l’interruption des enceintes » (page 17).
• Le volume de l’interruption du système d’usine du véhicule est trop faible.
- 1) Si un processeur audio externe est raccordé, réglez le volume du guidage vocal sur 15. Consultez la section « Réglage du volume
du guidage vocal » (page 12).
- 2) Lorsque le guidage vocal du système de navigation ou le son du téléphone du système d’usine du véhicule sont activés, réglez le
niveau sonore de l’entrée des enceintes (FACT SYS LV). Le son doit être clairement audible, mais le niveau ne doit pas dépasser
15. Le cas échéant, réglez le volume du système d’usine du véhicule. Consultez la section « Affichage du niveau sonore d’entrée
des enceintes » (page 16).
Si le niveau sonore de l’entrée des enceintes est inférieur au niveau de détection (FACT SYS DET), l’interruption n’a pas lieu.
Consultez la section « Réglage du niveau de détection de l’interruption de l’entrée des enceintes » (page 17).
• L’interruption se produit trop fréquemment, car le niveau de détection est trop faible.
- Augmentez le niveau de détection de l’interruption (FACT SYS DET). Consultez la section « Réglage du niveau de détection de
l’interruption de l’entrée des enceintes » (page 17).
• L’interruption ne se produit pas assez souvent, car le niveau de détection est trop élevé.
- Réduisez le niveau de détection de l’interruption (FACT SYS DET). Consultez la section « Réglage du niveau de détection de
l’interruption de l’entrée des enceintes » (page 17).
• La source est réglée sur FACTORY SYS.
- Sélectionnez une autre source. Si la source est réglée sur FACTORY SYS lorsque vous écoutez le système audio d’usine, le son est
reproduit par toutes les enceintes, sans interruption de l’enceinte avant pour le guidage vocal du système de navigation ou
l’utilisation du téléphone.
• Selon le type de sonnerie du téléphone, il se peut que l’interruption ne soit pas reconnue.
- Réduisez le niveau de détection de l’interruption (FACT SYS DET) ou modifiez la sonnerie du téléphone. Consultez la section
« Réglage du niveau de détection de l’interruption de l’entrée des enceintes » (page 17).
• Selon le véhicule, le volume du téléphone est automatiquement réduit. Par conséquent, l’interruption n’est pas reconnue.
- Réduisez le niveau de détection de l’interruption (FACT SYS DET) en fonction du niveau du système d’usine du véhicule.
Consultez la section « Réglage du niveau de détection de l’interruption de l’entrée des enceintes » (page 17).
Le volume de l’interruption du système de navigation du véhicule est trop élevé/faible.
• Le volume n’est pas correctement réglé.
- Réglez correctement le volume de l’interruption (FACT SYS MIX). Consultez la section « Réglage du niveau d’interruption de la
voix d’entrée des enceintes » (page 17).
ALPINE VPA-B222R 68-06194Z40-A (FR)
FR
Le volume de la source est trop élevé/faible pendant l’interruption du système de navigation du véhicule.
• Le volume n’est pas correctement réglé.
- Pendant l’interruption du guidage vocal du système de navigation, réglez le volume de la source d’écoute actuelle à l’aide de
l’appareil de commande. Lors de la prochaine interruption du guidage vocal du système de navigation, le volume s’ajuste à la source
réglée.
Lorsque le guidage vocal du système de navigation du véhicule s’interrompt, le volume de la source change.
• Le volume de la source a été réglé pendant une interruption du guidage vocal du système de navigation.
- Pendant une interruption du guidage vocal du système de navigation, réglez le volume au niveau souhaité à l’aide de l’appareil de
commande.
Si vous réglez le volume de la source pendant une interruption du guidage vocal du système de navigation, ce volume est enregistré
et sera ajusté lors de sa prochaine interruption par la voix du système de navigation.
L’interruption du système de navigation du véhicule n’est pas annulée.
• Le guidage vocal du système de navigation est diffusé.
- Il est impossible d’annuler l’interruption de la navigation sur l’appareil. 5 secondes après l’utilisation du système de navigation et la
fin du guidage vocal, l’interruption est annulée et le volume de la source revient à son niveau réglé précédemment.
Le volume de l’interruption du téléphone du système du véhicule est trop élevé/faible.
• Le volume n’est pas correctement réglé.
- Pendant une interruption par le téléphone, réglez correctement le volume à l’aide de l’appareil de commande. Lors de la prochaine
interruption par le téléphone, le volume sera automatiquement réglé à ce niveau. (En ce qui concerne l’affichage du volume : le
volume de la source est indiqué, et non le volume de l’interruption du téléphone.)
L’interruption du téléphone du système du véhicule n’est pas annulée.
• L’appel téléphonique est diffusé.
- Si le volume du téléphone est supérieur au niveau de détection de l’interruption (FACT SYS DET), l’appel téléphonique s’interrompt
à nouveau, même si l’interruption est annulée. Raccrochez, puis appuyez sur SOURCE/POWER et annulez l’interruption du
téléphone.
Même si l’écran de la source s’affiche, aucun son n’est reproduit.
• Le téléphone interrompt l’écoute de la source.
- 1) Vérifiez que l’appareil de commande clignote rapidement et raccrochez.
- 2) Appuyez sur SOURCE/POWER et annulez l’interruption du téléphone.
Cette opération ne peut pas être réalisée sur l’appareil.
• Le téléphone interrompt l’écoute de la source.
- Lorsque le mode d’entrée des enceintes (FACT SYS SET) est réglé sur INT ou BOTH, ou lorsque le type d’interruption vocale
(F.SYS MIX TYP) est réglé sur MUTE, le téléphone interrompt le son du système du véhicule si celui-ci est activé dans une source
autre que FACTORY SYS.
Désactivez le son du système du véhicule, puis appuyez sur SOURCE/POWER et annulez l’interruption du téléphone. Consultez les
sections « Réglage du mode d’entrée des enceintes » (page 16) et « Réglage du type d’interruption de la voix d’entrée des
enceintes » (page 17).
ALPINE VPA-B222R 68-06194Z40-A (FR)
Français
Español
L Incluya los ajustes y operaciones siguientes del SISTEMA DE FÁBRICA (Entrada de altavoces) en la sección “En
caso de dificultad” del Manual de operación (página 46).
El sonido de la entrada de los altavoces suena distorsionado.
• El Sistema de fábrica ya se ha ajustado.
- Si los siguientes ajustes de Sistema de fábrica: BASS, TREBLE, LOUDNESS, etc., se llevan a cabo en el modo de entrada de los
altavoces, el sonido del Sistema de fábrica se distorsionará con facilidad. Por lo tanto, restablezca los ajustes mostrados arriba.
• El volumen no se ajusta correctamente.
- Ajuste el nivel de volumen de la entrada de los altavoces (FACT SYS LV) en un valor por debajo de 15. A continuación, reduzca el
volumen del Sistema de fábrica del vehículo de modo que deje de sonar con distorsión. Consulte la sección “Visualización del nivel
del volumen de entrada de los altavoces” (página 16).
Mal funcionamiento.
• Se produce un mal funcionamiento provocado por ruidos en el cable de entrada de los altavoces.
- Agrupe y guíe los cables de entrada e y d de los altavoces. Al guiar los cables de entrada de los altavoces por separado pueden
aparecer ruidos.
El volumen del sistema de audio del vehículo está demasiado alto o bajo.
• El volumen no se ajusta correctamente.
- Seleccione FACTORY SYS en la pantalla de selección de la fuente y ajuste el volumen desde el panel de mandos.
La interrupción no funciona correctamente.
• La entrada de los altavoces no está ajustada correctamente para detectar el Sistema de fábrica.
- Verifique que el cable de los altavoces del Sistema de fábrica del vehículo está correctamente conectado. Confirme que la entrada
está correctamente seleccionada según los ajustes del canal de detección (F.SYS INT CH.). Consulte la sección “Configuración del
canal de detección de interrupción de los altavoces” (página 17).
• El volumen de interrupción del Sistema de fábrica del vehículo está demasiado bajo.
- 1) Si se conecta un procesador de audio externo, ajuste la voz de la guía en el valor 15. Consulte la sección “Ajuste del volumen de
la voz de la guía” (página 12).
- 2) Con el control por voz de navegación o el audio del teléfono del Sistema de fábrica del vehículo activado, ajuste el nivel del
volumen de entrada de los altavoces (FACT SYS LV). El sonido debería oírse perfectamente, pero el nivel del sonido no debe
superar el valor 15. Ajuste el volumen del Sistema de fábrica del vehículo si es necesario. Consulte la sección “Visualización del
nivel del volumen de entrada de los altavoces” (página 16).
Si el nivel del volumen de la entrada de los altavoces está por debajo del nivel de detección (FACT SYS DET), no se producirá
la interrupción. Consulte la sección “Configuración del nivel de detección de interrupción de entrada de los altavoces” (página
17).
• La interrupción se produce con demasiada frecuencia porque el nivel de detección está ajustado en un valor muy bajo.
- Aumente el nivel de detección de interrupción (FACT SYS DET). Consulte la sección “Configuración del nivel de detección de
interrupción de entrada de los altavoces” (página 17).
• La interrupción no se produce con la frecuencia deseada si el nivel de detección está ajustado en un valor demasiado alto.
- Reduzca el nivel de detección de interrupción (FACT SYS DET). Consulte la sección “Configuración del nivel de detección de
interrupción de entrada de los altavoces” (página 17).
• La fuente está ajustada en FACTORY SYS.
- Cambie a otra fuente. Si la fuente se ajusta en FACTORY SYS mientras se escucha el sistema de audio de fábrica, el sonido se
emitirá por todos los altavoces sin interrumpir el altavoz delantero para el control por voz de navegación ni para la voz del teléfono.
• En función del tipo de tono de llamada del teléfono, es posible que no se reconozca la interrupción.
- Reduzca el nivel de detección de interrupción (FACT SYS DET) o cambie el tono de llamada del teléfono. Consulte la sección
“Configuración del nivel de detección de interrupción de entrada de los altavoces” (página 17).
• En función del vehículo, el volumen del teléfono disminuye automáticamente. Por lo tanto, no se reconoce la interrupción.
- Reduzca el nivel de detección de interrupción (FACT SYS DET) según el nivel del Sistema de fábrica del vehículo. Consulte la
sección “Configuración del nivel de detección de interrupción de entrada de los altavoces” (página 17).
El volumen de interrupción del sistema de navegación del vehículo está demasiado alto o bajo.
• El volumen no se ajusta correctamente.
- Ajuste el volumen de interrupción (FACT SYS MIX) correctamente. Consulte la sección “Configuración del nivel de interrupción de
voz de entrada de los altavoces” (página 17).
ALPINE VPA-B222R 68-06194Z40-A (ES)
ES
El volumen de la fuente es demasiado alto o bajo durante la interrupción de navegación del sistema del vehículo.
• El volumen no se ajusta correctamente.
- Durante la interrupción de voz de navegación, ajuste el volumen de la fuente que escuche en ese momento con ayuda del panel de
mandos. La próxima vez que se produzca una interrupción de voz de navegación, el volumen se ajustará a la fuente configurada.
Cuando se interrumpa la voz de navegación del sistema del vehículo, el volumen de la fuente cambiará.
• El volumen de la fuente se ajustó durante una interrupción de voz de navegación.
- Durante una interrupción de voz de navegación, ajuste el volumen que desee con ayuda del panel de mandos.
Si el volumen de la fuente se ajusta durante una interrupción de voz de navegación, se guardará el valor del volumen y se ajustará el
volumen de la fuente en la próxima interrupción de voz de navegación.
La interrupción de navegación del sistema del vehículo no se cancela.
• Se escucha la voz de navegación.
- No es posible cancelar la interrupción de navegación en la unidad. 5 segundos de haber utilizado la navegación y cerrado la guía, se
cancela la interrupción y el volumen de la fuente vuelve al nivel ajustado anteriormente.
El volumen de la interrupción del teléfono del sistema del vehículo está demasiado alto o bajo.
• El volumen no se ajusta correctamente.
- Durante la interrupción del teléfono, ajuste el volumen correctamente con ayuda del panel de mandos. Cuando se produzca la
siguiente interrupción del teléfono, el volumen se ajustará automáticamente en dicho nivel. (En relación con la pantalla del volumen,
aunque sí se muestra el volumen de la fuente, no ocurre lo mismo con el volumen de la interrupción del teléfono.)
La interrupción del teléfono del sistema del vehículo no se cancela.
• Se escucha la voz del teléfono.
- Si el volumen del teléfono es más alto que el nivel de detección de interrupción (FACT SYS DET), la voz del teléfono se
interrumpirá de nuevo aunque se cancele la interrupción. Pulse SOURCE/POWER después de colgar y cancele la interrupción del
teléfono.
Aunque aparece la pantalla de fuente, no se escucha sonido.
• El teléfono está interrumpiendo.
- 1) Verifique que el panel de mandos parpadea con insistencia y cuelgue.
- 2) Pulse SOURCE/POWER y cancele la interrupción del teléfono.
No se puede realizar la operación en la unidad.
• El teléfono está interrumpiendo.
- Si el modo de entrada de los altavoces (FACT SYS SET) está ajustado en INT o BOTH, o bien si el tipo de interrupción de voz
(F.SYS MIX TYP) está ajustado en MUTE, el teléfono interrumpirá si el audio del sistema del vehículo se activa con una fuente que
no sea FACTORY SYS.
Pulse SOURCE/POWER tras desactivar el audio del sistema del vehículo y cancele la interrupción del teléfono. Consulte las
secciones “Configuración del modo de entrada de los altavoces” (página 16) y “Configuración del tipo de interrupción de la voz de
entrada de los altavoces” (página 17).
ALPINE VPA-B222R 68-06194Z40-A (ES)
Italiano
L Aggiungere a “In caso di difficoltà” nelle Istruzioni per l’uso (pagina 46) le seguenti impostazioni e operazioni
per IMPIANTO DI FABBRICA (Ingresso altoparlanti)
L’audio in ingresso negli altoparlanti è distorto.
• L’impianto è già stato regolato in fabbrica.
- Se le impostazioni BASS, TREBLE, LOUDNESS per l’impianto di fabbrica della vettura vengono utilizzate nella modalità di
ingresso altoparlanti, l’audio dell’impianto di fabbrica potrebbe risultare distorto. Ripristinare le impostazioni indicate.
• Il volume non è regolato correttamente.
- Impostare il livello del volume di ingresso altoparlanti (FACT SYS LV) su un valore inferiore a 15. Ridurre quindi il volume del
sistema di fabbrica della vettura in modo da evitare la distorsione del suono. Consultare “Visualizzazione del livello di volume
dell’ingresso altoparlanti” (pagina 16).
Malfunzionamenti.
• Un disturbo nel cavo di ingresso altoparlanti potrebbe provocare un malfunzionamento.
- Legare e far scorrere insieme i cavi di ingresso altoparlanti e e d. Se i cavi di ingresso altoparlanti vengono separati si potrebbero
verificare dei disturbi.
Il volume dell’impianto audio della vettura è troppo alto o troppo basso.
• Il volume non è regolato correttamente.
- Selezionare FACTORY SYS nella schermata di selezione della sorgente, quindi regolare il volume utilizzando la manopola di
comando.
La modalità interruzione non funziona correttamente.
• L’ingresso altoparlanti non è impostato in modo corretto per il rilevamento dell’impianto di fabbrica.
- Verificare che il cavo altoparlanti dell’impianto di fabbrica della vettura sia collegato correttamente. Verificare la corretta selezione
dell’ingresso secondo l’impostazione del canale di rilevamento (F.SYS INT CH.). Consultare “Impostazione del canale di
rilevamento dell’interruzione altoparlanti” (pagina 17).
• Il volume di interruzione dell’impianto di fabbrica della vettura è troppo basso.
- 1) Se è collegato un processore audio esterno, impostare la guida vocale su 15. Consultare “Regolazione del volume della voce
GUIDE” (pagina 12).
- 2) Se la guida vocale del sistema di navigazione o l’audio del telefono dell’impianto di fabbrica della vettura sono attivi, impostare
il livello di volume dell’ingresso altoparlanti (FACT SYS LV). L’audio dovrebbe essere udibile in modo chiaro, ma il livello non
deve superare 15. Regolare il volume dell’impianto di fabbrica della vettura, se necessario. Consultare “Visualizzazione del
livello di volume dell’ingresso altoparlanti” (pagina 16).
Se il livello di volume dell’ingresso altoparlanti è inferiore al livello di rilevamento (FACT SYS DET), l’interruzione non sarà
effettuata. Consultare “Regolazione del livello di rilevamento interruzioni nell’ingresso altoparlanti” (pagina 17).
• L’interruzione si verifica troppo spesso perché il livello di rilevamento è troppo basso.
- Aumentare il livello di rilevamento interruzioni (FACT SYS DET). Consultare “Regolazione del livello di rilevamento interruzioni
nell’ingresso altoparlanti” (pagina 17).
• L’interruzione non si verifica con la frequenza dovuta se il livello di rilevamento è troppo basso.
- Ridurre il livello di rilevamento interruzioni (FACT SYS DET). Consultare “Regolazione del livello di rilevamento interruzioni
nell’ingresso altoparlanti” (pagina 17).
• La sorgente è impostata su FACTORY SYS.
- Passare a un’altra sorgente. Se la sorgente è impostata su FACTORY SYS durante l’ascolto dall’impianto audio di fabbrica, l’audio
viene inviato su tutti gli altoparlanti senza interrompere l’altoparlante anteriore per la guida vocale del sistema di navigazione o le
telefonate.
• Secondo il tipo di suoneria del telefono, l’interruzione potrebbe non essere riconosciuta.
- Ridurre il livello di rilevamento interruzioni (FACT SYS DET) o cambiare la suoneria del telefono. Consultare “Regolazione del
livello di rilevamento interruzioni nell’ingresso altoparlanti” (pagina 17).
• Secondo la vettura in uso, il volume del telefono viene abbassato automaticamente. In questo caso, l’interruzione non viene
riconosciuta.
- Ridurre il livello di rilevamento interruzioni (FACT SYS DET) in base al livello dell’impianto di fabbrica della vettura. Consultare
“Regolazione del livello di rilevamento interruzioni nell’ingresso altoparlanti” (pagina 17).
Il volume di interruzione del sistema di navigazione della vettura è troppo alto o troppo basso.
• Il volume non è regolato correttamente.
- Impostare adeguatamente il volume dell’interruzione (FACT SYS MIX). Consultare “Regolazione del livello di interruzione
nell’ingresso altoparlanti” (pagina 17).
ALPINE VPA-B222R 68-06194Z40-A (IT)
IT
Il volume della sorgente è troppo alto o troppo basso durante l’interruzione per la navigazione dell’impianto della
vettura.
• Il volume non è regolato correttamente.
- Durante l’interruzione della voce di navigazione, regolare il volume della sorgente d’ascolto corrente utilizzando la manopola di
comando. Alla successiva interruzione da parte della voce di navigazione, il volume corrisponderà a quello della sorgente regolata.
Durante un’interruzione della voce di navigazione dell’impianto dell’audio, il volume della sorgente cambia.
• Il volume della sorgente è stato regolato durante un’interruzione della voce di navigazione.
- Durante un’interruzione della voce di navigazione, regolare il volume desiderato utilizzando la manopola di comando.
Se il volume della sorgente viene regolato durante un’interruzione della voce di navigazione, tale volume viene memorizzato e il
volume della sorgente viene regolato alla successiva interruzione della voce di navigazione.
L’interruzione della navigazione sull’impianto della vettura non viene annullata.
• Viene emessa la voce di navigazione.
- L’interruzione della navigazione non può essere annullata sull’unità. 5 secondi dopo l’uso della navigazione e la conclusione della
guida vocale, l’interruzione viene annullata e il volume della sorgente ritorna al livello precedentemente regolato.
Il volume di interruzione del telefono della vettura è troppo alto o troppo basso.
• Il volume non è regolato correttamente.
- Durante l’interruzione del telefono, regolare il volume in modo adeguato utilizzando la manopola di comando. Alla successiva
interruzione del telefono, il volume verrà regolato automaticamente su tale livello (per quanto riguarda la visualizzazione del
volume, viene visualizzato il volume della sorgente e non quello di interruzione del telefono).
L’interruzione del telefono sull’impianto della vettura non viene annullata.
• Viene emessa la voce del telefono.
- Se il volume del telefono è superiore al livello di rilevamento interruzioni (FACT SYS DET), la voce del telefono interrompe la
riproduzione anche se l’interruzione è stata annullata. Premere SOURCE/POWER dopo aver riagganciato e annullare l’interruzione
del telefono.
L’audio non viene emesso nonostante sia visualizzata la schermata della sorgente.
• Il telefono interrompe la riproduzione.
- 1) Verificare che la manopola di comando lampeggi rapidamente e riagganciare.
- 2) Premere SOURCE/POWER e annullare l’interruzione del telefono.
Non è possibile eseguire operazioni sull’unità.
• Il telefono interrompe la riproduzione.
- Se la modalità di ingresso altoparlanti (FACT SYS SET) è impostata su INT o BOTH, o se il tipo di interruzione vocale (F.SYS MIX
TYP) è impostato su MUTE, il telefono interrompe la riproduzione se l’audio dell’impianto della vettura è acceso su una sorgente
diversa da FACTORY SYS.
Premere SOURCE/POWER dopo aver disattivato l’audio dell’impianto della vettura e annullare l’interruzione del telefono.
Consultare “Impostazione del modo di ingresso degli altoparlanti” (pagina 16) e “Impostazione del tipo di interruzione della voce di
ingresso altoparlanti” (pagina 17).
ALPINE VPA-B222R 68-06194Z40-A (IT)
Svenska
L Lägg till följande inställningar och funktioner under ”Felsökning” i användarhandledning (sidan 46) för
FABRIKSSYSTEM (högtalaringång).
Högtalaringångens ljud är förvrängt.
• Fabrikssystemet har redan justerats.
- Om inställningar av bilens fabrikssystem, BASS, TREBLE, LOUDNESS etc., utförs i högtalaringångens läge, är det lätt att
fabrikssystemets ljud förvrängs. Återställ därför ovan nämnda inställningar.
• Volymen justeras inte korrekt.
- Ställ in högtalaringångens volym (FACT SYS LV) på lägre än 15. Sänk därefter bilens fabrikssystems volym så att ljudet inte
förvrängs. Se ”Visa högtalaringångens volymnivå” (sidan 16).
Funktionsstörning.
• En funktionsstörning orsakad av bruset i högtalaringångens kabel uppstår.
- Linda upp och dra högtalaringångens e och d -kablar. Det kan orsaka brus om högtalaringångens kablar dras separat.
Volymen i bilens ljudsystem är för hög/låg.
• Volymen justeras inte korrekt.
- Välj FACTORY SYS på skärmen för val av källa och justera volymen med hjälp av fjärrkontrollen.
Avbrott fungerar inte som det ska.
• Högtalaringången är inte korrekt inställd för att upptäcka fabrikssystemet.
- Kontrollera att högtalarkabeln för bilens fabrikssystem är ordentligt ansluten. Bekräfta att ingången valts korrekt i enlighet med
detekteringskanalens inställning (F.SYS INT CH.). Se “Ställ in kanal för högtalaravbrott” (sidan 17).
• Avbrottsvolym för bilens fabrikssystem är för låg.
- 1) När en extern ljudprocessor är ansluten ska GUIDE-rösten ställas in på 15. Se “Justering av volym för GUIDE-röst” (sidan 12).
- 2) Ställ in högtalaringångens volym (FACT SYS LV) när navigationens röstvägledning eller telefonens ljud i bilens fabrikssystem är
ON. Ljudet ska höras tydligt men nivån bör inte överstiga 15. Justera volymen för bilens fabrikssystem vid behov. Se ”Visa
högtalaringångens volymnivå” (sidan 16).
Om nivån på högtalaringångens volym är lägre än detekteringsnivån (FACT SYS DET) sker inget avbrott. Se ”Justering av
högtalaringångens avbrottsnivå” (sidan 17).
• Avbrott sker för ofta eftersom detekteringsnivån är för lågt inställd.
- Höj detekteringsnivån för avbrott (FACT SYS DET). Se ”Justering av högtalaringångens avbrottsnivå” (sidan 17).
• Avbrott sker inte ofta nog om detekteringsnivån är för högt inställd.
- Sänk detekteringsnivån för avbrott (FACT SYS DET). Se ”Justering av högtalaringångens avbrottsnivå” (sidan 17).
• Källan ställs in på FACTORY SYS.
- Byt till annan källa. Om källan är inställd på FACTORY SYS medan man lyssnar på fabriksljudsystemet, matas ljudet ut till alla
högtalarna utan att avbryta främre högtalaren för navigationens röstvägledning eller telefonröst.
• Beroende på vilken typ av ringsignal telefonen har kan det hända att avbrottet inte godkänns.
- Sänk detekteringsnivån för avbrott (FACT SYS DET) eller byt telefonens ringsignal. Se ”Justering av högtalaringångens
avbrottsnivå” (sidan 17).
• Telefonens volym sänks beroende på vilken typ av bil du har. Därför godkänns inte avbrottet.
- Sänk detekteringsnivån för avbrott (FACT SYS DET) baserat på nivån för bilens fabrikssystem. Se ”Justering av högtalaringångens
avbrottsnivå” (sidan 17).
Avbrottsvolymen för bilens navigationssystem är för hög/låg.
• Volymen är inte korrekt justerad.
- Ställ in avbrottsvolymen (FACT SYS MIX) ungefärligt. Se ”Justering av högtalaringångens nivå för röstavbrott” (sidan 17).
SE
ALPINE VPA-B222R 68-06194Z40-A (SE)
Källans volym är för hög/låg under bilsystemets navigationsavbrott.
• Volymen är inte korrekt justerad.
- Vid avbrott av navigationsrösten justeras volymen för aktuell ljudkälla med hjälp av fjärrkontrollen. Nästa gång navigationsrösten
avbryts motsvarar volymen den justerade källans.
När bilsystemets navigationsröst avbryter ändras källans volym.
• Källans volym justerades under navigationsröstens avbrott.
- Vid ett avbrott av navigationsrösten justeras den önskade volymen med hjälp av fjärrkontrollen.
Om källans volym justeras under ett avbrott av navigationsrösten lagras dess volym och källans volym justeras nästa gång
navigationsrösten avbryts.
Bilsystemets navigationsavbrott avbryts inte.
• Navigationsrösten matas ut.
- Navigationsavbrott kan inte avbrytas på enheten. Fem sekunder efter att du använt navigationen och avslutat vägledningen avslutas
avbrottet och källans volym återgår till föregående nivå.
Volymen för bilsystemets telefonavbrott är för hög/låg.
• Volymen är inte korrekt justerad.
- ustera volymen med fjärrkontrollen under telefonavbrottet. Vid nästa telefonavbrott kommer volymen automatiskt att justeras till den
nivån (när det gäller visningen av volymen så visas inte telefonavbrottets volym, trots att källans volym visas).
Bilsystemets telefonavbrott avbryts inte.
• Telefonrösten matas ut.
- Om telefonens volym är högre än avbrottets detekteringsnivå (FACT SYS DET), avbryter telefonrösten igen även då avbrottet
avslutats. Tryck på SOURCE/POWER efter att du lagt på och avsluta telefonens avbrott.
Även om skärmbilden för källan visas matas inget ljud ut.
• Telefonen avbryter.
- 1) Se till att fjärrkontrollen blinkar snabbt och lägg på luren.
- 2) Tryck på SOURCE/POWER och avsluta telefonens avbrott.
Funktionen kan inte utföras på enheten.
• Telefonen avbryter.
- När högtalaringångens läge (FACT SYS SET) är inställt på INT eller BOTH, eller om typen av röstavbrott (F.SYS MIX TYP) är
inställd på MUTE, kommer telefonen att avbryta om bilsystemets ljud sätts på i en annan källa än FACTORY SYS.
Tryck på SOURCE/POWER efter att bilsystemets ljud stängts av, och avsluta telefonens avbrott. Se “Inställning av högtalaringång”
(sidan 16) och “Inställning av avbrottstyp för högtalarens inmatningsröst” (sidan 17).
VPA-B222R
68-06194Z40-A (Y)
ALPINE VPA-B222R 68-06194Z40-A (SE)
Español
Svenska
Acerca de la conexión de otros productos
Om att ansluta andra produkter
L Conectar el procesador de audio compatible Ai-NET, el sistema de navegación, el
reproductor de DVD y el cambiador de discos (página 55).
L Anslut den Ai-NET-kompatibla ljudprocessorn, navigationssystem, DVD-spelare
och -växlare (sidan 55).
• Si el PXA-H701/PXA-H700 y el cambiador/reproductor de DVD están conectados mediante fibra digital, es posible que no se
obtenga el audio de interrupción al cambiar un disco, durante la pausa, etc. En este caso, conecte un altavoz externo con
amplificador incorporado en el terminal GUIDE OUT para obtener el audio de interrupción.
• Om PXA-H701/PXA-H700 och DVD-spelare/-växlare är anslutna med digital fiberoptik, kan det hända att avbrottssignalen inte
matas ut när en skiva byts, vid paus etc. I detta fall ska en extern högtalare med inbyggd förstärkare anslutas till GUIDE OUTkontakten för utmatning av avbrottssignalen.
El manual de operación contiene los errores mostrados aquí.
Tyvärr har det smugit in ett fel i användarhandledningen. Följande behöver rättas till.
<Incorrecto>
• Cuando el NVA-N751AS esté conectado al sistema de navegación, utilice el cable de conversión KWE-503N (se vende por separado).
<Correcto>
• Cuando el NVE-N055PS esté conectado al sistema de navegación, utilice el cable de conversión RGB KCE-030N (se vende por separado).
<Fel>
• Använd RGB-omvandlingskabel KWE-503N (säljs separat) när NVA-N751AS är ansluten som navigationssystem.
<Rätt>
• Använd en RGB-omvandlingskabel KCE-030N (säljs separat) när NVE-N055PS är ansluten som navigationssystem.
L Conectar el amplificador digital de home cinema, el sistema de navegación, el
cambiador de DVD y el cambiador de CD.
L Anslut den digitala bioförstärkaren, navigationssystem, DVD-växlare och CD-växlare.
NVE-N099P
NVE-N099P
Sistema de navegación
(Se vende por separado)
Cable
RGB
VPA-B222R
Terminal de
entrada del
sistema de
fábrica
Altavoz externo con
amplificador
incorporado (Se
vende por separado)
Prolongador
eléctrico RCA
(Se vende por
separado)
Prolongador eléctrico RCA
(incluido con el cambiador de DVD)
Amplificador digital
de home cinema
(MRA-D550)
Terminal de
entrada de
fibra digital
(para el
reproductor
de DVD)
Navigationssystem
(säljs separat)
RGB-kabel
Extern högtalare med
inbyggd förstärkare
(säljs separat)
Digital
bioförstärkare
(MRA-D550)
VPA-B222R
Fiberoptisk
digital ingång
(för DVD
-spelare)
Fabrikssystemingång
RCAförlängningskabel
(säljs separat)
Cable Ai-NET
(Incluido con
el cambiador
de CD)
RCA-förlängningskabel
(medföljer DVD-växlare)
Cable Ai-NET
(incluido con el
cambiador de DVD)
Ai-NET-kabel
(medföljer
CD-växlaren)
Ai-NETi-kabel
(medföljer
DVD-växlare)
Till Ai-NET-kontakt
(Grå)
Al conector Ai-NET
(gris)
(Gul)
(amarillo)
Ai-NETi-kabel
(medföljer förstärkare)
Cable Ai-NET
(incluido con el amplificador)
(blanco/marrón)
(blanco/marrón)
SALIDA
REMOTA
ENTRADA
REMOTA
Cambiador de DVD
Al conector Ai-NET (negro)
(Ai-NET) (DHA-S680P)
(Se vende por separado)
(Vit/Brun)
Cambiador de CD
(Ai-NET) (Se vende
por separado)
FJÄRRSTYRNINGSUTGÅNG
(Vit/Brun)
FJÄRRSTYRNINGSINGÅNG
DVD-växlare
(Ai-NET) (DHA-S680P)
(säljs separat)
Till Ai-NET-kontakt (Svart)
CD-växlare
(Ai-NET) (säljs separat)
• Si se conecta un reproductor de DVD como el DVA-5210 o el DVE-5207, no podrá conectar un amplificador digital de home
cinema mediante fibra digital al reproductor de DVD.
• Om en DVD-spelare som t ex DVA-5210 eller DVE-5207 är ansluten, kan inte en digital bioförstärkare anslutas till DVD-spelaren
med digital fiberoptik.
1 Terminal de entrada de navegación (entrada RGB)
1 Kontakt för navigationsinmatning (RGBingång)
4 Terminal de salida de la guía
Conéctelo al terminal de salida RGB del sistema
de navegación.
Si hay un procesador de audio externo conectado,
obtenga la señal de voz de interrupción de
navegación que entra al sistema de navegación de
Alpine o al terminal de entrada de los altavoces.
2 Interruptor del sistema
Si conecta un ecualizador o un separador
utilizando un elemento Ai-NET, sitúe este
interruptor en la posición EQ/DIV.
5 Cable de salida del control remoto (blanco/marrón)
Conecte este cable al cable de entrada del
control remoto. Este cable permite la salida de
señales de control del mando a distancia.
• Asegúrese de desactivar la alimentación de la
unidad antes de cambiar la posición del interruptor.
6 Terminal de entrada de vídeo AUX (AUX1)
3 Conector Ai-NET
Conecte el cable de salida de vídeo de un
reproductor de vídeo DVD o un cambiador de
DVD a este terminal.
Conéctelo al conector de salida o entrada de otro
producto equipado con Ai-NET.
Italiano
Collegamento di altri prodotti
L Collegare il processore audio compatibile con Ai-NET, il sistema di navigazione, il
lettore DVD e il caricatore (pagina 55).
• Se il PXA-H701/PXA-H700 e il lettore/cambia DVD sono collegati mediante dispositivi digitali in fibra, il segnale acustico di
interruzione non viene emesso quando si cambia un disco, durante la pausa, ecc. In tal caso, collegare un altoparlante esterno
con amplificatore incorporato al terminale GUIDE OUT per l’emissione del segnale acustico di interruzione.
Le istruzioni per l'uso contengono gli errori indicati di seguito.
<Errato>
• Quando è collegata un’unità NVA-N751AS per il sistema di navigazione, utilizzare il cavo di conversione RGB KWE-503N (venduto separatamente).
<Corratto>
• Quando vi è un unità NVE-N055PS collegata per il sistema di navigazione, utilizzare il cavo KCE-030N di conversione RGB (venduto separatamente).
L Collegare l'amplificatore Digital Theater, il sistema di navigazione, il cambia DVD e il
cambia CD.
NVE-N099P
Sistema di navigazione
(venduto separatamente)
Cavo
RGB
VPA-B222R
Altoparlante esterno
con amplificatore
incorporato (venduto
separatamente)
Amplificatore Digital
Theater (MRA-D550)
Terminale di
ingresso digitale
in fibra (per il
lettore DVD)
Terminale di
ingresso
sistema
industriale
Prolunga RCA
(venduta
separatamente)
Prolunga RCA (inclusa
con il caricatore DVD)
Cavo Ai-NET
(inclusa con
il caricatore
DVD)
Cavo Ai-NET
(incluso con
il caricatore
CD)
AI connettore Ai-NET
(grigio)
(giallo)
Cavo Ai-NET
(inclusa con amplificatore)
(bianco/marrone)
USCITA DEL
TELECOMANDO
(bianco/
marrone)
INGRESSO DEL
TELECOMANDO
Caricatore DVD
(Ai-NET) (DHA-S680P)
(venduto
separatamente)
AI connettore Ai-NET (nero)
Caricatore CD
(Ai-NET) (venduto
separatamente)
• Se è collegato un lettore DVD come il DVA-5210 o il DVE-5207, non è possibile collegare un amplificatore Digital Theater al
lettore DVD mediante dispositivi digitali in fibra.
1 Terminale di ingresso navigazione
(ingresso RGB)
Collegare al terminale di uscita RGB del sistema
di navigazione.
2 Interruttore sistema
Quando si collega un equalizzatore o un divisore
usando la funzione Ai-NET, portare l’interruttore
sulla posizione EQ/DIV.
• Assicurarsi di spegnere l’unità prima di
cambiare la posizione dell’interruttore.
3 Connettore Ai-NET
Collegarlo al connettore di uscita o ingresso di
altri prodotti dotati di Ai-NET.
4 Terminale di uscita guida
Se è collegato un processore audio esterno, emette
il segnale vocale di interruzione della navigazione
in ingresso dal sistema di navigazione Alpine o dal
terminale di ingresso degli altoparlanti.
5 Cavo di uscita del telecomando (bianco/marrone)
Collegare questo cavo al cavo di ingresso del
telecomando.
Questo cavo emette i segnali di controllo dal
telecomando.
6 Terminale (AUX1) di ingresso video AUX
Collegare a questo terminale il cavo di uscita
video di un lettore o caricatore DVD.
Anslut denna till navigationssystemets RGButgång.
2 Systemomkopplare
Ställ denna omkopplare i läget EQ/DIV när en
Ai-NET-kompatibel equalizer eller delningsfilter
ska anslutas.
• Glöm inte att du måste slå av strömmen till
enheten innan du ändrar läget på omkopplaren.
3 Ai-NET-kontakt
Anslut denna koppling till motsvarande koppling
på en annan produkt kompatibel med Ai-NET.
4 Guideutgång
Om en extern ljudprocessor är ansluten ska
navigatorns avbrottssignal som matas in från
Alpines navigationssystem eller högtalarens
ingång matas ut.
5 Kontrollkabel för bildskärm (Vit/Brun)
Anslut denna ledning till ingångsledningen för
fjärrstyrning.
Genom den här kabeln sänds kontrollsignaler ut
från fjärrkontrollen.
6 AUX-videoingång (AUX1)
Anslut videoutgångskabeln från en DVD-spelare
eller DVD-växlare till den här anslutningen.
01GB00VPAB222R.book Page 2 Monday, January 23, 2006 4:24 AM
CHA-S634
CHA-1214
•
•
•
•
•
•
•
•
•
•
•
•
CD changer for VPA-B222R.
CD-Wechsler für VPA-B222R.
Changeur CD pour VPA-B222R.
Cambiador de CD para VPA-B222R.
Cambia CD per VPA-B222R.
CD-växlare för VPA-B222R.
CHM-S630
CD changer for VPA-B222R.
CD-Wechsler für VPA-B222R.
Changeur CD pour VPA-B222R.
Cambiador de CD para VPA-B222R.
Cambia CD per VPA-B222R.
CD-växlare för VPA-B222R.
Alpine CD Changers Give You More!
More musical selections, more versatility, more convenience.
The CHA-S634 is a high-performance 6-disc changer with a new M DAC, CD-R/RW PLAY BACK, MP3 PLAY BACK and CD TEXT.
The CHA-1214 Ai-NET model holds 12 discs, and the CHM-S630 M-Bus model is a super-compact 6-disc changer with a CD-R/RW
PLAY BACK.
Von Alpine CD-Wechslern haben Sie mehr!
Mehr Musikauswahl, mehr Vielseitigkeit, mehr Komfort.
Der CHA-S634 ist ein Hochleistungs-Wechsler für 6 CDs mit dem neuen M-DAC, mit CD-R/RW- und MP3-Wiedergabefunktion und mit
CD-TEXT. Der CHA-1214 ist ein Ai-NET-Modell für 12 CDs. Der M-Bus-kompatible CHM-S630 ist ein superkompakter Wechsler für 6
CDs mit CD-R/RW-Wiedergabefunktion.
Changeurs de CD Alpine : vous avez le choix!
Plus de sélections musicales, plus de souplesse, plus de confort.
Le modèle CHA-S634 est un changeur 6 disques ultra performant équipé des nouvelles fonctions M DAC, CD-R/RW PLAY BACK, MP3
PLAY BACK et CD TEXT. Le modèle CHA-1214 Ai-NET contient 12 disques. Le modèle CHM-S630 M-Bus est un changeur 6 disques
super compact doté de la fonction CD-R/RW PLAY BACK.
¡Los cambiadores Alpine de CD le ofrecen más!
Más selecciones musicales, más versatilidad y más ventajas.
CHA-S634 es un cambiador de seis discos de alto rendimiento con nuevo M DAC, CD-R/RW PLAY BACK, MP3 PLAY BACK y CD
TEXT. El modelo CHA-1214 Ai-NET alberga 12 discos y el modelo CHM-S630 M-Bus es un cambiador de seis discos de tamaño
reducido con un CD-R/RW PLAY BACK.
I caricatori CD Alpine danno di più!
Più scelta, più versatilità, più comodità.
Il modello CHA-S634 è un caricatore a 6 dischi ad elevate prestazioni dotato di un nuovo M DAC, CD-R/RW PLAY BACK, MP3 PLAY
BACK e CD TEXT. Il modello CHA-1214 Ai-NET è in grado di contenere 12 dischi, il modello CHM-S630 M-Bus è un caricatore a 6
dischi ultra compatto dotato di un CD-R/RW PLAY BACK.
Alpines CD-växlare ger mer!
Fler musikval, mer variation, större bekvämlighet.
CHA-S634 är en växlare för 6 skivor med mycket höga prestanda och en ny M D/A-omvandlare samt uppspelning av CD-R/RW, MP3 och
CD TEXT. CHA-1214 Ai-NET rymmer 12 skivor. CHM-S630 M-Bus är en mycket kompakt växlare med kapaciteten 6 skivor med
uppspelning av CD-R/RW PLAY BACK.
01GB02VPAB222R.fm
ALPINE VPA-B222R 68-02065Z87-A (EN)
01SE00VPAB222R.book Page 62 Monday, January 23, 2006 4:43 AM
01SE08VPAB222R.fm
ALPINE IVA-W200Ri 68-04123Z68-A (SE)
01SE00VPAB222R.book Page 63 Monday, January 23, 2006 4:43 AM
01SE08VPAB222R.fm
ALPINE IVA-W200Ri 68-04123Z68-A (SE)
01SE00VPAB222R.book Page 64 Monday, January 23, 2006 4:43 AM
01SE08VPAB222R.fm
ALPINE IVA-W200Ri 68-04123Z68-A (SE)