1
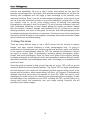
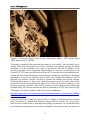
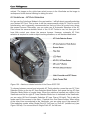
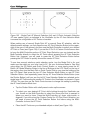
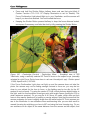
Canon 70D Experience PREVIEW of: Canon 70D Experience The Still Photography Guide to Operation and Image Creation with the Canon EOS 70D by Douglas J. Klostermann Full Stop. good writing for better photography 1 Canon 70D Experience All rights reserved. This e-book is licensed for your personal, non-commercial enjoyment only and may not be re-sold, file-shared, distributed, sub-licensed, or given away. This book can be printed for your personal use and read on your personal devices. Otherwise no part of this book may be reproduced or transmitted in any form or by any means, electronically or in print, without expressed permission from the author. Every effort has been made to make this e-book as accurate as possible, but no warranty of fitness is implied. The information is provided on an asis basis. The author shall have no liability or responsibility with respect to any loss or damages arising from the information provided in this e-book including but not limited to the use of any of the materials or methods described, the products, retailers, Internet web sites, or links provided. Please read and follow all instructions and use, safety and handling precautions expressed in the manuals provided with your equipment and software, and which take precedence over any content in this work. All contents of this work including cover design, text, and photographs, with the exception of products, brands, software, contents of menus and screenshots, and logos, are copyright by the author. All products, brands, software, contents of menus and screenshots, and logos are property of the respective companies and websites. Terms which are trademarks or service marks in this e-book are used in an editorial and/ or educational manner, and should not be regarded as affecting the validity of any trademark or service mark. “Canon” is a trademark of Canon Inc. “Adobe,” “Photoshop,” and “Lightroom” are trademarks of Adobe Systems Inc. The author and the contents of this book are not affiliated with or endorsed by Canon Inc. Special thanks to LensProToGo www.lensprotogo.com And special thanks to Newtonville Camera of Newton, Mass. http://www.nvcamera.com Douglas Klostermann is a participant in the Amazon Services LLC Associates Program, an affiliate advertising program designed to provide a means for sites to earn advertising fees by advertising and linking to amazon.com. (Links are provided to products and accessories mentioned in this guide.) 2 Canon 70D Experience Copyright 2013 Douglas J. Klostermann - all rights reserved Cover design and photograph by the author. Canon 70D Experience - PREVIEW The Still Photography Guide to Operation and Image Creation with the Canon EOS 70D by: Douglas J. Klostermann Version 1.0a October 2013 Author’s website: www.dojoklo.com Author’s blog: http://blog.dojoklo.com/ Published by Full Stop Media, LLC Full Stop. good writing for better photography Cambridge, Mass. USA http://www.dojoklo.com/Full_Stop/ 3 Canon 70D Experience CONTENTS 1. INTRODUCTION............................................................................................... 6 1.1 Take Control of Your Camera ................................................................................. 8 1.2 Using This Guide ................................................................................................... 10 1.3 Quick Start for Previous Canon dSLR Users ........................................................ 15 1.4 Getting Started....................................................................................................... 17 2. CAMERA CONTROLS ................................................................................... 19 2.1 EOS 70D Camera Controls ................................................................................... 19 2.2 Quick Control Screen and Touch Screen.............................................................. 33 3. MENU SETTINGS........................................................................................... 38 3.1 Introduction to Setting up the 70D......................................................................... 38 3.2 Shooting Menus..................................................................................................... 40 3.3 Live View Shooting Menus .................................................................................... 59 3.4 Playback Menus .................................................................................................... 65 3.5 Set-up Menus ........................................................................................................ 80 3.6 My Menu ................................................................................................................ 95 3.7 Movie Shooting Mode Menus ................................................................................ 97 4. CUSTOM FUNCTIONS MENUS................................................................... 105 4.1 C.Fn I: Exposure.................................................................................................. 105 4.2 C.Fn II: Autofocus ................................................................................................ 109 4.3 C.Fn III: Operation/Others ................................................................................... 123 4.4 C.Fn III-4: Custom Controls - Advanced ............................................................. 126 5. PLAYBACK and IMAGE FILE FORMATS .................................................. 132 5.1 Image Playback ................................................................................................... 132 5.2 Image File Formats - JPEG vs. RAW.................................................................. 134 5.3 File Sizes and Maximum Burst Rate ................................................................... 136 6. AUTOFOCUSING ......................................................................................... 138 6.1 Using Autofocus .................................................................................................. 138 6.2 Autofocus - AF Point Selection............................................................................ 141 6.3 Autofocus - AF Modes ......................................................................................... 144 6.4 Autofocus - AF Area Selection Modes ................................................................ 151 6.5 AF Points and Composition ................................................................................. 156 6.6 Autofocus Custom Function Settings .................................................................. 159 6.7 Back Button Focusing.......................................................................................... 161 6.8 Live View and Movie Autofocusing...................................................................... 165 7. DRIVE MODES ............................................................................................. 177 8. EXPOSURE Part 1 ....................................................................................... 180 8.1 Intro to Aperture, Shutter Speed and ISO ........................................................... 180 8.2 Aperture-Priority AE Mode (Av) and Shutter-Priority AE Mode (Tv) ................... 185 8.3 ISO....................................................................................................................... 192 8.4 Full Stops............................................................................................................. 194 8.5 Manual Exposure Mode (M) ................................................................................ 196 8.6 Basic Zone Shooting Modes ............................................................................... 198 4 Canon 70D Experience 9. METERING MODES ..................................................................................... 210 9.1 Evaluative Metering ............................................................................................. 211 9.2 Partial Metering.................................................................................................... 211 9.3 Spot Metering ...................................................................................................... 213 9.4 Center-Weighted Average Metering.................................................................... 215 9.5 Manual Metering .................................................................................................. 218 9.6 Metering Modes and Exposure ........................................................................... 219 10. EXPOSURE Part 2 ..................................................................................... 222 10.1 Exposure Lock ................................................................................................... 222 10.2 Histograms......................................................................................................... 225 10.3 Exposure Compensation ................................................................................... 229 10.4 Auto Exposure Bracketing ................................................................................. 233 10.5 HDR Shooting Mode and Multiple Exposure Mode .......................................... 236 11. ADDITIONAL CAMERA FUNCTIONS ....................................................... 243 11.1 Auto Lighting Optimizer and Highlight Tone Priority ......................................... 243 11.2 White Balance ................................................................................................... 244 11.3 Picture Styles..................................................................................................... 249 11.4 Ambience Selection and Lighting or Scene Type ............................................. 254 11.5 Flash .................................................................................................................. 256 11.6 External Flash.................................................................................................... 262 11.7 Wireless Flash ................................................................................................... 267 11.8 Sensor Cleaning ................................................................................................ 277 11.9 Putting it all into Practice ................................................................................... 279 12. THE IMAGE TAKING PROCESS ............................................................... 281 12.1 Still Subjects ...................................................................................................... 281 12.2 Moving Subjects ................................................................................................ 283 13. Wi-Fi FUNCTIONS...................................................................................... 286 14. VIDEO - AN INTRODUCTION .................................................................... 308 14.1 Image Size, Frame Rate, Compression ............................................................ 312 14.2 Video Settings ................................................................................................... 313 14.3 Manual Exposure Settings for Video ................................................................. 322 14.4 Audio.................................................................................................................. 325 15. COMPOSITION........................................................................................... 327 16. LENSES ...................................................................................................... 337 16.1 Lens Notations................................................................................................... 337 16.2 Fixed Maximum Aperture vs. Variable Maximum Aperture Lenses.................. 341 16.3 Which Lens to Buy Next .................................................................................... 342 17. PHOTOGRAPHY ACCESSORIES ............................................................. 351 17.1 Canon 70D Accessories .................................................................................... 351 17.2 Digital SLR Photography Accessories .............................................................. 352 17.3 Digital Photography Books ................................................................................ 356 18. CONCLUSION ............................................................................................ 357 Future Updates to the Text........................................................................................ 358 About the Author........................................................................................................ 359 5 Canon 70D Experience 1. INTRODUCTION The introduction of the Canon EOS 70D brings about an important and long-anticipated update to its predecessor, the EOS 60D. Nearly all of the camera’s essential specifications have been significantly improved, including the addition of Canon’s 19 point Viewfinder autofocus system, a 20.2 megapixel sensor, faster 7 frames per second continuous shooting speed, built-in Wi-Fi, and the in-camera HDR and Multiple Exposure modes. Perhaps the most dramatic upgrade is the new Dual Pixel CMOS AF Live View and movie autofocus system, which is a potentially revolutionary feature particularly for those shooting dSLR video of moving subjects. Figure 1 - Detail of the Canon EOS 70D. The customizable 19 point Viewfinder autofocus system will allow you to focus exactly where you desire, without having to lock focus and recompose as often as one might with the older 9 point AF system. And when tracking moving subjects with AI Servo Autofocus Mode, the 19 AF Points and autofocus-related Custom Functions will allow you to more successfully retain focus on a subject during sports, action, or wildlife shooting. The new Dual Pixel CMOS AF autofocusing system will enable you to more quickly and accurately focus and track a moving subject across a large central area of the frame when working in Live View or shooting video. When combined with one of Canon’s STM “stepping motor” lenses, this can even be accomplished with considerably reduced lens operation noise. The increased 7 frames per second (fps) continuous shooting speed will enable you to capture exactly the right moment, expression, or peak 6 Canon 70D Experience of action. And the Wi-Fi feature will enable you to remotely control the camera with a smartphone or tablet, remotely shoot and transfer images via your computer, and wirelessly upload photos directly from the camera to social media sites. The 70D also includes wireless flash control via the built-in flash, new Silent Shooting Drive Modes for quieter shooting in sensitive situations, the powerful Digic 5+ processor allowing in-camera processing and lens corrections features such as Multiple Exposure and Chromatic Aberration Correction. And now most all of the menus, settings, and image playback and processing functions can be performed with a highly responsive Touch Screen, including the ability to touch-focus during Live View and movie shooting. With its high-resolution, high-quality image sensor, 19 point autofocus system, 7 frames per second continuous shooting speed, 63-zone exposure metering system, Digic 5+ processor, and high ISO capabilities in low light, the Canon 70D enables photographers to consistently capture sharp, clean, and well-exposed images. Borrowing from among the best features of the Canon 6D and 7D, and even some of the exceptional capabilities of the high-end 5D Mark III, the 70D also boasts a big and bright Viewfinder with 98% coverage, full HD video, a ruggedly built and weather-sealed body, and numerous customization options. The 70D is clearly a powerful, advanced tool for digital photography and is fully capable of capturing professional quality images in most any situation you wish to use it. Figure 2 - Detail of 1962 Corvette production model, on display at the Heritage Museum, Sandwich, Mass. - 70D: Shutter speed 1/100, Aperture f/4.0, ISO 1600. 7 Canon 70D Experience But the 70D is merely a tool. It is up to you to make use of its features and capabilities to create the images you envision. While the camera’s manual will tell you about the settings and controls, how to change them, and their intended functions, this guide will build upon that and explain when and why you may want to use them. Every button, feature, menu item, and Custom Function setting of the 70D is there for a reason: to help you capture the images you want. Some of them are more useful to different types of photographers and shooting situations and you don’t necessarily need to learn and use them all immediately, but this guide will help to give you the knowledge to confidently use the ones that turn your Canon 70D into an image capturing tool that works best for you and the photography situations you work in. (Note that there are two versions of the Canon 70D: the EOS 70D (W) with built-in WiFi, and the EOS 70D (N) that is available in certain regions and does not include built-in Wi-Fi. Also be aware that the Wi-Fi should be disabled in locations and situations where its use is not allowed.) 1.1 Take Control of Your Camera Since the camera is a tool to take the images you want to take, you obviously can’t always allow the camera to make decisions for you. You have to take control of the camera to ensure that you capture exactly the images you intend - by autofocusing precisely where you want, setting the aperture or shutter speed that you want, and obtaining the exposure you want. While the 70D is an intelligent camera, it cannot read your mind and your intentions and does not know that you wish to focus on and properly expose the face of the man on the right side of the frame, while making the other man and the background appear out of focus, and the subject to be caught still and not be blurred from his motion, on this bright and sunny day (see Figure 3). You have to tell the camera to do all of this through the various controls and settings, such as the autofocus AF Mode (focus on the face on the right), the Exposure Metering Mode (properly expose for the face and the scene), the Aperture setting (the out-of-focus second man and background), the Shutter Speed (freeze the motion of the subject), the ISO (bright day) and the White Balance (sunny day). 8 Canon 70D Experience Figure 3 - Parade, Brooklyn, NY - Autofocus, exposure metering mode, aperture, shutter speed, ISO, and white balance all considered in capturing this image. Shutter speed 1/320, Aperture f/4.5, ISO 100. One has to think about all this stuff for every photo? Well, yes, that is what digital SLR photography is all about! At least if you wish to consistently create the well made, interesting, and compelling images you envision. And that is why the 70D has all the buttons, controls, custom functions, and features for you to make use of. Learning to use and get the most out of a highly advanced digital SLR (dSLR) camera like the 70D takes time, practice, patience, mistakes, and experimentation. If you have upgraded from a previous dSLR such as the EOS 60D or one of its predecessors, or from a Rebel such as the T4i/650D to the 70D, you are in for a treat. Its additional features and capabilities will more easily help you to capture images and photographs that you may have been limited in consistently attaining before. Its versatile and accurate autofocus system coupled with its rapid continuous shooting speed, plus its exposure metering system and high ISO capabilities will help you capture sharp images of subjects and moments that previously you may have missed, especially in action and in lower light situations. If you are relatively new to dSLR photography and are still in the process of learning all the controls of a dSLR and the exposure concepts of digital photography, you have perhaps ventured towards the proverbial deep end of the pool by choosing the advanced 70D! But don’t worry, this book will help guide you through its features, 9 Canon 70D Experience controls, and capabilities. Be sure to take it slowly and patiently as you learn the features and concepts that I will explain. With practice and experience you will soon be shooting with confidence and can begin to take advantage of the camera’s more advanced functions. Even if you are an intermediate photographer, don’t expect to just pick up all the new information at once, in one or two readings of a single book. (In fact, you wouldn’t want to, as the never ending journey of learning and mastering photography is a big part of what it’s all about!) Try not to become frustrated if you don’t quite understand something or aren’t always getting the results you desire. Instead learn the controls, functions, settings, and concepts bit by bit, try them out in real life shooting situations, and return to this guide, the manual, and other photography books to address questions and problems you encounter. Continue to learn and to photograph often and it should all begin to come together, sometimes slowly and sometimes in rapid spurts of discovery and understanding. 1.2 Using This Guide There are many different ways to use a dSLR camera and its controls to capture images, and many diverse situations in which photographers work. I’m going to concentrate on the techniques that I believe are the most practical, useful, and effective for the majority of photographers using the 70D. The settings and techniques I discuss can apply to various types of photography including general photography, action, portrait, and travel photography. Once you have a firm grasp of the controls, settings, and basic techniques you will have the tools and knowledge to address different issues, specialized situations, and challenging scenes, and I encourage you to experiment and continue to learn. Since this guide is intended to help you get the most out of your 70D, it will not go into extensive detail about the automatic features. The Canon 70D is a highly sophisticated tool that deserves to be used to its full potential, and that involves taking control of the camera and its functions, which means taking it off Auto+, off Program, off automatically selected auto-focus points when not required, off Auto ISO. While this may be more challenging for some users at first, these are the techniques that are necessary to take full advantage of the capabilities of any dSLR, including the 70D, and will lead you to having more control and consistency over your image making. Hopefully this will inevitably lead to better images! 10 Canon 70D Experience Figure 4 - Terracotta Figure, Public Library, Cambridge, Mass. - 70D: Shutter speed 1/800, Aperture f/4.0, ISO 200. This guide is intended to be used with the camera in your hands. That is the best way to directly follow and understand the controls, functions, and settings as they are being explained. It is also intended to be used in conjunction with and in addition to the camera’s manuals, not to completely replace them, so every bit of information in the Canon EOS 70D Instruction Manual and in the Wi-Fi manuals will not be repeated here. Among the often brief descriptions and sometimes frustratingly incomplete or disjointed explanations in the Canon manuals, there is some very valuable information as well as the basics for buttons, controls, and how to access and change most all the settings. Following what seems to be a new trend, the camera does not come with printed versions of the full Instruction Manual, the full Wi-Fi Function Instruction Manual, or the software instruction manuals - only the PDF versions of them which can be found on the included discs. All of these manuals can also be obtained as a PDF files from the EOS 70D page on the Canon website, under Brochures and Manuals: http://www.usa.canon.com/cusa/consumer/products/cameras/slr_cameras/eos_70d#Bro churesAndManuals If you have an iPad or tablet you will find that it is helpful to download all the manuals onto your device for reading and reference (along with this e-book). As you can see, there is a lot to make sense of regarding terminology and controls, so I recommend that you familiarize yourself with the controls and displays of the camera body, as shown on 11 Canon 70D Experience 2. CAMERA CONTROLS As I spoke about earlier, the 70D is an image making tool. It is up to you to make use of its features and capabilities to create the images you envision, so you can’t typically allow the camera to make decisions for you. You have to take control of the camera in order to consistently capture the images you intend - by autofocusing where and how you want, setting the aperture or shutter speed that you want, and obtaining the exposure you want. Each of these functions, and more, go into the making of most every image, whether you choose to control them or not, and each should be understood in order to get the most out of your 70D and your photography. To help you accomplish this, the 70D offers numerous external controls and the ability to customize them for your shooting needs. Many of the controls are designed to be easily accessible while the camera is held to your eye and in use, so that you can quickly adjust settings as you work. 2.1 EOS 70D Camera Controls Have a look at your camera and/ or pages 20-21 of the Canon EOS 70D Instruction Manual and I’ll go over the controls on your camera that you will be learning about throughout this guide and using in your shooting. Customizing the various buttons and controls will be discussed in the Menu Settings and Custom Functions Menus chapters, particularly in the C.Fn III-4 settings for Custom Controls. The controls will also be discussed in more detail in conjunction with the functions they perform and control, throughout this text. 19 Canon 70D Experience Figure 10 - View of the top controls of the Canon EOS 70D. On the top of the camera (see Figures 10 and 11), you will find: Shutter Button - Obviously, this is what you press to take a photo or series of photos. Tapping it half-way will do a few things like wake up the camera if it hasn’t been used in a few minutes and start the exposure metering. Pressing and holding it half-way will also perform functions like locking exposure and/ or focus or starting focus tracking (depending on your Shooting Mode, Focus Mode, and custom settings). AF Area Selection Mode Button - This small button is located between the Shutter Button and top Main Dial. It has been incorporated from the 7D and 5D Mark III, and is used to select one of the three Autofocus (AF) Area Selection Modes: Single-Point AF (Manual selection), Zone AF (Manual selection), or 19-Point Automatic Selection. First press either this button or the AF Point Selection Button (at the upper-right of the back of the camera), then press this button repeatedly to click through the various AF Area Selection Modes as you view them in the Viewfinder. The different modes will be indicated by the AF Area Selection Mode icons seen in the top of the Viewfinder. This button is labeled with an icon showing three dots and a triangle below (the significance of this graphic will be explained in a moment). Main Dial - Located just behind the Shutter Button, this changes settings like aperture size in Aperture Priority AE Mode (Av) or shutter speed in Shutter Priority AE Mode 20 Canon 70D Experience (Tv). It is also used in conjunction with other buttons, such as the ISO Speed Setting Button to adjust the ISO setting, or to jump ahead/ back a user-determined number of images during image review. Figure 11 - Detail of the controls on the top of the Canon EOS 70D body. AF - AF (Autofocus) Mode Selection Button - Press and release this button then turn either the Main Dial or Quick Control Dial to change the Autofocus (AF) Mode (such as One-Shot AF or AI Servo AF) while viewing the setting on the top LCD Panel. Notice that for each of these top buttons, the setting it changes is displayed immediately below it on the LCD panel. DRIVE - Drive Mode Selection Button - Press and release this button then turn either the Main Dial or Quick Control Dial to change the Drive Mode setting (such as Single Shooting, Continuous Shooting, Self-Timer) while viewing the setting on the top LCD Panel. ISO - ISO Speed Setting Button - Press and release this button then turn either the Main Dial or Quick Control Dial to change the ISO Speed Setting (such as 100, 400, 12,800) while viewing the setting on the top LCD Panel or in the Viewfinder. Note that this button is concave and has a small bump on it to allow you to identify it with your fingertip and change the ISO setting while shooting, without your eye leaving the Viewfinder - though the bump is not as pronounced as it perhaps should be. 21 Canon 70D Experience Metering Timer (Live View) This is the time that the camera will continue metering for the exposure setting after metering has begun in Live View, such as after you half press the Shutter Button or press the AE Lock Button. Set for perhaps 16 sec. or 30 sec. unless you take a longer time to compose and take your shot (such as maybe a landscape or studio shooter) then increase it accordingly (see Figure 58). 3.4 Playback Menus Playback 1 menu Figure 59 - Playback 1 menu. Protect Images This is to prevent the accidental erasing of an image or movie on the memory card when using the Erase function. However, this is not typically needed, as you should usually be backing up your image files on your computer and external hard drive and not dealing with them on an individual basis in your camera. If you do need to use this, perhaps to protect a great image you don’t wish to accidentally erase, access this menu item then choose Select Images. Turn the Quick Control Dial to scroll through your images (and/ or movies), and press the SET Button to protect the desired images. Press the Menu Button when finished (see Figure 60). Note that you can also use the [Q] Button during image playback to access Protect Images (see Figure 61-left). To protect all the images in a folder or on the memory card, access this menu and choose All images in folder or All images on card. Be aware that formatting the memory card will still delete protected images. You can also use this menu to Unprotect all the images in a folder or on the card. 65 Canon 70D Experience Figure 60 - Protect Images menu options (left), and choosing an individual image to Protect after selecting “Select Images” (right). Note that protected images will display the “key” icon at the top of the image, as shown at right. Another way to make use of this is to Protect the images you wish to keep on the card, and then use the Erase Images menu item (just below) and select All images on card. Your protected images will remain on the card, but all your unwanted images will be deleted at once. But of course be very careful when using this procedure so as not to delete any images you wish to keep. Figure 61 - Press the [Q] Button during image playback to access the Image Playback Quick Control Screen, where you can select options including Protect Images (left), and Rotate Image (right). Rotate Images This is to rotate an image in-camera. This is rarely needed, but could sometimes be helpful if you took a shot looking up or down and the camera got the orientation wrong but this is not a difficult fix in the computer. If needed, select this menu item, then use the Quick Control Dial to scroll through your images, then press SET to rotate 90 degrees at a time. You can also use the [Q] Button during image playback to quickly access Rotate (see Figure 61-right). If you would like your images to be automatically rotated in the camera (and computer) for playback, this will be addressed in the Set-up 1 menu item for Auto Rotate. 66 Canon 70D Experience Erase Images Careful, don't accidentally erase the wrong images off the memory card! This too is rarely needed if you manage your images once you upload them to your computer, however it can be useful to choose a couple sequential or non-sequential images that you select for quick deletion using this menu item. If you wish to make use of it, access this menu item, choose Select and erase images, then scroll through your images with the Quick Control Dial and press the SET Button to select the images to be erased (see Figure 62). When done choosing, press the Erase Button. Or you can use this in combination with the Protect Images menu item above to first Protect the images you wish to keep and then erase all unwanted images at once by choosing All images on card. Figure 62 - Erase Images menu options (left), and selecting individual images to erase after choosing the “Select and Erase Images” option (right). It is often easier to directly use the Erase Button on the camera for deleting single images during image playback. And you should be using Format card in the Set-up 1 menu to erase all the images on the card when you want to clear it off. More on that in a bit. Use a large enough memory card or multiple cards so that you don’t need to worry about deleting images in camera, and instead manage them on your computer after downloading all the images. Print Order If you print images directly from your camera, set this accordingly. The Canon manual explains it thoroughly on pages 345-358. Photobook Set-Up You can use this feature to select images that you wish to copy into a separate, dedicated folder when you transfer the images to your computer using the included EOS Utility software (see Figure 63). You can then easily upload or print these images using online or printer-included software. However, you may find that you can simply ignore this feature and do your image organizing more easily on your computer with software such as Adobe Bridge. If you wish to make use of it, select your desired images using the Quick Control Dial and SET Button. Or as with other functions you can select all images in a folder or on the card. Note that RAW images and movies cannot be selected. 67 Canon 70D Experience Figure 63 - Photobook Set-Up menu options, to select which images on the memory card you wish to download into a separate folder for use in a photobook. Creative Filters You can apply various filters to your images including Grainy Black and White, Soft Focus, Fish-Eye Effect, Art Bold Effect, Water Painting Effect, Toy Camera Effect, and Miniature Effect (see Figures 66, 67, and 68). The process and filters are mostly selfexplanatory, and are described in the Canon manual on pages 335-337. Simply access this menu and then choose the desired image (see Figure 64-left), press SET to view the available filters, select a filter using the left and right Multi-Controller or the Touch Screen, then press the SET Button to adjust the strength of the effect (see Figure 65). Then press SET followed by OK to save the image as a new file (while retaining the original image), followed by another OK when the process is complete. Experiment with them to see if you wish to make use of them. You can also easily access the Creative Filters by pressing the [Q] Button or Touch Screen [Q] icon during image playback to access the Image Playback Quick Control Screen, which will then allow you to touch or select the Creative Filters icon (see Figure 64-right). Note that you will not be able to make use of the Creative Filters if Wi-Fi is enabled. Figure 64 - Creative Filters - Left: Access the Creative Filters menu item, then select an image and press the SET Button or SET icon on the screen to view the Creative Filters, as then shown below in Figure 65-left. Right: You can also press the [Q] Button or [Q] icon during image playback to quickly access the Creative Filters. 68 Canon 70D Experience Figure 65 - Then select a filter such as Grainy Black and White and press the SET Button or SET icon, as shown at left, to then access its parameters as shown at right. Adjust the parameters, such as Contrast shown here, then press the SET Button or SET icon to save the image (right). Figure 66 - Canon 70D Creative Filters - Grainy Black and White effect with increased contrast (left), and the Miniature effect with dramatic depth of field and bolder colors (right). Figure 67 - Canon 70D Creative Filters - Fish-Eye effect with dramatic pin-cushion distortion (left), and Art Bold effect set on high, with saturated colors and higher contrast (right). 69 Canon 70D Experience 4. CUSTOM FUNCTIONS MENUS 4.1 C.Fn I: Exposure Figure 119 - Custom Functions C.Fn I: Exposure. I-1: Exposure Level Increments This is to change the increments of shutter speed, aperture, and exposure compensation available for you to select, either 1/3-stop increments or 1/2-stop (see Figure 120). This will apply to the Shooting Modes where you can select your desired aperture setting and/ or shutter speed, such as Aperture-Priority (Av) Mode, ShutterPriority (Tv) Mode, or Manual (M) Mode. This setting will also apply to the increments for Auto Exposure Bracketing (AEB) and Flash Exposure Compensation. For example, to progress 1 full stop using 1/3-stop increments, you will be able to select: Aperture: f/5.6, f/6.3, f/7.1, f/8.0 Shutter speed: 125, 160, 200, 250 With 1/2-stop increments, you can select: Aperture: f/5.6, f/6.7, f/8.0 Shutter speed: 125, 180, 250 Set this depending on your personal preference and what you are used to using for these increments. Many photographers prefer the greater precision of 1/3 stops, which is generally the traditional and standard setting, but you may prefer the simplicity and ease of 1/2 stops (which may also make “in-your-head” exposure calculations easier). Shutter speed and aperture will be fully explained in the Exposure Part 1 chapter, and Exposure Compensation in its own section of the text. recommend: 1/3-stop 105 Canon 70D Experience Figure 120 - Exposure Level Increments options (left), and ISO Speed Setting Increments (right). I-2: ISO Speed Setting Increments This sets the increments for ISO settings, either 1/3-stop or 1-stop (full stop). For example, to progress 1 full stop using 1/3-stop increments, you will be able to select: ISO: 100, 125, 160, 200 With 1-stop increments, you can select: ISO: 100, 200 Again, the setting depends on your personal preference and what you are used to (see Figure 120). Many photographers prefer the greater precision of 1/3 stops, which is generally the standard setting, but you may prefer the simplicity and ease of full stops. ISO is discussed in the Exposure Part 1 chapter. recommend: 1/3-stop I-3: Bracketing Auto Cancel Bracketing is when you take a series of the same image using different camera settings, in order to ensure that at least one of the images is correct, or to experiment, or for HDR purposes. Auto Exposure Bracketing (AEB) is when the camera automatically changes the settings and takes this series of shots, according to your user-determined settings. This menu item sets whether or not Auto Exposure Bracketing or White Balance Bracketing is canceled when you turn off your camera (see Figure 121). I recommend that you have this cancellation set for On: Enable, because if you have a shooting session where you are auto-bracketing, then use your camera the next day, you will probably have forgotten that it is set on bracketing, and then auto bracketing is going to occur and most of your shots are going to be improperly exposed. Auto Exposure Bracketing will be explained later in this text. recommend: On: Enable 106 Canon 70D Experience Figure 121 - Left: Exposure Bracketing Auto Cancel options to cancel Bracketing when the camera is turned off. Right: Bracketing Sequence options, to determine the order that Auto Exposure Bracketing (AEB) and White Balance Bracketing shots are taken. I-4: Bracketing Sequence This setting determines the sequence of exposures when using Auto Exposure Bracketing (AEB) or White Balance Bracketing. (The 70D can bracket either 2, 3, 5, or 7 shots, not just the traditional 3 shots - this number to be set with the next menu item.) The bracketing sequence setting depends how you like to order your bracketing, and this may be important to you if you do a lot of HDR work. Setting 0: 0, -, + means the “correct” exposure is taken first, then the darker exposure(s) (under exposed), then the lighter exposure(s) (over exposed), with “correct” meaning what the camera thinks is the proper exposure (see Figure 121). Setting 1: -, 0, + means the order is darker, normal, lighter. Setting 2: +, 0, - means the order is over exposed (lighter), normal, under exposed (darker). An HDR shooter and their software may prefer setting 1: -, 0, +. This also affects the bracketing sequence for white balance (WB) bracketing so determine what sequence you want if you make use of WB bracketing. When making use of White Balance Bracketing, the zero (0) in the series indicates the standard white balance. With White Balance Bracketing you can bracket along either the Blue/Amber axis or along the Magenta/Green axis, so the negative (-) will indicate either blue or magenta bias, and the positive (+) will indicate either amber or green bias. White Balance Bracketing will be explained in the White Balance section. recommend: User preference. The second setting (1: -, 0, +) is suggested for HDR shooters if it matches their personal and software workflow. I-5: Number of Bracketed Shots This is to set the number of shots that are taken in an Auto Exposure Bracketing (AEB) sequence or a White Balance (WB) bracketing sequence. The number you choose is obviously the number of shots that will be taken: 3, 2, 5, or 7 (see Figure 122). General bracketing is typically 3 shots, but those shooting for HDR work will want to take advantage of 5 or 7 shots. recommend: varies by user 107 Canon 70D Experience 6. AUTOFOCUSING 6.1 Using Autofocus One of the essential steps in taking a successful and sharp photo is controlling where the camera autofocuses. During Viewfinder shooting, if you allow the camera to autofocus by automatically choosing the focus point(s) (such as in Auto+ Shooting Mode or with One-Shot AF mode and Automatic AF Point Selection) it typically focuses on the closest object. This may or may not be what you want to focus on, so you should almost always select where the camera focuses by selecting the desired autofocus AF Point. Or if the situation or subject does not allow you to quickly or easily focus by selecting a specific point, you can instead decide to select a larger Zone. By selecting an AF Point (or Zone), you are telling the camera exactly where to autofocus (in One-Shot AF mode) or where to look to find a moving subject to start tracking (when working in AI Servo AF mode). For example, you often want to focus on a subject’s closest eye, but if you allow the camera to choose the autofocus point itself, it may select another part of the face, or somewhere else on the body, or even a raised hand that is nearer to the camera than the face, to focus most sharply on. If you are capturing an image of a bird in a tree the camera has no idea you want the autofocus system to zero in on the bird so that it is in sharp focus, and not the branches or leaves near it or perhaps even some leaves closer to you and nowhere near the intended subject. 138 Canon 70D Experience Figure 151 (previous page) - Inca Llama Effigies - Combine precise autofocusing with shallow depth of field to call attention to the desired subject - here, the front figurine, and below (Figure 152) the rear figurine. Shutter speed 1/40, Aperture f/2.8, ISO 1600. Figure 152 - Inca Llama Effigies - Combine precise autofocusing with shallow depth of field to call attention to the desired subject - above (Figure 151) the front figurine, and here the rear figurine. Shutter speed 1/40, Aperture f/2.8, ISO 1600. The autofocus system of a dSLR plays a large role in allowing you to capture exactly the shot you intend. In the Creative Zone Shooting Modes (P, Av, Tv, M, and Bulb-B) you can, and should, take control of the autofocus system. The Viewfinder autofocus system is comprised of the autofocus related controls (see Figure 154), the autofocus AF Modes (also called the AF Operation), the autofocus AF Area Selection Modes, the autofocus AF Points, and the autofocus related menu and Custom Function items described at the beginning of this text which customize how the AF system works. (Live View autofocusing is slightly different, and will be covered later in this chapter.) You will select an AF Mode typically based on if the subject is still (or perhaps only moving slightly or relatively slowly), or if you wish to continuously track and retain focus on a moving subject. And you will choose an AF Area Selection Mode based on how large of an area you want the camera to look at to find or track your intended subject - in other words how many AF Points will be active when attempting to focus on the subject. This can range from a single AF Point to a wider Zone to all the AF Points available in the Viewfinder. You can set the AF Modes and AF Area Selection Modes in a variety of combinations based on what and how you are shooting. Be sure to read the Menu 139 Canon 70D Experience Settings and the Custom Functions Menus chapters first to make sure your camera is properly set up to always display your active AF Point(s), and various other recommended AF settings. Viewfinder autofocus works by looking for contrast so you should try to focus (locate the active AF Point as seen in the Viewfinder as in Figure 153) on a texture or a detail with a pronounced line or some amount of contrast between light and dark. The camera may not be able to focus on a large area of consistent color - such as an all-white wall or clear blue sky, or even a uniformly colored and lit shirt - or on a subject that is too dark. It can be disrupted by regular patterns or confused when looking through close objects to objects farther away, such as looking through a fence. And it sometimes fails to work well in dim light, though the center AF Point is slightly more responsive than the outer AF Points in low light situations (down to -0.5 EV for the center point vs. 0 EV for the outer points). Also, the AF-Assist Beam Firing of Custom Function C.Fn II-5 can assist in this low light situation if you are using the built-in flash or an optional Speedlite. All of the 19 AF Points are the accurate cross-type points, so you should feel comfortable making use of any of them. (A cross-type AF Point detects contrast in both the horizontal and vertical directions, as opposed to AF Points which are only sensitive to contrast in one of these directions.) The center AF Point of the 70D performs with additional sensitivity when using most Canon lenses with an f/2.8 or wider maximum aperture. Note that with certain older Canon lenses, many of the outer AF Points will not act as cross-type points. See page 108 of the Canon manual for this list of lenses. I will use the term “recompose” a few times throughout the text. By this I mean moving the camera after you have locked the focus or exposure such as with a half-press of the Shutter Button, but before you fully press the Shutter Button and take the picture. This means that what you see in the Viewfinder changes from when you do those first actions to when you take the picture; you have re-composed the view you see in the Viewfinder (see Figure 153) This will be further explained in the AF Points and Composition section of this chapter. And remember, when photographing people generally try to focus somewhere on the face, ideally on the nearest eye, then recompose the framing of your image if necessary. Figure 153 - Simulated view of Canon 70D Viewfinder - The image on the left shows what is seen in the Viewfinder as one is using the selected AF Point to lock focus on the 140 Canon 70D Experience subject. The image on the right shows what is seen in the Viewfinder as the image is recomposed to the desired framing for taking the shot. 6.2 Autofocus - AF Point Selection As I go over the Autofocus Modes in the next section, I will talk about manually selecting your desired AF Point. This is done to tell the camera exactly which AF Point to use for autofocusing, and is generally recommended so that you have full control over where the camera focuses. Alternately, you can make use of Automatic Selection of the AF Point where the camera decides which of the 19 AF Points to use, but then you will have little control over where the camera focuses. However, automatic AF Point selection is required in certain subject-tracking situations, as will be described below. Figure 154 - Autofocus related controls of the Canon EOS 70D. To choose between manual and automatic AF Point selection, press the rear AF Point Selection Button or the top AF Area Selection Mode Button, then press the top AF Area Selection Mode Button a couple times. When the autofocus brackets are visible in the Viewfinder and the far-right AF Area Selection Mode icon is indicated in the Viewfinder, you are using 19-Point Automatic Selection AF (see Figure 155-right). This is also the mode used by the camera in the Auto+, Creative Auto, and Scene modes. When either of the other icons are selected in the Viewfinder, you are using one of the manual AF Point selection modes, either Single-Point AF (left icon) or Zone AF (middle icon) (see Figure 155-left). For now set this on Single-Point AF, the left icon. 141 Canon 70D Experience Figure 155 - Single-Point AF Manual Selection (left) and 19-Point Automatic Selection AF area modes (right), as indicated in the Viewfinder by the AF Area Selection Mode icons and the configuration of AF Points or brackets. When making use of manual Single-Point AF or manual Zone AF selection, with the default camera settings, you first press the rear AF Point Selection Button (at the upperright of the rear of the camera) and then use the Multi-Controller to select your desired AF Point or Zone (see Figure 154). If you set the C.Fn III-4: Custom Controls menu item to have the Multi-Controller perform AF Point Direct Selection, you can instead use the Multi-Controller directly to select the AF Point without pressing the AF Point Selection Button first. However, you will need to press the AF Point Selection Button before pressing the SET Button to quickly choose the center AF Point. To see how manual autofocus point selection works, turn the Mode Dial to Av, and make sure the switch on your lens it set to AF. Set your Autofocus Mode to One-Shot using either the [Q] Button and Quick Control Screen, or more simply press the AF Button (AF Mode Selection Button in the line of Buttons at the LCD Panel) on the top of the camera then turn the Main Dial or Quick Control Dial as you view the setting on the top LCD Panel. Next press the top AF Area Selection Mode Button or rear AF Point Selection Button, then repeatedly press the top AF Area Selection Mode Button (near the Shutter Button) until you see the left AF Area Selection Mode icon selected and a single large AF Point among the smaller AF Points in the Viewfinder, as shown in Figure 155-left. You can also use the Quick Control screen to change this setting by selecting the AF Area Selection Mode icon. Tap the Shutter Button with a half-press to wake up the camera. To select your own desired AF Point, while looking through the Viewfinder use your thumb on the Multi-Controller to select the focus point that is nearest to where you want to focus. Press the Multi-Controller up, down, side-to-side, or diagonal. If you did not set the Custom Control for AF Point Direct Selection, you will need to press the AF Point Selection Button first before using the MultiController to move the AF Point. Place that AF Point over your intended subject or detail (see Figure 156). 142 Canon 70D Experience Press and hold the Shutter Button halfway down and see that point blink (if Custom Function C.Fn II-12: VF Display Illumination is set for Enable). The Focus Confirmation Light should light up in your Viewfinder, and the camera will beep if you have that enabled. You have locked the focus. Keeping the Shutter Button pressed halfway to keep the focus distance locked, recompose if necessary, and take the shot by fully pressing the Shutter Button. Figure 156 - Cambridge Carnival - Cambridge, Mass. - Simulated view of 70D Viewfinder, using a manually selected AF Point to focus on the subject’s eye (manually selected far-right Focus Point shown here in red over the subject’s eye). Shutter speed 1/1000, Aperture f/4.0, ISO 400. If the Focus Confirmation Light does not light up and the camera does not take the photo, the camera may not be finding enough contrast to focus on, you may be too close to your subject for the lens to focus, or the lighting may be too dim for the AF system to work properly. Try using the center AF Point, which performs slightly better in low light, and is a more sensitive cross-type point with certain lenses (having an f/2.8 or wider maximum aperture). Or you may be in AI Servo AF mode, which does not lock focus in this manner because it is tracking a moving subject. Note that the area that the camera evaluates for focus is slightly larger than the actual active AF Point squares you see in the Viewfinder. In rare situations when autofocusing fails, you can also resort to manual focusing by switching your lens to MF and using the lens focusing ring. Or you can autofocus on an object at the same distance from the camera as the subject, and 143 Canon 70D Experience What Readers are Saying About Doug’s previous dSLR Camera Guides: Simplifies without technical jargon! - Douglas Klostermann has the unique ability to explain in very readable, easy-to-follow directions how to operate every facet of the Canon 5D Mark III. This is definitely worth purchasing as a companion to the camera and the camera's manual. -Alan Best reference book for Canon 5D Mk III - Well written and easy to understand. This book really helps one to be able to take advantage of all the features of the Canon 5D Mk III. A must have. -N.D. Excellent ebook - This book is first-class, and this author knows his stuff about Canon cameras. He cuts to the chase, and gets right to the heart of the important matters. I learned a lot and I learned it very quickly indeed. Highly recommended. -S. Walker Very clear and precise - It explains all the features of the 5D Mk3 and does this in a very clear and precise way giving a detailed run through of the camera functions and controls as well as the operation and options of the menu system - and it does this without assuming you are an expert photographer to begin with. This is an excellent book to help with getting to grips with the Canon EOS 5D Mark III, whether as a newcomer to the EOS world or upgrading from a previous version. -Camea Will Save You A Month On The Learning Curve - This book clearly and practically walks the reader through every step of setting up and using the 5D3. A wonderfully well-organized book, it explains every feature and setting on the camera with recommendations on optimal setup choices and the reasoning behind each recommendation. This is the lowest cost, highest value accessory I could have purchased. -Robert Superb Guide to the 5D Mark III - An excellent guide, clear and concise. A great tool for budding photographer as well as the seasoned pro. A sure way to get the most out of your camera. -Mark S. A Pro Right There With You - If you want to get the camera up and running with the feeling of a pro right there with you then I would strongly recommend it. Camera in one hand and reader in the other and dig in. Thanks Doug, just what I was looking for. -Tim S. A Must-Have Accessory - What a great addition to my bag. This is a well written, full body of work that explains, in plain English, how to get the most out my new camera. Doug provides the knowledge and experience to bring you to the next level. I look forward to learning more every time I open the book. -Steven Purchase Canon 70D Experience at: http://www.dojoklo.com/Full_Stop/Canon_70D_Experience.htm 360