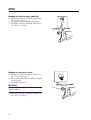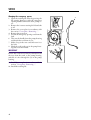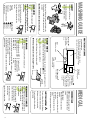
1
A
s
k
o
-
A
p
p
l
i
a
n
c
e
s
A
s
k
o
-
A
p
p
l
i
a
n
c
e
s
0
1
2
3
4
5
6
7
8
9
10
11
12
13
14
16
17
18
19
21
22
23
24
ASKO
SERVICE
ACADEMY
15
20
25
26
27
28
29
31
32
33
34
36
37
38
29
41
42
Service manual
Washing machine WMC55
Professional
30
35
40
43
44
45
46
47
48
49
50
51
52
53
54
55
56
57
58
59
60
61
62
63
64
65
66
67
BUILT TO LAST LONGER
68
69
70
INTRODUCTION
INTRODUCTION
You have in your hand the ASKO Service Manual for the new generation of washing
machines, that are friendly to the environment in both their manufacture and their
use.
This new generation of washing machines has been designed for ease of servicing. By
this we mean that it’s a simple job, for example, to replace a damaged side panel.
That’s why we’ve changed the design from a one-piece shell to a split shell.
To secure parts, we have replaced many of the screws by plastic snap fasteners. We
have also designed the machines so that you can perform as much servicing as possible from the front, all for simplifying service.
We have also integrated service aids, such as hooks to hang parts on, so that you can
use both hands for installation.
Servicing washing machines has to be easy, and just as it is important for us that the
customer shall be satisfied with our simple, able and durable machine, so we also
want to give you, the service engineer, the conditions to permit you to work efficiently and satisfactorily.
We hope that this Service Manual will be a positive tool in your daily work.
Art.no. Service manual 80 737 26
1
TABLE OF CONTENTS
Introduction
Installation
Transport supports
Location of the washing machine
Adjusting the feet
Water connection
Water intake – mixed or cold water
Drain connection
Connecting to a coin mechanism
Motorfunktions
Fault tracing
Problems
Components and measurement values
Test Program
Internal counter
Test program and fault indications
Fault indications
Consumption values
Tools
List of tools
Application areas
Special tools
Service
Top cover
Removing the top cover
Installing the top cover
Changing the top cover guides
Detergent insert
Changing the detergent insert handle
Panel
Removing the panel
Installing the panel
Changing the indication lamp/symbol
lens
Changing the main power button
Changing the push-button switches
Changing the DCU panel board and
push-buttons
Rear panel
Removing the rear panel
Installing the rear panel
Motor
Changing the drive belt
Changing the motor
Changing the motor control board
Front panel
Removing the front panel
2
1
4
4
5
5
6
6
7
8
10
14
16
18
20
20
20
20
22
26
26
27
28
29
29
29
29
29
30
30
31
31
31
32
32
33
34
35
35
35
36
36
36
37
38
38
Installing the front panel
38
Changing the plastic lockings on the front
panel
39
Changing the front panel securing clips 39
Detergent compartment
40
Removing the detergent compartment 40
Installing the detergent compartment 40
Changing the detergent compartment
corrugated hose
41
Washing lid
42
Removing the washing lid
42
Installing the washing lid
42
Changing the lid seal/glass
42
Changing the lid catch
43
Changing the emergency opener
44
Cover plate
45
Removing the cover plate
45
Installing the cover plate
45
Catch
46
Removing the catch
46
Installing the catch
46
Front end plate and inner cover plate 47
Removing the front end plate and inner
cover plate
47
Installing the front end plate and inner
cover plate
47
Drum
49
Removing the drum
49
Installing the drum
49
Changing the wash ridge
50
Drain pump
51
Removing drain pump and pump
housing
51
Installing the drain pump and pump
housing
51
Changing the drain pump rubber ring 52
Complete holder assembly
53
Changing the complete holder assembly
(holder, cradle and rear end plate)
53
Changing the bearing
54
Changing the v-ring cassette
55
Changing the heating element
56
Changing the thermistor
56
Changing the tensioning ring
57
Changing the balancing spring
58
TABLE OF CONTENTS
Electrical component bridge piece
Removing the electrical component
bridge piece
Installing the electrical component
bridge piece
Changing the level switch
Changing the level sensor
Changing the PCU program control
board and its holder
Cross member
Changing the input terminal block
Changing the fuse
Changing the fuse holder/insert
Changing the radio interference filter
Changing the cable stand
Changing the inlet valve
Side panels
Changing the side panels
Bottom
Change of bottom
Changing the shock absorbers
Changing pressure chamber
Front rail
Changing the front rail
Washing guide EURO
Washing guide MEDICAL
Washing guide MOP
Washing guide US
Change settings
Language
Locking a programme
Wash temperature - centigrade or
fahrenheit
Changing preset wash temperature
button
Child lock on
Changing the spin time in mop version
Cleaning and maintenance
Checking the needle trap and drain
pump
Cleaning the holes under the ridges
Cleaning the detergent compartment
If you live in an area with hard water
Index
Start/Stop
59
59
59
60
60
61
62
62
63
63
64
65
65
66
66
67
67
68
69
70
70
71
72
73
74
75
75
75
75
75
76
76
77
77
77
78
78
79
3
INSTALLATION
INSTALLATION
TRANSPORT SUPPORTS
Before the machine can be used, the 3 transport
supports must be removed. Each transport support consists of a screw, a washer and a transport
sleeve. The transport sleeves are used after the supports have been removed, to plug the holes in the
transport beam.
2
Removing the transport support
1. Undo the screw and remove the washer.
2. Remove the transport sleeve by first raising it
up and than taking it out.
3. Fit the transport sleeves into the transport support holes.
IMPORTANT
Keep the screws and washers in a safe place, in
case the machine has to be transported again later
on.
4
1
3
INSTALLATION
LOCATION OF THE WASHING MACHINE
The washing machine can be either free-standing
or built in.
P1
P2
P3
P4
Start/Stop
P5
P6
P7
P8
A. Free-standing
The washing machine can be located as a freestanding unit.
B. Built-in
The washing machine can be built in under a work
top with a working height of 850 - 900 mm.
Leave a 5 mm gap all round the machine, including a space between the rear edge of the top cover and the wall behind it.
min 600
min 850
103
120
140
135
ADJUSTING THE FEET
Adjust the feet so that the machine is stable and
upright on the floor. Secure the feet by tightening
their locking nuts.
5
INSTALLATION
WATER CONNECTION
The machine is plumbed in with the connection
hose that comes with it. The water pressure shall
be 0.1-1MPa (approx. 1-10kp/cm2 ; 10-100N/
cm2).
The water supply must have a stop cock. If the
piping is new, it can be advisable to first thoroughly flush it through so that any dirt will be flushed
out. Otherwise, any dirt in the piping could block
the filter in the machine's inlet valve and stop the
water supply.
WATER INTAKE – MIXED OR COLD WATER
On delivery the machine is set to use mixed hot
and cold water (E).
Machines with the US programme are set to use
both warm and cold water (H):
P1-P3: Warm water intake.
P4-P6: Mixed warm and cold water intake
P7-P8: Cold water intake.
To change the water intake setting, do as
follows:
Switch off the power switch,
, then switch it
on again so that the machine is in start-up mode.
Press the P8 button five times, then press the
P4 button five times. You have to complete these ten button presses within fifteen seconds.
Within three seconds of pressing the P4 button for the fifth time you must then select the
type of water intake you want by pressing the P6 ,
P7 or P8 buttons.
to use cold water intake only (C).
for US intake, see above (H). Could only be
used on machines with US programme.
P8 to use mixed hot and cold water (E).
A letter C near the bottom right of the display
shows that cold water is being used, H shows the
intake for US mentioned above and the letter E
indicates mixed hot and cold.
P6
P7
6
INSTALLATION
DRAIN CONNECTION
Machine with drain pump
The machine is delivered with a connected drain
hose that shall be connected to a suitable sink or
other drain connection. The height shall be 500 900 mm above floor level. Make sure the drain
hose does not kink.
Machine with drain valve
An outlet hose is supplied with the machine. This
must be connected to the outlet on the machine
and empty into a floor drain or gutter drain.
NOTE!
The end of the outlet hose must be lower than
the lowest point of the outlet valve.
7
INSTALLATION
CONNECTING TO A COIN MECHANISM
Connection to a coin mechanism must be carried
out by a qualified electrician.
A special connecting cable is required to connect the machine to a coin mechanism. This can
be ordered as a spare part, art. no. 92 090 95.
1
1. Remove the 3 screws at the rear of the top
cover. Remove the top cover.
2. Knock out the punching from the bottom of
the rear bracket.
2
3. Connect the socket of the connect cable as
shown in the pictures 3 and 4.
3
4. Lead the cable throught the hole in the
bracket.Use the cord restraint to secure the
position of the cable and moisture protection
of the machine.
4
5. To connect the connecting cable, see the instructions provided by the supplier of the coin
mechanism and the circuit diagram of the
machince.
8
INSTALLATION
The conducters in the connecting cable
No. Designation conducter
1,4 Signal
B2 Line
B3 Neutral
B5 Reset
B6 Ground
The coin mechanism shall be supplied by B2 and
B3.
Coin mechanism with timer
A short circuit is required to start the washing
machine. This short circuit shall be done by the
coin mechanism for a specified time. Recommended time is 10 minutes. This means that the machine must be started within 10 minutes after insert
of coin(s).
Coin mechanism with reset
A short circuit is required to start the washing
machine. This short circuit shall be done by the
coin mechanism for a specified time.
The washing machine sends a reset signal to
the coin mechanism when the machine has reached
the first drain in the washing programme. The
reset signal input on the coin mechanism should
be connected to B2 and B5.
9
MOTORFUNKTIONS
MOTOR- AND PROGRAMFUNCTIONS
Out-of-balance check and spin drying
There are 2 different spin dry sequences, long and
short. Both consist of a preliminary spin, the
washing cycle and a main spin dry.
Before the preliminary spin the machine runs
a separating cycle at 100 rpm, and measures the
drum inertia on the way up and down. This checks
for out-of-balance. During this cycle the holder
may make violent movements although there is
nothing wrong.
In attemp to get balance the machine does a
maximum of 10 restarts. If the out-of-balance is
still too great in the final, tenth, attempt, the program will continue without performing spin drying. This is indicated on the display after the program has finished.
Restart point after interrupted start attempt
If a start has been interrupted due to excessive outof-balance, the motor runs for 1 cycle counterclockwise, and then another attempt is made.
Drain pump during long spin dry
The drain pump runs continuously for the first 6
minutes and then 50 seconds off, 10 seconds on,
50 seconds off, and so on for the remainder of
the respective cycle. If a restart takes place due to
excessive out-of-balance, the drain pump operating time is reset to zero.
Drain pump during short spin dry
The drain pump runs continuously for the whole cycle.
10
Motor actions and inlet valve
Sequence
Inlet valve
Motor action
Pre-wash
1
Normal
Main wash
2 alt 3
Normal
Rinse 1
1
Normal
Rinse 2
1
Normal
Rinse 3
1+4
Normal
Wool
2 alt 3
Super gentle
Syntetic
2 alt 3
Normal
Spin. A
Normal
Spin. B
Normal
Motor actions
Normal: Clockwise 12 seconds on, 3 seconds off,
counterclockwise 12 seconds on, 3 seconds off,
49 rpm.
Super gentle: Clockwise 3 seconds on, 57 seconds
off, counterclockwise 3 seconds on, 57 seconds
off, 49 rpm.
Sequences
Spin A: Normal motor action clockwise and
counterclockwise followed by a clockwise peak
to 500 rpm, normal motor action clockwise and
counterclockwise followed by a clockwise spin for
210 seconds on 1000 rpm.
Spin B: Normal motor action clockwise and
counterclockwise followed by a clockwise peak
to 500 rpm, normal motor action clockwise and
counterclockwise followed by a clockwise spin for
15 seconds on 800 rpm.
MOTOR- AND PROGRAM FUNCTIONS
Programmes EURO-MOP-MEDICAL-MOP
WMC55 is delivered with one of the programmes
EURO, MOP, MEDICAL or MOP. The
programmes are described on the following pages.
All programmes are not sold on all markets.
The difference on the machines is how the
jumpers are set on the program controller board.
The jumper settings are described in the circuit
diagram, which is enclosed with the machine and
with this manual.
Use and care guides and a wall guides for the
program EURO, MOP, MEDICAL or MOP are
enclosed with the machine from the factory.
11
MOTOR- AND PROGRAMFUNCTIONS
PROGRAMME VERSION EURO
Progr.
Name
Temp
Spin
speed.
Pre wash
Main
wash
Rinse 1
Spin B
Rinse 2
Spin B
Rinse 3
Spin A
Spin B
min
°C
rpm
min
min
min
min
min
min
min
min
P1
Heavy
90
1000
10
37
3
2,5
3
2,5
3
6
P2
Normal
90
1000
37
3
2,5
3
2,5
3
6
P3
Normal
60
1000
23
3
2,5
3
2,5
3
6
2,5
3
2,5
3
6
EURO
P4
Normal
40
1000
11
3
P5
Syntetic
40
800
7
3
P6
Super Quick
40
800
4
3
P7
Wool
30
800
4
3
P8
Spin
3
3
3
2,5
3
2,5
3
2,5
800
2,5
For total time, see Consumption Values on page
22.
Main wash: Heating time are included in the time.
All main washes starts with 4 seconds on inlet
valve 1.
PROGRAMME VERSION MOP
Progr.
Name
MOP
Temp
Spin
speed
Pre wash
Main
wash
Rinse 1
Spin B
Rinse 2
Spin B
Rinse 3
Spin A
Spin B
°C
rpm
min
min
min
min
min
min
min
min
min
P1
Heavy
90
1000
10
37
3
2,5
3
2,5
3
6
P2
Heavy
60
1000
10
23
3
2,5
3
2,5
3
6
P3
Normal
90
1000
37
3
2,5
3
2,5
3
6
P4
Normal
60
1000
23
3
2,5
3
2,5
3
6
P5
Normal
40
1000
11
3
2,5
3
2,5
3
6
P6
Syntetic
40
800
7
3
3
3
2,5
P7
Wool
30
800
4
3
3
3
2,5
P8
Rinse
1000
For total time, see Consumption Values on page
23.
Main wash: Heating time are included in the time.
All main washes starts with 4 seconds on inlet
valve 1.
12
3
6
MOTOR- AND PROGRAM FUNCTIONS
PROGRAMME VERSION MEDICAL
Progr.
Name
MEDICAL
Temp
Spin
speed
Pre wash
Main
wash
Rinse 1
Spin B
Rinse 2
Spin B
Rinse 3
Spin A
Spin B
°C
rpm
min
min
min
min
min
min
min
min
min
P1
Heavy
90
1000
10
*
3
2,5
3
2,5
3
6
P2
Heavy
80
1000
10
*
3
2,5
3
2,5
3
6
P3
Normal
60
1000
23
3
2,5
3
2,5
3
6
2,5
3
2,5
3
6
P4
Normal
40
1000
11
3
P5
Syntetic
40
800
7
3
P6
Super Quick
40
800
4
3
P7
Wool
30
800
4
3
P8
Rinse
3
3
3
2,5
3
2,5
3
1000
2,5
3
6
For total time, see Consumption Values on page
24.
Main wash: Heating time are included in the time.
All main washes starts with 4 seconds on inlet
valve 1.
*)The main wash ends 11 minutes after the
selected temperature is reached.
PROGRAMME VERSION US
Progr.
Name
US
Temp
Spin
speed
Pre wash
Main
wash
Rinse 1
Spin B
Rinse 2
Spin B
Rinse 3
Spin A
Spin B
°C
rpm
min
min
min
min
min
min
min
min
min
5
P1
Heavy
60
1000
16
2,5
2,5
2,5
2,5
2,5
6
P2
Normal
60
1000
16
2,5
2,5
2,5
2,5
2,5
6
P3
Normal
40
1000
12
2,5
2,5
2,5
2,5
2,5
6
P4
Light
40
1000
11
2,5
P5
Super Quick
No heat
1000
7
2,5
P6
Syntetic
40
800
7
2,5
2,5
P7
Delicate
30
800
4
2,5
2,5
P8
Rinse
1000
2,5
2,5
2,5
2,5
2,5
2,5
2,5
2,5
2,5
2,5
6
For total time, see Consumption Values on page
25.
Main wash: Heating time are included in the time.
All main washes starts with 4 seconds on inlet
valve 1.
13
FAULT TRACING
FAULT TRACING
The machine will not start
1. Is the door shut properly? Push it firmly. A
flashing symbol appears in the display if
the machine is started with the door open.
2. Is there power to the machine. Check the fuse
box.
3. Check if the child lock is activated. To start
the machine when the child lock is activated,
hold in the
-button for 3 seconds. See
Changing settings.
Start/Stop
Door will not open
1. Check that the power switch is on.
2. Has there been a power cut? Check the fuses
in the fuse box. The door cannot be opened
button if there is no power.
with the
3. If everything else fails the door can be opened
in an emergency as follows:
•
Make sure the power switch is off.
•
Machines with a drain pump: First check that
there is no water left in the machine. If there
is, empty the machine as described under the
heading Checking trap and drain pump, in
the chapter on Cleaning and Maintenance.
•
Open the flap at the bottom left. Use a screwdriver as shown.
•
Unscrew the screw that holds the red plastic
handle.
•
Pull the handle to open the door.
•
Press the handle back into its recess and secure it with the screw. Close the flap.
If you have problems opening the door normally
again, call service.
The machine will not work
1. Measure the voltage between E1-1 and E1-2.
The value should be the same as the mains
power supply voltage.
2. Check the machine and house fuses. If necessary change the fuses and investigate why they
have blown.
3. Check the main power switch.
4. Check the door switch.
The washing lid is difficult to close or will
not close
1. Check the door switch, it may be faulty.
2. Check that the lid seal is located correctly.
The washing lid leaks
1. Clean the lid seal.
2. Mount an O-ring front door (Art. no: 80 641
78). O-ring front door has been added on
machines produced after week 18 2000. The
O-ring front door can be mounted on earlier
produced machines when it´s a leakage from
the lid.
Mount as follows:
Mount the O-ring by putting it on the outside of the seal, between the inner plastic part
of the front panel and the seal.
3. Check and if necessary change the lid seal.
The machine does not perform washing
rotation or does not reverse the direction of
washing rotation
1. Check that the drive belt is located correctly.
2. Check and repair or change the motor control board , see the electrical schematic diagrams to find the measuring points.
3. Check or change the motor.
4. Check the level switch.
The drum turns slowly during washing rotation
1. Check that the drive belt is tight and that the
adjustment screw for motor suspension is screwed tight.
14
FAULT TRACING
The machine does not spin dry
If 0000 is flashing in the top right corner of the
display the machine has not spin dried. The machine has a built-in out-of-balance sensor that will
reduce the spin drying speed or stop spin drying
altogether if the load is too unbalanced.
1. Open the washing lid and redistribute the
laundry.
2. Run the "Spin drying" program to check that
the problem has been solved.
The machine does not empty
1. Check the drain system.
2. Check the level switch.
3. Check and repair or change the motor control board, see the electrical schematic diagrams
to find the measuring points.
4. Check or change the drain pump/ inlet valve.
The machine does not fill with water
1. Check for error messages.
2. Check that the water stop cock is open.
3. Measure the voltage at the inlet valve and the
outputs from the program control board, see
the electrical schematic diagrams.
4. Check the level switch and its hose.
5. Check and repair or change the level sensor,
see the electrical schematic diagrams to find
the measuring points.
The machine continues to fill up with water
and the program stands still
1. Check the level switch and its hose.
2. Switch off the electrical supply to the machine. If water continues to come into the machine, the valve is stuck. In this case, remove
and clean the valve. Also clean the filter thoroughly.
3. Check and repair or change the level sensor,
see the electrical schematic diagrams to find
the measuring points.
The machine vibrates more than usual during
spin drying
1. Check that the transport supports are removed
2. Check that the machine is standing fair and
square on the floor.
3. Check the shock absorbers.
Water levels
Measurement must be carried out without laundry in machine.
1. Water level rinses approx. 20 litres.
2. Wash level Wool approx. 14.5 litres.
(Wash and rinse levels are the same.)
3. Wash level approx. 11 litres.
1
2
3
The display is lighting when a programme is
selected, but no characters or digits are
shown
No characters or digits are shown on the display
when a locked programme is selected.
To unlock a programme, see Changing settings.
The machine does not pump water out
1. Check the drain system.
2. Check that the pump rotor in the drain pump
moves freely.
3. Adjust or change defective parts.
15
PROBLEMS
PROBLEMS
COMMON QUESTIONS AND PROBLEMS
More information is found under ”Fault tracing”.
The lid will not open
Check that the main power switch is on and that
the indication lamp is on.
The machine will not start
If the lid is closed, check the house fuses.
The machine will not take in water
1. Is the stop cock open?
2. Check that the inlet hose filter is not blocked.
Foam in the last rinse, water remains in the
machine
1. Check that the drain hose is not blocked or
sharply kinked.
2. Check to see if the drain pump is blocked.
Water leaks
Check the hoses and seal at least once a year and
change them if they show signs of wear.
Vibration during spin drying
1. Check that the transport supports have been
removed.
2. The machine must stand firmly on the floor.
Adjust the machine feet and tighten the lock
nuts.
Locknut
Too much foam
1. Use only low-foam detergent.
2. Too much detergent, use only the dose stated
on the detergent packet.
16
The machine stops in the middle of the
program
It is normal for the machine to "pause" during
the program, especially between the different cycles, and during the Wool wash program.
Yellow laundry
Can be caused by body fluids that have not been
entirely washed out.
1. Use the highest possible temperature for this
load of washing. Try putting in more detergent than usual.
Can also be caused by iron or magnesium in the
water.
1. Install a filter.
Grey laundry
1. If the washing is very dirty, has oil stains or
the water is very hard, put in more detergent
than usual.
2. Choose the correct temperature for each washing load.
3. Sort the washing according to its colour. Never mix light and dark materials in the same
load.
4. Use detergent that contains whitener for white
textiles, and detergent without whitener for
coloureds.
Fluff, stains on the laundry
1. Detergent that does not contain phosphates
can, when combined with the minerals in hard
water, build up a substance that can cause
"fluff". If possible, install a water purifier.
2. Stains on laundry can occur if it comes into
contact with undiluted rinsing agent. Put the
rinsing agent dose into the compartment for
rinsing agents. Never add rinsing agent directly
to the washing.
3. Burls normally occur on cotton/polyester
material. For the best results, turn the garment
inside out and use the delicate washing program.
Creased laundry
1. Follow the washing advice.
2. Do not overload the machine.
3. Don not let the washing stay for a long time
in the machine after the program has finished.
PROBLEMS
4. Certain materials such as linen and cotton
crease naturally, regardless of how they are
washed.
Torn or damaged material
Material can be damaged by sharp objects, such
as metal parts on clothes or objects in pockets.
1. Empty all pockets and turn the garment inside out.
2. Close hooks and zips.
3. Turn inside out for washing.
Should I use a rinsing agent?
Yes, use a good quality product.
Should I use whitener?
Extra amounts of whitener are not necessary. Use
a detergent that includes whitener for white washing, and a detergent without whitener for coloureds.
Chemicals
Textiles that have been in contact with chemicals,
such as battery acid, solution for perming hair,
bleach, lavatory cleaner or acne-removing agent,
must be rinsed as quickly as possible to prevent
holes or stains. Do not let unrinsed textiles come
into contact with other material.
Iron-free garments
Wash these in a half-full machine. These garments
should not be mixed in with heavier washing such
jeans or large bath towels.
Fading, discoloration
1. Follow the washing advice.
2. Dark cotton textiles should be washed for the
first time at 60°C to wash out the surplus
colour.
3. Garments should be sorted according to their
colour and material.
4. Empty all pockets.
Stains remaining after washing
1. Protein stains, from milk, eggs or blood,
should first be soaked in cold water.
2. Oil stains are removed by washing in the hottest water the material can take.
Stains should be dealt with as quickly as possible.
The longer a stain remains, the harder it is to
remove.
OTHER COMMON QUESTIONS
Which detergent should I use?
Any low-foam detergent of good quality.
17
COMPONENTS AND MEASUREMENT VALUES
COMPONENTS AND MEASUREMENT VALUES
MOTORS CESET
(On machines manufactured until week 47/2000)
For machines for 50 Hz
Part no:
80 617 73
Resistances:
Pins 1-2 68,7 W
Pins 3-4 1,65 W
Rotor
1,52 W*
Pins 5-7 0,58 W
*) measured diagonally across the commutator.
All resistance values could have the tolerance of
±7%.
For machines for 60 Hz
Part no:
80 617 74
Resistances:
Pins 1-2 68,7 W
Pins 3-4 1,65 W
Rotor
1,52 W*
Pins 5-7 0,58 W
*) measured diagonally across the commutator.
All resistance values could have the tolerance of
±7%.
The motor is a universal motor controlled by an
external motor control unit (MCU).
The rotation speed is stepless and controlled by a
tachogenerator on the motor. The maximum
speed is 1000 rpm.
MOTORS FHP
(On machines manufactured after week 47/2000)
Part no:
80 637 34
Resistances:
Rotor
1,20 W*
Pins 5-6 1,58 W
Pins 6-7 0,87 W
*) measured diagonally across the commutator.
All resistance values could have the tolerance of
±8%.
MOTOR CONTROL
Part no.:
80 613 99
Motor control is via an external unit (MCU) located in the base and connected to the program
control board (PCU), see the electrical schematic
diagram.
18
HEATING ELEMENT
2000 W
Part no.:
Resistance:
80 617 03
27.64 W ±1,45%
1500 W (until week 49/2000)
Part no.:
80 639 42
Resistance:
36,86 W ±1,94%
1000 W (from week 50/2000)
Part no.:
80 617 04
Resistance:
55,29 W ±2,91%
THERMISTOR
Part no.:
80 616 63
Resistance:
40-60 kW
Room temperature 20-30 °C
The thermistor for temperature measurement is
located between the motor cradle and the holder.
The thermistor measures and controls the water
temperature, which can range from 0-90 °C. The
heating element is switched out if the thermistor
short-circuits or is disconnected from the program
control board or programmer.
DRAIN PUMP
50 Hz
Part no.:
80 616 96
NOTE! Ordered as part no. 88 011 66.
Resistance:
144 W
Current:
0.2 A, 23 W on load
60 Hz
Part no.:
80 619 37
NOTE! Ordered as part no. 88 011 67.
Resistance:
76 W
Current:
0.3 A, 28 W on load
The drain pump is combined with an integrated
needle trap, which can be cleaned by the user.
If the drain pump has run for 180 seconds during
emptying, the programme is stopped, reset to zero
and a fault code is indicated on the display.
COMPONENTS AND MEASUREMENT VALUES
OUTLET VALVE
INLET VALVES
50/60 Hz
Part no.:
80 083 65
Current:
0,18 A
Reversible 50 Hz or 60 Hz. The outlet valve is
open when there is no current.
3-way inlet valve
Part no.:
80 617 57
Resistance:
3.7 kW ± 0.5 kW
Current:
0.02 A, 5 W
LEVEL SWITCH
Part no.:
80 617 47
An electromechanical level switch operates at two
levels, see the electrical schematic diagram. It
checks the water level and starts the drain pump
if overfilling is indicated.
LEVEL SENSOR
Part no.:
80 616 64
ASKO Level sensor type 1166.
Voltage:
0.5 V out from the sensor at zero level and 230 V
mains voltage. 0-level is achieved at outlet.
Measurement at control unit under outlet.
The level sensor is located on the electrical component bridge and connected to the PCU, see the
electrical schematic diagram.
RELAY (CONTACTOR)
50 Hz
Part no.:
Resistance:
Current:
73 829 48
2.01 kW
0,01 A, 6 W
60 Hz
Part no.:
Resistance:
Current:
80 603 79
1.505 kW
0.02 A, 7 W
The relay is controlled by the level switch and
opens the connection to the heating element.
RADIO INTERFERENCE FILTER
Filter 1-phase machines 50/60 Hz
Art nr:
80 585 58
Filter 3-phase machines (from week 46/
2000)
Art nr:
80 585 58 - 1 pcs
80 585 59 - 2 pcs
The filter eliminates radio interference generated
by the machine.
Inlet valve for hot water (option)
Part no.:
80 617 29
Resistance:
3.7 kW ± 0.5 kW
Current:
0.02 A, 5 W
There are two inlet valves, one 3-way and one for
hot water connection.
INDICATION LAMP
230 V, 50 Hz
Part no.:
80 531 06 (until week 37/2000)
80 640 69 (from week 38/2000)
240 V, 60 Hz
Part no.:
80 637 57 (until week 5/2001)
80 640 68 (from week 6/2001)
The lamp indicates that the main power switch is
set to on.
DOOR LOCK
Part no.:
80 616 79
Resistance:
122 W
Current:
approx. 2 A
The door lock is mechanical and equipped with a
pull magnet. This function is controlled by the
door opening button and various safety devices.
CONTROL UNIT
Art. nr:
80 639 41
Control units delivered until week 40/2000 has a
pink label.
Control units delivered after week 40/2000 has
a green label.
For more information about the difference, see
service information Group 21 Nr. 165.
DISPLAY UNIT
Art. nr:
80 638 75(ASKO)
Art.nr:
80 637 29 (OEM)
PUSH BUTTON SWITCH
Art. nr:
80 618 75 (2-pole)
FUSE
Art. nr:
80 554 21
19
TEST PROGRAM AND FAULT INDICATIONS
TEST PROGRAM AND FAULT INDICATIONS
TEST PROGRAM
Press P1 5 times within 15 seconds to start test
program level 1.
Press one time on P8 to reach level 2. Press
P8
again to go back to level 1.
Start/Stop
ends the test program.
Level 1
P2
Inlet valve 1 (compartment for Pre-
FAULT INDICATIONS
If a fault occurs during a program cycle, this is
indicated on the display after the program has
finished or been interrupted.
Water inlet fault
Check that the filter in the machine water inlet is
not blocked.
Overfilling
Too much water in the drum due to a fault in the
level sensing system or the inlet valve.
wash)
P3
Inlet valve 2 (compartment for main
wash)
P4
P5
P6
P7
Inlet valve 3 (hot water)
Inlet valve 4 (compartment for rinsing
agent)
Door pull magnet
Heater relay (separate or under control)
Draining fault
Draining has taken too long. Check the drain hose
and the drain pump as follows:
1. Has any object stuck in the drain hose
outlet? Clean out the hose.
2. Is the drain pump blocked by foreign objects?
Clean out the pump.
3. Is the drain hose kinked?
4. After solving the problem, run program 10
(Emptying).
Level 2
P2
Drain pump
P3
Motor, normal operation
P4
Motor, delicate operation
P5
Long spin drying
INTERNAL COUNTER
The electronic control unit contains an internal
counter of the number of washing cycles.
To show the number of washing cycles in the
display:
1. Switch off the power switch,
and connect
a jumper to E14.
2. Switch on the machine again.
3. Press the P8 -button five times.
The counter is shown on the display.
The counter disappear when the jumper is
removed.
20
Thermistor fault
The thermistor is faulty or short-circuited. The
washing program has finished without heating.
Temperature stop fault
Check the fuses and the heating element.
The washing program has finished without heating.
Motor fault
Wiring open-circuit or motor fault has been indicated and the washing program has been interrupted.
Pressure sensor fault
A drop in pressure has been detected in the first
rinse. This could be due to leakage in the level
sensor or in the hose leading to it. The washing
program has been interrupted.
Door lock
Indicated when the circuit control is broken.
Change the the circuit control.
TEST PROGRAM AND FAULT INDICATIONS
0000
Indicated when to big unbalance occured during
spinning, ending in no fulfilled spinning cycle.
WRONG LANGUAGE ON THE DISPLAY
The languages that can be shown on the display
are Danish, German, English, Spanish, French,
Italian, Dutch, Norwegian, Portuguese, Finnish
and Swedish. If the language in the display has
changed, you can go back to the original language like this:
1. Switch off the mains power button,
and
press it again to restart the machine.
2. Press the P8 button five times, then press the
P1 button five times. These 10 button presses must be done within 15 seconds.
3. Within 3 seconds of last pressing the P1 button, use the P6 P7 button to step through to
the language you want.
21
CONSUMPTION VALUES
CONSUMPTION VALUES
The following conditions apply for the consumption values stated below:
Incoming water temperature
cold:15°C.
hot: 60°C.
Heater: 3500W.
Option: cold inlet
PROGRAMME VERSION EURO
Program
Material/
Temperature
Material/Temperatur
Load sixe
Fyllnadsgrad
Water consumption
Vattenförbrukning
(approx.
litres)
(ca liter)
Total
Totalt
(hot+cold water)
(varmt+kallt
vatten)
Energy
Energiförbrukning
approx.
KWh
kWh
(cold /mixat
/mixed inlet)
kallt
intag
Time
Programtid
approx.
min
(ca min)
(cold /mixat
/mixed inlet)
kallt
intag
P1
Bomull, linne 90°C
1/1 (5,0 kg)
80
(3+77)
2,0/1,9
85/80
82/77
P2
Bomull, linne 90°C
1/1 (5,0 kg)
72
(6+66)
1,6/1,5
73/68
70/65
P3
Bomull, linne 60°C
1/1 (5,0 kg)
65
(6+59)
1,1/0,82
59/54
57/52
P4
Bomull, linne 40°C
1/1 (5,0 kg)
65
(0+65)
0,40/0,40
40/40
P5
Polyester/bomull
nylon 40°C
1/2 (2,5 kg)
54
(0+54)
0,35/0,35
25/25
P6
Polyester/bomull
nylon 40°C
1/2 (2,5 kg)
42
(0+42)
0,35/0,35
20/20
P7
Ylle/handtvätt IWS
Superwash 30°C
1/3 (1,7 kg)
76
(0+76)
0,25/0,25
25/25
P8
Centrifugering kort
1/1 (5,0 kg)
----
0,05/---
4/4
22
CONSUMPTION VALUES
The following conditions apply for the consumption values stated below:
Incoming water temperature
cold:15°C.
hot: 60°C.
Heater: 3500W.
Option: cold inlet
PROGRAMME VERSION MOP
Program
Material/Temperature
Load size
Water consumption
(approx. litres)
Total
(hot+cold water)
Energy
approx. kWh
(cold /mixed inlet)
Time
approx. min
(cold /mixed inlet)
P1
Cotton, linen 90°C
1/1 (5,0 kg)
80
(3+77)
2,0/1,9
85/80
82/77
P2
Cotton, linen 60°C
1/1 (5,0 kg)
80
(3+77)
1,6/1,5
59/54
57/52
P3
Cotton, linen 90°C
1/1 (5,0 kg)
72
(6+66)
1,6/1,5
70/65
73/68
P4
Cotton, linen 60°C
1/1 (5,0 kg)
65
(6+59)
1,1/0,82
59/54
57/52
P5
Cotton, linen 40°C
1/1 (5,0 kg)
65
(6+65)
0,40/0,40
40/40
P6
Synthetic 40°C
1/2 (2,5 kg)
54
(0+54)
0,35/0,35
25/25
P7
Wool /handwash 30°C
1/3 (1,7 kg)
76
(0+76)
0,25/0,25
25/25
P8
One rinse, Long spin
1/1 (5,0 kg)
18
(0+18)
0,05/0,05
11/11
23
CONSUMPTION VALUES
The following conditions apply for the consumption values stated below:
Incoming water temperature
cold:15°C.
hot: 60°C.
Heater: 3500W.
Option: cold inlet
PROGRAMME VERSION MEDICAL
Program
Material/Temperature
Load size
Water consumption
(approx. litres)
Total
(hot+cold water)
Energy
approx. kWh
(cold /mixed inlet)
Time
approx. min
(cold /mixed inlet)
P1
Cotton, linen 90°C
1/1 (5,0 kg)
103
(3+100)
2,1/2,0
95/90
92/87
P2
Cotton, linne 90°C
1/1 (5,0 kg)
100
(3+97)
1,9/1,8
88/83
91/86
P3
Cotton, linne 60°C
1/1 (5,0 kg)
65
(6+59)
1,1/0,82
59/54
57/52
P4
Cotton, linne 60°C
1/1 (5,0 kg)
65
(0+65)
0,40/0,40
40/40
P5
Synthetic 40°C
1/2 (2,5 kg)
54
(0+54)
0,35/0,35
25/25
P6
Synthetic 40°C
1/2 (2,5 kg)
42
(0+42)
0,35/0,35
20/20
P7
Wool/handwash 30°C
1/3 (1,7 kg)
76
(0+76)
0,25/0,25
25/25
P8
Long spin
1/1 (5,0 kg)
18
(0+18)
0,05/0,05
11/11
24
CONSUMPTION VALUES
The following conditions apply for the consumption values stated below:
Incoming water temperature
cold:15°C.
hot: 60°C.
Heater: 3500W.
PROGRAMME VERSION US
Program
Material/Temperature
Load size
Water consumption
(approx. litres)
Total
(hot+cold water)
Energy
approx. kWh
(cold /mixed inlet)
Time
approx. min
(cold /mixed inlet)
P1
Cotton, linen 60°C
1/1 (5,0 kg)
73
(6+67)
1,2/1,0
57/52
55/50
P2
Cotton, linen 60°C
1/1 (5,0 kg)
65
(14+51)
1,2/0,4
50/44
48/42
P3
Cotton, linen 40°C
1/1 (5,0 kg)
65
(0+65)
0,40/0,40
38/38
P4
Cotton, linen 40°C
1/1 (5,0 kg)
54
(0+54)
0,35/0,35
26/26
P5
Synthetic, no heating
1/2 (2,5 kg)
48
(0+48)
0,05/0,05
20/20
P6
Synthetic 30°C
1/2 (2,5 kg)
54
(0+54)
0,35/0,35
23/23
P7
Wool/handwash 30°C
1/3 (1,7 kg)
76
(0+76)
0,25/0,25
25/25
P8
One rinse, long spin
1/1 (5,0 kg)
18
(0+18)
0,05/0,05
11/11
25
TOOLS
TOOLS
LIST OF TOOLS
"Torx" spanners:
• T25
• T20
• T10
U-ring spanners
• 11/16"
• 16 mm
• 13 mm
• 10 mm
Socket screwdriver
• 10 mm
24 mm extended socket + locking handle
5 mm socket head cap screwdriver + small
locking handle
Star socket head screwdriver
Flat screwdriver 6.5-7 mm
26
TOOLS
APPLICATION AREAS
Top lid:
• torx T20
Panel
• torx T20
• 6.5-7 mm wide blade screwdriver
Front panel
• torx T20
Detergent compartment
• torx T20
Washing lid removing/installing
• torx T25
Changing lid seal/glass
• torx T25
• torx T20
• U-ring spanner 10 mm
Cover plate
• torx T20
• U-ring spanner 10 mm
Lock
• torx T20
• U-ring spanner 10 mm
Front end plate and inner cover plate
• torx T20
• U-ring spanner 10 mm
Outlet valve
• torx T20
• torx T25
Change of complete holder
• torx T25
• torx T20
• 24 mm extended socket + locking handle
• 6.5-7 mm wide blade screwdriver
• U-ring spanner 16 mm
• U-ring spanner 13 mm
• Socket screwdriver 10 mm
• 5 mm socket head cap screwdriver + small
locking handle
• special tool (Part no. 88 011 52)
• special tool (Part no. 88 011 53)
Electrical component bridge piece
• torx T20
Cross member
• torx T20
• U-ring spanner 11/16"
• U-ring spanner 13 mm
Side panel
• torx T20
Bottom
• torx T25
• torx T20
• 24 mm extended socket + locking handle
• 6.5-7 mm wide blade screwdriver
• U-ring spanner 16 mm
• U-ring spanner 13 mm
• Socket screwdriver 10 mm
• 5 mm socket head cap screwdriver + small
Drum
• torx T25
• torx T20
• U-ring spanner 16 mm
• U-ring spanner 10 mm
• special tool (Part no. 88 011 52)
• special tool (Part no. 88 011 53)
Drain pump
• torx T20
• Star socket head screwdriver
27
SPECIAL TOOLS
SPECIAL TOOLS
DRUM INSTALLATION
Part no.: 88 011 52
This tool is used for centring and is fastened to
the drum edge when removing and installing the
front end plate.
The hook is fitted between the holder and the
bottom to facilitate removal and installation of
the front end plate.
INSTALLATION OF THE BEARING AND THE VRING CASSETTE
Part no.: 88 011 53
Installing the bearing
The inner bearing is fitted to the tool, which is
then put into the bearing housing.
The bolt is then loaded with the outer bearing,
washer and nut, which are put on to the bolt behind the bearing housing.
Installation of the v-ring cassette
The tool is first put into the bearing housing from
the rear of the machine. Then the white side of
the v-ring cassette is placed facing the flat side of
the washer, and they are put on the tool, inside
the holder. The v-ring cassette is then forced into
place by putting the nut on to the bolt and tightening it.
28
SERVICE
SERVICE
TOP COVER
1
Removing the top cover
1. Remove the 3 screws at the rear of the top
cover.
2. Tilt the cover and pull it backwards.
Installing the top cover
1. Ensure that the sealing strip is positioned along
the edge of the top cover.
2. Push the front edge of the top cover under
the panel and lower the cover.
1
3
IMPORTANT
Ensure the top cover is located by the guides.
3. Secure the top cover with the 3 screws at the
rear.
Changing the top cover guides
1. Remove the top cover.
2. Squeeze the latches together and push the guide upwards.
3. Push the new guide into place.
4. Secure the top cover.
29
SERVICE
DETERGENT INSERT
1
Changing the detergent insert handle
1. Pull forward and lift out the detergent insert.
NOTE
The detergent insert may have a child safety catch
fitted. To pull out the detergent insert when the
safety catch is set, you have to move the latch to
the left at the same time as you pull out the tray.
2. Remove the 2 snap fasteners from the underside of the insert with the aid of a screwdriver.
3. Pull the handle away from the detergent insert.
4. Insert the new handle into the groove in the
insert. Press it in until it snaps into place.
5. Put the detergent insert back in.
2
30
SERVICE
PANEL
4
Removing the panel
1. Remove the top cover by first removing the 3
screws along the rear edge and then lifting it
off.
2. Pull forward and lift out the detergent insert.
3. Remove the 2 screws for the detergent
compartment in the panel and 1 above the
compartment. Move the detergent compartment to one side.
4. Remove the 4 fasteners behind the panel by
bending the clips open with a broad-bladed
screwdriver (6.5 to 7 mm) and lifting off the
panel.
3
IMPORTANT
Be careful not to break the fasteners.
3
Installing the panel
5. Offer up the panel at the top edge and press it
into place at the bottom edge.
IMPORTANT
Don’t forget to put the indicator lamp back.
2
NOTE
Press with a screwdriver behind the beam when
the middle of the panel is being pressed into place.
6. Install the detergent compartment and secure
the 3 screws.
7. Put in the detergent insert.
8. Fit the top cover.
31
SERVICE
Changing the indication lamp/symbol lens
1. Remove the panel in accordance with the section ”Panel - removing...”.
2. Change the indication lamp/symbol lens.
3. Install the panel in accordance with the section ”Panel - installing...”.
2
Changing the main power button
1. Remove the panel in accordance with the section ”Panel - removing...”.
2. Press in the latches with a screwdriver and pull
out the button.
3. Install the new button.
IMPORTANT
Ensure that the spring is located in the button
before installing.
4. Install the panel in accordance with the section ”Panel - installing...”.
32
2
SERVICE
Changing the push-button switches
1. Remove the panel in accordance with the section ”Panel - removing...”.
2. Get hold of the switch inside the machine and
pull on it, while at the same time bending the
wings at the front of the switch inwards with
a screwdriver.
2
IMPORTANT
Don’t pull on the wires. The button might come
apart.
3. Press in the new push-button and check that
the wings open out.
2
IMPORTANT
Connect the wires to the correct connector pins.
4. Install the panel in accordance with the section ”Panel - Installing...”.
33
SERVICE
Changing the DCU panel board and pushbuttons
WARNING
An earthed EMC wristband must be worn at all
times when working with electronic components
to prevent damage to them.
1. Remove the three screws at the rear edge and
lift off the top cover.
2. Remove the panel in accordance with the section ”Panel - Removing...”.
3. Remove the panel board from the snap fasteners with the aid of a screwdriver.
4. Lift it out the panel board and the button
sheet with the push buttons.
5. Install the push-buttons and the panel board.
IMPORTANT
Take care when installing the push-buttons to get
them in the correct locations.
6. Install the panel in accordance with the section ”Panel - installing...”.
7. Fit the top cover.
34
3
4
SERVICE
REAR PANEL
Removing the rear panel
1. Remove the 12 screws around the rear panel.
2. Lift off the rear panel.
Installing the rear panel
3. Offer up the rear panel. Use the 2 hooks on
the upper edge to assist.
4. Refit the 12 screws.
1
35
SERVICE
MOTOR
Changing the drive belt
1. Remove the rear panel by first removing the
12 screws around it and then lifting it off.
2. Take off the drive belt by lifting it off one
side of the pulley and turning the pulley.
3. Install a new drive belt in the reverse order.
Start by putting the belt under the motor pulley.
IMPORTANT
3
Take care that the drive belt lies centred on the
top edge of the pulley. Turn the pulley to check
this.
2
4. Install the rear panel by hanging it on the 2
hooks on the top edge and then securing its
edges with the 12 screws.
Changing the motor
1. Remove the rear panel by first removing the
12 screws around it and then lifting it off.
2. Take off the drive belt by lifting it off one
side of the pulley and turning the pulley.
3. Remove the terminal block from the motor.
4. Mark the locations of the nuts on the motor
fixture.
5. Remove the nuts from the motor suspension
bolts.
6. Hold the motor and pull out the bolts.
7. Take out the motor.
8. Move the distance piece to the new motor.
9. Offer up the motor and insert the motor suspension bolts.
10. Tighten the nuts.
11. Fit the terminal block.
12. Install a new drive belt in the reverse order.
Start by putting the belt under the motor pulley.
13. Install the rear panel by hanging it on the 2
hooks on the top edge and then securing its
edges with the 12 screws.
2
5
3
4,5
36
SERVICE
Changing the motor control board
1. Remove the rear panel by first removing the
12 screws around it and then lifting it off.
2. Remove the securing screw for the motor control board holder and lift it out.
3. Cut the cabletie and remove the terminal
block.
4. Remove the motor control board by pressing
in the 2 plastic clips that secure the board.
5. Remove the other terminal block and change
the board.
6. Connect the wiring and the 2 terminal blocks.
7. Offer up the board to the holder and press it
into place.
8. Refit the holder and secure it with the screw.
9. Secure the cable clamp.
10. Fit the rear panel.
2
3
3
37
SERVICE
FRONT PANEL
Removing the front panel
1. Pull forward and lift out the detergent insert.
2. Open the drain pump cover. Use the partition from the detergent insert or a screwdriver.
3. Disconnect the drain hose.
1
5
IMPORTANT
Take care not to break off the drain plug.
NOTE
There may be water left in the machine, that will
run out through the drain hose.
4. Unscrew the emergency opening handle.
5. Remove the lower right hand screw from the
panel, and the 2 screws beneath.
6. Remove the panel by moving its lower edge
outwards and then pulling it down.
Installing the front panel
7. Transfer the securing clips from the side panels to the front panel.
8. Press the panel into place.
9. Secure the panel with screws at the detergent
compartment and on the lower edge.
IMPORTANT
Don’t forget the 2 star washers for the screws at
the lower edge.
5
3
10. Screw back the emergency opening handle and
reconnect the drain hose.
11. Refit the detergent insert.
4
38
SERVICE
Changing the plastic lockings on the front
panel
1. Remove the front panel in accordance with
the section ”Front panel - Removing...”.
2. Remove the control unit by squeezing the latches and pulling it out.
3. Push the new control unit in until it latches
into place.
4. Refit the front panel in accordance with the
section ”Front panel - Installing...”.
Changing the front panel securing clips
1. Remove the front panel in accordance with
the section ”Front panel - Removing...”.
2. Remove the securing clips by by squeezing the
latches and pulling it out.
3. Install new clips by inserting them into the
holes in the front panel and pushing them
down.
4. Install the front panel in accordance with the
section ”Front panel - Installing...”.
39
SERVICE
DETERGENT COMPARTMENT
Removing the detergent compartment
1. Remove the top cover by first removing the 3
screws at the rear edge and then lifting the cover
off.
2. Pull forward and lift out the detergent
compartment.
3. Remove the 2 uppermost screws from the
panel and the screw on the upper side.
4. Remove the hose clip and detach the corrugated hose from the detergent compartment.
5. Detach the wires from the underside of the
compartment by cutting the cable tie.
6. Detach the inlet hoses by cutting the cable tie.
Detach the air hose by releasing the hose clip.
Installing the detergent compartment
7. Secure the wiring under the detergent
compartment with a cable tie.
NOTE
The wires must not be pulled tight.
8. Put a hose clip on to the corrugated hose.
9. Put one hand into the detergent compartment
and take hold of the corrugated hose. Lift the
hose with your fingers.
NOTE
Soapy water can be used to facilitate connection
of the corrugated hose to the detergent compartment.
10. Tighten the hose clip.
11. Secure the 3 inlet hoses with cable ties and
the air hose with a hose clip.
12. Secure the compartment with the 3 screws.
13. Refit the detergent insert.
14. Fit the top cover.
40
5
4
3
3
6
SERVICE
Changing the detergent compartment corrugated hose
1. Carry out steps 1 to 4 under the heading ”Detergent compartment - Removing...” above.
2. Unhook the door lock protection from the
hose.
3. Remove the hose from the drum holder.
4. Install the new hose on the drum holder.
2
3
IMPORTANT
It is important for the corrugated hose to be installed with the hose marking facing the drum
holder marking.
5. Hook the door lock protection on to the hose.
6. Remove a wash ridge by inserting a screwdriver (or similar thin tool) into the centre ridge
hole and angling it carefully to the left.
7. Pull the ridge towards the drum opening and
lift it up.
8. Check that the corrugated hose is fitted correctly.
9. Place the ridge in the securing hole with the F
marking facing the drum opening. Push the
ridge inwards until is secured in place.
10. Carry out steps 8 to 11 under the heading ”Detergent compartment - Installing...” above.
4
6
9
41
SERVICE
WASHING LID
Removing the washing lid
1. Open the washing lid either by pressing the
lid opening button or with the emergency
opening handle behind the drain pump cover.
2. Remove the 2 screws securing the lid and take
it off.
2
Installing the washing lid
3. Hook on the lid.
4. Secure the lid with the 2 screws.
Changing the lid seal/glass
1. Open the washing lid either by pressing the
lid opening button or with the emergency
opening handle behind the drain pump cover.
2. Remove the 2 screws securing the lid and take
it off.
3. Remove the four screws around the glass.
4. Take off the frame by inserting a screwdriver
into the opening of the underside of the lid
and turning it.
5. Remove the glass.
6. Changing the seal: Pull off the seal and press a
new one on.
7. Install 2 of the fixings.
8. Slide the glass in under the fixings.
9. Install the other 2 fixings. Partly tighten the
screws.
10. Install the frame, starting at the rear edge, and
press it in.
11. Finally tighten the 4 screws fully.
12. Install the washing lid.
2
4
3
6
7
42
SERVICE
Changing the lid catch
1. Open the washing lid either by pressing the
lid opening button or with the emergency
opening handle behind the drain pump cover.
2. Remove the 2 screws securing the lid and take
it off.
3. Remove the four screws around the glass.
4. Take off the frame by inserting a screwdriver
into the opening at the side and turning it.
5. Pull the catch straight out.
6. Push in the new catch.
7. Install the frame, starting at the rear edge, and
press it in.
8. Install the washing lid.
2
5
4
3
43
SERVICE
Changing the emergency opener
1. Open the washing lid either by pressing the
lid opening button or with the emergency
opening handle behind the drain pump cover.
2. Remove the 2 screws securing the lid and take
it off.
3. Remove the cover plate in accordance with
the section ”Cover plate - Removing...”.
4. Remove the protection.
5. Detach the emergency opening cord from the
lock.
6. Take out the handle from the pump housing
and detach the cord from its eye.
7. Make a loop in the new cord and secure it to
the lock.
8. Hook the cord on the eye in the pump housing and secure the handle.
IMPORTANT
Ensure that cord is free from any obstructions all
the way from the catch to the pump housing,
and that it is free through the eye in the pump
housing.
9. Install the cover plate in accordance with the
section ”Cover plate - Removing...”.
10. Install the washing lid.
44
7
5
3
2
SERVICE
COVER PLATE
Removing the cover plate
1. Open the washing lid either by pressing the
lid opening button or with the emergency
opening handle behind the drain pump cover.
2. Remove the 2 screws securing the lid and take
it off.
3. Unhook the 4 springs and the lid catch screw.
4. Lift off the cover plate.
Installing the cover plate
5. Offer up the plate and secure it with the screw
at the lid catch.
6. Hook on the 4 springs.
7. Hook on the lid and secure it with the 2
screws.
2
3
3
3
45
SERVICE
CATCH
7
5
Removing the catch
1. Remove the cover plate in accordance with
the section ”Cover plate - Removing...”
2. Release the protection.
3. Disconnect the wires from the catch.
4. Remove the lid catch screws.
5. Pull out the catch.
6. Remove the emergency opening cord.
Installing the catch
7. Make a loop in the emergency opening cord
and hang it on the hook. Pull the loop.
8. Put the latch back and secure it.
9. Reconnect the wiring to the latch.
10. Refit the protection.
IMPORTANT
Make sure the emergency opening cord does not
get trapped between the protection and the holder.
11. Refit the cover plate in accordance with the
section ”Cover plate - Installing...”.
46
6
3
4
SERVICE
FRONT END PLATE AND INNER COVER PLATE
Removing the front end plate and inner
cover plate
1. Remove the protection and catch in accordance with the section ”Catch - Removing...”.
2. Fit the special centring tool (part no. 88 011
52).
3. Unhook the rear balancing spring from the
top side of the holder.
4. Install the hook at the bottom, between the
cradle and the bottom panel. First put the
small hook in the cradle and then push the
holder down to hook the other end in the
bottom.
5. Undo the tensioning ring and remove it.
3
9
IMPORTANT
Do not lever the tensioning ring off. Undo one
end and turn it round the holder to remove it.
2
6. Lift off the front end plate.
NOTE
If the end plate is stuck, a screwdriver can be used
to lever the front end plate away from the inner
cover plate.
5
7. Remove the special tool.
8. Remove the inner cover plate.
NOTE
4
If the inner cover plate is stuck, a screwdriver can
be used to lever it away from the drum holder.
Take care not to damage the rubber strip.
Installing the front end plate and inner cover
plate
9. Start by installing the inner cover plate and
special tool (part no. 88 011 52).
IMPORTANT
It is important for the cover plate to be positioned with the marking UP in line with the centre
bulge on the holder.
47
SERVICE
10. Install the front end plate and tension the special tool’s two lower parts to it.
IMPORTANT
It is important for the front plate to be located in
the groove in the holder panel.
10
NOTE
Use the special tool’s upper fixing to hang the
end plate on.
11
11. Install the tensioning ring by turning it to the
right place and then securing the screw.
IMPORTANT
Be sure that the tensioning ring is properly located over the edges of the end plate.
12. Tighten the screw fully.
13. Use a rubber mallet to knock the tensioning
ring into place on the upper edge and sides.
Also move it to the edge of the end plate with
pliers.
14. Tightly secure the tensioning ring.
15. Remove the lower hook.
16. Hook the balancing spring to the top side of
the holder.
17. Remove the special tool.
18. Refit the protection and catch in accordance
with the section ”Catch - Installing...”.
48
10
SERVICE
DRUM
Removing the drum
1. Remove the end plate and inner cover plate at
the front in accordance with the section ”Front
end plate holder... - Removing...”.
2. Remove the rear panel by first removing the
12 screws around it and then lifting it off.
3. Take off the drive belt by lifting it off one
side of the pulley and turning the pulley.
4. Remove the pulley screw and remove the pulley and the wavy washer.
5. Pull out the drum.
3
4
Installing the drum
6. Install an O-ring on the drum shaft
7. Install the drum.
8. Install the wavy washer on the drum shaft.
WARNING
A missing wavy washer can lead to leakage, drum
shaft failure and bearing failure.
9. Install the pulley and tighten the screw.
10. Install the drive belt in the reverse order. Start
by putting the belt under the motor pulley.
5
6
IMPORTANT
Take care that the drive belt lies centred on the
top edge of the pulley. Turn the pulley to check
this.
11. Install the rear panel by hanging it on the 2
hooks on the top edge and then securing its
edges with the 12 screws.
12. Refit the end plate and inner cover plate in
accordance with the section ”Front end plate... - Installing”.
49
SERVICE
Changing the wash ridge
1. Insert a screwdriver (or similar thin tool) into
the centre ridge hole and angle it carefully to
the left.
2. Pull the ridge towards the drum opening.
3. Lift up the ridge.
4. Place the new ridge in the securing hole with
the F marking facing the drum opening.
5. Push the ridge inwards until is secured in place.
1
4
50
SERVICE
DRAIN PUMP
Removing drain pump and pump housing
1. Remove the front panel in accordance with
the section ”Front panel - Removing...”.
2. Remove the pump and pump housing from
the rubber fixings in the bottom plate.
3. Release the 3 hose clips and remove the hoses.
Also remove the hose clip for the drain hose
and remove this.
4. Disconnect the terminal block.
5. Detach the emergency opening cord.
3
2
Installing the drain pump and pump housing
6. Secure the emergency opening cord.
IMPORTANT
3
It is important for the emergency opening cord
to be securely fastened to the pump housing and
that the cord is free from obstructions.
7. Secure the terminal block.
8. Connect the 3 hoses and secure them with
hose clips. Also connect the drain hose and
secure it with a hose clip.
9. Secure the pump housing to the fixings on
the bottom plate.
10. Install the front panel in accordance with the
section ”Front panel - Installing...”.
51
SERVICE
Changing the drain pump rubber ring
1. Open the drain pump cover. Use the partition from the detergent compartment or a
screwdriver.
2. Disconnect the drain hose.
2
IMPORTANT
Take care not to break off the drain plug.
NOTE
There may be water left in the machine, that will
run out through the drain hose.
3. Remove the screw to detach the emergency
opening handle.
4. Pull the rubber ring from the pump housing.
5. Put the new ring on to the pump housing.
IMPORTANT
The tab on the ring must be upwards and in line
with the tab on the pump housing.
6. Secure the emergency opening handle with the
screw and refit the drain hose.
7. Close the cover.
52
4
3
SERVICE
COMPLETE HOLDER ASSEMBLY
7
Changing the complete holder assembly
(holder, cradle and rear end plate)
1. Remove the detergent compartment in accordance with the section "Detergent compartment - Removal...".
2. Remove the electrical component bridge piece in accordance with the section "Electrical
component bridge piece - Removal...".
3. Remove the drum in accordance with the section "Drum - Removal...".
4. Remove the motor in accordance with steps
3 to 7 in the section "Motor - Changing motor".
IMPORTANT
The motor can stay in place while dismantling
the holder. Remember to put the holder down
gently to prevent the motor being damaged.
5.
6.
7.
8.
Remove all the necessary hoses and wiring.
Remove the holder and cradle.
Lift the holder straight up.
Transfer the piston rods and rubber dampers
to the shock absorbers.
9. Lower the new holder into the machine and
the piston rods and rubber dampers to the
shock absorbers.
NOTE
Soapy water can be used to make it easier to fit
the rubber dampers.
10. Refit the hoses and wiring.
11. Install the motor in accordance with steps 8
to 11 in the section "Motor - Changing motor".
12. Install the drum in accordance with the section "Drum - Install...".
13. Install the electrical component bridge piece
in accordance with the section "Electrical component bridge piece - Install...".
14. Install the detergent compartment in accordance with the section "Detergent compartment - Install...".
53
SERVICE
Changing the bearing
1. Remove the drum in accordance with the section ”Drum - Removing...”.
2. Remove the v-ring cassette with a screwdriver.
3. Knock out both bearings.
2,3
NOTE
Discard the bearings after removal.
4. Place the inner bearing on the inner part of
the special tool (part no. 88 011 53) and put
it inside the holder.
IMPORTANT
Position the special tool support between the heating element loops.
5. Put the outer part of the tool at the rear of
the bearing housing.
6. Tighten the nut.
7. Insert the bearing into place with the special
tool.
8. Remove the nut and remove the outer part of
the special tool.
9. Place the outer bearing on the outer part of
the special tool.
10. Place the outer part of the special tool at the
rear of the bearing housing.
11. Tighten the nut.
12. Insert the bearing into place with the special
tool.
13. Remove the nut and remove the special tool.
14. Install the drum in accordance with the section ”Drum - Installing...”.
54
11,12
SERVICE
Changing the v-ring cassette
1. Remove the drum in accordance with the section ”Drum - Remove...”.
2. Remove the v-ring cassette with a screwdriver.
3 Put the tool into the bearing housing from
the rear of the machine.
4 Put the new v-ring cassette on to the special
tool, inside the holder with its white side faces outwards. Then put the washer on the tool
with the flat side facing the cassette.
5 Fit the nut and force the v-ring cassette into
place by tightening the nut.
2
3
IMPORTANT
The v-ring cassette must be properly pressed in,
to prevent leakage or v-ring squeaking.
6. Remove the nut and remove the special tool.
7. Install the drum in accordance with the section "Drum - Installing...".
5
55
SERVICE
Changing the heating element
1. Remove the rear panel by first removing the
12 screws around it and then lifting it off.
2. Disconnect the wiring and unscrew the nut as
far as possible.
3. Tap the screw so that the seal on the inside is
separated from its flat washer.
4. Let the seal shrink and then pull out the element.
5. Install the element by pushing it in as far as
possible.
6. Tighten the nut and connect the wiring.
7. Install the rear panel.
2
OBS
Check if the heating element is in the element
holder when it is installed. See page 56.
Check by removing the drum paddle.
Changing the thermistor
1. Remove the 3 screws at the rear edge of the
top lid and lift off the lid.
2. Remove the 12 screws around the rear piece
and lift it off.
3. Pull the thermistor out to the left to remove
it.
4. Remove the thermistor header connector from
the program control board.
5. Install the new thermistor by threading it through the hole between the cradle and holder.
6. Connect the thermistor to the program control board.
7. Refit the rear piece and top lid.
56
3
SERVICE
Changing the tensioning ring
1. Remove the cover plate in accordance with
the section "Cover plate - Removing...".
2. Install the special tool (part no. 88 011 52).
2
IMPORTANT
Fasten the special tool's 3 fixings in the drum end.
3. Slacken the tensioning ring and remove it.
IMPORTANT
Do not lever the tensioning ring off. Undo one
end and turn it round the holder to remove it.
4. Install the new tensioning ring by turning it
to the right place and then securing the screw.
5. Tighten the screw fully. Use a rubber mallet
to knock the tensioning ring into place on the
upper edge. Also move it to the edge of the
end plate with pliers.
6. Tighten the tensioning ring more.
7. Remove the special tool.
8. Refit the cover plate in accordance with the
section "Cover plate - Installing...".
2
3
2
57
SERVICE
Changing the balancing spring
1. Remove the top cover by first removing the 3
screws at the rear edge and then lifting the cover
off.
2. Use pliers to unhook the balancing spring from
the holder.
3. Front spring: Unhook the spring from the
front rail.
Rear spring: Unhook the spring from the cross
member.
4. Install a new spring by first hooking it to the
member and then to the holder.
5. Fit the top cover.
58
3
2
SERVICE
ELECTRICAL COMPONENT BRIDGE PIECE
3
Removing the electrical component bridge
piece
1. Remove the top cover by first removing the 3
screws at the rear edge and then lifting the cover
off.
2. Remove the panel in accordance with the section "Panel - Removing...".
3. Remove the 2 screws at the rear from the cross
member.
4. Remove the 2 screws in the front rail.
5. Remove the wiring as necessary.
6. Lift out the bridge piece.
Installing the electrical component bridge
piece
7. Lay the bridge piece in place.
8. Secure the 2 screws to the cross member and
the 2 to the front rail.
9. Reconnect the wiring.
IMPORTANT
Ensure that the wiring is correctly connected.
2
10. Install the panel in accordance with the section "Panel - Installing...".
11. Fit the top cover.
4
59
SERVICE
Changing the level switch
1. Remove the top cover by first removing the 3
screws at the rear edge and then lifting the cover
off.
2. Squeeze the level switch securing clips, if necessary with pliers, and remove it from the
bridge piece.
3. Remove the wiring and connector pins.
4. Remove the rubber hose from the underside.
5. Put the rubber hose on to the new level switch.
6. Connect the wiring and connector pins.
7. Insert and push the level switch to secure it
on the bridge piece.
8. Fit the top cover.
Changing the level sensor
1. Remove the top cover by first removing the 3
screws at the rear edge and then lifting the cover
off.
2. Squeeze the level sensor securing clips, if necessary with pliers, and remove it from the
bridge piece.
3. Remove the connector pins.
4. Remove the rubber hose from the underside.
5. Put the rubber hose on to the new level sensor.
6. Reconnect the terminal block.
7. Insert and push the level sensor to secure it on
the bridge piece.
8. Fit the top cover.
60
2
2
SERVICE
Changing the PCU program control board and
its holder
2
WARNING
An earthed EMC wristband must be worn at all
times when working with electronic components
to prevent damage to them.
3
1. Remove the top cover by first removing the 3
screws at the rear edge and then lifting the cover
off.
2. Remove the board by pressing in the 2 plastic
clips.
3. Remove the terminal block.
4. Lift up the program control board.
5. Remove the 2 plastic catches on the underside of the bridge piece and lift up the holder.
6. Install the holder by pushing it in until the
catches clip on to the plate..
7. IMPORTANT! Make sure that the new
board has the same jumper settings as the
old board. When doubt, see circuit diagram
enclosed with the machine or in this manual.
8. Offer up the new board and press it into place.
9. Connect the wiring and terminal block.
10. Fit the top cover.
61
SERVICE
CROSS MEMBER
Changing the input terminal block
1. Remove the top cover by first removing the 3
screws at the rear edge and then lifting the cover
off.
2. Remove the earthing screw.
3. Disconnect all the wiring.
4. Press the latches in with a screwdriver and pull
out the input terminal block.
4
NOTE
Make sure that the wires are connected correctly
when changing the input terminal block and the
connection cables.
5. Install the new input terminal block, the latches must clip on to the edge of the plate.
6. Install the wiring in accordance with the electrical schematic diagram.
7. Secure the earthing screw.
IMPORTANT
Don't forget to put the earthing screw back.
2
8. Fit the top cover.
62
SERVICE
Changing the fuse
1. Remove the fuse holder insert with a screwdriver (1/4 turn).
2. Change the fuse.
IMPORTANT
The fuse must be of 250V and 6.3 Ampere type.
3. Fit the fuse holder insert with the fuse into
the fuse holder.
Changing the fuse holder/insert
1. Remove the three screws at the rear edge and
lift off the top cover.
2. Remove the wiring that goes to the fuse holder.
3. Remove the fuse holder insert with a screwdriver (1/4 turn).
4. Unscrew the fuse holder.
5. Fit the new fuse holder.
6. Connect the wiring.
7. Install the fuse holder and its insert.
8. Fit the top cover.
2
63
SERVICE
Changing the radio interference filter
1. Remove the top cover by first removing the 3
screws at the rear edge and then lifting the cover
off.
2. Disconnect the wiring from the radio interference filter.
3. Unscrew the nut securing the filter and take it
out.
4. Install the new radio interference filter.
5. Install the wiring in accordance with the labels on the wires.
2
IMPORTANT
Connect the wires to the correct flat pin connectors.
6. Fit the top cover.
F3
F2
64
F4
F1
SERVICE
Changing the cable stand
1. Remove the top cover by first removing the 3
screws at the rear edge and then lifting the cover
off.
2. Remove the wiring.
3. Route the new wiring and secure it.
2
IMPORTANT
Make sure that the wires are connected correctly.
4. Fit the top cover.
Changing the inlet valve
1. Remove the top cover by first removing the 3
screws at the rear edge and then lifting the cover
off.
2. Disconnect the water supply connection from
the inlet valve.
3. Remove the 2 screws under the cross member
and lift up the valve.
4. Remove the hoses and wiring.
5. Install the wiring in accordance with the electrical schematic diagram and secure the hoses.
6. Install the inlet valve in the cross member and
secure it with the 2 screws.
3
2
IMPORTANT
The wiring to the lid catch must run between the
inlet valve and the cross member.
4
7. Install the water supply connection.
8. Fit the top cover.
65
SERVICE
SIDE PANELS
Changing the side panels
1. Remove the rear panel by first removing the
12 screws around it and then lifting it off.
2. Remove the front panel in accordance with
the section "Front panel - Removing...".
3. Remove the panel in accordance with the section "Panel - Removing...".
4. Using a narrow chisel, cut off the rivet heads
(7) and break those on the front rail off with
a screwdriver (2).
5. Lift away the side panel.
6. File or grind smooth the places where the rivets were in the bottom and use a polygrip to
flatten the front rail.
4
4
WARNING
The edges of the bottom and the front rail where
the rivets were placed must be completely flat and
smooth.
7. Install 3 clips at the bottom of the side panels.
8. Lift the side panel into place.
9. Secure the cross member, transport beam and
the front rail to the side panels.
10. Secure the side panels to the new bottom.
11.Install the front panel in accordance with the
section "Front panel - Installing...".
12. Install the rear panel.
13. Install the panel in accordance with the section "Panel -Installing...".
66
7
SERVICE
BOTTOM
Change of bottom
1. Remove the holder complete in accordance
with the section ”Holder complete - Changing holder complete” point 1-7.
2. Dismantle the shock absorbers in accordance
with steps 2 to 6 in the section "Bottom Changing the shock absorbers".
3. Dismantle the motor control board in accordance with steps 2 to 5 in the section "Motor
- Changing motor control board".
4. Cut off the rivets between the bottom and
side panels.
5. Remove the two screws which secure the lower cover or the front plate in the bottom.
6. Lift the side panels with the front plate etc.
7. Install 6 clips on the side panel bottom edges.
8. Secure the side panels to the new bottom.
9. Install the motor control board in accordance
with steps 6 to 9 in the section "Motor Changing the motor control board".
10. Install the shock absorbers in accordance with
steps 7 to 9 in the section "Bottom - Changing the shock absorbers".
11. Install the holder complete in accordance with
the section ”Holder complete - Changing holder complete” point 9-14.
4
7
67
SERVICE
Changing the shock absorbers
1. Front shock absorbers: Remove the front panel in accordance with the section "Front panel - Removing..." or else the bottom cover
in accordance with the section "Bottom cover - Removing...".
Rear shock absorbers: Remove the rear panel by first removing the 12 screws around it
and then lifting it off.
2. Remove the shock absorber nuts under the
bottom plate.
3. Support the holder from underneath or secure it with a hook from above.
4. Compress the shock absorber. Angle it outwards and pull it off downwards.
5. Take off the piston rods.
6. Remove the rubber bushes.
7. Install new rubber bushes, piston rods and
shock absorbers.
8. Compress the shock absorber and put it into
position in the bottom plate.
9. Fit the nut on the underside and tighten it.
10. Front shock absorbers: Install the front panel in accordance with the section "Front panel - Installing..." or else the bottom cover in
accordance with the section "Bottom cover Installing...".
Install the rear panel by hanging it on the 2
hooks on the top edge and then securing its
edges with the 12 screws.
4
Left side
Red text
Right side
Black text
Bottom
Front
68
SERVICE
Changing pressure chamber
1. Remove the front panel in accordance with
the section "Front panel - Removing...".
2. Remove the hose clip securing the pressure
chamber to the corrugated hose and remove
the chamber.
3. Remove the rubber hose that leads to the level switch and level sensor.
4. Twist the pressure chamber 1/4 turn and take
it out of the bracket.
5. Secure the new chamber by inserting it into
the bracket and twisting it 1/4 turn.
6. Join the rubber hose and the corrugated hose
together with a hose clip. Tighten the hose
clip.
7. Install the front panel in accordance with the
section "Front panel - Installing...".
2
3
4
69
SERVICE
FRONT RAIL
Changing the front rail
1. Remove the panel in accordance with the section "Panel - removing...".
2. Remove the rivets with a screwdriver and flatten with a polygrip.
3. Secure the new front rail.
4. Install the panel in accordance with the section "Panel - installation...".
70
WASHING GUIDE
LAUNDRY
First sort the laundry into whites,
light colours and dark colours.
Empty pockets and fasten zips.
1
Read the care labels on the garments and divide up the
different piles according to the wash temperature on the
care labels.
Note! Underwired bras must be placed in a laundry bag.
LOAD MACHINE
1
2
3
4
5
6
7
8
NOTE! If you do not press a button within 3 minutes the
display will be switched off. It will light up again when you
press a button.
Press the power switch. The display will
light up.
2
Press the key button to open the door.
The door will open after 3 seconds.
Weight of load
(5.0 kg)
(5.0 kg)
(2.5 kg)
(1.7 kg)
Put the laundry in the drum and close
the door.
Program
Heavy wash
Normal wash
Synthetic and Super quick wash
Wool/hand wash
WHAT THE DISPLAY SHOWS
Program information
When you press P1 to P8 this field shows which
program is selected. While the program is running it
shows how far the cycle has progressed.
Door open
Shows that you
have opened the
door.
Start
Program has started.
Stop
Program is complete or
has been interrupted.
Reduce the dose if you are washing a small load.
Spin speed
for current program.
Pre-wash
Conditioner
Program time
for current program.
When you start a program it begins a countdown. The time display
switches between hours
(e.g. 1h) and minutes
(e.g. 22).
Wash temperature
for current program.
Main wash
1
1
2
2
3
3
4
4
5
5
6
6
7
7
8
8
EURO
ERROR MESSAGES
0000 flashing at the top right: open the
door, redistribute the load and run program 8.
Other messages:
- Write down the error message that is
displayed.
- Turn the power switch on the machine off
and on again.
- Press the key button and take out the
laundry.
- Contact the property management service.
SAFETY PRECAUTIONS
Do not use the machine for dry cleaning.
Only use automatic laundry detergent.
Children must not use this machine.
Do not spray the machine with water
when cleaning.
Switch off the washing machine.
Check that the drum is empty
and close the door.
Press the key button to open the
door. The door will open after 3
seconds. Take out the laundry.
1
2
3
4
5
6
7
8
The word Stop will appear on the display when the
wash program is complete. The display is switched
off three minutes after the end
of the wash program.
WHEN PROGRAM IS COMPLETE
5
Pour the detergent into the main wash dispenser ( 2 ) and, if required, the pre-wash dispenser ( 1 ).
Pour fabric conditioner into the right-hand dispenser with the - symbol.
DETERGENT DRAWER
3
If you use a liquid detergent place it in a detergent ball.
NOTE! A detergent ball cannot be used with program P1.
SELECT PROGRAM
P5 - Synthetic wash, 40°C
P6 - Super quick wash, 40°C
P7 - Wool/hand wash, 30°C
P8 - Spin
Press one of the program buttons P1 to P8 to choose the program you want to use.
4
P1 - Heavy wash with pre-wash, 90°C
P2 - Normal wash, 90°C
P3 - Normal wash, 60°C
P4 - Normal wash, 40°C
Press the Start/Stop button to start the machine. Hold in the Start/
Stop button for 3 seconds to interrupt the wash program.
The word Start will appear on the display to show that the washing
program has begun.
71
WASHING GUIDE
LAUNDRY
First sort the laundry into whites,
light colours and dark colours.
Empty pockets and fasten zips.
1
Read the care labels on the garments and divide up the
different piles according to the wash temperature on the
care labels.
Note! Underwired bras must be placed in a laundry bag.
LOAD MACHINE
1
2
3
4
5
6
7
8
NOTE! If you do not press a button within 3 minutes the
display will be switched off. It will light up again when you
press a button.
Press the power switch. The display will
light up.
2
Press the key button to open the door.
The door will open after 3 seconds
Weight of load
(5.0 kg)
(5.0 kg)
(2.5 kg)
(1.7 kg)
Put the laundry in the drum and close
the door.
Program
Heavy wash
Normal wash
Synthetic and Super quick wash
Wool/hand wash
WHAT THE DISPLAY SHOWS
Program information
When you press P1 to P8 this field shows which
program is selected. While the program is running it
shows how far the cycle has progressed.
Door open
Shows that you
have opened the
door.
Start
Program has started.
Stop
Program is complete or
has been interrupted.
Reduce the dose if you are washing a small load.
If you use a liquid detergent place it in a detergent ball.
Spin speed
for current program.
Pre-wash
Conditioner
Program time
for current program.
When you start a program it begins a countdown. The time display
switches between hours
(e.g. 1h) and minutes
(e.g. 22).
Wash temperature
for current program.
Main wash
1
1
2
2
3
3
4
4
5
5
6
6
7
7
8
8
MEDICAL
ERROR MESSAGES
0000 flashing at the top right: open the
door, redistribute the load and run program 8.
Other messages:
- Write down the error message that is
displayed.
- Turn the power switch on the machine off
and on again.
- Press the key button and take out the
laundry.
- Contact the property management service.
SAFETY PRECAUTIONS
Do not use the machine for dry cleaning.
Only use automatic laundry detergent.
Children must not use this machine.
Do not spray the machine with water
when cleaning.
Switch off the washing machine.
Check that the drum is empty
and close the door.
Press the key button to open the
door. The door will open after 3
seconds. Take out the laundry.
1
2
3
4
5
6
7
8
The word Stop will appear on the display when the
wash program is complete. The display is switched
off three minutes after the end
of the wash program.
WHEN PROGRAM IS COMPLETE
5
Pour the detergent into the main wash dispenser ( 2 ) and, if required, the pre-wash dispenser ( 1 ).
Pour fabric conditioner into the right-hand dispenser with the - symbol.
DETERGENT DRAWER
3
NOTE! A detergent ball cannot be used with program P1 and P2.
SELECT PROGRAM
Press one of the program buttons P1 to P8 to choose the program you want to use.
4
P1 -* Heavy wash with pre-wash, 0-90°C P5 - Synthetic wash, 40°C
P2 -* Heavy wash with pre-wash, 0-80°C P6 - Super quick wash, 40°C
P3 - Normal wash, 60°C
P7 - Wool/hand wash, 30°C
P4 - Normal wash, 40°C
P8 - Rinse
Press the Start/Stop button to start the machine. Hold in the Start/
Stop button for 3 seconds to interrupt the wash program.
*P1 and P2 cannot be interrupted.
The word Start will appear on the display to show that the washing
program has begun.
72
73
Program
Heavy wash
Normal wash
Synthetic and Super quick wash
Wool/hand wash
1
2
3
4
Weight of load
(5.0 kg)
(5.0 kg)
(2.5 kg)
(1.7 kg)
Put the laundry in the drum and close
the door.
Press the key button to open the door.
The door will open after 3 seconds.
5
6
7
8
NOTE! If you do not press a button within 3 minutes the
display will be switched off. It will light up again when you
press a button.
Press the power switch. The display will
light up.
2
LOAD MACHINE
Note! Underwired bras must be placed in a laundry bag.
Read the care labels on the garments and divide up the
different piles according to the wash temperature on the
care labels.
First sort the laundry into whites,
light colours and dark colours.
Empty pockets and fasten zips.
LAUNDRY
1
WASHING GUIDE
Stop
Program is complete or
has been interrupted.
Wash temperature
for current program.
Pre-wash
Conditioner
Program time
for current program.
When you start a program it begins a countdown. The time display
switches between hours
(e.g. 1h) and minutes
(e.g. 22).
Spin speed
for current program.
1
3
4
5
5
6
7
8
Heavy wash with pre-wash, 90°C
Heavy wash with pre-wash, 60°C
Normal wash, 90°C
Normal wash, 60°C
P5 P6 P7 P8 -
Normal wash, 40°C
Synthetic, 40°C
Wool/hand wash, 30°C
Rinse
Press the Start/Stop button to start the machine. Hold in the Start/
Stop button for 3 seconds to interrupt the wash program.
The word Start will appear on the display to show that the washing
program has begun.
P1 P2 P3 P4 -
5
2
3
4
6
7
8
Switch off the washing machine.
Check that the drum is empty
and close the door.
Press the key button to open the
door. The door will open after 3
seconds. Take out the laundry.
1
2
3
4
5
6
7
8
The word Stop will appear on the display when the
wash program is complete. The display is switched
off three minutes after the end
of the wash program.
2
Press one of the program buttons P1 to P8 to choose the program you want to use.
1
Do not spray the machine with water
when cleaning.
Children must not use this machine.
Only use automatic laundry detergent.
WHEN PROGRAM IS COMPLETE
Main wash
Do not use the machine for dry cleaning.
SAFETY PRECAUTIONS
Other messages:
- Write down the error message that is
displayed.
- Turn the power switch on the machine off
and on again.
- Press the key button and take out the
laundry.
- Contact the property management service.
0000 flashing at the top right: open the
door, redistribute the load and run program 8.
ERROR MESSAGES
MOPVASK
SELECT PROGRAM
4
NOTE! A detergent ball cannot be used with program P1.
If you use a liquid detergent place it in a detergent ball.
Reduce the dose if you are washing a small load.
Pour the detergent into the main wash dispenser ( 2 ) and, if required, the pre-wash dispenser ( 1 ).
Pour fabric conditioner into the right-hand dispenser with the - symbol.
DETERGENT DRAWER
3
Start
Program has started.
Door open
Shows that you
have opened the
door.
Program information
When you press P1 to P8 this field shows which
program is selected. While the program is running it
shows how far the cycle has progressed.
WHAT THE DISPLAY SHOWS
Art. no. 80 641 21.
Rev 01
Program
Heavy and Normal wash
Permanent press, Light and
Super quick wash
Delicate wash
Half
Third
Load size
Full
Put the laundry in the drum and close the door.
Press the key button to open the door.
The door will open after 3 seconds.
P1
Start/St
op
P2
P3
P4
P5
P6
P7
P8
NOTE! If you do not press a button within 3 minutes the
display will be switched off. It will light up again when you
press a button.
Press the power switch.
The display will light up.
LOAD MACHINE
2
Note! Underwired bras must be placed in a laundry bag.
Read the care labels on the garments and divide up the
different piles according to the wash temperature on the
care labels.
First sort the laundry into whites,
light colours and dark colours.
Empty pockets and fasten zips.
LAUNDRY
1
WASHING GUIDE
74
Stop
Program is complete or
has been interrupted.
Wash temperature °F
for current program.
Program time
for current program.
When you start a program it begins a countdown. The time display
switches between hours
(e.g. 1h) and minutes
(e.g. 22).
Spin speed
for current program.
Press the Start/Stop button to start the wash program. Hold in the
Start/Stop button for 3 seconds to interrupt the wash program.
The word Start will appear on the display to show that the washing
program has begun.
P1 - Heavy wash with pre-wash, 140°F P5 - Super quick wash, C*
P2 - Normal wash, 140°F
P6 - Permanent press, 105°F
P3 - Normal wash, 105°F
P7 - Delicate wash, 85°F
P4 - Light wash, 105°F
P8 - Rinse program
*) Temperature equal to temperature of incomming water.
P1
P2
Start/St
op
Start/St
op
P3
P3
P4
P4
P5
P5
P6
P6
P7
P7
P8
P8
5
Switch off the washing machine.
Press the key button to open
the door. The door will open
after 3 seconds.Then take out
the laundry.
Check that the drum is empty
and close the door.
P1
Start/St
op
P2
P3
P4
P5
P6
P7
P8
The word Stop will appear on the display when the
wash program is complete. The display is switched
off three minutes after the end of the wash program.
P2
Do not spray the machine with water
when cleaning.
Children must not use this machine.
Only use automatic laundry detergent.
Press one of the program buttons P1 to P8 to choose the program you want to use.
P1
Conditioner
WHEN PROGRAM IS COMPLETE
Main wash
Do not use the machine for dry cleaning.
SAFETY PRECAUTIONS
Other messages:
- Write down the error message that is
displayed.
- Turn the power switch on the machine off
and on again.
- Press the key button and take out the
laundry.
- Contact the property management service.
0000 flashing at the top right: open the
door, redistribute the load and run program 8.
ERROR MESSAGES
US
SELECT PROGRAM
4
NOTE! A detergent ball can not be used with program P1.
If you use a liquid detergent place it in a detergent ball.
Reduce the dose if you are washing a small load.
Pour the detergent into the main wash dispenser ( 2 ) and, if required, the pre-wash dispenser ( 1 ).
Pour fabric conditioner into the right-hand dispenser with the - symbol.
Pre-wash
3
DETERGENT DRAWER
Start
Program has started.
Door open
Shows that you have
opened the door.
Program information
When you press P1 to P8 this field shows which program
is selected. While the program is running it shows how far
the cycle has progressed.
WHAT THE DISPLAY SHOWS
CHANGE SETTINGS
CHANGING SETTINGS
LANGUAGE
You can change the language of the displayed text.
The languages you can choose from are Dansk,
Deutsch, English, Espanol, Français, Italiano,
Nederlands, Norsk, Portugués, Suomi and Svenska.
To change language do as follows:
Switch off the power switch,
, then switch it
on again so that the machine is in start-up mode.
Press the P8 button five times, then press the
P1 button five times. You have to complete these ten button presses within fifteen seconds.
Within three seconds of pressing the P1 button for the fifth time you should then select the
language you want by pressing the P6 or P7 buttons.
LOCKING A PROGRAMME
If for some reason you want to limit the number
of programmes that can be used you can lock one
or more programmes. •No characters or digits are
shown on the display when a locked programme
is selected.
To lock or unlock a programme on a machine
with an old control board (with pink label),
do as follows:
Hold in the programme button for the programme you want to lock. The chosen programme
appears in the display.
When the information in the display starts flashing you can lock the programme by releasing
the programme button and pressing the
button.
Do the same to unlock the programme.
Start/Stop
To lock or unlock a programme on a machine
with an new control board (with green
label), do as follows:
Switch off the power switch,
, then switch
it on again so that the machine is in start-up mode.
Press the P8 -button five times, then press the
P7 -button five times. You have to complete these
ten button presses within fifteen seconds.
Within three seconds of pressing the P7 -button for the fifth time you should hold in the
programme button for the programme you want
to lock for 5-10 seconds until the information in
the display starts flashing.
Then you can lock the programme by releasing the programme button and pressing the
button once.
Do the same to unlock the programme.
Start/Stop
W A S H T E M P E R AT U R E - C E N T I G R A D E O R
FAHRENHEIT
You can change the way the temperature is displayed from centigrade (C) to Fahrenheit (C).
To change the temperature display, do as
follows:
Switch off the power switch,
, then switch it
on again so that the machine is in start-up mode.
Press the P8 button five times, then press the
P2 button five times. You have to complete these ten button presses within fifteen seconds.
Within three seconds of pressing the P2 button for the fifth time you should then press the
P6 or P7 buttons to select centigrade (C) or Fahrenheit (F).
CHANGING PRESET WASH TEMPERATURE
You can change the preset wash temperatures for
each of the programmes. The temperatures you
can choose from are:
Heavy wash - C, 30, 35, …, 85, 90, 95ºC.
Normal wash - C, 30, 35, …, 85, 90, 95ºC.
Light wash, Synthetic wash, Permanent Press
- C, 30, 35, …, 85, 90, 95ºC.
Super quick wash (EURO, MEDICAL)
- C, 30, 35, …, 85, 90, 95ºC.
Super quick wash (US) - Not possible to
change.
Delicate and Wool wash - C, 30, 35, 40ºC.
If you choose C, the wash temperature
will be the same as the intake water temperature.
To change the wash temperature, do as
follows:
Switch off the power switch,
, then switch it
on again so that the machine is in start-up mode.
Press the P8 button five times, then press the
P6 button five times. You have to complete these ten button presses within fifteen seconds.
Press the programme button, P1 - P8 , to select the programme you want to change the wash
temperature for.
Then use buttons P6 (reduce temperature) and
P7
(increase temperature) to choose the wash
75
CHANGING SETTINGS
temperature. As you scroll through to the chosen
temperature it appears at the bottom of the display
alongside the symbol.
When your chosen wash temperature appears
press the P8 button again to confirm your choice.
CHILD LOCK ON
BUTTON
To prevent accidental button pushes on the
button you can activate the child lock function.
The
button then must be held in for three
seconds to activate the machine.
Start/Stop
Start/Stop
Start/Stop
To switch the child lock on or off, do as
follows:
, then switch it
Switch off the power switch,
on again so that the machine is in start-up mode.
Press the P8 button five times, then press the
P3 button five times. You have to complete these ten button presses within fifteen seconds.
Within three seconds of pressing the P3 button for the last time you must then press the P6
or P7 button to choose whether you want the
child lock on or off.
Press
Press
P7
P6
to activate the child lock.
to disable the child lock.
CHANGING THE SPIN TIME IN MOP VERSION
To change the spin time in MOP version do as
follows:
Switch off the power switch
, then switch it
on again so that the machine is in start-up mode.
Press the P8 -button five times, then press
P5 -button five times. You have to complete
these ten button presses within 15 seconds.
Select in which program you want to do the
change. Then use P6 -button (reduce time) or
P7 -button (increase time) to choose the spin time
(1.2.3.....29.30 seconds) ”C” means that the standard time for spin is chosen.
Confirm the change by pressing the P8 -button once. The change is now saved in the selected
program.
76
CLEANING AND MAINTENANCE
CLEANING AND MAINTENANCE
CHECKING THE NEEDLE TRAP AND DRAIN PUMP
The washing machine has a needle trap to catch
items such as coins, hairpins and similar objects.
Clean the needle trap and drain pump like this:
1. Ensure that the main power switch is off.
2. Using the detergent compartment divider or
a screwdriver, open the drain pump cover.
3. Disconnect the drain hose.
3
IMPORTANT
Take care not to break off the hose plug.
NOTE
There may be water left in the machine, that will
run out through the drain hose.
4. Open the pump by unscrewing its lid counterclockwise. Lift off the cover and the needle
trap.
5. Clean out any objects or foreign matter from
the pump housing. Also ensure that the pump
blade, furthest in, can be turned freely.
6. Insert the needle trap, screw the pump lid back
on and refit the drain hose. Close the drain
pump cover.
CLEANING THE HOLES UNDER THE RIDGES
If you suspect that objects such as nails, paper
clips, pins, etc., may have fallen through the washing drum you should check the spaces beneath
the ridges. Objects like this can corrode and stain
or tear holes in your washing.
1. Insert a screwdriver or similar tool into the
middle hole in the ridge and carefully push
the handle to the left.
2. Pull the ridge towards the opening in the
drum.
3. Lift the ridge up.
4. Remove any objects from underneath the ridge.
5. Place the ridge in its slot with the F marking
facing the drum opening. Push the ridge inwards as far as possible, to secure it.
1
5
77
CLEANING AND MAINTENANCE
CLEANING THE DETERGENT COMPARTMENT
1. Pull towards you and then lift out the detergent compartment.
2. Rinse and brush the compartment clean.
IMPORTANT
Do not wash the detergent compartment in a dishwasher.
3. Put the detergent compartment back into the
machine.
IF YOU LIVE IN AN AREA WITH HARD WATER
If the washing machine is installed in an area with
hard water the washer drum may become coated
with a greyish-white deposit. To remove this,
empty a packet of citric acid, about 20 grammes,
into the drum and run the Normal wash program at 90° C.
Citric acid can often be found on the spice shelf
in groceries.
78
INDEX
INDEX
Balancing spring
Bearing
Bottom
Cable stand
Catch
Child lock
Coin mechanism
Consumption values
Cover plate
Cross member
Detergent compartment
Detergent insert
Drain pump
Drive belt
Drum
Electrical component bridge piece
Emergency opener
Front panel
Front rail
Fuse holder/insert
Fuse
Hard water
58
54
67
65
46
76
8
22
45
62
40,41,78
30
51,77
36
49
59
44
38
70
63
63
Heating element
Holes under the ridges
78
56
77
Indication lamp/symbol lens
Inlet valve
Input terminal block
32
65
62
Language
Level sensor
Level switch
Lid catch
Lid seal/glass
75
60
60
43
42
Main power button
Measurement values
Motor control board
Motor
32
18
37
36
Needle trap
77
Panel board
34
34
39
69
61
51
33
Push-buttons
Plastic lockings
Pressure chamber
Program control PCU
Pump housing
Push-button switches
Radio interference filter
Rear panel
Rubber ring
Securing clips
Shock absorbers
Side panels
Tensioning ring
Thermistor
Tools
Top cover
Transport supports
Wash ridge
64
35
52
39
68
66
57
56
26,28
29
4
Washing lid
50
42
V-ring cassette
55
79
KOMPLE
LET
TTSCHEMA 80 640 004
4
S:\U\Wmd20\1_Tryckunderlag\Kopplingsschema\8064006 KWMC55\8064006 KWMC55-04.dft , sosv , 2000-09-18 11:05:14
F
E
D
A
B
C
This document must not be copied without
our written pemission, and the contents
thereof must not be imparted to a third party
nor be used for any unauthorized purpose.
Contravention will be prosecuted.
Asko Cylinda AB
L
L
N
8
L3
L2
L2
L1
N
N
INKB
NK B
MO
F21
F2
F2 2
B6
BA
BO1
MF
13 Vd
V dc
DAT
DA TA IN
CLOCK
DAT
DA TA OU
O UT
POWER ON
ON DOOR CLOSED
CLOS ED
E1:1-E
E1:1 -E1:
-E1:2
1: 2
E1:3
E1:3
E1:4
E1:
4
E1:5
E1:5
CON
CONNECT
ECTION
IO N FOR
USA
USA & CAN
CANADA
F2
F1
F3
F31
F3 2
EL2
EL2
7
BO2
F1
F2
F1
E10
E10-1
EL B
TG
RO
F3
F4
03
B5
TB1
TB1
6
RA
AP/AV
AP/A V
EL R
EL R
N1 1
p
N1 12
12
DL2
DL 2
5
B2
LB
AP/AV
AP/A V
B3
DL1
DL3
AP/A V
LM
02
EL V
EL B
INTERN
ERNAL CON
CONNECT
ECTION
ION
INTERN
ERN KOPPL ING
ALT
AL TERN
ERNATIVE WIR
WIRI
IR ING
ALT
AL TERN
ERNATIV KOP PLING
PLI NG
ALT
ALTERN
ER NATIVE
OUTL
OUTLE
TLET VALV
VALVE
ALV E
R43
R43 R44
R44
R33
R33 R34
R34
N1 11
N1 14
14
R23
R23 R24
R24
RB
6
N1 16
B2
8
E10
E1
0-1
E10
E10-3
E10
E10-5
E8E8-4
E8E8
-3
E8E8-2
E8-1
E8
-1
5
E5-1
SS
SB
E5-1
FUSE
COU
UNTRI
USE CON
CONNECT
ECTION
ION FOR ALL CO
TRIES E5E5-2
EXC
EXCEP
XC EPT
EPT USA
USA AND CAN
CANADA
04
E7-1
E7-2
2
E6-1
E6-1
4
1
ST2
ST2-1
ST1ST1 -5
E6E6
-2
E6E6-3
ST1ST1 -7
MO1
ST2
ST2-2
ST2
ST2-3
ST1ST1
-4
ST1ST1 -3
MCU
MO2
ST2
ST
2- 4
ST2
ST2-5
MO3
MO4
MO5
03
04
Jumpers changed
Coin cables modified
B5 added
Mod. L2, L3, E5 and E7
PS
PS
PS
SS
99
00
00
00
50
10
26
38
Appd Year Week
02
5
01
6
Rev ind Revision
4
E2-2
E2-1
E4-5
I V 2N
IV1N
V1 N
IV 4N
E4-1
E 4- 2
E4-3
E 4- 4
PCU
IV 2
3
IV3N
V3 N
IV1
IV 4
J1 J2
IV3
E14
E14
J3 J4 J5
P6
P7
P8
(S6) (S7) (S8)
+
--C
F
--O SEC
SE C --SE C 3 SEC
COLD HOT MIXED
MI XED
+
----+
---
TESTP
ESTPROGRAM
TPROGRAM
FUNCTION
IO N LEVEL
LE VEL
PRESS 5* SWI
TOGGLE WI
SW ITCH P1(S1)
P 1(S1)
W ITH EN
ENTER (S8)
SWIT
1
2
SWI TCH
P2 (S2)
DRAI
V1
(S 2)
DRA IN
(S3)
MOTOR N
P3 (S
3)
V2
V3
MOTOR G
P4 (S4)
(S 4)
MOTOR SPI
V4
P5
SP IN TYPE A
P 5 (S5)
(S 5)
--P6 (S6)
DOOR
--P7 (S7)
HEAT
TER
(S 7)
HEA
SPECI
SPEC IAL S ELEC
ELECTIONS
IONS
SELECCTIO
ION
SELE
N
LANG
LA NGU
NGUAGE
CELSI
CELS IUS/FAH
US/ FAHRE
FAH RENH
RE NHE
NHEIT
DELAYED
DELA YED ST
S TART
ART
INLE
NLET VALV
VALVES
ALV ES
SET
SET SPI
SP INNING TIME
IME MOP
SET
SET PROGR AM TEMP.
2
2
1
OF 1
KCU
PRESS URE
SENSOR
SE NSOR
ON/CLOSED
JUMPER
OF F/C
F/CUT
ON/ CLOSED OFF/
SETTING
UMPER SET
SEE TABLE SEE TABLE
PROGRAM
J1
SEE TABLE SEE TABLE
PROGRAM
J2
DISABLE
DRA IN PUM
J3
ABLE D
DIS ABLED
ABLE D ENABLED
PUMP
UMP
FOAM ING DE
J4
ABLE D
DIS ABLED
ABLE D ENABLED
DETECT
ECTION
ION DISABLE
SHOW TEMPERA
J5
ABLE D
DIS ABLED
ABLE D ENABLED
EMPE RAT
RA TURE DISABLE
JUMPER
UMPER PROGRAM AL TERN
ERNATIVE
J1 J2
01
E
UROPA
1
1
1
0 MOP
0
1 MEDI
MED ICAL
0 US VERS
0
VERSIO
ERSION
IO N
CON ECTION CLOSED
1 CO
N
N
EC
T
IO
N
IS
CLOS
ED
0 CON
CO NNECT
ECTION
ION IS CU
C UT
TH
E3-1
E3-1
N2-3
E3E3-2
E9-1
K1-1
N2-2
N2-1
E1-1
E1-1
K1-2
K1-2
K1-3
K1-3
E9-2
E9-3
E1E1-2
E1E1-3
K1-4
K1-4
K1-5
K1-5
B4
B1
E1E1-4
E1E1-5
E11-1
E11 -1
E11E11 -2
E12
E12-1
E12
E12-2
Project
Replace
1FORMAT A3
8064006.rev03
Material
(OV ERF
ERFILL 0 Vd
Vdc)
THE
THE ABOVE
ABOV E REQU
REQ UIRE
IRE THE
THE LEV
L EVEL
EV EL SWI
SW ITCH IN POS. N1 14
14
Rev Ind
E11:1-E
E11:1 -E11:
-E11:2
11: 2 5 Vd
V dc
E12:
E12:12:1-E1
1- E12:
E12:2
2:2 15 Vd
V dc
2
80 640 06 04
Kopplingsschema WMC55
Circuit diagram WMC55
Description(ENG)
3
Week
Gen.tolerance
Year
Description(SE)
Iss by Dept
UT
99
ASKO CYLINDA
09
Gen.tol.Angle
Dens.Kg/dm3 Dimensions, Type, etc.
Name of item
E9:1-E
:1-E9:2 0,5
0,5 Vd
V dc AT ZERO WAT
WATER PRESS
PR ESSU
ESS URE
Vac HEAT
HEA TER OF
O FF 0 V HEAT
HEA TER ON
ON
E10:1
E10:1-E
0:1-E10:
-E10:3
10:3 230 Vac
Vac HEAT
HEA TER OF
O FF 0 V HEAT
E10:
E10:5
0:5-E10:
-E10:3
10:3 230 Vac
HEA TER ON
ON
PRESS 5*ENTER(S8)
+ 5*PX (SX)
P1 (S1)
P2 (S2)
(S 2)
P3 (S3)
(S 3)
P4 (S4)
(S 4)
P5 (S5)
(S 5)
P6 (S6)
Material
Scale
Designed by
Released by
4
HT
Pos. Qty Part No.
230 Vac
Vac
0V
DOOR OP EN
230 Vac
Vac DOOR CLOSED
230 Vac
NOID ON
ON 10
1 0 mS
Vac DOOR SOLE NOID
5 Vd
V dc
E6E6-4
E6E6-5
E7:17:1-E
1- E7:2
7:2
E8:1-E
E8:1 -E8:
-E8:4
8: 4
E8:1-E
E8:1 -E8:
-E8:4
8: 4
E8:2
E8:2-E8:
-E8:3
8: 3
E9:1-E
:1-E9:3
ST1ST1 -2
ST1-1
ST1 -1
Vac
23 0 V
ac IV2 OON
N
230 Vac
Vac
230 Vac
Vac
5 Vd
V dc
DAT
DA TA SER
S ERI
ER IELL
ST2
ST2-6
ST2
ST2-7
4:11-EE4:
4:5
E4:
15
E5:1E5:1-E5
:1-E5:2
E5:2
E6:1E6:1-E6:
1-E6:2
E6: 2
E6:3
E6:3-E6:
-E6:5
6:5
E6:4
E6:4
MO6
MO7
1 FAS 10A
1 0A
1 PHASE
PH ASE 10A
1 0A
E10
E10-1
EL V
N1 14
14 EL V
TB1
TB1 8
E10
E10-3
WIRI
WIRI
RING
WIRING
RING WI
W ITH COI
CO INME
NMETER
WI
RING WI
W ITHOU
THO UT COI
CO INME
NMETER
1
Svar
Sva rt/Blac
t/Bl ack
ack 1
2
Brun/B
n/Brow
rown 2
3
Bl}/B
3
Bl }/Bl
}/B lue
4
Svar
Sva rt/Blac
t/Bl ack
ack 4
Bl}/B
Bl }/Bl
}/B lue
5
5
Gul
Gul-Gr
-Gr|n/
6
Yello
Yellow-G
llo w-Gr
w-G reen
een 6
E2:12:1-E
1-E2:2
2:2 230 Vac
Vac DRA IN PUM
PUMP/O
UMP/OU
P/O UTLE
TL ET VALV
V ALVE
ALV E ON
ON
E3:1E3:1-E3
:1-E3:2
E3:2 5 Vd
V dc (THERMIS
(THE RMISTOR
RMIS TOR DISCO
DISCO NNECT
ECTED)
E4:1ON
4:1-E
1-E4:2
4:2 230 Vac
V ac IV4 ON
E4:14:1-E
1-E4:3
4:3 230 Vac
V ac IV3 ON
ON
E4:14:1-E
1-E4:4
4:4 230 Vac
V ac IV1 ON
ON
TB1
TB1 8
E10
E10-3
7
N1 14
1 4 EL V
EL V EL B
E10
E10-5
1 FAS 10/1
10/16A
0/1 6A
1 PHASE
PH ASE 10/1
1 0/16A
0/16A
EL1
INLE
TU B
NLET VALV
VALVE
ALV E PREWASH
PREW ASH AND RI
R INSE
NS E
BA:
IV1:
BALJ
INLOPPSVE
BAL JA
NLO PPSVEN
PPSVE NTIL F\RT
F\R TV[T
V[TT OCH SKJ\L
SK J\LJ
J\L J
INLE
BOT
NLET VALV
VALVE
ALV E MA
M AINWASH COLD
BO TTOM
BO:
IV2:
INLOPPSVE
BOTT
NLO PPSVEN
PPSVE NTIL HU
H UVUDTV[
DTV[T
V[TT
BOT TEN
INLE
MAI
NLET VALV
VALVE
ALV E MA
M AINWASH HO T
MA IN TERMI
ERMINAL BLOCK
INKB:
IV3:
NK B:
V3 :
INLOPPSVE
INKOPPLI
NLO PPSVEN
PPSVE NTIL HU
H UVUDTV[
DTV[T
V[TT VARMV
V ARMV ATTEN
NKOP PLINGSPL
PLI NGSPLI
NGSPL INT
INLE
TACHOGE NERATOR
NLET VALV
VALVE
ALV E RINS
RINSE
NSE AGEN
AGE NT
ERA TOR
TG:
IV4:
INLOPPSVE
TACHOGE NERATOR
NLO PPSVEN
PPSVE NTIL SKL\ JMEDEL
JMEDEL
ERA TOR
PROGRAM CON
ROTOR
CO NTROL UNIT
PCU
RO: ROTOR
PCU:
PROGRAM KON
KO NTROLLE
TROL LENH
LENHE
NHET
RELAY
RELA Y
DOOR SW ITCH
R:
LB:
REL[
LUCKBRY
LUCKBRY TARE
HEAT
HEA
TER
MOTOR BRACKE
BR ACKET
ACKE T
EL:
MF:
V[RM EELEME
EEL EMEN
EMENT
MOTOR VAGGA
VAGGA
DRA IN PUM
PUMP
UMP
MOTOR
AP:
MO:
AVLOP PSPUM
PSP UMP
UMP
MOTOR
THERM
TH ERMIS
ERMISTOR
ISTOR
ILT
FIL
TER
TH:
F:
TERMIS
ERMISTOR
ISTOR
FILT
IL TER
DOOR SOLE NOID
NOID
TERMI
ERMINAL COIN
COI N
LM:
B:
LUCKMAG
LUCKMAG NET
BLOCK
M
Y
NTMÄT.
TMÄ T.
DISPLAY
OVER FLOW PROT.
DISP LAY UNIT
PRO T. SWI
SW ITCH KCU
KCU: DISPLAY
DISP LAY KORT
KOR T
\VERS V[MN
V[M NINGSBRY
NGSB RYT
RY TARE
L3
OF:
L3
04
L2
L1
N
L2
L1
INKB
NK B
8
F
E
D
C
B
A