1
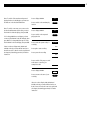
B E O S O U N D
P R I N C I P L E S
O U V E R T U R E
O F
O P E R A T I O N
The BeoSound Ouverture is a fully
integrated music system with radio,
compact disc player and tape
recorder all in one unit.
The system can be placed anywhere
you want music – on a wall in the
specially designed wall bracket, on
the specially designed stand, or on a
table or sideboard.
No matter how, whenever you reach
out to operate the BeoSound
Ouverture, the glass doors slide open
as if by magic, inviting you in to the
music...
User’s guide
1
2
This User’s guide describes the operation of the
BeoSound Ouverture music system. Each function
described in this guide is accompanied by a set of
buttons which will guide you through the
operation step-by-step.
The BeoSound Ouverture may be used with
various types of active Bang & Olufsen
loudspeakers, or it may be used as a music centre
in a Bang & Olufsen AV system. This guide applies
to both situations.
Note: Complete setting-up and maintenance
instructions are found in the Setting-up guide,
which is also enclosed with the BeoSound
Ouverture.
Be sure to keep the Setting-up guide. You will
need it for cleaning and maintenance instructions,
and when you move or rearrange your BeoSound
Ouverture setup in the future.
3
C O N T E N T S
4 Open to possibilities
6 Principles of operation
9 Using the radio
15 Using the CD player
21 Using the tape recorder
27 Timer programming
33 Nice to know
40 Remote control
Using BeoSound Ouverture in a
link room with Beo4
Note: Detailed contents are found at the start of
each major section.
4
O P E N
T O
P O S S I B I L I T I E S
Your BeoSound Ouverture music
system is versatile, mobile... and
responsive!
You can move the whole system
around at will and place it wherever
you like – on the wall in a specially
designed bracket, on a table, or on the
specially designed stand.
But no matter where you place your
BeoSound Ouverture, it will always
respond to a wave of your hand.
As soon as you reach out to touch the
operation panel, the glass doors open
automatically, revealing the music
system concealed behind the screen.
5
6
P R I N C I P L E S
O F
O P E R A T I O N
The top section holds the tray for
compact discs. The disc is kept in
place by a clamp, which can be
raised or lowered by pressing the
LOAD button (top right-hand
button). Discs must always be loaded
with the text side facing you!
The BeoSound Ouverture radio only
becomes visible when it is being used.
The display then lights up with radio
program information.
The middle-section contains the
display and the buttons for
operating the system.
The bottom section is for tape
cassettes. Cassettes must be loaded
with the tape slot pointing
downwards!
Socket for headphones.
7
The open doors give you access to the
operating panel and the display...
Number buttons
The number buttons enable
you to key in radio program
numbers, and to select specific
tracks on a CD or a tape.
Status display
The display keeps you informed
about what the system is doing and
about any on-going operation.
Volume buttons
∧ and ∨ allow you to raise and
lower the volume level.
For detailed operating instructions,
please refer to the relevant
sections in this guide.
Secondary functions
The buttons in the left-hand
section give access to all the
secondary functions in the
system: Tuning in to radio
stations and naming them,
controlling the tape,
programming a sequence of
tracks on the CD player,
adjusting sound, programming
the Timer function, etc...
The three buttons with green
text are used for recording only.
Primary functions
The buttons in the right-hand section give access to
the primary functions in the system:
RADIO, CD, or TAPE: Plays the radio, the CD or the
tape.
AUX: Switches on extra Bang & Olufsen equipment.
MUTE: Mutes or demutes the loudspeakers.
•: Switches the Ouverture to stand-by.
The step (▲ ▼) and wind (ss tt) buttons let you
step or wind through radio programs and tracks.
REPEAT and RANDOM operate the special repeated
and random playing functions in the CD player.
8
N O T E S
U S I N G
T H E
9
R A D I O
10 Switching displays
11 Playing your radio programs
12 Presetting radio stations
13 Radio program list
Clearing presets
14 Fine tuning a radio station
Mono/stereo reception
Note: Proper FM and AM aerial connections must
be made to the BeoSound Ouverture in order for
the radio to pick up the stations available in your
area. Please refer to the Setting-up guide for
details about aerial connections.
10
U S I N G
T H E
R A D I O
Switching displays
RADIO
Turn on the radio
then
DISPLAY
Press repeatedly to change the radio
display indication
The display can give you three
different types of information about
the radio program you are listening to:
Program name indication*
• Program name*
• Program number
• Radio frequency
Program number indication
To switch from one display to the
other, you must press the DISPLAY
button repeatedly while the radio is
playing.
Radio frequency indication
Your chosen display indication for the
radio will be maintained until you
select another via the DISPLAY button.
*Nice to know about RDS...
The program name function requires that your
radio is equipped with the RDS facility.
RDS is not a standard feature in all BeoSound
Ouverture radios. Please contact your Bang &
Olufsen dealer for further information.
The RDS facility enables you to give a short name
of your own choice to your radio programs. If you
haven’t named a program yourself, the station’s
own name may appear instead, provided such a
name is being transmitted by the station.
In this way, the RDS facility enables you to
remember a station not only by its program
number, but also by a particular name.
B E O C E N T E R
11
9 3 0 0
Playing your radio programs
To turn on the radio simply press the
RADIO button. The program you were
last listening to starts playing, and you
will see the indication RADIO followed
by a program number in the display.
If you have given a name to the radio
program, or if the radio station you are
listening to transmits a name of its
own, the display may read out that
name instead*.
To switch to another program you can
either use the step buttons ▲ or ▼, or
you can key in the exact program
number you want, using the number
buttons.
* Note: The program name function requires that
the radio is equipped with the RDS facility
described on page 10.
If you select another source, the radio
switches off automatically. To switch
off the entire system, press the standby button •.
Note: Selecting radio programs as described here
requires that you have tuned in to all your
favourite radio stations and preset them on
program numbers of their own. See how on the
next few pages.
Turns on the radio
RADIO
Press to step through your radio
programs
Alternatively, key in the exact
program number you want (1-30)
or
0
through
9
Press to raise the volume
Press to lower the volume
Silences the speakers immediately
Press again to recall the sound
Switches the system to stand-by
MUTE
•
12
> Using the radio
Presetting radio stations
RADIO
Turn on the radio
then
TUNE
Press to access to the tuning
function
Switches from FM to AM, or vice
versa
then
PLAY
Press to accept FM or AM
Press to search for a radio station
– up or down the frequency band
or
then
PLAY
Press to accept the station you have
found
Press to change the displayed
program number (1-30), if you like
or
To be able to use the radio as
described on the previous page, you
must first tune in to your favourite
radio stations and store them on
program numbers of their own.
You can store up to 30 radio stations
and, if your radio is equipped with the
RDS facility, you will even be able to
give a short name of your own choice
to each program.
The TUNE button gives access to
presetting radio stations. When you
have pressed TUNE, presetting a radio
station is like having a conversation
with the BeoSound Ouverture display:
then
PLAY
Press to store the radio station on
the displayed program number
If you want to name* the program:
Press to reveal the characters one
by one
or
tt
or
ss
PLAY
Moves to the next character position
forwards or backwards
The display prompts you to do
something; then press ▲ or ▼ to reveal
other options. Pressing the PLAY
button accepts any information that is
currently shown in the display.
1. First you must select the band in which you
want to tune – FM or AM.
2. Then you can make the radio search for a
station by pressing ▲ or ▼. Searching stops at
the first station producing an acceptable
signal. If this is not the station you want, just
press ▲ or ▼ again to continue searching.
3. When you have found a station, you must store
it on a program number of its own. The display
automatically offers you a vacant program
number, but you may select another if you like.
If the number in the display is blinking, it is to
indicate that the station you have found has
already been stored once – and on that
program number.
4. Then, if you like, you can give a short name of
your own choice (8 characters) to your new
radio program*; or you can skip the naming
function by pressing PLAY – in that case, you
will see the name transmitted by the radio
station (if any) instead when you play the radio
program*.
5. Finally, you must store your new radio program
along with all the information you have keyed
in with it.
All in all, the tuning procedure takes
you through five stages...
Keep writing the name you want,
using this method...
Finally, press to store your new radio
program
* Note: This function is only available if your radio
is equipped with the RDS facility. Please refer to
page 10 for further information.
Note: If a station needs fine tuning, or if you wish
to switch sound (mono/stereo) on a radio
program, please refer to page 14.
13
Document your radio presets here
1
2
3
4
5
6
7
8
9
10
11
12
13
14
15
16
17
18
19
20
21
22
23
24
25
26
27
28
29
30
Clearing presets...
If you wish to clear (cancel) one of your
radio presets, you can do so via the
SETUP button. See how to the right...
Switch on to the radio program you
want to clear,
for example program number 5
RADIO
Press to access the setup function
SETUP
When the program number has been
cleared, the display reads CLEARED.
Press twice until the display reads
CLEAR?
then
5
then
then
Press to confirm that you want to
clear (cancel) the radio program
PLAY
14
> Using the radio
Fine tuning a radio station
RADIO
then
5
TUNE
then
Switch on to the radio program you
wish to fine tune,
for example program number 5
Press to get access to the tuning
function
PLAY
TUNE
Press again to get access to the fine
tuning function
then
Fine tunes towards a higher or a
lower frequency
or
PLAY
If the sound from a radio station is not
coming through clearly, it may be
because the station needs fine tuning.
The fine tuning function enables you
to move slowly through the
frequencies, or to detune a station
slightly because of noisy reception.
To do so, just follow the instructions to
the left, and listen carefully as you
proceed...
Press to store your fine tuning
Mono/stereo reception
RADIO
then
5
TUNE
then
Switch on to the relevant radio
program,
for example program number 5
Press to get access to the tuning
function
PLAY
TUNE
Press twice to display the current
mono/stereo setting
then
Press to switch from stereo to
mono,or vice versa
PLAY
Press to store your new setting on
the program number
If you have tuned in to an FM station
broadcasting a stereo signal, this signal
will be stored along with the radio
program.
The system automatically switches to
mono if the stereo signal is not strong
enough to produce an acceptable
sound.
However, you can overrule this
automatic function if you wish, and
select mono or stereo manually. See
how to the left on this page...
The current setting is indicated in the display –
stereo or mono sound.
U S I N G
T H E
C O M P A C T
D I S C
P L A Y E R
16 Loading a CD
Switching displays
17 Playing the CD
18 Playing tracks in random order
Playing the CD over and over again
19 Programming a sequence of tracks
15
16
U S I N G
T H E
C O M P A C T
D I S C
P L A Y E R
Loading a CD
LOAD
Raises and lowers the clamp which
holds the CD in place
Pressing the LOAD button raises the
clamp which hold the CD in place. You
can then remove any CD from the
compartment and load the one you
want to play. Always load the CD with
the text side facing you!
Note: If you leave the clamp open, it will close
automatically after 5 minutes.
Pressing LOAD again lowers the clamp.
You may also press the CD button to
lower the clamp and start playing the
CD at once.
Switching displays
CD
Start playing a CD
then
DISPLAY
Press repeatedly to change the CD
display indication
The display can give you three
different types of information about
where you are on a CD:
Track number
• Track number
• Track time
• Remaining playing time
Elapsed time of the current track
To switch from one display to the
other, you must press the DISPLAY
button repeatedly while the CD is
playing.
Your chosen display indication for the
CD player will be maintained until you
select another via the DISPLAY button.
Remaining playing time for the entire CD
17
Playing the CD
When you press the CD button to start
playing, all information on the CD – for
example the total number of tracks –
will first be registered. Then the CD
starts playing from the beginning.
While the CD is playing, you can step
through the tracks by pressing the step
buttons ▲ or ▼; or you can key in the
exact track number you want to hear,
using the number buttons.
By pressing tt or ss you can search
for a specific passage on a CD (forward
or backwards) – just as if you were
winding through an audio tape.
Searching continues for as long as you
keep your finger on the button – at a
low speed to begin with and, after 3
seconds, at a high speed. When you lift
your finger off the button, the CD
resumes playing – or pausing, if it was
paused when you started.
By means of the PAUSE and PLAY
buttons you can pause and resume
playback any time.
When the CD has been played through
once, the CD player stops – waiting for
another instruction to play.
Starts playing the CD you have
loaded
CD
Press to play the next track
If you select another source, the CD
player switches off automatically. To
switch off the entire system, press the
stand-by button •.
Note: If the CD player is left paused or stopped for
more than 30 minutes, the system automatically
switches to stand-by.
or
Press to play the current track again
Press twice to play the previous track
Alternatively, key in the exact track
number you want to hear, e.g. 10
1
0
Hold down to search forward
towards the end of the CD
tt
Hold down to search backwards
towards the beginning of the CD
ss
Press to pause playback
PAUSE
Press to resume playing
PLAY
Press to raise the volume
Press to lower the volume
Silences the speakers immediately
Press again to recall the sound
Switches the system to stand-by
MUTE
•
18
> Using the compact disc player
Playing tracks in random order
RANDOM
Press while the CD is playing to see
the current setting in the display
then
RANDOM
Press again to switch the random
play function on or off
Note: The function remains on until you change it
via the RANDOM button, or until you switch the
system to stand-by.
The random play function enables you
to play all the tracks on a CD in random
order. To do so, you must press the
RANDOM button.
Whenever you press RANDOM, the
display shows the current setting. Then,
to change from one to the other, just
press RANDOM again.
When all the tracks on the CD have
been played through once – in random
order, the CD player stops, waiting for
another instruction to play.
The random play function is switched on
The random play function is switched off
Note: While playing tracks in random order, the
display cannot be set to showing remaining
playing time.
Playing the CD over and over again
REPEAT
Press while the CD is playing to see
the current setting in the display
then
REPEAT
Press again to switch the CD-repeat
function on or off
Note: The CD-repeat function remains on for 12
hours; until you change it via the REPEAT button;
or until you switch the system to stand-by.
The CD-repeat function makes the CD
player play the CD over and over again
for up to 12 hours. The REPEAT button
gives access to this function.
Whenever you press REPEAT, the
display shows the current setting. Then,
to change from one to the other, just
press REPEAT again.
After 12 hours of uninterrupted
playing, the system automatically
switches to stand-by.
The CD-repeat function is switched on
The CD-repeat function is switched off
19
Programming a sequence of tracks
Start playing the CD
You can program the CD player either
to play specific tracks on the CD you
have loaded, or to leave out certain
tracks.
then
Press to pause the CD player
Pressing PLAY (or CD) makes the CD
player start playing your programmed
sequence of tracks – in numerical
order.
The CD player memorizes the track
sequence until you unload the CD. But
you may also clear (cancel) the
sequence yourself by pressing REJECT
for two seconds (while the CD is
playing).
Note: By pressing the step buttons ▲ or ▼, you
can step through the tracks in the sequence as
you like.
PAUSE
Then start programming your
sequence of tracks...
To do so, you must start playing the
CD. If you don’t want playing to
continue while you program the track
sequence, press PAUSE.
You can then either select the tracks
you want in the sequence, using the
SELECT button; or you can reject the
tracks you want to leave out, using the
REJECT button. The display will guide
you through the programming.
CD
Press to include a track number
SELECT
Key in the track number of your
choice, e.g. 10
1
then
0
or
Press to exclude a track number
Whenever you press the SELECT or the REJECT
button, the display prompts you to key in a track
number.
The display then writes SELECTED (included) or
REJECTED (excluded) indicating that the CD player
now memorizes the track number. Then press
SELECT or REJECT again to key in the next track
number you want (or don’t want) in your
sequence of tracks.
REJECT
then
Key in the track number you want to
leave out, e.g. 11
1
1
Repeat the including or excluding of
track numbers using one of the
above methods
Starts playing the programmed
sequence
PLAY
or
CD
Clears a programmed sequence of
tracks (hold down for 2 seconds)
REJECT
↓
20
N O T E S
U S I N G
T H E
T A P E
R E C O R D E R
22 Loading a tape
Switching displays
23 Playing the tape
24 Instant recording on tape
25 Recording specific CD tracks
26 Using Dolby NR noise reduction
Cancelling the tape reverse
function
21
22
U S I N G
T H E
T A P E
R E C O R D E R
Loading a tape
The tape cassette must be loaded with
the tape slot facing downwards – and
with the A-side out.
To unload the tape, grip the sides of the
cassette – a little below the middle –
and gently but firmly pull it outwards.
Insert the top section first, then push in
the bottom half of the cassette until it
is properly seated in the compartment.
Note: The tape recorder adjusts automatically to
the type of tape you are using: ferro, chrome or
metal.
Switching displays
TAPE
Start playing a tape
then
DISPLAY
Press repeatedly to change the tape
display indication
The display can give you two different
types of information about where you
are on a tape:
Track number
• Track number
• Counter position
Tape counter position
To switch from one display to the
other, you must press the DISPLAY
button while the tape is playing.
Your chosen display indication for the
tape recorder will be maintained until
you select another via the DISPLAY
button.
Only when you ask for a specific track, will the
tape recorder start registering track numbers: The
tape is rewound to the beginning and then forwarded until the tape recorder finds your chosen
track number.
Note: The tape recorder only recognizes tracks if
there is a pause (or blank) of at least 3 seconds
between them.
When the tape has been played through once, the
tape recorder knows exactly how many tracks it
contains. When you ask for a specific number, it
therefore immediately starts winding until it finds
your chosen track.
Note: When you first load a tape, the tape
recorder does not know how many tracks it
contains, or which track is currently playing, and
there will be no indication of track number in the
display.
Note: Likewise, the counter indication will always
start at 0000 when you load a tape, even if it is
halfway through. Therefore, if you want the
correct counter indication, you must rewind the
tape to the beginning before you start playing or
recording.
23
Playing the tape
Pressing the TAPE button starts the
tape recorder. If you press TAPE then 1,
the tape will be rewound to the
beginning to start playing from the
first track.
The tape recorder automatically
reverses the tape at the end of the first
side and, within one second, resumes
playing. If you want to “turn” the tape
to play the other side, just press TURN.
While the tape recorder is playing, you
can step through the tracks on the tape
by pressing the step buttons ▲ or ▼; or
you can key in the exact track number
you want to hear, using the number
buttons.
You can also rewind or fast forward
the tape to a specific position. To do
so, press ss or tt. When the tape
reaches the point you want, just press
PAUSE to pause the tape recorder, or
press PLAY to resume playback.
PAUSE and PLAY can also be used
during playback to pause and resume
playing the tape at any point you like.
When the tape has been played
through once, the tape recorder will
pause, waiting for another instruction
to play.
If you select another source, the tape
recorder switches off automatically. To
switch off the entire system, press the
stand-by button •.
Note: If the tape recorder is left paused for more
than 30 minutes, the system switches to stand-by.
Starts playing the tape you have
loaded
TAPE
Press 1 to start playing from the very
beginning of the tape
“Turns” the tape to start playing the
other side
TURN
Press to play the next track
or
Press to play the current track again
Press twice to play the previous track
Alternatively, key in the exact track
number you want to hear, e.g. 10
1
0
Rewinds the tape
ss
Fast forwards the tape
tt
then
Press to pause the tape recorder
PAUSE
or
Press to resume playing
PLAY
Press to raise the volume
Press to lower the volume
Silences the speakers immediately
Press again to recall the sound
Switches the system to stand-by
MUTE
•
24
> Using the tape recorder
Instant recording on tape
RADIO
Start playing the source you wish to
record, for example radio
then
RECORD
Press to make the tape recorder
ready for recording
then
RECORD
PAUSE
Press again to start recording
then
Press to resume recording
or
RADIO
Press to stop the tape recorder and
return to controlling, for example
the radio
At any time before you stop the
tape recorder...
RETURN
Whenever the BeoSound Ouverture is
playing, you can start recording directly
on the tape in the tape recorder – just
press the RECORD button twice.
Press to pause your recording
A pause of four seconds is inserted
on the tape
RECORD
The buttons you will use for recording
are the three buttons with green text:
RECORD, PAUSE, and RETURN.
Press to return to the spot where
your recording started
When you press RECORD the first time,
the tape recorder gets ready for
recording. The display indicates that
the system is ready by, alternately,
displaying RECORD and the source you
are listening to.
If you press the RETURN button during
recording or while the recording is
paused, the tape recorder will rewind
the tape to the spot where your
recording started – that is to the spot
where you last pressed RECORD.
You can then play back what you have
just recorded (press TAPE), or if you
regret your recording, just press
RECORD again to record something
else.
Press the RECORD button again, and
recording starts immediately.
You can pause your recording any time
by pressing the green PAUSE button.
The tape recorder automatically inserts
a pause of 4 seconds on the tape.
Then press RECORD again to resume
recording; or press another source
button, for example RADIO, to stop
recording and switch off the tape
recorder.
Nice to know...
• Before you start recording, don’t forget to set
the Dolby NR function and the automatic tape
reverse function as you prefer. See page 26.
• The recording level is adjusted automatically,
which ensures that your tapes will not be
overloaded.
• The four-second pauses between your
recordings are important for the tape recorder
to be able to register the tracks on a tape
during playback.
• When the source for your recording stops (e.g.
the CD player), the tape recorder pauses as well
– quite automatically.
Note: The copyright laws of some countries
prohibit the copying of prerecorded material.
• If the tape runs out, the tape recorder leaves
the recording mode and the source for your
recording stops simultaneously. If no further
instructions are received, the system automatically switches to stand-by after 30 minutes.
25
Recording specific CD tracks
The system also allows you to start
recording from a specific track on a CD.
If you press RECORD while a CD is
playing, the CD player pauses. You can
then key in the track number from
which you want the recording to start.
Then, when you press RECORD again,
the tape recorder starts recording and
the CD player starts playing from the
beginning of the track you have
chosen.
At the end of the track, or later if you
like, press the green PAUSE button to
pause the recording.
Start playing the CD
Then press, for example, the CD button
to switch off the tape recorder and
return to just listening to the CD.
The CD player pauses...
Note: Please refer to the previous page for further
information about recording.
CD
then
Press to make the tape recorder
ready for recording
Key in the track number you want,
for example track number 10
RECORD
1
0
then
Press again to start recording the
track you have chosen
RECORD
By the end of the track (or later)...
Press to pause your recording
You may then key in a new track
number and press RECORD to
resume recording; or press CD to
stop recording
PAUSE
26
> Using the tape recorder
Using Dolby NR* noise reduction
NR
Press while the tape is playing to see
the current setting
NR
Press again to switch Dolby NR from
ON to OFF, or vice versa
then
Dolby NR is automatically reset to
ON during recording.
The BeoSound Ouverture is equipped
with the Dolby B NR system. From the
factory, the noise reduction system is
cut in.
If you wish to change this setting, you
may do so by pressing the NR button.
The display then shows the current
setting. Press NR again to change from
ON to OFF, or vice versa.
Note: The Dolby NR system reduces the background noise on your tapes. If a tape is recorded
with the Dolby NR system cut in, the tape must
also be played back with the Dolby NR system cut
in.
Dolby NR is cut in
Dolby NR is cut out
*Trademark of Dolby Laboratories Licensing Corporation.
Noise reduction system manufactured under license from
Dolby Laboratories Licensing Corporation.
Cancelling the automatic tape reverse function
AUT REV
Press while the tape is playing to see
the current setting
then
AUT REV
Press again to switch the automatic
tape reverse function from ON to
OFF, or vice versa
The tape recorder always plays through
the entire tape (A and B side) before
stopping – that is, you don’t have to
turn the tape manually.
You can of course cancel the automatic
tape reverse function if you like, so
that only the current side will be
played (or recorded on).
To do so, you must press the AUT REV
button. The display then shows the
current setting. Press AUT REV again to
change from ON to OFF, or vice versa.
The automatic tape reverse function is cut in
The automatic tape reverse function is cut out
T I M E R
27
P R O G R A M M I N G
28 Programming Timers
30 Switch on the Timer function!
31 Checking or cancelling your
Timers
32 Setting the built-in clock
28
T I M E R
P R O G R A M M I N G
Programming Timers
PROGRAM
Press to access the Timer
programming function
Press repeatedly to display the type
of Timer you wish to program
(Timer Record, -Play, or -Stand-by)
You can program the system to start
recording, to start playing, or to switch
off quite automatically – without you
having to be there to control the
process:
then
PLAY
Press to select the displayed type of
Timer
The display reads NEW?
• The Timer Record function enables
you to program the system to start
and stop recording a radio program.
then
PLAY
Press to confirm that you want to
program a new Timer
Then start programming...
Press to reveal new options (or
numbers) in the display
or
then
PLAY
Press to accept what is shown in the
display – and to move on
To program a WEEKLY Timer...
Press to reveal the day(s) you want
in the display: M T W T F S S
then
tt
Press to move from one day to the
next
then
PLAY
Press to accept the days displayed
PLAY
When you have entered all the
relevant information...
Press to store your programming
• The Timer Play function can, for
example, be used to wake you up in
the morning to the sound from either
your favourite radio program, CD or
tape.
• The Timer Stand-by function enables
you to program the system to switch
off automatically – for example after
you leave for work in the morning.
The BeoSound Ouverture memorizes
up to 11 such programmings at a time.
Once you have pressed the PROGRAM
button to get started, programming a
new Timer is just like having a
conversation with the display...
Note: When you have programmed a Timer, make
sure that the green timer indication in the display
is switched on! Please refer to page 30.
Nice to know...
• If you happen to make a mistake or change
your mind while you are programming, just
press the PROGRAM button again – and start
over.
• While you are programming a Timer, pressing
the ss button will take you back one step in
the programming sequence.
• For a Timer Stand-by programming, you will
neither be asked to key in a source, nor a start
time. All the system needs to know, is at what
time you want it to stop playing, and how
often.
• The system has a 24-hour clock. This means that
the display reads, for example, 22.15 for a
quarter past ten pm. In order for the Timers to
be executed correctly, the clock must be set to
the correct time – see how on page 32.
• If you want to set the volume level higher or
lower for your Timer, refer to page 34 for
further instruction.
• “How often?”...
The system must be programmed to carry out a
Timer either once on a specific date (ONCE), or
on selected weekdays in the future (WEEKLY).
If you select ONCE, the cue DATE in the display
prompts you to select a date within the next
month (1-31). Press ▲ or ▼ and then PLAY to do
so.
If you select WEEKLY, seven dashes appear in
the display, prompting you to fill in the
weekday(s) on which you want the system to
carry out the Timer: M T W T F S S. The letters
represent the seven days of the week, starting
with M for Monday. Press ▲ to enter a day, and
press tt to move on to the next day you want
to enter. Finally press PLAY to accept the days
in the display.
29
1
First you must select the type of Timer you want
to program: Timer Record,...
2
When you select NEW?, you inform the system
that you want to program a new Timer. Then start
programming...
3
Display the source you want, for example radio.
Then press PLAY.
Timer Play, or...
Display the program number you want. Then
press PLAY.
Timer Stand-by.
Display the time you want the Timer to start. Then
press PLAY.
Display the time you want the Timer to stop. Then
press PLAY.
Display “how often” you want the Timer to take
place: ONCE (on one specific date), or WEEKLY (on
specific weekdays in the future). Then press PLAY.
Please note…
To make use of the sources TV, SAT (satellite TV),
and V.TAPE (video tape recorder) displayed, the
BeoSound Ouverture must be connected to a
Bang & Olufsen video system.
When the BeoSound Ouverture is used in certain
types of integrated Bang & Olufsen AV systems
(see page 39), the Timer Play function will not be
available. Timer Play must then be programmed
via your TV*.
*Note: If you make a Timer Play via your TV and
wish to hear Radio in your TV speakers, then you
still have to cut in the Timer Play function on
BeoSound Ouverture to get access to Radio.
Cutting in Timer Play on Ouverture is described on
page 30.
Display the date (for a ONCE programming); or fill
in the weekdays (for a WEEKLY programming).
Then press PLAY.
Finally, press PLAY to store your new Timer.
30
> Timer programming
Switch on the Timer function!
SETUP
Press to enter the setup function
then
Press until TIMER? is displayed
then
PLAY
Press to see the current Timer setting
in the display
then
Press to switch from ON to OFF, or
vice versa
then
PLAY
Press to store the displayed Timer
setting
The Timers you have programmed into
the BeoSound Ouverture can all be
executed with or without the loudspeakers being cut in.
For the loudspeakers to be cut in – so
that you can hear your Timer Play
programmings, you must switch on the
Timer sound control!
A small green light then appears in the
display (next to the stand-by light).
See how to switch the Timer sound
control on or off to the left on this
page...
The green light shows you that the Timer Play
function is cut in.
Note: If you forget to switch the Timer sound
control on, the programmed Timers will be
executed at the specified times, but the speakers
will be muted.
Note: If you use the BeoSound Overture in a fully
integrated Bang & Olufsen AV system (see page
39), the Timer sound control must be set on/off
via the TV. In that case, the green light in the
Ouverture display will not switch on.
31
Checking or cancelling your Timers
You can look up each Timer you have
programmed to either check its
contents, or to cancel it completely. To
do so, you must press the PROGRAM
button.
When you have pressed PROGRAM,
you must first decide which type of
Timer it is that you want to look up:
RECORD, PLAY, or ST.BY. (stand-by).
At the end of each Timer, you will see
the cue MORE? in the display, meaning: “Do you want to check the next
timer programming?” Press PLAY if
you do; or press ▼ or tt to reveal
CLEAR? instead.
While CLEAR? is displayed, pressing
PLAY will clear (cancel) the Timer you
have just checked.
Press to access the Timer
programming function
PROGRAM
then
Press repeatedly to display the type
of Timer you wish to check
(Record / Play / Stand-by)
then
Accesses the displayed group of
Timers
PLAY
The display reads NEW?
Press until CHECK? is displayed
Then, display CHECK? – and press
PLAY. You will then find that each
Timer you have programmed within
that group is listed.
To leaf through the Timers, just press ▲
repeatedly. You can also check the
exact contents of a Timer by pressing
PLAY repeatedly.
Note: If you want to clear a Timer, without
checking its contents first, just look up the Timer
and press tt to step directly to MORE?, then press
▼ or tt to reveal CLEAR...
then
Press to start checking your
programmed Timers within that
group...
PLAY
Press repeatedly to display your
programmed Timers one by one
Press repeatedly if you want to
check a particular Timer in detail
When MORE? is displayed...
Press to see the next Timer
PLAY
PLAY
or
Press to reveal CLEAR? instead
or
tt
then
Clears (cancels) the current Timer
The display reads CLEARED
PLAY
32
> Timer programming
Setting the built-in clock
SETUP
Press to access the setup function
If CLOCK? is not already displayed
press ▼ until CLOCK? is displayed
then
PLAY
Press to call up the built-in clock
The time is displayed...
Press to change the displayed time,
if necessary
or
then
PLAY
Press to accept the displayed time
The date and month are displayed...
Press to change the displayed date
and month, if necessary
or
then
PLAY
Press to accept the date
The year is displayed...
Press to change the displayed year, if
necessary
or
then
PLAY
Press to accept the year
The display now reads STORE?
PLAY
Press to store your new setting of
the clock
If you want to make use of the Timer
function, you must first make sure that
the built-in 24 hour clock in the
BeoSound Ouverture has been set to
the correct time, date and year.
The display enables you to check that
the clock is set correctly. If it is not, you
can change the setting in the process.
To check (or set) the clock, you must
use the SETUP button. Any new
settings you make will be stored in the
BeoSound Ouverture when you press
PLAY in the end. See how to the left
on this page...
Note: If you happen to make a mistake or change
your mind while you are setting the clock, just
press SETUP again – and start over.
Note: If you use the BeoSound Overture in a fully
integrated Bang & Olufsen AV system (see page
39), the clock must be set via the TV.
The display shows the time,
...the date,
...and the year
Note: The display writes 14:45 for a quarter to
three pm. – and it writes...
JAN... for January
FEB... for February
MAR... for March
APR... for April
MAY... for May
JUN... for June
JUL... for July
AUG... for August
SEP... for September
OCT... for October
NOV... for November
DEC... for December
N I C E
T O
33
K N O W
34 Adjusting sound
36 Playing auxiliary sources
37 Music throughout the house
38 From audio to video – or vice
versa
34
N I C E
T O
K N O W
Adjusting sound
Select a source…
then
SETUP
Press to access the setup function
The display reads SOUND?
then
PLAY
Press to access the sound adjustment
function
PLAY
Press repeatedly to display the sound
cue you want
Then adjust the sound to your
liking...
ss
Adjusts balance to the left
tt
Adjusts balance to the right
or
Raises or lowers the sound levels;
cuts the loudness function in or out
or
The SETUP button gives access to
adjusting the sound coming out of the
speakers connected to the BeoSound
Ouverture. And it gives access to
storing the adjustment as a permanent
setting, if you like.
All you have to do is choose a source
and then find SOUND? in the display
and press PLAY.
You can then adjust the volume level
and the bass and treble levels to suit
your personal taste; you can alter the
balance between the left and the right
speaker to direct the sound towards
your favourite listening position; and
you can cut the loudness function in or
out as you like.
then
PLAY
Press repeatedly until STORE? is
displayed
then
PLAY
Press to store all the current sound
levels
If you haven’t stored your sound
adjustment...
RESET
Press any time to reset the sound
levels to their original settings
Each time you press the PLAY button,
a new cue appears in the display,
indicating which adjustment can be
made, and showing the current setting.
Then use the step buttons ▲ and ▼, or
ss and tt to adjust as required.
You can press RESET any time to reset
the sound levels to their original
settings.
However, all you have to do to turn
your adjustment into a permanent
setting of the system, is keep pressing
PLAY, until the display reads STORE?.
Then press PLAY one last time to store
your new sound setting.
35
The display shows the current volume level.
Volume can be adjusted in steps of two within a
range of 00 to 72.
The display shows the current balance setting –
here neutral. Balance can be adjusted within a
range of 7 to either side.
The display shows the current bass level – here
neutral. Bass can be adjusted within a range of
-5 to +5.
The display shows the current treble level – here
neutral. Treble can be adjusted within a range of
–5 to +5.
The display shows the current loudness setting –
ON if it is switched on, OFF it is switched off.
The display asks you if you want to store the
current sound setting. Press PLAY if you do.
Nice to know...
• When the BeoSound Ouverture leaves the
factory, all these sound levels are set to neutral
values which will suit the majority of situations.
• All the current sound levels will be stored
simultaneously.
• If you make your sound adjustments without
accepting STORE? in the end, the sound
adjustment cues simply disappear, and the
system reverts to normal playback. But, when
you switch off the system, the adjusted sound
levels will be reset to their original values.
• To adjust volume, you need not press the SETUP
button first – just press the volume buttons ∧ or
∨; or press MUTE to silence the speakers
completely.
• The loudness function is used to compensate for
the human ear’s lack of sensitivity to high and
low frequencies when listening to low volume
levels. It “boosts” the high and low frequencies,
so that the music becomes more dynamic.
• When the BeoSound Ouverture is used in a fully
integrated Bang & Olufsen AV system (see page
39), sound must be adjusted as described in the
guide for your video system.
36
> Nice to know
Playing auxiliary sources
AUX
Turns on the auxiliary function and
your extra Bang & Olufsen product
Press to step through the music on a
record; or to step through tracks
on a tape or a CD
or
tt
Fast forwards a tape; searches
forward on a CD
ss
Rewinds a tape; searches backwards
on a CD
PAUSE
PLAY
Press to pause playback
Press to resume playback
Press to raise the volume
Press to lower the volume
MUTE
•
Silences the speakers immediately
Press again to recall the sound
The AUX button enables you to start
playing any extra Bang & Olufsen
equipment* you may have connected
to the BeoSound Ouverture.
Note: The extra equipment must be connected to
the AUX-socket on the back of the BeoSound
Ouverture. For further information, please refer
to the Setting-up guide which is also enclosed
with the BeoSound Ouverture.
You will then hear the sound from the
extra source through your BeoSound
Ouverture speakers.
* Note: Only Bang & Olufsen data-link products
can be used as described on this page.
While the source is playing, you can
control some of the daily playback
functions via the BeoSound Ouverture
key-pad. The available functions are
shown to the left on this page...
If you select one of the sources in the
BeoSound Ouverture instead, the AUX
function is stopped automatically.
Only Bang & Olufsen record players equipped
with a RIAA pre-amplifier can be used with the
BeoSound Ouverture.
Note: If you connect non-Bang & Olufsen
equipment to the AUX-socket, pressing AUX will
open up for the signal into the BeoSound
Ouverture. Non-Bang & Olufsen products cannot
be operated via the BeoSound Ouverture, but
must be operated as usual – directly on the
product.
Or, you may press the stand-by button
• to switch off both the auxiliary source
and the BeoSound Ouverture
simultaneously.
Press to switch off
Note: Please contact your Bang & Olufsen dealer
for complete information about which Bang &
Olufsen products can be used with the BeoSound
Ouverture.
37
Music throughout the house
The Bang & Olufsen BeoLink system
enables you to “take your system with
you”.
As you move through your house, you
can communicate with your BeoSound
Ouverture in any room in which you
have installed BeoLink equipment.
You can play any program or music
source you like on the BeoSound
Ouverture and hear it in the room with
your extra speakers or your extra TV.
For the BeoLink system to work, a BeoLink
installation is required from the BeoSound
Ouverture (or your AV system) to the room where
you want sound and pictures – or sound alone.
Different configurations are available. Your
Bang & Olufsen dealer will assist you with further
information.
The basic functions offered by the
BeoSound Ouverture can even be
operated via your BeoLink products –
just as if you were operating the
system directly, using the remote
control.
Please refer to the User’s guide for
your BeoLink products for operating
instructions.
38
> Nice to know
From audio to video – or vice versa
LIST
GO
Remote AV operation...
Press LIST until AV* is displayed
Press to activate the audio/video
function
All that is required for the audio/video integration
to work is that your Bang & Olufsen video system
and the BeoSound Ouverture are interconnected
by a special link cable.
Press to play TV sound on the
Ouverture speakers
The special link cable is available at your Bang &
Olufsen dealer, who will also assist you with
further information about audio/video integration.
then
TV
or
V TAPE
Press to play video tape sound on
the Ouverture speakers
or
SAT
Press to play a satellite TV/radio
program on the Ouverture speakers
If you want pictures on the TV screen while
listening to the sound on the Ouverture speakers,
just press, for example: TV then LIST until AV* is
displayed and then TV
LIST
GO
Press LIST until AV* is displayed
Press to activate the audio/video
function
then
RADIO
Press to play the radio on the TV
speakers
CD
Press to play CD sound on the TV
speakers
A TAPE
Press to play audio tape sound on
the TV speakers
or
or
To regain full control of any source, press the
appropriate source button first, for example TV or
RADIO
You can operate the BeoSound
Ouverture in conjunction with a Bang
& Olufsen video system*. You can then
hear any source you like in the
loudspeakers of either system.
You can, for example, hear a music
video through the Ouverture speakers,
or listen-in while the TV news is
playing; or you can use the system the
other way around, and listen to the
radio, a CD, or a tape on your TV
speakers.
To operate these audio/video
functions, you must use the AV* LIST
button on the Beo4 remote control.
Audio/Video recording
The video sound you hear in the Ouverture
speakers can be recorded on the tape in the
BeoSound Ouverture. To do so, just follow the
usual recording procedure.
Likewise, the sound you hear in the TV speakers
can be recorded on the video tape recorder –
please refer to the User’s guide for your video
system to see how.
If only sound is heard in the TV speakers (that is if
the TV screen is blank), you will record sound
only; but if the sound is accompanied by pictures,
the pictures will be recorded along with the
sound produced by your BeoSound Ouverture (=
simulcast recording).
Note: A special recording lock function ensures
that you cannot switch to another program while
such a recording is in progress.
*Note: In order to display AV on Beo4, you must
add the function to Beo4. Please refer to Beo4’s
own User’s guide and the chapter Customising
your Beo4 for further instruction.
* Note: Not all types of Bang & Olufsen video
systems support audio/video integration with the
BeoSound Ouverture. Please contact your Bang &
Olufsen dealer for further information.
39
When the BeoSound Ouverture music centre is
used in a fully integrated Bang & Olufsen AV
system, the video system takes over some of
the functions mentioned in this guide, for
example the functions related to the BeoSound
Ouverture SETUP button.
In an AV system, the loudspeakers (two or four)
are connected to the video system.
Furthermore, in an AV system all remote control
operations (audio and video) must be directed to
the video system.
BeoSound Ouverture without
speakers – AV system...
The BeoSound Ouverture music centre
can also be used in a Bang & Olufsen
surround sound AV system.
In an AV system, you have direct access
to all your audio and video sources –
and they are all heard through the
same set of loudspeakers.
To play a source in the AV system, all
you have to do is press a single button
– either directly on the system (audio
or video), or on the remote control.
The Beo4 remote control integrates
remote operation of all the sources in
the AV system.
Beo4 remote control and AV system...
In a fully integrated Bang & Olufsen AV system,
the AV button on the Beo4 remote control gives
access to a few extra functions:
*Note: In order to display AV on Beo4, you must
add the function to Beo4. Please refer to Beo4’s
own User’s guide and the chapter Customising
your Beo4 for further instruction.
• Simulcast radio/TV transmissions...
To watch a TV program while listening to the
sound from a radio program at the same time,
press TV then LIST until AV* is displayed, and
then RADIO on the Beo4 remote control.
(Simulcast radio/TV transmissions can be
recorded on the video tape recorder.)
• Recording on the ‘opposite’ recorder...
In an AV system, the sound from your video
sources (TV, Satellite, or video tape) can be
recorded on the tape in the BeoSound
Ouverture: To do so, you must press, for
example, TV then LIST until AV* is displayed,
and then RECORD, RECORD on the Beo4 remote
control.
Note: The operations described on page 38 do not
apply to a fully integrated AV system as described
on this page.
* Note: Only certain types of Bang & Olufsen
video systems are equipped to master a fully
integrated AV system – operated with the Beo4
remote control. Please contact your Bang &
Olufsen dealer for further information.
40
R E M O T E
C O N T R O L
Using the Beo4
RADIO
CD
A TAPE
LIST
Turns on the radio
Starts the CD player
Starts the tape recorder
Press to display TURN*
then
GO
Press to “turn” the tape
Press to step through your radio
programs, tracks on a tape or a CD
or
Alternatively, key in the exact
number using the number keys
tt
Fast forwards a tape
ss
Rewinds a tape
or
Searches through a CD
Although designed primarily for closeup operation, the BeoSound Ouverture
music system can also be operated
from a distance.
The Beo4 remote control operates all
the primary functions in the BeoSound
Ouverture, such as switching on,
selecting other radio programs,
selecting tracks on a CD or a tape,
adjusting volume, and switching off.
But this is not all. The Beo4 remote
control also enables you to switch on
the special random and repeated
playing functions in the CD player...
Note: Please refer to the Beo4 User’s guide for
information about the Beo4 principles of
operation.
or
TV
LIGHT
RADIO
SAT
DVD
CD
V TAPE
RECORD
A TAPE
7
8
9
4
5
6
1
2
3
TEXT
0
MENU
Searches backwards through a CD
STOP
Pauses playback any time
GO
Press to resume playback
GO
Raises the volume
Lowers the volume
Press ∧ and ∨ simultaneously to
silence the speakers completely;
press again to recall the sound
•
LIST
STOP
Switches off
The Beo4 remote control is not a standard
component of the BeoSound Ouverture.
Beo4 is available as an optional extra at your
Bang & Olufsen dealer.
EXIT
41
Note: To switch off the random and repeated
playing functions in the CD player, you must use
the buttons on the BeoSound Ouverture.
Note: To switch on an extra source connected to
the BeoSound Ouverture AUX-socket, you must
find A.AUX* in the Beo4 display, then press GO.
If it is a Bang & Olufsen record player you have
connected, find PHONO* in the Beo4 display, then
press GO. If it is a Bang & Olufsen tape recorder,
find A.TAPE2* in the Beo4 display, then press GO.
*Note: In order to display A.AUX, PHONO and
A.TAPE2 on Beo4, you must add the functions to
Beo4. Please refer to Beo4’s own User’s guide and
the chapter, Customising your Beo4, for further
instruction.
Press to display RANDOM
LIST
Press to switch on the random play
function
GO
Press to display REPEAT*
LIST
Press to switch on the repeated
playing function
GO
then
then
Press to make the system ready for
recording
RECORD
Press again to start recording
RECORD
Press to pause the recording
A TAPE
then
then
STOP
Press to switch off the tape recorder
and return to controlling, for
example the radio
RADIO
Press to display RETURN*
LIST
Press to return to the start of your
recording
GO
then
*Note: In order to display TURN, REPEAT and
RETURN on Beo4, you must add the functions to
Beo4. Please refer to Beo4’s own User’s guide and
the chapter, Customising your Beo4, for further
instruction.
42
> Remote control
Using BeoSound Ouverture in a link room with Beo4
RADIO
CD
A TAPE
Press to switch on the radio
Press to switch on the CD player
Press to switch on the tape recorder
Then operate your radio, CD player
and tape recorder as usual…
Transferring main room sources, sound only…
TV
Press to listen to the sound from a
TV programme
SAT
Press to listen to the sound from a
Satellite programme
LIST
Press until LINK is revealed on Beo4
then
CD
Before you start…
Please refer to the Setting-up guide for further
instruction of how to prepare BeoSound
Ouverture for use in a link room.
Press to listen to CD
If you have BeoLink installed in your
home and choose to place your
BeoSound Ouverture in a link room,
operate your BeoSound Ouverture as if
it was placed in a main room.
You can listen to the sources available
in your link room BeoSound Ouverture
and you can hear the audio or video
sources from your main room on
BeoSound Ouverture as well.
You can furthermore also record the
sound from the sources available in
your main room system onto your
BeoSound Ouverture audio tape
recorder.
A Timer play programmed via your
main room system will also be
executed on your link room BeoSound
Ouverture if you wish.
Note: If you have a BeoLink setup with both a
BeoSound Ouverture and a TV e.g. MX 4002 in
your link room and want to hear main room
video sources on your BeoSound Ouverture, you
must press LIST until AV* is displayed, then TV to
hear a TV programme and LIST until AV is
displayed, then SAT to hear a Satellite
programme.
or
A TAPE
Press to listen to an audio tape
Recording onto your tape recorder…
Press to record CD
CD
or
Press to record radio
RADIO
Use the number keys to selct a radio
program number
then
RECORD
Press to start recording
RECORD
See the following page for more
information about recording…
Note: In order to display AV on Beo4, you must
add the function to Beo4. Please refer to Beo4’s
own User’s guide and the chapter, Customising
your Beo4, for further instruction.
43
Recording main room sources…
TV
Press to record TV sound only
SAT
Press to record Satellite sound only
or
Use the number keys to select a TV
or Satellite program number
or
LIST
Press until LINK* appears on Beo4
then
CD
Press to record CD from main room
or
A TAPE
Press to record audio tape from
main room
then
RECORD
Press to start recording
RECORD
To stop recording…
STOP
RADIO
Press to pause recording
Press another source button to stop
recording entirely, e.g. RADIO
*Note: In order to display LINK on Beo4, you
must add the function to the Beo4 list of
functions, see Beo4’s own User’s guide and the
chapter, Customising your Beo4, for further
instruction.
44
N O T E S
Date purchased
Contact person
Dealer
Telephone
Address
BeoSound Ouverture serial number
Dear Customer,
Your needs as the user of our products are always given careful
consideration during the design and development process, and we strive to
make our products easy and comfortable to operate.
We therefore hope that you will take time to drop us a line, telling us about
your experiences with your Bang & Olufsen system. Anything which you
consider important – positive or negative – may help us in our constant
efforts to refine our products.
Thank you!
Please write to:
Customer information dept. 7240
Bang & Olufsen a/s
DK-7600 Struer
Denmark
3508068
0997
Printed in Denmark by
Bogtrykkergården a-s, Struer