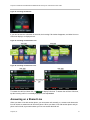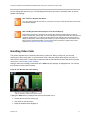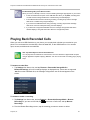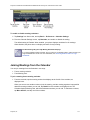
1
USER’S GUIDE Software 5.0.0 | August 2013 | 1725-44635-001 Rev D Polycom® VVX® 500 and 600 Business Media Phones and Polycom® VVX® Camera Polycom, Inc. 1 Polycom VVX 500 and VVX 600 Business Media Phones and Polycom VVX Camera User’s Guide Copyright ©2013, Polycom, Inc. All rights reserved. No part of this document may be reproduced, translated into another language or format, or transmitted in any form or by any means, electronic or mechanical, for any purpose, without the express written permission of Polycom, Inc. 6001 America Center Drive San Jose, CA 95002 USA Trademarks Polycom®, the Polycom logo and the names and marks associated with Polycom products are trademarks and/or service marks of Polycom, Inc. and are registered and/or common law marks in the United States and various other countries. All other trademarks are property of their respective owners. No portion hereof may be reproduced or transmitted in any form or by any means, for any purpose other than the recipient's personal use, without the express written permission of Polycom. End User License Agreement By installing, copying, or otherwise using this product, you acknowledge that you have read, understand and agree to be bound by the terms and conditions of the End User License Agreement for this product. Patent Information The accompanying product may be protected by one or more U.S. and foreign patents and/or pending patent applications held by Polycom, Inc. Open Source Software Used in this Product This product may contain open source software. You may receive the open source software from Polycom up to three (3) years after the distribution date of the applicable product or software at a charge not greater than the cost to Polycom of shipping or distributing the software to you. To receive software information, as well as the open source software code used in this product, contact Polycom by email at [email protected]. Disclaimer While Polycom uses reasonable efforts to include accurate and up-to-date information in this document, Polycom makes no warranties or representations as to its accuracy. Polycom assumes no liability or responsibility for any typographical or other errors or omissions in the content of this document. Limitation of Liability Polycom and/or its respective suppliers make no representations about the suitability of the information contained in this document for any purpose. Information is provided “as is” without warranty of any kind and is subject to change without notice. The entire risk arising out of its use remains with the recipient. In no event shall Polycom and/or its respective suppliers be liable for any direct, consequential, incidental, special, punitive or other damages whatsoever (including without limitation, damages for loss of business profits, business interruption, or loss of business information), even if Polycom has been advised of the possibility of such damages. Customer Feedback We are striving to improve our documentation quality and we appreciate your feedback. Email your opinions and comments to [email protected]. Visit the Polycom Support Center for End User License Agreements, software downloads, product documents, product licenses, troubleshooting tips, service requests, and more. Polycom, Inc. 2 Contents About This Guide ...................................................................................................... 7 Who Should Read this Guide? ........................................................................................................ 7 Conventions Used in this Guide ..................................................................................................... 7 Terms and Writing Conventions ....................................................................................................... 7 Information Elements ....................................................................................................................... 8 Typographic Conventions ................................................................................................................ 9 What’s in This Guide ...................................................................................................................... 10 Related Documents ........................................................................................................................ 10 1: Getting Started .................................................................................................... 13 Understanding Phone Keys and Hardware .................................................................................. 13 Navigating Phone Views ................................................................................................................ 14 Home View ..................................................................................................................................... 15 Lines View ...................................................................................................................................... 17 Active Call View ............................................................................................................................. 18 Calls View ...................................................................................................................................... 18 Understanding Phone Icons and Status Indicators .................................................................... 19 Navigating Your Phone Interface .................................................................................................. 20 Entering Data and Updating Fields ............................................................................................... 21 Using the Onscreen Keyboard ....................................................................................................... 22 Using the Dialpad Keys on the Phone Console ............................................................................. 24 Cleaning the Touchscreen ............................................................................................................. 25 Registering the Phone .................................................................................................................... 26 Configuring Your Phone Using the Web Configuration Utility .................................................. 26 2: Using Basic Features ......................................................................................... 28 How Your Phone Handles Calls .................................................................................................... 28 Answering Calls .............................................................................................................................. 29 Answering Another Call.................................................................................................................. 30 Answering on a Shared Line .......................................................................................................... 31 Answering Calls Automatically ....................................................................................................... 32 Managing Multiple Calls ................................................................................................................. 32 Placing Calls ................................................................................................................................... 34 Calling from the Dialer.................................................................................................................... 34 Placing Calls from Favorites, Recent Call Lists, and Directories ................................................... 35 Redialing Numbers......................................................................................................................... 36 Ending Calls .................................................................................................................................... 36 Using Headsets ............................................................................................................................... 36 Enabling Headset Memory Mode ................................................................................................... 37 Using Bluetooth Headsets with Your VVX 600 Phone ................................................................... 38 Responding to Incoming Calls ...................................................................................................... 42 Ignoring Incoming Calls.................................................................................................................. 42 Polycom, Inc. 3 Polycom VVX 500 and VVX 600 Business Media Phones and Polycom VVX Camera User’s Guide Rejecting Incoming Calls................................................................................................................ 42 Forwarding Incoming Calls to Another Person .............................................................................. 43 During Calls ..................................................................................................................................... 43 Holding Calls .................................................................................................................................. 43 Transferring Calls ........................................................................................................................... 44 Setting Up and Handling Conference Calls ................................................................................. 45 Setting Up Conference Calls .......................................................................................................... 45 Holding and Resuming Conference Calls ...................................................................................... 46 Ending Conference Calls ............................................................................................................... 46 Splitting Conference Calls into Two Held Calls ............................................................................. 47 Managing Conference Call Participants......................................................................................... 47 Changing the Way Calls are Answered ........................................................................................ 48 Forwarding All Calls to Another Person ......................................................................................... 48 Rejecting Calls from a Contact ...................................................................................................... 49 Diverting Calls from a Contact to Another Person ......................................................................... 50 Using Do Not Disturb ..................................................................................................................... 50 Using Do Not Disturb with Multiple Lines ....................................................................................... 52 Listening to Voicemail .................................................................................................................... 52 Viewing Recent Calls...................................................................................................................... 53 Working with Your Contact Directory ........................................................................................... 56 Working with a Corporate Directory ............................................................................................. 59 Controlling What is Heard.............................................................................................................. 60 Updating the Incoming Call Ringtone ............................................................................................ 60 Changing the Speaker Volume ...................................................................................................... 60 Changing the Ringer Volume ......................................................................................................... 60 Updating a Contact’s Ringtone ...................................................................................................... 61 Muting the Microphone................................................................................................................... 61 Choosing Where You Hear Sound Effects..................................................................................... 61 Managing Favorites ........................................................................................................................ 62 Working with Shared Lines............................................................................................................ 64 3: Using Video and the Polycom VVX Camera ..................................................... 66 Handling Video Calls Without a VVX Camera .............................................................................. 66 About Video Calls ........................................................................................................................... 67 Handling Video During Calls .......................................................................................................... 68 Handling a Mixture of Video and Audio-Only Calls ........................................................................ 70 Handling Conference Calls with Video........................................................................................... 70 Viewing All Video Calls on the Full Screen .................................................................................... 71 Displaying Video in Normal, Full, and Cropped Modes ................................................................. 72 Setting the Call Rate for Video Calls .............................................................................................. 73 Using a VVX Camera ...................................................................................................................... 73 Getting Started ............................................................................................................................... 74 About Video Calls ........................................................................................................................... 76 Handling Video Calls ...................................................................................................................... 77 Handling a Mixture of Video and Non-Video Calls ......................................................................... 81 Handling Conference Calls with Video........................................................................................... 82 Changing Video Settings................................................................................................................ 83 Placing Audio-Only Calls ............................................................................................................... 88 Polycom, Inc. 4 Polycom VVX 500 and VVX 600 Business Media Phones and Polycom VVX Camera User’s Guide Calling Using the H.323 Protocol .................................................................................................. 89 Tips for Video Calls ........................................................................................................................ 89 4: Using Advanced Features .................................................................................. 91 Using Buddy Lists .......................................................................................................................... 91 Updating Your Status ..................................................................................................................... 92 Setting Up and Managing a Buddy List .......................................................................................... 93 Blocking Contacts from Viewing Your Status................................................................................. 93 Monitoring Buddies ........................................................................................................................ 94 Integrating with Microsoft Lync Server ........................................................................................ 96 Recording Calls .............................................................................................................................. 96 Playing Back Recorded Calls ........................................................................................................ 99 Using the Browser ........................................................................................................................ 100 Navigating the Main Browser ....................................................................................................... 101 Entering Information in the Main Browser .................................................................................... 102 Broadcasting Messages Using Push-to-Talk and Group Paging ............................................ 102 Push-to-Talk Mode ....................................................................................................................... 102 Group Paging Mode ..................................................................................................................... 106 Using the Calendar ....................................................................................................................... 109 Opening and Closing the Calendar .............................................................................................. 110 Navigating Month View ................................................................................................................ 110 Navigating Day View .................................................................................................................... 111 Navigating Meeting View.............................................................................................................. 111 Working with Meeting Reminders ................................................................................................ 112 Joining Meetings from the Calendar ............................................................................................ 113 Using a Mouse and Keyboard with Your Phone ........................................................................ 114 Starting and Stopping Polycom Desktop Connector .................................................................... 115 How to Use Your Computer’s Mouse and Keyboard with Your Phone ....................................... 116 Logging into Phones .................................................................................................................... 118 Logging In and Out of a Phone .................................................................................................... 119 Placing Calls from Phones that are in the Logged-Out State ...................................................... 119 Changing Your Password ............................................................................................................ 120 Locking the Phone ........................................................................................................................ 120 About Your User Password .......................................................................................................... 120 Locking and Unlocking Your Phone ............................................................................................. 121 Calling and Answering from a Locked Phone .............................................................................. 121 Accessing Features with Your Login Credentials ..................................................................... 122 5: Customizing the Phone’s Display ................................................................... 123 Changing the Language on Your Phone .................................................................................... 123 Changing the Time and Date Display ......................................................................................... 123 Changing the Backlight................................................................................................................ 124 Changing the Background Picture ............................................................................................. 125 Using One of Your Own Pictures as the Background Picture...................................................... 126 Displaying Screen Savers ............................................................................................................ 126 Setting Up Screen Savers ............................................................................................................ 127 Interrupting and Disabling Screen Savers ................................................................................... 128 Using the Phone as a Digital Picture Frame .............................................................................. 128 Polycom, Inc. 5 Polycom VVX 500 and VVX 600 Business Media Phones and Polycom VVX Camera User’s Guide Using Power-Saving Mode........................................................................................................... 129 Changing Your Office Hours ........................................................................................................ 130 Changing Timeouts ...................................................................................................................... 130 6: Administrative Tasks ........................................................................................ 132 Investigating Phone Warnings .................................................................................................... 132 Restarting the Phone .................................................................................................................... 132 Updating Phone Configuration ................................................................................................... 133 Testing Phone Hardware.............................................................................................................. 133 7: Copyright, Safety, and Regulatory Notices .................................................... 135 Service Agreements ..................................................................................................................... 135 Governing Law ............................................................................................................................. 135 Limitations of Liability ................................................................................................................... 135 Polycom Limited Warranty and Limitation Liability ...................................................................... 135 Exclusions .................................................................................................................................... 136 Warranty Exclusive ...................................................................................................................... 136 Safety, Compliance, and Disposal Information ............................................................................ 136 Polycom, Inc. 6 About This Guide This VVX 500 and VVX 600 business media phones and VVX camera user guide uses a number of conventions that help you to understand information and perform tasks. Who Should Read this Guide? This guide contains overview information for people who are just starting to learn about their VVX 500 or VVX 600 phone, or who have experience, but need a quick refresher. It is intended for beginning users, as well as intermediate and advanced users who want to learn about their phone’s features. Conventions Used in this Guide This user guide contains terms, graphical elements, and a few typographic conventions. Familiarizing yourself with these terms, elements, and conventions helps you successfully perform tasks. Terms and Writing Conventions The Phone/your phone These terms refer to either the VVX 500 or VVX 600 phone. Unless specifically noted in this guide, especially with regard to phone graphics, both phones operate in the same way and the information in this guide applies to both phones. Tap This term refers to touching an item on the screen with your finger and then lifting your finger. Press This action refers to depressing a key on the keypad or pressing a screen item for a second or two. Press and hold When you press and hold a screen item, you need to touch the screen for a second or two before lifting your finger. Tap Submenu > Submenu > Submenu This convention describes how to access submenus. Each submenu name is in boldface and separated by a ‘greater than’ symbol. If the instructions indicate to tap Basic > Preferences > Language, tap the Basic submenu, tap the Preferences submenu, and tap the Language submenu. Highlight This action refers to tapping an item on the screen so that its appearance brightens. Soft keys apply to highlighted items. Select Selecting an item on the screen refers to tapping the item so that another screen opens. Views Your phone has four main views: Home, Calls, Active Call, and Lines (the default view). A view is a specific screen on the phone interface that provides unique information and enables you to perform specific tasks. Dialpad The dialpad is the area of the keypad you use to enter numbers and characters. The dialpad consists of all the number keys, as well as the asterisk (*) and pound (#) keys. Scroll This action describes how to view lists that appear on more than one screen. To scroll through items or lists, touch the screen, and then drag your finger up, down, left, or right. To stop scrolling, stop the dragging motion. Polycom, Inc. 7 Polycom VVX 500 and VVX 600 Business Media Phones and Polycom VVX Camera User’s Guide Swipe This action moves a list of items up, down, left, or right. When you want to scroll quickly, swipe your finger across the screen, either up, down, left, or right. To stop your screen from scrolling, press your finger anywhere on the screen. Touching the screen while it scrolls does not select anything. Swiping your finger to the left or right also displays other phone views. Key This term refers to any button on the phone console. Phone keys include the dialpad keys, , , , , and . Option An option is one of a series of items you can select for a phone setting, such as Enabled and Disabled. Held call This term describes any call that is held. Audio for held calls cannot be heard. Active call This term refers to a call, including conference calls, you are currently in. An active call has audio associated with it. Soft key This term describes the context-sensitive keys that display along the bottom of the screen that update depending on the task you are performing. To view additional soft keys, if additional soft keys are available, tap More. The More soft key is always on the far-right of the soft key area, as displayed next. Figure 1: Soft Keys Soft key area The soft key area, displayed in the following picture, is the area along the bottom of the screen that displays context-sensitive soft keys. Figure 2: Soft Key Area Status bar The status bar, displayed in the following picture, is the top-most part of the touchscreen. It displays the time and date and if your phone has messages, scrolling messages under the time display. The information that displays on the left of the status bar depends what view you are in. From Home view, your phone line displays. In other views, icons display that you can tap to access messages, recent calls, or view phone information. Icons may also display to let you know a certain feature, such as Bluetooth, is enabled. Figure 3: Status Bar Information Elements This guide uses the following information elements to highlight important information. Polycom, Inc. 8 Polycom VVX 500 and VVX 600 Business Media Phones and Polycom VVX Camera User’s Guide Icons Used in this Guide Name Icon Description Note The Note icon highlights information of interest or important information needed to be successful in accomplishing a procedure or to understand a concept. Administrator Tip The Administrator Tip icon highlights techniques, shortcuts, or productivity related tips. Caution The Caution icon highlights information you need to know to avoid a hazard that could potentially impact device performance, application functionality, or successful feature configuration. Warning The Warning icon highlights an action you must perform (or avoid) to prevent issues that may cause you to lose information or your configuration setup, and/or affect phone or network performance. Web Info The Web Info icon highlights supplementary information available online such as documents or downloads on support.polycom.com or other locations. Timesaver The Timesaver icon highlights a faster or alternative method for accomplishing a method or operation. Power Tip The Power Tip icon highlights faster, alternative procedures for advanced administrators already familiar with the techniques being discussed. Troubleshooting The Troubleshooting icon highlights information that may help you solve a relevant problem or to refer you to other relevant troubleshooting resources. Settings The Settings icon highlights settings you may need to choose for a specific behavior, to enable a specific feature, or to access customization options. Typographic Conventions A few typographic conventions, listed next, are used in this guide to distinguish types of in-text information. Typographic Conventions Convention Description Bold Highlights interface items such as menus, soft keys, file names, and directories. Also used to represent menu selections and text entry to the phone. Italics Used to emphasize text, to show example values or inputs, and to show titles of reference documents available from the Polycom Support Web site and other reference sites. Polycom, Inc. 9 Polycom VVX 500 and VVX 600 Business Media Phones and Polycom VVX Camera User’s Guide Convention Description Blue Text Used for cross references to other sections within this document and for hyperlinks to external sites and documents. Courier Used for code fragments and parameter names. What’s in This Guide This guide is organized into six chapters. The beginning chapters introduce the phone, describe how to use video and the VVX Camera, and explain how to use basic features. Later chapters describe advanced phone features, and how to customize your phone to suit your needs. The guide also includes safety and legal information. Chapter 1: Getting Started This chapter contains general information about your phone that is helpful before you start using your phone. It describes phone hardware and phone views, and how to use the touchscreen, navigate menus, and enter data. Chapter 2: Using Basic Features All the basic features that your phone offers, such as how to add contacts and favorites, or transfer or forward calls, are described in this chapter. Chapter 3: Using Video and the Polycom VVX Camera If video is enabled on your phone, and/or you have a VVX Camera attached to your phone, refer to this chapter for information on how video and the VVX Camera work on your phone. Chapter 4: Using Advanced Features Advanced features that may not be available on the phone, or that you may not use on a day-to-day basis, are described in this chapter. Advanced features include recording calls, locking your phone, monitoring buddies, and accessing a Browser. Chapter 5: Customizing Your Phone You can customize your phone in many ways, including setting up a screen saver, or changing the backlight, background picture, or time and date format. Read this chapter to personalize your phone. Chapter 6: Administrative Tasks This chapter describes tasks that your administrator may ask you to perform. These tasks include investigating phone issues, restarting the phone, updating the phone’s configuration, and testing phone hardware. Copyright, Safety, and Regulatory Notices information related to your phone. This section provides important safety and compliance End-User License Agreement The End-User License Agreement outlines the legal agreement between you and Polycom when you agree to install and use Polycom software. Related Documents For additional information about the VVX 500, VVX 600, and VVX Camera, see the following documents: User Documents: Polycom, Inc. 10 Polycom VVX 500 and VVX 600 Business Media Phones and Polycom VVX Camera User’s Guide Polycom VVX 500 and VVX 600 Business Media Phones and Polycom VVX Camera Quick User Guide This guide is a quick reference on how to use the phone’s most basic features, including how to use video and the VVX Camera. It also briefly describes how to navigate the phone and enter information. It is available from the Polycom VVX 500, Polycom VVX 600, and VVX Camera support pages. Setup and maintenance documents: Polycom VVX 500 and VVX 600 Business Media Phones Quick Start Guide This guide describes the contents of your phone package, how to assemble the phone, and how to connect the phone to the network. The quick start guide is included in your phone package. It is also available from the Polycom VVX 500 and Polycom VVX 600 support pages. Polycom VVX Camera Quick Start Guide This guide describes the contents of your camera package, and how to attach the camera to your phone. The quick start guide is included in your camera package. It is also available from the VVX Camera support page. Polycom VVX 500 Business Media Phone Administrators’ Guide This guide provides detailed information about setting up and configuring your phone, including how to configure features. It is available from the Polycom VVX 500 support page. Polycom VVX 600 Business Media Phone Administrators’ Guide This guide provides detailed information about setting up and configuring your phone, including how to configure features. It is available from the Polycom VVX 600 support page. Polycom VVX Camera Administrators’ Guide This guide provides detailed information about setting up and configuring your camera, including how to configure features. It is available from the VVX Camera Support page. Polycom VVX 500 and VVX 600 Business Media Phone Wallmount Instructions This document provides detailed instructions for mounting your phone on the wall. To install your phone on the wall, you’ll need the optional wallmount package. The wallmount instructions are included in the optional wallmount package. They are also available from the Polycom VVX 500 or Polycom VVX 600 support pages. Feature Descriptions and Technical Notifications for Polycom phones These documents describe workarounds to existing issues and provide expanded descriptions and examples for phone settings and features. You can find these documents on the Polycom Support Web site on the Polycom Profiled UC Software Features and Polycom Engineering Advisories and Technical Notifications support pages. Polycom, Inc. 11 1: Getting Started Before you use your phone, take a few moments to become familiar with its features and user interface. This chapter details your phone’s components, the screen layout of your phone, and how to use your phone’s touchscreen. This chapter also includes how to clean the touchscreen and configure your phone remotely using the Polycom Web Configuration Utility. Note: Accessing Features and Options As you read this guide, keep in mind that certain phone features are configurable by your system administrator or determined by your phone environment. As a result, some features may not be enabled or may operate differently on your phone. The examples and figures in this guide may not directly reflect what displays or is available on your phone screen. Understanding Phone Keys and Hardware The following figure displays the important phone features on the VVX 500 and VVX 600 Figure 4: VVX 500 and VVX 600 Phone Features Polycom, Inc. 13 Polycom VVX 500 and VVX 600 Business Media Phones and Polycom VVX Camera User’s Guide The following list describes the important phone features on the VVX 500 and VVX 600: Reversible tab Secures the handset in the cradle when your phone stand is positioned at a high angle. To secure the handset, remove the tab, reverse it so the protrusion points up, and re-insert it. Then, position the handset so the protrusion on the tab fits into the slot on the handset. Speaker Provides ringer and speakerphone audio output. Dialpad Enables you to enter numbers, letters, and special characters. You can also use the dialpad keys to select menu items that have index numbers. Security Slot The connector on the left side of your phone that enables you to attach a laptop cable lock to your phone so you can secure it to a desktop. For more information on locking your phone to the desktop, see Security Slots on Polycom Phones (Technical Bulletin 64654). USB Ports Enable you to: Attach a USB flash drive so you can record calls, update the background picture on your phone, set up a screen saver, or use your phone as a digital picture frame. Attach a USB headset. Attach a VVX Camera to the top-most port. Message Waiting Indicator Home and Lines Key Press Flashes red to indicate new messages. from any screen to display Home view. From Home view, press to display other phone views: Line and Call view. Touchscreen The screen is touch-sensitive. Tap to select and highlight screen items. To scroll, touch the screen, and swipe your finger up, down, right, or left. Headset Key Enables you to place and receive calls through a headset. The key glows green when an analog headset is activated, and blue when a USB or Bluetooth headset is activated. Speakerphone Key Enables you to place and receive calls using the speakerphone. The key glows green when activated. Mute Key Mutes local audio during calls and conferences. The key glows red when activated. Volume Key Adjust the volume of the handset, headset, speaker, and phone’s ringer. Microphone Transmits sound to other phones. Web Info: Attaching Phone Hardware For information on attaching phone hardware, including how to connect your phone to the network, see the Quick Start Guide for your phone, available by navigating to your phone’s Support page from the Business Media Phones Support page. Navigating Phone Views Your phone has four main views: Home, Calls, Active Call, and Lines (the default view). To change views: For Home view, press Polycom, Inc. . 14 Polycom VVX 500 and VVX 600 Business Media Phones and Polycom VVX Camera User’s Guide From Home view, press to display either Lines, Calls, or Active Call view. To switch between Lines view and either Calls or Active Call view, swipe the screen to the right or left. Troubleshooting: Why Can’t I Access a Certain View? The views you can access depend on the number of calls your phone has, and if your phone has an active call. If your phone is idle, you can access Home and Lines view. If your phone has one call only—and it is active—you can access Home, Lines, and Active Call view. If your phone has multiple calls, or one held call, you can access Home, Lines, and Calls view. At the top of each view is a status bar, displayed next. The status bar displays the date and time, your phone line—depending what view you are in, and icons that you can tap to access messages or recent calls. When your phone has information you should know about, icons and messages scroll together with the date, under the time display. If you have a VVX 600, additional icons might display in the status bar, such as Do Not Disturb (DND) and Warning icons, which you can tap. Figure 5: Status Bar Home View You can display Home view, displayed next, by pressing . Home view displays your phone line and icons you can tap to access phone features, settings, and information. At the bottom of Home view is a Page Indicator that you can press and hold to control how many icons Home view displays. Figure 6: Home View Polycom, Inc. 15 Polycom VVX 500 and VVX 600 Business Media Phones and Polycom VVX Camera User’s Guide To display additional Home view icons, displayed next, press and hold the Page Indicator. Press and hold the Page Indicator again to view fewer icons. Figure 7: Additional Home View Icons User Tip: Displaying Additional Home View Icons Instead of pressing the Page Indicator to view additional Home view icons, swipe the screen right or left. Home view displays the following icons: New Call Tap New Call to display the Dialer so you can place a call. Messages Tap Messages to access your voicemail. Directories Tap Directories to access your Contact Directory and Recent Calls list. You can also tap Directories to access a Corporate Directory and a Buddy Status List if they are set up on your phone. Forward Tap Forward to set up forwarding options for incoming calls. DND Tap DND to toggle DND (Do Not Disturb) on or off. When DND is enabled, your phone does not ring and incoming calls go to voice mail. Settings Tap Settings to access phone features and settings to customize your phone. Additional icons may include: Applications Tap Applications to access a menu of custom applications. Ask your system administrator for information about any specific applications listed in this menu. Calendar Tap Calendar to show a calendar with your meeting details. Using the Calendar feature, you can join meetings directly from your phone. From Home view, tap a phone line to display additional phone lines that you can set up for your phone and favorites, displayed next. From this screen, tap a phone line to open the Dialer, or tap a favorite to dial the favorite. To display the Home view icons again, tap Close. Polycom, Inc. 16 Polycom VVX 500 and VVX 600 Business Media Phones and Polycom VVX Camera User’s Guide Figure 8: Additional Lines and Favorites from Home View Lines View Lines view, displayed next, is your phone’s default display. To display Lines view, press from Home view. Lines view displays your phone lines, your favorites, and soft keys in the soft key area. Figure 9: Lines View When your phone is idle, you can: Tap a phone line to access the Dialer. Swipe to switch between Lines view and the Idle Browser, if available. When calls are queued in your phone, the phone line indicates the number of calls you have, and if they are active or held. When the phone line has an active call, a green bar displays, as displayed in the following VVX 500 example. When the phone line has one or more held calls, a flashing red bar displays, as displayed in the following VVX 600 example. To display your calls, press and hold the phone line, or swipe the screen. Polycom, Inc. 17 Polycom VVX 500 and VVX 600 Business Media Phones and Polycom VVX Camera User’s Guide Figure 10: Active and Held Calls Troubleshooting: Why Can’t I Access the Idle Browser? If your phone has calls, you cannot access the Idle Browser. To access the Main Browser, tap Applications from Home view. For information about the Idle and Main Browsers, see Using the Browser. Active Call View When you have only one call in progress and it is an active call, you can access Active Call view, displayed next. When you are in Home view, you can display Active Call view by pressing , or tapping in the status bar. To switch between Lines and Active Call view, swipe the screen right or left. Active Call view displays the name and number of the person you are talking with and the duration of the call. From Active Call view, you can manage the call. You can hold, end, or transfer the call, or set up a conference call with the person you’re talking with and other parties. Figure 11: Active Call View Calls View You can access Calls view, displayed next, if your phone has multiple calls in progress, or your phone has one held call. If you are in Home view, you can display Calls view by pressing , or tapping in the status bar. To switch between Lines and Calls view, swipe the screen right or left. Polycom, Inc. 18 Polycom VVX 500 and VVX 600 Business Media Phones and Polycom VVX Camera User’s Guide Figure 12: Calls View Scroll to see all your calls. If your phone has multiple lines, calls display under the associated line. Call color indicates status: Dark Green Dark Blue Active call. Incoming and held calls. Bright Green Bright Blue Active call is highlighted. Incoming or held call is highlighted. Note: What Does a Highlighted Call Indicate? How Do I Highlight a Call? A highlighted call is either bright green or blue. Tap an active call to make it bright green, or tap a held call to make it bright blue. The soft keys apply to the highlighted call. Understanding Phone Icons and Status Indicators The following table displays icons, including phone, call, or buddy/contact status, and indicators which let you know that a feature is enabled. You can tap certain icons to access information or features. For information on video icons, see Chapter 3, Using Video and the Polycom VVX Camera. Table 1: Phone Icons and Status Indicators Icon Polycom, Inc. Description Icon Description Registered line Status indicators in Lines view. A flashing red bar indicates held calls. A green bar indicates an active call. Unregistered line Do Not Disturb enabled Placing a call Phone warning Active call using Polycom HD Voice Login credentials invalid 19 Polycom VVX 500 and VVX 600 Business Media Phones and Polycom VVX Camera User’s Guide Icon Description Icon Description Held call Shared line Incoming call in Lines view Shared line with a held call Incoming call in Call view Call forwarding is enabled Active conference Tap to access recent calls USB flash drive attached Tap to access messages Recording in progress or paused (VVX 500 only) Presence status (Available) Recording paused (VVX 600 only) Presence status (Busy) Recording in progress (VVX 600 only) Presence status (Away) Placed call Presence status (Do Not Disturb) Received call Presence status (Offline) Missed call Presence status (No information) Bluetooth available (VVX 600 only) Bluetooth headset paired and connected (VVX 600 only) Navigating Your Phone Interface The following table shows you how to navigate your phone’s screens, as well as select and highlight options. Table 2: Navigating Your Phone Interface Task Action Return to Home view from any screen Press Return to the previous screen Tap Back, as displayed next. Polycom, Inc. . 20 Polycom VVX 500 and VVX 600 Business Media Phones and Polycom VVX Camera User’s Guide Task Action Switch phone views If you are in an active call, press to switch between Home view, Lines view and Calls view. If you are not in an active call press between Home view and Lines view. to switch If you are in Home view and press , the Idle Browser may display. Swipe the screen to display Lines view. Highlight calls in Calls view Tap a call to highlight it. The soft keys apply to the highlighted call. Select a menu item or option Tap the menu item or option. Close an option box without selecting anything Tap Select an icon, soft key, menu item, or option Tap the icon, soft key, menu item, or option. If an item in a list has a number next to it, you can press the corresponding number on the dialpad to select the item. Select a soft key that’s not in view If a More soft key displays in the far-right of the soft key area (as displayed next), there are additional soft keys available, but you cannot see them. Tap More to view the additional soft keys. . Entering Data and Updating Fields You can enter information and edit fields using the onscreen keyboard, or using the dialpad keys on the phone console. Before you use the onscreen keyboard or the dialpad keys to enter information in fields, you can tap the Encoding or Mode soft key to specify how you want to enter information: Mode enables you to enter just numbers, or text in title case, lower case, or upper case characters. Encoding enables you to enter alphanumeric and special characters—including all the options available when you tap Mode—as well as characters in special languages. The following tables list the Mode and Encoding options. Polycom, Inc. 21 Polycom VVX 500 and VVX 600 Business Media Phones and Polycom VVX Camera User’s Guide Table 3: Mode and Encoding Options Options Available When You Tap Mode Options Available When You Tap Encoding or Abc (to capitalize the first letter only, and use lower case for the remaining letters) Abc ABC (to enter upper case only) ABC Abc (to enter lower case only) abc 123 (to enter numbers only) 123 ASCII (for regular text) Latin (to enter accented characters) Katakana (for Japanese characters) Unicode (to store characters as double bytes) Cyrillic (for Russian characters) Troubleshooting: I’m Using the Onscreen Keyboard, But the Encoding or Mode Soft Key Doesn’t Display When the onscreen keyboard displays, the Encoding and Mode soft keys are not available. To select Encoding options, tap . Or, tap , , , or to enter information in a specific way. For tips on using the onscreen keyboard, see Using the Onscreen Keyboard. Using the Onscreen Keyboard Use the onscreen keyboard, displayed next, to quickly update field information. When a data entry field only requires numbers, the onscreen keyboard just displays numbers. Figure 13: Onscreen Keyboard To access the onscreen keyboard, tap in the phone’s status bar, as displayed next. The icon displays in the status bar whenever you can enter information in a field. Polycom, Inc. 22 Polycom VVX 500 and VVX 600 Business Media Phones and Polycom VVX Camera User’s Guide Figure 14: Status Bar To use the onscreen keyboard: 1 Open the onscreen keyboard by tapping in the phone’s status bar. 2 To enter information in a specific way—for example, in upper case only and using the ASCII format—tap and select the options you want, as displayed next. User Tip: Another Way to Select How You Want to Enter Information Tap , , , or to select alphabetic, numerical, upper case, or lower case mode. For more information on these keys, see the table below. 3 Press your finger on the character you want. The character displays in a magnified view on the screen, as displayed next. To enter the character, lift your finger. If you do not want to enter the character, drag and lift your finger. 4 When you finish entering information, tap . 5 Tap Save. Polycom, Inc. 23 Polycom VVX 500 and VVX 600 Business Media Phones and Polycom VVX Camera User’s Guide Use the tips in the following table to enter information using the onscreen keyboard. Table 4: Using the Onscreen Keyboard to Enter Information Task Action Select an Encoding option (title case, upper case, lower case, numbers-only, ASCII, Latin, Katakana, Unicode, Cyrillic) Tap Enter text Tap and tap the characters you want. Enter upper case characters Tap and tap the characters you want. Enter lower case characters Tap and tap the characters you want. Enter numbers Tap and tap the numbers you want. Enter special characters Tap and tap the characters you want. Exit the onscreen keyboard, enter the information, and update the next field Tap Delete one or more characters Drag your finger across the characters to highlight them in yellow and tap . Replace characters Highlight the characters you want to delete. Then, enter the characters you want. and tap the Encoding options you want. . Using the Dialpad Keys on the Phone Console Instead of using the onscreen keyboard, you can use the dialpad keys on your phone console to update field information. When a field requires data input, tap Encoding or Mode to specify how you want to enter data. The following table describes how to enter different types of data on your phone. Table 5: Using the Dialpad Keys to Enter Information Data Type Action Enter numbers, or characters in upper case, lower case, or title case mode Tap Encoding or Mode, and select one of the alphabetic (ABC, abc, or Abc) options. Enter only numbers Tap Encoding or Mode, and select the numeric (123) option. Enter text in a special language Tap Encoding, and select one of the language options. Polycom, Inc. 24 Polycom VVX 500 and VVX 600 Business Media Phones and Polycom VVX Camera User’s Guide Data Type Action Enter a character Press a dialpad key repeatedly to view the character options and stop to select. When the character you want to enter displays in the field, wait one second, and enter the next character. Enter a number Press a dialpad key repeatedly (depending what mode you’re in) to enter the number that displays on that key. Enter a special character Tap Encoding, and select one of the alphabetic (Abc, ABC, or abc) options. Then, press the 1, *, 0, or # key one or more times to enter one of the following special characters: 1 key: * key: 0 key: # key: You cannot access special characters when you are in numerical (123) mode. Enter a space Tap Encoding, and select one of the alphabetic (Abc, ABC, or abc) options. Then, press the 0 key. You cannot enter a space when you are in numerical (123) mode. Delete one or more characters Drag your finger across the characters until the cursor is positioned to the right of the character(s) you want to delete. Then, tap (or press and hold) . Cleaning the Touchscreen The touchscreen requires very little maintenance. Periodically, however, you may need to clean it. Use a clean, dry, microfiber cloth—the kind you would use to clean glass surfaces—to wipe the touchscreen. This type of cloth is available from many office supply stores. Before you clean the screen, disable it so you do not activate phone functions while you wipe the touchscreen. To enable the touchscreen again, press any key on the phone console. To answer a call while the touchscreen is disabled, pick up the handset. Or, press or and tap Answer. To clean the touchscreen: 1 Tap Settings from Home view, and tap Basic > Screen Clean. 2 Wipe the glass with a clean, dry, microfiber cloth. 3 To enable the touchscreen again, press any key on the phone console. Polycom, Inc. 25 Polycom VVX 500 and VVX 600 Business Media Phones and Polycom VVX Camera User’s Guide Note: What Happens if I Wipe the Touchscreen, But It’s Still Dirty? Dampen a soft, lint-free cloth with an isopropyl alcohol and water solution of 50:50, and then wipe the screen with the cloth. Always use the dampened cloth to apply the solution; never apply the solution directly, which could seep inside the screen or stain the phone. In addition, do not use caustic chemicals to clean the touchscreen. Registering the Phone In most cases, your phone is deployed with multiple other phones and your system administrator configures the phone parameters, so that after you set up your phone, the phone is registered and ready to use. When your phone is not part of a large phone deployment, your phone might not be registered after you set it up. Before you use your phone, you or your system administrator has to register it. Web Info: How to Register Your Phone For detailed information on how to register your phone after you install it, see Registering Standalone Polycom Phones (Quick Tip 44011). Configuring Your Phone Using the Web Configuration Utility This user guide explains how to update phone settings from your phone using the phone’s menu commands. If you wish, you can also update these settings remotely with the Polycom Web Configuration Utility. The phone’s Web Configuration Utility enables you to view and configure phone behavior from a computer using a Web browser. The utility provides a browser-friendly view of your phone’s current settings. Using the utility, you can perform many of the same updates from your computer that you can perform using your phone’s menu system. You can access the utility using any compatible Web browser installed on a computer that resides on the same network as your phone. Before you begin, you need to know the IP address of your phone and the user password to log in to the utility. Web Info: Using the Utility For detailed information on accessing, navigating, and using the utility, see the Polycom Web Configuration Utility User Guide. Polycom, Inc. 26 Polycom VVX 500 and VVX 600 Business Media Phones and Polycom VVX Camera User’s Guide Before you begin using the Web Configuration Utility, you need to know the IP address of your phone and the user password to log in to the utility. To find your phone’s IP address: » From Home view, Select Settings > Status > Platform > Phone, and use the arrow keys to navigate to your phone’s IP address. To access the Web Configuration Utility for your phone: 1 Launch a Web browser from a computer on the same network as your phone. 2 In the Address Bar of your Web Browser, enter the IP address of your phone. For example, if your phone’s IP address is 123.22.3.4, enter this information in the address bar. 3 Press the Enter key. 4 From the Web Configuration Utility login screen, select User, and enter the user password. The default user password is 123. 5 Click Submit. The Web Configuration Utility Home screen displays. Polycom, Inc. 27 2: Using Basic Features Now that you are familiar with your phone’s user interface, you are ready to perform basic phone tasks that you can use on a daily basis. This chapter explains how to handle multiple calls at one time, how to manipulate incoming and active calls, and how to access directories and lists so you can perform tasks quickly and efficiently. The following information is described: Calling, answering, holding, and ending calls Ignoring, rejecting, forwarding, and transferring calls Setting up conference calls Enabling Do Not Disturb Listening to voicemail Handling Directories, Recent Calls, and Favorites Customizing ringtones Controlling phone volume Using headsets Managing shared lines How Your Phone Handles Calls Your phone can handle multiple calls at a time. However, only one active call—the call that has audio associated with it—can be in progress at any given time. In addition to the active call, your phone may have multiple other calls that are either held, or in an incoming or ringing state. Your phone can handle a maximum of 24 calls at one time. Your administrator can set up your phone to have up to 12 lines (for the VVX 500) or 16 lines (for the VVX 600). Lines can have unique extension numbers, or they can have the same extension number as other lines. You can place and answer calls in these ways: Using the handset Using the speakerphone Using a headset During a call, you can alternate between handset, headset, or speakerphone modes by picking up the handset, or pressing mode by pressing or . For example, if you’re using the handset, you can switch to headset , or switch to speakerphone mode by pressing . When you’re in speakerphone mode, glows green. When you’re in headset mode, glows green if an analog headset is connected, and blue if a USB headset is connected. When both an analog and USB headset are connected, the USB headset is used. Polycom, Inc. 28 Polycom VVX 500 and VVX 600 Business Media Phones and Polycom VVX Camera User’s Guide Troubleshooting: Why Doesn’t the Speakerphone Work? If your speakerphone doesn’t work, your system administrator may have disabled it. You must handle calls using the handset or a headset. If your system administrator disables the speakerphone on your phone, Handsfree mode disabled appears on the touchscreen after you press . Power Tip: Setting Up the Phone to Automatically Use Your Headset for All Calls If you frequently use a headset, you can make the headset the default call path. To set this up, see Enabling Headset Memory Mode. Answering Calls All incoming calls display in an Incoming Call window, as displayed next. Figure 15: Incoming Call Window To answer the call, do one of the following: To use the handset, pick up the handset. To use the speakerphone, press To use your headset, press or tap Answer. . When you’re already in handset, speakerphone, or headset mode, tap Answer, and the phone automatically uses the mode you’re in. When you don’t answer the call within 10 seconds, the Incoming Call window disappears, and either Home or Calls view displays, as displayed next. The view that displays depends if your phone last displayed Home or Lines view. Polycom, Inc. 29 Polycom VVX 500 and VVX 600 Business Media Phones and Polycom VVX Camera User’s Guide Figure 16: Incoming call from Home view: Figure 17: Incoming call from Calls view: To answer the call, pick up the handset, press the speakerphone. , or press . Or, from Calls view, tap Answer to use Note: Setting Up a Visual Incoming Call Alert Your system administrator can enable the touchscreen to flash bright orange when you have an incoming call. The touchscreen continues to flash until the incoming call displays in Home or Calls view. For more information about this feature, see your system administrator. Note: Answering Calls When Your Phone is Locked If your phone is locked, the way you answer calls is different. For more information on answering calls from a locked phone, see Calling and Answering from a Locked Phone. Answering Another Call When you are in an active call and an incoming call arrives on the same or a different line, a call waiting tone beeps, and the Incoming Call window displays, as displayed next. To answer the call, tap Answer. The call you were in is held. Polycom, Inc. 30 Polycom VVX 500 and VVX 600 Business Media Phones and Polycom VVX Camera User’s Guide Figure 18: Incoming Call Window If you don’t answer the call within 10 seconds, the Incoming Call window disappears, and either Home or Calls view displays, as displayed next. Figure 19: Incoming call from Home view: Figure 20: Incoming call from Calls view: To answer the call from Home view, tap to display Calls view. To answer the call from Calls view, tap the incoming call if it’s not already highlighted, and tap Answer. Answering on a Shared Line When you share a line with another phone, you can answer calls normally, or, someone who shares the line can choose to answer the call from their phone. When you share a line with another phone and you place a call on hold, anyone who shares your line can answer the held call. Polycom, Inc. 31 Polycom VVX 500 and VVX 600 Business Media Phones and Polycom VVX Camera User’s Guide For more information about shared lines, including what you can and cannot do with shared lines, see Working with Shared Lines. Answering Calls Automatically You can set up your phone to auto-answer calls, so you do not have to push a button or tap a key to answer a call. When you enable this feature, your phone automatically answers incoming calls using the speakerphone. Your system administrator sets how many times your phone rings before the call is autoanswered. When Auto Answer is enabled and a call arrives while you are already in a call, the incoming call is automatically answered only if you end or hold the current call. Note: Auto-Answered Calls and Microphone Mute Your phone mutes the microphone for all auto-answered calls, so that the party calling you can’t hear you. To unmute the microphone so the other party can hear you, press . To enable or disable microphone mute for auto-answered calls, see the following procedure. To enable your phone to automatically answer calls: 1 Tap Settings from Home view, and tap Basic > Preferences > Auto Answer. 2 From the Auto Answer screen, you can: Enable your phone to automatically answer SIP calls. Tap Auto Answer SIP Calls, and tap Yes. The default setting is No. Enable your phone to automatically answer H.323 calls. Tap Auto Answer H.323 Calls, and tap Yes. The default setting is No. This field only displays if your phone supports the H.323 protocol. Mute the microphone for all auto-answered calls so the incoming caller can’t hear you. Tap Microphone Mute, and tap Yes. The default setting is Yes. Mute the video when video calls are auto-answered (so that the incoming caller cannot see you), tap Video Mute, and tap Yes. The default setting is No. 3 Tap Save. Managing Multiple Calls You can manage multiple calls from Lines and Calls view. To switch between the two views, swipe the screen. In Lines view you can see each line on your phone and how many calls each line has, as displayed next. A green bar indicates a line with an active call. A flashing red bar indicates a line with one or more held calls. In the example on the left, line 2091 has two calls, one active call and one held call, and line 2095 has one held call. The soft keys apply to the phone line that has the blue border, line 2091. To display the calls for a particular line, press and hold the phone line. Polycom, Inc. 32 Polycom VVX 500 and VVX 600 Business Media Phones and Polycom VVX Camera User’s Guide Figure 21: Lines View When you tap a phone line that does not have an active call, the most recent call on that line becomes active, even if you are already in an active call on a different line. If you are already in an active call on a different line, the active call is held. Swipe the screen to display Calls view. Calls view displays all the calls for each phone line, as displayed next. All the calls for a phone line display under the associated phone line. Scroll up or down to see all your lines and calls. Figure 22: Call View To manage a call, tap the call to highlight it. Then, tap one of the soft keys to hold, resume, end, or transfer the highlighted call, or set up a conference with the highlighted call. When you navigate away from your calls, tap to see Active Call or Calls view, as displayed next. Figure 23: Status Bar with Calls Button Polycom, Inc. 33 Polycom VVX 500 and VVX 600 Business Media Phones and Polycom VVX Camera User’s Guide Placing Calls You can place a call using the handset, speakerphone, or headset. You can dial the number first, and then choose the method—by picking up the handset, pressing method first, and then dial the number. , or pressing —or choose the You can place calls in these ways: Manually, from the Dialer Automatically, by tapping a favorite in Home or Lines view Automatically, from your Favorites list, Recent Calls list, or Contact Directory. Note: Calling from a Locked Phone If your phone is locked, see Calling and Answering from a Locked Phone for information on placing calls when your phone is locked. Calling from the Dialer The Dialer displays a list of previously placed calls. Tap one of the Dialer entries to enter it. Or, start entering a number. As you enter numbers, the Dialer displays a list of similar numbers, as displayed next. Tap a match to automatically enter it. Figure 24: The Dialer To display the Dialer, do one of the following: From Home view, tap New Call. From Lines or Calls view, tap the New Call soft key. The New Call soft key does not display if you have an active call. Start entering a phone number, if your phone is idle. Pick up the handset, or press or , if you do not have an active call. In Lines view, tap a phone line that does not have any calls. Polycom, Inc. 34 Polycom VVX 500 and VVX 600 Business Media Phones and Polycom VVX Camera User’s Guide User Tip: Choosing URLs or Numbers Mode from the Dialer To enter a URL in the Dialer, tap URL. To exit URL mode and enter numbers, tap Number. When you access the Dialer, an active call is held. To call from the Dialer: Enter the number, and then pick up the handset. Press or tap , or press . If you’re already in handset, speakerphone, or headset mode, enter the number, and tap . Note: Handling Automatically-Placed Calls Your administrator sets up your phone to automatically place the call after you enter a certain number of digits. If your phone doesn’t automatically place the call, tap . If a call is placed before you enter all the digits, place the call as follows: enter the phone number and tap . Placing Calls from Favorites, Recent Call Lists, and Directories In addition to the Dialer, you can place calls from the Recent Calls list, Favorites list, or you’re Directory. Or, you can quickly call a favorite from Home or Lines view. To call from the Recent Calls list: 1 Access your Recent Calls list by doing one of the following: From Home view, tap Directories, and tap Recent Calls. From the Dialer, tap Recent. From Lines, Calls, or Active Call view, tap . 2 From the Recent Calls list, tap the person you want to call. The call is automatically placed. To call from your Favorites list: 1 From Home view, tap New Call. 2 From the Dialer, tap Favorites. 3 From your Favorites list, tap the favorite you want to call. The call is automatically placed. Timesaver: Automatically Dialing Favorites You can quickly dial a favorite from Home or Lines view: From Home view: Tap the phone line, and tap the favorite you want to call. From Lines view: Tap the favorite you want to call. Polycom, Inc. 35 Polycom VVX 500 and VVX 600 Business Media Phones and Polycom VVX Camera User’s Guide To call from your Directory: 1 Access your directory by doing on of the following: From Home view, tap Directories, and tap Contact Directory From Home view, tap New Call, and tap Directory. 2 From your Directory, tap the contact you want to call. 3 From the contact’s information screen, tap the contact’s phone number. The call is automatically placed. Redialing Numbers To dial the last number you called, open the Dialer. The first number in the list is the last call you placed. To redial a number: 1 From the Dialer, displayed next, tap the first number in the list. 2 Place the call. Ending Calls To quickly end an active call, replace the handset, or press or . Or, from Active Call, Lines, or Calls view, tap End Call. If you’re in Calls view, be sure to highlight the call first. Note: How Do I End a Held Call? A call must be active to end it. To end a held call: From Calls view, tap the held call to highlight it, tap Resume, and then tap End Call. Using Headsets You can connect an analog and USB headset to your phone. When an analog headset is connected and in use, Polycom, Inc. glows green. When a USB headset is connected and in use, glows blue. When both an 36 Polycom VVX 500 and VVX 600 Business Media Phones and Polycom VVX Camera User’s Guide analog and USB headset are connected, the USB headset is used. When two USB headsets are connected, the headset you connected first is used. When you use a headset, you can set up your phone so that all calls use your headset. To enable this feature, see Enabling Headset Memory Mode. When you use a headset that supports electronic hookswitch (EHS), you can use the controls on your headset to answer and end calls. In addition, you may be able to mute calls and control volume from your headset. VVX 600 phones also support Bluetooth headsets. If your system administrator enables Bluetooth capability for your phone, you can use a Bluetooth device to handle calls. When a Bluetooth headset is connected and in use, glows blue. When analog, digital, and Bluetooth headsets are connected to your phone, the Bluetooth headset is used. To use a Bluetooth headset, see Using Bluetooth Headsets with Your VVX 600 Phone. Web Info: More Information About Headsets For information on how to connect a headset to your phone, see the Quick Start Guide for your phone, available by navigating to your phone’s Web page from the Business Media Phones Support page. For information on your headset’s features, as well as how to sync your headset with your phone, see your headset documentation. For a list of supported headsets, see Using Headsets with Polycom Phones (Feature Profile 37477). For detailed information about how to use electronic hookswitch, see Using an Electronic Hookswitch (Technical Bulletin 35150). These documents are available from the Polycom Profiled UC Software Features and Polycom Engineering Advisories and Technical Notifications Support pages. Troubleshooting: Why Doesn’t My Headset Work with My Phone? Certain USB headsets—such as those that come with a docking station—have two modes: deskphone and softphone. To work with your phone, your headset must be in softphone mode. If you cannot operate the phone from your headset, it is possible your headset is in deskphone mode. To switch modes, press and hold the headset hookswitch until you hear a sound or message on the headset. Enabling Headset Memory Mode This feature is useful for permanent or full-time headset users. You can set up your phone so that all incoming and outgoing calls use your headset. At any time, you can switch to handset or speakerphone mode. To use Headset Memory Mode, enable and then activate Headset Memory Mode. When Headset Memory Mode is activated, headsets. flashes either green, for analog headsets, or blue, for USB or Bluetooth To enable Headset Memory Mode: 1 Tap Settings from Home view, and tap Basic > Preferences > Headset > Headset Memory. 1 From the Headset Memory Mode screen, tap Enabled. Polycom, Inc. 37 Polycom VVX 500 and VVX 600 Business Media Phones and Polycom VVX Camera User’s Guide 2 Press . 3 To activate Headset Memory Mode, press phone is in Headset Memory Mode. twice. The Headset key flashes to indicate that the Now, whenever you answer a call, the call connects to your headset automatically. When you switch to the speakerphone or the handset, you deactivate Headset Memory Mode. Calls no longer automatically go to your headset, unless you choose this mode. To have calls go to your headset again, activate Headset Memory Mode by pressing twice. Using Bluetooth Headsets with Your VVX 600 Phone If you have a VVX 600 phone and your system administrator enables Bluetooth capability, you can use a Bluetooth headset with your phone to handle calls. To use your Bluetooth headset with your phone, you need to turn on the Bluetooth option on your phone, and then pair and connect your Bluetooth device with your phone. This section shows you how to turn Bluetooth on, and how to pair and connect your Bluetooth headset. It also provides general information on how to use your Bluetooth headset with your phone, and how to disconnect and remove your Bluetooth headset from your phone. Turning On the Bluetooth Option Before you can use a Bluetooth headset with your phone, you need to turn on the Bluetooth option. When Bluetooth is turned on, the Bluetooth icon displays in the status bar, as displayed next. Figure 24: Status Bar After you turn on the Bluetooth option, you can pair and connect your Bluetooth headset. To turn on the Bluetooth option on your phone: 1 From Home view, tap Settings > Basic > Bluetooth Settings > Bluetooth Radio. The Bluetooth Radio screen displays, as displayed next. 2 To turn Bluetooth on, tap On. The message Turning BT radio on/Please wait displays. Polycom, Inc. 38 Polycom VVX 500 and VVX 600 Business Media Phones and Polycom VVX Camera User’s Guide The Bluetooth icon displays in the status bar. You may have to wait several seconds for the icon to display. When the icon displays, you can pair and connect your Bluetooth headset. Pairing and Connecting Bluetooth Headsets Before you use your Bluetooth headset, you need to pair and connect it with your phone. You can pair up to four Bluetooth headsets with your phone; however, only one headset can be connected at a time. Note: Pairing and Connecting Bluetooth Headsets The following instructions are intended as a guide, and do not apply to all Bluetooth devices. You can usually find instructions for your headset on the device manufacturer’s Web site. Troubleshooting: Why Don’t the Bluetooth Settings Display on My Phone? If the Bluetooth settings don’t display on your phone, check that your administrator has enabled the Bluetooth feature on your phone. If the feature is enabled, make sure you have turned the Bluetooth option on. See Turning On the Bluetooth Option. To pair and connect your Bluetooth headset with your phone: 1 Turn your Bluetooth headset on and place the headset in discovery mode. To place your headset in discovery mode, refer to your headset documentation. 2 From Home view, tap Settings > Basic > Bluetooth Settings > Manage BT Headsets. A list of all paired and connected headsets displays, as displayed next. The icon next to each headset indicates headset status: Bluetooth icon indicates that the headset is paired but not connected. Bluetooth/Headset icon indicates that the headset is both paired and connected. In the following example, the first headset is paired but not connected, and the second headset is both paired and connected. 3 Do one of the following: Polycom, Inc. 39 Polycom VVX 500 and VVX 600 Business Media Phones and Polycom VVX Camera User’s Guide If your headset is listed, but is just paired and not connected (that is, it has next to it), go to step 5 to connect it. If your headset is not listed, find the headset by tapping Scan. Make sure your headset is in discovery mode before you tap Scan. The message Place device in discoverable mode reminds you to do this. Refer to your headset documentation for information on how to place your headset in discovery mode. All the nearby devices in discovery mode are added to the list, as displayed next. A red icon displays next to each unpaired headset. 4 Tap the headset you want to pair and tap Add to begin the pairing process. An Adding device message displays. After your headset is added, the Manage BT Headsets screen displays. Your headset is paired, but not connected, as displayed next. Note: Why Doesn’t My Headset Pair Automatically? If your headset is an older model, you may have to enter a password (for example, 0000) before the headset can pair with your phone. Polycom, Inc. 40 Polycom VVX 500 and VVX 600 Business Media Phones and Polycom VVX Camera User’s Guide 5 Tap the headset you want to connect, and tap Connect. A Connecting device message displays. After your headset connects, a Headset attached message displays, and your headset model displays next to the Bluetooth/Headset paired and connected, displayed next. icon, the icon that indicates that your headset is both The Bluetooth/Headset icon also displays in the status bar, as displayed next. If you tap the icon, the Bluetooth Settings screen displays. You can now use your headset to handle calls. Handling Calls with Your Bluetooth Headset When your Bluetooth headset is turned on, and paired and connected with your phone, you can: Use the headset to handle calls, including muting and adjusting call volume. Initiate and end calls on your headset by pressing , or using a control on the headset. Switch to handset or speakerphone mode during a headset call by picking up the handset or pressing . When a Bluetooth headset is paired and connected, and you turn the headset off, the message Headset removed displays. The headset is not connected anymore, but remains paired. When you turn the headset back on, the message Headset attached displays, and the headset is connected again, indicating that you can use it to handle calls. Disconnecting and Removing Your Bluetooth Headset You can disconnect your headset from your phone, but still keep it paired. When you disconnect a headset, it remains paired so you can easily connect it to your phone again. You can also remove your headset, so it is no longer paired or connected. When you remove your headset, it won’t display in the Manage BT Headsets screen. To connect it back to your phone, you’ll need to scan for the device, add it, and connect it again. Polycom, Inc. 41 Polycom VVX 500 and VVX 600 Business Media Phones and Polycom VVX Camera User’s Guide To disconnect your headset: From Home view, tap Settings > Basic > Bluetooth Settings > Manage BT Headsets. From the Manage BT Headsets screen, tap your headset, and tap Disconnect. Your headset remains paired to your phone but is no longer connected. To connect it to your phone again, tap Connect. Timesaver: How to Quickly Connect and Disconnect Your Headset You can quickly disconnect your headset by turning your headset off. When you turn it off, the message Headset removed displays. When you turn your headset back on, the headset is connected again. To remove your headset: 1 From Home view, tap Settings > Basic > Bluetooth Settings > Manage BT Headsets. 2 From the Manage BT Headsets screen, tap your headset, and tap Remove. Your headset is removed from the list and is no longer paired or connected with your phone. Responding to Incoming Calls While your phone rings, you can do the following: Temporarily ignore the call before answering it. Reject the call so it goes directly to voicemail. Forward the call to another person. Ignoring Incoming Calls Ignore or silence a call to stop your phone from ringing. Even though the call is ignored, your phone still displays the incoming call notification so you can still answer the call. To ignore or silence a call: From the Incoming Call window, tap Ignore, for private lines, or Silence, for shared lines. The Incoming Call window disappears, your phone stops ringing, and either Home or Calls view displays. Rejecting Incoming Calls Reject a call to stop your phone from ringing and send the call directly to voicemail. Calls you reject display in your Recent Calls list. Rejecting calls is not available for shared lines. To reject an incoming call: From the Incoming Call window, tap Reject. You can also reject an incoming call from Lines and Calls view. The call goes directly to voicemail. Polycom, Inc. 42 Polycom VVX 500 and VVX 600 Business Media Phones and Polycom VVX Camera User’s Guide Forwarding Incoming Calls to Another Person While your phone rings, you can forward the call to another person. To forward an incoming call to another person: 1 While your phone rings, tap Forward. 2 From the Call Forwarding screen, enter the forwarding number, and tap Forward. User Tip: Other Ways to Forward Calls You can also set up your phone to forward all incoming calls to another person (see Forwarding All Calls to Another Person), or forward all calls from a certain contact to another person (see Diverting Calls from a Contact to Another Person). During Calls When you are in a call, you can do the following: Hold the call. Transfer the call to another person. Set up a conference call with the person you’re talking with and another person. Holding Calls You can place any active call on hold. A held call displays in Home, Lines, and Calls view as follows: Figure 25: A Held Call in Home, Lines, and Calls View Polycom, Inc. 43 Polycom VVX 500 and VVX 600 Business Media Phones and Polycom VVX Camera User’s Guide To hold a call: From Active Call, Lines, or Calls view, tap Hold. If you’re in Calls view, be sure to highlight the call first. To resume a held call: Do one of the following: From Lines view, tap Resume. If there is more than one held call on the line, the last call that you held is resumed. If you have multiple lines and you tap Resume, the last call that you held, on either line, is resumed. From Calls view, tap the call to highlight it, and tap Resume. Transferring Calls When you transfer a call to another person, you have the option to talk to the person before the transfer completes. If your phone supports a blind transfer, you can automatically transfer a call without talking to the other person. The call is automatically transferred after you dial the number you’re transferring the call to. To transfer a call: 1 From Active Call, Lines, or Calls view, tap Transfer. The active call is held. 2 From the Dialer, place a call to the person you want to transfer the call to. User Tip: Accessing Your Directories and Favorites When You Transfer a Call Instead of entering or selecting a number from the Dialer, you can select a directory entry or a favorite to transfer the call to. To transfer to a directory entry: After you tap Transfer, press , tap Directories, and then tap Contact Directory or Corporate Directory. Search for the person, and then call them. To transfer to a favorite: After you tap Transfer, tap Favorites, and tap the favorite you want to call. 3 When you hear the ring-back sound, tap Transfer to complete the transfer. Or, if you want to talk with the person before the transfer completes, connect and talk with the person, and then tap Transfer. To cancel the transfer before the call connects, tap Cancel. To perform a blind transfer: 1 From Active Call, Lines, or Calls view, tap Transfer. The active call is held. 2 From the Dialer, tap Blind, and place a call to the person you want to transfer the call to. If you don’t see Blind, tap More (at the top of the screen), and tap Blind. Polycom, Inc. 44 Polycom VVX 500 and VVX 600 Business Media Phones and Polycom VVX Camera User’s Guide User Tip: Accessing Your Directories and Favorites When You Blind Transfer a Call Instead of entering or selecting a number from the Dialer, you can select a directory entry or a favorite to transfer the call to. To transfer to a directory entry: After you tap Blind, press , tap Directories, and then tap Contact Directory or Corporate Directory. Search for the person, and then call them. To transfer to a favorite: After you tap Blind, tap Favorites, and tap the favorite you want to call. The call automatically transfers to the person you specified. Timesaver: Completing a Transfer If you’re using a handset, complete a transfer by replacing the handset. Setting Up and Handling Conference Calls You can set up a conference call with two or more other people. Ask your system administrator to for the maximum number of people you can set up a conference with. Just as with other calls, you can hold and resume conference calls. In addition, you have the option to split a conference call – to end the conference and place the people you were talking with on hold. If your system administrator enables the conference management feature on your phone, you can manage each person in a conference call. You can you can mute, hold, and remove each person in the conference. For more information, see Managing Conference Call Participants. User Tip: Tips for When You Are in Conference Calls When you are in a conference call: Use the handset or a headset if you’re in an open environment. Mute your microphone when you are not speaking, especially in noisy environments. Avoid tapping the microphone or rustling papers near the microphone. Speak in your normal voice without shouting. Setting Up Conference Calls You can set up a conference by calling two people and using the Confrnc soft key, or by joining two existing calls using the Join soft key. To set up a conference call: 1 Call the first person. Polycom, Inc. 45 Polycom VVX 500 and VVX 600 Business Media Phones and Polycom VVX Camera User’s Guide 2 From Active Call, Lines, or Calls view, tap Confrnc. The active call is held. 3 Using the Dialer, call the second person. 4 When the second person answers, tap Confrnc to join everyone in a conference. The Active: Conference screen displays, as displayed next. User Tip: How to Quickly Set Up a Conference If your phone has an active call and one held call, on the same or different lines, tap Join from either Lines or Calls view to automatically create a conference call. The conference call takes place on the line from which you handled the last active call. Holding and Resuming Conference Calls When you place a conference call on hold, you place the other people in the call on hold. No one in a held conference call can hear each other. To place hold one person on hold, see Managing Conference Call Participants. To place a conference call on hold: From Active Call, Lines, or Calls view, tap Hold. If you’re in Calls view, highlight the conference first. The other people in the conference are held. The following example shows a held conference in Calls view. To resume a held conference call: From Lines or Calls view, tap Resume. Ending Conference Calls To end a conference, tap End Call. By default, when you tap End Call, the other people in the conference remain connected with each other. However, your system administrator can set up your phone so that all connections end. To end a conference call: From Active Call, Lines, or Calls view, tap End Call. Polycom, Inc. 46 Polycom VVX 500 and VVX 600 Business Media Phones and Polycom VVX Camera User’s Guide Splitting Conference Calls into Two Held Calls When you split a conference, you end the conference and place the other two people on hold. You can split an active or held conference call. To split a conference call: From Active Call, Lines, or Calls view, tap Split. The conference call ends. By default, the other two people are held. Managing Conference Call Participants If your system administrator enables the conference management feature on your phone, you can manage conference call participants. You can you do the following: Mute a participant. Hold a participant. Remove a participant from the conference. List information about a participant, such as the participant’s name, number, and call details—such as whether the call is muted, held, or is video-enabled. To manage a participant in a conference call: 1 Set up an active conference call. 2 From Active Call, Lines, or Calls view, tap Manage. If you’re in Calls view, be sure to highlight the conference first. The following examples show the screens that display when you manage a conference. Timesaver: How to Manage a Participant Without Tapping Manage When you are in Active Call view, simply tap a conference participant to start managing the participant. 3 Tap the participant you want to manage. 4 Do one of the following: Polycom, Inc. 47 Polycom VVX 500 and VVX 600 Business Media Phones and Polycom VVX Camera User’s Guide Tap Far Mute to mute the participant. The muted participant can hear everyone, but no one can hear the muted participant. Tap Hold to hold the participant. The held participant cannot hear anyone, and no one can hear the held participant. Tap Remove to remove the participant from the conference, end the conference call, and create an active call between you and the participant still in the call. Tap Information to view information about the participant and their call status. When you tap Information, a popup displays listing the person’s information, as displayed next. 5 Tap Back to exit the conference management function. Changing the Way Calls are Answered Change the way calls are answered by doing the following: Forwarding all calls to another person. Rejecting calls from a contact. Diverting calls from a contact to another person. Temporarily refusing all calls by enabling Do Not Disturb. Forwarding All Calls to Another Person You can set up your phone to forward all calls to another number, even if the Do Not Disturb feature is enabled. Call forwarding is not available on shared lines. Power Tip: Forwarding Calls on a Call-by-Call Basis You can choose to forward a call as your phone rings. For more information on forwarding calls on a call-by-call basis, see Forwarding Incoming Calls to Another Person. Note: Call Forwarding and Microsoft® Lync® Server If your phone is configured to work with Microsoft Lync Server, your call forwarding options are different than those described below. For more information on forwarding calls with Microsoft Lync, see Using Polycom Phones with Microsoft Lync Server Quick User Guide, available by navigating to your phone’s Web page from the Business Media Phones Support page. Polycom, Inc. 48 Polycom VVX 500 and VVX 600 Business Media Phones and Polycom VVX Camera User’s Guide To forward all calls to another person: 1 From Home view, tap Forward. (You can also tap Settings from Home view, and tap Features > Forward, or if your phone is idle, tap Forward from Lines view.) 2 When your phone is set up with multiple lines, tap the line to apply forwarding to. 3 From the Forwarding Type Select screen, tap the forwarding type you want: Always To forward all incoming calls. No Answer Busy To forward all unanswered incoming calls. To forward calls that arrive when you’re already in a call. 4 Enter the forwarding number, and tap Enable. If you selected the No Answer option, you can enter the number of rings before your phone forwards the call. A value of 2 is recommended. The forwarding number you chose scrolls in the status bar, as displayed next. When a phone line is idle, Lines view displays the forwarding icon, displayed next. next to the phone line, as Figure 26: The Forwarding Icon in Lines View To disable call forwarding: 1 From Home view, tap Forward. 2 When your phone is set up with multiple lines, tap the line to disable forwarding for. 3 From the Forwarding Type Select screen, tap the forwarding type to disable, and tap Disable. Rejecting Calls from a Contact You can send incoming calls from a particular contact to your voicemail system. Polycom, Inc. 49 Polycom VVX 500 and VVX 600 Business Media Phones and Polycom VVX Camera User’s Guide Note: Rejecting Calls and Shared Lines You cannot reject calls on shared lines. You can only silence them. For more information, see Working with Shared Lines. To send incoming calls from a contact to your voicemail system: 1. Tap Directories from Home view, and tap Contact Directory. 2. From your directory, tap the contact whose calls you want to reject. 3. From the contact’s information screen, tap . 4. From the Edit Contact screen, tap Auto Reject, tap Enabled, and then tap Save. Diverting Calls from a Contact to Another Person The Divert option enables you to transfer all incoming calls from a particular contact to another person. To divert incoming calls from a contact to another person: 1. Tap Directories from Home view, and tap Contact Directory. 2. From your directory, tap the contact whose calls you want to send to another person. 3. From the contact’s information screen, tap . 4. From the Edit Contact screen, do the following: Tap Divert Contact, and enter the number of the person you want the call to go to. Tap Auto Divert, and tap Enabled. Tap Save. Using Do Not Disturb Enabling Do Not Disturb (DND) stops your phone from ringing and sends all incoming calls directly to voicemail. All calls you receive while DND is enabled are logged to your Recent Calls list. When you enable Do Not Disturb, the following happens: The Do Not Disturb icon, , displays in the status bar, as displayed next. For VVX 500 phones, the icon scrolls under the time display. For VVX 600 phones, the icon displays at the far right of the status bar, next to other icons that you can tap. When your phone is idle, the Do Not Disturb icon, , displays next to your phone line in Lines view, as displayed next. If you have new messages or forwarding enabled, the messages or forwarding icon displays instead. Polycom, Inc. 50 Polycom VVX 500 and VVX 600 Business Media Phones and Polycom VVX Camera User’s Guide The DND icon in Home view, , changes to , as displayed next. Note: Do Not Disturb and Shared Lines Enabling Do Not Disturb on shared lines disables ringing only. You still see a visual notification of the call and have the option to answer the call. Troubleshooting: Why Doesn’t the DND Icon Display? When you have set your presence status to Do Not Disturb, as well as enabled DND for your phone, the message My Status: Do Not Disturb scrolls under the time display, and the DND icon does not display in the status bar. To toggle Do Not Disturb on and off: From Home view, tap DND. Or, if your phone is idle, tap DND from Lines view. Timesaver: Quick Way to Disable DND on the VVX 600 To turn DND off, tap Polycom, Inc. , located in the status bar. 51 Polycom VVX 500 and VVX 600 Business Media Phones and Polycom VVX Camera User’s Guide Using Do Not Disturb with Multiple Lines By default, the Do Not Disturb feature applies to all lines on your phone. However, your system administrator can set up your phone so that you can enable the feature on a per-line basis. To enable or disable Do Not Disturb for a particular line: 1. From Home view, tap DND. 2. From the Line Select screen, tap the line to enable or disable Do Not Disturb on. 3. From the Do Not Disturb screen, tap Enable or Disable. Power Tip: Automatically Enabling or Disabling Do Not Disturb for All Lines To automatically enable Do Not Disturb for all lines, tap Set All. To automatically disable the feature for all lines, tap Clear All. Listening to Voicemail Your phone may indicate new voicemail messages by the following: A message counter in Home view, as displayed next. The counter indicates the number of new messages you have. A message counter in the status bar, displayed next. The counter displays on the Message icon, . When you have new messages, the Message icon also displays next to the phone line in Lines view, as displayed next. Polycom, Inc. 52 Polycom VVX 500 and VVX 600 Business Media Phones and Polycom VVX Camera User’s Guide A flashing Message Waiting Indicator, located at the top-right of your phone. An audible alert (if your phone is on-hook). Note: Temporarily Removing Message Indicators To temporarily remove message indicators, tap , and tap Message Center (or tap Messages from Home view, and tap Message Center) and tap Clear. After a period of time—usually about an hour or two—the message indicators appear again. To listen to voicemail messages: 1 On the status bar, tap Message Center. , and tap Message Center. Or, from Home view, tap Messages, and tap 2 If multiple lines are configured on your phone, the Line Select screen displays. Tap the line that has the message. 3 From the Messages screen, tap Connect and follow the prompts. Viewing Recent Calls Your phone maintains a Recent Calls list, a list of missed, received, and placed calls. Each list holds up to 100 entries. From the Recent Calls list, displayed next, you can: Sort, order, and filter calls. By default, the list displays all call types (missed, placed, and received), with the most recent call displaying first. Remove certain calls from the list. Tap a call record to view call details and manage the call. Tap a call record to automatically call the person. Polycom, Inc. 53 Polycom VVX 500 and VVX 600 Business Media Phones and Polycom VVX Camera User’s Guide Icons display next to a call to indicate the call type: Placed calls display . Received calls display Missed calls display . . To view your Recent Calls list: From Home view, tap New Call, and tap Recent. You can also access recent calls by tapping Directories from Home view, and tapping Recent Calls. Timesaver: Quickly Accessing the Recent Calls List To quickly access recent calls, tap in Lines, Calls, or Active Call view, as displayed next. To manage a call record: 1. From your Recent Calls list, tap next to a call record. 2. From the call details screen, displayed next, you can: Tap Dial to call the person. Tap Save to add the person to your Contact Directory. If the person is already in your Contact Directory, but isn’t a favorite, Add to Favorites displays instead. Tap Add to Favorites to automatically make the person a favorite. Tap to delete the call from the list. Tap to edit the phone number before you dial the person. Polycom, Inc. 54 Polycom VVX 500 and VVX 600 Business Media Phones and Polycom VVX Camera User’s Guide To customize the list: From your Recent Calls list, displayed next, tap for specific lines. to sort and order calls, and tap to filter calls When you sort calls by the time of the call, you can order calls in ascending (oldest call first) or descending (most recent call first) order. When you sort calls by call name, you can order calls in ascending (alphabetical) or descending (reverse-alphabetical) order. When you filter calls, you can choose to display only missed, received, or placed calls. Or, you can choose to display all call types (the default). Note: About Filtered Call Lists You cannot save your filtered call list results. If you filter your Recent Calls list so that only a certain call type—for example, only missed calls—display, the next time you display the list, all call types (the default filter) displays. To remove certain calls from the list: From your Recent Calls list, tap that display on the screen. Polycom, Inc. . You can remove a specific call type, all calls, or just the calls 55 Polycom VVX 500 and VVX 600 Business Media Phones and Polycom VVX Camera User’s Guide Working with Your Contact Directory You can store a large number of contacts in your phone’s local Contact Directory displayed next. Contact your administrator for the exact number. Figure 27: Local Contact Directory From your local Contact Directory, you can: View contact information. Search for contacts. Dial contacts. If you can update your Contact Directory, you can also do the following: Add contacts. Update contact information. Delete contacts. Note: Accessing a Corporate Directory Your system administrator can set up your phone so you have access to a Corporate. If you have access to a Corporate Directory, you can dial people in the Corporate Directory, as well as save them to your Contact Directory. For more information, see Working with a Corporate Directory. To view your Contact Directory: Tap Directories from Home view, and tap Contact Directory. Tap New Call from Home view, and tap Directory. From your Contact Directory, scroll to view contacts or enter search criteria to find one. To view contact information: From your Contact Directory, tap the contact. The contact’s information screen, including the contact’s name and phone number, displays, as displayed next. Additional information—such as a job title, label, or email address—can also display. Polycom, Inc. 56 Polycom VVX 500 and VVX 600 Business Media Phones and Polycom VVX Camera User’s Guide To search for a contact: 1 From your Contact Directory, tap Search. 2 From the Search screen, enter search criteria and tap Search. If you’re using the onscreen keyboard, tap before you tap Search. A list of search results is displayed. Tap Return to display your Contact Directory again. To dial a contact: 1 From your Contact Directory, tap the contact you want to call. 2 From the contact’s information screen, displayed next, tap the contact’s phone number. To add a contact: 1. From your Contact Directory, tap . 2. From the Add Contact screen, enter contact information: Note: Directory Fields are Administrator-Set Your phone displays one required field, the Contact field, which contains the contact’s phone number. Your administrator sets all other directory fields. For more information, see your administrator. For First Name, enter the contact’s first name. Tap Last Name, and enter the contact’s last name. Tap Contact, and enter the contact’s phone number. The phone number must be unique and cannot already exist in the directory. If you save an entry with a non-unique phone number, the entry is not saved. Polycom, Inc. 57 Polycom VVX 500 and VVX 600 Business Media Phones and Polycom VVX Camera User’s Guide Tap Job Title, and enter the contact’s job title, such as Manager. Tap Email, and enter the contact’s email address. Tap Favorite Index, and enter a favorite index number. The number can be any unused value, up to a maximum value of 9999. A contact that has a favorite index number automatically displays in your Favorites list. For more information about favorites, see Managing Favorites. Tap Label, and enter a label for the contact such as, Marketing. When you specify a label, the label is first item that displays for the contact on the Directory screen, and in your Favorites list if the contact is a favorite. Tap Ring Type, and select the ringtone you want to use for the contact. Tap Divert Contact, and enter the phone number of the third party you want this contact’s calls sent to. Tap Auto Reject, and enable or disable the setting. The default setting is Disabled. When enabled, each time the contact calls, the call is directed to your mail system. Tap Auto Divert, and enable or disable the setting. The default setting is Disabled. When enabled, each time the contact calls, the call is directed to the third party you specified in the Divert Contact field. Tap Watch Buddy, and enable or disable the setting. The default setting is Disabled. When enabled, you can monitor the contact’s status. For more information on monitoring status, see Using Buddy Lists. Tap Block Buddy, and enable or disable the setting. The default setting is Disabled. When enabled, the contact cannot monitor your status. For more information on monitoring status, see Using Buddy Lists. 3. Tap Save. Timesaver: Saving Recent Callers and Corporate Directory Contacts to Your Directory You can automatically save a recent caller to your directory. From your Recent Calls list, tap next to the call record. From the call information screen, tap Save. The Add Contact screen displays, with the name (if specified) and contact fields populated. Enter additional information, if desired, and tap Save. If a Corporate Directory is available on your phone, you can add contacts from the Corporate Directory to your Contact Directory. For information on how to update your Contact Directory in this way, see Working with a Corporate Directory. To update a contact’s information: 1. From the Contact Directory, tap the contact you want to update. 2. From the contact’s information screen, tap . 3. From the Edit Contact screen, update the contact’s information. 4. Tap Save. Polycom, Inc. 58 Polycom VVX 500 and VVX 600 Business Media Phones and Polycom VVX Camera User’s Guide To delete a contact: 1 From your Contact Directory, tap the contact you want to delete. 2 From the contact’s information screen, tap . A confirmation message displays, confirming that you want to delete the contact. Tap Yes or No. Working with a Corporate Directory Your system administrator can set up your phone so that you can access portions of a Corporate Directory. You cannot update your Corporate Directory; your administrator determines which contacts you can see. From the Corporate Directory, you can do the following: Search for contacts. Dial contacts. Add contacts to your local Contact Directory. To view the Corporate Directory: Tap Directories from Home view, and tap Corporate Directory. By default, a blank search screen displays. To view entries, search for a person. User Tip: Saving Corporate Directory Search Results You can save your last search results, so that the next time you view the Corporate Directory, the results of your last search displays. To save Corporate Directory search results, tap Settings from Home view, and tap Basic > Preferences > Corporate Directory > View Persistency. From the View Persistency screen, tap Enabled. The next time you view Corporate Directory, your last search results display. To search the Corporate Directory: From the Corporate Directory, perform a quick search or an advanced search: To perform a quick search, enter the first few characters of the contact’s first or last name (depending on how the directory is organized), and tap Submit. To perform an advanced search, tap AdvFind. From the Advanced Find screen, enter your search criteria, and tap Submit. The screen displays a list of contacts, starting with the most successful matches. To view information for the contact, tap View. To erase all your search criteria and enter new criteria before you submit your search, tap Clear. To dial a Corporate Directory contact: 1. From the Corporate Directory, search for the contact you want to dial. 2. From the search results, tap the contact, and tap Dial. Polycom, Inc. 59 Polycom VVX 500 and VVX 600 Business Media Phones and Polycom VVX Camera User’s Guide To add a contact to your local Contact Directory: 1. From the Corporate Directory, search for the contact you want to add to your Contact Directory. 2. From the search results, tap the contact’s record, and tap View. 3. From the contact’s information screen, tap Save. Only the first name, last name, and phone number are saved in the local Contact Directory. You can go to the Contact Directory to see if the contact was saved correctly and to add additional contact information. Controlling What is Heard You can change what you hear by doing the following: Updating the incoming call ringtone. Updating a contact’s ringtone. Changing the speaker volume. Changing the ringer volume. Muting the microphone. Changing where you hear sound effects. Updating the Incoming Call Ringtone A simple way to personalize your phone is to change your phone’s ringtone. You can pick unique ringtones for the different lines on your phone. To select an incoming call ringtone for your phone or a line: 1 Tap Settings from Home view, and tap Basic > Ring Type. 2 When multiple lines are configured on your phone, tap the line you want to apply a new ringtone to. 3 From the Ring Type screen, tap the ringtone you want. To hear the ringtone before you change it, tap Play. The default ringtone is Low Trill. Changing the Speaker Volume To change the volume of what you hear during a call, press one of the Volume keys, , while you are in a call. Changing the Ringer Volume To change the volume of the incoming call ringtone, press one of the Volume keys, , while your phone is idle or ringing. Polycom, Inc. 60 Polycom VVX 500 and VVX 600 Business Media Phones and Polycom VVX Camera User’s Guide Updating a Contact’s Ringtone You can select unique ringtones for the various contacts in your Contact Directory. This helps you quickly identify callers as your phone rings. To select a ringtone for a contact: 1. From your Contact Directory, tap the contact whose ringtone you want to change. 2. From the contact’s information screen, tap . 3. From the Edit Contact screen, tap Ring Type, tap the ringtone you want, and then tap . User Tip: Listening to a Ringtone Before You Save It To listen to a ringtone before you save it, tap the ring type and tap . 4. From the Edit Contact screen, tap Save. Muting the Microphone Mute the microphone so other parties cannot hear you. Microphone Mute applies to all modes (handset, headset, and speakerphone). You can still hear all other parties when you mute the microphone. To mute the microphone: During a call, including a conference call, press . The Mute key glows red. The other parties cannot hear you. To disable Mute, press again. Choosing Where You Hear Sound Effects You can choose whether you hear sound effects—all phone sounds except call audio—from the handset, headset, or speaker. For example, you can configure your phone to ring on your headset instead of the speaker. By default, you hear all sound effects from the speaker. To choose where you hear sound effects: 1. Tap Settings from Home view, and tap Basic > Preferences > Audible Ringer. 2. From the Audible Ringer screen, select where you want to hear sound effects: To hear sound effects only from the phone’s loudspeaker, tap Speaker. To hear sound effects only from the handset, tap Handset. To hear sound effects only from the headset, tap Headset. To hear sound effects only from the device you’re currently using to hear call audio, tap Active. The default destination is Speaker. Polycom, Inc. 61 Polycom VVX 500 and VVX 600 Business Media Phones and Polycom VVX Camera User’s Guide Managing Favorites Favorites are the contacts in your Contact Directory that you call most often. To make a contact a favorite, assign the contact a favorite index number from the Contact Directory. Contacts that have a favorite index number display , as displayed next. Figure 28: A Favorite All your favorites display in your Favorites list. A smaller number of Favorites (11 for the VVX 500 and 15 for the VVX 600) display in Lines view and from Home view. The following figure displays a sample Favorites list. Figure 29: Sample Favorites List Polycom, Inc. 62 Polycom VVX 500 and VVX 600 Business Media Phones and Polycom VVX Camera User’s Guide The following figure displays your favorites in Lines view. Favorites display under the phone lines. Figure 30: Favorites in Lines View Favorites also display from Home view, as displayed next. Figure 31: Favorites in Home View Favorites display consecutively, according to their index number. The contact with the lowest number displays first. To reorder your favorites, assign the contact a different index number. To see your Favorites list: Tap New Call from Home view, and tap Favorites. To see your favorites from Home view: From Home view, tap the phone line. To see your favorites from Lines view: From Home view, press . If the idle browser displays, swipe the screen to see Lines view. To make a contact a Favorite: Do one of the following: From your Contact Directory, tap the contact. From the contact’s information screen, tap Add to Favorites. From your Recent Calls list, tap Favorites. Polycom, Inc. next to a call record. From the call details screen, tap Add to 63 Polycom VVX 500 and VVX 600 Business Media Phones and Polycom VVX Camera User’s Guide The contact now has a green star next to their name when you view the contact from the Contact Directory or the Recent Calls list. Power Tip: Manually Assigning a Favorite Index Number When You Make a Favorite After you tap Add to Favorites, a dialog displays asking if you want to automatically accept the next available index number, or manually enter your own. Tap Yes to automatically accept an index number, or tap Edit Index to enter a unique index number. You can enter a number up to 9999. To quickly call a favorite: From your Favorites list, or from Home or Lines view, tap the favorite you want to call. The call is automatically placed. To reorder your favorites: 1. From your Contact Directory, tap the contact. 2. From the contact’s information screen, tap . 3. From the Edit Contact screen, tap Favorite Index, and enter a new favorite index number. 4. Tap Save. To delete a favorite: 1. From your Contact Directory, tap the contact. 2. From the contact’s information screen, tap . 3. From the Edit Contact screen, tap Favorite Index, and delete the favorite index number. 4. Tap Save. User Tip: Quickly Deleting a Favorite From Lines view, press and hold the favorite until the contact’s information screen displays. Then, tap . The contact remains in your directory, but is no longer a favorite. Working with Shared Lines If your phone shares a line with other phones, an incoming call to the shared line causes all phones to ring. The call can be answered on any of the phones. You can transfer, hold, or set up a conference with calls on shared lines. When you have an incoming call on a shared line, you can stop your phone from ringing by tapping Silence. Even though the phone does not ring, the call’s visual notification still displays and you still have the option to answer the call. In Lines view, the following icons and status indicators display for shared lines, depending if the line is idle, has an active call, or has a held call: Polycom, Inc. 64 Polycom VVX 500 and VVX 600 Business Media Phones and Polycom VVX Camera User’s Guide Table 6: Icons and Status Indicators for Shared Lines Shared Line Status Icon and Status Indicator Status Indicator Idle (No indicator) Active call Solid green Held call Flashing red Note: Unsupported Features on Shared Lines Call Forwarding is not available on shared lines. Enabling Do Not Disturb on shared lines disables ringing only. You’ll still see a visual notification of the call and have the option to answer the call. If you are running Polycom UC Software 5.0.0, and you have an incoming call on a shared line, which none of the phones answer, the call displays in the missed calls log on all the phones. If you have an incoming call on a shared line and you or any of the other phones answer the call, the call is not logged as missed on any phone. Your Administrator can configure the phones so that if you have an incoming call on a shared line and one phone answers, the other phones log the call as a received call. That way, if another phone on a shared line answers an incoming call, you can still from your phone’s call log, that you did not answer the call. Polycom, Inc. 65 3: Using Video and the Polycom VVX Camera Your administrator can enable your phone—without any optional equipment—to receive video during calls. When you receive video, you see the other person’s video, but because your phone cannot send video, the person on the other end of the call cannot to see you. If you attach a Polycom® VVX® Camera to your phone, you can send and receive video during calls. The VVX Camera is an optional accessory that attaches to the USB port on the top of your phone. For information about purchasing a VVX Camera, contact your Polycom reseller. Web Info: Learning More About the VVX Camera You can find information about the VVX Camera, such as how to attach it to your phone, from the VVX Camera support page. The following sections describe how to use your phone both with and without a VVX Camera. You also learn how to place audio-only calls and learn special tips for when you’re in a video call. The topics include: Handling Video Calls Without a VVX Camera Using a VVX Camera Placing Audio-Only Calls Calling Using the H.323 Protocol Handling Video Calls Without a VVX Camera This section describes how video call work when you do not have a VVX Camera attached to your phone. You can receive video, but you cannot send video. When the person you are talking with can send video, and your phone is enabled to receive video, video always displays. In this section, you’ll learn the following: About video calls How to handle video during calls How to handle a mixture of video and audio-only calls How to handle conference calls that include video How to view all video on the full screen How to view video in normal, cropped, and full modes How to set the call rate for video calls Polycom, Inc. 66 Polycom VVX 500 and VVX 600 Business Media Phones and Polycom VVX Camera User’s Guide Note: How Can I Stop Video? When you are in a call with a person that has a video-enabled phone, you cannot start and stop the video. If your phone is video-enabled, it always displays video from another video-enabled phone. Note: Video from Different Endpoints Display Differently on Your Phone Depending on the phone or system that is sending video, black bars may appear on the top, bottom, or sides of the video image. This occurs because the aspect ratio of the sent video doesn’t match the display area on your phone, and the portions of the video that aren’t being received display as black bars. If the received video matches your phone’s display area, the received video fills the screen. If black bars display, you can remove them by selecting ‘cropped’ video screen mode (see Displaying Video in Normal, Full, and Cropped Modes.) About Video Calls When you are in a call with a person that has a video-enabled phone, the person you are talking with— the ‘far side’—displays in the call window, as displayed next. Figure 32: Call Window with Far-Side Video Far-side video also displays in Calls view, as displayed next. Figure 33 Far-Side Video in Calls View Polycom, Inc. 67 Polycom VVX 500 and VVX 600 Business Media Phones and Polycom VVX Camera User’s Guide If the far side stops sending video, a ‘no video’ icon displays on your phone, as displayed next. If the far side is unable to send video, for example, if the far side is video-enabled, but doesn’t have a camera attached to their phone, a thunderbolt icon displays next to the ‘no video’ icon. Figure 34: Call Window with No Video Note: Why Do I See a Different ‘No-Video’ Icon? Depending on the phone or system that has stopped sending video, you may see a different icon than the one shown above. If you place a video call on hold, the person’s video stream stops and is replaced by a paused grayscale image taken just before you held the call, as displayed next. The person’s video stream returns when you resume the call. Figure 35: Held Video Call Handling Video During Calls During a video call, you have the option of viewing video on the full screen, displayed next, instead of in the smaller call window. Polycom, Inc. 68 Polycom VVX 500 and VVX 600 Business Media Phones and Polycom VVX Camera User’s Guide Figure 36: Full Screen Video To view full-screen video: Do one of the following: From Active Call or Calls view, tap , as displayed next. You can also tap the video area to view video on the full screen. From Active Call or Calls view, tap Video, and tap Full Screen. Full-screen video displays. Call details display at the bottom of the screen, along with an icon that you can tap to exit full screen mode, as displayed next. The call details display for five seconds, and then disappear. To see the details again, tap the screen. Polycom, Inc. 69 Polycom VVX 500 and VVX 600 Business Media Phones and Polycom VVX Camera User’s Guide User Tip: Can I Automatically View All Video Calls in Full-Screen Mode? You can set up your phone to automatically display all video calls in full-screen mode. For more information, see Viewing All Video Calls on the Full Screen. Handling a Mixture of Video and Audio-Only Calls When you have multiple calls, you can easily manage a video call from Calls view. From Calls view, you can quickly identify the video call by the video stream that displays next to the call details, as displayed next. Figure 37: Video Calls in Calls View If two or more calls are video calls, only the active call shows a video stream of the far side. All other video calls show a paused grayscale image of the far side, as displayed next. If you resume a held video call, the held call becomes active and displays an active video stream again. Figure 38: Active and Held Video Calls in Calls View Handling Conference Calls with Video When you set up a conference, your phone displays video for only one conference participant, even if more than one participant can send video. The person whose video you see is the last person who joins the conference. If you use the Join soft key to set up the conference, you see the video of the person who was held just prior to joining the conference. Polycom, Inc. 70 Polycom VVX 500 and VVX 600 Business Media Phones and Polycom VVX Camera User’s Guide Note: Is it Possible to View All Video Participants? Viewing all video participants requires the use of a Polycom Video Conference Bridge. For more information, contact your Polycom reseller. When your system administrator enables the conference management feature on your phone, you can manage conference call participants during a conference. You can mute, hold, and remove individual participants, as well as select whose video to see. To exchange video a conference participant: 1 Set up a conference call and tap Manage. 2 From the Conference window, tap the person whose video you want to see and tap Select Video, displayed next. The person who previously displayed video displays a paused grayscale image, and the person you selected, who previously displays a paused grayscale image, displays video. Viewing All Video Calls on the Full Screen You can choose to display all video calls on the full screen or in the call window. By default, all video calls display in the smaller call window. To change where video calls display: 1 Tap Settings from Home view and tap Basic > Video > Video Call Settings. 1 From the Video Call Settings screen, enable or disable Auto Video Full Screen. 2 If enabled, your phone displays all video calls on the full screen. If disabled, all video calls display in the call window. The default setting is Disabled. 3 Tap Save. Troubleshooting: I Updated a Video Setting, But I Don’t See the Changes You can update video settings during a video call. However, the updated setting applies to the next call, not the current call. Polycom, Inc. 71 Polycom VVX 500 and VVX 600 Business Media Phones and Polycom VVX Camera User’s Guide Displaying Video in Normal, Full, and Cropped Modes You can choose to display all video calls as either normal, full, or cropped images: Normal The video image displays with correct proportions. If necessary, black bars appear on the top, bottom, or sides of the area to maintain the correct aspect ratio. Full If the received video image is not the same aspect ratio as the phone’s display area, the video image stretch to fill the area. If the aspect ratios match, no stretching occurs. Crop Black bars do not appear, and the video image is re-sized to maintain the correct aspect ratio. Any parts of the image that do not fit within the area are cropped. You can select different settings for video that displays on the full screen and in the call window. The following graphics show how normal, full, and cropped modes display in the call window. Figure 39: Call Window with Normal, Full, and Cropped Video The following graphics show how normal, full, and cropped modes display for full-screen video. Figure 40: Full Video Screen with Normal, Full, and Cropped Video To change how video calls display: 1 Tap Settings from Home view, and tap Basic > Video > Video Screen Mode. 2 From the Video Screen Mode screen, tap, and then adjust the following settings: Video Screen Mode (Window) Adjusts the video image that displays in the call window. Select from Normal, Full, or Crop. The default setting is Normal. Video Screen Mode (Full Screen) Adjusts the video image that displays on the full screen. Select from Normal, Full, or Crop. The default setting is Normal. Polycom, Inc. 72 Polycom VVX 500 and VVX 600 Business Media Phones and Polycom VVX Camera User’s Guide 3 Tap Save. Setting the Call Rate for Video Calls You can set the maximum call rate for all video calls. The maximum call rate specifies the maximum bandwidth a video call can use. Troubleshooting: Why Can’t I Select the Call Rate I Want? Your system administrator can set a maximum call rate for video calls. If your system administrator sets a limit, you won’t be able to select a call rate above this limit. To set the maximum call rate to use for video calls: 1. Tap Settings from Home view, and tap Basic > Call Rate. 2. From the Call Rate screen, tap the maximum call rate you want to use for video calls. The default setting is 512 kbps. Using a VVX Camera If a Polycom VVX Camera is attached to your phone, as displayed next, you can send, as well as receive, video. This section explains how to use your VVX Camera, including: How to get started with your VVX Camera About video calls Handling video calls Handling a mixture of video and non-video calls Handling conference calls with video Changing video settings Polycom, Inc. 73 Polycom VVX 500 and VVX 600 Business Media Phones and Polycom VVX Camera User’s Guide Getting Started Before you attach your VVX Camera, it is a good idea to perform a couple preliminary of steps to confirm your camera can work with your phone. You can also familiarize yourself with the camera’s various LED indicators and messages and learn what they mean. First Steps Before you start using your camera, make sure your phone has the correct software version to work with the camera. You can check your phone’s software version by tapping Settings from Home view, and then tapping Status > Platform > Application > Main. Make sure the software version listed next to ‘Version’ is 4.1.3.xxxx or later. You also need to check with your system administrator that your phone is enabled to handle video calls. If your phone has the correct software version and is video-enabled, attach the VVX Camera to the USB port on the top of your phone. Web Info: How to Attach the Camera and Adjust the Camera Lens and Shutter For information on attaching the VVX Camera, see the VVX Camera Quick Start Guide, available from the VVX Camera Support page. The guide also shows you how to adjust the camera lens and shutter. After you attach your camera, you might receive a message indicating that your camera firmware is updating and syncing with your phone. During this process, do not remove the camera. After your phone and camera sync, a camera ready message displays, and your camera is ready to use. Understanding the Camera’s LEDs and Messages Your camera has an indicator light on the front right that lets you know when it is ready to use, and when a video call is incoming, outgoing, active, held, or muted. Depending on the camera and call state, the indicator is amber, green, steady, or flashing. Various messages also display on your phone to indicate the camera state. For example, a message displays to let you know that your camera is ready to use, or that your camera is updating and unavailable to use. The following tables describe your VVX camera’s LEDs and messages. Table 7: VVX Camera LEDs LED State Phone State No LED One of the following: Phone has no power Camera shutter is closed Flashes red and green, and then turns off Polycom, Inc. Camera is booting up 74 Polycom VVX 500 and VVX 600 Business Media Phones and Polycom VVX Camera User’s Guide LED State Phone State Flashes amber and green Camera firmware is updating Flashes green Incoming video call Green Video call is connected Amber One of the following: Incoming call (no video or audio-only) Outgoing call Audio call is connected Video is muted Held call Camera shutter is open, but video is not enabled and camera is not selected Table 8: VVX Camera Messages Message What to Do VVX Camera attached. Firmware sync in progress, do not remove camera. Your camera is upgrading. Do not remove your camera during this process. The upgrade is complete when you receive either a firmware sync complete or upgrade failed message. For more information on the firmware sync complete or upgrade failed message, locate the message in this table. VVX Camera firmware sync complete. Camera ready. Indicates that your camera is ready to use. VVX Camera firmware sync complete. Contact administrator to enable video. Indicates that your camera is ready to use. However, your phone is not enabled to send and receive video. See your system administrator. VVX Camera firmware sync complete. Camera rebooting. Indicates that the camera firmware sync is finished, and your camera is in the process of rebooting. VVX Camera firmware sync complete. Video available when next idle. Indicates that your camera is ready to use for your next video call. VVX Camera attached, camera ready. Indicates that your camera is ready to use. VVX Camera attached. Contact administrator to enable video. Indicates that your camera is ready to use. However, your phone isn’t enabled to send and receive video. See your system administrator. VVX Camera attached. Video available when next idle. Indicates that your camera is ready to use for your next video call. Polycom, Inc. 75 Polycom VVX 500 and VVX 600 Business Media Phones and Polycom VVX Camera User’s Guide Message What to Do VVX Camera removed. Indicates that you have detached your camera from your phone. VVX Camera is not connected Indicates that a VVX Camera is not attached to your phone, but you are accessing a feature or function that requires that the camera be attached. About Video Calls When you have a VVX Camera attached to your phone, your video image—the ‘near side’—displays at the top-right of the screen. This video is called picture-in-picture (PIP) video, as displayed next. Figure 41: Home View with Picture-in-Picture Video When you’re in a call with a person that has a video-enabled phone, your video (the near side) displays in the PIP, and the person you’re talking with (the far side) displays in the call window, as displayed next. Figure 42: Call Window with Near and Far Side Video You can customize how and where you see your video and the far-side video. For example, you can swap the windows video displays in, or even start and stop the transmission of your video, so the person Polycom, Inc. 76 Polycom VVX 500 and VVX 600 Business Media Phones and Polycom VVX Camera User’s Guide you are talking with cannot see you. The following sections show you how to customize video, as well as update video settings. Note: How Can I Stop Far-Side Video? You can’t start and stop far-side video. If your phone is set up to receive far-side video, the far-side video always displays. Note: The Way Far-Side Video Displays On Your Phone May Vary Depending on the phone or system that is sending video, black bars might appear on the top, bottom, or sides of the video image. This occurs because the aspect ratio of the sent video does not match the display area on your phone, and the portions of the video that are not being received display as black bars. If the received video matches your phone’s display area, the received video fills the screen. If black bars display, you can remove them by selecting ‘cropped’ video screen mode (see Changing How Non-PIP Video Displays). Handling Video Calls This section explains how to customize video during a video call. During a video call, you can stop sending your video, swap video, or view full-screen video. All these actions affect only the call you’re in and not future video calls. To learn how to customize video so that it affects all video calls and not just the call you’re in, see Changing Video Settings. During a video call, including a conference call, a Video soft key displays, as displayed next. You can tap this soft key to access video functions. Figure 44: Call Window with Video Soft Key Tapping the Video soft key displays other soft keys that allow you to: Prevent the far side from seeing you View video on the full screen Swap the windows video displays in Polycom, Inc. 77 Polycom VVX 500 and VVX 600 Business Media Phones and Polycom VVX Camera User’s Guide The following figure shows the Video soft keys. Tap Back to see the call soft keys again (Hold, End Call, Transfer, and Confrnc). Figure 45: Call Window with Video Soft Keys Stopping the Transmission of Your Video During a video call, you can stop the far side from seeing you by stopping the transmission of your video. If you stop video, the stop video icon, , displays next to your PIP video, as displayed next. Figure 46: Call Window with No Picture-in-Picture Video If the far side cannot send video, or stops sending video, a ‘no video’ icon displays on your phone, as displayed next. If the far side is unable to send video, for example, if the far side is video-enabled but does not have a camera attached to their phone, a thunderbolt icon displays next to the ‘no video’ icon. Polycom, Inc. 78 Polycom VVX 500 and VVX 600 Business Media Phones and Polycom VVX Camera User’s Guide Figure 47: Call Window with No Video Note: Why Do I See a Different ‘No-Video’ Icon? Depending on the phone or system that has stopped sending video, you may see a different icon than the one shown above. To start or stop your video during a call: Do one of the following: From Active Call or Calls view, tap Video, and then tap Stop Video to prevent the far side from seeing you, or tap Start Video so the far side can see you. Open or close the camera shutter. For information on closing the shutter, see the VVX Camera Quick Start Guide, available from the VVX Camera Support page. Note: Other Ways to Stop the Far Side From Seeing You You can stop the transmission of your video for all calls and not just the call you’re in. For more information, see Stopping the Transmission of Your Video for All Calls. Caution: Does Stopping Video Create an Audio-Only Call? Stopping video or closing the camera shutter does not create an audio-only call. Even if you stop video, video information is still transmitted to the far side as a still picture, and the call is still a video call. To dial an audio-only call, see Placing Audio-Only Calls. Viewing Full Screen Video During a video call, the far side displays in the call window, as displayed next. This is the default view for all video calls. Polycom, Inc. 79 Polycom VVX 500 and VVX 600 Business Media Phones and Polycom VVX Camera User’s Guide Figure 48: If you want the video call to display in a larger area, you can display the far side on the full screen, as displayed next. The PIP still displays in the corner, but the soft keys are hidden. Call details display at the bottom of the screen, displayed next, along with an icon that you can tap to exit full screen mode and display the call window and soft keys again. The call details display for about five seconds, and then disappear. To see the details again, tap the screen. To view video on the full screen: Do one of the following: From Active Call or Calls view, tap Video, and tap Full Screen. From Active Call or Calls view, tap . From Active Call view, tap the screen outside of the PIP. To view video in the call window again: Do one of the following: Tap . (If you don’t see ,, press your finger at the bottom of the screen until it displays.) Tap the screen outside of the PIP. Polycom, Inc. 80 Polycom VVX 500 and VVX 600 Business Media Phones and Polycom VVX Camera User’s Guide Swapping Video You can switch the locations of your video and the far-side video, as displayed next. If you do this, your video (the PIP) displays in the call window, and the far-end video, previously displayed in the call window, displays in the PIP location. If you swap video so that your video displays in the call window, rather than in the PIP, ‘Local camera’ displays next to your video, as displayed next. To swap where video displays: From Active Call or Calls view, do one of the following: Tap Video, and tap Swap. Tap the PIP. Handling a Mixture of Video and Non-Video Calls When you have multiple calls, you can easily manage a video call from Calls view. From Calls view, you can identify the video call by the video stream that displays next to the call details, as displayed next. Polycom, Inc. 81 Polycom VVX 500 and VVX 600 Business Media Phones and Polycom VVX Camera User’s Guide When two or more calls are video calls, only the active call displays video. All other video calls show a paused grayscale image of the far side taken just before the call was held, as displayed next. When you resume a held video call, the held call becomes active and displays video. If a video call is active, you can: Tap to view the call on the full screen. To return to Calls view again, tap touchscreen outside of the PIP. Tap Video to access additional soft keys that enable you to stop video, view the video call on the full screen, or swap the locations of video images. When your video displays in the Calls view list, ‘Local camera’ displays next to it. , or tap the Handling Conference Calls with Video When you set up a conference, your phone displays video for only one conference participant, even if more than one participant can send video. The person whose video you see is the last person who joins the conference. If you use the Join soft key to set up the conference, you see the video of the person who was held just prior to joining the conference. Polycom, Inc. 82 Polycom VVX 500 and VVX 600 Business Media Phones and Polycom VVX Camera User’s Guide Note: Is it Possible to View All Video Participants? Viewing all video participants requires the use of a Polycom Video Conference Bridge. For more information, contact your Polycom reseller. When your system administrator enables the conference management feature on your phone, you can manage conference call participants during a conference. You can mute, hold, and remove individual participants, as well as select whose video to see. To exchange video a conference participant: 1 Set up a conference call and tap Manage. 2 From the Conference window, tap the person whose video you want to see and tap Select Video, displayed next. The person who previously displayed video displays a paused grayscale image, and the person you selected, who previously displays a paused grayscale image, now displays video. Changing Video Settings When you update video settings, you change the way all video calls display and not just the call you’re in. You can update when and how video displays by doing the following: Stopping the transmission of your video for all calls Changing the clarity of your video Changing how you view all video calls Setting the call rate for all video calls Note: Updated Video Settings Don’t Apply to the Current Call If you update settings during a call, the new settings apply to the next call, not the current call. Polycom, Inc. 83 Polycom VVX 500 and VVX 600 Business Media Phones and Polycom VVX Camera User’s Guide Stopping the Transmission of Your Video for All Calls You can stop your phone from automatically transmitting your video at the start of all calls. Caution: Does Stopping Video Create an Audio-Only Call? Stopping video doesn’t create an audio-only call. Even if you stop video, video information is still transmitted to the far side as a still picture, and the call is still a video call. To dial an audio-only call, see Placing Audio-Only Calls. To enable or disable the transmission of your video for all calls: 1. Tap Settings from Home view, and tap Basic > Video > Video Call Settings. 2. From the Video Call Settings screen, tap Auto Start Video Tx, and either enable or disable the setting. When enabled, your phone automatically transmits video at the start of all calls. When disabled, your phone does not automatically transmit video at the start of all calls, and displays next to your video during video calls. The default setting is Enabled. Changing the Clarity of Your Video You can change the clarity of your video, including the brightness, contrast, and sharpness of your video stream. If your camera faces a bright light source, such as a bright window, you may need to increase the camera’s brightness, contrast, and sharpness levels so the far side can see you better. To see how you look to the far side, view the PIP. To change the clarity of your video: 1. Tap Settings from Home view, and tap Basic > Video > Camera Settings. 2. From the Camera Settings screen, tap, and then adjust, the following camera settings: Target Frame Rate sets how smoothly your video displays. You can set a rate between 5 (least smooth) and 30 (most smooth). The default rate is 25. Brightness Level sets how bright your video displays. You can set a level between 0 (dimmest) and 6 (brightest). The default level is 3. Saturation Level sets how much color your video displays. You can set a level between 0 (lowest) and 6 (highest). The default level is 3. Contrast Level sets the difference in brightness between the light and dark areas of your video. You can set a level between 0 (no contrast increase) and Auto (noise reduction contrast). The default level is 0. Sharpness Level sets the clarity of detail in your video. You can set a level between 0 (lowest) and 6 (highest). The default level is 3. Flicker Avoidance adjusts the flickering of your video captured by the camera sensor. Tap 50 Hz (flicker avoidance for Europe and Asia) or 60 Hz (flicker avoidance for North America). The default is 50 Hz. Polycom, Inc. 84 Polycom VVX 500 and VVX 600 Business Media Phones and Polycom VVX Camera User’s Guide Changing How You View All Video Calls You can set up your phone so that it handles all video calls in specific ways. You can choose to do the following: Display all incoming video calls on the full screen Change the way Non-PIP video displays View full-screen video with or without the PIP, and display the PIP next to, or over, full-screen video Displaying All Incoming Video Calls on the Full Screen By default, far-side video always displays in the call window, as displayed next. You can enable your phone to display all incoming video on the full screen, as displayed next. To display all incoming video on the full screen: 1 Tap Settings from Home view and tap Basic > Video > Video Call Settings. 1 From the Video Call Settings screen, tap Auto Video Full Screen, and enable the setting. 2 When enabled, this setting automatically enables your phone to display far-side video on the full screen. When disabled, far-side video displays in the smaller call window. The default setting is Disabled. 3 Tap Save. Changing How Non-PIP Video Displays You can adjust the appearance of non-PIP video so that it displays normal, full, or cropped video: Polycom, Inc. 85 Polycom VVX 500 and VVX 600 Business Media Phones and Polycom VVX Camera User’s Guide Normal The video image displays with correct proportions. If necessary, black bars appear on the top, bottom, or sides of the area to maintain the correct aspect ratio. Full If the received video image is not the same aspect ratio as the phone’s display area, the video image stretch to fill the area. If the aspect ratios match, no stretching occurs. Crop Black bars do not appear, and the video image is re-sized to maintain the correct aspect ratio. Any parts of the image that do not fit within the area are cropped. You can select different settings for video that displays on the full screen and in the call window. The following pictures show how normal, full, and cropped modes display in the call window. The following pictures show how normal, full, and cropped modes display in full-screen mode. To change the way non-PIP video displays: 1 Tap Settings from Home view, and tap Basic > Video > Video Screen Mode. 2 From the Video Screen Mode screen, tap, and then adjust the following settings: Video Screen Mode (Window) Adjusts the video image that displays in the call window. Select from Normal, Full, or Crop. The default setting is Normal. Video Screen Mode (Full Screen) Adjusts the video image that displays on the full screen. Select from Normal, Full, or Crop. The default setting is Normal. 3 Tap Save. Changing How PIP Video Displays You can update the way the PIP displays. For example, when you’re in full screen mode, when you view the far-side or your video on the full screen, you can do the following: Disable the PIP so the PIP doesn’t display, as displayed next. Polycom, Inc. 86 Polycom VVX 500 and VVX 600 Business Media Phones and Polycom VVX Camera User’s Guide Enable the PIP to display next to full-screen video (‘side-by-side mode’), as displayed next. Enable the PIP to display over full-screen video (‘PIP mode’), as displayed next. To change the way the PIP displays: 1 Tap Settings from Home view, and tap Basic > Video > Local Camera View. 2 From the Local Camera View screen, tap, and then adjust the following settings: Local Camera View (Full Screen) Enables or disables the PIP from displaying when you view video on the full screen. The default setting is Enabled. Local Camera View Mode (Full Screen) Sets whether you want the PIP to display over, or next to, full-screen video. Select one of these settings: Side-by-Side PIP Displays the PIP next to, rather than over, full-screen video. Displays the PIP over full-screen video. The default setting is Side-by-Side. Polycom, Inc. 87 Polycom VVX 500 and VVX 600 Business Media Phones and Polycom VVX Camera User’s Guide Note: How Do I Display Full-Screen Video Without the Black Bars? If you select PIP, as well as update the way full-screen video displays (by choosing Full or Crop mode), the full-screen video displays on the entire screen without the black sidebars. To choose Full or Crop mode, see Changing How Non-PIP Video Displays. 3 Tap Save. Setting the Call Rate for Video Calls You can set the maximum bandwidth to use for a video call. The call rate you select applies to your next video call. Note: Why Can’t I Choose Certain Call Rates? Your system administrator can set a maximum call rate for video calls. If your system administrator sets a call rate limit, you won’t be able to select a call rate above this limit. To set the maximum bandwidth to use for video calls: 1 Tap Settings from Home view, and tap Basic > Call Rate. 2 From the Call Rate screen, tap the maximum call rate you want to use for video calls. You can choose a call rate between 128 kbps and 768 kbps. The default setting is 512 kbps. Placing Audio-Only Calls When your administrator has enabled video on your phone, all calls you place are video calls. This means that: The person you call sees you on their phone. When the person you call sends video, you see the person on your phone. Your administrator can enable your phone to send audio calls only. This means that no video information is included in the call at all. Your phone screen does not display any video windows, and you do not have the option to send video. If the person you call sends video, you do not see them. Your system administrator can also set up your phone so that you can choose the call mode - video or audio-only - for the calls you place. If this option is set up on your phone, you can choose the call mode on a call-by-call basis, as well as choose a mode to apply to all the calls you place. To choose audio-only or video mode for all your calls: 1 From Home view, tap Settings, and tap Basic > Video > Video Call Settings. 2 From the Video Call Settings screen, tap Default Call Mode, and tap Audio only or Video. The mode you choose applies to your next call and all subsequent calls. Polycom, Inc. 88 Polycom VVX 500 and VVX 600 Business Media Phones and Polycom VVX Camera User’s Guide Note: Audio-Only Calls and H.323 Placing audio-only calls applies to SIP calls only. This feature is not available for H.323 calls. Calling Using the H.323 Protocol Your system administrator can set up your phone so that it can handle calls that use either the SIP or H.323 protocol, or both protocols. When this feature is enabled, your system administrator can set up your phone so that you can select which protocol to use before you tap Dial or Send, or before a call is automatically placed. Your system administrator can also set up your phone so you can automatically select the protocol to use. When your phone is set up to handle both protocols and your phone enables you to select a protocol to use before placing a call, select the protocol you want to use by one of the following methods: Soft Key Method Soft keys display to allow you to choose the protocol. Tap Use SIP, to place a SIP call, tap Use H.323, to place an H.323 call, or tap Use Auto, to allow your phone to automatically select the protocol to use. Tap each soft key one or more times to toggle between them. The protocol you select displays in the title bar. Your phone uses the selected protocol for all subsequent calls, unless you select a different protocol. Dialog Box Method A dialog box displays to allow you to choose the protocol. Tap Use SIP, to place a SIP call, or Use H.323,to place an H.323 call. For dual-protocol phones, the protocol displays next to all call IDs, including the call IDs for conference call participants and calls on hold. When you place calls from call lists or directories, your phone automatically chooses the protocol to use based on the information in the call list or directory. When you set up a contact in your local Contact Directory, you can specify the protocol the contact uses to handle calls. This allows your phone to automatically use the correct protocol when you dial the contact. When your phone supports H.323 protocol the following limitations exist: You cannot forward or transfer H.323 calls. You cannot set up forwarding for lines that just use the H.323 protocol. You cannot set up shared lines for lines that use the H.323 protocol. You cannot place a call by just entering an H.323 name. To place a call using an H.323 name, use URL-dialing mode and enter the following format for the URL: <H.323 name>@<server name> For example: [email protected] Tips for Video Calls Use these tips when you’re in a video call: Check your video image to make sure it’s clear, bright, and sharp. For information on adjusting camera settings, see Changing the Clarity of Your Video. Polycom, Inc. 89 Polycom VVX 500 and VVX 600 Business Media Phones and Polycom VVX Camera User’s Guide Avoid bright lights or windows behind you. If the camera faces a window or bright lights, you may have to adjust the camera settings. To adjust camera settings, see Changing the Clarity of Your Video. Avoid wearing bright colors, all-light or all-dark clothing, or busy patterns, such as small checks or narrow stripes. Pastels and muted colors look the best on the screen. Use natural gestures when you speak. If you are in a conference call, review The Etiquette of Video Conferencing and Telepresence. Polycom, Inc. 90 4: Using Advanced Features Now that you have mastered the basic features of your phone, you are ready to learn about all the other interesting and powerful features that your phone has to offer. This chapter describes exciting phone, such as joining Microsoft Outlook meetings with one tap of your finger, using your computer’s keyboard and mouse to handle calls, viewing Web content, or monitoring other phone users to see when they’re available or away from their desk. This chapter includes the following: Managing Buddies Integrating with Microsoft Lync Server Recording and playing back recorded calls Viewing the Browser Broadcasting messages using Push-to-Talk and group paging Using the Calendar feature Using the Polycom Desktop Connector to link your computer keyboard and mouse to your phone Logging into other phones Locking your phone Accessing features with your login credentials Note: Feature Availability Your phone might not support all of the features described in this chapter. Check with your system administrator to find out which features are available on your phone. Using Buddy Lists A Buddy list is a list of users/devices whose status—or presence—you can monitor. Users update their presence setting, such as Be right back, Out to lunch, or Busy, and you can view their status in real time from your Buddy list. You can also view your buddies’ status from Lines view and Home view, if your buddy is a favorite. In this section, you’ll learn how to: Update your presence status Set up and manage a Buddy list Block people from monitoring your status Monitor your buddies from your phone Polycom, Inc. 91 Polycom VVX 500 and VVX 600 Business Media Phones and Polycom VVX Camera User’s Guide Note: Buddies and Microsoft Lync Server If your phone is configured to work with Microsoft Lync Server, the way you manage buddies is different. For more information, see Using Polycom Phones with Microsoft Lync Server Quick User Guide, available by navigating to your phone from the Polycom Business Media Phones Support page. Updating Your Status Update your status so that other people can monitor your status from their phones. When you update your status, your status is automatically sent to the people watching you. You can update your status to one of the following: Online Busy Be right back Away On the phone Out to lunch Do not disturb Your phone also sends certain status information to the people watching you automatically—such as if you are in a call, if you enabled Do Not Disturb on your phone, or if your phone is offline because you restarted it. For example, if you enable the Do Not Disturb feature on your phone, your availability automatically updates to Do Not Disturb. When you select a presence setting other than online, the setting scrolls under the time display on the status bar, as displayed next. Note: Your Presence Status When You Enable and Disable the Do Not Disturb Feature on Your Phone If you select the status option Do Not Disturb, and then enable and disable the Do Not Disturb feature on your phone, your status changes to Online. To update your presence setting: 1 From Lines view, tap My Status. Or, tap Settings from Home view, and tap Features > Presence > My Status. 2 From the My Status screen, tap the status you want. Your new status is sent to phones watching you. Polycom, Inc. 92 Polycom VVX 500 and VVX 600 Business Media Phones and Polycom VVX Camera User’s Guide User Tip: How to Automatically Change Your Status When Your Phone is Idle You can enable your phone to automatically set your status to Away when your phone is idle for a certain length of time. After you touch the screen or press a key on your phone, your status changes to Available again. To enable this feature, tap Settings from Home view, and tap Basic > Preferences > Presence > Idle Timeout. From the Idle Timeout screen, enable an office hours and off hours timeout period, and enter the number of minutes your phone should be idle before your status changes to Away. For steps on how to set your office hours, see Changing Your Office Hours. Setting Up and Managing a Buddy List If you want to monitor other people, you need to make sure they are in your Buddy list. You add people to your Buddy list from your Contact Directory, so in order to add someone to your Buddy list, you must first add them to your Contact Directory. For information on adding a person to your contact directory see Working with Your Contact Directory. To update your Buddy list: 1 From your Contact Directory, tap the contact you want to start or stop monitoring. 1 From the contact’s information screen, tap . 2 From the Edit Contact screen, tap Watch Buddy, and enable or disable the field. The default setting is Disabled. When enabled, the contact is added to your Buddy list so you can monitor the contact’s status. When disabled, the contact is removed from your Buddy list, and you cannot monitor the contact’s status. 3 Tap Save. When you enabled the Watch Buddy setting for a contact, the contact displays in your Buddy list. To view your Buddy list, tap Buddies from Lines view. User Tip: Dialing Buddies You can quickly dial a buddy by accessing your Buddy list. From Lines view, tap Buddies, tap the buddy you want to call, and tap Dial. Blocking Contacts from Viewing Your Status You can prevent someone from monitoring you by blocking the contact in your Contact Directory. If you unblock the contact, the contact can add you to their Buddy list and monitor you. Polycom, Inc. 93 Polycom VVX 500 and VVX 600 Business Media Phones and Polycom VVX Camera User’s Guide User Tip: How to Access Your Blocked and Watcher Lists To view a list of contacts that can and cannot monitor your status, do the following: To display contacts that can view your status, tap Settings from Home view, and tap Features > Presence > Watcher List. To display contacts that can’t view your status, tap Settings from Home view, and tap Features > Presence > Blocked List. To block or unblock a contact from viewing your status: 1 From your Contact Directory, tap the contact you want to block or unblock. 2 From the contact’s information screen, tap . 3 From the Edit Contact screen, tap Block Buddy, and enable or disable the field. The default setting is Disabled. When enabled, the contact cannot watch your status, and the contact displays in your Blocked List. When disabled, the contact can watch your status, and the contact displays in your Watcher List. 4 Tap Save. Timesaver: How to Quickly Unblock a Contact You can use your Blocked List to unblock a contact, rather than updating the Contact Directory: Tap Settings from Home view, and tap Features > Presence > Blocked List. From the Blocked List, tap the contact you want to unblock, and tap Unblock. The contact can now watch your phone, and displays in your Watcher List. Monitoring Buddies You can monitor your buddies from your Buddy Status list. If a buddy is a favorite, you can also monitor the buddy from Home and Lines view. Your buddies display an icon next to their name to indicate their status. The following table shows the icons and the status they represent. Table 9: Buddy Status and Icons Buddy Status Icon Buddy Status Available Do Not Disturb Busy Offline Away No information Polycom, Inc. Icon 94 Polycom VVX 500 and VVX 600 Business Media Phones and Polycom VVX Camera User’s Guide The following table shows you how to monitor your buddies from your Buddy Status list, Home view, and Lines view. Table 10: Monitoring Buddies From Your Buddy Status List Display Action Buddy list From Lines view, tap Buddies. From Home view, tap Settings, and tap Features > Presence > Buddy Status. Your Buddy list displays, as displayed next. Lines view From Home view, press . If Lines view doesn’t display, swipe the screen. The buddies who are favorites display their status, as displayed next. Home view From Home view, tap the phone line. The buddies who are favorites display their status, as displayed next. Polycom, Inc. 95 Polycom VVX 500 and VVX 600 Business Media Phones and Polycom VVX Camera User’s Guide Integrating with Microsoft Lync Server Your system administrator can configure your phone to work with Microsoft Lync Server and communicate with others using Microsoft Lync. From your phone, you can monitor the status of your Microsoft Lync contacts. For more information on integrating with Microsoft Lync Server, refer to one of the following documents available by navigating to your phone from the Polycom Business Media Phones Web page: For users: Using Polycom Phones in a Microsoft Lync 2010 Environment For administrators: Deploying Polycom UC Software for Use with Microsoft Lync Server 2010 Recording Calls When the call recording feature is available, and you connect a USB flash drive to the USB port on your phone, you can record active audio calls on your phone. Recordings are stored as .wav files on the USB flash drive. You can record up to four hours in one file. Web Info: How Do I Attach a USB Flash Drive to My Phone? To attach a USB flash drive, see the Quick Start Guide for your phone, available by navigating to your phone’s Support page from the Business Media Phones Support page. When you attach a USB flash drive to your phone, a USB icon, , displays in the status bar, together with a message that tells you how much recording time is available on the USB flash drive. If you have a VVX 600, you can tap to view your recordings and USB properties. You cannot record when: There are no connected calls on your phone. You place a new call to transfer a call or set up a conference. The phone prompts you to answer an incoming call. When you place a call on hold, recording pauses. However, when another person places you on hold, recording continues. Recording stops when all active calls end, no matter who ends the calls. When you press while recording, only other participants in the call are recorded. Tones and indications, such as the dialing of digits or ringing from another person’s phone, that occur before a call connects are not recorded. Local tones and indications, such as DTMF tones when dialing, are not recorded. However, tones from another person’s phone are sometimes recorded. You control recording by tapping Start, Pause, Resume, and Stop. All active calls that occur on your phone between the time you tap Start and Stop are recorded, alternating in the same .wav file. For example, on June 22, 2012 at 11:22 a.m., you answer a call from person A. During your call with person A, you answer calls from person B and person C. Your conversations with persons A, B, and C are all recorded in the same .wav file as follows: Polycom, Inc. 96 Polycom VVX 500 and VVX 600 Business Media Phones and Polycom VVX Camera User’s Guide Web Info: Which USB Flash Drives Does My Phone Support? For a list of supported USB flash drives to record phone audio, see Supported USB Devices (Technical Bulletin 38084). Caution: Be Aware of Laws Governing Call Recording You may be required by federal, state, and local laws to notify some or all called participants when you record calls. You can find specific information about US state requirements at http://www.rcfp.org/taping/. Telephone call recording regulations in other countries vary widely. Polycom recommends checking with the local government’s telecommunications authority and government legal agencies. You can find other information that may be useful at: http://www.fcc.gov/cgb/consumerfacts/recordcalls.html http://www.privacyrights.org/fs/fs9-wrtp.htm Caution: Removing a USB Flash Drive During a Recording Polycom recommends that you do not remove the USB flash drive while recording. The file being recorded will be incomplete and cannot be played back later. When you remove the USB flash drive while recording, you may also damage the flash drive itself. To record a call: 1 From Lines, Calls, or Active Call view, tap Record. 2 To start recording, tap Start. Polycom, Inc. 97 Polycom VVX 500 and VVX 600 Business Media Phones and Polycom VVX Camera User’s Guide The message Recording in progress scrolls in the status bar. The Recording icon also displays in the status bar, as displayed next. 3 To stop recording, do one of the following: Tap Stop. Tap Back, and tap End Call. Depending what mode you are using, press or , or replace the handset. When you stop recording, the USB icon, , displays in the status bar, as displayed next. Note: Managing a Call While You’re Recording You can hold, end, transfer, or set up a conference call while you record, or while a recording is paused. To manage a call during a recording, tap Back and choose the task you want to perform. To see the Recording soft keys again, tap Record. To record a conference: You can record a conference call in the same way as other calls with the following exceptions: All conference call participants are recorded. When one of the conference participants presses that participant is not recorded. , When you hold a conference call, recording pauses. You can place or answer other calls, which are recorded in the same file. When you resume the conference call, recording resumes. To pause and resume a recording: Tap Pause. To resume the recording, tap Resume. Recording continues within the same .wav file. When you pause a recording, Recording Paused scrolls in the status bar. If you have a VVX 600, the Recording Paused icon, Polycom, Inc. , also displays in the status bar. 98 Polycom VVX 500 and VVX 600 Business Media Phones and Polycom VVX Camera User’s Guide Troubleshooting: Why Can’t I Record a Call? When you record, or attempt to record, a call, the following messages might appear on your screen: If there is insufficient free space on the USB flash drive when you tap Start, recording does not start and the message USB device is full/Recording cancelled displays. If the USB flash drive becomes full during recording, recording stops and the message USB device is full/Recording stopped displays. If you remove the USB flash drive during recording, recording stops and the message USB device removed unsafely/Recording cancelled displays. If you attach an unsupported USB flash drive, the message Unsupported USB device attached displays, along with information about the unsupported product. Playing Back Recorded Calls When you connect a USB flash drive to your phone, you can play back calls that you recorded on your phone. You can browse the recorded files, stored as .wav files, on the USB flash drive. You can also open, rename, and delete the recorded files. User Tip: Other Ways to Listen to Recorded Calls You can play back recorded files on other devices, such as a Windows or Apple based computer using an application capable of playing .wav files. If an error occurs while a recording plays, playing stops. To browse recorded files: Tap Settings from Home view, and tap Features > Removable Storage Media > Browse Recordings. A list of recordings displays, as displayed next. If there are no supported .wav files on the USB flash drive, the message Unsupported .wav file format appears on the screen. To rename or delete a recording: 1 Tap Settings from Home view, and tap Features > Removable Storage Media > Browse Recordings. If you have a VVX 600, tap from Lines or Calls view, and tap Browse Recordings. 2 From the Browse Recordings screen, tap the recording you want to rename or delete. Polycom, Inc. 99 Polycom VVX 500 and VVX 600 Business Media Phones and Polycom VVX Camera User’s Guide 3 To rename the file, tap Rename, update the filename, and tap OK. Or, to delete the file, tap Delete. To play a recorded call: 1 Tap Settings from Home view, and tap Features > Removable Storage Media > Browse Recordings. Or, if you have a VVX 600, tap Recordings. from Lines or Calls view, and tap Browse 2 From the Browse Recordings screen, tap the file you want to play, and tap Open. 3 Tap Play. Playing displays on the screen. The position indicator displays in hours, minutes, and seconds above the progress bar and changes as the file plays in real time, as displayed next. While the recording plays, you can pause by tapping Pause. To resume playing, tap Resume. To stop playing and return to the Browse Recordings screen, tap Exit. User Tip: How to Listen to Recorded Calls Use these tips when you listen to recorded calls: To adjust the volume of a recording while you play it, press one of the Volume keys, . Playback stops if you tap Exit, or press If the handset is off-hook when you tap Play, you hear audio through the handset. If the handset is on-hook when you tap Play, you hear audio through the speaker. If you lift the handset while you listen through the speaker, you hear the audio through the handset. When you are playing a file and an incoming call arrives, playing pauses and the phone rings. If you do not answer your phone, playback remains paused, and you have to tap Resume to continue playing back the recording. If you decide to reject the incoming call, tap Resume, and playback resumes. , or . You cannot open a .wav file if you have an active call or if you’re recording. If you try to, the message Action aborted displays. If all calls are held, you can start playing a recording. However, if you resume a call, playback stops. Using the Browser Certain Polycom phone models have an idle browser that displays non-interactive web content. You can configure the content you want the Idle Browser to display. To see the Idle Browser, press Polycom, Inc. from 100 Polycom VVX 500 and VVX 600 Business Media Phones and Polycom VVX Camera User’s Guide Home view. Swipe the screen to switch between the Idle Browser and Lines view. When your phone has calls, the Idle Browser does not display. To view an interactive Main Browser, tap Applications from Home view. From the Main Browser, you can: Tap hyperlinks to view more Web pages. Tap a text box and enter information by using the dialpad keys on the phone console or the editing icons. Move around by swiping your finger up, down, right, or left. Scrolling indicators on the screen indicate your position on the Web page. To stop a scrolling page, touch the screen. Navigation and editing icons displayed next, display in a toolbar along the bottom of the Main Browser. The toolbar hides, after it displays for three seconds, unless you’ve touched a text box that requires input. You can also display or hide the toolbar by pressing the touchscreen until the toolbar displays or hides. The following sections describe how to navigate and enter information in the Main Browser. Navigating the Main Browser Navigation icons enable you to view previous web pages, refresh the current page, return to the Main Browser’s Home page, or go back to your phone’s Home screen. Table 11: Navigating the Main Browser Icon Action Go back to the previous web page. Refresh the current web page. Stop refreshing. Return to the Main Browser’s home page. Display the toolbar permanently so it does not hide every three seconds. When the toolbar is permanently enabled, the icon changes to . Enable the toolbar to hide every three seconds. To display a hidden toolbar, you have to press the touchscreen until the toolbar displays. Return to the phone’s Home screen. Polycom, Inc. 101 Polycom VVX 500 and VVX 600 Business Media Phones and Polycom VVX Camera User’s Guide Entering Information in the Main Browser Editing icons enable you to enter information in text boxes. To display the editing icons, tap a text box in the Main Browser. Table 12: Editing Icons in the Main Browser Icon Action Select lower case, upper case, or numerical mode, or a special character encoding. Display an onscreen keyboard so you can enter numbers, letters, and characters in a text box. Hide the editing icons and display the navigation icons. Broadcasting Messages Using Push-to-Talk and Group Paging The Group Paging feature enables you to make pages—one-way audio announcements—to users subscribed to a page group. The Push-to-Talk (PTT) feature is a collaborative tool that enables you to exchange broadcasts to users subscribed to a PTT channel, much like a walkie-talkie. Your system administrator can set up both features on your phone. Your system administrator can define up to 25 paging groups for Group Paging mode or Channels for PTT mode. Your system administrator can assign a label to each group or channel that easily identifies the phones in the group or channel, such as All, HR Dept, Shipping Staff, or Executives. Each group or channel has one of the following priorities: Normal By default, broadcasts sent to Groups/Channels 1 to 23 are considered Normal broadcasts. If two users begin a broadcast on the same group/channel at the same time, the phone with the lower serial number continues to transmit while the other phone enters the receiving state. By default, all phones are configured to receive broadcasts sent to Group/Channel 1. Priority By default, broadcasts sent to Group/Channel 24 are considered Priority broadcasts. A Priority broadcast interrupts Normal broadcasts or active calls. All phones receive Priority broadcasts unless Do Not Disturb is enabled. Phones play Priority broadcasts at the phone’s current audio level. Emergency By default, broadcasts sent to Group/Channel 25 are considered Emergency broadcasts. An Emergency broadcast interrupts Normal broadcasts, Priority broadcasts, and active calls and plays out at near maximum volume even if Do Not Disturb is turned on. Push-to-Talk Mode Your system administrator can enable your phone to operate in a broadcast mode called Push-to-Talk (PTT). In order to send and receive PTT broadcasts, you have to subscribe to PTT channels. PTT broadcasts are collaborative: you can transmit messages and listen to replies. Polycom, Inc. 102 Polycom VVX 500 and VVX 600 Business Media Phones and Polycom VVX Camera User’s Guide Sending and Receiving PTT Broadcasts By default, you are subscribed to Channels 1, 24, and 25. This means that you can send and receive PTT broadcasts on Channels 1, 24, and 25. When you end a PTT broadcast, the channel remains open and enters a 10 second waiting period. This waiting period gives people who received the broadcast a chance to respond. If no one responds within the waiting period, the channel closes. Sending PTT Broadcasts Before you can send a PTT broadcast, you need to choose a channel to broadcast on. Or, you can hold the Talk soft key to immediately begin broadcasting on Channel 1, the default channel. You can change your default channel to any channel you want. To change the default channel see Changing the Default Channel. When you change the default channel, you are automatically subscribed to the channel you selected. To send a PTT broadcast: 1 From Lines view, tap Talk. Timesaver: Automatically Sending a PTT Broadcast To automatically send a PTT broadcast on the default channel, press and hold Talk. After the ‘transmitting’ beep, begin speaking. 2 From the PTT Channels List screen, tap the channel to send the broadcast on. The list displays the default channel, the most recent channel you sent a broadcast on, and other channels you can broadcast on. 3 To start the broadcast, press Talk. Be sure to press Talk throughout the entire broadcast. You hear a ‘transmitting’ beep, and then the phone displays the channel information such as the channel label. 4 Begin speaking. Note: What Happens When I Release Talk During A Broadcast? When you release Talk while you are sending the broadcast, the broadcast temporarily stops and enters a 10 second waiting period. During this period, the channel remains open to give people a chance to reply. At any time during the waiting period, you can resume your broadcast by pressing and holding Talk. If no one broadcasts during the waiting period, the channel closes and the broadcast ends. 5 When you finish your broadcast, do one of the following: Release Talk. Tap End PTT. Polycom, Inc. 103 Polycom VVX 500 and VVX 600 Business Media Phones and Polycom VVX Camera User’s Guide After you tap End PTT , you can immediately initiate another broadcast on another channel, even if the previous broadcast is still in its waiting period. Receiving PTT Broadcasts To receive a broadcast sent on a particular channel, you need to be subscribed to that channel. To subscribe to a channel, see Updating Channel Subscriptions. How you receive a PTT broadcast depends on the broadcast priority, whether you are in an active call, and whether your phone is set up to receive broadcasts during active calls. You receive broadcasts on the channels you are subscribed to as well as Channel 24, the Priority channel, and Channel 25, the Emergency channel. When you enable Do Not Disturb on your phone, you only receive Emergency broadcasts. Non-emergency broadcasts do not display or play on your phone. When a broadcast ends, your phone emits an end of transmission beep and enters a 10 second waiting period. During this period, you can respond to the broadcast. For more information, see Replying to PTT Broadcasts. Receiving PTT Broadcasts When You are Not in an Active Call When you receive a broadcast and you are not in an active call, the broadcast immediately plays, regardless of the broadcast priority. Receiving PTT Broadcasts During Active Calls How you handle a broadcast when you are in an active call depends on the broadcast priority and if your phone is set up to receive a broadcast when you are in an active call. When the broadcast is a Normal broadcast: When your phone is set to receive broadcasts during active calls, the broadcast immediately plays. You hear both the original call and the broadcast. To listen to only the broadcast, hold or end the call. When your phone is not set up to receive broadcasts during active calls, the broadcast displays as a Pending broadcast. To listen to the broadcast, hold or end the call, or tap the broadcast, and tap Accept. When the broadcast is a Priority or Emergency broadcast, the broadcast immediately plays. You hear the original call and the broadcast. To listen to only the broadcast, hold or end the call. Replying to PTT Broadcasts When a broadcast ends, the broadcast enters a 10 second waiting period. During this period, the channel remains open to receive or send additional broadcasts. During a waiting period, you can press and hold Talk and talk to all the people listening on the channel. When you finish talking, release Talk. The broadcast enters another waiting period until someone broadcasts again. If no activity occurs within the waiting period, the channel closes and no more broadcasts can take place. Polycom, Inc. 104 Polycom VVX 500 and VVX 600 Business Media Phones and Polycom VVX Camera User’s Guide Ending PTT Broadcasts You can end a PTT broadcast by releasing Talk, or by tapping End PTT. After you end a broadcast, the channel remains open so others can respond. When you release Talk without tapping End PTT: You can resume the broadcast by pressing and holding Talk, when the broadcast is in a waiting period. You cannot initiate another broadcast on another channel until the waiting period ends. When you tap End PTT: You cannot resume the broadcast by pressing and holding Talk. You can immediately initiate another broadcast on another channel. Adjusting the Volume of PTT Broadcasts You can adjust the volume of PTT broadcasts while they play. During a broadcast, press one of the Volume keys, , to raise or lower the volume of the broadcast. When you adjust the volume of a non-emergency broadcast, your phone retains the adjusted volume for all subsequent non-emergency broadcasts. However, only system administrators can adjust the volume level of an Emergency broadcast. Changing Where Broadcasts are Played While you send a broadcast, you can pick up the handset, or press or , and continue speaking. You can also press to mute your audio so that the people receiving your broadcast do not hear anything. This behavior is similar to a phone call. When you listen to a broadcast, you can pick up the handset, or press to the broadcast. or , and continue listening Changing the Default Channel When you press and hold Talk, your broadcast automatically transmits on the default channel, Channel 1. You can change the default channel to a different channel. To change the default channel: 1 Tap Settings from Home view, and tap Basic > Preferences > Paging/PTT Configuration > PTT Push to Talk. 2 From the PTT Channel Configuration screen, tap Default Channel, and tap the number of the channel you want to use. Updating Channel Subscriptions You can subscribe to any channel that has been enabled by your administrator and appears in your channels list. When you subscribe to a channel, you can send and receive PTT broadcasts on that channel. Polycom, Inc. 105 Polycom VVX 500 and VVX 600 Business Media Phones and Polycom VVX Camera User’s Guide To subscribe to additional PTT channels: 1 Tap Settings from Home view, and tap Basic > Preferences > Paging/PTT Configuration > PTT Push to Talk. 2 From the PTT Channel Configuration screen, tap Channel Subscriptions. From the Channel Subscriptions screen, tap the channel you want to subscribe to, and tap Yes. By default, you’re subscribed to Channels 1, 24, and 25. Enabling PTT Broadcasts to Play During Active Calls The Accept While Busy setting determines what happens when you are in a call and receive a PTT broadcast. When you enable the Accept While Busy setting, a PTT broadcast interrupts telephone calls and you hear the audio of the telephone call and the broadcast. When you disable the Accept While Busy setting, the incoming broadcast is held in a Pending state; it does not disrupt the telephone call and you cannot hear the broadcast. To hear the PTT broadcast, tap the PTT broadcast and tap Accept. The active telephone call is automatically held. Or, hold or end the telephone call. To enable or disable PTT broadcasts during an active call: 1 Tap Settings from Home view, and tap Basic > Preferences > Paging/PTT Configuration > PTT Push to Talk. 2 From the PTT Channel Configuration screen, tap Accept While Busy, and enable or disable the setting. The default setting is Disabled. When enabled, your phone accepts and play broadcasts while you are in an active call. When disabled, your phone does not play broadcasts while you are in a call, but holds them in a Pending state instead. Group Paging Mode Your administrator can enable your phone to operate in a broadcast mode called Group Paging mode. In this mode, you can broadcast one-way announcements to a specified group of phones, called a Paging Group. In Group Paging mode, users must subscribe to Paging Groups to send and receive pages. Sending and Receiving Pages To send and receive pages, you need to subscribe to certain paging groups. By default, you are subscribed to Paging Groups 1, 24, and 25. This means that you can send and receive pages to Paging Groups 1, 24, and 25. Sending Pages When you send a group page, it is automatically sent to Paging Group 1. This is your default paging group. You can change the default paging group to any group you want. To change the default paging group, see Changing the Default Paging Group. If you change your default paging group, you are automatically subscribed to the group you selected. You cannot send a Page-mode page while you are in an active call. Polycom, Inc. 106 Polycom VVX 500 and VVX 600 Business Media Phones and Polycom VVX Camera User’s Guide To send a page: 1 From Lines view, tap Paging. 2 From the Paging Groups List screen, tap the paging group to send the page to. 3 To begin a page, tap Page. Just before the page starts, you’ll hear an alert tone, and then the page begins. 4 Begin speaking. 5 To end the page, tap End Page. Receiving Pages To receive a page sent to a particular paging group, you need to be subscribed to that group. To subscribe to a paging group, see Updating Paging Group Subscriptions. How you receive a page depends on the priority of the page, whether you are in an active call, and whether your phone is set to receive a page during an active call. You receive pages on the paging groups you are subscribed to as well as Group 24, Priority pages, and Group 25, Emergency pages. When you enabled Do Not Disturb, you only receive Emergency pages. Non-emergency pages do not display or play on your phone. Receiving Pages When You are Not in an Active Call When you receive a page and you are not in an active call, the page immediately plays, regardless of the paging priority. While a page plays, you can: Hold the page. End the page. This ends the page at your phone only. Place a new call. Receiving Pages During Active Calls How you handle a page when you are in an active call depends on the page priority and if your phone is set up to receive a page when you are in an active call. When the page is a Normal page: When your phone is set up to receive pages during active calls, the page immediately plays. You hear both the original call and the page. To hear only the page, hold or end the call. When your phone is not set up to receive pages during active calls, the page displays as a Pending page. To listen to the page, tap the page, and tap Accept. Or, hold or end the call. When the page is a Priority or Emergency page, the page immediately plays. You hear the original call and the page. To hear just the page, hold or end the call. Polycom, Inc. 107 Polycom VVX 500 and VVX 600 Business Media Phones and Polycom VVX Camera User’s Guide Adjusting the Volume of Pages You can adjust the volume of pages while they play. During a page, press one of the Volume keys, , to raise or lower the page volume. When you adjust the volume of a non-emergency page, your phone uses the adjusted volume for subsequent non-emergency pages. However, only your system administrator can change the volume of an Emergency page. Changing Where Pages are Played While you send a page, you can pick up the handset, or press or and continue speaking. You can also press to mute your audio so that the people receiving your page do not hear anything. This behavior is similar to a phone call. When you receive a page, the page is always played through the phone’s speakerphone. You cannot play a page through your handset or headset. Changing the Default Paging Group When you press and hold Paging, your page is automatically sent to the default paging group, Paging Group 1. You can change the default paging group. To change the default Paging Group: 1 Tap Settings from Home view, and tap Basic > Preferences > Paging/PTT Configuration > Group Paging. 2 From the Group Paging Configuration screen, tap Default Group, and tap a new paging group number. The default paging group is 1. Updating Paging Group Subscriptions By default you are subscribed to Paging Groups 1, 24, and 25. This means that you can send pages to and receive pages sent from these groups. You can change which groups you are subscribed to. However, you cannot disable your subscriptions to Paging Groups 24 and 25. To update your Paging Group subscriptions: 1 Tap Settings from Home view, and tap Basic > Preferences > Paging/PTT Configuration > Group Paging. 2 From the Group Paging Configuration screen, tap Group Subscriptions. 3 From the Group Subscriptions screen, tap the group you want to subscribe to, and tap Yes. Enabling Pages to Play During Active Calls The Accept While Busy setting determines what happens when you are in a call and receive a page. When you enable the Accept While Busy setting, a page interrupts telephone calls and you hear the audio of the telephone call and the page. When you disable the Accept While Busy setting, the incoming page is held in a Pending state; it does not disrupt the telephone call, and you cannot hear the page. To Polycom, Inc. 108 Polycom VVX 500 and VVX 600 Business Media Phones and Polycom VVX Camera User’s Guide hear the page, tap the page and tap Accept. The active telephone call is automatically held. Or, hold or end the telephone call. To allow or disallow pages to play during an active call: 1 Tap Settings from Home view, and tap Basic > Preferences > Paging/PTT Configuration > Group Paging. 2 From the Group Paging Configuration screen, scroll to Accept While Busy, and enable or disable the setting. The default setting is Disabled. When enabled, your phone accepts and plays pages while you are in an active call. When disabled, your phone does not play pages while you are in a call, but holds them in a Pending instead. Using the Calendar When your phone is configured to connect to the Microsoft Exchange Server, you can view and join ® ® meetings scheduled in your Microsoft Outlook application from your phone. When your phone is configured to connect to the Microsoft Exchange Server, and the ® ® ® Polycom Conferencing for Microsoft Outlook software feature is installed at your site, you can schedule meetings using Polycom Conferencing for Outlook. Your system administrator assigns you login credentials, a domain, user name, and password, so you can access the Calendar from your phone. To use the Calendar feature, the phone must have your correct Login Credentials. Troubleshooting: What Happens if My Phone Has the Wrong Login Credentials? If your phone has incorrect Login Credentials, or you need to re-submit Login Credentials, the following happens: The message Login Credentials have failed/Please update them if information is correct displays on the screen. An icon, have failed. The message Invalid login credentials scrolls under the time in the status bar. The Calendar icon that displays on the Home screen is not available. , displays under the time in the status bar to warn you that your credentials To learn more about your Login Credentials and how to re-submit or update them, see Accessing Features with Your Login Credentials. Troubleshooting: Why Doesn’t the Calendar Display Anymore? When you do not see the Calendar icon in Home view, or you are not receiving meeting reminders, it is possible that your phone is not connected to the Microsoft Exchange Server. To re-connect to the server and use the Calendar feature again, tap Settings from Home view, and tap Features > Calendar. From the Calendar screen, tap Connect to the server. Polycom, Inc. 109 Polycom VVX 500 and VVX 600 Business Media Phones and Polycom VVX Camera User’s Guide Note: Accessing the Calendar When the User Login Feature is Enabled When you log in to a phone that has the User Login feature enabled to access the Calendar, reenter your login credentials so that the Calendar works. For information about entering your login credentials, see Accessing Features with Your Login Credentials. Opening and Closing the Calendar To open the calendar, tap Calendar from Home view. The Calendar’s Day view displays showing your meetings for the day, as displayed next. From Day view, you can access additional Calendar views: Month View and Meeting view. To see Month view, tap . To see Meeting view, tap a meeting. To close the Calendar, press . Or, navigate to Month view by tapping , and tap . Troubleshooting: Why Doesn’t the Calendar Display? If you tap Calendar from Home view, but the Calendar does not display, it is possible your Login Credentials are incorrect. To re-submit or update your Login Credentials, see Accessing Features with Your Login Credentials. Navigating Month View To see Month view, tap . Month view displays all the days in the month, with a yellow dot next to the days that have meetings, as displayed next. The current day displays in red, unless you select it. Then it displays in grey. To navigate in Month view: To view the previous month, tap To view the next month, tap . . To select another day, tap the day. To close the Calendar and display the Home screen, tap Polycom, Inc. or press . 110 Polycom VVX 500 and VVX 600 Business Media Phones and Polycom VVX Camera User’s Guide Navigating Day View When you tap a day in Month view, Day view displays. Day view displays all the meetings scheduled for the selected day, including the time, subject, and location of each meeting, as displayed next. To navigate in Day view: To view the meetings for the previous day, tap To view the meetings for the next day, tap . . To view details for a specific meeting, tap the meeting. To see the day’s meetings, scroll up and down. To return to Month view, tap . Navigating Meeting View You can view meeting details from Meeting view, as displayed next. To see Meeting view, tap a meeting in Day view. From Meeting view, you can: Polycom, Inc. 111 Polycom VVX 500 and VVX 600 Business Media Phones and Polycom VVX Camera User’s Guide View the meeting’s start and end time, location and organizer, required attendees, and meeting description. View the numbers that you can call to join the meeting. Tap a meeting number to join the meeting. To navigate in Meeting view: To see the meeting details, scroll up or down. To return to Day view, tap . Working with Meeting Reminders By default, your phone displays a meeting reminder 15 minutes before a meeting starts, as displayed next. Every minute before the meeting starts, the phone emits an alert tone and updates the meeting timer. If a meeting starts and you have not joined the meeting, the reminder indicates that the meeting is overdue. From the reminder, you can: Tap the meeting number, on the far-left of the reminder, to join the meeting. Tap Detail to view specific information about the meeting. Tap Snooze to temporarily remove the reminder from the screen, until the next scheduled reminder. Tap Dismiss to permanently remove the reminder from the screen and stop all future reminders for the meeting. Polycom, Inc. 112 Polycom VVX 500 and VVX 600 Business Media Phones and Polycom VVX Camera User’s Guide To enable or disable meeting reminders: 1 Tap Settings from Home view, and tap Basic > Preferences > Calendar Settings. 2 From the Calendar Settings screen, tap Reminder, and enable or disable the setting. The default setting is Enabled. When enabled, your phone displays reminders for all meetings. When disabled, the phone does not display reminders for any meeting. Troubleshooting: Why Don’t My Meeting Reminders Display? If you have enabled meeting reminders, but your phone is not displaying them, make sure that your Login Credentials are correct. For more information, see Accessing Features with Your Login Credentials. Joining Meetings from the Calendar You can join meetings from the Calendar in two ways: From a meeting reminder. From Meeting view. To join a meeting from a meeting reminder: From the reminder, tap the meeting number that displays at the far-left of the reminder, as displayed next. When you want to use another number to join the meeting, and the meeting organizer has specified alternate meeting numbers you can call, tap Detail from the reminder, as displayed next. The Calendar displays Meeting view, which lists alternate numbers you can call. To dial these numbers, tap More Actions, and tap one of the numbers. Polycom, Inc. 113 Polycom VVX 500 and VVX 600 Business Media Phones and Polycom VVX Camera User’s Guide To join a meeting from Meeting view: 1 From Day view, tap the meeting you want to join. 2 From Meeting view, tap the meeting number, as displayed next. When you want to use another number to join the meeting, and the meeting organizer has specified alternate numbers you can call, tap More Actions, as displayed next. A list of numbers that you can dial is displayed. To join the meeting, tap one of the numbers. Using a Mouse and Keyboard with Your Phone You can use your computer’s mouse and keyboard to enter information and navigate screens on your phone. For example, you can enter phone numbers, contact directory information, and select touchscreen objects without using the phone’s keypad or tapping the touchscreen. You can move the mouse pointer back and forth between your computer and your phone depending on your task. Before you can use your mouse and keyboard with your phone, you need to make sure the Polycom Desktop Connector (PDC) application is installed and running on your computer. While the PDC application is running, you can move your mouse pointer back and forth between your computer and phone. Polycom, Inc. 114 Polycom VVX 500 and VVX 600 Business Media Phones and Polycom VVX Camera User’s Guide Web Info: Detailed Information About Setting Up, Enabling, and Using PDC For more information about setting up and enabling the Polycom Desktop Connector, including how to use it to navigate and enter information on your phone, see Extend Your PC to Your Phone with the Polycom Desktop Connector (Feature Profile 52855). Starting and Stopping Polycom Desktop Connector Before you can start using your mouse and keyboard with your phone, you need to start the PDC application from your computer. You can close the application at any time to prevent your mouse pointer from moving to the phone. If you stop the application, you can restart it again at any time. To start Polycom Desktop Connector: 1 From the Start Menu, select Programs > Polycom > Polycom Desktop Connector. After a few seconds, the Polycom Desktop Connector icon, displayed next, displays in the Windows system tray, and the message Allow remote control of device <MAC address of phone> displays on the computer. This message only displays the first time the application is started. 1 Click OK. When your phone is configured correctly, the Polycom Desktop Connector turns red, as displayed next. When the red icon displays, the application is enabled and connected to your phone, and you can use your mouse and keyboard with your phone. If the icon does not change, contact your system administrator. Polycom, Inc. 115 Polycom VVX 500 and VVX 600 Business Media Phones and Polycom VVX Camera User’s Guide To quit Polycom Desktop Connector: 1 Right-click the red Polycom Desktop Connector icon in the Windows system tray, and select Exit. 2 The message Are you sure you want to stop Polycom Desktop Connector Server displays. Click Ok. The icon is removed from the system tray and the application is terminated. You can no longer use your mouse and keyboard with your phone. Note: Do I Have to Start PDC Each Time I Restart My Computer? Once you set up and start PDC on your computer, it automatically starts each time you restart your computer. How to Use Your Computer’s Mouse and Keyboard with Your Phone When Polycom Desktop Connector is enabled, you can use your mouse and keyboard to navigate menus, make option selections, and enter text and numeric values as an alternative to using your phone’s keypad interface. For example, you can use your mouse and keyboard to select and copy text from your computer and paste it into the editable fields on your phone’s screen. To display the mouse pointer on your phone’s screen, drag the mouse pointer beyond the edge of your computer screen in the direction of your phone screen. When you see the mouse pointer on your phone screen, you can start selecting items, and entering data in fields that have a flashing cursor. To enter information on your computer again, drag the mouse pointer back to your computer screen. Troubleshooting: Why Can’t I Use My Computer Keyboard to Enter Information in Certain Fields? If you cannot use your computer keyboard to enter information in a field on your phone, check to see if the field has a flashing cursor. Entering information using your computer keyboard only works when the field has a flashing cursor. When you use your mouse and keyboard with your phone, you can do the following: Use your keyboard to enter information on your phone screen. Use the number keys above the alphabetic characters to enter numeric information such as phone numbers. If you enable the Num Lock function on your keyboard, you can also use the numeric keypad on your keyboard. Copy information from your computer screen and paste it onto your phone screen, using your keyboard’s shortcuts to cut, copy, and paste. You cannot copy information from your phone screen and paste it onto your computer screen. Copy and paste information between fields on your phone screen by right-clicking the field, and choosing a clipboard command such as Cut (Ctrl+X), Copy (Ctrl+C), and Paste (Ctrl+V). Polycom, Inc. 116 Polycom VVX 500 and VVX 600 Business Media Phones and Polycom VVX Camera User’s Guide Use your mouse pointer to highlight information on the phone. Delete information on your phone by highlighting the information using your cursor and pressing the Delete or Backspace keys on your keyboard. Use the Home and End keys on your keyboard to position your cursor at the beginning or the end of fields on your phone. Use the Arrow keys to move within text fields. Hold the Alt + Up Arrow key to increase the volume, and the Alt + Down Arrow key to decrease the volume. Use the mouse scroll wheel to navigate through lists and menus. Note: Placing Calls from Your Computer Keyboard If you’re using PDC, you can place a call using the New Call soft key. To place a call, select New Call from Home view, enter the phone number, and select number and select . Or, just enter the phone . You can also use the function keys on your keyboard to save time and be more productive. The function keys are mapped to features on your phone, as displayed in the following table. Table 13: Mapping Function Keys to Your Phone Features Function Keys Keyboard Action F1 Tap the left-most soft key F2 Tap the second soft key from the left F3 Tap the third soft key from the left F4 Tap the fourth soft key from the left F5 Tap the right-most soft key F6 Press F7 Open the Directories menu F8 Open the Messages menu F11 Open Applications F12 Press Alt+F2 Redial Alt+F3 Transfer Alt+F3 Conference Polycom, Inc. 117 Polycom VVX 500 and VVX 600 Business Media Phones and Polycom VVX Camera User’s Guide Function Keys Keyboard Action Alt+F6 Enable or disable Do Not Disturb Alt+ F7 Enable or disable Microphone Mute ( Alt+F11 Press ) Troubleshooting: Why Aren’t My Mouse Pointer and Cursor Responding? If your computer has multiple programs open or is in any way unresponsive, the mouse pointer or cursor may not respond as quickly on your phone. Try closing any unnecessary programs. Logging into Phones When your system administrator enables the User Login feature, you can view your personal phone settings from any phone that is part of your organization. You can access your contact directory and speed dials, as well as other phone settings, when you change locations. When the User Login feature is enabled and you change settings while you are logged in to a phone, the settings are saved and displayed the next time you log in to a phone. When you log out, your personal phone settings no longer display. You can log in to a phone by entering your user ID and password. Default passwords are preset at the factory to the numerals 123. Note: Placing a Call from a Phone in the Logged-Out State When a phone is in the logged-out state and requires a user login, it is possible that you can use the phone to place emergency calls to standard emergency numbers, such as 911, and other preconfigured phone numbers. These numbers are configured by your administrator. For information on how to place authorized calls, see Placing Calls from Phones that are in the Logged-Out State. When the User Login feature is set up on your company’s phones, to use this feature you need to know how to: Log in to a phone to access your personal phone settings. Log out of a phone after you finish using it. Place a call to an authorized number from a phone that is in the logged-out state and requires a user login. Change your user password. Polycom, Inc. 118 Polycom VVX 500 and VVX 600 Business Media Phones and Polycom VVX Camera User’s Guide Logging In and Out of a Phone Depending on how your system administrator enables the User Login feature, certain phones require you to log in before you can use them. Other phones do not require you to log in before you to use them, however, if you do not log in, you see the phone’s default profile. When you want to see your personal phone settings from the phone, you must to log in. When you log in, you have full access to your personal phone settings and your directory. After you log out of the phone, you can no longer view this information on the phone. After you use a phone, log out of the phone to prevent access to your personal settings. Note: Accessing the Calendar When the User Login Feature is Enabled When you log in to a phone that has the User Login feature enabled and when you want to access features that require your login credentials, you need to re-enter your login credentials. For more information, see Accessing Features with Your Login Credentials. To log in to a phone: 1 When you see the User Login screen proceed to step 2. If you do not see the User Login screen, do one of the following: From Lines view, tap Log in. Tap Settings from Home view, and tap Features > User Login > Log in. 2 From the User Login screen, enter your user ID and password, and tap Log in. Default passwords are preset at the factory to the numerals 123. However, your system administrator may have changed this for security reasons. When your login credentials are accepted, the phone updates to display your personal phone profile. When your credentials are not accepted, the message User login failed displays, and the User Login screen displays again. If you need to confirm your log in credentials, check with your system administrator. To log out of a phone: 1 From Lines view, tap Log out. Or, tap Settings from Home view, and tap Features > User Login > Log out. The Logout screen displays with a confirmation message. 2 Tap Yes. Your personal profile is no longer accessible, and the phone displays either the User Login screen for the next user login, or the default phone profile for anonymous users. Placing Calls from Phones that are in the Logged-Out State When a phone does not require a user login, you can use the phone to place calls to any number, even when the phone is in a logged-out state. Polycom, Inc. 119 Polycom VVX 500 and VVX 600 Business Media Phones and Polycom VVX Camera User’s Guide When a phone does require a user login, depending your phone you can place calls to authorized numbers when the phone is in the logged-out state. When your system administrator sets up emergency numbers on the phone, you can place calls to the standard emergency numbers, such as 911, and up to five other authorized numbers. You cannot call any other numbers until you log in to the phone. To place a call to an authorized number from a phone in the logged-out state: 1 Tap New Call. 2 From the Place an Authorized Call screen, tap the number you want to call, and tap Dial. Changing Your Password You can change your password from any phone that you are currently logged in to. To change your user password: 1 Log in to any phone on your network. 2 Tap Settings from Home view, and tap Features > User Login > Change User Login Password. 3 From the Change User Login Password screen, enter your old password, enter a new password and confirm it, and then tap Enter. Your password is changed. The next time you log in to a phone, you need to enter your new password. Locking the Phone Lock your phone to do the following: Prevent unauthorized outgoing calls. Allow only authorized people to answer calls. Prevent people from viewing or modifying phone information, such as your directory, call lists, or favorites. When your phone is locked: You can only make an outgoing call to a number from a list of authorized numbers. You must enter a password to answer incoming calls. All keys and screen items are disabled, except those that allow you to unlock the phone, make an authorized call, or view the browser if enabled. The messages The phone is locked and Authorized calls only scroll on the status bar in Lines view. Messages that displayed before the phone was locked do not display. You can unlock the phone by entering your user password. If your phone restarts for any reason while it is locked, your phone remains locked when it restarts, unless your phone is configured to start up unlocked. About Your User Password You are a user password so you can answer calls from your locked phone and unlock the phone. By default, your user password is 123. You can change your user password at any time. Polycom, Inc. 120 Polycom VVX 500 and VVX 600 Business Media Phones and Polycom VVX Camera User’s Guide To change your user password: 1 Tap Settings from Home view, and tap Advanced. 2 From the Password screen, enter your user password, and tap Enter. 3 From the Advanced screen, tap Change User Password. 4 From the Change User Password screen, enter your password information, and tap Enter. Locking and Unlocking Your Phone You can choose how you want your phone to handle incoming calls when it is locked. When you set up your phone to receive incoming calls when it is locked (the default setting), incoming calls ring on your phone, and you can answer calls by entering your user password. When you set up your phone to ignore incoming calls, Do Not Disturb applies to all lines on your phone, and your phone does not ring. To lock your phone: 1 Tap Settings from Home view, and tap Basic > Lock Phone. 2 From the Lock Phone screen, select how you want incoming calls handled when your phone is locked. The default setting is Allow ringing when locked. Allow ringing when locked Select this option if you want your phone to ring when you have an incoming call. When you choose this option, you can answer a call by entering your password. 3 Tap Lock. Your phone is locked. Timesaver: A Quick Way to Lock Your Phone Your phone is set up so that you can quickly lock it by tapping Lock from Lines view. When you do this, you cannot choose how to handle incoming calls. Your phone uses the default setting, Allow ringing when locked, or the last setting you selected. To unlock your phone: 1 Tap Unlock. 2 Enter your user password, and tap Enter. The phone unlocks. Calling and Answering from a Locked Phone From a locked phone, anyone can dial the standard emergency number, such as 911, and up to five other authorized numbers that your administrator can set up. You cannot call any other numbers from a locked phone. When you set up your phone so you can answer incoming calls when your phone is locked, you can answer calls by entering your user password. Polycom, Inc. 121 Polycom VVX 500 and VVX 600 Business Media Phones and Polycom VVX Camera User’s Guide To call an authorized number from a locked phone: Do one of the following: Tap New Call. From the Place an Authorized Call screen, tap the number you want to call, and tap Dial. Place a call to an authorized number by using the handset, headset, or speakerphone. The call is placed. To answer a call on a locked phone: 1 From the Incoming Call window, tap Answer. 2 Enter your user password and tap Enter. The call connects. Accessing Features with Your Login Credentials Your system administrator assigns you login credentials, a domain, user name, and password, so your phone can access the Calendar feature or work with Microsoft Lync Server. If there is a problem with your login credentials, you cannot access your phone’s Calendar or use features associated with Microsoft Lync Server. When your phone has incorrect login credentials, the following happens: An icon, , displays on the status bar. When you have a VVX 600, you can tap the icon to access the Login Credentials screen. The message Login Credentials have failed/Please update them if information is incorrect displays for 10 seconds. Your phone displays a Warning message. For information about phone Warnings, see Investigating Phone Warnings. To access the features again, re-submit or enter your login credentials. Note: Accessing the Calendar when the User Login Feature is Enabled When you log in to a phone that has the User Login feature enabled, and when you want to access features that require your login credentials, you need to re-enter your login credentials. To re-submit or enter your login credentials: 1 Tap Settings from Home view, and tap Basic > Login Credentials. 2 From the Login Credentials screen, tap Submit. Your credentials are re-submitted and you have access to the features again. Troubleshooting: What Happens if I Can’t Access Features? When you still do not have access to the features, try entering your credentials and tapping Submit. When you still do not have access, or if you lock your account, see your system administrator. Polycom, Inc. 122 5: Customizing the Phone’s Display This chapter explains how to customize your phone’s touchscreen display so that it is unique to you. Basic customizations include changing the time and date format and updating the screen brightness. You can also set up a screen saver or use your phone as a digital picture frame. In this chapter includes the following information: Changing the language on your phone Changing the time and date display Changing the backlight settings Changing the background picture Displaying a screen saver Using the phone as a digital picture frame Setting up power saving mode Changing the Language on Your Phone Your phone supports several languages. To change the language: 1 Tap Settings from Home view, and tap Basic > Preferences > Language. 2 From the Language screen, tap the language you want. The language on your phone updates automatically. Changing the Time and Date Display The time and date display in the status bar. When your phone cannot obtain a time and date, the time and date display flashes. Contact your system administrator when the display flashes, or when the time or date is incorrect. You can choose from a variety of time and date formats, including options to display the day, month, or year. You can also turn the time and date display off, so that the time and date do not display at all. You can select and set options that are right for you. The following figure displays the default display for the time and date. To update the time and date display: 1 Tap Settings from Home view, and tap Basic > Preferences > Time & Date. 2 From the Time & Date screen, do one of the following: To change the date format, tap Clock Date. Polycom, Inc. 123 Polycom VVX 500 and VVX 600 Business Media Phones and Polycom VVX Camera User’s Guide To change the time format, tap Clock Time. To change the order of the time and date display, tap Clock Order. 3 From the Clock Date, Clock Time, or Clock Order screen, tap the format you want. To enable or disable the time and date display: 1 Tap Settings from Home view, and tap Basic > Preferences > Time & Date. 2 From the Time & Date screen, tap Enable or Disable to turn on or off the time and date display. Changing the Backlight Your phone’s backlight has two components: Backlight Intensity The brightness of the screen during phone activity and inactivity. Backlight intensity has three settings: Backlight On Backlight Idle The brightness of the screen when there is phone activity. The brightness of the screen when there is no phone activity. Maximum Intensity The brightness scale that applies to both Backlight On and Backlight Idle intensities. Backlight Timeout The number of seconds the phone is inactive before the backlight dims to its Backlight Idle intensity. The backlight timeout period begins after your last key press or the last phone event, such as an incoming call. You can change the Backlight On intensity and the Backlight Idle intensity separately. You can choose a high, medium, or low intensity, or turn off the backlight entirely. When you change the Maximum Intensity, you modify the entire backlight intensity scale. For example, if you decrease the Maximum Intensity, the low, medium, and high levels for both Backlight On and Backlight Idle intensities decrease. The backlight automatically turns on with any phone activity. By setting the Backlight Timeout, you can determine how long the phone should be idle before the backlight dims to its Backlight Idle intensity. By default, after the phone is idle for 40 seconds, the backlight dims. To change the backlight intensity: 1 Tap Settings from Home view, and tap Basic > Backlight Intensity. 2 From the Backlight Intensity screen, tap Backlight On Intensity. 3 From the Backlight On Intensity screen, tap the intensity you want, and tap Back. The default is High. 4 From the Backlight Intensity screen, tap Backlight Idle Intensity. 5 From the Backlight Idle Intensity screen, tap the intensity you want, and tap Back. The default is Low. 6 From the Backlight Intensity screen, tap Maximum Intensity. 7 From the Maximum Intensity screen, tap Up or Down, or drag your finger along the slider, to increase or decrease the maximum intensity the screen displays. Polycom, Inc. 124 Polycom VVX 500 and VVX 600 Business Media Phones and Polycom VVX Camera User’s Guide To change the Backlight Timeout: 1 Tap Settings from Home view, and tap Basic > Backlight Timeout. 2 From the Backlight Timeout screen, tap the number of seconds the phone is idle before the backlight dims. The default is 40 seconds. Changing the Background Picture You can change the background picture that displays on your phone. By default, your screen displays a blue background that is named Default. Your system administrator sets up the background images for your phone. If no background images are set up, only the blue background, named Default, is available. You can use a picture of your own as the background image for your phone. For more information, see Using One of Your Own Pictures as the Background Picture. Web Info: Adding a Web Page as the Background on Your Phone You may be able to add a Web page as the background on your phone. For more information, see Branding Your Polycom Phone (Best Practices 75556). To change the background picture: 1 Tap Settings from Home view, and tap Basic > Preferences > Background. The Background screen displays. Depending how your system is set up, you might have to tap Settings from Home view, and tap Basic > Preferences > Background > Select Background. The Select Background screen displays instead. The following figure displays a sample background screen. Your screen has the default option, as well as other options that your administrator adds to your phone. When you set an image on your USB flash drive as your background image, the image displays in the list as Local File. 2 Tap the background image you want. Polycom, Inc. 125 Polycom VVX 500 and VVX 600 Business Media Phones and Polycom VVX Camera User’s Guide Using One of Your Own Pictures as the Background Picture You can use a picture that is stored on your USB flash drive as the background picture on your phone. When you set one of your pictures as the background picture, the picture displays as Local File in the Backgrounds list. Before you can set a picture on your USB flash drive as the background picture, confirm the following: The picture is on a USB flash drive, and the USB flash drive is attached to your phone. You have specified the folder the picture is in on your USB flash drive. For more information on placing a picture on your USB flash drive, connecting the USB flash drive to your phone, and specifying a folder, see Displaying Screen Savers. Note: Restrictions for Background Images When you use one of your own pictures as the background image, keep in mind the following: Progressive or multiscan JPEG images are not supported. The phone screen size is 320 x 240 pixels (for the VVX 500) and 480 x 272 (for the VVX 600). Smaller images are centered and surrounded with black space. Larger images are scaled proportionally to fit the screen. Horizontal or vertical black bars are added to preserve the original aspect ratio. To use a picture on your USB flash drive as the background picture on your phone: 1 Tap Settings from Home view, and tap Features > Removable Storage Media > Picture Frame. Your pictures display, one-by-one. 2 To set a picture as the background picture for your phone, wait for the picture to display, and tap . Or, tap one of the arrow icons, , to display the picture, and tap . Home view updates to display the background picture you selected. To reset your background image to the default, select Default from the Background screen. Displaying Screen Savers Another way to personalize your phone is to use the pictures stored on a USB flash drive as a screen saver. The screen saver automatically starts each time your phone is idle a certain amount of time. You can stop the screen saver at any time by tapping the touchscreen. When your phone is idle again for a specified period of time, the screen saver starts again. User Tip: Using Your Phone as a Digital Picture Frame You can use the Picture Frame feature to set a single picture to display, or have all pictures display in slide-show style. This avoids the need for you to set up a screen saver that automatically starts each time your phone is idle a certain amount of time. For more information, see Using the Phone as a Digital Picture Frame. Polycom, Inc. 126 Polycom VVX 500 and VVX 600 Business Media Phones and Polycom VVX Camera User’s Guide Setting Up Screen Savers To set up a screen saver of your pictures, you need to set up certain screen saver settings, place your pictures on a USB flash drive, and attach the USB flash drive to the phone. The phone can only display the screen saver when the USB flash drive is attached to the phone. Web Info: Supported USB Flash Drives For a list of supported USB flash drives, see Supported USB Devices for Polycom Phones (Technical Bulletin 38084). To set up a screen saver of your pictures: 1 Place one or more pictures on a USB flash drive, either in the root directory or in a folder. The pictures must have the following file type and size: File type: BMP, JPEG, or PNG Maximum size: 9999 x 9999 pixels 2 Attach the USB flash drive to your phone. The USB icon, , displays on the status bar. Web Info: How Do I Attach a USB Flash Drive? For information on how to attach a USB flash drive, see the Quick Start Guide for your phone, available by navigating to your phone from the Business Media Phones Web page. 3 Tap Settings from Home view, and tap Basic > Preferences > Picture Frame. 4 From the Picture Frame screen, specify the folder you stored your images in on the USB flash drive, and the length of time you want each image to display: Tap Folder, and enter the name of the folder you placed your images in on the USB flash drive. When you did not place the pictures in a folder, but placed them in the root directory instead, do not enter a folder name. Tap Time Per Image, and enter the number of seconds you want each picture to display. You can enter a minimum of 3 seconds and a maximum of 300 seconds. The default is 5 seconds. Tap Save. When the message No pictures found displays after you tap Save, there are no pictures in the folder you specified, or in the root directory. Go back and make sure the information you entered is correct. 5 Tap Settings from Home view, and tap Basic > Preferences > Screen Saver. Polycom, Inc. 127 Polycom VVX 500 and VVX 600 Business Media Phones and Polycom VVX Camera User’s Guide 6 From the Screen Saver screen, do the following: Tap Screen Saver, and tap Enabled. Tap Wait Time, and enter the number of minutes the phone should wait, after no activity, before displaying the screen saver. You can enter a minimum of 1 minute and a maximum of 9999 minutes. The default is 15 minutes. 7 Tap Save. After the number of minutes you specified in the Wait Time field, your phone displays the screen saver. You can stop the screen saver at any time by touching the screen, but the screen saver re-starts when your phone is idle again. Interrupting and Disabling Screen Savers You can stop a screen saver at any time by touching the screen. After your phone is idle for the specified period of time, the screen saver starts again. You can disable a screen saver—prevent it from starting, even if your phone has been idle for the specified period of time—by doing the following: Removing the USB flash drive. The screen saver does not display until you attach the USB flash drive again, and your phone is idle for the period of time you specified. Disabling the Screen Saver setting. When you disable the setting, the screen saver does not display, even though the USB flash drive is still attached. To disable the Screen Saver setting: 1 Tap Settings from Home view, and tap Basic > Preferences > Screen Saver. 2 From the Screen Saver screen, tap Screen Saver, and tap Disabled. 3 Tap Save. Using the Phone as a Digital Picture Frame You can view the pictures that are stored on your USB flash drive at any time, without setting up a screen saver that automatically starts each time your phone is idle. This is called the Picture Frame feature. You can display your pictures as thumbnails, one-by-one like a slide show, or display just one picture. Before you can display your pictures, confirm the following: Your pictures are on the USB flash drive, and the USB flash drive is attached to your phone. You have specified the folder the pictures are in on your USB flash drive. For information on how to place pictures on a USB flash drive, connect the USB flash drive to your phone, and specify a folder, see Displaying Screen Savers. To display the pictures on your USB flash drive: Tap Settings from Home view, and tap Features > Removable Storage Media > Picture Frame. Your pictures display one-by-one, like a slide show. Six icons display beneath your pictures. Polycom, Inc. 128 Polycom VVX 500 and VVX 600 Business Media Phones and Polycom VVX Camera User’s Guide The following figure displays picture that is stored on a USB flash drive, and the six icons that display so you can set a picture as the background image on your phone, or display the pictures as thumbnails, oneby-one, or as one picture only. Table 14: Tapping Icons to Display Your Pictures Icons Display View thumbnails of your pictures. View the previous picture. View the next picture. Pause and display the current picture only. After you’ve paused, display the pictures one-by-one again. Stop displaying the pictures. The pictures do not display again until you access the Picture Frame feature (unless you have a screen saver set up, or you enable one). Set the picture that currently displays as the background picture for your phone. Using Power-Saving Mode By default, your phone is set up with a power-saving mode that turns off the touchscreen to conserve energy. Your phone enters power-saving mode after it has been idle for a certain period of time. You can configure the period of time that the phone is idle before the touchscreen turns off. You can configure different idle timeouts for office hours and off hours, such as evenings and weekends. During off hours, the message Off Hours Mode scrolls on the status bar. Your phone exits power-saving mode if a phone event occurs—for example, if the phone has an incoming call or message, or you press a key or tap the screen. If a screen saver is enabled on your phone, power-saving mode still occurs. Polycom, Inc. 129 Polycom VVX 500 and VVX 600 Business Media Phones and Polycom VVX Camera User’s Guide The power-saving settings you can update are: Office Hours When you start work and how long you’re in the office each day. For more information, see Changing Your Office Hours. Timeouts The period of time the phone should be idle before the touchscreen turns off. For more information, see Changing Timeouts. Changing Your Office Hours Update your office hours so the phone knows when you are in the office. When you update your office hours, you specify when you start, and how long you work each day. To change your office hours: 1 Tap Settings from Home view, and tap Basic > Power Saving > Office Hours > Start Hour. 2 From the Start Hour screen, tap the day of the week you want to update, enter your start time, and tap Save. Enter a start time using the 24-hour clock. You can enter a start time from 0 to 23. 3 From the Office Hours screen, tap Duration. 4 From the Duration screen, tap the day of the week you want to update, enter the number of hours you work, and tap Save. Enter a duration of 0 to 12 hours per day. Changing Timeouts You can update the period of time the phone is idle before the touchscreen turns off. You can specify different timeouts for office hours (Office Hours Idle Timeout) and non-office hours (Off Hours Idle Timeout). By default, the Office Hours Idle Timeout is much longer than the Off Hours Idle Timeout. You can also specify a separate timeout period that applies after you press a key or tap the screen. This is called the User Input Idle Timeout. You can choose to set a higher User Input Idle Timeout than the Office Hours and Off Hours Idle Timeouts so that when you’re actively using the phone, power-saving mode won’t initiate as often. User Tip: Determining Which Idle Timeout Applies If you press a key or tap the screen, the idle timeout period that applies (User Input Idle Timeout or Office Hours/Off Hours Idle Timeout) is the timeout with the highest value. To change timeouts: 1 Tap Settings from Home view, and tap Basic > Power Saving > Timeouts. 2 Tap Office Hours Idle Timeout, and enter the number of minutes the phone should wait, during office hours, before starting power-saving mode. Enter a number between 1 minute and 600 minutes. The default is 10 minutes. Polycom, Inc. 130 Polycom VVX 500 and VVX 600 Business Media Phones and Polycom VVX Camera User’s Guide 3 Tap Off Hours Idle Timeout, and enter the number of minutes the phone should wait, during offhours, before starting power-saving mode. Enter a number between 1 minute and 10 minutes. The default is 1 minute. 4 Tap User Input Idle Timeout, and enter the number of minutes the phone should wait after a key press or screen tap before starting power-saving mode. Enter a number between 1 minute and 10 minutes. The default is 10 minutes. 5 Tap Save. Polycom, Inc. 131 6: Administrative Tasks When your phone is unable to operate properly, you may have to investigate or troubleshoot issues. To solve issues, your administrator may ask you to restart your phone, update the phone’s configuration, or test phone hardware. This chapter shows you how to perform these tasks. Investigating Phone Warnings When your phone is unable to perform certain tasks, a warning icon, , displays in the status bar, as displayed next. The warning icon lets you know that your phone has one or more important issues. You can view details about the issues from the Warnings screen. If you have a VVX 600, the icon has a counter indicating the number of warning messages you have, and you can tap the icon to automatically view the messages. To view a detailed list of phone issues: Tap Settings from Home view, and tap Status > Diagnostics > Warnings. The Warnings screen displays, as displayed next, listing any phone issues. After you view the phone warnings, you can tap Clear Icon to remove the warning icon from the status bar. However, the warning still displays in the Warnings list until the phone issue is fixed. Each time your phone has a warning that you haven’t viewed, the Warning icon displays. Restarting the Phone Your system administrator may ask you to restart your phone if your phone malfunctions or to assist in troubleshooting. Polycom, Inc. 132 Polycom VVX 500 and VVX 600 Business Media Phones and Polycom VVX Camera User’s Guide Caution: Restarting Your Phone Before you restart your phone, contact your system administrator. If your phone is malfunctioning, you may be able to restore normal operation without restarting the phone. In addition, your administrator may want to troubleshoot your phone before you restart it. If you need to update your phone’s configuration, don’t restart your phone. To update the phone’s configuration, see Updating Phone Configuration. To restart the phone: 1 Tap Settings from Home view, and tap Basic > Restart Phone. The message Are you sure? displays. 2 If you still want to restart the phone, tap Yes. The restart process begins. The process ends when the default Home screen displays. Updating Phone Configuration Your system administrator may ask you to update your phone configuration. You may be able to do this without restarting your phone. To update your phone’s configuration: 1 Tap Settings from Home view, and tap Basic > Update Configuration. The message Are you sure? displays. 2 To update the configuration, tap Yes. The configuration is updated. Your phone may restart, depending on the phone settings that have changed. Testing Phone Hardware Your system administrator might ask you to access a diagnostics menu on your phone to test your phone hardware. You can test your phone’s microphones, speaker, handset, third-party headset (if present), keypad mappings, touchscreen, and LEDs . See your system administrator for instructions on how to perform these tests. To test your phone hardware: 1 Tap Settings from Home view, and tap Status > Diagnostics > Test Hardware. 2 From the Test Hardware screen, tap one of the following: Audio Diagnostics Keypad Diagnostics Display Diagnostics Touch Screen Diagnostics Brightness Diagnostics Polycom, Inc. 133 Polycom VVX 500 and VVX 600 Business Media Phones and Polycom VVX Camera User’s Guide LED Diagnostics Polycom, Inc. 134 7: Copyright, Safety, and Regulatory Notices Service Agreements Please contact your Polycom Authorized Reseller for information about service agreements applicable to your product. Governing Law This Limited Warranty and Limitation of Liability shall be governed by the laws of the State of California, U.S.A., and by the laws of the United States, excluding their conflicts of laws principles. The United Nations Convention on Contracts for the International Sale of Goods is hereby excluded in its entirety from application to this Limited Warranty and Limitation of Liability. All rights reserved under International and Pan-American Copyright Conventions. No part of the contents of this manual may be copied, reproduced, or transmitted in any form or by any means, or translated into another language or format, in whole or part, without written consent from Polycom, Inc. Do not remove (or allow anybody else to remove) any product identification, copyright or other notices. Limitations of Liability LIMITATION OF LIABILITY. TO THE FULL EXTENT ALLOWED BY LAW, POLYCOM EXCLUDES FOR ITSELF AND ITS SUPPLIERS ANY LIABILITY, WHETHER BASED IN CONTRACT OR TORT (INCLUDING NEGLIGENCE), FOR INCIDENTAL, CONSEQUENTIAL, INDIRECT, SPECIAL, OR PUNITIVE DAMAGES OF ANY KIND, OR FOR LOSS OF REVENUE OR PROFITS, LOSS OF BUSINESS, LOSS OF INFORMATION OR DATA, OR OTHER FINANCIAL LOSS ARISING OUT OF OR IN CONNECTION WITH THE SALE, INSTALLATION, MAINTENANCE, USE, PERFORMANCE, FAILURE, OR INTERRUPTION OF ITS PRODUCTS, EVEN IF POLYCOM OR ITS AUTHORIZED RESELLER HAS BEEN ADVISED OF THE POSSIBILITY OF SUCH DAMAGES, AND LIMITS ITS LIABILITY TO REPAIR, REPLACEMENT, OR REFUND OF THE PURCHASE PRICE PAID, AT POLYCOM’S OPTION. THIS DISCLAIMER OF LIABILITY FOR DAMAGES WILL NOT BE AFFECTED IF ANY REMEDY PROVIDED HEREIN SHALL FAIL OF ITS ESSENTIAL PURPOSE. Polycom Limited Warranty and Limitation Liability LIMITED WARRANTY. Polycom warrants to the end user (“Customer”) that this product is expected to be free from defects in workmanship and materials, under normal use and service, for one year from the date of purchase from Polycom or its authorized reseller. Polycom’s sole obligation under this express warranty is at Polycom’s option and expense, to repair the defective product or part, deliver to Customer an equivalent product or part to replace the defective item, or if neither of the two foregoing options are reasonably available, Polycom may, on its sole discretion, refund to Customer the purchase price paid for the defective product. All products that are replaced will become the property of Polycom. Replacement products or parts may be new or reconditioned. Polycom, Inc. 135 Polycom VVX 500 and VVX 600 Business Media Phones and Polycom VVX Camera User’s Guide Polycom is expected to warrant any replaced or repaired product or part for ninety (90) days from shipment, or the remainder of the initial warranty period, whichever is longer. Products returned to Polycom must be sent prepaid and packaged appropriately for safe shipment, and it is recommended that they be insured or sent by a method that provides for tracking of the package. Responsibility for loss or damage does not transfer to Polycom until the returned item is received by Polycom. The repaired or replaced item will be shipped to Customer, at Polycom’s expense, not later than thirty (30) days after Polycom receives the defective product, and Polycom will retain risk of loss or damage until the item is delivered to Customer. The product software comes with 90-day software warranty, providing for software updates (minor releases/bug fixes). To continue to receive support, purchasing a maintenance contract is the most economical solution. Exclusions Polycom will not be liable under this limited warranty if its testing and examination disclose that the alleged defect or malfunction in the product does not exist or results from: Failure to follow Polycom’s installation, operation, or maintenance instructions. Unauthorized product modification or alteration. Unauthorized use of common carrier communication services accessed through the product. Abuse, misuse, negligent acts or omissions of Customer and persons under Customer’s control; or Acts of third parties, acts of God, accident, fire, lightening, power surges or outages, or other hazards. Warranty Exclusive IF A POLYCOM PRODUCT DOES NOT OPERATE AS WARRANTED ABOVE, CUSTOMER’S SOLE REMEDY FOR BREACH OF THAT WARRANTY SHALL BE REPAIR, REPLACEMENT, OR REFUND OF THE PURCHASE PRICE PAID, AT POLYCOM’S OPTION. TO THE FULL EXTENT ALLOWED BY LAW, THE FOREGOING WARRANTIES AND REMEDIES ARE EXCLUSIVE AND ARE IN LIEU OF ALL OTHER WARRANTIES, TERMS, OR CONDITIONS, EXPRESS OR IMPLIED, EITHER IN FACT OR BY OPERATION OF LAW, STATUTORY OR OTHERWISE, INCLUDING WARRANTIES, TERMS, OR CONDITIONS OF MERCHANTABILITY, FITNESS FOR A PARTICULAR PURPOSE, SATISFACTORY QUALITY, CORRESPONDENCE WITH DESCRIPTION, AND NON-INFRINGEMENT, ALL OF WHICH ARE EXPRESSLY DISCLAIMED. POLYCOM NEITHER ASSUMES NOR AUTHORIZES ANY OTHER PERSON TO ASSUME FOR IT ANY OTHER LIABILITY IN CONNECTION WITH THE SALE, INSTALLATION, MAINTENANCE OR USE OF ITS PRODUCTS. Safety, Compliance, and Disposal Information Part 15 FCC Rules This device is compliant with Part 15 of the FCC Rules. Operation is subject to the following two conditions: This device may not cause harmful interference, and Polycom, Inc. 136 Polycom VVX 500 and VVX 600 Business Media Phones and Polycom VVX Camera User’s Guide This device must accept any interferences received, including interference that may cause undesired operation. Class B Digital Device or Peripheral Note: This equipment is tested and complies with the limits for a Class B digital device, pursuant to Part 15 of the FCC Rules. These limits are designed to provide reasonable protection against harmful interference in a residential installation. This equipment generates, uses, and can radiate radio frequency energy and, if not installed and used in accordance with the instructions, may cause harmful interference to radio communications. However, there is no guarantee that interference will not occur in a particular installation. If this equipment does cause harmful interference to radio or television reception, which can be determined by turning the equipment off and on, the user is encouraged to try to correct the interference by one or more of the following measures: Reorient or relocate the receiving antenna. Increase the separation between the equipment and receiver. Connect the equipment into an outlet on a circuit different from that to which the receiver is connected. Consult the dealer or an experienced radio/TV technician for help. Modifications In accordance with Part 15 of the FCC Rules, the user is cautioned that any changes or modifications not expressly approved by Polycom, Inc. could void the user’s authority to operate the equipment. This equipment may not be used on a coin service or party line. Installation Instructions Installation must be performed in accordance with all relevant national wiring rules. L’Installation doit être exécutée conformément à tous les règlements nationaux applicable au filage électrique. When using Power over Ethernet (PoE), the equipment is to be connected only to PoE networks without connections to the outside plant. Plug Acts as Disconnect Device The socket outlet to which this apparatus is connected must be installed near the equipment and must always be readily accessible. La prise électrique à laquelle l’appareil est branché doit être installée près de l’équipement et doit toujours être facilement accessible. Industry Canada (IC) This Class [B] digital apparatus complies with Canadian ICES-003. Cet appareil numérique de la classe [B] est conforme à la norme NMB-003 du Canada. Polycom, Inc. 137 Polycom VVX 500 and VVX 600 Business Media Phones and Polycom VVX Camera User’s Guide CE and VCCI Mark The VVX 500 and VVX 600 are marked with the CE mark. This mark indicates compliance with EC Directive 1999/5/EC. The VVX Camera is marked with the CE mark. This mark indicates compliance with LVD & EMC Directives 2006/95/EC & 2004/108/EC. A full copy of the Declaration of Conformity can be obtained from Polycom Ltd., 270 Bath Road, Slough, Berkshire, SL1 4DX, UK. CE Mark R & TTE Directive (EU only) Česky [Czech]: Polycom (UK) Ltd tímto prohlašuje, že tento VVX 500/VVX 600 je ve shodě se základními požadavky a dalšími příslušnými ustanoveními směrnice 1999/5/ES. Dansk [Danish]: Undertegnede Polycom (UK) Ltd erklærer herved, at følgende udstyr VVX 500/VVX 600 overholder de væsentlige krav og øvrige relevante krav i direktiv 1999/5/EF. Deutsch [German]: Hiermit erklärt Polycom (UK) Ltd, dass sich das Gerät VVX 500/VVX 600 in Übereinstimmung mit den grundlegenden Anforderungen und den übrigen einschlägigen Bestimmungen der Richtlinie 1999/5/EG befindet. Eesti [Estonian]: Käesolevaga kinnitab Polycom (UK) Ltd seadme VVX 500/VVX 600 vastavust direktiivi 1999/5/EÜ põhinõuetele ja nimetatud direktiivist tulenevatele teistele asjakohastele sätetele. English: Hereby, Polycom (UK) Ltd. declares that this VVX 500/VVX 600 is in compliance with the essential requirements and other relevant provisions of Directive 1999/5/EC. Español [Spanish]: Por medio de la presente Polycom (UK) Ltd declara que el VVX 500/VVX 600 cumple con los requisitos esenciales y cualesquiera otras disposiciones aplicables o exigibles de la Directiva 1999/5/CE. Ελληνική [Greek]: ΜΕ ΤΗΝ ΠΑΡΟΥΣΑ Polycom (UK) Ltd ΔΗΛΩΝΕΙ ΟΤΙ VVX 500/VVX 600 ΣΥΜΜΟΡΦΩΝΕΤΑΙ ΠΡΟΣ ΤΙΣ ΟΥΣΙΩΔΕΙΣ ΑΠΑΙΤΗΣΕΙΣ ΚΑΙ ΤΙΣ ΛΟΙΠΕΣ ΣΧΕΤΙΚΕΣ ΔΙΑΤΑΞΕΙΣ ΤΗΣ ΟΔΗΓΙΑΣ 1999/5/ΕΚ. Français [French]: Par la présente Polycom (UK) Ltd déclare que l’appareil VVX 500/VVX 600 est conforme aux exigences essentielles et aux autres dispositions pertinentes de la directive 1999/5/CE. Italiano [Italian]: Con la presente Polycom (UK) Ltd dichiara che questo VVX 500/VVX 600 è conforme ai requisiti essenziali ed alle altre disposizioni pertinenti stabilite dalla direttiva 1999/5/CE. Íslenska (Icelandic): Hér með lýsir Polycom (UK) Ltd yfir því að VVX 500/VVX 600 er í samræmi við grunnkröfur og aðrar kröfur, sem gerðar eru í tilskipun 1999/5/EC Latviski [Latvian]: Ar šo Polycom (UK) Ltd deklarē, VVX 500/VVX 600 atbilst Direktīvas 1999/5/EK būtiskajām prasībām un citiem ar to saistītajiem noteikumiem. Lietuvių [Lithuanian]: Šiuo Polycom (UK) Ltd deklaruoja, kad šis VVX 500/VVX 600 atitinka esminius reikalavimus ir kitas 1999/5/EB Direktyvos nuostatas. Nederlands [Dutch]: Hierbij verklaart Polycom (UK) Ltd dat het toestel VVX 500/VVX 600 in overeenstemming is met de essentiële eisen en de andere relevante bepalingen van richtlijn 1999/5/EG. Polycom, Inc. 138 Polycom VVX 500 and VVX 600 Business Media Phones and Polycom VVX Camera User’s Guide Malti [Maltese]: Hawnhekk, Polycom (UK) Ltd, jiddikjara li dan VVX 500/VVX 600 jikkonforma malħtiġijiet essenzjali u ma provvedimenti oħrajn relevanti li hemm fid-Dirrettiva 1999/5/EC. Magyar [Hungarian]: Alulírott, Polycom (UK) Ltd nyilatkozom, hogy a VVX 500/VVX 600 megfelel a vonatkozó alapvetõ követelményeknek és az 1999/5/EC irányelv egyéb elõírásainak. Norsk [Norwegian]: Polycom (UK) Ltd erklærer herved at utstyret VVX 500/VVX 600 er i samsvar med de grunnleggende krav og øvrige relevante krav i direktiv 1999/5/EF. Polski [Polish]: Niniejszym Polycom (UK) Ltd oświadcza, że VVX 500/VVX 600 jest zgodne z zasadniczymi wymaganiami oraz innymi stosownymi postanowieniami Dyrektywy 1999/5/WE Português [Portuguese]: Polycom (UK) Ltd declara que este VVX 500/VVX 600 está conforme com os requisitos essenciais e outras disposições da Directiva 1999/5/CE. Slovensko [Slovenian]: Polycom (UK) Ltd izjavlja, da je ta VVX 500/VVX 600 v skladu z bistvenimi zahtevami in ostalimi relevantnimi določili direktive 1999/5/ES. Slovensky [Slovak]: Polycom (UK) Ltd týmto vyhlasuje, že VVX 500/VVX 600 spĺňa základné požiadavky a všetky príslušné ustanovenia Smernice 1999/5/ES. Suomi [Finnish]: Polycom (UK) Ltd vakuuttaa täten että VVX 500/VVX 600 tyyppinen laite on direktiivin 1999/5/EY oleellisten vaatimusten ja sitä koskevien direktiivin muiden ehtojen mukainen. Svenska [Swedish]: Härmed intygar Polycom (UK) Ltd att denna VVX 500/VVX 600 står I överensstämmelse med de väsentliga egenskapskrav och övriga relevanta bestämmelser som framgår av direktiv 1999/5/EG. WARNING Electrical Safety To avoid electric shock, do not connect safety extra low voltage (SELV) circuits to teleconference station network (TNV) circuits. LAN ports contain SELV circuit, and WAN ports contain TNV circuits. Some LAN and WAN ports both use RJ-45 connectors. Use caution when connecting cables. The VVX 500 and VVX 600 are rated 48Vdc, 0.375A. When used with the optional external power supply (PSC18U-480, or similar rated PSU), the power supply shall be a Listed power supply with a LPS output, rated 48V, min. 0.38A. The VVX Camera is USB powered (5VDC 0.5A) only. Russian Compliance VVX 500: Ministry of Information Technologies & Communication of the Russian Federation – Declaration of Conformity. Д- СПД-5520 valid until 15/11/2014. VVX 600: Ministry of Information Technologies & Communication of the Russian Federation – Declaration of Conformity. Д-СПД-6013 valid until 27/11/2015. Polycom, Inc. 139 Polycom VVX 500 and VVX 600 Business Media Phones and Polycom VVX Camera User’s Guide New Zealand Telepermit VVX 500: PTC 220/11/098 VVX 600: PTC 220/12/058 Special Conditions for this User Guide PTC General Warning The grant of a Telepermit for any item of terminal equipment indicates only that Telecom has accepted that the item complies with minimum conditions for connection to its network. It indicates no endorsement of the product by Telecom, nor does it provide any sort of warranty. Above all, it provides no assurance that any item will work correctly in all respects with another item of Telepermitted equipment of a different make or model, nor does it imply that any product is compatible with all of Telecom’s network services. Echo Cancellation Echo cancellers are not normally required in the Telecom PSTN because geographic delays are acceptable where CPE return loss is maintained within Telepermit limits. However, those private networks making use of Voice over IP technology are required to provide echo cancellation for all voice calls. The combined effect of audio / VoIP conversion delay and IP routing delay can cause the echo cancellation time of 64 mS or more to be required. Software Versions in the Polycom VVX 500 and Polycom VVX 600 VoIP Desktop Telephones When Used on the Telecom Network The Polycom VVX 500 must be equipped with the software installed during the PTC testing (version 6.4.1.0008) for compliance to be guaranteed. The Polycom VVX 600 must be equipped with the software installed during the PTC testing (version 4.1.0.xxxx) for compliance to be guaranteed. Australia Warning This equipment will not operate when mains power fails WARNING FOR ALL POLCOM PHONES THAT USE HANDSETS With respect to section 5.4.3.11 of the Australian Communications Authority as Telecommunications Technical Standard AS/ACIF S004 2006: You should be aware that, under certain operating conditions, the handset earpiece may retain small metallic objects. If this occurs, these objects should be removed before using the handset. Operating Ambient Temperatures Operating temperature: +32 to 104°F (0 to 40°C) Relative humidity: 5% to 95%, noncondensing Storage temperature: -40 to +160°F (-40 to +70°C) Polycom, Inc. 140 Polycom VVX 500 and VVX 600 Business Media Phones and Polycom VVX Camera User’s Guide Hearing Aid Compatibility (HAC) This product is hearing aid compatible. Waste Electrical and Electronic Equipment (WEEE) All Polycom products that fall within the scope of the EU WEEE Directive carry the crossed wheelie bin symbol which advises customers not to recycle electronic products in the domestic waste stream but to recycle them safely as e-waste. Restriction of Hazardous Substances Directive (RoHS) All Polycom products comply with the requirements of the EU RoHS Directive. Statements of compliance can be obtained by contacting [email protected]. Polycom Take Back In addition to any mandated take back requirement, Polycom offers free recycling of its branded products to business users. Detailed information is available at http://www.polycom.com/company/aboutus/recycle-program.html. Applies to VVX 600 Phones Only Radiation Exposure Statement: The antenna used for this transmitter must be installed to provide a separation distance of at least 20 centimeters from all persons and must not be co-located or operating in conjunction with any other antenna or transmitter. FCC Radiation Exposure Statement: This portable device with its antenna complies with FCC’s RF radiation exposure limits set forth for an uncontrolled environment. To maintain compliance this transmitter must not be co-located or operating in conjunction with any other antenna or transmitter. FCC registration number: M72-VVX600. This device complies with RSS-210 of Industry Canada. Operation is subject to the following two conditions: 1) This device may not cause interference, and 2) this device must accept any interference, including interference that may cause undesired operation of the device. Privacy of communications may not be ensured when using this telephone. Certification Number IC: 1849C-VVX600. Polycom, Inc. 141