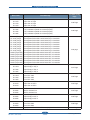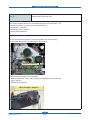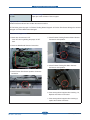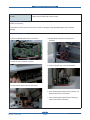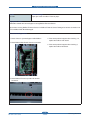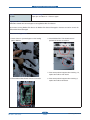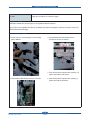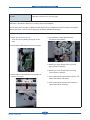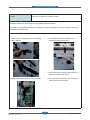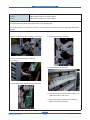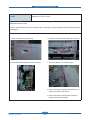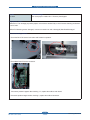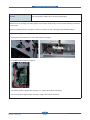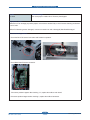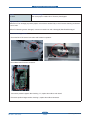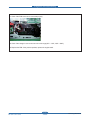
1
4. Alignment and Troubleshooting 4.2.2 Error Message and Troubleshooting Messages appear on the Smart Panel program window or on the control panel to indicate machine status or errors. Refer to the tables below to correct the problem. Error Code Error Message Troubleshooting Page A1-1110 Actuator Motor Failure #A1-1110: Turn off then on. 4-40 Page A1-1210 Actuator Motor Failure #A1-1210: Turn off then on. 4-42 Page A1-1310 Actuator Motor Failure #A1-1310: Turn off then on. 4-44 Page A1-3110 Actuator Motor Failure #A1-3110: Turn off then on. 4-46 Page A2-1910 Actuator Fan Failure: #A2-1910. Turn off then on. 4-48 Page A2-1920 Actuator Fan Failure: #A2-1920. Turn off then on 4-49 Page A2-2410 Actuator Fan Failure: #A2-2410. 4-50 Page A3-2110 Actuator Sensor Failure: #A3-2110. 4-51 Page A3-5110 Actuator Sensor Failure: #A3-5110. 4-51 Page C1-1110 C1-1110 Prepare new toner cartridge. 4-52 Page C1-1120 C1-1120 Replace with new toner cartridge 4-52 Page C1-1140 C1-1140 Replace with new toner cartridge 4-52 Page C1-1311 Toner Failure: #C1-1311: Install toner again 4-53 Page C1-1330 C1-1411 Toner Failure: #C1-1330: Install toner again Toner cartridge is not installed. Install it 4-54 Page C1-1412 Did not supply enough toner. Reinstall it 4-53 Page C1-1413 Shake toner cartridge and then install. 4-53 Page C1-1512 Toner cartridge is not compatible. Check guide 4-54 Page C3-1110 Prepare new imaging unit 4-55 Page C3-1120 C3-1140 Replace with new imaging unit Replace with new imaging unit 4-55 Page C3-1312 Imaging Unit Failure #C3-1312: Install IMG. unit. 4-53 Page C3-1315 Imaging Unit Failure #C3-1315: Install IMG. unit. 4-53 Page C3-1320 C3-1330 C3-1411 C3-1412 Imaging Unit Failure #C3-1320: Install IMG. unit. Imaging Unit Failure #C3-1330: Install IMG. unit. Imaging unit is not installed. Install the unit. Did not supply enough toner. Reinstall Toner 4-55 page C3-1512 C3-1514 Imaging unit is not compatible. Check guide Imaging unit is not compatible. Check guide 4-56 Page C5-1510 Imaging Unit Failure #C3-1330: Turn off then on. 4-56 Page C6-1110 C6-1120 Replace with new fuser unit Replace with new fuser unit 4-57 Page C7-1110 C7-1120 Waste toner container is almost full. Replace with new one Waste toner container is almost full. Replace with new one 4-57 Page C7-1310 Install waste toner container. 4-57 Page Service Manual ML-551x / 651x series 4-36 Samsung Electronics 4. Alignment and Troubleshooting Error Code Error Message Troubleshooting Page H1-1210 H1-1310 H1-1410 H1-1510 Paper Jam in Tray2 Paper Jam in Tray3 Paper Jam in Tray4 Paper Jam in Tray5 4-58 Page H1-1222 H1-1322 H1-1422 H1-1522 Tray 2 cassette is pulled out. Insert it properly. Tray 3 cassette is pulled out. Insert it properly. Tray 4 cassette is pulled out. Insert it properly. Tray 5 cassette is pulled out. Insert it properly. 4-59 Page Input System Failure #H1-1230:Check Tray 2 connection. Input System Failure #H1-1233:Check Tray 2 connection. Input System Failure #H1-1330:Check Tray 3 connection. Input System Failure #H1-1333:Check Tray 3 connection. Input System Failure #H1-1430:Check Tray 4 connection. Input System Failure #H1-1433:Check Tray 4 connection. Input System Failure #H1-1530:Check Tray 5 connection. Input System Failure #H1-1533:Check Tray 5 connection. Input System Failure #H1-2230:Check HCF 2 connection. Input System Failure #H1-2233:Check HCF 2 connection. Input System Failure #H1-2330:Check HCF 3 connection. Input System Failure #H1-2333:Check HCF 3 connection. Input System Failure #H1-2430:Check HCF 4 connection. Input System Failure #H1-2433:Check HCF 4 connection. 4-60 page H1-1252 H1-1352 H1-1452 H1-1552 Paper Empty in Tray 2 Paper Empty in Tray 3 Paper Empty in Tray 4 Paper Empty in Tray 5 4-61 Page H1-1253 H1-1353 H1-1453 H1-1553 Error: #H1-1253 Error: #H1-1353 Error: #H1-1453 Error: #H1-1553 4-62 Page H1-2210 H1-2310 H1-2410 Paper Jam in HCF2 Paper Jam in HCF3 Paper Jam in HCF4 4-63 Page H1-2222 H1-2322 H1-2422 HCF 2 cassette Out HCF 3 cassette Out HCF 4 cassette Out 4-64 Page H1-2252 H1-2352 H1-2452 Paper Empty in HCF 2 Paper Empty in HCF 3 Paper Empty in HCF 4 4-65 Page H1-2253 H1-2353 H1-2453 Error: #H1-2253 Error: #H1-2353 Error: #H1-2453 4-66 Page H2-1100 Paper jam inside of finisher. Remove paper 4-67 Page H1-1230 (Tray2) H1-1233 (Tray2) H1-1330 (Tray3) H1-1333 (Tray3) H1-1430 (Tray4) H1-1433 (Tray4) H1-1530 (Tray5) H1-1533 (Tray5) H1-2230 (Tray2-HCF) H1-2233 (Tray2-HCF) H1-2330 (Tray3-HCF) H1-2333 (Tray3-HCF) H1-2430 (Tray4-HCF) H1-2433 (Tray4-HCF) Service Manual ML-551x / 651x series 4-37 Samsung Electronics 4. Alignment and Troubleshooting Error Code Error Message Troubleshooting Page H2-1101 Paper jam in front of finisher. Remove paper 4-68 Page H2-1102 Paper jam inside of finisher. Remove paper 4-69 Page H2-1200 Paper jam inside of finisher. Remove paper 4-70 Page H2-1300 Paper jam at exit of finisher. Remove paper 4-71 Page H2-1302 Paper jam at exit of finisher. Remove paper 4-72 Page H2-1710 H2-1711 Finisher Failure: #H2-1710. Check finisher Finisher Failure: #H2-1711. Check finisher 4-73 Page H2-1720 H2-1721 Finisher Failure: #H2-1720. Check finisher Finisher Failure: #H2-1721. Check finisher 4-74 Page H2-1730 H2-1731 Finisher Failure: #H2-1730. Check finisher Finisher Failure: #H2-1731. Check finisher 4-75 Page H2-1A70 H2-1750 H2-1751 H2-1753 Finisher Failure: #H2-1A70. Check finisher Finisher Failure: #H2-1750. Check finisher Finisher Failure: #H2-1751. Check finisher Finisher Failure: #H2-1753. Check finisher 4-76 Page H2-1752 Finisher Failure: #H2-1752. Check finisher 4-77 Page H2-1760 H2-1A80 Finisher Failure: #H2-1760. Check finisher Finisher Failure: #H2-1A80. Check finisher 4-78 Page H2-1800 Finisher Failure: #H2-1800. Check finisher 4-79 Page H2-1A20 Finisher door is open. Close it 4-80 Page H2-1A32 Too much paper in finisher stacker. Remove printed paper 4-82 Page H2-1A50 Finisher Failure: #H2-1A50. Check finisher 4-83 Page H2-1A62 Staple cartridge is low. Replace it 4-84 page H2-1A63 Staple cartridge is empty. Replace it 4-85 Page H2-4100 Paper jam in front of mailbox. Remove paper 4-86 page H2-4101 Paper jam inside of mailbox. Remove paper 4-87 page H2-4102 Paper jam inside of mailbox. Remove paper 4-88 Page H2-4200 Paper jam in front of bin 1. Remove paper 4-89 Page H2-4201 Paper jam at mailbox bin 1. Remove paper 4-90 Page H2-4202 Paper jam at mailbox bin 1. Remove paper 4-91 Page H2-4300 Paper jam in front of bin 2. Remove paper 4-92 Page H2-4301 Paper jam at mailbox bin 2. Remove paper 4-93 Page H2-4302 Paper jam at mailbox bin 2. Remove paper 4-94 Page H2-4400 Paper jam in front of bin 3. Remove paper 4-95 Page H2-4401 Paper jam at mailbox bin 3. Remove paper 4-96 Page H2-4402 Paper jam at mailbox bin 3. Remove paper 4-97 Page H2-4500 Paper jam in front of bin 4. Remove paper 4-98 Page H2-4501 Paper jam at mailbox bin 4. Remove paper 4-99 Page H2-4502 Paper jam at mailbox bin 4. Remove paper 4-100 Page Service Manual ML-551x / 651x series 4-38 Samsung Electronics 4. Alignment and Troubleshooting Error Code Error Message Troubleshooting Page H2-4700 H2-4701 Mailbox Failure: #H2-4700. Check mailbox Mailbox Failure: #H2-4701. Check mailbox 4-101 Page H2-4710 H2-4711 Mailbox Failure: #H2-4710. Check mailbox Mailbox Failure: #H2-4711. Check mailbox 4-102 page H2-4A20 Mailbox door is open. Close it 4-103 Page H2-4A32 Too much paper in mailbox bin 1. Remove printed paper 4-104 Page H2-4A35 Too much paper in mailbox bin 2. Remove printed paper 4-105 Page H2-4A38 Too much paper in mailbox bin 3. Remove printed paper 4-106 Page H2-4A3C Too much paper in mailbox bin 4. Remove printed paper 4-107 Page M1-1110 Paper Jam in Tray 1 4-108 Page M1-1610 Paper Jam in MP tray 4-108 Page M1-3122 Tray1 cassette is pulled out. Insert it properly 4-109 Page M1-4111 Input System Failure: #M1-4111. 4-109 Page M1-5112 Paper Empty in tray1 4-110 Page M1-5612 Paper Empty in MP 4-110 Page M2-1110 Paper Jam in tray1 4-111 Page M2-2110 Jam top of duplex 4-111 Page M2-2310 Jam bottom of duplex 4-112 Page M2-3120 Install duplex unit. 4-112 Page M3-1110 Jam in exit area 4-113 Page M3-2130 Output bin full. Remove printed paper 4-113 Page S2-4110 Door is open. Close it 4-114 Page S2-4610 Rear Door is open. Close it 4-115 Page S6-3123 This IP address conflicts with that of other system 4-116 Page S6-3128 802.1x Network Error Contact the Admin. 4-116 Page U1-2115 Fuser Unit Failure: #U1-2115. Turn off then on 4-117 Page U1-2117 Fuser Unit Failure: #U1-2117. Turn off then on 4-120 Page U1-2320 Fuser Unit Failure: #U1-2320. Turn off then on 4-122 Page U1-2330 Fuser Unit Failure: #U1-2330. Turn off then on 4-125 Page U1-2340 Fuser Unit Failure: #U1-2340. Turn off then on 4-129 Page U2-1111 LSU Unit Failure: #U2-1111. Turn off then on 4-132 Page U2-1113 LSU Unit Failure: #U2-1113. Turn off then on 4-133 Page Service Manual ML-551x / 651x series 4-39 Samsung Electronics 4. Alignment and Troubleshooting Code A1-1110 Error message Actuator Motor Failure #A1-1110: Turn off then on. Symptom / Cause After working the main BLDC motor, the Ready signal has not occurred within 1 sec. 1. Harness is defective. Connector is not connected properly. 2. OPC coupler in the imaging unit has overloaded. 3. Main BLDC motor is defective. 4. Engine board is defective. Troubleshooting method : 叛First, turn the machine off then on. If the error persists, refer to the following. 1. Check if the connector is connected properly. Reconnect it. Main BLDC connector 2. OPC coupler has overloaded. After removing the imaging unit, rotate the OPC coupler. If there is any damage, the OPC coupler can’t rotate well. Replace the imaging unit. OPC coupler Spec : 4kgf.cm Service Manual ML-551x / 651x series 4-40 Samsung Electronics 4. Alignment and Troubleshooting 3. The main BLDC motor is defective. - Unplug the connector from the motor. - Replace the main BLDC motor with new one. 4. If the problem persists, replace the engine board. Service Manual ML-551x / 651x series 4-41 Samsung Electronics 4. Alignment and Troubleshooting Code A1-1210 Error message Actuator Motor Failure #A1-1210: Turn off then on. Symptom / Cause After working the Fuser BLDC motor, the Ready signal has not occurred within 1 sec. 1. Harness is defective. Connector is not connected properly. 2. Heat roller in the fuser unit has overloaded. 3. Main BLDC motor is defective. 4. Engine board is defective. Troubleshooting method 叛First, turn the machine off then on. If the error persists, refer to the following. 1. Check if the connector is connected properly. Reconnect it. Fuser BLDC connector 2. Heat roller in the fuser unit has overloaded. - Remove the fuser unit after removing rear cover and duplex unit. - Rotate the heat roller gear. If there is any damage, the heat roller gear can’t rotate well. (Spec : 5kgf.cm) Replace the fuser unit. Heat Roller Gear (Spec : 5kgf.cm) Service Manual ML-551x / 651x series 4-42 Samsung Electronics 4. Alignment and Troubleshooting 3. Engine Board is defective. - Unplug all connectors on the Engine Board. - Remove 4 screws. - Replace the Engine Board with new one. Remove all the connectors. 4. Fuser BLDC Motor is defective. - Remove the Main Drive unit. (Screw 5 EA, Lever Coupler) - Remove the Engine Board & Engine Board bracket. - Remove the Main Board & Main Board bracket. - Remove the Rear Cover and duplex unit. - Remove the fuser unit. - Replace the fuser drive unit with new one. Main Drive unit Main Board Engine board & Bracket Service Manual ML-551x / 651x series 4-43 Samsung Electronics 4. Alignment and Troubleshooting Code A1-1310 Error message Actuator Motor Failure #A1-1310: Turn off then on. Symptom / Cause After working the Pick-up BLDC motor, the Ready signal has not occurred within 1 sec. 1. Harness is defective. Connector is not connected properly. 2. Pick up/ Regi. clutch is defective. 3. Main BLDC motor is defective. 4. Engine board is defective. Troubleshooting method 叛First, turn the machine off then on. If the error persists, refer to the following. 1. Check if the connector is connected properly. Reconnect it. Check the connector 2. Pick up/ Regi clutch is defective. - Remove the Regi. clutch then warm up the machine. If the corresponding error has disappeared, Regi. clutch is defective. Replace the Regi. clutch. - Remove the pick up clutch then warm up the machine. If the corresponding error has disappeared, pick up clutch is defective. Replace the pick up clutch. Regi clutch connector Pick up clutch connector Service Manual ML-551x / 651x series 4-44 Samsung Electronics 4. Alignment and Troubleshooting 3. Pick up BLDC motor is defective. - Unplug all connectors on the Engine Board. - Remove the Engine board with the bracket. - Replace the BLDC motor with new one. Remove all the connectors. 4. Engine Board is defective. - Unplug all connectors. - Replace the Engine board with new one after removing 4 screws. Service Manual ML-551x / 651x series 4-45 Samsung Electronics 4. Alignment and Troubleshooting Code A1-3110 Error message Actuator Motor Failure #A1-3110 Symptom / Cause After working the Deve BLDC motor, the Ready signal has not occurred within 1 sec. 1. Harness is defective. Connector is not connected properly. 2. Mag. Roller is overloaded. 3. Deve BLDC motor is defective. 4. Engine board is defective. Troubleshooting method 叛First, turn the machine off then on. If the error persists, refer to the following. 1. Check if the connector is connected properly. Reconnect it. Check the connector 2. Mag roller in the imaging unit is overloaded. - Rotate the Mag roller. If there is any damage, the Mag roller can’t be rotated well. (Spec : 4kgf.cm) Replace the imaging unit. Mag roller (Spec : 4kgf.cm) Service Manual ML-551x / 651x series 4-46 Samsung Electronics 4. Alignment and Troubleshooting 3. Deve BLDC motor is defective. - Replace the BLDC motor with new one. 4. Engine Board is defective. - Unplug all connectors. - Replace the Engine board with new one after removing 4 screws. Remove all the connectors. Service Manual ML-551x / 651x series 4-47 Samsung Electronics 4. Alignment and Troubleshooting Code A2-1910 Error message Actuator Fan Failure: #A2-1910. Turn off then on. Symptom / Cause The Main(SMPS) Fan does not work normally. 1. Fan Harness connection is bad. 2. Harness is defective or GND is short. 3. Fan is defective. Troubleshooting method 1. Check if the Fan Relay connector is connected properly. 2. Connect the Harness Housing correctly. 3. Check if the Fan harness is normal. If it is defective, replace it. 4. Enter the Tech mode and execute the Main Fan test (EDC code : 100-0260 (SMPS FAN). To enter the Tech mode, press the button in this order. (Menu - # - 1 - 9 -3 -4 - OK ) SMPS FAN Service Manual ML-551x / 651x series 4-48 Samsung Electronics 4. Alignment and Troubleshooting Code A2-1920 Error message Actuator Fan Failure: #A2-1920. Turn off then on Symptom / Cause The Rear Fan does not work normally. 1. Fan Harness connection is bad. 2. Harness is defective or GND is short. 3. Fan is defective. Troubleshooting method 1. Check if the Fan Relay connector is connected properly. 2. Connect the Harness Housing correctly. 3. Check if the Fan harness is normal. If it is defective, replace it. 4. Enter the Tech mode and execute the Main Fan test (EDC code : 109-0042 (Rear FAN). To enter the Tech mode, press the button in this order. (Menu - # - 1 - 9 -3 -4 - OK ) Service Manual ML-551x / 651x series 4-49 Samsung Electronics 4. Alignment and Troubleshooting Code A2-2410 Error message Actuator Fan Failure: #A2-2410. Symptom / Cause The LSU Fan does not work. Troubleshooting method 1. Check if there is any obstacle in LSU Fan. 2. Check if the harness is connected properly. 3. Check if the joint connector is connected properly. 4. Check if the harness is defective. 5. Enter the tech mode and execute the LSU fan test. 6. If the fan is defective, replace it. LSU FAN Service Manual ML-551x / 651x series 4-50 Samsung Electronics 4. Alignment and Troubleshooting Code A3-2110 Error message Actuator Sensor Failure: #A3-2110. Symptom / Cause ID control algorithm to control the density finds the ID Sensor value input in an abnormal state. 1. The image density of the imaging unit is abnormal. 2. ID sensor (CTD sensor) is defective. Troubleshooting method 1. In case of density defect. Print the sample page. If the density is too low or dark, replace the imaging unit. 2. In case of ID sensor defect. Print the sample page. If the density is normal, replace the ID sensor or the sensor cleaning part. Code A3-5110 Error message Actuator Sensor Failure: #A3-5110. Symptom / Cause The signal level of the Toner Empty sensor is 0V. Troubleshooting method 1. Remove the Left cover. Check if the sensor connector of the WTB Pipe unit is connected properly. 2. If the harness is defective, replace it. Service Manual ML-551x / 651x series 4-51 Samsung Electronics 4. Alignment and Troubleshooting Code C1-1110 Error message C1-1110 Prepare new toner cartridge. Symptom / Cause The remaining toner in cartridge is less than 10% of its life. (10% is default, this value can be adjusted.) Troubleshooting method Check the life remaining of the toner cartridge. If its life is at the end, turn the machine off and replace the toner cartridge with new one. Code C1-1120 Error message C1-1120 Replace with new toner cartridge Symptom / Cause The remaining toner in cartridge is less than 0% of its life. Troubleshooting method Check the life remaining of the toner cartridge. If its life is at the end, turn the machine off and replace the toner cartridge with new one. Code C1-1140 Error message C1-1140 Replace with new toner cartridge Symptom / Cause The toner cartridge is at the end of its life. Troubleshooting method Replace the toner cartridge with new one. Service Manual ML-551x / 651x series 4-52 Samsung Electronics 4. Alignment and Troubleshooting Code C1-1311 C1-1412 C1-1413 C3-1312 C3-1315 Error message Toner Failure: #C1-1311: Install toner again Did not supply enough toner. Reinstall it Shake toner cartridge and then install. Imaging Unit Failure #C3-1312: Install IMG. unit. Imaging Unit Failure #C3-1315: Install IMG. unit. Symptom / Cause The imaging unit does not get enough toner from the toner cartridge. 1. The toner cartridge shutter does not work normally. 2. The imaging unit shutter does not work normally. 3. The toner cartridge seal is not removed. 4. The toner cartridge is not installed properly. 5. The toner is consumed quickly due to a defective image (Background etc.) Troubleshooting method 1. Turn the machine off then on. 2. Remove the toner cartridge. Thoroughly roll the cartridge five or six times to distribute the toner evenly inside the cartridge. And reinstall the toner cartridge. 3. Try to print out the sample page more than 20 pages. 4. Check the toner cartridge. - Check if the toner supply shutter between the toner cartridge and the imaging unit works normally. - Remove the seal. Check if the auger rotates normally. - Reinstall the toner cartridge. 5. Replace the toner cartridge. Print out the sample page. 6. Check if the toner supply motor works normally. Service Manual ML-551x / 651x series 4-53 Samsung Electronics 4. Alignment and Troubleshooting Code C1-1330 C1-1411 Error message Toner Failure: #C1-1330: Install toner again Toner cartridge is not installed. Install it Symptom / Cause 1. The toner cartridge is not installed. 2. The toner cartridge is not installed properly. Troubleshooting method 1. Install the genuine samsung toner cartridge. 2. If the toner cartridge is already installed, check the following. a. Reinstall the toner cartridge and imaging unit. b. Check If the CRUM contact is normal. c. After reinstallation, turn the machine off then on. Code C1-1512 Error message Toner cartridge is not compatible. Check guide Symptom / Cause Toner cartridge is not compatible. Troubleshooting method 1. Check information of the toner cartridge. 2. If the toner cartridge is not a genuine samsung toner cartridge, replace with new one. Service Manual ML-551x / 651x series 4-54 Samsung Electronics 4. Alignment and Troubleshooting Code C3-1110 C3-1120 C3-1140 Error message Prepare new imaging unit Replace with new imaging unit Replace with new imaging unit Symptom / Cause The remaining life of the imaging unit is less than 10% of its life. The remaining life of the imaging unit is less than 0% of its life. Troubleshooting method Prepare the new imaging unit. Code C3-1320 C3-1330 C3-1411 C3-1412 Error message Imaging Unit Failure #C3-1320: Install IMG. unit. Imaging Unit Failure #C3-1330: Install IMG. unit. Imaging unit is not installed. Install the unit. Did not supply enough toner. Reinstall Toner Symptom / Cause 1. The imaging unit is not installed. 2. The imaging unit is not installed properly. Troubleshooting method 1. Install the samsung genuine imaging unit. 2. If the imaging unit is already installed, check the following. a. Reinstall the toner cartridge and imaging unit. b. Check If the CRUM contact is normal. c. After reinstallation, turn the machine off then on. Service Manual ML-551x / 651x series 4-55 Samsung Electronics 4. Alignment and Troubleshooting Code C3-1512 C3-1514 Error message Imaging unit is not compatible. Check guide Imaging unit is not compatible. Check guide Symptom / Cause The imaging unit is not compatible. Troubleshooting method 1. Check information of the imaging unit. 2. If the imaging unit is not a Samsung genuine imaging unit, replace with new one. Code C5-1510 Error message Symptom / Cause The imaging unit does not get the normal high voltage. 1. The imaging unit is not installed properly. 2. The contact between the machine and the imaging unit is bad. 3. The imaging unit is defective. Troubleshooting method 1. Remove the imaging unit. Check if the contact terminal is contaminated. Reinstall the imaging unit. And turn the machine off then on. Print 10 sample pages for test. 2. If the problem persists, replace the imaging unit. 3. If the problem persists after removing the imaging unit, replace the HVPS board or the engine board. Service Manual ML-551x / 651x series 4-56 Samsung Electronics 4. Alignment and Troubleshooting Code C6-1110 C6-1120 Error message Replace with new fuser unit Replace with new fuser unit Symptom / Cause The fuser unit is at the end of its life. Troubleshooting method 1. Remove the Rear cover and Duplex unit. Replace the fuser unit after removing 4 screws. 2. Tighten 4 screws. Assemble the Rear Cover and Duplex Unit. Code C7-1110 C7-1120 Error message Waste toner container is almost full. Replace with new one Waste toner container is almost full. Replace with new one Symptom / Cause The waste toner container is full. Troubleshooting method Replace the waste toner container with new one. Code C7-1310 Error message Install waste toner container. Symptom / Cause The waste toner container is full. Troubleshooting method Install the waste toner container. If the waste toner container is already installed, remove and reinstall it. Service Manual ML-551x / 651x series 4-57 Samsung Electronics 4. Alignment and Troubleshooting Code H1-1210 H1-1310 H1-1410 H1-1510 Error message Paper Jam in Tray2 Paper Jam in Tray3 Paper Jam in Tray4 Paper Jam in Tray5 Symptom / Cause A jammed paper has occurred in the option cassette. (SCF unit) Troubleshooting method 5. Check if the main board/ motor/ clutch connector are connected properly. 1. Remove the jammed paper. If the problem persists, check the followings. 2. Check if the paper is loaded in the SCF tray properly. 6. Check if the AS-SPRING_ES is deforemd or assembled properly. 3. Check if the roller is defective or worn out. Iruzdug#Uroohu DV0VSULQJbHV Slfnxs#Uroohu 7. Check if the Press D-cut of the Gear-Lifting is broken. 4. Check if the Empty/ Pick up/ Regi-Act sensor is working properly. OK NG Empty Sensor Pickup Sensor 8. If the problem persists after checking No. 1~7, replace the SCF main board. 9. If the probelm persists, replace the Drop connector harness. Regi-Act. Sensor Service Manual ML-551x / 651x series 4-58 Samsung Electronics 4. Alignment and Troubleshooting Code H1-1222 H1-1322 H1-1422 H1-1522 Error message Tray2 cassette is pulled out. Insert it properly. Tray3 cassette is pulled out. Insert it properly. Tray4 cassette is pulled out. Insert it properly. Tray5 cassette is pulled out. Insert it properly. Symptom / Cause A optional cassette (SCF) is pulled out. Troubleshooting method 1. Check if the optional cassette is inserted propelry. Remove the cassette then re-install it. 2. Check if the Signal-Switch is deformed or broken. If it is defective, replace it. Service Manual ML-551x / 651x series 4-59 Samsung Electronics 4. Alignment and Troubleshooting Code H1-1230 (Tray2) H1-1233 (Tray2) H1-1330 (Tray3) H1-1333 (Tray3) H1-1430 (Tray4) H1-1433 (Tray4) H1-1530 (Tray5) H1-1533 (Tray5) H1-2230 (Tray2-HCF) H1-2233 (Tray2-HCF) H1-2330 (Tray3-HCF) H1-2333 (Tray3-HCF) H1-2430 (Tray4-HCF) H1-2433 (Tray4-HCF) Error message Input System Failure #H1-1230:Check Tray 2 connection. Input System Failure #H1-1233:Check Tray 2 connection. Input System Failure #H1-1330:Check Tray 3 connection. Input System Failure #H1-1333:Check Tray 3 connection. Input System Failure #H1-1430:Check Tray 4 connection. Input System Failure #H1-1433:Check Tray 4 connection. Input System Failure #H1-1530:Check Tray 5 connection. Input System Failure #H1-1533:Check Tray 5 connection. Input System Failure #H1-2230:Check HCF 2 connection. Input System Failure #H1-2233:Check HCF 2 connection. Input System Failure #H1-2330:Check HCF 3 connection. Input System Failure #H1-2333:Check HCF 3 connection. Input System Failure #H1-2430:Check HCF 4 connection. Input System Failure #H1-2433:Check HCF 4 connection. Symptom / Cause The communication error between the machine and option cassette has occurred. Troubleshooting method 1. Turn the machine off then on. 2. Remove and reinstall the corresponding optional tray. 3. Check if the option tray harness is connected properly. Reconnect or replace the harness. 4. Replace the option tray board. 5. Replace the option tray Assy. Service Manual ML-551x / 651x series 4-60 Samsung Electronics 4. Alignment and Troubleshooting Code H1-1252 H1-1352 H1-1452 H1-1552 Error message Paper Empty in Tray2 Paper Empty in Tray3 Paper Empty in Tray4 Paper Empty in Tray5 Symptom / Cause Paper in the optional cassette is empty. Troubleshooting method 1. Check if the paper in optional cassette is loaded. Load the paper. 2. Check if the empty actuator and empty senosr are assembled properly. Empty Sensor Empty Act. 3. If the empty actuator is defective, replace it. 4. If the problem persists after replacing the empty actuator, replace the empty sensor. Service Manual ML-551x / 651x series 4-61 Samsung Electronics 4. Alignment and Troubleshooting Code H1-1253 H1-1353 H1-1453 H1-1553 Error message Error : #H1-1253 Error : #H1-1353 Error : #H1-1453 Error : #H1-1553 Symptom / Cause The paper in the optional cassette is not picked up. Troubleshooting method 1. Check if the Gear-Idle Lift is broken. 2. Check if the Signal-Swtich is operated properly. If it is defective, replace it. 3. Check if the Lift-Motor connector is connected properly. 4. Check if the Press D-Cut of the Gear-Lifting is deformed or broken. OK NG 5. If the problem persists, replace the Lift-Motor. Service Manual ML-551x / 651x series 4-62 Samsung Electronics 4. Alignment and Troubleshooting Code H1-2210 H1-2310 H1-2410 Error message Paper Jam in HCF2 Paper Jam in HCF3 Paper Jam in HCF4 Symptom / Cause A jammed paper has occurred in the option cassette. (HCF unit) Troubleshooting method 1. Remove the jammed paper. If the problem persists, check the followings. 5. Check if the main board/ motor/ clutch connector are connected properly. 2. Check if the paper is loaded in the HCF tray properly. 3. Check if the roller is defective or worn out. Iruzdug#Uroohu 6. PICK-UP-SPRING is deformed or assembled properly. Slfnxs#Uroohu 4. Check if the Empty/ Pick up/ Regi-Act sensor is working properly. Empty Sensor SLFN0XS0VSULQJ 7. If the problem persists after checking No. 1~6, replace the HCF main board. Pickup Sensor 8. If the probelm persists, replace the Drop connector harness. Regi-Act. Sensor Service Manual ML-551x / 651x series 4-63 Samsung Electronics 4. Alignment and Troubleshooting Code H1-2222 H1-2322 H1-2422 Error message HCF 2 cassette Out HCF 3 cassette Out HCF 4 cassette Out Symptom / Cause A optional cassette (HCF) is pulled out. Troubleshooting method 1. Check if the Cover-Front Door is closed propelry. Open and Close it. 2. Check if the connector of the PBA-SUB Cover Open is connected properly. If it is defective, replace it. ͳͲ͞΄Άͳ͑ʹΠΧΖΣ͑ΡΖΟ 3. If the connection is OK, replace the PBA-SUB Cover Open. Service Manual ML-551x / 651x series 4-64 Samsung Electronics 4. Alignment and Troubleshooting Code H1-2252 H1-2352 H1-2452 Error message Paper Empty in HCF 2 Paper Empty in HCF 3 Paper Empty in HCF 4 Symptom / Cause Paper in the optional cassette (HCF) is empty. Troubleshooting method 1. Check if the paper in HCF Unit is loaded. Load the paper. 2. Check if the empty actuator and empty sensor are assembled properly. Empty Sensor Empty Act. 3. If the empty actuator is defective, replace it. 4. If the problem persists after replacing the empty actuator, replace the empty sensor. Service Manual ML-551x / 651x series 4-65 Samsung Electronics 4. Alignment and Troubleshooting Code H1-2253 H1-2353 H1-2453 Error message Error : #H1-2253 Error : #H1-2353 Error : #H1-2453 Symptom / Cause The paper in the optional cassette is not picked up. Troubleshooting method 1. Check if the Gear-Coupling and Gear-Lift are broken. Jhdu0Frxsolqj# Jhdu0Oliw 2. Check if the SPRING-ES and SPRING-CS are assembled propelry. VSULQJ0HV VSULQJ0FV 3. Check if the Lift-Motor connector is connected properly. ͳͲ͞΄Άͳ͑ʹΠΧΖΣ͑ΡΖΟ 4. Check if the Press D-Cut of the Gear-Lifting is deformed or broken. 5. If the problem persists, replace the Lift-Motor. Service Manual ML-551x / 651x series 4-66 Samsung Electronics 4. Alignment and Troubleshooting Code H2-1100 Error message Paper jam inside of finisher. Remove paper Symptom / Cause Finisher Entrance sensor actuator does not return after a paper covers it IOT Exit Roller grabs the paper. Or Finisher Feeding Motors Stopped. Or Finisher Entrance Sensor damaged or harness damaged. Or Finisher Main Board damaged Troubleshooting method 1. Check Jam Occurrence in IOT. - If the IOT roller is grabbing the paper, it’s IOT fault 4. Check Finisher Feeding Entrance Motor Harness Connection and operation. 2. Check the Main Board Harness Connection. 5. Check Finisher Feeding Exit Motor Harness Connection and operation. 3. Check Finisher Entrance operation & harness connection. 6. If the same problem happens after checking 1~5, Replace the Finisher main board. 7. If the same problem happens after checking 5, replace the Finisher harnesses. Service Manual ML-551x / 651x series 4-67 Samsung Electronics 4. Alignment and Troubleshooting Code H2-1101 Error message Paper jam in front of finisher. Remove paper Symptom / Cause Paper doesn’t reach Finisher’s Entrance Sensor. Paper jam in IOT. Or Finisher Diverter operation not well. Or IOT Deflector Damaged. Or Finisher Entrance Sensor not working (Finisher Entrance Sensor Damaged, Harness connection not well, Main Board damaged) Troubleshooting method 1. Check Jam Occurrence in IOT. 4. Check Finisher’s Entrance operation & harness connection 2. Check IOT Deflector part’s operation. 5. Referring to H2-1800, Check the Finisher Diverter operation. 3. Check the Main Board Harness Connection. 6. If the same problem happens after checking 1~5, Replace the Finisher main board. 7. If the same problem happens after checking 6, replace the Finisher harnesses. Service Manual ML-551x / 651x series 4-68 Samsung Electronics 4. Alignment and Troubleshooting Code H2-1102 Error message Paper jam inside of finisher. Remove paper Symptom / Cause Initialization started with Jammed paper covering Finisher Entrance Sensor. Paper exists covering Finisher Entrance Sensor. Or Finisher Entrance Sensor Damaged or harness connection not well. Or Finisher Main Board damaged Troubleshooting method 1. Check if there is a jammed paper inside Finisher. 4. If the same problem happens after checking 1~3, Replace the Finisher main board. 2. Check the Main Board Harness Connection. 5. If the same problem happens after checking 4, replace the Finisher harnesses. 3. Check Finisher Entrance operation & harness connection. Service Manual ML-551x / 651x series 4-69 Samsung Electronics 4. Alignment and Troubleshooting Code H2-1200 Error message Paper jam inside of finisher. Remove paper Symptom / Cause Finisher Exit Sensor doesn’t turn on after a paper entered Finisher. IOT Exit Roller grabs the paper. Or Finisher Feeding Motors Stopped. Or Finisher Exit Sensor damaged or harness damaged. Or Finisher Main Board damaged Troubleshooting method 1. Check Jam Occurrence in IOT. - If the IOT roller is grabbing the paper, it’s IOT fault. 4. Check Finisher Feeding Entrance Motor Harness Connection and operation. 2. Check the Main Board Harness Connection. 5. Check Finisher Feeding Exit Motor Harness Connection and operation. 3. Check Finisher Exit Sensor operation & harness connection. 6. If the same problem happens after checking 1~5, Replace the Finisher main board. 7. If the same problem happens after checking 6, replace the Finisher harnesses. Service Manual ML-551x / 651x series 4-70 Samsung Electronics 4. Alignment and Troubleshooting Code H2-1300 Error message Paper jam inside of finisher. Remove paper Symptom / Cause Finisher Exit Sensor doesn’t turn off after the sensor turned on IOT Exit Roller grabs the paper. Or Finisher Feeding Motors Stopped. Or Finisher Exit Sensor damaged or harness damaged. Or Finisher Main Board damaged Troubleshooting method 1. Check Jam Occurrence in IOT. - If the IOT roller is grabbing the paper, it’s IOT fault. 4. Check Finisher Feeding Entrance Motor Harness Connection and operation. 2. Check the Main Board Harness Connection. 5. Check Finisher Feeding Exit Motor Harness Connection and operation. 3. Check Finisher Exit Sensor operation & harness connection. 6. If the same problem happens after checking 1~5, Replace the Finisher main board. 7. If the same problem happens after checking 6, replace the Finisher harnesses. Service Manual ML-551x / 651x series 4-71 Samsung Electronics 4. Alignment and Troubleshooting Code H2-1302 Error message Paper jam inside of finisher. Remove paper Symptom / Cause Initialization started with Jammed paper covering Finisher Exit Sensor. Paper exists covering Finisher Exit Sensor. Or Finisher Exit Sensor Damaged or harness connection not well. Or Finisher Main Board damaged Troubleshooting method 1. Check if there is a jammed paper on the feeding path of Finisher. 3. Check Finisher Exit sensors’ operation & harness connection. 2. Check the Main Board Harness Connection. 4. If the same problem happens after checking 1~3, Replace the Finisher main board. 5. If the same problem happens after checking 4, replace the Finisher harnesses. Service Manual ML-551x / 651x series 4-72 Samsung Electronics 4. Alignment and Troubleshooting Code H2-1710 H2-1711 Error message Finisher Failure: #H2-1710. Check finisher Finisher Failure: #H2-1711. Check finisher Symptom / Cause Front Jogger is not working well. Front Jogger Home Sensor, Front Jogger Motor Harness Connection not well or damaged, Main Board damaged. Troubleshooting method 1. Check the Main Board Harness Connection. 3. Check the Finisher Front Jogger Motor’s Harness Connection and operation. 2. Check the Finisher Front Jogger Home Sensor’s Harness Connection. 4. Check if Front jogger part is contaminated. 5. If the same problem happens after checking 1~4, Replace the Finisher main board. 6. If the same problem happens after checking 5, Replace the Finisher harnesses. Service Manual ML-551x / 651x series 4-73 Samsung Electronics 4. Alignment and Troubleshooting Code H2-1720 H2-1721 Error message Finisher Failure: #H2-1720. Check finisher Finisher Failure: #H2-1721. Check finisher Symptom / Cause Rear Jogger is not working well. Rear Jogger Home Sensor, Rear Jogger Motor Harness Connection not well or damaged, Main Board damaged. Troubleshooting method 1. Check the Main Board Harness Connection. 4. Check if Rear jogger part is contaminated. 2. Check the Finisher Rear Jogger Home Sensor’s Harness Connection. 5. If the same problem happens after checking 1~4, Replace the Finisher main board. 3. Check the Finisher Rear Jogger Motor’s Harness Connection and operation. Service Manual ML-551x / 651x series 6. If the same problem happens after checking 5, Replace the Finisher harnesses. 4-74 Samsung Electronics 4. Alignment and Troubleshooting Code H2-1730 H2-1731 Error message Finisher Failure: #H2-1730. Check finisher Finisher Failure: #H2-1731. Check finisher Symptom / Cause Support Finger (Extension Tray) is not working well. Support Finger Home Sensor, Support Finger Motor Harness Connection not well or damaged, Main Board damaged Troubleshooting method 1. Check the Main Board Harness Connection. 3. Check the Finisher Support Finger Motor’s Harness Connection and operation. 2. Check the Finisher Support Finger Home Sensor’s Harness Connection. 4. If the same problem happens after checking 1~3, Replace the Finisher main board. 5. If the same problem happens after checking 4, Replace the Finisher harnesses. Service Manual ML-551x / 651x series 4-75 Samsung Electronics 4. Alignment and Troubleshooting Code H2-1A70 H2-1750 H2-1751 H2-1753 Error message Finisher Failure: #H2-1A70. Check finisher Finisher Failure: #H2-1750. Check finisher Finisher Failure: #H2-1751. Check finisher Finisher Failure: #H2-1753. Check finisher Symptom / Cause Stapler is not working well. Stapler Harness Connection not well. Or Cartridge set sensors damaged, Or Main Board damaged. Troubleshooting method 3. Check if staples are stuck in Stapler Head area and damage of Stapler itself. NOTE - Make sure that the staple strips on top of the stack are complete and flat. Remove any partial strips and any strips that are bent. 1. Check the Main Board Harness Connection. 2. Check the Stapler harness connection. 4. If the same problem happens after checking 1~3, Replace the Finisher main board. 5. If the same problem happens after checking 4, Replace the Finisher Stapler. 6. If the same problem happens after checking 5, Replace the Finisher harnesses. Service Manual ML-551x / 651x series 4-76 Samsung Electronics 4. Alignment and Troubleshooting Code H2-1752 Error message Finisher Failure: #H2-1752. Check finisher Symptom / Cause Finisher compiles all the papers and moves them to stapling position and do nothing. the message “Stapler Safety Fault” pops up. Safety Switch Harness connection not well. Main Board damaged. Troubleshooting method 1. Check the Main Board Harness Connection. 4. Check the Safety Unit’s operation using Rear Jogger. The same “switch ON/OFF” operation should be followed. 2. Check the Safety Switch Harness Connection. 5. Check the Safety Unit’s operation. When Rear Jogger stands at the position having the Shield and Rear Jogger met, the Safety Switch should be ON. 3. Check the Safety Unit’s operation. Check the switch is clicked when the Safety Link moves. 6. If the same problem happens after checking 1~5, Replace the Finisher main board. 7. If the same problem happens after checking 6, Replace the Finisher harnesses. Service Manual ML-551x / 651x series 4-77 Samsung Electronics 4. Alignment and Troubleshooting Code H2-1760 H2-1A80 Error message Finisher Failure: #H2-1760. Check finisher Finisher Failure: #H2-1A80. Check finisher Symptom / Cause Stacker Unit is not working. Stacker Level sensor, Stack Full sensor, Stacker Motor Harness Connection not well or damaged, Main Board damaged. Troubleshooting method 1. Check the Main Board Harness Connection. 3. Check the Stacker Motor Harness Connection and operation. 2. Check the Stacker Level Sensor’s Harness Connection and Actuator’s operation & its Spring behind the wall. 4. Check the Stack Full Sensor Connection and operation. 5. If the same problem happens after checking 1~3, Replace the Finisher main board. 6. If the same problem happens after checking 4, replace the Finisher harnesses. Service Manual ML-551x / 651x series 4-78 Samsung Electronics 4. Alignment and Troubleshooting Code H2-1800 Error message Finisher Failure: #H2-1800. Check finisher Symptom / Cause Diverter is not working. Diverter Motor, Sensor Harness Connection not well or damaged. Main Board Damaged. IOT’s Deflector damaged. Troubleshooting method 1. Check the Main Board Harness Connection. 4. Diverter Motor Harness Connection and operation. 2. Check the IOT’s Deflector operation. 5. Check if Diverter Unit is not contaminated. 3. Check Diverter sensor harness connection. 6. If the same problem happens after checking 1~5, Replace the Finisher main board. 7. If the same problem happens after checking 6, replace the Finisher harnesses. Service Manual ML-551x / 651x series 4-79 Samsung Electronics 4. Alignment and Troubleshooting Code H2-1A20 Error message Finisher door is open. Close it Symptom / Cause Finisher Motors doesn’t work. Jam Cover Opened, Jam Cover not assembled well or Jam Cover Flag damaged, Stapler Door Opened, Stapler Door Micro Switch not assembled well or Stapler Door Flag damaged, Harness Damaged. Main Board Damaged, door flag damaged. Troubleshooting method 1. Check the Jam Cover and Stapler Door Closed firmly. 4. Check the Stapler Door Switch Harness Connection. 2. Check if Mounting Part not damaged - Male part in Finisher - Female part in IOT 5. Check the Stapler Door flag damaged. 3. Check the Main Board Harness Connection. Service Manual ML-551x / 651x series 4-80 Samsung Electronics 4. Alignment and Troubleshooting 6. Check the Jam Cover Sensor Harness connection. 7. Check the Jam Cover flag damaged 8. If the same problem happens after checking 1~7, Replace the Finisher main board. 9. If the same problem happens after checking 8, replace the Finisher harnesses. Service Manual ML-551x / 651x series 4-81 Samsung Electronics 4. Alignment and Troubleshooting Code H2-1A32 Error message Too much paper in finisher stacker. Remove printed paper Symptom / Cause Finisher Full message pops when papers on the Stacker Tray are stacked fully or the full sensor detecting mechanism is out of order Finisher Full detecting sensor damaged, harness connection not well or damaged, Main Board damaged. Troubleshooting method 1. Check the Stacker Tray’s Full Sensor Connection and check if Flag is damaged - The sensor must not be covered besides the full detecting flag. 2. Check Finisher Main Board Harness Connection. 3. If the same problem happens after checking 1~2, Replace the Finisher main board. 4. If the same problem happens after checking 3, Replace the Finisher harnesses. Service Manual ML-551x / 651x series 4-82 Samsung Electronics 4. Alignment and Troubleshooting Code H2-1A50 Error message Finisher Failure: #H2-1A50. Check finisher Symptom / Cause Finisher doesn’t work because of Communication error between finisher and IOT. Interface Cable Connection not well or Interface Cable(Harness) damaged, Main Board damaged. Troubleshooting method 1. Check if Mounting Part not damaged - Male part in Finisher - Female part in IOT 2. Check the Main Board Harness Connection. 3. If the same problem happens after checking 1~2, Replace the Finisher main board.. 4. If the same problem happens after checking 3, Replace the Finisher harnesses Service Manual ML-551x / 651x series 4-83 Samsung Electronics 4. Alignment and Troubleshooting Code H2-1A62 Error message Staple cartridge is low. Replace it Symptom / Cause No more stapling job will not be performed if the near empty Stapler Cartridge will not be replaced soon. The staples in Staple Cartridge are going to a shortage. Or Stapler harness connection now well. Or Stapler set sensors damaged, Main Board damaged. Troubleshooting method 1. Check if staples in cartridge are in some level. - With such level like the below picture during jobs, The sensor detects it as “Low”. Only twenty more stapling jobs can be performed normally. 3. Check the Cartridge Set sensor’s operation. 4. Check the Main Board Harness connection. 5. If the same problem happens after checking 1~4, replace the Finisher main board. NOTE - Make sure that the staple strips on top of the stack are complete and flat. Remove any partial strips and any strips that are bent. 6. If the same problem happens after checking 5, replace the Finisher Stapler. 2. If the Cartridge is not low after checking with your naked eyes, Check the Stapler Harness connection Service Manual ML-551x / 651x series 7. If the same problem happens after checking 6, replace the Finisher harnesses. 4-84 Samsung Electronics 4. Alignment and Troubleshooting Code H2-1A63 Error message Staple cartridge is empty. Replace it Symptom / Cause Finisher doesn’t staple. Staple Cartridge is not inserted Or Staples are in short supply. Or Stapler Harness connection not well. Or Cartridge set sensor damaged, Or Main Board damaged. Troubleshooting method 1. Check if Cartridge exists. 4. Check the Stapler harness connection. 2. Check if Cartridge is inserted firmly. 5. Check the Cartridge Set sensors’ operation. 3. Check if staples in cartridge are in some level. - With such level like the below picture or lower during POPO(Power off power on), The sensor detects it “empty”. 6. Check the Main Board Harness Connection. 7. If the same problem happens after checking 1~6, replace the Finisher main board. NOTE - Make sure that the staple strips on top of the stack are complete and flat. Remove any partial strips and any strips that are bent. 8. If the same problem happens after checking 7, replace the Finisher Stapler. 9. If the same problem happens after checking 8, replace the Finisher harnesses. Service Manual ML-551x / 651x series 4-85 Samsung Electronics 4. Alignment and Troubleshooting Code H2-4100 Error message Paper jam in front of mailbox. Remove paper Symptom / Cause Paper doesn’t reach Mailbox’s Entrance Sensor. Paper jam in IOT. Or Mailbox Lower Diverter operation not well. Or IOT Deflector Damaged. Or Mailbox Entrance Sensor not working (Mailbox Entrance Sensor Damaged, Harness connection not well, MainBoard damaged) Troubleshooting method 1. Check Jam Occurrence in IOT. 4. Check Mailbox Entrance operation & harness connection. 2. Check IOT Deflector part’s operation. 5. Refer to the Lower Diverter fault. 3. Check Mailbox Main Board Harness connection. 6. If the same problem happens after checking 1~5, Replace the mailbox main board. 7. If the same problem happens after checking 6, Replace the mailbox harnesses. Service Manual ML-551x / 651x series 4-86 Samsung Electronics 4. Alignment and Troubleshooting Code H2-4101 Error message Paper jam inside of mailbox. Remove paper Symptom / Cause Mailbox Entrance sensor actuator does not return after a paper covers it. IOT Exit Roller grabs the paper. Or Mailbox Feeding Motor Stops. Or Mailbox Entrance Sensor damaged or harness damaged. Or Mailbox Main Board damaged. Troubleshooting method 1. Check Jam Occurrence in IOT. - If the IOT roller is grabbing the paper, it’s IOT fault. 4. Check Mailbox Feeding Motor Harness connection and operation. 2. Check Mailbox Main Board Harness connection. 5. If the same problem happens after checking 1~4, replace the mailbox main board. 6. If the same problem happens after checking 5, replace the mailbox harnesses. 3. Check Mailbox Entrance operation & harness connection. Service Manual ML-551x / 651x series 4-87 Samsung Electronics 4. Alignment and Troubleshooting Code H2-4102 Error message Paper jam inside of mailbox. Remove paper Symptom / Cause Initialization started with Jammed paper covering Mailbox Entrance Sensor. Paper exists covering Mailbox Entrance Sensor. Or Mailbox Entrance Sensor Damaged or harness connection not well. Or Mailbox Main Board damaged. Troubleshooting method 1. Check if there is a jammed paper inside Mailbox. 4. If the same problem happens after checking 1~3, replace the mailbox main board. 2. Check Mailbox Main Board Harness connection. 5. If the same problem happens after checking 4, replace the mailbox harnesses. 3. Check Mailbox Entrance operation & harness connection. Service Manual ML-551x / 651x series 4-88 Samsung Electronics 4. Alignment and Troubleshooting Code H2-4200 Error message Paper jam in front of bin 1. Remove paper Symptom / Cause Mailbox Bin 1 Exit Sensor doesn’t turn on after a paper entered Mailbox. IOT Exit Roller grabs the paper. Or Mailbox Feeding Motor Stops. Or Mailbox Entrance Exit Sensor damaged or Mailbox Gate doesn’t work or harness damaged. Or Mailbox Main Board damaged. Troubleshooting method 1. Check Jam Occurrence in IOT. - If the IOT roller is grabbing the paper, it’s IOT fault. 4. Check Mailbox Feeding Motor Harness Connection and operation. 2. Check Mailbox Main Board Harness connection. 5. Referring to Upper Diverter Fault, check the Upper Diverter’s operation. 6. Referring to Lower Diverter Fault, check the Lower Diverter’s operation 3. Check Mailbox Exit-related Sensors operation & harness connection. 7. If the same problem happens after checking 1~6, replace the mailbox main board. 8. If the same problem happens after checking 7, replace the mailbox harnesses. Service Manual ML-551x / 651x series 4-89 Samsung Electronics 4. Alignment and Troubleshooting Code H2-4201 Error message Paper jam at mailbox bin 1. Remove paper Symptom / Cause Mailbox Bin 1 Exit Sensor doesn’t turn off after the sensor turned on. IOT Exit Roller grabs the paper. Or Mailbox Feeding Motor Stops. Or Mailbox Entrance Exit Sensor damaged or Mailbox Gate doesn’t work or harness damaged. Or Mailbox Main Board damaged. Troubleshooting method 1. Check Jam Occurrence in IOT. - If the IOT roller is grabbing the paper, it’s IOT fault. 4. Check Mailbox Feeding Motor Harness Connection and operation. 2. Check Mailbox Main Board Harness connection. 5. Referring to Upper Diverter Fault, check the Upper Diverter’s operation. 6. Referring to Lower Diverter Fault, check the Lower Diverter’s operation 3. Check Mailbox Exit-related Sensors operation & harness connection. 7. If the same problem happens after checking 1~6, replace the mailbox main board. 8. If the same problem happens after checking 7, replace the mailbox harnesses. Service Manual ML-551x / 651x series 4-90 Samsung Electronics 4. Alignment and Troubleshooting Code H2-4202 Error message Paper jam at mailbox bin 1. Remove paper Symptom / Cause Initialization started with Jammed paper covering Mailbox Bin1 Exit Sensor. Paper exists covering Mailbox Exit Sensor. Or Mailbox Exit Sensor Damaged or harness connection not well. Or Mailbox Main Board damaged. Troubleshooting method 1. Check if there is a jammed paper on the feeding path of Mailbox. 3. Check Mailbox Bin1 Exit-related sensors’ operation & harness connection. 4. If the same problem happens after checking 1~3, replace the mailbox main board. 5. If the same problem happens after checking 4, replace the mailbox harnesses. 2. Check Mailbox Main Board Harness connection. Service Manual ML-551x / 651x series 4-91 Samsung Electronics 4. Alignment and Troubleshooting Code H2-4300 Error message Paper jam in front of bin 2. Remove paper Symptom / Cause Mailbox Bin 2 Exit Sensor doesn’t turn on after a paper entered Mailbox. IOT Exit Roller grabs the paper. Or Mailbox Feeding Motor Stops. Or Mailbox Entrance Exit Sensor damaged or Mailbox Gate doesn’t work or harness damaged. Or Mailbox Main Board damaged. Troubleshooting method 1. Check Jam Occurrence in IOT. - If the IOT roller is grabbing the paper, it’s IOT fault. 4. Check Mailbox Feeding Motor Harness Connection and operation. 2. Check Mailbox Main Board Harness connection. 5. Referring to Upper Diverter Fault, check the Upper Diverter’s operation. 6. Referring to Lower Diverter Fault, check the Lower Diverter’s operation 3. Check Mailbox Exit-related Sensors operation & harness connection. 7. If the same problem happens after checking 1~6, replace the mailbox main board. 8. If the same problem happens after checking 7, replace the mailbox harnesses. Service Manual ML-551x / 651x series 4-92 Samsung Electronics 4. Alignment and Troubleshooting Code H2-4301 Error message Paper jam in front of bin 2. Remove paper Symptom / Cause Mailbox Bin 2 Exit Sensor doesn’t turn off after the sensor turned on. IOT Exit Roller grabs the paper. Or Mailbox Feeding Motor Stops. Or Mailbox Entrance Exit Sensor damaged or Mailbox Gate doesn’t work or harness damaged. Or Mailbox Main Board damaged. Troubleshooting method 1. Check Jam Occurrence in IOT. - If the IOT roller is grabbing the paper, it’s IOT fault. 4. Check Mailbox Feeding Motor Harness Connection and operation. 2. Check Mailbox Main Board Harness connection. 5. Referring to Upper Diverter Fault, check the Upper Diverter’s operation. 6. Referring to 12-945, 12-955 Check the Lower Diverter’s operation 3. Check Mailbox Exit-related Sensors operation & harness connection. 7. If the same problem happens after checking 1~6, replace the mailbox main board. 8. If the same problem happens after checking 7, replace the mailbox harnesses. Service Manual ML-551x / 651x series 4-93 Samsung Electronics 4. Alignment and Troubleshooting Code H2-4302 Error message Paper jam at mailbox bin 2. Remove paper Symptom / Cause Initialization started with Jammed paper covering Mailbox Bin2 Exit Sensor. Paper exists covering Mailbox Exit Sensor. Or Mailbox Exit Sensor Damaged or harness connection not well. Or Mailbox Main Board damaged. Troubleshooting method 1. Check if there is a jammed paper on the feeding path of Mailbox. 3. Check Mailbox Bin2 Exit-related sensors’ operation & harness connection. 4. If the same problem happens after checking 1~3, replace the mailbox main board. 5. If the same problem happens after checking 4, replace the mailbox harnesses. 2. Check Mailbox Main Board Harness connection. Service Manual ML-551x / 651x series 4-94 Samsung Electronics 4. Alignment and Troubleshooting Code H2-4400 Error message Paper jam in front of bin 3. Remove paper Symptom / Cause Mailbox Bin 3 Exit Sensor doesn’t turn on after a paper entered Mailbox. IOT Exit Roller grabs the paper. Or Mailbox Feeding Motor Stops. Or Mailbox Entrance Exit Sensor damaged or Mailbox Gate doesn’t work or harness damaged. Or Mailbox Main Board damaged. Troubleshooting method 1. Check Jam Occurrence in IOT. - If the IOT roller is grabbing the paper, it’s IOT fault. 4. Check Mailbox Feeding Motor Harness Connection and operation. 2. Check Mailbox Main Board Harness connection. 5. Referring to Upper Diverter Fault, check the Upper Diverter’s operation. 6. Referring to Lower Diverter Fault, check the Lower Diverter’s operation 3. Check Mailbox Exit-related Sensors operation & harness connection. 7. If the same problem happens after checking 1~6, replace the mailbox main board. 8. If the same problem happens after checking 7, replace the mailbox harnesses. Service Manual ML-551x / 651x series 4-95 Samsung Electronics 4. Alignment and Troubleshooting Code H2-4401 Error message Paper jam at mailbox bin 3. Remove paper Symptom / Cause Mailbox Bin 3 Exit Sensor doesn’t turn off after the sensor turned on. IOT Exit Roller grabs the paper. Or Mailbox Feeding Motor Stops. Or Mailbox Entrance Exit Sensor damaged or Mailbox Gate doesn’t work or harness damaged. Or Mailbox Main Board damaged. Troubleshooting method 1. Check Jam Occurrence in IOT. - If the IOT roller is grabbing the paper, it’s IOT fault. 4. Check Mailbox Feeding Motor Harness Connection and operation. 2. Check Mailbox Main Board Harness connection. 5. Referring to Upper Diverter Fault, check the Upper Diverter’s operation. 6. Referring to Lower Diverter Fault, check the Lower Diverter’s operation 3. Check Mailbox Exit-related Sensors operation & harness connection. 7. If the same problem happens after checking 1~6, replace the mailbox main board. 8. If the same problem happens after checking 7, replace the mailbox harnesses. Service Manual ML-551x / 651x series 4-96 Samsung Electronics 4. Alignment and Troubleshooting Code H2-4402 Error message Paper jam at mailbox bin 3. Remove paper Symptom / Cause Initialization started with Jammed paper covering Mailbox Bin3 Exit Sensor. Paper exists covering Mailbox Exit Sensor. Or Mailbox Exit Sensor Damaged or harness connection not well. Or Mailbox Main Board damaged. Troubleshooting method 1. Check if there is a jammed paper on the feeding path of Mailbox. 3. Check Mailbox Bin3 Exit-related sensors’ operation & harness connection. 4. If the same problem happens after checking 1~3, replace the mailbox main board. 5. If the same problem happens after checking 4, replace the mailbox harnesses. 2. Check Mailbox Main Board Harness connection. Service Manual ML-551x / 651x series 4-97 Samsung Electronics 4. Alignment and Troubleshooting Code H2-4500 Error message Paper jam in front of bin 4. Remove paper Symptom / Cause Mailbox Bin 4 Exit Sensor doesn’t turn on after a paper entered Mailbox. IOT Exit Roller grabs the paper. Or Mailbox Feeding Motor Stops. Or Mailbox Entrance Exit Sensor damaged or Mailbox Gate doesn’t work or harness damaged. Or Mailbox Main Board damaged. Troubleshooting method 1. Check Jam Occurrence in IOT. - If the IOT roller is grabbing the paper, it is IOT fault. 4. Check Mailbox Feeding Motor Harness Connection and operation. 2. Check Mailbox Main Board Harness connection. 5. Referring to Upper Diverter Fault, check the Upper Diverter’s operation. 6. Referring to Lower Diverter Fault, check the Lower Diverter’s operation 3. Check Mailbox Exit-related Sensors operation & harness connection. 7. If the same problem happens after checking 1~6, replace the mailbox main board. 8. If the same problem happens after checking 7, replace the mailbox harnesses. Service Manual ML-551x / 651x series 4-98 Samsung Electronics 4. Alignment and Troubleshooting Code H2-4501 Error message Paper jam at mailbox bin 4. Remove paper Symptom / Cause Mailbox Bin 4 Exit Sensor doesn’t turn off after the sensor turned on. IOT Exit Roller grabs the paper. Or Mailbox Feeding Motor Stops. Or Mailbox Entrance Exit Sensor damaged or Mailbox Gate doesn’t work or harness damaged. Or Mailbox Main Board damaged. Troubleshooting method 1. Check Jam Occurrence in IOT. - If the IOT roller is grabbing the paper, it’s IOT fault. 4. Check Mailbox Feeding Motor Harness Connection and operation. 2. Check Mailbox Main Board Harness connection. 5. Referring to Upper Diverter Fault, check the Upper Diverter’s operation. 6. Referring to Lower Diverter Fault, check the Lower Diverter’s operation 3. Check Mailbox Exit-related Sensors operation & harness connection. 7. If the same problem happens after checking 1~6, replace the mailbox main board. 8. If the same problem happens after checking 7, replace the mailbox harnesses. Service Manual ML-551x / 651x series 4-99 Samsung Electronics 4. Alignment and Troubleshooting Code H2-4502 Error message Paper jam at mailbox bin 4. Remove paper Symptom / Cause Initialization started with Jammed paper covering Mailbox Bin4 Exit Sensor. Paper exists covering Mailbox Exit Sensor. Or Mailbox Exit Sensor Damaged or harness connection not well. Or Mailbox Main Board damaged. Troubleshooting method 1. Check if there is a jammed paper on the feeding path of Mailbox. 3. Check Mailbox Bin4 Exit-related sensors’ operation & harness connection. 4. If the same problem happens after checking 1~3, replace the mailbox main board. 2. Check Mailbox Main Board Harness connection. Service Manual ML-551x / 651x series 5. If the same problem happens after checking 4, replace the mailbox harnesses. 4-100 Samsung Electronics 4. Alignment and Troubleshooting Code H2-4700 H2-4701 Error message Mailbox Failure: #H2-4700. Check mailbox. Mailbox Failure: #H2-4701. Check mailbox. Symptom / Cause Two Upper Gates seen when opening Rear Door is not operating well. Upper Diverter Motor or Upper Diverter Sensor not assembled well or damaged. Harness Damaged. Main Board damaged. Troubleshooting method 1. Check Upper Diverter Motor Harness connection. 4. Check Upper Diverter operation. 2. Check Upper Diverter Sensor Harness connection. 5. Check Mailbox Gate operation. 3. Check Mailbox Main Board Harness connection. 6. If the same problem happens after checking 1~5, replace the mailbox main board. 7. If the same problem happens after checking 6, replace the mailbox harnesses. Service Manual ML-551x / 651x series 4-101 Samsung Electronics 4. Alignment and Troubleshooting Code H2-4710 H2-4711 Error message Mailbox Failure: #H2-4710. Check mailbox. Mailbox Failure: #H2-4711. Check mailbox. Symptom / Cause The Lowest Gate seen when opening Rear Door is not operating well. Lower Diverter Motor or Lower Diverter Sensor not assembled well or damaged. Harness Damaged. Main Board damaged. Troubleshooting method 1. Check Lower Diverter Motor Harness connection. 4. Check Lower Diverter operation. 2. Check Lower Diverter Sensor Harness connection. 5. Check Mailbox Gate operation. 3. Check Mailbox Main Board Harness connection. 6. If the same problem happens after checking 1~5, replace the mailbox main board. 7. If the same problem happens after checking 6, replace the mailbox harnesses. Service Manual ML-551x / 651x series 4-102 Samsung Electronics 4. Alignment and Troubleshooting Code H2-4A20 Error message Mailbox door is open. Close it Symptom / Cause Mailbox Motors doesn’t work. Rear Door Opened, Micro Switch not assembled well or damaged, Harness Damaged. Main Board Damaged, door flag damaged. Troubleshooting method 1. Check the Rear Door Closed firmly. 3. Check the Rear Door Switch Harness connection. 2. Check Mailbox Main Board Harness connection. 4. Check the Mailbox cover flag damaged. 5. If the same problem happens after checking 1~4, replace the mailbox main board. 6. If the same problem happens after checking 5, replace the mailbox harnesses. Service Manual ML-551x / 651x series 4-103 Samsung Electronics 4. Alignment and Troubleshooting Code H2-4A32 Error message Too much paper in mailbox bin 1. Remove printed paper Symptom / Cause Mailbox bin 1 Full message pops when papers on that bin are stacked fully or the full sensor detecting mechanism is out of order. Mailbox Full detecting sensor damaged, harness connection not well or damaged, Main Board damaged. Troubleshooting method : 1. Check the Bin’s Full Sensor Connection and Actuator’s operation. 2. Check Main Board Harness connection. 3 . If the same problem happens after checking 1~2, replace the mailbox main board. 4. If the same problem happens after checking 3, replace the mailbox harnesses. Service Manual ML-551x / 651x series 4-104 Samsung Electronics 4. Alignment and Troubleshooting Code H2-4A35 Error message Too much paper in mailbox bin 2. Remove printed paper Symptom / Cause Mailbox bin 2 Full message pops when papers on that bin are stacked fully or the full sensor detecting mechanism is out of order. Mailbox Full detecting sensor damaged, harness connection not well or damaged, Main Board damaged. Troubleshooting method : 1. Check the Bin’s Full Sensor Connection and Actuator’s operation. 2. Check Main Board Harness connection. 3 . If the same problem happens after checking 1~2, replace the mailbox main board. 4. If the same problem happens after checking 3, replace the mailbox harnesses. Service Manual ML-551x / 651x series 4-105 Samsung Electronics 4. Alignment and Troubleshooting Code H2-4A38 Error message Too much paper in mailbox bin 3. Remove printed paper Symptom / Cause Mailbox bin 3 Full message pops when papers on that bin are stacked fully or the full sensor detecting mechanism is out of order. Mailbox Full detecting sensor damaged, harness connection not well or damaged, Main Board damaged. Troubleshooting method : 1. Check the Bin’s Full Sensor Connection and Actuator’s operation. 2. Check Main Board Harness connection. 3 . If the same problem happens after checking 1~2, replace the mailbox main board. 4. If the same problem happens after checking 3, replace the mailbox harnesses. Service Manual ML-551x / 651x series 4-106 Samsung Electronics 4. Alignment and Troubleshooting Code H2-4A3C Error message Too much paper in mailbox bin 4. Remove printed paper Symptom / Cause Mailbox bin 4 Full message pops when papers on that bin are stacked fully or the full sensor detecting mechanism is out of order. Mailbox Full detecting sensor damaged, harness connection not well or damaged, Main Board damaged. Troubleshooting method : 1. Check the Bin’s Full Sensor Connection and Actuator’s operation.. 2. Check Main Board Harness connection. 3 . If the same problem happens after checking 1~2, replace the mailbox main board. 4. If the same problem happens after checking 3, replace the mailbox harnesses. Service Manual ML-551x / 651x series 4-107 Samsung Electronics 4. Alignment and Troubleshooting Code M1-1110 Error message Paper Jam in Tray 1 Symptom / Cause The jammed paper has occurred in the tray1. 1. Pick up/ Forward/ Retard roller is contaminated or worn out. 2. There is some obstacles in the paper path. Troubleshooting method 1. Clear the jammed paper. If the problem persists, check the following. 2. Check if the pick up/ forward/ retard roller is contaminated or worn out. Clean or replace it if necessary. 3. Check if there is any obstacles or contamination in the paper path. Code M1-1610 Error message Paper Jam in MP tray Symptom / Cause The jammed paper has occurred in the MP tray. 1. MP Pick up/ Forward/ Retard roller is contaminated or worn out. 2. There is some obstacles in the paper path. Troubleshooting method 1. Clear the jammed paper. If the problem persists, check the following. 2. Check if the MP pick up/ forward/ retard roller is contaminated or worn out. Clean or replace it if necessary. 3. Check if there is any obstacles or contamination in the paper path. Service Manual ML-551x / 651x series 4-108 Samsung Electronics 4. Alignment and Troubleshooting Code M1-3122 Error message Tray1 cassette is pulled out. Insert it properly Symptom / Cause Tray1 is not installed properly. 1. Tray1 is not installed. 2. Paper Size Sensor is defective. 3. Harness connection error. Troubleshooting method 1. Install the tray1. 2. Check if the paper size sensor is working properly. 3. Check if the harness is connected to the connector properly. Code M1-4111 Error message Input System Failure: #M1-4111. Call for service Symptom / Cause The paper has jammed in the path or can’t be fed. 1. Pick up error 2. Multi-feed error 3. Skewed or Wrinkled page Troubleshooting method 1. Check if the pick up/ forward/ retard roller is contaminated or worn out. Replace the defective roller. 2. Check if each sensor is working properly. 3. Check if there is any jammed paper in the path. Remove it. 4. When loading the paper, adjust the paper guide. Service Manual ML-551x / 651x series 4-109 Samsung Electronics 4. Alignment and Troubleshooting Code M1-5112 Error message Paper Empty in tray1 Symptom / Cause Paper is empty in Tray1. The status LED is red. 1. There is no paper in the tray1. 2. Actuator-Paper Empty is defective. 3. Photo Sensor is defective or connection is bad. 4. Engine Board is defective. Troubleshooting method 1. Load the paper in the tray1. 2. If the Actuator-Paper Empty is defective, replace it. 3. If the Photo Sensor is defective, replace it. Check if the connector is connected properly. 4. If the problem persists, replace the engine board. Code M1-5612 Error message Paper Empty in MP Symptom / Cause Paper is empty in Tray1. The status LED is red. 1. There is no paper in the MP tray. 2. Actuator-Paper Empty is defective. 3. Photo Sensor is defective or connection is bad. 4. Engine Board is defective. Troubleshooting method 1. Load the paper in the MP tray. 2. If the Actuator-Paper Empty is defective, replace it. 3. If the Photo Sensor is defective, replace it. Check if the connector is connected properly. 4. If the problem persists, replace the engine board. Service Manual ML-551x / 651x series 4-110 Samsung Electronics 4. Alignment and Troubleshooting Code M2-1110 Error message Paper Jam in tray1 Symptom / Cause The paper has jammed at the feed sensor. 1. Feed sensor detection error. 2. The Regi. Roller is contaminated or worn out. 3. There is any obstacles in the path. Troubleshooting method 1. Check the level value of the feed sensor. Check the harness connection. 2. Check if the Regi. Roller is contaminated or worn out. 3. If there is any obstacles or contamination in the path, clean or remove it. Code M2-2110 Error message Jam top of duplex Symptom / Cause The paper did not enter the duplex path and has jammed. 1. The duplex unit is not installed. 2. There is any obstacles in the paper path. 3. The duplex motor is defective. 4. Paper size lever position error. Troubleshooting method 1. Check if the duplex unit is installed properly. 2. If there is any obstacles or contamination in the path, clean or remove it. 3. Check if the duplex motor is operated properly. If the duplex motor is defective, replace it. 4. If the paper size lever is placed on wrong position, adjust it. Service Manual ML-551x / 651x series 4-111 Samsung Electronics 4. Alignment and Troubleshooting Code M2-2310 Error message Jam bottom of duplex Symptom / Cause The paper has jammed in the duplex path. 1. There is any obstacles in the paper path. 2. The duplex motor is defective. 3. The duplex sensor is defective. Troubleshooting method 1. If there is any obstacles or contamination in the path, clean or remove it. 2. Check if the duplex motor is operated properly. If the duplex motor is defective, replace it. 3. Check if the duplex sensor is operated proerly. If the duplex sensor is defective, replace it. Code M2-3120 Error message Install duplex unit. Symptom / Cause The duplex unit is not installed properly. 1. The photo sensor for duplex unit is defective. 2. Harness connection error. 3. Duplex unit installation error. Troubleshooting method 1. Check if the photo sensor for duplex unit is operated properly. 2. Check if the harness is connected to the connector properly. Reconnect it. 3. Reinstall the duplex unit. Service Manual ML-551x / 651x series 4-112 Samsung Electronics 4. Alignment and Troubleshooting Code M3-1110 Error message Jam in exit area Symptom / Cause The paper has jammed in the exit path. 1. There is any obstacles in the paper path. 2. The exit motor is defective. Troubleshooting method 1. If there is any obstacles or contamination in the path, clean or remove it. 2. Check if the exit motor is operated properly. If the exit motor is defective, replace it. Code M3-2130 Error message Output bin full. Remove printed paper Symptom / Cause The paper is full on the output bin. - The outbin full sensor is defective. Troubleshooting method 1. Remove the paper on the output bin. 2. Check if the sensor connector is connected properly. Service Manual ML-551x / 651x series 4-113 Samsung Electronics 4. Alignment and Troubleshooting Code S2-4110 Error message Door is open. Close it Symptom / Cause The top cover is closed but error message is not disappeared. 1. Harness connection error. 2. Micro Switch defect. Troubleshooting method 1. Check if the harness (Picture(1)-ᐭ) is normal. 2. Check if the harness is the connected to the Relay connector (Picture(1)-ᐮ) properly. 3. Check if the connector CN9 (Picture(1)-ᐯ) on the engine board is connected properly. 4. Open the cover of the OPE panel. Check if the UI message is changed when pushing the micro switch (Picture(2)-ᐰ). 5. If the micro switch is defective, replace it. 4 1 2 3 4 Service Manual ML-551x / 651x series 4-114 Samsung Electronics 4. Alignment and Troubleshooting Code S2-4610 Error message Rear Door is open. Close it Symptom / Cause The rear cover is closed but error message is not disappeared. 1. The rear cover is closed perfectly. 2. Relay connector pin is defective. 3. Harness connection error. Troubleshooting method 1. Check if the rear cover is closed perfectly. 2. Check the Relay connector Pin ᐭ. If it is defective, replace it. 3. Check the Relay connectorᐮ. If it is defective, replace it. 4. Remove the left cover. Check the harnessᐯ between the Joint board and Relay connector. 5. Check if the harness ᐰ is connected to the connector properly. 3 4 1 2 Service Manual ML-551x / 651x series 4-115 Samsung Electronics 4. Alignment and Troubleshooting Code S6-3123 Error message This IP address conflicts with that of other system Symptom / Cause IP address conflicts with that of other system. Troubleshooting method Change the machine’s IP address. Code S6-3128 Error message 802.1x Network Error Contact the Admin. Symptom / Cause Can not get the authentication from server after setting up to 802.1x on SWS. Can not access to network. Troubleshooting method Check if the Authentication method is selected properly. Check if the User Name/Password is entered properly. Service Manual ML-551x / 651x series 4-116 Samsung Electronics 4. Alignment and Troubleshooting Code U1-2115 Error message Fuser Unit Failure: #U1-2115. Turn off then on Symptom / Cause The photo sensor is defective or some part is not assembled properly. Troubleshooting method 1. Remove the Rear Cover and Duplex Unit. Remove the fuser unit after removing 4 screws. 2. Remove the GUIDE-EXIT LOWER. To remove it, first, push and release the green lever to the direction of arrow. Then, lift and pull it. Service Manual ML-551x / 651x series 4-117 Samsung Electronics 4. Alignment and Troubleshooting 3. To remove the COVER-DUPELX, a. Remove 1 screw. Lift up the COVER-DUPLEX PATH to the direction of arrow slightly. b. Release the both hooks with the tweezers or (-) driver. 4. Remove the COVER-LEFT after removing 2 screws. Remove the COVER-RIGHT after removing 2 screws. Service Manual ML-551x / 651x series 4-118 Samsung Electronics 4. Alignment and Troubleshooting 5. Check if the photo sensor connector from the COVER-RIGHT is connected properly. 6. Check if the left/right CAM and the ENCORDER are assembled properly. 7. If there is no problem for above steps, reassemble the fuser unit and turn the machine on. 8. If the error persists, download the firmware again. 9. If the problem persists, replace the fuser unit with new one. 10. If the problem persists, replace the engine board. Service Manual ML-551x / 651x series 4-119 Samsung Electronics 4. Alignment and Troubleshooting Code U1-2117 Error message Fuser Unit Failure: #U1-2117. Turn off then on Symptom / Cause The photo sensor is defective or some part is not assembled properly. Troubleshooting method 1. Remove the Rear Cover and Duplex Unit. Remove the fuser unit after removing 4 screws. 2. Remove the GUIDE-EXIT LOWER. To remove it, first, push and release the green lever to the direction of arrow. Then, lift and pull it. Service Manual ML-551x / 651x series 4-120 Samsung Electronics 4. Alignment and Troubleshooting 3. To remove the COVER-DUPELX, a. Remove 1 screw. Lift up the COVER-DUPLEX PATH to the direction of arrow slightly. b. Release the both hooks with the tweezers or (-) driver. 4. Check if the fuser is assembled and fuser connector is connected properly. 5. If there is no problem for above steps, reassemble the fuser unit and turn the machine on. 6. If the error persists, execute the Memory Clear. (Note: Perform a backup first if necessary.) 7. If the problem persists, replace the fuser unit with new one. 8. If the problem persists, replace the engine board. Service Manual ML-551x / 651x series 4-121 Samsung Electronics 4. Alignment and Troubleshooting Code U1-2320 Error message Fuser Unit Failure: #U1-2320. Turn off then on Symptom / Cause The fuser unit is not installed or AC is not supplied to the Heat Lamp. Thermistor is defective. Troubleshooting method 1. Check if the fuser unit is installed properly. Turn the machine off then on. 2. Remove the fuser unit. Remove the COVER-UPPER. And measure the thermostat continuity. Check if the thermostat is opened. 3. Measure the LAMP-HALOGEN resistance value from the center and both sides. Check if it has the continuity. Service Manual ML-551x / 651x series 4-122 Samsung Electronics 4. Alignment and Troubleshooting 4. Check if 2 thermistor connectors are connected properly. 5. Remove the thermistor. Check if the thermistor has curled as shown below. If there is any contamination on the film, clean it. Caution - Be careful not to be scratched or curled the film. Deqrupdo Qrupdo 6. Check if the thermistor connector on the engine board is connected properly. Service Manual ML-551x / 651x series 4-123 Samsung Electronics 4. Alignment and Troubleshooting 7. Check if the FDB connector is connected properly. 8. Check if the voltage in user environment is in this range (80V ~ 140V, 160V ~ 260V). 9. Replace the FDB. If the problem persists, replace the engine board. Service Manual ML-551x / 651x series 4-124 Samsung Electronics 4. Alignment and Troubleshooting Code U1-2330 Error message Fuser Unit Failure: #U1-2330. Turn off then on Symptom / Cause Low Heat error has occurred. The fuser unit can not reach the target temperature within normal time. Troubleshooting method 1. Check if the fuser unit is installed properly. Turn the machine off then on. 2. Remove the fuser unit after removing 4 screws. 3. Check if the fuser unit is overheated. a. Remove the GUIDE-EXIT LOWER. To remove it, first, push and release the green lever to the direction of arrow. Then, lift and pull it. Service Manual ML-551x / 651x series 4-125 Samsung Electronics 4. Alignment and Troubleshooting b. Rotate the gear to direction of arrow and check the surface of the Hear roller and Pressure roller. If there is any overheated traces, replace the fuser unit. c. Remove the COVER-UPPER. Check if the thermistor harness is connected properly and the thermistor is defective. 4. Remove the thermistor. Check if the thermistor has curled as shown below. If there is any contamination on the film, clean it. Caution - Be careful not to be scratched or curled the film. Deqrupdo Service Manual ML-551x / 651x series Qrupdo 4-126 Samsung Electronics 4. Alignment and Troubleshooting 5. Check if the center/side lamp is assembled properly. a. To remove the COVER-DUPELX, Remove 1 screw. Lift up the COVER-DUPLEX PATH to the direction of arrow slightly. b. Release the both hooks with the tweezers or (-) driver. c. Check if the lamp harness and harness are connected properly. (white-white , color-color) Service Manual ML-551x / 651x series 4-127 Samsung Electronics 4. Alignment and Troubleshooting * Reassemble the fuser unit. Turn the machine off then on. If the problem persists, go to the next step. 6. Check if the thermistor connector on the engine board is connected properly. 7. Check if the FDB connector is connected properly. 8. If there is no problem, upgrade the latest firmware. Service Manual ML-551x / 651x series 4-128 Samsung Electronics 4. Alignment and Troubleshooting Code U1-2340 Error message Fuser Unit Failure: #U1-2340. Turn off then on Symptom / Cause The overheat error has occurred. Troubleshooting method 1. Check if the fuser unit is installed properly. Turn the machine off then on. 2. Remove the fuser unit after removing 4 screws. 3. Check if the fuser unit is overheated. a. Remove the GUIDE-EXIT LOWER. To remove it, first, push and release the green lever to the direction of arrow. Then, lift and pull it. Service Manual ML-551x / 651x series 4-129 Samsung Electronics 4. Alignment and Troubleshooting b. Rotate the gear to direction of arrow and check the surface of the Hear roller and Pressure roller. If there is any overheated traces, replace the fuser unit. c. Remove the COVER-UPPER. Check if the thermistor harness is connected properly and the thermistor is defective. 4. Remove the thermistor. Check if the thermistor has curled as shown below. If there is any contamination on the film, clean it. Caution - Be careful not to be scratched or curled the film. Deqrupdo Service Manual ML-551x / 651x series Qrupdo 4-130 Samsung Electronics 4. Alignment and Troubleshooting 6. Measure the thermostat resistance. Check if the thermostat is opened. Although the thermostat is opened, check the following steps. And then replace the fuser unit. 7. Remove the FDB cover. Check if the FDB Triac is short. Check the resistance among 3 legs of both transistors. If it is short, replace the FDB. 8. If there is no problem for above steps, repalce the FDB, engine board step by step. If the fuser unit is defective, replace it. Service Manual ML-551x / 651x series 4-131 Samsung Electronics 4. Alignment and Troubleshooting Code U2-1111 Error message LSU Unit Failure: #U2-1111. Turn off then on Symptom / Cause LSU motor does not work normally. 1. Harness connection error. 2. LSU is defective. 3. Main board is defective. Troubleshooting method Check the followings. 1. Execute the LSU motor test in EDC mode. Check LSU motor operation sound. 2. If there is no sound, remove the right cover. Check if the C9 or C10 connector is connected properly (Picture-ᐭ). 3. It it is OK, remove the top cover. Check if the LSU connector is connected properly. (Picture-ᐮ). 4. Check if the LSU harness is defective. (Picture-ᐯ) 5. Reconnect the LSU harness and then execute the LSU motor test again. 6. Replace the LSU. 7. If the problem persists, replace the main board. 1 3 3 2 Service Manual ML-551x / 651x series 4-132 3 Samsung Electronics 4. Alignment and Troubleshooting Code U2-1113 Error message LSU Unit Failure: #U2-1113. Turn off then on Symptom / Cause LSU LD(Laser Beam Detect) signal is abnormal. 1. Harness connection error. 2. LSU is defective. 3. Main board is defective. 4. Engine board is defective. Troubleshooting method 1. Check if the C9 or C10 connector on the main board is connected properly. 2. Check if the LSU harness is defective. 3. Check if the LSU connector is connected properly. Reconnect it. 4. Turn the machine off then on. 5. If the problem persists, replace the LSU. 6. If the problem persists after replacing the LSU, remove the main board. 7. If the problem persists after replacing the main board, remove the engine board. 8. If you have the DVM, measure the voltage level for LD optical power control before step 5. If it is normal, the value is between 0.6V~2.0V. If the value is less than 0.5V, check the FFC cable between engine and main board. Replace the FFC cable. 3 1 3 2 4 Service Manual ML-551x / 651x series 4-133 Samsung Electronics