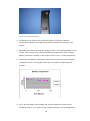
1
Dealer Service Manual
Maintenance and repair Instructions
Wisper Electric Bicycles
March 2011 1st edition
©Copyright 2010 Wisper Ltd
1
Contents
1
Section 2: Overview of Wisper models and key features / differences ........................................... 5
2 Section 3: Description of main electrical system control components ............................................ 6
2.1
Throttle ..................................................................................................................................... 7
2.2
Handlebar display types and functions: .................................................................................. 11
2.2.1 Battery charge indicator status lights housed within the throttle assembly on early
model bikes................................................................................................................................... 11
2.2.2 Separate battery charge status indicator unit mounted on the handlebar (early
806 models) .................................................................................................................................. 11
2.2.3 Hi Lo selector switch fitted to late 2008 and 2009 model bikes to control level of
power assistance (20% and 80%). ................................................................................................ 12
2.2.4
LED type display fitted to 2010 models . ......................................................................... 12
2.2.5
LCD display fitted to Alpino bikes.................................................................................... 12
2.3
De restrictor button ................................................................................................................ 13
2.4
Brake cut outs ......................................................................................................................... 15
2.5
Pedelec sensors ....................................................................................................................... 17
2.6
Controllers............................................................................................................................... 19
3
Motors............................................................................................................................................ 21
4
Batteries ......................................................................................................................................... 26
4.1
Battery fuses ........................................................................................................................... 29
4.2
Battery change procedure ...................................................................................................... 32
4.3
Battery fault finding procedure .............................................................................................. 33
4.3.1
No power to bike.............................................................................................................. 33
4.3.2
Battery will not charge ..................................................................................................... 34
4.3.3
Low range or cutting out .................................................................................................. 35
5
Battery Chargers ............................................................................................................................ 38
6
Logical Fault finding procedures on bikes fitted with Bafang motor system (flow chart) ............. 40
6.1
Top level fault finding ............................................................................................................. 41
6.2
Detailed fault finding procedure: ............................................................................................ 43
7 Fault finding procedures on Alpino model bikes fitted with Dapush motor system and LCD
diagnostics display ................................................................................................................................ 46
8
LED Front lights .............................................................................................................................. 47
2
9
Removing and replacing motor wheels from the bike for servicing .............................................. 48
9.1
Non Alpino/XC models ............................................................................................................ 48
9.2
Alpino/XC models ................................................................................................................... 51
10 Servicing of electrical connections ................................................................................................. 52
10.1
Maintenance of motor Connections: .................................................................................... 52
10.2
Removing 8 pin connectors .................................................................................................. 53
11 The green de restrictor button ...................................................................................................... 55
12 Braking system components .......................................................................................................... 56
13 Pre delivery inspection (PDI) and 300 mile service procedures .................................................... 57
14 Identifying and ordering spare parts ............................................................................................. 60
15 Frequently asked questions (FAQs) ............................................................................................... 61
16 Glossary .......................................................................................................................................... 65
17 Training .......................................................................................................................................... 67
18 Annexe 1: Chart of Model variations and identifying features ..................................................... 68
19 Annexe 2: Wiring diagrams ............................................................................................................ 73
19.1
2009 model 705Se, 905Se Sport, City and City S .................................................................. 73
19.2
2009 model 705 and 905 eco ............................................................................................... 74
19.3
2009 model 705 and 905 Front Connector Box .................................................................... 75
19.4
2010 model 805fe ................................................................................................................. 76
19.5
2010 model 806 Alpino ......................................................................................................... 77
19.6
2010 model 905eco .............................................................................................................. 78
19.7
2010 Model 706 Alpino and 906 Alpino ............................................................................... 79
20 Annexe 3: Torque settings. ............................................................................................................ 80
21 Annexe 4: Factors affecting range ................................................................................................. 81
3
Section 1: Scope
1. This manual covers the fault finding procedures, maintenance and repair of all variants
of Wisper bikes produced during the period 2008 to 2010 including 705, 805, 905, 706,
806 and 906 models.
2. It is intended to be used by authorised Wisper bike dealers to assist with the
maintenance and repair of Wisper electric bikes particularly the electrical aspects of
the bikes. It does not cover aspects of routine maintenance which would be similar to
those for a non-electric bike such as adjustment of brakes, gears etc. These aspects are
covered in the Wisper user manuals and in other standard bicycle publications.
3. It does not cover operating instructions that are covered in the Wisper user manuals
and hence this manual must be used in conjunction with the relevant user manual.
4.
Suitably qualified technicians holding recognised cycle industry training qualifications
should conduct all repairs. Suggestions for suitable training are included in section 18
of this manual. If in doubt contact the Wisper Service department.
4
1
Section 2: Overview of Wisper models and key features / differences
1. The key model identifying features are listed in annexe 1 to this manual to assist
with identifying model variants and associated repair procedures described later in
the manual. This information also can be used for parts ordering purposes (see
section 16 for further details on parts ordering).
2. The key distinguishing features amongst the models are battery type, operating
voltage, front connector box (fcb) type (either 3 hole or 5 hole if fitted), hi lo box
or handlebar display if fitted, and wheel motor / rim type.
3. It is strongly recommended that the user of this manual checks any bike presented
for service against this information in order to ensure the correct procedures and
parts are used.
4. NB: The information in the annexe does not cover the complete specification for
the bike but provides enough detail to identify the model type.
5. NB: If bikes are presented for service that do not match the criteria in the annexe
please contact Wisper service department quoting the frame number for advice
and confirmation that it is a genuine Wisper bike.
5
2
Section 3: Description of main electrical system control components
1. This section describes the main electrical system control components (excluding
battery and motor) used in Wisper bikes including throttle, handlebar display types
and functions, de restrictor button, brake cut outs, pedelec sensors, controllers,
followed by simple procedures for testing individual components (off the bike) and
correct installation arrangements.
2. The image below shows a typical set of electrical components for a 2010 905
model bike and generic wiring configuration. Further wiring diagrams are included
in Annexe 2 of this manual:
6
2.1 Throttle
1. Wisper throttles are all of the Hall effect type with an output (control) voltage ranging
from 0 to 5 volts.
2. Depending on the age of the bike and operating mode selected by the user throttles
can either work independently of the pedelec function (i.e. work without the rider
turning the pedals) or may only work in pedelec work which requires the rider to be
pedalling. This aspect is covered further in the user manuals and in the fault finding
procedure section of this manual.
3. Furthermore in 2010 model bikes the independent use of the throttle is limited to
4mph (6 kph) (walk along mode). These functions are controlled by the connection or
disconnection of the 2 single purple wires at the controller located below the battery.
Bikes will normally be supplied set up to meet the requirements of national legislation
and any modifications may render the bike illegal for use on public roads.
4. Throttles can either have a full-length cable running back to the control box or on the
newer models a short cable connecting into the front connector box (fcb).
5. Throttles with a long cable incorporate a red on / off latching push switch and can
have either 3 separate wiring connectors or one 6-way connector.
6. Short cable throttles utilise one 6 way connector and may include an on off switch
depending on the model year.
7. Throttle twist grips can be full length or half-length and are normally mounted on the
RHS handlebar. On Alpino models they are mounted on the LHS and cannot be
interchanged with RHS throttles.
7
8. Typical throttles are shown below:
Early type throttle
Used on late 2008 model bikes
2009 onwards, later models without the red on /off switch or battery indicators
8
Alpino models with L.H. throttle
9. Testing (throttle taken off the bike) is limited to the red on / off switch in throttles
equipped with this feature. To test this switch un plug the wire(s) leading from the
throttle at either the fcb or controller. Connect a multimeter set to a continuity or
Ohms range across the two terminals connected to the brown and yellow two pin
connector if equipped with 3 connectors or the first two pins of the 6 way connector
(brown and white). The meter should show 0 ohms or infinity when operating the
switch on and off. Failure of this switch will disable the bike.
10. No other testing of throttles apart from checking connections is practical without more
specialised equipment and they should be replaced with genuine Wisper parts if found
faulty following correct diagnosis procedures in the fault finding sections 7 and 8.
11. However as most problems are caused by connections these should always be checked
carefully first before suspecting a faulty component. The image below show a typical
connection problem normally caused by cables being strained or corrosion caused by
9
extreme weather conditions. The brown wire pin insert has been pushed back out of
the connector body resulting in no power to the bike.
12. Extreme care should be taken when installing or adjusting throttles to ensure the
spring return mechanism is not impaired. The throttle must close smoothly and quickly
when released. For full length throttles ensure that the end the handlebar is not
pressing against the inside of the throttle operating sleeve and that there are no burs
on the handlebar. If the throttle is pressing on the end of the handlebar simply slacken
the throttle clamping screw and slide the throttle 2-3 mm towards the end of the
handlebar to provide clearance.
13. For half-length throttles ensure the plastic top hat spacer is properly located between
the ½ grip and the throttle. See image below:
10
2.2 Handlebar display types and functions:
Wisper bikes use five types of handlebar display:
2.2.1
Battery charge indicator status lights housed within the throttle assembly on early
model bikes
2.2.2
Separate battery charge status indicator unit mounted on the handlebar (early 806
models)
11
2.2.3
Hi Lo selector switch fitted to late 2008 and 2009 model bikes to control level of
power assistance (20% and 80%).
Early bikes default to a low power setting on start up but later bikes default to a high
power setting. Failure of the switch will not normally disable the bike and the bike will
default to a maximum power mode.
2.2.4 LED type display fitted to 2010 models.
This type of display shows the battery charge status and also incorporates the power level
assistance selector switch (3 levels), the light switch and the main on off switch.
2.2.5 LCD display fitted to Alpino bikes
An LCD display is fitted to Alpino model bikes incorporating the main on off switch, power
assistance level selection (5 levels), battery charge status, plus power usage, speed and
time information. This display also incorporates built in diagnostics to assist with
faultfinding and this should be used in accordance with the instructions in the user manual
and later in section 8 of this manual.
12
NB: The light switch incorporated in this unit controls the display backlight and not the
main bike lists
LCD display fitted to Alpino models
No testing of displays apart from checking connections as described in the throttle section
above is practical without more specialised equipment and they should be replaced with
genuine Wisper parts if found faulty following correct diagnosis procedures in the fault
finding sections 7 and 8.
2.3 De restrict button
1. The green de restrict button is fitted to the left hand side of the handlebars and the
wires connected into the front connector box (fcb)
13
2. The green button works as follows:
3. When the button is pushed and latched ”in” the bike is restricted to the statutory
maximum speed of 15.5mph (25kph) above which power will be cut to the motor to
limit the speed.
4. When the button is pushed again and the button released the bike is derestricted and
should only be used off road in that position. This allows for an approximate increase
of 10% in the speed limit before the power is cut to the motor. It does not provide
more power but simply controls the speed at which power is cut.
5. Each repeated push changes the operating mode from one mode to the other.
6. De restriction is not possible on some eco models fitted with smaller capacity batteries
due to the higher battery usage expected and consequent effect on range when used
in de restrict mode.
7. Further information on fitting is included in section 12.
8. The green button can be tested in a similar way to the throttle mounted on / off
switch. To test this switch un plug the wire leading from the switch at either the fcb or
controller and connect a multimeter set to a continuity range across the two terminals
connected to two pin connector. The meter should show 0 ohms or infinity when
operating the switch on and off. Failure of this switch will not disable the bike and the
bike will default to an un-restricted mode.
14
2.4 Brake cut outs
1. These switches are installed within the brake levers on all Wisper bikes to comply
with legal requirements and to protect the motor. Power is cut to the motor when
brakes are applied.
2. The images below show typical levers and wiring arrangements.
2008 onwards using a 3-wire type switch
2010 model bikes using a 2-wire switch
3. Two types of switches are fitted either incorporating a simple on off switch with a
two-wire connection or a Hall effect transducer indicated by 3 wires at the
connector.
4. To test a two wire type switch un plug the wire leading from the switch at either
the fcb or controller and connect a multimeter set to a continuity range across the
two terminals connected to two-pin connector. The meter should show 0 ohms
when the brake lever is operated (pulled in) or infinity when in the normal riding
mode.
15
No (off bike) testing of the 3 wire type apart from checking connections as
described in the throttle section above is practical without more specialised
equipment and they should be replaced with genuine Wisper parts if found faulty
following correct diagnosis procedures in the fault finding sections 7 and 8.
5. Failure of either type into an open circuit (infinity) state will not disable the bike
but will render it unsafe to ride and the faulty component must be replaced with a
genuine Wisper part.
6. Failure of either type into a short circuit (0 ohms) state will disable the bike and
the faulty component must be replaced with a genuine Wisper part.
7. When testing the brake cut out switches installed on or off the bike the sensitivity
should be checked as overly sensitive brake cut out switches can lead to erratic
bike operation and intermittent loss of power. It should be possible to pull the
lever sufficiently to leave a gap of 2-3 mm at the brake cable anchoring point
between the lever blade and the housing before the switch is activated. See image
below (the gap has been exaggerated for illustrative purposes):
16
2.5 Pedelec sensors
1. These sensors are fitted to the bottom bracket (axle and frame) and control the
operation in pedelec mode by detecting the rotation of the pedal cranks. A typical
sensor set up is shown below:
2. The assembly comprises a disc containing 5 or 6 magnets that is fitted to the
bottom bracket axle and rotates with the pedal cranks, and a fixed sensor fitted to
the frame.
3. The sensor must be adjusted such that there is a 1-2 mm air gap between the tip
of the sensor and the magnet disc and that the sensor tip is on the same radius as
the magnets. If the gap is too large there will be no power in pedelec mode (and
possibly no power in throttle mode depending on the way the operating mode for
the throttle is configured) or operation of the bike will be erratic. Care should be
taken to ensure the sensor bracket is not bent or misaligned. Always check the gap
is consistent for a full 360-degree rotation of the pedal cranks.
4. When replacing the disc care should be taken to observe the direction of rotation
arrows marked on the disc. Ensure all 5 or 6 magnets are in place in the disc. There
may be some spare holes in the disc on early bikes, which is quite normal.
17
As this disc is a friction fit on the bottom bracket axle it can be easily moved along
the axle to achieve the correct air gap above but care must be taken not to allow
lubricants or similar fluids to contact the disc as this could cause slippage of the
disc on the shaft.
5. No testing of the sensor off the bike apart from checking connections as described
in the throttle section above is practical without more specialised equipment and
they should be replaced with genuine Wisper parts if found faulty following
correct diagnosis procedures in the fault finding sections 7 and 8. The sensors are
however vulnerable to damage and corrosion being in an exposed position and a
careful visual check should be made for these potential problems.
6. When ordering spare sensors ensure that the correct male or female wiring
connector is specified, as there are variations amongst models.
18
2.6
Controllers
1. All Wisper bikes utilise a controller, which incorporates all of the inputs from the
above devices and the battery and provides a regulated DC power output to the
motor. Three typical controllers are shown below:
Early 2008 model controller with separate motor connectors
2008-2009 type controller with multi-pin motor connector
2010 model with 3 and 5 pin connector
19
2. The controller is located behind the triangular plate located underneath the
battery cradle. It is also accessible from beneath the bike by removing the tunnel
shaped cover (see section 10 and 11 for details of removing the cover).
3. Apart from adjustment of the maximum speed on early bike models no adjustment
or testing of the controller off the bike apart from checking connections as
described in the throttle section above and in section 11 is practical without more
specialised equipment and they should be replaced with genuine Wisper parts if
found faulty following correct diagnosis procedures in the fault finding sections 7
and 8.
4. Special care must be taken with older style controllers on 2008 models to make a
note of the connector arrangements before disconnecting any leads as some plugs
and sockets can be easily confused with others. The brake lever cut outs and de
restrict switches utilise identical connector and wire colour codes so these
components must be identified and the cables labelled before disconnecting them.
5. On no account connect together any unused plugs and sockets on the controllers
as these are meant to be left disconnected and connecting them will damage the
bike electrical system.
6. In most cases each controller is unique to the model and no attempt should be
made to substitute controllers from one model to another. When ordering spare
controllers always quote the ECN number as shown below along with the
operating voltage and model number.
ECN 0133 type controller for 2010 models
20
3
Motors:
1. Wisper bikes currently use two types of motor fitted in either the front or rear wheel
referred to as the Bafang or Dapu motor type. The Dapu is used in the Alpino range
and the Bafang in all other models.
2. Both are brushless motors with the Bafang motor incorporating Hall effect sensors and
the Dapu motor being of a sensorless design. This results in different wiring
arrangements as shown later in this section.
3. Both motors use internal gearing which is replaceable in the Bafang motor
4. The Bafang motor showing the internal gearing
5. There is no routine servicing required on these motors but a periodic
inspection and re-greasing of the gears should be undertaken if the bike is
used for very high mileages, if any excessive gear noise is evident or water
ingress is suspected.
6. To disassemble the motor first remove the motor connecting plug following
instructions shown in section 15. Then using a standard freewheel extraction
tool, remove the freewheel.
7. This provides access to the 6 side cover screws that should be removed.
21
8. Take off the left hand nut that keeps the entire inner assembly in the hub.
9. Give a sharp tap to the end of the spindle using a mallet or similar to release
the cover from the hub shell and the entire inner with side cover can be
withdrawn. You will then see the gear assembly and the rack inside the hub
shell. These gears can be replaced either as a set of 3 or as a complete
assembly if any damage is visible.
10. Make a note of any shims on the end of the spindle that might fall off inside
the hub shell and make sure you put them back when reassembling.
11. Before reassembly re-lubricate the gears with a specialist grease (see range
from Kluber). Reverse the above procedure when reassembling and tighten
the external axle nut fully to ensure the correct internal positioning of the
gears.
22
12. Due to the need to ensure correct axial alignment of the motor internal
components it is not recommended that the motor hub is replaced
separately to the outer housing built into the wheel but instead a complete
motor assembly should be used.
13. There are no service procedures recommended for the Dapush motor.
Wiring arrangements:
14. The Bafang motor has 8 cables connected to the motor, 3 heavy cables for
the main power connections and 5 lighter cables for the connections to the
Hall effect sensors.
15. The motors have a variety of connector types with some examples shown
here;
23
16. Always ensure the colour codes on the 8 motor cables match the
corresponding colours on the controller connector and that the power
connectors are not swapped with the Hall effect connectors. Regular
maintenance for bikes fitted with an eight way multi-pin connector is
recommended. Further details are included in section 11.
17. Ensure the pin inserts are fully engaged in the male and female parts of the
8-way connector and are properly latched in place. Check the rear of the
connectors for inserts that are not properly installed as shown below. If pins
are found to be in this condition refer to section 11 for repair procedures.
18. The Dapu motor incorporates a 6-way connector with 3 power connectors
and 3 wires providing a speed sensor output. The 6-way connector is
moulded to the cable and is not replaceable.
24
Visual inspection and electrical tests: The following inspection and tests
can be undertaken on wheels fitted with the Bafang motor if a wheel is
suspected as faulty.
19. Check the condition of the wiring where it emerges from the end of the
hollow motor spindle for damage. Carefully remove any rubber end cap from
the spindle and ease the protective spring back down the cable toward the
connector plug. Examine the wiring for typical damage caused by the user
as shown below
20. If damage is evident or the wheel exhibits intermittent type rotation under
power or other intermittent fault check the electrical continuity of the motor
windings via the 3 main power connectors as follows. Using a multimeter on
the lowest Ohms range connect the meter probes between any two of the 3
connectors. A reading close to 0 should be obtained as shown below (0.5
ohms for this motor which is a satisfactory reading). Then repeat the
process using 2 different connectors and finally a third time using a third
combination of two out of three cables. A reading close to zero should be
obtained for each of the 3 possible combinations. Finally test each winding
for a possible short circuit to the metal body of the motor by testing the
continuity between each connector and the motor body in turn. The reading
should be infinity on the meter or indicate open circuit if using a continuity
type tester. A reading close to zero would indicate a fault. See picture below
showing the test procedure. If unsatisfactory readings are obtained or the
cable is damaged then return the wheel to Wisper service for further
investigation.
25
21. With the bike suitably supported of the ground and the power off rotate the
wheel in a forward and backward direction by hand. In the forward direction
there should be little or no resistance. In the backward direction there
should be a small amount of additional resistance resulting from the motor
internal gearing. If excessive resistance is felt in either direction then return
the wheel to Wisper service for further investigation.
22. No testing is possible on the Dapu motor and it should be returned to Wisper
service if found faulty after following the fault finding procedure.
26
4
Batteries
1. Wisper bikes use a variety of battery sizes and capacities the details of
which are shown in Annexe 1. A selection of battery types is shown below:
Early 705 and 805 batteries
Kettle plug type battery from early model 905’s
27
Current 705 and 905 model battery
2. All batteries use Lithium Ion technology and incorporate a battery
management system and LED charge status indicators including a test
button.
3. Batteries are rated at a nominal voltage of 24 or 36 volts depending on the
model. This however is a nominal operating voltage and a fully charged
battery will have a voltage in the region of 27.8 or 41.7 volts respectively.
4. During use the battery voltage will slowly decline from the fully charged
voltage as shown in the graph below (36 volt 14Ah and 8Ah batteries
shown):
5. For a 36 volt battery the voltage will decline towards 30 volts during
discharge and at 31.5 volts the low voltage protection circuit designed to
28
protect the battery from excessive discharge will be activated and cut the
power to the bike.
6. The battery capacity is specified in terms of Amp hours (Ah), which is
calculated by multiplying the average current delivered during discharge by
the time in hours to a fully discharged condition.
7. The batteries are not designed to be serviced but dealers following the
procedure below can undertake fault diagnosis and limited testing and
repair. The battery cases should not be opened as this will void the warranty
and if a fault is suspected following the correct diagnosis procedures in the fault
finding sections 7 and 8 they should be returned to the Wisper service department for
further investigation.
8. For later bikes the 8Ah and 14Ah batteries can be interchanged following the
procedure shown later in this section but a charger of the correct size must be
provided if changing from a 14Ah to 8Ah battery.
9. Charging procedures: charging procedures are covered in the user manuals
and particular note must be taken by dealers of the need to charge batteries
on a regular basis if held in stock for extended periods to avoid deterioration
in storage. A fully depleted battery left for longer than two weeks can incur
irreparable cell damage which will not be covered under warranty. It is the Dealer’s
responsibility to maintain the battery as described in the user manual
29
4.1 Battery fuses
1. Most Wisper batteries contain two fuses. One of these is shown in the image
below:
2. The fuse fitted at the top of the battery next to the key switch is the charging fuse
and is rated at 5 amps.
3. The fuse fitted at the bottom of the battery on the opposite side to the key switch
(not shown in the above picture is the main output fuse and is rated at 20 amps.
4. On no account should any other size or type of fuse be used.
5. For older style batteries using a kettle plug connector on the side only one external
fuse is fitted and depending on the battery age this can be either the charging fuse
or the main output fuse. If in doubt please contact Wisper Service department
before proceeding further.
6. For 806 and 805Fe batteries only one external fuse is fitted (a 15A output fuse)
located as shown in the image below (L.H. top corner).
30
7. For older style Aluminium case batteries fitted to early 705 models the fuse fitted
to the top of the battery is the charging fuse and the bottom fuse is the main
output fuse.
8. Fuses should be checked as a matter of routine when servicing the bike or when
diagnosing problems. To remove the fuse, use a Philips No.2 (not Pozidrive)
screwdriver to unscrew the fuse holder cap and remove the fuse. Visually inspect
the fuse for any signs of burning (black soot like deposits) or damage to the glass
or end cap fittings. Replace or clean if necessary with a fuse of the correct rating.
9. Fuses can be tested using a multimeter set to the Ohms or continuity range as
shown in the picture below
10. A reading of close to 0 Ohms should be obtained on the meter. If higher this
indicates a poor contact or blown fuse which should be replaced using a genuine
Wisper replacement fuse only of the correct capacity. Check the end caps are
secure on the fuse before refitting and if in doubt replace the fuse.
11. When refitting the fuse take great care not to over tighten the fuse holder cap as
it will be damaged or broken if excess force is used. Only tighten using light
finger pressure.
12. Do not spray any type of cleaning fluid or other fluid into the fuse holder when
refitting the fuses.
31
4.2 Battery change procedure
1. On later 700 and 900 series bikes the 8Ah and 14 Ah batteries can be interchanged
following the procedure shown below but a charger of the correct size must be
provided if changing from a 14Ah to 8Ah battery.
2. To change the battery, remove the battery from the bike following the procedures
shown in the user manual. Then remove the battery support rail complete with
plastic lock pin retaining plate from the lower cradle by unscrewing the single
countersunk screw located at the bottom of the support rail and the intermediate
locating screw using a Philips No. 2 screwdriver.
3. Remove the plastic lock pin retaining plate from the top of the rail by unscrewing
the single countersunk screw located at the top of the support rail using a Philips
No.2 screwdriver and fit to a replacement rail with the correct length for the new
battery. Replacement rails are available from Wisper service.
4. Refit the rail assembly by reversing the above steps and check the new battery fits
securely into the lower cradle and engages correctly with the battery connection
power pins. Check the lock pin engages in the hole in the retaining plate without
undue force being applied to the key and that power is being provided to the bike.
5. On earlier bikes fitted with kettle plug type batteries the battery case are identical
irrespective of capacity but the polarity of the output connection can vary
between batteries. Therefore the polarity of the new battery must be checked for
compatibility with the existing battery and bike wiring before changing the battery.
Failure to observe this will result in severe damage to the bike electrical system.
6. Warning – Never connect a mains lead directly to the kettle plug socket on the
battery.
32
4.3 Battery fault finding procedure
Obtain a description of the problem from the customer and depending on this information and
any observations made when checking the bike choose from one of the 3 main headings
below:
4.3.1
No power to bike
If there is no power to the bike then go to the purple flow chart below and follow the steps.
4.3.2
Battery will not charge
If the battery will not charge then go to the blue flow chart below and follow the steps
4.3.3
Low range or cutting out
If the battery is giving a low range or cutting out then go to the orange flow chart below and
follow the steps.
No power to bike
Step 1: Check status of battery LEDS and
that battery is correctly seated in bike. If
only a red LED is showing on battery go to
step 3
Step 2: Check key switch by turning key on
and off several times and check if there is
now power to bike. Return battery to
Wisper service if key switch is intermittent
Step 3; Remove battery and measure
output voltage with key switch in on
position by connecting a meter across the
output terminals
Step 4; Depending on
33voltage measured
follow one of steps below
Step 6; Measure voltage again. If still 0 volts
or < 30 volts then return battery to Wisper
Step 7: If between 30-40 volts try battery
again on bike. If problem resolved recharge
battery until green light shows on charger
and test battery voltage (should be approx
41.7). If problem is not resolved or reading
is not approx 41.7 then continue with main
bike fault finding procedure in section 7 or
8 of manual or return battery to Wisper.
Step 8; If > 40 volts try battery again on
bike. If problem resolved there is no need
to recharge the battery. If problem is not
resolved then continue with bike fault
finding procedure in section 7 or 8.
Battery will not charge
Step 1: Measure output voltage or check
status of battery LEDS. If voltage is approx
41.7 volts or all 4 green LEDS are visible
than battery is fully charged and charger
LED will go straight to green when the
charger is connected. If not fully charged
then connect battery to a charger of known
performance if available and observe
behaviour of charger LEDs and fan for
correct charging cycle behaviour
34
Step 2: If battery charges correctly then
test customers battery charger as
described in the main manual and replace
charger if faulty
Step 3: If a charger of known performance
is not available then test customer’s
charger as described in the main manual to
ensure it is not the cause of the problem
and then try charging the battery
Step 4: If the battery will still not charge
then remove the fuse from the fuse holder
at the top of the battery and test as
described in section 5 of the manual. If
faulty replace with correct 5 or 10 amp fuse
and try charging again.
Step 5; If problem persists then return the
battery and charger to Wisper service for
further investigation.
Low range or cutting out
Step 1: Obtain description of problem and
history from customer.
35
Step 2: Check external factors affecting
range from the annexe of this manual and
discuss with the customer if these are likely
to be the cause of the low range.
Step 3: Discuss with the customer how
often the battery has been charged and
what is the maximum time it has been left
between recharges. If left for more than 2
months then the battery is likely to have
incurred damage that will not be covered
by the warranty.
Step 4; Measure output voltage of the
battery as received for reference purpose.
If less than 30 volts then return battery to
Wisper for further investigation
Step 5; Check bike overall condition (if
available) for items described in the annexe
and correct / adjust as necessary if any
faults found.
Step 6; Check customers battery charger is
delivering the correct voltage as described
in the main section of the manual. If not
then repair or replace and work on
assumption that the charger is the likely
cause of the problem
36
Step 7: Charge the battery using either the
customer’s charger if considered
serviceable or a charger of known
performance. When fully charged measure
the voltage and check it is approx 41.7
volts.
Step 8; If greater than 41 volts then road
test the bike / battery and discuss
performance and other findings with
customer
Step 9; If less than 41.0 volts when fully
charged then consider trying a second
charger.
Step 10; If still less than 4`1.0 volts or any
doubts remain as to the range of the
battery then return the battery to Wisper
service for a full capacity check as this is the
only way to accurately quantify the
capacity. If found to be less than 75% of the
rated capacity and it is less than two years
old and has been charged on a regular basis
as described in the user manual it will be
replaced under warranty
37
5
Battery Chargers
1. Most Wisper bikes utilise a fan-cooled charger rated at 24 or 36 volts and
2, 3 or 4 amp output.
2. General instructions for use of the chargers are included in the user
manuals.
3. Only use the correct charger supplied with the bike and do not substitute
other types or sizes of charger.
4. Do not attempt to use a 36 volt charger on a 24 volt battery or vice
versa.
5. Only use the 4 amp charger (identifiable by a gold label) on 14Ah
batteries. Use of the 4 amp charger on 8 Ah batteries may lead to
serious overheating of the battery resulting in possible damage. If
changing from a 14Ah battery to an 8Ah battery a replacement charger
of the correct size must be provided to the customer on an exchange
basis.
6. Charger faults: If the amber charging light and fan does not remain on
when the battery is put on charge but instead the light goes straight to
green and the fan stops the following items should be checked:
7. Check the battery indicator LEDS to ascertain the charge level of the
battery and also the output voltage using the procedure listed in the
battery fault-finding procedure above. If the battery is fully charged then
the charger LED will exhibit the above characteristics and no further
action is required or the charger should be tested on a depleted battery.
8. If the charger still exhibits this characteristic then With the charger
unplugged from the battery switch on the charger at the mains and at
the switch on the back of the charger. Check that the single red mains
indicator light is illuminated. If not check the fuse in the power supply
lead.
9. If the red light is lit carefully measure the charger output voltage by
using a multimeter on a 200 volt DC range as shown below to measure
the charger output. A reading of approximately 41.7 volts should be
38
obtained for a 36 volt charger. Great care is needed when doing this not
to short out the charger when connecting the test lead probes.
10. If there is no output check the fuse located in the charger that can be
accessed by removing the fuse holder cap locate don the front of the
charger. Check the fuse following the procedures above and replace if
necessary using the correct rated Wisper fuse. Older chargers utilise a 5
amp fuse whereas later chargers use a 10 amp. Always replace with a
similar size rated fuse.
11. If the charger still does not work return to Wisper service for further
checks.
12. Similar charger behaviour can also be displayed if there is a bad
connection where the charger plugs into the battery. Carefully check for
corrosion or looseness at the battery-charging socket particularly on
older style kettle plug batteries. If found please return the battery to
Wisper service for repair.
39
6
Logical Fault finding procedures on bikes fitted with Bafang motor
system (flow chart based)
The flow charts below cover a generic logical fault finding process for Wisper bikes fitted
with the Bafang motor system. Due to the number of models covered by this manual its is
not possible to cover all of the possible combinations of faults for each model variant but
the procedures below should provide a general guide as to how to approach fault finding.
It can also be used as a generic fault finding aid for Alpino bikes but further information
regarding the use of the built in diagnostic capability on Alpino bikes is covered in the next
section and should be used in conjunction with this section of the manual.
When attempting to diagnose faults on the bike first discuss the problem with the
customer to gain an understanding of the background and history. Key questions to ask
the customer are:
Do the power indicator status lights (red light on throttle or on LED handlebar
display) remain lit when the problem occurs?
is the fault intermittent or does it occur after a certain distance?
does the problem occur in throttle or pedelec mode or both modes?
Always consider that it is possible that the bike has more than one fault and this must be
born in mind when fault finding.
Also a fault in the pedelec system on 2008 and 2009 models could also impact on the use
of the throttle depending on the mode in which the bike is set up (throttle dependent or
independent of the pedelec). An apparently faulty throttle could in fact be the result of a
fault in the pedelec system if the bike is in “pedelec dependant” mode (two purple wires at
the controller connected together) as the throttle will not work in this mode if the pedelec
sensor is faulty.
For 2010 bikes the throttle should provide power independently of the pedelec up to
4mph or maximum speed when the two purple wires are connected.
40
6.1 Top level fault finding:
The general order of fault finding should be as shown in the flow chart below:
Step 1: Establish what if any operating
modes the bikes works in
Step 2: If it works in pedelec mode but not
in throttle mode then the problem probably
lies with the throttle or connections
Step 3: If it works in throttle mode but not
in pedelec mode then the pedelec sensor
may be faulty or need adjustment
Step 4: If the bike has no power assistance
then in the following order
Step 5: Check all connections (most
problems are connection related)
Step 6: Check battery output and that it is
correctly installed on bike
Step 7: Check brake cut out switches
Step 8: Check throttle
41
Step 9: Check pedelec sensor
Step 10: Check controller
Step 11; Check Motor
42
6.2 Detailed fault finding procedure:
Ensure the bike is secured in a suitable stand. An ideal arrangement to do this and for most
service activities is to clamp a spare seat post in the seat post tube (using a spare seat post
clamp) and to then invert the bike and place the seat post in a vertical support tube
securely fixed to the workshop floor as shown in the image in section 10. This allows easy
access to the bike controller and motor connectors. (Ensure the battery is locked to bike
before attempting to do this and safe manual handling procedures are followed along with
an appropriate risk assessment).
If there is no power assistance at all to the bike the following procedure should be
followed;
Step 1; Check all connections at the fcb, the controller and the motor cable connector.
Check that all connectors are fully inserted into their opposite half and latched, that
no wires have become detached from the connector pin inserts, and that no pin
inserts are protruding from the back of the connectors. See images in section 3 for
typical problems. Rectify any faults found and try the bike again. If the problem is
cured refit all cover plates ensuring no wires are trapped and road test the bike.
Step 2: Check condition of all cables for cuts, chafes and other external damage.
Particular attention needs to be given to the motor cable where it emerges from the
motor axle for any damage caused. Replace any components with damaged cables. Try
the bike again. If the problem is cured refit all cover plates ensuring no wires are
trapped and road test the bike.
Step 3: If not resolved then remove battery from the bike and check the battery has
power at the output terminals by testing with a millimetre as described in section 5.
Voltage must be above 36 volts in order to continue fault finding. If not then follow
process in section 5
Step 8: If the throttle is now working then suspect one or more of the brake lever cut
out switches is faulty. If possible check the switches as described in section 3 to identify
the faulty component. If not Refit one switches connector to the wiring loom in its
original position and tests the bike again. If not working then the first switch is faulty
and should be replaced. If still working then fit the second switch and test again. If the
bike now no longer works the second switch is faulty and should be replaced. Reconnect
all wires and re fit all cover plates ensuring no wires are trapped and road test the bike.
43
Step 9: If no apparent faults are found with the brake switches and the bike is still not
working then disconnect the two switches again. Then rotate the pedal cranks through
one complete turn (simulating peddle mode). Does the motor operate? If the motor is
now working it suggests a throttle fault and a replacement throttle should be fitted if no
faults can be found with the connections to the throttle.
Step 10: If no response in peddles mode then check alignment of peddle sensor as
described in section 3. Adjust alignment and gap if necessary. Check cable is not
damaged to the sensor and check the wiring connections again for the sensor where it
connects to the controller (see section 3 for details)
Step 11: Recheck operation in peeled mode. If the bike is now working reconnect all
wires and re fit all cover plates ensuring no wires are trapped and road test the bike.
Step 12: If not working replace the pedelec sensor. If the bike is now working reconnect
all wires and re fit all cover plates ensuring no wires are trapped and road test the bike.
Step 13: If the bike is still not working then recheck the controller connections. Contact
Wisper service and obtain a replacement controller quoting ECN number from old unit
Step 14: If the bike is still not working then re check motor connections and cable and
check the motor as described in section 4. If a fault is suspected then discuss problem
with Wisper service and obtain a replacement wheel
Step 15: On completion of repair reconnect all wires including the brake cut out
switches and purple wires if appropriate and re fit all cover plates ensuring no wires are
trapped and road test the bike.
44
If no status lights are visible on the handlebar controls then follow the procedure below:
Step 16: Check the battery output voltage at the bottom or side mounted terminals by
testing with a millimetre as described in section 5. Voltage must be above 36 volts in
order to continue fault finding. If not then follow process in section 5 of the manual
Step 17: Check the battery key switch can turn fully to the on position and the locking
pin is not being restricted in any way from fully engaging in the key switch locking plate
fitted to the bike.
Step 18: With the key switch in the fully on position check the voltage at the white twopin connector that connects the battery supply to the controller. The voltage should be
the same as measured directly on the battery above. If not then recheck the battery
mounting arrangements and the cables from the fixed battering connecting terminals
on the bike or the flying lead in the case of kettle plug type batteries.
Step 19: If fitted with an old style throttle that has a red push button on off switch then
disconnect the throttle at the fcb or controller and test the red on off switch as
described in section 3. If faulty fit a replacement throttle
Step 20: If fitted with a LED handlebar mounted display incorporating the on off switch
then fit a replacement unit as no testing is possible on these units.
Step 21: If still no power to the bike then recheck the controller connections. Contact
Wisper service and obtain a replacement controller quoting ECN number from old unit.
Step 22: If the bike is now working then reconnect all wires including the brake cut out
switches and purple wires if appropriate and re fit all cover plates ensuring no wires are
trapped and road test the bike. If the status indicators are now working but the bike is
not working then continue the fault finding using the flow chart above from step 6
45
7
Fault finding procedures on Alpino model bikes fitted with Dapush
motor system and LCD diagnostics display
A table containing simple fault finding procedures is included in the user manual and this
should be consulted in the first instance if problems are suspected.
In addition the Alpino range of bikes incorporate a built in diagnostic fault finding system
and details on how to interpret the fault codes on the LCD display are shown in the table
below;
LCD fault
code
Likely cause
02
Often caused by inappropriate use of throttle and riding
technique. If problem persists return wheel to Wisper service to
check for short circuits in motor connections or motor internal
windings.
03
Motor cable connection may be loose. Check that motor is
correctly plugged into the wiring harness at the wheel and
connections at the controller are not loose or corroded.
04
Battery voltage is too low. Check battery output as described in
section 5
05
Brake lever cut out function problem. Check connections in FCB
initially. Then disconnect both brake levers and then reconnect
each brake lever in turn until fault repeats itself. Then replace
faulty lever with new part.
07
The throttle is faulty. Check connections in FCB and then replace
throttle with new part if problem persists
08
Controller faulty. Check connections at controller housing for
tightness and corrosion. If problem persists replace controller
09
Battery output voltage is too high. Measure voltage and refer to
Wisper service for advice.
In most cases the information above should provide a solution to most problems but if
problems still persist then follow the generic fault finding procedure listed above in section
7.
46
8
LED Front lights
1. Some models are fitted with LED headlamps wired to the bike electrical system.
2. On Alpino models the lights are automatic and incorporate a light sensor to switch the
light on and off depending on ambient light conditions. Further details on operation
are included in the user manual.
3. On non-Alpino models the light is controlled via a switch on the LED handlebar display
unit (see section 4).
4. The lights are not interchangeable and care should be taken when ordering
replacements to obtain the correct type. The Alpino type is easily identified by the
presence of a small hole on the underside of the lamp body where the sensor is
located.
5. For these lights care should be taken to ensure the correct polarity is observed when
connecting the wires. The black cable with the white tracer should go to the terminal
marked + on the light which is on the left hand side when sitting on the bike facing
forward.
+ (Positive) terminal is in bottom R H corner in the above view
6. If the Alpino light has been connected with the wrong polarity it is likely that the
auxiliary light controller located next to the main controller may have been damaged.
Spares of these are available from Wisper support.
47
9
Removing and replacing motor wheels from the bike for servicing
9.1 Non Alpino models;
1. To remove the rear wheel turn the bike over and ensure the bike is secure in a suitable
stand or resting on raised blocks on the handlebars to ensure no damage occurs to the
handlebar controls. An ideal arrangement to do this and for most service activities is to
clamp a spare seat post in the seat post tube (using a spare seat post clamp) and to
then invert the bike and place the seat post in a vertical support tube securely fixed to
the workshop floor as shown in the image below. This allows easy access to the bike
controller and motor connectors. (Ensure the battery is locked to bike before
attempting to do this and safe manual handling procedures are followed along with an
appropriate risk assessment).
2. From the underside remove the tunnel shaped cover by unscrewing the 4 Allen
screws holding the bottom cover in place (it is the tunnel shaped plate, just
behind the pedal crank axle – on the bottom of the bike, directly under the
battery/controller housing).
3. You now have access to the high current connections of your bike.
48
4. Unplug the eight-pin motor cable plug or the 3 separate motor connectors
and one 5-pin connector.
5. Note: depress the end of the release lever to unlock the multi-pin plug so
you can disconnect it.
6. Unclip the motor cable from the chain stays of the frame by carefully cutting the tie.
7. Remove the derailleur protector frame by undoing the two screws holding it to the
frame drop out. Do not attempt to remove the derailleur itself from the drop out.
8. Remove the plastic covers from the axle ends. Slide the cover fitted to the RHS of the
axle down the motor cable to give access to the axle
9. Slacken the axle nuts using a 18mm spanner. Then using finger pressure only unscrew
the RHS nut as far as possible along the axle taking care not to damage the motor
cable where it emerges from the axle end. This will provide enough clearance to lift
49
the wheel complete with motor cable clear of the drop-outs and derailleur gear
changer. Ensure the motor cable is not snagged and lift the wheel clear of the bike.
10. To reinstall reverse the above procedure tightening the nuts to the torque setting
shown in Annexe 3.
11. Re clip the motor cable in position with new cable ties ensuring it cannot rub against
the rear tyre and reconnect the motor connector(s) correctly. Check the adjustment of
the rear brake pads and test the rear brake before test riding the bike.
50
9.2 Alpino models
1. Turn the bike upside down and secure it in a safe working position as per the first
step in the above procedure.
2. Unplug the multi-pin motor cable connector located on the LHS front fork
stanchion and carefully cut any tie wraps securing the cable.
3. Remove the plastic covers from the axle ends and slacken the nuts using a 19mm
spanner.
4. Remove the front wheel taking are not to displace the front disc pads from the
brake calliper.
5. Reverse the above steps to reassemble and tighten the axle nuts to the torque
shown in annexe 4. Ensure the brake pads are correctly located in the brake
calliper and renew any cable ties removed ensuring the cable cannot rub against
the front tyre and reconnect the motor connector(s) correctly.
6. Test the front brake before test riding the bike.
51
10 Servicing of electrical connections
10.1 Maintenance of motor Connections:
1. Check the high current plug/socket connections for your motor and powerinput every 6 months and remove any corrosion.
2. To do this, turn the bike upside-down and remove the 4 bolts holding the
bottom plate in place (it is the curved plate, just behind the pedal crank axle
– on the bottom of the bike, directly under the battery/controller housing).
3. You now have access to the high current connections of your bike.
4. Unplug both the eight pin motor cable plug and the two pin battery input
plug.
5. Note: depress the end of the release lever to unlock the plug so you can
disconnect it.
52
6. Spray a little of contact improver (WD-40, CRC 2-26, etc) into both sockets.
Check the 8 pins of the motor cable plug are well aligned and the yellow
inserts are in place in both sides of the connector (unlike this example which
has one missing). Straighten any that are off line or depressed into the
socket too far (very carefully pull these up with long-nosed pliers).
7. Now reconnect the plugs until they click. Connect/Disconnect the plugs
several times to help scrape off any oxide on the terminals (you don’t need
to fully separate the plug from the socket, just side it half off and then back
on again several times).
8. Give the 8pin motor cable plug one final check to make sure all the pins are
in line, then reconnect and lay both cables into their original positions and
replace the Bottom plate.
9. Important: repeat this process every 6 months to avoid socket burnout.
10. Later model bikes use 3 separate bullet type connectors for the high power
motor connections and these should be checked and cleaned by
Connecting/Disconnecting the plugs several times to help scrape off any
oxide on the terminals followed by Spraying a little of contact improver (WD40, CRC 2-26, etc) into the 3 separate sockets.
53
10.2 Removing 8 pin connectors
1. To remove the connector first remove the yellow insert by carefully
pulling it out of the connector using long nosed pliers.
2. The pins in both sides of the plug connector can then be removed by
carefully easing back the locking catches within the base of the plug
housing and pushing the pins out towards and through the back of the
connector. A small flat bladed jeweller’s screwdriver normally works OK.
3. However the catches on the black 8 way connector type do not always
spring back into the locked position (its not really designed to be reused)
so great care is needed when reassembling as if these catches are not
properly engaged with the pins the pins can slip back into the housing
which could potentially lead to poor contact and possible overheating.
4. You also need to check the yellow pin locking inserts are in place in both
halves of the connector on reassembly, as without these in place the
above catches will not be properly secured.
5. There should be one of these yellow inserts in each part of the connector
(the two inserts are different for the male and female half of the
connector) and they should snap firmly into place.
6. Spares of these yellow inserts are available.
7. Also please check the orange sealing gasket is in place and properly
located in the controller half of the connector as this can be dislodged
preventing the plug from fully engaging. Also likewise the red wire entry
seals.
54
11 The green de restrict button
1. To install the green button remove the left hand handlebar grip and slide the green
button onto the handlebars with the button lowermost. Reinstall the grip and then
tighten the Allen screw in the button housing to clamp the button adjacent to the end
of the grip.
2. Remove the 4 small screws from the back of the fcb and detach the front cover of the
fcb. There is a two pin connector inside the fcb which will either have a connector
already fitted with a short white wire loop going across the connector pins or possibly
the connector will have nothing plugged in. If necessary remove the connector with
the wire loop and plug the green button connector in its place. (see image below and
the wiring diagram shown later in the manual for more details of the wring).
3. Fit the grommet supplied over the end of the green button cable’s outer insulation
nearest the fcb. The grommet is split to make fitting easy. Remove the spare blanking
grommet from the unused hole in the top of the fcb and fit the new wire and grommet
in its place. Carefully align all the connectors and wires in their respective slots within
the fcb ensuring none of the wires will be trapped when refitting the front cover. Refit
the front cover and tighten all 4 screws securing it to the back part of the fcb. Do not
over tighten the screws.
4. It is not recommended that Wisper dealers fit de restrictor switches to customer bikes.
Switches can be provided to customers if requested for their own fitment.
55
12 Braking system components
1. Wisper bikes have used a variety of brake system components and care must be taken
when replacing these components during maintenance to ensure the correct parts are
used
2. Wisper currently uses Tektro brakes on the 705, 805, and 905 models.
3. Prior to that Promax brakes were used with either Apse or Tektro levers on 2008-09
models
4. Zoom brakes were used with Wuxing levers on early 2007 08 model bikes.
5. For the 706 Alpino, 906 Alpino and XC model bikes Shimano (Alfine) brakes are used
with Tektro levers.
6. When ordering spare parts from Wisper please ensure the model type, year and frame
number and details of the brake manufacturer are provided
7. For bikes fitted with the Promax brakes ensure the front disc pads are fitted correctly
as the two pads are of a different thickness and need to be fitted with the thicker pad
in the correct position. The thicker pad (originally with backing plate coloured blue)
should be fitted on the opposite side to the calliper-operating lever (the side that has
the large aluminium removable threaded plug).
Zoom disc brake pads fitted to early bikes
56
13 Pre delivery inspection (PDI) and 300 mile service procedures
The PDI is a critical part of the overall QA process and must be completed by the supplying
dealer followed by a test ride and sign off before passing the bike to the customer.
The following items below are a generic list for all current Wisper models and must be covered
during the PDI.
NB: The assembly of the bike is covered in a separate manual.
Item
Activity
Notes
Cycle parts
1
Check front and rear wheel for alignment and run
out
Tighten spokes if necessary
2
Check tightness of front and rear axle nuts
Tighten to torque setting in
user manual
3
Check front and rear axle plastic covers in place
4
Check tyre pressures front and rear
Inflate to correct pressure
5
Check and adjust action of front and rear brakes
Ensure there is no noise or
squeal
6
Check smooth action and adjustment of front
suspension forks
Inflate air forks if necessary
to correct pressure (see
manual supplied with bike)
7
Check adjustment of bearings in headstock
Adjust if necessary
8
Check security of all handlebar stem fixings and
clamps
Adjust to suit customer
preferences
9
Check front and rear mudguards and skirt guards
if fitted for security and clearance from tyres
10
Check all cables are clipped securely and safely
Check motor cable cannot
rub against the tyre
12
Check pedals have been fitted correctly and
tightened fully
Note left and right hand
threads
13
Check pedal cranks have been tightened fully on
taper of axles.
Tighten to torque setting in
user and service manual
57
14
Check smoothness and running clearance of
bottom bracket
15
Check seat post clamp quick release clamp is
properly in place and secure and saddle is
correctly fitted and secure
Adjust as necessary
16
Check smooth operation of gear change on either
derailleur or Alfine hub gear and ensure all gears
can be selected
Adjust as necessary
17
Ensure side stand supports bike correctly and
does not interfere with other moving cycle parts
18
Ensure rear motor wheel turns smoothly and
quietly when rotated by hand in forward and
reverse direction
19
Ensure correct chain tension on Alfine equipped
models
20
Ensure chain guard is not rubbing on models
equipped with guard
21
Ensure all reflectors are in place on pedals,
wheels etc
Some additional resistance
will be felt when rotated in
reverse
Electrical Parts
1
Fit and check correct operation of front and rear
lights
Note Alpino lights are light
sensitive
2
Check wiring at front connector box
All grommets to be in place
and no bare wires to be
visible
3
Check throttle returns smoothly to closed position
and plastic spacer is in position
Adjust if necessary (see
section in manual)
4
Check brake cut out switches cut power to motor
5
Fit de restrict button if requested by customer
and check functionality
6
Check functionality of LCD display on Alpino bikes
58
Includes selection of power
assist levels, speed readout,
etc. and all functions are
correct as described in the
user and service manual
7
Check functionality of LED display on Non Alpino
bikes
Ensure 3 levels of assistance
can be selected and all
functions are correct as
described in the user and
service manual
8
Check battery locates properly in the lower cradle
and locks in place securely
Ensure 3 keys are present
with same number
9
Check alignment and clearance of pedelec sensor
Adjust if necessary (see
manual)
10
Remove triangular cover beneath battery cradle
and check security of all plugs and sockets.
Check motor cable cannot
rub against the tyre
11
Charge battery off the bike for 12 hours and check
charger and battery functions correctly
Check status lights on charger
and battery LEDs during and
after charging. Advise
customer to complete two
more 12-hour charges.
Road Testing
1
Road test the bike in a safe environment to test
functionality of both electrical and cycle systems
as described in the user manual, and check noise
and performance levels
Adjust / correct after test
ride.
2
Notify Wisper service if any manufacturing faults
are identified quoting details on the QA label and
providing photographs if possible of any faulty
components.
Print out and Sign off the
above check list and pass to
customer along with the QA
label attached to the bike
The 300-mile service and any subsequent service should generally follow the above check list
with particular emphasis place on re tensioning of spokes at the 300 mile service to ensure
compliance with the Wisper warranty.
59
14 Identifying and ordering spare parts
If spare parts are required use the charts located in Annexe 1 to identify the model year,
variant and type of components fitted.
This will assist Wisper service when ordering spare parts to ensure the correct part is provided.
It is also essential to provide the frame number which will be found on the headstock or on
older bikes, underneath the bottom bracket and also the date of sale if available.
Spares can be ordered through:
Wisper Support
CycleMech
The Chantry (rear of)
The Mayford Centre
Mayford Green
Woking
Surrey
GU22 0PP
Email Address: [email protected]
Phone number: 07799 794520
60
15 Frequently asked questions (FAQs)
The following section covers frequently asked questions. In many cases the detailed answers
to these questions can be found in the relevant section of the manual but for convenience are
included below.
Q. Can you swap a 14Ah battery to an 8Ah or vice versa?
A. Yes – on the 700 and 900 series from 2009 onwards they can be switched by following the
instructions in section 5.2 of the manual
Q. What is a kettle plug battery?
A. A type of battery fitted to early model Wisper bikes that had a lead that plugged into the
side of the battery using an electric kettle type plug and socket. See the description in section
5.
Q. Can I fit a new style battery to a bike fitted with a kettle plug battery?
A. No – the case dimensions and electrical contacts are different
Q. Why is polarity important on the kettle plug battery?
A. The output connectors on some early batteries were wired with the opposite polarity.
Hence kettle plug batteries should never be swapped between bikes and when ordering or
fitting a new battery the polarity of the output connector must be checked
Q. The red and black leads seemed to be reversed on my kettle plug battery lead where they
go into the controller
A. This is quite normal and the cables should not be swapped over in an attempt to align the
cable colours
Q. What do I do if I have no power to the bike?
A. See the faultfinding and battery sections of the manual and follow the procedures as
described
Q. How long will a battery last
A. This depends on many factors the most important being regular usage and recharging at the
prescribed intervals if left in storage. Further details are included in the service and user
manuals. If properly maintained a life of up to 1000 charge and discharge cycles could be
obtained.
61
Q. How can I extend battery life?
A. By following the instructions above.
Q. My customer is reporting a low battery range
A. See section 5.3 and Annexe 4 in the service manual for more details.
Q. How do I fit a de restrict switch?
A. See section 12 of the service manual
Q. Will the de restrictor switch make the bike more powerful?
A. No – this is explained in section 3.3 and 12.
Q. Can I fit a throttle to an 806 or 805fe?
A. Unfortunately not. The wiring and control system does not support the use of a throttle
Q. What brake pads do I need to stock?
A. Details of the brake pads are included in section 13 of the manual
Q. Can I fit a flip up saddle?
A. Yes – it is a standard accessory available from Wisper.
Q. Can I disconnect the brake cut out switches permanently?
A. This is not recommended as it will make the bike illegal to use in the UK and possibly in
other countries and could cause damage to the motor
Q. Should the purple wires with the two plugs in the controller be connected or left unplugged
A. Generally these should be left in the same state as when the bike is delivered to you by
Wisper. Further details are included in section 3.1 of the manual and in the fault finding
sections
Q. There are unused plugs and sockets on the controller - should I plug them together
A. No – these must not be connected together.
Q. The replacement controller supplied looks different to the original
A. For certain early models Wisper have had new controllers manufactured with simpler
connection arrangements. Details regarding connections will be provided by Wisper service on
request. If in doubt contact Wisper service
Q. Where do I obtain spare parts?
A. From Wisper service details of which are included in section 15.
62
Q. Where do I find the ECN number on the controller?
A. This number will be on the controller label as shown in section 3.6
Q. The LED headlamp is not switching on.
A. See section 9 explaining the differences between the automatic and manually switched
lights.
Q. What does the auxiliary controller do on the Alpinos?
A. This controller controls the lights as explained in section 9.
Q. Is the LED headlamp polarity sensitive?
A. Yes. Further details are provided in section 9 and the correct polarity must be observed
Q. What tyre pressure should I use?
A. Information regarding this is included in the user manuals. Also observe any maximum
pressure quoted on the tyre.
Q. Can I fit suspension forks to an older 905 Se City?
A. Yes but bear in mind it will also be necessary to change to disc brakes and to fit a disc
compatible front wheel
Q. My customer is reporting continued spoke breakage
A. this is normally due to incorrect spoke tensioning. Spokes must be checked at the PDI, the
300 mile service and at regular intervals thereafter.
Q. Can I fit a sealed bottom bracket to early bikes?
A. No.
Q. Are all bottom brackets the same
A. No. Wisper have used a variety of cup and cone type bottom brackets on earlier bikes and
sealed cartridge types on 2010 models. Always provide a frame number and model details
when ordering replacement parts. Also provide a measurement for the axle length between
the bearing shoulders of cup and cone type bottom brackets.
Q. Can I change the overall gearing on bikes fitted with Alfine hubs
A. Yes. Wisper service will be able to advise on what gear options are available.
Q. I cannot get the front wheel to fit between the fork drop-outs on an Alpino model.
A. Check the overall width of the motor including the axle nuts that fit inside the drop-outs and
compare to the internal width between the fork drop outs. If the difference is greater than
2mm then contact Wisper service who will provide thinner axle nuts (the internal ones that go
inside the drop out). Do not fit these thinner axle nuts on the outside of the drop outs.
63
Q. How do I remove the rear wheel on bikes fitted with rear motors?
A. Full details are described in section 10.1 of the manual.
Q. The pedals are making a clicking noise.
A. Check the pedal crank retaining nuts (or bolts on later models) are tightened to the torque
specified in Annexe 3. Check the condition of the bottom bracket.
64
16 Glossary
A glossary of electric bike specific terms is included below to assist with providing standardised
descriptions of components when discussing fault finding or other issues with customers and
Wisper service and when ordering spare parts.
This terminology is also used in the relevant sections of this manual where further information
will be found regarding these components and their function.
Standard (non electric) bicycle terms are not included.
Throttle – a twist grip device fitted to the handlebars to activate the electric motor.
LED display – a type of display fitted to the handlebars incorporating individual light emitting
diode (LED) status lights and switch functions.
LCD display - a type of display fitted to the handlebars incorporating a liquid crystal display
(LCD) providing information to the rider relating to the operating mode of the bike and
diagnostic information. Also provides switch functions.
De restrict switch –a green push button fitted to the left hand side of the handlebars which
overrides the 15.5mph (25kph) speed limit at which power is normally cut to the electric
motor.
Brake cut out switch – a switch incorporated in each brake lever to cut the power to the motor
when the brakes are applied.
Front connector box (fcb) – a heart shape connector box fitted to the headstock of the bike
where connections form the various handlebar controls are connected to the main wiring
loom.
Main wiring loom – a single multicore cable running from the fcb to the bike controller.
Motor – the main electric motor fitted to either the front or rear wheel
Bafang – refers to the manufacturer’s name of one of the two motor types used on Wisper
bikes
Dapu – refers to the manufacturer’s name of one of the two motor types used on Wisper
bikes
Sensorless motor - a type of motor, which does not incorporate movement sensors to control
the power applied to the motor e.g. the Dapu motor.
Brushless motor- All Wisper motors are brushless, as they do not use carbon brushes to
provide power to the motor. Brushes are prone to wear causing possible reliability problems
and hence are not used in Wisper motors.
65
Pedelec sensor – a sensor fitted to the bottom bracket of the bike to detect rotation of the
pedal cranks.
Controller – an electronic control unit housed above the bottom bracket of the bike, which
takes inputs from all of the above control devices and provides a regulated output to the
motor.
Hall Effect – a type of magnetically operated movement sensor used in the throttles, brake cut
out switch, pedelec sensor and Bafang motors.
Battery – the main battery fitted to the bike to provide power to the electric motor.
Lithium Ion (polymer) – describes the type of battery material /chemistry and associated
construction used by Wisper
Alpino – a model name used by Wisper
Alfine – a trade name used by Shimano for the 8-speed gear hub used on Wisper bikes
66
17 Training
Wisper is working in partnership with the British Electrical Bike Association (BEBA) and the
Cycle industry training organisation CyTech to develop electric bike specific courses and
modules with these organisations and it is strongly recommended that dealers ensure
technicians are qualified for both conventional cycle and electric bike specific aspects through
certified courses offered by CyTech.
Wisper can also provide Dealer based training covering the electric bike specific aspects.
Contact details;
Cytech Training Providers
There are two approved Cytech Technical training providers delivering the full range of courses
and qualifications.
ATG
Offer Cytech training and accreditation courses at professional workshop centres in Aylesbury
and Manchester. In-store training options are also available through a nationwide network of
assessors.
Government funding is available as well as fast-track assessment options.
Visit the ATG website for more details - www.atg-training.co.uk - or call 01296 737 815
PJCS
Cytech training and accreditation courses available at a professional workshop in Milton
Keynes.
Modular and fast-track training and assessment courses are available.
67
18 Annexe 1: Chart of Model variations and identifying features
2008 model bikes with older style batteries (see pictures for illustration
below table)
Year
/Model
705eco
705se
805fe16
805Fe20
905e
905se (3
variants)
Voltage
(volt)
24
36
24
24
36
36
Capacity
(Ah)
8
9
8
10
10
14
Wheel
size (inch)
26
26
16
20
26
26
Battery
case type
Aluminium
Aluminium
Aluminium
Aluminium
Plastic –
kettle
plug
Plastic –
kettle
plug
FCB
No
No
No
No
No
No
Hi Lo box
on
handlebar
No
No
No
No
No
No
Brake
switch cut
out
2 wire type
2 wire type
2 wire type
2 wire type
2 wire
type
2 wire
type
Wheel rim
type
Plain black
square
section
Plain back
deep wall
double
section
Plain
black
square
section
Plain
back
deep wall
double
section
Motor
type
Bafang in
rear wheel
Bafang in
rear wheel
Bafang
in rear
wheel
Bafang in
rear
wheel
Early 2008
Bafang in
rear wheel
68
Bafang in
rear wheel
Mid 2008
Voltage
(volt)
24
36
24
24
36
36
Capacity
(Ah)
8
9
8
10
10
14
Battery
case type
Aluminium
Aluminium
Aluminium
Aluminium
Plastic –
kettle
plug
Plastic –
kettle
plug
Wheel
size (inch)
26
26
16
20
26
26
FCB (3
hole type)
Yes
Yes
Yes
Yes
Yes
Yes
Hi Lo box
Yes
Yes
Yes
Yes
Yes
Yes
Brake
switch cut
out
3 wire type
3 wire type
3 wire type
3 wire type
3 wire
type
3 wire
type
Wheel rim
type
Plain black
square
section
Plain back
deep wall
double
section
Plain silver
square
section
Plain silver
square
section
Plain
black
square
section
Plain
back
deep wall
double
section
Motor
type
Bafang in
rear wheel
Bafang in
rear wheel
Bafang in
rear wheel
Bafang in
rear wheel
Bafang
in rear
wheel
Bafang in
rear
wheel
Above shows batteries fitted to 2008 model 705eco (and 805fe16) and 705se
69
2009 model bikes with new style batteries (see pictures for illustration
below table)
Year
/Model
705se
806fe
905eco
905se (3
variants
Voltage
(volt)
36
24
36
36
Capacity
(Ah)
8/14
9
8/14
8/14
Battery
case type
Plastic with
built in
connector
Plastic with
built in
connector
Plastic
with built
in
connector
Plastic
with built
in
connector
Wheel size
(inch)
26
20
26
26
FCB (5
hole type)
Yes
Yes
Yes
Yes
Hi Lo box
Yes
no
Yes
Yes
Brake
switch cut
out
3 wire type
3 wire type
3 wire
type
3 wire
type
Wheel rim
type
black deep
wall double
section with
yellow Alex
rim logo
Plain silver
square
section
Plain black
square
section
back deep
wall
double
section
with
yellow
Alex rim
logo
Motor
type
Bafang in
rear wheel
Bafang in
front wheel
Bafang in
rear wheel
Bafang in
rear wheel
Mid 2009
70
2010 model bikes with new style batteries (see pictures for illustration
below table)
Year
/Model
705se
706 Alpino
805fe
806 Alpino
905 (all
variants
906
Alpino
Voltage
(volt)
36
36
36
36
36
36
Capacity
(Ah)
8/14
8/14
9
9
8/14
8/14
Wheel
size
(inch)
26
26/28
20
20
26
26/28
Battery
case type
Plastic
with built
in
connector
Plastic with Plastic
built in
with built
connector in
connector
Plastic with Plastic
built in
with built
connector in
connector
Plastic
with built
in
connector
FCB
yes
yes
yes
yes
2010
LCD
display
yes
yes
yes
yes
LED
display
yes
Brake
switch
cut out
3 wire
type
2 wire type
3 wire type
Wheel
rim type
black deep
wall
double
section
with
yellow
Alex rim
logo
black deep
wall
double
section
with
yellow Alex
rim logo
Plain black
square
section
Motor
type
Bafang in
rear wheel
Dapush in
front
wheel
Bafang in
rear wheel
yes
71
yes
yes
2 wire type
Dapush in
front
wheel
3 wire
type
2 wire
type
black
deep wall
double
section
with
yellow
Alex rim
logo
black
deep wall
double
section
with
yellow
Alex rim
logo
Bafang in
rear
wheel
Dapush in
front
wheel
LED display fitted to non Alpino bikes
LCD display fitted to Alpino models
72
19 Annexe 2: Wiring diagrams (Large files are available on request from
Wisper Support
19.1 2009 model 705Se, 905Se Sport, City and City S
73
19.2 2009 model 705 and 905 eco
74
19.3 2009 Model 705 and 905 Front Connector Box
75
19.4 2010 model 805fe
76
19.5 2010 model 806 Alpino
77
19.6 2010 model 905eco
78
19.7 2010 Model 706 Alpino and 906 Alpino
79
20 Annexe 3: Torque settings.
The following torque settings should be used on Wisper bikes:
(A) Front axle nuts.
70Nm (Alpino), 46Nm (non Alpino)
(B) Back axle nuts.
70Nm (Alpino), 70Nm (non Alpino)
(C)Handlebar clamp bolt. 18 to 20 Nm
(D)Seat pillar clamp nut/bolt. 5-8 Nm
(E)Seat clamp nuts. 24Nm
(F) Gear shifter screws 4Nm
(G) Rear carrier screws. 8Nm
(H) Mudguard bracket nuts 8Nm
(I) pedal cranks 46Nm
For other fixings refer to the user manuals or use the following settings if
not specified in the manual based on the thread size.
M4:2.5-4.0Nm M5:4.0-6.0Nm M6:6.0-7.5Nm
80
21 Annexe 4: Factors affecting Range
The range of an electric bike can vary massively depending on the following factors:
Weight: Not just the weight of the rider but also the weight of any luggage being carried or
towed, affects the range you will get from your bike.
Wind resistance: Have you ever wondered why road racers wear Lycra? It’s not just to show
off muscles! The fact is that if you were to wear Lycra on your electric bike (I don’t suggest for
a moment that you do!) your range would be much higher than if you were wearing a huge
overcoat and a nice big set of panniers!
Tyre Pressures: Always keep your tyres pumped up to the correct pressure, if you have ever
had a flat tyre you will know why.
Air temperature: You will get about 15% more range on a warm sunny day than you would in
deep winter.
Road conditions: A smooth flat road is much more efficient than gravel or grass for long range.
Hills: I realise you can come down the hill you just went up without using any power but you
would have used a lot less power if you covered the same distance on the flat.
Throttle: If you are lucky enough to live in an area that allows throttles without pedalling, you
can use masses of power getting from start to cruising speed on the throttle alone. So try
always to pedal up to a comfortable speed before you transfer to throttle.
Battery age: As batteries get older they start to lose the ability to hold a charge for as long as
they did when they were new. If you are using a 5 year old battery you will not get the same
range as when the battery was charged for the first time.
Hint: Recharge a fully depleted battery as soon as is practical. A fully depleted battery left for
extended periods can incur irreparable cell damage which will not be covered under warranty.
It is the owner’s responsibility to maintain their battery as described in the user manual.
Hint: In winter keep your battery inside (at room temperature of 15 deg C or higher) so it is
‘warm’ when it goes on your bike. This is better for your battery and will give you up to 15%
more power for the hills. A cold battery will not discharge as efficiently as a warm battery.
Hint: To maximise the lifespan of your battery, once you have completed the initial deep cycle
conditioning process, recharge your battery after every use... Lithium batteries prefer
shallow discharge so keeping them topped up is good practice. It also means your bike will
always deliver maximum
There are of course other factors such as maintenance and wind speed but these are the most
important points to remember.
81