1
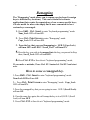
COMFORT KEYBOARD ERGOMAGIC™ KEYBOARD ERGOFLEX™ KEYBOARD USER’S MANUAL Designed by Comfort keyboard Co, Inc WWW.COMFORTKEYBOARD.COM User’s Manual Comfort™ Keyboard System 2 Comfort™ Keyboard Company, Inc. 5608 WEST HEMLOCK STREET MILWAUKEE, WI 53223 www.comfortkeyboard.com Telephone: Fax: Technical Assistance (414)-431-4622 (414)-431-4801 (414)-431-4836 Email: [email protected] Information for your record: ___________________________________ Serial No. ____________________________________________________ Purchase Date:________________________________________________ Comfort keyboard System received a U.S patent in 1991. In addition to the basic patent application are pending for various improvements in the Comfort keyboard, ErgoMagic keyboard, ErgoFlex keyboard and support devices. Copyright © 2000 and 2001 Comfort Keyboard Company, Inc. IBM is registered trademark of International Business Machines Corp. 3 Macintosh is a registered trademark of Apple Computers, Inc. Sun and Sun Microsystems are registered trademarks of Sun Microsystems, Inc. NOTICE: Comfort™ Keyboard, ErgoMagic™ and ErgoFlex™ Systems is intend to address the issues of awkward posture, discomfort and fatigue. Other than as explicitly set forth in the limited warranty section of this User’s manual (inside back cover), Comfort Keyboard Company, Inc. has not made and is not making any warranties or representations concerning the products, including without limitation, any warranty that the use of the products will have any effect on reducing likelihood that the user of the Comfort™ keyboard, ErgoMagic™ Keyboard and ErgoFlex™ Keyboard will contract any cumulative trauma disorders or any physical or emotional disorder which may be associated with keying/typing activity. Equally, Comfort keyboards Company, Inc is making no warranties or representations that use of these products will ameliorate any such pre -existing condition. If you have experienced pain in the shoulders, arms, wrists or fingers, or if you have history of any physical problems and/or disorders, please see your doctor or company medical director before using the Comfort™ Keyboard System. If you have question, ask for guidance from your doctor or your company’s safety manger, medical director or occupational health nurse, or ask your safety manager to refer you to an ergonomist or occupational therapist. If you still need help or have any questions, please contact Comfort Keyboard Company, Inc at 4380 South Kansas Ave, Saint Francis, WI 53235, (414) 481-2056. TABLE OF CONTENTS Before You Begin ----------------------------------------------------6 Installation and Introduction to the Comfort™ Keyboard System 7 4 Setting up the Comfort™ keyboard System-------------------- 12 Position the Comfort Keyboard™ System for you------------------- 13 Changing the order of sections and locating the Keyboard on your work Surface-------------------------------------------- 14 How to explore your Natural Posture and Comfort Zone---------------- 17 Acclimation: Getting Used to Your New Comfortable Typing Posture ------- 21 Special Keyboard Functions --------------------------------------------------------- 22 REMAP MACRO CLEAR KRYBOARD TO DEAFULT 23 24 27 USB SYSTEM ------------------------ 28 Ø APPLE USB --------------------- 29 Ø SUN USB ------------------------- 30 Technical Information ---------------------------------- 31 FCC NOTICE INFORMATION TO THE USER Comfort Keyboard System units that are compatible with IBM or Macintosh have been tested and found to comply with the limits for a class B digital device, pursuant to Part 15 of FCC Rules: these limits are designed to provide reasonable 5 protection against harmful interference in a residential installation. All other units comply with the limits for a Class A digital device. This equipment generates, uses and can radiate radio frequency energy and, if not installed and used in accordance with the instructions, may cause harmful interference to radio communications. However there is no guarantee that interference not occurs in a particular installation. If this equipment does cause interference to radio or television reception, which can be determined by turning the equipment OFF & ON, the user in encouraged to try to correct the interference by one or more of the following measures: Ø Reorient or relocate the receiving antenna. Ø Increase the separation between the equipment and receiver. Ø Connect the equipment to an outlet on a circuit different from that to which the receiver is connected. Ø Consult with the dealer or an experienced radio/ TV technician for help and for addition suggestions. The user may find the following booklet prepared by the Federal Communications Commission helpful: ”How to Identify and Resolve Radio-TV Interface Problems” This booklet is available from the U.S Government Printing Office, Washington, DC 20402, Stock No. 004-000-00345-4 FCC WARNING The user is cautioned that changes or modifications not expressly approved by the manufacture could void the user’s authority to operate this equipment. Note: In order for an installation of this product to maintain compliance with the limits for a Class A or Class B device, shielded cables must be used. BEFORE YOU BEGIN . . . Congratulations on becoming a user of the Comfort Keyboard System! This award-winning keyboard is the world's only TOTALLY adjustable computer keyboard. It is at the leading edge 6 of ergonomically designed computer equipment, and is a valuable component of today's ergonomically designed computer workstation. It can help you work at your computer in greater comfort. It is important for you to understand that the Comfort Keyboard System has been designed specifically to address the issues of awkward posture, discomfort and fatigue experienced by computer operators. The Comfort Keyboard System addresses these issues by offering TOTAL adjustability. Now, individual users can type in the comfort of their own natural posture. *** NOTE: The Disc Loc tm Universal Mount is precision equipment that must be used correctly. Before adjusting a keyboard section, loosen the Disc Loc tm completely until it stops--otherwise, you can damage it permanently. Insufficient tightening or loosening may damage the Disc Loc tm mountings INSTALLATION & INTRODUCTION TO THE COMFORT KEYBOARD SYSTEM The Award winning Comfort Keyboard System you have before you is at the leading edge of ergonomically designed computer technology--- 7 giving you an adjustable keyboard that can help you work at the computer more comfortably. The Comfort Keyboard System uses the conventions QWERTY key arrangement it has been manufactured in three sections. Each section is mounted on its own Disc Lock Universal Mount, which allows the sections to be separated along the track to conform to user's different shoulder widths. Each section can also be rotated and tilted to the precise position that’s most comfortable to the user. The sections then lock easily into position. This allows each person and in fact each hand of each user to work in the most comfortable posture . This unlimited three-dimensional adjustability is what makes the Comfort Keyboard System Unique. It allows each section to be adjusted 8 to an infinite number of positions. THAT IS IMPORTANT BECAUSE NO TWO PEOPLE ARE PHYSICALLY IDENTICAL. Why comfort is important A skilled baseball player has his/her own particular batting stance and swing, depending on individual posture, body size and type, musculature, and preference. Each batter chooses the bats, shoes, gloves, etc. that fit him or her best. Exactly the same level of concern should be shown in coping with the complex sequence of muscle acts, which make up computer keying. We can think in terms of “keyboard athletes.” However, until now, keyboard athletes have not had the tools available to accommodate natural posture and individual preferences. Why adjustability is important Flat keyboard forces computer workers to bend their hands and wrists into an inherently awkward posture –a posture that decreases comfort and increases fatigue. In order to key more comfortably, the hands should be maintained in their natural posture –that is, the same position as when they are hanging relaxed at your sides. In an article included among selected references by the U.S. Department of Health and Human Services, Thomas J. Armstrong, Ph.D., states: “As a general rule, tools and tasks should be designed so that they can be used and performed without causing wrist deviation (bending) from side to side or causing the wrist to be flexed (bent toward the palm) or highly extended (bent away from the palm). The wrist should be maintained in the same position as though the arms were hanging relaxed at the worker’s side.” If you are keying at a flat keyboard, maintaining your natural posture is impossible. If you start with your hands hanging relaxed at your sides, and maintain that straight hand/wrist posture while bending your elbows to form right angles, you will be assuming 9 the natural wrist/arm posture recommended for keyboard operation. The flat keyboard, in contrast, requires you to rotate your palms from facing each other to facing down (Pronation); then, to position the fingers on the home row keys, most people have to angle their wrists inward (Ulnar deviation). This stressful rotating and angling of the wrists when keying is an awkward posture, which lessens your comfort. It is quite different from the recommended natural posture. Note that keyboards that are partially adjustable or non adjustable require typists to compromise their natural posture. Comfort Keyboard System by contrast gives you the power to set up your keyboard in the way that accommodates your natural posture. Because people come in all shapes and sizes, with different physical capabilities, this natural and comfortable posture of the hands varies from person and even from your right hand to your left. That is why TOTAL adjustability is so important. 10 Natural Wrist/Arm Posture for typing Pronation required by Flat keyboard Ulnar deviation usually required by Flat keyboard Natural Posture with Comfort Keyboard Awkward & uncomfortable posture required by Flat keyboard 11 Comfort Keyboard System allows you to find your own comfort zone, if you tire of the position you have chosen for the keyboard sections, or if someone else has readjusted the keyboard, it takes only seconds to adjust the keyboard sections so they are comfortable for you. The Comfort keyboard System is so versatile that it also can be of great benefit if you find the flat keyboard difficult to use because you have special positioning needs due to physical disability. Also note that you can vary the width of the keyboard by separating the sections. This accommodates people of differing shoulder widths. Even the arrangement of the three keyboard sections can be changed. Sometimes Left-handed people and others prefer to have the Numeric Section on the left, A person using a headstick or mouthstick can place the sections so as to minimize head movements making the Comfort Keyboard System easier to use than flat or partially –adjustable keyboards . Furthermore the Comfort Keyboard System incorporates “ Special Keyboard Functions” that make possible the use of the MACROS and programmable keys. These are designed to increase productivity and help operator use time more effectively. They can also adapt the keyboard to the special needs of people with motor control limitations . In short, you do not have to adapt yourself to this keyboard- Comfort keyboard System can be adjusted to you. 12 SETTING UP THE COMFORT KEYBOARD 1. With your host (computer) turned off, or your terminal disconnected, disconnect your old keyboard cable from the computer’s keyboard port and remove your old keyboard. 2. Place the Comfort Keyboard System on your work surface. 3. Connect the three keyboard sections using the two section-to-section coiled cables. 4. (PC) Plug one side of the 6 pin mini DIN cable to the top side of the Numeric Section. Making sure that the pins are aligned. 5.(PC) Plug the other side of the 6 pin mini DIN cable into the computer's keyboard port, making sure that the pins are aligned. Important: there may be special instructions in the Appendix applicable to your particular computer system. Important: on systems using devices downline from the keyboard, all downline devices should be connected before turning your computer ON. 6.Position and adjust the sections of the Comfort Keyboard so they are most comfortable for you, as outlined in the following section. 13 POSITIONING THE COMFORT KEYBOARD SYSTEM FOR YOU WARNING: IF YOU DO NOT LOOSEN THE DISC LOC COMPLETELY (UNTIL IT STOPS) BEFORE ADJUSTING. YOU MAY DAMAGE IT PERMANENTLY. Insufficient tightening or insufficient loosening may damage the Disc Loc Universal Mount 1. Make sure the keyboard is Unplugged. 2. The Disc Loc tm Universal Mounts operate exactly as do standard screws: counterclockwise loosens, and clockwise tightens. To loosen a Disc Loc, turn disc counterclockwise 1/3 to ½ turn, until it stops. That section now can be raised, lowered, tilted, rotated and moved left or right along the base. 3. To lock a section in the desired position, grasp the section firmly and hold it steady; tighten the disc by turning the disc clockwise until the section is locked securely in place. 4. To extend the space bars for comfortable placement of the thumbs, use the space bar tab to push the extender toward the center of the keyboard. To return the space bar to its original length, push the extender back gently. 14 CHANGING THE ORDER OF THE SECTIONS & LOCATING THE COMFORT KEYBOARD ON YOUR WORK SURFACE The arrangement of the three keyboard sections (LH section, RH section, NK section) can be changed. Sometimes left-handed people prefer to have the Numeric Section on the left; others may even want to position NK in the center. Positioning the NK in the center can help you to maximize the width of the keyboard if you are broad shouldered. 1. Make sure that the keyboard is unplugged. 2. Unplug the two-coiled section-to-section cables from the three sections (just as you would unplug a telephone cord). 3. Loosen each Disc Loc by turning each disc counterclockwise until it stops. 4. Slide the section that you want to re-arrange off the track on the keyboard base. Put them back in the order that you prefer: NK-LH–RH or LH-NK-RH, for example. 5. Re-connect the cables; then plug the keyboard to your PC. 15 Recommended procedure for re-attaching a section to the keyboard base 1. In one hand, hang the individual section upside down, with the straight arm of the Disc Loc facing you. 2. Turn the round metal plate with the two flat edges counterclockwise until it stops. 3. Hold the Disc Lock in your hand as follows: Your thumb should be on the topside of the plastic disc (which is now facing down); your fingers should be on the bottom side of the round metal plate with the two flat edges (now facing up). 4. Depress the round center button with the middle finger. (Make sure the middle finger is parallel to the flat edges of the round metal plate—see photo). 5. Now rotate the section right side up. 6. Insert the round metal plate with the two flat edges into the track on the keyboard base. Making sure that the flat edges line up with the flat edges of the track. 16 Using the Comfort Keyboard System gives you the power to setup your Keyboard to fit you-- to accommodate your natural hand/wrist posture and shoulder width. Only by exploring the different possibilities that this keyboard offers, you can determine the posture that is most comfortable for you. To start, we suggest that you think about the keyboard task on which you spend the most time. You will probably be most comfortable in that task if your body is kept as symmetrical as possible ---- that is, the position of the left side of the body shoulder ”mirror” the position of the right side. You know, for example, that if you twist your neck all day to hold the phone on one shoulder, you may experience discomfort in your neck and shoulder. In a more subtle but important way, keying for long periods of time in an unbalanced posture may be uncomfortable, and you could tire more quickly that if you were sitting symmetrically. This is not to say that your hands should be positioned symmetrically. On the contrary, just as your hands differ in strength and dexterity (because you are either right-handed or left left-handed), the comfort zones for the two hands are likely to differ to some degree. Again, that is why TOTAL, threedimensional adjustability is so important. A common pitfall is that most people center their computer monitor and keyboard on the work surface, but it is more important that these items or the component of them that you use most frequently be centered on you! Otherwise, you may spend the day keying with both arms (and/or your head) angled to the left or right. It is important to have the specific equipment you are working with positioned directly in front of you. We recommend that you explore and modify, and explore and modify again, until you find the positions that are appropriate for your tasks and are most comfortable for you. You will learn more about exploring comfortable postures in the Ergonomics chapter of the manual. 17 It is important to have your primary task directly in front of you. This man is working in an awkward posture with his arms extending to his left. Since he is using the LH & RH sections primarily, those sections should be centered in front of him. Above: The LH & RH sections take up valuable space in front of this right handed worker, who is using only the NK section while turning documents with his left hand. A better arrangement would be to locate the NK section on the far left of the keyboard base, and move the entire keyboard unit to the right so that the NK is in front of the worker. This would allow him to have both the NK and his document directly in front of him. 18 HOW TO EXPLORE YOUR NATURAL POSTURE AND COMFORT ZONE 1- Sit comfortably in your chair, as you should when keying. 2- Unlock each Disc Lock by turning the disc counterclockwise until it stops. 3- Slide the other keyboard sections away from the right 4- keyboard section. Pick up the RH section with both hands, and slip the left hand under it to support it. 5- With your right hand and arm hanging relaxed at your side, keep that hand/wrist posture consistent and bend your right elbow to form a right angle. Maintaining this natural, straight-wrist posture, use your left hand to move the RH section so that the home row keys meet the fingertips of your hand. Continuing to use your left hand to support and move the RH section, and maintaining contact between the home row and the fingers of your right hand, move the section slightly (raise, lower, rotate and tilt it, and move it sideways along the base), exploring subtle variations until you feel confident that you have positioned keying posture of your right hand. 6- Without changing the tilt or rotation of the section, raise & lower it to determine the best height. Most often people find it best to have one corner of the section as low as possible, close to the base, However, the section should be raised if the lowest position (when the corner is touching the base) causes the right hand to drop lower than the right elbow. To verify that the position you have chosen for the RH section is, in fact the most comfortable for you, move your little finger from the ; key to the ? to the P key to see if the movement feels comfortable. If not you may want to readjust the section slightly. 19 7- 8- In order to appreciate fully the level of comfort this natural hand posture provides, you may want compare it with awkward posture dictated by a flat keyboard; keeping your right hand fingers on the home row, use the left hand to lower the RH section to its original flat position. Now, again move your little finger from the ; key to the ? To the P. You will probably feel the strain as your wrist bends and your hand is forced to confirm to this awkward posture. When you are satisfied that you have found the best position, hold the RH section in place with one hand and lock the section in place with the other hand by turning the Disc Loc clockwise until it is firmly secured. Following the same process, explore positioning the LH section and NK section. Points to remember in adjusting your keyboard v Explore different keyboard widths, by separating the sections along the base, to find the width that is most comfortable for you. v Do not expect the positions of your two hands to correspond exactly or “mirror” each other: the difference in strength or physical dimensions due to being left- or –right- handed may cause you to choose a different position for each hand. v Just as you re- adjust your car seat every so often during a long trip, you may want to re-adjust the keyboard sections slightly from time to time during the day. v Learn to be sensitive to what your body is telling you, and adjust the keyboard, and/or other workstation components, accordingly. v As long as you keep your wrists straight in all directions (as if your arms were hanging loosely by your side), feel free to try various angles and positions of the keyboard sections! Only with ongoing exploration can you determine the precise position that is most comfortable for you. 20 If you use wrist rests and arm supports (including the arm rest of the chair), choose and/or adjust them carefully to facilitate natural (straight) wrist/arm posture, and to allow the upper arm to fall relaxed from the shoulder when you are seated properly. Ø Always let your upper arms fall relaxed from your shoulders, and keep your forearms parallel to the floor (or with your fingertips about 1 & 1/2 inches above the parallel, at most). Ø Key as gently (with as little force) as possible. Note that any key you press will register on the screen early in the keystroke. You will require less energy if you press just until the image appears on the screen, and you will reduce fatigue in the hands, wrists and arms. Ø Take a rest break whenever you can. An informal rest break may consist of a brief pause to stretch, getting up to do an errand, or alternating keying with non-keying task. Formal rest breaks should include getting up and moving around, to help increase blood flow to all parts of the body. BAD WRIST AND ARM POSTURES v Upper arms angled forward or outward away from the body, instead of falling relaxed from the shoulder. v Forearms not horizontal. Hands should be neither below, nor more than 1 & 1/2 inch above the level of the elbow. v Anything that causes the wrists to be angles to any direction. 21 GETTING USED TO YOUR NEW, MORE COMFORTABLE TYPING POSTURE Most Comfort Keyboard System users find it very easy to get used to the new keyboard and to keying in their natural posture. But it does take some people longer than others to begin using the keyboard to its full potential. Typically, it may take a few days to get used to your new keyboard. Don’t let that concern you---- There is a “learning curve” when using any new equipment. Some users can adjust their keyboard to their most comfortable posture and begin using it right away. Others may prefer to start out gradually, changing the positions of the sections a little each day (see photos). You should do what ever makes the most sense for you. The important point to remember as you acclimate to the Comfort keyboard System is that you are developing a new, more comfortable relationship with your computer. You will continue to gain confidence as you gradually familiarize yourself with the new section positionings you choose 22 SPECIAL KEYBOARD FUNCTION Besides its total adjustability and practically, Comfort keyboard System offers numerous special keyboard functions to help you use your computer more effectively . Many of the Special Keyboard Functions are designed to increase your productivity. They can substantially reduce the number of keystrokes you have to make during computer operation. The following is a list of Special Keyboard Function that are available via keyboard commands, some of these features might not be available for all compatibilities. ü Left or right “Space bar as Backspace” function ü Remapping ü Macro Programming. ü Clear Keyboard Setup To “default” values. ü Foot Pedal. NOTE: All function-programming values are approximate. Left or Right space bar as backspace For added convenience, the Comfort Keyboard System allows you to program either the left or right space bar to backspace. 1. Press Shift - Ctrl - Insert to enter "keyboard programming" mode. (Num Lock LED) will turn ON. 2. Press Ctrl – PRINT_SCREEN. (Caps Lock LED ) will turn ON 3. Press SPACE BAR only once. 4. Press BackSpace only once. 5. Press Ctrl - F12 to save & exit "keyboard programming" mode. 23 Remapping The "Remapping" mode allows you to remap your keyboard (reassign keys to different key locations). This can be useful for software applications that require the repeated use of one or more specific keys; it is also useful for users who simply find it more convenient to have various keys rearranged. 1. Press Shift - Ctrl - Insert to enter "keyboard programming" mode. Num_Lock LED will turn ON. 2. Press Ctrl - Print Screen to enter "Remapping" mode. Caps_Lock LED will turn ON. 3. Press the key that your are Remapping to. LED 2 (Caps Lock) will turn OFF and LED 3 “Scroll_Lock” will turn ON. 5. Press the key you wish to be mapped into the key you pressed in Step three, Scroll_Lock LED will turn OFF. 6. Press Ctrl - F12 to Save & exit "keyboard programming" mode, If you make a mistake, Press Ctrl- F11 instead of Ctrl F12 and start over. How to erase a remapped key. 1-Press Shift - Ctrl - Insert to enter "keyboard programming" mode. Num Lock LED will turn ON. 2-. Press Ctrl - Print Screen to enter "Remapping" mode. Caps_Lock LED will turn ON. 3-Press the remapped key that you are going to erase. LED 3 (Scroll Lock) will turn ON. 4- Press the same key again, this will remap the key to it self, LED 3 (Scroll Lock) will turn OFF 5. Press Ctrl - F12 to Save & exit "keyboard programming" mode. 24 “MACRO Programming” A macro is multiple keystrokes stored in a single key. Pressing that key plays back those multiple keystrokes. If you find yourself typing a particular series of characters repeatedly, you can program that series into a macro key. You simply select a key to represent the series of characters. You may also program macros to reassign (remap) keys on your keyboard. In addition, you can use a macro to exit a program and enter another program quickly. 1. Press Shift - Ctrl - Insert to enter "keyboard programming" mode. Num Lock LED will turn ON. 2. Press Ctrl - F3 to enter "Macro" mode. Caps Lock LED will turn ON. 3. Press the key to which you are assigning the macro. “Caps_Lock Led will turn oFF and Scroll Lock Led will turn ON 4. Type in the sequence of keystrokes you desire to make up the macro. 5. Press Ctrl – F4 to exit "macro programming" mode. Caps Lock LED will turn ON momentary and go OFF 7. Press Ctrl - F12 to exit "keyboard Programming" mode. You Can NOT assign macro to the following key: • C Comfort Key 25 "Macro Playback” Macro play back mod can be toggled on and off at any time during normal keyboard operation, except when operating in the keyboard programming mode. Pressing the “C” Comfort key located on top right corner of the Numeric section turns ON “MACRO PLAY BACK MODE”. HOW TO ERASE A MACRO 1.Press Shift - Ctrl - Insert to enter "keyboard programming" mode. Num Lock LED will turn ON. 2.Press CTRL – SCROLL LOCK Key, LED 2( Caps Lock ) will turn ON.. 3.Press the key containing the macro you wish to erase. LED 2( Caps Lock) will Turn OFF. 4.Press Ctrl - F12 to save & exit "keyboard Programming" mode The key will no longer has a macro, but all other keys containing Macros remain unaltered. “FOOT PEDAL” Some people like to use a foot pedal that is mapped for a frequently used or hard to reach key, or used as a macro. An optional foot pedal for use with your Comfort Keyboard System is available from Comfort Keyboard Company, • Single foot pedal: this can be programmed to be any key on the keyboard, and can store a Macro. It plugs in to the right corner of the Comfort Numeric Section. • Three-foot pedals: these can be any three keys on the keyboard and it can also emulate the Left, Center, & Right mouse clicks. It does work with any keyboard on the market. USB & PS/2 compatible. 26 ADDITIONAL SPECIAL KEYBOARD FUNCTION FOR SPECIAL NEEDS Comfort™ Keyboard System has features that make it useful for many people with physical disabilities, this chapter describes how to adjust the Comfort™ Keyboard to fit any specialized needs you may have, and how to take advantage of its capabilities. What ever your needs are, it is important first to familiarize yourself with the general instructions preceding this chapter. Remember that if you have a physical disability, body positioning is very important, your body may not be symmetrical, or the same on both sides, if this the case, explore the keyboard positions that are most comfortable for each side, without trying to position the keyboard section symmetrically. The special Keyboard Functions that are especially useful to certain people with disabilities include: Ø Sticky Keys: for people who have difficult pressing two keys or more at the same time (simultaneously). Ø Bounce Keys: for people who have difficulty pressing a key only once because they sometimes bounce on a key when the press it. Ø Slow Keys: for people who sometimes bump keys unintentionally because they have difficult targeting specific keys. Ø Delay Until Repeat: for people, who have difficult releasing a key quickly after it is pressed, thereby causing unintended repetition of character. For more information please visit our web www.comfortkeyboard 27 “CLEAR & RESET KEYBOARD TO DEFAULT” Ø If you have any problem with the keyboard. Ø If the keyboard is typing the wrong keys. Ø To clear keyboard memory If you are in the middle of programming special keyboard functions and you realize that you have made a mistake and would like to start over, you can use this feature to "Zero out" clear the keyboard memory. 1. Press SHIFT, CTRL, INSERT enter in to programming mode, Num Lock LED will turn ON. 2. Press CTRL, F11 “CLEAR & RESET USB KEYBOARD TO DEFAULT” o Press SHIFT, CTRL, INSERT o Press CTRL, F11 28 USB (CKS) This section is ONLY for the USB Keyboard. Both Disc keys work as a Windows Key and can be programmed to be another key. MACRO PROGRAMING USB KEYBOARD ONLY 1. Press Shift - Ctrl - Insert “NUM LOCK LED WILL TURN ON” 2. Press Ctrl – F3 “CAPS LOCK LED WILL TURN ON” 3. Press the key to which you are assigning the macro “SCROLL LOCK LED will turn ON” 4. Type in the sequence of keystrokes you desire to make up the macro. 5. Press Ctrl – F4 to exit "macro programming" mode. “Caps Lock LED will turn ON “ Press Ctrl - F12 to exit "keyboard Programming" mode 6. Ø To activate your macro, PRESS Comfort C. SCROLL LOCK LED will flash twice to let you know that MACRO is ON, IF scroll Lock LED flashes once, it means that Macro is OFF “CLEAR & RESET USB KEYBOARD TO DEFAULT” o Press SHIFT, CTRL, INSERT o Press CTRL, F11 29 APPLE USB KEYBOARD Ø To set up your keyboard so that: DISC key = Option Key Alt Key = Apple Key q q q Press CTRL, SHIFT, INSERT Press CTRL, Tab Press CTRL, F12 Ø To set up your keyboard so that: DISC key = APPLE Key Alt Key = Option Key q q q Press CTRL, SHIFT, INSERT Press CTRL, ~ Press CTRL, F12 Ø Left SHIFT & Comfort C, will bring down the shut down menu. 30 SUN USB KEYBOARD To access the SUN option keys: -Go into Programming Mode. o Press CTRL, SHIFT, INSERT o Press CTRL-F8 to turn on the SUN option keys, Caps Lock LED will flash green. o Press CTRL, F12 (To turn off SUN Option keys) o Press CTRL, SHIFT, INSERT. o Press CTRL-F9 to turn off the SUN option keys. o Press CTRL, F12. To use the sun option keys, press the RIGHT Disk Key and + F1 = STOP + F2 = AGAIN + F3 = Props + F4 = Undo + F5 = Menu + F6 = Copy + F7 = Select + F8 = Paste + F9 = Find + F10 = Cut + F11 = Help + F12 = Execute 31 Technical Information Y-AXIS ADJUSTABILITY: Each of three independent separate sections adjusts 090 degrees into an infinite number of positions. WEIGHT: Three keyboard sections with base plate; 5lb 12oz (2.61kg). OPERATING TEMPERATURE: 0-70 degrees Celsius. KEY LAYOUT: 105 keys, with standard 101 QWERTY layout and special function keys to emulate the Macintosh and other configurations, and activated Special Keyboard Functions. KEY SWITCHES: Conductive Elastomer rubber designed for 60 million cycles. KEYTOPS: Molded ABS plastic, double shot injection. DIMENSIONS: Three keyboard sections (collapsed): H 2.5in (65mm) x L 18.25in(464 mm) x D 6.25in (159mm). Base plate: H 0.125in(3mm) x L 22in(559) x D 4.5in(114mm). KEYBOARD ENCLOSURES High quality Cycolac ABS plastic, grade KJW. DISC LOC UNIVERSAL MOUNTS: Hardened Steel. SUPPLY VOLTAGE: 5 VDC. NOMINAL CURRENT: Draws <200 mA . MICROPROCESSORS: Three, type Z8 (8bit). MEMORY STORAGE AND TYPE: 32 Kbytes ROM, 8 Kbytes RAM Specifications are subject to change without notice. 32 Your comments and subjections on technical aspects of the Comfort Keyboard System would be appreciated: call technical assistance at 414481-2056 or Email [email protected].