1
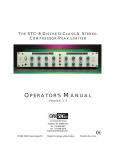
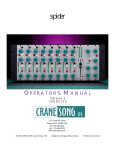
FLAMINGO.1
OPERATOR'S MANUAL
Version 1.1
20090110
LTD.
2117 East 5th Street
Superior, WI 54880 USA
tel: 715-398-3627
fax: 715-398-3279
www.cranesong.com
© 2004, 2005, 2006, 2009 Crane Song, LTD.
Subject to change without notice.
U.S.A.
Printed in the
IMPORTANT SAFETY INSTRUCTIONS
1. Read these instructions
2. Keep these instructions
3. Heed all warnings
4. Follow all instructions
5. Do not use this apparatus near water
6. Clean only with dry cloth
7. Install in accordance with the manufacturer's instructions
8. Do not install near any heat sources such as radiators, heat registers, stoves, or other
apparatus (including amplifiers) that produce heat
9. Protect the power cord from being walked on or pinched particularly at plugs and the
point where they exit from the apparatus
10. Only use attachments/accessories specified by the manufacturer
11. Unplug this apparatus during lightning storms or when unused for long periods of
time
12. Refer all servicing to qualified service personnel. Servicing is required when the
apparatus has been damaged in any way, such as power-supply cord or plug is damaged, liquid has been spilled or objects have fallen into the apparatus, the apparatus
has been exposed to rain or moisture, does not operate normally, or has been dropped
13. CAUTION: To disconnect the unit completely from the MAINS, unplug the unit. Turning the power switch off does not disconnect the unit completely from the MAINS.
2
3
INTRODUCTION
FLAMINGO, is a high quality 2 channel discrete class A microphone pre-amp. It can be operated as a
musically transparent pre-amplifier, but is capable of emulating vintage sounds as well as creating
distinctive new ones.
The input gain is selected by a stepped switch for gain matching and repeatability. This is followed by a
continuously variable attenuator to provide gain trim. Gain is adjustable in 6 db steps to 66 db gain and
down to off by the attenuator.
Each channel has independently switchable phase and phantom power switches.
FLAMINGO also contains a 2 channel 22 element VU meter with an over load indicator to allow accurate
monitoring and ease of level adjustment.
Unique to FLAMINGO are three switches that allow the user to select different sounds; these are the
IRON, SOUND and TONE switches. By using these switches FLAMINGO can produce many different
sounds. The SOUND switch changes the type of amplifier and the IRON switch puts iron in the audio
path. The TONE switch, a 3 position switch allows for standard - (original Flamingo sound) when the
switch is in the center position, when moved to the right, Flamingo operates as a transparent preamp,
and when the switch is in the left most position, It has more color.
Also added to Flamingo is an input impedance switch. Providing 2 choices, the first is the original
Flamingo; the second is to match large diaphragm condenser mics as recommended by David Bock, of
Bock Audio
FLAMINGO has transformer-less balanced inputs and outputs. The unit is 1 rack space tall and operates
from 100V, 115V, 230V or 240V mains.
FLAMINGO is designed to be flexible and give the user a tool to solve real world recording, broadcast,
and sound reinforcement problems. It can provide an artistic choice of sounds at the flip of a switch.
The original Flamingo is not upgradable to this version
4
CLASS A DISCRETE TOPOLOGIES
Flamingo has a Class A audio path, which is significantly different than designs that use integrated
circuits. Class A circuits sound better because their distortion components tend to be Second Harmonic;
musically pleasing. IC Op-Amps do not have class A output circuits and their distortion components tend
to be high order odd harmonics; not musical. The most important thing to remember about Class A
circuits is that they sound better.
This type of technology has 2 disadvantages when compared to IC designs. 1) Due to the large number
of parts in discrete circuits; they are costly. 2) Class a circuits run warm.
FLAMINGO must have adequate ventilation. Vent holes must not be blocked. Do not set anything
directly on top of Flamingo. When mounting Flamingo in a rack, provide as much air flow as possible.
Leaving the back of the rack open is another option. If you provide adequate ventilation, you will be
rewarded with years of reliable operation.
All precision electronic equipment has an operating temperature that when reached will result in best
performance. Flamingo should be allowed a 10 to 15 minute warm up period before use.
CONTROL DESCRIPTION
THE SOUND SWITCH
The “sound” switch changes the amplifier type in the Flamingo. This alternative amplifier path creates a
different sound. In the “Fat” mode Flamingo has a much higher level of second and third harmonic distortion than in the non fat setting. The amount of color heard will depend on the type of signal and the operating level. With some material the change will be heard with the flip of the switch: and with other material
more listening may be required. Hearing a color change may take time and some ear training. With the
second harmonic being an octave it can have small or great effect depending on the purity of the sound.
For example, it will be easier to hear second harmonic distortion on a flute than on a guitar chord. The
main use of the sound switch is to fatten, thicken and warm up sound. If the idea of distortion seems a
bit scary, remember that the reason two different amplifiers with the same frequency response sound
different is because of their distortion characteristics. With careful circuit design we have created distortions that sound pleasing. The types of distortion that the “fat” setting generates are similar to the distortion that tubes generate.
The sound switch is very useful on vocals, bass, drums, and any other instruments that could benefit from
a richer sound. Vocal arrangements may require a thicker sound on some parts but not on others. As an
example; using the fat sound for the lead line and the harmonies, but not on the high vocal line can help
separate the parts in a vocal mix comprised of a lead vocal, vocal harmonies, and a high answer/echo
line.
A trick that can be tried in order to get more color is to turn up the gain switch by 6 db, antennuate the
output by 6 db. The higher signal level in the fat amplifier will result in more harmonic content being
generated. This same idea holds true with the iron amplifier.
5
Note that the sound switch changes both channels. An audible pop may be heard when the switch is
flipped. This occurs because a different amplifier is being switched into the audio path. Be aware that
flipping this switch during a recording take is not advised. At any other time the audible pop is merely a
momentary nuisance. Changing the circuit to eliminate the pop would compromise the audio path.
THE IRON SWITCH
“Iron” has a different distortion characteristic than an amplifier. Iron will distort low frequencies and not
higher frequencies. The amount of iron in the component will determine how much signal level at a
specific frequency that the component can handle before it’s distortion levels start rising. This means that
a signal level which will produce 5% distortion at 40Hz, may only produce a distortion level of .5% at 120
Hz. In recording a bass, for example, the distortion would be increasing the harmonic content of its low
notes, but would not have much effect on its high notes. Thus the low notes would be easier to hear
because of their increased harmonic content. The iron setting can be used on anything with low frequency content. Above 400 Hz the setting has little effect.
Note that the “iron” switch changes both channels. An audible pop may be heard when the switch is
flipped because a different amplifier is being switched into the audio path. Be aware that flipping this
switch during a recording take is not advised. Changing the circuit to eliminate the pop would compromise the audio path.
TONE SWITCH
The switch labeled “TONE” is a 3 position switch that allows standard Flamingo operation in the center
position. This is the same sound as the original Flamingo. Moving the switch to the right “THE LESS”
position results in a more transparent sound. This can be useful when accuracy is important, but also in
creating a contrast in sounds between different tracks. The cleaner sound may also be thought of as
faster. In the left most position there is additional color added to the preamp. This is different from the
color that the FAT switch adds, and is mostly second and third harmonic content. This added color is
also gain dependent. At lower gains this switch will have a very light effect, while at high gains it will
influence the sound of the audio more and more. Higher gain = more color
When using the fat position with the tone switch there are more possibilities in sounds . The original
flamingo had 4 sound choices, with the added tone switch there are now 12 different sound choices 4 in
each of the 3 tone switch positions. These sounds range from less color to more color and different
flavors. The harmonic content from the FAT and the TONE switches adds together in complex ways.
This results in sounds that are different, as compaired to driving the fat amp harder.
When using the TONE switch for adding more color the input impedance will switch to the lower value.
Thus the impedance switch will not make any difference in this setting.
Please Note, that the TONE switch changes both channels. An audible pop may be heard when the
switch is flipped. This occurs because a different amplifier is being switched into the audio path. Be
aware that flipping this switch during a recording take is not advised.
Using the “iron”, “fat” and “tone” settings together will create different vintage type sounds, and new
sounds.
6
INPUT IMPEDANCE SWITCH
This switch changes the impedance to a lower value from the standard Flamingo value. This lower value
has been recommended by David Bock, of Soundelux Microphones. This will match Flamingo’s input
impedance for optimum performance with the Soundlux Microphones. This will also work with other tube,
and transistor type microphones that use an output transformer in the microphone. If the impedance is to
low, the mic would have a loss of low frequency and, an increase in distortion. If the impedance is to high
the output transformer in the microphone will ring or have a high frequency rise that could result in a thin or
harsh sound.
THE GAIN SWITCH
The gain switch is a stepped switch with a 6db change per step starting with 6 db of gain and with maximum gain of 66 db. This approach was chosen for those who do stereo recording and would like to have
matched gain of the stereo channels.
THE ATTENUATOR
The attenuator is continuously variable to allow gain trim when needed. The gain range is from maximum
gain as set by the gain switch to no output. In normal operation this control is operated all the way up.
Some engineers like to be able to pull down the pre-amplifier’s output at the end of takes to prevent
recording unwanted room noise. This is easily done with the attenuator.
An additional function that can be done is to increase the pre-amplifiers gain with the gain switch and turn
down the attenuator to allow for over drive of the fat or iron amplifiers. In some cases this will allow an
increased level of fatness in the sound however, in some cases this may not be useable.
THE PHASE SWITCH
The phase switch allows phase reversal of each channel with the “+” symbol indicating no phase change
through the channel. Each channel has a separate switch.
PHANTOM POWER SWITCH
This switch allows the user to supply or not supply 48 volts to the microphone. Each channel has a
separate switch.
THE POWER SWITCH
Turns the unit on or off.
THE METER
The meter is an LED bar graph with 22 led’s and follows a VU type scale with +4 dbm considered to be 0
VU. The clip light indicates clipping in the input stage of the pre-amp and is calibrated to turn on at .5 db
below clipping.
7
I/O CONNECTORS
INPUT:
The maximum input level for the Flamingo is +18 dBm with the unit’s gain set at 6 db. The input is balanced with pin 2 being signal positive and pin 3 signal negative. The input connector is a XLR connector.
OUTPUT:
The maximum output level for Flamingo is +25 dBm. The XLR connector is wired with pin 2 hot or signal
“+”, pin 3 signal negative and pin 1 signal ground. If it is necessary to run the output unbalanced, tie pin 3
to pin 1 at the XLR connector.
POWER
Flamingo can run on 4 different line voltages. Please have voltage and fuse changed by a qualified
technician. The two voltage selection switches are located inside the unit near the power connector. The
unit MUST BE UNPLUGGED when changing voltage.
VOLTAGE AND FUSE TYPE:
100, 120, 230, 240 volt; 50/60 Hz; 45 watts
MDL 0.5A Fuse for 100V and 120V
MDL 0.3A Fuse for 230V and 240V
Pilot Lamp: # 7335
Shipping Weight: 15 lbs. (8.6 kg)
Depth Behind Panel: 10 inches (31.75 cm) plus cabling
Panel Height: 1 rack space
Noise:
Input Impedance: 8.5K ohms
Frequency Response:
8
CRANE SONG
LTD.
2117 E. 5th Street
Superior, WI 54880 USA
tel. 715-398-3627
fax. 715-398-3279
DISCRETE CLASS A MIC PRE-AMP
REGISTRATION FORM
Please fill out this form and return. It will be used for sending updates
and pertinent information as it becomes available.
Thank you.
NAME___________________________________________________
STUDIO NAME___________________________________________
ADDRESS ______________________________________________
CITY___________________________STATE_____ ZIP___________
COUNTRY________________PHONE ________________________
SERIAL # _______________________________________________
DEALER___________________________________________________
PURCHASE PRICE _______________________
EMAIL________________
WEBSITE_______________________
9