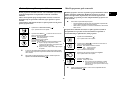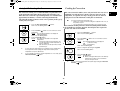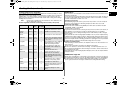
1
CUPTOR CU MICROUNDE Manual de utilizare si ghid de preparare CE1185GW CE1185GB CE1185UB Code No.: DE68-03190B Ghid rapid .................................................................................................. 2 Folosirea functiunii de curatare cu aburi - Steam Cleaning ........................ 3 Panou de control ...................................................................................... 4 Cuptor ........................................................................................................ 4 Accesorii .................................................................................................... 5 Folosire manual de instructiuni ................................................................ 5 Masuri de siguranta ................................................................................... 6 Instalarea cuptorului cu microunde .......................................................... 7 Setarea ceasului ........................................................................................ 8 Verificarea functionarii corecte a cuptorului ........................................ 8 Modul de functionare a cuptorului cu microunde ............................... 9 Ce trebuie facut atunci cand cuptorul nu functioneaza ..................... 9 Preparare/ Reincalzire .......................................................................... 10 Nivele putere si variatii ale timpului ...................................................... 10 Oprire preparare .................................................................................... 11 Ajustarea timpului de preparare .......................................................... 11 Folosirea functiunii Auto preparare ........................................................... 12 Folosirea functiunii de dezghetare automata ............................................ 13 Folosirea farfuriei crustate ........................................................................ 14 Preincalzirea rapida a cuptorului .............................................................. 15 Preparare prin convectie ........................................................................... 15 Prajire ....................................................................................................... 16 Alegerea pozitiei elementului de incalzire ................................................. 16 Alegerea accesoriilor ................................................................................ 16 Mod de preparare combinat ...................................................................... 17 Blocarea cuptorului cu microunde ............................................................ 17 Oprirea semnalului sonor .......................................................................... 18 Oprirea manuala a platanului .................................................................... 18 Ghid accesorii de preparare ..................................................................... 19 Ghid de preparare ..................................................................................... 20 Curatarea cuptorului cu microunde ........................................................... 27 Depozitarea si repararea cuptorului cu microunde ................................... 28 Specificatii tehnice .................................................................................... 28 Ghid rapid RO Daca doriti sa dezghetati rapid un aliment Daca doriti sa preparati un aliment 1. Apasati butonul Microwave( ) . Apoi : Apasati butonul care clipeste. 1. Introduceti alimentul congelat in cuptor. 1. Apasati butonul Power Defrost( ) . Apoi : Apasati butonul care clipeste. 2. Apasati butonul Select ( ) pana ce este afisat nivelul de putere dorit. Apoi : Rotiti butonul care clipeste. 2. Selectati tipul alimentului ce va fi dezghetat apasand butonul Select( ) , pana ce categoria dorita va fi afisata. Apoi : Rotiti butonul care clipeste. 3. Setati timpul de preparare rotind butonul Jog Dial . Apoi : Apasati butonul care clipeste. 3. Selectati greutatea rotind butonul Jog Dial. Apoi : Apasati butonul care clipeste. 4. Apasati butonul Start( ) . Rezultat: Incepe prepararea alimentului. ◆ La sfarsitul prepararii, cuptorul va emite un bip si indicatia “0” va clipi de patru ori. Apoi cuptorul va emite un bip la fiecare minut. 4. Apasati butonul Start( ) . Rezultat: Incepe dezghetarea alimentului congelat. ◆ La sfarsitul prepararii, cuptorul va emite un bip si indicatia “0” va clipi de patru ori. Apoi cuptorul va emite un bip la fiecare minut. Daca doriti sa mariti timpul de preparare Lasati alimentul in cuptor. Apasati butonul +30s( ) o data sau de mai multe ori, pentru fiecare 30 de secunde pe care doriti sa le adaugati. 2 Folosirea functiunii Steam Cleaning Avertizare! • Vasul cu apa poate fi folosit numai cu functiunea “Steam Clean” . • Atunci cand preparati alimente solide, scoateti vasul de apa din cuptor, deoarece acesta poate provoca incendiu sau deteriorarea cuptorului. Aburii proveniti de la sistemul steam clean vor inmuia suprafata cavitatii. Dupa folosirea functiunii steam clean , puteti curata usor cuptorul. ☛ ☛ ☛ ☛ Folositi aceasta functiune numai dupa ce cuptorul s-a racit complet. (temperatura camerei) Folositi numai apa obisnuita si nu folositi niciodata apa distilata. Dupa functiunea Steam cleaning este recomandata folosirea functiunii de deodorizare. Daca dechideti usa in timpul acestei operatii, va fi afisata indicatia « E-01» (Apa din cuptor va fi foarte fierbinte, datorita functiunii steam cleaning.) 1. Deschideti usa. 2. Umpleti vasul cu apa, pana la marcaj. (Continutul pana la linie este de 30 ml.) 3. Atasati vasul cu apa in partea dreapta a cuptorului. 4. Inchideti usa. 5. Apasati butonul Steam clean ( ) . (Lampa nu functioneaza in timpul acestei operatiuni.) 6. Deschideti usa. 7. Curatati cavitatea interioara cu o carpa uscata. 3 RO Panoul de control Cuptor RO ORIFICII DE VENTILATIE 1 2 8 3 9 4 10 11 5 ELEMENT INCALZIRE USA ORIFICII DE VENTILATIE 6 MANER USA PANOU DE CONTRO PLATAN DISPOZITIVE DE INEL DE RULARE SIGURANTA CUPLAJ INCUIETORI USA 12 7 13 14 1. BUTON MICROUNDE 2. BUTON GRATAR 3. BUTON DEZGHETARE AUTOMATA 4. BUTON MOD COMBINAT 5. BUTON AUTO PREPARARE 6. AFISAJ 7. BUTON STOP / ANULARE 8. BUTON CONVECTIE 9. 10. 11. 12. 13. 14. BUTON PREINCALZIRE RAPIDA BUTON SELECTARE BUTON STEAM CLEAN BUTON JOG DIAL BUTON START BUTON PORNIRE/ OPRIRE PLATAN 4 Accesorii Folosirea manualului de instructiuni In functie de modelul pe care l-ati achizitionat, vi se vor livra cateva accesorii, care pot fi folosite in diferite moduri. Tocmai ati achizitionat un cuptor cu microunde SAMSUNG. RO Manualul de instructiuni cuprinde informatii importante referitoare la prepararea cu ajutorul cuptorului cu microunde: • Masuri de siguranta • Accesorii potrivite si vesela de preparare • Sfaturi utile de preparare In interiorul manualului veti gasi un ghid rapid, care va va explica trei operatii de baza: • Preparare (mod microunde) • Dezghetare • Marirea duratei de preparare, daca alimentul nu este preparat corespunzator sau necesita reincalzire La inceputul manualului veti gasi ilustratii asupra cuptorului, si in special ale panoului de comanda, astfel ca veti recunoaste butoanele mult mai usor. Procedurile pas cu pas folosesc doua simboluri diferite. 1. Cuplaj, deja plasat pe axul motorului situat la baza cuptorului. Scop: Cuplajul roteste platanul. 2. Inel de rulare, care se plaseaza in centrul cuptorului. Inelul de rulare sustine platanul. Scop: 3. Platan, care se plaseaza pe inelul de rulare cu centrul fixandu-se la cuplaj. Scop: Platanul serveste ca suprafata principala de preparare; poate fi scos cu usurinta, pentru curatare. 4. Rafturi metalice (superior, inferior), care se plaseaza pe platan. Scop: Rafturile metalice pot fi folosite pentru prepararea a doua portii in acelasi timp. Portia mai mica poate fi plasata pe platan iar cea de a doua portie pe raftul metalic. Rafturile metalice pot fi folosite in modurile gratar, convectie si preparare combinata. ☛ Important 5. Vas pentru apa, care se plaseaza in partea dreapta a cuptorului.. Scop: Vasul de apa poate fi folosit pentru curatarea cuptorului. ✉ Nota PRECAUTII PENTRU EVITAREA UNEI POSIBILE EXPUNERI EXCESIVE LA ENERGIA MICROUNDELOR Cititi cu atentie urmatoarele masuri de siguranta; in caz contrar poate avea loc o expunere la energia microundelor, ce poate avea urmari neplacute. (a) In nici un caz, nu trebuie sa incercati sa folositi cuptorul cu microunde cu usa deschisa, sa modificati incuietorile de siguranta ale usii sau sa introduceti obiecte in gaurile incuietorilor de siguranta. (b) Nu plasati nici un obiect intre usa cuptorului si partea frontala si nu permiteti resturilor alimentare sa se acumuleze pe suprafetele de etansare. Asigurati-va ca usa si suprafetele de etansare sunt curate, stergandu-le dupa folosire cu o carpa umeda si apoi cu o carpa moale si uscata. (c) Nu folositi cuptorul cu microunde, daca acesta este defect. Apelati la ajutorul unui tehnician service, instruit de catre producator. Este foarte important ca usa cuptorului sa se inchida corect si sa nu existe nici o defectiune a: (1) Usii, incuietorilor acesteia si a suprafetelor de etansare (2) Balamalelor usii (rupte sau slabite) (3) Cablului de alimentare (d) Cuptorul cu microunde nu trebuie modificat sau reparat, decat de catre un tehnician service calificat corespunzator si instruit de catre producator. 6. Farfurie crustata, care se plaseaza pe platan. Scop: Farfuria crustata este folosita pentru a rumeni mai bine alimentele, in modurile de preparare microunde si combinat cu gratar. 5 Masuri de siguranta RO Masuri de siguranta importante. Cititi cu atentie si pastrati manualul pentru o folosire ulterioara. Inainte de a prepara alimente sau lichide in cuptor, va rugam sa verificati daca au fost luate urmatoarele masuri de siguranta. 8. Aveti o grija deosebita atunci cand, incalziti lichide sau alimente pentru copii. • Lasati intotdeauna un timp de asteptare de 20 de secunde, dupa ce cuptorul a fost oprit, pentru a permite echilibrarea temperaturii. • Amestecati pe durata incalzirii, daca este necesar, si intotdeauna dupa incalzire. • Pentru a preveni fierberea intarziata si o posibila oparire, ar trebui sa introduceti o lingurita de plastic sau o bagheta de sticla in lichide si amestecati inainte, in timpul si dupa preparare. • In caz de oparire, urmati instructiunile de prim ajutor urmatoare: * Introduceti zona oparita in apa rece, pentru cel putin 10 minute. * Acoperiti cu o haina curata si uscata. * Nu aplicati nici un fel de creme, uleiuri sau lotiuni. • Nu umpleti niciodata complet vasul si alegeti un vas care este mai larg la gura decat la baza, pentru a preveni scurgerea la fierbere a lichidului. Sticlele cu gat subtire pot de asemenea exploda, daca sunt supraincalzite. • Verificati intotdeauna temperatura alimentelor pentru copii si a laptelui, inainte de servire. • Nu incalziti niciodata o sticla pentru copii cu biberonul atasat; poate exploda la supraincalzire. 1. Nu folositi nici un vas metalic in interiorul cuptorului cu microunde: • Containere metalice • Vesela cu ornamentatii de aur sau argint • Frigarui , furculite, etc. Motiv: Pot apare scantei sau arc electric, care vor deteriora cuptorul. 2. Nu incalziti: • Sticle, borcane, containere etanse sau sigilate in vid. Ex: Borcane cu alimente pentru copii. • Alimente sigilate ermetic. Ex: Oua, rosii. Presiunea va creste la incalzire si poate duce la explozia acestora. Motiv: Sfat: Scoateti capacele si intepati sacii sau pungile, etc. 3. Nu puneti in functiune cuptorul cu microunde, atunci cand acesta este gol. Peretii cuptorului se pot deteriora. Motiv: Sfat: Lasati intotdeauna un pahar cu apa in interiorul cuptorului. Apa va absoarbe microundele in cazul unei porniri accidentale a cuptorului cu microunde, atunci cand acesta este gol. 9. Aveti grija sa nu deteriorati cablul de alimentare. • Nu introduceti cablul de alimentare sau stecherul in apa si tineti cablul de alimentare departe de suprafetele incalzite. • Nu folositi acest aparat daca, cablul de alimentare sau stecherul este defect. 10. Atunci cand deschideti usa cuptorului, stati la o lungime de brat de acesta. Motiv: Aerul cald sau aburul eliberat pot provoca oparirea. 4. Nu acoperiti orificiile de ventilatie cu carpe sau hartie. Motiv: Carpele sau hartia pot lua foc datorita aerului cald evacuat din cuptor. 11. Pastrati curat interiorul cuptorului cu microunde . Motiv: Particulele de alimente sau petele de ulei de pe peretii sau baza cuptorului, pot deteriora vopseaua si reduce eficienta aparatului. 5. Folositi intotdeauna manusi atunci cand scoateti alimente sau vesela din cuptor. Motiv: Unele vase absorb microundele si caldura este transferata intotodeauna de la aliment la vas. De aceea, vasele sunt fierbinti. 12. Un "clic" poate fi observat pe durata functionarii, in special, atunci cand cuptorul se afla in modul de dezghetare. Motiv: Atunci cand puterea de iesire se schimba, este posibil sa auziti acest sunet. 13. In cazul in care cuptorul cu microunde functioneaza gol, alimentarea cu energie se va opri automat, pentru siguranta. Puteti folosi din nou cuptorul, in mod normal, dupa o perioada de 30 de minute. • Nu va ingrijorati daca dupa terminarea prepararii cuptorul continua sa functioneze. Motiv: Acest produs este conceput sa fie ventilat cateva minute, fara functionare microunde (MWO), pentru a raci componentele electronice, la apasarea butonului stop sau la deschiderea usii, la sfarsitul prepararii, dupa functionarea in modul microunde, gratar, convectie, microunde+convectie, microunde+gratar. La sfarsitul prepararii cuptorul va emite un bip si indicatia “0” va clipi de patru ori. Apoi cuptorul va emite un bip la fiecare minut. 6. Nu atingeti elementul de incalzire si peretii interiori ai cuptorului cu microunde. Acesti pereti ar putea sa fie destul de fierbinti incat sa va arda chiar Motiv: si dupa ce prepararea a luat sfarsit. Nu permiteti ca materiale inflamabile sa intre in contact cu aria interioara a cuptorului. Lasati intai cuptorul sa se raceasca. 7. Pentru a reduce riscul unui incendiu in cavitatea cuptorului: • Nu depozitati materiale inflamabile in interiorul cuptorului cu microunde. • Indepartati sigiliile metalice ale ambalajelor de plastic sau hartie, ale alimentelor. • Nu folositi cuptorul cu microunde pentru a usca ziare. • Daca observati ca iese fum, lasati usa cuptorului inchisa si opriti aparatul sau deconectati-l de la sursa de alimentare. 6 Masuri de siguranta (continuare) Instalarea cuptorului cu microunde MASURI DE SIGURANTA IMPORTANTE Asezati cuptorul cu microunde pe o suprafata neteda, dreapta si destul de rezistenta incat sa suporte greutatea acestuia. Pe durata prepararii, ar trebui sa va uitati din cand in cand in interiorul cuptorului, atunci cand alimentele sunt incalzite sau preparate in recipiente de unica folosinta din plastic, hartie sau alt material combustibil. 20cm deasupra 10cm in spate AVERTIZARE: Daca usa sau garniturile de etansare ale acesteia sunt defecte, nu folositi cuptorul pana la repararea de catre personal autorizat. 85 cm de la podea AVERTIZARE: Operatiunile de service sau reparatii, ce implica demontarea capacului de protectie impotriva expunderii la energia miocroundelor, trebuie executate numai de catre personal calificat. 3. Acest cuptor cu microunde trebuie pozitionat astfel incat stecherul cablului de alimentare sa fie usor accesibil. AVERTIZARE: Lichidele sau alte tipuri de alimente nu trebuie incalzite in recipiente etanse, deoarece acestea pot exploda. ☛ Nu blocati niciodata orificiile de ventilatie, deoarece cuptorul se va supraincalzi si se va opri automat. Va ramane inoperabil pana ce se raceste suficient. ☛ Pentru siguranta dumneavoastra, conectati cablul de alimentare la o priza cu 3-pini, 230 Volti, 50Hz, AC si cu legare la pamant. In cazul in care cablul de alimentare se deterioreaza, acesta trebuie inlocuit de producator sau un agent de service calificat. ☛ Nu instalati cuptorul cu microunde in mediu cald si umed, precum in apropierea unui cuptor obisnuit sau radiator. Specificatiile sursei de alimentare a cuptorului trebuie respectate si orice extensie de cablu trebuie sa aiba acelasi standard ca si cablul de alimentare, livrat odata cu cuptorul. Stergeti interiorul si etansarea usii cu o carpa umeda, inainte de a folosi cuptorul cu microunde pentru prima data. AVERTIZARE: Permiteti copiilor sa foloseasca cuptorul cu microunde fara supraveghere, numai atunci cand acestia au fost corespunzator instruiti, astfel incat sa fie capabili de a utiliza aparatul in siguranta si de a intelege riscurile unei utilizari incorecte. AVERTIZARE: Carcasa si usa cuptorului cu microunde vor deveni foerbinti in timpul prepararii prin convectie sau in timpul prepararii in mod combinat. ☛ 10cm pe laterale 1. Atunci cand instalati cuptorul cu microunde, asigurati-va ca exista o ventilatie adecvata, lasand un spatiu de cel putin 10 cm in spate si in laterale, un spatiu de 20 cm deasupra acestuia si un spatiu de 85 de cm de la podea la cuptorul cu microunde. 2. Scoateti toate materialele de ambalare din interiorul cuptorului. Instalati inelul de rulare si platanul. Verificati daca platanul se invarte corect. Nu puneti in functiune cuptorul cu microunde fara cuplaj, inel de rulare si platan. 7 RO RO Setarea ceasului Verificarea functionarii corecte a cuptorului Cuptorul cu microunde are un ceas incorporat. Ora poate fi afisata in numai in sistem de notare de 24 de ore. Trebuie sa setati ceasul: • Atunci cand instalati cuptorul cu microunde pentru prima data • Dupa o cadere de tensiune Urmatoarea procedura simpla va permite sa verificati, in orice moment, functionarea corecta a cuptorului cu microunde. Daca este necesar, consultati capitolul “Ce trebuie facut atunci cand cuptorul nu functioneaza” din pagina urmatoare. ✉ ✉ Nu uitati sa resetati ceasul atunci cand, se face trecerea de la ora de vara la cea de iarna si invers. 1. Rotiti butonul Jog Dial pentru a seta ora. Apoi : Apasati butonul care clipeste. Cuptorul trebuie conectat la priza de perete corespunzatoare. Platanul trebuie sa se afle in pozitia sa in interiorul cuptorului. Daca este folosit un nivel al puterii altul decat cel maxim, (100% 900 W) apa are nevoie de mai mult timp pentru a fierbe. Deschideti usa cuptorului tragand de manerul situat in partea dreapta a acesteia. Asezati un pahar cu apa pe platan. Inchideti usa. Apasati butonul start( ) si setati timpul de preparare la 4 sau 5 minute, apasand butonul start( ) de numarul corespunzator de ori. Result: Cuptorul cu microunde incalzeste apa timp de 4 - 5 minute. Apa ar trebui sa fiarba. 2. Apasati butonul start( ) . Apoi : Rotiti butonul care clipeste. 3. Rotiti butonul Jog Dial pentru a seta minutele. Apoi : Apasati butonul care clipeste. 4. Atunci cand ora este corect reglata, apasati butonul start( ) pentru a porni ceasul. Rezultat: Ora curenta va fi afisata atunci cand nu folositi cuptorul cu microunde. 8 Modul de functionare a cuptorului cu microunde Ce trebuie facut atunci cand cuptorul nu functioneaza corect Microundele sunt unde electromagnetice de inalta frecventa; energia eliberata permite prepararea sau reincalzirea alimentelor, fara a le schimba forma sau culoarea. Puteti folosi cuptorul cu microunde pentru: • Dezghetare • Reincalzire • Preparare Principiul de preparare RO Familiarizarea cu un nou aparat necesita intotdeauna o scurta perioada de timp. Daca intalniti una din problemele listate mai jos, incercati solutiile date, inainte de a contacta centrul service. ◆ Este normal. • Aparitia condensului in interiorul cuptorului cu microunde. • Iesirea aerului pe langa usa si carcasa exterioara. • Reflectarea luminii pe langa usa si carcasa exterioara. • Iesirea aburilor pe langa usa cuptorului. ◆ Alimentul nu este preparat deloc. • Ati setat timpul corect si ati apasat butonul Start( )? • Usa este inchisa? • Ati supraincarcat circuitul electric si ati provocat arderea unei sigurante sau declansarea unui intreruptor automat? ◆ Alimentul este prea mult sau prea putin preparat. • Ati setat durata de preparare corespunzator cu tipul alimentului? • Ati ales un nivel de putere corespunzator? ◆ Apar scantei si arc electric in interiorul cuptorului cu microunde. • Ati folosit vesela cu ornamente metalice? • Ati lasat o furculita sau o ustensila metalica in interiorul cuptorului? • Folia de aluminiu este prea aproape de peretii interiori ai cuptorului? ◆ Cuptorul cu microunde provoaca interferente cu radio-ul sau televizorul. • O usoara interferenta poate fi observata la radio sau televizor, atunci cand cuptorul functioneaza. Este normal. * Solutie: instalati cuptorul departe de radio, televizor sau antene. • Daca interferenta este detectata de catre procesorul cuptorului, afisajul ar putea fi resetat. * Solutie: deconectati cablul de alimentare si apoi reconectati-l. Resetati timpul. ◆ Mesajul “E-25" indica • Mesajul "E-25" este activat automat inainte de supraincalzirea cuptorului cu microunde. Daca mesajul "E-25" este activat, apasati butonul " " pentru a utiliza modul de initializare. 1. Microundele generate de magnetron sunt distribuite uniform, deoarece alimentele se rotesc pe platan. Alimentul este preparat bine si uniform. 2. Microundele sunt absorbite de aliment pana la o adancime de aproximativ 2,5 cm. Prepararea continua apoi, in timp ce caldura este disipata in interiorul alimentului. 3. Timpul de preparare variaza in functie de natura recipientului folosit si proprietatile alimentului: • Cantitate si densitate • Continutul de apa • Temperatura initiala (congelat sau nu) ☛ Deoarece, centrul alimentului este preparat prin disiparea caldurii, prepararea continua chiar si dupa ce ati scos alimentul din cuptor. Timpul de asteptare din retetele de la sfarsitul acestui manual, trebuie de aceea respectat, pentru a asigura: • O preparare uniforma a alimentului pana la centru • Aceeasi temperatura a alimentului (suprafata si interior). Daca informatiile de mai sus nu va permit sa rezolvati problema, contactati centrul local service Samsung. Va rugam sa va notati urmatoarele informatii; • • • Modelul si numarul de serie, marcat pe partea posterioara a cuptorului cu microunde Detaliile certificatului de garantie O descriere clara a problemei Apoi contactati dealerul dumneavoastra sau centrul service SAMSUNG. 9 RO Preparare/ Reincalzire Nivele de putere si variatii ale timpului Urmatoarea procedura va arata cum puteti prepara sau reincalzi alimente. Diferitele nivele de putere va permit sa adaptati cantitatea de energie disipata si prin urmare timpul necesar pentru prepararea sau reincalzirea alimentelor, in functie de tipul si cantitatea acestora. Puteti alege unul din cele sase nivele de putere. ☛ Verificati intotdeauna setarile facute pentru preparare, inainte de a lasa cuptorul nesupravegheat. Deschideti usa. Asezati alimentul in centrul platanului. Inchideti usa. Nu porniti niciodata cuptorul cu microunde, atunci cand acesta este gol. 1. Apasati butonul Microwave( ) . Rezultat: Va fi afisata urmatoarea indicatie: ( ) (mod microunde) Apoi : Apasati butonul care clipeste. 2. Selectati nivelul de putere corespunzator apasand din nou butonul Microwave( ) pana ce nivelul de putere dorit ceste afisat pe ecran. Pentru detalii suplimentare consultati tabelul cu nivele de putere. Apoi : Rotiti butonul care clipeste. Daca doriti sa aflati nivelul de putere curent al cavitatii cuptorului, apasati o data butonul Select( ). Daca doriti sa schimbati nivelul de putere in timpul prepararii, apasati butonul Select( ) de doua sau de mai multe ori, pentru a selecta nivelul de putere dorit. Pornire rapida: ✉ Procentaj Iesire Ridicat Mediu ridicat Mediu Mediu Mediu scazut Dezghetare Scazut 100 % 67 % 50 % 33 % 20 % 11 % 900 W 600 W 450 W 300 W 180 W 100 W Timpul de preparare prezentat in retete si in acest manual corespunde nivelului puterii de preparare specificat. 3. Setati timpul de preparare rotind butonul Jog Dial. • Exemplu: Pentru un timp de preparare de 3 minute, 30 de secunde, rotiti butonul catre dreapta pentru a seta 3:30. Rezultat: Este afisat timpul de preparare. Apoi : Apasati butonul care clipeste. 4. Apasati butonul Start( ) . Rezultat: Se aprinde lumina interioara a cuptorului si platanul incepe sa se roteasca. Incepe prepararea si atunci cand se termina: ◆ Cuptorul emite un bip si “0” clipeste de patru ori. Apoi cuptorul va emite un bip la fiecare minut. ✉ Nivel putere Daca doriti sa incalziti un aliment pentru o scurta perioada de timp, la putere maxima (900W), puteti de asemenea apasa butonul +30s ( ) o data pentru fiecare 30 de secunde de timp de preparare. Cuptorul va porni imediat. 10 Daca selectati un... Atunci timpul de preparare trebuie sa... Nivel ridicat de putere Nivel scazut de putere Scada Creasca Oprirea prepararii Ajustarea timpului de preparare Puteti opri prepararea in orice moment, pentru a: Ca si in cazul cuptoarelor traditionale, veti observa ca, in functie de caracteristicile alimentului si gustul dumneavoastra, va fi nevoie sa ajustati putin timpul de preparare. Puteti: • • • Verifica alimentul Intoarce sau amesteca alimentul Permite un timp de asteptare Pentru a opri prepararea... Atunci... Temporar Deschideti usa. Rezultat: Prepararea se opreste. Pentru a continua prepararea, inchideti usa si apasati butonul Start( ). Complet Apasati butonul Stop( ) . Rezultat: Prepararea se opreste. Daca doriti sa anulati setarile prepararii, apasati din nou butonul Stop( ). • • Verificati in orice moment modul in care se desfasoara prepararea prin simpla deschidere a usii Mari sau reduce timpul de preparare ramas 1. Pentru a creste timpul de preparare a alimentului, apasati butonul +30s( ) o data pentru fiecare 30 de secunde pe care doriti sa le adaugati. • Exemplu: Pentru a adauga trei minute, apasati butonul +30s( ) de sase ori. 2. In timpul prepararii, pentru a creste sau reduce timpul de preparare a alimentului, rotiti butonul Jog Dial catre stanga sau dreapta. 11 RO Folosirea functiunii Auto preparare RO Urmatorul tabel prezinta diferite programe de auto preparare, cantitati, timp de asteptare si recomandari potrivite. Programele 1, 4 si 5 folosesc numai energia microundelor. Programul 3 foloseste un mod combinat de preparare: microunde si gratar. Programul 2 foloseste un mod combinat de preparare: microunde si convectie. Functiunea Auto Cook( ) este programata cu setari diferite de preparare. Nu este nevoie sa setati nici timpul de preparare si nici nivelul puterii. Puteti ajusta numarul de portii de servire rotind butonul Jog Dial. ☛ Folositi numai recipiente compatibile si sigure. Deschideti usa. Asezati alimentul in centrul platanului. Inchideti usa. Cod Aliment Portie de servire Gata preparat (rece) 0.3-0.35 kg 0.4-0.45 kg 0.5-0.55 kg 3min. 2. Selectati tipul alimentului pe care doriti sa il preparati, apasand butonul Select ( ) . Consultati tabelul din pagina urmatoare pentru o descriere a diferitelor setari. Apoi : Rotiti butonul care clipeste. Asezati alimentul pe o farfurie ceramica si acoperiti cu pelicula. Acest program este potrivit pentru mancare constand in 3 elemente (de ex. carne cu sos, legume, orez sau paste). Pizza congelata 0.3-0.4 kg 0.45-0.55 kg 0.6-0.7 kg - Asezati o pizza congelata (-18°C) pe raftul mic. Asezati doua pizza congelate una pe raftul mic si cealalta pe cel inalt. 3. Selectati marimea portiei de servire rotind butonul Jog Dial. Apoi : Apasati butonul care clipeste. Bucati de pui 200-300 g (1 buc) 400-500 g (2 buc) 600-700 g (2-3 buc) 800-900 g (3-4 buc) 2-3min. Ungeti bucatile de pui cu ulei si condimentati-le cu piper, sare si paprika. Asezati bucatile de pui in cerc, pe raftul inalt, cu pielea orientata catre in jos. Intoarceti atunci cand cuptorul emite semnal sonor. Legume proaspete 0.2-0.25 kg 0.3-0.35 kg 0.4-0.45 kg 0.5-0.55 kg 0.6-0.65 kg 0.7-0.75 kg 2-3 min. Cantariti legumele dupa spalare, apoi curatati si taiati in bucati de aceeasi marime. Asezati-le intr-un vas de sticla cu capac. Adaugati 30 ml (2 linguri) de apa pentru prepararea a 200-250 g, 45 ml (3 linguri) pentru 300-450 g si adaugati 6075 ml (4-5 linguri) pentru 500-750 g. Amestecati dupa preparare. Atunci cand preparati cantitati mari, amestecati o data in timpul prepararii. Cartofi decojiti 0.3-0.35 kg 0.4-0.45 kg 0.5-0.55 kg 0.6-0.65 kg 0.7-0.75 kg 2-3 min. Cantariti cartofii dupa curatare, apoi spalati si taiati in bucati de aceeasi marime. Asezati cartofii intr-un cas de sticla cu capac. Adaugati 45 ml (3 linguri) de apa pentru a prepara 300450g, adaugati 60ml (4 linguri) pentru a prepara 500-750 g. 1. Apasati butonul Auto Cook( ). Apoi : Apasati butonul care clipeste. 4. Apasati butonul Start( ) . Rezultat: Alimentul va fi preparat in functie de setarile programate. ◆ Atunci cand se termina prepararea, cuptorul va emite patru bip-uri si indicatia “0” va clipi de patru ori. Apoi cuptorul va emite un bip la fiecare minut. 12 Timp de asteptare Recomandari Folosirea functiunii de dezghetare automata Functiunea Power Defrost( ) va permite sa dezghetati carne, pasari, peste, paine, prajituri si fructe. Timpul de dezghetare si nivelul de putere sunt setate automat. Dumneavoastra selectati numai programul si greutatea. ☛ Urmatorul tabel prezinta diferite programe de dezghetare Power Defrost, cantitati, timp de asteptare si recomandari potrivite. Indepartati toate materialele de ambalare, inainte de dezghetare. Asezati carnea , pasarea sau pestele pe o farfurie ceramica. Cod Folositi numai recipiente compatibile si sigure. Aliment Portie de servire Deschideti usa. Asezati alimentul congelat pe o farfurie ceramica, in centrul platanului. Inchideti usa. 0.2~2kg 20-90 min. Inveliti marginile in folie de aluminiu. Intoarceti alimentul atunci cand, cuptorul emite un bip. Acest program este potrivit pentru carne de oaie, carne de miel, carne de porc, fripturi, cotlete, chiftele. Pasare 0.2~2kg 20-90 min. Inveliti marginile in folie de aluminiu. Intoarceti alimentul atunci cand, cuptorul emite un bip. Acest program este potrivit pentru bucati de pui cat si pentru pui intreg. Peste 0.2~2kg 20-60 min. Inveliti coada pestelui intreg in folie de aluminiu. Intoarceti alimentul atunci cand, cuptorul emite un bip. Programul este potrivit pentru peste intreg si fille de peste. Paine 0.12~1kg 10-60 min. Asezati painea pe hartie de bucatarie si intoarceti imediat ce cuptorul emite un bip. Asezati produsele de patiserie pe o farfurie ceramica plata si intoarceti imediat ce cuptorul emite un bip.(Cuptorul va continua sa functioneze si se va opri atunci cand deschideti usa. Acest program este potrivit pentru orice tip de paine, felii sau intreaga, precum si pentru chifle si baghete. Asezati chiflele in cerc. Acest program este potrivit pentru toate tipurile de biscuiti, prajituri cu branza si produse de patiserie. Programul nu este recomandat pentru prajituri cu umpluturi de fructe precum si pentru prajituri cu glazura de ciocolata. Fructe 0.1~0.6kg 5-20 min. Distribuiti fructele uniform pe o farfurie ceramica plata. Acest program este potrivit pentru toate tipurile de fructe. 3. Selectati marimea portiei de servire rotind butonul Jog Dial. Apoi : Apasati butonul care clipeste. 4. Apasati butonul Start( ) . Rezultat: ◆ Incepe dezghetarea alimentului. ◆ In timpul dezghetarii, cuptorul emite semnale sonore pentru a va aminti sa intoarceti alimentul. 5. Apasati din nou butonul Start( ) pentru a termina dezghetarea. Rezultat: Atunci cand se termina prepararea, cuptorul va emite patru bip-uri si indicatia “0” va clipi de patru ori. Apoi cuptorul va emite un bip la fiecare minut. ☛ De asemenea, puteti dezgheta alimentele manual. Pentru aceasta, selectati functiunea microunde cu un nivel de putere de 180 W. Consultati capitolul “Dezghetare” de la pagina 23 pentru detalii suplimentare. 13 Recomandari Carne 1. Apasati butonul Power Defrost ( ). Apoi : Apasati butonul care clipeste. 2. Selectati tipul alimentului pe care doriti sa il preparati, apasand butonul Select ( ). Consultati tabelul din pagina urmatoare pentru o descriere a diferitelor setari. Apoi : Rotiti butonul care clipeste. Timp de asteptare RO Folosirea farfuriei crustate RO Cum se curata farfuria crustata La prepararea in cuptoare cu microunde, folosind modul de preparare gratar sau microunde, alimentele precum produsele de patiserie si pizza sunt moi in interior. Folosind farfuria crustata Samsung alimentele devin crocante si uniform preparate. Farfuria crustata poate fi folosita si pentru prepararea suncii, oualelor, carnatilor, etc. ☛ Cea mai buna metoda de curatare a farfuriei crustate este spalarea cu apa calda si detergent. Clatiti apoi cu apa rece. Nu folositi o perie sau un burete dur, deoarece se poate deteriora suprafata farfuriei. Preincalziti farfuria crustata inainte de utilizare, timp de 3 pana la 5 minute, selectand modul combinat de preparare: • Mod combinat de preparare: convectie (220°C) si microunde (600W nivel putere) • Mod combinat de preparare: gratar si microunde (nivel putere 300 W) • Consultati pagina 17. ☛ 1. Preincalziti farfuria crustata, asa cum este descris mai sus. • Folositi intotdeauna manusi, pentru a scoate farfuria crustata din cuptor, deoarece devine foarte fierbinte. 2. Ungeti farfuria cu ulei daca doriti sa preparati alimente precum sunca si oua, pentru a rumeni mai bine alimentele. 3. Asezati alimentul pe farfuria crustata. • Nu asezati obiecte care nu sunt rezistente la temperatura ridicata pe farfuria crustata; ex. vase din plastic. 4. Asezati farfuria crustata pe platan in cuptor. • Nu folositi niciodata farfuria crustata fara platan. 5. Apasati butonul Combi. Apoi : Apasati butonul care clipeste. 6. Selectati nivelul corespunzator de putere apasand butonul Select( ) . Apoi : Rotiti butonul care clipeste. 7. Setati apoi timpul de preparare rotind butonul Jog Dial pana ce timpul de preparare corespunzator este afisat pe ecran. Apoi : Apasati butonul care clipeste. 8. Apasati butonul Start( ). Rezultat: Incepe prepararea. ◆ Atunci cand se termina prepararea, cuptorul va emite un semnal sonor si indicatia “0” va clipi de patru ori. Apoi cuptorul va emite un bip la fiecare minut. 14 Farfuria crustata este acoperita cu un strat de Teflon. Daca folositi incorect farfuria acest strat se poate deteriora. • Nu taiati niciodata alimente pe farfuria crustata. Luati alimentele de pe farfurie inainte de taierea acestora • Este recomandat sa intoarceti alimentele cu o lingura de lemn sau plastic. Preincalzirea rapida a cuptorului Mod de preparare prin convectie Pentru prepararea in modul convectie, este recomandat sa preincalziti cuptorul la temperatura corespunzatoare inainte de a introduce alimentul. Atunci cand cuptorul ajunge la temperatura necesara, aceasta este mentinuta timp de aproximativ 10 minute; apoi cuptorul se opreste automat. Verificati daca elementul de incalzire se afla in pozitia corecta pentru tipul de preparare dorit. Modul de preparare convectie va permite sa preparati alimente in mod similar cuptoarelor traditionale. Modul microunde nu este folosit. Puteti seta temperatura, dupa dorinta, intr-o banda cuprinsa intre 40°C si 250°C, in opt nivele presetate. Timpul maxim de preparare este de 60 de minute. 1. Apasati butonul Auto Fast Preheat( Apoi : Apasati butonul care clipeste. ☛ ). Verificati daca elementul de incalzire se afla in pozitie orizontala si daca platanul este in pozitia corecta. Deschideti usa cuptorului si asezati alimentul pe raftul mai mic, situat pe platan. 2. Apasati butonul Select ( ) o data sau de mai multe ori pentru a seta temperatura. Rezultat: Este afisata indicatia urmatoare 250°C(temperatura) Apoi : Rotiti butonul care clipeste. 3. Apasati butonul Start( ) . Rezultat: Cuptorul este preincalzit la temperatura dorita. ◆ Dupa ce ajunge la temperatura setata, cuptorul emite sase bipuri si temperatura este mentinuta timp de 10 minute. ◆ Dupa 10 minute, cuptorul emite 4 bipuri si apoi se opreste. ✉ ✉ Daca doriti sa preincalziti rapid cuptorul. • Folositi intotdeauna manusi atunci cand scoateti recipientele din cuptor, deorece acestea sunt foarte fierbinti. • Puteti obtine o preparare si o rumenire a alimentelor, daca folositi raftul mai mic. 1. Apasati butonul Convection ( ) . Apoi : Apasati butonul care clipeste. 2. Apasati butonul Select( ) o data sau de mai multe ori pentru a seta temperatura. Rezultat: Este afisata indicatia urmatoare: (mod convectie) 250°C (temperatura) Apoi : Rotiti butonul care clipeste. In cazul in care temperatura interioara a atins temperatura setata, cuptorul emite 6 bipuri si temperatura setata este mentinuta timp de 10 minute. 3. Setati timpul de preparare rotind butonul Jog Dial. Apoi : Apasati butonul care clipeste. Daca doriti sa aflati temperatura curenta a cavitatii cuptorului apasati butonul Auto Fast Preheat( ). 4. Apasati butonul Start( ) . Rezultat: Incepe prepararea: ◆ Atunci cand se termina prepararea, cuptorul va emite un semnal sonor si indicatia “0” va clipi de patru ori. Apoi cuptorul va emite un bip la fiecare minut. ✉ Puteti verifica temperatura in orice moment, apasand butonul Auto Fast Preheat( 15 ). RO RO Prajirea Alegerea pozitiei elementului de incalzire Gratarul va permite sa incalziti si sa rumeniti rapid alimentele, fara a folosi microundele. Elementul de incalzire este folosit atunci cand prajiti alimente. Elementul de incalzire este folosit la prepararea alimentelor prin convectie sau prajire. Poate fi amplasat in una din cele doua pozitii: • • Folositi intotdeauna manusi atunci cand scoateti recipientele din cuptor, deorece acestea sunt foarte fierbinti. Puteti obtine o mai buna preparare si o rumenire a alimentelor, daca folositi raftul mai inalt.. • ☛ Verificati daca elementul de incalzire este in pozitie orizontala si daca raftul se afla in pozitia corecta. 1. Deschideti usa cuptorului si asezati alimentul pe raft. Pozitie orizontala pentru preparare prin convectie sau prajire Schimbati pozitia elementului de incalzire numai atunci cand, acesta este rece si nu folositi o forta excesiva atunci cand il plasati in pozitie verticala. Pentru a plasa elementul in... Atunci... Pozitie verticala ◆ Trageti in jos elementul de incalzire ◆ Impingeti elementul catre spatele cuptorului pana ce acesta este paralel cu peretele posterior Pozitie orizontala (preparare prin convectie sau prajire) ◆ Trageti elementul catre dumneavoastra ◆ Impingeti elementul in sus, pana ce este paralel cu partea de sus a cuptorului. 2. Apasati butonul Grill ( ) . Rezultat: Vor fi afisate urmatoarele indicatii: (mod gratar) Apoi : Rotiti butonul care clipeste. • Nu puteti seta temperatura gratarului. 3. Setati timpul de prajire rotind butonul Jog Dial. • Timpul maxim de prajire este de 60 de minute. Apoi : Apasati butonul care clipeste. 4. Apasati butonul Start( ) button. Rezultat: Incepe prajirea: ◆ Atunci cand se termina prepararea, cuptorul va emite un semnal sonor si indicatia “0” va clipi de patru ori. Apoi cuptorul va emite un bip la fiecare minut. Alegerea accesoriilor Prepararea traditionala prin convectie necesita accesorii de preparare. Oricum, trebuie sa folositi accesorii de preparare pe care la utilizati la cuptoarele traditionale. Recipientele recomandate pentru microunde nu sunt de obicei potrivite pentru prepararea prin convectie; nu folositi containere sau vase din plastic, cesti de hartie, etc. Daca doriti sa selectati un mod combinat de preparare (microunde si gratar sau convectie), folositi numai vase recomandate pentru microunde. Ustensilele sau vasele metalice pot deteriora cuptorul. ☛ 16 Pentru detalii referitoare la ustensile si vase potrivite, consultati capitolul "Ghid accesorii de preparare", de la pagina 19 . Modul combinat de preparare convectie si gratar Blocarea cuptorului cu microunde Mod combinat de preparare ce foloseste incalzirea prin convectie si gratarul, pentru preparare rapida si rumenire in acelasi timp. Cuptorul cu microunde este prevazut cu un program special Child Safety, care va permite sa blocati functionarea cuptorului, astfel incat, copiii sau persoanele nefamiliarizate cu acesta, sa nu il poata activa din greseala. Puteti bloca, in orice moment, functionarea cuptorului. ☛ Folositi intotdeauna vesela recomandata pentru microunde. Vasele din sticla sau ceramica sunt ideale, deoarece permit microundelor sa penetreze uniform alimentele. Folositi intotdeauna manusi, atunci cand atingeti recipientele din as cuptor, deoarece acestea sunt foarte fierbinti. Puteti prepara si praji mai bine alimentele, daca folositi raftul mic. 1. Apasati simultan butoanele Grill si Convection (timp de aproximativ trei secunde). Rezultat: ◆ Cuptorul este blocat. ◆ Este afisata indicatia “L”. Deschideti usa. Asezati alimentul pe platan sau pe raftul mic sau mare, ce trebuie amplasate pe platan. Inchideti usa. Elementul de incalzire trebuie sa fie in pozitie orizontala. 2. Pentru a debloca cuptorul, apasati din nou butoanele Grill si Convection in acelasi timp (timp de aproximativ trei secunde). Rezultat: Cuptorul poate fi folosit normal. 1. Apasati butonul Combi. Apoi : Apasati butonul care clipeste. 2. Selectati nivelul corespunzator de putere apasand butonul Select ( ) . Consultati tabelul cunivele de putere pentru o descriere a diferitelor setari. Apoi : Rotiti butonul care clipeste. 3. Setati timpul de preparare rotind butonul Jog Dial. Timpul maxim de preparare este de 60 de minute. Apoi : Apasati butonul care clipeste. 4. Apasati butonul Start( ) . Rezultat: ◆ Incepe prepararea in mod combinat. ◆ Atunci cand se termina prepararea, cuptorul va emite un semnal sonor si indicatia “0” va clipi de patru ori. Apoi cuptorul va emite un bip la fiecare minut. Mod Nivel putere C1 Microunde(300w) + Gratar C2 Microunde(180w) + Convectie (200°C) C3 Microunde(450w) + Convectie (200°C) C4 Microunde(600w) + Convectie (220°C) 17 RO RO Oprirea semnalului sonor Oprirea manuala a platanului Puteti opri in orice moment semnalul sonor de avertizare al cuptorului. Butonul on/off ( ) de pornire/ oprire a platanului va permite sa folositi vase de mari dimensiuni, care pot impiedica rotirea platanului (numai mod de preparare manual). 1. Apasati butoanele Microwave( ) si Grill ( ) in acelasi timp (timp de aproximativ o secunda). Rezultat: Cuptorul nu va mai emite semnal sonor pentru a indica sfarsitul unei functiuni. ☛ 2. Pentru a activa din nou semnalul sonor, apasati butoanele Microwave( ) si Grill ( ) in acelasi timp (timp de aproximativ o secunda). Rezultat: Cuptorul functioneaza normal. In acest caz, rezultatele prepararii vor fi mai slabe, deoarece prepararea nu este uniforma. Va recomandam sa intoarceti vasul manual la jumatatea procesului de preparare. Atentie ! Nu actionati niciodata platanul, fara aliment in cuptor. Motiv: Aceasta poate cauza incendiu sau deteriorarea aparatului. 1. Apasati butonul Turntable on/off ( ). Rezultat: Platanul nu se mai roteste. 2. Pentru a porni miscarea de rotatie a platanului, apasati din nou butonul Turntable on/off ( ). Rezultat: Platanul se roteste. ✉ 18 Nu apasati butonul Turntable on/off( ) in timpului procesului de preparare. Anulati procesul de preparare, inainte de a apasa butonul Turntable On/Off( ). Ghid accesorii de preparare Pentru a prepara alimente in cuptorul cu microunde, microundele trebuie sa poata penetra alimentul, fara a fi reflectate sau absorbite de vesela folosita. De aceea, trebuie sa alegeti cu grija accesoriile de preparare. Daca acestea sunt marcate cu simbolul "microwave safe", nu trebuie sa va mai faceti griji. Urmatorul tabel prezinta diferite tipuri de accesorii de preparare si indica daca si cum trebuie folosite, in cuptorul cu microunde. Accesorii Metal • • Hartie • • Vesela Ambalaje cu sigilii metalice ✗ ✗ Pot provoca arc electric sau incendiu. Farfurii, cesti, servetele, hartie de bucatarie Hartie reciclata ✓ Pentru incalzire si timp de preparare scurt. De asemenea, pentru absorbirea umiditatii. Poate provoca arc electric. Plastic • Containere Recoman- Comentarii date pt uz (microwave safe) Folie de aluminiu ✓✗ Poate fi folosita in cantitati mici pentru a proteja anumite zone impotriva prajirii excesive. Arcul electric poate apare, daca folia este prea aproape de peretii cuptorului sau este in cantitate mare. • Pelicula Farfurie crustata ✓ Nu preincalziti mai mult de opt minute. • Portelan si ceramica ✓ Pungi de congelare Portelanul, ceramica, vasele din lut sunt in mod obisnuit potrivite, numai daca nu sunt decorate cu ornamente metalice. Vase de unica folosinta din carton, poliester Ambalaje Fast-food • Cesti sau containere din polistiren • Pungi de hartie sau ziare • Hartie reciclata sau vesela cu ornamente metalice ✓ ✓ Unele alimente congelate sunt ambalate in astfel de vase. ✗ Pot fi folosite pentru incalzire. Supraincalzirea poate duce la topirea polistirenului. Pot provoca incendiu. ✗ Pot provoca arc electric. Vesela de masa ✓ • Stclarie fina ✓ • Borcane de sticla ✓ Poate fi folosita, numai daca nu este decorata cu ornamente metalice. Pot fi folosite pentru incalzire. Sticla fina se poate sparge sau crapa, la supraincalzire. Trebuie scos capacul. Numai pentru incalzire. Sticla • Hartie cerata ✓ :Recomandat ✓✗:Folositi cu atentie ✗ :Periculos 19 ✗ ✓ ✓ ✓✗ ✓ Numai daca e plastic rezistent la incalzire. Unele tipuri de plastic, se deformeaza si se decoloreaza la temperaturi ridicate. Nu folositi melamina. Poate fi folosita pentru a retine umezeala. Aceasta nu trebuie sa atinga alimentele. Aveti grija la indepartarea peliculei, deoarece vor fi eliberati aburi fierbinti. Numai daca rezista la fierbere. Nu trebuie sa fie ermetica. Daca e necesar, intepati cu furculita. Poate fi folosita pentru retinerea umezelii. Impiedica formarea petelor de grasime, ulei. RO Ghid de preparare RO MICROUNDE Aliment Energia microundelor penetreaza alimentul, atrasa si absorbita de apa, grasimea si continutul de zahar al acestuia. Microundele provoaca o accelerare a miscarii moleculelor alimentului. Miscarea rapida a acestor molecule produce frecarea si caldura rezultata prepara alimentul. Portie Putere Timp (min.) Timp Instructiuni asteptare (min.) Mazare 300g 600W PREPARARE Fasole verde 300g Accesorii pentru prepararea cu microunde: Accesoriile de preparare trebuie sa permita trecerea energiei microundelor, pentru o eficienta maxima. Microundele sunt reflectate de metal, precum otel, aluminiu si cupru, dar pot penetra ceramica, sticla, portelanul si plasticul precum si hartia si lemnul. Deci, alimentele nu trebuie preparate niciodata in containere de metal. Legume mixte (morcov/ mazare/ porumb) Legume mixte (stil chinezesc) Alimente potrivite pentru prepararea cu microunde: Multe tipuri de alimente sunt potrivite pentru prepararea cu microunde, incluzand peste sau legume congelate, fructe, paste, orez, cereale, fasole, peste si carne. Sosuri, creme, supe, budinci, conserve si condimente pot fi de asemenea preparate in cuptorul cu microunde. In general, prepararea in cuptorul cu microunde este ideala pentru orice tip de aliment ce intr-un cuptor traditional. De exemplu, topirea untului si a ciocolatei (vedeti capitolul referitor la sfaturi si tehnici de preparare). 7-8 2-3 Adaugati 15 ml (o lingura) de apa rece. 600W 7½-8½ 2-3 Adaugati 30 ml (2 linguri) de apa rece.. 300g 600W 2-3 Adaugati 15 ml (o lingura) de apa rece. 300g 600W 7½-8½ 2-3 Adaugati 15 ml (o lingura) de apa rece 7-8 Ghid de preparare pentru orez si paste Acoperirea pe durata prepararii Este foarte important sa acoperiti alimentele in timpul prepararii, pentru ca apa evaporata se transorma in aburi si contribuie la procesul de preparare. Alimentele pot fi acoperite in mai multe moduri, de exemplu cu o farfurie ceramica, capac de plastic sau pelicula. Timp de asteptare Dupa preparare, este important sa lasati alimentului un timp de asteptare, pentru echilibrarea temperaturii in interiorul acestuia. Orez: Folositi un vas mare cu capac - orezul isi dubleaza volumul in timpul prepararii. Preparati acoperit. La sfarsitul timpului de preparare, amestecati inainte de timpul de asteptare si adaugati sare si unt. Remarca: Orezul ar putea sa nu absoarba toata apa, dupa ce timpul de preparare s-a sfarsit. Paste: Folositi un vas mare.. Adaugati apa fierbinte, putine sare si amestecati bine. Preparati neacoperit. Amestecati in timpul prepararii si dupa preparare. Acoperiti pe durata timpului de asteptare si scurgeti bine dupa aceea. Aliment Portie Putere Timp (min.) Timp de Instructiuni asteptare (min.) Ghid de preparare pentru legumele congelate Folositi un vas de sticla cu capac. Preparati acoperit respectand timpul corespunzator vedeti tablul de mai jos. Continuati prepararea pentru a obtine rezultatele dorite. Amestecati de doua ori in timpul prepararii si o data dupa preparare. Adaugati sare, condimente sau unt, dupa preparare. Acoperiti pe durata timpului de asteptare. Aliment Portie Putere Timp (min.) Timp Instructiuni asteptare (min.) Spanac 150g 600W 5-6 2-3 Adaugati 15 ml (o lingura) de apa rece. Broccoli 300g 600W 8-9 2-3 Adaugati 30 ml (2 linguri) de apa rece. 20 Orez alb (oparit) 0.25kg 0.37kg 900W 15-16 17½-18½ 5 Adaugati 500 ml si respectiv 750 ml apa rece. Orez maro (oparit) 0.25kg 0.37kg 900W 20-21 22-23 5 Adaugati 500 ml si respectiv 750 ml apa rece. Orez mixt 0.25kg 900W 16-17 5 Adaugati 500 ml apa rece. Porumb mixt 0.25kg 900W 17-18 5 Adaugati 400 ml de apa rece. Paste 0.25kg 900W 10-11 5 Adaugati 1000 ml de apa fierbinte. Ghid de preparare (continuare) Ghid de preparare pentru legume proaspete REINCALZIRE Folositi un vas de sticla cu capac. Adaugati 30-45 ml de apa rece (2-3 linguri) pentru fiecare 250 g , numai daca nu este recomandata alta cantitate de apa vedeti tabelul. Preparati acoperit pe timp minim - vedeti tabelul. Continuati prepararea pentru a obtine rezultatele dorite. Amestecati o data in timpul prepararii si o data dupa. Adaugati sare, condimente si unt dupa preparare. Acoperiti pe durata timpului de asteptare de 3 minute. Sfat: Taiati legumele in bucati de marime egala. Cu cat le taiati mai mici, cu atat mai repede se vor prepara. Toate legumele proaspete trebuie preparate, folosind nivelul maxim de putere (900W). Cuptorul cu microunde va reincalzi alimente intr-un timp mai scurt decat cel necesar cuptoarelor traditionale. Folositi nivelul de putere si timpul indicat in tabelul de mai jos. Timpul din tabel este calculat considerand ca lichidele sunt la temperatura camerei +18 pana la +20°C iar alimentele la o temperatura de +5 pana la +7°C. Aranjare si acoperire Evitati reincalzirea bucatilor mari de alimente, precum o pulpa de carne - acestea au tendinta sa se arda si sa se usuce. Reincalzirea bucatilor mici va fi mai satisfacatoare. Nivele de putere si amestecare Unele alimente pot fi reincalzite folosind o putere de 900 W in timp ce altele trebuie reincalzite la 600 W, 450 W sau chiar 300 W. Verificati tabelele, pentru ghidare. In general, este mai bine sa incalziti alimentul folosind un nivel scazut al puterii, daca acesta este delicat, in cantitati mari, sau daca acesta se incalzeste foarte repede (de exemplu chiftelele). Pentru rezultate mai bune, amestecati bine si intoarceti alimentul. Atunci cand este posibil, amestecati din nou inainte de servire. Aveti grija, atunci cand incalziti lichide si alimente pentru copii. Pentru a preveni eruptia fierberii lichidelor si o posibila oparire, amestecati inainte, in timpul si dupa incalzire. Patrati-le in cuptor pe durata timpului de asteptare. Va recomandam sa introduceti o lingurita de plastic sau o bagheta de sticla in lichide. Evitati supraincalzirea alimentului. Este de preferat, sa subestimati timpul de preparare si apoi sa adaugati timp de incalzire, daca este necesar. Incalzire si timp de asteptare Atunci cand incalziti alimentul pentru prima data, va va fi de ajutor sa notati timpul necesar, pentru o referire ulterioara. Asigurati-va intotdeauna ca, incalzirea alimentului s-a facut uniform, pana la centru. Lasati alimentului un timp de asteptare dupa reincalzire - pentru echilibrarea temperaturii. Timpul recomandat de asteptare dupa reincalzire este de 2-4 minute, numai daca nu este specificat alt timp in tabel. Aveti grija atunci cand incalziti lichide si alimente pentru copii. Vedeti capitolul referitor la masuri de siguranta. Aliment Portie Timp (min.) Timp de Instructiuni asteptare (min.) Broccoli 250g 500g 4½-5 7-8 3 Preparati in bucati de marime egala. Aranjati cozile catre centru. Varza de Bruxell 250g 6-6½ 3 Adaugati 60-75 ml (5-6 linguri) de apa. Morcovi 250g 4½-5 3 Taiati morcovii in felii egale. Conopida 250g 500g 5-5½ 7½-8½ 3 Preparati in bucati de marime egala.Taiati bucatile mari in jumatate, cu cozile catre centru. Dovlecei 250g 4-4½ 3 Taiati dovleceii in felii. Adaugati 30 ml (2 linguri) de apa sau adaugati unt. Preparati doar pana la rumenire. Vinete 250g 3½-4 3 Taiati vinetele in bucati mici si stropiti-le cu o lingurita de suc de lamaie. Praz 250g 4-4½ 3 Taiati prazul in felii subtiri. Ciuperci 120g 120g 1½-2 2½-3 3 Preparati ciupercile mici intregi si pe cele mari taiate. Nu adaugati apa. Stropiti cu suc de lamaie. Condimentati cu sare si piper si apoi scurgeti inainte de servire. Ceapa 250g 5-5½ 3 Taiati ceapa felii sau in jumatati. Adaugati numai 15 ml de apa. Ardei 250g 4½-5 3 Taiati ardeii in bucati mici. Cartofi 250g 500g 4-5 7-8 3 Cantariti cartofii decojiti si apoi taiatii in jumatati sau sferturi. Napi 250g 5½-6 3 Taiati napii in cuburi mici. REINCALZIREA LICHIDELOR Lasati intotdeauna un timp de asteptare de cel putin 20 de secunde dupa ce cuptorul s-a oprit, pentru echilibrarea temperaturii. Amestecati in timpul incalzirii, daca este necesar si intotdeauna dupa incalzire. Pentru a preveni eruptia fierberii si o posibila oparire, ar trebui sa introduceti o lingurita de plastic sau o bagheta de sticla in lichide. 21 RO Ghid de preparare (continuare) RO REINCALZIREA ALIMENTELOR PENTRU COPII Reincalzirea lichidelor si alimentelor Pentru reincalzire, folositi nivelul de putere si timpul indicat in tabelul de mai jos. Aliment pentru copii: Goliti intr-o farfurie ceramica plata. Acoperiti cu capac de plastic. Amestecati bine dupa incalzire! Lasati un timp de asteptare de 2-3 minute inainte de servire. Temperatura recomandata de servire: intre 30-40°C. Lapte pentru copii: Turnati laptele intr-o sticla sterilizata. Reincalziti neacoperit. Nu incalziti o sticla pentru copii cu tot cu biberon; poate exploda la supraincalzire. Agitati bine inaintea timpului de asteptare si inainte de servire! Verificati intotdeauna temperatura laptelui si a alimentului pentru copii. Temperatura recomandata de servire: aproximativ 37°C. Aliment Turnati intr-o ceasca ceramica si incalziti acoperit. Asezati o ceasca (150 ml) in centrul platanului cuptorului. Amestecati bine inainte si dupa timpul de asteptare. 2-3 Turnati intr-un vas cera-mic adanc. Acoperiti cu capac de plastic. Amestecati bine dupa reincalzire si inainte de servire. 600W 4½-5½ 2-3 Asezati tocana pe o far-furie ceramica adanca. Acoperiti cu capac de plastic. Amestecat in timpul reincalzirii dupa reincalzire si inainte de servire. 0.35kg 600W 3½-4½ 3 Puneti pastele (de ex. spaghetti) pe o farfurie ceramica plata. Acoperiti cu pelicula. Amestecati bine inainte de servire. Paste umplute cu sos (rece) 0.35kg 600W 3 Puneti pastele umplute (ravioli, tortellini) intr-o farfurie ceramica adanca. Acoperiti cu capac de plastic. Amestecati in timpul reincalzirii si inainte de servire. Portie de mancare (rece) 0.35kg 0.45kg 0.55kg 600W 4½-5½ 5½-6½ 6½-7½ 3 Asezati mancarea pe o farfurie ceramica. Acoperiti cu pelicula. Branza Fondue gata de servire (rece) 0.4kg 600W Supa (rece) 0.25kg 0.35kg 0.45kg 0.55kg 900W 2½-3 3-3½ 3½-4 4½-5 Tocana (rece) 0.35kg 350g Paste cu sos (rece) Pentru reincalzire, folositi nivelul de putere si timpul indicat in tabelul de mai jos. Timp de Instructiuni asteptare (min.) Aliment pentru copii (legume+ carne) 190g Pasat pentru copii (cereale + lapte +fructe) 190g Lapte pentru copii 0.1kg 0.2kg 600W 600W 300W 30sec. 20sec. 30-40sec. 1min. la 1min. 10sec. 2-3 2-3 2-3 Instructiuni asteptare 1-2 1-1½ Reincalzirea alimentelor si a laptelui pentru copii Putere Timp Timp de (min.) Alimentele pentru copii, in special, trebuie verificate cu atentie, inainte de servire, pentru a preveni accidentele. Folositi nivelul de putere si timpul indicat in tabelul urmator. Portie Putere Timp (min.) 0.15kg 900W (1ceasca) 0.3kg (2 cesti) 0.4kg (3 cesti) 0.6kg (4 cesti) Bauturi (cafea, ceai si apa) REMARCA: Aliment Portie Goliti intr-o farfurie ceramica adanca. Preparati acoperit. Amestecati dupa preparare. Asteptati 2-3 minute. Inainte de servire, amestecati bine si verificati cu atentie temperatura. Goliti intr-o farfurie ceramica adanca. Preparati acoperit. Amestecati dupa preparare Asteptati 2-3 minute. Inainte de servire, amestecati bine si verificati cu atentie temperatura. Amestecati sau agitati bine si turnati intr-o sticla steri-lizata. Asezati pe centrul platanului. Preparati ne-acoperit. Agitati bine si asteptati cel putin 3 minu-te. Inainte de servire, agitati bine si verificati cu atentie temperatura. 22 2-2½ 3-3½ 3½-4 4-5 6-7 1-2 Asezati branza fondue gata de servire intr-un vas de sticla cu capac, de marime potrivita. Amestecati ocazional in timpul reincalzirii si dupa aceea.. Amestecati bine inainte de servire. Ghid de preparare (continuare) DEZGHETARE Toate alimentele congelate trebuie dezghetate folosind un nivel al puterii de 180 W. Microundele sunt o cale excelenta de dezghetare a alimentelor congelate. Microundele dezgheata alimentele intr-o perioada de timp scurta. Acest lucru poate fi un mare avantaj, atunci cand primiti oaspeti pe neasteptate. Aliment Pasarile congelate trebuie dezghetate bine inainte de preparare. Indepartati sigiliile metalice si ambalajul, pentru a permite lichidului dezghetat sa se scurga. Timp (min.) Timp de Instructiuni asteptare (min.) Carne Carne tocata Puneti pasarea congelata intr-un vas fara capac. Intoarceti la jumatatea timpului de dezghetare, scurgeti si indepartati maruntaiele cat mai repede posibil. Verificati din cand in cand alimentul pentru a va asigura ca acesta nu se incalzeste. Daca partile mai mici sau mai subtiri ale alimentului incep sa se incalzeasca, acestea pot fi protejate invelindu-le cu bucati foarte mici de folie de aluminiu. Cotlet de porc Pasare Bucati de pui Daca pasarile incep sa se incalzeasca la suprafata, opriti dezghetarea si asteptati 20 de minute, apoi continuati. Lasati un timp de asteptare pentru peste, carne si pasari pentru a completa dezghetarea. Timpul de asteptare pentru o dezghetare completa, depinde de cantitatea ce va fi dezghetata. Vedeti tabelul de mai jos. Sfat: Portie Pui intreg Bucatile de alimentele subtiri se dezgheta mai usor decat cele groase si cantitatile mai mici mai rapid decat cele mari. Amintiti-va acest lucru, la congelare si dezghetare. Peste File de peste/ Pentru dezghetarea unui aliment cu o temperatura de -18 pana la - 20 °C, folositi ca ghid urmatorul tabel. Peste intreg Fructe Zmeura Paine Chifle (cca. 50 g fiecare) Prajita/ Sandwich Paine germana 23 15-30 Asezati carnea pe o farfurie ceramica dreapta. Inveliti marginile subtiri cu folie de aluminiu. Intoarceti la jumatatea timpului de dezghetare! 15-60 Intai, asezati bucatile de pui cu pielea in jos, puiul intreg cu pieptul in jos pe o farfurie ceramica dreapta. Inveliti partile subtiri, precum aripile si capetele in folie de aluminiu. Intoarceti la jumatatea timpului de dezghetare! 10-25 Asezati pestele congelat in mijlocul unei farfurii ceramice drepte. Aranjati bucatile subtiri sub cele mai groase. Inveliti bucatile subtiri cu folie de aluminiu. Intoarceti la jumatatea timpului de dezghetare! 6-7 5-10 Asezati fructele pe un vas de sticla drept si rotund (cu diametru mare). 2buc 4buc 250g 1-1½ 2½-3 4-4½ 5-20 500g 7-9 Aranjati chiflele in cerc sau painea orizontal, pe hartie de bucatarie, in mijlocul platanului. Intoarceti la jumatatea timpului de dezghetare! 250g 500g 6-7 10-12 250g 7-8 500g (2buc) 12-14 1200g 28-32 200g 6-7 400g 11-13 300g RO Ghid de preparare (continuare) RO GRATAR Ghid de preparare pentru gratar - alimente proaspete Elementul de incalzire al gratarului este pozitionat sub tavanul cavitatii. Functioneaza atunci cand usa este inchisa si platanul se roteste. Rotirea platanului face rumenirea alimentelor uniforma. Preincalzirea gratarului timp de 4 minute va face rumenirea alimentelor mai rapida. Accesorii pentru prajire: Trebuie sa fie protejate impotriva flacarilor si pot fi metalice. Nu folositi nici un tip de accesoriu din plastic, deoarece se poate topi. Alimente potrivite pentru prajire: Cotlete, carnati, fripturi, hamburgeri, sunca, bucati subtiri de peste, sandvisuri si toate tipurile de aluat. Preincalziti gratarul cu functiunea gratar timp de 3 minute. Folositi nivelul de putere si timpul indicat in tabelul de mai jos. Aliment proaspat REMARCA IMPORTANTA: Atunci cand folositi numai modul gratar, asigurati-va ca elementul de incalzire se afla sub tavan in pozitie orizontala si nu pe peretele din spate in pozitie verticala. Va rugam sa va reamintiti ca, alimentul trebuie asezat pe un raft metalic inalt, numai daca alte instructiuni nu va recomanda altfel. Portie Putere Partea 1 Partea 2 Instructiuni Timp (min) Timp (min.) Felii de paine 4 buc ( 25g fiecare) Numai gratar 3½-4½ 3-4 Asezati feliile de o parte si de alta a raftului metalic. Rosii prajite 200 g (2buc) 400 g (4buc) 300W + Gratar 4-5 - Taiati rosiile in jumatati. Presarati putina branza. Aranjati in cerc intr-un vas de sticla drept. Asezati vasul pe raftul metalic. Paine cu branza si rosii 4 buc (300 g) 300W + 4½-5½ Gratar - Prajiti intai feliile de paine. Asezati feliile de paine pe raftul inalt. Asteptati timp de 2-3 minute. Mere coapte 2 mere (ca.400g) 4 mere (ca.800g) 300W + 6½-7½ Gratar 11-13 - Curatati merele si umpleti-le cu stafide si gem. Presarati putine migdale deasupra. Puneti merele intr-un vas de sticla plat. Asezati vasul direct pe platan. 5½-6½ MICROUNDE + GRATAR Acest mod de preparare combina caldura radianta ce vine de la gratar cu viteza prepararii cu microunde. Functioneaza numai atunci cand usa este inchisa si platanul se roteste. Datorita rotatiei platanului, alimentele se rumenesc uniform. La acest model, sunt disponibile trei moduri combinate: 600 W + Gratar, 450 W + Gratar si 300 W + Gratar. Accesorii pentru prepararea microunde + gratar Folositi numai accesorii ce pot fi penetrate de microunde. Accesoriile nu trebuie sa fie inflamabile. Nu folositi accesorii de metal in modul de preparare combinat. Nu folositi nici un tip de accesoriu din plastic, deoarece se pot topi. Alimente potrivite pentru prepararea microunde + gratar: Alimentele potrivite pentru modul de preparare combinat includ toate tipurile de alimente preparate care au nevoie de reincalzire sau rumenire (paste), precum si alimente care au nevoie de un timp scurt de preparare pentru a se rumeni. Acest mod poate fi folosit si pentru alimentele taiate in portii groase. Pentru detalii, vedeti tabelul referitor la gratar. REMARCA IMPORTANTA: Atunci cand este folosit modul combinat (microunde + gratar), asigurati-va ca elementul de incalzire este situat sub tavan in pozitie orizontala si nu pe peretele din spate in pozitie verticala. Alimentul trebuie asezat pe un raft metalic inalt, numai daca alta instructiune nu recomanda altfel. In caz contrar trebuie plasat direct pe platan. Vedeti instructiunile din tabelul urmator. Alimentul trebuie intors, daca doriti sa rumeniti alimentul pe ambele fet. 24 Ghid de preparare (continuare) Ghid de preparare (gratar) pentru alimente proaspete (continuare) Aliment proaspat Bucati de pui Cotlet de miel (medium) Portie Putere 300W + Gratar 400 g (4buc) Numai gratar 10-11 12-13 MW + Gratar Friptura porc 400 g (2buc) Peste prajit Partea 1 Partea 2 Instructiuni Timp (min) 500 g (2buc) 900 g (3-4buc) Accesorii pentru prepararea microunde + convectie: Folositi numai accesorii ce pot fi penetrate de microunde. Recomandate (sticla, ceramica sau portelan fara ornamentatii metalice); similare cu acesoriile de preparare prezentata pentru prepararea microunde + gratar. 10-12 Timp (min.) 9-10 Ungeti bucatile de pui cu ulei si condimente. Asezati-le in cerc 11-12 pe raftul inalt. Asteptati timp de 2-3 minute. 8-9 Alimente potrivite pentru preparare microunde + convectie: Toate tipurile de carne, prajituri si prajituri cu fructe, placinte, biscuiti si paine. Ghid de preparare prin convectie pentru alimente congelate precum chifle, paine, prajituri si produse de patiserie Ungeti cotletul de miel cu ulei si condimente. Asezati-le in cerc pe raftul inalt. Dupa prajire, asteptati timp de 2 - 3 minute. Preincalziti cuptorul folosind functiunea de preincalzire, pana ce acesta ajunge la temperatura dorita, numai daca nu se specifica altfel - vedeti tabelul. Folositi nivelul de putere si timpul indicat in tabelul de mai jos. Food 300W+ Numai Ungeti friptura de porc cu ulei Gratar gratar si condimente. Asezati in cerc 8-9 8-9 pe raftul inalt. Dupa prajire, asteptati timp de 2 - 3 minute. 400-500 g 300W + Gratar 6-7 7-8 CHIFLE Chifle (deja preparate) Ungeti pestele intreg cu ulei si adaugati condimente. Asezati doi pesti unul langa altul (cap la coada) pe raftul inalt. Asteptati timp de 2-3 minute. Portion 4-6 buc (50 g fiecare) Accesorii pentru prepararea prin convectie: Toate accesoriile traditionale – orice accesoriu folosit in mod normal la cuptoarele traditionale – pot fi folosite. Alimente potrivite pentru preparare prin convectie: Toate tipurile de biscuiti, chiflele si prajiturile, precum si prajiturile bogate in fructe, produse de patiserie si sufleuri. MICROUNDE + CONVECTIE Acest mod de preparare combina energia microundelor cu aerul fierbinte, reducand astfel timpul de preparare si oferind alimentului o suprafata rumena si crocanta. Prepararea prin convectie este metoda traditionala si cea mai cunoscuta de a prepara alimente in cuptoarele traditionale, cu aer cald circulat de un ventilator situat pe peretele posterior. 25 Numai convectie 180°C Time Instructions (min.) 2-3 Asezati chiflele in cerc pe raftul inferior. Folositi manusi pentru a scoate alimentele! Asteptati 2-3 minute. Prajitura cu lamaie (aluat proaspat) 0.7kg 24-26 Asezati aluatul proaspat intr-un vas de copt metalic sau de sticla, fara (lungime 25 cm). Asezati preincalzire! prajitura pe raftul mic. Asteptati timp de 5-10 minute. Produse de patiserie cu umplutura (reci) 0.25kg (5pcs) Numai convectie 220°C 15-20 Asezati produsele de patiserie cu umplutura in cerc pe hartie de copt, pe raftul inalt. Lasati centrul liber. Folositi manusi atunci cand le scoateti! Asteptati 5 minute. Briose (aluat proaspat) 6 x 70 g (0.40.45kg) 180 W + 200°C 14-16 Umpleti aluatul proaspat uniform, intr-un vas ceramic, potrivit pentru 6 briose de marime medie, sau folositi 6 vase din sticla mici si rotunde. Asezati vasul pe raftul mic. Asteptati 5 minute. CONVECTIE Prepararea prin convectie este metoda traditionala si cea mai cunoscuta de a prepara talimente in cuptoarele traditionale, cu aer cald. Elementul de incalzire si ventilatorul sunt situate pe peretele posterior, astfel incat sa permita circulatia aerului cald. Power 180 W + 220°C RO Ghid de preparare (continuare) RO Ghid de preparare prin convectie pentru alimente congelate precum chifle, paine, prajituri si produse de patiserie Ghid de preparare prin convectie pentru alimente congelate precum pizza, paste, chipsuri si aripi de pui Preincalziti cuptorul folosind functiunea de preincalzire, pana ce acesta ajunge la temperatura dorita, numai daca nu se specifica altfel - vedeti tabelul. Folositi nivelul de putere si timpul indicat in tabelul de mai jos. Preincalziti cuptorul folosind functiunea de preincalzire, pana ce acesta ajunge la temperatura dorita, numai daca nu se specifica altfel - vedeti tabelul. Folositi nivelul de putere si timpul indicat in tabelul de mai jos. Aliment Food Baghete / Paine cu usturoi (semipreparate) Portie 0.2-0.25kg (1buc) Putere 180 W + 200°C Timp Instructiuni (min.) 6-7 Asezati baghetele congelate pe hartie de copt, pe raftul mic. Dupa preparare, asteptati timp de 2-3 minute. 26 Portion Power Time (min.) Instructions Paste (Lasagne sau Canneloni) 0.4kg 450 W + 200°C fara preincalzire! 20-22 Asezati-le intr-un vas de sticla de marime potrivita sau lasati-le in ambalajul original (asigurativa ca acesta este corespunzator pentru preparare la microunde). Asezati pastele lasagne congelate pe raftul mic. Dupa preparare, asteptati timp de 2-3 minute. Paste (Macaroni, Tortellini) 0.4kg 450 W + 200°C fara preincalzire! 16-18 Asezati-le intr-un vas de sticla de marime potrivita sau lasati-le in ambalajul original (asigurativa ca acesta este corespunzator pentru preparare la microunde). Asezati pastele congelate pe raftul mic. Dupa preparare, asteptati timp de 2-3 minute. Aripi de pui 0.25kg 450 W + 200°C 6½-7½ Asezati aripile de pui pe raftul mic. Dupa preparare, asteptati timp de 2-3 minute. Ghid de preparare (continuare) Curatarea cuptorului cu microunde SFATURI SPECIALE Urmatoarele parti ale cuptorului cu microunde trebuie curatate RO regulat, pentru a preveni formarea depunerilor de resturi alimentare si grasimi: • Suprafetele interioare si exterioare • Usa si etansarile acesteia • Platanul si inelul de rulare TOPIRE UNT Puneti 50 g de unt intr-un vas adanc si mic, de sticla. Acoperiti cu capac de plastic. Incalziti timp de 30-40 de secunde la 900 W, pana ce untul se topeste. TOPIRE CIOCOLATA Puneti 100 g de ciocolata intr-un vas adanc si mic, de sticla. Incalziti timp de 3-5 minute, la 450W pana ce se topeste ciocolata. Amestecati o data sau de doua ori in timpul topirii. Folositi manusi, pentru a scoate vasul! ☛ ☛ TOPIRE MIERE CRISTALIZATA Puneti 20 g de miere cristalizata intr-un vas adanc si mic, de sticla. Incalziti timp de 20-30 de secunde la 300 W, pana ce mierea se topeste. Asigurati-va intotodeauna ca etansarile usii sunt curate si usa se inchide corect. In cazul in care cuptorul nu este pastrat in bune conditii si nu este curatat corespunzator, se poate deteriora suprafata acestuia, ceea ce va afecta aspectul cat si performanta aparatului. 1. Curatati suprafetele exterioare cu o carpa moale si apa calda cu sapun. Clatiti si uscati. TOPIRE GELATINA Lasati un strat uscat de gelatina (10 g) in apa rece , timp de 5 minute. Scurgeti gelatina si puneti-o intr-un vas mic de sticla. Incalziti timp de 1 minut la 300 W. Amestecati dupa topire. 2. Indepartati orice pete de pe suprafetele interioare sau inelul de rulare cu o carpa cu sapun. Clatiti si uscati.. 3. Pentru a curata mai usor depunerile si a indeparta mirosurile, asezati o ceasca cu suc de lamaie diluat pe platan, si incalziti timp de zece minute la putere maxima. PREPARAREA GLAZURII (PENTRU PRAJITURI) Amestecati glazura instanta (aproximativ 14 g) cu 40 g de zahar si 250 ml apa rece. Preparati neacoperit intr-un vas de sticla timp de 3 ½ pana la 4 ½ minute la 900 W, pana ce glazura este transparenta. Amestecati de doua ori pe durata prepararii. 4. Spalati platanul, oricand este necesar. ✉ PREPARAREA GEMULUI Puneti 600 g de fructe intr-un vas de sticla de marime potrivita, cu capac. Adaugati 300 g de zahar si amestecati bine. Preparati acoperit timp de 10-12 minute la 900 W. Amestecati de cateva ori in timpul prepararii. Goliti intr-un borcan de sticla cu capac cu filet. Asteptati 5 minute inainte de a pune capacul. Nu turnati apa pe orificiile de ventilatie. Nu folositi niciodata produse abrazive sau solventi chimici. Aveti grija, atunci cand curatati etansarile, ca particulele de alimente sa nu: • • ✉ PREPARAREA BUDINCII Amestecati praf de budinca cu zahar si lapte (500 ml), urmand instructiunile producatorului, si amestecati bine. Folositi un vas de sticla de marime potrivita, cu capac. . Preparati acoperit timp de 6 ½ pana la 7 ½ minute la 900 W. Amestecati bine de cateva ori, pe durata prepararii RUMENIREA MIGDALELOR Imprastiati uniform 30 g migdale taiate, pe o farfurie ceramica de marime medie. Amestecati de cateva ori pe durata rumenirii timp de 3 ½ pana la 4 ½ minute la 600W. Lasati-le sa stea timp de 2 - 3 minute in cuptor. Folositi manusi, atunci cand scoateti vasul! 27 Se acumuleze Impiedice inchiderea corecta a usii. Curatati cavitatea cuptorului, imedat dupa fiecare folosire cu un detergent usor, dar lasati cuptorul cu microunde sa se raceasca, inainte de curatare, pentru a preveni accidentele. RO Depozitare si reparare cuptorul cu microunde Specificatii tehnice Cateva precautii simple trebuie luate, atunci cand depozitati sau duceti la centrul service cuptorul cu microunde. Cuptorul nu trebuie folosit daca, usa sau incuietorile acesteia sunt defecte: SAMSUNG tinde sa isi imbunatateasca tot timpul produsele. Atat specificatiile design-ului cat si acest manual de instructiuni se pot schimba, fara notificare prealabila. • • • Sursa de alimentare 230V ~ 50 Hz AC Putere consum Putere maxima Microunde Gratar (element incalzire) Convectie (element incalzire) 3100 W 1400 W 1300 W 1700 W Nu scoateti niciodata carcasa cuptorului cu microunde. Daca acesta este defect si are nevoie de service sau nu sunteti siguri de starea lui: Putere de iesire 100 W / 900 W - 6 nivele (IEC-705) • Frecventa de operare 2450 MHz Dimensiuni (W x D x H) Exterior Cavitate interioara cuptor 522 x 539 x 312 mm 355 x 380.6 x 234 mm Volum 32 litri Greutate Neta Livrare aproximativ 21.0 kg aproximativ 23.5 kg Balama rupta Incuietori deteriorate Carcasa defomata sau indoita Reparatia trebuie facuta numai de catre personal calificat de service. ☛ • ✉ Deconectati cablul de alimentare de la sursa Contactati cel mai apropiat centru service. Daca doriti sa depozitati temporar cuptorul cu microunde, alegeti un loc uscat, fara praf. • Motiv: Praful si umezeala pot afecta diferite componente ale cuptorului. 28 Note RO 29 Note RO 30 Note RO 31 jlXX_\|inluTWZX`WiluUGGwGXGG~ SGhGY[SGYWW\GG`aW[Ght MICROWAVE OVEN Owner’s Instructions and Cooking Guide CE1185GW CE1185GB CE1185UB “Quick” Look-up Guide ................................................................................ 2 Using the Steam Cleaning .......................................................................... 3 Control Panel ............................................................................................. 4 Oven ........................................................................................................... 4 Accessories ................................................................................................ 5 Using this Instruction Booklet ..................................................................... 5 Safety Precautions ...................................................................................... 6 Installing Your Microwave Oven ................................................................. 7 Setting the Time .......................................................................................... 8 Checking that Your Oven is Operating Correctly ........................................ 8 How a Microwave Oven Works ................................................................... 9 What to Do if You are in Doubt or You have a Problem ............................. 9 Cooking/Reheating ................................................................................... 10 Power Levels and Time Variations ........................................................... 10 Stopping the Cooking ............................................................................... 11 Adjusting the Cooking Time ...................................................................... 11 Using the Auto Cook Feature ................................................................... 12 Using the Power Defrost Feature ............................................................. 13 Using Crust Plate ...................................................................................... 14 Auto fast Preheating the Oven .................................................................. 15 Cooking by Convection ............................................................................. 15 Grilling ....................................................................................................... 16 Choosing the Heating Element Position ................................................... 16 Choosing the Accessories ........................................................................ 16 Cooking by Combination ........................................................................... 17 Safety-locking Your Microwave Oven ....................................................... 17 Switching the Beeper Off .......................................................................... 18 Manual Stop Turntable Function ............................................................... 18 Cookware Guide ....................................................................................... 19 Cooking Guide .......................................................................................... 20 Cleaning Your Microwave Oven ............................................................... 27 Storing and Repairing Your Microwave Oven ........................................... 28 Technical Specifications ........................................................................... 28 jlXX_\|inluTWZX`WiluUGGwGYGG~ SGhGY[SGYWW\GG`aW[Ght “Quick” Look-up Guide EN I want to cook some food I want to Power defrost some food 1. Press the Microwave( ) button. Next : Press the blinking button. 1. Place the frozen food in the oven. Press the Power Defrost( ) button. Next : Press the blinking button. 2. Press the Select ( ) button until the appropriate power level is displayed. Next : Turn the blinking dial. 2. Select the food category by pressing the Select( until the desired food category is selected. Next : Turn the blinking dial. 3. Select the cooking time by turning the Jog Dial as required. Next : Press the blinking button. 3. Select the weight by turning the Jog Dial as required. Next : Press the blinking button. 4. Press Start( ) button. Result: Cooking starts ◆ When cooking has finished, the oven will beep and flash “0” four times. The oven will then beep one time per minute. 4. Press Start( ) button. Result: Defrosting starts ◆ When cooking has finished, the oven will beep and flash “0” four times. The oven will then beep one time per minute. I want to add an extra 30 seconds Leave the food in the oven. Press +30s( ) button one or more times for each extra 30 seconds that you wish to add. 2 ) button, jlXX_\|inluTWZX`WiluUGGwGZGG~ SGhGY[SGYWW\GG`aW[Ght Using the Steam Cleaning Warning! • Water Bowl only can be use during “Steam Clean” mode. • When cooking non-liquid itensm, remove water bowl because It will damage and cause fire to the microwave oven. The steam provided by steam clean system will soak the cavity surface. After using steam clean function, you can easily clean the cavity of oven. ☛ ☛ ☛ ☛ Use this function only after the oven has completely cooled. (Room temperature) Use normal water only,and no distilled water. It will be more better if you do a deodorization function after using Steam cleaning. If the door is opened during this operation « E-01 » will be displayed. (The water in the oven will be very hot due to the steam cleaning function.) 1. Open the Door. 2. Fill with water following guide line inside the water bowl. OThe line is about 30ml.) 3. Please attach the water bowl in right side of the oven 4. Close the door. 5. Press the Steam clean ( ) button. (Bulb does work during Steam cleaning time.) 6. Open the Door. 7. Please clean cavity of oven with dried dishtowel. Remove the turntable and only under rack with kitchen paper. 3 EN jlXX_\|inluTWZX`WiluUGGwG[GG~ SGhGY[SGYWW\GG`aW[Ght Control Panel Oven EN HEATING ELEMENT VENTILATION HOLES 1 2 8 3 9 4 10 11 5 DOOR VENTILATION HOLES 6 DOOR HANDLE CONTROL PANEL TURNTABLE COUPLER DOOR LATCHES 12 7 13 14 1. MICROWAVE BUTTON 2. GRILL BUTTON 3. POWER DEFROST FEATURE MODE 4. COMBINED BUTTON 5. AUTO COOK FEATURE MODE 6. DISPLAY 7. STOP / CANCEL BUTTON 8. CONVECTION BUTTON 9. FAST PREHEAT SELECTION BUTTON 10. SELECT BUTTON 11. STEAM CLEAN BUTTON 12. JOG DIAL 13. START BUTTON 14. TURNTABLE ON/OFF BUTTON 4 ROLLER RING SAFETY INTERLOCK HOLES jlXX_\|inluTWZX`WiluUGGwG\GG~ SGhGY[SGYWW\GG`aW[Ght Accessories Using this Instruction Booklet Depending on the model that you have purchased, you are supplied with several accessories that can be used in a variety of ways. Thank you for purchasing a SAMSUNG microwave oven. Your Owner’s Instructions contains much valuable information on cooking with your new microwave oven: 1. Coupler, to be placed correctly over the motor shaft in the base of the oven. Purpose: The coupler rotates the turntable. • • • Safety precautions Accessories and cookware Useful cooking tips Inside the cover you will find a quick look-up guide explaining three basic cooking operations: 2. Roller ring, to be placed in the center of the oven. Purpose: The roller ring supports the turntable. • • • 3. Turntable, to be placed on the roller ring with the center fitting on to the coupler. Purpose: The turntable serves as the main cooking surface; it can be easily removed for cleaning. Cooking (microwave mode) Defrosting Adding an extra 30 seconds, if the dish is inadequately cooked or requires additional reheating At the end of the booklet you will find illustrations of the oven, and more importantly the control panel, so that you can find the buttons more easily. The illustrations in the step-by-step procedures use two different symbols. 4. Metal racks (High rack, Low rack), to be placed on the turntable. Purpose: The metal racks can be used to cook two dishes at the same time. A small dish may be placed on the turntable and a second dish on the rack. The metal racks can be used in grill, convection and combination cooking. ☛ ✉ Important Note PRECAUTIONS TO AVOID POSSIBLE EXPOSURE TO EXCESSIVE MICROWAVE ENERGY 5. Clean water bowl, to be placed in the right side of the oven. Purpose: The water bowl can be used to clean. Failure to observe the following safety precautions may result in harmful exposure to microwave energy. (a) Under no circumstances should any attempt be made to operate the oven with the door open or to tamper with the safety interlocks (door latches) or to insert anything into the safety interlock holes. (b) Do not place any object between the oven door and front face, or allow food or cleaner residues to accumulate on sealing surfaces. Ensure that the door and door sealing surfaces are kept clean by wiping after use with first a damp cloth and then a final wipe with a soft dry cloth. (c) Do not operate the oven if it is damaged until it has been repaired by a qualified microwave service technician trained by the manufacturer. It is particularly important that the oven door closes properly and that there is no damage to the: (1) Door, door seals and sealing surfaces (2) Door hinges (broken or loose) (3) Power cable (d) The oven should not be adjusted or repaired by anyone other than a properly qualified microwave service technician trained by the manufacturer. 6. Crust plate, to be placed on the turntable. Purpose: The crust plate is used to brown food better in the microwave or grill combination cooking modes and to keep pastry and pizza dough crisp. 5 EN jlXX_\|inluTWZX`WiluUGGwG]GG~ SGhGY[SGYWW\GG`aW[Ght Safety Precautions EN • IMPORTANT SAFETY INSTRUCTIONS. READ CAREFULLY AND KEEP FOR FUTURE REFERENCE. Before cooking food or liquids in your microwave oven, please check that the following safety precautions are taken. In the event of scalding, follow these FIRST AID instructions : * * * • 1. DO NOT use any metallic cookware in the microwave oven: • Metallic containers • Dinnerware with gold or silver trimmings • Skewers, forks, etc. Reason: Electric arcing or sparking may occur and may damage the oven. • • • 2. DO NOT heat: • Airtight or vacuum-sealed bottles, jars, containers. Ex) Baby food jars • Airtight food. Ex) Eggs, nuts in shells, tomatoes Reason: The increase in pressure may cause them to explode. Tip: Remove lids and pierce skins, bags, etc. Immerse hand in cold water for at least 10 minutes. Cover with clean, dry dressing. Do not apply any creams, oils or lotions. NEVER fill the container to the top and choose a container that is wider at the top than at the bottom to prevent the liquid from boiling over. Bottles with narrow necks may also explode if overheated. ALWAYS check the temperature of baby food or milk before giving it to the baby. NEVER heat a baby's bottle with the teat on, as the bottle may explode if overheated. During microwave heating of beverages, there are results in delayed eruptive boiling, therefore care has to be taken when handling the container. 9. Be careful not to damage the power cable. • Do not immerse power cable or plug in water and keep power cable away from heated surfaces. • Do not operate this appliance if it has a damaged power cable or plug. 10. Stand at arm’s length from the oven when opening the door. Reason: The hot air or steam released may cause scalding. 3. DO NOT operate the microwave oven when it is empty. Reason: The oven walls may be damaged. Tip: Leave a glass of water inside the oven at all times. The water will absorb the microwaves if you accidentally set the oven going when it is empty. 11. Keep the inside of the oven clean. • Clean the inside of the oven right after each use with a mild detergent solution, but let the microwave oven cool down before cleaning in order to avoid injury. Reason: Food particles or spattered oils stuck to oven walls or floor can cause the damage of painting and reduce the efficiency of the oven. 4. DO NOT cover the rear ventilation slots with cloths or paper. Reason: The cloths or paper may catch fire as hot air is evacuated from the oven. 12. “Clicking” sound might be noticed while operating, especially in defrosting mode. Reason: When the power output is changing electrically, you may hear that sound. This is normal. 5. ALWAYS use oven gloves when removing a dish from the oven. Reason: Some dishes absorb microwaves and heat is always transferred from the food to the dish. The dishes are therefore hot. 13. If the microwave oven is operating without any load, the power will cut off automatically for safety. After standing for over 30 min, you can operate the oven normally. • Do not worry is the oven continues to work after cooking has finished. Reason: This product is designed to fan for some minutes, not operating microwave oven(MWO), to cool down the inner electronic parts when the stop button is pressed or the door is opened after finishing cooking in case that the oven operates for some minutes in cooking(MWO, GRILL, CONVECTION, MWO+GRILL, MWO+ CONVECTION). When cooking has finished, the oven will beep and flash “0” four times. The oven will then beep one time per minute. 6. DO NOT touch heating elements or interior oven walls. Reason: These walls may be hot enough to burn skin even after cooking is finished, oven though they do not appear to be so. Keep away from hot spot. Do not allow inflammable materials to come into contact with any interior area of the oven. Let the oven cool down first. 7. To reduce the risk of fire in the oven cavity • Do not store flammable materials in the oven • Remove wire twist ties from paper or plastic bags • Do not use your microwave oven to dry newspapers • If smoke is observed, keep the oven door closed and switch off or disconnect the oven from the power supply. 8. Take particular care when heating liquids and baby foods. • ALWAYS allow a standing time of at least 20 seconds after the oven has been switched off to allow the temperature to equalize. • Stir during heating if necessary and ALWAYS stir after heating. • To prevent eruptive boiling and possible scalding, you should stir before, during, and after heating. 6 jlXX_\|inluTWZX`WiluUGGwG^GG~ SGhGY[SGYWW\GG`aW[Ght Safety Precautions (continued) Installing Your Microwave Oven IMPORTANT SAFETY INSTRUCTIONS This microwave oven can be placed almost anywhere (kitchen work surface or shelf, movable trolley, table). During cooking, you should look into the oven from time to time when food is being heated or cooked in disposable containers of plastic paper or other combustible material. 20cm above 10cm behind WARNING: Do not use the door or door seals are damaged, the oven must not be operated until it has been repaired by a competent person. 85 cm of the floor WARNING: It is hazardous for anyone other than a comperent person to carry out any service or repair operation which involves the removal of a cover which gives protection against exposure to microwave energy. 3. This microwave oven has to be positioned so that plug is accessible. WARNING: ☛ Liquids and other foods must not be heated in sealed containers since they are liable to explode. ☛ WARNING: Only allow children to use the oven without supervicion when adequate instructions have been given so that the child is able to use the oven in a safe way and understands the hazards of improper use. ☛ WARNING: Oven casing and door will get hot during convection and combination cooking. ☛ 10cm on the side 1. When you install your oven, make sure there is adequate ventilation for your oven by leaving at least 10 cm (4 inches) of space behind, and on the sides of the oven and 20 cm (8 inches) of space above the oven and 85 cm (33 inches) of the floor. 2. Remove all packing materials inside the oven. Install the roller ring and turntable. Check that the turntable rotates freely. DO NOT operate the microwave oven without the coupler, roller ring and turntable. 7 Never block the air vents as the oven may overheat and automatically switch itself off. It will remain inoperable until it has cooled sufficiently. For your personal safety, plug the cable into a 3-pin, 230 Volt, 50Hz, AC earthed socket. If the power cable of this appliance is damaged, it must be replaced by the manufacturer or its service agent or a similarly qualified person in order to avoid a hazard. Do not install the microwave oven in hot or damp surroundings like next to a traditional oven or radiator. The power supply specifications of the oven must be respected and any extension cable used must be of the same standard as the power cable supplied with the oven. Wipe the interior and the door seal with a damp cloth before using your microwave oven for the first time. EN jlXX_\|inluTWZX`WiluUGGwG_GG~ SGhGY[SGYWW\GG`aW[Ght EN Setting the Time Checking that Your Oven is Operating Correctly Your microwave oven has an inbuilt clock. The time can be displayed the only 24-hour notation. You must set the clock: The following simple procedure enables you to check that your oven is working correctly at all times. If you are in doubt, refer to the section entitled “What to Do if You are in Doubt or Have a Problem” next the page. • • ✉ When you first install your microwave oven After a power failure ✉ Do not forget to reset the clock when you switch to and from summer or winter time. 1. Turn the Jog Dial to set the hour. Next : Press the blinking button. The oven must be plugged into an appropriate wall socket. The turntable must be in position in the oven. If a power level other than the maximum (100% - 900 W) is used, the water takes longer to boil. Open the oven door by pulling the handle on the right side of the door. Place a glass of water on the turntable. Close the door. Press the start( ) button and set the time to 4 or 5 minutes, by pressing the start( ) button the appropriate number of times. Result: The oven heats the water for 4 or 5 minutes. The water should then be boiling. 2. Press the start( ) button. Next : Turn the blinking dial. 3. Turn the Jog Dial to set the minute. Next : Press the blinking button. 4. When the right time is dispeayed, press the start( ) button. Result: The time is displayed whenever you are not using the microwave oven. 8 jlXX_\|inluTWZX`WiluUGGwG`GG~ SGhGY[SGYWW\GG`aW[Ght How a Microwave Oven Works What to Do if You are in Doubt or You have a Problem Microwaves are high-frequency electromagnetic waves; the energy released enables food to be cooked or reheated without changing either the form or the colour. You can use your microwave oven to: • • • EN Becoming familiar with a new appliance always takes a little time. If you have any of the problems listed below, try the solutions given. They may save you the time and inconvenience of an unnecessary service call. Defrost Reheat Cook ◆ The following are normal occurrences. • Condensation inside the oven • Air flow around the door and outer casing • Light reflection around the door and outer casing • Steam escaping from around the door or vents ◆ The food is not cooked at all • Have you set the timer correctly and pressed the Start( ) button? • Is the door closed? • Have you overloaded the electric circuit and caused a fuse to blow or a breaker to be triggered. ◆ The food is either overcooked or undercooked • Was the appropriate cooking length set for the type of food? • Was an appropriate power level chosen? ◆ Sparking and cracking occur inside the oven (arcing) • Have you used a dish with metal trimmings? • Have you left a fork or other metal utensil inside the oven? • Is aluminium foil too close to the inside walls? ◆ The oven causes interference with radios or televisions • Slight interference may be observed on televisions or radios when the oven is operating. This is normal. Cooking Principle 1. The microwaves generated by the magnetron reflected at cavity and are distributed uniformly as the food rotates on the turntable. The food is thus cooked evenly. 2. The microwaves are absorbed by the food up to a depth of about 1 inch (2.5 cm). Cooking then continues as the heat is dissipated within the food. 3. Cooking times vary according to the container used and the properties of the food: • Quantity and density • Water content • Initial temperature (refrigerated or not) ☛ As the centre of the food is cooked by heat dissipation, cooking continues even when you have taken the food out of the oven. Standing times specified in recipes and in this booklet must therefore be respected to ensure: • Even cooking of the food right to the centre • The same temperature throughout the food * • Solution: Install the oven away from televisions, radios and aerials. If interference is detected by the oven’s microprocessor, the display may be reset. * Solution: Disconnect the power plug and reconnect it. Reset the time. ◆ « E - 25 » message indicates • The « E - 25 »message is automatically activated prior to the microwave oven overheating. Should the « E - 25 » message be activated, then depress the " " key to utilize the initialization mode. If the above guidelines do not enable you to solve the problem, then contact your local Samsung customer service centre. Please have the following information read; • • • The model and serial numbers, normally printed on the rear of the oven Your warranty details A clear description of the problem Then contact your local dealer or SAMSUNG aftersales service. 9 jlXX_\|inluTWZX`WiluUGGwGXWGG~ SGhGY[SGYWW\GG`aW[Ght EN Cooking/Reheating Power Levels and Time Variations The following procedure explains how to cook or reheat food. The power level function enables you to adapt the amount of energy dissipated and thus the time required to cook or reheat your food, according to its type and quantity. You can choose between six power levels. ☛ ALWAYS check your cooking settings before leaving the oven unattended. Open the door. Place the food in the centre of the turntable. Close the door. Never switch the microwave oven on when it is empty. Power Level HIGH MEDIUM HIGH MEDIUM MEDIUM LOW DEFROST LOW 1. Press the Microwave( ) button. The following indications are displayed: Result: ( ) (microwave mode) Next : Press the blinking button. 2. Select the appropriate power level by pressing the Select( ) button until the corresponding output power is displayed. Refer to the power level table below for further details. Next : Turn the blinking dial. If you would like to know the current power level of the oven cavity, press Select( ) button once. If you would like to change the power level during cooking, press the Select( ) button twice or more times to select the desired power level. Quick Start: ✉ Output 100 % 67 % 50 % 33 % 20 % 11 % 900 W 600 W 450 W 300 W 180 W 100 W The cooking times given in recipes and in this booklet correspond to the specific power level indicated. 3. Set the cooking time by turning the Jog Dial. • Example: For a cooking time of 3 minutes, 30 seconds, turn the jog dial to the right to set 3:30. Result: The cooking time is displayed. Next : Press the blinking button. 4. Press the Start( ) button. Result: The oven light comes on and the turntable starts rotating. Cooking starts and when it has finished: ◆ The oven will beep and flash “0” four times. The oven will then beep one time per minute. ✉ Percentage If you wish to heat a dish for a short period of time at maximum power (900W), you can also simply press the +30s ( ) button once for each 30 seconds of cooking time. The oven starts immediately. 10 If you select a... Then the cooking time must be... Higher power level Lower power level Decreased Increased jlXX_\|inluTWZX`WiluUGGwGXXGG~ SGhGY[SGYWW\GG`aW[Ght Stopping the Cooking Adjusting the Cooking Time You can stop cooking at any time so that you can: Like traditional cooking, you may find that, depending on the food’s characteristics or your tastes, you have to adjust the cooking times slightly. You can: • • • Check the food Turn the food over or stir it Leave it to stand To stop the cooking... Then... Temporarily Open the door. Result: Cooking stops. To resume cooking, close the door again and press the Start( ) button. Completely Press the Stop( ) button. Result: Cooking stops. If you wish to cancel the cooking settings, press the Stop( ) button again. • • Check how cooking is progressing at any time simply by opening the door Increase or decrease the remaining cooking time 1. To increase the cooking time of your food, press the +30s( ) button once for each 30 seconds that you wish to add. • Example: To add three minutes, press the +30s( ) button six times. 2. During the cooking, to increase or decrease the cooking time of your food, turn the Jog Dial right or left. 11 EN jlXX_\|inluTWZX`WiluUGGwGXYGG~ SGhGY[SGYWW\GG`aW[Ght Using the Auto Cook Feature EN The following table presents the various Auto Cook Programmes, quantities, standing times and appropriate recommendations. Programmes no 1, 4 and 5 are running with microwave energy only. Programmes no 3 is running with a combination of microwaves and grill. Programmes no 2 is running with a combination of microwaves and convection. The five Auto Cook( ) features include/provide preprogrammed cooking times. You do not need to set either the cooking times or the power level. You can adjust the size of the serving by turning the Jog Dial. ☛ Use only recipients that are microwave-safe. Open the door. Place the food in the centre of the turntable. Close the door. Code Food 1. Press the Auto Cook( ) button. Next : Press the blinking button. 2. Select the type of food that you are cooking by pressing the Select ( ) button. Refer to the table on the following page for a description of the various pre-programmed settings. Next : Turn the blinking dial. 3. Select the size of the serving by turning the Jog Dial. Next : Press the blinking button. 4. Press the Start( ) button. Result: The food is cooked according to the preprogrammed setting selected. ◆ When cooking has finished, the oven will beep and flash “0” four times. The oven will then beep one time per minute. 12 Serving Size Standing Recommendations Time Ready Meal (chilled) 0.3-0.35 kg 0.4-0.45 kg 0.5-0.55 kg 3min. Put on a ceramic plate and cover with microwave cling film. This programme is suitable for meals consisting of 3 components (e.g. meat with sauce, vegetables and a side dish like potatoes, rice or pasta). Frozen Pizza 0.3-0.4 kg 0.45-0.55 kg 0.6-0.7 kg - Place one frozen pizza (-18°C) on the low rack, place two frozen pizzas on the low and high rack Chicken Pieces 0.2-0.3 kg (1pc) 0.4-0.5 kg (2pcs) 0.6-0.7 kg (3pcs) 0.8-0.9 kg (3-4pcs) 2-3min. Brush the chicken pieces with oil and spice them with pepper, salt and paprika. Put them in a circle on the high rack with the skin-side down. Turn over, as soon as the beep sounds. Fresh 0.2-0.25 kg Vegetables 0.3-0.35 kg 0.4-0.45 kg 0.5-0.55 kg 0.6-0.65 kg 0.7-0.75 kg 2-3 min. Weigh the vegetables after washing, cleaning and cutting into similar size. Put them into a glass bowl with lid. Add 30 ml (2 tablespoons) water when cooking for 200-250 g, add 45 ml (3 tablespo-ons) for 300-450 g and add 60-75 ml (4-5 tablespoons) for 500-750 g.Stir after cooking. When cooking higher quantities stir once during cooking. Peeled Potatoes 2-3 min. Weigh the potatoes after peeling, washing and cutting into a similar size. Put them into a glass bowl with lid. Add 45 ml (3tablespoons) water when cooking 300-450g, add 60ml (4tablespoons) for cooking 500-750 g. 0.3-0.35 kg 0.4-0.45 kg 0.5-0.55 kg 0.6-0.65 kg 0.7-0.75 kg jlXX_\|inluTWZX`WiluUGGwGXZGG~ SGhGY[SGYWW\GG`aW[Ght Using the Power Defrost Feature The Power Defrost( ) feature enables you to defrost meat, poultry, fish, bread , cake and fruit. The defrost time and power level are set automatically. You simply select the programme and the weight. ☛ The following table presents the various Power Defrost programmes, quantities, standing times and appropriate recommendations. Remove all kind of package material before defrosting. Place meat, poultry and fish on a ceramic plate. Use only containers that are microwave-safe. Code Food Open the door. Place the frozen food on a ceramic in the centre of the turntable. Close the door. Serving Size 0.2~2kg 20-90 min. Shield the edges with aluminium foil. Turn the meat over, when the oven beeps. This programme is suitable for beef, lamb, pork, steaks, chops and minced meat. Poultry 0.2~2kg 20-90 min. Shield the leg and wing tips with aluminium foil. Turn the poultry over, when the oven beeps. This programme is suitable for whole chicken as well as for chicken pieces. Fish 0.2~2kg 20-60 min. Shield the tail of a whole fish with aluminium foil. Turn the fish over, when the oven beeps. This programme is suitable for whole fishes as well as for fish fillets. Bread/ Cake 0.12~1kg 10-60 min. Put bread or cake on a piece of kitchen paper and turn over, as soon as the oven beeps (oven keeps operating and is stopped, when you open the door). This programme is suitable for all kinds of bread, sliced or whole, as well as for bread rolls and baguettes. Arrange bread rolls in a circle. This programme is suitable for all kinds of yeast cake, biscuit, cheese cake and puff pastry. It is not suitable for short/crust pastry, fruit and cream cakes as well as for cake with chocolate topping. Fruit 0.1~0.6kg 5-20 min. Spread fruits evenly into a flat glass dish or use a flat ceramic plate. This programme is suitable for all kinds of fruit. 3. Select the food weight by turning the Jog Dial. Next : Press the blinking button. 4. Press Start( ) button. Result: ◆ Defrosting begins. ◆ The oven beeps through defrosting to remind you to turn the food over. 5. Press the Start( ) again to finish defrosting. Result: When cooking has finished, the oven will beep and flash “0” four times. The oven will then beep one time per minute. ☛ You can also defrost food manually. To do so, select the microwave function with a power level of 180 W. Refer to the section entitled “Defrosting” on page 23 for further details. 13 Recommendations Meat 1. Press the Power Defrost ( ) button. Next : Press the blinking button. 2. Select the type of food that you are cooking by pressing the Select ( ) button. Refer to the table on the following page for a description of the various pre-programmed settings. Next : Turn the blinking dial. Standing Time EN jlXX_\|inluTWZX`WiluUGGwGX[GG~ SGhGY[SGYWW\GG`aW[Ght Using Crust Plate EN How to clean the Crust plate Normally when cooking in microwave oven, using grill or microwave mode in grill/convection ovens, foods like pastries and pizza become soggy from button side. Using the Samsung Crust plate helps to gain a crispy cookde result of your food. The crust plate can also be used for bacon, eggs, sausages, etc. ☛ The best way to clean the crust plate is to wash it with hot water and detergent. Then rinse if off with clean water. Do not use a scrubbing brush or a hard sponge otherwise the top layer will be damaged. Before using the crust plate, preheat it by selecting the combination mode for 3 to 5 minutes: • Combination of convection (220°C) and microwaves. (600 W power level) • Combination of grill and microwaves (300 W power level) • See page 17 respectively. ☛ 1. Preheat the crust plate, as described above. • Use oven gloves at all times as the crust plate will become very hot. 2. Brush the plate with oil if you are cooking food, such as bacon and eggs, in order to brown the food nicely. 3. Place the food on the crust plate. • Do not place any recipients on the crust plate that are not heat-resistant (plastic bowls for example). 4. Place the crust plate on the turntable in the microwave oven. • Never place the crust plate in the oven without the turntable. 5. Press the Combi button. Next : Press the blinking button. 6. Select the appropriate Combination mode by pressing the Select( ) button. Next : Turn the blinking dial. 7. Set the cooking time by turning the Jog Dial until the appropriate cooking time is displayed. Next : Press the blinking button. 8. Press the Start( ) button. Result: Cooking starts. ◆ When cooking has finished, the oven will beep and flash “0” four times. The oven will then beep one time per minute. 14 As the crust plate has a Teflon layer, if you use it incorrectly, it can be damaged. • Never cut the food on the plate. Remove the food from the plate before to cutting into slices. • Turn the food over preferably with a plastic or wooden spatula. jlXX_\|inluTWZX`WiluUGGwGX\GG~ SGhGY[SGYWW\GG`aW[Ght Auto fast Preheating the Oven Cooking by Convection For convection cooking, it is recommended that you preheat the oven to the appropriate temperature before placing the food in the oven. When the oven reaches the requested temperature, it is maintained for approximately 10 minutes; it is then switched off automatically. Check that the heating element is in the correct position for the type of cooking that you require. The convection mode enables you to cook food in the same way as in a traditional oven. The microwave mode is not used. You can set the temperature, as required, in a range varying from 40°C to 250°C in eight preset levels. The maximum cooking time is 60 minutes. 1. Press the Auto Fast Preheat( Next : Press the blinking button. ☛ ) button. Check that the heating element is in the horizontal position and that the turntable is in position. Open the door and place the recipient on the low rack and set on turntable. 2. Press the Select ( ) button one or more times to set the temperature. Result: The following indications are displayed: 250°C(temperature) Next : Press the blinking button. 3. Press the Start( ) button. Result: The oven is preheated to the requested temperature. ◆ Upon arrival at the preset temperature, the oven beeps 6 times and the temperature is kept for 10 minutes. ◆ After 10 minutes, the beeps 4 times and the operation stops. ✉ ✉ If you wish to Auto Fast Preheat the oven. • Always use oven gloves when touching the recipients in the oven, as they will be very hot. • You can get better cooking and browning, if you use the low rack. 1. Press the Convection ( ) button. Next : Press the blinking button. 2. Press the Select( ) button once or more times to set the temperature. Result: The following indications are displayed: (convection mode) 250°C (temperature) Next : Turn the blinking dial. 3. Set the cooking time by turning the Jog Dial. Next : Press the blinking button. In case the inner temperature has reached the preset temperature, the beep 6 times when setting the temperature and the preset temperature is kept for 10 minutes. If you would like to know the current temperature of oven cavity, press Auto Fast Preheat( ) button. 4. Press the Start( ) button. Result: Cooking starts: ◆ When cooking has finished, the oven will beep and flash “0” four times. The oven will then beep one time per minute. ✉ 15 You can check the temperature at any time by pressing the Auto Fast Preheat( ) button. EN jlXX_\|inluTWZX`WiluUGGwGX]GG~ SGhGY[SGYWW\GG`aW[Ght EN Grilling Choosing the Heating Element Position The grill enables you to heat and brown food quickly, without using microwaves. The heating element is used when grilling. The heating element is used when cooking food by convection, grilling or spit roasting. It can be placed in one of two positions: • • Always use oven gloves when touching the recipients in the oven, as they will be very hot. You can get better cooking and grilling results, if you use the high rack. • ☛ Check that the heating element is in the horizontal position, and that the appropriate rack is in position. 1. Open the door and place the food on the rack. 2. Press the Grill ( ) button. Result: The following indications are displayed: (grill mode) Next : Turn the blinking dial. • You cannot set the temperature of the grill. Horizontal position for convection cooking and grilling Only change the position of the heating element when it is cold and do not apply excessive force when placing it in the vertical position. To set the heating element to the... Then... Vertical position ◆ Pull down on the heating element ◆ Push it towards the back of the oven until it is parallel with the back wall Horizontal position (convection cooking and grilling) ◆ Pull the heating element towards you ◆ Push it upwards until it is parallel with the ceiling (top) of the oven 3. Set the grilling time by turning the Jog Dial. • The maximum grilling time is 60 minutes. Next : Press the blinking button. Choosing the Accessories 4. Press the Start( ) button. Result: Grilling starts: ◆ When cooking has finished, the oven will beep and flash “0” four times. The oven will then beep one time per minute. Traditional convection cooking does require cookware. You should, however, use only cookware that you would use in your normal oven. Microwave-safe cantainers are not usually suitable for convection cooking; don’t use plastic containers, dishes, paper cups, towels, etc. If you wish to select a combined cooking mode (microwave and grill or convection), use only recipients that are microwave-safe and oven-proof. Metallic cookware or utensils may damage your oven. ☛ 16 For further details on suitable cookware and utensils, refer to the Cookware Guide on page 19 . jlXX_\|inluTWZX`WiluUGGwGX^GG~ SGhGY[SGYWW\GG`aW[Ght Cooking by Combination Safety-locking Your Microwave Oven You can also combine microwave cooking with the grill or convection, to cook quickly and brown at the same time. Your microwave oven is fitted with a special Child Safety programme, which enables the oven to be “locked” so that children or anyone unfamiliar with it cannot operate it accidentally. The oven can be locked at any time. ☛ ALWAYS use microwave-safe and oven-proof cookware. Glass or ceramic dishes are ideal as they allow the microwaves to penetrate the food evenly. 1. Press the Grill and Convection buttons at the same time(about one second). Result: ◆ The oven is locked. ◆ The follow indication is display “L”. ALWAYS use oven gloves when touching the recipients in the oven, as they will be very hot. You can improve cooking and grilling, if you use the high rack. Open the door. Place the food on the rack best suited to the type of food to be cooked. Place the rack on the turntable. Close the door. 2. Press the Grill and Convection buttons at the same time(about one second). Result: The oven can be used normally. 1. Press the Combi button. Next : Press the blinking button. 2. Select the appropriate Combination mode by pressing the Select ( ) button. Refer to the conbination mode and power level table below for further detaies. Next : Turn the blinking dial. 3. Set the cooking time by turning the Jog Dial. The maximum cooking time is 60 minutes. Next : Press the blinking button. 4. Press the Start( ) button. Result: ◆ Combination cooking starts. ◆ When cooking has finished, the oven will beep and flash “0” four times. The oven will then beep one time per minute. Mode Power Level C1 Microwave(300w) + Grill C2 Microwave(180w) + Convection (200°C) C3 Microwave(450w) + Convection (200°C) C4 Microwave(600w) + Convection (220°C) 17 EN jlXX_\|inluTWZX`WiluUGGwGX_GG~ SGhGY[SGYWW\GG`aW[Ght EN Switching the Beeper Off Manual Stop Turntable Function You can switch the beeper off whenever you want. The turntable on/off( ) button enables you to use large dishes which fill the whole oven by stopping the turntable from rotating (only manual cooking mode). 1. Press the Microwave( ) and Grill ( ) buttons at the same time (about one second). The oven does not beep to indicate the end of a Result: function. ☛ 2. To switch the beeper back on, press the Microwave( ) and Grill ( ) buttons again at the same time (about one second). Result: The oven operates normally. The results will be less satisfactory in this case as the cooking is less even. We recommend that you turn the dish by hand halfway through the cooking process. Warning ! Never operate the turntable without food in the oven. Reason: This may cause fire or damage to the unit. 1. Press the Turntable on/off ( ) button. The turntable will not rotate. Result: 2. To switch the turntable rotating back on, press the Turntable on/off ( ) button again. Result: The turntable will rotate. ✉ 18 Do not press the Turntable on/off( ) button during the cooking process. Cancel the cooking phase, before pressing the turntable On/Off( ) button. jlXX_\|inluTWZX`WiluUGGwGX`GG~ SGhGY[SGYWW\GG`aW[Ght Cookware Guide To cook food in the microwave oven, the microwaves must be able to penetrate the food, without being reflected or absorbed by the dish used. Care must therefore be taken when choosing the cookware. If the cookware is marked microwave-safe, you do not need to worry. The following table lists various types of cookware and indicates whether and how they should be used in a microwave oven. Cookware Aluminium foil ✓✗ Can be used in small quantities to protect areas against overcooking. Arcing can occur if the foil is too close to the oven wall or if too much foil is used. ✓ Do not preheat for more than 8minutes. China and earthenware ✓ Porcelain, pottery, glazed earthenware and bone china are usually suitable, unless deco-rated with a metal trim. Disposable polyester cardboard dishes ✓ Some frozen foods are packaged in these dishes. ✓ ✗ Can be used to warm food. Overheating may cause the polystyrene to melt. May catch fire. ✗ May cause arcing. ✓ Can be used, unless decorated with a metal trim. Can be used to warm foods or liquids. Delicate glass may break or crack if heated suddenly. Must remove the lid. Suitable for warming only. Glassware • Oven-to-table ware • Fine glassware ✓ • Glass jars ✓ Dishes Freezer bag twist ties ✗ ✗ Metal • • Plastic • Containers Microwave- Comments Safe Crust plate Fast-food packaging • Polystyrene cups containers • Paper bags or newspaper • Recycled paper or metal trims Paper • Plates, cups, napkins and Kitchen paper • Recycled paper • Cling film • Freezer bags Wax or grease-proof paper ✓ :Recommended ✓✗:Use Caution ✗ :Unsafe May cause arcing or fire. 19 ✓ For short cooking times and warming. Also to absorb excess moisture. ✗ May cause arcing. ✓ Particularly if heat-resistant thermoplastic. Some other plastics may warp or discolour at high temperatures. Do not use Melamine plas-tic. Can be used to retain moisture. Should not touch the food. Take care when removing the film as hot steam will escape. Only if boilable or oven-proof. Should not be airtight. Prick with a fork, if necessary. ✓ ✓✗ ✓ Can be used to retain moisture and prevent spattering. EN jlXX_\|inluTWZX`WiluUGGwGYWGG~ SGhGY[SGYWW\GG`aW[Ght Cooking Guide EN MICROWAVES Food Microwave energy actually penetrates food, attracted and absorbed by its water, fat and sugar content. The microwaves cause the molecules in the food to move rapidly. The rapid movement of these molecules creates friction and the resulting heat cooks the food. COOKING Cookware for microwave cooking: Cookware must allow microwave energy to pass through it for maximum efficiency. Microwaves are reflected by metal, such as stainless steel, aluminium and copper, but they can penetrate through ceramic, glass, porcelain and plastic as well as paper and wood. So food must never be cooked in metal containers. Covering during cooking To cover the food during cooking is very important, as the evaporated water rises as steam and contributes to cooking process. Food can be covered in different ways: e.g. with a ceramic plate, plastic cover or microwave suitable cling film. Cooking Guide for frozen vegetables Use a suitable glass pyrex bowl with lid. Cook covered for the minimum time - see table. Continue cooking to get the result you prefer. Stir twice during cooking and once after cooking. Add salt, herbs or butter after cooking. Cover during standing time. Power Time (min.) Standing Time(min.) Instructions Spinach 0.15kg 600W 5-6 2-3 Add 15 ml (1 tablespoon) cold water. Broccoli 0.3kg 600W 8-9 2-3 Add 30 ml (2 tbsp.) cold water. Peas 0.3kg 600W 7-8 2-3 Add 15 ml (1 tbsp.) cold water. Green Beans 0.3kg 600W 7½-8½ 2-3 Add 30 ml (2 tbsp.) cold water. Mixed Vegetables (carrots/peas/ corn) 0.3kg 600W Mixed Vegetables (Chinese style) 0.3kg 600W 7½-8½ Standing Time(min.) 7-8 Instructions 2-3 Add 15 ml (1 tbsp.) cold water. 2-3 Add 15 ml (1 tbsp.) cold water. Rice: Use a large glass pyrex bowl with lid – rice doubles in volume during cooking. Cook covered. After the cooking time is over, stir before standing time and salt or add herbs and butter. Remark: The rice may not have absorbed all water after the cooking time is finished. Pasta: Use a large glass pyrex bowl. Add boiling water, a pinch of salt and stir well. Cook uncovered. Stir occasionally during and after cooking. Cover during standing time and drain thoroughly afterwards. Food Standing times After cooking is over food the standing time is important to allow the temperature to even out within the food. Portion Power Time (min.) Cooking Guide for rice and pasta Food suitable for microwave cooking: Many kinds of food are suitable for microwave cooking, including fresh or frozen vegetables, fruit, pasta, rice, grains, beans, fish, and meat. Sauces, custard, soups, steamed puddings, preserves, and chutneys can also be cooked in a microwave oven. Generally speaking, microwave cooking is ideal for any food that would normally be prepared on a hob. Melting butter or chocolate, for example (see the chapter with tips, techniques and hints). Food Portion 20 Portion Power Time (min.) Standing Time(min.) Instructions White Rice (parboiled) 0.25kg 0.37kg 900W 15-16 17½-18½ 5 Add 500 ml cold water. Add 750 ml cold water. Brown Rice (parboiled) 0.25kg 0.37kg 900W 20-21 22-23 5 Add 500 ml cold water. Add 750 ml cold water. Mixed Rice (rice + wild rice) 0.25kg 900W 16-17 5 Add 500 ml cold water. Mixed Corn (rice + grain) 0.25kg 900W 17-18 5 Add 400 ml cold water. Pasta 0.25kg 900W 10-11 5 Add 1000 ml hot water. jlXX_\|inluTWZX`WiluUGGwGYXGG~ SGhGY[SGYWW\GG`aW[Ght Cooking Guide (continued) Cooking Guide for fresh vegetables REHEATING Use a suitable glass pyrex bowl with lid. Add 30-45 ml cold water (2-3 tbsp.) for every 250 g unless another water quantity is recommended – see table. Cook covered for the minimum time – see table. Continue cooking to get the result you prefer. Stir once during and once after cooking. Add salt, herbs or butter after cooking. Cover during a standing time of 3 minutes. Hint: Cut the fresh vegetables into even sized pieces. The smaller they are cut, the quicker they will cook. All fresh vegetables should be cooked using full microwave power (900W). Your microwave oven will reheat food in a fraction of the time that conventional ovens and hobs normally take. Use the power levels and reheating times in the following chart as a guide. The times in the chart consider liquids with a room temperature of about +18 to +20°C or a chilled food with a temperature of about +5 to +7°C. Arranging and covering Avoid reheating large items such as joint of meat - they tend to overcook and dry out before the centre is piping hot. Reheating small pieces will be more successful. Power levels and stirring Some foods can be reheated using 900 W power while others should be reheated using 600 W, 450 W or even 300 W. Check the tables for guidance. In general, it is better to reheat food using a lower power level, if the food is delicate, in large quantities, or if it is likely to heat up very quickly (mince pies, for example). Stir well or turn food over during reheating for best results. When possible, stir again before serving. Take particular care when heating liquids and baby foods. To prevent eruptive boiling of liquids and possible scalding, stir before, during and after heating. Keep them in the microwave oven during standing time. We recommend putting a plastic spoon or glass stick into the liquids. Avoid overheating (and therefore spoiling) the food. It is preferable to underestimate cooking time and add extra heating time, if necessary. Heating and standing times When reheating food for the first time, it is helpful to make a note of the time taken - for future reference. Always make sure that the reheated food is piping hot throughout. Allow food to stand for a short time after reheating - to let the temperature even out. The recommended standing time after reheating is 2-4 minutes, unless another time is recommended in the chart. Take particular care when heating liquids and baby food. See also the chapter with the safety precautions. Food Portion Time (min.) Standing Instructions Time (min.) Broccoli 0.25kg 0.5kg 4½-5 7-8 3 Prepare even sized florets. Arrange the stems to the centre. Brussels Sprouts 0.25kg 6-6½ 3 Add 60-75 ml (5-6 tbsp.) water. Carrots 0.25kg 4½-5 3 Cut carrots into even sized slices. Cauliflower 0.25kg 0.5kg 5-5½ 7½-8½ 3 Prepare even sized florets. Cut big florets into halves. Arrange stems to the centre. Courgettes 0.25kg 4-4½ 3 Cut courgettes into slices. Add 30 ml (2 tbsp.) water or a knob of butter. Cook until just tender. Egg Plants 0.25kg 3½-4 3 Cut egg plants into small slices and sprinkle with 1 tablespoon lemon juice. Leeks 0.25kg 4-4½ 3 Cut leeks into thick slices. Mushrooms 0.12kg 0.12kg 1½-2 2½-3 3 Prepare small whole or sliced mushrooms. Do not add any water. Sprinkle with lemon juice. Spice with salt and pepper. Drain before serving. Onions 0.25kg 5-5½ 3 REHEATING LIQUIDS Always allow a standing time of at least 20 seconds after the oven has been switched off to allow the temperature to even out. Stir during heating, if necessary, and ALWAYS stir after heating. To prevent eruptive boiling and possible scalding, you should put a spoon or glass stick into the beverages and stir before, during and after heating. Cut onions into slices or halves. Add only 15 ml (1 tbsp.) water. Pepper 0.25kg 4½-5 3 Cut pepper into small slices. Potatoes 0.25kg 0.5kg 4-5 7-8 3 Weigh the peeled potatoes and cut them into similar sized halves or quarters. Turnip Cabbage 0.25kg 5½-6 3 Cut turnip cabbage into small cubes. 21 EN jlXX_\|inluTWZX`WiluUGGwGYYGG~ SGhGY[SGYWW\GG`aW[Ght Cooking Guide (continued) EN Reheating Liquids and Food REHEATING BABY FOOD Use the power levels and times in this table as a guide lines for reheating. BABY FOOD: Empty into a deep ceramic plate. Cover with plastic lid. Stir well after reheating! Let stand for 2-3 minutes before serving. Stir again and check the temperature. Recommended serving temperature: between 30-40°C. BABY MILK: Pour milk into a sterilised glass bottle. Reheat uncovered. Never heat a baby’s bottle with teat on, as the bottle may explode if overheated. Shake well before standing time and again before serving! Always carefully check the temperature of baby milk or food before giving it to the baby. Recommended serving temperature: ca. 37°C. REMARK: Baby food particularly needs to be checked carefully before serving to prevent burns. Use the power levels and times in the next table as a guide lines for reheating. Food Portion Drinks (coffee, tea and water) 0.15kg 900W (1 cup) 0.3kg (2 cups) 0.4kg (3 cups) 0.6kg (4 cups) Baby food (vegetables + meat) 0.19kg Baby porridge (grain + milk + fruit) 0.19kg Baby milk 0.1kg 0.2kg 600W 600W 300W Time 30sec. 20sec. 30-40sec. 1min. to 1min. 10sec. Standing Time(min.) 2-3 2-3 2-3 Instructions Empty into ceramic deep plate. Cook covered. Stir after cooking time. Stand for 2-3 minutes. Before serving, stir well and check the temperature carefully. Empty into ceramic deep plate. Cook covered. Stir after cooking time. Stand for 2-3 minutes. Before serving, stir well and check the temperature carefully. Stir or shake well and pour into a sterilised glass bottle. Place into the centre of turntable. Cook uncovered. Shake well and stand for at least 3 minutes. Before serving, shake well and check the temperature carefully. 22 1-2 Pour into cups and reheat uncovered: 1 cup in the centre, 2 cups opposite of each other, 3 cups in a circle. Keep in microwave oven during standing time and stir well. 2-3 Pour into a deep ceramic plate or deep ceramic bowl. Cover with plastic lid. Stir well after reheating. Stir again before serving. 2-2½ 3-3½ 3½-4 0.25kg 0.35kg 0.45kg 0.55kg 900W Stew (chilled) 0.35kg 600W 4½-5½ 2-3 Put stew in a deep ceramic plate. Cover with plastic lid. Stir occasionally during reheating and again before standing and serving. Pasta with sauce (chilled) 0.35kg 600W 3½-4½ 3 Put pasta (e.g. spaghetti or egg noodles) on a flat ceramic plate. Cover with microwave cling film. Stir before serving. Filled pasta with sauce (chilled) 0.35kg 600W 3 Put filled pasta (e.g. ravioli, tortellini) in a deep ceramic plate. Cover with plastic lid. Stir occasionally during reheating and again before standing and serving. Plated Meal (chilled) 0.35kg 0.45kg 0.55kg 600W 4½-5½ 5½-6½ 6½-7½ 3 Plate a meal of 2-3 chilled components on a ceramic dish. Cover with microwave cling-film. Cheese Fondue ready-toserve (chilled) 0.4kg 600W 1-2 Put the ready-to-serve cheese fondue in a suitable sized glass pyrex bowl with lid. Stir occasionally during and after reheating. Stir well before serving. Use the power levels and times in this table as guide lines for reheating. Portion Power 1-1½ Standing Instructions Time (min.) Soup (chilled) Reheating Baby Food and Milk Food Power Time (min.) 2½-3 3-3½ 3½-4 4½-5 4-5 6-7 jlXX_\|inluTWZX`WiluUGGwGYZGG~ SGhGY[SGYWW\GG`aW[Ght Cooking Guide (continued) DEFROSTING Microwaves are an excellent way of defrosting frozen food. Microwaves gently defrost frozen food in a short period of time. This can be of great advantage, if unexpected guests suddenly show up. All frozen food should be defrosted using defrosting power level (180 W). Frozen poultry must be thoroughly thawed before cooking. Remove any metal ties and take it out of any wrapping to allow thawed liquid to drain away. Meat Minced beef Food Put the frozen food on a dish without cover. Turn over half way, drain off any liquid and remove any giblets as soon as possible. Check the food occasionally to make sure that it does not feel warm. If smaller and thinner parts of the frozen food start to warm up, they can be shield by wrapping very small strips of aluminium foil around them during defrosting. Time (min.) 0.25kg 0.5kg 6-7 10-12 0.25kg 7-8 0.5kg (2pcs) 12-14 1.2kg 28-32 Fish Fish fillets/ 0.2kg 6-7 Whole fish 0.4kg 11-13 0.3kg Pork steaks Poultry Chicken pieces Should poultry start to warm up on the outer surface, stop thawing and allow it to stand for 20 minutes before continuing. Leave the fish, meat and poultry to stand in order to complete defrosting. The standing time for complete defrosting will vary depending on the quantity defrosted. Please refer to the table below. Hint: Portion Whole chicken lat food defrosts better than thick and smaller quantities need less time than bigger ones. Remember this hint while freezing and defrosting food. Standing Instructions Time (min.) 15-30 Place the meat on a flat ceramic plate. Shield thinner edges with aluminium foil. Turn over after half of defrosting time! 15-60 First, put chicken pieces first skin-side down, whole chicken first breast-side-down on a flat ceramic plate. Shield the thinner parts like wings and ends with aluminium foil. Turn over after half of defrosting time! 10-25 Put frozen fish in the middle of a flat ceramic plate. Arrange the thinner parts under the thicker parts. Shield narrow ends with aluminium foil. Turn over after half of defrosting time! 6-7 5-10 Spread fruit on a flat, round glass dish (with a large diameter). 2pcs 4pcs 0.25kg 1-1½ 2½-3 4-4½ 5-20 0.5kg 7-9 Arrange rolls in a circle or bread vertically(like a tower) on kitchen paper in the middle of turntable. Turn over after half of defrosting time! For defrosting of frozen food with a temperature of about -18 to - 20°C, use the following table as a guide. Fruits Berries Bread Bread rolls (each ca. 50 g) Toast/ Sandwich German bread (wheat + rye flour) 23 EN jlXX_\|inluTWZX`WiluUGGwGY[GG~ SGhGY[SGYWW\GG`aW[Ght Cooking Guide (continued) EN GRILL Grill Guide for fresh food The grill-heating element is located underneath the ceiling of the cavity. It operates while the door is closed and the turntable is rotating. The turntable’s rotation makes the food brown more evenly. Preheating the grill for 4 minutes will make the food brown more quickly. Cookware for grilling: Should be flameproof and may include metal. Do not use any type of plastic cookware, as it can melt. Food suitable for grilling: Chops, sausages, steaks, hamburgers, bacon and gammon rashers, thin fish portions, sandwiches and all kinds of toast with toppings. Preheat the grill with the grill-function for 3 minutes. Use the power levels and times in this table as guide lines for grilling. Fresh Food IMPORTANT REMARK: Whenever the grill only mode is used, make sure that the grill-heating element is under the ceiling in the horizontal position and not on the back-wall in the vertical position. Please remember that food must be placed on the high rack, unless another instruction is recommended. Portion Power 1. Side 2. Side Instructions Time Time (min.) (min.) Toast Slices 4 pcs (each 0.25kg) Grill only 3½-4½ 3-4 Put toast slices side by side on the rack. Grilled Tomatoes 0.2kg (2pcs) 0.4kg (4pcs) 300W + Grill - Cut tomatoes into halves. Put some cheese on top. Arrange in a circle in a flat glass pyrex dish. Place it on the high rack. Stand for 2-3 minutes. TomatoCheese Toast 4 pcs (0.3kg) 300W + 4½-5½ Grill - Toast the bread slices first. Put the toast with topping on the high rack. Stand for 2-3 minutes Baked Apples 2 apples (ca.0.4kg) 4 apples (ca.0.8kg) 300W + 6½-7½ Grill 11-13 - Core the apples and fill them with raisins and jam. Put some almond slices on top. Put apples on a flat glass pyrex dish. Place the dish directly on the low rack. 4-5 5½-6½ MICROWAVE + GRILL This cooking mode combines the radiant heat that is coming from the grill with the speed of microwave cooking. It operates only while the door is closed and the turntable is rotating. Due to the rotation of the turntable, the food browns evenly. Cookware for cooking with microwaves + grill Please use cookware that microwaves can pass through. Cookware should be flameproof. Do not use metal cookware with combination mode. Do not use any type of plastic cookware, as it can melt. Food suitable for microwaves + grill cooking: Food suitable for combination mode cooking include all kinds of cooked food which need reheating and browning (e.g. baked pasta), as well as foods which require a short cooking time to brown the top of the food. Also, this mode can be used for thick food portions that benefit from a browned and crispy top (e.g. chicken pieces, turning them over half way through cooking). Please refer to the grill table for further details. IMPORTANT REMARK: Whenever the combination mode (microwave + grill) is used, make sure that the grill heating element is under the ceiling in the horizontal position and not on the back-wall in the vertical position. The food should be placed on the high rack, unless another instruction is recommended. Otherwise it has to be placed directly on the turntable. Please refer to the instructions in the following chart. The food must be turned over, if it is to be browned on both sides. 24 jlXX_\|inluTWZX`WiluUGGwGY\GG~ SGhGY[SGYWW\GG`aW[Ght Cooking Guide (continued) Grill Guide for fresh food (continued) Convection Guide for fresh food like Bread Rolls, Bread and Cake Fresh Food Portion Power Preheat the convection with the preheating function to the desired temperature, unless we recommend not to preheat the oven- see table. Use the power levels and times in this table as guide lines for convection cooking. Chicken Pieces 300W + Grill Lamb Chops (medium) 0.5kg (2pcs) 0.9kg (3-4pcs) 0.4kg (4pcs) Food 8-9 Brush the lamb chops with oil and spices. Lay them in a circle on the high rack. After grilling stand for 2-3 minutes. BREAD ROLLS Bread Rolls (ready baked) 300W+ Grill 8-9 Grill only 8-9 Brush the pork steaks with oil and spices.Lay them in a circle on the high rack. After grilling stand for 2-3 minutes. 6-7 7-8 Brush skin of whole fish with oil and add herbs and spices. Put two fishes side by side (head to tail) on the high rack. Stand for 2-3 minutes. Grill only 10-12 0.4kg (2pcs) Roast Fish 9-10 10-11 12-13 MW + Grill Pork Steaks 1. Side 2. Side Instructions Time Time (min.) (min.) 0.4-0.5kg 300W + Grill Brush chicken pieces with oil and spices. Put them in a circle 11-12 on the high rack. Stand for 2-3 minutes CONVECTION Cooking with convection is the traditional and well known method of cooking food in a traditional oven with hot air. The heating element and the fan are situated on the back-wall, so that the hot air is circulating. Cookware for convection cooking: All conventional ovenproof cookware, baking tins and sheets – anything you would normally use in a traditional convection oven – can be used. Food suitable for convection cooking: All biscuits, individual scones, rolls and cakes should be made by this mode as well as rich fruit cakes, choux pastry and soufflés. MICROWAVES +CONVECTION This mode combines the microwave energy with the hot air and is therefore reducing the cooking time while giving the food a brown and crispy surface. Cooking with convection is the traditional and well known method of cooking food in an oven with hot air circulated by a fan on the back-wall. Cookware for cooking with microwaves + convection: Should be able to let the microwaves pass through. Should be ovenproof (like glass, pottery or china without metal trims); similar to the cookware described under MW + Grill. Food suitable for microwave + convection cooking: All kinds of meats and poultry as well as casseroles and gratin dishes, sponge cakes and light fruit cakes, pies and crumbles, roast vegetables, scones and breads. 25 Portion Power 4-6 pcs Only (each ca. convection 0.05kg) 180°C Time Instructions (min.) 2-3 Put bread rolls in a circle on the low rack. Use oven gloves while taking out! Stand 2-3 minutes. Marble Cake/ Lemon cake (fresh dough) 0.7kg 180 W + 24-26 Put the fresh dough in a 220°C rectangular glass or black metal without baking dish (length 25 cm). preheating! Put the cake on the low rack. Stand for 5-10 minutes. Filled Puff Pastries(chilled) 0.25kg (5pcs) Only 15-20 Fill fresh puff pastry dough with convection e.g. ham, sausages, cheese or 220°C vegetables.Put them on baking paper in a circle on the high rack. Muffins (fresh dough) 6 x 70 g (0.40.45kg) 180 W + 200°C 14-16 Fill the fresh dough evenly in a ceramic muffin-dish, suitable for 6 medium sized muffins, or use 6 small, round glass pyrex dishes. Put the dish on the low rack. Stand for 5 min. EN jlXX_\|inluTWZX`WiluUGGwGY]GG~ SGhGY[SGYWW\GG`aW[Ght Cooking Guide (continued) EN Convection guide for frozen food like Bread Rolls, Bread, Cake and Pastry Convection guide for frozen Pizza, Pasta, Chips and Nuggets Preheat the convection with the preheating function until the desired temperature is reached, unless we recommend not to preheat the oven- see table. Use the power levels and times in this table as guide lines for baking. Preheat the convection with the preheating function until the desired temperature is reached, unless we recommend not to preheat the oven- see table. Use the power levels and times in this table as guide lines for baking. Food Baguettes / Garlic Bread (pre-baked) Portion 0.2-0.25kg (1pc) Power 180 W + 200°C Food Time Instructions (min.) 6-7 Put the frozen baguette on baking paper on the low rack. After baking stand for 2-3 minutes. 26 Portion Power Time (min.) Instructions Pasta (Lasagne or Canneloni) 0.4kg 450 W + 200°C without preheating! 20-22 Put into a suitable sized glass pyrex dish or leave in the original packaging (take care that this is suitable for microwaves and oven heat). Put frozen lasagne on the low rack. After cooking stand for 2-3 minutes. Pasta (Macaroni, Tortellini) 0.4kg 450 W + 200°C without preheating! 16-18 Put into a suitable sized glass pyrex dish or leave in the original packaging (take care that this is suitable for microwaves and oven heat). Put frozen pasta gratin on the low rack. After cooking stand for 2-3 minutes. Chicken Nuggets 0.25kg 450 W + 200°C 6½-7½ Put chicken nuggets on the low rack. After cooking stand for 2-3 minutes. jlXX_\|inluTWZX`WiluUGGwGY^GG~ SGhGY[SGYWW\GG`aW[Ght Cooking Guide (continued) Cleaning Your Microwave Oven SPECIAL HINTS The following parts of your microwave oven should be cleaned regularly to prevent grease and food particles from building up: MELTING BUTTER Put 50 g butter into a small deep glass dish. Cover with plastic lid. Heat for 30-40 seconds using 900 W, until butter is melted. • • • MELTING CHOCOLATE Put 100 g chocolate into a small deep glass dish. Heat for 3-5 minutes, using 450 W until chocolate is melted. Stir once or twice during melting. Use oven gloves while taking out! ☛ ☛ MELTNG CRYSTALLIZED HONEY Put 20 g crystallized honey into a small deep glass dish. Heat for 20-30 seconds using 300 W, until honey is melted. Inside and outside surfaces Door and door seals Turntable and Roller rings ALWAYS ensure that the door seals are clean and the door closes properly. Failure to maintain the oven in a clean condition could lead to deterioration of the surface that could adversely affect the of the appliance and possibly result in a hazardous situation. 1. Clean the outside surfaces with a soft cloth and warm, soapy water. Rinse and dry. MELTING GELATINE Lay dry gelatine sheets (10 g) for 5 minutes into cold water. Put drained gelatine into a small glass pyrex bowl. Heat for 1 minute using 300 W. Stir after melting. 2. Remove any splashes or stains on the inside surfaces or on the roller ring with a soapy cloth. Rinse and dry. 3. To loosen hardened food particles and remove smells, place a cup of diluted lemon juice on the turntable and heat for ten minutes at maximum power. COOKING GLAZE/ICING (FOR CAKE AND GATEAUX) Mix instant glaze (approximately 14 g) with 40 g sugar and 250 ml cold water. Cook uncovered in a glass pyrex bowl for 3 ½ to 4 ½ minutes using 900 W, until glaze/icing is transparent. Stir twice during cooking. 4. Wash the dishwasher-safe plate whenever necessary. ✉ COOKING JAM Put 600 g fruits (for example mixed berries) in a suitable sized glass pyrex bowl with lid. Add 300 g preserving sugar and stir well. Cook covered for 10-12 minutes using 900 W. Stir several times during cooking. Empty directly into small jam glasses with twist-off lids. Stand on lid for 5 minutes. ✉ COOKING PUDDING Mix pudding powder with sugar and milk (500 ml) by following the manufacturers instructions and stir well. Use a suitable sized glass pyrex bowl with lid. Cook covered for 6 ½ to 7 ½ minutes using 900 W. Stir several times well during cooking. ✉ BROWNING ALMOND SLICES Spread 30 g sliced almonds evenly on a medium sized ceramic plate. Stir several times during browning for 3 ½ to 4 ½ minutes using 600 W. Let it stand for 2-3 minutes in the oven. Use oven gloves while taking out! 27 DO NOT spill water in the vents. NEVER use any abrasive products or chemical solvents. Take particular care when cleaning the door seals to ensure that no particles: • Accumulate • Prevent the door from closing correctly Clean the microwave oven cavity right ofter each use with a mild detergent solution, but let the microwave oven cool down before cleaning in order to avoid injury. The instructions for cooking ranges, hobs and ovens shall state that a steam cleaner is not to be used. EN jlXX_\|inluTWZX`WiluUGGwGY_GG~ SGhGY[SGYWW\GG`aW[Ght EN Storing and Repairing Your Microwave Oven Technical Specifications A few simple precautions should be taken when storing or having your microwave oven serviced. The oven must not be used if the door or door seals are damaged: SAMSUNG strives to improve its products at all times. Both the design specifications and these user instructions are thus subject to change without notice. • • • Broken hinge Deteriorated seals Distorted or bent oven casing Power source 230V ~ 50 Hz AC Power consumption Maximum power Microwave Grill (heating element) Convection (heating element) 3100 W 1400 W 1300 W 1700 W needs servicing or you are in doubt about its condition: • Unplug it from the wall socket • Contact the nearest after-sales service centre Output power 100 W / 900 W - 6 levels (IEC-705) Operating frequency 2450 MHz If you wish to store your oven away temporarily, choose a dry, dustfree place. • Reason: Dust and damp may adversely affect the working parts in the oven Dimensions (W x D x H) Outside Oven cavity 522 x 539 x 312 mm 355 x 380.6 x 234 mm Volume 32 Liter Weight Net Shipping 21.0 kg approx. 23.5 kg approx. Only a qualified microwave service technician should perform repairs. ☛ ✉ NEVER remove the outer casing from the oven. If the oven is faulty and 28 jlXX_\|inluTWZX`WiluUGGwGY`GG~ SGhGY[SGYWW\GG`aW[Ght Note EN 29 jlXX_\|inluTWZX`WiluUGGwGZWGG~ SGhGY[SGYWW\GG`aW[Ght Note EN 30 jlXX_\|inluTWZX`WiluUGGwGZXGG~ SGhGY[SGYWW\GG`aW[Ght Note EN 31 jlXX_\|inluTWZX`WiluUGGwGZYGG~ SGhGY[SGYWW\GG`aW[Ght