1
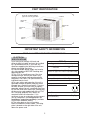
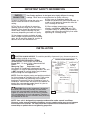
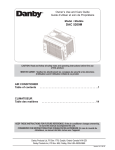
Owner’s Use and Care Guide
Guide de soin d’utiliser-et
Model • Modèle
DAC 8007EE
CAUTION: Read and follow all safety rules and operating instructions before first use
of this product.
MISE EN GARDE : Veuillez lire attentivement les consignes de sécurité et les directives
d'utilisation avant l'utilisation initiale de ce produit.
AIR CONDITIONER
Table of contents
. . . . . . . . . . . . . . . . . . . . . . . . . . . . . . . . . . . . . . .1
CLIMATISEUR
Table des matières
. . . . . . . . . . . . . . . . . . . . . . . . . . . . . . . . . . . . 14
KEEP THESE INSTRUCTIONS FOR FUTURE REFERENCE: If the air conditioner changes ownership,
be sure this manual accompanies the unit.
CONSERVER CES INSTRUCTIONS POUR CONSULTATION ULTÉRIEURE: En cas de revente du
climatiseur, ce manuel doit être inclus avec l’appareil.
Danby Products Ltd, PO Box 1778, Guelph, Ontario Canada N1H 6Z9
Danby Products Inc, PO Box 669, Findlay, Ohio USA 45839-0669
Version 2.12.08 JF
TABLE OF CONTENTS
UNIT SPECIFICATIONS
................................. 2
PART IDENTIFICATION
................................. 3
IMPORTANT SAFETY INFORMATION
Electrical Specifications
Energy Saving Tips
...................................... 3
...................................... 4
INSTALLATION
...................................... 4
Location
.................................................5
Installation Instructions
. . . . . . . . . . . . . . . . . . . . . . . . . . . . . . . . . . . . . 5-6
OPERATING INSTRUCTIONS
Key Pad Features
............................................7
Remote Control Features
................................. 8
CARE AND MAINTENANCE
TROUBLESHOOTING
Warranty
............................ 9
. . . . . . . . . . . . . . . . . . . . . . . . . . . . . . . . .10
. . . . . . . . . . . . . . . . . . . . . . . . . . . . . . . . . . . . . . . . . . . . . . . . 11
1
WELCOME
Thank you for choosing a Danby Room Air Conditioner to cool your home. This
Owner’s Use and Care Guide will provide you with valuable information necessary for
the proper care and maintenance of your new appliance. If properly maintained, your
Danby appliance will give you many years of trouble free operation. Please take a few
moments to read the instructions thoroughly and familiarize yourself with all of the
operational aspects of this appliance.
NOTE: This unit is NOT designed for “Through-the-wall” installation.
For easy reference, may we suggest you attach a copy of your sales slip/receipt to this
page, along with the following information, located on the manufacturers nameplate on
the rear panel of the unit.
Model Number:
Serial Number:
Date of Purchase:
This information will be necessary if your unit requires servicing and/or for
general inquiries. To contact a Customer Service Representative, call Danby TOLL
FREE: 1-800-26-
(1-800-263-2629)
CAUTION: Do not leave a room air conditioner unattended in a room where people or
animals who cannot react to a failed unit are located. A failed unit can cause extreme
overheating and fire in an enclosed, unattended space.
UNIT SPECIFICATIONS
Model Number
Voltage/Frequency
Noise Level
Fan/Cooling Speeds
Cooling Capacity
Energy Efficiency Rating (EER)
Input Wattage
Unit Dimensions (W) x (D) x (H)(inches)
Window Kit Dimensions Max Width
Min. Width
Min. Height
Unit Weight
DAC8007EE
115V-60Hz
53 dB
3/3
8000 BTU
10.8
740
19 2/16”x 12 5/8” x 15 3/4”
40 6/16” (1025.5mm)
22 3/8” (568.3mm)
13 9/16” (344.5mm)
22.9 kg (50.5 lbs)
NOTE: Continuing research results in steady improvement. Therefore, this information
and these specifications are subject to change without notice.
2
PART IDENTIFICATION
Fresh Air Ventilation Switch
(open for Fan only operation
Cabinet
Interior air
outlet
Exterior air
inlet
Interior air
inlet
Control
Panel
Filter
IMPORTANT SAFETY INFORMATION
READ ALL SAFETY INFORMATION BEFORE USING
ELECTRICAL
SPECIFICATIONS
1) All wiring must comply with local and
national electrical codes and must be installed
by a qualified electrician. If you have any
questions regarding the following instructions,
contact a qualified electrician.
2) Check available power supply and resolve
any wiring problems BEFORE installing and
operating this unit.
3) This 115V air conditioner uses 10 or less
nameplate amps and may be used in any
properly wired, general purpose household
receptacle. See Table 1 for specifications for
individual branch circuit.
4) For your safety and protection, this unit is
grounded through the power cord plug when
plugged into a matching wall outlet. If you are
not sure whether your wall outlet is properly
grounded, please consult a qualified electrician.
5) The wall outlet must match the 3-prong plug
on the service cord supplied with the unit. DO
NOT use plug adapters. See Table 2 for
receptacle and fuse information. If it is
necessary to use an extension cord to connect
your air conditioner, use an approved “air
conditioner” extension cord only (available
at most local hardware stores).
6) The rating plate on the unit contains
electrical and other technical data. The rating
plate is located on the right side of the unit,
above the power cord.
3
TABLE 1
Suggested Individual Branch Circuit
Nameplate Amps
*AWG Wire Size
4.9 to 10
14
AWG- American Wire Gauge
*Based on copper wire at 60°C temperature rating.
TABLE 2
Receptacle and Fuse Types
Rated Volts
125
Amps
Wall Outlet
15
Fuse Size
15
Time Delay Fuse
(or Circuit Breaker)
Plug Type
IMPORTANT SAFETY INFORMATION
ENERGYSAVING TIPS
Your Danby appliance is designed to be highly efficient in energy
savings. Follow these recommendations for greater efficiency.
4) Start your air conditioner before the
1) Select a thermostat setting that suits your
outdoor air becomes hot and uncomfortable, to
comfort needs and leave at that chosen
avoid an initial period of discomfort while the
setting.
unit is cooling off the room.
2) The filter is very efficient in removing
5) When outdoor temperatures are cool
airborne particles. Keep the air filter clean.
enough, use HIGH or LOW FAN only. This
Normally, filters should be cleaned every 2
circulates indoor air, providing some cooling
weeks. More frequent cleaning may be
comfort, and utilizes less electricity than when
necessary depending on indoor air quality.
operating on a cooling setting.
3) Use drapes, curtains or shades to keep
direct sunlight from penetrating and heating
room, but do not allow drapes or curtains to
obstruct the air flow around the unit.
INSTALLATION
ELECTRIC SHOCK HAZARD: To avoid the possibility of personal injury, disconnect power to
the unit before installing or servicing.
INSTALLATION HARDWARE
TOOLS NEEDED FOR INSTALLATION:
Screw Drivers: Both Phillips and flat head
3/4” (19.1mm)
Safety Lock (1)
Power Drill: 1/8 inch (3.2mm) diameter drill bit
screws (9)
Pencil
Scissors
“L” Shaped
3/8” (9.5mm) screws
mounting
(4) (*Factory
Measuring Tape
Carpenters Level
bracket (1)
installed on some
models)
Your Room Air Conditioner is designed for easy
*Factory installed
installtion in a single or double-hung window. This unit
on some models
is NOT designed for vertical (slider type) windows
Sash bracket (2)
and/or through-the-wall applications.
Adhesive
Foam Seal(1)
NOTE: Save the shipping carton and packing materials
for future storage or transport of the unit. From carton,
remove the plastic bag containing the installation
hardware kit necessary for the installation of your air
conditioner. Please check the contents of hardware kit
against the corresponding model check list, prior to
installation of the unit. See Fig. 1.
CAUTION: Because the compressor is located on
the controls side of the unit (left side), this side will be
heavier and more awkward to manipulate. Inadequate
support on control side of the unit can result in personal
injury and damage to your unit and property. Therefore, it
is recommended that you have someone assist you during
the installation of this unit.
Side Curtain RH (1)
Side Curtain LH (1)
Fig. 1
NOTE: Your unit is designed to evaporate condensation under normal conditions.
However, under extreme humidity conditions, excess condensation may cause basepan
to overflow to the outside. The unit should be installed where condensation run-off
cannot drip on pedestrains or neighboring properties
4