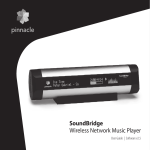
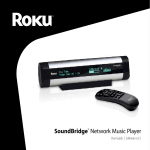
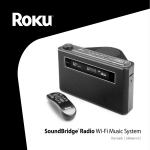
Download Roku SoundBridge Radio Wi-Fi Music System Operating instructions
Transcript
SoundBridge
HomeMusic
Powered by Roku
Instructions
Table of Contents
English .........................................................................................................................................4
Welcome ..................................................................................................................................4
Downloading the Current Operating Manual............................................................................4
Support.....................................................................................................................................4
INITIAL STEPS............................................................................................................................5
I. Music Server Software Requirements ......................................................................................6
What is "Music Server Software"? ...........................................................................................6
A. Instructions for installing Windows Media Connect and enabling music sharing: ...............8
B. Installing the Firefly Media Server and enabling music sharing ..........................................9
C. Instructions for installing Rhapsody and enabling music sharing........................................9
D. Instructions for installing Musicmatch Jukebox and enabling music sharing ......................9
II. Connecting to the Hardware to Your Home Network ............................................................10
III. Connecting SoundBridge to Loud Speakers or a Stereo System ........................................10
1. SoundBridge HomeMusic cabling with active loud speakers: ..........................................10
2. SoundBridge HomeMusic cabling with stereo system ......................................................11
IV. Connecting SoundBridge to the Wall Socket .......................................................................11
V. Using the Remote Control .....................................................................................................12
Remote Control Functions .....................................................................................................12
VI. Establishing a Network Connection .....................................................................................13
Wireless (Wi-Fi) Network .......................................................................................................13
Personal Firewall....................................................................................................................14
VII. Select Music Library ............................................................................................................14
2
VIII. Internet Radio.....................................................................................................................16
Browsing Internet Radio Stations...........................................................................................16
Customizing Favorites and Presets for Internet Radio ..........................................................17
Playing Stations Saved as “My Favorites” or “Presets” .........................................................19
Playback Limitations of Internet Radio Streams ....................................................................20
Discovering More Internet Radio Stations .............................................................................20
APPENDIX 1: END USER SOFTWARE LICENCE AGREEMENT...........................................21
APPENDIX 2: PROCEDURES AND SAFETY ..........................................................................22
Important Safety Instructions .................................................................................................22
3
English
Welcome
Thank you for choosing SoundBridge HomeMusic!! The development of this product was a lot
of fun for us, and we hope that you will have just as much fun in using it. With SoundBridge,
you can play back your digital music saved on your computer any time and in any room you
want. SoundBridge also gives you access to over a thousand free Internet radio stations.
We are continually working on improving the software. SoundBridge has a menu option for
automatically checking for and installing software updates. After you have installed and set up
SoundBridge, use this option as quickly as possible to make sure that you are using the most
current version of the software (for more information, refer to the section "Initial Steps"). We
also recommend that you register your purchase at www.pinnaclesys.com so that we can let
you know when new upgrades are available. Have fun!
Register your SoundBridge! It is quick and easy and lets you download the latest software
updates for your SoundBridge. Of course, your personal information will be kept confidential
and will not be shared with any third party.
Downloading the Current Operating Manual
As soon as the software version of your SoundBridge changes, you can download an updated
operating manual from www.pinnaclesys.com as well as from www.rokulabs.com/pinnacle.
Support
If you need help with your SoundBridge, please check www.pinnaclesys.com and
www.rokulabs.com/support.
4
INITIAL STEPS
To be able to use your SoundBridge, the following requirements must be met:
1. Compatible music server software must be installed. Compatible music server software is
contained in iTunes, Windows Media Connect, Rhapsody, Musicmatch and other
programs. If you are using iTunes, please install the Firefly Media Server from the
installation CD included in the package.
2. If SoundBridge is to be connected to a wireless network which uses WEP encryption, the
WEP password needs to be entered here using the remote control.
3. SoundBridge needs to be connected to active speakers, a hi-fi receiver or an amplifier.
4. The power unit needs to be connected to SoundBridge and to the power supply system
(there is no On/ Off switch).
5. The batteries must be inserted into the remote control.
6. Music sharing must be enabled in the music server software:
a. Windows Media Connect: Add SoundBridge to the authorized devices.
Firefly Media Server: Always enabled.
b. Real networks Rhapsody (this service is not yet available in Europe): Select
"Enable Music Server" and "UPnP" in the menu Options –> Settings.
c. Musicmatch: "Enable Music Server" and "UPnP" in the menu Options / Play /
Settings.
7. A music library must be selected and connected.
8. Internet radio must be available.
5
I. Music Server Software Requirements
SoundBridge has been developed as a playback client for several different music libraries, for
example, Windows Media Connect, Rhapsody, Musicmatch and iTunes. SoundBridge also
plays back WMA and DRM WMA (copy-protected files). These types of files can be purchased
online from many providers. (Note: Apple policies forbid SoundBridge from supporting
protected AAC files.)
What is "Music Server Software"?
SoundBridge is a network – music – player. This means that it doesn't save music but plays
back files that are stored on your computer/music server on your home network. (SoundBridge
can play back Internet radio via a direct Internet connection without a computer having to be
connected.) In order to play back music stored on your computer, SoundBridge must receive
the music data from software that "serves" the data to SoundBridge. This kind of "music server
software" plays back the music on SoundBridge.
The "music server software" also sends title lists and enables search queries in the music
library.
Perhaps you already have music server software installed and haven't noticed. Microsoft has
developed its own music server software: Windows Media Connect. There is no real standard
for music server software and therefore all the currently available programs have different
functions. One great advantage to SoundBridge is that all the popular programs are supported
by an easy to operate interface. The most popular music server applications are iTunes,
Windows Media Connect and Rhapsody. If you would like to use the PlaysForSure music
service, you need to use Windows Media Connect. If you would like to play back AAC files, you
need to use iTunes combined with the Firefly Media Server, and if you would like to use the
Rhapsody music service, you need to use the Rhapsody music server software (check the
availability of Real Networks Rhapsody in Europe under www.Rhapsody.com).
6
Note: In order to play back Internet radio from the "Radio Favorites“ list, you don't need music
server software since SoundBridge receives the data directly from the Internet.
Music Server Software
Recommended
for …
Note
Windows Media Connect
(UPnP Windows Media
DRM 10 protocols)
Windows XP with
Service Pack 2
Firefly Media Server
(support for Roku server
protocol)
PC/Mac
Rhapsody (proprietary
Rhapsody protocol)
Rhapsody
subscribers
Free music server software from Microsoft. Works
with any music jukebox, but is optimized for
Windows Media Player 10.
Supports the entire user interface incl. search and
browsing.
Supports: MP3, WMA, WMA DRM, WMA lossless
and playlists that have been created in a jukebox
such as Windows Media Player.
This high quality “open source” media server will
serve music in many formats (WMA, MP3, AAC,
FLAC, Apple Lossless). It integrates directly with
iTunes and can share your iTunes music library,
or any music library. As with all non-Apple
products, it does NOT support protected AAC
files. It does not support protected WMA files. It
does support SoundBridge’s full Browse, Search
and Display feature set as well as playlists and
Smart Playlists created in iTunes.
Music server software that is required for the
Rhapsody music service.
7
Music Server Software
Recommended for
…
Note
Musicmatch Jukebox
(UPnP AV protocol)
Windows 98SE/
ME/XP/2000 (as of
Service Pack 3)
SlimServer
(SlimServer protocol)
PC/Mac
Very popular music jukebox and music server
software with integrated UPnP AV server that is
supported by SoundBridge. Windows Media
Connect in combination with Musicmatch can
also be used - this extends the functionality.
Supports: MP3, WMA,WAV, WMA DRM only in
conjunction with Windows Media Connect.
Compatible with SoundBridge, but is not
supported by ROKU. Requires downloading the
SlimServer software.
SoundBridge has two user interfaces. In order to use the entire SoundBridge user interface,
which offers a search function and many browsing options, you need to use the Firefly Media
Server or Windows Media Connect.
The other programs do not have the entire range of functions necessary to provide
SoundBridge the data for the user interface, for example, some music servers do not support
the search function. Software 2.x provides SoundBridge many ways to connect to a music
library.
A. Instructions for installing Windows Media Connect and enabling music
sharing:
1. If it is not yet installed, download and install the free Windows XP Service Pack 2 from
2.
3.
4.
Microsoft or use the Windows Updater to perform the update.
If it is not yet installed, download and install the latest version of the free Windows Media
Player 10 from Microsoft or use the Windows Updater to perform the update.
Download and install the free music server software Windows Media Connect from
Microsoft.
Then follow the instructions in Section II ("Connecting the Hardware“).
8
Music sharing: Authorize SoundBridge as an allowed client for the Windows Media Player
with the music server software Windows Media Connect. Click the system icon next to the
clock to the bottom right. A list of all available clients is displayed. In the wizard window that
now appears, click "ADD" to add SoundBridge; confirm this with OK. To make sure that
SoundBridge appears in the list of authorized clients, check this again. Then exit the program.
B. Installing the Firefly Media Server and enabling music sharing
1. Install the Firefly Media Server from the installation CD included in the package or
2.
download the Firefly Media Server from www.fireflymediaserver.com.
Continue with the menu item “Enable Firefly Media Server”.
Music sharing: It is not necessary to enable the Firefly Media Server for music sharing.
However, the program must be running to be able to play back music from your SoundBridge.
C. Instructions for installing Rhapsody and enabling music sharing
1. If it is not yet installed, download and install the Real Networks Rhapsody client (download
2.
from www.rhapsody.com)
Then follow the instructions in Section II (“Connecting the Hardware”)
Music sharing: Start the Rhapsody program. In the menu item OPTION, select the sub-item
USER SETTINGS and click the UPnP tab. Click START to start the UPnP server. The "Start
UPnP server once logged in" option automatically starts the UPnP music server as soon as
Rhapsody is opened.
D. Instructions for installing Musicmatch Jukebox and enabling music sharing
1. If it is not yet installed, download and install the Musicmatch Jukebox from
2.
www.musicmatch.com.
Then follow the instructions in Section II ("Connecting the Hardware“).
9
II. Connecting to the Hardware to Your Home Network
Example: SoundBridge HomeMusic
Wireless connection: No additional hardware needs to be installed. The connection can only
be made via a router or access point (network mode).
Note that not all wireless access points and routers are compatible with SoundBridge. The
Web sites http://www.pinnaclesys/support and www.rokulabs.com/support provide a list of all
supported wireless CF adaptors.
III. Connecting SoundBridge to Loud Speakers or a Stereo System
There are several ways of establishing an audio connection to SoundBridge.
1.
SoundBridge HomeMusic cabling with active loud speakers:
Connect to active boxes using the audio cable included in the package (3.5 mm jack), or via
the 3.5 mm audio connection on the active loud speakers:
10
2.
SoundBridge HomeMusic cabling with stereo system
Connect to the AUX jack or another "Line IN" jack using the cinch (white/red) audio cable
included in the package:
IV. Connecting SoundBridge to the Wall Socket
Insert the power plug into the SoundBridge socket; insert the other end into a power socket.
Note: SoundBridge does not have an On/Off switch. After you connect the power cable, you
see the welcome window for “SoundBridge” after a short time. If not, cancel the operation and
make sure the power supply is correctly connected at both ends. Please make sure that the
power supply (remove the power plug from the socket outlet) is disconnected before
connecting the cable or wireless adaptor. In order to avoid disturbances due to static buildup,
make sure that both covers are snapped in as soon as SoundBridge is connected to the socket
outlet.
11
V. Using the Remote Control
First insert the two AAA batteries (micro-cells, included in the package) into the remote control.
Then point the remote control at SoundBridge (make sure that the receiver is not covered).
Remote Control Functions
Button
Name
Function
Up / Down
Navigates through available selections in the list.
Left/Right
“FastBrowse.” When browsing for an artist alphabetically,
you skip from one letter of the alphabet to another.
Select
Play
Selects any item shown on the SoundBridge display.
Pressing Select is like clicking your mouse on a
highlighted item.
Begins playing current selection.
Pause
Pauses currently playing song.
Add
Adds current selection to your Song Queue.
Home
Takes you to the Source or Home Menu.
Search
Displays text based search options.
Browse
Browse through songs by title, artist, album, composer or
genre.
Exit
Takes you one step backward and works like the Back
button on your Internet browser. Pressing Exit repeatedly
displays information about the song currently playing.
12
Standby
Volume
Stops playing the current selection and puts SoundBridge
Radio in standby mode.
Adjusts brightness and size of display information when
used with Up/Down and Left/Right buttons.
Adjusts the volume.
Next/Previous
Track
Shuffle
Moves you forward or backward in your Song Queue, one
song at a time.
Plays Song Queue in random order.
Repeat
Continuously plays back your Song Queue.
Internet
Radio
Server
Searches for Internet radio stations.
Adjust Display
Returns you to the last music server accessed.
VI. Establishing a Network Connection
Wireless (Wi-Fi) Network
If your home network is a wireless network and no WEP security keys have been set, the
connection to your wireless network is established automatically. If your SoundBridge finds
more than one wireless network, you will be prompted to select the SSID (network ID).
If you have a security key, you need to manually enter your WEP key into SoundBridge. This is
the same key that you entered in your access point and your computer. Your display should
show something similar to the following:
No music libraries found (why?)
System Configuration
Use the arrow to move the contents of the window on the screen upwards until the system
configuration is highlighted and then press Select on the remote control. The following screen
is then displayed:
Software version & updates
Show Ethernet status
Show Wi-Fi status
13
Select Wi-Fi SSID & password
Go down to "Select Wi-Fi SSID & password" and select the name and password of your
wireless network.
Personal Firewall
If you have problems establishing a connection and a firewall is installed on your computer, the
firewall must be configured in such a way that your music server can access and play back
your audio files.
VII. Select Music Library
Once SoundBridge is successfully connected to your network and your server’s music sharing
options are enabled, SoundBridge will automatically find any supported music libraries on the
network. You will be prompted to choose the library you would like to access from a screen
that looks something like the one on the left:
Navigate to your preferred library (in this example, “Joe’s Music”) and press Select. You will
then see the “Home Menu” (see above at right), where you can begin browsing and playing
your music.
To change to a different library, or to play Internet radio, select the “Change Library or
Configuration” option located at the bottom of SoundBridge’s Home Menu (accessible by
pressing the Home Menu.
14
Hint: SoundBridge will automatically connect to the last library you were connected to
when awakened from Standby. Use the “Change Library or Configuration” option to
select a different library.
Remote Control Quick Reference
Use these commands on your remote control to select and play music:
• Use the Up and Down arrow buttons to take you through a list item by item. Use the
Select button to take you one level down into the highlighted item (think of it as doubleclicking a selected item).
• Use the Left and Right arrow buttons to “fast browse” a list of music options by skipping to
the next or previous letter of the alphabet, or if your list is not arranged alphabetically, by
about 5% of your list at a time. Then use the Select button to choose an item to play.
• Use the Back button to go one step backward while browsing, much like the Back button
on your Internet browser. (Pressing Back repeatedly displays the “Now Playing” screen,
with information about the song currently playing.)
• The Search button takes you to your text-based search options (if supported by your music
server).
• When you find a selection you want to play, you can use the Play button to play it, or the
Add button to add your current selection to the end of your Song Queue.
• The Pause button pauses playback of audio currently playing; pressing again resumes
playback.
• The Next Track and Previous Track buttons advance or retreat playback of your Song
Queue (or Internet Radio menu) one song at a time.
• Press the Home Menu button at any point to return to the beginning menu.
15
VIII. Internet Radio
You can listen to Internet radio in one of two ways. First, you can listen to SoundBridge’s builtin set of radio stations located in the “Internet Radio” Library. Your computer does not need to
be on - all you need is an active Internet connection on your home network. Second, you can
enter a URL of a radio station playlist on the Internet Radio tab of the SoundBridge web page.
The easiest way to play Internet radio on SoundBridge is through the “Internet Radio” Library,
where you can access a large and growing number of Internet radio stations, browseable by
Name, Genre, Language, and Location. To navigate to the “Internet Radio” Library, follow
these steps:
1. Press Home Menu. Navigate down to ”Change Library or Configuration” and press Select.
2. Your available music libraries will be displayed, including the one named “Internet Radio.”
Select that library and you will see a list of Internet radio stations. These are your Presets,
and they are pre-loaded when your SoundBridge is first set up. See below for more
information on how to edit these Presets.
3. Scroll to the station you want to play and press Play. (Alternatively, you can press Select
Select and choose “Get Station Info” to view the genre/format of the station, its language
and location.)
When the station is playing, the “Now Playing” screen looks similar to this:
Michelle Shocked — Black Widow
http://www.radioparadise.com
RadioParadise.com
The song and artist information is provided by each Internet radio station. Therefore, it may not
be available for every Internet radio station, or it may look slightly different.
Browsing Internet Radio Stations
You can browse SoundBridge’s built-in stations by Name, Genre, Language or Location. From
anywhere in the Internet Radio Library, press Home Menu. You will see the following options:
16
My Favorites
Browse
Play Preset
Show Now Playing
Select “Browse” and choose the method of browsing that you prefer:
Browse Names
Browse Genres
Browse Locations (by country of origin)
Browse Languages
Hint: You can “Fast Browse” a list of results by pressing the Left/Right arrows on your
remote; your results will skip to the next letter of the alphabet.
Choose your desired browse option and press Select. Scroll down to the station you would like
to hear and press Play (or Select twice) to begin playback.
Customizing Favorites and Presets for Internet Radio
There are two ways to save Internet radio stations for easy playback.
The first way has already been discussed, and that is to save the station as a Preset. Whether
the station was found by browsing SoundBridge’s built-in Internet Radio Library, by playing it
from music server on your computer, or by entering it manually on the web page, it can be
stored in a Preset slot and played back easily via the “Play Preset” command.
The second way is to mark a station from the built-in Internet Radio Library as a favorite. When
a station is marked as a favorite, it appears in the “My Favorites” list in the Internet Radio
library, but does not use up one of the 18 Preset slots.
Note: If a station is saved as a Preset, then it is assumed to also be a “favorite”, and will
always appear at the front of the “My Favorites” list.
17
There are several important differences between Presets and My Favorites:
Presets are accessible from any Library, while My Favorites only appear in the
Internet Radio Library.
My Favorites may only contain stations found by browsing the Internet Radio
Library. Presets may contain stations from the built-in library or entered via the
web page.
Presets can recall content other than Internet radio stations, like playlists or
selections that you have browsed to from SoundBridge (such as all songs by a
particular artist, etc). My Favorites include only Internet radio stations.
When displaying My Favorites, Internet radio station Presets are also included at
the beginning of the list.
Presets can be programmed and played from the preset web page Presets can be
programmed as discrete commands on a custom remote control. (For more
information about customizing your remote for SoundBridge control and a pronto
CCF file, please visit the Support section of our web site.)
To save an Internet radio station to My Favorites:
1. From the “Internet Radio” Library, Scroll down to the “Browse” menu item. Navigate to the
station you would like to save.
2. Press Select, then press the Down arrow to display these options:
Play [Station name]
Get Station Info
Add Station to My Favorites
3. Scroll down to the option “Add Station to My Favorites” and press Select. You will see the
message “Station added to your favorites”. Next time you view My Favorites, you will see
that station displayed in the list.
18
You can also save a station to My Favorites while it is playing. Simply press Select to display
these options:
Get info for “[Station name]”
Play Preset…
Save Preset: [Station name]
Add Station to My Favorites
Stop
Select the option “Add Station to My Favorites” and press Select.
Note: Only stations that you have accessed via the browse feature in the Internet Radio
Library can be saved to your Favorites. Stations that are played from a URL manually entered
as a Preset cannot be saved to your Favorites.
To save an Internet radio station to your Presets:
Play a radio station and press Select. You will see the following list of options:
Get info for “[Station name]”
Play Preset… (this displays a list of your 18 presets)
Save Preset: [Station name]
Add Station to My Favorites
Stop
Select the option “Save Preset: [Station name]” and press Select. Scroll down to the position
you want to replace and press Select. Next time you view Presets, you will see that station
displayed in the position you have chosen. You will also see Presets displayed first in the list of
My Favorites.
Playing Stations Saved as “My Favorites” or “Presets”
From anywhere in the Internet Radio Library, press the Home Menu. Choose the “My
Favorites” option. You will see a list of your Internet radio Presets followed by your Favorites.
Navigate to the station you would like to play and press Select. You will have the option to play
it, get station info, or “Remove station from My Favorites”.
19
You can also just press the Down arrow on the Now Playing screen of an Internet radio
station. Since there is no Song Queue when listening to Internet radio, this shortcut takes you
directly to My Favorites. If the currently-playing station appears in My Favorites, it will be
marked with the speaker icon.
To play your Presets, you can also choose the Play Preset option from the Home Menu of any
music library (not just the Internet Radio Library). Choose the station you would like to play,
then press Select.
Playback Limitations of Internet Radio Streams
SoundBridge currently supports MP3 and WMA Internet radio stations. RealAudio and
AACplus stations are not supported at this time. However, stay tuned for additional formats
that may be supported in future software releases.
Unfortunately, there are few standards in Internet radio (especially for MP3 stations), and
sometimes a station will do something out of the ordinary that will prevent SoundBridge from
being able to play it. See our online document at www.rokulabs.com/support/internetradio.php
for more information.
Discovering More Internet Radio Stations
Our online user forums have an active discussion dedicated to helping SoundBridge users find
good Internet radio stations in a variety of genres. Visit our Forums (accessible from
www.rokulabs.com/support) and look for the discussion topics related to Internet radio stations
if you would like to find more stations in a particular genre or would like to suggest a station or
offer help to others on this topic.
20
APPENDIX 1: END USER SOFTWARE LICENCE AGREEMENT
IMPORTANT — READ CAREFULLY: By using the software in your SoundBridge, you agree to
be bound by the license terms and conditions below. If you do not agree to these terms and
conditions, you must immediately return your SoundBridge in its original condition and
packaging to the point of purchase for a refund of your purchase price (after inspection).
Roku Software License
Subject to these terms and conditions, ROKU grants you a non-exclusive license, with no right
to sublicense, to execute the software included with the SoundBridge or subsequently provided
to you by ROKU (together, the “Software”) on your SoundBridge solely for your personal use of
the intended features and functions of the SoundBridge. The license may be transferred only
with the transfer of the SoundBridge on which ROKU has installed the software; any transferee
will be subject to the terms and conditions of this license. This license will terminate
automatically, without notice, if you fail to comply with the terms and conditions, including the
restrictions, of this license.
ROKU and its licensors own and retain all proprietary rights, including all patent, copyright,
trade secret, trademark and other intellectual property rights, in and to the SoundBridge
Software. You acknowledge that the license granted above does not provide you with title to or
ownership of the Software, but only a right of limited use under these terms and conditions.
The Software embodies ROKU’s trade secrets and other proprietary information and materials.
Any attempt to modify, enhance, disassemble, decompile, reverse engineer or otherwise gain
access to the source code to the Software, to remove or unbundle the Software from the
SoundBridge, or to sublicense or distribute the Software is strictly prohibited, except as may be
otherwise agreed by ROKU in writing.
21
Third Party License Information
Soundbridge includes AES code Copyright © 2003, Dr. Brian Gladman, Worcester, UK.
This product is protected by certain intellectual property rights of Microsoft Corporation. Use or
distribution of such technology outside of this product is prohibited without a license from
Microsoft or an authorized Microsoft subsidiary.
APPENDIX 2: PROCEDURES AND SAFETY
Important Safety Instructions
1. Read Instructions. All the safety and operating instructions should be read before the
product is operated.
2. Retain Instructions. The safety and operating instructions should be retained for future
reference.
3. Heed Warnings. All warnings on the product and in the operating instructions should be
adhered to.
4. Follow Instructions. All operating and use instructions should be followed.
5. Cleaning. Unplug this product from the wall outlet before cleaning. Do not use liquid
cleaners or aerosol cleaners. Use a damp cloth for cleaning.
6. Water and Moisture. To reduce the risk of fire or electric shock, do not expose this
appliance to rain or moisture. Apparatus shall not be exposed to dripping or splashing and
no objects filled with liquids, such as vases, shall be placed on the apparatus. Do not use
this product near water for example, near a bathtub, wash bowl, kitchen sink or laundry
tub; in a wet basement; or near a swimming pool; and the like.
7. Accessories. Do not place this product on an unstable cart, stand, tripod, bracket or table.
The product may fall, causing serious injury to a child or adult and serious damage to the
product. Use only with a cart, stand, tripod, bracket or table recommended by the
manufacturer, or sold with the product. Any mounting of the product should follow the
22
manufacturer’s instructions, and should use a mounting accessory recommended by the
manufacturer. A product and cart combination should be moved with care. Quick stops,
excessive force and uneven surfaces may cause the product and cart combination to
overturn.
8. Power Sources. This product should be operated only from the type of power source
indicated on the marking label. If you are not sure of the type of power supply to your
home, consult your product dealer or local power company. For products intended to
operate from battery power, or other sources, refer to the operating instructions.
9. Grounding or Polarization. This product may be equipped with a polarized alternatingcurrent line plug (a plug having one blade wider than the other). This plug will fit into the
power outlet only one way. This is a safety feature. If you are unable to insert the plug fully
into the outlet, try reversing the plug. If the plug should still fail to fit, contact your electrician
to replace your obsolete outlet. Do not defeat the safety purpose of the polarized plug.
10. Power Cord Protection. Power-supply cords should be routed so that they are not likely to
be walked on or pinched by items placed upon or against them, paying particular attention
to cords at plugs, convenience receptacles and the point where they exit from the product.
11. Overloading. Do not overload wall outlets, extension cords or integral convenience
receptacles as this can result in a risk of fire or electric shock.
12. Object and Liquid Entry. Never push objects of any kind into this product through
openings as they may touch dangerous voltage points or short-out parts that could result in
a fire or electric shock. Never spill liquid of any kind on the product.
13. Servicing. Do not attempt to service this product yourself as opening or removing covers
may expose you to dangerous voltage or other hazards. Refer all servicing to qualified
service personnel.
14. Damage Requiring Service. Unplug this product from the wall outlet and refer servicing to
qualified service personnel under the following conditions:
– When the power-supply cord or plug is damaged,
– If liquid has been spilled or objects have fallen into the product,
23
– If the product has been exposed to rain or water,
– If the product does not operate normally by following the operating instructions. Adjust only
those controls that are covered by the operating instructions as an improper adjustment of
other controls may result in damage and will often require extensive work by a qualified
technician to restore the product to its normal operation,
– If the product has been dropped or damaged in any way, and
– When the product exhibits a distinct change in performance, this indicates a need for
service.
15. Heat. The product should be situated away from heat sources such as radiators, heat
registers, stoves or other products (including amplifiers) that produce heat.
Comments on Copyright:
Intellectual property, including music, is subject to worldwide copyright protection. In most
countries, it is permitted to make personal copies of legally acquired sound media (for
example, CDs) or music files (for example, from the Internet). In any case, the following
applies: It is not permitted to sell or give these copies to a third party. Be careful when
downloading MP3 files from the Internet: Please make sure that the files are properly licensed,
in other words, that the supplier also has rights to the titles offered.
Declaration of Conformity:
Pinnacle Systems herewith declares that this device is in accordance with the basic
requirements and the other applicable regulations described in the Directive 89/336/EWG.
The declarations for EC and FCC conformity as well as the statement of type equality are
available at http://www.pinnaclesys.com/compliance.
24


