1
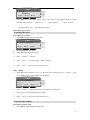
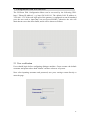
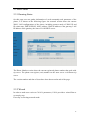
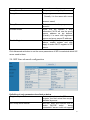
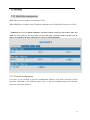
Installation and User Guide
1
Table of Contents
Citel IP Phone C4110 ......................................................................................................................4
Installation and User Guide...............................................................................................................4
Citel IP Phone C4110 Installation .....................................................................................................5
Connecting your C4110 Phone .........................................................................................................6
1. Initialization ..................................................................................................................................7
1.1 To set Network setting ................................................................................................................7
1.2 To set SIP setting.......................................................................................................................11
1.3 Customizing your C4110 IP Phone ...........................................................................................15
1.3.1 To set Ringer Type .................................................................................................................15
1.3.2 To set screen setting sublist....................................................................................................15
1.3.3 To set Volume Control sublist ................................................................................................15
1.3.4 To change the display Language ............................................................................................16
1.3.5 To set Greeting Message ........................................................................................................16
1.3.6 To set Memory key setting .....................................................................................................17
1.3.7 To Model Information Sublist ................................................................................................17
1.3.8 To reboot system ....................................................................................................................17
2. Configuration with web browser.................................................................................................18
2.1 User verification........................................................................................................................18
2.2 Basic Status ...............................................................................................................................19
2.2.1 Running Status .......................................................................................................................19
2.2.2 Wizard ....................................................................................................................................19
2.3 Network configuration ..............................................................................................................21
2.3.1 Wide area network (WAN).....................................................................................................21
2.3.2 LAN Configuration ................................................................................................................22
2.4 VOIP Configuration ..................................................................................................................24
2.4.1SIP Line advanced configuration ............................................................................................25
2.4.2 IAX2 configuration ................................................................................................................27
2.4.3STUN Set ................................................................................................................................28
2.4.4 Dial peer configuration ..........................................................................................................29
2.5 DSP configuration.....................................................................................................................31
2.5.1 Call Service configuration......................................................................................................32
2.5.2 Digital Map configuration......................................................................................................33
2.5.3 Phone Book configuration .....................................................................................................34
2.5.4 Function Key configuration ...................................................................................................34
2.6 Phone Maintenance ...................................................................................................................36
2.6.1 Auto Update configuration.....................................................................................................36
2.6.2 Syslog configuration ..............................................................................................................37
2.6.3 Save Config............................................................................................................................38
2
2.6.4 Upload WEB page..................................................................................................................38
2.6.5 FTP download ........................................................................................................................39
2.6.7 Account management.............................................................................................................40
2.6.8 Reboot ....................................................................................................................................41
2.7 Security .....................................................................................................................................42
2.7.1 MMI Filter configuration .......................................................................................................42
2.7.2 Firewall configuration............................................................................................................42
2.7.3 VPN Tunnel configuration .....................................................................................................44
2.8 Logout .......................................................................................................................................44
3. Citel IP Phone C4110 Basic Operation .......................................................................................45
3.1 Making a call.............................................................................................................................45
3.2 Answering a call........................................................................................................................45
3.3 Using Hold and Mute................................................................................................................45
3.4 Volume adjustment....................................................................................................................45
3.5 Redial ........................................................................................................................................45
3.6 Call lists ....................................................................................................................................46
3.7 Auto dial/Feature.......................................................................................................................46
3.8 Auto dial/Feature Access...........................................................................................................46
3.9 Voice mail .................................................................................................................................46
3.10 N’pad(Note Pad) .....................................................................................................................46
3.11 Call transfer (Blind and Consult) ............................................................................................47
3.12 Call waiting.............................................................................................................................47
3.13 Conference calling ..................................................................................................................47
3.14 Directory /Phone Book............................................................................................................47
3.15 Auto dial/Feature Access.........................................................................................................48
4 Trouble shooting ..........................................................................................................................49
3
Citel IP Phone C4110
Installation and User Guide
Citel IP Phone C4110 Introduction
Internet Protocol (IP) telephone is the next generation of telecommunication services
that integrates voice and data capabilities to enhance everyday communications and
increase productivity, it takes advantage of new high-bandwidth central office
technologies to provide service, anywhere, at anytime instantly.
Today, many small, medium and large businesses in the world are deploying IP
telephone systems to reduce the cost of operations and increase productivity of
workers.
The design of the C4110 IP Phone includes one-button access to features like
Speakerphone, Phonebook, Call history, Transfer, Conference, Auto dial, etc. And
supports the unique requirements of various users.
Additional features and functionality of C4110 IP Phone includes a display screen,
soft keys, Note Pad (N’pad), etc.
Citel IP Phone C4110 Features
z
z
z
z
z
z
z
z
z
z
z
z
SIP & IAX2 Support
Wide ranges of codec supported G.729, G..723, Wideband G..722 & G.711
a/ulaw.
Three-line display screen with backlight and adjustable contrast
Two lines supported with corresponding LED indicators
Three screen-driven soft keys
4 programmable buttons for auto dial and specific function access
High quality Full-duplex speaker phone for hands free calls
Two port 10/100M Ethernet switch for shared PC access
8 button memory key expansion model (Option)
RJ9 headset connection jack
Hearing Aid Compatibility(HAC)
In line power support (PoE/802,3af), which eliminates power adapters
4
Figure 1 Features and Keys
Citel IP Phone C4110 Installation
The C4110 IP Phone must be set up and configured prior to its first use. If your
system administrator has not already set up your C4110 Phone, please refer to the
C4110 User Guide for basic installation and physical set up configuration information.
Please contact your service provider or regional distributor.
Caution:1. Use your IP Phone C4110with the supplier approved AC adapter
for this model of phone only.
Caution:2 . Severe damage to your IP Phone will occur if this phone is
plugged into PSTN telephone line and an ISDN connection. Consult your
system administrator to ensure that you are plugging your IP Phone into a
10/100 Base-T Ethernet Jack.
5
Connecting your C4110 Phone
Follow the following steps to connect the C4110 IP Phone
Step1: Pull upward the stand through the slots on the base, remove the stand.
Step2: Connect one end of the handset cord to the handset jack with symbol on the
telephone base and connect the other end of the handset cord to the handset. Route the
cord through the cord guide channel.
Slide the stand back until it clicks into the lock position.
Step3: Connect one end of the supplied Ethernet cable with RJ45 connector to the
Ethernet port on the telephone base and connect the other end of the cable to an IP
voice network jack through the catch on the telephone stand.
Step4: If you are connecting your PC Ethernet through the phone, connect one end of
the PC Ethernet cable to your phone using the RJ45 connector marked with the
symbol on the telephone base, and thread it through the catch on the stand. Connect
the other end to the LAN port on your PC.
Step5: Plug AC power adapter into the base of the telephone, and plug the adapter
into the nearest AC power outlet. If you are using PoE (Power over Ethernet), the AC
power adapter is not needed.
Step6: To wall mount the C4110 IP Phone, you need to remove the stand and reverse
it, then slide it back. Use the wall mounting holes on the stand to attach the IP Phone
on the wall.
6
1. Initialization
1.1 To set Network setting
C4110 can provide web setting mode and phone setting mode.
1. Setting through phone setting
Use the following procedure to configure the Network setting.
1.
Press“ Menu”i nto main menu, and use Up and Down navigation key or Next key to select
user mode to“ A dvanced Sublist ” M ode.
Citel
02 Advanced
Sublist
Next
2.
Enter
Quit
Menu
Callers
Press “ Enter ” into ‘Advanced Sublist’ menu.
Citel
Enter Password
* * *
Del Enter Quit
3.
Menu
Callers
Input the default password:1 2 3
Citel
01 Set Password
Next Edit Quit
4.
Menu
Callers
Press use Up and Down navigation key or Next key to select user mode to
“ Network Setting ”
Mode
Citel
02 Network
Sublist
Next Enter Quit
Menu
Callers
To set the Net Mode
1.
Press Edit use Left and Right key to select IP type as Static, DHCP or PPPOE.
7
Citel
01 Net Mode
Menu
〈 〉 Static
Next
2.
3.
Edit
Quit
Callers
Press Save to save your setting.
Press Quit key back to last menu and non-save.
Remark:
If “DHCP” mode is selected,Serve will use static distribution IP address, and it means the
networking setting is done.
If “PPPoE” mode is selected,you need access “PPPoE Setting” mode and set account No#,
Passwords and related information.
If
“Static” mode is selected,you need access “Static Setting” mode and set related information.
To set the Static setting
1.
Press Enter into Static IP editing menu.
Citel
02 Static Setting
Sublist
Next
2.
Enter
Quit
Menu
Callers
Press Next or Up and Down key to switch between “ Static IP ”、“ S tatic Netmask ”、
“ S tatic gateway ”“ S tatic DNS ” menu.
3.
Press “ Quit” B ack to last menu.
Static IP editing
1. Press Edit into Static IP editing menu.
Citel
01
IP
192.168.1.179
Next
2.
Edit
Quit
Menu
Callers
Input the Static IP address in the IP editing line, the ‘*’ means ‘.’.
Citel
3.
New Parameter
192.168.1.1_
Menu
Delete
Callers
Save
Quit
Press “ Delete ” to delete character in the editing line.
8
4.
Press “Save” to save the IP address you input.
5.
Press “ Quit” b ack to last menu and non-save.
Static Netmask editing
1. Press Edit into StaticNetmask editing menu.
Citel
02
Netmask
255.255.255.0
Next
2.
Edit
Quit
Menu
Callers
Input the Static Netmask in the editing line, the ‘*’ means ‘.’.
Citel
New Parameter
255.255.255.0_
Menu
Delete
Callers
Save
Quit
3.
Press “ Delete ” to delete character in the editing line.
4.
Press “Save” to save the IP address you input.
5.
Press “ Quit” b ack to last menu and non-save.
Static Gateway editing
1. Press Edit into Static Gateway editing menu.
Citel
02
Gateway
192.168.1.1
Next
2.
Edit
Menu
Quit
Callers
Input the Static Gateway in the editing line, the ‘*’ means ‘.’.
Citel
New Parameter
192.168.1._
Menu
Delete
Callers
Save
Quit
3.
Press “ Delete ” to delete character in the editing line.
4.
Press “Save” to save the Gateway you input.
5.
Press “ Quit” b ack to last menu and non-save.
Static DNS editing
1. Press Edit into Static DNS editing menu.
9
Citel
02
DNS
202.96.134.133
Next
2.
Edit
Quit
Menu
Callers
Input the Static DNS the editing line, the ‘*’ means ‘.’.
Citel
New Parameter
202.193.134.1_
Menu
Delete
Callers
Save
Quit
3.
Press “ Delete ” to delete character in the editing line.
4.
Press “Save” to save the DNS you input.
5.
Press “ Quit” b ack to last menu and non-save.
To set the PPPoE setting
1.
Press Enter into PPPoE Setting editing menu.
Citel
03 PPPoE Setting
Sublist
Next
Enter
Quit
Menu
Callers
2.
Press Next or Up and Down key to switch between “Account” and “Password” menu.
3.
Press “ Quit” B ack to last menu.
Account editing
1. Press Edit into Account editing menu.
Citel
01 Account
User1
Next
2.
Edit
Menu
Quit
Callers
Input the Acount in the editing line.
Citel
New Parameter
User1_
Menu
Delete
Callers
Save
Quit
3.
Press “ Delete ” to delete character in the editing line.
4.
Press “Save” to save the Account you input.
5.
Press “ Quit” b ack to last menu and non-save.
10
Password editing
1. Press Edit into Account editing menu.
Citel
02 Password
******
Next
2.
Menu
Edit
Quit
Callers
Input the Password in the editing line.
Citel
New Parameter
123456_
Menu
Delete
Callers
Save
Quit
3.
Press “ Delete ” to delete character in the editing line.
4.
Press “Save” to save the Password you input.
5.
Press “ Quit” b ack to last menu and non-save.
1.2 To set SIP setting
Use the following procedure to configure the SIP setting sublist.
For example:
SIP server (Register Server Add): 10.10.10.1 (is your ip pbx address or provided by
your local telecomm company)
SIP Number(Register Phone number): 622 (provided by your ip pbx or your local
telecomm company)
SIP Account(Register Number): 622 (provided by your ip pbx or your local telecomm
company)
SIP Password (Register password): 261972 (provided by your ip pbx or your local
telecomm company)
To enter SIP setting mode
1.
Press “ Menu ” and using Up, Down or “ Next ” key into “ SIP setting” m ode.
Citel
06 SIP Setting
Sublist
Next
Enter
Quit
Menu
Callers
2.
Press “Next” and Up, Down to select “ S IP1 ” or “ SIP2” m ode.
3.
Press “ Quit” b ack to last menu.
4.
Press “ Enter” into SIP1 menu
11
Citel
Menu
01 Sip1
Sublist
Next
5.
Enter
Quit
Callers
Press Enter into select “SIP1 Name” menu, and use Next or Up, Down button to switch
between “SIP1 Name”,“ S IP1 Sever ” , “ S I P1 Number” , “ S IP1 Account ” ,
“ S IP1 password” and “ S IP1 Register” menu
Enter SIP1 Server menu
To set the SIP1 Sever
Enter SIP1 Server menu
1. Press Edit into SIP1 Server editing menu.
Citel
01 SIP1 Server
Next
Edit
Quit
Menu
Callers
2.
3.
Press Quit back to last menu.
Press Next into SIP Number menu.
4.
Press “ Delete ” to delete
5.
Press “ Save” t o save as diag.3,Back to diag.2-1
6.
Press “ Quit” b ack to last menu and non-save.
SIP1 editing
1. Input SIP1 Server address 10.10.10.1 in the SIP Server editing line, the ‘*’ means ‘.’. The
server address can be a web address or a IP address.
Citel
New Parameter
10.10.10.1_
Menu
Delete
Callers
Save
Quit
2.
Press “ Delete ” to delete character in the SIP Server editing line.
3.
Press “Save” to save the SIP Name you input.
4.
Press “ Quit” b ack to last menu and non-save.
To set the SIP1 Number
Enter SIP1 Number menu
1. Press Edit into SIP1 Number editing menu
12
Citel
02 SIP1 Number
Next
Edit
Quit
Menu
Callers
2. Press Quit back to last menu.
3. Press Next into SIP Account menu.
SIP1 Number editing
1. Input SIP1 Number 622 in the SIP Number editing line
Citel
Enter Number
622_
Menu
Delete
Callers
Save
Quit
2.
Press “ Delete ” to delete character in the SIP Number editing line.
3.
Press “Save” to save the SIP Number you input.
4.
Press “ Quit” b ack to last menu and non-save.
To set the SIP1 Account
Enter SIP1 Account menu
1. Press Edit into SIP1 Account editing menu
Citel
03 SIP1 Account
Next
2.
3.
Edit
Quit
Menu
Callers
Press Quit back to last menu.
Press Next into SIP Account menu.
SIP1 Account editing
1. Input SIP1 Account 622 in the SIP Account editing line.
Citel
New Parameter
Menu
Delete
Callers
622
Save
Quit
2.
Press “ Delete ” to delete character in the SIP Account editing line.
3.
Press “Save” to save the SIP Account you input.
4.
Press “ Quit” b ack to last menu and non-save.
To set the SIP1 Password
Enter SIP1 Password menu
1.
Press Edit into SIP1 Password editing menu.
13
Citel
04 SIP1 Password
******
Next
2.
3.
Edit
Quit
Menu
Callers
Press Quit back to last menu.
Press Next into SIP1 Register menu.
SIP1 Password editing
1. Input SIP1 Password 261972 in the SIP Password editing line.
Citel
New Parameter
Menu
Delete
Callers
261972_
Save
Quit
2.
Press “ Delete ” to delete character in the SIP Account editing line.
3.
Press “Save” to save the SIP Account you input.
4.
Press “ Quit” b ack to last menu and non-save.
To set the SIP1 Server Port
Enter SIP1 Server Port menu
1.Press Edit into SIP1 Server Port editing menu.Default Port:5060
Citel
05 SIP1 Server Port
5060
Next
Edit
Quit
Menu
Callers
2.Press Quit back to last menu.
3.Press Next into SIP1 Register menu.
To set the SIP1 Register
1.
Press Left, Right key to ON/OFF the SIP1.
Citel
06 SIP1 Register
□ ON ■ OFF
Next
Save
Quit
Menu
Callers
2.
Press “ Save” t o save and quit.
3.
Press “ Quit” b ack to last menu and non-save.
14
1.3 Customizing your C4110 IP Phone
1.3.1 To set Ringer Type
You can select different ringer type to match your preferences and distinguish
between calls on lines.
-To change the ringer type
1. Press
key and select “User preferences” item
2. If two lines are used, first select which line to change.
3. Press
key to select desired rings , then press Save soft key to save your
settings.
1.3.2 To set screen setting sublist
Press Menu and go into
1.
2.
Either press
“User Preferences Sublist” press “Enter”
or Next softkey to scroll. “Screen Setting”
3.
Press Enter soft key and select Contrast or Brightness function.
To set Contrast
z
Enter into Contrast menu.
z
find desired setting using.
z
Press Save softkey to save your setting
To set Brightness
z
Enter into Brightness menu.
z
Select one of three kinds of brightness: Off, Low or High as you like using
z
Press Save softkey to save and quit or Next softkey directly to save and go to the next.
1.3.3 To set Volume Control sublist
1.Press Menu and go into
“User Preferences Sublist” press “Enter”
2.Either press
or Next softkey to scroll. “Volume Control sublist ”
3.Press Enter soft key and select Ringer volume or Mic Volume function
To set Ringer volume:
z
Enter the Ringer volume menu.
z
Press
z
Press Save softkey to save your setting
to adjust and reach the desired ringer volume.
15
You have 2 other ways to adjust your ringer volume:
To adjust ringer volume directly when a call is coming:
You can press left or right side of volume bar
directly to adjust ringer volume while a
call is coming and the telephone is ring before you pick up the call.
To adjust ringer volume anytime
You can press left or right side of volume bar
directly to adjust ringer volume
anytime if you like. But please don’t press Handsfree or lift the handset.
To set Mic volume:
z
Enter the Mic volume menu.
z
Press
z
Press Save softkey to save your setting
to adjust and reach the desired Mic volume.
1.3.4 To change the display Language
For changing business requirements, you may wish to change the language of your display
messages and prompts.
1.
Press
Men.u
and go into
“User Preferences Sublist” press “Enter”
2. Either press
or Next softkey to scroll. “Language Set”
3. “English is in use” is the default setting.
4. There are 2 kinds of language for your choice: English, Chinese. Use
to select your
display language.
5. Press Save softkey to store your setting and quit, or press Quit softkey to give up the setting
and go back up level.
1.3.5 To set Greeting Message
Greeting Message function lets your C4110 IP Phone display owner’s phone number
or name on the phone
1.
2.
3.
Press Menu and go into “User Preferences Sublist” press “Enter”
Either press
or Next softkey to scrol “Greeting Message ”
Press Edit soft key to enter this setting, use dial /pad to input your desired
information, then press Save soft key.
16
1.3.6 To set Memory key setting
You can save the numbers of your customers, business associates, or anyone you call frequently
and phone systems’ feature access code in C4110’s four memory keys.
To save numbers in memory keys
1. select one of the four memory keys by one you want to store the number or feature code as the
instructions on the display and enter the title ,number or feature code.
2. Press Save softkey to store your setting or press Quit softkey to give up the setting and return
back up level.
3. You can delete the number stored in one memory key and save a new one in it or let it empty.
1.3.7 To Model Information Sublist
1. Press
Menu
2. Either press
or Next softkey to scroll “Model Information Sublist”.
3. Press Enter soft key and select “Model Number , “Mac Address”or “Software Version”
1.3.8 To reboot system
Press Menu and use
to reboot the device
key or Next to select “reboot system” Press “reboot” button
17
2. Configuration with web browser
The IP Phone Web Configuration Menu can be accessed by the following URL:
http:// "Phone-IP-Address". e.g. http://20.20.20.119. The default LAN IP address is
"192.168.1.179".If the web login port of the gateway is configured as non-80 standard
port, the user need to input http://xxx.xxx.xxx.xxx:PORT/, otherwise the web will
show that no server has been found, and it will be shown as follows:
2.1 User verification
Users should login before configuring dialogue machine. Guest account: the default
username and password are both "admin" can have a browse of system.
Note: after inputting username and password, user press carriage return directly to
enter the page.
18
2.2 Basic Status
2.2.1 Running Status
On this page user can gather information of each commonly-used parameter of the
phone, it is shown as the following figure: the network section shows the current
WAN, LAN configurations of the phone: including connect mode of WAN IP and
IP( static state, DHCP, PPPoE), MAC address, WAN IP address of the gateway, LAN
IP address of the gateway, the state of LAN DHCP server.
The Phone Number section show the current registered phone number that work with
sip server. The phone can register (two) number on the same server or different sip
server.
The version number and date of issue have been shown at the end of the page.
2.2.2 Wizard
In order to make user easier set C4110’s parameters, C4110 provides a wizard flow to
set step by step.
First step is selecting network mode
19
Second step is setting network parameters if user uses static or PPP0E, else jump to
step 3 directly
Third step is setting SIP
The last step is show the result of wizard. If user makes mistakes during the wizard,
20
he might click back to correct the error. Click Finish button, C4110 will save the
setting and reboot. Then user might start to make/answer calls.
2.3 Network configuration
2.3.1 Wide area network (WAN)
User can view the current network IP linking mode of the system on this page.
User will be authorized to set the network IP, Gateway and DNS if the system adopts
the static linking mode.
21
If the system selects DHCP service in the network which is using DHCP service, IP
address will be gained dynamically.
If the system selects PPPOE service in the network which is using the PPPOE service,
then the IP address will be gained by the set PPPOE ISP
Current gateway IP, subnet mask, MAC address and current gateway IP:
Configure Mac Authenticating code, the phone don’t work if error code.
Select acquisition option; Configure way of IP for WAN; This is single static IP
parameter for WAN
Select “static”. These are must be filling
Select “PPPoE”. These are must be filling.
PPPoE Server: the name of ISP PPPoE server, we suggest don’t change if no especial
request.
2.3.2 LAN Configuration
User can make local area network (LAN) configuration on this page, when bridge
mode is selected, the local area network (LAN) configuration will no longer go into
22
effect.
Configuration Item explanation:
Select “Bridge Mode”. LAN and WAN are in the same network.
Static Address and Netmask. When the “DHCP service is” selected, the phone as a
DHCP Server. When the “NAT” is selected, the phone as a router.
23
2.4 VOIP Configuration
User can configure specific parameters of SIP line on this page;Click Basic to set the
common parameters of SIP line selected.
Definition of each parameter described as below
SIP Line Select
Select a line of SIP to configured,
then click load button to get ready to
set parameters
Registrar status
SIP register state;if register
successfully, show “Registered,
Server address
otherwise show different results
Set SIP server IP address or Domain
Server Port
Account/User Username
Set SIP server signal port
Set SIP server account username
( Usually it is the same with the
config port number)
Password
Phone Number
Display Name
Proxy Server Address
Set password of SIP server account
Set assigned phone number
Set assigned SIP display name as
caller
Set proxy server IP address if SIP
24
Proxy Server Port
account’s server has proxy
Set proxy server signal port
Proxy Username
Set proxy server account username
(Usually it is the same with server
account name)
Proxy Password
Domain Realm
Enable Register
Set password of proxy server
account
Enter the sip domain if any,
otherwise C4110 will use the proxy
server address as sip domain.
(Usually it is same with registered
server and proxy server IP address).
After setting all the parameters
above, enable register and click
apply to make C4110 register to SIP
server
Click Advanced set button to set the some parameters of SIP line selected which SIP
server need to them.
2.4.1SIP Line advanced configuration
Definition of each parameter described as below
Register Expire Time
Set expire time of SIP server
register, the final actual time maybe
decided by server
NAT Keep Alive Interval
Set NAT keep alive interval time to
make C4110E could
being
contacted if server could not support
25
keeping NAT alive
User Agent
Signal Key
Media Key
Server Type
DTMF Mode
RFC Protocol Edition
Forward Phone Number
Enable PRACK
Enable Keep Authentication
NAT Keep Alive
Enable Session Timer
Signal Encode
Rtp Encode
Set the user agent name to show the
information of C4110
Fill in the key for SIP encryption
according to the Server type
selected. Default is common
Fill in the key for Media encryption
according to the Server type
selected. Default is common
Set SIP server type if server is
special or encrypted server
Set DTMF sending mode, support
RFC2833, DTMF_RELAY and SIP
info
Enable the phone to use protocol
edition. When the phone needs to
communicate with phones using
SIP1.0 such as CISCO5300 and so
on, needs to modify into RFC2543.
the default is to RFC3261
Set the selected Line’s call forward
number
Enable / Disable SIP prack function.
Default is unchecked. Prack is same
with ACK that is used for temporary
response.Prack is one of SIP
request info
Enable /disable support register with
authentication, so that C4110
needn`t carry authentication field,
response each time. When server
receive the register request with
authentication, server will response
200 message, not 401
Enable/disable NAT keep alive
function
Enable/disable support RFC4028.
Enable/disable signal Encryption
according to the server type.
Enable/disable Voice encryption
according to the server type
26
Enable Via rport
Enable/disable
support
RFC3581.When Phone is behind a
NAT. "rport " allows request that
the server send the response
back to the source IP address and
port from which the request
originated.
Click Global Set button to set the parameters efficiently for all SIP lines.
2.4.2 IAX2 configuration
Definition of each parameter described as below
Register Status
Shows if the phone has been registered the IAX2 server or not.
IAX2 Server Addr
Input your IAX2 server address.
IAX2 Server Port
Set your IAX2 server port, the default is 4569.
Account Name
Account Password
Phone Number
Local Port
Voice Mail Number
Voice Mail Text
Echo Test Number
Input your IAX2 register account name.
Input your IAX2 register password.
Input your assigned phone number (usually it is same you’re your
IAX2 account name ).
Set your local sport,the default is 4569.
Specify the voice mail’s number.
Specify the voice mail’s name.
Set echo test number. If IAX2 server supports echo test, and echo test
number is non- numeric, system could set an echo test number to
27
replace the echo test text. So user can dial the numeric number to test
echo voice test. This function is provided with server to make
endpoint to test whether endpoint could talk through server normally.
Echo Test Text
Refresh Time
Enable Register
Enable G.729
IAX2
(Default Protocol)
Specify echo test text’s name.
Set expire time of IAX2 server register, you can set it between 60 and
3600 seconds.
Start to register the IAX2 server or not by selecting it or not.
Enable or disable code G.729 by selecting it or not
Select it to make all outgoing calls through the IAX2 server by
default. If you also need make a call through SIP server, you can
make prefix in dial peer setting to realize SIP calling.
Note: any incoming call can be from both IAX2 and SIP.;
2.4.3STUN Set
Definition of each parameter described as below
STUN NAT Transverse
Indication that current NAT is type
that could be transverse or not
STUN Server Addr
Set
the
STUN
server’s
IP
address/domain
STUN Server Port
Set the STUN server’s port
STUN Effect Time
Local SIP Port
Set the interval time of STUN
detection
Set C4110 SIP signal port
After finished the aforesaid network and VoIP configurations on the phone and
network communication has been implemented,the user can make VoIP calls by the
28
calling register and proxy server.
2.4.4 Dial peer configuration
Number IP table configuration
Function of number IP table is one way to implement the phone's calling online, and
the calling of the phone will be more flexible by configuring the number IP table. For
example, user knows the other party's number and IP and want to make direct call to
the party by point-to-point mode : the other party's number is 1234 , make a
configuration of 1234 directly ,then the phone will send the called number-1234 to the
corresponding IP address; Or set numbers with prefix matching pattern. For
example, user wants to make a call to a number in a certain region(010),user can
configure the corresponding number IP as 010T― protocol-IP,after that, whenever
user dial numbers with 010 prefix( such as 010-62201234), the call will be made by
this rule.
Base on this configuration,we can also make the phone use different accounts and
run speed dialing without manual swap. When making deletion or modification, select
the number first and click Modify button to change the rule.
29
Click Add,add Dial Peer configuration will be shown at the upper part of the
page.
Phone Number is to add outgoing call number, there are two kinds of outgoing call
number setup: One is exactitude matching,after this configuration has been done,
when the number is totally the same with the user's dialing number, the phone will
make the call with this number's IP address image or configuration; Another is
prefix matching(be equivalent to PSTN's district number prefix function,if the
previous N digit of this number are the same with that of the user's dialing number(the
prefix number length),then the phone will use this number's IP address image or
configuration to make the call. When configuring the prefix matching, letter "T" should
be added behind the prefix number to be distinguished from the exactitude matching.
Destination(optional) is configuration of destination address,if it is point-to-point call,
then input the opposite terminal's IP address, it can also be set as domain name and
resolved the specific IP address by DNS server of the phone. If no configuration has
been made, then the IP will be considered as 0.0.0.0. This is an optional
configuration item.
Port(optional) is configuration of the called party's protocol signal port, this is optional
configuration item; if nothing is input, C4110 will set it as the default value 5060 of sip
protocol.
Configure alias,this is optional configuration item:it is the number to be used when
the other party's number has prefix; when no configuration has been made, C4110
will be shown as no alias.
Configure suffix,this is optional configuration item; it is the additive dial-out number
behind the number; when no configuration has been made, C4110 will be shown as
no
30
2.5 DSP configuration
On this page, user can set speech coding,IO volume control, cue tone standard,
caller ID standard and so on.
1. Configure Coding Rule according to network bandwidth and VoIP server;
support G.711a/u G.729 G723 and Wideband G.722 Codec for better
speech quality.
2. Input Volume is to adjust mike volume. The value is from 1 to 9
3. Output Volume is to adjust handset out volume. The value is from 1 to 9.
4. Configure Signal Standard according to country’s phone voice. It acts on
the tone when you pick up phone, ring back tone and so on.
5. Normally, G729 Payload Length does not need to be changed into 10 ms;
the voice 6,payload size can be represented in terms of the codec
samples. For example, a G.729 voice payload size of 20 ms (two 10 ms
codec samples) represents a voice payload of 20 bytes [ (20 bytes * 8) /
(20 ms) = 8 Kbps ]
6. Adjust the hand down time .The time range is from 80ms to 800ms.
7. VAD Enable/disable VAD (Voice activity detection).
31
2.5.1 Call Service configuration
On this page, user can set value added services such as hot-line,blacklist,out-limit list and so
on
Configuration Items Explanation:
Hotline
Configure hot-line number of the port. With this number of the port,
this hot-line number will be dialed automatically as soon as off
hook and user can't dial any other number.
No Disturb
Do no disturb
Enable
Call Configuration enable/disable call transfer
Transfer
Enable Three Configuration enable/disable three way call
way call
Enable
call Configuration enable/disable call waiting
waiting
Answer
any Configuration enable/disable answer any call
call
Enable voice Configuration enable/disable voice recording
recording
Incoming
Configuration enable/disable playing record.
record playing
No
Answer Configuration time how long is no answer, the default is 20 seconds
time
Black list
Phone in this list will refuse when it coming call
32
2.5.2 Digital Map configuration
Digit map is a set of rules to determine when the user has finished dialing. Digital Map is
based on some rules to judge when user end their dialing and send the number to the server.
With digital map, users don’t have to press‘#’ key or "call" key after finish dialing. If the
number dialed matches some item in the digital map table, or it doesn’t match with any item,
this number will be sent out immediately. It is not like using dial peer; using digital map
won’t change the number dialed, the number sent is the same as the number dialed.
End With “#”: Checked- use # for the end of dialing. User dials 200300#. phone send 200300
to server immediately.
Fixed Length:
when the length of the dialing is matched, the call will be sent.
Timeout: Specify the timeout of the last dial digit. The call will be sent after timeout.
End with “#”, fixed length and Time out, these options are not repulsion. That means, these
three ways can be use together or alone.
User could also use digital map table to make own rule.
X Represents any one number between 0 and 9.
Tn Represents the last digit timeout. Here [ n ] represents the time from 0~9 second, it is
necessary. Tn must be the last two digit in the entry. If Tn is not included in the entry, we
use T0 as default, it means system will sent the number immediately if the number
matches the entry.
.
(Dot) represents any number and no length limit.
[ ] Number location value range. It can be a number range(such as [1-4]), or number is
separated by comma such as [1,3,5], or use a list such as [234]
Example:
[1-8]xxx
any 4 digits number between 1000 and 8999 sending out immediately.
33
9xxxxxxx
911
911T4
9911x.T4
seconds.
any 8 digits number starting with 9 will be sent out immediately.
after finishing dialing 911, it will be sent out immediately.
after finishing dial 911, it will be sent out in 4 second.
any number more than 5 digits length starting with 9911, will be sent out in 4
2.5.3 Phone Book configuration
Phone book configuration is used for add phone Book, Delete phone Book, Modify phone
Book. Support up to 500 items.
2.5.4 Function Key configuration
There are 4 programmable memory keys on the C4110 phone and 8 programmable memory keys on the
extended model . You can set the programmable keys with any of the following functions: Line, memory
keys, key event.
34
Setting a Memory Key: The speed dial function can be set using the IP phone UI or the
C4110 Web UI. You can save up to 12 speed dial numbers and names on the C4110.these can
be programmed to quickly access features such as (*97), Voicemail.
Setting a Key Event: You can set DND, Pbook,Redial,on the programmable keys using the
IP phone Web UI only.
35
2.6 Phone Maintenance
System manage is used for firmware/config file update, config file backup, config Account
save/clear config, and reboot function.
2.6.1 Auto Update configuration
Definition) of each parameter described as below
Server Address: your FTP or TFTP server address.
36
Username: FTP server login user name. If it is used with TFTP, user need not fill anything.
Password: FTP server login user password. If it is used with TFTP, user need not fill
anything.
Config File name: the name of config file in FTP or TFTP server. If “config file name” is
unfilled, that means the phone will auto search the right config file from FTP /TFTP server
by MAC address matching.
Config Encrypt Key: If the config file is encrypted, C4110 need to be filled in the encrypt key.
config file supports AES (The Advanced Encryption Standard) 64. After download config
file to phone, the phone will auto make decryption.
Protocol Type: update protocol selecting, Support FTP and TFTP protocol. It also can support
optional HTTP.
Update interval time: the interval time of deciding to update the config file. It cooperate with
update mode “update at a time interval”.
Update mode: there are three option for selection. Disable-disable auto update function;
Update after reboot-when rebooting, it will auto connect server to update the config file;
Update at a time interval-C4110 will check the config file of FTP server every interval time
after reboot.
2.6.2 Syslog configuration
Users can star or close syslog function and configure syslog server IP address & port.
Definition of each parameter described as below
Enable Syslog
Config enable/disable syslog function, choose it and
then click “Apply” button to go into effect
37
Server IP
Server Port
MGR Log Level
SIP Log Level
Config syslog server IP address
Config syslog server port, click “ Apply” button after
inputting server IP & server port to take effect
Set system manager debug messages open with different
level
Set SIP debug messages open with different level
2.6.3 Save Config
After setting parameters to C4110, user click save button to save the new config to C4110
If user want to make C4110 return to the factory default configuration, user could login as
root level(such as admin), then click Clear button to use all default set. C4110 will clear
config file in the system and reboot with default setting. If user use general level(such as
guest), C4110 will not clear all set but part of them to default setting.
User could click the right key of mouse to save the config file of C4110 to the local PC when
mouse move to “Right Click here to Save as Config File(.txt)”.
2.6.4 Upload WEB page
On this page, user can select the upgrade documents (firmware or config file) on hard disk of
the computer directly to run the system upgrade. After the upgrade has been completed,
restart the gateway and it will be usable at once.
38
2.6.5 FTP download
On this page, user can upgrade system and configure files by FTP or TFTP mode.
Configuration Item Explanation
Server
IP address of FTP/TFTP server
Username
Name of user
Password
Password
File name
Name of download/upload file name
Type
Configure the operation type. There are 3 types:
1. "application update": update the system through ftp or tftp
2. "config file export": Upload the gateway configuration file to
39
Protocol
the remote server through ftp or tftp protocols
3. "config file from gateway import": Download the configuration
file from remote server and import to local
Server type: FTP or TFTP
2.6.7 Account management
Users can edit users (add or delete) account and modify existing users’ authority on
this web page.
Definition of each parameter described as below
User Name
User Level
Add
Delete
Modify
Operation Example:
List existing phone user account name
Show existing user account level [two option]:Root and
General: Root level users have the right to modify config;
General level users have the right to read-only
Add user account to IP phone
Delete increased user account
Modify increased user level and password
Add one new account:
Click “Add” button →input User name (No-Modify) →Choosing User level from dropdown
menu →set new user password →confirm password →submit the new account info by
clicking “submit” button →show “submit success” on screen →return to account
configuration interface by clicking “Return” button
Delete increased account:
40
Choosing the account need to del from dropdown menu→ Delete account by pressing
“Delete button” →show “Submit Success” on screen
Modify account’s password:
Choosing the modified account →enter below interface →modify user password →click
“Submit” button to submit the modification
Owing to the phone's default account:accounts of the administrator level-admin account and
the ordinary level-guest account are all weak account and weak password, the username
and password will be easily to guess on public network, so the user had better modify the
administrator and ordinary user.
Enter with manager level when making modification,create a administrator account and a
browse account (you'd better not set the name as admin, administrator, guest, etc.),set
password and then save configuration,entering with new manager account, delete default
manager and browse account and save configuration,security will be enhanced!
2.6.8 Reboot
The phone will reboot when Administrator have modify some configuration. Configuration
not effect until phone reboots. To reboot, press “Reboot” button.
41
2.7 Security
2.7.1 MMI Filter configuration
MMI filter is used to make access limit toC4110。
When MMI filter is enable. Only IP address within the start IP and end IP can access C4110
. WARNING! If you try to Enable MMI filter check box without setting any item in filter table. You
could not access gateway any more after you close this page. Therefore make sure that your IP
address is included in the filter table before you want to enable MMI Filter.
2.7.2 Firewall configuration
User may set up firewall to prevent unauthorized Internet users from accessing private
networks connected to the Internet (input rule), or prevent unauthorized private network
devices to access the internet.
42
Access list support two type limits: input access or output access. Each type supports 10
items maximum.
C4110E firewall filter is base WAN port. So the source address or input destination address
should be WAN port IP address.
Configuration:
in access enable Enable in access rule.
out access enable Enable out access rule.
Input/Output:
Specify current adding rule is input rule or output rule.
Deny/Permit:
Specify current adding rule is deny rule or permit rule.
Protocol Type: protocol using in this rule: TCP/IP/ICMP/UDP.
Port Range: port range if this rule.
Src Addr: Source address. can be single IP address or network address.
Dest Addr: Destination address. can be IP address or network address.
Src Mask: Source address mask. Indicate the source is dedicate IP if set to
255.255.255.255. Otherwise is network ID.
Des Mask: Destination address mask. Indicate the source is dedicate IP if set to
255.255.255.255. Otherwise is network ID.
43
2.7.3 VPN Tunnel configuration
2.8 Logout
After setting the C4110, user had better click Logout to end the management, keep C4110 in
safe and authorized environment.
44
3. Citel IP Phone C4110 Basic Operation
3.1 Making a call
-Using handset
Pick up the handset, and dial the desired number, or dial the desired number first and then
pick the handset when your call is completed, put the handset on hook or press Rls key
-Using the speaker phone
With the handset on hook, press Handsfree key, dial the desired number on the dial pad, or
dial the desired number and then press Handsfree or Dial soft key. When your call is
completed, press Rls key or press Handsfree key again.
Note: During a call, you can alternate between handset and handsfree mode by picking up
handset or press Handsfree key.
(Note: Please dial the number end with number”#” for quickly call set up. If you have two
lines, press SIP soft key to select one of the lines.)
3.2 Answering a call
Answer a ringing call by picking up the handset or pressing the Handsfree key.
When your call is completed, put the handset on hook or press Rls key, or press
Handsfree key again.
3.3 Using Hold and Mute
During a call, press Mute key will mute your handset or hands-free Microphone and you
can hear the other party on the phone, the LED will light on while Mute is enabled. Press
Mute again to speak with your caller.
During a call, press the Hold key will place your caller on hold. To retrieve your call, press
Hold key again. When you place your caller on hold, the caller may hear music on hold. You
can not hear the speech of the caller.
3.4 Volume adjustment
4. Press
key to adjust handset and hands free speaker volume during a call,
5. Pressing the volume key in ringing or idle state adjusts the ringer volume.
3.5 Redial
Pick up handset or press Handsfree key, then press “Redial”softkey to redial the last dialed
number.
Press“Redial”softkey first ,then use
key to scroll 100 recently dialed numbers. When
you get your desired number, pick up handset or press
Handsfree
key or press Dial soft key
45
to make a call.
3.6 Call lists
1. Press Callers key, then select “Callers”use
key or Next softkey to view missed,
incoming, outgoing call list. Press Enter soft key to check detail caller information.
2. Press Delete soft key to clear the call records from the list
3. Press Edit soft key to save the number and name into Directory
4. press Dial soft key, then you can insert number or edit number before dialing and press
Call soft key to return the call
3.7 Auto dial/Feature
There are four memory keys on the phone can be programmed as Auto dial or Feature Access
key like, Ring again, Call forward or Pick up etc.
Press Menu key, follow the instruction on the screen to complete your Auto Dial keys programming.
Pick up the handset, press the Auto dial key then the stored number will be dialed or press Auto dial key
first then followed by pressing
Handsfree
key or pressing Dial soft key or pick up handset.
3.8 Auto dial/Feature Access
(For programming Auto Dial key, please refer to the” Customizing your phone”)
3.9 Voice mail
Message waiting indicator (MWI) light will flash to indicate that messages are waiting at the
voice mail or message center. Press voice mail access code,(like*97)to enter voice mail
system and follow voice prompts to listen to the messages. When you heard messages, then
MWI light will turn off.
Note:1. *Voice mail is an optional feature that must be configured on the call server.
Particulars and menu options may vary.
2.When you have missed call or call records, the MWI light will light on as well.
3.10 N’pad(Note Pad)
N’pad gives the phone user a choice to stored a number on the screen and can be easily to
dial out and save to the directory.
During a call, press N’pad soft key, dial the number you want to store. When you finish,
press Enter soft key to save the number.
To retrieve the number in N’pad, press N’pad soft key, your stored number will display on
the screen.
Use Save soft key to save into Directory, pick up handset or press
Handsfree
to dial this
46
number.
3.11 Call transfer (Blind and Consult)
-Blind Transfer
During a call, press Transfer this will make the caller on hold and not provide the dial tone,
input transfer number with dial pad, press Transfer then hang up.
-Consult transfer
1. During a call, press Transfer key on the phone, this will make the caller on hold and
provide dial tone, dial the transfer number with dial pad, press “#” or Send soft key
2. When the second party picks up, you may consult with them to transfer the call, then
press Transfer to transfer the call.
3.12 Call waiting
When a second call is received while a user is engaged in a call, the user is informed via
screen display and call waiting tone.
1.
Press “ Aanswer ” softkey to answer the second call, this will place first call on hold
2.
3.
Press “resume” softkey , will resume the first call
To end the active call, press “End”or, press Rls to end Talk calls.
3.13 Conference calling
-To create a three-way conference call:
1. Call the first party
2.
press the“ Conf”softkey on the phone, then call the second party. When the second party
answers, press the Conf. soft key to add all callers to the conference call.
-To split a conference call
1. Press “Split” will make one of the callers on hold ,keep to press this key will change call
between two callers.
2. If you like to disconnect one of the callers, press “End” will end the active caller, then
you can continue to talk to the other caller.
3.14 Directory /Phone Book
-To add or edit a contact in your phone directory.
1. Press the “Callers” key on the phone,select “PBooK, the screen will display “XX items
in the list”
2. press a Add soft key to input your contact name and phone number with dial pad.
To search a contact number in the Directory
47
1.
Press the “Callers” key on the phone,select “PBooK, the screen will display “XX items
in the list”
2. Press Enter soft key, then use dial pad to input the contact name (letter) for searching
your contact or use
key to scroll.
3. When find the desired contact, pick up handset, press Handsfree or press Dial softkey to
call the contact.
3.15 Auto dial/Feature Access
User can save instant dialed number or feature access code on the four memory keys of the IP
Phone.
1.
2.
choose the memory key then you will program , follow the instruction on screen to
program features, like, Pick up, Ring Again, Message, Call Forward etc.or store the
instant phone number on the memory keys.
When you have finished programming, remove the key cap, put a label in it to mark your
function or stored numbers.
48
4 Trouble shooting
What’s the Web GUI Default IP and Password?
Your phone system Default IP is 192.168.1.179 and username /password is admin/admin.If Phone is in
DHCP Mode find the IP by pressing
Button.
The display is in an alternate language.
You can change the display language using the Set Options key. See ‘To change display language’ of
‘Setting options by using Menu’ for more information.
Why is the light not coming on with a new voice mail message?.
Your phone system or service provider must provide ‘Visual’ message waiting service for this function to
work, check with your system administrator for more information.
How do I switching between two Number ?
Press the SIP soft key
How do I find the IP address of my phone ?
Press
and you can find it.
How do I make sure my phone was registered server?
Press
to check it
Why does my phone display ‘Wan Disconnected’ ?
Make sure your telephone was connected to the network.
How do I restart the IP phone ?
Enter into the Menu and press Next softkey or
to reach ‘Reboot system’, enter the Reboot softkey.
Where I can find the latest Firmware?
Latest Firmware can be downloaded from Citel website Firmware upgrade section at
http://www.citel.com/Products/ip-phones.asp
Note: Your phone will be out of service temporarily during the restart and downloading process.
49