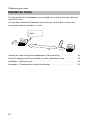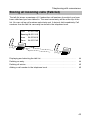
1
We give you the edge.
Medium
Telephone
Integral TM 13
connected to ISDN Telecommunications Systems Integral
Operating Instructions
Familiarise yourself with your telephone
Important notes
What you should definitely read
-- Your TM 13 and all keys at a glance (see Pages 6/7)
-- Basic operating principles (starting on Page 9)
Please note
This telephone was designed exclusively for connection to Tenovis telecommunications systems. It may not be directly connected to a public telephone network.
This telephone meets European requirements for safety and electromagnetic compatibility only when connected to a Tenovis telecommunications system.
The equipment may only be opened or repaired by a qualified technician. Do not
open the telephone yourself. This could damage the unit and cause it to malfunction.
Positioning the telephone
Place the telephone on a non--slip surface, especially if the furniture is new or has
recently been cleaned with cleaning agents. Enamels or cleaning agents may contain substances which soften the base parts of your telephone, and the softened
bases can leave undesirable marks on the furniture. Tenovis cannot assume liability
for damages of this kind.
Additional functions
Functions labelled with - are not installed as standard on your phone.
Further functions can be barred from use. If you want to use one of these functions,
please ask your TENOVIS Service.
2
Table of Contents
Familiarise yourself with your telephone
Important Notes . . . . . . . . . . . . . . . . . . . . . . . . . . . . . . . . . . . . . . . . . . . . . . . . . . . . . .
2
Your TM 13 at a glance . . . . . . . . . . . . . . . . . . . . . . . . . . . . . . . . . . . . . . . . . . . . . . .
6
All keys at a glance . . . . . . . . . . . . . . . . . . . . . . . . . . . . . . . . . . . . . . . . . . . . . . . . . . .
7
Get to know your telephone
Special features of your telephone . . . . . . . . . . . . . . . . . . . . . . . . . . . . . . . . . . . . . .
8
Basic operating principles . . . . . . . . . . . . . . . . . . . . . . . . . . . . . . . . . . . . . . . . . . . . .
9
Make it easy on yourself . . . . . . . . . . . . . . . . . . . . . . . . . . . . . . . . . . . . . . . . . . . . . . .
13
Initial operation of your telephone . . . . . . . . . . . . . . . . . . . . . . . . . . . . . . . . . . . . . .
14
Telephoning as usual
Making a call . . . . . . . . . . . . . . . . . . . . . . . . . . . . . . . . . . . . . . . . . . . . . . . . . . . . . . . .
15
Accepting calls . . . . . . . . . . . . . . . . . . . . . . . . . . . . . . . . . . . . . . . . . . . . . . . . . . . . . . .
20
Handsfree mode . . . . . . . . . . . . . . . . . . . . . . . . . . . . . . . . . . . . . . . . . . . . . . . . . . . . .
22
Making several connections simultaneously . . . . . . . . . . . . . . . . . . . . . . . . . . . . .
24
Diverting calls . . . . . . . . . . . . . . . . . . . . . . . . . . . . . . . . . . . . . . . . . . . . . . . . . . . . . . . .
30
Telephoning with convenience
Who called? (Call list) . . . . . . . . . . . . . . . . . . . . . . . . . . . . . . . . . . . . . . . . . . . . . . . . .
33
Using the telephone book . . . . . . . . . . . . . . . . . . . . . . . . . . . . . . . . . . . . . . . . . . . . . .
36
Storing all incoming calls (Talk list) . . . . . . . . . . . . . . . . . . . . . . . . . . . . . . . . . . . . . .
43
Querying messages (Voice mail) - . . . . . . . . . . . . . . . . . . . . . . . . . . . . . . . . . . . . .
46
Viewing call charges . . . . . . . . . . . . . . . . . . . . . . . . . . . . . . . . . . . . . . . . . . . . . . . . . .
48
Reminding yourself (Appointments) . . . . . . . . . . . . . . . . . . . . . . . . . . . . . . . . . . . . .
52
Sending and receiving texts . . . . . . . . . . . . . . . . . . . . . . . . . . . . . . . . . . . . . . . . . . .
54
Locking your telephone . . . . . . . . . . . . . . . . . . . . . . . . . . . . . . . . . . . . . . . . . . . . . . . .
60
3
TM 13 an Integral 33
Using the telephone with partners
Using the telephone with partners - . . . . . . . . . . . . . . . . . . . . . . . . . . . . . . . . . . . .
63
Using the telephone with Multiline
Using the telephone with Multiline- . . . . . . . . . . . . . . . . . . . . . . . . . . . . . . . . . . . .
74
Customise your telephone
Switching the mode of operation . . . . . . . . . . . . . . . . . . . . . . . . . . . . . . . . . . . . . . . .
89
Silencing the telephone . . . . . . . . . . . . . . . . . . . . . . . . . . . . . . . . . . . . . . . . . . . . . . .
90
Taking a call elsewhere (Following) - . . . . . . . . . . . . . . . . . . . . . . . . . . . . . . . . . . .
93
Double Call . . . . . . . . . . . . . . . . . . . . . . . . . . . . . . . . . . . . . . . . . . . . . . . . . . . . . . . . . .
96
Setting function keys . . . . . . . . . . . . . . . . . . . . . . . . . . . . . . . . . . . . . . . . . . . . . . . . . .
97
Setting macro functions . . . . . . . . . . . . . . . . . . . . . . . . . . . . . . . . . . . . . . . . . . . . . . .
98
Telephone settings . . . . . . . . . . . . . . . . . . . . . . . . . . . . . . . . . . . . . . . . . . . . . . . . . . . 102
Deactivating the automatic tone dial (DTMF) . . . . . . . . . . . . . . . . . . . . . . . . . . . . . 103
Activating key beep . . . . . . . . . . . . . . . . . . . . . . . . . . . . . . . . . . . . . . . . . . . . . . . . . . . 104
Time zones . . . . . . . . . . . . . . . . . . . . . . . . . . . . . . . . . . . . . . . . . . . . . . . . . . . . . . . . . 105
Private User Mobility - . . . . . . . . . . . . . . . . . . . . . . . . . . . . . . . . . . . . . . . . . . . . . . . 106
Storing personal data . . . . . . . . . . . . . . . . . . . . . . . . . . . . . . . . . . . . . . . . . . . . . . . . . 107
Setting VIP functions - . . . . . . . . . . . . . . . . . . . . . . . . . . . . . . . . . . . . . . . . . . . . . . .
112
Setting audio, contrast and language . . . . . . . . . . . . . . . . . . . . . . . . . . . . . . . . . . . . 126
Activating the CSTA Answer Call - . . . . . . . . . . . . . . . . . . . . . . . . . . . . . . . . . . . . . 129
Activating call monitoring when AEI--dialing . . . . . . . . . . . . . . . . . . . . . . . . . . . . . . 130
Extras for your telephone
Konf-Tel external handsfree equipment - . . . . . . . . . . . . . . . . . . . . . . . . . . . . . . . 131
DSS module - . . . . . . . . . . . . . . . . . . . . . . . . . . . . . . . . . . . . . . . . . . . . . . . . . . . . . . 133
Handsfree with auxiliary loudspeaker - . . . . . . . . . . . . . . . . . . . . . . . . . . . . . . . . . 135
4
Table of Contents
When in doubt, look it up
Overview of telephone functions . . . . . . . . . . . . . . . . . . . . . . . . . . . . . . . . . . . . . . . . 137
Display . . . . . . . . . . . . . . . . . . . . . . . . . . . . . . . . . . . . . . . . . . . . . . . . . . . . . . . . . . . . . 143
Display during emergency operation . . . . . . . . . . . . . . . . . . . . . . . . . . . . . . . . . . . . 147
Menu items in the display . . . . . . . . . . . . . . . . . . . . . . . . . . . . . . . . . . . . . . . . . . . . . . 148
Ringing and handset tones . . . . . . . . . . . . . . . . . . . . . . . . . . . . . . . . . . . . . . . . . . . . 169
If something is not working . . . . . . . . . . . . . . . . . . . . . . . . . . . . . . . . . . . . . . . . . . . . . 170
Terminal adapter - . . . . . . . . . . . . . . . . . . . . . . . . . . . . . . . . . . . . . . . . . . . . . . . . . . . 172
Testing the telephone . . . . . . . . . . . . . . . . . . . . . . . . . . . . . . . . . . . . . . . . . . . . . . . . . 174
Signing up for automatic call distribution - . . . . . . . . . . . . . . . . . . . . . . . . . . . . . . 175
Index . . . . . . . . . . . . . . . . . . . . . . . . . . . . . . . . . . . . . . . . . . . . . . . . . . . . . . . . . . . . . . . 176
5
Familiarise yourself with your telephone
Your TM 13 at a glance
AEI interface
For connecting
accessories
(bottom of unit)
Display
The displays assist you in
operating the phone.
Handsfree
microphone
(bottom of unit)
LED display
Flashes when you
receive a call, or when
Handsfree Answer Back
activated and illuminates
during call diversion
6
Digit keys with
alphabetic labelling
for dialing call
numbers and entering
codes
Programmable
function keys or
destination keys or
partner keys or
display keys
The current function is shown
in the display.
Pre--assigned function
keys
For quick access to
certain functions
Familiarise yourself with your telephone
All keys at a glance
Digit keys with letters:
for dialing call numbers and
entering codes. The alphabetic
labelling allows you to dial letter
codes (vanity numbers).
Star and Hash:
for special functions
Destinations:
shows additional levels of the
display keys.
Call monitoring:
switches the loudspeaker on and
off and enables dialing with the
handset on--hook.
Redial:
redials the 5 most recently dialed
call numbers.
Refer--back:
initiates refer--back.
Call--back if busy:
initiates an automatic call--back.
Hands--free mode:
activates loudspeaker and
microphone so that you can
comfortably use the phone with
the handset on--hook.
Release:
releases the current connection
and, in entry mode, exits the
current menu.
Menu:
displays the menu from which
you can execute many of your
phone’s functions.
Up / Down arrows:
moves the highlight in the display
up or down.
Enter:
calls up a highlighted menu item,
or used to confirm an entry.
Freely assignable function
keys (default assignments):
Transfer call
for refer--back
Interchange
between two callers
Further display keys without
standard functions.
Telephone book:
for storing and dialing call
numbers.
7
Get to know your telephone
Special features of your telephone
The display helps you
The displays also lead you step--by--step through the operation of the phone, and
contain various information, such as your current connection.
The display keys have varying functions, depending on the operating steps you are
currently executing. The current function of each key is shown in the display (see
Page 11).
The call number of every external ISDN caller is shown in the display as long as
they did not activate the Suppress call number function. This allows you to see
who’s calling. If the name and call number of the caller are stored in your telephone
book, then you will also see the caller’s name.
You can select the way the display shows you through the operation. You have
three options to choose from: a display with a preview, one without a preview for
advanced users and an abbreviated display for practised users.
Menu and function keys
Most functions can be selected and executed via the menu (see Page 10). To make
operation easier, you can assign frequently used functions to function keys. Two of
these keys have already been assigned functions by the factory (see Page 7).
Protection against unauthorised use
You can use the built--in lock to protect your phone against unauthorised use (see
Page 60).
8
Get to know your telephone
Basic operating principles
The following pages provide a short description of the basic operating principles of
your telephone.
-- How to select and call up functions in the menu
-- What your phone’s idle display shows you
-- How to use the display keys of your phone
-- How to enter letters, such as a name in the telephone book
Table of Contents
Selecting functions in the menu . . . . . . . . . . . . . . . . . . . . . . . . . . . . . . . . . . . . . . . .
10
Cancelling or ending a procedure . . . . . . . . . . . . . . . . . . . . . . . . . . . . . . . . . . . . . . .
10
What does the idle display show? . . . . . . . . . . . . . . . . . . . . . . . . . . . . . . . . . . . . . . .
11
Display keys . . . . . . . . . . . . . . . . . . . . . . . . . . . . . . . . . . . . . . . . . . . . . . . . . . . . . . . . .
11
Entering a text . . . . . . . . . . . . . . . . . . . . . . . . . . . . . . . . . . . . . . . . . . . . . . . . . . . . . . .
12
9
Get to know your telephone
Basic operating principles
Selecting functions in the menu
Press the menu key. The menu appears.
or
Press the Up or Down arrow key until the desired menu item is
highlighted.
Press the Enter key to call up the highlighted function.
Cancelling or ending a procedure
If you made a mistake or want to end a procedure:
Press the Release key to cancel or end the procedure.
i
• Upon leaving the factory your telephone has been set to show only one menu
item in the display (standard operating mode).
• When using the phone you can use the additional menu functions, which can be
called up in the same manner.
10
Get to know your telephone
Basic operating principles
What does the idle display show?
The idle display contains:
1234 BERT 11.11.99 16:50↓
SMIT MYER MILL JOHN DAVE
SAMM GARA JUDY PLANE
-- Your name and call number
-- Date and time
Display keys
1234 Bert 12.11.99 16:50
BERT SMIT MYER ANDR MATT
GREE GARA JUDY BOSS PLANE
The display keys can have various
functions assigned to them (only those 10
keys that are beneath the display). The
current function of each key is shown in the
display.
Example: ”Myer”:
With this function key you can call up
”Myer”.
Display keys in several levels:
The display shows one level with a maximum of 10 assignments. However, each
key can be assigned more than one allocation. The first level displays partners,
functions or destinations 1--10, the second level shows further functions and the
third level further functions.
Press the destination key to display the various levels.
11
Get to know your telephone
Basic operating principles
Entering a text (example: Telephone book)
Enter the desired name by using the digit keys with alphabetic labeling.
You can enter the letters A to Z and the numbers 1 to 0, asdescribed in the following
example:
Entering the letter C: Press the digit key 2 three times.
Enter the digit 2: Press the digit key 2 four times.
Name
↓
ÄÖÜß ÁÀÂÃ ÅÆÇÐ ÉÈÊË Corr
íìîï ÑÓÒÔ ÕØÚÙ ÛÿþX ↓
The display keys can be used to enter
additional letters, such as umlauts (Ä,Ü,Ö),
or to correct the text (corr).
Use the display key ”↓” to display further
letters.
i
• If your telephone has digit keys without alphabetic labeling, use the display
keys to enter the letters A to Z.
12
Get to know your telephone
Make it easy on yourself
Adjusting the volume
You can adjust various acoustic settings, such as the ringing of the handset or the
handsfree mode settings, to adapt to your surroundings.
Adjusting the contrast of the display
You can adjust the contrast of the display according to your surroundings (see
Page 127).
Specifying the language of the menu
The menu items can be displayed in either English, German or French (see
Page 128). You can separately determine the language for the Minimail texts.
Storing call numbers
Your phone has a personal telephone book, in which you can store frequently used
call numbers. You can modify the telephone book entries yourself (see Page 36).
Handsfree when called
You can set your telephone to automatically answer calls in the handsfree mode.
You will not need to lift the handset and can immediately start speaking to the caller
(see Page 113).
Changing the label
Functions that are often used can be
assigned to the display keys by the
TENOVIS Service.
The labels beneath these keys can be filled
out and inserted.
This allows you to see at a glance which
functions are assigned to these keys.
13
Get to know your telephone
Initial operation of your telephone
Changing the language for the display and the Minimail
This message appears in the idle display.
Status
'D/GB/F↑
Status
'D/GB/F↑
Language
Language
Mail
Mail
texts
texts
'English↓
'English↓
'English↓
'English↓
Press the Enter key to call up the
corresponding menu item.
The display shows the languages available
for the display texts.
Select the desired language for the display
texts.
Confirm your selection. The display texts
will appear in the chosen language.
The display then shows the languages
available for the Minimail texts.
Select the desired language for the
Minimail.
Confirm your selection. The Minimail texts
will then appear in the chosen language.
i
• The language can be changed at any time. For further information see the
Chapter ”Audio settings, contrast and language”.
14
Telephoning as usual
Making a call
You can use the telephone as usual within and outside your telephone system.
Internal: Dial the desired extension number directly.
External: Depending on the system, dial the external extension number, e.g. ”9”.
You can use the destination keys to dial the most recent call number again (Redial)
and to dial frequently needed call numbers.
You can initiate an automatic call--back within your telephone system to be notified
when an occupied connection becomes free.
You can also deactivate the call number and call charges displays.
Calling within your telephone system . . . . . . . . . . . . . . . . . . . . . . . . . . . . . . . . . . . .
16
Using destination keys to call within your telephone system . . . . . . . . . . . . . . . .
16
Calling outside your telephone system . . . . . . . . . . . . . . . . . . . . . . . . . . . . . . . . . .
16
Using destination keys to calling outside your telephone system . . . . . . . . . . . .
16
Dialing the last call number again (Redial) . . . . . . . . . . . . . . . . . . . . . . . . . . . . . . .
17
In case of busy signal (Automatic call--back) . . . . . . . . . . . . . . . . . . . . . . . . . . . . .
17
Repeatedly redialing a call number . . . . . . . . . . . . . . . . . . . . . . . . . . . . . . . . . . . . . .
17
Deactivating the call number and call charges displays . . . . . . . . . . . . . . . . . . . .
18
Activating the call number and call charges displays . . . . . . . . . . . . . . . . . . . . . . .
18
Calling via the system from a remote phone - . . . . . . . . . . . . . . . . . . . . . . . . . . .
19
15
Telephoning as usual
Making a call
Calling within your telephone system
Lift the handset.
...
Enter the call number.
Using destination keys to call within your telephone system
Lift the handset.
Press the destination key for the desired subscriber.
Calling outside your telephone system
Lift the handset.
Enter the exit code.
...
Enter the call number.
Using destination keys to calling outside your telephone system
Lift the handset.
Enter the exit code.
Press the destination key for the desired subscriber.
• Using the phone without the handset: Press the Handsfree key.
i
• If you want to make a call, you can also first dial the desired call number or use
the corresponding destination key, and then lift the handset (dialing with handset
on--hook).
16
Telephoning as usual
Making a call
Dialing the last call number again (Redial)
Lift the handset.
Press the Redial key to dial the last call number again.
In case of busy signal (Automatic call--back)
The internal connection dialed is busy.
Initiate call--back.
Replace the handset. As soon as the other connection is free, your telephone
rings.
Lift the handset. The other connection is called automatically via the telephone
system.
Repeatedly redialing a call number
The connection dialed is busy.
Scroll to the Delayed
redial
menu item.
Confirm your selection.
Replace the handset. The dialing process is repeated up to 9 times with an
interval of 30 seconds. The automatic redial is terminated when you press a key or
lift the handset.
i
• You can very easily dial the last five call numbers again. Press the Redial key
〈→→) until the desired call number is displayed. Then you can initiate the call by
simply lifting the handset.
17
Telephoning as usual
Making a call
Deactivating the call number and call charges displays
During a call:
Scroll to the Display menu item.
Confirm your selection. Call number and name of the caller are no longer
displayed and the call number is not stored in the redial memory. The call charges
display is deactivated, but the charges continue to be counted internally.
Activating the call number and call charges displays
Select the Display menu item again.
Confirm your selection.
18
Telephoning as usual
Making a call
Calling via the system from a remote phoneYou can call from outside of the telecommunication system to conduct an expensive
long--distance call, for example, via the system. In this case the system incurs the call
charges. This is possible from every telephone with subsequent-tone dial (DTMF).
Dial your telecommunication system call number
from an external telephone, e.g. 0697505.
Enter your system’s flat--rate line code, e.g. 89. You hear the dialing tone
as confirmation.
Enter your PIN if necessary, e.g. 1234.
Enter the system’s external line code
and then the call number which you would like to dial via the telecommunication
system, e.g. 0004197543. This call number is immediately dialed.
i
• “Calling via the system from a remote phone” has to be activated by the Tenovis
service department. The service department can also give you the flat--rate line
code and tell you whether a PIN is required.
• In many cases you can only call via the system from certain pre--defined telephones. Your service department can tell you whether this applies to your system.
19
Telephoning as usual
Accepting calls
You can lift the handset and speak with the caller as usual.
Alternatively, you can answer the call by pressing the Handsfree key , which
enables you to conduct the call with the handset on--hook.
If another subscriber in your system receives a call, you can pick up the call from
your phone.
When you receive a call . . . . . . . . . . . . . . . . . . . . . . . . . . . . . . . . . . . . . . . . . . . . . . .
21
When another telephone receives a call (Pick--up) . . . . . . . . . . . . . . . . . . . . . . . .
21
20
Telephoning as usual
Accepting calls
When you receive a call
Your telephone rings. The call is shown in the display.
Lift the handset.
When another telephone receives a call (Pick--up)
Another telephone rings.
...
Enter the number of the ringing telephone with your handset on--hook.
Scroll to the Call
pick-up
menu item.
Confirm your selection and wait until the call arrives at your telephone.
Lift the handset.
• Using the telephone without the handset: Press the Handsfree key.
i
• If your telephone system is set accordingly, you also have the option of picking
up a call in a different manner. All you need to do then is enter a code. After
lifting the handset, enter, for example, ”*6” for the Pick--up function and then the
call number of the ringing telephone. For approximately one second you will hear
a special dial tone. The call is then directly transferred.
Should questions arise, please ask your TENOVIS Service.
21
Telephoning as usual
Handsfree mode
You can activate the loudspeaker of your telephone in order to hear the caller out
loud in the room.
You can also activate the Handsfree mode during a call and then continue the
conversation with the handset on--hook.
Hello...
Hearing the caller through the loudspeaker (Call monitoring) . . . . . . . . . . . . . . .
23
Using the telephone with the handset on--hook (Handsfree mode) . . . . . . . . . . .
23
Handsfree -- Ending the call . . . . . . . . . . . . . . . . . . . . . . . . . . . . . . . . . . . . . . . . . . . .
23
Handsfree -- Continuing the call with the handset . . . . . . . . . . . . . . . . . . . . . . . . .
23
22
Telephoning as usual
Handsfree mode
Hearing the caller through the loudspeaker (Call monitoring)
During a call:
Activate the loudspeaker. You can hear the caller through the loudspeaker. If
you want to adjust the volume of the loudspeaker, select the ”Volume” menu item.
The loudspeaker can be deactivated again by pressing the Loudspeaker key.
Using the telephone with the handset on--hook (Handsfree mode)
During a call:
Activate the Handsfree mode.
Replace the handset.
You hear the caller through the loudspeaker and can conduct the conversation with
the handset on--hook.
Handsfree -- Ending the call
During the handsfree call:
Deactivate the Handsfree mode.
Handsfree -- Continuing the call with the handset
During the handsfree call:
Lift the handset.
23
Telephoning as usual
Making several connections simultaneously
You can accept or refuse an additional call (Call waiting) during an existing
connection. You can freely switch back and forth between the callers. Connections
to a maximum of four parties can be established simultaneously. You can speak
with two callers simultaneously (Conference).
Please note that for the following functions the operating procedures for CTI agents
(CTI = Computer-Telephone-Integration) can differ.
Answering an additional call (Second call) . . . . . . . . . . . . . . . . . . . . . . . . . . . . . . .
25
Accepting up to two additional calls - . . . . . . . . . . . . . . . . . . . . . . . . . . . . . . . . . .
25
Refusing an additional call . . . . . . . . . . . . . . . . . . . . . . . . . . . . . . . . . . . . . . . . . . . . .
26
Consultation during a call (Refer--back) . . . . . . . . . . . . . . . . . . . . . . . . . . . . . . . . . .
26
Switching back and forth between caller and the consultation subscriber . . . . .
26
Switching between caller and an additional caller . . . . . . . . . . . . . . . . . . . . . . . . .
26
Forwarding a second caller . . . . . . . . . . . . . . . . . . . . . . . . . . . . . . . . . . . . . . . . . . . .
27
Calling two parties simultaneously (Conference) . . . . . . . . . . . . . . . . . . . . . . . . . .
28
Speaking with just one conference subscriber . . . . . . . . . . . . . . . . . . . . . . . . . . . .
28
Connecting conference participants with each other . . . . . . . . . . . . . . . . . . . . . . .
28
Disconnecting selected conference subscribers . . . . . . . . . . . . . . . . . . . . . . . . . . .
29
Ending the conference . . . . . . . . . . . . . . . . . . . . . . . . . . . . . . . . . . . . . . . . . . . . . . . .
29
24
Telephoning as usual
Making several connections simultaneously
Answering an additional call (Second call)
Press the Interchange function key. You can find this function key
on the very right of the bottom row.
Confirm your selection. You are then connected with the additional caller.
The first caller is waiting and cannot hear your conversation.
Accepting up to two additional calls You receive a second call while you are on the phone. You hear an alerting tone,
and the bell symbol flashes.
Press the Interchange function key repeatedly until the caller is shown in the
display. The bell symbol is on.
Scroll to the Accept
call
menu item.
Confirm your selection. You are then connected with the caller. The other
callers are waiting and cannot hear your conversation.
Interchanging between the callers:
Press the Interchange function key repeatedly until the desired
caller is shown in the display.
Scroll to the Connect menu item.
Confirm your selection. You are then connected with the caller.
The other callers are waiting and cannot hear your conversation.
i
• You can only use the feature ”Accepting up to two additional calls” with a CTI
Agent.
Should questions arise, please refer to the TENOVIS Service.
25
Telephoning as usual
Making several connections simultaneously
Refusing an additional call
Scroll to the Refuse
call
menu item.
Confirm your selection.
Consultation during a call (Refer--back)
During a call:
Initiate refer--back. The caller is waiting.
...
Enter the number of the subscriber whom you want to consult.
Switching back and forth between the caller and the consultation subscriber
During a call:
Press the Refer--back key to switch between callers or press the Interchange
function key if using the CTI agent.
Switching between caller and an additional caller
During a call:
Press the Interchange function key to switch between callers.
26
Telephoning as usual
Making several connections simultaneously
Forwarding a second caller
During a call:
Press the Interchange function key. You see the name and call number of the
second caller.
Press the Enter key. You are then connected with the additional caller. The first
caller is waiting and cannot hear your conversation.
Initiate refer--back.
...
Enter the number of the desired subscriber. You can now announce
the call. Your first call partner is waiting.
Press the Transfer function key. Both subscribers will be connected to each
other, and you can continue your original call.
27
Telephoning as usual
Making several connections simultaneously
Calling two parties simultaneously (Conference)
During a call:
Initiate refer--back. The caller is waiting.
...
Enter the call number of the consultation subscriber. If you are
connected to both subscribers, you can initiate the conference.
Scroll to the Conference menu item.
Confirm your selection.
Speaking with just one conference subscriber
If necessary, select the Interchange
whom you want to speak.
users
menu item to display the subscriber with
Press the Refer--back key. You can now speak alone with the desired
subscriber. When you want to speak with both parties again, select the
”Conference” menu item.
CTI agents can speak to the desired subscriber alone if they select the
Conference off menu item.
Connecting conference participants with each other
During the conference:
Replace the handset or press the Transfer function key (CTI agent).
i
• The third subscriber whom you are calling does not answer: Press the Release
key to return to the original caller.
• Each of the two other callers can cut themselves out: Replace the handset.
• You can also assign a Conference function key. To assign function keys, please
refer to the Chapter ”Setting function keys” on Page 97.
28
Telephoning as usual
Making several connections simultaneously
Disconnecting selected conference subscribers
During the conference:
If necessary, select Interchange users in order to switch the subscriber you want to
disconnect to the front field of the display.
Disconnect the subscriber.
Ending the conference
During the conference:
Scroll to the Terminate
conf.
menu item.
Confirm your selection.
29
Telephoning as usual
Diverting calls
You can divert calls to another connection within your telephone system.
You can also activate an additional Call diversion destination to divert calls only
when your line is busy.
Diverting calls for your telephone . . . . . . . . . . . . . . . . . . . . . . . . . . . . . . . . . . . . . . .
31
Diverting calls when your line is busy - . . . . . . . . . . . . . . . . . . . . . . . . . . . . . . . . .
31
Deactivating call diversion . . . . . . . . . . . . . . . . . . . . . . . . . . . . . . . . . . . . . . . . . . . . .
31
Changing call diversion from another phone - . . . . . . . . . . . . . . . . . . . . . . . . . . .
32
30
Telephoning as usual
Diverting calls
Diverting calls for your telephone
Scroll to the Call
diversion
menu item.
Confirm your selection.
Scroll to the Div. menu item.
...
Enter the internal call number to which the calls are to be diverted.
Confirm your selection. The display shows the status message ”DIV. xxxx” and
the LED illuminates.
Diverting calls when your line is busy Scroll to the Call
diversion
menu item.
Confirm your selection.
Scroll to the Div.
...
busy
menu item.
Enter the internal call number to which the calls are to be diverted.
Confirm your selection. The display shows the status message ”DIV busy xxxx”
and the LED illuminates.
Deactivating call diversion
Scroll to the Call
diversion
menu item.
Confirm your selection.
Select the active call diversion (indicated by ”+”), for example +
DIV 3315 .
Confirm your selection.
31
Telephoning as usual
Diverting calls
Changing call diversion from another phone You can call from outside of the telecommunication system to set up or change a
call diversion for your telephone or another telephone. This is possible from every
telephone with subsequent-tone dial (DTMF).
Dial the subscriber whose call diversion is to be changed:
Dial your telecommunication system call number
from an external telephone, e.g. 0697505.
Enter your system’s flat--rate line code, e.g. 89. You hear the dialing tone
as confirmation.
Enter the call number of the subscriber for whom you want to
change the call diversion, e.g. 6055.
Enter your PIN if necessary, e.g. 1234.
Now you can set up, change or deactivate call diversion:
Setting up or changing a call diversion:
Enter the codes for “Activate follow me”, e.g. Star 14.
Enter the system’s external line code and then the
call number which is to receive the diverted calls, e.g. 00897543. An acknowledgement
tone confirms the action.
Deactivating a call diversion:
Enter the codes for “Deactivate follow me”, e.g. Hash 14.
i
• “Changing call diversion from another phone” must be activated by the Tenovis
service department. The service department can also give you the flat--rate line
code and PIN.
• In many cases you can only change call diversion from certain pre--defined telephones. Your service department can tell you whether this applies to your system.
32
Telephoning with convenience
Who called? (Call list)
If you do not to answer a call, the day of the week and time of the call will be stored
in the call list. You can display this list at any time and return calls to the subscribers
entered in it. The list contains the 10 most recent entries.
Jones
13.04 08:53
Miller
12.04 15:56
Smith
12.04 13:12
Larsen 12.04 10:47
Dialing a number from the call list . . . . . . . . . . . . . . . . . . . . . . . . . . . . . . . . . . . . . . .
34
Deleting an entry . . . . . . . . . . . . . . . . . . . . . . . . . . . . . . . . . . . . . . . . . . . . . . . . . . . . .
34
Deleting all entries . . . . . . . . . . . . . . . . . . . . . . . . . . . . . . . . . . . . . . . . . . . . . . . . . . . .
35
Accepting an entry from the telephone book . . . . . . . . . . . . . . . . . . . . . . . . . . . . . .
35
Symbols in the call list . . . . . . . . . . . . . . . . . . . . . . . . . . . . . . . . . . . . . . . . . . . . . . . .
35
33
Telephoning with convenience
Who called? (Call list)
Dialing a number from the call list
The display shows the ”List” message.
Scroll to the Display
call list
menu item.
Confirm your selection.
Scroll to the desired menu item, e.g. 069123456 .
Lift the handset.
Deleting an entry
The display shows the ”List” message.
Scroll to the Display
call list
menu item.
Confirm your selection.
Scroll to the desired menu item, e.g. 069123456 .
Confirm your selection.
Scroll to the Delete menu item.
Confirm your selection.
i
• Once you return a call from the call list, that entry is automatically deleted.
• The idle display will show the message ”List” until you have scrolled through all
new entries.
• To use the phone without the handset: Press the Handsfree key.
34
Telephoning with convenience
Who called? (Call list)
Deleting all entries
Scroll to the Display
call list
menu item.
Confirm your selection.
Scroll to the Delete
all
menu item.
Confirm your selection.
Accepting an entry from the telephone book
The display shows the ”List” message.
Scroll to the Display
call list
menu item.
Confirm your selection.
Scroll to the desired menu item, e.g. 069123456 .
Confirm your selection.
Scroll to the Reallocate menu item.
Confirm your selection. Now you can also edit the entry in the telephone book.
Symbols in the call list
An entry in the call list can look as follows:
069750...
14:42
+
3
>
*
069750...
14:42
+3>*
Call number of the caller
Time
Call has not been viewed yet
Number of calls from the subscriber
Diverted call
Call with message (VIP number)
i
• If name and call number of the caller are stored in the telephone book, the name
is displayed in the call list instead of the call number.
35
Telephoning with convenience
Using the telephone book
Your telephone has a personal telephone book, in which you can store up to 268
call numbers. You can then dial these call numbers quickly and conveniently. You
may modify the entries in the personal telephone book yourself.
Brown 2435
Bauer 3827
Dann 7483
Garl
6126
Dialing a call number from the telephone book . . . . . . . . . . . . . . . . . . . . . . . . . . . .
37
Entering a new call number into the telephone book . . . . . . . . . . . . . . . . . . . . . . .
37
Reallocating the redial in the telephone book . . . . . . . . . . . . . . . . . . . . . . . . . . . . .
37
Viewing entries in the telephone book . . . . . . . . . . . . . . . . . . . . . . . . . . . . . . . . . . .
38
Editing entries in the telephone book . . . . . . . . . . . . . . . . . . . . . . . . . . . . . . . . . . . .
38
Storing a call number as a note . . . . . . . . . . . . . . . . . . . . . . . . . . . . . . . . . . . . . . . . .
39
Assigning a call number in the telephone book to a destination key . . . . . . . . . .
40
Storing a call number in the telephone book as a DSS destination - . . . . . . . .
41
Storing an emergency number or own call number . . . . . . . . . . . . . . . . . . . . . . . .
42
36
Telephoning with convenience
Using the telephone book
Dialing a call number from the telephone book
Call up the telephone book.
N
or
Press a digit key with letters or a programmed function key to enter the
first letter of the name, e.g. N.
Confirm the entry.
Scroll to the desired menu item, e.g. Nadine
069123456 .
Lift the handset.
Entering a new call number into the telephone book
Call up the telephone book.
Scroll to the New
entry
menu item.
Confirm your selection and enter the new data.
Scroll to the menu item Store or Store
+ continue .
Confirm your selection.
Reallocating the redial in the telephone book
Press the Redial key repeatedly until the desired call number appears.
Scroll to the Reallocate menu item.
Confirm your selection.
i
• If you would like to use the Continue Main TB display key with the main
telephone book (MTB), you can have this feature set up by your TENOVIS
Service.
37
Telephoning with convenience
Using the telephone book
Viewing entries in the telephone book
Call up the telephone book.
Scroll to the Display
lists
menu item.
Confirm your selection.
Scroll to the desired item, e.g. Destination
keys .
Confirm your selection. You will see all entries that are assigned to destination
keys.
Editing entries in the telephone book
Call up the telephone book.
N
or
Press a digit key with letters or a programmed function key to enter the
first letter of the name, such as N.
Scroll to the Modify
entry
menu item.
Confirm your selection.
Scroll to the desired menu item, e.g. Nadine
069123456 .
Confirm your selection.
Scroll to the Edit menu item.
Confirm your selection. You can now edit the entry.
Scroll to the Store menu item and
confirm your selection.
i
• You can also limit the search in the telephone book: To do so, enter consecutive
letters of the name you want to find.
• If you want to delete an entry in the telephone book, proceed as described in the
section ”Editing entries in the telephone book” and select the menu item ”Delete”
instead of ”Edit”.
38
Telephoning with convenience
Using the telephone book
Storing a call number as a note
During a call:
Call up the telephone book.
Scroll to the New
entry
menu item.
Confirm your selection and enter the call number of the caller.
Scroll to the Allocate menu item.
Select the Note menu item.
Scroll to the Store menu item.
Confirm your selection.
39
Telephoning with convenience
Using the telephone book
Assigning a call number in the telephone book to a destination key
Call up the telephone book.
Scroll to the Modify
entry
menu item.
Confirm your selection.
Scroll to the desired menu item, e.g. Nadine
069123456 .
Confirm your selection.
Scroll to the Edit menu item.
Confirm your selection.
Scroll to the Allocate menu item.
Press the Redial key repeatedly until Destination
1..20
appears.
Press the desired destination key.
Scroll to the Store menu item.
Confirm your selection.
i
• You can only assign functions to the second level of destination keys.
• If a destination key is already assigned to a function, the old content will be
overwritten by the new entry. The old content is stored with the allocation ”Only
telephone book”.
40
Telephoning with convenience
Using the telephone book
Storing a call number in the telephone book as a DSS destination Call up the telephone book.
Scroll to the Modify
entry
menu item.
Confirm your selection.
Scroll to the desired menu item, e.g. Nadine
069123456 .
Confirm your selection.
Scroll to the Edit menu item.
Confirm your selection.
Scroll to the Allocate menu item.
Press the Redial key repeatedly until DSS
destination
appears.
Press the desired key on the DSS module.
Scroll to the Store menu item.
Confirm your selection.
i
• If you select ”DSS priority destinations” instead of ”DSS destinations” in the
”Allocation” menu item, your telephone will automatically activate the Handsfree
mode when you press the Direct call key. This will be ignored if the called
subscriber deactivated the Second call function. You can then still speak to them
even if it’s busy: Press the Direct call key once more. This is only possible if you
have the corresponding cut--in access permissions. When using the direct call
destinations the LED will show you if the subscriber is free (LED off) or busy
(LED on). You can find further information on the DSS module on Page 133.
41
Telephoning with convenience
Using the telephone book
Storing an emergency number or own call number
Call up the telephone book.
Scroll to the Modify
entry
menu item.
Confirm your selection.
Scroll to the desired menu item, e.g. Nadine
069123456 .
Confirm your selection.
Scroll to the Edit menu item.
Confirm your selection.
Scroll to the Allocate menu item.
Press the Redial key repeatedly until Own
appears.
call number
or Indiv.
emerg. no.
Press the desired destination key (only for ”Indiv. emerg. number”).
Scroll to the Store menu item.
Confirm your selection.
i
• The emergency number can be dialed even when the telephone is locked.
42
Telephoning with convenience
Storing all incoming calls (Talk list)
The talk list stores a maximum of 10 subscriber call numbers from which you have
been called and you have talked to. The most recent entry will be at the top of the
list. You can call up call numbers selectively and, if desired, dial immediately. Call
numbers from the talk list can easily be stored in the telephone book.
John
31.05 10:56
Benning18.05 12:13
Voss
04.05 08:16
Dann
04.05 07:42
Displaying and selecting the talk list . . . . . . . . . . . . . . . . . . . . . . . . . . . . . . . . . . . . .
44
Deleting an entry . . . . . . . . . . . . . . . . . . . . . . . . . . . . . . . . . . . . . . . . . . . . . . . . . . . . .
44
Deleting all entries . . . . . . . . . . . . . . . . . . . . . . . . . . . . . . . . . . . . . . . . . . . . . . . . . . . .
45
Adding a call number to the telephone book . . . . . . . . . . . . . . . . . . . . . . . . . . . . . .
45
43
Telephoning with convenience
Storing all incoming calls (Talk list)
Displaying and selecting the talk list
Scroll to the Display
talk list
menu item.
Confirm your selection. A list of all entries in the talk list appears. The
subscriber and time are displayed at the end of the list.
Scroll to the desired menu item, e.g. Sandra
10:13 .
Confirm your selection.
Scroll to the Dial menu item.
Confirm your selection. Your telephone automatically activates the Handsfree
mode. You can then use the phone with the handset on--hook.
Deleting an entry
Scroll to the Display
talk list
menu item.
Confirm your selection.
Scroll to the desired menu item, e.g. 069123456 .
Confirm your selection.
Scroll to the Delete menu item.
Confirm your selection.
44
Telephoning with convenience
Storing all incoming calls (Talk list)
Deleting all entries
Scroll to the Display
talk list
menu item.
Confirm your selection.
Scroll to the desired menu item, e.g. 069123456 .
Confirm your selection.
Scroll to the Delete
all
menu item.
Confirm your selection.
Adding a call number to the telephone book
Scroll to the Display
talk list
menu item.
Confirm your selection.
Scroll to the desired menu item, e.g. Sandra
10:13 .
Confirm your selection.
Scroll to the Reallocate menu item.
Confirm your selection. The entry can then be edited in the telephone book.
45
Telephoning with convenience
Querying messages (Voice mail) If your system is connected to a Voice mail, callers can leave messages for you
similar to an answering machine. You can query these messages by calling.
Message...
Diverting all calls to the Voice mail . . . . . . . . . . . . . . . . . . . . . . . . . . . . . . . . . . . . . .
47
Querying messages . . . . . . . . . . . . . . . . . . . . . . . . . . . . . . . . . . . . . . . . . . . . . . . . . .
47
Deactivating the call diversion to the Voice mail . . . . . . . . . . . . . . . . . . . . . . . . . . .
47
46
Telephoning with convenience
Querying messages (Voice mail) Diverting all calls to the Voice mail
Scroll to the Call
diversion
menu item.
Confirm your selection.
...
Enter the internal call number that is assigned to the Voice mail in your
system.
Confirm your selection.
Querying messages
The idle display shows the symbol for ”Messages” .
Scroll to the Messages: menu item.
Confirm your selection.
Scroll to the Server
message
menu item.
Confirm your selection.
Dial. You are guided through the operation of the Voice mail.
Deactivating the call diversion to the Voice mail
Scroll to the Call
diversion
menu item.
Select the active call diversion indicated by ”+”.
Confirm your selection. The LED is no longer illuminated and the ”+”
disappears. The call diversion to the Voice mail is deactivated.
47
Telephoning with convenience
Viewing call charges
All call charges incurred since the last reset are stored and totalled in your
telephone system. You can view the call charges for the last two calls and delete the
display.
It is also possible to display the current call charges during a conversation in either
units, DM or Euros.
You can delete the counters for single calls and the sum if this function was set
accordingly by the TENOVIS Service.
Your telephone system can also separately meter and bill the call charges for single
projects or private calls.
View call charges . . . . . . . . . . . . . . . . . . . . . . . . . . . . . . . . . . . . . . . . . . . . . . . . . . . . .
49
Activating and deactivating the call charges display . . . . . . . . . . . . . . . . . . . . . . .
49
Resetting the call charges counter . . . . . . . . . . . . . . . . . . . . . . . . . . . . . . . . . . . . . .
49
Switching the call charges display to Euros . . . . . . . . . . . . . . . . . . . . . . . . . . . . . .
50
Switching the charges display to units . . . . . . . . . . . . . . . . . . . . . . . . . . . . . . . . . . .
50
Metering the call charges for private calls and projects - . . . . . . . . . . . . . . . . . .
51
48
Telephoning with convenience
Viewing call charges
View call charges
Scroll to the Call
charges
menu item.
Confirm your selection.
Activating and deactivating the call charges display
Scroll to the Call
charges
menu item.
Confirm your selection.
Scroll to the menu item Disable
charges
or Enable
charges .
Confirm your selection.
Resetting the call charges counter
Scroll to the Call
charges
menu item.
Confirm your selection.
Scroll to the Delete
single counter
menu item.
Confirm your selection. The charges for the single call are deleted.
i
• To delete the sum of all calls, the TENOVIS Service will need to enable this
function.
49
Telephoning with convenience
Viewing call charges
Switching the call charges display to Euros
Scroll to the Charges menu item.
Confirm your selection.
Scroll to the Convert
to Euro
menu item.
Confirm your selection.
Select the currency DEM .
Confirm your selection.
Switching the charges display to units
Scroll to the Charges menu item.
Confirm your selection.
Scroll to the Display
units
menu item.
Confirm your selection.
i
• Use the function ”Disable conversion” function to switch from Euros to DM.
50
Telephoning with convenience
Viewing call charges
Metering the call charges for private calls and projects You want to dial a call number with a project or private PIN.
...
Enter the external line code that has been assigned for dialing with a
project or private code in your telephone system, e.g. ”1”. This external line code
can contain up to 5 digits.
...
Enter the code that has been assigned for private use or the
respective project, e.g. ”3433”. This code can contain up to 9 digits.
...
Enter the desired call number.
Lift the handset. The charges for this call will then be metered and billed in the
system for the respective project or private code.
i
• For security reasons the code is not shown in the display or when the Redial
function is being used. The code cannot be stored in the telephone book. If you
want to dial a call number from the call list with a project code, you will manually
need to enter the external line code and the project code in the display of the call
list.
51
Telephoning with convenience
Reminding yourself (Appointments)
You can have your telephone remind you of important appointments. Up to ten
appointments can be entered. You can choose whether you want to be reminded
just once or every day.
You will hear a signal tone to remind you of the appointment and see the text you
entered for this appointment.
Entering a new appointment . . . . . . . . . . . . . . . . . . . . . . . . . . . . . . . . . . . . . . . . . . .
53
View appointment . . . . . . . . . . . . . . . . . . . . . . . . . . . . . . . . . . . . . . . . . . . . . . . . . . . .
53
Reminder message . . . . . . . . . . . . . . . . . . . . . . . . . . . . . . . . . . . . . . . . . . . . . . . . . . .
53
52
Telephoning with convenience
Reminding yourself (Appointments)
Entering a new appointment
Scroll to the Appointments menu item.
Confirm your selection.
Scroll to the Enter menu item.
Confirm your selection and enter the new appointment.
Scroll to the Store menu item.
Confirm your selection. The following message appears in the idle display:
Appointment activated .
View appointment
Scroll to the Appointments menu item.
Confirm your selection. The appointments already entered are displayed.
”+” indicates, that the appointment is activated and ”d” indicates that the
appointment is set to ”daily”.
Reminder message
A signal tone will sound at the appropriate time and the display will show the
message ”Appointment expired”.
Press the Enter key to turn off the signal tone. The appointment dates are
displayed.
i
• If your telephone has digit keys without alphabetic labeling, use the display
keys to enter the letters.
53
Telephoning with convenience
Sending and receiving texts
You can send short texts to up to 5 people. Up to 10 texts are available:
-- 7 prepared texts that you can edit or add to,
-- 3 texts which you can compose yourself.
You can also receive texts. The mailbox is a call list for texts. Callers can leave up
to 10 Minimails. A Minimail has the length of one display line. The display will
indicate that you have received a Minimail.
Meeting 14:30
...
Selecting and sending a prepared text message . . . . . . . . . . . . . . . . . . . . . . . . . .
55
Editing and sending a prepared text message . . . . . . . . . . . . . . . . . . . . . . . . . . . .
56
Composing and sending your own text message . . . . . . . . . . . . . . . . . . . . . . . . . .
57
Sending a text message to all subscribers . . . . . . . . . . . . . . . . . . . . . . . . . . . . . . .
58
Viewing and deleting received text messages . . . . . . . . . . . . . . . . . . . . . . . . . . . .
59
54
Telephoning with convenience
Sending and receiving texts
Selecting and sending a prepared text message
Scroll to the Messages: menu item.
Confirm your selection.
Scroll to the Send
Minimail
menu item.
Confirm your selection.
Scroll to the desired menu item, e.g. Meeting
...
00:00 00.00 .
Complete the entry, i.e. enter the date and time.
Confirm the entry.
...
Enter the call number of the recipient.
Confirm your selection. ”+” indicates, that the subscriber has been selected.
Scroll to the Send menu item.
Confirm your selection. The display indicates a successful transfer of the
message:
“?”:
”+”:
”--”:
The message is being sent.
The message has reached its destination.
The subscriber could not be reached.
i
• You can set the language of the prepared Minimail texts according to your
needs. The available languages are English, German and French.
For further information see the Chapter ”Audio settings, contrast and language”
(→ Page 128).
55
Telephoning with convenience
Sending and receiving texts
Editing and sending a prepared text message
Scroll to the Messages: menu item.
Confirm your selection.
Scroll to the Send
Minimail
menu item.
Confirm your selection.
Scroll to the Edit menu item.
Confirm your selection. The texts which can be edited are shown in the display.
You can then edit the texts or simply overwrite them.
Confirm the entry.
...
Enter the call number of the recipient.
Confirm the entry. ”+” indicates, that the subscriber has been selected.
Scroll to the Send menu item.
Confirm your selection. The display indicates a successful transfer of the
message:
“?”:
”+”:
”--”:
The message is being sent.
The message has reached its destination.
The subscriber could not be reached.
i
• You can set the language of the prepared Minimail texts according to your
needs. The available languages are English, German and French.
For further information see the Chapter ”Audio settings, contrast and language”
(→ Page 128).
56
Telephoning with convenience
Sending and receiving texts
Composing and sending your own text message
Scroll to the Messages: menu item.
Confirm your selection.
Scroll to the Send
Minimail
menu item.
Confirm your selection.
Scroll to the Edit menu item.
Confirm your selection.
Scroll down through all texts. You can now enter the text.
Confirm the entry.
...
Enter the call number of the recipient.
Confirm the entry. ”+” indicates, that the subscriber has been selected.
Scroll to the Send menu item.
Confirm your selection. The display indicates a successful transfer of the
message:
“?”:
”+”:
”--”:
The message is being sent.
The message has reached its destination.
The subscriber could not be reached.
i
• If your telephone has digit keys without alphabetic labeling, use the display
keys to enter the letters.
57
Telephoning with convenience
Sending and receiving texts
Sending a text message to all subscribers
Scroll to the Messages: menu item.
Confirm your selection.
Scroll to the Send
Minimail
menu item.
Confirm your selection.
Scroll to the desired entry.
...
Complete the entry, i.e. enter the date and time.
Confirm the entry.
...
Enter the call numbers of the desired recipients.
Scroll to the Minimail
to all
menu item.
Confirm your selection. The display indicates a successful transfer of the
message:
“?”:
”+”:
”--”:
58
The message is being sent.
The message has reached its destination.
The subscriber could not be reached.
Telephoning with convenience
Sending and receiving texts
Viewing and deleting received text messages
The idle display shows the symbol for ”Messages” :
Scroll to the Messages: menu item.
Confirm your selection.
Scroll to the View
Mailbox
menu item.
Confirm your selection.
Scroll to the desired text message, e.g. Meeting
14:00 14.01 .
Confirm your selection.
Scroll to the Delete menu item.
Confirm your selection.
59
Telephoning with convenience
Locking your telephone
You can protect the telephone against unauthorised use by locking it with a PIN
(Personal Identification Number). You can enter this PIN yourself and also change it
at any time. Others will then only be able to use your telephone for dialing internal
or emergency numbers or to accept calls, depending on the locking level.
You can choose from 5 different locking levels (not included in the standard setting,
please refer to the TENOVIS Service).
Setting / changing the PIN (Personal Identification Number) . . . . . . . . . . . . . . . .
61
Locking your telephone . . . . . . . . . . . . . . . . . . . . . . . . . . . . . . . . . . . . . . . . . . . . . . . .
61
Unlocking your telephone . . . . . . . . . . . . . . . . . . . . . . . . . . . . . . . . . . . . . . . . . . . . . .
62
Specifying the locking level - . . . . . . . . . . . . . . . . . . . . . . . . . . . . . . . . . . . . . . . . . .
62
60
Telephoning with convenience
Locking your telephone
Setting / changing the PIN (Personal Identification Number)
Scroll to the Lock menu item.
Confirm your selection.
Scroll to the Enter
PIN
menu item.
Confirm your selection.
...
Enter the current PIN. This step is excluded when you enter your PIN
for the first time.
...
Enter the new PIN.
...
Enter the PIN again to confirm.
Locking your telephone
Scroll to the Lock menu item.
Confirm your selection.
Scroll to the Lock menu item.
Confirm your selection.
i
• The PIN can contain four to six digits. If your telephone has a local lock, then the
PIN has to have four digits. Upon entering the PIN for the first time, you will need
to enter a number starting at 2000. If your telephone is locked at the system, the
PIN can contain four to six digits.
Should questions arise, please ask your TENOVIS Service.
61
Telephoning with convenience
Locking your telephone
Unlocking your telephone
In the idle display:
Scroll to the Locked entry.
Confirm your selection.
...
Enter the current PIN. If you enter an incorrect PIN three consecutive
times, the telephone is blocked for the next 15 minutes.
Specifying the locking level Scroll to the Lock menu item.
Confirm your selection.
..
Enter the desired locking level with a digit key.
You have the following options:
1 Only emergency numbers accessible
2 Emergency and internal numbers accessible
3 Emergency and internal number, Code dial, TA and AEI accessible
4 Settings locked
5 No lock
i
• The PIN can contain four to six digits. If your telephone has a local lock, then the
PIN has to have four digits. Upon entering the PIN for the first time, you will need
to enter a number starting at 2000. If your telephone is locked at the system, the
PIN can contain four to six digits.
Should questions arise, please ask your TENOVIS Service.
• ”Specifying the locking level” is not a standard setting. Please refer to the
TENOVIS Service.
62
Using the telephone with partners
Using the telephone with partners The TENOVIS Service can connect up to 10 telephones of your system with each
other to form a partner group. The display provides information on the activities of
each partner. You can set your telephone to sound a short tone whenever one of
your partners receives a call (Partner beep).
By simply pressing a few keys you can also set and delete partner diversions. A
Deputy function key must be set for this.
Table of Contents
Information in the partner display . . . . . . . . . . . . . . . . . . . . . . . . . . . . . . . . . . . . . . .
64
Calling a partner . . . . . . . . . . . . . . . . . . . . . . . . . . . . . . . . . . . . . . . . . . . . . . . . . . . . .
64
Answering a call to a partner . . . . . . . . . . . . . . . . . . . . . . . . . . . . . . . . . . . . . . . . . . .
64
Diverting calls from one partner to another . . . . . . . . . . . . . . . . . . . . . . . . . . . . . . .
65
Switching diversion on and off . . . . . . . . . . . . . . . . . . . . . . . . . . . . . . . . . . . . . . . . . .
65
Setting the partner beep . . . . . . . . . . . . . . . . . . . . . . . . . . . . . . . . . . . . . . . . . . . . . . .
66
Expanding the partner group - . . . . . . . . . . . . . . . . . . . . . . . . . . . . . . . . . . . . . . . .
67
Reducing the partner group - . . . . . . . . . . . . . . . . . . . . . . . . . . . . . . . . . . . . . . . . .
68
Restricting partner signaling - . . . . . . . . . . . . . . . . . . . . . . . . . . . . . . . . . . . . . . . . .
69
Allowing partner signaling - . . . . . . . . . . . . . . . . . . . . . . . . . . . . . . . . . . . . . . . . . . .
69
Assigning partners to different destination keys . . . . . . . . . . . . . . . . . . . . . . . . . . .
70
Assigning a partner to the DSS module - . . . . . . . . . . . . . . . . . . . . . . . . . . . . . . .
71
Deactivating partner display . . . . . . . . . . . . . . . . . . . . . . . . . . . . . . . . . . . . . . . . . . . .
72
Labeling partner fields with text . . . . . . . . . . . . . . . . . . . . . . . . . . . . . . . . . . . . . . . . .
72
Setting a deputy key . . . . . . . . . . . . . . . . . . . . . . . . . . . . . . . . . . . . . . . . . . . . . . . . .
73
63
Using the telephone with partners
Using the telephone with partners Information in the partner display
A
"
A
A
or
A
Flashes alternately with the partner display: The partner is being called.
Flashes alternately with the partner display: The partner for whom a partner
diversion is set is being called.
Flashes alternately with the partner display: The partner is being called
simultaneously by two different callers.
The partner is making a call.
Flashes alternately with the partner display: The partner is making and
receiving a call simultaneously.
The partner has set up partner diversion.
Partner diversion is set up to this partner.
Partner display or partner beep is activated.
These characters are only displayed during setup of the partner beep!
Dial the A if you want the usual ringing tone,
A if you want the alerting tone.
Calling a partner
Press the key for the desired partner.
Lift the handset.
Answering a call to a partner
A partner telephone rings and the corresponding display flashes:
Press the partner key and wait until the call reaches you.
Lift the handset.
i
• It is possible that your telephone is set up for Multiline instead of for partner
functions. If this is the case, then the partner functions are not available. Please
ask the TENOVIS Service for help.
64
Using the telephone with partners
Using the telephone with partners Diverting calls from one partner to another
Scroll to the Further
functions:
menu item.
Confirm your selection.
Scroll to the Partners menu item.
Confirm your selection.
Press the key for the partner for whom you are diverting.
Press the key for the partner to whom you want to divert.
Scroll to the Store menu item.
Confirm your selection. The partner diversion is set for the phone. You can
activate it at any time.
Switching diversion on and off
Scroll to the Further
functions:
menu item.
Confirm your selection.
Scroll to the Partners menu item.
Confirm your selection.
Scroll to the menu item Partner
div. on
or Partner
div. off .
Confirm your selection.
i
• It is possible that your telephone is set up for Multiline instead of for partner
functions. If this is the case, then the partner functions are not available. Please
ask the TENOVIS Service for help.
65
Using the telephone with partners
Using the telephone with partners Setting the partner beep
Scroll to the Further
functions:
menu item.
Confirm your selection.
Scroll to the Partners menu item.
Confirm your selection.
Scroll to the Set
partner beep
menu item.
Confirm your selection.
Press the key for the partner (also multiple) to switch on the partner beep.
i
• It is possible that your telephone is set up for Multiline instead of for partner
functions. If this is the case, then the partner functions are not available. Please
ask the TENOVIS Service for help.
66
Using the telephone with partners
Using the telephone with partners Expanding the partner group Scroll to the Further
functions:
menu item.
Confirm your selection.
Scroll to the Partners menu item.
Confirm your selection.
Scroll to the Expand
group
menu item.
Confirm your selection.
...
Enter the call number of the subscriber that is supposed to be added
to the partner group.
Scroll to the Store menu item.
Confirm the entry.
i
• It is possible that your telephone is set up for Multiline instead of for partner
functions. If this is the case, then the partner functions are not available. Please
ask the TENOVIS Service for help.
• The call numbers of the subscribers to the partner groups need to be set by the
TENOVIS Service.
67
Using the telephone with partners
Using the telephone with partners Reducing the partner group Scroll to the Further
functions:
menu item.
Confirm your selection.
Scroll to the Partners menu item.
Confirm your selection.
Scroll to the Reduce
group
menu item.
Confirm your selection.
Press the key for the partner that is supposed to be removed from the group.
Scroll to the Delete menu item.
Confirm your selection.
i
• It is possible that your telephone is set up for Multiline instead of for partner
functions. If this is the case, then the partner functions are not available. Please
ask the TENOVIS Service for help.
68
Using the telephone with partners
Using the telephone with partners Restricting partner signaling Scroll to the Further
functions:
menu item.
Confirm your selection.
Scroll to the Partners menu item.
Confirm your selection.
Scroll to the Restr.
signaling
menu item.
Confirm your selection. The partners can no longer see in their display
if you are making a call, being called, if call diversion is activated for your
phone, etc.
Allowing partner signaling Scroll to the Further
functions:
menu item.
Confirm your selection.
Scroll to the Partners menu item.
Confirm your selection.
Scroll to the Allow
signaling
menu item.
Confirm your selection. The partners can now see in their displays whether you
are making a call, being called, using call diversion, etc.
i
• It is possible that your telephone is set up for Multiline instead of for partner
functions. If this is the case, then the partner functions are not available. Please
ask the TENOVIS Service for help.
• The function ”Restrict partner signaling” needs to be enabled by the TENOVIS
Service.
69
Using the telephone with partners
Using the telephone with partners Assigning partners to different destination keys
Scroll to the Further
functions:
menu item.
Confirm your selection.
Scroll to the Partner menu item.
Confirm your selection.
Scroll to the Spec
partner pos.
menu item.
Confirm your selection.
Press the key for the partner that is to be assigned to a different key.
Press the partner or destination key that is supposed to be assigned.
i
• It is possible that your telephone is set up for Multiline instead of for partner
functions. If this is the case, then the partner functions are not available. Please
ask the TENOVIS Service for help.
70
Using the telephone with partners
Using the telephone with partners Assigning a partner to the DSS module Scroll to the Further
functions:
menu item.
Confirm your selection.
Scroll to the Partners menu item.
Confirm your selection.
Scroll to the Spec
partner pos.
menu item.
Confirm your selection.
Scroll to the Partner
on DSS
menu item.
Confirm your selection. The partners are transferred to the top row of keys of
the DSS module in their current order.
i
• It is possible that your telephone is set up for Multiline instead of for partner
functions. If this is the case, then the partner functions are not available. Please
ask the TENOVIS Service for help.
• The DSS module is not part of the items delivered as standard.
71
Using the telephone with partners
Using the telephone with partners Deactivating partner display
Scroll to the Further
functions:
menu item.
Confirm your selection.
Scroll to the Partners menu item.
Confirm your selection.
Scroll to the Set
partner disp.
menu item.
Confirm your selection.
Press the desired partner key (or several keys). The black triangle disappears.
Labeling partner fields with text
Press the desired partner key.
Scroll to the Edit menu item.
Confirm your selection, then enter the desired text.
Scroll to the Store menu item.
Confirm your selection. The display shows the first four letters of the text.
i
• It is possible that your telephone is set up for Multiline instead of for partner
functions. If this is the case, then the partner functions are not available. Please
ask the TENOVIS Service for help.
• ”Labeling partner fields with text”: The function ”Direct dial: Destin.” may not be
activated during the procedure described above.
You can also label the partner fields via the telephone book: Find the desired
partner entry in the telephone book, edit (or enter the desired text) and store.
72
Using the telephone with partners
Using the telephone with partners Setting a deputy key
Scroll to the Further
functions:
menu item.
Confirm your selection.
Scroll to the Partners menu item.
Confirm your selection.
Scroll to the Set
deputy key
menu item.
Confirm your selection.
Press the key of the partners for whom call diversion is to be be activated.
Scroll to the Return menu item.
Confirm your selection.
Press the key of the partners to whom the calls are to be diverted to.
Confirm your selection. The calls for the partners selected are now diverted to
that partner. This diversion destination can also be your own call number.
You can now set a function key called ”Deputy key”. This key will switch the call
diversions in the idle display in the following manner:
Press key once: Setting a selective partner diversion
Press key twice: Deleting the selective partner diversion
i
• It is possible that your telephone is set up for Multiline instead of for partner
functions. If this is the case, then the partner functions are not available. Please
ask the TENOVIS Service for help.
• For more information on assigning function keys, see Chapter ”Setting function
keys” on Page 97.
73
Using the telephone with Multiline
Using the telephone with Multiline The TENOVIS Service has set up the telephone system so that you and each of
your colleagues have access to every line (32 available) in order to make and
answer calls.
The display provides you with information on all lines and calls. The keys of the
display act as line keys.
You can also connect a DSS module to have single or all lines displayed.
The following pages provide you with information about the functions that are
available for your telephone when using Multiline:
-- How to accept more than one call at a time
-- How to put calls on hold (Waiting position)
-- How to simultaneously conduct a refer--back
-- How to pick up calls from your colleagues
-- How to set call diversions
-- How to send text messages (Minimails)
-- How to lock lines
74
Using the telephone with Multiline
Using the telephone with Multiline Table of Contents
Information in the display . . . . . . . . . . . . . . . . . . . . . . . . . . . . . . . . . . . . . . . . . . . . . .
76
Occupying a line . . . . . . . . . . . . . . . . . . . . . . . . . . . . . . . . . . . . . . . . . . . . . . . . . . . . .
76
Answering a call to a phone line . . . . . . . . . . . . . . . . . . . . . . . . . . . . . . . . . . . . . . . .
76
Answering calls when you are already on the phone . . . . . . . . . . . . . . . . . . . . . . .
77
Automatic hold (basic setting) . . . . . . . . . . . . . . . . . . . . . . . . . . . . . . . . . . . . . . . . . .
77
Manual hold . . . . . . . . . . . . . . . . . . . . . . . . . . . . . . . . . . . . . . . . . . . . . . . . . . . . . . . . .
77
Exclusive hold . . . . . . . . . . . . . . . . . . . . . . . . . . . . . . . . . . . . . . . . . . . . . . . . . . . . . . .
77
Initiating refer--back . . . . . . . . . . . . . . . . . . . . . . . . . . . . . . . . . . . . . . . . . . . . . . . . . .
78
Initiating a conference via phone lines . . . . . . . . . . . . . . . . . . . . . . . . . . . . . . . . . . .
78
Setting call diversion . . . . . . . . . . . . . . . . . . . . . . . . . . . . . . . . . . . . . . . . . . . . . . . . . .
79
Setting additional call diversions - . . . . . . . . . . . . . . . . . . . . . . . . . . . . . . . . . . . . .
79
Deactivating call diversion . . . . . . . . . . . . . . . . . . . . . . . . . . . . . . . . . . . . . . . . . . . . .
80
Dialing a number from the local call list . . . . . . . . . . . . . . . . . . . . . . . . . . . . . . . . . .
81
Dialing a number from the central call list . . . . . . . . . . . . . . . . . . . . . . . . . . . . . . . .
81
Locking a line . . . . . . . . . . . . . . . . . . . . . . . . . . . . . . . . . . . . . . . . . . . . . . . . . . . . . . . .
82
Unlocking a line . . . . . . . . . . . . . . . . . . . . . . . . . . . . . . . . . . . . . . . . . . . . . . . . . . . . . .
82
Placing all lines on the DSS module - . . . . . . . . . . . . . . . . . . . . . . . . . . . . . . . . . .
83
Assigning lines to different line keys . . . . . . . . . . . . . . . . . . . . . . . . . . . . . . . . . . . . .
84
Activating line beep . . . . . . . . . . . . . . . . . . . . . . . . . . . . . . . . . . . . . . . . . . . . . . . . . . .
85
Setting the info display . . . . . . . . . . . . . . . . . . . . . . . . . . . . . . . . . . . . . . . . . . . . . . . .
86
Sending a Minimail . . . . . . . . . . . . . . . . . . . . . . . . . . . . . . . . . . . . . . . . . . . . . . . . . . .
87
Switching the line display on / off . . . . . . . . . . . . . . . . . . . . . . . . . . . . . . . . . . . . . . .
88
75
Using the telephone with Multiline
Using the telephone with Multiline Information in the display
Display
Meaning
Call number / name
Your telephone is idle
Call number / name +
A colleague is making a call (Connection)
Your own call
Call number / name flashes
You are receiving a call
with
Call number / name
Hold
Call number / name
Hold -- Recall according to time
Call number / name
Exclusive hold
flashes slowly, ”HOLD” message
flashes with
+
flashes slowly, ”EXHD” message
Call number / name flashes
with ”EX” message +
Exclusive hold -- Recall according to time
+
Occupying a line
Press the desired line key.
Lift the handset. The line is occupied. You can now call a subscriber as usual.
Answering a call to a phone line
A telephone rings. The corresponding line display flashes.
Press the line key. The call on this line is diverted to you. Your phone rings.
You can now answer the call.
i
• Four spaces per Multiline key are provided for information in the display fields.
If the name of the line is known, the first four characters of this name are
displayed. Otherwise, the last four digits of the line number are displayed.
76
Using the telephone with Multiline
Using the telephone with Multiline Answering calls when you are already on the phone
Press the line key for the call you want to pick up. The connection is put on
hold (see ”Automatic hold (basic setting)”).
Answering the call depends on the settings of your phone (see ”Setting the info
display”). If the automatic hold was deactivated by the service technician, the
connection is lost.
Automatic hold (basic setting)
You are making a call and want to retrieve a different call.
Press the desired line key. The current connection is placed on hold and you
are connected with the next caller.
Manual hold
You want to put a call on hold.
Press the HOLD key. It is positioned on the very right of bottom row.
This function is only available when there is no ”Refer--back” (i.e. consultation)
existing for this call. If that should be the case, a negative response tone sounds.
Exclusive hold
You want to put a call on exclusive hold.
Press the ”EXHD” function key. It is positioned on the very right of the top row.
Unlike the ”HOLD” function, no other subscriber can pick up this connection.
This function is only available when there is no Refer--back (i.e. consultation)
existing for this call. If that should be the case, a negative response tone sounds.
77
Using the telephone with Multiline
Using the telephone with Multiline Initiating refer--back
During a call:
Initiate refer--back. The caller is waiting.
...
Enter the number of the subscriber whom you want to consult. Once
the refer--back subscriber has answered the call, you can initiate a conference (see
Page 28).
Initiating a conference via phone lines
Setting up a conference is only possible if an active connection and a connection on
hold have been made.
Press the Conference function key.
Press the line key of the connection on hold (must happen within 3
seconds).
i
• You can set up your telephone in such a way that you only have to press the
destination key (not the line key) of the subscriber whom you would like to
consult. That subscriber is called immediately, without your having to press the
Refer--back key.
• No Multiline functions are available during a consultation or conference. The
following functions are thus not possible during a refer--back connection or
conference:
-- manual hold,
-- retrieve waiting subscriber,
-- pick up a call from another line,
-- occupy a new line.
In these cases, a negative response tone sounds. The Multiline functions are
completely useable again when the consultation or refer--back is ended.
• For more information on assigning function keys, see Chapter ”Setting function
keys” on Page 97.
78
Using the telephone with Multiline
Using the telephone with Multiline Setting call diversion
Scroll to the Call
diversion
menu item.
Confirm your selection.
Press a line key for the call number assigned to you, for which you want to set
up call diversion. This step is omitted if you only have one call number.
Scroll to the menu item Div. or Div.
...
busy .
Enter the internal call number to which the calls are to be diverted.
Confirm your selection. The display shows you the status message ”DIV xxxx
for LNxx” or ”DIV busy xxxx for LNxx” and the LED illuminates.
Setting additional call diversions Scroll to the Call
diversion
menu item.
Confirm your selection.
Press the line key for another call number allocated to you, for which you want
to set call diversion.
Scroll to the menu item Div. or Div.
...
busy .
Enter the internal call number to which the calls are to be diverted.
Confirm your selection. The display shows the status message ”Div. enabled”
and the LED stays illuminated.
i
• ”Setting additional call diversions” is only possible if you have at least two own
phone numbers.
• If you have several call diversions set up, you can have these displayed by
selecting the ”Call diversions enabled” status display.
79
Using the telephone with Multiline
Using the telephone with Multiline Deactivating call diversion
Scroll to the Call
diversion
menu item.
Confirm your selection.
Press the line key for which the call diversion is to be disabled.
This step is omitted if you have only one call number.
Select the active call diversion (indicated by ”+”).
Confirm your selection.
80
Using the telephone with Multiline
Using the telephone with Multiline Dialing a number from the local call list
A call on a line assigned to you has not been answered.
The idle display (status) shows the message ”New ln. call list”.
Scroll to the New
ln. call list
status item.
Confirm your selection.
Scroll to the desired entry. The right--hand side of the display shows you which
line assigned to you received the call.
Lift the handset.
Dialing a number from the central call list
A line that has been not been allocated to either you or one of your colleagues
received a call that was not answered.
The idle display (status) shows the message ”New ln. call list”.
Scroll to the New
ln. call list
status item.
Confirm your selection. You can now see which lines contain call list entries.
Scroll to the desired selection line, e.g. Call
list LN04 .
Confirm your selection. You can now see the call list data for the selected line.
Scroll to the desired entry.
Lift the handset.
81
Using the telephone with Multiline
Using the telephone with Multiline Locking a line
Scroll to the Lock menu item.
Confirm your selection.
Press a line key for the call number assigned to you that you want to lock. This
step is omitted if you only have one call number.
Scroll to the Lock menu item.
Confirm your selection. The display shows you how many of
your call numbers are locked.
Unlocking a line
Scroll to the Lock menu item.
Confirm your selection.
Press the line key of the line you want to unlock.
This step is omitted if you have only one call number.
...
Enter the current PIN for this line.
• Locking a line blocks the local functions of the telephone.
i
• The Lock line function is only available if all subscribers in the Multiline group
have the same PIN length for the central lock (system lock). Should questions
arise, please ask your TENOVIS Service.
82
Using the telephone with Multiline
Using the telephone with Multiline Placing all lines on the DSS module Scroll to the Further
functions:
menu item.
Confirm your selection.
Scroll to the Line
function
menu item.
Confirm your selection.
Scroll to the Set
line position
menu item.
Confirm your selection.
Scroll to the Lines
on DSS module
menu item.
Confirm your selection. All existing lines are signaled only on the DSS module
by light diodes.
Light diode
Connection
off
on
on
quickly flashing
slowly flashing
quickly flashing
slowly flashing
quickly flashing
free (idle status)
connection
your own connection
call
hold
hold -- recall according to time
exclusive hold
excl. hold -- recall according to time
i
• By selecting the ”Lines on telephone” menu item you can display the first 10
lines on the telephone. Lines 11 through 32 are not available.
• The DSS module is not part of the items delivered as standard.
83
Using the telephone with Multiline
Using the telephone with Multiline Assigning lines to different line keys
Scroll to the Further
functions:
menu item.
Confirm your selection.
Scroll to the Line
function
menu item.
Confirm your selection.
Scroll to the Set
line position
menu item.
Confirm your selection.
Press the line key which you want to assign to a different key.
Press the line or destination key to which it is supposed to be assigned. The
line is now assigned to a new key.
i
• If the desired line is not shown in the display, you can display it with the
corresponding menu item (”Line 1-10”, ”Line 11-20”, ”Line 21-30” or ”Line
31-32”).
• If you have a DSS module, you can also place individual lines on the DSS
module, or from the DSS module back onto the line or destination keys of the
telephone.
84
Using the telephone with Multiline
Using the telephone with Multiline Activating line beep
Scroll to the Further
functions:
menu item.
Confirm your selection.
Scroll to the Line
function
menu item.
Confirm your selection.
Scroll to the Set
line beep
menu item.
Confirm your selection.
Press the desired line key repeatedly until every line has been signaled
according to your needs.
The following signals are available:
A
A
If you want an alerting tone for the chosen
line, press the line key once to select a
small triangle.
If you want normal ringing for a chosen
line, press the key twice to select a large
triangle.
• Only those lines which you have specified are shown in the display.
i
85
Using the telephone with Multiline
Using the telephone with Multiline Setting the info display
Scroll to the Further
functions:
menu item.
Confirm your selection.
Scroll to the Line
function
menu item.
Confirm your selection.
Scroll to the Set
info display
menu item.
Confirm your selection. You can now specify whether you want to retrieve a
call directly or pick up a calling / on--hold line via an info query. Each type requires
its own operating procedures:
Info Retrieve on:
1. Press the line key of the connection on--hold.
(Display: ”HOLD”).
The call number of the caller on hold is shown in the display.
2. Select the ”Accept call” menu item and press ”Enter”,
or lift the handset.
The telephone connection is established.
Info Retrieve off:
Press the line key of the connection on hold
(Display: ”HOLD”, Handsfree mode is activated),
or lift the handset.
The telephone connection is established.
Info Answer call on:
1. Press the line key indicating the call. The display contains
information on the caller.
2. Select the ”Accept call” menu item and press ”Enter”,
or lift the handset.
The telephone connection is established.
Info Answer call off:
Press the line key indicating a call (Handsfree mode is activated)
or lift the handset.
The telephone connection is established.
86
Using the telephone with Multiline
Using the telephone with Multiline Sending a Minimail
Scroll to the Messages: menu item.
Confirm your selection.
Scroll to the Send
Minimail
menu item.
Confirm your selection.
Scroll to the desired menu item, e.g. Meeting
...
00:00 00.00 .
Complete the entry, i.e. enter the date and time.
Confirm the entry.
...
Enter the call number of the recipient.
Confirm your selection. ”+” indicates, that the subscriber has been selected.
Press the line key for a call number assigned to you, for which you want to
send a Minimail. This step is omitted if you only have one call number.
Scroll to the Send menu item.
Confirm your selection. The display indicates a successful transfer of the
message:
“?”:
”+”:
”--”:
The message is being sent.
The message has reached its destination.
The subscriber could not be reached.
87
Using the telephone with Multiline
Using the telephone with Multiline Switching the line display on / off
Scroll to the Further
functions:
menu item.
Confirm your selection.
Scroll to the Line
function
menu item.
Confirm your selection.
Press the desired line key that is to be or is not to be displayed. The black
triangle disappears.
88
Customise your telephone
Switching the mode of operation
You can change the mode of operation according to your needs. There are three
different ways the menus can be displayed.
-- Simple mode: All three lines of the display are used for the menu.
-- Standard mode: Your telephone is originally set to the standard mode. The current
menu item is displayed in the first line of text. You can use the arrow keys to scroll
to the other menu items. The second and third lines of text display the assignments of the function keys. The modes of operation described in this manual refer
to the standard mode.
-- Soft key mode: If you are familiar with the use of this telephone you can switch to
the soft key mode. While using the telephone you can operate all functions with
help of the display keys. For example, to change the handset volume,
press only one of the two corresponding display keys.
Switching the mode of operation
Scroll to the Further
functions:
menu item.
Confirm your selection.
Scroll to the Phone
settings
menu item.
Confirm your selection.
Scroll to the Mode
of operation
menu item.
Press the Enter key repeatedly until the desired mode of operation appears.
89
Customise your telephone
Silencing the telephone
You can deactivate the normal ringing, signal tone and VIP ringing if, for example,
you are in a meeting. An incoming call is then indicated only by the alerting tone.
If you are a subscriber to a group line, you can temporarily cut yourself out of the
group line.
Table of Contents
Deactivating the ringing / signal tone / VIP tone . . . . . . . . . . . . . . . . . . . . . . . . . . .
91
Activating the ringing / signal tone / VIP tone . . . . . . . . . . . . . . . . . . . . . . . . . . . . .
91
Leaving a group line - . . . . . . . . . . . . . . . . . . . . . . . . . . . . . . . . . . . . . . . . . . . . . . . .
92
90
Customise your telephone
Silencing the telephone
Deactivating the ringing / signal tone / VIP tone
Scroll to the Further
functions:
menu item.
Confirm your selection.
Scroll to the Further
Settings:
menu item.
Confirm your selection.
Scroll to the Silence menu item.
Confirm your selection.
Scroll to the desired menu item, e.g. Ringing
tone .
Switch the desired tone to ”off”.
Activating the ringing / signal tone / VIP tone
Scroll to the Further
functions:
menu item.
Confirm your selection.
Scroll to the Further
Settings:
menu item.
Confirm your selection.
Scroll to the Silence menu item.
Confirm your selection.
Scroll to the desired menu item, e.g. Ringing
tone .
Switch the desired tone to ”on”.
91
Customise your telephone
Silencing the telephone
Leaving a group line Scroll to the Further
functions:
menu item.
Confirm your selection.
Scroll to the Phone
settings
menu item.
Confirm your selection.
Scroll to the Part
of group
menu item.
Switch the menu item to ”off”. Calls will then be diverted to the next group line
subscriber.
92
Customise your telephone
Taking a call elsewhere (Following) You can also use another telephone to set up call diversion to your own phone. You
first have to prepare this function on your own telephone.
The process is set, activated and deactivated with particular codes. Please contact
your TENOVIS Service for the valid codes.
Table of Contents
Preparing the Following process on your own telephone . . . . . . . . . . . . . . . . . . .
94
Activating the Following process on another telephone . . . . . . . . . . . . . . . . . . . .
94
Deactivating the Following process on your own telephone . . . . . . . . . . . . . . . . .
95
Deactivating the Following process on another telephone . . . . . . . . . . . . . . . . . .
95
93
Customise your telephone
Taking a call elsewhere (Following) Preparing the Following process on your own telephone
Lift the handset.
Press the Star key and enter the code, e.g. ”13”.
Replace the handset.
Activating the Following process on another telephone
At the other phone:
Lift the handset.
Press the Star key and enter the code, e.g. ”14”.
...
Dial your own call number.
Replace the handset. Incoming calls to your telephone are then diverted to the
other phone.
94
Customise your telephone
Taking a call elsewhere (Following) Deactivating the Following process on your own telephone
Lift the handset.
Press the Hash key and enter the code, e.g. ”13”.
Replace the handset.
Deactivating the Following process on another telephone
At another phone:
Lift the handset.
Press the Hash key and enter the code, e.g. ”14”.
...
Dial your own call number.
Replace the handset.
95
Customise your telephone
Double Call
Your telephone and another telephone ring simultaneously for the same incoming
call.
Double Call is set, activated and deactivated with particular codes.
Setting a Double Call destination
Lift the handset.
Press the Star key and, for example, enter the code ”33”.
...
Enter the call number of your Double Call destination.
Press the Hash key.
Replace the handset.
Activating Double Call
Lift the handset.
Press the Star key and, for example, enter the code ”34”.
Replace the handset.
Deactivating Double Call
Lift the handset.
Press the Hash key and, for example, enter the code ”34”.
Replace the handset.
96
Customise your telephone
Setting function keys
You can assign often used functions to the programmable function keys. These
functions can then be performed by simply pressing the respective key.
You can find more information on this subject on Page 137.
Setting function keys
Scroll to the Further
functions:
menu item.
Confirm your selection.
Scroll to the Set
function keys
menu item.
Confirm your selection.
Press the key to which you want to assign the new function.
Press the desired function, e.g. Second
call .
Confirm your selection.
Resetting a function key
Scroll to the Further
functions:
menu item.
Confirm your selection.
Scroll to the Set
function keys
menu item.
Confirm your selection.
Press the key whose function you want to delete.
Scroll to the Function
key free
menu item.
Confirm your selection.
97
Customise your telephone
Setting macro functions
You can assign multiple--step macro functions to the function keys of your telephone. This, for example, allows you to activate and deactivate a fixed call diversion
by simply pressing a key.
Table of Contents
Assigning a macro to a function key . . . . . . . . . . . . . . . . . . . . . . . . . . . . . . . . . . . . .
99
Assigning partner diversion to a function key . . . . . . . . . . . . . . . . . . . . . . . . . . . . . 100
Enabling a function key . . . . . . . . . . . . . . . . . . . . . . . . . . . . . . . . . . . . . . . . . . . . . . . . 101
98
Customise your telephone
Setting macro functions
Assigning a macro to a function key
Scroll to the Further
functions:
menu item.
Confirm your selection.
Scroll to the Set
up macro
menu item.
Confirm your selection.
Select the desired function: DIV1 or DIV2 for call diversion, or PCK1 or PCK2
for Call pick--up.
...
Enter the call number to which you want to divert the calls (Call diversion), or from which you want to pick up calls (Call pick--up).
Confirm your selection.
Press the key to which you want to assign the macro function.
Select the desired macro function, e.g. PCK1 .
Confirm your selection.
• Each function can be assigned twice.
i
99
Customise your telephone
Setting macro functions
Assigning partner diversion to a function key
Scroll to the Further
functions:
menu item.
Confirm your selection.
Scroll to the Set
up macro
menu item.
Confirm your selection.
Select function PDV1 or PDV2.
Use the partner keys to enter the call numbers for which you want to set up the
partner diversion.
Call diversion from x to y:
Enter two partners to set up the simple partner diversion. This call diversion can be
activated or deactivated later by simply pressing a key.
Call diversion from x to y or z:
Enter three partners to set up the partner diversion with two destinations. You can
then switch between these two destinations by simply pressing a key.
Confirm your selection.
Press the key to which you want to assign the macro function.
Select the desired macro function.
Confirm your selection.
i
• The partner diversion with two destinations can only be deactivated via the
partner menu.
100
Customise your telephone
Setting macro functions
Enabling a function key
Scroll to the Further
functions:
menu item.
Confirm your selection.
Scroll to the Set
up macro
menu item.
Confirm your selection.
or
Scroll down through all functions or press the Enter key.
Press the key that is to be enabled.
Scroll to the Function
key free
menu item.
Confirm your selection.
101
Customise your telephone
Telephone settings
You can set your telephone according to your individual needs. This function gives
you the option, for example, to activate the Second Call or to set the DTMF pulse
duration. Should questions arise, please ask your TENOVIS Service.
Setting the telephone
Scroll to the Further
functions:
menu item.
Confirm your selection.
Scroll to the Phone
settings
menu item.
Confirm your selection.
Select the desired menu item, e.g. Second
call .
Switch the menu item to ”off”, for example.
102
Customise your telephone
Deactivating the automatic tone dial (DTMF)
Your telephone has been set as standard to send the pressing of a key as a tone
when dialing during a connection. This allows you, for example, to query the Voice
mail or to remotely operate the answering machine. These digits are neither displayed nor entered into the redial memory.
Deactivating the automatic tone dial (DTMF)
Scroll to the Further
functions:
menu item.
Confirm your selection.
Scroll to the Phone
settings
menu item.
Confirm your selection.
Select the Auto.
postdial/DTMF
menu item.
Switch the menu item to ”off”.
Re--activating the automatic tone dial
Scroll to the Further
functions:
menu item.
Confirm your selection.
Scroll to the Phone
settings
menu item.
Confirm your selection.
Select the Auto.
postdial/DTMF
menu item.
Set the menu item to ”on”.
103
Customise your telephone
Activating key beep
You can set the telephone to indicate the pressing of a key by a beep (key beep).
Activating the key beep
Scroll to the Further
functions:
menu item.
Confirm your selection.
Scroll to the Phone
settings
menu item.
Confirm your selection.
Select the Key
beep
menu item.
Set the menu item to ”on”.
i
• If you want to deactivate the key beep, simply set the menu item to ”off”.
104
Customise your telephone
Time Zones
The current time of 26 cities can be displayed.
Viewing the time zone
Scroll to the Alter.
time zone
menu item.
Confirm your selection. The display shows the current time of 26 cities.
i
• Due to the varying changeovers between standard and daylight--savings times
from country to country, the time which your telephone displays for a particular
city may not correspond to the actual time of that city.
105
Customise your telephone
Private User Mobility With your personal call number you can simply log in to every telephone within your
system. This allows you to use this telephone in the same manner as your own.
This function is secured by a Personal Identification Number (PIN).
To use this function, it has to be enabled in the system and two function keys need
to be assigned with the functions ”Sign up” and ”Sign off”.
Signing up at a telephone / ”Log on”
ON
Press the Sign up function key.
...
Enter your personal call number.
Scroll to the ”Password” menu item.
...
Enter your PIN. The digits are shown as asterisks ” * ” in the display.
Scroll to the Login
user
menu item.
Confirm your selection. The display shows a status message. You are now
signed up at this telephone and can use it in the same manner as your own.
Signing off from the telephone / ”Log off”
OFF
or PUM 5595 Press the Sign off function key or select the
corresponding status message.
You are now logged off from this telephone. Your personal settings (redial, call
diversion, entered recalls) are deleted.
i
• If you sign up at another telephone, the call and talk lists are not available to you.
Anrufliste und keine Gesprächsliste zur Verfügung.
• You are automatically logged out if another subscriber signs up to this telephone
with their personal call number.
106
Customise your telephone
Storing personal data
Your personal telephone settings can be stored locally in the telephone unit, as well
as centrally in the system, if enabled by the TENOVIS Service. Your data is protected in the telephone system by a password. The TENOVIS Service can centrally
store or play back your personal telephone data. This can be avoided by blocking
the central data saving.
Table of Contents
Locally storing data immediately . . . . . . . . . . . . . . . . . . . . . . . . . . . . . . . . . . . . . . . . 108
Locally storing data automatically . . . . . . . . . . . . . . . . . . . . . . . . . . . . . . . . . . . . . . . 108
Deactivating local data saving . . . . . . . . . . . . . . . . . . . . . . . . . . . . . . . . . . . . . . . . . . 109
Centrally storing data immediately - . . . . . . . . . . . . . . . . . . . . . . . . . . . . . . . . . . .
110
Blocking central data saving . . . . . . . . . . . . . . . . . . . . . . . . . . . . . . . . . . . . . . . . . . .
111
107
Customise your telephone
Storing personal data
Locally storing data immediately
Scroll to the Further
functions:
menu item.
Confirm your selection.
Scroll to the Further
Settings:
menu item.
Confirm your selection.
Scroll to the Save
menu item.
data
Confirm your selection.
Scroll to the Save
data
immediately
menu item.
Confirm your selection.
Locally storing data automatically
Scroll to the Further
functions:
menu item.
Confirm your selection.
Scroll to the Further
Settings:
menu item.
Confirm your selection.
Scroll to the Save
data
menu item.
Confirm your selection.
Scroll to the Save
...
108
data at
00:00
menu item.
Enter the time when the local data saving is to be executed.
Customise your telephone
Storing personal data
Deactivating local data saving
Scroll to the Further
functions:
menu item.
Confirm your selection.
Scroll to the Further
Settings:
menu item.
Confirm your selection.
Scroll to the Save
data
menu item.
Confirm your selection.
Scroll to the Save
data
on
menu item.
Switch the menu item to ”off”.
i
• If you want to reactivate the local data storing, scroll to the ”Save data off”
menu item and select ”on”.
109
Customise your telephone
Storing personal data
Centrally storing data immediately Scroll to the Further
functions:
menu item.
Confirm your selection.
Scroll to the Further
Settings:
menu item.
Confirm your selection.
Scroll to the Save
data
menu item.
Confirm your selection.
Scroll to the Save
centrally immediately
menu item.
Confirm your selection.
...
Enter your PIN. The digits are shown as asterisks ” * ” in the display.
The message ”Save data centrally” is shown in the display. Your data is now saved.
110
Customise your telephone
Storing personal data
Blocking central data saving
Scroll to the Further
functions:
menu item.
Confirm your selection.
Scroll to the Further
Settings:
menu item.
Confirm your selection.
Scroll to the Save
data
menu item.
Confirm your selection.
Scroll to the Save
centrally
free
menu item.
Confirm your selection.
...
Enter your PIN. The digits are shown as asterisks ” * ” in the display.
Your data can no longer be saved centrally.
i
• If you want to reactivate the local data storing, scroll to the ”Save centrally
Barred” menu item and select ”Free”.
111
Customise your telephone
Setting VIP functions With appropriate preparations you can set special functions between the telephones
of your system. In order to do this, the pre--settings of the sending and the receiving
telephones need to correspond with each other. The following pages will give you
examples for typical uses of the VIP functions. To simplify matters, the sending telephone will be called the ”executive set” and the receiving telephone the ”secretary’s
set” in these examples.
Table of Contents
Automatic call answering (Handsfree answer back) . . . . . . . . . . . . . . . . . . . . . . .
113
Using an executive phone as intercom to the reception area . . . . . . . . . . . . . . .
114
Sending a message from the executive set to the secretary’s busy set . . . . . . .
117
Announcements from the executive set . . . . . . . . . . . . . . . . . . . . . . . . . . . . . . . . . .
119
Using the VIP functions . . . . . . . . . . . . . . . . . . . . . . . . . . . . . . . . . . . . . . . . . . . . . . . 121
Deactivating all VIP functions . . . . . . . . . . . . . . . . . . . . . . . . . . . . . . . . . . . . . . . . . . 122
Deactivating VIP functions for certain telephones . . . . . . . . . . . . . . . . . . . . . . . . . 123
Menu items that prepare your telephone for receiving VIP calls . . . . . . . . . . . . . 124
Menu items that prepare your telephone for sending VIP calls . . . . . . . . . . . . . . 125
112
Customise your telephone
Setting VIP functions Automatic call answering (Handsfree answer back)
Scroll to the Further
functions:
menu item.
Confirm your selection.
Scroll to the Further
Settings:
menu item.
Confirm your selection.
Scroll to the VIP
functions
menu item.
Confirm your selection.
Scroll to the Get
VIP functions
menu item.
Confirm your selection.
...
Enter your PIN. The digits are shown as asterisks ” * ” in the display.
To activate the VIP functions, set the ”Receive VIP functions” menu item to
”on”, if you want VIP functions to be possible for all subscribers, to
”Auth.”, if the VIP functions should only be possible for those subscribers indicated
by the entry ”VIP number yes” in your telephone book.
Scroll to the Hands-free
Set Hands-free
answer
answer
menu item.
to ”on”. The LED flashes.
i
• The function ”Setting VIP functions” is not installed as standard on your phone.
113
Customise your telephone
Setting VIP functions Using an executive phone as intercom to the reception area
Setting the executive set:
Scroll to the Further
functions:
menu item.
Confirm your selection.
Scroll to the Further
Settings:
menu item.
Confirm your selection.
Scroll to the VIP
functions
menu item.
Confirm your selection.
Scroll to the Send
VIP funct.
menu item.
Confirm your selection.
...
Enter your PIN.
Set the Send
VIP funct.
menu item to ”on”.
Leave the menu.
Call up the telephone book to indicate the entry for the secretary’s set.
Select the desired entry, edit and scroll to the Attribute menu item.
Press the Enter key repeatedly until Announce/Ackn. appears.
Scroll to the Store menu item.
Confirm your selection. The executive set is now prepared to execute this function.
• ”Setting VIP functions” is not installed as standard on your phone.
114
i
Customise your telephone
Setting VIP functions Using an executive phone as intercom to the reception area (cont.)
Setting the secretary’s set:
Scroll to the Further
functions:
menu item.
Confirm your selection.
Scroll to the Further
Settings:
menu item.
Confirm your selection.
Scroll to the VIP
functions
menu item.
Confirm your selection.
Scroll to the Get
VIP functions
menu item.
Confirm your selection.
...
Enter your PIN.
Set the Get
VIP functions
menu item to Authorized
users .
Scroll to the Announce/Ackn. menu item.
Set the Announce/Ackn. menu item to ”on”.
Leave the menu.
• ”Setting VIP functions” is not installed as standard on your phone.
i
115
Customise your telephone
Setting VIP functions Using an executive phone as intercom to the reception area (cont.)
Setting the secretary’s set (cont.):
Call up the telephone book to indicate the entry of the executive set
as VIP.
Select the desired entry, edit and scroll to the VIP
Set VIP
number
number
menu item.
to Yes .
Scroll to the Store menu item.
Confirm your selection. This entry is now indicated as ”executive set”.
• ”Setting VIP functions” is not installed as standard on your phone.
116
i
Customise your telephone
Setting VIP functions Sending a message from the executive set to the secretary’s busy set
Setting the executive set:
Scroll to the Further
functions:
menu item.
Confirm your selection.
Scroll to the Further
Settings:
menu item.
Confirm your selection.
Scroll to the VIP
functions
menu item.
Confirm your selection.
Scroll to the Send
VIP funct.
menu item.
Confirm your selection.
...
Enter your PIN.
Set the Send
VIP funct.
menu item to ”on”.
Leave the menu.
Call up the telephone book to indicate the entry for the secretary’s set.
Select the desired entry, edit and scroll to the Attribute menu item.
Press the Enter key repeatedly until Text
if busy
appears.
Scroll to the Store menu item.
Confirm your selection. The executive set is now prepared to execute this function.
• ”Setting VIP functions” is not installed as standard on your phone.
i
117
Customise your telephone
Setting VIP functions Sending a message from the executive set to the secretary’s busy set (cont.)
Setting the secretary’s set:
Scroll to the Further
functions:
menu item.
Confirm your selection.
Scroll to the Further
Settings:
menu item.
Confirm your selection.
Scroll to the VIP
functions
menu item.
Confirm your selection.
Scroll to the Get
VIP functions
menu item.
Confirm your selection.
...
Enter your PIN.
Set the Get
VIP functions
menu item to Authorized
users .
Leave the menu.
Call up the telephone book to indicate the entry of the executive set as VIP.
Select the desired entry, edit and scroll to the VIP
Set VIP
number
number
menu item.
to Yes .
Scroll to the Store menu item and confirm with
.
• ”Setting VIP functions” is not installed as standard on your phone.
118
i
Customise your telephone
Setting VIP functions Announcements from the executive set
Setting the executive set:
Scroll to the Further
functions:
menu item.
Confirm your selection.
Scroll to the Further
Settings:
menu item.
Confirm your selection.
Scroll to the VIP
functions
menu item.
Confirm your selection.
Scroll to the Send
VIP funct.
menu item.
Confirm your selection.
...
Enter your PIN.
Set the Send
VIP funct.
menu item to ”on”.
Leave the menu.
Call up the telephone book to indicate the entry for the secretary’s set.
Select the desired entry, edit and scroll to the Attribute menu item.
Press the Enter key repeatedly until Announcement appears.
Scroll to the Store menu item.
Confirm your selection. The executive set is now prepared to execute this function.
• ”Setting VIP functions” is not installed as standard on your phone.
i
119
Customise your telephone
Setting VIP functions Announcements from the executive set (cont.)
Setting the secretary’s set:
Scroll to the Further
functions:
menu item.
Confirm your selection.
Scroll to the Further
Settings:
menu item.
Confirm your selection.
Scroll to the VIP
functions
menu item.
Confirm your selection.
Scroll to the Get
VIP functions
menu item.
Confirm your selection.
...
Enter your PIN.
Set the Get
VIP functions
menu item to Authorized
users .
Leave the menu.
Call up the telephone book to indicate the entry of the executive set as VIP.
Select the desired entry, edit and scroll to the VIP
Set VIP
number
number
menu item.
to ”yes”.
Scroll to the Store menu item and confirm with
.
• ”Setting VIP functions” is not installed as standard on your phone.
120
i
Customise your telephone
Setting VIP functions Using the VIP functions
Using the Announcement / Intercom functions:
Secretary
Press the corresponding destination key or select the telephone book
entry.
Press the Handsfree key or lift the handset. Do not press the Call monitoring
key (otherwise you will place a normal call)! The secretary’s set automatically activates the Handsfree mode. Both subscribers can now talk to each other. When ”Announcement” is selected, the secretary’s set automatically activates the loudspeaker. You can make an announcement.
Sending a message to the secretary’s set when it is busy:
Secretary
Press the corresponding destination key or select the telephone book
entry.
Press the Handsfree key or lift the handset. Do not press the Call monitoring
key (otherwise you will place a normal call)! The secretary’s set will enter the message ”Please call back” into the call list if the line is busy and the Second call function
is not available.
• ”Setting VIP functions” is not installed as standard on your phone.
i
121
Customise your telephone
Setting VIP functions Deactivating all VIP functions
Scroll to the Further
functions:
menu item.
Confirm your selection.
Scroll to the Further
Settings:
menu item.
Confirm your selection.
Scroll to the VIP
functions
menu item.
Confirm your selection.
Scroll to the Send
VIP funct.
menu item.
Confirm your selection.
...
Enter your PIN.
Set the menu items ”Send VIP functions”, ”Announcement/Acknowledgement”,
”Hands--free answer back” and ”Get VIP functions” to ”off”.
Confirm your selection.
• ”Setting VIP functions” is not installed as standard on your phone.
122
i
Customise your telephone
Setting VIP functions Deactivating VIP functions for certain telephones
(”Receiving VIP functions” must be set to ”Authorised”)
For removing single VIP functions:
Call up the telephone book.
Select the desired entry and scroll to the Attribute menu item.
Press the Enter key repeatedly until Normal
call
appears.
Scroll to the Store menu item.
Confirm your selection.
For incoming VIP functions:
Call up the telephone book.
Select the desired entry and scroll to the VIP
number
menu item.
Switch the ”VIP number” menu item to No .
Scroll to the Store menu item.
Confirm your selection.
• ”Setting VIP functions” is not installed as standard on your phone.
i
123
Customise your telephone
Setting VIP functions Menu items that prepare your telephone for receiving VIP calls
Announce/Ackn (in the ”Telephone settings” menu)
Announcement with acknowledgement. You hear a short signal tone, your
telephone automatically activates the Handsfree mode and you can answer
directly. The caller needs to have this attribute activated in his telephone.
Set the ”Receive VIP functions” to ”Authorised” or to ”on”.
Authorised users: Only specified subscribers can use this function for your
telephone. The call number of the caller must be indicated as a VIP number
in your telephone book.
on: All subscribers can use this function for your telephone.
If your line is busy, this call will be received as a second call.
Display VIP mess.
View the message (standard message ”Please call back”), that has been
received from a VIP subscriber while your line was busy.
Hands-free answer back
If ”Hands--free answer back” is activated, the LED on your telephone will
blink. A short signal tone will sound during an incoming call and your telephone automatically activates the Handsfree mode. You can answer directly. To activate the ”Handsfree answer back” mode, you first need to
enter your PIN (Personal Identification Number).
The ”Receive VIP functions” menu item must be set to ”on” or ”Authorised”.
If your line is busy, this call will be received as a second call.
In order to avoid abuse and involuntary monitoring of other subscribers, the
setup of VIP functions is protected by a PIN.
Please note: For the setting ”Receive VIP functions on”, your microphone
is activated for every call if you did not temporarily deactivate it with your
PIN. A short signal tone sounds. The microphone is activated and all conversations can be heard throughout the room.
VIP ringing tone
Incoming calls from VIP subscribers are indicated by a special signal tone.
The VIP tone can be activated or deactivated in the ”Silence” menu.
• ”Setting VIP functions” is not installed as standard on your phone.
124
i
Customise your telephone
Setting VIP functions Get VIP functions
off: The VIP function is not available.
Authorised users: The VIP functions are only available for subscribers
that you have previously indicated in your telephone book by the entry ”VIP
number yes”.
on: VIP functions available for all subscribers.
VIP number
You are indicating a call number as a VIP number in your telephone book.
Menu items that prepare your telephone for sending VIP calls
Attribute (in the telephone book)
The receiving subscriber needs to have the function ”Receive VIP functions” activated in order to receive the attributes.
Normal call: The VIP functions are deactivated and the telephone will receive an incoming call like a normal telephone.
VIP call: A call placed via partner or destination keys rings with a VIP ringing tone. The call number of the calling subscriber is displayed.
Announcement: You can make an announcement. The telephone of the
called VIP partner activates the monitoring.
Announcement with acknowledgement: You can make an announcement. The called telephone will activate the handsfree microphone and the
VIP subscriber can answer directly.
Text if busy: You can send messages to the called VIP subscriber if their
line is busy.
Send VIP funct. (in the ”Telephone settings” menu)
Activates /deactivates the VIP functions on your telephone.
• ”Setting VIP functions” is not installed as standard on your phone.
i
125
Customise your telephone
Setting audio, contrast and language
You can modify various audio settings as well as the contrast of the display.
You can also change the language of the display texts at any time. The language of
the prepared Minimails can be changed independently of the language of the display texts. The available languages are English, German and French.
Table of Contents
Adjusting audio and contrast . . . . . . . . . . . . . . . . . . . . . . . . . . . . . . . . . . . . . . . . . . . 127
Changing the language for the display and Minimail . . . . . . . . . . . . . . . . . . . . . . . 128
126
Customise your telephone
Setting audio, contrast and language
Adjusting audio and contrast
Scroll to the Further
functions:
menu item.
Confirm your selection.
Scroll to the Further
Settings:
menu item.
Confirm your selection.
Scroll to the Audio/Contrast menu item.
Confirm your selection.
Scroll to the desired menu item, e.g. Loudsp.
..
1...8 .
Use the number keys to enter the desired volume of 1 to 8.
Confirm the entry. The settings are stored.
i
• To reset a value to the normal setting (work setting): Press the “Star” key. The
current value will be reset to the pre--set value.
127
Customise your telephone
Setting audio, contrast and language
Changing the language for the display and Minimail
Scroll to the Further
functions:
menu item.
Confirm your selection.
Scroll to the Further
Settings:
menu item.
Confirm your selection.
Scroll to the Switch
language
menu item.
Confirm your selection.
Select the desired language for the display texts, e.g. Deutsch .
Confirm your selection.
Select the desired language for the Minimail, e.g. English .
Confirm your selection.
i
• If you change the language of the Minimail texts, all texts which you have
entered or modified yourself will be reset to the basic status.
128
Customise your telephone
Activating the CSTA Answer Call If your telephone network and your PC network for CSTA (Computer Service Telephony Application) are connected to each other and the CSTA Answer Call function is activated, you can also receive calls on your PC. When the telephone rings,
simply click the symbol for the CSTA Answer Call on your computer screen. The
telephone automatically activates the Handsfree mode and you can speak with the
caller.
Activating the CSTA Answer Call on your telephone
Scroll to the Further
functions:
menu item.
Confirm your selection.
Scroll to the Telephone
Settings:
menu item.
Confirm your selection.
Scroll to the CSTA
Answer Call
menu item.
Confirm your selection.
...
Enter your PIN.
Set CSTA
Answer Call
to ”on”.
i
• To deactivate this function, repeat these steps and select the option ”off” instead
of ”on”.
129
Customise your telephone
Activating call monitoring when AEI--dialing
You can connect your telephone to a PC and operate the phone with the according
software. You can specify directly at the phone whether Call monitoring should be
activated when you dial with the PC.
Activating Call monitoring when AEI--dialing
Scroll to the Further
functions:
menu item.
Confirm your selection.
Scroll to the Further
Settings:
menu item.
Confirm your selection.
Scroll to the Headset/AEI menu item.
Confirm your selection.
Scroll to the Monit.
Set Monit.
AEI X/Y calls
AEI X/Y calls
menu item.
to ”on”.
i
• To deactivate this function, repeat these steps and select the option ”off” instead
of ”on”.
130
Extras for your telephone
Konf--Tel external handsfree equipment You can connect the external handsfree equipment ”Konf-Tel Conference Unit
101/AEI” to the AEI interface of your telephone to improve handsfree quality.
The built--in microphone and loudspeaker on your phone are then deactivated. You
can adjust the handsfree volume directly on the Konf--Tel.
Activating Konf-Tel . . . . . . . . . . . . . . . . . . . . . . . . . . . . . . . . . . . . . . . . . . . . . . . . . . . 132
131
Extras for your telephone
Konf--Tel external handsfree equipment Activating Konf-Tel
Scroll to the Further
functions:
menu item.
Confirm your selection.
Scroll to the Further
Settings:
menu item.
Confirm your selection.
Scroll to the Headset/AEI menu item.
Confirm your selection.
Scroll to the Headset
present
menu item.
Press the Redial key repeatedly until AEI appears.
Scroll to the AEI
operation
menu item.
Press the Redial key repeatedly until Y ETSI AT appears. The settings are
stored. The handsfree equipment is properly connected.
132
Extras for your telephone
DSS module The TENOVIS Service can connect up to two DSS modules to your telephone.
(DSS module = Direct Station Select module)
Every DSS module has 36 keys, which the TENOVIS Service can assign according
to your needs. The following options are available:
-- Call numbers of your partners
-- Individual destinations (frequently used call numbers)
-- Line keys (for Multiline)
Keys with light
diode
Labelling strips
Dialing with the DSS module . . . . . . . . . . . . . . . . . . . . . . . . . . . . . . . . . . . . . . . . . . . 134
133
Extras for your telephone
DSS module Dialing with the DSS module
Lift the handset.
Press the DSS key for the desired subscriber.
For partner keys the light diode indicates whether the connection is free or busy.
Light diode
Connection
off
on
free (idle status)
busy
slowly flashing
quickly flashing
call
second call
i
• Instead of lifting the handset first and then dialing, you can also press the DSS
key for the desired subscriber and then lift the handset (Dialing with handset
on--hook).
134
Extras for your telephone
Handsfree with auxiliary loudspeaker You can connect an auxiliary loudspeaker to your telephone for improved handsfree
quality.
Connecting an auxiliary loudspeaker
Plug connector
AEI interface on bottom
of telephone
XY
Z
AEI
-- Pull the plug connector out of the AEI--Z interface on the telephone.
Do not lose the plug connector, or you will not be able to deactivate the auxiliary
loudspeaker later!
-- Connect the auxiliary loudspeaker to the AEI--Z interface on the phone.
-- Place the auxiliary loudspeaker at least 80 cm away from the phone in order to
prevent annoying echoes.
135
Extras for your telephone
Handsfree with auxiliary loudspeaker Setting an auxiliary loudspeaker
Scroll to the Further
functions:
menu item.
Confirm your selection.
Scroll to the Further
settings:
menu item.
Confirm your selection.
Scroll to the Audio/Contrast menu item.
Confirm your selection.
Scroll to the Loudsp.
..
1...8
menu item.
Use the number keys to enter the desired volume of 1 to 8. For optimum
Handsfree mode quality, keep the volume setting as low as possible.
Scroll to the Handsfree
1..4
menu item.
Enter the number 4: The new setting is then saved. If your call partner informs
you that the transmission quality is not optimal, you can set the Handsfree mode
one step back.
Deactivating the auxiliary loudspeaker
-- Pull the plug of the auxiliary loudspeaker out of the AEI--Z interface on the phone.
-- Insert the plug connector back into the AEI--Z interface on the phone. The internal
loudspeaker is then activated again.
136
When in doubt, look it up
Overview of the telephone functions
If you do not know what is concealed behind a function name, such as Code dial,
you can look it up here. This list contains all functions that can be assigned to the
display keys. The corresponding symbols or abbreviations then appear in the
display. The pages mentioned contain further information on the respective topic.
A
ACD
ACD user function Activates the ACD user function to log on and off of the automatic call
distribution. The ACD needs to be enabled by the TENOVIS Service.
2.
Alter. time zone
The current time of 26 cities can be displayed.
Appointments
To call up the list of appointments you have entered.
Audio/Contrast
(! Page 127)
Adjust the handset and loudspeaker volumes, the sound of various tones
and the contrast.
C
CADI
Call diversion (! Page 31)
You can divert calls to other telephones within your system.
CHAR
Call charges (! S. 49)
You can view a list of the call charges incurred during previous calls.
CODE
Code dialing
Allows you to dial any call number stored in your system independently of
your authorisation. If you enter the code dial number, the entire call number
is dialed automatically. Additionally to the code dial number you can also
dial further digits (such as a number for a direct call).
CONF
Conference (! Page 28)
Speaking with two callers simultaneously.
i
• Functions which are labeled with - are not installed as standard on your phone.
137
When in doubt, look it up
Overview of the telephone functions
Corr
Correction key
CPCK
Call pick-up (! Page 21)
Allows you to pick up calls from the line shown in the display. Enter the
respective number and press ”Pick--up”.
If Direct dial has been activated, you will need to press this key before
entering the first digit.
Correct entered digits. The characters are deleted from back to front in the
display.
The Correction key has been assigned to a display key as standard. This
can be changed at any time.
This key can also be used when the allocation is not shown in the display.
D
- ←
Decrease vol./contr. (! Page 127)
Adjust the handset and, if activated, the loudspeaker volume during a call.
When your phone is in the idle position, this key will take you to the
”Audio/Contrast settings” menu.
f←
Deputy key (! Page 73) This key allows you to set up the selected partner diversion (press key
once) or to delete it (press key twice) in the idle menu.
Door
Door device You can switch a door device on or off by simply pressing a key. This
function can only be used when it is enabled and a door device is
connected to your telephone.
E
EMER
Indiv. emerg. no. (! Page 42)
You can dial your personal emergency number at any time, even if the
telephone is protected against unauthorised use (Lock). Store your
personal emergency number in the telephone book.
EXHD
Exclusive hold (! Page 77)
You can place a call on exclusive hold. No other subscriber can then pick
up the call.
i
• Functions which are labeled with - are not installed as standard on your phone.
138
When in doubt, look it up
Overview of the telephone functions
F
Function key free (! Page 101)
Deletes the current assignment of a function key.
G
GLN
Leave group line - (! Page 92)
You can leave or access a group line.
This function needs to be enabled by the TENOVIS Service.
H
HOLD
Hold - (! Page 77)
You can place a call on hold.
HST
Headset to AEI
”Headset to AEI” is switched on or off in order to save the step of going via
the menu.
I
→ +
Increase vol./contr. (! Page 127)
Adjust the handset and, if activated, the loudspeaker volume during a call.
When your phone is in the idle position, this key will take you to the
”Audio/Contrast settings” menu.
INFO
Time/Part./Ln./DSS
Update the time and partner / line display as well as the displays of the
DSS module.
Interchange
(! Page 26)
You can switch between your first caller and a second call.
L
LANG
Switch language (! Page 128)
Select the language for the display. The available languages are English,
German and French.
i
• Functions which are labeled with - are not installed as standard on your phone.
139
When in doubt, look it up
Overview of the telephone functions
LCL . Line call list This function allows you to view the call for those lines that are not
assigned directly to you or your colleagues.
LINE
Line function - (! Page 88)
You can have calls to another line indicated on your telephone, as well as
modify the line display.
LIST
Display call list (! Page 34)
The call list contains all calls which you did not answer.
1... ← X Local display
During a call, you can can switch the display of your partner’s call number
on and off. Delete the redial.
M
MAIL
Send Minimail
(! Page 55)
Send a short message to one or more people.
MBOX
View Mailbox (! Page 59)
To check whether you have received a Minimail.
MESS
Server message (→ Page 47)
You can check whether there is a message for you, such as a fax or Voice
mail.
Microphone Off/On
You can switch off the microphone of the handset and the telephone, so
that the caller cannot hear a conversation in the room.
O
OFF
Lock
- (! Page 61)
You can protect your telephone against unauthorised use, as well as
determine which functions should still be available after locking the
telephone (the locking levels need to be enabled by the TENOVIS Service).
i
• Functions which are labeled with - are not installed as standard on your phone.
140
When in doubt, look it up
Overview of the telephone functions
OFF
Logout user - (! Page 106)
If you are logged on to another telephone in your system, use this function
key to log out again. This function needs to be previously enabled in your
system to for you to use it.
ON
Login user - (! Page 106)
If this function is enabled in your system, you can use your personal call
number or PIN to log on to any telephone in the system.
P
PART
Partners - (! Page 63)
You can divert calls to other partners, deactivate the call diversion, have
calls for a partner indicated on your phone and change the partner display.
R
1... → X Remote display
Before placing a call, switch the function that shows your call number in the
display of your partner on or off.
S
Second call
Once you switch off the Second call, no further calls are indicated during a
call. Existing second calls are rejected.
T
TA
TA dialing To set up and view information concerning data connections via the
installed terminal adapter.
TA-S
Set TA Change the basic settings of your terminal adapter according to your
needs.
i
• Functions which are labeled with - are not installed as standard on your phone.
141
When in doubt, look it up
Overview of the telephone functions
TBC
Central TBook The central telephone book (CETB) is a call number memory in
your telephone system. Here you can find and dial call numbers just like
with your own telephone. The search for a call number in the central
telephone book can be facilitated by assigning the Search function to a
function key.
←…→ Text shift key
This key allows you to view texts that are indicated by ”...” in the display
because they are too long for the display line. The key moves the text
through the display and can also be used when the allocation is not shown
in the display.
TLST
Display talk list (! Page 44)
You can view the list of the callers that you have spoken to
(a maximum of 10).
Tone dial next
During a connection you can change the dialing procedure to remotely
operate an answering machine, for example.
Tone ringing off (! Page 91)
To switch off the ringing tone. You will hear a single alerting tone when
being called.
→
TRAP
Transfer call
You are accepting a second call during a connection and divert it to another
subscriber with a refer--back.
Trap call Allows you to register the call number of a caller you do not want to speak
to.
V
VIP
Display VIP message Here you can check whether there is a VIP message for you in the call list.
i
• Functions which are labeled with - are not installed as standard on your phone.
142
When in doubt, look it up
Display
The display provides you with important information on the connections and settings
of your telephone. This includes messages which you can see in the status display.
Symbols in the display
You are receiving a call.
You are receiving a second call.
You are on the phone.
You have a second connection.
You are part of a conference.
”on” = Data connection
(flashes: Data call)
The loudspeaker of the telephone
(”Monitoring”) is activated.
”Handsfree answer back” is activated. The
loudspeaker and microphone on the
telephone are activated (Handsfree) or the
headset is switched on.
The handset and the handsfree
microphone are switched off.
There is a new entry in your
call list.
There is a message for you in the system
or a Minimail has arrived.
You have deactivated the ringing with
”Silence the telephone”.
You have deactivated Second call.
The status display has information (symbol
flashes).
143
When in doubt, look it up
Display
Information in the display
There is a message for you in the Voice mail.
Second call off: Additional calls are rejected during a connection. Second
call is deactivated in the ”Telephone settings” menu.
A
Appmt. activate
Appears, if you set an appointment.
Appointment expired
An appointment has expired. You can either change or delete it.
C
Call Back stored
You have initiated an automatic call--back. Your telephone will ring as soon
as the subscriber’s line is free again (Call--back).
Call div. active
Call diversion has been set up for several own call numbers.
D
D/GB/F
Language: Select the line for selecting the language. This message is only
displayed upon initial operation. You can specify the language in the menu
later.
Div. busy xxxx
All calls to your telephone are diverted to another subscriber when your line
is busy.
DIV busy. xxxx for xxxx
If this line is busy, all calls are diverted to another telephone.
Div. xxxx
All calls to your telephone are diverted to another subscriber.
DIV xxxx for xxxx
All calls to line xxxx are diverted to another subscriber.
144
When in doubt, look it up
Display
Divert call?
Call diversion: You can choose whether you want terminate the call or be
connected to the call diversion destination.
-- Connecting: Press the Enter key,
-- Terminate call: Replace the handset.
Door device on
The door device is turned on. To deactivate: Select the line or press the
corresponding function key.
H
Headset present
This message will appear in the idle display if a headset has been
connected and activated. The headset can be deactivated with a function
key.
L
List
Locked
Someone has tried to reach you while you were out or your line was busy.
You can view the corresponding information. This status message will also
be displayed for a Team call with message.
Your telephone is locked. To unlock the phone, enter your PIN.
N
New ln. call list
A call that has not been assigned directly to either you or your colleagues
was not taken. You can view the corresponding information.
No Data Terminal
There is no data terminal connected to the terminal adapter.
No remote display
Your call number is not shown in your partner’s display.
P
Power unit off
No voltage: The power supply unit of the terminal adapter is switched off.
145
When in doubt, look it up
Display
PUM
Mobile direct dial call number (Private User Mobility): If you have logged on
to another telephone in your system, this status message in the idle display
indicates that you are logged on to this telephone. You can use it in the
same manner as your own telephone.
To log off of a telephone: Select the status message or press the Logout
function key.
R
Restr. signaling
The partners can no longer see in their displays whether you are making a
call, being called, using call diversion, etc.
S
Stop group calls
You have cut your telephone out of the group line.
T
TA local test lp
The test loop of the terminal adapter is set to ”on”.
TA remote test lp
The test loop of the terminal adapter is set to ”on”.
Telephone locked xxxx of xxxx
Shows you, how many of your own call numbers are locked. Enter the
appropriate PIN to unlock a line again.
U
User xxxx
You are signed up for the automatic call diversion (ACD).
146
When in doubt, look it up
Display during emergency operation
In case of a power outage your telephone is automatically set to emergency
operation. This will change some of the function settings. Depending on the setting,
certain functions, such as handsfree, are blocked. If the display is not deactivated,
the corresponding messages will be displayed in it.
Overview of messages
AEI off
Your telephone has switched itself to emergency operation and the AEI
interface is blocked. Connected equipment, such as a DSS module, can
then no longer be used.
Emergency oper.
Your telephone has switched itself to emergency operation after a power
outage.
Emergency oper.-...
Your telephone has switched itself to emergency operation. The displayed
function, e.g. Call monitoring, is blocked.
No hands-free
To reduce the power consumption, loudspeakers and microphones are
switched off. You can no longer use the Handsfree mode, whereas Call
monitoring is still possible.
No monitoring
To reduce the power consumption, loudspeakers and microphones are
switched off. You can no longer use the Call monitoring and Handsfree
modes.
i
• The previous functions are only available if additional telephones are connected
to your telephone.
• Depending on the setting, the LED is turned off to reduce the power
consumption. A call diversion is then no longer displayed.
147
When in doubt, look it up
Menu items in the display
Depending on the functions you are currently using, the menu items for selecting
the next operating step appear. This overview contains all menu items, arranged
alphabetically.
A
Accept call
If you want to accept a second call.
Accept entry
To transfer an entry from the central telephone book (CTB) of your system
into your personal telephone book.
ACD user function You can sign up for the automatic call distribution. This function must be
enabled by the TENOVIS Service.
AEI operation
You can connect a variety of additional equipment such as a headset,
handsfree equipment, a DSS module or a PC via the AEI interface on the
bottom of the telephone. According to the configuration that is to be used,
you need to set one of three different modes of operation.
AT commands: This mode of operation makes your phone act like a
modem that can be controlled with AT commands. Only the telphone is
controlled. Data is not transferred to the other subscriber. Three additional
menu items are available, with which you can set the Baud rate, data bits
and parity.
Y ETSI AT: You can connect a PC to the AEI interface on the bottom of the
telephone. In order to do this you need to set the AEI mode of operation to
”Y ETSI AT”.
You can then use PTM (”Personal Telephone Manager”, a Windows
program) or Com4Tel to execute your phone’s functions via the PC. These
functions are: Setting the telephone and writing texts for notes or telephone
book entries, as well as storing data on the PC. You can also check on the
PC, whether calls have been diverted or forwarded from another
connection. The PC also shows you, to which number an actual connection
is existent.
i
• Functions which are labeled with - are not installed as standard on your phone.
148
When in doubt, look it up
Menu items in the display
X FTZ AT: This mode of operation corresponds to the definition of the X
interface of the FTZ, as used for the first generation of the ISDN main
connection telephones. With this protocol, the AEI interface is compatible
with PC applications, especially with ISDN cards that are required by this X
interface.
Caution!
Connect only devices that have a potential separator which meets the
criteria for a base insulation according to EN 60950.
Alerting 1...8
You can adjust the volume of the alerting tone on a level from 1 (soft) to 8
(loud).
All entries
All entries in the telephone book are shown in the display in alphabetical
order.
Allocation
Select an allocation for the call number.
Alter. Time Zone
The current time of 26 cities can be displayed.
Announce/Ackn. You can activate the VIP function ”Announcements with
acknowledgement”. In order to use this function, the setting ”VIP sending”
must be set to ”on” (in the ”Telephone settings” menu), and the receiving
party needs to have the settings ”VIP receiving” or ”Authorised users” and
”Announcements with acknowledgement” activated.
Appointments
Viewing, entering, editing or deleting an appointment.
Apptmt expired
A signal tone will sound at the time of the entered appointment, and this
message appears in the idle display.
i
• Functions which are labeled with - are not installed as standard on your phone.
149
When in doubt, look it up
Menu items in the display
Attribute (in the telephone book)
Normal call: The called subscriber will hear the normal ringing tone.
VIP call: Team call rings with a VIP ringing tone.
Announcement: You can make an announcement. The telephone of the
called team subscriber activates call monitoring.
Announcement with acknowledgement: You can make an
announcement. The telephone of the called team subscriber activates the
handsfree microphone and can answer directly.
Text if busy: You can send messages to the called team subscriber, if their
line is busy.
Audio/Contrast
Adjust the handset and loudspeaker volumes, the sound of various tones
and the contrast.
Autom. postdial/DTMF
Your telephone has been set as standard to send all keys dialed as a tone
when dialing during a connection. You can also deactivate this function and
initiate the subsequent tone dial manually during a connection.
B
Baud rate (AT)
You can set the Baud rate of your telephone for data transfer here. The
values 1200, 2400, 4800 and 9600 are available.
The menu item is only displayed when the AEI mode of operation is set to
”AT command”.
Break
Terminates the current function.
C
Call Back
If a subscriber you call is occupying the line, you can activate a signal
which lets you know when the line is free again. Your telephone will ring
and as soon as you lift the handset, the other line is called automatically via
the telephone system. This is only possible for calls within your system.
You can request more than one call.
i
• Functions which are labeled with - are not installed as standard on your phone.
150
When in doubt, look it up
Menu items in the display
Call charges
You can view the list of the call charges incurred.
Call div.?
The caller can decide whether they want to terminate the call or be
connected to the call diversion destination.
Call diversion
You can divert calls to other telephones, whether externally or within your
system. The name of the incoming caller is shown in your display if they
are stored in your local telephone book.
Call sum
The call charges incurred for all connections are displayed.
You can select whether this is to be done in DM, Euros, or units.
Call with data
This menu item must be set to ”on” for all entries in the telephone book
from which you want to receive data calls.
Code dial
Allows you to dial any call number stored in your system independent of
your authorisation. If you enter the code dial number, the entire call number
is dialed automatically.
Additionally to the code dial number you can also dial further digits (such as
a number for a direct call).
Code dialing dest.: If you enter ”Yes”, the stored call number is accepted by the system as a
code dial number.
Conference
Speaking with two callers simultaneously. Each of the three can speak with
the others. A subscriber to a conference must be a refer--back subscriber.
Conference off
You can end the conference. The connection shown in the front display
field will become the active connection when the conference is ended,
and the connection to the conference subscriber in the back field will be put on hold.
i
• Functions which are labeled with - are not installed as standard on your phone.
151
When in doubt, look it up
Menu items in the display
Connect For switching a connection that is on hold in the front display window to the
active connection.
Continue main TB To search for an entry in the central telephone book of the system.
Contrast
Setting the diplay lighter or darker. Eight levels of contrast are avaiable.
Convert to Euro
Setting the call charges display from DM to Euros.
Correction
-- Correcting an entered call number (also for redial and destination
numbers).
CSTA Answer Call If your telephone network and your PC network for CSTA (Computer
Service Telephony Application) are connected to each other and the CSTA
Answer Call function is activated, you can also receive calls on your PC.
When the telephone rings, simply click the symbol for the CSTA Answer
Call on your computer screen. The telephone is automatically set to the
”Handsfree” mode and you can speak with the caller.
Current PIN
In order to change your PIN, you first need to enter your current PIN.
D
Data bits AT
You can set the Baud rate of your telephone for data transfer here. The
settings ”7 bit” and ”8 bit” are available.
The menu item is only displayed when the AEI mode of operation is set to
”AT command”.
Data call number
Displays the list of existing destinations in your telephone book, which can
automatically make a data connection with you via the terminal adapter.
i
• Functions which are labeled with - are not installed as standard on your phone.
152
When in doubt, look it up
Menu items in the display
Data destination
Assign: Select this setting for all entries in the telephone book which you
can access automatically.
Data sum conn.
The call charges incurred for all data connections are displayed.
You can select whether this is to be done in DM, Euros, or units.
Delayed redial
Redial: If the line is busy, the most recently dialed call number is dialed
again automatically.
Delete
The highlighted entry is deleted.
Delete all
-- To delete all entries in the redial memory.
-- All entries in the call list are deleted.
-- All entries in the talk list are deleted.
-- All Minimail entries are deleted.
Please note:
If you select this menu item, all entries are immediately deleted. To aviod
this, press the Release key.
Delete all PUML All call diversions of the selected partner group are deleted.
Destination (1..20)
Allocation: Assign the call number to a destination key.
Destination keys
All entries assigned to a destination key are displayed.
Dial
The call number displayed is being dialed.
i
• Functions which are labeled with - are not installed as standard on your phone.
153
When in doubt, look it up
Menu items in the display
Dial Set terminal adapter: Different settings enable incoming and outgoing or
only outgoing connections.
Manually:
Only async. Support for simple terminals. You can enter the call number via
the keyboard of the terminal.
AT command:
Only async. For automatic connection control via AT commands from the
terminal.
Hotline 108:
For applications in the permanent line mode. The destination address is
transmitted from the telephone book of your phone.
Incoming:
For automatic conneciton. Only incoming calls are possible.
Direct dial: dest.
Direct dial: The dialing process begins as soon as you press a destination
key.
Direct dial digits
Direct dial: The dialing process begins as soon as you press a digit key.
Disable charges
Deactivate the call charges transmission for charged calls.
Disable conversion
Setting the call charges display from Euros back to DM.
Disconnect
DTR: To end the connection via your terminal. The ”DTR Contr.” function
needs to be activated, otherwise a connection can only be ended by the
remote subscriber or your telephone.
Display
If you switch your call number display off, it is no longer possible to see in
the display who you are talking to.
The number is not entered into the redial memory. The call charges counter
is also switched off.
Display the call number: Select the menu item once more.
i
• Functions which are labeled with - are not installed as standard on your phone.
154
When in doubt, look it up
Menu items in the display
Display
Testing the display. The display first shows a light display, then all displays
and finally a pattern. Every display will be shown for 5 seconds.
Display call list
For viewing the call list. Every incoming call that has not been answered
is entered into the call list.
Display lists
You can choose which telephone--book entries you want to display as a list,
e. g. all partner - or destination numbers.
Display VIP mess. You can view the message that has been received from a VIP subscriber
while your line was busy. This menu item will only appear in the menu if
you have actually received a VIP message.
Div. busy Call diversion if busy: Diverting calls when your line is busy (does not work
for partner key).
This function must be enabled by the TENOVIS Service.
Div., DIV1, DIV2
Call diversion: You can divert calls to other telephones within your system.
Depending on the telephone system, you can also divert calls to an
external telephone.
Div. from
Divert call from: Diverts calls from a partner to you.
Diversion 212 to 243 on
Diversion: A partner diversion from 212 to 243 is set.
DSS destinations Entries you can assign to a DSS module.
i
• Functions which are labeled with - are not installed as standard on your phone.
155
When in doubt, look it up
Menu items in the display
DSS priority destinations Allocation: Store a call number on a key of your DSS module. When you
press the Direct call key, your telephone will automatically activate the
Handsfree mode.
In case the called subscriber’s line is busy, you can still speak to them if
you have pick--up authorisation. Press the Direct call key once more.
E
Edit
Editing a telephone book entry
Emerg. no. + own no.
Emergency and own call number: Only the emergency and your own call
numbers are displayed.
Emergency no. dial
For dialing a stored emergency number during a refer--back. The
emergency number can be dialed even when the telephone is locked.
Enable charges
Activate the call charges transmission for charged calls.
Enter
Depending on the menu item, you can enter texts or call numbers, e.g.
appointments.
Enter PIN
You can enter and change a PIN. Enter a number from 2000 upwards.
Expand partner gr. A partner group can contain a maximum of ten subscribers.
F
Function key free
Function key free: Deletes the current assignment of a function key.
i
• Functions which are labeled with - are not installed as standard on your phone.
156
When in doubt, look it up
Menu items in the display
G
Get VIP functions on / off / authorized users Receive VIP functions: You can activate the VIP functions on your
telephone for either all subscribers or only for authorised users. Authorised
users need to have the entry ”VIP number yes” in the telephone book when
storing.
H
Handset 1...4
Adjusting the handset volume. You can select from level 1 (soft) to 4 (loud)
for the volume setting.
Hands-free 1...4
If the party you are calling indicates that the transmission quality is low, you
can adjust the handsfree function to the surroundings.
You can choose between the levels Area 1 (low sensitivity) to Area 4 (high
sensitivity).
The higher the sensitivity the stronger the echo.
Hands-free answer back Requirement: ”Receive VIP functions” must be activated.
For first calls, the microphone and loudspeaker of your telephone are
activated and the connection made.
Please note: If you set ”Receive VIP functions on”, your telephone will
activate the handsfree microphone for every call. A short signal tone
sounds. The microphone is activated and all conversations can be heard
throughout the room.
Headset present
Headset present: Set this menu item to
-- ”Handset”, if a headset is connected to the handset interface,
-- to ”AEI”, if a handset or the external handsfree equipment Konf--Tel,
CU101/AEI is connected to the AEI,
-- to ”No”, if no headset is connected.
If a headset is present, a corresponding message will appear in the idle
display.
i
• Functions which are labeled with - are not installed as standard on your phone.
157
When in doubt, look it up
Menu items in the display
I
Incoming Allows you to adjust the response threshold and the switch--over manner
for the handsfree mode to best suit your surroundings. For optimum use
select the lowest setting possible.
If your telephone is equipped with convenience handsfree equipment you
can also adjust the echo and the amplification. The lower the level the
lower the effect of the echo. Should questions arise, please refer to the
TENOVIS Service.
Indiv. emergency no.
Personal emergency call (Allocation): Storing a call number as an
emergency number, which you can then dial when the telephone is locked.
Interchange
Speak alternately with the first caller and an additionally accepted caller.
Interchange calls
Accept a second call before the first.
Interchange users
Change subscribers: During a conference you can switch either of the two
parties into the display, so that you can have the call charges displayed or
can speak to one conference party selectively.
Press the Refer--back key to put the other subscriber on hold.
K
Key beep
Activating / deactivating the keyboard beeps.
Keyboard
Starts the keyboard test. You can test all keys. Press the key which you
would like to test. The key name is displayed if the key functions correctly.
The Release key functions correctly if the test mode display is interrupted.
L
Line 1 to 10 The first ten lines are shown in the display so that you can move them.
i
• Functions which are labeled with - are not installed as standard on your phone.
158
When in doubt, look it up
Menu items in the display
Line 11 to 20 Lines 11 to 20 are shown in the display so that you can move them.
Line 21 to 30 Lines 21 to 30 are shown in the display so that you can move them.
Line 31 to 32 Lines 31 to 32 are shown in the display so that you can move them.
Line beep on For activating Double Call on lines.
Line display You can delete the display of a line and acitvate it again.
Lines Set the line functions and the lines display according to your needs.
Lines on DSS module You can place all lines on the DSS module.
Lines on telephone You can have the first ten lines shown in the display again. Lines 11
through 32 are not available.
Local display
Local display: You can determine whether the call number of the other party
is to be shown in your display.
Lock
Lock your telephone.
Lock You can protect your telephone against unauthorised use. You can also
determine which function should be available after locking the phone (the
various locking levels need to be enabled by the TENOVIS Service).
Login If this function is enabled in your system you can use your personal call
number or PIN to log on to any telephone in the system.
i
• Functions which are labeled with - are not installed as standard on your phone.
159
When in doubt, look it up
Menu items in the display
Loudsp. 1...8
Adjusting the loudspeaker volume. You can select a volume level from
1 (soft) to 8 (loud).
M
Mediate
Alternating between your first call partner and a refer--back subscriber.
Memory
Tests the volatile memory that stores all telephone settings. This memory is
not protected in case of a power outage. If the memory works correctly, you
will hear an affirmative response tone and the display will show the
message ”Test status test ended”. Otherwise you will hear a negative
response tone. Please refer to the TENOVIS Service in this case.
Microphone Off/On
Activates or deactivates the microphone of handset and telephone. If it is
deactivated, the other party cannot hear any of the conversations in the
room.
Mode of operation
Simple:
Displays three menu items at a time (preview).
Standard (delivery condition):
The display shows only one menu item. Your telephone is set to this mode
of operation upon initial operation.
Soft key:
The available functions are displayed as assignments to display keys when
you are using the phone.
Modify entry
You can edit the entry, for example entering a new call number for an
already stored name.
Monit. AEI X/Y calls on/off
You can connect your telephone to a PC and operate the phone with
according software. You can set the telephone to automatically activate the
call monitoring when you dial at the PC.
i
• Functions which are labeled with - are not installed as standard on your phone.
160
When in doubt, look it up
Menu items in the display
N
Name
Enter the name.
New entry
You can enter a new call number into the telephone book.
New: from PA X to PA Y You can enter a call diversion from partner X to partner Y.
Simply press the desired partner keys.
Next
Note
Notes
Number
The next entry is displayed.
Allocation: Enter a call number as note during a connection. Notes can be
separately listed in the telephone book. If a note contains a call number,
you can dial it as well.
All entries stored as a note are displayed.
Enter the call number.
O
Oper. mode The connection control via the data terminal supports procedures, for which
the destination address is transferred via the DEE or stored in the
telephone book.
Async:
Enables connection control via the terminal. The destination address can
be transmitted manually, from the data terminal or from the telephone book
of your telephone. The maximum Baud rate is 38,4 kbit/s.
Sync:
For the use of permanent line connections via ISDN--dialing connections, or
the connection of synchronised data terminals. The destination address
can be transmitted manually or via the telephone book of your telephone.
The maximum Baud rate is 64 kbit/s.
i
• Functions which are labeled with - are not installed as standard on your phone.
161
When in doubt, look it up
Menu items in the display
Outgoing Allows you to adjust the response threshold and the switch--over manner
for the handsfree mode to best suit your surroundings. For optimum use
select the lowest setting possible.
If your telephone is equipped with convenience handsfree equipment you
can also adjust the echo and the amplification. A higher level increases the
microphone signal. Should questions arise, please refer to the TENOVIS
Service.
Own call number
Own call number (Allocation): Store your own call number to show it in the
display.
P
Parity (AT)
You can set the parity here for the control of your telephone. The settings
”None” and ”Uneven” are available.
The menu item is only displayed when the AEI mode of operation is set to
”AT command”.
Part of group You can leave or access a group line. This function must be enabled by the
Tenovis Service.
Partners Set the partner functions and the partner display according to your needs.
Partner div. off Deactivate the current partner diversion.
Partner div. xxx to xxx Partner diversion: You are asked whether you want to delete this diversion.
PCK
You can use this function to accept calls for other subscribers. First enter
the call number, then select the menu item.
PCK1, PCK2
Prepared macros to pick up a call from the other telephone.
i
• Functions which are labeled with - are not installed as standard on your phone.
162
When in doubt, look it up
Menu items in the display
PDV1, PDV2 Partner diversion, you can prepare two partner diversions and activate /
deactivate them via function keys.
R
Reallocate
You can store a call number directly from the call list, the talk list or the
redial in your telephone book.
Refer back/Dest.
Determines, how refer--back with destination keys is to be carried out.
R key:
To carry out a refer--back during a connection you first need to press the R
key and then the appropriate destination key.
Immediately:
If you want to carry out a refer--back during a connection, you only need to
press the approppriate destination key.
Refuse call
You do not want to accept a second call during a conversation. The caller
then hears the busy signal.
Remote display Remote number display: You can determine whether your call number is to
be shown to the other parties.
Restr. signaling
You can suppress the display of your telephone settings for the
other partners.
Return
Back to the last display.
Ringing 1...8
Adjusting the ringing tone volume. It can be adjusted on a level on a level
from 1 (soft) to 8 (loud).
Ringing tone
You can switch the ringing tone on or off. If the ringing tone is switched off,
you will hear a single alerting tone when being called.
i
• Functions which are labeled with - are not installed as standard on your phone.
163
When in doubt, look it up
Menu items in the display
S
Save data
You can determine whether your data is to be stored in a permanent
memory.
Save data centrally Free / Barred
The TENOVIS Service can centrally store or play back your personal
telephone data. This can be avoided by blocking the central data saving.
Save data centrally immediately You can ”immediately” store your data in the system. First enter your PIN.
Your telephone is not ready for use while storing.
Save data immediately
You can store ”immediately” at any time. Your telephone is not ready for
use while storing.
Save data on / off
You can determine whether your telephone data is to be stored in a
permanent memory.
Second call
In the main menu, deactivate the second call (only in idle position), if you
do not want to be disturbed by additional calls. This can also be done
during a connection.
Select partner Select the partners for whom you want to set up the call diversion.
Send VIP funct. Send VIP functions: You can activate and deactivate the VIP functions.
Set deputy key This function allows you to set up several partner diversions and delete
them again, if necessary.
Set function key
Select this menu item assign functions that are used often to display keys.
These functions are then no longer shown in the display.
i
• Functions which are labeled with - are not installed as standard on your phone.
164
When in doubt, look it up
Menu items in the display
Set line position You can assign a line to a different DSS, line or destination key.
Set partner beep For activating Double Call for partners.
Set partner disp. You can delete the display of a partner and acitvate it again.
Set TA Terminal adapter: Set the transmission parameters that correspond to the
respective data terminal. This setting can only be modified when there is no
data connection.
Signal tone 1...8
Adjusting the signal tone volume. You can select from level 1 (soft) to 8
(loud) for the volume setting.
Spec. appointment save
Store your appointment.
Spec partner pos. You can assign a partner to a different partner or destination key.
Speech path
Starts the speech path test. You can test the handset and Call monitoring
by blowing lightly into the handset.
Upon lifting the handset the ”Handset lifted” symbol will appear.
When activating Call monitoring, the ”Call monitoring on” symbol will
appear”.
Store
Store your entries, for example your new PIN.
Store data at
Enter the time the data is to be stored. The time is pre--set to 00:00. Your
telephone is not ready for use while storing.
Subsequent tone dial (DTMF)
During a connection you can send numbers in the tone dial mode,
to operate your answering machine, for example.
i
• Functions which are labeled with - are not installed as standard on your phone.
165
When in doubt, look it up
Menu items in the display
Subsequent tone dial (DTMF) slow/medium/fast
You can modify the DTMF impulse duration (DTMF dialing = Dual--tone
multifrequency dialing). This can be of use when, for example, an
answering machine does not react to signals from your telephone.
Depending on the answering machine, an impulse duration of 1000 ms or
500 ms is necessary.
Your telephone is pre--set to 100 ms.
Switch language
Select the language for the display. The available languages are English,
German and French.
T
TA dialing Terminal adapter: Select this menu item if you want to enter the call number
for a data connection or to display a data connection.
Tel. book only
Only telephone book (Allocation): Storing a call number in the telephone
book, and do not assign it to a key.
Terminate conf.
Ends the connection to both conference subscribers.
Test mode
Starts various test runs. During the test mode your telephone is not ready
for use. This function must be enabled by the TENOVIS Service.
Test no.
Check call numbers on: Checks whether the call number of a data caller in
your telephone book is stored as a data number. Only entered callers are
accepted.
Test TA Testing the terminal adapter.
Time/Part/Ln./DSS
Update the time and partner / line display as well as the displays of the
DSS module.
i
• Functions which are labeled with - are not installed as standard on your phone.
166
When in doubt, look it up
Menu items in the display
Tone ring 1...8
Adjusting the sound of the ringing tone. You have the choice between 8
different sounds.
Tone VIP 1...8
Changing the sound of the VIP call tone. You can choose between 8
different sounds.
Transfer call
Connecting an additional caller with a refer--back subscriber.
Trap a call Allows you to register the call number of a caller you do not want to speak
to. This function must be enabled by the TENOVIS Service.
Trap call Allows you to register the call number of a caller you do not want to speak
to. This function must be enabled by the TENOVIS Service.
Turn off ringing
Switch off the ringing tone during a call. This setting is only activated during
this one specific call.
U
Units
Select whether you want the call charges to be displayed in the currency
(DM) or in units.
-- If you accidentally pressed the wrong partner key in the
partner menu.
Unlock with PIN
You tried to call up a function at a locked telephone. Enter the current PIN
to unlock the telephone.
V
VIP number Store this call number as a VIP number, meaning that the subscriber with
this number is authorised to initiate VIP functions for you.
i
• Functions which are labeled with - are not installed as standard on your phone.
167
When in doubt, look it up
Menu items in the display
VIP ringing tone on / off
For deactivating the VIP ringing tone. The VIP ringing tone indicates
distinctive calls from your VIP partners.
Volume
You can change the volumes of the handset and loudspeaker during a call.
These changes are only valid during that connection.
i
• Functions which are labeled with - are not installed as standard on your phone.
168
When in doubt, look it up
Ringing and handset tones
Tones for internal and external calls
Normal ringing tone for external calls:
This tone can be switched off
(→ Page 91).
Normal ringing tone for internal calls:
This tone can be switched off
(→ Page 91).
Alerting tone:
Additional call during a
connection, partner beep.
Boss call:
VIP- function. This tone can be
switched off (→ Page 91).
Call when ”Handsfree answer back”:
Announcement (also with
acknowledgement),
Message if busy: Special tone.
Tones in the handset
Tones during a cut--in connection.
Signal tone:
When activating Call monitoring, Handsfree
and dialing with the handset on--hook.
The other party can also hear this tone.
169
When in doubt, look it up
If something is not working
The incorrect date and time are displayed
Select the menu item ”Time/Part/Ln./DSS”.
Date and time will be updated by the system.
The call number of a caller is not displayed
The call was transmitted without the call number, meaning that the incoming call is
analogous or the caller has turned off his call number display.
The partner or line display disappeared
The line display was deactivated in the ”Partner” or ”Line functions” menu.
You can switch it on again there.
or
Select the menu item ”Time/Part/Ln./DSS”.
The partner or line display will be updated by the system.
Note:
The display is updated automatically as soon as a partner or one of your
colleagues use their phone.
Short tones during a call
A second caller is signaled. Please see the Chapter ”Making several connections
simultaneously” (→ Page 24) for information about possible operating steps.
or
You have activated Call monitoring or Handsfree. You and the caller will hear a short
alerting tone.
A function is not executed
This function may need to be enabled by the TENOVIS Service first. Functions
which are not enabled are indicated by -.
The telephone cancels prematurely when programming
It is possible that no key has been pressed in the last 60 seconds. This will
terminate every programming procedure.
The programming procedure is also cancelled when accepting a call.
A call number that is entered into the telephone book has a $ in the first
position
You accepted a call while entering a call number. The entry is saved with a $ in the
first position. Edit the entry and replace the $ with the correct digit.
170
When in doubt, look it up
If something is not working
A call diversion is not executed
Check whether the call diversion is activated.
A call number that has been dialed with code dialing, cannot be extended
The subsequent dialing function possibly is locked.
A call is shown in the display but the phone does not ring
Check whether the ringing tone is switched off (in the ”Silence” menu).
171
When in doubt, look it up
Terminal adapter If a terminal adapter is installed in your TM 13, make a connection to compatible
data terminals via the V.24 interface. First, set the transmission parameters.
Depending on the connection to your telephone system, you can use the telephone
as usual at the same time.
Making a data connection via the telephone
Scroll to the TA
dialing
menu item.
Confirm your selection.
...
Enter the call number of the other party.
Scroll to the Dial menu item.
Confirm your selection. The call number is dialed. You can now start the data
transmission.
Making a data connection via the data terminal
You can make a data connection via the data terminal. Select the corresponding
dialing mode. For further information, please refer to the operating manual
for the terminal adapter.
Disconnecting the data connection via the telephone
Press the Release key. The conference is then ended.
Making a data connection via the data terminal
The setting ”DTR” must be selected in the ”Release” menu item.
i
• The existing data connection is indicated by ”on” in the display. If you assign the
TA dialing function to a function key you can switch at any time by simply
pressing a key.
172
When in doubt, look it up
Terminal adapter Setting the terminal adapter
Scroll to the Set
TA
menu item.
Confirm your selection. This menu shows you all the parameters that can be
changed.
Set all the parameters according to the requirements of your terminal one after
the other. Some parameters cannot be modified. For more information on the single
parameters, please refer to the operation manual of the terminal adapter.
Testing the terminal adapter
Scroll to the Test
TA
menu item.
Confirm your selection. You can now perform various tests. To view the
condition of the V.24 interface lines, repeatedly press the Down arrow key until
these are shown in the display.
i
• The settings on your terminal adapter can only be modified when there is no
data connection.
173
When in doubt, look it up
Testing the telephone
You can test various functions of your telephone.
You cannot be called as long your telephone is in the test mode. Leave the test
mode when you are done with the tests.
Each test takes only a few seconds.
Start function test
Scroll to the Further
functions:
menu item.
Confirm your selection.
Scroll to the Test
mode
menu item.
Confirm your selection.
Select the desired function, e.g. Display .
Confirm your selection.
174
When in doubt, look it up
Signing up for automatic call distribution The TENOVIS Service needs to set a personal call number (max. of 5 digits) and a
personal password (6 characters) for your telephone in order to enable ACD
(Automatic Call Distribution) or BCC (Business Call Center). You need your call
number and password to sign up.
Signing up for automatic call distribution
Scroll to the Further
functions:
menu item.
Confirm your selection.
Scroll to the ACD
user function
menu item.
Confirm your selection.
...
Enter your personal call number with a maximum of five digits.
Scroll to the ”Password” menu item.
...
Enter your password containing six characters.
Scroll to the Log
on
menu item.
Confirm your selection.
i
• To sign off, confirm the status message ”User xxx” with ”Enter” and then select
”Logoff”.
• For more information on ACD and BCC, please refer to the ”Call Center
Functions, Integral TH13/TM13/TS13, ISDN telephones on the Business Call
Center”.
175
When in doubt, look it up
Index
Activating, Connection, 25
AEI interface, 135, 148, 150, 152, 162
Alerting tone, 85
Announcement, 119, 125
Announcement with
acknowledgement, 124, 125
Announcements with
acknowledgement, 149
Appointment, 52
Appointments
Entering, 53, 149
Expired, 149
Viewing, 53, 149
Attribute, 125, 150
Automatic call--back, 150
Call monitoring, 23
When dialing with PC, 130, 160
Call number
Assign to destination key, 40
Dialing again, 17
Entering, 37
Noting, 39
Own, 156, 162
Reallocating, 35, 45
Storing on DSS module, 41
Suppressing, 159, 163
Call number display
Activating, 18
Deactivating, 18
Remote, 159, 163
Call pick--up, 21, 138, 162
Call--back, 17, 34, 150
Auxiliary loudspeaker, 135
Caller
Switching, 26
Trap, 142, 167
Baud rate, 150
Cancel, 10
Blocking, 60
Central telephone book, 37, 142
Busy, 17
Changing dialing mode, 103
Call
Accepting, 20
Deactivating call diversion, 31
Diverting, 30
During a call, 25
Forwarding, 167
In call list, 34
Pick--up, 21
Refusing, 163
Charges, 48, 49, 167
For private calls and projects, 51
Call diversion, 30, 145, 151, 155
Deactivating, 31
Following, 93
If busy, 144
Connecting, 27, 167
Automatic connection, 113, 124, 157
Call list, 33
176
Charges display
Activating, 18
Deactivating, 18
Code dial, 151
Conference, 28, 151
Ending, 29
Connecting a PC, 148
Connecting accessories
AEI-XY interface, 148
Handsfree equipment, 132
When in doubt, look it up
Index
CORR, 138
DSS module, 156
Correcting, 12
DTMF
Modifying impulse duration., 166
Subsequent tone dial, 103
Switching, 103
CSTA Answer Call, 129, 152
CTI agent, 25
Current settings, 143
Data
Storing, 164, 165
Transmitting, 172
Emergency number
Dialing, 156
Storing, 42
Ending, 10
Data bits, 152
Entering names, 12
Date/Time, 11
Entering text, With display keys, 12
Deputy key, 73
Error, 170
Destination key, 16
Exit code, 16
Destination keys, 40
External, 15
Destinations, 7
Following, 94
Dialing
With DSS module, 134
Without handset, 16, 21
Forwarding a call, 27, 167
Direct dial, 154
Display, 11, 155
Display during emergency
operation, 147
Display of the menu items, 148
Overview, 143
Partner, 64
Specifying language, 128
Telephone status, 143
Display keys, 11
Function keys, 7
Deleting, 97
Enabling, 101
Levels, 11
Macros, 99
Setting, 97, 100
Functions
Overview, 137
Selecting, 10
Group line, 92
Handset, Tones, 169
Door device, 138, 145
Handsfree, 16, 21, 23
Setting sensitivity, 158, 162
With auxiliary loudspeaker, 135, 136
With Konf--Tel, 131
Double Call, 96
Handsfree answer back, 113, 124, 157
DSS module, 71, 133
Headset, 145, 157
Diverting, 30
Deactivating call diversion, 31
177
When in doubt, look it up
Index
Help, 170
Malfunction, 170
Hold
Automatic hold, 77
Exclusive hold, 77
Manual, 77
Mediating, 26, 27, 160
Idle display, 11
Message, 54
Incoming, 158
Messages, Sending, 125
Info display, 86
Microphone, 160
Switching on or off, 160
Intercom, 114
Internal, 15
Key beep, 104, 158
Menu, 7
Selecting a function, 10
Minimail
Changing text, 56
Receiving, 59
Sending, 55
Keyboard beeps, 158
Mobile direct dialing call number, 146
Keys
Labelling, 13
Overview, 7
Mode of operation, 89, 160
Konf--Tel, 131
Mounting, 2
Konftel CU 101/AEI handsfree
equipment, Connecting, 132
MTB, 37, 142
Leaving a group line, 92
Letters, 12
Lock, 60
Locking, 61
Log off, 106
Log on, 106
Lower--case letters, 12
Macro, Enabling a key, 101
Mailbox, 59
Making calls, 15
With DSS module, 134
178
Modifying impulse duration (DTMF), 166
Multiline, 74
Update display, 166
Accepting call, 76
Activating the line display, 88
Call diversion, 79
Calling, 76
Central call list, 81
Conference, 78
Display, 76
Line beep, 85
Lines on DSS module, 83
Local call list, 81
Locking a line, 82
Send Minimail, 87
No second call, 167
Note, 39
When in doubt, look it up
Index
Overview
Display, 143
Display during emergency
operation, 147
Functions, 137
Keys, 7
Menu items, 148
Telephone, 6
Parity, 162
Participating in a group line, 92
Partner, 63
Allow signaling, 69
Calling, 64
Diverting, 65, 100
Diverting calls, 155
Double Call, 66
Form groups, 67
on DSS module, 71
Reducing group, 68
Requesting, 170
Restrict signaling, 69
Refer--back, 26
With destination keys, 163
Release, 7
Requesting time, 170
Ringing, 91, 169
Switching on and off selectively, 91
Tones, 169
Ringing tones, 169
Saving data, Locally, 108
Second call, 25
Deactivating, 164
Selecting the language, 128
Sending, 162
Sending messages, 117, 150
Minimail, 55
Settings, 13, 14, 102
Audio/contrast/language, 126
Partner beep, 66
Signal tone, 91, 169
Pick--up, 21, 138
Signing off, 106
PIN, 51, 60, 156
Modifying , 61
Signing up, 106
Pr. call, 156
Problems, 170
Protection, 60
PTM, 148
PUM, 146
Query answering machine (DTMF), 166
Querying messages, 47
Reallocate, 163
Redial, 17
Delayed, 17
Silence the telephone, 90
Silence when telephoning, 91
Simple mode, 89
Soft key mode, 89
Sound, 167
Standard mode, 89
Storing data, 164
Centrally, 110
Subsequent tone dial (DTMF)
Automatic, 103
Deactivating, 103
Switching, Call charges display, 50
179
When in doubt, look it up
Index
Switching between calls, 26
Trap call, 142, 167
Symbols in the display, 143
Unlocking, 62
T dialing, 172
Updating the partner display, 166
Talk list, 43, 44
Upper--case letters, 12
Telephone
Locking, 60
Mounting, 2
Overview, 6
User functions, 148
Telephone book, 36
Call number on DSS module, 41
Call number to destination key, 40
Centrally, 142
Dialing a call number, 37
Note, 39, 161
Search for name, 37
VIP functions
On/off, 157
Sending, 164
Telephone settings, 102
Telephone status, 143
Terminal adapter, 172
Data connection, 172
Information, 141
Setting, 141, 165, 173
Testing, 166, 173
Testing
Keyboard, 158
Memory, 160
Speech path, 165
Terminal adapter, 166
Text message, 55
Time display, Updating, 166
Time Zone, 105
Time zone, 137
Tone ringing off, 142
Subsequent tone dial (DTMF), 165
Setting, 166
Transfer call, 167
180
Vanity number, 7, 12
VIP call, 125
VIP number, 125, 167
VIP functions
Announcement, 119
Deactivating, 122
Handsfree answer back, 113
Intercom, 114
On/off, 125
Sending, 125
Sending messages, 117
Using, 121
Voice mail, 47
Volume, Auxiliary loudspeaker, 136
Without handset, 16, 21, 22
When in doubt, look it up
181
Tenovis GmbH & Co. KG · Austria
Hüttenbrennergasse 5 · A-1030 Wien
T +43 (0)1 87870-0
F +43 (0)1 87870-7370
Telenorm Ltd. · Greece
Ethelonton Aimodonton Str. 3
12131 Peristeri, Athen
T +301 5785220 · F +301 5785227
N.V. Tenovis S.A. · Belgium
Rue Henri Genesse 1 · B-1070 Bruxelles
T +32-2-5255111
F +32-2-5255000
NORMA Telecom AG · Greece
Polytechniou 6
54626 Saloniki
T +303 1500600
F +303 1555347
Tenovis S.r.l. · Italy
Via Gadames, 7 · I-20151 Milano
T +39 02 39244-1
F +39 02 39244-805
Tenovis BV · Netherlands
Neptunusstraat 71 · NL-2132 JP
Hoofddorp
T +31-23-5656-410
F +31-23-5656-411
Tenovis GmbH · Switzerland
Ifangstrasse 1 · CH-8952 Schlieren
T +41 (0) 1738-7272
F +41 (0) 1738-7218
Telecomunicaciones Tenovis S.L.
Spain
Carretera N-VI, KM 18,150
E-28230 Las Rozas (Madrid)
T +34-91-6312400
F +34-91-6312486
MKS · Bosnia
Kotromanica 48 · BH-Sarajevo
T +3 87 71 27 5825
F +3 87 71 27 5835
Telenorma Colombia S.A.
Av. 13 (aut. Norte) No 118-30 Of. 702
Santafé de Bogotá
T +57 1 600 0400
F +57 1 629 4272
Robert Bosch Odbytova s.r.o.
Czech Republic
Pod visnovkou 25
CZ 142 00 Praha
T +420 2 6130 0612
F +420 2 6130 0638
MTS Modern Telecom System
Egypt
Sheraton Heliopolis Buildings,
Area 1157, Building 12
Nasr City, Cairo
T +20 (2)2682365
F +20 (2)2682371
MTV Telecom Distribution PLC
Great Britain
Sky Business Park
Eversley Way
Thorpe, Egham
Surrey TW20 8RF
T +44 (0)1784 740000
F +44 (0)1784 744030
INFA Telecom · Hong Kong
38/F Manulife Tower
169 Electric Road, Hong Kong
T +85-2-28066653
F +85-2-25107243
Telenorma C.A. · Venezuela
Avenida Republica Dominicana
Edf. Delcha 1, Boleita Sur
Apartado del Este 61405 · 1060A Caracas
T +58-212-2077511
F +58-212-2398735
Robert Bosch Kft. · Hungary
Gyömro˝i út 120 · H-1103 Budapest
T +36-1-4313-700
F +36-1-4313-717
NETCOMM Telephone Systems Ltd.
Mauritius
34, De Courcy Street
Port-Louis
T +230-211-64 00
F +230-211-5226
Computer Telephony S.A. de C.V.
Diagonal No. 27 · Col. Del Valle
03100, México, D. F.
T +525 340-1411
F +525 340-1402
EEI Corporation
Philippines
188 E Rodriguez jr. Avenue
Ortigas Industrial Estate
Quezon City, Metro Manila 1110
T +63-2-63 508 51
F +63-2-63 509 75
C&C Partners Telecom Sp. zo.o.
Poland
Ul. 17 Stycznia 119, 121· PL 64-100 Leszno
T +48 65 5255 555
F +48 65 5255 666
VADO Telecom · Russia
Krasnaja Presnja 28
RF 123376 Moscow
T +7- 095-252 00 21
F +7- 095-956 70 36
TEHCOM d.o.o · Yugoslavia
Bulevar vojvode Micˇic´a 37
SR-11000 Beograd
T +381 11 3690211
F +381 11 3690211
Procom Inzeniring d.o.o. · Slovenia
Likozarjeva 14 · SI-1000 Ljubljana
T +3 86 130 66 212
F +3 86 130 66 222
ELCyM Telecoms (Pty) Ltd.
South Africa
1, Samrand Avenue · Samrand Industrial
and Commercial Park · P.O. Box 10025,
Centurion 0157
T +27 12 677-6000
F +27 12 677-6677
www.tenovis.com
[email protected]
(Germany)
T 08 00 -2 66 10 00
F 08 00 -2 66 12 19
(International)
T +49 (69) 75 05-28 33
F +49 (69) 75 05-28 41
4.999.061.826 · 1/1101 · SW E06.2 / V6 · gb · Modifications reserved
Tenovis S.A. · France
122, Rue Marcel Hartmann
F-94853 Ivry s/Seine
T +33-1-45156515
F +33-1-45156500
MTechSA (Pty) Ltd. · South Africa
92, Indaba Lane
P.O. Box 1403
Reitfontein/Honeydew, Krugersdorp
T +27 11 796 2600
F +27 11 796 2655