1
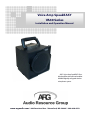
Voice Amp SpeakEASY
VA30 Series
Installation and Operation Manual
ARG’s Voice Amp SpeakEASY Portable Amplifier with optional modular
900MHz digitally encrypted wireless
microphone system.
www.argaudio.com ◊ 440 Ramsland Ave ◊ Hannaford, ND 58448 ◊ 888.468.4552
Voice Amp SpeakEASY Owner’s Manual: ARG-OM1
© 2011 Audio Resource Group, Inc.
All Rights Reserved.
ARG PRODUCT MANUAL SERIES: Voice Amp SpeakEASY
Congratulations and thank you for purchasing ARG’s VoiceAmp
SpeakEASY Portable Amplifier System. Each system has been designed
and manufactured right here in the USA. Our products have been in use
throughout the world for more than 50 years. All of ARG’s high quality
products are designed to provide many years of reliable service; they are
uncomplicated to use so anyone can operate them with ease and confidence. I am certain after using your newly purchased product that you will
join ARG’s long list of satisfied customers.
This manual contains basic product information to ensure trouble
free operation, so please take time to read through this manual thoroughly before using your new VoiceAmp SpeakEASYsystem. If for any
reason you have additional questions you can call our headquarters tollfree at (888)-468-4552 and talk to one of our professional Sales Team
Members who will be happy to help you Monday through Friday between
the hours of 8:00AM and 5:00 PM Central Standard Time; you can also
email ARG at [email protected] or visit our web site at
www.argaudio.com for additional resources and product options.
Everyone at ARG is firmly committed to our motto, which isn’t just a
tagline, it’s our assurance that ARG’s high quality products will meet your
expectations for many years to come.
Every word...every sound….heard. Understood.
Again, on behalf of everyone at ARG, Thank you!
Rick Allerdings, President
www.argaudio.com ◊ 440 Ramsland Ave ◊ Hannaford, ND 58448 ◊ 888.468.4552
Page 2
I ns i de St o ry Headl i ne
ARG PRODUCT MANUAL SERIES: Voice Amp SpeakEASY
Page 5
CONTENTS
Safety & Caution Information
p. 6
System Contents
p. 7-8
Front View Diagram
p. 9
Rear View Diagram
p. 10-12
Quick Use Guide
p. 13-15
ARG-TX900HH Product Detail
p. 16
ARG-TX900HH Quick Use Guide
p. 17
ARG-TX900BP Product Detail
p. 18
ARG-TX900BP Quick Use Guide
p. 19
Trouble Shooting Guide
p. 20-21
Technical Specifications
p. 22
Compliance Information
p. 23
Warranty Information
p. 23
www.argaudio.com ◊ 440 Ramsland Ave ◊ Hannaford, ND 58448 ◊ 888.468.4552
I ns i de St o ry Headl i ne
ARG PRODUCT MANUAL SERIES: Voice Amp SpeakEASY
Page 6
SAFETY INFORMATION
This product is designed to amplify sounds to a high volume level
which could potentially cause hearing loss if used improperly and
cause damage to your equipment.
To protect your hearing and the hearing of others:
1. Always set all volume levels at the minimum setting before
powering on your device. Then adjust the volume to a comfortable level.
2. Use caution when using the siren alert button because it can
produce very high volume levels which can cause hearing damage. Turn master volume control to the lowest setting and test
in short intervals to determine the proper volume level.
3. If feedback (a high pitch squealing sound) occurs:
♦ immediately move the microphone away from the speaker
♦ reduce the volume level on the speaker
♦ move the microphone to the side and behind the speaker,
never use it directly in front of the speaker
♦ point the microphone away from the speaker
4. Do not allow children or unauthorized persons access or use of
this product.
1. THIS PRODUCT HAS BEEN DESIGNED AND MANUFACTURED TO ENSURE YOUR PERSONAL SAFETY SO PLEASE READ AND FOLLOW THE
INSTALLATION AND OPERATIONS INFORMATION IN THIS MANUAL.
2. TO REDUCE THE RISK OF ELECTRIC SHOCK AND FIRE HAZARDS, DO
NOT MODIFY OR DIS-ASSEMBLE. SERVICING SHOULD BE PERFORMED BY QUALIFIED FACTORY PERSONNEL ONLY.
3. IMPROPER USE CAN RESULT IN POSSIBLE ELECTRICAL SHOCK OR
FIRE HAZARDS.
4. DO NOT EXPOSE THIS UNIT TO RAIN OR MOISTURE.
5. THIS PRODUCT SHOULD BE USED WITH THE SUPPLIED SWITCHING
POWER SUPPLY AND 110-125VAC OUTLET ONLY.
Product Recycling Instructions
DO NOT DISPOSE ELECTRONICS IN THE HOUSEHOLD TRASH!
Help ARG protect our environment by locating an electronics recycling
center OR return the product(s) to ARG for proper disposal.
www.argaudio.com ◊ 440 Ramsland Ave ◊ Hannaford, ND 58448 ◊ 888.468.4552
I ns i de St o ry Headl i ne
ARG PRODUCT MANUAL SERIES: Voice Amp SpeakEASY
SYSTEM CONTENTS
VoiceAmp SpeakEASY AMPLIFIER ONLY System includes:
(1)
(1)
(1)
(1)
(1)
(1)
(1)
ARG-VA30S - Portable Amplifier
ARG-BCR16VLI - Lithium Battery Pack *built-in
ARG-AC-PS4 - Switching Power Supply/Battery Charger
ARG-CC8 - Soft Sided Bag
ARG-SS1 - Shoulder Strap
ARG-MP10 – Wired Handheld Microphone with 10’ attached cable
ARG-OM1 - Operation Manual
VoiceAmp SpeakEASY SINGLE WIRELESS System includes:
(1)
(1)
(1)
(1)
(1)
(1)
(1)
(1)
ARG-VA30S-SPK1 - Portable Amplifier with (1) 900MHz Wireless Module
ARG-BCR16VLI - Lithium Battery Pack *built-in
ARG-AC-PS4 - Switching Power Supply/Battery Charger
ARG-CC8 - Soft Sided Bag
ARG-SS1 - Shoulder Strap
ARG-RC1 - Remote Control
ARG-AN3 - Rubber Duckie Antenna
ARG-OM1 - Operation Manual
ONE of the following two transmitter combinations is included:
(1) ARG-TX900BP – 900MHz Bodypack Transmitter
(1) ARG MP2 - Headworn Microphone
(2) ARG-BCAA - AA Alkaline Disposable Batteries
(1) ARG-AC-PS1 - Body Pack Transmitter Battery Charger
OR (1) ARG-TX900HH – 900MHz Handheld Transmitter
(3) ARG-BCAA - AA Alkaline Disposable Batteries
VoiceAmp SpeakEASY DUAL WIRELESS System includes:
(1)
(1)
(1)
(1)
(1)
(1)
(2)
(1)
ARG-VA30S-SPK2 - Portable Amplifier with (2) 900MHz Wireless Modules
ARG-BCR16VLI - Lithium Battery Pack *built-in
ARG-AC-PS4 - Switching Power Supply/Battery Charger
ARG-CC8 - Soft Sided Bag
ARG-SS1 - Shoulder Strap
ARG-RC1 - Remote Control
ARG-AN3 - Rubber Duckie Antenna
ARG-OM1 - Operation Manual
ONE of the following three transmitter combinations is included:
(2) ARG-TX900BP – 900MHz Bodypack Transmitter
(2) ARG MP2 - Headworn Microphone
(4) ARG-BCAA - AA Alkaline Disposable Battery
(2) ARG-AC-PS1 - Body Pack Transmitter Battery Charger
OR (2) ARG-TX900HH – 900MHz Handheld Transmitters
(6) ARG-BCAA - AA Alkaline Disposable Batteries
www.argaudio.com ◊ 440 Ramsland Ave ◊ Hannaford, ND 58448 ◊ 888.468.4552
Page 7
I ns i de St o ry Headl i ne
ARG PRODUCT MANUAL SERIES: Voice Amp SpeakEASY
VoiceAmp SpeakEASY DUAL WIRELESS system includes: (continued)
OR (1)
(1)
(2)
(1)
(1)
(3)
ARG-TX900BP – 900MHz Bodypack Transmitter
ARG MP2 - Headworn Microphone
ARG-BCAA - AA Alkaline Disposable Batteries
ARG-AC-PS1 - Body Pack Transmitter Battery Charger
ARG-TX900HH – 900MHz Handheld Transmitter
ARG-BCAA - AA Alkaline Disposable Batteries
Optional Accessories for ALL Voice Amp SpeakEASY Systems:
Batteries:
ARG-BCAA-24 – AA Alkaline Disposable Batteries, 24 pack
ARG-BCRAA - AA NiMH Rechargeable Batteries
ARG-BCRAA-24 - AA NiMH Batteries, 24 pack
ARG-AC-BC4 - NiMH Battery Charger, 4 slot
Companion Speakers:
ARG-VA30S-SPK - Unpowered 5-1/4” speaker
Flash Drive:
ARG-USB1 - 4G flash drive
Microphones:
ARG-MP3 - Miniature headworn microphone, tan
ARG-MP4 - Miniature single side headworn microphone, tan
ARG-MP5 - Omni-directional lapel microphone
ARG-MP6 - Uni-directional lapel microphone
ARG-MP7 - Miniature handheld microphone
ARG-MP8 - Collar microphone
ARG-MP9 - Professional Cardiod handheld microphone
ARG-CA4 - 20’ microphone cable with ¼” plug
ARG-CA5 - 50’ microphone cable with ¼” plug
ARG-CA6 - 10’ microphone cable with ¼” plug
ARG-CA7 - 10’ coiled microphone cable with ¼” plug
ARG-TC5 - Replacement tie clip for ARG-MP5
ARG-TC6 - Replacement tie clip for ARG-MP6
ARG-WS2 - Replacement windscreen for ARG-MP2
ARG-WS3 - Replacement windscreen for ARG-MP3
ARG-WS4 - Replacement windscreen for ARG-MP4
ARG-WS5 - Replacement windscreen for ARG-MP5
ARG-WS6 - Replacement windscreen for ARG-MP6
ARG-WS7 - Replacement windscreen for ARG-MP7
ARG-WS8 - Replacement windscreen for ARG-MP8
ARG-WS9 - Replacement windscreen for ARG-MP9
Modular USB/MP3 Player:
ARG-MU3
Speaker Stands:
ARG-TP1 ARG-TP2 ARG-TP3 ARG-TP4 -
Light Duty Speaker Stand
Heavy Duty Speaker Stand
5/8” - 27 to 3/8” - 16 Speaker Stand Adapter for the ARG-TP2
Wall or Ceiling Speaker Mount
www.argaudio.com ◊ 440 Ramsland Ave ◊ Hannaford, ND 58448 ◊ 888.468.4552
Page 8
I ns i de St o ry Headl i ne
ARG PRODUCT MANUAL SERIES: Voice Amp SpeakEASY
SYSTEM CONTROLS: FRONT VIEW
4
3
2 1
1 - Battery Charging Indicator
2 - IR Remote Sensor
3 - Low Battery Indicator
4 - Power On Indicator
5 - Speaker
6 - Wood Cabinet
7 - Threaded Insert
1 - Battery Charging Indicator: The (yellow) light activates when the battery charger
begins the charging cycle and it will shut off when completed. Charge time is 5
hours.
2 - IR Remote Sensor: (clear)
3 - Low Battery Indicator: The (red) light activates when the battery is low and
needs to be recharged. The unit will continue to operate for 1-2 hours after the
light comes on.
4 - Power On Indicator: The (green) light activates when the power switch is turned
on. The light will flicker when the volume control is being adjusted between low
and maximum positions.
5 - Speaker: 5-1/4” with 1” horn
6 - Wood Cabinet: An engineered wood product (MDF) is used to construct each
cabinet made here in the USA. Once assembled, a custom formulated polyurethane coating with rubber granules is applied to provide a tough, waterproof,
and chemical-resistant textured finish. This finish also helps deaden outside
sound and vibrations which produces a richer warmer sound compared to
molded plastic housings.
7 - 3/8”-16 Threaded Insert: Used for speaker stand or wall and ceiling mount applications.
www.argaudio.com ◊ 440 Ramsland Ave ◊ Hannaford, ND 58448 ◊ 888.468.4552
Page 9
I ns i de St o ry Headl i ne
ARG PRODUCT MANUAL SERIES: Voice Amp SpeakEASY
Page 10
SYSTEM CONTROLS: REAR VIEW
1
see below *2
3
4
5
6
7
8
9
11
14
10
12
13
15
16
17
18
19
20
21
22
23
24
25
*#2 LCD Display
Signal Strength
Lock/Unlock
Channel Number
www.argaudio.com ◊ 440 Ramsland Ave ◊ Hannaford, ND 58448 ◊ 888.468.4552
I ns i de St o ry Headl i ne
ARG PRODUCT MANUAL SERIES: Voice Amp SpeakEASY
Page 11
1. Wireless Receiver (A&B): Optional FCC compliant 900MHz digitally encrypted wireless receiver module with
diversity reception. The 900MHz Radio frequencies used fall under the ISM band classification which is FCC
License free and is globally accepted in most countries.
2. LCD Display (A&B):
(A&B) Displays basic information including, Channel number, signal strength and lock/unlock
status. *Please see detailed display on previous page.
3. Antenna (A&B): The 900MHz Digital Receiver has an internal antenna attached which provides enough signal
strength to provide up to 100’ of range.
Note: If additional range is required attach the ARG-AN3 antenna for a maximum range of 300’.
Note: When using both internal and external antenna, the receiver will be in switching diversity mode.
4. Lock/Unlock (A&B): Press the “LOCK button” for three seconds until the lock icon disappears from the display
to enter into the programming mode. Press it again for three seconds to return to the lock mode.
5. Channel UP (A&B): Use to scroll up the 1-12 available channels.
Note: The receiver must be unlocked (4) for channel selection.
6. Channel Down (A&B): Use to scroll down the 1-12 available channels.
Note: The receiver must be unlocked (4) for channel selection.
7. ON/OFF Audio Level Control (A&B): Turn control knob clockwise to turn the receiver ON and to increase the
audio input level, turn the control knob counter clockwise to turn the receiver OFF and to decrease the audio input level.
8. MP3/USB Player: Optional MP3 player with USB port.
9. LCD Display: Displays basic information including, total number of songs, individual song the player is playing,
song timer, mode (10) and if the USB is inserted and ready to start. **Please see detailed diagram on page 10.
10. Mode: Six selectable presets for customized listening mode: including Normal, Pop, Jazz, Rock, Classic and R&B
11. USB Connector: Insert USB Flash Drive with pre-recorded material for playback.
Note: Only insert/unplug the USB flash drive when the MP3/USB player is OFF (13) otherwise damage may occur.
12.
12 Play/Pause: Press once to start playing a music file, press once to pause and press again to continue playing.
13. MP3 Player ON/OFF/Volume Control: Turn control knob clockwise to turn the MP3 player ON or to increase the
volume level. Turn the control knob counter clockwise to turn the MP3/USB player OFF or to decrease the
volume level.
14. Skip Reverse: Press once to skip a song and go back to the previous song played.
15. Skip Forward: Press once to skip a song and go forward to the next song to be played.
16. Master Tone Control: Turn control knob clockwise / counterclockwise to adjust the equalization of frequencies
used in the audio signal. This allows listeners to adjust the sound for their personal preference.
17. Line
Line--In Input Jack Level Control: This controls the volume input level to the device plugged into the Line-In
Input Jack (18). To adjust, turn clockwise to increase the input volume level and turn counterclockwise to
decrease the volume input level.
18. Line
Line--In Input Jack: The mono 3.5mm jack accepts audio devices that have a line-level output, including MP3
players, IPods and CD players. The volume input level is controlled by the Line-In Input Jack (17).
19. Wired MicMic-In Input Jack Level Control: This controls the volume input level to the wired microphone plugged
into the Mic-In Input Jack (20). To adjust, turn clockwise to increase the input volume level and turn counterclockwise to decrease the volume input level.
www.argaudio.com ◊ 440 Ramsland Ave ◊ Hannaford, ND 58448 ◊ 888.468.4552
I ns i de St o ry Headl i ne
ARG PRODUCT MANUAL SERIES: Voice Amp SpeakEASY
Page 12
20. Wired MicMic-In Input Jack: The mono ¼” jack accepts wired low impedance dynamic microphones. The volume
input level is controlled by the Wired Mic-In Input Jack Level Control (19).
Note:
Note This input does not provide phantom power.
21. Master Power ON/OFF: Controls main power to unit.
22. Master Volume Control: Controls overall volume level of speaker and the Alert Signal (24).
23. LineLine-Out Output Jack: The mono 3.5mm jack provides line-level audio to secondary powered speaker or
audio devices having a Line-In Input jack.
Note: To daisy chain multiple systems (make sure the power is OFF before making any connections), plug one end
of the speaker cable into the LINE OUT of the primary (MASTER) speaker and plug the other end of the cable into the
LINE IN of the secondary (SLAVE) speaker. Adjust the MASTER VOLUME CONTROL and LINE-IN INPUT control to the
MAXIMUM setting on ALL secondary (SLAVE) speakers so the primary (MASTER) speaker has full volume control over
the entire system. It is best to power on the primary (SLAVE) speaker first, followed by the secondary (SLAVE) speakers in sequence order . To power off, reverse the sequence so the primary (MASTER) speaker will be turned off last.
24. Alert Signal: Press and hold to activate the alert signal. Adjust the volume with the Master Volume Level (22),
release button to deactivate.
Note:
Note Always set the Master Volume Control (22) to the minimum setting before using!
25. Power Supply / Charging Jack: Plug the supplied 18V AC adapter (ARG-AC-PS4) to supply continuous power
or to recharge the Lithium Battery Pack for portable use.
**9 MP3/USB Player LCD Display Detail
No USB
00000/00000/00:00
MP3/USB Player power is on but no flash drive is
inserted into the player.
Normal
Manu_PLAY
MP3 OK:
00000/00000/00:00
MP3/USB Player power is on and the flash drive is
inserted into the player but is not playing.
Normal
Manu_PLAY
MP3 OK:
►
00001/00003/00:01
MP3/USB Player power is on and the flash drive is
inserted into the player and the music is playing.
00001 - Folder number of file being played
Normal
Manu_PLAY
00003 - Number of the file in that folder
00:01 - Timer for file being played.
www.argaudio.com ◊ 440 Ramsland Ave ◊ Hannaford, ND 58448 ◊ 888.468.4552
I ns i de St o ry Headl i ne
ARG PRODUCT MANUAL SERIES: Voice Amp SpeakEASY
Page 13
Voice Amp SpeakEASY QUICK USE GUIDE
1. Getting Started:
The Voice Amp SpeakEASY can operate on either AC or battery power. To use
AC power, plug the included ARG-AC-PS4 switching power supply/battery charger to
the power supply/charging jack “DC 18V/3A” located on the back of the speaker. Plug
the other end into a 110-125 VAC outlet and push the Master Power ON button.
When battery operation is needed, you will need to fully charge the installed
lithium battery pack before using. To charge, plug the included ARG-AC-PS4 switching
power supply/battery charger to the power supply/charging jack “DC 18V/3A” located
on the back of the speaker, plug the other end into a 110-125 VAC outlet. The charging cycle will take approximately 4-5 hours. The (yellow) LED on the front panel will
illuminate during the charge cycle, once the battery is fully charged the (yellow)
charge LED indicator will shut off. The speaker can operate for 10+ hours on a fully
charged battery. When battery capacity is low, the (red) low battery level LED located
on the front panel will illuminate, there will be about 1 hour of operation time before
the system shuts down.
Note: Battery removal must be done by a factory trained professional.
Note: Battery life is directly related to the volume level; the louder the level,
the higher the current consumption resulting in less operation time.
Note: If the optional ARG-RX900MOD receiver is installed, it also has a
battery level indicator icon located on the LCD display.
Note: The battery charging cycle will not activate if the Master Power
Button is in the “ON” position; the Master Power Button must be set to the “OFF”
position to charge the lithium battery pack.
2. Correct System Set-Up:
a. For the best possible coverage and to produce balanced audio for the entire audience, face the speaker toward the center of the crowd, and elevate above audience
using a speaker stand (ARG-TP1 or ARG-TP2).
Note: If possible , place speaker a minimum of 3’ above the floor and at least three feet
away from walls or metal objects.
b. To reduce the risk of feedback, position the speaker between the crowd and presenter.
c. The presenter should always be positioned behind the speaker and as far away from
the speaker as possible while maintaining signal strength.
d. Line-of-site in between the transmitter and speaker is best; remove all obstructions if
possible.
e. Never point the microphone directly toward the speaker.
f. If you encounter interference, change the sound system to a different channel.
g. Avoid placing the speaker near large metal objects; neon and florescent lighting;
electric motors; or other electronic equipment if possible.
www.argaudio.com ◊ 440 Ramsland Ave ◊ Hannaford, ND 58448 ◊ 888.468.4552
I ns i de St o ry Headl i ne
ARG PRODUCT MANUAL SERIES: Voice Amp SpeakEASY
Voice Amp SpeakEASY: QUICK USE GUIDE
(continued)
Correct System Setup Diagram
Incorrect System Setup Diagram
3. Set all level controls to minimum before turning the system on.
4. Push the Master Power ON/OFF in to turn on the power on.
www.argaudio.com ◊ 440 Ramsland Ave ◊ Hannaford, ND 58448 ◊ 888.468.4552
Page 14
I ns i de St o ry Headl i ne
ARG PRODUCT MANUAL SERIES: Voice Amp SpeakEASY
Voice Amp SpeakEASY: QUICK USE GUIDE
(continued)
5. Choose audio source(s):
Note: Multiple input sources can be used simultaneously.
5A. ARG-RX900MOD Wireless Receiver(s):
a. Rotate the ON/OFF Audio Level Control clockwise to turn on the
receiver/s; set at 1/3 level (10:00 o’clock position).
b. Confirm the channel number matches the channel number of the
transmitter/s.
Note: When using two transmitters simultaneously they must be set to different channels.
Note: The receiver “CH-A” is factory set to channel 1
Note: The receiver “CH-B” is factory set to Channel 12.
c. Slowly rotate the “master volume level” clockwise to adjust the volume
to a comfortable level.
d. Rotate the “master tone control” clockwise to an acceptable level.
5B. Mic-In Input:
a. Plug a wired dynamic microphone into the ¼” Mic-Input Jack located on
the back of the amplifier.
Note: If there is an on/off switch located on the microphone make sure to turn it ON.
Note: The Mic-In Input does not supply phantom power.
b. Slowly rotate the “Mic-Volume Control” clockwise to adjust the level of
the wired microphone.
5C. Line-In Input:
a. Plug audio cable from an I POD, MP3 Player, CD player or other audio
source into the mono 3.5mm jack on the back of the amplifier.
b. Slowly rotate the “Line-Volume control” clockwise to adjust the level of
the audio source.
5D. USB/MP3 Player:
a. Insert USB flash drive into USB port.
b. Push ˃II button to start play.
c. Slowly rotate the “ON/OFF Volume Control” clockwise to adjust the level
of the audio.
d. Push the “mode” button to choose between six selectable presets for
customized listening mode, including Normal, Pop, Jazz, Rock, Classic
and R&B.
e. Push the ˃II button to pause playing.
f. Push the ˃ button to skip forward.
g. Push the ˂ button to skip back.
6. Rotate the Master Volume Control clockwise to adjust overall volume level of all
input options.
Note: The volume level can also be adjusted with the optional remote control (ARG-RC1)
7. When finished push the “Power” button to turn off and rotate all of the input
level controls counterclockwise to their minimum settings.
www.argaudio.com ◊ 440 Ramsland Ave ◊ Hannaford, ND 58448 ◊ 888.468.4552
Page 15
I ns i de St o ry Headl i ne
ARG PRODUCT MANUAL SERIES: Voice Amp SpeakEASY
Page 16
900MHz DIGITAL HANDHELD TRANSMITTER
Model Number ARG-TX900HH
1. ON/OFF: Main power control.
2. LCD Display: Displays basic information including: channel number, volume, battery
level, low pass filter setting and the lock/unlock status.
3. Lock/Unlock: Press the “LOCK button” for three seconds until the lock icon disappears
from the display to enter into the programming mode. Press it again for three seconds to
return to the lock mode.
4. (-): Use to scroll down the 1-12 available channels. Note: transmitter must be in the unlock
mode (3) for channel selection.
5. (+): Use to scroll up the 1-12 available channels while the transmitter is in the “unlock”
mode (3) for channel selection.
6. Battery Compartment: Holds three AA disposable alkaline batteries (ARG-BCAA).
7. Microphone Gain: To increase the gain, press the channel + (5) to choose between setting 0-9 while the transmitter is in the “lock” mode (3). The factory default setting is 3,
therefore every time the ON/OFF (1) is cycled off, the gain will default back to 3 when the
ON/OFF (1) is cycled on again.
8. Low Pass Filter: To decrease unwanted high-frequency signals which cause hissing and
background noise, press the (-) while the transmitter is in the lock mode to adjust the
level of filtering from (1-8). (1 being the lowest filter setting and 8 being the highest filter setting). The display
area will go blank once you scroll past 8, which indicates the filter is disabled. The system
will automatically start at 1 once you scroll past the blank screen.
Note: A low-pass filter is a filter that passes low-frequency signals but attenuates signals with
frequencies higher than the cutoff frequency. The purpose of adding this into design is to
block high pitches which cannot be efficiently broadcast.
www.argaudio.com ◊ 440 Ramsland Ave ◊ Hannaford, ND 58448 ◊ 888.468.4552
I ns i de St o ry Headl i ne
ARG PRODUCT MANUAL SERIES: Voice Amp SpeakEASY
Page 17
ARG-TX900HH TRANSMITTER: QUICK USE GUIDE
1. Locate and unscrew the battery compartment cover (This is the bottom portion of the microphone housing).
2. Install (3) AA batteries by pressing them into place while observing the proper battery
polarity. The microphone will not work if the batteries are incorrectly installed.
Note: Incorrect insertion may cause both mechanical and electrical damage not covered by
the limited lifetime warranty.
Note: Use only alkaline batteries. Do not use general purpose batteries. Do not mix new and
used batteries.
3. Turn the power switch to “ON” position, the LCD backlight will appear.
4. Adjust the Microphone Gain setting and the Low Pass Filter setting, if needed.
5. Adjust the channel number to match the channel number on the receiver.
Note: When using two transmitters simultaneously, the transmitters must be set to different
channels.
6. Replace the battery cover and hand tighten.
7. Maintain line-of-site operation with the speaker, if possible.
Note: The transmitter and speaker should be as close as possible to each another but no closer
than three feet.
8. When finished using, slide the “ON/OFF” switch to the “OFF” position.
Note: Replace batteries when the battery level gauge is empty. Repeat steps 1,2, and 4.
Note: For extended periods of storage, remove batteries to eliminate possible leakage.
www.argaudio.com ◊ 440 Ramsland Ave ◊ Hannaford, ND 58448 ◊ 888.468.4552
I ns i de St o ry Headl i ne
ARG PRODUCT MANUAL SERIES: Voice Amp SpeakEASY
Page 18
900MHz DIGITAL BODYPACK TRANSMITTER
Model Number ARG-TX900BP
1. ON/OFF: Main power control.
2. LED Display: Blue indicates power on; Red indicates battery is charging.
3. SET - (Microphone Gain): Press to adjust the microphone gain between 0-9, (0 is the
lowest setting and 9 is the highest setting). The factory default setting is 3, therefore every
time the ON/OFF (1) is cycled, the transmitter will default back to 3.
Note: The “LOCK” (4) needs to be in the “UNLOCK” mode.
4. LOCK: Press for three seconds until the lock icon disappears from the display to enter
into the Programming Mode. Press it again for three seconds to return to the Lock
Mode.
5. ˂ (Low Pass Filter): Increasing the filter setting decreases unwanted high frequencies
while maintaining an acceptable audio range; this is adjustable from 1-8. The display
area will go blank once it is scrolled past 8, which indicates the filter is off.
Note: The default setting is OFF.
Note: “LOCK” (4) needs to be in the “UNLOCK” mode.
6. ˃ (Channel): Use to scroll through the available channels, 1-12.
Note: The “LOCK” (4) needs to be in the “UNLOCK” mode.
7. USB: Charging port for ARG-AC-PS1 battery charger.
8. Mic-In/Line-In: The mono 3.5mm jack accepts wired microphones or audio devices
that have a line-level output, this includes MP3 players, IPODS and CD players.
www.argaudio.com ◊ 440 Ramsland Ave ◊ Hannaford, ND 58448 ◊ 888.468.4552
I ns i de St o ry Headl i ne
ARG PRODUCT MANUAL SERIES: Voice Amp SpeakEASY
Page 19
ARG-TX900BP TRANSMITTER: QUICK USE GUIDE
1. The ARG-TX900BP has a lithium battery pack installed. Before initial use, you will need
to charge the battery with the included ARG-AC-PS1 battery charger. When fully
charged, the red charge LED indicator will shut off indicating the battery is charged
and ready for use.
The charging cycle is approximately 3 ½ hours and the transmitter can operate for
up to 20 hours in between charging cycles. The battery level is displayed on the battery level indicator located on the LCD display.
Note: Battery removal must be done by a factory trained professional.
2.
Insert the included microphone into the Microphone-Input Jack located on the side
of the transmitter.
3. Turn the power switch to “ON” position and the LCD backlight will appear.
4. Adjust the channel number to match the channel number on the receiver.
Note: When using two transmitters simultaneously, both must be set to different
channels.
Note: The transmitter must be in the “UNLOCKED” mode.
5. Adjust the Microphone Gain setting and the Low Pass Filter setting, if needed.
Note: The transmitter must be in the “UNLOCKED” mode.
6. Maintain line-of-site operation with the speaker, if possible.
Note: The transmitter and speaker should be as close as possible to each other, but no
closer than three feet.
7. When finished using, slide the “ON/OFF” switch to the “OFF” position.
Note: For extended periods of storage, make sure to fully charge the battery before
storing.
www.argaudio.com ◊ 440 Ramsland Ave ◊ Hannaford, ND 58448 ◊ 888.468.4552
I ns i de St o ry Headl i ne
ARG PRODUCT MANUAL SERIES: Voice Amp SpeakEASY
Page 20
TROUBLE-SHOOTING GUIDE
A.
Thoroughly read the operation manual carefully to verify proper setup and installation of your system before using.
B.
Make sure the batteries are fresh or completely charged and the plus (+) and minus (-)
terminals are installed correctly.
C.
Make sure the transmitter and receiver are set to the same channel.
D.
If using two wireless systems simultaneously, make sure one system (1 transmitter and
1 receiver) is set to a matching channel and the second system (1 transmitter and 1 receiver) is set to a matching channel that is different than the system one channel.
E.
If feedback (a high pitch squealing sound) occurs:
F.
♦
Immediately move the microphone away from the speaker.
♦
Reduce the master volume level on the speaker.
♦
Reduce audio level of input device/s.
♦
Reduce the microphone gain setting on the transmitter.
♦
Move the microphone to the side and behind the speaker. NEVER use it directly
in front of the speaker.
♦
Point the microphone away from the speaker.
No Sound and Green Power LED Light is OFF:
G.
♦
Turn the power switch to ON and the green power LED should illuminate.
♦
Batteries are low or empty. Replace disposable batteries and/or recharge the
rechargeable batteries.
♦
The small DC power cord from the in-line power supply is not plugged in to the
jack on the back of the speaker or the in-line power supply is not plugged into
the AC power outlet.
♦
AC power is not present from the AC outlet.
No Sound and the Green Power LED Light is ON:
♦
Check the audio source output level control(s).
♦
Turn up the master volume control.
♦
Check to make sure any audio cables are plugged in properly.
♦
Confirm the transmitter switch is ON.
♦
Transmitter and speaker are not on the same channel.
♦
The transmitter batteries are weak or dead and need to be replaced.
♦
Using the ARG-TX900BP transmitter, make sure the microphone is plugged into
the microphone input jack located on the side of the transmitter.
♦
If the problem continues, cycle the transmitter power OFF and then ON again.
www.argaudio.com ◊ 440 Ramsland Ave ◊ Hannaford, ND 58448 ◊ 888.468.4552
ARG PRODUCT MANUAL SERIES: Voice Amp SpeakEASY
Page 21
TROUBLE-SHOOTING GUIDE
H. Charge Indicator Not ON:
♦
The small DC power cord from the in-line power supply is not plugged in to the
jack on the back of the speaker or the in-line power supply is not plugged into the
AC power.
♦
The Master Power button is not in OFF position.
♦
AC power is not present at the AC outlet.
♦
The AC power supply has failed (call ARG for replacement).
I. Shortened Battery Life:
♦
Batteries are not fully charged and need to be completely charged.
♦
If battery life continues to diminish prematurely, the speaker needs to be returned to the factory for battery replacement.
J. Noisy and/or Distorted Sound:
♦ Transmitter audio gain level is too high.
♦ Input level control(s) is too high.
♦ Master volume level is too high.
♦ Batteries may be weak and need to be changed or charged.
♦ Two transmitters might be operating on the same channel or using incompatible
channels, locate the extra transmitter and turn it off or change channels and retest.
♦ Turn off the transmitter(s), if you still hear interference, change to a clear channel.
♦ If the problem continues, cycle the transmitter power OFF and then ON again.
K. Momentary Loss of Sound (dropouts):
♦
Transmitter and speaker antennas are not in line-of-sight or they are too far apart;
reposition both units if possible so they are visible to each other and/or closer
together. Attach the included rubber ducky antennas and position them at 45
degree angles opposite of each other to extend the range.
♦
Select a different channel.
♦
Reposition if either the transmitter or speaker are located close to large metal objects, or other types of wireless electronics or lighting equipment.
♦
If the problem continues, cycle the transmitter power OFF and then ON again.
L. Excess Hum or Noise:
♦
All audio input cables should be shielded cables.
♦
If the problem continues, cycle the transmitter power OFF and then ON again.
www.argaudio.com ◊ 440 Ramsland Ave ◊ Hannaford, ND 58448 ◊ 888.468.4552
ARG PRODUCT MANUAL SERIES: Voice Amp SpeakEASY
VA 30S Voice Amp SpeakEASY TECHNICAL SPECIFICATIONS
Rated Power Output
30 Watts CLASS D
Max SPL @ Rated Power
90dB @ 1 meter
Frequency Response
60 Hz – 18 kHz
Switch Power Supply/Battery Charger
INPUT 100Vac-240Vac, 50/60Hz 1.5A-0.9A
OUTPUT: 16V – 3.36A
Battery Built-IN
14.8V 3000mAh Polymer
Lithium Battery Pack
Dimensions
7-5/8” (W) x 7-1/2” (H) x 6-3/8” (D)
Weight
6 lbs
Inputs/Outputs
Line-IN
Mono 3.5mm jack accepts audio devices that have a line-level out
put: including MP3 players, IPODS and CD players
Mic-IN
Mono ¼” jack accepts wired low impedance dynamic microphones
USB Player
Supports MPEG audio 1, 2 and 2.5; supports layer 1, 2, and 3
Line-OUT
Mono 3.5mm jack provides line-level audio to secondary powered
speaker or audio devices having a line-In Input jack.
Wireless Systems
ARG-TX900BP 900MHz Transmitter & ARG-TX900HH 900MHz Transmitter
Frequency Range: 902 MHz – 928 MHz
Frequency Response: 20 Hz – 15 kHz
Output Power: 10dBm
Mute: Auto when signal lost
Frequency Space: 2MHz
S/N Ratio: 80dB
Channel Number: CH01 – CH12
Audio Sampling: 32KHz QPSk
Audio Input: Mic-IN/Line-IN (ARG-TX900BP)
Charge Power: 5V (ARG-TX900BP)
Battery: 1200mAh lithium battery pack (ARG-TX900BP)
3 X AA, Alkaline Battery (ARG-TX900HH)
NOTE: SPECIFICATIONS SUBJECT TO CHANGE WITHOUT NOTICE!
www.argaudio.com ◊ 440 Ramsland Ave ◊ Hannaford, ND 58448 ◊ 888.468.4552
Page 22
ARG PRODUCT MANUAL SERIES: Voice Amp SpeakEASY
Page 23
COMPLIANCE
These transmitters (ARG-TX900BP & ARG-TX900HH) are authorized by rule under the Low
Power Radio Service (47 C.F.R. part 95) and must not cause harmful interference to TV reception or United States Navy SPASUR installations. You do not need an FCC license to operate
this transmitter. This transmitter may only be used to provide: auditory assistance to persons
with disabilities; persons who require language translation; or persons in educational settings; healthcare services to the ill; law enforcement tracking services under agreement with
a law enforcement agency; or automated maritime telecommunications systems (AMTS) network control communications. Two-way voice communications and all other types of uses
not mentioned above are expressly prohibited.
Operation is subject to the following two conditions:
1) This device may not cause interference, and
2) This device must accept any interference, including interference that may cause
undesired operation of the device.
WARRANTY
Audio Resource Group, Inc. (ARG) develops, designs and manufactures our own products
in order to provide our customers the highest quality products possible that provide many
years of trouble-free service. ARG warrants our products from the date of purchase to be
free from defects in materials and workmanship under normal use and conditions for lifetime
of the product. Warranty only applies to the original buyer. Warranty is void if products
have been damaged due to modification, repair, or misuse by unauthorized factory personnel. Warranty does not apply to normal wear and tear of the products' useful lifetime. ARG,
Inc. is not liable, without limitation to any person or entity, for any direct, incidental, consequential damages or medical expenses caused by any use, defect, failure or malfunction of
the product. The terms of the warranty are governed by the laws of the state of North Dakota, USA. Only with prepaid shipping and a return authorization number will returned
products be accepted by ARG, Inc. Contact ARG, Inc at 888-468-4552 for more information.
If you are experiencing difficulty with your system, call Toll-Free for Customer Assistance:
1-888-468-4552
If it is necessary to return your system for service, please contact your Customer Service
Representative for a Return Authorization Number prior to shipping.
Mail to: ARG, Inc.
ATTN: Repair Department
PO Box 39
440 Ramsland Avenue (for UPS Shipments only)
Hannaford, ND 58448
Phone: 888-468-4552
Fax: 888-373-4819
Email: [email protected]
www.argaudio.com ◊ 440 Ramsland Ave ◊ Hannaford, ND 58448 ◊ 888.468.4552
Operator’s Manual: ARG-OM1
©2011 Audio Resource Group, Inc. All Rights Reserved
www.argaudio.com ◊ 440 Ramsland Ave ◊ Hannaford, ND 58448 ◊ 888.468.4552