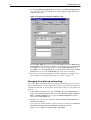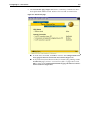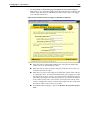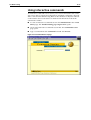
1
AR100 SERIES INTERNET ROUTER
USER
GUIDE
Ü
ABOUT Ü
CONTENTS
Simply connecting the world
AR100 Series Internet Router User Guide
Document Number C613-02001-00 REV B.
Copyright © 1999-2000 Allied Telesyn International, Corp.
960 Stewart Drive Suite B, Sunnyvale CA 94086, USA.
All rights reserved. No part of this publication may be reproduced without prior written
permission from Allied Telesyn.
Allied Telesyn International, Corp. reserves the right to make changes in specifications
and other information contained in this document without prior written notice. The
information provided herein is subject to change without notice. In no event shall Allied
Telesyn be liable for any incidental, special, indirect, or consequential damages
whatsoever, including but not limited to lost profits, arising out of or related to this
manual or the information contained herein, even if Allied Telesyn has been advised of,
known, or should have known, the possibility of such damages.
Contents
CHAPTER 1
Introduction
What can the AR100 do for you? .................................................................. 1-1
What does your AR100 need? ....................................................................... 1-3
Hardware and software requirements ...................................................... 1-3
ISDN service requirements ....................................................................... 1-3
Ordering ISDN in Australia ....................................................................... 1-4
Ordering ISDN in North America .............................................................. 1-4
Telephony on the AR140 ......................................................................... 1-6
Internet connection ................................................................................. 1-6
About this manual ......................................................................................... 1-6
Technical support ........................................................................................... 1-7
ISDN Order Forms .......................................................................................... 1-7
ISDN Line Configuration Request Form with IOCs ................................... 1-8
ISDN Line Configuration Request Form for 5ESS AT&T switch
without IOCs ................................................................................... 1-9
ISDN Line Configuration Request Form for DMS-100 Northern Telecom
switch without IOCs ....................................................................... 1-10
CHAPTER 2
Installing the AR100 Series Internet Router
Unpack your router ........................................................................................
Position your router .......................................................................................
Connect your router ......................................................................................
Connecting the router directly to your PC ................................................
Connecting the router to an existing LAN ................................................
CHAPTER 3
2-1
2-2
2-2
2-2
2-2
Getting Connected
Configuring your PC ...................................................................................... 3-1
Installing TCP/IP on your PC ..................................................................... 3-1
Changing from dial-up networking ......................................................... 3-6
Installing support software ............................................................................. 3-7
Getting the PC and router communicating ..................................................... 3-8
Connecting additional PCs ........................................................................... 3-15
Record LAN configuration ..................................................................... 3-15
Changing from dial-up networking ....................................................... 3-28
CHAPTER 4
About Web Access to the AR100
Web pages and your browser ........................................................................
AR100 Configuration Wizard ..................................................................
AR100 Management Wizard ...................................................................
One at a time ................................................................................................
Security .........................................................................................................
Access the router with your web browser ......................................................
4-1
4-1
4-1
4-2
4-2
4-2
iv
Navigating the configuration pages ............................................................... 4-4
Saving and exiting the web pages .................................................................. 4-4
CHAPTER 5
Configuring for the First Time
Internet dial-on-demand connection .............................................................. 5-3
Inter-office dial-on-demand connection .......................................................... 5-9
Internet and inter-office dial-on-demand connections .................................. 5-15
CHAPTER 6
Configuring for a Leased Line
Internet leased line connection ...................................................................... 6-3
Inter-office leased line connection ................................................................ 6-10
Internet and inter-office leased line connections ........................................... 6-17
Internet dial-on-demand & inter-office leased line connections ..................... 6-26
Internet leased line & inter-office dial-on-demand connections ..................... 6-36
CHAPTER 7
Changing Your Configuration
Changing system information ........................................................................ 7-2
Changing phone and ISDN information ......................................................... 7-4
Phone setup ............................................................................................ 7-4
ISDN setup .............................................................................................. 7-4
Call bumping .......................................................................................... 7-6
Data over voice ....................................................................................... 7-6
Save changes .......................................................................................... 7-6
Adding or changing an Internet connection ................................................... 7-6
Activate a second ISDN call on demand ................................................... 7-7
Data compression .................................................................................... 7-7
Keeping calls up semi-permanently .......................................................... 7-9
Auto-disconnect time .............................................................................. 7-9
Data over voice ....................................................................................... 7-9
Internet connection limits ........................................................................ 7-9
Save changes ........................................................................................ 7-10
Removing an Internet connection ................................................................ 7-10
Changing an inter-office connection ............................................................ 7-10
Making calls semi-permanent ................................................................ 7-12
Activate a second ISDN call on demand ................................................. 7-12
Data compression .................................................................................. 7-12
Auto-disconnect time ............................................................................ 7-13
Data over voice ..................................................................................... 7-13
Callback ................................................................................................ 7-13
Update IP networks ............................................................................... 7-13
Save changes ........................................................................................ 7-13
Removing an inter-office connection ............................................................ 7-14
Changing your Ethernet IP address .............................................................. 7-14
CHAPTER 8
Using Telephony Services
Call Waiting ...................................................................................................
Conference Calling ........................................................................................
Call Transfer ...................................................................................................
Call Forwarding .............................................................................................
CHAPTER 9
8-1
8-2
8-3
8-3
Accessing Router Utilities
Monitor router operation ............................................................................... 9-2
Test router connections .................................................................................. 9-3
Upgrade router software ................................................................................ 9-4
Contents
v
CHAPTER 10
Troubleshooting
Front panel LEDs .......................................................................................... 10-1
Troubleshooting installation ......................................................................... 10-2
No LEDs light ......................................................................................... 10-2
System LED stays on .............................................................................. 10-2
LAN Link LED does not light .................................................................. 10-2
Communication problems between PC and router ....................................... 10-3
No Ethernet card ................................................................................... 10-3
No web browser .................................................................................... 10-4
TCP/IP not installed ................................................................................ 10-5
Wizard already active ............................................................................ 10-5
Dynamic IP address assignment failed .................................................... 10-6
No routers found ................................................................................... 10-7
Not responding ..................................................................................... 10-8
No free IP address .................................................................................. 10-8
No gateway address .............................................................................. 10-9
Gateway address already used ............................................................... 10-9
No Internet access ..................................................................................... 10-10
No access to remote office ......................................................................... 10-11
Access to router denied ............................................................................. 10-12
Connection test fails .................................................................................. 10-13
ISDN Status ......................................................................................... 10-13
Internet Connection ............................................................................ 10-13
Inter-Office Connection ....................................................................... 10-14
Software upgrade problems ....................................................................... 10-15
Advanced troubleshooting utility ................................................................ 10-16
Using interactive commands ...................................................................... 10-17
Advanced ISDN troubleshooting ................................................................. 10-18
Test your own router ........................................................................... 10-18
Show ISDN call connections ................................................................. 10-18
CHAPTER 11
Safety and Statutory Information
Safety and statutory statements ................................................................... 11-1
Environmental Conditions ............................................................................ 11-4
Sicherheitshinweise ...................................................................................... 11-4
Chapter 1
Introduction
Welcome to the AR100 Series Internet Router—the complete Small Office/
Home Office Internet solution. Your AR100 Series Internet Router has a Basic
Rate ISDN port with full support for two ISDN B channels, providing dual
high speed connections to the Internet, to a remote office, or both. You can connect up to four PCs directly to the AR100, or connect a hub for even more LAN
connections. The AR130 and AR140 differ only in that the AR140 has two telephone ports for connecting telephones or facsimile machines.
Data and voice traffic share the one ISDN connection, saving on connection
costs. Advanced call management functionality can automatically use a second
ISDN B channel for bandwidth-on-demand applications, or disconnect a lower
priority data call to free a B channel for a voice call or higher priority data traffic.
Whether your ISDN service provider offers an ISDN dial-on-demand service
enabling you to make calls only when you need to, or an ISDN leased line service which stays connected continuously, you can configure your router to suit
the needs of your office.
What can the AR100 do for you?
Connect you to the Internet
The AR100 Series Internet Router provides you with high speed, unrestricted
access to the Internet, with compression techniques that speed up your data
traffic. It can automatically disconnect the ISDN call if there is no data to be
sent or received, to minimise call charges. It can limit the connection time or
amount of data transmitted to thresholds you choose, allowing you to limit
your ISP charges. The AR100 makes it easy for your Internet Service Provider
to dynamically assign your Internet address every time you surf the net. You
can use your router in an existing LAN, or directly connect up to four PCs to its
four Ethernet LAN ports.
Connect you to a remote office
Many small offices and home offices require fast and efficient access to a central
office to check email, access a database or download a file. Your AR100 can
automatically open another ISDN channel when extra capacity is required, and
close it when traffic levels reduce. If your office LAN uses private IP addresses
1-2
What can the AR100 do for you?
not registered on the Internet, the AR100 can translate these private addresses
to a single registered IP address for communication across the Internet, saving
you the time and expense of assigning registered IP addresses to each device
on your LAN.
Connect you to other trading partners
The AR100 allows small offices to communicate with other trading partners
using ISDN dial-on-demand or ISDN leased line. Information such as reports,
quotes and orders can be transferred between the two offices. The AR100 does
not place any limits on the number of network users, so it will continue to support you as your business grows.
Make phone and facsimile calls
The AR140 has two phone ports. Any combination of telephones, facsimile
machines, and answering machines can be connected to these two ports. Once
connected, they behave as if connected to a standard telephone network. Local,
national and international voice and facsimile calls can be placed and received
as normal. There is no need for a separate line for voice, facsimile and data—
one ISDN connection does it all. The two ISDN channels are shared between
data and voice as required. When both channels are being used for data, the
AR140 can be configured to bump one of these channels if a voice call is
required, for example when an emergency number is dialled.
The AR140 supports ISDN supplementary services, including call waiting, conference calling, implicit call transfer and call forwarding. These services must
be provisioned on your ISDN line before they can be used by the AR140.
Note for Germany and Austria only: If you have leased lines on both ISDN B
channels, for instance one for an Internet connection and one for an inter-office
connection, you will not be able to connect telephones and use telephony services even if you have an AR140 with phone ports.
Protect your network from unauthorised access
When you connect to the Internet you have unrestricted access to the WorldWide Web. Likewise, it has access to you! This is not normally a problem as you
are just one of many millions of subscribers. However, the AR100 includes a
sophisticated packet filtering firewall that prevents unauthorised users accessing your local network, and ensures that only authorised users can access the
central office.
The AR100 also supports callback for outgoing calls. This allows a remote site
to reverse the call charges to a central office, for central billing of ISDN calls.
Make configuration simple
Your AR100 Series Internet Router has an easy to use web-based configuration
tool. A wizard leads you step by step through setting up an Internet connection
and/or an inter-office connection for the first time. If you want to add another
connection or change the configuration later on, you can do this easily from
your web browser.
Introduction
1-3
What does your AR100 need?
This section describes the hardware, software and ISDN and Internet service
requirements you need before you can configure and use your AR100 router.
Hardware and software requirements
Before you can install, configure and use your router, you need a PC with the
following hardware and software:
■
An i486, Pentium or equivalent processor
■
Windows 95, 98 or 2000.
■
An Ethernet adapter card.
■
A CD-ROM drive.
■
TCP/IP installed and configured on your Ethernet adapter card. TCP/IP is
required for your PC to communicate with the router and the Internet. For
more information, see “Installing TCP/IP on your PC” on page 3-1 or in the
Start Here Guide.
If you do not have any of the above items, contact your PC supplier.
You also need:
■
A UTP (CAT 5) Ethernet cable to connect your Ethernet adapter card to a
LAN port on your router. Contact your authorised Allied Telesyn distributor or reseller if you need this.
■
A web browser to access the Configuration Wizard, and Adobe Acrobat
Reader to view the on-line manuals. These are included on the AR100
Installer and Documentation CD-ROM.
Note: Any device that can use TCP/IP to communicate can be connected to the
router’s LAN ports and use the AR100 to access the Internet. However, only PCs
running Windows 95, 98 and 2000 can use the AR100 CD and run the Configuration and Management Wizard.
ISDN service requirements
To connect to the Internet or a remote office, you need a Basic Rate ISDN dialon-demand or Basic Rate ISDN leased line (Germany and Austria only)
account with an ISDN service provider. Some ISDN service providers may
have different charges for services supporting data only and services supporting voice and data. We recommend that you compare the charges and features
of ISDN services available. In most places this is fairly straight forward. In
Australia, the United States and Canada there are more options available, and
these are described in the following sections.
1-4
What does your AR100 need?
Ordering ISDN in Australia
The AR100 supports keeping an ISDN call connected semi-permanently. If you
subscribe to the OnRamp Express service in Australia, outgoing calls on this
line are charged at a lower rate than regular dial on demand ISDN calls. This
means that a call can be set up to remain connected indefinitely, and to be
reconnected if a fault in the ISDN network disconnects it.
Note: Only outgoing calls on the OnRamp Express service are charged at the
lower rate. Incoming calls are charged at the higher casual rate, even if the calls
are kept up semi-permanently, potentially leading to high ISDN call charges.
Ordering ISDN in North America
In the United States and Canada, Basic Rate ISDN is provided using National
ISDN-1, 5ESS or DMS-100 formats on the following switch types, all of which
are supported by the AR100 Series routers.
■
NI-1 (National ISDN-1)
■
5ESS (AT&T Custom, Point to Point or Multipoint)
■
DMS-100 (Northern Telecom)
Because an ISDN service provider uses hundreds of parameters to configure an
ISDN line, the North American ISDN Users’ Forum (NIUF) has defined some
standard Capability Packages to make it easier to order ISDN. Each capability
package consists of some standard line sets and feature sets that match the
requirements of particular applications. Many ISDN service providers have
implemented these capability packages, and you can order the one that suits
your needs by using the corresponding ISDN Ordering Codes (IOCs). The
ordering of ISDN services has been further simplified by defining some EZISDN packages which are supersets of Capability Packages that are expected to
meet the needs of many ISDN subscribers. Note that the EZ-ISDN packages 1
and 1A are the same as the superset capability packages U and V.
If your ISDN service provider does not use IOCs, see “ISDN Order Forms” on
page 1-7.
If your ISDN provider uses IOCs, use Table 1-1 to choose the capability package that suits your needs. Some ISDN service providers have lower call charges
for data-only applications. If this is the case and you do not require voice capabilities, order an ISDN line that supports data only. Some ISDN service providers charge lower rates for voice calls than for data calls. The AR100 supports
Data Over Voice (DOV), enabling you to send data calls as though they are
voice calls, if the router at the other end of your calls is also configured for
DOV. Depending on your location and ISDN service, this may not be permitted. If you will use DOV you may need to order an additional directory
number from your ISDN service provider. Voice features supported by the
AR140 are described in “Telephony on the AR140” on page 1-6.
You can send the ISDN Line Configuration Request Form with IOCs in
“ISDN Order Forms” on page 1-7, or call your telephone company and give the
corresponding information to the ISDN representative.
Order from your ISDN service provider:
■
The IOC you want.
Introduction
1-5
■
An RJ-45 connector to be installed on the ISDN outlet.
■
An NT1 to connect your AR100 router to the ISDN line.
Ask for this information from your ISDN service provider:
■
The ISDN switch type they are using
■
One or two directory numbers, as required
■
One or two associated Service Profile Identifiers (SPIDs).
The AR130 and AR140 have completed the ISDN Ordering Codes Translation
Review and are registered for IOC S and EZ-ISDN 1.
Table 1-1: Features of Capability Packages and ISDN Ordering Codes (IOC)
Capability Package/ISDN Ordering Code
Feature
IOC U
EZ-ISDN 1
IOC V
EZ-ISDN 1A
IOC S†
IOC S1‡
IOC R§
2 B channels
Yes
Yes
Yes
Yes
Yes
Both B channels alternating data and
voice
Yes
Yes
No
No
No
No
No
Yes
Yes
No
Data calls only on both B channels
No
No
No
No
Yes
Two directory numbers
Yes
Yes
Yes
Yes
Yes
Caller ID sent automatically
Yes
Yes
Yes
Yes
No
Calling number privacy
On request
On request
No
No
Yes
Yes
Yes
No
Yes
Not applicable
Yes
Yes
No
No
Not applicable
Call Forwarding on directory number 1
Yes
Yes
No
No
Not applicable
Additional Call Offering (ACO) on
directory number 2
On request
On request
No
Yes
Not applicable
Flexible Call Offering (FCO) on directory
number 2
On request
On request
No
No
Not applicable
Call Forwarding on directory number 2
On request
On request
No
No
Not applicable
Voice mail on directory number 1
No
Yes
No
No
Not applicable
Voice mail on directory number 2
No
On request
No
No
Not applicable
You can have data or voice on either directory
number, but not both data and voice on the
same directory number simultaneously.
Both B channels simultaneous data and
voice.
You can have data and voice simultaneously
on the same directory number.
The calling number is blocked.
Additional Call Offering (ACO)
Call Waiting and Dynamic Bandwidth
Allocation on directory number 1
Flexible Call Offering (FCO)
Call Conference (three-way calling) on
directory number 1
† IOC S was previously called Generic Data M.
‡ IOC S1 was previously called NYNEX.
§ IOC R was previously called Generic Data I.
1-6
About this manual
Telephony on the AR140
The AR140 with voice ports supports supplementary services available in
North America, if the corresponding services are provided on your ISDN line.
Check with your ISDN service provider to confirm whether these services are
available to you and if so, if there are any additional charges for them. The
AR140 supports the following supplementary services:
■
Call Waiting—requires Additional Call Offering (ACO) on your ISDN line.
■
Conference (3-way) Calling—requires Flexible Calling on your ISDN line.
■
Implicit Call Transfer—requires Flexible Calling on your ISDN line.
■
Call Forwarding
■
Reminder Ring
Internet connection
If you wish to use your router to connect to the Internet, then you also need an
account with an Internet Service Provider (ISP).
About this manual
This user guide provides an introduction to the AR100 Series Internet Router,
and detailed step-by-step instructions for installing the AR100 and configuring
the AR100 using the Access Wizard and Configuration Wizard. The user guide
is organised into the following chapters:
■
Chapter 1, Introduction introduces the AR100 Series Internet Router and
describes the features and benefits of using the AR100, and the prerequisites for making full use of it.
■
Chapter 2, Installing the AR100 Series Internet Router describes how to install
the AR100 Series Internet Router.
■
Chapter 3, Getting Connected describes how to establish communication
between your router and the PC you will use to configure the router.
■
Chapter 4, About Web Access to the AR100 describes how to access the router
using your web browser.
■
Chapter 5, Configuring for the First Time describes the Configuration Wizard
that will lead you through configuring your AR100 for the first time. See
this chapter if you have dial on demand ISDN only (most users).
■
Chapter 6, Configuring for a Leased Line describes the Configuration Wizard
that leads you through configuring your AR100 for the first time. See this
chapter if you are in Germany or Austria and have leased line ISDN.
■
Chapter 7, Changing Your Configuration describes the web-based Management Wizard that you use to make subsequent changes to your configuration.
■
Chapter 8, Using Telephony Services describes how to use the services available for telephones connected to an AR140 with phone ports.
■
Chapter 9, Accessing Router Utilities describes the router monitoring and
upgrading utilities available from the web-based Management Wizard.
■
Chapter 10, Troubleshooting gives hints and techniques for troubleshooting
installation and configuration problems.
Introduction
1-7
■
Chapter 11, Safety and Statutory Information contains important safety information for your protection.
If you want to find out more about how different Internet protocols work, or
how to configure the AR100’s advanced networking features using the command line interface, refer to the AR100 Series Internet Router Reference Manual
on the Installer and Documentation CD-ROM.
If you have an Internet connection, you can download the latest versions of this
User Guide and other AR100 Series documentation from the AR100 Support
Site at http://www.alliedtelesyn.co.nz/support/ar100.
Technical support
For on-line support for your AR100 Series Internet Router, see our on-line support page at http://www.alliedtelesyn.co.nz/support/ar100. If you require further
assistance, contact your authorised Allied Telesyn distributor or reseller.
ISDN Order Forms
The following pages contain forms for ordering ISDN lines in North America.
Print, complete and send one of these forms to your ISDN service provider.
If your ISDN service provider uses ISDN Ordering Codes (and most do), use
the ISDN Line Configuration Request Form with IOCs.
Ordering an ISDN BRI line from an ISDN service provider in North America
that does not use the standard ISDN Ordering Codes is sometimes called “a la
carte” ordering. If your ISDN service provider does not ISDN Ordering Codes,
check which kind of switch they use, and send either the ISDN Line Configuration Request Form for 5ESS AT&T switch without IOCs form or the ISDN
Line Configuration Request Form for DMS-100 Northern Telecom switch
without IOCs form.
Allied Telesyn AR100 Series Internet Router
North America
ISDN Line Configuration Request Form with IOCs
Enter your details here and send to your ISDN service provider when ordering your ISDN service:
Name ___________________________________________________________________________
Title ___________________________________________________________________________
Company ___________________________________________________________________________
Address ___________________________________________________________________________
City, State, ZIP ___________________________________________________________________________
Telephone ___________________________________________________________________________
Facsimile ___________________________________________________________________________
Name ___________________________________________________________________________
Please provision the ISDN line with the Capability Package and options selected below:
❑ Capability U (EZ-ISDN 1) Voice and data with ACO
❑ ACO on directory number 2
❑ FCO on directory number 2
❑ Call Forwarding Variable on directory number 2
❑ Calling number privacy
❑ Capability V (EZ-ISDN 1A) Voice and data with ACO and Voice Mail
❑ ACO on directory number 2
❑ Call Forwarding Variable on directory number 2
❑ FCO on directory number 2
❑ Calling number privacy
❑ Voice Mail on directory number 2
❑ Capability S - Voice and data without ACO
❑ Capability S1 - Voice and data with ACO
❑ Capability R - Data only
Please use the long distance carrier selected below:
❑ AT&T
❑ MCI
❑ Sprint
❑ Other...
❑ Please install an RJ-45 connector on the ISDN outlet.
❑ Please provide an NT1 to connect our router to the ISDN line.
For ISDN Service Provider Use:
Please fax this sheet, with the information requested below, to the person listed above.
Select the switch type:
❑ NI-1 (National ISDN-1)
❑ DMS-100 (Northern Telecom)
❑ 5ESS (Custom AT&T)
Enter the Service Profile Identifiers (SPIDs) and directory numbers (DNs):
SPID #1:_____________________________________
SPID #2:_____________________________________
DN #1:_____________________________________
DN #2:_____________________________________
Allied Telesyn AR100 Series Internet Router
North America
ISDN Line Configuration Request Form for 5ESS AT&T switch without IOCs
Enter your details here and send to your ISDN service provider when ordering your ISDN service:
Name ___________________________________________________________________________
Title ___________________________________________________________________________
Company ___________________________________________________________________________
Address ___________________________________________________________________________
City, State, ZIP ___________________________________________________________________________
Telephone ___________________________________________________________________________
Facsimile ___________________________________________________________________________
Please provision the ISDN line with the configuration below for the appropriate switch:
❑ Custom Multipoint
❑1 ❑2 ❑3
❑ Custom Point-to-Point
Service Profile Identifiers (SPIDs) 2
2
0
Data Line Class (DSLCLS)
MP
PP
Parameter
Directory Numbers (DN)
B1 Service (B1SERV)
❑ National ISDN-1
❑1 ❑2 ❑3
STD
1
❑ DMD (On Demand) for voice ❑ DMD (On Demand) for voice ❑ DMD (On Demand) for voice
and data on AR140 OR
and data on AR140 OR
and data on AR140 OR
❑
❑
DATA
ONLY
for
AR130
DATA ONLY for AR130
❑ DATA ONLY for AR130
❑ DMD (On Demand) for
❑ DMD (On Demand) for
❑ DMD (On Demand) for
AR140 if voice required on B2
channel OR
❑ DATA ONLY for AR130
AR140 if voice required on B2
channel OR
❑ DATA ONLY for AR130
AR140 if voice required on B2
channel OR
❑ DATA ONLY for AR130
Circuit Switched Voice (CSV)
2
2
1
CSV Channel (CSV CHL)
Any
Any
Any
CSV Additional Call Offering
(CSV ACO)
Unrestricted (U)
-
-
CSV Limit
2
-
-
Circuit Switched Data (CSD)
2
2
2
CSD Channel (CSD CHL)
Any
Any
Any
CSD Additional Call Offering
(CSD ACO)
No
-
-
Terminal Type (TERMTYP)
A
A
A
Electronic Key System (EKTS)
No
-
-
B2 Service (B2SERV)
Please use the long distance carrier selected below:
❑ AT&T
❑ MCI
❑ Sprint
❑ Please install an RJ-45 connector on the ISDN outlet.
❑ Please provide an NT1 to connect our router to the ISDN line.
❑ Other...__________________
For ISDN Service Provider Use:
Please fax this sheet, with the information requested below, to the person listed above.
Select the switch type:
❑ NI-1 (National ISDN-1)
❑ 5ESS (Custom AT&T)
❑ DMS-100 (Northern Telecom)
Enter the Service Profile Identifiers (SPIDs) and directory numbers (DNs):
SPID #1:_________________________________
SPID #2:__________________________________
DN #1:_________________________________
DN #2:__________________________________
Allied Telesyn AR100 Series Internet Router
North America
ISDN Line Configuration Request Form for DMS-100 Northern Telecom switch without IOCs
Enter your details here and send to your ISDN service provider when ordering your ISDN service:
Name ______________________________________________________________
Title ______________________________________________________________
Company ______________________________________________________________
Address ______________________________________________________________
City, State, ZIP ______________________________________________________________
Telephone ______________________________________________________________
Facsimile ______________________________________________________________
Please provision the ISDN line with the configuration below for the appropriate switch.
Parameter
Directory Numbers (DN)
❑ National ISDN-1
❑1 ❑2 ❑3
❑ Custom Multipoint
❑1 ❑2 ❑3
Service Profile Identifiers (SPIDs) 2
2
Signalling
Functional
Functional
B Channels
2
2
Protocol Version Control (PVC)
2
1
Bearer Service
VVBD/CMD on any B
VVBD/CMD on any B
TEI Assignment
Dynamic
Dynamic
Release Key
No
NO
Additional Call Offering
Yes
Yes
Electronic Key System (EKTS)
No
No
Notification Busy Limit
1
1
Please use the long distance carrier selected below.
❑ AT&T
❑ MCI
❑ Sprint
❑ Other...__________________
❑ Please install an RJ-45 connector on the ISDN outlet.
❑ Please provide an NT1 to connect our router to the ISDN line.
For ISDN Service Provider Use:
Please fax this sheet, with the information requested below, to the person listed above.
Select the switch type:
❑ NI-1 (National ISDN-1)
❑ 5ESS (Custom AT&T)
❑ DMS-100 (Northern Telecom)
Enter the Service Profile Identifiers (SPIDs) and directory numbers (DNs):
SPID #1:_________________________________
SPID #2:__________________________________
DN #1:_________________________________
DN #2:__________________________________
Chapter 2
Installing the AR100 Series Internet
Router
Please read Chapter 11, Safety and Statutory Information before installing the
AR100 router. It contains important safety information. The Start Here Guide
also shows step by step how to install your router, and includes pictures of the
components.
Unpack your router
Check the contents of the shipping carton. If any items are missing or damaged, contact the shipping agent or your authorised Allied Telesyn distributor
or reseller immediately. Keep the shipping box, if possible. The shipping carton
should include:
■
AR130 or AR140 Internet Router
■
Power supply unit
■
Green ISDN cable
■
Two voice stub cables (AR140 only)
■
Two green S-bus termination straps
■
Start Here Guide
■
Warranty card
■
AR100 Series Installer and Documentation CD-ROM.
Note: The two green S-bus termination straps are not needed in most situations,
and the router uses line termination in the building. If you need to change your
router to network termination, contact your Allied Telesyn distributor or reseller. Do not attempt to install them yourself. They must only be installed by
authorised service personnel.
2-2
Position your router
Position your router
Make sure you router is positioned:
■
On a clean flat surface.
■
Out of direct sunlight and away from other heat sources. The router is
designed and tested to function between -5° C and 45° C.
■
With plenty of room for air to circulate around the router and its air vents.
■
Where moisture cannot enter the router.
Connect your router
Your router can be connected directly to your PC or to an existing LAN to provide an Internet and/or inter-office connection.
Connecting the router directly to your PC
1.
Switch off the power to your computer.
2.
Connect the ISDN port on the router to the ISDN line wall jack or NT1,
using the supplied green ISDN cable.
3.
Connect the Ethernet adapter card on your PC to one of the four LAN ports
on the AR100 using a UTP Ethernet cable (obtained from your authorised
Allied Telesyn distributor or reseller).
Note: If you connect your PC to LAN port 4, make sure the PC/Hub switch is
in the out/PC position. If you connect your PC to LAN port 1, 2 or 3 this button
is not used. (If you use a crossover cable instead of a direct cable, this switch
should be in the opposite position for either a PC or a hub connection.)
4.
If you have an AR140 with phone ports, connect up to two telephones,
facsimile machines, or answer phones to the phone ports.
5.
Connect the router to the mains power supply using the power supply unit
supplied. Switch on the mains power supply. The Power LED lights and
stays on, and the System LED flashes on briefly. The router start-up
sequence takes less than a minute.
Caution: If the mains supply is outside the accepted range for the router, 100–
240 VAC and 50–60 Hz, the router will not operate and may be damaged.
6.
Switch on your PC. The router is now ready for initialisation. Proceed to
Chapter 3, Getting Connected.
Connecting the router to an existing LAN
1.
Connect the ISDN port on the router to the ISDN line wall jack or NT1,
using the supplied green ISDN cable.
2.
Connect LAN port 4 on the router to a hub on the LAN using a UTP
Ethernet cable (obtained from your authorised Allied Telesyn distributor or
reseller).
Installing the AR100 Series Internet Router
3.
2-3
Make sure the PC/Hub switch is in the in/Hub position. (If you use a
crossover cable instead of a direct cable, this switch must be in the out/PC
position.
Note: If the PC/Hub button is in the wrong position the router cannot communicate with the LAN. (If you use a crossover cable instead of a direct cable, this
switch must be in the opposite out/PC position.)
4.
If you have an AR140 with phone ports, connect up to two telephones,
facsimile machines, or answer phones to the phone ports.
5.
Connect the router to the mains power supply using the power supply unit
supplied. Switch on the mains power supply. The Power LED lights and
stays on, and the System LED flashes on briefly. The router start-up
sequence takes less than a minute. The router is now ready for initialisation.
Proceed to Chapter 3, Getting Connected.
Caution: If the mains supply is outside the accepted range for the router, 100–
240 VAC and 50–60 Hz, the router will not operate and may be damaged.
Chapter 3
Getting Connected
Now that you have made all the physical connections, you need to establish
communication between the router and the PC you will use to configure the
router. This chapter describes how to:
■
Configure the first PC connected to the router.
■
Install the support software from the CD-ROM onto the PC.
■
Establish communication between the PC and the router using the AR100
Access Wizard
■
Configure any additional PCs connected to the router. This is easily done
as soon as you have initialised the router, or at any time in the future if you
want to add more PCs.
Configuring your PC
Before you can establish communication with the router your PC must have
TCP/IP installed and configured, as this is the protocol used to communicate
with the router.
Installing TCP/IP on your PC
The first thing to check is that TCP/IP is installed on your PC. The files needed
to install TCP/IP are included in Windows 95, 98 and 2000. The dialogs for
Windows 2000 differ slightly from those shown here for Windows 95 and 98.
If TCP/IP is already installed, go to “Installing support software” on page 3-7.
3-2
Configuring your PC
1.
In the Windows Start menu, point to Settings and click the Control Panel.
Figure 3-1: Windows Control Panel
2.
Windows 95 and 98: In the Control Panel, double click the Network icon to
display the Network dialog box.
Windows 2000: In the Control Panel, click Network and Dial-up Connections. In the Network and Dial-up Connections dialog, right click on the
Local Area Connection icon, and select Properties. The Local Area Connection Properties dialog opens, corresponding to the Network dialog in
Windows 95 and 98. (If the Local Area Connection icon does not appear,
check that your network adapter card is correctly installed and configured.)
Getting Connected
3-3
Figure 3-2: Windows Network dialog
If TCP/IP appears in the list of network components, then it is already installed. Go to “Installing support software” on page 3-7.
3.
If TCP/IP does not appear in the list of network components, click Add in
Windows 95 or 98, or Install in Windows 2000, to display the Select Network Component Type dialog box.
Figure 3-3: Select Network Component Type dialog
4.
Select Protocol and click Add to display the Select Network Protocol
dialog.
3-4
Configuring your PC
Figure 3-4: Select Network Protocol dialog
Select Microsoft from the Manufacturers list and TCP/IP from the Network
Protocols list. Click OK to dismiss the dialog.
5.
In the Network dialog box, select TCP/IP and click Properties to check the
TCP/IP configuration. (If your PC has more than one network adapter, in
the Network dialog box, select the TCP/IP entry for the network adapter
connected to the router, and click Properties. If TCP/IP is installed over a
Dial Up Adapter, do not select this.)
Figure 3-5: Network dialog
Getting Connected
3-5
6.
Windows 95 and 98: In the TCP/IP Properties dialog, click on the IP Address tab.
Windows 2000: The Internet Protocol (TCP/IP) Properties dialog corresponds to the IP Address and DNS Configuration tabs in Windows 95 and
98.
Figure 3-6: TCP/IP Properties IP Address tab
Select Obtain an IP address automatically.
3-6
Configuring your PC
7.
Click on the DNS Configuration tab to display the DNS Configuration dialog. Your ISP or network administrator will supply the DNS information
required in this tab.
Figure 3-7: TCP/IP Properties DNS Configuration tab
Select Enable DNS. Enter a host name in the Host field. In the DNS Server
Search Order field, enter the IP address of your DNS server and click Add.
Click OK to save your changes and close the TCP/IP Properties dialog.
Click OK to close the Network dialog. Click the Close button in the Control
Panel title bar to close the Control Panel. TCP/IP is now installed.
8.
Restart your PC when prompted to put the configuration changes into effect. Continue at “Changing from dial-up networking” on page 3-6.
Changing from dial-up networking
If you have been using Windows 95 or 98 dial-up networking for your connections to the Internet or a remote office previously, you may need to change the
connection parameters so that your PC will use the router for your remote connections.
1.
In the Windows Start menu, point to Settings and click Control Panel, to
display the Control Panel. Double click on the Internet, Internet Connections or Internet Options icon to open the Internet Properties window.
Click on the Connections tab.
2.
Windows 95: If you have a check box labelled Connect to the Internet as
needed, UNCHECK it.
If you do not have this check box, but you do have an option to Connect to
the Internet using a local area network, CHECK this instead.
Windows 98 or 2000: Select Never dial a connection.
Getting Connected
3-7
3.
Click OK to save your changes and close the Internet Properties dialog.
Click the Close button in the Control Panel title bar to close the Control
Panel.
Installing support software
The AR100 Access Wizard requires some support files to be installed on your
PC. You will also need a web browser to use the Configuration Wizard, and
Adobe Acrobat Reader to view the on-line manuals. You should install these
now from the Installer and Documentation CD-ROM.
1.
Insert the CD-ROM into your PC’s CD-ROM drive. The CD-ROM Main
Menu screen (Figure 3-8) appears.
Figure 3-8: CD-ROM Main Menu screen
If the Welcome screen does not appear automatically, select Run from the
Windows Start Menu, type d:\start.exe (where d: is your CD-ROM drive)
and click OK.
3-8
Getting the PC and router communicating
2.
Click Install Software to open the CD-ROM Install Software screen (Figure 3-9).
Figure 3-9: CD-ROM Install Software screen
■
Install the support files for the AR100 Access Wizard on your PC by clicking on AR100 Access Wizard and following the on screen instructions.
■
If you do not have Adobe Acrobat Reader installed on your PC, install it
now by clicking Acrobat Reader and following the on screen instructions.
You will need Acrobat Reader to view the User Guide or the Reference
Manual.
■
If you do not already have a web browser installed on your PC, install one
now by clicking on either Internet Explorer or Netscape Communicator
and following the on-screen instructions. You will use the web browser to
configure the router with information specific to your connections.
■
Click Main Menu to return to the CD-ROM Main Menu.
Getting the PC and router communicating
The AR100 Access Wizard will automatically set up communication between
your PC and your router. It checks that your PC has an Ethernet adapter card,
that TCP/IP is installed and correctly configured, and that a web browser is
installed. It checks that there is a connection between the router and the PC,
and makes sure that the router and the PC have the IP addresses they need to
communicate with one another.
If anything in the system setup prevents communication, dialog boxes will tell
you what to do. For more information, see Chapter 10, Troubleshooting. If you
need to restart the AR100 Access Wizard after an interruption, remove the CD,
re-insert it in the CD-ROM drive, and click Configure Router again.
Getting Connected
3-9
1.
Start the AR100 Access Wizard by clicking Configure Router on the CD’s
Welcome screen. The Welcome to the AR100 Access Wizard dialog (Figure
3-10) opens.
Figure 3-10: Welcome to the AR100 Access Wizard dialog
In the Welcome dialog, click on the Start button. The Select a Router dialog
(Figure 3-11) opens, and the AR100 Access Wizard searches for all the
AR100 Series routers on the local LAN.
2.
The Select a Router dialog (Figure 3-11) displays the AR100 routers that the
Access Wizard has found.
Figure 3-11: Select a Router dialog
Select the router you want to configure, and click Next.
If you select a router that is already configured, your web browser connects
you to the AR100 Management Wizard.
If you select a router that has not yet been configured, the Choosing an IP
Address dialog (Figure 3-12) opens.
3-10
Getting the PC and router communicating
3.
In the Choosing an IP Address dialog (Figure 3-12), an “Initialising...” message appears in the IP Address field to show that the wizard is choosing a
free IP address for the router.
Figure 3-12: Choosing an IP Address dialog
When an IP address appears in the IP Address field, click Next.
Depending on the PC’s configuration either the Gateway Not Set dialog
(Figure 3-13), the Gateway Already Set dialog (Figure 3-14) or the Domain
Name Server dialog (Figure 3-15) opens.
4.
The gateway is the device on your network that connects you to the Internet
or a remote office network. You may see one of the following two dialogs.
Figure 3-13: Gateway Not Set dialog
If you see the Gateway Not Set dialog (Figure 3-13), then you probably
want the PC to use the AR100 as its gateway. Choose Yes.If there is another
device connected to your PC that you want to use as its gateway, then
choose No. You may need to set the other device as the PC’s gateway. If you
are unsure, contact your network administrator.
Getting Connected
3-11
Select whether or not to use the AR100 as the PC’s gateway, and click Next.
The Domain Name Server dialog (Figure 3-15) opens. Go to step 5 on page
3-11.
Figure 3-14: Gateway Already Set dialog
If you see the Gateway Already Set dialog (Figure 3-14), the PC has been
configured to use another device on the LAN as its gateway. You can choose
whether you want the PC to use the AR100 as its gateway or whether you
want it to continue to use the device at the IP address shown as its gateway.
If you are unsure, contact your network administrator or ISP.
Select whether or not to use the AR100 as the PC’s gateway, and click Next.
The Domain Name Server dialog (Figure 3-15) opens.
5.
The Domain Name Server dialog (Figure 3-15) allows you to choose
whether or not you need a Domain Name Server (DNS). The DNS server
translates IP domain names, for instance alliedtelesyn.co.nz, to IP addresses,
for instance 123.156.78.9, so that data is sent to the right address.
Figure 3-15: Domain Name Server dialog
3-12
Getting the PC and router communicating
If you use your router to access the Internet, your PC needs the IP address
of a Domain Name Server (DNS). If you not wish to access the Internet, you
may still need a DNS server to access your remote office. If you are unsure,
contact your network administrator.
Select whether or not you need a Domain Name Server, and click Next. If
you need a Domain Name Server, the Valid Domain Name Servers dialog
(Figure 3-16) opens. Go to step 6 on page 3-12.
If you do not need a Domain Name Server, the Select Your Country dialog
(Figure 3-19) opens. Go to step 8 on page 3-14.
6.
If you are unsure whether the DNS addresses listed in the Valid Domain
Name Servers dialog (Figure 3-16) are valid, contact your network administrator.
Figure 3-16: Valid Domain Name Servers dialog
If the DNS that you want the router to use is in the list, select it. Select Yes
and then click Next. Go to step 8 on page 3-14.
If the DNS server that you want the router to use does not appear in the list,
select No and click Next.
Getting Connected
3-13
7.
The Domain Name Server Address dialog (Figure 3-17) allows you to enter
a DNS address. Your ISP will have supplied at least one DNS address.
Figure 3-17: Domain Name Server Address dialog
Enter the IP address for the DNS server you want your PC to use, and click
Next.
If you have more than three DNS addresses configured, the Overwrite Domain Name Server Address dialog (Figure 3-18) opens. Otherwise the new
DNS address is entered, and the Select Your Country dialog (Figure 3-19)
opens.
Figure 3-18: Overwrite Domain Name Server Address dialog
Your PC can only have a limited number of DNS addresses. If this dialog
appears, you have tried to add one too many. You will have to replace one
of the existing DNS addresses with the new one that you want the PC to use,
entered in the previous dialog box.
Select an IP address that you no longer need in the list. Click Next to replace
it with the IP address for the new DNS server.
3-14
Getting the PC and router communicating
8.
Setting the correct location in the Select Your Country dialog (Figure 3-19)
allows the AR100 Configuration and Management Wizards to set up the
correct ISDN configuration options for your location.
Figure 3-19: Select Your Country dialog
Select the country in which the router is located. If your country is not in the
list, choose ‘Rest of World’. Click Next. The Communication With Router
Established dialog (Figure 3-20) opens.
9.
The Communication With Router Established dialog (Figure 3-20) shows
that the AR100 Access Wizard has established communication between
your PC and the router.
Figure 3-20: Communication With Router Established dialog
Click Continue to log into the router and start the AR100 Configuration
Wizard in your web browser.
Getting Connected
3-15
Connecting additional PCs
The AR100 has four LAN ports which can be used to create a Local Area Network (LAN). PC’s connected to the hub can communicate directly with one
another to exchange email, transfer files, or use workgroup applications like
Microsoft Netmeeting and Outlook. You can connect additional PCs at any
time after you have configured the router for the first time.
To connect an additional PC:
■
Connect the additional PC to the router as described in “Connect your
router” on page 2-2.
■
Check the current LAN configuration and configure TCP/IP on the additional PC as described in this section.
If you want the new PC to use the AR100 Management Wizard to access the
router’s configuration and other utilities you will also need to:
■
Install the support software as described in “Installing support software” on
page 3-7.
■
Run the AR100 Access Wizard as described in “Getting the PC and router
communicating” on page 3-8.
Note: Any device using TCP/IP to communicate can be connected to the
router’s LAN ports. However, only PCs running Windows 95 and 98 can use the
AR100 CD and run the Configuration and Management Wizard. If you connect
another device, it’s configuration should be comparable to that described in this
chapter for Windows 95 and 98.
Follow the steps below. The figures
Record LAN configuration
The AR100 supports a range of Local Area Network (LAN) configurations, but
all PCs connected to the router must have the same configuration. The LAN
configuration will depend on any previous TCP/IP configuration and any
changes made by the AR100 Access Wizard.
The most likely configuration for a small office or home office is for the PC to
use IP addresses allocated dynamically by the router’s DHCP server. This is the
simplest configuration and requires minimal changes to the additional PCs.
Other possibilities are for the PC to use IP addresses dynamically allocated by a
DHCP server other than the AR100, or to use static IP addresses and no DHCP
server.
Print Table 3-1. Use this table as you follow the steps below. The dialogs for
Windows 2000 differ slightly from those shown here for Windows 95 and 98.
Table 3-1: Check list for configuring additional PCs
Configuration parameter
Examples
Enter your data below
Check the TCP/IP configuration on the first PC. Record whether the IP address is
dynamically or statically allocated in field A or field B. If the first PC is configured with a
specified IP address, record the IP address in field C and the subnet mask in field D.
Obtain IP address automatically ✓
A
✓
B
Specify an IP address
IP Address for first PC
192.168.163.21
C
Subnet Mask
255.255.255.0
D
From the DNS Configuration tab on the first PC, record the DNS Server Search Order in
field G and the DNS host in field F.
DNS Configuration
Enable DNS
E
DNS Host for first PC
PC1
F
DNS Server Search Order
192.168.163.2
G
If field B above shows Specify an IP address, record the gateway address in field H.
Gateway address
H
192.168.163.3
Is the router’s DHCP server is enabled or disabled? Record this in field I.
AR100 DHCP server
I
disabled
Enter a DNS host name for each additional PC in field J, field K and field L.6
DNS Host for second PC
PC2
J
DNS Host for third PC
PC3
K
DNS Host for fourth PC
-------------------
L
If field B above shows Specify an IP address, record a free IP address for each additional PC
in field M, field N and field O. Ask your network administrator for assistance. If field A
shows that IP addresses are obtained automatically, draw a line through field M, field N
and field O.
IP Address for second PC
192.168.163.22
M
IP Address for third PC
192.168.163.24
N
IP Address for fourth PC
-------------------
O
If field B above shows Specify an IP address, enter No in field P. If field I shows that the
router’s DHCP server is enabled, enter No in field P. If field A shows that IP addresses are
obtained automatically and field I shows that the router’s DHCP server is disabled, enter
Yes in field P.
Another DHCP server to
configure
No
P
If the PC has been used for Windows 95 or 98 dial up networking, enter Yes in field P.
Change from dial up
networking
Yes
Q
Getting Connected
3-17
Check the first PC’s configuration
1.
On the first PC used to configure the router, in the Windows Start menu,
point to Settings and click the Control Panel.
Figure 3-21: Windows Control Panel
2.
Windows 95 and 98: In the Control Panel, double click the Network icon to
display the Network dialog box.
Windows 2000: In the Control Panel, click Network and Dial-up Connections. In the Network and Dial-up Connections dialog, right click on the
Local Area Connection icon, and select Properties. The Local Area Connection Properties dialog opens, corresponding to the Network dialog in Windows 95 and 98.
3-18
Connecting additional PCs
Figure 3-22: Windows Network dialog
In the Network dialog box, select TCP/IP and click Properties to check the
TCP/IP configuration. (If your PC has more than one network adapter, in
the Network dialog box, select the TCP/IP entry for the network adapter
connected to the router, and click Properties. If TCP/IP is installed over a
Dial Up Adapter, do not select this.)
Getting Connected
3-19
3.
Windows 95 and 98: In the TCP/IP Properties dialog box, click on the IP
Address tab.
Windows 2000: The Internet Protocol (TCP/IP) Properties dialog corresponds to the IP Address, DNS Configuration and Gateway tabs in Windows 95 and 98.
Figure 3-23: TCP/IP Properties - IP Address tab
4.
Record whether the PC is set to Obtain IP address automatically in field A
in Table 3-1 on page 3-16, or Specify an IP address in field B in Table 3-1. If
the PCs IP address is set to Specify an IP address, record the IP Address in
field C and the Subnet Mask in field D in Table 3-1.
3-20
Connecting additional PCs
5.
Click on the DNS Configuration tab.
Figure 3-24: DNS Configuration tab
Record the host name in field F and the DNS server search order in field G
in Table 3-1.
If the PC’s IP address is set to Specify an IP address (field B in Table 3-1),
continue at step 6 on page 3-21 to record the gateway.
If the PC’s IP address is set to Obtain an IP address automatically (field A
in Table 3-1) click Cancel to close the TCP/IP Properties dialog. Click OK to
close the Network dialog. Click the Close button in the Control Panel title
bar to close the Control Panel. Go to step 1 on page 3-22 to check the router’s DHCP server.
Getting Connected
3-21
6.
Click on the Gateway tab to display the Gateway dialog.
Figure 3-25: Gateway tab
Record the gateway address in field H in Table 3-1. Click Cancel to close the
TCP/IP Properties dialog box. Click OK to close the Network dialog box.
Click the Close button in the Control Panel title bar to close the Control
Panel. Go to step 2 on page 3-22.
3-22
Connecting additional PCs
Is the router’s DHCP server enabled?
1.
Using the first PC that configured the router, log into the router’s Menu
page and select Update Configuration to open the Update Configuration
page. See Chapter 7, Changing Your Configuration. On the Update Configuration page, select Ethernet Connection/Modify.
Figure 3-26: Ethernet LAN Connection page in the AR100 Management Wizard
Record whether the DHCP server is enabled or disabled in field I in
Table 3-1 on page 3-16.
Caution: Do not change Ethernet LAN connection settings, as this is likely to
stop communication between the PC and the router.
2.
Enter DNS host names for the additional PCs in fields J, K and L in Table 3-1.
If the PCs do not already have DNS host names, you can make up unique
names for them. If field B in Table 3-1 shows Specify an IP address, enter
free IP addresses for the additional PCs in fields M, N and O in Table 3-1.
Ask your network administrator for assistance.
3.
If field I in Table 3-1 shows that the router’s DHCP server is enabled, enter
No in field P in Table 3-1. If field B in Table 3-1 shows that IP addresses are
statically allocated, enter No in field P in Table 3-1. If field I in Table 3-1
shows that the router’s DHCP server is disabled, and field A in Table 3-1
shows that IP addresses are obtained automatically, there is another DHCP
server (not the AR100) on your LAN. Enter Yes in field P in Table 3-1. You
will need to configure the other DHCP server to allocate dynamic configuration values to the additional PCs. Ask your network administrator for assistance.
Getting Connected
3-23
Configure TCP/IP on additional PCs
You now have all the information you need to configure TCP/IP on the additional PCs. For each additional PC, follow these steps.
1.
In the Windows Start menu, point to Settings and click the Control Panel.
Figure 3-27: Windows Control Panel
2.
Windows 95 and 98: In the Control Panel, double click the Network icon to
display the Network dialog.
Windows 2000: In the Control Panel, click Network and Dial-up Connections. In the Network and Dial-up Connections dialog, right click on the
Local Area Connection icon, and select Properties. The Local Area Connection Properties dialog opens, corresponding to the Network dialog in Windows 95 and 98. (If the Local Area Connection icon does not appear, check
that your network adapter card is correctly installed and configured.)
3-24
Connecting additional PCs
Figure 3-28: Windows Network dialog.
If TCP/IP appears in the list of network components, then it is already installed. Go to step 5 on page 3-25.
3.
If TCP/IP does not appear in the list of network components, click Add in
Windows 95 or 98, or Install in Windows 2000, to display the Select Network Component Type dialog box.
Figure 3-29: Select Network Component Type dialog
4.
Select Protocol and click Add to display the Select Network Protocol dialog.
Getting Connected
3-25
Figure 3-30: Select Network Protocol dialog.
Select Microsoft from the Manufacturers list and TCP/IP from the Network
Protocols list. Click OK to dismiss the dialog box.
5.
In the Network dialog box, select TCP/IP and click Properties. (If your PC
has more than one network adapter, in the Network dialog box, select the
TCP/IP entry for the network adapter connected to the router, and click
Properties. If TCP/IP is installed over a Dial Up Adapter, do not select this.)
Figure 3-31: Network dialog.
3-26
Connecting additional PCs
6.
Windows 95 and 98: In the TCP/IP Properties dialog box, click on the IP
Address tab.
Windows 2000: The Internet Protocol (TCP/IP) Properties dialog corresponds to the IP Address, DNS Configuration and Gateway tabs in Windows 95 and 98.
Figure 3-32: TCP/IP Properties IP Address tab
If field A in Table 3-1 shows the IP addresses are obtained automatically,
select Obtain IP address automatically. If field B in Table 3-1 shows Specify
an IP address, select Specify an IP address and enter the IP address for the
new PC from fields M, N or O in Table 3-1.
7.
Click on the DNS Configuration tab.
Getting Connected
3-27
Figure 3-33: DNS Configuration tab
Select Enable DNS. Enter the DNS host name for the additional PC from
fields J, K and L in Table 3-1. Enter the DNS Server Search Order from field
G in Table 3-1.
If field A in Table 3-1 shows the IP addresses are obtained automatically,
click OK to save your changes and close the TCP/IP Properties dialog box.
Click OK to close the Network dialog box. Restart your PC when prompted
to put the configuration changes into effect. Go to step 9 on page 3-28 to
check your Internet connection properties.
If field B in Table 3-1 shows Specify an IP address, continue at step 8 on
page 3-28 to enter the gateway address.
3-28
Connecting additional PCs
8.
Click the Gateway tab.
Figure 3-34: Gateway tab
Enter the gateway address from field H in Table 3-1. Click OK to save your
changes and close the TCP/IP Properties dialog. Click OK to close the Network dialog. Restart your PC when prompted to put the configuration
changes into effect.
Changing from dial-up networking
If you have been using Windows dial-up networking for your connections to
the Internet or a remote office previously, you may need to change the connection parameters so that your PC will use the router for your remote connections.
9.
In the Control Panel, double click on the Internet, Internet Connections or
Internet Options icon to open the Internet Properties dialog. Click on the
Connections tab.
Windows 95: If you have a check box labelled Connect to the Internet as
needed, UNCHECK it.
If you do not have this check box, but you do have an option to Connect to
the Internet using a local area network, CHECK this instead.
Windows 98 or 2000: Select Never dial a connection.
Click OK to save your changes and close the Internet Properties dialog.
Click the Close button in the Control Panel title bar to close the Control
Panel.
Chapter 4
About Web Access to the AR100
The AR100 Configuration Wizard makes configuring your router easy, whether
you want to configure it for the first time, view or change an existing configuration, monitor the router’s operation, test connections, troubleshoot network
problems or upgrade the software for your router.
Web pages and your browser
You configure the router using a web browser. If you do not have a browser
installed on your computer already, install the Netscape Navigator or Microsoft
Internet Explorer software from the Installer and Documentation CD-ROM, as
described in “Installing support software” on page 3-7.
Because the configuration information needed differs for the ISDN services
available in different countries, some of the wizard pages may differ from those
shown in this User Guide. There may also be small differences in these pages
depending on the web browser and the version of the router software you are
using.
AR100 Configuration Wizard
When you configure the router for the first time, the AR100 Configuration Wizard asks for the configuration information specific to your router setup. The
wizard gives the router a standard configuration that will suit most users. Once
the wizard is finished, it saves your configuration in a script that it will keep
using, even when you update to a new version of the software.
AR100 Management Wizard
Once the router has been configured, you have access to the AR100 Main
Menu page (Figure 4-2) with links to the router’s utilities to update the router
configuration, monitor the router’s operation, and download software
updates.
4-2
One at a time
One at a time
Only one user at a time can access the AR100 Configuration Wizard to configure the router. If you leave the wizard for more than thirty minutes while you
are in the middle of configuring it, another user can log into it. This will restart
the configuration wizard without permanently saving any of the configuration.
The second user can then configure the router from the beginning.
More than one person can access the AR100 Management Wizard Main Menu
and Monitoring pages of a configured router at the same time, since these
pages are not used to change the router’s configuration. If you leave the other
AR100 Management Wizard pages for more than thirty minutes, a second user
can access the pages. If they do, then you (the first user) will lose access to the
Management Wizard pages. Otherwise you will get another thirty minutes
exclusive access to the Management Wizard pages as soon as you start using
them again.
Security
When you have completed the Configuration Wizard and arrive at the Main
Menu page, we recommend that you change the management password. This
is the password you use to log in to the router. It is very important that you
remember this password, as it is encrypted, and there is no way to retrieve it
from the router.
Note that the other passwords entered on the Configuration Wizard pages for
connecting to your ISP or remote office can be seen by anyone backing through
the web browser pages on the PC.
Access the router with your web browser
1.
Insert the Installer and Documentation CD-ROM in the CD ROM drive. The
CD-ROM Main Menu screen (Figure 3-8) is displayed. Click Configure
Router. The Welcome to the AR100 Access Wizard dialog (Figure 3-10)
opens. Click Start. The Select a Router dialog (Figure 3-11) opens.
2.
Select the router you want access to, and click Next.
If you select an uninitialised router, the AR100 Access Wizard leads you
through the configuration process. See “Getting the PC and router communicating” on page 3-8.
If you select an initialised router, your web browser is connected to the router, and the Enter Network Password dialog (Figure 4-1) opens.
About Web Access to the AR100
3.
4-3
The Enter Network Password dialog (Figure 4-1) allows only authorised
users with the correct password to access the router. (The appearance of this
dialog may differ depending on the browser you use.)
Figure 4-1: Enter Network Password dialog
■
Enter the username manager and the password friend.
If you selected a router that has not yet been configured, your web browser
will take you through the AR100 Configuration Wizard. Follow the instructions in Chapter 5, Configuring for the First Time.
If you selected a router that has been configured, your web browser opens
the AR100 Management Wizard’s AR100 Main Menu page (Figure 4-2).
4.
The AR100 Main Menu page (Figure 4-2) lets you change the router’s configuration, monitor its operation, or download the latest router software release.
Figure 4-2: AR100 Main Menu page
■
To change the router’s configuration, click Update Configuration, and
follow the instructions in Chapter 7, Changing Your Configuration.
4-4
Navigating the configuration pages
■
If you haven’t yet changed the initial manager password, we recommend that you do this now, by following the instructions in “Changing
system information” on page 7-2.
■
To use the other router utilities available from the Main Menu, see Chapter 9, Accessing Router Utilities.
■
If you have an Internet connection, you can go to the Allied Telesyn
International support page by clicking ATI Online.
Navigating the configuration pages
While using the AR100 Configuration and Management Wizards, use the buttons on the pages to navigate, not the browser’s Back and Forward buttons, to
ensure that configuration information is stored correctly.
Saving and exiting the web pages
The AR100 Configuration Wizard saves the configuration you enter when you
click End Wizard on the Configuration Summary page. If you leave the Configuration Wizard before clicking End Wizard, no configuration data is saved,
and you will have to run the Wizard again from the beginning.
The AR100 Management Wizard saves any configuration changes you make
when you click OK in the page where the changes are made.
To leave either the Configuration or Management Wizards, simply close the
web browser, or use it to go to another web address outside of the router’s
pages.
Chapter 5
Configuring for the First Time
This chapter gives step by step instructions for configuring your router for the
first time for dial-on-demand ISDN connections with the web based AR100
Configuration Wizard. If you are in Germany or Austria and have an ISDN
leased line, see Chapter 6, Configuring for a Leased Line. For more general information about using these web pages, see Chapter 4, About Web Access to the
AR100. Gather all the information in the configuration checklist included in the
section for your kind of connection before you run this wizard. Hardware, software and service requirements are described in “What does your AR100 need?”
on page 1-3.
When you log into a router that has not yet been configured, the Welcome page
for the AR100 Configuration Wizard (Figure 5-1) opens.
Figure 5-1: Welcome page for the AR100 Configuration Wizard
5-2
This is the beginning of a series of pages that ask you for specific information
about your connections. The wizard creates a standard configuration that will
suit most users. If you want to change this initial configuration, add a new connection, or remove a connection, you can do this later, as described in Chapter 7,
Changing Your Configuration.
While using the wizard, if you want to go back to a previous page, use the Back
button on the pages, not the browser’s Back button, so that your configuration
will be correctly stored. If you need to restart the wizard, re-insert the AR100
CD into the PC’s CD-ROM drive, and click Configure Router again.
Go to the section that describes the kind of connection(s) you want, and follow
the instructions to configure your router.
■
“Internet dial-on-demand connection” on page 5-3
■
“Inter-office dial-on-demand connection” on page 5-9
■
“Internet and inter-office dial-on-demand connections” on page 5-15
■
Leased lines or leased and dial-on-demand lines - Chapter 6, Configuring for
a Leased Line
Configuring for the First Time
5-3
Internet dial-on-demand connection
1.
Print out the following configuration checklist, and gather the information
required.
Table 5-1: Checklist for Internet connections, ISDN Dial-on-Demand.
Configuration parameter
Examples
Enter your data below
If you have an AR140 with phone ports, your ISDN provider may have supplied you with
one or two ISDN numbers that external callers will use to ring the phone extensions.
In North America your ISDN service may support call waiting. If so, decide whether to
enable it on each phone port. Determine whether you want a call to one of the phones
to ring both phones, or only that phone.
Local ISDN number for Phone 1
356767
Enable or disable call waiting on Enable call waiting
Phone 1 (North America only)
Local ISDN number for Phone 2
356768
Enable or disable call waiting on Disable call waiting
Phone 2 (North America only)
Each number rings one or both
phones?
RIng only the phone on
the port for the
number called
In North America, you will also need some ISDN set-up information from your ISDN service
provider. This may include the ISDN switch type to which you are connected, SPIDs and
associated phone or directory numbers to identify your ISDN service, and your ISDN
connection speed.
ISDN switch type
NI1
SPID 1
246246200
Local data number 1
2462462
SPID 2
246345701
Local data number 2
2463457
ISDN connection speed
56K, 64K
You need the following information from your ISP service provider. The ISDN number is
the phone number your router will dial to connect to your ISP (through which you access
the Internet). Most ISPs dynamically allocate IP addresses. If your ISP has given you a fixed
IP address, record it here. In Australia your ISDN service may offer a lower rate for a semipermanent connection. For instance, if you subscribe to OnRamp Express, configure your
router to make calls semi-permanent. If the office at the other end of your connection
subscribes to OnRamp Express, do not make your calls semi-permanent, as they will be
charged at the higher rate.
ISP ISDN number
3456789
ISP Username
janes
ISP Password
tea4tWo
IP address or dynamic allocation Dynamic
Make ISDN call semi-permanent
(Australia only)
Yes
5-4
Internet dial-on-demand connection
2.
On the Welcome page, choose ISDN call to the Internet. Click Next.
If you have an AR140 router with phone ports, the Phone Setup page (Figure 5-2) opens. Continue at step 3 on page 5-4.
If you have an AR130 router without phone ports and are in North America,
the ISDN Setup page (Figure 5-3) opens. Go to step 4 on page 5-5.
If you have an AR130 router without phone ports, and you are not located
in North America, the Internet Connection page for ISDN Dial-on-Demand (Figure 5-4) opens. Go to step 5 on page 5-6.
3.
The Phone Setup page (Figure 5-2) only appears on the AR140 with phone
ports. It allows you to enter the telephone numbers that people will use to
call the telephones or facsimile machines you connect to these phone ports.
Figure 5-2: Phone Setup page
■
Enter the local telephone numbers allocated to you by your ISDN provider. If you only have one number, leave the other blank.
■
If you are in North America and your ISDN service supports Call Waiting, choose whether or not to enable it for each phone port.
■
Select whether you want both phones to ring when either number is
called, or only the phone on the port for the number called. Click Next.
If you are in North America the ISDN Setup page (Figure 5-3) opens. Continue at step 4 on page 5-5.
Otherwise the Internet Connection page for ISDN Dial-on-Demand (Figure 5-4) opens. Go to step 5 on page 5-6.
Configuring for the First Time
5-5
4.
The ISDN Setup page (Figure 5-3) appears only in North America to allow
you to enter ISDN configuration information. The ISDN switch type to
which you are connected and the SPID information are available from your
ISDN service provider.
Figure 5-3: ISDN Setup page
■
Select the ISDN switch type to which you are connected.
■
Enter SPID numbers and data directory numbers.
■
Select your ISDN connection speed.
■
Click Next.
5-6
Internet dial-on-demand connection
5.
The Internet Connection page for ISDN Dial-on-Demand (Figure 5-4) allows you to enter configuration information for your Internet connection.
Your ISP will have given you account information that the router needs to
connect to the Internet through your ISP.
Figure 5-4: Internet Connection page for ISDN Dial-on-Demand
■
Enter your ISP’s ISDN number. This is the phone number or directory
number that your router dials to call your ISP.
■
Enter the username and password your router will use to connect to the
ISP.
■
Choose dynamic or fixed IP address. Most ISPs dynamically allocate IP
addresses, but some allocate fixed IP addresses. If your ISP has given
you an IP address, select Fixed IP address and enter the IP address. Otherwise select Dynamic IP address.
■
The Make ISDN call semi-permanent check box appears in Australia
only. In Australia, some ISDN service providers have charges appropriate to semi-permanent ISDN calls, for instance OnRamp Express. If you
select Make call semi-permanent the call will be kept up and will be
reconnected if a fault in the ISDN network disconnects it. Choose
whether or not to make ISDN calls to the Internet semi-permanent.
Note for Australia only: To make this call semi-permanent, you will also need to
set the Auto-disconnect time to Off. After you have finished the Configuration
Wizard, see the Internet Connection page (Figure 7-5).
Waution for Australia only: If you subscribe to OnRamp Express, outgoing
calls will be charged at a lower rate than the casual ISDN call charge. Calls
from a subscriber that does not have OnRamp Express to a subscriber that
does have OnRamp Express will be charged at the higher casual rate, even if
Configuring for the First Time
5-7
the call is made semi-permanent. This could lead to high ISDN call charges.
If unsure, check with your ISDN service provider.
■
6.
Click Next.
The Configuration Summary page for an Internet connection (Figure 5-5)
shows a summary of all the router configuration parameters you have entered, as well as standard parameters in the configuration.
Figure 5-5: Configuration Summary page for an Internet connection
The wizard creates a standard configuration using the parameters you have
entered. You can change these and other parameters from the Main Menu
page in the future if you wish.
■
If you wish to change any of the parameters you have entered, use the
Back button at the bottom of the page to go back to the page you want
to change.
■
If you are satisfied with the configuration and want to test your Internet
connection, click Test Connection. The Test Results page (Figure 5-6)
opens to show you a summary of the connection test results.
■
When you are satisfied with the configuration, click End Wizard to save
the configuration. The AR100 Main Menu page (Figure 4-2) opens.
■
Put a bookmark in your web browser at this page so that you can easily
reach it in the future.
Note: You have gained access to the router to configure it by using the factory
default password for the router’s manager account. To limit unauthorised access to the router and its configuration, we recommend that you change this
password as soon as you have configured the router for the first time. Go
to“Changing system information” on page 7-2 of Chapter 7, Changing Your Configuration
5-8
Internet dial-on-demand connection
7.
The Test Results page shows a summary of which tests have been performed and the results. It takes a few seconds for all the tests to be run.
Figure 5-6: Test Results page
■
If all the tests succeeded, click OK to return to the Configuration Summary page.
■
If any tests failed, note the test results (for instance, by printing out the
Test Results page) and see “Connection test fails” on page 10-13. Click
OK to return to the Configuration Summary page.
Configuring for the First Time
5-9
Inter-office dial-on-demand connection
1.
Print out the configuration checklist, and gather the information required.
Table 5-2: Checklist for Inter-office connection, ISDN Dial-on-Demand.
Configuration parameter
Examples
Enter your data below
If you have an AR140 with phone ports, your ISDN provider may have supplied you with
one or two ISDN numbers that external callers will use to ring the phone extensions. In
North America your ISDN service may support call waiting. If so, decide whether to enable
it on each phone port. Determine whether you want a call to one of the phones to ring
both phones, or only that phone.
Local ISDN number for Phone 1
35676767
Enable or disable call waiting on Enable call waiting
Phone 1 (North America only)
Local ISDN number for Phone 2
356767
Enable or disable call waiting on Disable call waiting
Phone 2
Each number rings one or both
phones?
RIng only the phone on
the port for the
number called
In North America, you also need ISDN setup information from your ISDN service provider.
This includes the ISDN switch type to which you are connected, SPIDs and associated
phone numbers to identify your ISDN service, and your ISDN connection speed.
ISDN switch type
NI1
SPID 1
2462462-1
Local data number 1
2462462
SPID 2
2463457-2
Local data number 2
2463457
ISDN connection speed
56K, 64K
You need the following information from your network administrator at the remote
office. The router uses the remote office ISDN number, username and password to
contact the remote office. The local username and password are used by the remote
office router to connect to your router. If your network administrator does not supply
these, create your own local username and password using only letters and digits.
Remember to give these to your network administrator at the remote office. In Australia
your ISDN service may offer a lower rate for a semi-permanent connection. If you
subscribe to OnRamp Express, configure your router to make calls semi-permanent. If the
office at the other end of your connection subscribes to OnRamp Express, do not make
your calls semi-permanent, as they will be charged at the higher rate.
Remote office ISDN number
345678
Remote office username
canterbury
Remote office password
lookB4
Local office username
northland
Local office password
icur2Ys4me
Make ISDN call semi-permanent
(Australia only)
Yes
5-10
Inter-office dial-on-demand connection
2.
On the Welcome page choose ISDN call to the Office. Click Next.
If you have an AR140 router with phone ports, the Phone Setup page (Figure 5-7) opens. Continue at step 3 on page 5-10.
If you have an AR130 router without phone ports and are in North America,
the ISDN Setup page (Figure 5-8) opens. Go to step 4 on page 5-11.
If you have an AR130 router without phone ports, and you are not located
in the USA or Canada, the Inter-Office Connection page for ISDN Dialon-Demand (Figure 5-9) opens. Go to step 5 on page 5-12.
3.
The Phone Setup page (Figure 5-7) only appears on the AR140 with phone
ports. It allows you to enter the telephone numbers that people will use to
call the telephones or facsimile machines you connect to these phone ports.
Figure 5-7: Phone Setup page
■
Enter the local telephone numbers allocated to you by your ISDN provider. If you only have one number, leave the other blank.
■
If you are in North America and your ISDN service supports Call Waiting, choose whether or not to enable it for each phone port.
■
Select whether you want both phones to ring when either number is
called, or only the phone on the port for the number called.
■
Click Next.
If you are in North America, the ISDN Setup page (Figure 5-8) opens. Continue at step 4 on page 5-11.
In the rest of the world, the Inter-Office Connection page for ISDN Dialon-Demand (Figure 5-9) opens. Go to step 5 on page 5-12.
Configuring for the First Time
5-11
4.
The ISDN Setup page (Figure 5-8) appears only in North America to allow
you to enter ISDN configuration information. The information required on
this page is available from your ISDN service provider.
Figure 5-8: ISDN Setup page
■
Select the ISDN switch type to which you are connected.
■
Enter SPID numbers and data directory numbers.
■
Select your ISDN connection speed.
■
Click Next.
5-12
Inter-office dial-on-demand connection
5.
The Inter-Office Connection page for ISDN Dial-on-Demand (Figure 5-9)
allows you to enter the information the router needs to connect to the remote office. The network administrator at the remote office will supply you
with this information.
Figure 5-9: Inter-Office Connection page for ISDN Dial-on-Demand
■
Enter the remote office ISDN number. This is the phone number the
router will use to call the remote office.
■
Enter the remote office username and password the router will use to
connect to the remote office.
■
Enter the local user name and password that the remote office will use
to contact this office. Your network administrator may supply you with
this information. If not, create your own username and password. Use
only letters and digits. Give this information to your network administrator at the remote office, who needs to enter it into the remote office
router’s configuration. This local username and password is used when
the remote office router contacts your office.
■
The Make ISDN call semi-permanent check box appears in Australia
only. In Australia, some ISDN service providers have charges appropriate to semi-permanent ISDN calls, for instance OnRamp Express. If you
select Make call semi-permanent the call will be kept up and will be
reconnected if a fault in the ISDN network disconnects it. Choose
whether or not to the call to your remote office semi-permanent.
Note for Australia only: To make this call semi-permanent, you will need to do
three things. Firstly, select Make call semi-permanent in this page. Secondly, set
the Auto-disconnect time to Off after you have finished the Configuration Wizard (see the Inter-Office Connection page (Figure 7-6)). Thirdly, tell the network administrator at your remote office that you have set up a semi-permanent
Configuring for the First Time
5-13
call with lower ISDN call charges, so that the router at the remote office can be
configured only to accept incoming calls from your office, and not to send outgoing calls to your office, since the latter would be charged at a higher casual
rate.
Caution for Australia only: If you subscribe to OnRamp Express, outgoing
calls will be charged at a lower rate than the casual ISDN call charge. Calls
from a subscriber that does not have OnRamp Express to a subscriber that
does have OnRamp Express will be charged at the higher casual rate, even if
the call is made semi-permanent. This could lead to high ISDN call charges.
If unsure, check with your ISDN service provider.
■
6.
Click Next.
The Configuration Summary page for an inter-office connection (Figure
5-10) shows a summary of all the router configuration parameters you have
entered, as well as standard parameters in the configuration.
Figure 5-10: Configuration Summary page for an inter-office connection
The wizard creates a standard configuration using the parameters you have
entered. You can change these and other parameters from the Main Menu
page in the future if you wish.
■
If you wish to change any of the parameters you have entered, use the
Back button at the bottom of the page to go back to the page you want
to change.
■
If you are satisfied with the configuration and want to test your Internet
connection, click Test Connection. The Test Results page (Figure 5-6)
opens to show you a summary of the connection test results.
■
When you are satisfied with the configuration, click End Wizard to save
the configuration. The AR100 Main Menu page (Figure 4-2) opens.
5-14
Inter-office dial-on-demand connection
■
Put a bookmark in your web browser at this page so that you can easily
reach it in the future.
Note: You have gained access to the router to configure it by using the factory
default password for the router’s manager account. To limit unauthorised access to the router and its configuration, we recommend that you change this
password as soon as you have configured the router for the first time. Go to
“Changing system information” on page 7-2 of Chapter 7, Changing Your Configuration
7.
The Test Results page shows a summary of which tests have been performed and the results. It takes a few seconds for all the tests to be run. It
takes a few seconds for all the tests to be run.
Figure 5-11: Test Results page
■
If all the tests succeeded, click OK to return to the Configuration Summary page.
■
If any tests failed, note the test results (for instance, by printing out the
Test Results page) and see “Connection test fails” on page 10-13. Click
OK to return to the Configuration Summary page.
Configuring for the First Time
5-15
Internet and inter-office dial-on-demand
connections
1.
Print out the following configuration checklist, and gather the information
required.
Table 5-3: Checklist for Internet and Inter-office connections, ISDN Dial-on-Demand
Configuration parameter
Examples
Enter your data below
If you have an AR140 with phone ports, your ISDN provider may have supplied you with
one or two ISDN numbers that external callers will use to ring the phone extensions. In
North America your ISDN service may support call waiting. If so, decide whether to enable
it on each phone port. Determine whether you want a call to one of the phones to ring
both phones, or only that phone.
Local ISDN number for
Phone 1
35676767
Call waiting on Phone 1
(North America only)
Enable call waiting
Local ISDN number - Phone 2 356767
Call waiting on Phone 2
(North America only)
Disable call waiting
Each number rings one or
both phones?
RIng only the phone on the
port for the number called
In North America, you will also need some ISDN setup information from your ISDN service
provider. This includes the ISDN switch type to which you are connected, SPIDs and
associated phone or directory numbers to identify your ISDN service, and your ISDN
connection speed.
ISDN switch type
NI1
SPID 1
2462462-1
Local data number 1
2462462
SPID 2
2463457-2
Local data number 2
2463457
ISDN connection speed
56K, 64K
The following information comes from your ISP service provider. The ISDN number is the
phone number your router dials to connect to your ISP. Most ISPs allocate dynamic IP
addresses. If your ISP has given you a fixed IP address, record it here. In Australia your ISDN
service may offer a lower rate for a semi-permanent connection. For instance, if you
subscribe to OnRamp Express, configure your router to make calls semi-permanent.
ISDN number
3456789
ISP Username
janes
ISP Password
tea4tWo
IP address or dynamic
allocation
Dynamic
OnRamp Express
Make ISDN call semipermanent (Australia only)
5-16
Internet and inter-office dial-on-demand connections
Configuration parameter
Examples
Enter your data below
You need the following information from your network administrator at the remote office.
The router uses the remote office ISDN number, username and password to contact the
remote office.The local username and password are used by the remote office router to
connect to your router. If your network administrator does not supply these, create a local
username and password using only letters and digits. Give these to the network
administrator at the remote office. In Australia your ISDN service may offer a lower rate
for a semi-permanent connection. For instance, if you subscribe to OnRamp Express,
configure your router to make calls semi-permanent. If the office at the other end of your
connection subscribes to OnRamp Express, do not make your calls semi-permanent, as
they will be charged at the higher rate.
Remote office ISDN number 345678
Remote office username
canterbury
Remote office password
lookB4
Local office username
northland
Local office password
icur2Ys4me
No
Make ISDN call semipermanent (Australia only)
You need one or more IP address ranges and masks from your network administrator to
determine which subnetworks your router can connect to at the remote office.
IP network at remote office 192.182.35.0
Mask
255.255.255.0
IP network at remote office 192.182.36.0
Mask
255.255.255.0
■
Choose ISDN call to the Office; ISDN call to the Internet on the Welcome page. Click Next.
■
If you have an AR140 router with phone ports, the Phone Setup page
(Figure 5-12) opens. Continue at step 2 on page 5-17.
If you have an AR130 router without phone ports and are in North America,
the ISDN Setup page (Figure 5-13) opens. Go to step 3 on page 5-18.
If you have an AR130 router without phone ports, and you are not located
in the USA or Canada, the Internet Connection page for ISDN Dial-onDemand (Figure 5-14) opens. Go to step 4 on page 5-19.
Configuring for the First Time
5-17
2.
The Phone Setup page (Figure 5-12) only appears on the AR140 with phone
ports. It allows you to enter the telephone numbers that people will use to
call the telephones or facsimile machines you connect to these phone ports.
Figure 5-12: Phone Setup page
■
Enter the local telephone numbers allocated to you by your ISDN provider. If you only have one number, leave the other blank.
■
If you are in North America and your ISDN service supports Call Waiting, choose whether or not to enable it for each phone port.
■
Select whether you want both phones to ring when either number is
called, or only the phone on the port for the number called.
■
Click Next.
If you are in North America the ISDN Setup page (Figure 5-13) opens. Continue at step 3 on page 5-18.
In the rest of the world the Internet Connection page for ISDN Dial-onDemand (Figure 5-14) opens. Go to step 4 on page 5-19.
5-18
Internet and inter-office dial-on-demand connections
3.
The ISDN Setup page (Figure 5-13) appears only in North America to allow
you to enter ISDN configuration information. The ISDN switch type to
which you are connected and the SPID information are available from your
ISDN service provider.
Figure 5-13: ISDN Setup page
■
Select the ISDN switch type to which you are connected.
■
Enter SPID numbers and data directory numbers.
■
Select your ISDN channel speed.
■
Click Next.
Configuring for the First Time
5-19
4.
The Internet Connection page for ISDN Dial-on-Demand (Figure 5-14) allows you to enter configuration information for your Internet connection.
Your ISP will have given you account information that the router needs to
connect to the Internet through your ISP.
Figure 5-14: Internet Connection page for ISDN Dial-on-Demand
■
Enter your ISP’s ISDN number. This is the phone number or directory
number that your router dials to call your ISP.
■
Enter the username and password your router will use to connect to the
ISP.
■
Choose dynamic or fixed IP address. Most ISPs dynamically allocate IP
addresses, but some allocate fixed IP addresses. If your ISP has given
you an IP address, select Fixed IP address and enter the IP address. Otherwise select Dynamic IP address.
■
The Make ISDN call semi-permanent check box appears in Australia
only. In Australia, some ISDN service providers have charges appropriate to semi-permanent ISDN calls, for instance OnRamp Express. If you
select Make call semi-permanent the call will be kept up and will be
reconnected if a fault in the ISDN network disconnects it. Choose
whether or not to make ISDN calls to the Internet semi-permanent.
Note for Australia only: To make this call semi-permanent, you will also need to
set the Auto-disconnect time to Off. After you have finished the Configuration
Wizard, see the Internet Connection page (Figure 7-5).
Caution for Australia only: If you subscribe to OnRamp Express, outgoing
calls will be charged at a lower rate than the casual ISDN call charge. Calls
from a subscriber that does not have OnRamp Express to a subscriber that
does have OnRamp Express will be charged at the higher casual rate, even if
5-20
Internet and inter-office dial-on-demand connections
the call is made semi-permanent. This could lead to high ISDN call charges.
If unsure, check with your ISDN service provider.
■
5.
Click Next.
The Inter-Office Connection page for ISDN Dial-on-Demand (Figure
5-15) allows you to enter the information the router needs to connect to the
remote office. The network administrator at the remote office will supply
you with this information.
Figure 5-15: Inter-Office Connection page for ISDN Dial-on-Demand
■
Enter the remote office ISDN number. This is the phone number the
router will use to call the remote office.
■
Enter the remote office username and password the router will use to
connect to the remote office.
■
Enter the local user name and password that the remote office will use
to contact this office. Your network administrator may supply you with
this information. If not, create your own username and password. Use
only letters and digits. Give this information to your network administrator at the remote office, who needs to enter it into the remote office
router’s configuration. This local username and password is used when
the remote office router contacts your office.
■
The Make ISDN call semi-permanent check box appears in Australia
only. In Australia, some ISDN service providers have charges appropriate to semi-permanent ISDN calls, for instance OnRamp Express. If you
select Make call semi-permanent the call will be kept up and will be
reconnected if a fault in the ISDN network disconnects it. Choose
whether or not to the call to your remote office semi-permanent.
Configuring for the First Time
5-21
Note for Australia only: To make this call semi-permanent, you will need to do
three things. Firstly, select Make call semi-permanent in this page. Secondly, set
the Auto-disconnect time to Off after you have finished the Configuration Wizard (see the Inter-Office Connection page (Figure 7-6)). Thirdly, tell the network administrator at your remote office that you have set up a semi-permanent
call with lower ISDN call charges, so that the router at the remote office can be
configured only to accept incoming calls from your office, and not to send outgoing calls to your office, since the latter would be charged at a higher casual
rate.
Caution for Australia only: If you subscribe to OnRamp Express, outgoing
calls will be charged at a lower rate than the casual ISDN call charge. Calls
from a subscriber that does not have OnRamp Express to a subscriber that
does have OnRamp Express will be charged at the higher casual rate, even if
the call is made semi-permanent. This could lead to high ISDN call charges.
If unsure, check with your ISDN service provider.
Note: If you have an AR140 with voice ports, and want to use telephones or
other devices connected to these, do not make calls to both the Internet and your
remote office semi-permanent. If you do, there will be no channels available for
phone calls.
■
Click Next.
5-22
Internet and inter-office dial-on-demand connections
6.
The Remote IP Networks page (Figure 5-16) shows which IP subnetworks
this router has access to at the remote office. Data for destinations in the
subnetworks listed here will be sent on the remote office connection. Data
for destinations not specified here will be sent on the Internet connection.
The first time you reach this page, there will be no subnetworks listed. Your
network administrator at the remote office will supply you with a list of IP
address ranges and masks.
Figure 5-16: Remote IP Networks page
■
To add an IP subnetwork, click Add New Network. The New IP Network page (Figure 5-17) opens.
■
To remove an IP address range, click Remove.
■
When the list is complete, click Next. The Configuration Summary
page for Internet and inter-office connections (Figure 5-18) opens. Go
to step 7 on page 5-24.
Configuring for the First Time
5-23
The New IP Network page (Figure 5-17) adds a new subnetwork to the list
of subnetworks that the router has access to at the remote office. Return to
this page to enter each new subnetwork.
Figure 5-17: New IP Network page
■
Enter a subnetwork IP address range and mask. Click OK to return to
the Remote IP Networks page (Figure 5-16), which now shows the new
IP address and mask.
5-24
Internet and inter-office dial-on-demand connections
7.
The Configuration Summary page for Internet and inter-office connections (Figure 5-18) shows a summary of all the router configuration parameters you have entered, as well as standard parameters in the configuration.
It takes a few seconds for all the tests to be run.
Figure 5-18: Configuration Summary page for Internet and inter-office connections
The wizard creates a standard configuration using the parameters you have
entered. You can change these and other parameters from the Main Menu
page in the future if you wish.
■
If you wish to change any of the parameters you have entered, use the
Back button at the bottom of the page to go back to the page you want
to change.
■
If you are satisfied with the configuration and want to test your Internet
connection, click Test Connection. The Test Results page (Figure 5-19)
opens to show you a summary of the connection test results. See step 8
on page 5-25.
■
When you are satisfied with the configuration, click End Wizard to save
the configuration. The AR100 Main Menu page (Figure 4-2) opens.
■
Put a bookmark in your web browser at this page so that you can easily
reach it in the future.
Note: You have gained access to the router to configure it by using the factory
default password for the router’s manager account. To limit unauthorised access to the router and its configuration, we recommend that you change this
password as soon as you have configured the router for the first time. Go to
“Changing system information” on page 7-2 of Chapter 7, Changing Your Configuration
Configuring for the First Time
8.
5-25
The Test Results page shows a summary of which tests have been performed and the results. It takes a few seconds for all the tests to be run.
Figure 5-19: Test Results page
■
If all the tests succeeded, click OK to return to the Configuration Summary page for Internet and inter-office connections (Figure 5-18).
■
If any tests failed, note the test results (for instance, by printing out the
Test Results page) and see “Connection test fails” on page 10-13. Click
OK to return to the Configuration Summary page for Internet and inter-office connections (Figure 5-18).
Chapter 6
Configuring for a Leased Line
This chapter describes how to configure your router for the first time if you
have an ISDN leased line or a combination of leased and dial-on-demand ISDN
lines. Leased lines are available in Germany and Austria only. To configure
your router for dial on demand only connections in all other countries, see
Chapter 5, Configuring for the First Time. For more general information about
using the web based AR100 Configuration Wizard, see Chapter 4, About Web
Access to the AR100. Gather all the information in the configuration checklist
included in the section for your kind of connection before you run this wizard.
When you log into a router that has not yet been configured, the Welcome page
for the AR100 Configuration Wizard (Figure 6-1) opens.
Figure 6-1: Welcome page for the AR100 Configuration Wizard
6-2
This is the beginning of a series of pages that ask you for specific information
about your connections. The wizard creates a standard configuration that will
suit many users. If you want to change this initial configuration, add a new
connection, or remove a connection, you can do this later, as described in Chapter 7, Changing Your Configuration.
While using the wizard, if you want to go back to a previous page, use the Back
button on the pages, not the browser’s Back button, so that your configuration
will be correctly stored. If you need to restart the wizard, re-insert the AR100
CD into the PC’s CD-ROM drive, and click Configure Router again.
Note: If you use leased lines on both ISDN B channels, for instance one to your
ISP and one to your remote office, you will not be able connect telephones and
use telephony services, even if you have an AR140 with phone ports.
Go to the section that describes the kind of connection(s) you want, and follow
the instructions to configure your router.
■
“Internet leased line connection” on page 6-3
■
“Inter-office leased line connection” on page 6-10
■
“Internet and inter-office leased line connections” on page 6-17
■
“Internet dial-on-demand & inter-office leased line connections” on page 6-26
■
“Internet leased line & inter-office dial-on-demand connections” on page 6-36
■
Dial-on-demand only - Chapter 5, Configuring for the First Time
Configuring for a Leased Line
6-3
Internet leased line connection
1.
Print out the following configuration checklist, and gather the information
required.
Table 6-1: Check list for Internet connection, ISDN Leased Line
Configuration Parameter
Examples
Enter your data below
Your ISDN provider connects you to your ISP with a leased line on one or two B channels,
B1 and B2. Your ISDN provider will supply this information.
B channels used for leased
line to ISP
Leased line to ISP
on B1 & B2
If you have an AR140 with phone ports, your ISDN provider may have supplied you with
one or two ISDN numbers that external callers will use to ring the phone extensions.
Determine whether you want a call to one of the phones to ring both phones, or only that
phone.
Local ISDN number for
Phone 1
35676767
Local ISDN number for
Phone 2
356767
Each number rings one or
both phones?
RIng only the phone
on the port for the
number called
You need the IP address of your Internet Service Provider (ISP).
IP address
2.
123.23.4.1
On the Welcome page for the AR100 Configuration Wizard (Figure 6-1),
click the Show me ISDN leased line connection options link.
6-4
Internet leased line connection
3.
The Leased Line Connections page appears in Germany and Austria only.
It allows you to select leased line ISDN connections or combinations of
leased line and dial-on-demand ISDN connections.
Figure 6-2: Leased Line Connections page
■
Choose ISDN leased line to the Internet. Click Next. The ISDN Leased
Line page (Figure 6-3) opens.
Configuring for a Leased Line
4.
6-5
Your ISDN connection has two channels, B1 and B2, that can be used for one
or two connections, and a D channel used for signalling. The ISDN Leased
Line page (Figure 6-3) allows you to choose the B channels the router will
use to connect to your ISP. If you are unsure, contact your ISDN service
provider.
Figure 6-3: ISDN Leased Line page
■
Select the B channel(s) for your ISDN leased line connection. Click Next.
If you have an AR140 router with phone ports, the Phone Setup page (Figure 6-4) opens. Continue at step 5 on page 6-6.
If you have an AR130 router without phone ports, the Internet Connection
page for ISDN Leased Line (Figure 6-5) opens. Go to step 6 on page 6-7.
6-6
Internet leased line connection
5.
The Phone Setup page (Figure 6-4) only appears on the AR140 with phone
ports. It allows you to enter the telephone numbers that people will use to
call the telephones or facsimile machines you connect to these phone ports.
Figure 6-4: Phone Setup page
■
Enter the local telephone numbers allocated to you by your ISDN provider. If you only have one number, leave the other blank.
■
Select whether you want both phones to ring when either number is
called, or only the phone on the port for the number called. Click Next.
Configuring for a Leased Line
6.
6-7
The Internet Connection page for ISDN Leased Line (Figure 6-5) allows
you to enter the IP address that the router will use to connect to your
Internet Service Provider (ISP). Your ISP will have given you this
information.
Figure 6-5: Internet Connection page for ISDN Leased Line
■
Enter the IP address for your ISP, and click Next.
6-8
Internet leased line connection
7.
The Configuration Summary page for Internet connection Leased Line
(Figure 6-6) shows a summary of all the router configuration parameters
you have entered, as well as standard parameters in the configuration.
Figure 6-6: Configuration Summary page for Internet connection Leased Line
The wizard creates a standard configuration using the parameters you have
entered. You can change these and other parameters from the Main Menu
page in the future if you wish.
■
If you wish to change any of the parameters you have entered, use the
Back button at the bottom of the page to go back to the page you want
to change.
■
If you are satisfied with the configuration and want to test your Internet
connection, click Test Connection. The Test Results page (Figure 6-7)
opens to show you a summary of the connection test results.
■
When you are satisfied with the configuration, click End Wizard to save
the configuration. The AR100 Main Menu page (Figure 4-2) opens.
■
Put a bookmark in your web browser at this page so that you can easily
reach it in the future.
Note: You have gained access to the router to configure it by using the factory
default password for the router’s manager account. To limit unauthorised access to the router and its configuration, we recommend that you change this
password as soon as you have configured the router for the first time. Go
to“Changing system information” on page 7-2.
Configuring for a Leased Line
8.
6-9
The Test Results page (Figure 6-7) shows a summary of which tests have
been performed and the results. It takes a few seconds to run the tests.
Figure 6-7: Test Results page
■
If all the tests succeeded, click OK to return to the Configuration Summary page for Internet connection Leased Line (Figure 6-6).
■
If any tests failed, note the test results (for instance, by printing out the
Test Results page) and see “Connection test fails” on page 10-13. Click
OK to return to the Configuration Summary page for Internet connection Leased Line (Figure 6-6).
6-10
Inter-office leased line connection
Inter-office leased line connection
1.
Print out the following configuration checklist and gather the information
required.
Table 6-2: Checklist for Inter-office connection, ISDN Leased Line.
Configuration parameter
Examples
Enter your data below
Your ISDN provider connects you to your remote office with a leased line on one or two
B channels, B1 and B2. Your ISDN provider will supply this information.
B channels used for leased line
to remote office
Leased line to remote
office on B2
If you have an AR140 with phone ports, your ISDN provider may have supplied you with
one or two ISDN numbers that external callers will use to ring the phone extensions.
Determine whether you want a call to one of the phones to ring both phones, or only that
phone.
Local ISDN number for Phone 1 35676767
Local ISDN number for Phone 2 356767
Each number rings one or both RIng only the phone on
phones?
the port for the
number called
You need the following information from your network administrator at the remote
office. The router uses the remote office username and password to contact the remote
office.The local username and password are used by the remote office router to connect
to your router. If your network administrator does not supply these, create your own local
username and password using only letters and digits. Remember to give these to your
network administrator at the remote office.
Remote office username
canterbury
Remote office password
lookB4
Local office username
northland
Local office password
icur2Ys4me
2.
On the Welcome page for the AR100 Configuration Wizard (Figure 6-1),
click on the Show me ISDN Leased Line connection options link.
Configuring for a Leased Line
3.
6-11
The Leased Line Connections page appears in Germany and Austria only.
It allows you to select leased line ISDN connections or combinations of
leased line and dial-on-demand ISDN connections.
Figure 6-8: Leased Line Connections page
■
Choose ISDN leased line to the Office. Click Next. The ISDN Leased
Line page (Figure 6-9) opens.
6-12
Inter-office leased line connection
4.
Your ISDN connection has two channels, B1 and B2, that can be used for one
or two connections, and a D channel used for signalling. The ISDN Leased
Line page (Figure 6-9) allows you to choose the B channels the router will
use to connect to your remote office. If you are unsure, contact your ISDN
service provider.
Figure 6-9: ISDN Leased Line page
■
Select the B channel(s) for your ISDN leased line connection. Click Next.
If you have an AR140 router with phone ports, the Phone Setup page (Figure 6-10) opens. Continue at step 5 on page 6-13.
If you have an AR130 router without phone ports, the Inter-Office Connection page for ISDN Leased Line (Figure 6-11) opens. Go to step 6 on page
6-14
Configuring for a Leased Line
5.
6-13
The Phone Setup page (Figure 6-10) only appears on the AR140 with phone
ports. It allows you to enter the telephone numbers that people will use to
call the telephones or facsimile machines you connect to these phone ports.
Figure 6-10: Phone Setup page
■
Enter the local telephone numbers allocated to you by your ISDN provider. If you only have one number, leave the other blank.
■
Select whether you want both phones to ring when either number is
called, or only the phone on the port for the number called. Click Next.
6-14
Inter-office leased line connection
6.
The Inter-Office Connection page for ISDN Leased Line (Figure 6-11)
allows you to enter the configuration the router needs to connect to the
remote office. The network administrator at the remote office will supply
you with this information.
Figure 6-11: Inter-Office Connection page for ISDN Leased Line
■
Enter the remote office username and password the router will use to
connect to the remote office.
■
Enter the local user name and password that the remote office will use
to contact this office. Your network administrator may supply you with
this information. If not, create your own username and password. Use
only letters and digits. Give this information to your network administrator at the remote office, who needs to enter it into the remote office
router’s configuration. This local username and password is used when
the remote office router contacts your office.
■
Click Next.
Configuring for a Leased Line
7.
6-15
The Configuration Summary for Inter-office Leased Line connection
(Figure 6-12) shows a summary of all the router configuration parameters
you have entered, as well as standard parameters in the configuration.
Figure 6-12: Configuration Summary for Inter-office Leased Line connection
The wizard creates a standard configuration using the parameters you have
entered. You can change these and other parameters from the Main Menu
page in the future if you wish.
■
If you wish to change any of the parameters you have entered, use the
Back button at the bottom of the page to go back to the page you want
to change.
■
If you are satisfied with the configuration and want to test your Internet
connection, click Test Connection. The Test Results page (Figure 6-13)
opens to show you a summary of the connection test results.
■
When you are satisfied with the configuration, click End Wizard to save
the configuration. The AR100 Main Menu page (Figure 4-2) opens.
■
Put a bookmark in your web browser at this page so that you can easily
reach it in the future.
Note: You have gained access to the router to configure it by using the factory
default password for the router’s manager account. To limit unauthorised access to the router and its configuration, we recommend that you change this
password as soon as you have configured the router for the first time. Go
to“Changing system information” on page 7-2 of Chapter 7, Changing Your Configuration
6-16
Inter-office leased line connection
8.
The Test Results page (Figure 6-13) shows a summary of which tests have
been performed and the results. It takes a few seconds to run the tests.
Figure 6-13: Test Results page
■
If all the tests succeeded, click OK to return to the Configuration Summary for Inter-office Leased Line connection (Figure 6-12).
■
If any tests failed, note the test results (for instance, by printing out the
Test Results page) and see “Connection test fails” on page 10-13. Click
OK to return to the Configuration Summary for Inter-office Leased
Line connection (Figure 6-12).
Configuring for a Leased Line
6-17
Internet and inter-office leased line
connections
1.
Print out the following configuration checklist and gather the information
required.
Table 6-3: Checklist for Internet and Inter-office connections, ISDN Leased Line
Configuration parameter
Examples
Enter your data below
Your ISDN provider connects you to your ISP and your remote office with a leased lines
on two B channels, B1 and B2. Your ISDN provider will supply this information.
B channels used for leased line Leased line to ISP on B1
to ISP and remote office
and remote office on B2.
You need the IP address of your Internet Service Provider (ISP).
IP address
123.23.4.1
You need the following information from your network administrator at the remote
office. The router uses the remote office ISDN number, username and password to
contact the remote office.The local username and password are used by the remote
office router to connect to your router. If your network administrator does not supply
these, create your own local username and password using only letters and digits.
Remember to give these to your network administrator at the remote office.
Remote office username
canterbury
Remote office password
lookB4
Local office username
northland
Local office password
icur2Ys4me
You need one or more IP address ranges and masks from your network administrator to
determine which subnetworks your router can connect to at the remote office.
IP network at remote office
192.182.35.0
Mask
255.255.255.0
IP network at remote office
192.182.578.0
Mask
255.255.255.0
2.
On the Welcome page for the AR100 Configuration Wizard (Figure 6-1),
click on the Show me ISDN Leased Line connection options link.
6-18
Internet and inter-office leased line connections
3.
The Leased Line Connections page appears in Germany and Austria only.
It allows you to select leased line ISDN connections or combinations of
leased line and dial-on-demand ISDN connections.
Figure 6-14: Leased Line Connections page
■
Choose ISDN leased line to the Office; ISDN leased line to the Internet. Click Next. The ISDN Leased Line page (Figure 6-15) opens.
Configuring for a Leased Line
4.
6-19
Your ISDN connection has two channels, B1 and B2, that can be used for two
connections, and a D channel used for signalling. The ISDN Leased Line
page (Figure 6-15) allows you to choose which of these B channels the
router will use to connect to your ISP, and which it will use to connect to
your remote office. If you are unsure, contact your ISDN service provider.
Figure 6-15: ISDN Leased Line page
■
Select the B channels for your ISDN Leased Line connections.
■
Click Next. The Internet Connection page for ISDN Leased Line (Figure 6-16) opens.
6-20
Internet and inter-office leased line connections
5.
The Internet Connection page for ISDN Leased Line (Figure 6-16) allows
you to enter the IP address that the router will use to connect your Internet
Service Provider (ISP). Your ISP will have given you this information.
Figure 6-16: Internet Connection page for ISDN Leased Line
■
Enter the IP address for your ISP, and click Next.
Configuring for a Leased Line
6.
6-21
The Inter-Office Connection page for ISDN Leased Line (Figure 6-17)
allows you to enter the configuration the router needs to connect to the
remote office. The network administrator at the remote office will supply
you with this information.
Figure 6-17: Inter-Office Connection page for ISDN Leased Line
■
Enter the remote office username and password the router will use to
connect to the remote office.
■
Enter the local user name and password that the remote office will use
to contact this office. Your network administrator may supply you with
this information. If not, create your own username and password. Use
only letters and digits. Give this information to your network administrator at the remote office, who needs to enter it into the remote office
router’s configuration. This local username and password is used when
the remote office router contacts your office.
■
Click Next.
6-22
Internet and inter-office leased line connections
7.
The Remote IP Networks page (Figure 6-18) shows which IP subnetworks
this router has access to at the remote office. Data for destinations in the
subnetworks listed here will be sent on the remote office connection. Data
for destinations not specified here will be sent on the Internet connection.
The first time you reach this page, there will be no subnetworks listed. Your
network administrator at the remote office will supply you with a list of IP
address ranges and masks.
Figure 6-18: Remote IP Networks page
■
To add an IP subnetwork, click Add New Network. The New IP Network page (Figure 6-19) opens.
■
To remove an IP address range, click Remove.
■
When the list is complete, click Next. The Configuration Summary, Internet and inter-office leased line (Figure 6-20) opens. Go to step 8 on
page 6-24.
Configuring for a Leased Line
6-23
The New IP Network page (Figure 6-19) adds a new subnetwork to the list
of subnetworks that the router has access to at the remote office. Return to
this page to enter each new subnetwork.
Figure 6-19: New IP Network page
■
Enter a subnetwork IP address range and mask. Click OK to return to
the Remote IP Networks page (Figure 6-18), which now shows the new
IP address and mask.
6-24
Internet and inter-office leased line connections
8.
The Configuration Summary, Internet and inter-office leased line (Figure
6-20) shows a summary of all the router configuration parameters you have
entered, as well as standard parameters in the configuration.
Figure 6-20: Configuration Summary, Internet and inter-office leased line
The wizard creates a standard configuration using the parameters you have
entered. You can change these and other parameters from the Main Menu
page in the future if you wish.
■
If you wish to change any of the parameters you have entered, use the
Back button at the bottom of the page to go back to the page you want
to change.
■
If you are satisfied with the configuration and want to test your Internet
connection, click Test Connection. The Test Results page (Figure 6-21)
opens to show you a summary of the connection test results.
■
When you are satisfied with the configuration, click End Wizard to save
the configuration. The AR100 Main Menu page (Figure 4-2) opens.
■
Put a bookmark in your web browser at this page so that you can easily
reach it in the future.
Note: You have gained access to the router to configure it by using the factory
default password for the router’s manager account. To limit unauthorised access to the router and its configuration, we recommend that you change this
password as soon as you have configured the router for the first time. Go
to“Changing system information” on page 7-2 of Chapter 7, Changing Your Configuration
Configuring for a Leased Line
9.
6-25
The Test Results page (Figure 6-21) shows a summary of which tests have
been performed and the results. It takes a few seconds to run the tests.
Figure 6-21: Test Results page
■
If all the tests succeeded, click OK to return to the Configuration Summary, Internet and inter-office leased line (Figure 6-20).
■
If any tests failed, note the test results (for instance, by printing out the
Test Results page) and see “Connection test fails” on page 10-13. Click
OK to return to the Configuration Summary, Internet and inter-office
leased line (Figure 6-20).
6-26
Internet dial-on-demand & inter-office leased line connections
Internet dial-on-demand & inter-office
leased line connections
1.
Print out the following checklist, and gather the information required.
Table 6-4: Checklist for Internet Dial-on-Demand and Inter-office Leased Line
Configuration parameter
Examples
Enter your data below
Your ISDN provider connects you to your remote office with a leased line on one of two
B channels, B1 and B2. Your ISDN provider will supply this information.
B channels used for leased
line to remote office
Leased line to
remote office on B2
If you have an AR140 with phone ports, your ISDN provider may have supplied one or two
ISDN numbers that external callers will use to ring the phone extensions. Determine
whether you want a call to one of the phones to ring both phones, or only that phone.
Local ISDN number - Phone 1 35676767
Local ISDN number - Phone 2 356767
Each number rings one or
both phones?
RIng only the phone
on the port for the
number called
You need the following information from your ISP service provider. The ISDN number is the
phone number your router will dial to connect to your ISP (through which you access the
Internet). Most ISPs dynamically allocate IP addresses. If your ISP has given you a fixed IP
address, record it here.
ISP ISDN number
3337777
ISP Username
janes
ISP Password
tea4tWo
IP address or dynamic
allocation
Dynamic
You need the following information from your network administrator at the remote office.
The router uses the remote office ISDN number, username and password to contact the
remote office.The local username and password are used by the remote office router to
connect to your router. If your network administrator does not supply these, create your
own local username and password using only letters and digits. Remember to give these
to your network administrator at the remote office.
Remote office username
canterbury
Remote office password
lookB4
Local office username
northland
Local office password
icur2Ys4me
You need one or more IP address ranges and masks from your network administrator to
determine which subnetworks your router can connect to at the remote office.
IP network at remote office
192.182.35.0
Mask
255.255.255.0
IP network at remote office
192.182.36.0
Mask
255.255.255.0
Configuring for a Leased Line
6-27
2.
On the Welcome page for the AR100 Configuration Wizard (Figure 6-1),
click the Show me ISDN Leased Line connection options link.
3.
The Leased Line Connections page appears in Germany and Austria only.
It allows you to select leased line ISDN connections or combinations of
leased line and dial-on-demand ISDN connections.
Figure 6-22: Leased Line Connections page
■
Choose ISDN leased line to the Office; ISDN call to the Internet. Click
Next. The ISDN Leased Line page (Figure 6-23) opens.
6-28
Internet dial-on-demand & inter-office leased line connections
4.
Your ISDN connection has two channels, B1 and B2, that can be used for one
or two connections, and a D channel used for signalling. The ISDN Leased
Line page (Figure 6-23) allows you to choose which of these B channels the
router will use for the leased line connection to your remote office. If you are
unsure, contact your ISDN service provider.
Figure 6-23: ISDN Leased Line page
■
Select the B channel for your ISDN Leased Line connection. Click Next.
If you have an AR140 router with phone ports, the Phone Setup page (Figure 6-24) opens. Continue at step 5 on page 6-29.
If you have an AR130 router without phone ports, the Internet Connection
page for ISDN Dial-on-Demand (Figure 6-25) opens. Go to step 6 on page
6-30.
Configuring for a Leased Line
5.
6-29
The Phone Setup page (Figure 6-24) only appears on the AR140 with phone
ports. It allows you to enter the telephone numbers that people will use to
call the telephones or facsimile machines you connect to these phone ports.
Figure 6-24: Phone Setup page
■
Enter the local telephone numbers allocated to you by your ISDN provider. If you only have one number, leave the other blank.
■
Select whether you want both phones to ring when either number is
called, or only the phone on the port for the number called. Click Next.
The Internet Connection page for ISDN Dial-on-Demand (Figure 6-25)
opens.
6-30
Internet dial-on-demand & inter-office leased line connections
6.
The Internet Connection page for ISDN Dial-on-Demand (Figure 6-25)
allows you to enter configuration information for your Internet connection.
Your ISP will have given you account information that the router needs to
connect to the Internet through your ISP.
Figure 6-25: Internet Connection page for ISDN Dial-on-Demand
■
Enter your ISP’s ISDN number. This is the phone number or directory
number that your router dials to call your ISP.
■
Enter the username and password your router will use to connect to the
ISP.
■
Choose dynamic or fixed IP address. Most ISPs dynamically allocate IP
addresses, but some allocate fixed IP addresses. If your ISP has given
you an IP address, select Fixed IP address and enter the IP address.
■
Click Next. The next page to open is the Inter-Office Connection page
for ISDN Leased Line (Figure 6-26).
Configuring for a Leased Line
7.
6-31
The Inter-Office Connection page for ISDN Leased Line (Figure 6-26)
allows you to enter the information the router needs to connect to the
remote office. The network administrator at the remote office will supply
you with this information.
Figure 6-26: Inter-Office Connection page for ISDN Leased Line
■
Enter the remote office username and password the router will use to
connect to the remote office.
■
Enter the local user name and password that the remote office will use
to contact this office. Your network administrator may supply you with
this information. If not, create your own username and password. Use
only letters and digits. Give this information to your network administrator at the remote office, who needs to enter it into the remote office
router’s configuration. This local username and password is used when
the remote office router contacts your office.
■
Click Next.
6-32
Internet dial-on-demand & inter-office leased line connections
8.
The Remote IP Networks page (Figure 6-27) shows which IP subnetworks
this router has access to at the remote office. Data for destinations in the
subnetworks listed here will be sent on the remote office connection. Data
for destinations not specified here will be sent on the Internet connection.
The first time you reach this page, there will be no subnetworks listed. Your
network administrator at the remote office will supply you with a list of IP
address ranges and masks.
Figure 6-27: Remote IP Networks page
■
To add an IP subnetwork, click Add New Network. The New IP Network page (Figure 6-28) opens.
■
To remove an IP address range, click Remove.
■
When the list is complete, click Next. The Configuration Summary: Internet dial-on-demand, inter-office leased line (Figure 6-29) opens. Go
to step 9 on page 6-34.
Configuring for a Leased Line
6-33
The New IP Network page (Figure 6-28) adds a new subnetwork to the list
of subnetworks that the router has access to at the remote office. Return to
this page to enter each new subnetwork.
Figure 6-28: New IP Network page
■
Enter a subnetwork IP address range and mask. Click OK to return to
the Remote IP Networks page (Figure 6-27), which now shows the new
IP address and mask.
6-34
Internet dial-on-demand & inter-office leased line connections
9.
The Configuration Summary, Internet and inter-office leased line (Figure
6-20) shows a summary of all the router configuration parameters you have
entered, as well as standard parameters in the configuration.
Figure 6-29: Configuration Summary: Internet dial-on-demand, inter-office leased
line
The wizard creates a standard configuration using the parameters you have
entered. You can change these and other parameters from the Main Menu
page in the future if you wish.
■
If you wish to change any of the parameters you have entered, use the
Back button at the bottom of the page to go back to the page you want
to change.
■
If you are satisfied with the configuration and want to test your Internet
connection, click Test Connection. The Test Results page (Figure 6-30)
opens to show you a summary of the connection test results.
■
When you are satisfied with the configuration, click End Wizard to save
the configuration. The AR100 Main Menu page (Figure 4-2) opens.
■
Put a bookmark in your web browser at this page so that you can easily
reach it in the future.
Note: You have gained access to the router to configure it by using the factory
default password for the router’s manager account. To limit unauthorised access to the router and its configuration, we recommend that you change this
password as soon as you have configured the router for the first time. Go
to“Changing system information” on page 7-2 of Chapter 7, Changing Your Configuration
Configuring for a Leased Line
6-35
10. The Test Results page (Figure 6-30) shows a summary of which tests have
been performed and the results. It takes a few seconds to run the tests.
Figure 6-30: Test Results page
■
If all the tests succeeded, click OK to return to the Configuration Summary: Internet dial-on-demand, inter-office leased line (Figure 6-29).
■
If any tests failed, note the test results (for instance, by printing out the
Test Results page) and see “Connection test fails” on page 10-13. Click
OK to return to the Configuration Summary: Internet dial-on-demand, inter-office leased line (Figure 6-29).
6-36
Internet leased line & inter-office dial-on-demand connections
Internet leased line & inter-office dial-ondemand connections
1.
Print out the following checklist, and gather the information required.
Table 6-5: Checklist for Internet Leased Line and Inter-office Dial-on-Demand
Configuration parameter
Examples
Enter your data below
Your ISDN provider connects you to your ISP with a leased line on one of two B channels,
B1 or B2. Your ISDN provider will supply this information.
B channels used for leased line
to ISP
Leased line to ISP on B1
If you have an AR140 with phone ports, your ISDN provider may have supplied you with
one or two ISDN numbers that external callers will use to ring the phone extensions.
Determine whether you want a call to one of the phones to ring both phones, or only that
phone.
Local ISDN number for Phone 1 35676767
Local ISDN number for Phone 2 356767
Each number rings one or both RIng only the phone on
phones?
the port for the number
called
You need the IP address of your Internet Service Provider (ISP).
IP address
123.23.4.1
You need the following information from your network administrator at the remote
office. The router uses the remote office ISDN number, username and password to
contact the remote office.The local username and password are used by the remote
office router to connect to your router. If your network administrator does not supply
these, create your own local username and password using only letters and digits.
Remember to give these to your network administrator at the remote office.
ISDN number
3337777
Remote office username
canterbury
Remote office password
lookB4
Local office username
northland
Local office password
icur2Ys4me
You need one or more IP address ranges and masks from your network administrator to
determine which subnetworks your router can connect to at the remote office.
IP network at remote office
192.182.35.0
Mask
255.255.255.0
IP network at remote office
192.182.578.0
Mask
255.255.255.0
2.
On the Welcome page for the AR100 Configuration Wizard (Figure 6-1),
click on the Show me ISDN Leased Line connection options link.
Configuring for a Leased Line
3.
6-37
The Leased Line Connections page appears in Germany and Austria only.
It allows you to select leased line ISDN connections or combinations of
leased line and dial-on-demand ISDN connections.
Figure 6-31: Leased Line Connections page
■
Choose ISDN call to the Office; ISDN leased line to the Internet. Click
Next. The ISDN Leased Line page (Figure 6-32) opens.
6-38
Internet leased line & inter-office dial-on-demand connections
4.
Your ISDN connection has two channels, B1 and B2, that can be used for
your two connections, and a D channel used for signalling. The ISDN
Leased Line page (Figure 6-32) allows you to choose which one of these B
channels the router will use to connect to your ISP. If you are unsure, contact
your ISDN service provider.
Figure 6-32: ISDN Leased Line page
■
Select the B channel for your ISDN Leased Line connection. Click Next.
If you have an AR140 router with phone ports, the Phone Setup page (Figure 6-33) opens. Continue at step 5 on page 6-39.
If you have an AR130 router without phone ports, the Internet Connection
page for ISDN Leased Line (Figure 6-34) opens. Go step 6 on page 6-40.
Configuring for a Leased Line
5.
6-39
The Phone Setup page (Figure 6-33) only appears on the AR140 with phone
ports. It allows you to enter the telephone numbers that people will use to
call the telephones or facsimile machines you connect to these phone ports.
Figure 6-33: Phone Setup page
■
Enter the local telephone numbers allocated to you by your ISDN provider. If you only have one number, leave the other blank.
■
Select whether you want both phones to ring when either number is
called, or only the phone on the port for the number called. Click Next.
The Internet Connection page for ISDN Leased Line (Figure 6-34) opens.
6-40
Internet leased line & inter-office dial-on-demand connections
6.
The Internet Connection page for ISDN Leased Line (Figure 6-34) allows
you to enter the IP address that the router will use to connect your Internet
Service Provider (ISP). Your ISP will have given you this information.
Figure 6-34: Internet Connection page for ISDN Leased Line
■
Enter the IP address for your ISP, and click Next.
Configuring for a Leased Line
7.
6-41
The Inter-Office Connection page for ISDN Dial-on-Demand (Figure
6-35) allows you to enter the configuration the router needs to connect to the
remote office. The network administrator at the remote office will supply
you with this information.
Figure 6-35: Inter-Office Connection page for ISDN Dial-on-Demand
■
Enter the remote office ISDN number. This is the phone number the
router will use to call the remote office.
■
Enter the remote office username and password the router will use to
connect to the remote office.
■
Enter the local user name and password that the remote office will use
to contact this office. Your network administrator may supply you with
this information. If not, create your own username and password. Use
only letters and digits. Give this information to your network administrator at the remote office, who needs to enter it into the remote office
router’s configuration. This local username and password is used when
the remote office router contacts your office.
■
Click Next. The next page to open is the Remote IP Networks (Figure
6-36).
6-42
Internet leased line & inter-office dial-on-demand connections
8.
The Remote IP Networks (Figure 6-36) shows which IP subnetworks this
router has access to at the remote office. Data for destinations in the
subnetworks listed here will be sent on the remote office connection. Data
for destinations not specified here will be sent on the Internet connection.
The first time you reach this page, there will be no subnetworks listed. Your
network administrator at the remote office will supply you with a list of IP
address ranges and masks.
Figure 6-36: Remote IP Networks
■
To add an IP subnetwork, click Add New Network. The New IP Network page (Figure 6-37) opens.
■
To remove an IP address range, click Remove.
■
When the list is complete, click Next. The Configuration Summary
page for Internet and inter-office connections (Figure 6-38) opens. Go
to step 9 on page 6-44.
Configuring for a Leased Line
6-43
The New IP Network page (Figure 6-37) adds a new subnetwork to the list
of subnetworks that the router has access to at the remote office. Return to
this page to enter each new subnetwork.
Figure 6-37: New IP Network page
■
Enter a subnetwork IP address range and mask. Click OK to return to
the Remote IP Networks (Figure 6-36), which now shows the new IP
address and mask.
6-44
Internet leased line & inter-office dial-on-demand connections
9.
The Configuration Summary page for Internet and inter-office
connections (Figure 6-38) shows a summary of all the router configuration
parameters you have entered, as well as standard parameters in the
configuration.
Figure 6-38: Configuration Summary page for Internet and inter-office connections
The wizard creates a standard configuration using the parameters you have
entered. You can change these and other parameters from the Main Menu
page in the future if you wish.
■
If you wish to change any of the parameters you have entered, use the
Back button at the bottom of the page to go back to the page you want
to change.
■
If you are satisfied with the configuration and want to test your Internet
connection, click Test Connection. The Test Results page (Figure 6-39)
opens to show you a summary of the connection test results.
■
When you are satisfied with the configuration, click End Wizard to save
the configuration. The AR100 Main Menu page (Figure 4-2) opens.
■
Put a bookmark in your web browser at this page so that you can easily
reach it in the future.
Note: You have gained access to the router to configure it by using the factory
default password for the router’s manager account. To limit unauthorised access to the router and its configuration, we recommend that you change this
password as soon as you have configured the router for the first time. Go to
“Changing system information” on page 7-2 of Chapter 7, Changing Your Configuration.
Configuring for a Leased Line
6-45
10. The Test Results page (Figure 6-39) shows a summary of which tests have
been performed and the results. It takes a few seconds to run the tests.
Figure 6-39: Test Results page
■
If all the tests succeeded, click OK to return to the Configuration Summary page for Internet and inter-office connections (Figure 6-38).
■
If any tests failed, note the test results (for instance, by printing out the
Test Results page) and see “Connection test fails” on page 10-13. Click
OK to return to the Configuration Summary page for Internet and inter-office connections (Figure 6-38).
Chapter 7
Changing Your Configuration
Once you have configured your router for the first time using the AR100
Configuration Wizard you can add or remove connections, or change the
router’s configuration.
1.
The AR100 Main Menu page (Figure 7-1) has links to all the AR100
Management Wizard utilities.
Figure 7-1: AR100 Main Menu page
■
Click on the Update Configuration button to open the Update Configuration page (Figure 7-2).
7-2
Changing system information
2.
The Update Configuration page (Figure 7-2), gives you access to configure
all the AR100’s connections.
Figure 7-2: Update Configuration page
■
To modify any existing information, click Modify for the type of information you want to change.
■
To add an Internet or inter-office connection, click Add.
■
To remove an Internet or inter-office connection, click Remove. There
must be at least one configured connection at all times. This page will
not allow you to remove the last one.
Changing system information
We recommend that you change the password that gives access to the router
itself and its configuration.
In the Update Configuration page (Figure 7-2), click on the System
Information/Modify button. The System Information page (Figure 7-3)
opens. In this page you can change any of the system information. The country
selected is used to make the correct configuration parameters for your country
available in these wizard pages. All the other parameters are optional.
Changing Your Configuration
7-3
Figure 7-3: System Information page
■
Enter a new password. REMEMBER THIS PASSWORD. WRITE IT DOWN
AND KEEP IT IN A SECURE PLACE.
Caution: The router’s password is encrypted as soon as you save it, so if you
forget or lose this password, there is no way to retrieve it. If this happens you
will be unable to reach your router’s configuration or other utilities.
■
Make sure the correct Domain Name Server (DNS) address for your router
is entered. The DNS server translates IP domain names, for instance
alliedtelesyn.co.nz, to IP addresses, for instance 123.156.78.9, so that data is
sent to the right address.
■
Make sure the correct country is selected.
■
You can enter a unique router name for administering your network.
■
You can enter your owner contact details.
7-4
Changing phone and ISDN information
■
If the date or time need adjusting, enter the correct date (Day-Month-Year)
and time (Hours:Minutes:Seconds, 24 hour format). This will be set when
you click the OK button, not when you type in the time values. Enter or
check the time values just before you click OK to save the changes.
■
To return to the Update Configuration page (Figure 7-2) without saving
changes to the system information, click the Cancel button.
■
Click OK to save the changes and return to the Update Configuration
page (Figure 7-2). If you have changed the password, the Enter Network
Password dialog (Figure 4-1) appears. Enter the username and the new
password, and click OK. The Update Configuration page (Figure 7-2)
opens.
Changing phone and ISDN information
You can change or add information about your phone connections if you have
an AR140 with phone ports and your ISDN connection, or change the standard
configuration to enable other advanced features. If you have an AR130 without
phone ports, this will be an ISDN Information page only. Information about
your ISDN service is available from your ISDN service provider.
In the Update Configuration page (Figure 7-2), click on the ISDN Information/
Modify button to open the System Information page (Figure 7-3).
Phone setup
If you have an AR140 router with phone ports, you can add or change the
phone numbers that will ring the extensions connected to each phone port. If
you are in North America your ISDN service may support call waiting.
■
Add or change the directory numbers
■
Choose whether both phone extensions ring when either is called, or
whether only the extension called rings.
■
In North America, choose whether or not to enable call waiting on each
phone port.
ISDN setup
If you are in North America, configuration information is required about the
ISDN switch type that your ISDN service connects you to, SPIDs to identify
your ISDN service, and the associated ISDN phone or directory numbers. For
most of the rest of the world these are not required.
■
If necessary, change the ISDN switch type, add, change or remove the SPIDs
and associated directory or phone numbers, or change the channel speed.
Changing Your Configuration
Figure 7-4: Phone and ISDN Information page
7-5
7-6
Adding or changing an Internet connection
Call bumping
Voice call bumping disconnects a data call when both ISDN B channels are in
use, to make room for an outgoing call. If you have both Internet and interoffice connections, you can specify which data connection should be
disconnected first for an outgoing voice call.
If you have both Internet and inter-office connections, data call bumping
allows a new outgoing data call to be made even if both B channels are being
used for the other connection, by disconnecting the second demand call.
Note: If you want calls to emergency phone numbers to override data calls to
the Internet or remote office, you must enable voice call bumping.
■
If you want phone calls to disconnect data calls, select Enable voice call
bumping. Choose whether you want data calls to the Internet or your
remote office to be disconnected first for voice calls.
■
Choose whether or not to enable Data call bumping.
Data over voice
The Data Over Voice (DOV) feature sends data calls over the ISDN network as
though they are voice calls. For those ISDN service providers that have lower
charges for voice calls than for data calls, this feature can give reduced ISDN
call charges. If you are to receive DOV calls, you must have an ISDN directory
number to be used only by DOV calls entered on this page. DOV must be
enabled on the Internet Connection page (Figure 7-5) and/or the Inter-Office
Connection page (Figure 7-6). If you are to send or receive DOV calls, the ISP
or remote office router must also be configured for Data Over Voice calls.
■
Enter the ISDN directory number for Voice Over Data calls.
Note: Depending on where you are located and your ISDN service, the use of
the Data Over Voice feature may not be permitted.
Save changes
■
Click OK to save these changes and return to the Update Configuration
page (Figure 7-2).
■
To return to the Update Configuration page (Figure 7-2) without saving
changes to the phone and ISDN information, click the Cancel button.
Adding or changing an Internet
connection
Your Internet Service Provider (ISP) will have given you account information
that the router needs to connect to the Internet through your ISP.
Changing Your Configuration
7-7
To add a new Internet connection, click on the Internet Connection/Add
button in the Update Configuration page (Figure 7-2). The Internet
Connection page (Figure 7-5) opens.
To modify the configuration for an existing Internet connection, click on the
Internet Connection/Modify button in the Update Configuration page
(Figure 7-2). The Internet Connection page (Figure 7-5) opens.
The ISDN number is the phone number or directory number that your router
dials to call your ISP. If your Internet connection only uses a leased line, then
you may not need to enter this information. Most ISPs dynamically allocate IP
addresses, but some allocate fixed IP addresses.
■
Enter or modify your ISP ISDN number, username and password. Select
account information on the Internet Connection page.
■
Select Dynamic IP address or select Fixed IP address and enter the address.
Activate a second ISDN call on demand
The AR100 can make a second ISDN call to the Internet to increase the speed of
your connection when the demand for it rises above a threshold. It will
automatically disconnect such a call when the demand falls below a lower
threshold value for a specified time. You can use the default threshold and time
values or change these values to tune your connection. You will also need to
enter the ISDN number for the second call to connect to your ISP.
Note: To determine whether data or voice Dial-on-Demand calls will be
dropped for higher priority calls for an AR140 with phone ports, see Call bumping on the Phone and ISDN Information page (Figure 7-4).
■
Choose whether or not to activate a second ISDN Dial-on-Demand call
when the demand on your Internet connection is high.
■
If necessary, modify the threshold values.
■
Enter the ISP’s ISDN number for the second call.
Data compression
Stac LZS compression reduces the amount of data passing over your Internet
connection if it is also supported by your ISP. It improves performance and
may reduce call charges,
■
If necessary, modify the Compression setting.
7-8
Adding or changing an Internet connection
Figure 7-5: Internet Connection page
Changing Your Configuration
7-9
Keeping calls up semi-permanently
The AR100 supports semi-permanent ISDN calls. This means that an ISDN call
can be configured to remain connected indefinitely, and to be automatically
reconnected if it is disconnected for any reason. If you subscribe to the
OnRamp Express service in Australia, outgoing calls on this line are charged at
a lower rate than regular dial-on-demand ISDN calls.
If you subscribe to OnRamp Express:
■
Select Keep call up semi-permanently.
■
Set the Auto-disconnect time described below to Off.
Caution for Australia only: Only outgoing calls on the OnRamp Express
service are charged at the lower rate. Incoming calls are charged at the higher
casual rate, even if the calls are kept up semi-permanently, potentially
leading to high ISDN call charges.
Note for Australia only: If you have an AR140 with voice ports, and want to use
telephones or other devices connected to these, do not make calls to both the
Internet and your remote office semi-permanent. If you do, there will be no
channels available for phone calls.
Auto-disconnect time
If you are using ISDN Dial-on-Demand, your Internet connection will by
default automatically be disconnected if it is unused for more than 60 seconds,
to save call charges. It will automatically be reconnected when there is new
data to send. You can change the value of the Auto-disconnect timer, or select
Off to keep the ISDN call connected permanently (for instance, if you subscribe
to OnRamp Express in Australia).
■
If necessary, modify the Auto-disconnect timer.
Data over voice
The Data Over Voice (DOV) feature sends data calls over the ISDN network as
though they are voice calls. For those ISDN service providers that have lower
charges for voice calls than for data calls, this feature can give reduced ISDN call
charges. If you are to send DOV calls, the ISP must also be configured for DOV.
■
Enable or disable Data Over Voice calls.
Caution: Depending on which country you are located in and the ISDN
service you use, using the Data Over Voice feature may not be permitted.
Internet connection limits
You can limit the use of your Internet connection. Depending on how your ISP
charges for your Internet connection, you can choose to limit the connection
time, or the amount of data sent or received, or the total data sent and received
over your Internet connection. When the limits are exceeded, the router will
7-10
Removing an Internet connection
not connect to the Internet again until the counters for these limits are reset. If
no limits are entered here, the router will never automatically disconnect the
Internet connection. The counters are automatically reset every week at
midnight between Sunday night and Monday morning. You can manually
reset them at any time on the Monitoring page (Figure 9-2).
To see the connection time or data transmission remaining for the week, see
“Monitor router operation” on page 9-2.
Save changes
■
Click OK to save these changes and return to the Update Configuration
page (Figure 7-2).
■
To return to the Update Configuration page (Figure 7-2) without saving
changes to the Internet connection configuration, click the Cancel button.
Removing an Internet connection
1.
To remove an Internet connection that is no longer needed, click on the
Internet Connection/ Remove button in the Update Configuration page
(Figure 7-2). The Internet connection is removed from the configuration,
and a Connection Deleted page opens.
2.
Click OK to return to the Update Configuration page (Figure 7-2).
Changing an inter-office connection
To add a new inter-office connection, click on the Inter-Office Connection/Add
button in the Update Configuration page (Figure 7-2). The Inter-Office
Connection page (Figure 7-6) opens.
To modify the configuration for an existing inter-office connection, click on the
Inter-Office Connection/Modify button in the Update Configuration page
(Figure 7-2). The Inter-Office Connection page (Figure 7-6) opens.
The router needs information about the ISDN number, the username and the
password it will use to contact the remote office. The network administrator at
the remote office will supply you with this information. The router also needs a
local user name and password that the remote office will use to contact this
office. Your network administrator may supply you with this information. If
not, create your own username and password. Use only letters and digits. Your
network administrator at the remote office needs this information, so that it can
be entered into the remote office router’s configuration. This local username
and password is used when the remote office router contacts your office.
■
Enter or modify the ISDN number, the username and the password for
connecting to the remote office.
■
Enter or modify the local username and password for the remote office to
connect to your office. If you have created your own local username and
password, give them to the network administrator at the remote office.
Changing Your Configuration
Figure 7-6: Inter-Office Connection page
7-11
7-12
Changing an inter-office connection
Making calls semi-permanent
The AR 100 supports semi-permanent ISDN calls. This means that an ISDN call
can be configured to remain connected indefinitely, and to be automatically
reconnected if it is disconnected for any reason. If you subscribe to the
OnRamp Express service in Australia, outgoing calls on this line are charged at
a lower rate than regular dial-on-demand ISDN calls.
If you subscribe to OnRamp Express:
■
Select Keep call up semi-permanently.
■
Set the Auto-disconnect time described below to Off.
■
Tell the network administrator at the remote office that you have lower call
charges, so that they can configure their router only to accept incoming
data calls from your office, and not to send outgoing data calls to your
office.
Caution for Australia only: Only outgoing calls on the OnRamp Express
service are charged at the lower rate. Incoming calls are charged at the higher
casual rate, even if the calls are kept up semi-permanently, potentially
leading to high ISDN call charges.
Note for Australia only: If you have an AR140 with voice ports, and want to use
telephones or other devices connected to these, do not make calls to both the
Internet and your remote office semi-permanent. If you do, there will be no
channels available for phone calls.
Activate a second ISDN call on demand
The AR100 can make a second ISDN call to your remote office to increase the
speed of your connection when the demand for it rises above a threshold. It
will automatically disconnect such a Dial-on-Demand call when the demand
falls below a lower threshold value for a specified time. You can use the default
threshold and time values or change these values to tune your connection. You
will also need to enter the ISDN number for the second call to connect to your
remote office.
Note: To determine whether data or voice Dial-on-Demand calls will be
dropped for higher priority calls for an AR140 with phone ports, see Call bumping on the Phone and ISDN Information page (Figure 7-4).
■
Choose whether or not to activate a second ISDN Dial-on-Demand call
when the demand on your inter-office connection is high.
■
If necessary, modify the threshold values.
■
Enter the remote office ISDN number.
Data compression
Stac LZS compression reduces the amount of data passing over your interoffice connection. It improves performance and may reduce call charges.
■
If necessary, modify the Compression setting.
Changing Your Configuration
7-13
Auto-disconnect time
If you are using ISDN Dial-on-Demand, your interoffice connection will by
default automatically be disconnected if it is unused for more than 60 seconds,
to save call charges. It will automatically be reconnected when there is new
data to send. You can change the value of the Auto-disconnect timer, or select
Off to keep the ISDN call connected permanently.
■
If necessary, modify the Auto-disconnect timer.
Data over voice
The Data Over Voice (DOV) feature sends data calls over the ISDN network as
though they are voice calls. For those ISDN service providers that have lower
charges for voice calls than for data calls, this feature can give reduced ISDN
call charges. If you are to receive DOV calls, you must have an ISDN directory
number to be used only by DOV calls, entered in the Phone and ISDN
Information page (Figure 7-4). If you are to send or receive DOV calls, the
remote office must also be configured for Data Over Voice calls.
■
Enable or disable Data Over Voice calls.
Caution: Depending on which country you are located in and the ISDN
service you use, using the Data Over Voice feature may not be permitted.
Callback
The AR100 supports callback for outgoing calls. Beyond the small charge for
the initial ISDN call, this allows a remote site to reverse the call charges to a
central office, for central billing of ISDN calls. If you are unsure about whether
this feature is also supported by your remote office, contact your network
administrator at the remote office.
■
Choose whether or not to enable callback.
Update IP networks
If you have both Internet and inter-office connections, your router must be
configured with the correct IP address ranges and masks at the remote office.
■
To check these click the Update IP Networks button at the bottom of the
page. The Remote IP Networks page opens.
Data for destinations within the IP address ranges specified here are sent over
the inter-office connection. Data to all other destinations is sent over the
Internet connection.
■
To add a new subnetwork click the Add IP Network button.
■
To remove a subnetwork click the Remove button beside the subnetwork
you want to remove.
Save changes
■
Click the OK button to save these changes and return to the Update
Configuration page (Figure 7-2).
7-14
Removing an inter-office connection
■
To return to the Update Configuration page (Figure 7-2) without saving
any changes to the inter-office connection configuration, click the Cancel
button.
Removing an inter-office connection
1.
To remove an inter-office connection that is no longer needed, click on the
Inter-Office Connection/Remove button in the Update Configuration
page (Figure 7-2). The Internet connection is removed from the
configuration, and a Connection Deleted page opens.
2.
Click OK to return to the Update Configuration page (Figure 7-2).
Changing your Ethernet IP address
When the router was connected and configured for the first time, an Ethernet
IP address was set up on the router that allowed for successful communication
between the PC and the router. We recommend not changing the Ethernet
connection configuration if the router and the PC connected to it are
communicating successfully. Changing this IP address could cause your
connections to fail. Read this section carefully before changing the DHCP
server status or the router’s Ethernet IP address. If you are unsure, contact your
network administrator.
There is a DHCP (Dynamic Host Configuration Protocol) server in the AR100
that you can enable or disable. The DHCP server provides configuration
information such as IP addresses, DNS addresses and gateway addresses to
devices on the network.
If the DHCP (Dynamic Host Configuration Protocol) server in the router is
enabled, then it allocates dynamic Ethernet IP addresses to devices on the LAN
including the router itself, and you cannot change these IP addresses unless
you disable the DHCP server. The IP address entered in this page determines
the range of IP addresses allocated by the router’s DHCP server.
Caution: If you must disable the DHCP server, you will need to reconfigure
all the other devices on the LAN that receive dynamic configuration from the
router’s DHCP server to use static IP addresses, or add another DHCP server
to the network.
If the router’s DHCP server is disabled, then the router’s Ethernet IP address is
determined by the IP address and mask you enter in the configuration.
Communication between the router and the PC you are using to configure it
depends on them having Ethernet IP addresses in the same IP subnetwork.
Caution: The router’s IP address should generally not be changed, as doing so
is likely to disrupt network communications. If you change the router’s IP
address to an address that is not in the same IP subnetwork as the PC, then
they will no longer be able to communicate with each other. Not only will the
router not be able to route data to and from the subnetwork that the PC is in,
the PC will no longer be able to use the web configuration tool on the router
Changing Your Configuration
7-15
to change its configuration. Should this happen, the only way for the PC to
get access to the router’s configuration is to change its own Ethernet IP
address so that it is in the same IP subnetwork as the router, and then reboot.
■
To change the configuration of the router’s Ethernet LAN connection, click
on the Ethernet LAN Connection/Modify button in the Update
Configuration page (Figure 7-2).
The Ethernet LAN Connection page (Figure 7-7) opens, showing the router’s Ethernet IP address and mask and whether or not the router’s DHCP
server is enabled.
Figure 7-7: Ethernet LAN Connection page
■
If necessary, enable or disable the router’s DHCP server
■
If necessary, change the router’s Ethernet IP address or mask.
■
To return to the Update Configuration page (Figure 7-2) without saving
any changes to the inter-office connection configuration, click Cancel.
■
To save the changes click OK. If you change the IP address, the browser
will no longer be connected to the router. You can either enter the new IP
address in the browser’s address field, or close your browser and find the
router again with the AR100 Access Wizard.
Chapter 8
Using Telephony Services
If you have an AR140 Internet Router with phone ports, you can connect up to
two telephones, facsimile machines, answering machines or modems. You can
use them in the same way that you use them on a regular telephone line. You
can use one of these phone ports even when one of the ISDN channels is being
used for a data call, and can configure your router to disconnect data calls for
outgoing phone calls or not as suits your situation.
The router supports ISDN supplementary services available in North America.
These services must be provided on your ISDN line before you can use them on
your AR140. Check with your telephone company to confirm whether these
services are available to you and if so, if there are any additional charges for
them. Typically these features are only supported on your first directory
number, in which case you may want to request that they be supported on your
second directory number as well. This usually costs more.
The supplementary services supported are:
■
Call Waiting - requires Additional Call Offering (ACO) on your ISDN line.
■
Conference (3-way) Calling - requires Flexible Calling on your ISDN line
■
Implicit Call Transfer - requires Flexible Calling on your ISDN line
■
Call Forwarding
■
Reminder Ring
Call Waiting
ISDN Call Waiting is supported in North America only, and allows you to place
a call on hold while you answer another incoming call on the same directory
number. By default call waiting is disabled on both phone ports, but can be
enabled on either port from the Phone and ISDN Information page (Figure
7-4).
The Call Waiting feature on your ISDN line works the same way it does on a
regular analog line.
■
After hearing a call waiting indicator tone, press and release the flash hook
button on your telephone. This will put your current call on hold, and
answer the incoming call.
8-2
Conference Calling
■
To switch back to the first call, press and release the flash hook button on
your telephone.
■
To toggle between the two calls, press and release the flash hook button.
■
To end your current call when you hear the call waiting tone and answer
the waiting call, simply hang-up the phone and wait for the phone to ring.
When you answer the call you will be connected to the second call.
■
If you have a call on hold, and want to end your current call, hang up the
phone and wait for the phone to ring. Pick up the phone to reconnect to the
call on hold.
■
If you have a call on hold and want to end it, reconnect to the held call by
pressing and releasing the flash hook button. Then hang up and wait for
the phone to ring to connect you to the other caller.
■
If you have a call on hold and the held caller hangs up, you will not hear an
indication tone from the network. If you try to reconnect to the held caller
by pressing and releasing the flash hook button either you will put the current call on hold (if you don’t have Flexible Calling) and you will need to
press and release the flash hook button to go back to them, or you will get
dial tone (if you have Flexible Calling).
■
If you have a call on hold and the current caller hangs up, you can retrieve
the held call by pressing and releasing the flash hook button or by hanging
the phone up and waiting for it to ring.
■
If a call is ringing and another call is received, the call waiting tone will be
generated as soon as the first ringing call is answered.
Conference Calling
The Conference Call feature allows you to add a third party to an existing call.
You will need Flexible Calling enabled on your ISDN line. A conference call
can be initiated by you regardless of whether you initiated the call or received
it.
■
If you wish to call someone and include them in an existing call, then press
the flash hook button and release it to put the existing call on hold and
receive a dial tone. Dial the third party’s phone number. When you are
ready to conference the calls together, press the flash hook button and
release it to establish a Three Way Conference Call. You can conference the
third party into the call before the third party has answered the call. You
can not dial a third party to add them to a conference call until the first call
is answered.
■
To drop the last call added to the conference call, simply press the flash
hook button. The last call that was added to the conference will be
dropped.
■
To drop yourself from the conference call, hang-up your phone. The two
other callers will remain connected and the ISDN network will do an
implicit transfer to directly connect the two remaining callers together.
■
If the third party’s line is busy, press and release the flash hook button once
to return to your original caller.
If the third party doesn’t answer, you haven’t pressed and released the flash
hook button to invoke the conference, and you wish to return to your original caller, press and release the flash hook button twice.
Using Telephony Services
8-3
If you have already pressed and released the flash hook button to invoke the
conference, press and release the flash hook button once to return to your
caller.
■
If you dial a number which is unallocated or realise you have dialled a
wrong digit, wait until you hear the router’s unavailable tone and then
press and release the flash hook button once to return to the original caller.
If you dial a wrong number, press and release the flash hook button once to
drop the call and again to return to the original call.
Call Transfer
Call Transfer allows you to implicitly transfer an active call to a third party. You
need Flexible Calling enabled on your ISDN line.
■
To transfer an active call to a third party, and announce the call, press and
release the flash hook button on your telephone to put the active call on
hold and receive a dial tone. Then dial the third party’s phone number.
Announce the call and press and release the flash hook button to establish
a conference call. Hang-up the phone. The ISDN network will do an
implicit transfer to directly connect the two callers.
■
To transfer an active call to a third party, without announcing the call
(known as a blind transfer), press and release the flash hook button on
your telephone to put the active call on hold and receive a dial tone. Then
dial the third party’s phone number. Before the third party answers the
call, hang-up the phone. The ISDN network will do an implicit transfer to
directly connect the two callers.
Call Forwarding
The AR140 supports Call Forwarding. To use this feature, use the telephone
keypad to enter the appropriate dial access codes. Your ISDN service provider
will provide you with the access code. In most cases the call forwarding activation code is “*72” and the deactivation code is “*73”. While the Call Forwarding feature is active, the forwarded call is announced by a single ring on the
telephone from which you entered the access codes. This feature reminds you
that your calls are being forwarded.
■
To activate call forwarding, dial the activate access code (for instance
“*72”) and then the number you want incoming calls to be forwarded to.
■
To deactivate call forwarding, dial the deactivate access code (for instance
“*72”).
Chapter 9
Accessing Router Utilities
A number of utilities are available from the AR100 Main Menu page (Figure 9-1).
Figure 9-1: AR100 Main Menu page
Updating the router configuration is described in Chapter 7, Changing Your Configuration. The troubleshooting utility is described in “Advanced troubleshooting
utility” on page 10-16. The utilities for monitoring operations, testing connections and upgrading software are described in this chapter.
9-2
Monitor router operation
Monitor router operation
The Monitoring page (Figure 9-2) shows information about the router’s operations. You can use this information to help plan any future changes to your network, to monitor particular events like connections going up and down and for
troubleshooting.
1.
Click the Monitor Operation button in the AR100 Main Menu page (Figure
9-1). The Monitoring page (Figure 9-2) opens.
Figure 9-2: Monitoring page
2.
Click on the tab for the connection you want to monitor.
■
The Monitoring Ethernet Connection tab shows operations data for the
Ethernet connection to your local LAN or PC.
■
The Monitoring Internet Connection tab shows operations data for your
Internet connection.
■
The Monitoring Internet Limits tab shows the configured weekly limits
on your Internet connection and the connection time or data transmission
remaining till the limits are reached. You can reset the counters for any of
these limits here.
■
The Monitoring Inter-Office Connection tab shows operations data for
the connection to your remote office.
Accessing Router Utilities
9-3
Test router connections
The router’s Internet and inter-office connections can be tested.
1.
Click the Test Connection button. The Test Results page (Figure 9-3) opens
to show you a summary of which connection tests have been performed and
the results.
Figure 9-3: Test Results page
If any of the tests fail, the page will advise you about what to do.
2.
If all the tests succeeded, click the Main Menu button to return to the AR100
Main Menu page (Figure 9-1).
If any tests failed, note (for instance, by printing out the Test Results page)
and follow the description and instructions given to correct them. See also
“Connection test fails” on page 10-13. Click Main Menu to return to the
AR100 Main Menu page (Figure 9-1).
9-4
Upgrade router software
Upgrade router software
You can automatically download and install the latest release of the router software from the Allied Telesyn web site. When you use this utility, the router
finds out which are the latest versions of the software files available from ATI
web site, and compares them with the versions of the files that the router is currently running. Your web page will tell you whether there is a later version of
the software available, or whether you are already running the latest version. If
there is a later version, you can choose to download the new release. The router
automatically downloads and installs the necessary software files.
Once the new software is installed, the router automatically restarts so that the
router starts running the new software. The configuration you have previously
set up for the router is stored in a script that will automatically be read and
applied by the updated software.
1.
Click on the Upgrade Router Software button in the AR100 Main Menu
page (Figure 9-1). The Upgrade Software page (Figure 9-4) opens.
Figure 9-4: Upgrade Software page
2.
Click Check Version. The router will check the ATI site and compare the
version of the software currently running on your router with the latest version available.
The next page tells you whether you are already running the latest software, or
whether there are new versions of the software release or the resource file used
to display the Configuration and Management Wizards.
Accessing Router Utilities
9-5
Figure 9-5: Upgrade Software page when latest version running
3.
If you are already running the latest version of the software, click Main
Menu to return to the AR100 Main Menu page (Figure 9-1).
Figure 9-6: Upgrade Software page when new version available.
If there are upgrades available for the Software Release or the Configuration
and Management Wizard, click Upgrade Software.
The router loads the new files, showing its progress as it goes. This may take
several minutes.
9-6
Upgrade router software
Figure 9-7: Upgrade Software page while new software is loading
Once the new files are loaded the router installs them and restarts the router.
Figure 9-8: Upgrade Software page while new software is installed
Once the new files are installed the router restarts and the following page
shows that the router is now running the latest version of the software.
Accessing Router Utilities
9-7
Figure 9-9: Upgrade Software page when upgrade completed
4.
Click Main Menu to return to the AR100 Main Menu page (Figure 9-1).
If the resource file for the Configuration and Management Wizards is
upgraded, you may see minor changes in the appearance of the router’s web
pages.
Chapter 10
Troubleshooting
Refer to this chapter for problem solving help.
Front panel LEDs
The LEDs on the front panel of the router show information about its state.
Table 10-1: Front panel LEDs
LED
Meaning when lit
Power
Lit when the router is on.
System
Lit for a short time while the router performs its start-up
sequence and self tests. Off during normal operation.
LAN Link 1-4
Lit when the corresponding LAN port has an Ethernet
connection to a PC or hub.
LAN Activity 1-4
Lit when data is being sent or received over the corresponding
LAN (Ethernet) connection.
LAN Collision
Lit when there is a collision on the Ethernet connection.
ISDN Active
Lit when the ISDN U or S/T port on the router is connected to an
ISDN service, and is available for phone or data calls.
ISDN Data 1
Lit when data is sent or received over the ISDN B1 channel.
ISDN Data 2
Lit when data is sent or received over the ISDN B2 channel.
Call Alert
Flashes when configured limits on the Internet connection are
exceeded.
Voice 1 (AR140 only)
Lit when the telephone connected to the Phone 1 port is off the
hook.
Voice 2 (AR140 only)
Lit when the telephone connected to the Phone 2 port is off the
hook.
10-2
Troubleshooting installation
Troubleshooting installation
If you are having problems installing the router, try one or more of the
following:
No LEDs light
If none of the LEDs on the front panel of the router light up the most likely
reason is that the router is not receiving mains power. Check the following:
■
The power switch on the mains supply outlet is not switched on. Check
that the switch is in the ON position.
■
The mains power outlet is not functioning. Test the mains power outlet
with some other equipment you know works.
■
If the problem persists, please contact your authorised Allied Telesyn distributor or reseller immediately.
System LED stays on
If the System LED stays on contact your authorised Allied Telesyn distributor
or reseller immediately.
LAN Link LED does not light
If the LAN Link LED corresponding to the port to which your PC is connected
does not light, there is be no Ethernet communication between them. Your PC
should be connected to one of the four LAN ports with an Ethernet UTP direct
cable.
■
Make sure the Ethernet card on your PC is connected to one of the four
LAN ports on the back of the router.
■
If your PC is connected to LAN port 4 with an Ethernet UTP direct cable,
make sure the PC/Hub switch is in the PC position (out). (If this connection is made with an Ethernet crossover cable instead of a direct cable, put
this switch in the reverse Hub position.) You can reverse this switch by
pressing with a narrow implement.
■
Check that you have the correct Ethernet UTP cable.
■
If the problem persists, contact your authorised Allied Telesyn distributor
or reseller.
If the router is connected to a hub to extend the LAN, LAN port 4 should be
connected to the hub with a UTP direct cable.
■
Make sure the hub is connected to LAN port 4 with a UTP direct cable.
■
Check that the PC/Hub switch is in the Hub position (in). (If this connection is made with a crossover cable instead of a direct cable, put this switch
in the reverse PC position.)
■
Check that you have the correct Ethernet UTP cable, and that it is functioning. Try with another cable if you have one.
■
If the problem persists, contact your authorised Allied Telesyn distributor
or reseller.
Troubleshooting
10-3
Communication problems between PC
and router
If the AR100 Access Wizard on the PC cannot establish communication with
the router, then it will show one or more of the following dialog boxes. Exit the
AR100 Access Wizard, follow the instructions to resolve the problem, and run
the AR100 Access Wizard again by re-inserting the CD in the CD-ROM drive
and clicking on Configure Router.
No Ethernet card
The PC you use to configure the router uses an Ethernet adapter card to
communicate over the Ethernet. If this dialog appears, your PC does not have
an Ethernet card correctly installed.
Figure 10-1: No Ethernet Card dialog box
■
If your PC does not have an Ethernet card, contact your PC supplier or use
another PC that has an Ethernet card.
■
To make sure the Ethernet adapter on your PC is correctly installed, follow
the steps below. You will need the name and manufacturer of your Ethernet card, and if you have the installation disk for your Ethernet card, you
may need this too.
Follow these steps.
1.
In the Windows Start menu, point to Settings and click the Control Panel.
2.
In the Control Panel, double click the Network icon to display the Network
dialog box.
3.
If your Ethernet adapter card appears in the configuration list then it is installed, and you can close these dialogs.
If your Ethernet adapter card does not appear in the list of network components, click Add to display the Select Network Component Type dialog
box.
4.
Select Adapter and click Add to display the Select Network Adapters dialog box.
10-4
Communication problems between PC and router
5.
Select your Ethernet adapter card’s manufacturer in the Manufacturers
field and your Ethernet adapter card in the Network Adapters field. If you
have the installation disk, click Have Disk and follow the instructions given. Otherwise click OK to save your changes. The Ethernet adapter card
appears in the Network dialog Configuration list.
6.
Click OK to close the Network dialog. Click the Close button in the Control
Panel title bar to close the Control Panel.
7.
Restart your PC.
No web browser
You need a web browser to access and configure the router. If this dialog box
appears, you will need to install a web browser on your PC.
Figure 10-2: No Web Browser dialog
■
Insert the AR100 CD into the PC’s CD-ROM drive, and Install Software to
install Netscape Navigator or Microsoft Internet Explorer.
Troubleshooting
10-5
TCP/IP not installed
TCP/IP is the protocol that the PC uses to communicate with the router. If this
dialog appears, you will need to install and configure TCP/IP on your PC.
Figure 10-3: TCP/IP Not Installed dialog
Follow the instructions in “Installing TCP/IP on your PC” on page 3-1, or in the
Start Here Guide.
Wizard already active
If you already have the AR100 Access Wizard running on your PC and try to
start another one, this dialog appears.
Figure 10-4: Wizard Already Active dialog
■
Exit this AR100 Access Wizard, and use the one that was already running.
10-6
Communication problems between PC and router
Dynamic IP address assignment failed
Your PC needs to have an IP address assigned to it so that it can communicate
with the router. This can either be an IP address dynamically assigned to your
PC by a DHCP server, or it can be a fixed IP address. The AR100 has a DHCP
server that can be used to assign IP addresses to your PC. If this dialog appears,
your PC expects the AR100 to assign it an IP address, but it hasn’t received one.
Figure 10-5: Dynamic IP Address Assignment Failed dialog
■
Make sure that the router is connected to the power supply and that the
mains power supply is switched on.
■
Make sure the Ethernet port on the PC is connected to one of the LAN
ports on the router by an Ethernet direct cable. If connected to LAN port 4,
make sure that the PC/Hub switch is in the PC position. Check that the
Link LED is on. Click Continue.
■
Restart the PC to force it to request dynamic IP address again.
■
If the problem persists, contact your authorised Allied Telesyn distributor
or reseller.
Troubleshooting
10-7
No routers found
When the AR100 Access Wizard is started it searches for any AR100s connected
to the PC either directly or via the LAN. If it does not find any, this dialog
appears.
Figure 10-6: No Routers Found dialog
■
Make sure that the router is connected to the power supply and that the
mains power supply is switched on.
■
Make sure the Ethernet port on the PC is connected to one of the LAN
ports on the router by an Ethernet direct cable. If connected to LAN port 4,
make sure that the PC/Hub switch is in the PC position. Check that the
Link LED is on. Click Continue.
■
If the problem persists, contact your authorised Allied Telesyn distributor
or reseller.
10-8
Communication problems between PC and router
Not responding
If this dialog appears, the uninitialised router is not responding as expected to
the AR100 Access Wizard.
Figure 10-7: Not Responding dialog
■
Make sure that the router is connected to the power supply.
■
Make sure the Ethernet port on the PC is connected to one of the LAN
ports on the router by an Ethernet direct cable. If connected to LAN port 4,
make sure that the PC/Hub switch is in the PC position. Click Continue.
■
If the problem persists, contact your authorised Allied Telesyn distributor
or reseller.
No free IP address
Your router needs an IP address. This dialog appears if there are no IP
addresses available.
Figure 10-8: No Free IP Address dialog
Troubleshooting
10-9
■
Remove another device from your LAN by switching it off or disconnecting it. Click Continue to try again.
No gateway address
Your PC needs the IP address of a valid gateway to access remote networks like
the Internet or your remote office. It is configured to get IP addresses
dynamically assigned to it by a DHCP server. The AR100 may be running as a
DHCP server. If this dialog appears, then your PC has been assigned its own IP
address, but has not been given a valid gateway address. This mean that there
is another DHCP server on your LAN in addition to the router you are
configuring, and that it does not supply a valid gateway address.
Figure 10-9: No Gateway Address dialog
1.
Either
■
Disable the DHCP server at the IP address shown so that the AR100
router can assign the gateway address to your PC, or
■
Add a gateway address to the DHCP server at the IP address shown.
If you are unsure, contact your network administrator.
2.
Restart all the devices on your LAN (connected to the PC or the router), and
wait till they have all finished restarting.
3.
Exit and rerun the AR100 Access Wizard.
Gateway address already used
Your PC needs the IP address of a valid gateway to access remote networks like
the Internet or your remote office. This PC uses the router as its gateway. The
PC is configured to get its own IP address and the gateway IP address
dynamically assigned by a DHCP server. The AR100 series router may be
running as a DHCP server. When the PC gets a gateway address from the
DHCP server, it assigns it to the AR100.
10-10
No Internet access
If the Gateway Address Already Used dialog (Figure 10-10) appears, the
DHCP server has allocated a gateway IP address to the PC that is already being
used by another device, so that it cannot be used for the AR100.
Figure 10-10: Gateway Address Already Used dialog
1.
Either
■
Remove the other device at the IP address shown by switching it off or
disconnecting it from the LAN, or
■
Modify the gateway address in the DHCP server to be a free IP address.
If you are unsure, contact your network administrator.
2.
Restart all the devices on your LAN, including the DHCP server, the AR100,
and the PC. Wait till they have all finished restarting.
3.
Exit and rerun the AR100 Access Wizard.
No Internet access
If you cannot log in to your ISP, the cause may be one of the following.
■
The ISDN number, username or password for connecting to your ISP are
wrong. Check the ISDN number, and the username and password on the
Internet Connection page (Figure 7-5). Check spelling, and the use of
upper and lower case letters.
■
The ISP is busy. Try again later.
If your ISP username and password are accepted, but you are unable to access
the Internet, the problem could be with either your router configuration or
your ISP.
■
Check the configuration of your Internet connection. If you are in North
America, make sure the router is configured with the correct channel speed
(56K or 64K) for your Internet connection. See “Adding or changing an Internet connection” on page 7-6.
■
Contact your ISP for assistance.
Troubleshooting
10-11
No access to remote office
If you cannot log in to your remote office, the cause may be one of the
following.
■
The ISDN number, username or password for logging in to your remote
office are wrong. Check the ISDN number, username and password on the
Inter-Office Connection page (Figure 7-6). Check spelling, and the use of
upper and lower case letters.
If your ISP username and password are accepted, but you are unable to access
the remote office network, the problem could be with either your router configuration or the configuration at the remote office.
■
Check the configuration of your Inter-Office connection.
If you are in North America, make sure the router is configured with the
correct channel speed (56K or 64K) for your Internet connection.
If you have both Internet and an inter-office connections, make sure that
you have the correct IP address ranges and masks for access to the IP networks at the remote office.
See “Changing an inter-office connection” on page 7-10.
■
Contact the network administrator at the remote office.
10-12
Access to router denied
Access to router denied
This page appears if you are locked out of the router because someone else is
using the Configuration and Management Wizard pages. The same page will
also tell you if you are locked out because someone else is logged into the
router and using the Configuration and Management Wizard after you left it
unused for more than 30 minutes.
Figure 10-11: Access Denied page
■
Wait until the other user has finished using the pages or left the router
unused for more than thirty minutes. Try again. See “Web pages and your
browser” on page 4-1.
Troubleshooting
10-13
Connection test fails
This section describes the most likely causes of any test connection failures that
may arise when you click Test Connections in the Configuration Wizard or in
the AR100 Main Menu page (Figure 9-1). For more detailed explanations and
troubleshooting tests see “Advanced ISDN troubleshooting” on page 10-18.
ISDN Status
The ISDN status tests check that there is a connection to the ISDN network.
ISDN port check: Not Active
The ISDN port is not active. There is no signalling level connection to the ISDN
network. This may have be due to:
■
A failure in the physical connection between the router and the ISDN network. Make sure the ISDN port on the router is connected to the ISDN
service as shown in the Start Here Guide. Check the ISDN cable. Try another
cable if you have one.
■
A failure in the ISDN network. Contact your ISDN service provider.
■
A failure in the router. Contact your authorised Allied Telesyn distributor
or reseller.
The ISDN Active LED on the front of the router lights when there is a connection to the ISDN service.
ISDN link check: Not Active
The ISDN link is not active for making calls. The router has failed to establish a
logical connection to the ISDN switch using LAPD. Contact your ISDN service
provider.
Internet Connection
The Internet connection tests check that your router can connect to your ISP.
Test ISDN call setup by making an ISDN call to ISP: Failed
The router failed to make an ISDN call to the ISP. This may be due to:
■
The router is configured with the wrong ISDN directory number for the
ISP. Make sure that the correct ISDN number for your ISP is entered in the
Internet Connection page.
■
The ISP is busy or unavailable. Try again later, and if the problem persists,
contact your ISP.
■
There is congestion or a fault in the ISDN network. Try again later, and if
the problem persists, contact your ISDN service provider.
Test PPP connection to ISP: Failed
The router failed to make a PPP connection to the ISP. This may be due to:
■
There is an error in the configuration of either your router or the ISP’s
router. Contact your ISP.
10-14
Connection test fails
■
The router is configured with a valid ISDN number, but it is not the ISP’s
directory number. Make sure that the correct ISDN number for your ISP is
entered in the Internet Connection page.
Test username and password by logging into ISP: Failed
Your router failed to log into the ISP.
■
Make sure the correct username and password are entered in the Internet
Connection page. Try again.
■
If the problem persists, contact your ISP.
Test IP connection to ISP: Failed
Your router failed to make an IP connection to the ISP.
■
There is an error in the configuration of either your router or the ISP’s
router. Contact your ISP.
Inter-Office Connection
The Inter-Office connection tests check that your router can connect to your
remote office.
Test ISDN call setup by making an ISDN call to office: Failed
The router failed to make an ISDN call to the remote office. This may have one
of the following causes.
■
The router is configured with the wrong ISDN directory number for the
remote office. Make sure that the correct ISDN number for your ISP is
entered in the Inter-Office Connection page.
■
The remote office is busy or unavailable. Try again later, and if the problem
persists, contact your network administrator at the remote office.
■
There is congestion or a fault in the ISDN network. Try again later, and if
the problem persists, contact your ISDN service provider.
Test PPP connection to your office: Failed
The router failed to make a PPP connection to the remote office. This may have
one of the following causes:
■
There is an error in the configuration of either your router or the remote
office router. Contact your network administrator at the remote office.
■
The router is configured with a valid ISDN number, but it is not the remote
office directory number. Make sure that the correct ISDN number for your
remote office is entered in the Inter-Office Connection page.
Test username and password by logging into office: Failed
Your router failed to log into the remote office.
■
Make sure the correct username and password are entered in the InterOffice Connection page. Try again.
■
If the problem persists, contact your network administrator at the remote
office.
Troubleshooting
10-15
Test IP connection to your office: Failed
Your router failed to make an IP connection to the remote router.
■
Contact your the network administrator for the remote office.
Software upgrade problems
A failed attempt to upgrade to the latest version of the router software could
have one of the following causes.
■
The ATI web site is temporarily unavailable. Try again later.
■
There is an error in the configuration of your Internet connection. Check
the ISDN number, username and password on the Inter-Office Connection page (Figure 7-6). If unsure, contact your ISP.
■
Your ISP is busy. Try again later.
■
If the problem persists, contact your authorised Allied Telesyn distributor
or reseller.
If a new software release file is successfully loaded and installed, but the Configuration and Management Wizard resource file fails to load or install successfully, the router will still run correctly, but the appearance of the Wizard pages
may be affected.
■
Run the software. Try again later to download the new Configuration and
Management Wizard resource file.
■
If the problem persists, contact your authorised Allied Telesyn distributor
or reseller.
If a new software release file fails to load or install correctly the router software
still needs to be upgraded.
■
Try again later.
■
If the problem persists, contact your authorised Allied Telesyn distributor
or reseller.
10-16
Advanced troubleshooting utility
Advanced troubleshooting utility
You can get more detail about the router’s operation using the Troubleshooting
utility. If you use this page, you can refer to the Reference Manual, also on the
AR100 CD, for explanations of the data reported.
1.
Click on the Troubleshoot button in the AR100 Main Menu page (Figure
9-1). The Troubleshooting page (Figure 10-12) opens.
Figure 10-12: Troubleshooting page
2.
Select the kind of data you want a report of in the pick lists. Click the View
Output button to see a report.
3.
To return to the Troubleshooting page (Figure 10-12), click the OK button
on the report page.
■
If you want to restart the AR100 Configuration Wizard, click Restart Wizard. This will remove an existing configuration. A warning dialog asks you
to confirm that you want to remove the existing configuration.
■
If you reset factory defaults, you will need to use the AR100 Access Wizard
to initialise the router again. A warning dialog asks you to confirm that
you want to remove the existing configuration.
Troubleshooting
10-17
Using interactive commands
An interactive command session allows you to send commands to the router.
You can use this for advanced configuration, including configuring a firewall,
and for advanced troubleshooting. Refer to the AR100 Series Reference Manual
on the Installer and Documentation CD-ROM for full information about the
commands available.
■
To start an interactive command session click Troubleshoot in the AR100
Menu page. The Troubleshooting page (Figure 10-12) opens.
■
Click on the interactive command session link. The Command Session
page opens.
■
Type a command into the Command field and click Execute.
Figure 10-13: Command Session page
10-18
Advanced ISDN troubleshooting
Advanced ISDN troubleshooting
By using the Troubleshooting page you can find out more about the source of
ISDN connection problems. Record the results and output from your checks
and have these at hand if you need to ask for assistance from your network
administrator at the remote office, your ISDN service provider or your
authorised Allied Telesyn distributor or reseller.
Test your own router
Your router can perform a self test to check itself for faults, and show you the
results of this self test. This will show that either:
■
Your router is OK, and your ISDN connection problems are caused by a
fault in the ISDN network, your router’s connection to it, or configuration
errors. Go to “Show ISDN call connections” on page 10-18.
OR
■
Your ISDN connection problems are caused by a faulty router, and you
should contact your authorised Allied Telesyn distributor or reseller.
Note: The router cannot perform any of its normal operations while it is self
testing.
To run a self test on the router select an interactive command session on the
Management Wizard Troubleshooting page (Figure 10-12).
In the Command Session page that opens enter the command:
ENABLE TEST INT=BRI0
and click Execute. The System LED lights. Wait for four minutes, then enter the
command:
SHOW TEST
and click Execute. If the output shows the result for the completed BRI0 test to
be “good”, that is, it includes the line:
BRI0
complete
good
then the router has not detected any physical fault in the router’s Basic Rate
ISDN interface. If the result is not “good” there may be a fault in your router.
Show ISDN call connections
If the router has a LAPD connection to the switch (the Test Connection result
shows the ISDN link to be Active), then when an outgoing call is made from
the router, it sends a call setup message to the switch. If the switch believes that
the message packet is valid and there are channels available in the ISDN
network, it will forward it to the router at the other end of the call. The
receiving router will then either accept or reject the call, depending on the
contents of the packet.
If the receiving router accepts the call setup request, the ISDN call opens, and
the routers will endeavour to exchange data packets. If the call does not open
there is no exchange of data. To show whether calls are opening, select ISDN
Calls in the ISDN Output field on the Troubleshooting page and click View
Troubleshooting
10-19
Output. The Output page shows data about the last few ISDN calls, successful
or otherwise.
Figure 10-14: Example output on the ISDN Calls Output page
Call Name
Start Time
Duration Dir
Number
Cause
---------------------------------------------------------------------------tdc
12-Dec-1997 11:18:51
CLEARED
OUT
035439003
U16,chs
12-Dec-1997 11:19:03
CLEARED
OUT
073333333
N1,ajpwlg
12-Dec-1997 11:19:36
0:01:01
OUT
044940190
U16,ajpwlg
12-Dec-1997 11:23:12
0:01:01
OUT
044940190
U16,abb
12-Dec-1997 11:23:33
0:00:4
OUT
093560114
U16,ajpwlg
12-Dec-1997 11:24:05
CLEARED
OUT
ajpwlg
12-Dec-1997 11:24:25
0:01:02
OUT
044940190
U16,ajpwlg
12-Dec-1997 11:24:27
CLEARED
OUT
044940190
N21,gc
12-Dec-1997 11:25:14
CLEARED
OUT
3776569
N27,ppta
12-Dec-1997 11:25:38
CLEARED
OUT
043842672
N17,to_boe
12-Dec-1997 11:26:13
CLEARED
OUT
00441256376991 N18,pfricc
12-Dec-1997 11:26:38
CLEARED
OUT
3432977
N17,----------------------------------------------------------------------------
If a time value is given in the Duration column the ISDN call connected for this
length of time. If the values in the Duration column are CLEARED the calls
have never been connected. The cause column gives a code for the reason a call
was disconnected. The descriptions following of some of the more common
cause codes may help you identify where the ISDN problem is occurring.
In the cause codes the letter U (User) means that your router closed the ISDN
call, while the letter N (Network) means that either the ISDN switch or the
router at the other end closed the ISDN call.
The cause code number may be one of the following.
■
1 - Invalid number
The number you are calling is not assigned to any connection. Check the
number you are calling.
Note: This cause code also occurs if your router is connected to a centrex service,
and you are calling a number outside of the centrex extensions, but have not
preceded it with the prefix for an 'outside line'.
■
16 - Normal call clearing
This shows that there was no problem with the ISDN call, but the call was
closed for a higher layer reason. In particular, if the call duration was about
2-5 seconds, then the problem is likely to be an incorrect username or password. Check the username and password for connection to your ISP or remote office. If unsure, contact your ISP or the network administrator at your
remote office.
■
17 - User busy
This is like an engaged signal on a voice call, and does not indicate a configuration problem. Try this call again later.
■
18 - No user responding
There seems to be a device at the far end which has a LAPD connection to
the switch but it is not responding to the call setup messages. This may indicate that the device at the far end has been set up to only make outgoing
10-20
Advanced ISDN troubleshooting
calls, or that it has a software or hardware fault that has put it in a state
whereby it is capable of maintaining a LAPD connection to the switch, but
can't actually responding to call setup requests.
Contact your ISP or the network administrator at your remote office, depending on where the call was made to.
■
21 - Call rejected
This code almost always indicates a mistake in router configuration, either
at your end or at the other end of the connection. This cause code occurs
when the call setup packet is successfully delivered to the router at the other
end of the connection, but the router refuses the call because it is not configured to accept the call. There can be are a number of configuration errors
that can result in a call being refused.
Contact your ISP or the network administrator at your the remote office,
depending on where the call was made to.
The following are some of the more common configuration errors to look
out for.
■
■
No ISDN call definitions have yet been created on the receiving router.
■
The ISDN call definitions configured on the receiving router are set up
to search for particular strings in the subaddress, CLI or user-user fields
in the call setup packet, but the sending router is not putting the correct
strings into the correct fields.
■
There is an ISDN call definition on the receiving router that will accept
the incoming call, but there is not yet a layer 2 interface (PPP or Frame
Relay) configured to use this call definition.
■
There is an ISDN call definition on the receiving router that will accept
the incoming call, and there is a layer 2 interface configured over the call
definition, but this particular call definition is already taken by another
incoming call.
27 - Destination out of order
You are calling a valid number, but the switch does not have a valid LAPD
connection on the channel corresponding to the number you are calling.
This may mean that the device at the other end has not be properly installed
yet, or is switched off. Or it may indicate a fault in the wiring between the
switch and the site where that call is terminated. Contact your ISP or the
network administrator at the remote office, depending on where the call
was made to.
■
34, 38, 44, 42 - ISDN network congestion or fault
If you receive these cause codes regularly, contact your ISDN service provider.
Chapter 11
Safety and Statutory Information
Safety and statutory statements
This information must be read prior to use of this equipment, and overrides as
appropriate any information in respect of connection and use of the
equipment. Any enquiries regarding regulatory aspects of this equipment
should be addressed to Allied Telesyn International. This product meets the
requirements of EN60950 1992 including amendments 1 through 5, Austel
AS3260 / TS001 and UL1950. / CSA C22.2 No 950.
1. Connection to mains voltage supply
This product is supplied with a power cord which incorporates a moulded
plug and has been approved for use. It must only be used with the power cord
supplied.
For continued protection against the risk of fire and shock hazard, replace fuses
only with the same type and rating.
2. Earthing
The power cord supplied with this equipment must be connected to a power
socket which provides a reliable protective earth connection.
3. Connection to ISDN network
This product is supplied with an approved patch cord, coloured Green, for
connection to the ISDN Basic Rate Network.
Caution: To reduce risk of fire use only no.26 awg or larger
telecommunications line cord if the cord supplied is not used with the
apparatus.
4. Ports for the connection of other apparatus
The following interfaces normally operate at SELV (Safe Extra Low Voltage)
levels:
■
Asynchronous (console) ports.
■
Hub ports.
Note: SELV is a voltage that does not exceed 42.4V peak a.c. or 60V d.c.
11-2
Safety and statutory statements
The following interfaces are Telecommunications Network Voltage (TNV1) circuits which operate normally within the limits of SELV:
■
BRI ports for connection to ISDN Basic Rate telecommunications networks.
Note: A TNV1 circuit is a circuit which under normal operating conditions does
not exceed the limits for SELV but on which overvoltages from
TELECOMMUNICATION NETWORKS are possible.
The following interfaces are Telecommunications Network Voltage (TNV2) circuits:
■
POTS ports (AR140 only).
Note: A TNV2 circuit is a circuit which under normal operating conditions may
exceed SELV but on which overvoltages from TELECOMMUNICATION
NETWORKS are not possible.
5. Product servicing
This product contains no user-serviceable parts. All product servicing must be
carried out by qualified service personnel.
6. Lithium cell
This product includes an Integrated Circuit containing a Lithium cell. It carries
a warning
Do not dispose in fire
This warning should be strictly adhered to. Replacement and disposal of this
device must be carried out by qualified service personnel.
Warning: Danger of explosion if the battery is incorrectly replaced. Replace
only with the same type or equivalent type recommended by the
manufacturer. Dispose of used battery according to the manufacturer’s
instructions.
7. European EMC compliance
This product meets the requirements of the European Electromagnetic
Compatibility (EMC) Directive 89/336/EEC. The product complies with the
requirements of CISPR 22 (EN55022) for Emissions and EN50082-1 for
Immunity for limits of radio disturbance characteristics for Information
Technology Equipment (ITE).
8. US Federal Communications Commission (FCC)
This equipment complies with Part 15 of FCC Rules. Operation is subject to the
following two conditions: (1) this device may not cause harmful interference,
and (2) this device must accept any interference received, including
interference that may cause undesired operation.
This equipment complies with Part 68 of the Federal Communications Commission (FCC) rules for the United States.
Safety and Statutory Information
11-3
A label is located on the underside of the base unit containing the FCC registration number. You must, upon request, provide the following information to
your local telephone company:
Facility Interface Code
02IS5
Service Order Code
6.0Y
The AR130 and AR140 have completed the ISDN Ordering Codes
Translation Review and are registered for IOC S and EZ-ISDN 1.
USOC Jack Type
RJ49C
Should you experience trouble with this telephone equipment, please contact:
ALLIED TELESYN INTERNATIONAL
19800 NORTH CREEK PARKWAY #200
BOTHELL
WASHINGTON 98011
TEL: 425 487 8880
FAX: 425 489 9191
If trouble is experienced with this equipment (AR140U OR AR130U), for repair
or warranty information, please contact the above. If the equipment is causing
harm to the telephone network, the telephone company may request that you
disconnect the equipment until the problem is resolved.
This equipment cannot be used on public coin phone service provided by the
telephone company. Connection to party line service is subject to state tariffs.
Your telephone company may discontinue your service if your equipment
causes harm to the telephone network. They will notify you in advance of
disconnection, if possible. During notification, you will be informed of your
right to file a complaint to the FCC.
Occasionally, your telephone company may make changes in its facilities,
equipment, operation, or procedures that could affect the operation of your
equipment. If so, you will be given advance notice of the change to give you an
opportunity to maintain uninterrupted service.
For repair/warranty information. The telephone company may ask you to
disconnect this equipment from the line network until the problem has been
been corrected.
9. Canadian Department of Communications
NOTCE: The Industry Canada label identifies certified equipment. This
certification means that the equipment meets telecommunications network
protective, operational and safety requirements as prescribed in the
appropriate Terminal Equipment Technical Requirements document(s). The
Department does not guarantee the equipment will operate to the user's
satisfaction.
Before installing this equipment, users should ensure that it is permissible to be
connected to the facilities of the local telecommunications company. The
equipment must also be installed using an acceptable method of connection.
The customer should be aware that compliance with the above conditions may
not prevent degradation of service in some situations.
Repairs to certified equipment should be coordinated by a representative
designated by the supplier. Any repairs or alterations made by the user to this
equipment, or equipment malfunctions, may give the telecommunications
company cause to request the user to disconnect the equipment.
Users should ensure for their own protection that the electrical ground
connections of the power utility, telephone lines and internal metallic water
11-4
Environmental Conditions
pipe system, if present, are connected together. This precaution may be
particularly important in rural areas.
Warning: Users should not attempt to make such connections themselves, but
should contact the appropriate electric inspection authority, or electrician, as
appropriate.
This digital apparatus does not exceed the limits for radio noise emissions from
digital apparatus as set out in the Radio Interface Regulations of the Canadian
Department of Communications.
Le present appareil numerique n’emet pas de bruits radioelectriques depassant
les limites applicables aux appareils numeriques prescrites dans le Reglement
sur le brouillage radioelectrique edicte par le ministere des Communications
du Canada.
Environmental Conditions
This apparatus is designed for operation under the following environmental
conditions:
Operating Temperature
-5ºC to 40ºC
Storage Temperature
-5ºC to 70ºC
Humidity
5% to 95% non condensing
Operating Atmospheric Pressure
86 kPa to 106 kPa
Sicherheitshinweise
Sie müssen diese Information lesen, bevor Sie dieses Produkt in Deutschland
verwenden. Diese Information ersetzt gegebenenfalls jegliche Informationen
bezüglich Anschluss und Verwendung von diesem Produkt.
1. Anschluß an das allgemeine Stromnetz
Die Geräte, die an das allgemeine Stromnetz anschlossen werden, dürfen nur
mit den gelieferten Kabeln benutzt werden. Die Sicherheitssteckdose soll in der
Nähe des Geräts installiert sein und muss leicht zu erreichen sein.
Das Netzkabel, das mit diesem Gerät geliefert wird, darf nur an eine
Sicherheitssteckdose mit einer zuverlässigen Erdung angeschlossen werden.
Für weiterreichenden Schutz gegen Feuerrisiko und um die Möglichkeit eines
elektrischen Schocks zu vermeiden, sollen Sicherungen nur durch solche desselben Typs und derselben Stärke ersetzt werden.
2. Erdung
Die Erdung soll durch die beigepackten Netzkabel erfolgen.
Safety and Statutory Information
11-5
3. Anschluss an das ISDN Netz
Dieses Produkt wird mit einem zugelassenem RJ45 Kabel in der Farbe Grün
geliefert. Dieses ist für die Verbindung zum ISDN Basic Rate Netztwerk.
Vorsicht: Um das Feuerrisiko zu reduzieren verwenden Sie nur no.26 awg
oder starkeres Telekommunikationskabel falls das mitgelieferte Kabel nicht
mit dem Gerät verwendet wird.
4. Sicherheit des Leitungsnetzes
Alle Anschlüsse, die im Format RJ45,15 und 37 Anschlusstypen D-sind,
arbeiten normalerweise auf SELV (Sicherheits-Extra -Niederspannungs) Ebene.
5. Wartung des Geräts
Dieses Gerät enthält keine Bestandteile, die vom Benutzer selbst gewartet
werden können.
Versuche von nicht qualifiziertem Personal, Zugang zum Geräteinneren zu
erlangen, kompromittieren die Zulassungsbestimmungen. Im Falle eines solchen versuchten Zugangs wird keine Haftung dafür übernommen, wenn sich
das Gerät als nicht mehr den Zulassungbestimmungen entsprechend erweist.
Alle Produktwartung muß von qualifiziertem Servicepersonal durchgeführt
werden.
6. Lithiumzelle
Dieses Produkt enthält einen integrierten Schaltskreis, der eine Lithiumzelle
enhält. Man kann diesen Bauteil durch die Teilnummer DS1286 und DS1213D
identifizieren.
Warnung: Explosionsgefahr falls die Batterie inkorrekt ersetzt wird. Ersetzen
Sie diese nur mit der selben oder equivalenten vom Hersteller empfohlenen
Type. Entsorgen Sie leere Batterien entsprechend den Anweisungen des
Herstellers.
Batterie nicht ins Feuer werfen.
Befolgen Sie diese Warnung genau. Versuchen Sie nicht, die Batterie zu öffnen.
Entsorgung dieses Teiles darf ausschliesslich von qualifiziertem
Servicepersonal durchgeführt werden.